Realtek HD Audio Driver Failure Error Code: 0xE0000246
The Realtek HD audio driver failure error code: 0x0000246 occurs for a number of different reasons.
It may point to an environment variable that prevents the installation of new audio devices, or corrupted driver software.
Troubleshooting the issue should start with the driver software, but if the same error occurs with different drivers then you may be required to make some changes to your environment.

Install Error 0x0000246
1. Fixing Error Code: 0x0000246 from Device Manager
The first step is to remove the device from Device Manager after the failed installation. Once the device is no longer available in Device Manager, you can either try a different installation file or use the Windows driver to fix the installation process.
Removing Audio Device from Device Manager
- To open Device Manager, hit the Windows key and type “device manager,” and then select the top result.


Open Device Manager
- In Device Manager, scroll down and locate Other Devices section.


Locate Other Devices
- If you cannot locate Other Devices from the list, you may need to change the view settings by ticking the “Show Hidden Devices” option.


Show Hidden Devices
- Once you locate the audio device with the failed installation, use the right mouse button to open the context menu and select “Uninstall Device.”


Uninstall Failed Audio Device
- When prompted, click Uninstall to remove the device from your system.


Select Uninstall from Prompt
Add the Device Again using Automatic Driver Search in Windows
- The device will no longer be available in Device Manager’s list. You should restart your computer before continuing with the following steps.


Other Device Removed
- Reopen Device Manager and to start adding the device, select the Action Menu and click on “Scan for Hardware Changes.”


Scan for Hardware Changes
- In Device Manager, locate the Video, Audio and Game Controllers section and expand the list to view the new High Definition Audio device.


Locate Generic Audio Device
Note: The device should function correctly using the generic Windows Driver.
- To install the Original Equipment Manufacturer’s driver, use the right mouse button to open the Context Menu and select “Update Driver”.


Select Update Driver
- On the Update Driver page, select the “Search automatically for updated driver software” option. Windows will connect to the internet and locate the latest driver for your audio device.


Automatically Search for Updated Driver Software
- Windows will now download and install the correct driver for you from the OEM’s latest signed and verified driver list.


Updating Device Driver Automatically
- Once the process completes, you’ll receive a message indicating the successful installation of the audio device.


Driver Automatic Update Successfully Completed
- If the process does not complete successfully, you can try to add a legacy driver. For details on adding a legacy driver, see the next section.


Failed to Automatically Update Device Driver
Add the Device Using Windows Legacy Drivers
- If the previous solution did not work for you, you can attempt to add a Legacy Driver for the audio device. Use the right mouse button to open the Context Menu, and select Update Driver. Instead of letting Windows search for the latest driver automatically, select the second option to locate the driver yourself.


Select Browse my Computer for Driver
- On the Locate Driver Page, select the second option to choose a component from a list of Windows device drivers.


Choose Let Me Pick from a List of Drivers
Note: If you’ve previously downloaded a driver and know where it’s located, you can select the first option and browse the .dll file’s location. However, this will not be the same as the Windows Legacy Driver and may result in you receiving the same error.
- On the next page, there will be a list of manufacturers and associated drivers. If the option for “Show Compatible Hardware” box prevents you from seeing any devices, untick the box and scroll down to Realtek.


Select Realtek High Definition Audio from List
- You can now click on the Next Button to start the installation process.

- After the installation completes, you’ll see the success message on the final page.


Successfully Installed Legacy Driver
- Your device will now be available in the Device Manager list.


Realtek Audio with Legacy Device Driver
For only $9.99 a month Driver Support | ONE can help you save time and frustration dealing with common Windows device issues as well as added optimization and safety features.
Give Driver Support a Try Today
2. Fixing Error Code 0x0000246 from Control Panel
If the preceding steps did not resolve your issue, it may be required to remove the Realtek software from your computer completely and reinstall the latest version provided by the company.
Note that this should also solve the issue with any dangling Registry Entries that may be preventing the driver from installing.
Removing Realtek Software from Your PC
- To start Control Panel, hit the Windows Key, type “Control Panel”, and select the top result.


Open Control Panel
- Once the Control Panel loads, select the Programs and Features icon to access all your installed programs.


Open Programs and Features
- Scroll down to the Realtek program, use the right mouse button to open the Context Menu, and select “Uninstall.”


Uninstall Realtek Software
- On the Prompt, select “Yes” to uninstall all Realtek software.


Confirm Uninstall of Realtek Software
- You’ll see the progress of the uninstall process.


Uninstall Progress Window
- Once the software finishes uninstalling the Realtek application, you’ll receive a prompt to restart your PC.


Restart PC to Finishes Uninstall Process
Note: It is important that you restart the PC before reinstalling the Realtek application, as the process will remove any dangling entries in the Registry automatically.
Reinstall the Latest Realtek Driver Application
- Download the latest Realtek application from the Realtek Website.


Select Download
Note: Ensure you select the correct 32bit or 64bit download for your PC’s architecture.
- On the download page, you’ll need to provide an email address and then verify that you’re human using a Captcha code.
- After the download completes, find the file on your PC and double-click to start the installer.
- Once the Realtek installer launches, click next to start installing the software.


Install Realtek Application
- The software will show a progress bar.


Installation Progress
- Another prompt will allow you to restart the PC, and you should now have resolved the Realtek HD Audio Driver Failure Error Code: 0x0000246 problem.


Realtek Audio Device Fixed
For only $9.99 a month Driver Support | ONE can help you save time and frustration dealing with common Windows device issues as well as added optimization and safety features.
Give Driver Support a Try Today
3. Manually Fixing Error Code: 0x0000246
If you are still experiencing issues with updating the driver or installing the Realtek software, you’ll need to fix your Registry.
Although there are third-party Registry scanning tools, these usually come with adware or only fix a limited amount of issues unless you activate the software.
To fix the issue manually, you’ll need to edit the Registry values.
Note: Before making manual updates, you should create a backup of the current Registry by exporting it to a location on your PC.
If anything goes wrong, you can simply import the old Registry to restore it to its previous state.
Manually Fixing the Device Install Settings in the Registry
- Hit the Windows Key + R and type “regedit” in the run box. Click Okay to start the Registry Editor.


Start Registry Editor
- In the Registry Editor, navigate and find Device Install Policy Key:

Device Install Registry Key
- If the Key does not exist, you’ll have to create it by navigating to the Windows folder, right-clicking on the folder and select New > Key.


Add New Registry Key
- Name the new Key “DeviceInstall”.


Create DeviceInstall Policy Key
- Add another Key below the DeviceInstall Key and name it “Settings”.


Add Settings Key
- In the Settings Key, create a new DWORD(32-Bit) entry and name it “InstallTimeout”.


Add InstallTimeout Entry
- Use the Right Hand Mouse Button to modify the value.


Modify InstallTimeout Value
- Set the value to 708 and click OK.


Update InstallTimeout Value to 708
- Restart your PC for the changes to take effect.
Note: If none of the above solves your issue, you may need to go back to a previous restore point in order to fix the problem.
As the Realtek HD audio driver failure with error code 0x0000246 relates specifically to an environment variable blocking installation privileges for the application, you should also check that your system didn’t disable the Device Install and Device Setup Manager services.
4. Automatic Driver Administration
To prevent similar corrupted drivers from creating issues on your PC in the future, use Driver Support to manage all your drivers automatically.
Driver Support will inventory yourL
- Computer devices
- Locate the correct drivers
- Install drivers for you in minutes!
To help your PC operate reliably, as well as create driver backups for you to restore if anything does go wrong, Give Driver Support | ONE a try today! today.
Was this article helpful?
Search for solutions
Page load link
- Remove From My Forums
-
Question
-
Hi,
My driver has been successfully installed in hundreds of computers over several years. This is the first time I have seen this particular error on a customer’s system.
This particular error doesn’t seem to have much documentation about it. This is a KMDF 1.9 driver that’s trying to install a software only device.
Can you tell me how do I find more information as to what went wrong and how to maybe resolve it?
>>> [Setup Import Driver Package — C:Program FilesMediafourMacDrive 10RAID DriverMDRAID.inf]
>>> Section start 2016/06/08 23:56:48.434
cmd: C:WindowsSystem32MsiExec.exe -Embedding BF4295DB2BCBC482522276A5E368E2DD E GlobalMSI0000
inf: Provider: Mediafour Corporation
inf: Class GUID: {4d36e97d-e325-11ce-bfc1-08002be10318}
inf: Driver Version: 01/25/2016,10.0.0.0
inf: Catalog File: MDRAID.cat
pol: {Driver package policy check} 23:56:48.442
pol: {Driver package policy check — exit(0x00000000)} 23:56:48.442
sto: {Stage Driver Package: C:Program FilesMediafourMacDrive 10RAID DriverMDRAID.inf} 23:56:48.442
inf: {Query Configurability: C:Program FilesMediafourMacDrive 10RAID DriverMDRAID.inf} 23:56:48.444
inf: Driver package uses WDF.
inf: Driver package ‘MDRAID.inf’ is configurable.
inf: {Query Configurability: exit(0x00000000)} 23:56:48.445
flq: Copying ‘C:Program FilesMediafourMacDrive 10RAID DriverMDRAID.sys’ to ‘C:WINDOWSSystem32DriverStoreTemp{1ade73ce-6f13-7547-88a1-226fa150372c}MDRAID.sys’.
flq: Copying ‘C:Program FilesMediafourMacDrive 10RAID DriverWdfCoInstaller01009.dll’ to ‘C:WINDOWSSystem32DriverStoreTemp{1ade73ce-6f13-7547-88a1-226fa150372c}WdfCoInstaller01009.dll’.
flq: Copying ‘C:Program FilesMediafourMacDrive 10RAID DriverMDRAID.cat’ to ‘C:WINDOWSSystem32DriverStoreTemp{1ade73ce-6f13-7547-88a1-226fa150372c}MDRAID.cat’.
flq: Copying ‘C:Program FilesMediafourMacDrive 10RAID DriverMDRAID.inf’ to ‘C:WINDOWSSystem32DriverStoreTemp{1ade73ce-6f13-7547-88a1-226fa150372c}MDRAID.inf’.
sto: {DRIVERSTORE IMPORT VALIDATE} 23:56:48.501
sig: {_VERIFY_FILE_SIGNATURE} 23:56:48.524
sig: Key = MDRAID.inf
sig: FilePath = C:WINDOWSSystem32DriverStoreTemp{1ade73ce-6f13-7547-88a1-226fa150372c}MDRAID.inf
sig: Catalog = C:WINDOWSSystem32DriverStoreTemp{1ade73ce-6f13-7547-88a1-226fa150372c}MDRAID.cat
! sig: Verifying file against specific (valid) catalog failed! (0x800b0109)
! sig: Error 0x800b0109: A certificate chain processed, but terminated in a root certificate which is not trusted by the trust provider.
sig: {_VERIFY_FILE_SIGNATURE exit(0x800b0109)} 23:56:48.535
sig: {_VERIFY_FILE_SIGNATURE} 23:56:48.536
sig: Key = MDRAID.inf
sig: FilePath = C:WINDOWSSystem32DriverStoreTemp{1ade73ce-6f13-7547-88a1-226fa150372c}MDRAID.inf
sig: Catalog = C:WINDOWSSystem32DriverStoreTemp{1ade73ce-6f13-7547-88a1-226fa150372c}MDRAID.cat
sig: Success: File is signed in Authenticode(tm) catalog.
sig: Error 0xe0000241: The INF was signed with an Authenticode(tm) catalog from a trusted publisher.
sig: {_VERIFY_FILE_SIGNATURE exit(0xe0000241)} 23:56:48.550
sto: {DRIVERSTORE IMPORT VALIDATE: exit(0x00000000)} 23:56:48.627
sig: Signer Score = 0x0F000000
sig: Signer Name = Mediafour Corporation
sto: {DRIVERSTORE IMPORT BEGIN} 23:56:48.628
sto: {DRIVERSTORE IMPORT BEGIN: exit(0x00000000)} 23:56:48.628
cpy: {Copy Directory: C:WINDOWSSystem32DriverStoreTemp{1ade73ce-6f13-7547-88a1-226fa150372c}} 23:56:48.628
cpy: Target Path = C:WINDOWSSystem32DriverStoreFileRepositorymdraid.inf_amd64_cf2de6f715e6aa4e
cpy: {Copy Directory: exit(0x00000000)} 23:56:48.630
idb: {Register Driver Package: C:WINDOWSSystem32DriverStoreFileRepositorymdraid.inf_amd64_cf2de6f715e6aa4eMDRAID.inf} 23:56:48.631
idb: Created driver package object ‘mdraid.inf_amd64_cf2de6f715e6aa4e’ in SYSTEM database node.
idb: Created driver INF file object ‘oem47.inf’ in SYSTEM database node.
idb: Registered driver package ‘mdraid.inf_amd64_cf2de6f715e6aa4e’ with ‘oem47.inf’.
idb: {Register Driver Package: exit(0x00000000)} 23:56:48.633
idb: {Publish Driver Package: C:WINDOWSSystem32DriverStoreFileRepositorymdraid.inf_amd64_cf2de6f715e6aa4eMDRAID.inf} 23:56:48.633
idb: Activating driver package ‘mdraid.inf_amd64_cf2de6f715e6aa4e’.
cpy: Published ‘mdraid.inf_amd64_cf2de6f715e6aa4emdraid.inf’ to ‘oem47.inf’.
idb: Indexed 2 device IDs for ‘mdraid.inf_amd64_cf2de6f715e6aa4e’.
sto: Flushed driver database node ‘SYSTEM’. Time = 16 ms
idb: {Publish Driver Package: exit(0x00000000)} 23:56:48.651
sto: {DRIVERSTORE IMPORT END} 23:56:48.655
sig: Installed catalog ‘MDRAID.cat’ as ‘oem47.cat’.
sto: {DRIVERSTORE IMPORT END: exit(0x00000000)} 23:56:48.661
sto: {Stage Driver Package: exit(0x00000000)} 23:56:48.662
<<< Section end 2016/06/08 23:56:48.671
<<< [Exit status: SUCCESS]>>> [SetupCopyOEMInf — C:WINDOWSSystem32DriverStoreFileRepositorymdraid.inf_amd64_cf2de6f715e6aa4eMDRAID.inf]
>>> Section start 2016/06/08 23:56:48.672
cmd: C:WindowsSystem32MsiExec.exe -Embedding BF4295DB2BCBC482522276A5E368E2DD E GlobalMSI0000
inf: Copy style: 0x00040000
inf: Driver Store Path: C:WINDOWSSystem32DriverStoreFileRepositorymdraid.inf_amd64_cf2de6f715e6aa4emdraid.inf
inf: Published Inf Path: C:WINDOWSINFoem47.inf
sig: Installing catalog MDRAID.cat as: oem47.CAT
<<< Section end 2016/06/08 23:56:48.683
<<< [Exit status: SUCCESS]>>> [Device Install (UpdateDriverForPlugAndPlayDevices) — RootMDRAIDBUS]
>>> Section start 2016/06/08 23:56:48.702
cmd: C:WindowsSystem32MsiExec.exe -Embedding BF4295DB2BCBC482522276A5E368E2DD E GlobalMSI0000
ndv: INF path: C:WINDOWSSystem32DriverStoreFileRepositorymdraid.inf_amd64_cf2de6f715e6aa4eMDRAID.inf
ndv: Install flags: 0x00000001
ndv: {Update Device Driver — ROOTSYSTEM001}
ndv: Search options: 0x00000080
ndv: Searching single INF ‘C:WINDOWSSystem32DriverStoreFileRepositorymdraid.inf_amd64_cf2de6f715e6aa4eMDRAID.inf’
dvi: {Build Driver List} 23:56:48.712
dvi: Searching for hardware ID(s):
dvi: rootmdraidbus
dvi: Created Driver Node:
dvi: HardwareID — RootMDRAIDBUS
dvi: InfName — c:windowssystem32driverstorefilerepositorymdraid.inf_amd64_cf2de6f715e6aa4emdraid.inf
dvi: DevDesc — MDRAID Device
dvi: Section — MDRAID_Device.NT
dvi: Rank — 0x00ff0000
dvi: Signer Score — Authenticode
dvi: DrvDate — 01/25/2016
dvi: Version — 10.0.0.0
dvi: {Build Driver List — exit(0x00000000)} 23:56:48.715
dvi: {DIF_SELECTBESTCOMPATDRV} 23:56:48.715
dvi: Default installer: Enter 23:56:48.716
dvi: {Select Best Driver}
dvi: Class GUID of device changed to: {4d36e97d-e325-11ce-bfc1-08002be10318}.
dvi: Selected:
dvi: Description — [MDRAID Device]
dvi: InfFile — [c:windowssystem32driverstorefilerepositorymdraid.inf_amd64_cf2de6f715e6aa4emdraid.inf]
dvi: Section — [MDRAID_Device]
dvi: {Select Best Driver — exit(0x00000000)}
dvi: Default installer: Exit
dvi: {DIF_SELECTBESTCOMPATDRV — exit(0x00000000)} 23:56:48.718
ndv: Forcing driver install:
ndv: Inf Name — oem47.inf
ndv: Driver Date — 01/25/2016
ndv: Driver Version — 10.0.0.0
ndv: Driver package ‘C:WINDOWSINFoem47.inf’ exists under ‘C:WINDOWSSystem32DriverStoreFileRepositorymdraid.inf_amd64_cf2de6f715e6aa4emdraid.inf’ (oem47.inf).
dvi: Searching for hardware ID(s):
dvi: rootmdraidbus
dvi: Class GUID of device changed to: {4d36e97d-e325-11ce-bfc1-08002be10318}.
ump: Installation will be processed asynchronously
!!! ndv: Device install failed for device.
!!! ndv: Error 0xe0000246: One of the installers for this device cannot perform the installation at this time.
ndv: Installing NULL driver.
ump: Installation will be processed asynchronously
ndv: {Update Device Driver — exit(e0000246)}
!!! ndv: Failed to install device instance ‘ROOTSYSTEM001’. Error = 0xe0000246
<<< Section end 2016/06/08 23:56:48.724
<<< [Exit status: FAILURE(0xe0000246)]>>> [Setup Delete Driver Package — C:WINDOWSSystem32DriverStoreFileRepositorymdraid.inf_amd64_cf2de6f715e6aa4eMDRAID.inf]
>>> Section start 2016/06/08 23:56:48.728
cmd: C:WindowsSystem32MsiExec.exe -Embedding BF4295DB2BCBC482522276A5E368E2DD E GlobalMSI0000
pol: {Driver package policy check} 23:56:48.734
pol: {Driver package policy check — exit(0x00000000)} 23:56:48.735
sto: {Unstage Driver Package: C:WINDOWSSystem32DriverStoreFileRepositorymdraid.inf_amd64_cf2de6f715e6aa4eMDRAID.inf} 23:56:48.735
sto: {DRIVERSTORE DELETE BEGIN} 23:56:48.735
sto: {DRIVERSTORE DELETE BEGIN: exit(0x00000000)} 23:56:48.736
idb: {Unpublish Driver Package: C:WINDOWSSystem32DriverStoreFileRepositorymdraid.inf_amd64_cf2de6f715e6aa4eMDRAID.inf} 23:56:48.736
idb: Clearing active driver package ‘mdraid.inf_amd64_cf2de6f715e6aa4e’.
cpy: Unpublished ‘oem47.inf’.
idb: Deindexed 2 device IDs for ‘mdraid.inf_amd64_cf2de6f715e6aa4e’.
sto: Flushed driver database node ‘SYSTEM’. Time = 0 ms
idb: {Unpublish Driver Package: exit(0x00000000)} 23:56:48.745
idb: {Unregister Driver Package: C:WINDOWSSystem32DriverStoreFileRepositorymdraid.inf_amd64_cf2de6f715e6aa4eMDRAID.inf} 23:56:48.746
idb: Unregistered driver package ‘mdraid.inf_amd64_cf2de6f715e6aa4e’ from ‘oem47.inf’.
idb: Deleted driver package object ‘mdraid.inf_amd64_cf2de6f715e6aa4e’ from SYSTEM database node.
idb: Deleted driver INF file object ‘oem47.inf’ from SYSTEM database node.
idb: {Unregister Driver Package: exit(0x00000000)} 23:56:48.747
cpy: {Delete Directory: C:WINDOWSSystem32DriverStoreFileRepositorymdraid.inf_amd64_cf2de6f715e6aa4e} 23:56:48.747
cpy: {Delete Directory: exit(0x00000000)} 23:56:48.749
sto: {DRIVERSTORE DELETE END} 23:56:48.749
sig: Uninstalled catalog ‘oem47.cat’.
sto: {DRIVERSTORE DELETE END: exit(0x00000000)} 23:56:48.753
sto: {Unstage Driver Package: exit(0x00000000)} 23:56:48.753
<<< Section end 2016/06/08 23:56:48.756
<<< [Exit status: SUCCESS]Thanks!
Mridul
Answers
-
SOLVED !!
open regedit
go to ComputerHKEY_LOCAL_MACHINESYSTEMCurrentControlSetServicesDeviceInstallParameters
change DeviceInstallDisabled to 0
restart ! done !!
-
Proposed as answer by
Thursday, May 2, 2019 9:54 PM
-
Marked as answer by
Brian Catlin
Friday, May 31, 2019 3:30 AM
-
Proposed as answer by
Realtek HD Audio Driver Failure Error Code: 0xE0000246
The Realtek HD audio driver failure error code: 0x0000246 occurs for a number of different reasons.
It may point to an environment variable that prevents the installation of new audio devices, or corrupted driver software.
Troubleshooting the issue should start with the driver software, but if the same error occurs with different drivers then you may be required to make some changes to your environment.

Install Error 0x0000246
1. Fixing Error Code: 0x0000246 from Device Manager
The first step is to remove the device from Device Manager after the failed installation. Once the device is no longer available in Device Manager, you can either try a different installation file or use the Windows driver to fix the installation process.
Removing Audio Device from Device Manager
- To open Device Manager, hit the Windows key and type “device manager,” and then select the top result.


Open Device Manager
- In Device Manager, scroll down and locate Other Devices section.

Locate Other Devices
- If you cannot locate Other Devices from the list, you may need to change the view settings by ticking the “Show Hidden Devices” option.

Show Hidden Devices
- Once you locate the audio device with the failed installation, use the right mouse button to open the context menu and select “Uninstall Device.”

Uninstall Failed Audio Device
- When prompted, click Uninstall to remove the device from your system.

Select Uninstall from Prompt
Add the Device Again using Automatic Driver Search in Windows
- The device will no longer be available in Device Manager’s list. You should restart your computer before continuing with the following steps.

Other Device Removed
- Reopen Device Manager and to start adding the device, select the Action Menu and click on “Scan for Hardware Changes.”

Scan for Hardware Changes
- In Device Manager, locate the Video, Audio and Game Controllers section and expand the list to view the new High Definition Audio device.

Locate Generic Audio Device
Note: The device should function correctly using the generic Windows Driver.
- To install the Original Equipment Manufacturer’s driver, use the right mouse button to open the Context Menu and select “Update Driver”.

Select Update Driver
- On the Update Driver page, select the “Search automatically for updated driver software” option. Windows will connect to the internet and locate the latest driver for your audio device.

Automatically Search for Updated Driver Software
- Windows will now download and install the correct driver for you from the OEM’s latest signed and verified driver list.

Updating Device Driver Automatically
- Once the process completes, you’ll receive a message indicating the successful installation of the audio device.

Driver Automatic Update Successfully Completed
- If the process does not complete successfully, you can try to add a legacy driver. For details on adding a legacy driver, see the next section.

Failed to Automatically Update Device Driver
Add the Device Using Windows Legacy Drivers
- If the previous solution did not work for you, you can attempt to add a Legacy Driver for the audio device. Use the right mouse button to open the Context Menu, and select Update Driver. Instead of letting Windows search for the latest driver automatically, select the second option to locate the driver yourself.

Select Browse my Computer for Driver
- On the Locate Driver Page, select the second option to choose a component from a list of Windows device drivers.

Choose Let Me Pick from a List of Drivers
Note: If you’ve previously downloaded a driver and know where it’s located, you can select the first option and browse the .dll file’s location. However, this will not be the same as the Windows Legacy Driver and may result in you receiving the same error.
- On the next page, there will be a list of manufacturers and associated drivers. If the option for “Show Compatible Hardware” box prevents you from seeing any devices, untick the box and scroll down to Realtek.

Select Realtek High Definition Audio from List
- You can now click on the Next Button to start the installation process.

- After the installation completes, you’ll see the success message on the final page.

Successfully Installed Legacy Driver
- Your device will now be available in the Device Manager list.

Realtek Audio with Legacy Device Driver
2. Fixing Error Code 0x0000246 from Control Panel
If the preceding steps did not resolve your issue, it may be required to remove the Realtek software from your computer completely and reinstall the latest version provided by the company.
Note that this should also solve the issue with any dangling Registry Entries that may be preventing the driver from installing.
Removing Realtek Software from Your PC
- To start Control Panel, hit the Windows Key, type “Control Panel”, and select the top result.

Open Control Panel
- Once the Control Panel loads, select the Programs and Features icon to access all your installed programs.

Open Programs and Features
- Scroll down to the Realtek program, use the right mouse button to open the Context Menu, and select “Uninstall.”

Uninstall Realtek Software
- On the Prompt, select “Yes” to uninstall all Realtek software.

Confirm Uninstall of Realtek Software
- You’ll see the progress of the uninstall process.

Uninstall Progress Window
- Once the software finishes uninstalling the Realtek application, you’ll receive a prompt to restart your PC.

Restart PC to Finishes Uninstall Process
Note: It is important that you restart the PC before reinstalling the Realtek application, as the process will remove any dangling entries in the Registry automatically.
Reinstall the Latest Realtek Driver Application
- Download the latest Realtek application from the Realtek Website.

Note: Ensure you select the correct 32bit or 64bit download for your PC’s architecture.
- On the download page, you’ll need to provide an email address and then verify that you’re human using a Captcha code.
- After the download completes, find the file on your PC and double-click to start the installer.
- Once the Realtek installer launches, click next to start installing the software.

Install Realtek Application
- The software will show a progress bar.

- Another prompt will allow you to restart the PC, and you should now have resolved the Realtek HD Audio Driver Failure Error Code: 0x0000246 problem.

Realtek Audio Device Fixed
3. Manually Fixing Error Code: 0x0000246
If you are still experiencing issues with updating the driver or installing the Realtek software, you’ll need to fix your Registry.
Although there are third-party Registry scanning tools, these usually come with adware or only fix a limited amount of issues unless you activate the software.
To fix the issue manually, you’ll need to edit the Registry values.
Note: Before making manual updates, you should create a backup of the current Registry by exporting it to a location on your PC.
If anything goes wrong, you can simply import the old Registry to restore it to its previous state.
Manually Fixing the Device Install Settings in the Registry
- Hit the Windows Key + R and type “regedit” in the run box. Click Okay to start the Registry Editor.

Start Registry Editor
- In the Registry Editor, navigate and find Device Install Policy Key:

Device Install Registry Key
- If the Key does not exist, you’ll have to create it by navigating to the Windows folder, right-clicking on the folder and select New > Key.

Add New Registry Key
- Name the new Key “DeviceInstall”.

Create DeviceInstall Policy Key
- Add another Key below the DeviceInstall Key and name it “Settings”.

Add Settings Key
- In the Settings Key, create a new DWORD(32-Bit) entry and name it “InstallTimeout”.

Add InstallTimeout Entry
- Use the Right Hand Mouse Button to modify the value.

Modify InstallTimeout Value
- Set the value to 708 and click OK.

Update InstallTimeout Value to 708
- Restart your PC for the changes to take effect.
Note: If none of the above solves your issue, you may need to go back to a previous restore point in order to fix the problem.
As the Realtek HD audio driver failure with error code 0x0000246 relates specifically to an environment variable blocking installation privileges for the application, you should also check that your system didn’t disable the Device Install and Device Setup Manager services.
4. Automatic Driver Administration
To prevent similar corrupted drivers from creating issues on your PC in the future, use Driver Support to manage all your drivers automatically.
Driver Support will inventory yourL
- Computer devices
- Locate the correct drivers
- Install drivers for you in minutes!
To help your PC operate reliably, as well as create driver backups for you to restore if anything does go wrong, Give Driver Support | ONE a try today! today.
Источник
Context:
I believe I’ve screwed up my laptop. Ever since I upgraded from Windows 7 Home Prem (that’s what it says on the label) to Windows 10, I’ve been getting a lot of problems (program compatibility issues, a lot of bsod, etc). I can’t even install updates anymore, because I got an error that I couldn’t figure out how to fix, but my computer was still running, so I ignored it.
Yesterday I bought a headset and the mic wouldn’t work. After trying some suggestions from the internet, I started plugging and unplugging in frustration and got a bsod. I tried updating my sound driver by dling the latest driver from the Realtek website. During the installation process, it required me to uninstall the version I had and reboot the pc. After rebooting, the installation continued, but during the process, I got the error message in the post title. I googled that and the only fix that actually solved it for the original poster was reinstalling the OS. All the others I couldn’t follow completely (I don’t have or can’t find the UAA driver on device manager) or got more errors (sfc /scannow returns «… could not perform requested operation.»). So now I have no sound, and I’m worse off. Right now, I’m in the process of backing up some stuff, so I can do a factory reset. This is obviously my last resort, so if anyone has any suggestions, please do tell me !!
TL;DR: Headset mic didn’t work, tried to upgrade sound driver and got the error message on title.
SPECS:
Idk if this is what you need but:
System Information
  Time of this report: 11/21/2015, 21:16:46
         Machine name: SAMY-PC
     Operating System: Windows 10 Pro 64-bit (10.0, Build 10240) (10240.th1.150807-2049)
             Language: English (Regional Setting: English)
  System Manufacturer: LENOVO
         System Model: Lenovo IdeaPad Y480
                 BIOS: InsydeH2O Version 03.71.515DCN37WW(V2.04)
            Processor: Intel(R) Core(TM) i7-3610QM CPU @ 2.30GHz (8 CPUs), ~2.3GHz
               Memory: 8192MB RAM
  Available OS Memory: 8094MB RAM
            Page File: 4080MB used, 12205MB available
          Windows Dir: C:WINDOWS
      DirectX Version: 11.2
  DX Setup Parameters: Not found
     User DPI Setting: Using System DPI
   System DPI Setting: 96 DPI (100 percent)
      DWM DPI Scaling: Disabled
             Miracast: Available, with HDCP
Microsoft Graphics Hybrid: Not Supported DxDiag Version: 10.00.10240.16384 64bit Unicode
DxDiag Notes
  Display Tab 1: No problems found.
    Sound Tab 1: No sound card was found.  If one is expected, you should install a sound driver provided by the hardware manufacturer.
      Input Tab: No problems found.
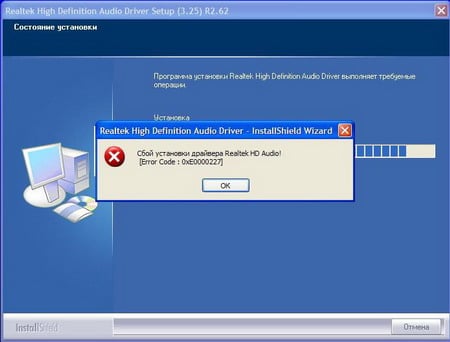
Драйвера от компании Realtek всегда славились самым большим количеством возникающих конфликтов с операционной системой Windows, даже еще со времен Windows XP. Ошибка “Сбой установки драйвера Realtek HD Audio” идет за руки с кодом ошибки 0x000000FF и она не позволит вам установить необходимые вам драйвера для вашей звуковой карты.
Данная проблема возникает в различных условиях, так что причин ее возникновения куда больше чем одна или две. Также нужно понимать, что ошибка может проявлять себя еще и в том случае, если ваша аудиокарта, так сказать, ушла из жизни.
Если же это произошло, то тут уже ничего не исправить какими-то методами. Вам необходимо будет попросту заменить вышедшею из строя аудиокарту на новую. После замены, вы не должны будете увидеть каких-либо ошибок.
Содержание
- Исправляем ошибку “Сбой установки драйвера Realtek HD Audio”
- Метод №1 Проверьте драйвера на поломки и обновите их вручную
- Метод №2 Использовать опцию “Установить старое устройство” в Диспетчере устройств
- Метод №3 Удалить драйвера и дать Windows установить их самостоятельно
- Метод №4 Отключение Microsoft UAA Bus драйвера для High Definition Audio
Исправляем ошибку “Сбой установки драйвера Realtek HD Audio”
Метод №1 Проверьте драйвера на поломки и обновите их вручную
Если Windows не позволяет вам произвести установку драйверов, то попробуйте их обновить через “Диспетчер устройств”.
- Нажмите комбинацию клавиш Win+R и впишите в пустой строке devmgmt.msc
- Внутри окошка “Диспетчера устройств”, раскройте меню с названием “Звуковые, игровые и видеоустройства”.
- Посмотрите, нет ли в этом пункте никаких желтых значков или знаков восклицания.
- Нажмите правой кнопкой на вашу аудиокарту, если вы обнаружили на ней указывающий на неполадки знак, и выберите “Обновить драйвер”. Следуйте инструкциям на экране. После проведения обновления перезагрузите систему.
Метод №2 Использовать опцию “Установить старое устройство” в Диспетчере устройств
Этот метод стоит применять только в том случае, если “Звуковые, игровые и видеоустройства” исчезли из “Диспетчера устройств”.
- Нажмите комбинацию клавиш Win+R и впишите в пустой строке devmgmt.msc
- Далее нажмите на “Действие” в верхней панели и выберите “Установить старое устройство”.
- Следуйте наставлениям мастера установки.
- Как только закончите, вы должны будете увидеть Realtek Audio Device в “Диспетчере устройств”. Следуйте третьему шагу из первого метода и обновите драйвера для устройства.
Метод №3 Удалить драйвера и дать Windows установить их самостоятельно
- Снова нажмите комбинацию клавиш Win+R и впишите в пустой строке devmgmt.msc
- Найдите Realtek Audio Device в “Звуковые, игровые и видеоустройства”. Нажмите на него правой кнопкой мыши и выберите “Удалить”. Следуйте инструкциям на экране.
- После этого перезагрузите систему и снова откройте “Диспетчер задач”.
- Нажмите на “Действие” в верхней панели и выберите “Обновить конфигурацию оборудования”.
- После этого в списке устройств должен появиться Realtek Audio Device. Таким образом вы сможете его обновить.
Метод №4 Отключение Microsoft UAA Bus драйвера для High Definition Audio
Только аудиодравера от Realtek идут вместе со встроенными UAA драйверами, в отличии от драйверов от Conexant или SoundMAX. Так что вы можете отключить эти встроенные драйвера и переустановить их. Если учитывать, что ошибка “Сбой установки драйвера Realtek HD Audio” возникает из-за конфликта с UAA, то их удаление позволит Realtek спокойно установиться.
- Уже в четвертый раз нажмите комбинацию клавиш Win+R и впишите в пустой строке devmgmt.msc.
- Разверните “Системные устройства” и найдите там Microsoft UAA Bus драйвера для High Definition Audio. Нажмите правой кнопкой мыши по ним и выберите “Отключить”.
- После их отключения, снова попытайтесь провести установку Realtek драйверов. В этот раз все должно пройти как по маслу.