Contents
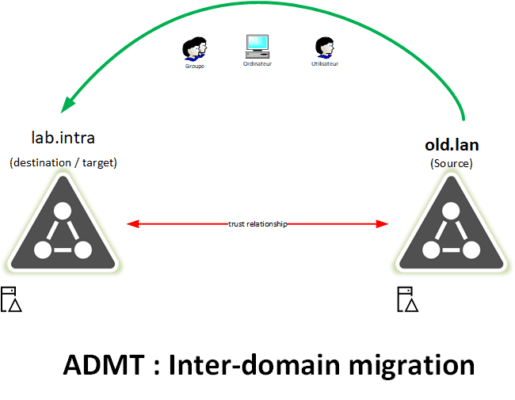
ADMT (Active Directory Migration Tool) is a free Microsoft tool that allows the migration of objects (Users, Computers, and Groups) between two Active Directory domains.
Some examples of using ADMT:
- Enterprise merge to consolidate Active Directory.
- Enterprise split to transfer the Active Directory objects to the new entity.
- Deleting a child domain.
Prerequisites
- A server dedicated to ADMT with a SQL Express database in 2008 version minimum.
- An approval relationship must be in place between the two domains.
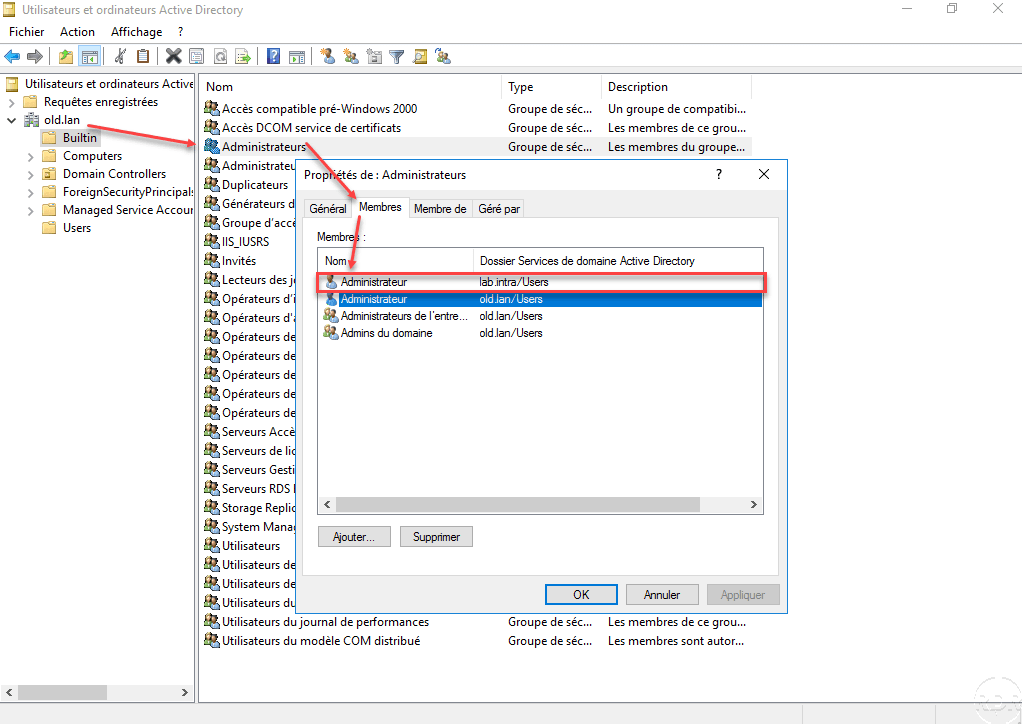
- Use a user account in the BUILTIN Administrators group of both domains.
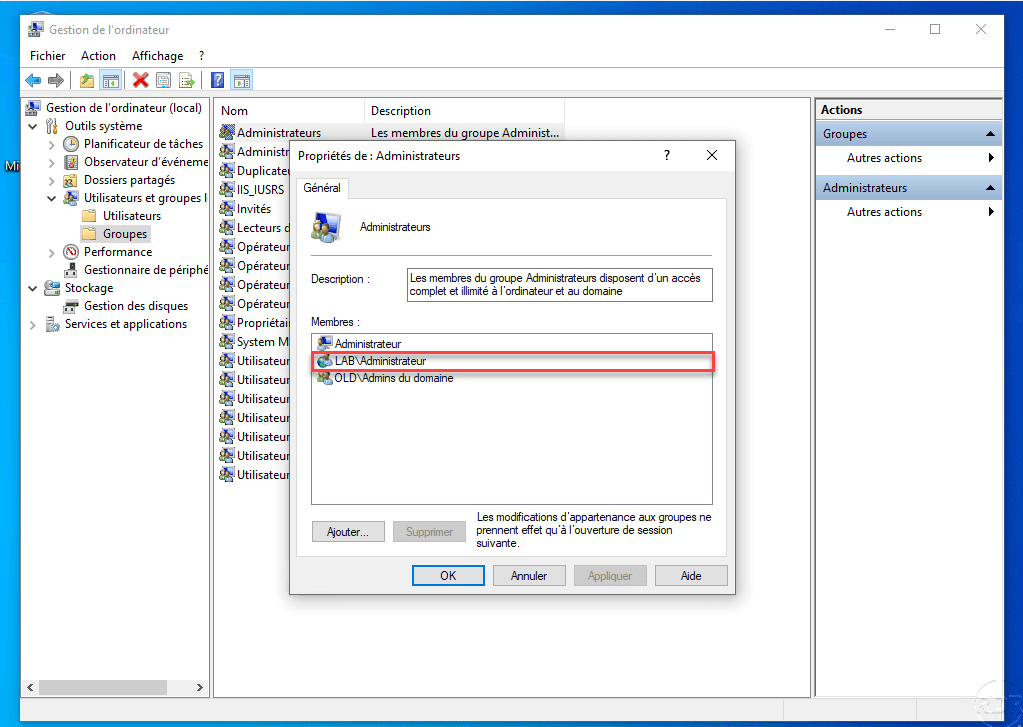
- To migrate the computers, the target domain migration user account must also be the station’s local administrator.
The migration account will be configured during the first object migration that will be done between the two domains. In the tutorial, I used the admin account of the destination domain. In case you want to dedicate an account to ADMT, ADMT must be a member of the Domain Admins group of the target domain and a member of the BUILTAdministrators group of the source domain.
Download the necessary tools:
- ADMT 3.2
- Password Export Server (PES) which allows the migration of passwords.
I usually refer to this good article for how to migrate Active Directory objects (users, groups, and workstations or member servers) between two domains in the same forest (Intraforest) using Active Directory Migration Tool (ADMT) 3.2.
Intraforest Migration in Windows Server 2016 with Active Directory Migration Tool (ADMT) 3.2
https://www.starwindsoftware.com/blog/intraforest-migration-in-windows-server-2016-with-active-directory-migration-tool-admt-3-2
Besides, if you want a powershell guide, I recommend this one:
Step-by-Step Guide to Migrate from Active Directory 2012 R2 to Active Directory 2019 (PowerShell Guide)
Please Note: Since the website is not hosted by Microsoft, the link may change without notice. Microsoft does not guarantee the accuracy of this information.
Have a look
Regards
Please remember to mark the replies as answers if they help.
If you have feedback for TechNet Subscriber Support, contact
tnmff@microsoft.com.
Last Updated on August 12, 2020 by
As you may already know, Windows Server 2008 and 2008 R2 products reached End of Extended support on 1/14/2020. So if your Active Directory is running on Windows Server 2008, It is time to look for upgrade options.
In this blog post, I am going to demonstrate how to migrate Active Directory from Windows Server 2008 to Windows Server 2019.
AD Migration task itself is very straight forward. But there are other things you need to consider before you do an AD migration. Below I listed a checklist you can use on many occasions.
Active Directory Migration Check List
• Evaluate business requirement for Active Directory migration
• Perform Audit on Existing Active Directory Infrastructure to make sure there are no existing health issues
• Provide Plan for implementation Process
• Prepare Physical / Virtual resources for Domain Controller
• Install Windows server 2019 Standard / Datacenter
• Patch Servers with latest Windows Updates
• Assign Dedicate IP address to Domain Controller
• Install AD DS Role
• Migrate Application and Server Roles from the Existing Domain Controllers.
• Migrate FSMO roles to new Domain Controllers
• Add New Domain controllers to the Existing Monitoring system
• Add New Domain controllers to the Existing DR Solution
• Decommission old domain controllers
• Raise the Domain and Forest Functional level
• On-Going Maintenance (Group Policy Review, New Features Implementations, Identify and fix active directory infrastructure issues)
If organizations running AD DS, it’s obvious it to have active directory integrated applications. Some of those may use it just for LDAP authentication and some may use advanced integration with modified active directory schema. with active directory migration, some of these applications may require modifications or upgrades to match with the new AD DS version. Therefor before the implementation process, it is important to recognize these active directory integrated applications and evaluate its impact on the migration.
LDAP Connection String Modifications – To use single-sign-on (SSO) with applications it may use LDAP connections to domain controllers. sometimes applications use hardcoded hostnames or IP addresses of domain controllers to define the connections. If domain migration involves IP address changes and Hostname changes, alternation to these records will be needed.
Schema Version Changes – Some legacy applications only support certain versions of active directory schema. This is specifically applying for custom made active directory integrated applications. This is very rare but I have to face these in my active directory migrations projects. Therefore if it’s not well-known applications, check with the application vendor if it supported new AD DS schema version.
Application Migrations – Some organizations have legacy application versions that no longer support or develop by its vendor. There are occasions where these types of issues turn to be bottlenecks for AD Migration projects. Once I was working on AD DS 2003 to AD DS 2012 R2 migration project. The organization had a legacy application that runs on windows server 2000 system. AD DS 2012 R2 does not support windows server 2000-member servers. The vendor who created the application no longer in business. Then we had to users to similar type application which supports new operating systems before we start the Active Directory migrations.
Server Roles/Applications installed on Domain Controllers – In the majority of the cases, once FSMO roles migrated to new domain controllers, old domain controllers will be decommissioned. Even though Microsoft recommends not to install applications or other server roles in domain controllers, people still do it. Some of the common roles installed in domain controllers are DHCP, File Servers, Licensing Server. If existing domain controllers are subject decommission these applications and server roles need to migrate new servers.
Most Common Questions About Active Directory Migrations
In below I listed some of the most common questions I get about AD migration,
1. Can I keep the same IP address for the PDC? Yes, you can. Active Directory fully supports for IP address changes. Once FDMO role migration is completed, you can swap the IP addresses of Domain Controllers.
2. Can I downgrade forest/domain functional levels? Yes, you can do it from Windows server 2008 R2.
3. Do I need to migrate the DNS role? No, it is part of the AD. When you add a new domain controller, you can make it as DNS server too.
4. Do I need to change SYSVOL replication from FRS to DFS? If your domain is built based on Windows server 2008 or Windows Server 2008 R2, you are already using DFS for SYSVOL replication. If you originally migrated from Windows server 2003, it’s more likely you are still using FRS. In that case, after the migration, you can also change the SYSVOL replication method from FRS to DFS. I already have a blog post covering this topic https://www.rebeladmin.com/2015/04/step-by-step-guide-for-upgrading-sysvol-replication-to-dfsr-distributed-file-system-replication/
5. Can I keep Windows 2008 Domain Controllers and upgrade forest and domain functional level to Windows Server 2016? (Windows server 2019 does not have the forest and domain functional level name as Windows server 2019. it is still called Windows server 2016) – No, you can’t. Before forest and domain functional level upgrade, you need to decommission Windows server 2008 domain controllers.
Demo Environment
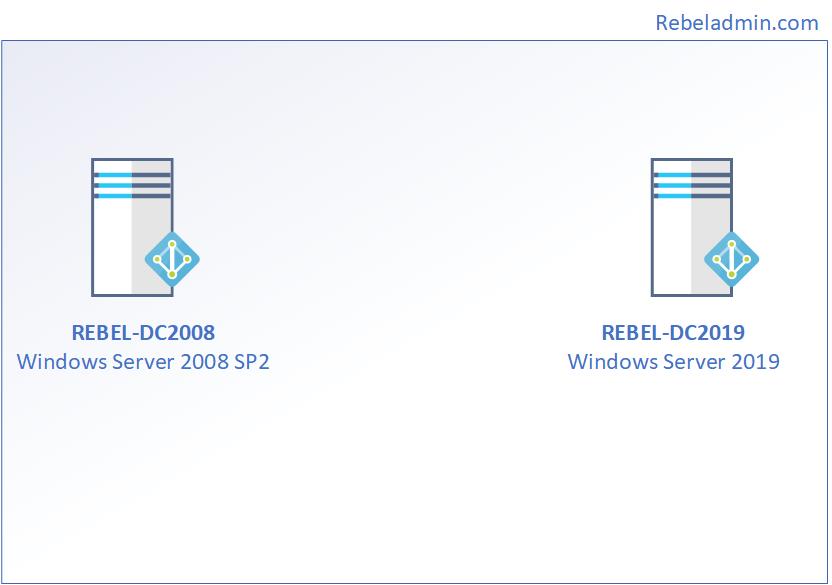
As per the above figure, rebeladmin.com domain has two domain controllers. The FSMO role holder (REBEL-DC2008) is running a domain controller based on windows server 2008. Domain and forest functional level currently operating at Windows server 2008. A new domain controller with Windows Server 2019 (REBEL-DC2019) will be introduced and it will be the new FSMO role holder for the domain. once FSMO role migration completed, Domain controller running windows server 2008 will be decommissioned. After that forest and domain, the functional level will be raised to the windows server 2019.
Note – When you introduce new domain controllers to the existing infrastructure it is recommended to introduce to the forest root level first and then go to the domain tree levels.
Add Windows server 2019 Domain Controller
As the first part of the configuration, we need to make REBEL-DC2019 as an Additional Domain Controller. To do that,
1. Log in to the Server as a member of the local administrators’ group.
2. Add server to the existing domain as a member.
3. Log in to the domain controller as an enterprise administrator.
4. Verify the static IP address allocation using ipconfig /all.
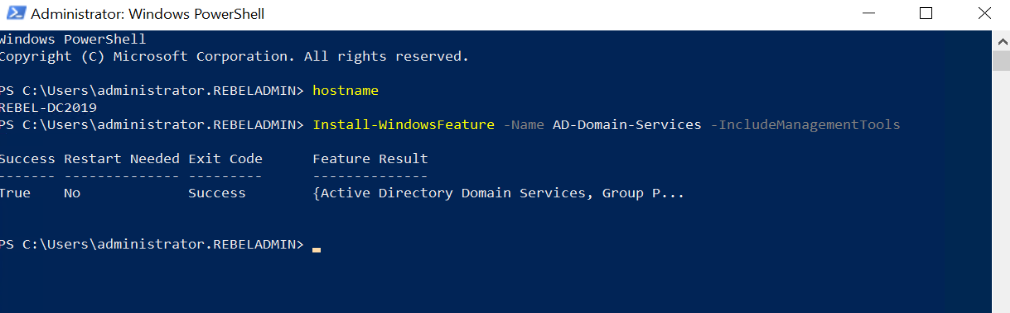
5. Launch the PowerShell Console as an Administrator
6. Before the configuration process, we need to install the AD DS Role in the given server. To do that we can use the following command.
Install-WindowsFeature –Name AD-Domain-Services -IncludeManagementTools
7. Configure the new server as an additional domain controller using,
Install-ADDSDomainController
-CreateDnsDelegation:$false
-InstallDns:$true
-DomainName “rebeladmin.com”
-SiteName “Default-First-Site-Name”
-ReplicationSourceDC “REBEL-DC2008.rebeladmin.com”
-DatabasePath “C:WindowsNTDS”
-LogPath “C:WindowsNTDS”
-SysvolPath “C:WindowsSYSVOL”
-Force:$true
Note – There are no line breaks for the command and I have listed it as above to allow readers to focus on the parameters.
The following table explain the PowerShell arguments and what it will do.
| Argument | Description |
| Install-ADDSDomainController | This cmdlet will install the domain controller in active directory infrastructure. |
| -CreateDnsDelegation | Using this parameter can define whether to create DNS delegation that reference active directory integrated DNS. |
| -InstallDns | Using this can specify whether DNS role need to install with active directory domain controller. For new forest, it is default requirement to set it to $true. |
| -DomainName | This parameter defines the FQDN for the active directory domain. |
| -SiteName | This Parameter can use to define the active directory site name. the default value is Default-First-Site-Name |
| -ReplicationSourceDC | Using this parameter can define the active directory replication source. By default, it will use any available domain controller. But if need we can be specific. |
| -DatabasePath | This parameter will use to define the folder path to store active directory database file (Ntds.dit) |
| -LogPath | Log path can use to specify the location to save domain log files. |
| -SysvolPath | This is to define the SYSVOL folder path. Default location for it will be C:Windows |
| -Force | This parameter will force command to execute by ignoring the warning. It is typical for the system to pass the warning about best practices and recommendations. |
Once execute the command it will ask for SafeModeAdministrator Password. Please use a complex password to proceed. This will be used for DSRM.
After the server is rebooted, log back in as an administrator to check the AD DS status.
Get-Service adws,kdc,netlogon,dns
Will confirm the status of the AD DS service.

Then run following to confirm the current FSMO role holder.
$FormatEnumerationLimit =-1
Get-ADDomainController -Filter * | Select-Object Name, Domain, Forest, OperationMasterRoles | Where-Object {$_.OperationMasterRoles} | out-string -Width 160

In the above, I used $FormatEnumerationLimit to show more data in output without truncating.
As we can see in output REBEL-DC2008 holds all five FSMO roles.
Move Active Directory FSMO roles
The next part of the migration is to move FSMO roles to the new Windows Server 2019 Domain controller (REBEL-DC2019).
We can do this by running,
Move-ADDirectoryServerOperationMasterRole -Identity REBEL-DC2019 -OperationMasterRole SchemaMaster, DomainNamingMaster, PDCEmulator, RIDMaster, InfrastructureMaster

This command needs to run in the new windows 2019 domain controller as Enterprise Administrator.
Then rerun the following command to verify the new FSMO role owner.
Get-ADDomainController -Filter * | Select-Object Name, Domain, Forest, OperationMasterRoles | Where-Object {$_.OperationMasterRoles} | out-string -Width 160

Decommission Old Domain Controller
Now we moved FSMO roles over and the next step is to decommission old DC which is running with windows server 2008.
To do that,
1. log in to old DC as enterprise administrator
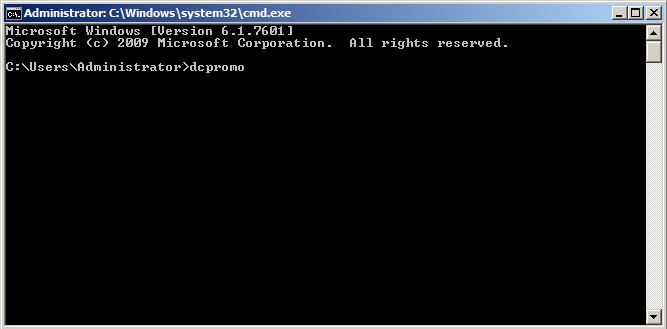
2. Go to Run | dcpromo
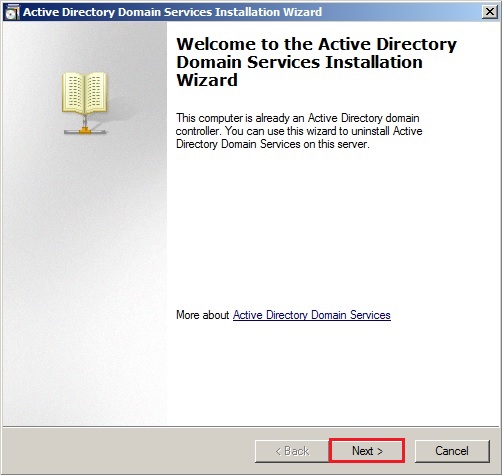
3. It will open up the dcpromo wizard. Click on Next to continue.

4. In the next page also click on Next.
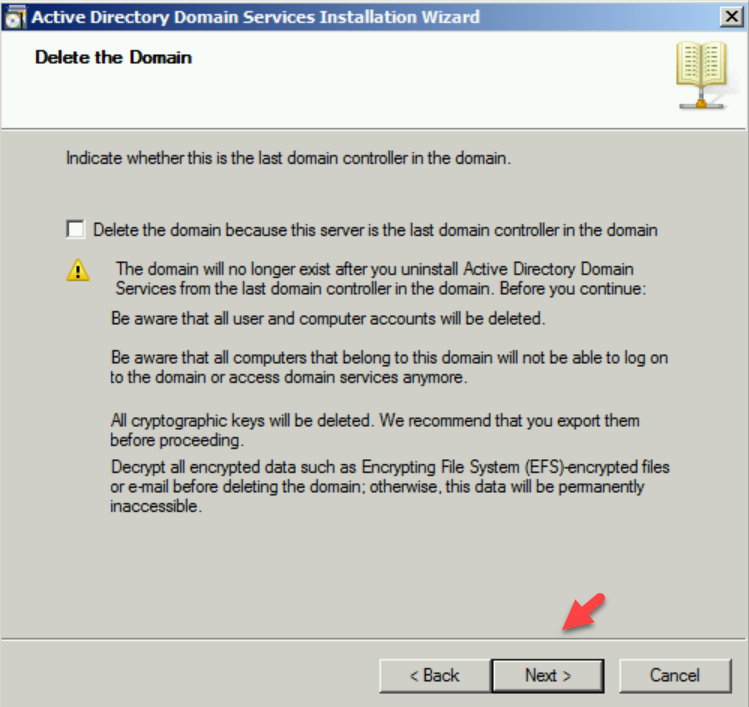
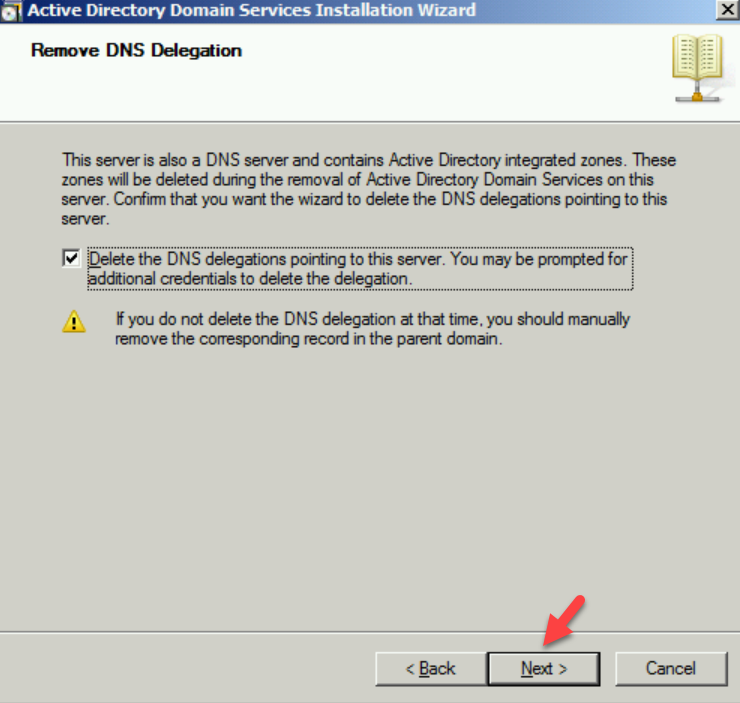
5. In Remove DNS Delegation page keep the default selection and click on Next.
6. Then the system will prompt for credentials. Provide Domain Admin credentials here.
7. On the next page, type a new password for the local administrator account.

8. In summary, page, click on Next to complete the process.

Once the process is completed, reboot the server.
Raise Domain and Forest Functional level
After you demote your last domain controller running with windows server 2008 we can raise Domain and Forest Functional level to windows server 2016 ( Windows server 2019 is the same).
To upgrade the domain functional level, you can use the following PowerShell command in the Windows server 2019 domain controller.
Set-ADDomainMode –identity rebeladmin.com -DomainMode Windows2016Domain

To upgrade the forest function level, you can use the following command
Set-ADForestMode -Identity rebeladmin.com -ForestMode Windows2016Forest

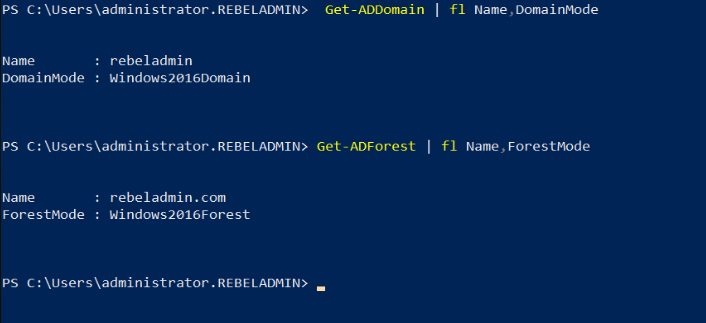
After the migration completes, we still need to verify if it completes successfully.
Get-ADDomain | fl Name,DomainMode
This command will show the current Domain functional level of the domain after the migration.
Get-ADForest | fl Name,ForestMode
The above command will show the current forest functional level of the domain.
This marks the end of this blog post. Hope now you know how to migrate Active Directory from Windows server 2008 to Windows Server 2019. If you have any questions feel free to contact me on rebeladm@live.com also follow me on twitter @rebeladm to get updates about new blog posts.
Содержание
- Active directory migration tool windows server 2019
- Сведения о поддержке ADMT и PES
- Аннотация
- Руководство по ADMT
- Известные проблемы и ограничения
Данная пошаговая наглядная статья описывает миграцию пользователей и их паролей, а так же компьютеров между доменами с помощью инструмента Active Directory Migration Tool. Для выполнения миграции через ADMT необходимо выполнить следующие условия:
— доверительные отношения между доменами
— отключение фильтрации SID, если пользователю необходим доступ к ресурсам без изменений
— учётная запись, под который выполняется миграция, должна быть членом группы Administrators в исходном домене
— учётная запись, под который выполняется миграция, должна быть членом локальной группы Administrators в каждом компьютере
— для установки ADMT v3.2 необходимо установить MS SQL Express
— для миграции паролей на контроллере исходного домена устанавливается утилита PES
— во время миграции компьютера на нём не должно быть активных сессий
Тестовый стенд реализован на следующем железе. Все образы дисков хранятся на Storage Spaces из 4 HDD:

Тестовая сеть.
Исходный домен:
DC01.OLD.EXONIX.RU — 192.168.0.10
CLI01 — 192.168.0.11
Домен назначения:
DC03.NEW.EXONIX.MOSCOW — 172.30.130.10
ADMT. NEW.EXONIX.MOSCOW — 172.30.130.11
DC02.MAIN .EXONIX.MOSCOW — 10.10.11.10 — используется только как родительский домен в лесу.
Маршрутизация сетей
ROUTER — все сети
Новый домен с имеющемся лесу создаётся при выборе следующей опции:

Результат настройки доверий между лесами должен выглядеть следующим образом:

Для работы ADMT 3.2 необходимо установить бесплатный SQL Express. В моей статье я буду использовать MS SQL 2012 Express, который устанавливается почти с настройками по умолчанию.


Проверка членства администратора целевого домена в группе Administrators исходного домена:

Отключение фильтрации SID в доменах, а так же создание ключа для установки PES.

Установка PES на контроллере исходного домена запускается из командной строки, запущенной с правами Администратора, в противном случае пароль для ключа не будет приниматься.


После установки PES необходимо перезагрузить сервер и в службах вручную включить службу PES.


В исходном домене создаются соответвующая NetBios имени группа с областью действия «Доменно локальная» как показано ниже:

Приступаем к тестовой миграции группы old$$$. Для миграции SID необходимо включить Audit Account Management в обоих доменах. Это можно сделать вручную через локальные политики контроллера домена, который будет указываться во время миграции (или групповые для OU Domain Controllers если таковых несколько, и будет указываться автовыбор контроллера домена) или ADMT это сделает сам как будет показано ниже:

Записываем имена доменов и выбираем контроллеры доменов. Выбор контроллера для исходного домена обязателен, если в домене их больше одного, а PES установлен только на одном из них.

Выбираем ранее созданную группу и указываем путь в AD куда мигрировать.

ADMT предлагает включить Аудит на указанных контроллерах домена в каждом домене:

Выбираем опции при разрешении конфликтов:

После миграции смотрим логи на предмет миграции SID.

Так же SID можно увидеть в аттрибуте sIDHistory. В Событиях можно посмотреть сообщение 4765:

Приступаем к миграции пользователя выбрав соответствующую задачу в ADMT. При первом переносе учётной записи пользователя его пароль не мигрируется, даже если указать соответствующую опцию.


Во время миграции пользователя можно задать миграцию и всех групп, в которые он входит. В моём случае, пользователь входит в одну группу:


Проверяем логи на предмет ошибок. В логах отображено сообщение о том, что пароль не был скопирован, а его, как я понял, хешь записан в текстовый файл, который можно открыть блокнотом запущенным от имени администратора.

При повторной миграции пользователя скопируется его пароль, а так же будет установлен аттрибут — смена пароля при первом входе.

Приступаем к миграции компьютера, выбрав соответствующее действие и опции. Рекомендую перед переносом реального пользовательского компьютера протестировать миграцию его клона в тестовой среде, и проверить работоспособность пользовательских приложений, которые используют сертификаты. Например, клиент-банки.


Миграция компьютера в другой домен завершена. Пользователь может залогинится на своём компьютере в новом домене.
Для того, чтобы отключить Аудит, включённый ADMT, необходимо открыть оснастку локальных политик контроллера домена:

Во время переноса может возникнуть ошибка подключения к компьютеру. Это связанно с фаерволом, в котором необходимо включить все правила File Sharing:

Если возникнет ошибка: ERR2:7674 Unable to determine the local path for ADMIN share on the machine ‘CLI01’. rc=-2147024891 — это означает, что нет административных прав на данный компьютер для учётной записи, которая выполняет миграцию. Решается добавлением этой учётной записи в локальную группу Администраторы с помощью групповых политик Restricted Groups.
Сведения о поддержке ADMT и PES
В этой статье описываются сведения о средстве миграции Active Directory версии 3.2 (ADMT версии 3.2) и сервере экспорта паролей версии 3.1 (PES версии 3.1).
Исходная версия продукта: Windows Server 2019, Windows Server 2016, Windows Server 2012 R2
Исходный номер КБ: 4089459
Аннотация
В этой статье данная статья содержит бесплатные средства миграции Active Directory и документацию. Это средства ADMT v3.2 и PES 3.1. В этой статье также описываются известные проблемы и ограничения, связанные с этим инструментарием.
Руководство по ADMT
В следующем руководстве содержится руководство по переносу доменов с помощью средства миграции Active Directory:
- ADMT не обновлен для переноса Windows 8.1 и 10 рабочих станций.
- Windows Server 2012, Windows Server 2012 R2 и более поздние версии Windows Server не проверялись на современные приложения и миграции профилей. Ваш опыт может отличаться в зависимости от многих факторов, включая переносимую версию Windows. Используйте набор инструментов на свой риск.
- Альтернатива набору средств ADMT также доступна в службах Microsoft Services:Active Directory Migration Services(ADMS). Это средство работает в облаке Azure. Сведения о начальном уровне см. в подстановок «Попробовать Premier: консолидация каталогов с Windows Azure службами миграции Active Directory и службой миграции Microsoft Azure Active Directory».
Известные проблемы и ограничения
Установка PES в Windows Server 2012 и более поздних версиях
В старых руководствах ADMT не упоминается необходимость запуска файла pedmig.msi командной pedmig.msi с повышенными уровнями. Это требование упоминается в последнем руководстве ADMT. Последнее руководство датировано 26 февраля 2018 г. и доступно в Центре загрузки Майкрософт.
Компьютер с ADMT не должен использовать Credential Guard
На рабочей станции, управляющей миграцией, миграция не делается сама по себе. Перемещение объекта выполняется на целевом контроллере домена (DC). Он делегирует пользователя, запускающего задачу миграции при миграции пользователя из домена источника.
По умолчанию контроллеры домена настроены для бесконтактного делегирования, которое больше не разрешено Credential Guard.
Если ADMT установлен на рядовом сервере под управлением Windows Server 2016 или более поздней версии, необходимо отключить Credential Guard для запуска миграции. Также можно переместить установку ADMT в целевой домен DC, где не требуется делегировать. Кроме того, Credential Guard не поддерживается на целевых DCS.
DC не может использовать неоконченные делегирования
Из-за имеющихся векторов атаки Корпорация Майкрософт ограничивает и блокирует использование неограниченного делегирования. Это также влияет на компьютеры. ADMT занося в журнал следующую ошибку:
Ошибка журнала ADMT: не удалось переместить исходный объект. Убедитесь, что учетная запись вызываемого пользователя не помечена как конфиденциальную и поэтому не может быть делегирована. hr=0x8009030e в пакете безопасности нет учетных данных
Изменение поведения для Windows Server 2008 R2 содержится в 12 марта 2019 г. — KB4489885 (обновление толькодля системы безопасности).
Microsoft PFE обсуждает эту проблему в теме «Избавиться от учетных записей, которые используют неподдержимое делегированное делегирования Kerberos». В другом блоге описывается план выпуска.
Можно настроить DCS целевого домена для ограниченного делегирования и разрешить целевым доменным DCS делегировать исходным DCS (ограниченное делегирование на основересурсов). Это возможно, только если ваши компьютеры являются Windows Server 2012 или более поздней версии Windows Server.
В Windows Server 2008 R2 или более ранней версии Windows Server можно переместить установку ADMT только в целевой домен DC. После этого у вас нет необходимости делегировать.
Для подключения к SQL Server на компьютере ADMT должен быть включен TLS 1.0 SQL Server
Если TLS 1.0 отключен, на компьютере ADMT вы получите сообщение, похожее на следующее:
Не удается проверить неудались действия. : DBManager.ImanaDB.1 : [DBNETLIB][ConnectionOpen (SECCreateCredentials())] Ошибка безопасности SSL.

Кроме того, если TLS 1.0 отключен, средство администрирования не загружает оснастку при ее открывании. Вы получаете сообщение, похожее на следующее:

Пользователи, работающие под управлением ADMT, не должны быть членами размежести проверки подлинности
Учетная запись пользователя, используемая для переноса SidHistory, не должна быть в области проверки подлинности. При переносе SidHistory между лесами целевой dc создает сетевой сеанс на исходный dc и аутентификацию с помощью NTLM. Для учетных записей администраторов, которые находятся в области проверки подлинности, в некоторых ОС NTLM не разрешен для этих учетных записей пользователей по умолчанию или отключен пользователями.
Домены в потоке проверки подлинности задач ADMT не должны ограничивать NTLM
По той же причине, что и для предотвращения разграничения проверки подлинности, домены, используемые для миграции ADMT SidHistory, не должны ограничивать использование NTLMодной из политик.
SQL Server версий
Проверка версий для SQL Server с ADMT не проводится. Последние тесты были проведенны в 2013 г. Поэтому компьютеры, работающие под управлением SQL Server 2014 и более поздних версий, не протестировали. Выполните собственное тестирование ADMT в тестовой среде перед использованием средства для переноса в производственную среду.
Групповые управляемые учетные записи служб
27 февраля 2018 г. в руководстве ADMT описывается, как обрабатывать управляемые учетные записи служб, реализованные в Windows Server 2008 R2. Тестирование групповых управляемых учетных записей служб (GMSA) не было. Учитывая особую обработку этих учетных записей в нескольких местах, следует следовать следующим рекомендациям:
- Не пытайтесь перенести GMSA через границы леса.
- При попытке переместить GMSA в лес следует соблюдать осторожность.
Клиентские операционные системы
Несмотря на то что последний инструментарий был выпущен после выхода Windows 8.0, тестирование переноса учетных записей компьютера Windows 8.xand 10.x и, в частности, не было тестирования для полной миграции профилей пользователей.
Обнаружено несколько проблем миграции, связанных с правильным переносом профилей пользователей. Это особенно верно для современных регистраций приложений и разрешений профилей.
Повторная миграция для обновления паролей
Некоторые клиенты запускают повторную миграцию учетных записей для переноса нового пароля из учетной записи источника в новую учетную запись в другом лесу. ADMT не предназначен для этого подхода. Он отслеживает каждое задание миграции в своей базе данных. Со временем размер базы данных ADMT увеличивается. В конечном итоге может возникнуть следующее:
База данных превышает лицензированный размер базы данных (для SQL express Deployments).
База данных превышает доступное место на диске на компьютерах, на которых SQL Server.
Задания миграции замедляются. Это происходит потому, что средство сканирует историю миграции при запуске нового задания.
Если вы собираетесь использовать ADMT таким образом в течение нескольких недель или месяцев и у вас есть расписание частой синхронизации, мы рекомендуем решение на основе решения синхронизации, например Microsoft Identity Manager.
Installation and configuration of ADMT tool and Password Export Server
Now that we have got our active directories in both source and target domain ready for migration, let’s install the tools required for migration.
ADMT Migration Account
The ADMT service account needs to have administrative rights in both source and target domains. It’s a good idea to create a user specifically for the ADMT Migration, however you may still use an existing user if desired. A single service account will be used for the entire migration:
- In the target domain, create an administrator account
Target Domain:
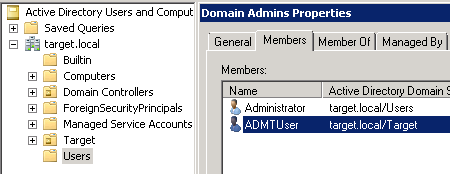
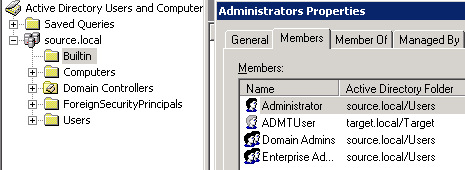
- In the source domain add the same user to the built-in Administrators group (it can’t be added directly to domain admins group).
- On the domain controller in Source domain, click Start, Administrative Tools, then select Active Directory Users and Computers.
- In left panel, select built-in, then in right panel right click on Administrators group, select Properties.
- Select Members tab, click Add and add the account to this group.
Source Domain:
- In the target domain, delegate permissions on OUs that are targets for migration to the above account
Installation and configuration of ADMT tool
ADMT tool should be installed on a machine in target domain. Also make sure that the user/client machines and the domain controllers (PES tool will be installed on a domain controller in source domain) in source domain are reachable from this machine. Otherwise you might end up having issues migrating users retaining their existing passwords and the user local profile on their machine.
ADMT v3.2 requires a preconfigured instance of SQL Server for its underlying data store. Use the ADMT migration service account created in above account for installation of SQL server and ADMT tool.
- Double click on SQLEXPR_x64_ENU.exe and run application.
- On right panel, click Installation, then on left side click New SQL Server stand-alone installation or add features to an existing installation.
- On the Setup Support Rules page, click OK.
- On the Product Key page, click Next.
- On the License Terms page, select I accept the license terms box, then click Next.
- On the Setup Support Files page, click Install.
- On the Setup Support Rules page, click Next.
- On the Feature Selection page, select Database Engine Service, then click Next.
- On the Instance Configuration page, accept default names and setting, click Next.
- On the Disk Space Requirements page, click Next.
- On the Server Configuration page for SQL Server Service, use your ADMT Service Account then click Next.
- On Database Engine Configuration page, select Windows authentication Mode, then in Specify SQL Server administrators add ADMT administrator account. Click Next.
- On Error and Usage Reporting page, click Next.
- On Installation Rules page, click Next.
- On Ready to Install page, click Install.
- On Installation Progress page, click Next.
- On Complete page, click Close.
Installing ADMT 3.2
Now, we install ADMT 3.2 on target domain. ADMT 3.2 installation is supported on Windows 2008 R2, Windows Server 2012 / 2012 R2 servers.
- On Welcome to the Active Directory Migration Tool Installation page, click Next.
- On License Agreement page, select I Agree, then click Next.
- On Customer Experience Improvement Program page, click Next.
- On Database Selection page, in Database write your SQL Database Instance, .SQLEXPRESS, then click Next.
- On Database Import page, select No, do not import data from an existing database (Default), then click Next.
- Review information, then click Finish.
Password Export Server /
ADMT Password Migration DLL
As mentioned in my 1st post, during the User account migration you will have the option to migrate passwords from the source domain to the target domain using ADMT. This can be achieved by installing Password Export Server onto a domain controller in the source domain. Again, make sure that the 2 machines, ADMT and PES, can communicate with each other. If the 2 machines can’t talk, user password migration will fail.
- Before installing PES, you need to create an encryption key from the ADMT machine in the target domain. From the command prompt run:
admt key

/option:create /sourcedomain:source.local /keyfile:"<localdirectory>PES.pes"

/keypassword:*
| Syntax | Description |
| <SourceDomain> |
Specifies the name of the source domain in which the PES service is being installed. Can be specified as either the Domain Name System (DNS) or NetBIOS name. |
| <KeyFilePath> |
Specifies the path to the location where the encrypted key is stored. |
| {<password>|*} |
A password, which provides key encryption, is optional. To protect the shared key, type either the password or an asterisk (*) on the command line. |
- On the DC in source domain, copy the encryption file created in previous step, to a local folder
- Run the PES installer (my suggestion is to run command prompt as an administrator and run the executable through command prompt otherwise the next step is going to fail.)
- When prompted choose the .key file you created on the ADMT machine.
- Key in the password you used while creating the key.
- Run the PES service as ADMT account user in the target domain.
- The installation is now complete, Click finish and restart the domain controller.
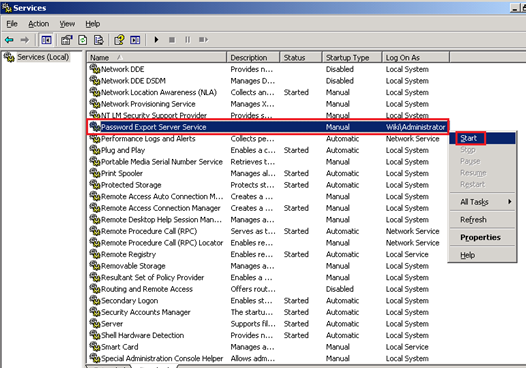
Starting Password Export Server Service
After restarting domain controller, the Password Export Server Services need to be manually started.
- Click Start, Administrative Tools, then click Services.
- Right click on Password Export Server Services, then click Start.
Series:
Part 1. Introduction and high-level migration approach
Part 2. Configuring source and target domains for SID history and accepted-domains
Part 3. Installation and configuration of ADMT tool and Password Export Server
Part 4. Groups Migration
Part 5. Users Migration
Part 6. Security Translation Wizard – Local Profiles and things to consider for end user experience

KEEP IN MIND
- In this scenario, the Active Directory and DNS are migrated from Microsoft Server 2012 to Microsoft Server 2019.
- The migration process is configured in Virtual lab environment using VMware workstation.
- This migration is conducted without a migration tool and ideal for small to medium sized business environment.
- Before the migration, it is advised to back up the DC and remove the shares from ‘Files and Storage Services’.
- To make it easier to follow, the tutorial is mainly divided into 4 sections.
-
- Pre-configuration tasks
- Install Active Directory and promote the new Server 2019
- Confirm Replication & DNS in Server 2012 and 2019
- Transfer FSMO roles to the new server (Server 2019)
01 Pre-configuration tasks
The domain is already configured as ‘techin.com’
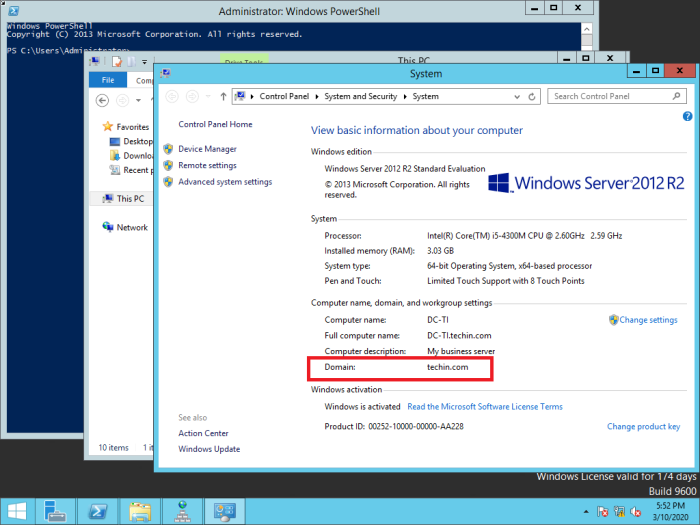
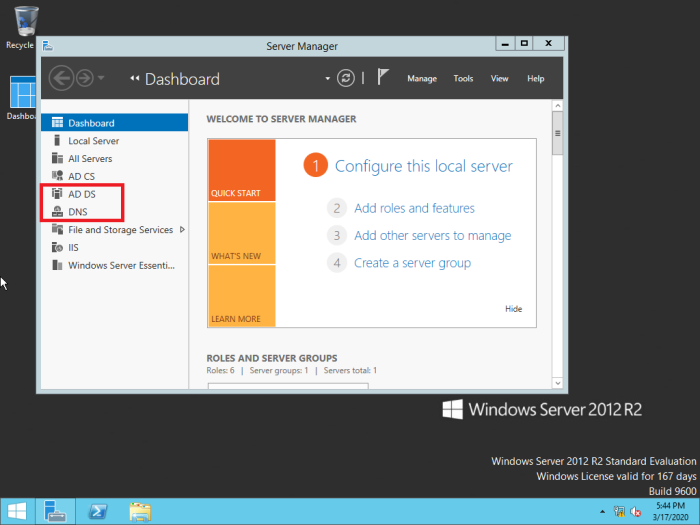
The old server 2012 is already installed with Active Directory, DNS
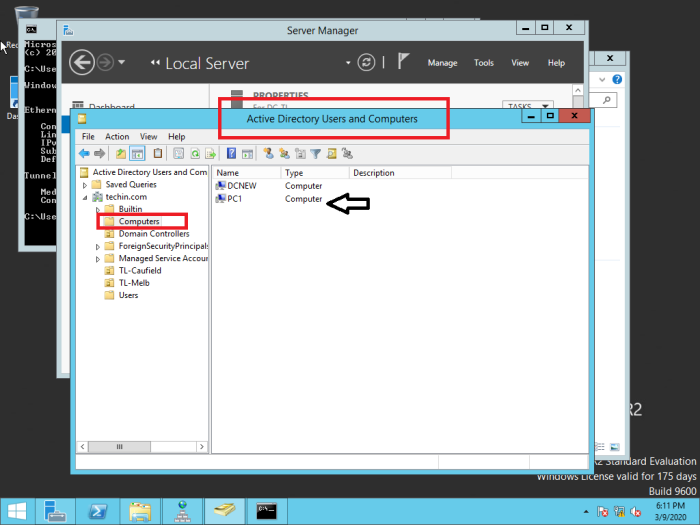
Windows 10 computer is added to the domain
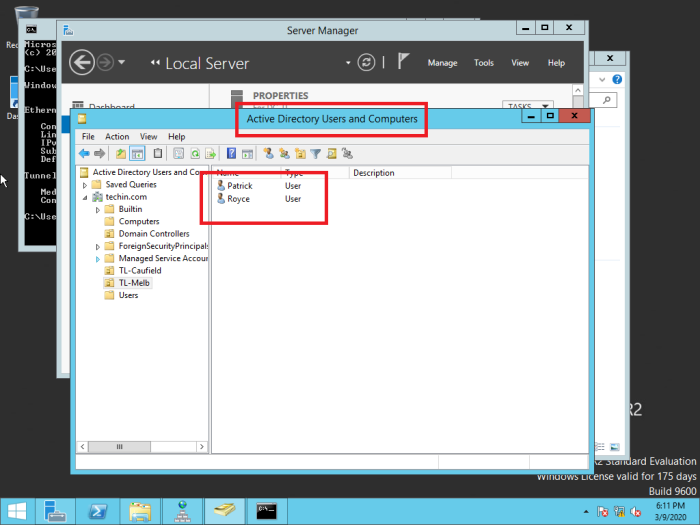
Users are created in ‘Active Directory Users and Computers’
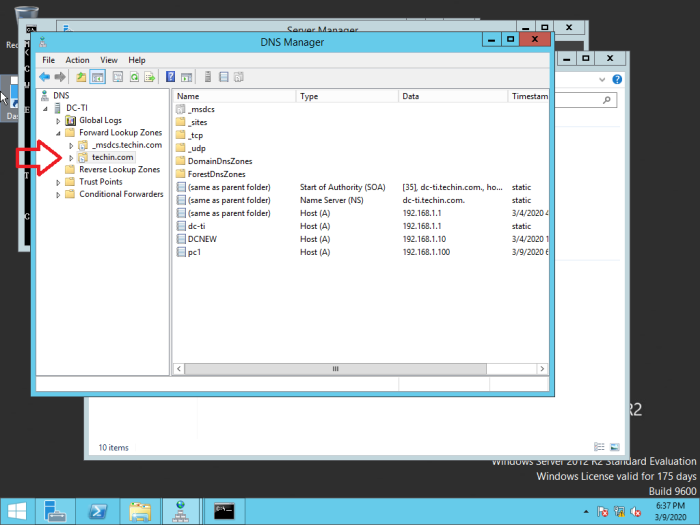
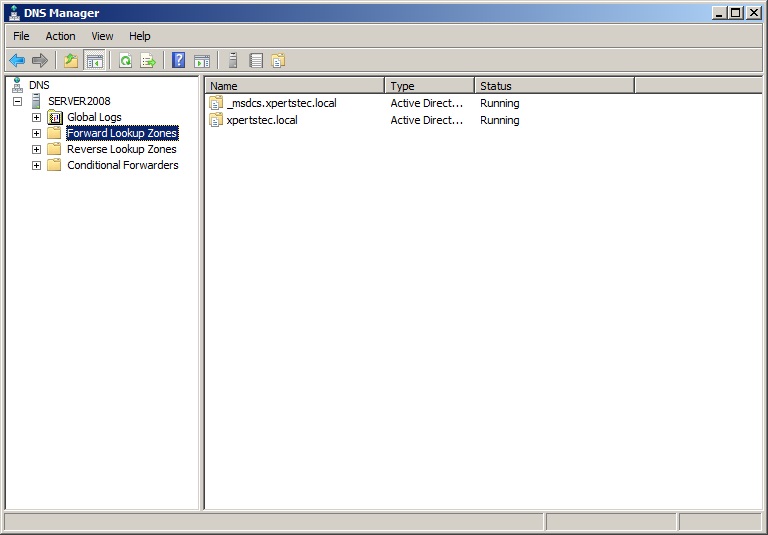
The following DNS configurations are visible
02 Install Active Directory and promote the new Server 2019
Firstly, you have to install Windows Server 2019 to a new server machine.
Refer article : https://techencyclopedia.wordpress.com/2020/02/15/microsoft-windows-server-2019-installation-step-by-step-guide/
After Installing Windows Server 2019, add the new server to the existing domain (In this case techin.com). And log in as the domain administrator
After adding to the domain install active directory and DNS
You can get an idea from the following article on how to install AD DS and DNS properly. However, you have to make slight changes during installation and screenshots are provided below.
Refer article : https://techencyclopedia.wordpress.com/2020/02/16/how-to-install-active-directory-in-windows-server-2019-step-by-step-guide/
When the server is promoted, instead of adding a new forest and providing a root domain name you have to add the domain controller to the existing domain which is ‘techin.com’.
And also make sure the credentials provided have permission to perform installation
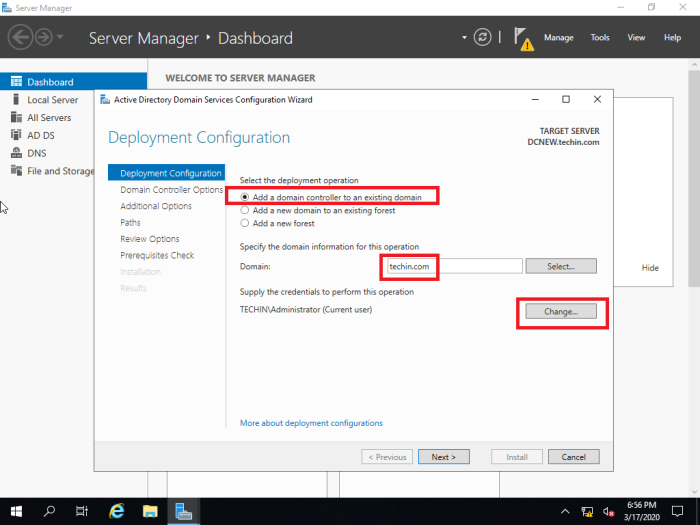
The replication should be from the main server 2012. This needs to be chosen correctly and will be an issue if the organization has multiple domain controllers.

03 Confirm Replication & DNS in Server 2012 and 2019
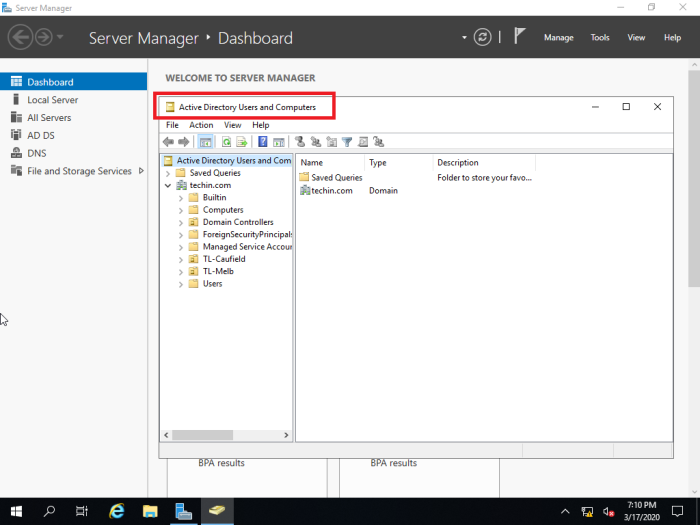
After the active directory and DNS installation you have to confirm the replication from old 2012 server to new 2019 server
Check Active Directory Users and Computers
Check DNS Manager

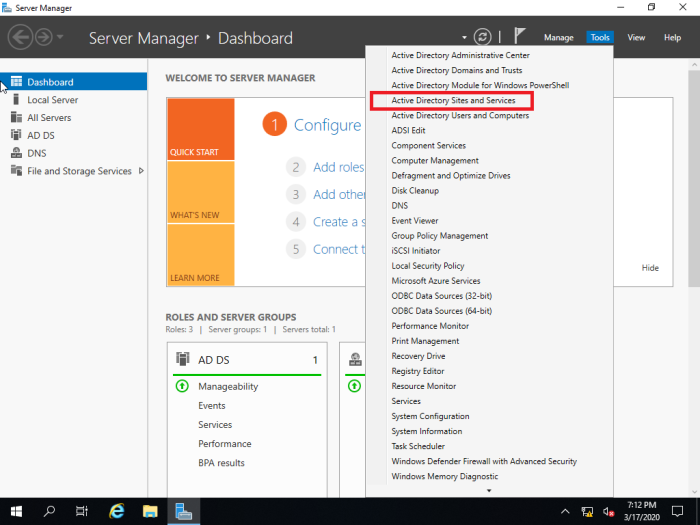
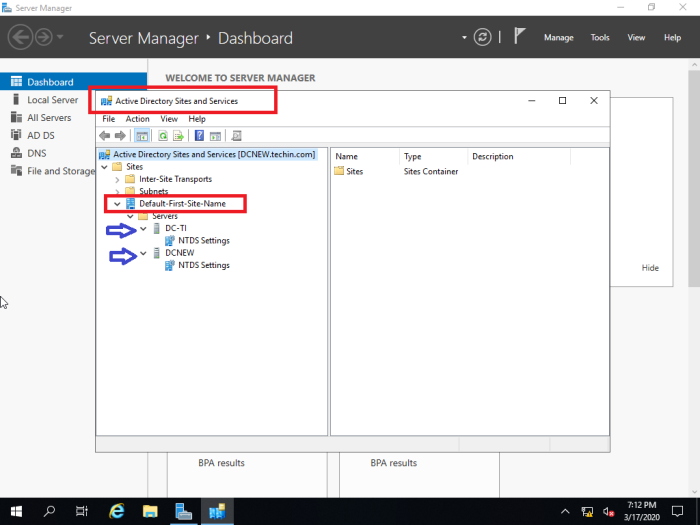
If it is not replicated from old DC you have to use ‘Active Directory Sites and Services’ to replicate manually.
Following is done in the newly installed 2019 server. The manual replication can also be done from the old 2012 server as well.

After confirming replication, you can login to the already added workstation from a domain user to check the success of the replication process. Before log in make sure that you configure the DNS accordingly. It should be the DNS of the newly configured Server.
04 Transfer FSMO roles to the new server (Server 2019)
Finally, you have to transfer the Flexible Single-Master Operations (FSMO) roles. There are 5 FSMO roles that needs to be transferred namely Schema master, Domain naming master, RID master, PDC emulator and Infrastructure master.
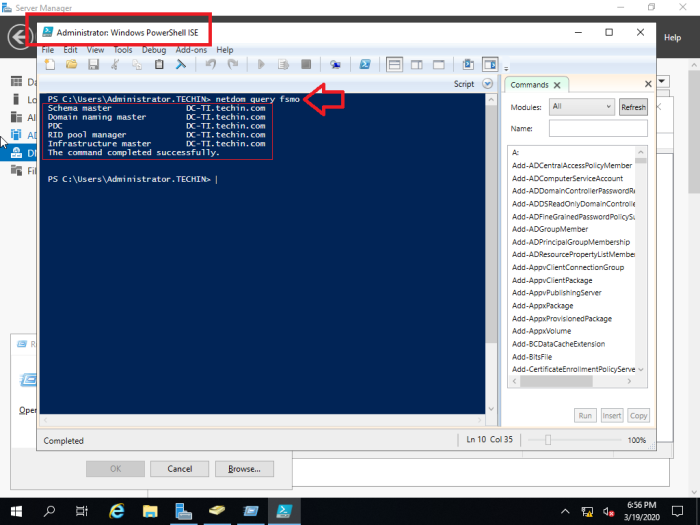
Firstly, open the PowerShell and run ‘netdom query fsmo’ command to locate the server where the FSMO roles are based. (In this case it is the old 2012 server and we need to transfer them to the new 2019 server one by one)
netdom query fsmo
Transfer the RID master, PDC emulator and Infrastructure Master Roles
These three FSMO roles can be transferred using single MMC
go to
Server Manager > Tools > Active Directory Users and Computers
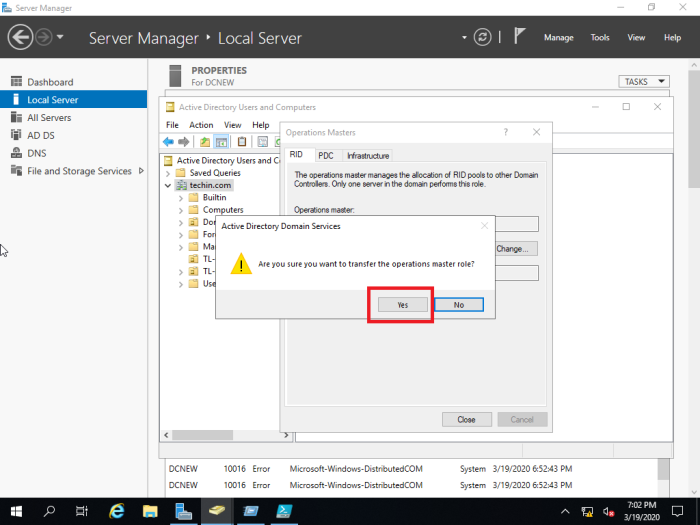
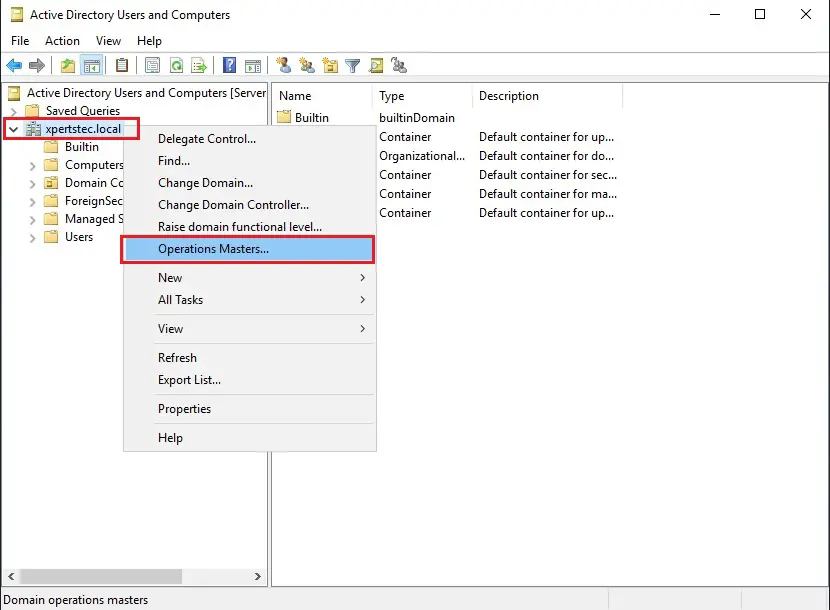
In the MMC right click on the domain name and select operations masters
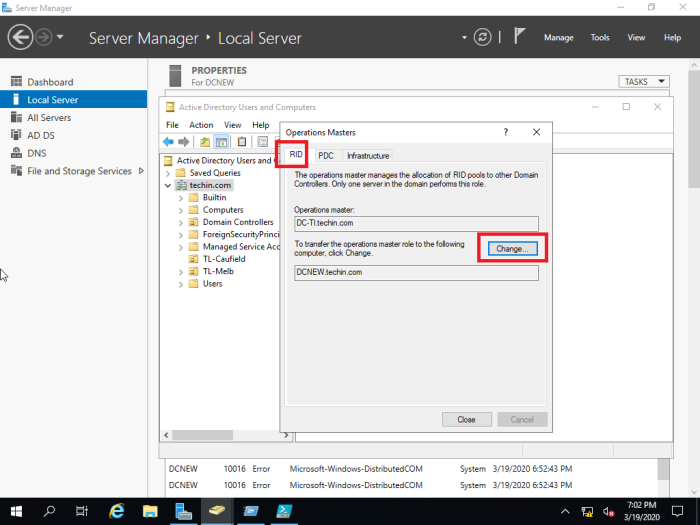
Change all three of them
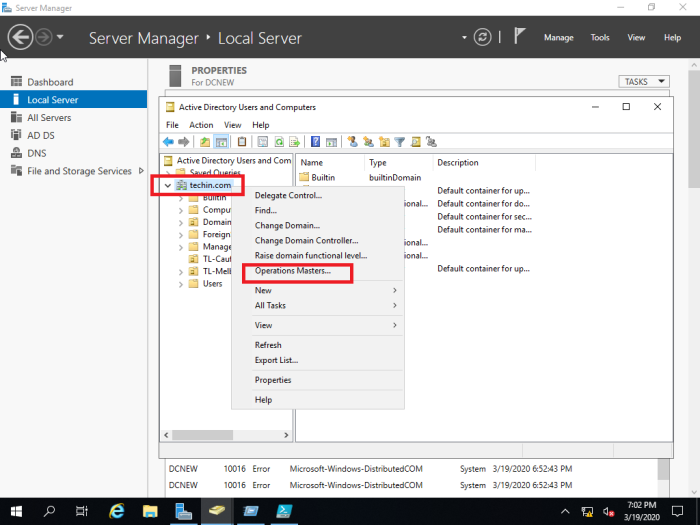
In this case only RID master role is shown and PDC and Infrastructure can be transferred in the same manner.
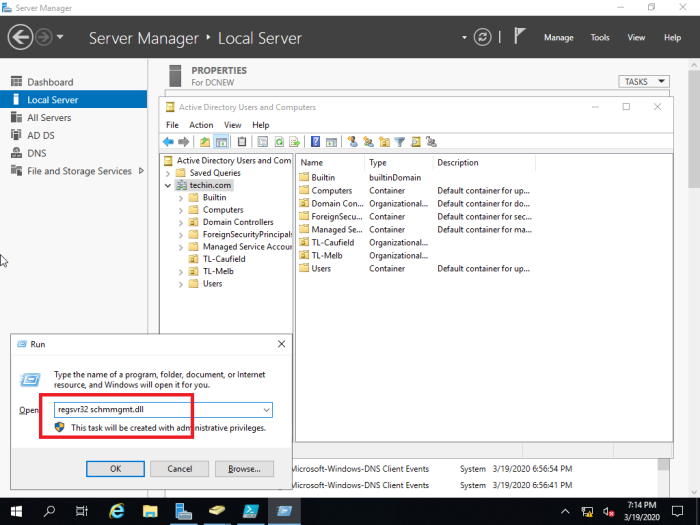
Transfer schema master role
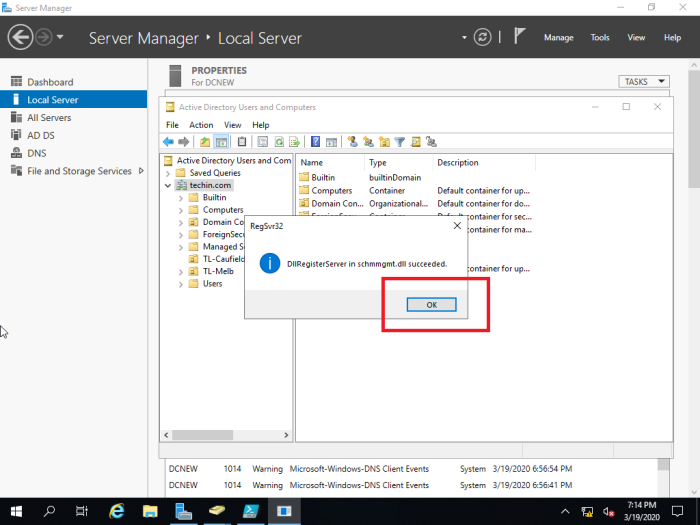
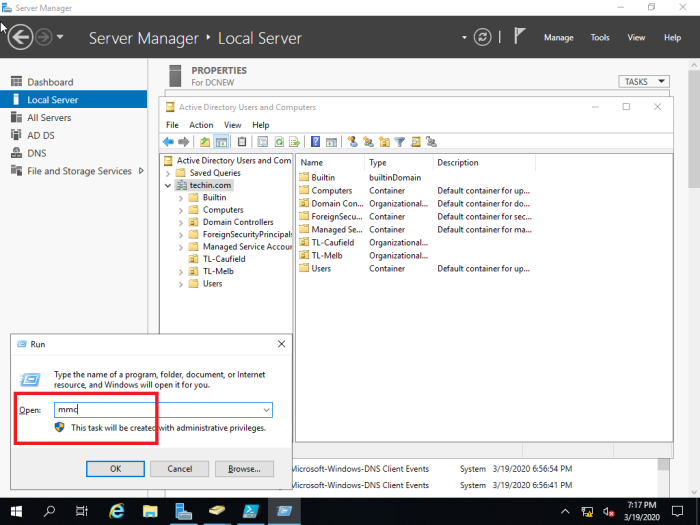
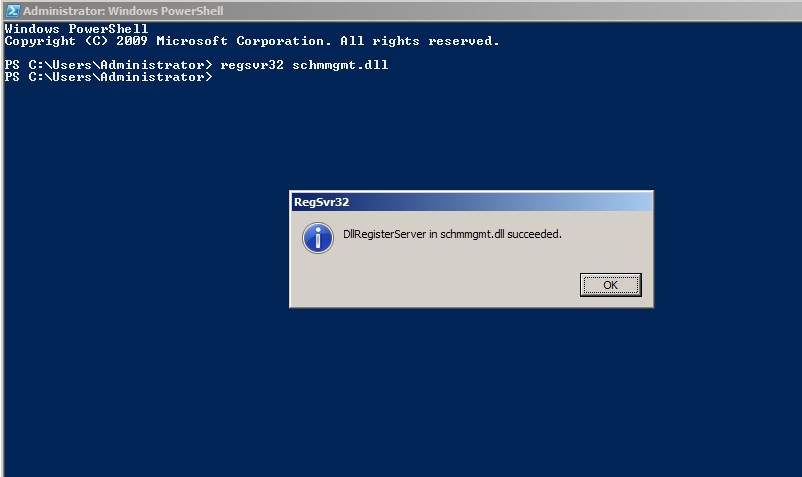
Type run command regsvr32 schmmgmt.dll and Press OK in the next window
Type run command mmc
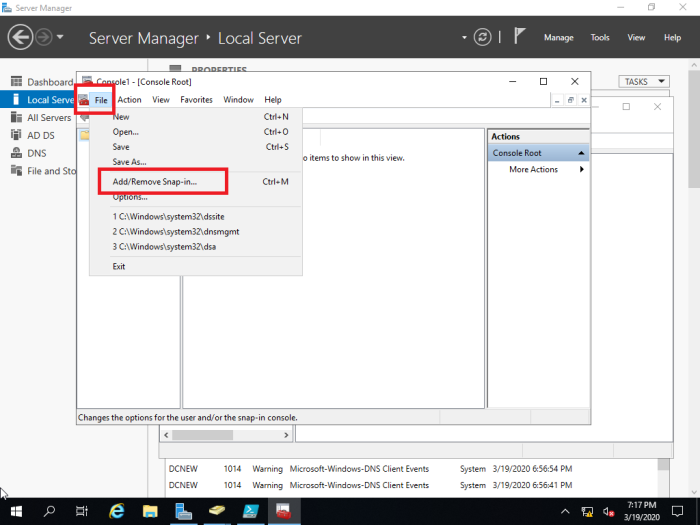
File > Add/Remove Snap-in…
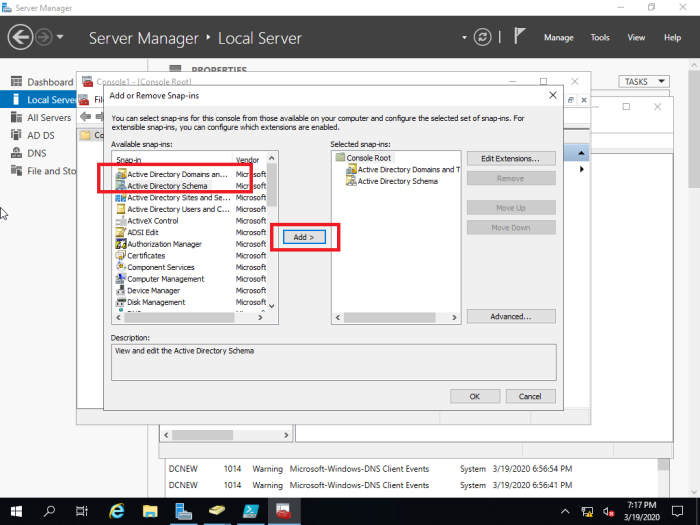
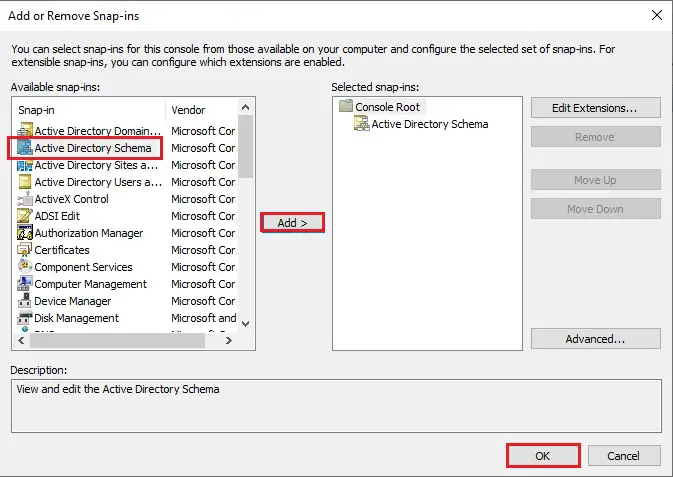
Choose and add ‘Active Directory Schema’ from ‘Available snap-ins’ and ‘Selected snap-ins’ (in this case ‘Active Directory Domains and Trusts’ are also added since it is needed to transfer ‘domain naming master role’)
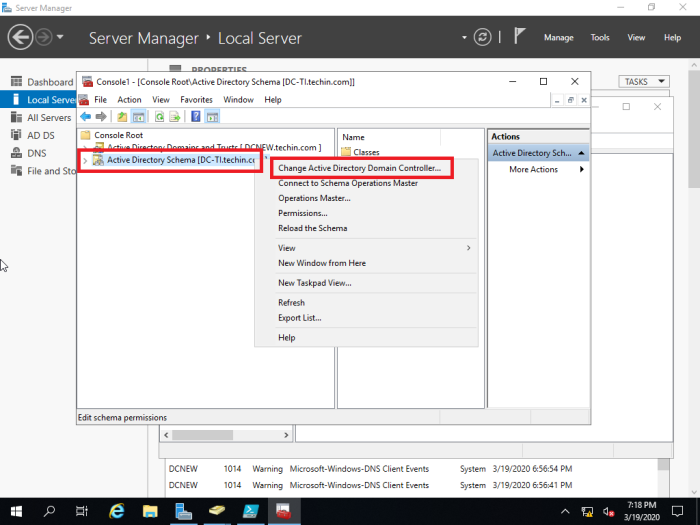
You have to change the domain controller to the new DC to proceed and steps are shown below
Transfer Domain Naming Master
This is similar to transferring ‘Schema master role’


Uninstall Old DC (Server 2012)
Lastly, you can uninstall old Domain controller (server 2012) from the network.
Active Directory Migration – In this blog, we’ll move the roles on our Server2008 (Windows Server 2008 R2 SP1) AD server to Server2019 (new Windows Server 2019 Standard).
Before proceeding to migrate an Active Directory from Windows Server 2008 R2 to Windows Server 2019, you want to first install Windows Server 2019 on a replacement machine which can then be promoted to Active Directory Server 2019.
Install Windows Server 2019.
How to Install Windows Server 2019, Click here
Rename Windows Server 2019.
How to rename Windows Server 2019, Click here
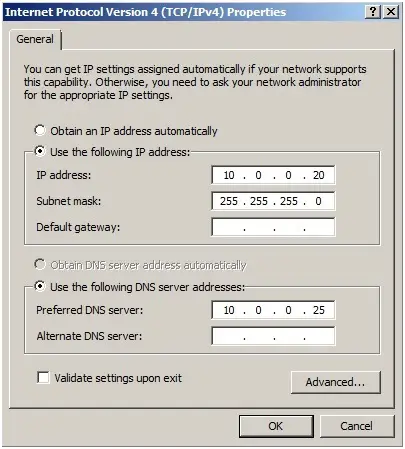
Configure the IP Addresses in Server 2019.
The next step is to configure the IP and the DNS Addresses on the new server.
Windows Server 2008
R2
Windows Server 2019
Computer Name: Server2008 Server2019
Domain Name:
xpertstec.local
IP Address (Static): 10.0.0.20
10.0.0.22
Subnet Mask:
255.255.255.0 255.255.255.0
Default Gateway: 10.0.0.1 10.0.0.1
Preferred DNS Server: 10.0.0.20 10.0.0.20
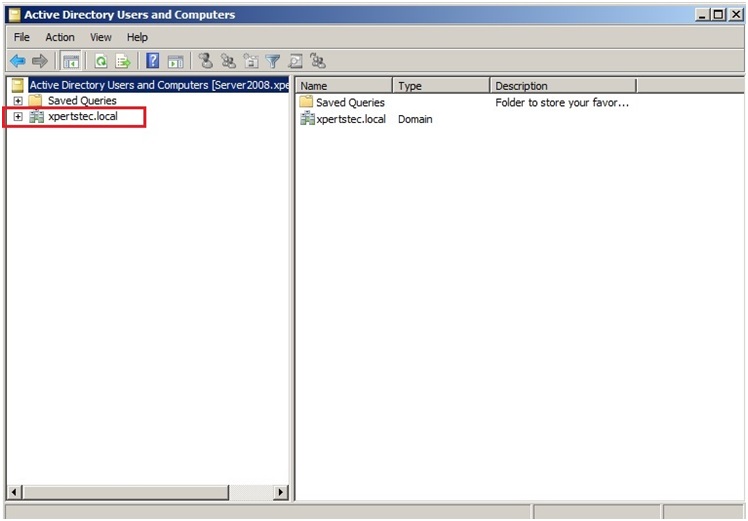
Active Directory Migration 2008
1- First, let’s have a glance at my environment. we have a domain controller xpertstec.local which is installed on Windows Server 2008 R2.
Raise the Forest Functional Levels and Domain Functional Levels in Windows Server 2008 R2.
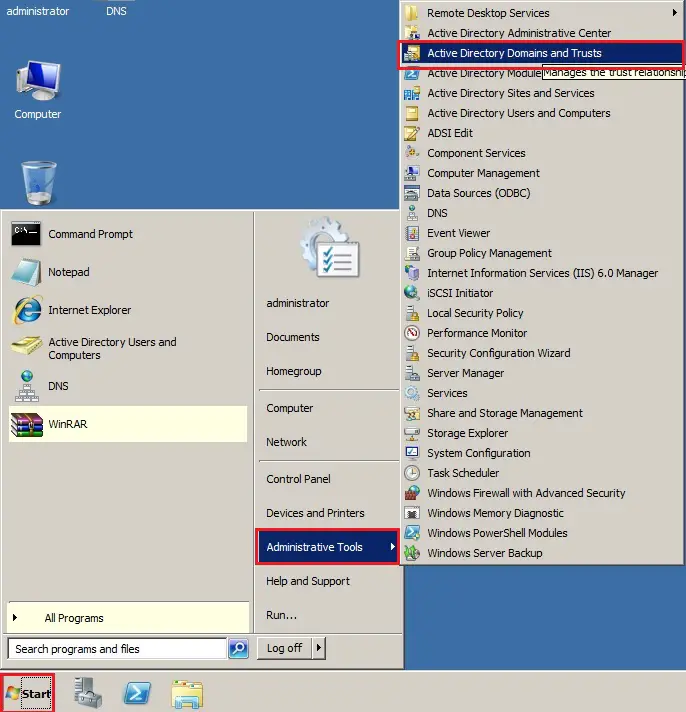
2- Click Start and select Administrative Tools and then Active Directory Domains and Trusts.
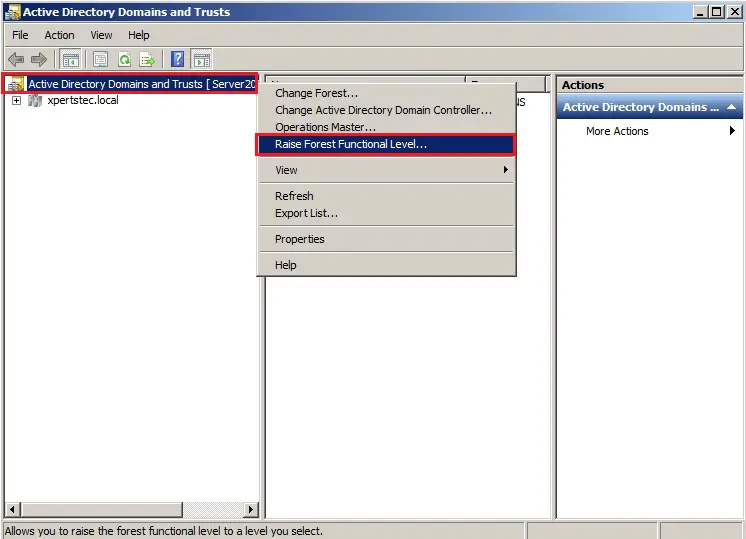
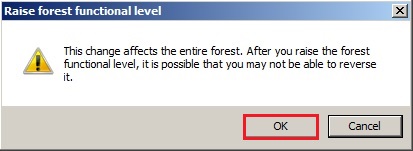
3- Right click on Active Directory Domains and Trusts and choose Raise Forest Functional Level.
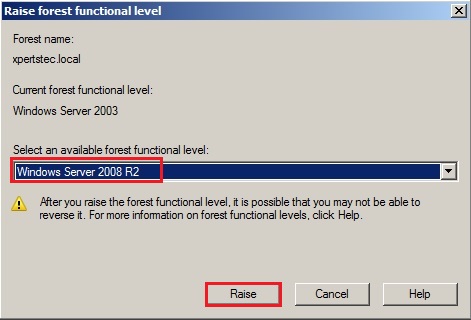
4- Select an available forest functional level “Windows Server 2008 R2 and click Raise.
5- Now click on OK.
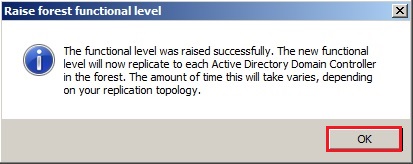
6- The forest functional level was raised successfully so click on ok.
Now Raising the Function Level of the Domain
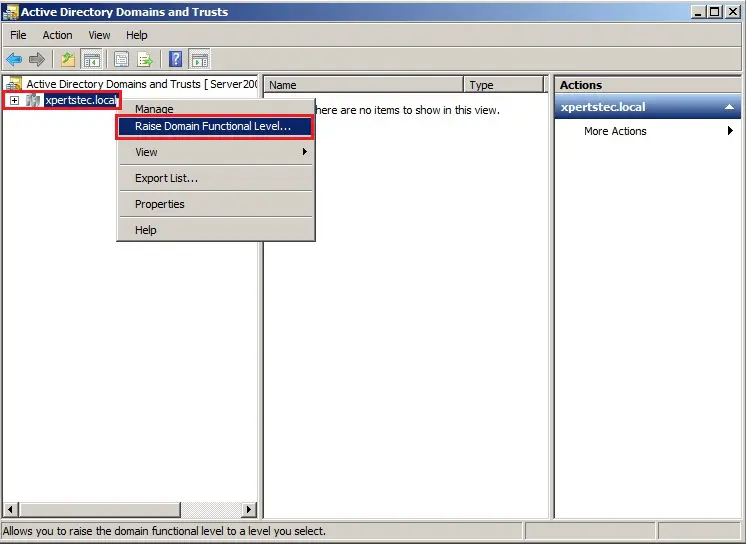
7- Right click on the Domain name (xpertstec.local) and click Raise Domain Functional Level.
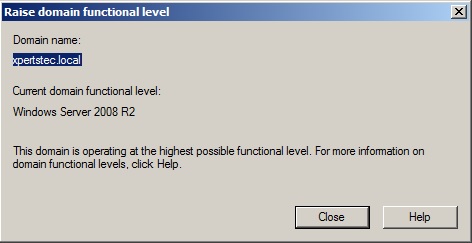
8- It has already got raised the Domain Functional Level to Windows Server 2008 R2 so click on close.
9- Now type the Netdom query fsmo command to check which server has installed FSMO roles.

10- DNS Manager.
Active Directory Migration Steps
Join Windows Server 2019 to an Active Directory Domain.
How to Join Windows Server 2019 to an Active Directory Domain, Click here
Now sign in Windows Server 2019 with the domain administrator account.
Create Additional Domain Controller (ADC) In Windows Server 2019
How to Create Additional Domain Controller (ADC) In Windows Server 2019 so Click here
11- Now have a look at my active directory Domain Controllers Server2008. We can now see that our server Server2019 is in the domain role.

Transferring the Flexible Single
Master Operations (FSMO) Role
I have a Windows Server 2008 Domain Controller (server2008) and have a further Windows Server 2019 domain controller (Server2019). To finish the migration. We’d like to transfer 5 FSMO roles to the new domain controller.
- Schema Master
- Domain Naming Master
- PDC
- RID pool manager
- Infrastructure Master
12- To find which server is currently holding FSMO then run the following command. netdom query fsmo
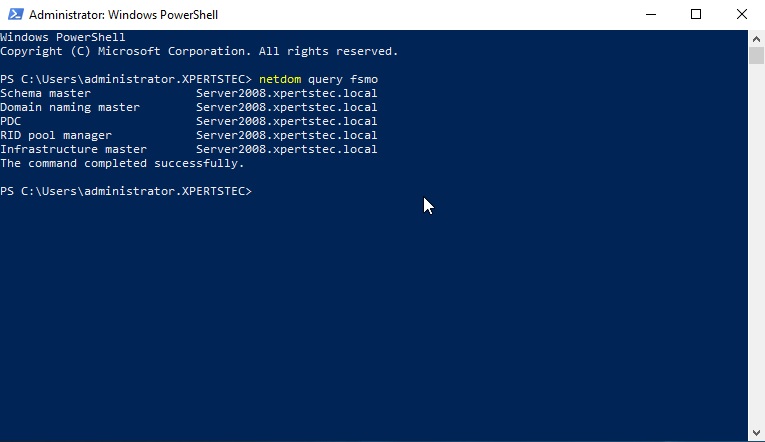
The FSMO roles are currently with the Windows Server 2008 R2 Active Directory domain controller (server2008)
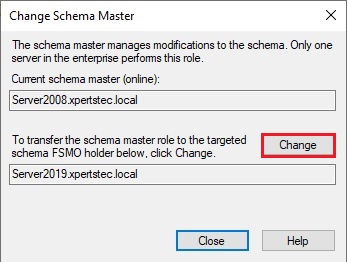
Using Active Directory Schema snap-in to transfer the Schema Master role 13- Open Command Prompt in administrative mode and type regsvr32 schmmgmt.dll and then click on ok.
Operations Master Roles Tranfer
14- On the Server2019 server, open Active Directory Users and Computers, right click domain xpertstec.local and then click Operations Masters.
15- On the Operations Masters, Select the RID tab and select the Change button.
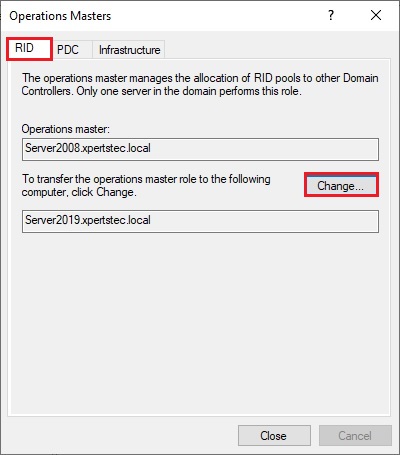
16- Now click Yes.
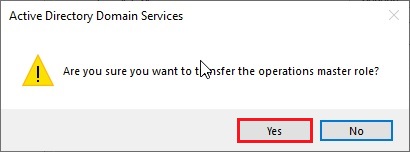
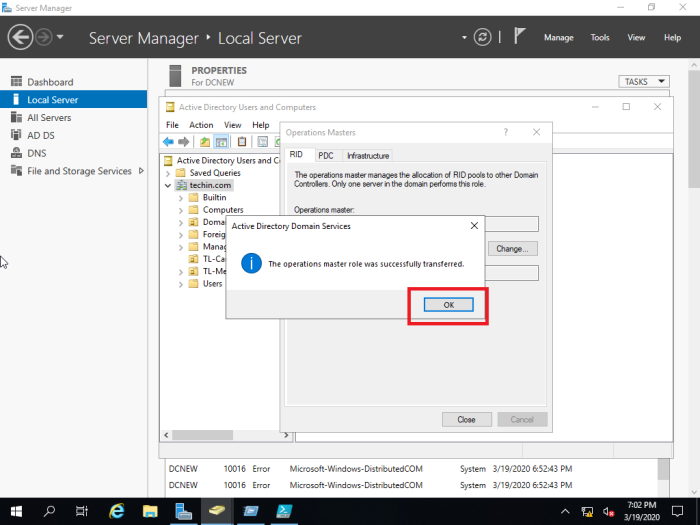
17- The operations master role was successfully transferred so click ok.
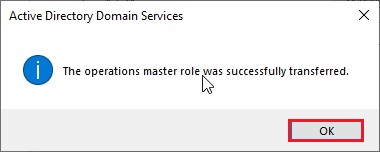
18- Now you can verify that Operation master now transferred to our new Server Server2019.xpertstec.local
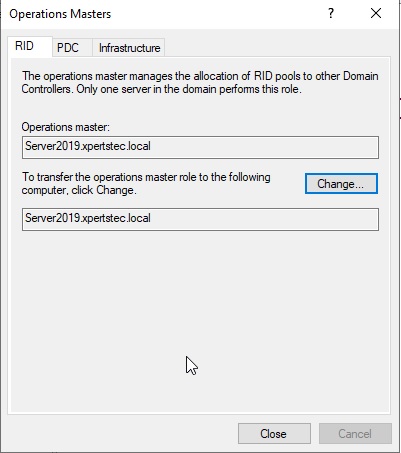
19- On the Operations Masters, select the PDC tab and then click the change button.
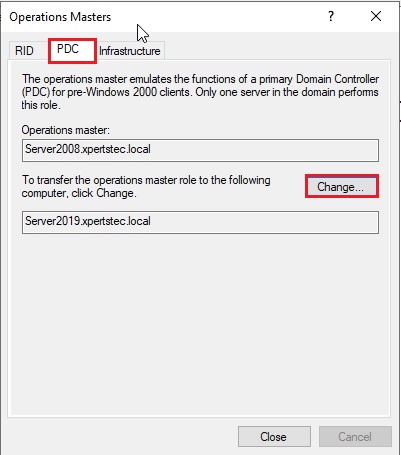
20- Now click Yes.
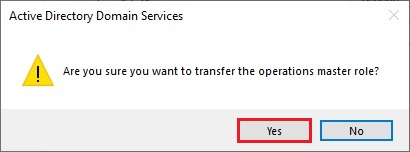
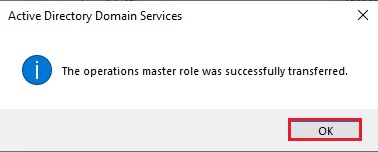
21- The operations master role was successfully transferred, then click ok.
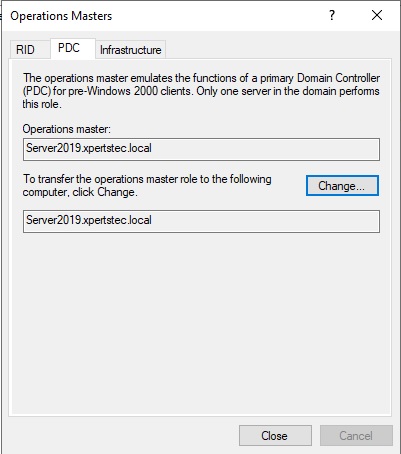
22- Now you can verify that Operation master now transferred to our new Server Server2019.xpertstec.local
23- On the Operations Masters, select the Infrastructure tab and click on change button.
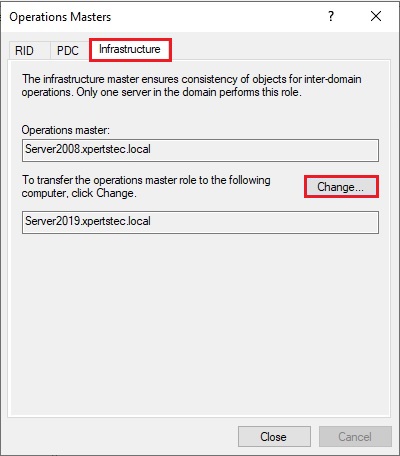
24- Then click Yes.
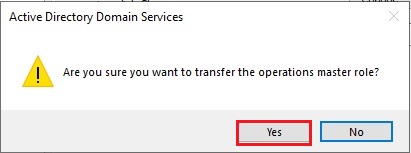
25- The operations master role was successfully transferred, then click ok.
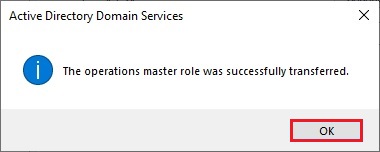
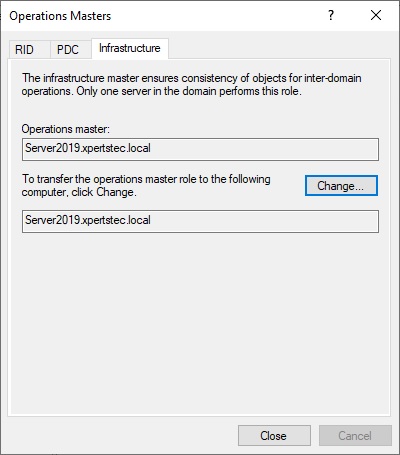
26- Now you can verify that Operation master now transferred to our new Server Server2019.xpertstec.local
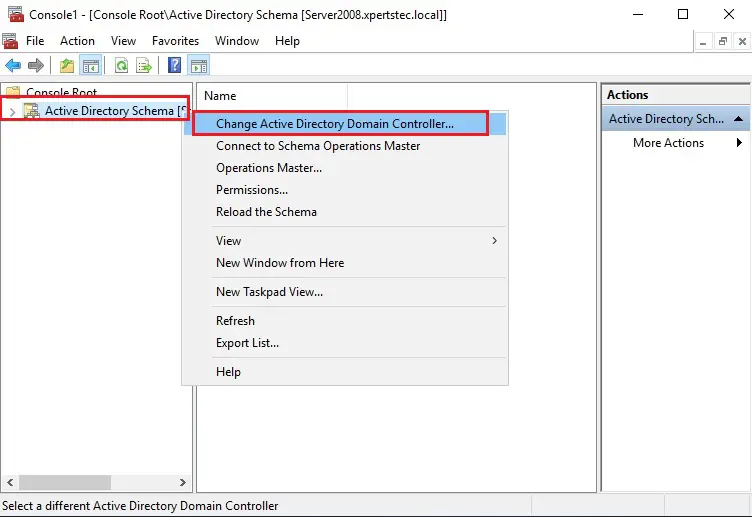
27- Open Server Manager and select Tools and then click Active Directory Domains and Trusts.
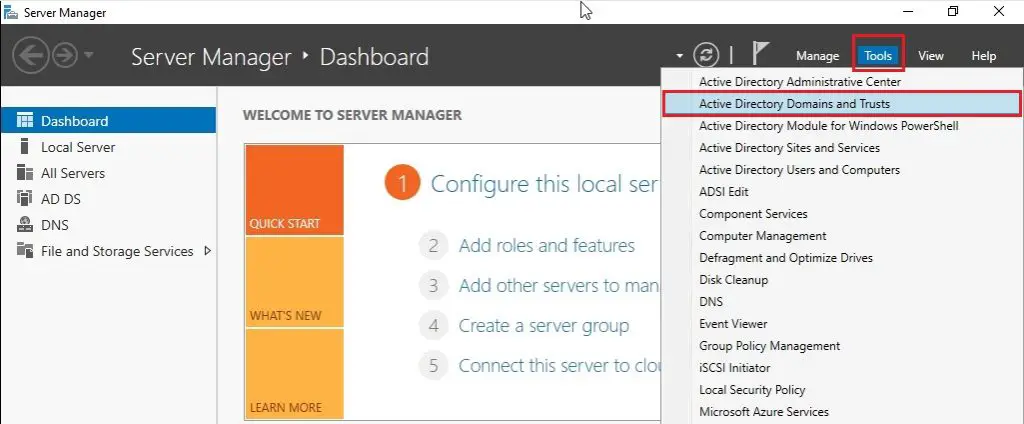
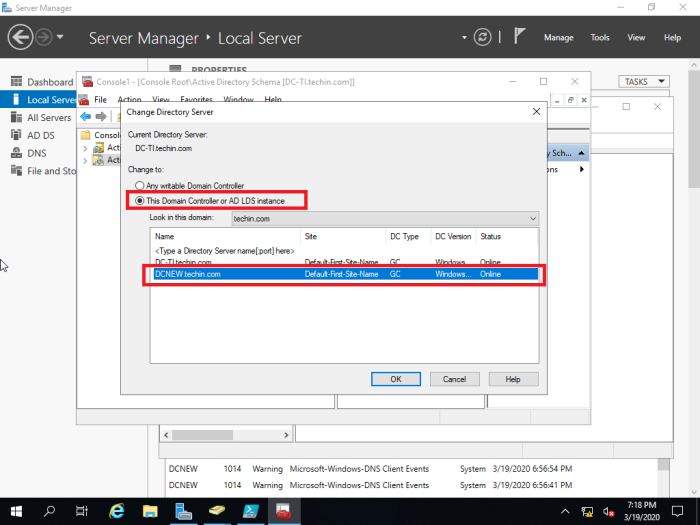
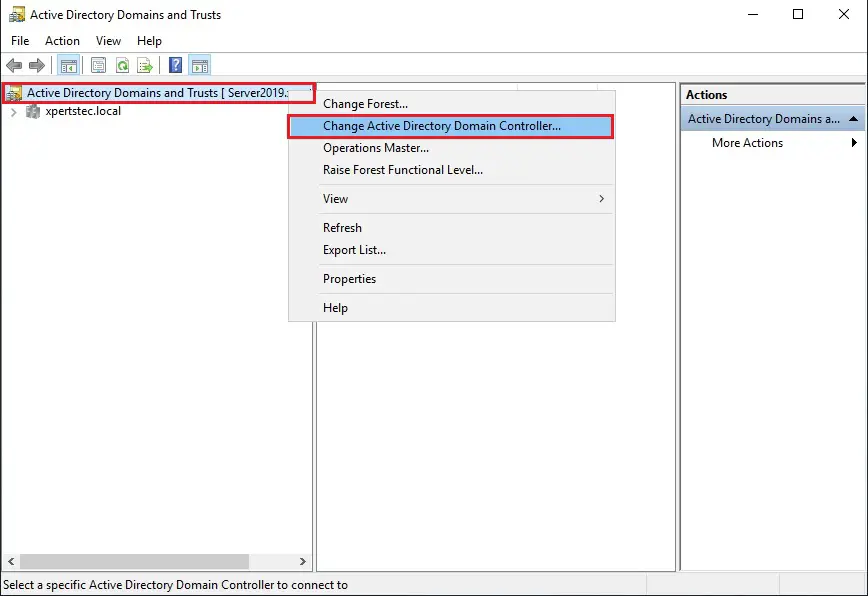
28- Right click on Active Directory Domains and Trusts and then select change active directory domain controller.
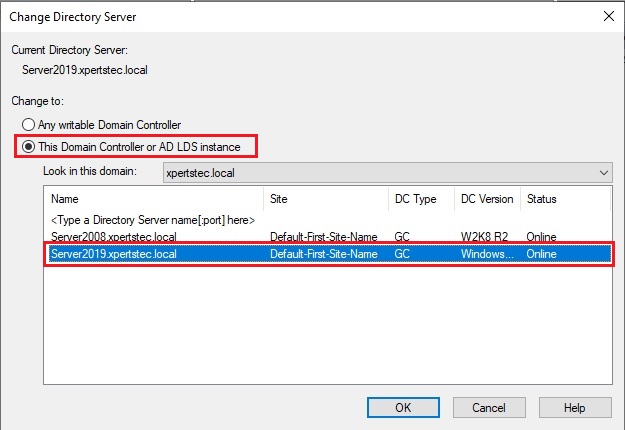
29- Select this Domain Controller or AD LDS Instance and click on the domain controller that you want to be the schema master role and then click ok.
Transfer Domain Master Role
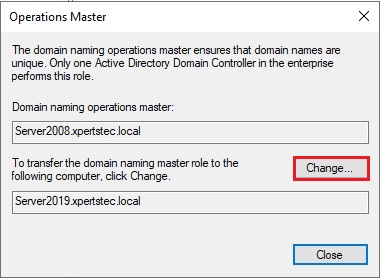
30- Right click Active Directory Domains and Trusts and then select Operations Master.
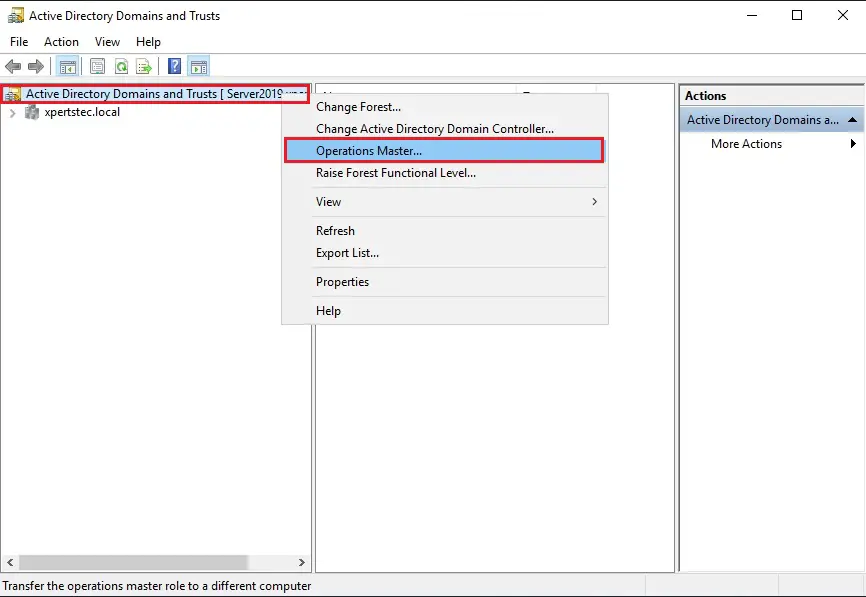
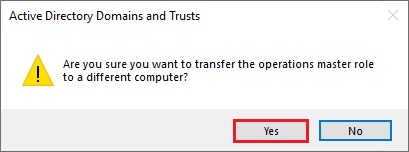
31- Now click on Change
32- then click Yes.
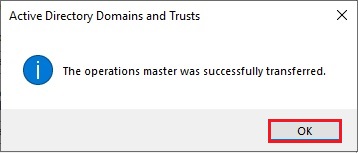
33- The operations master was successfully transferred then click ok.
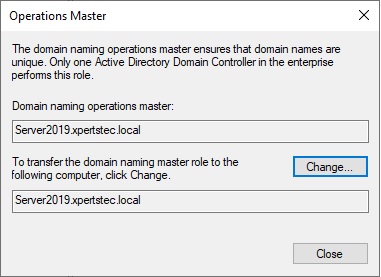
34- Confirmed the domain naming operation master role and click on Close.
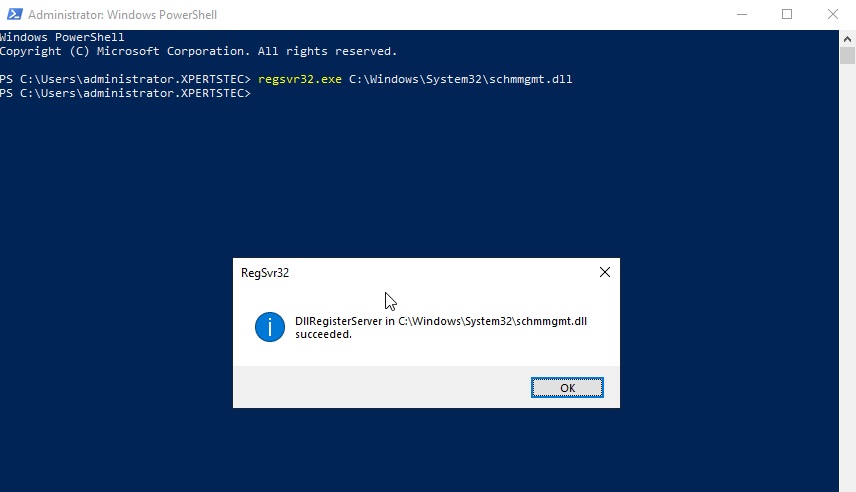
35- Now we need to move our Schema Master role, so we need to register the schmmgmt.dll open command prompt and run the command below.
Regsvr32.exe C: windows system32 schmmgmt.dll
The process was completed successfully so click on ok.
36- Open Microsoft Management Console mmc type mmc and then hit enter.
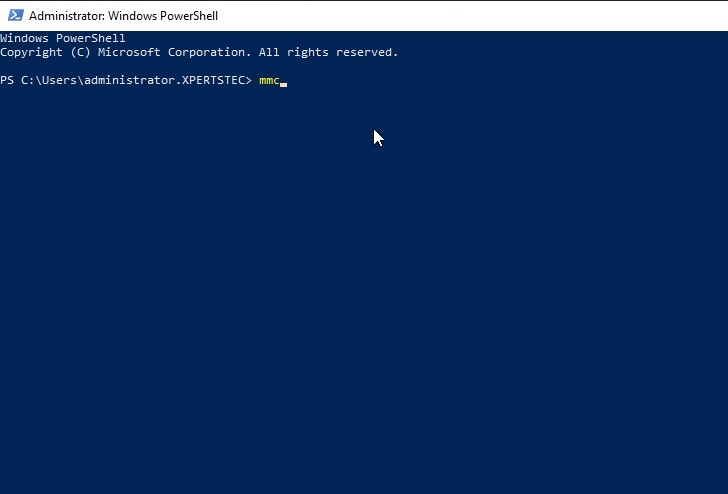
Console
37- Select the File tab and then select Add/Remove Snap-in.
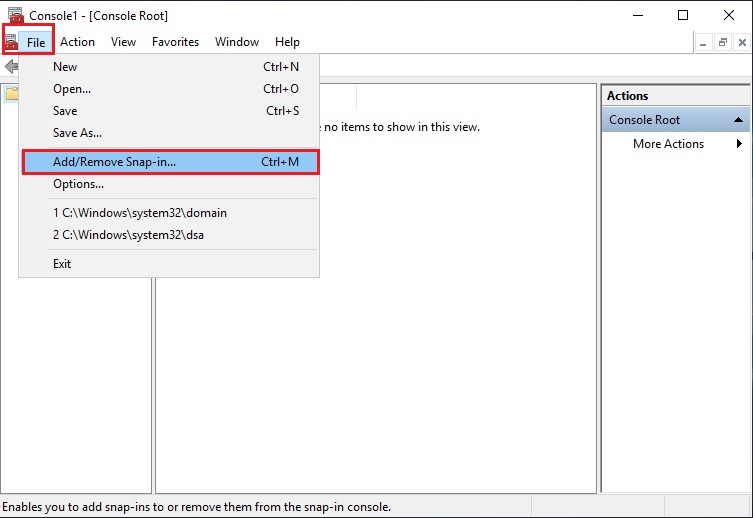
38- From the left side, under Available Snap-ins, Select Active Directory Schema, click Add button and then click ok.
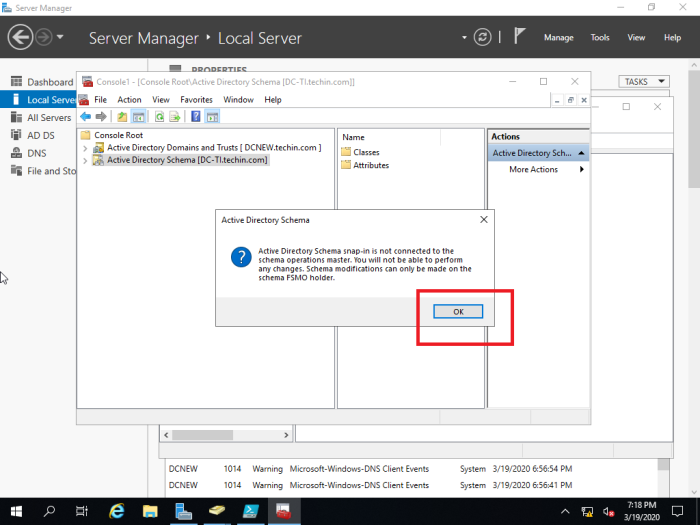
39- Right click Active Directory Schema, and then select Change Active Directory Domain Controller.
40- Select this Domain Controller or AD LDS Instance, click on the domain controller that you want to be the schema master role and then click on ok.
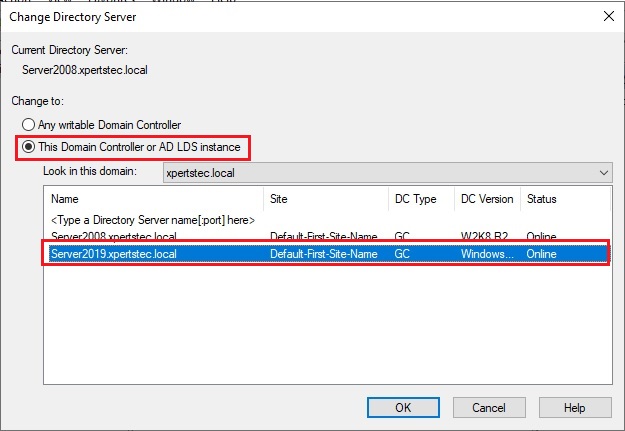
41- Now click OK.
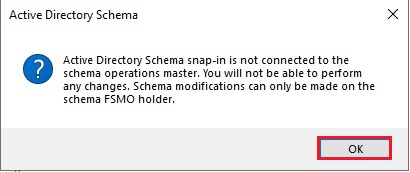
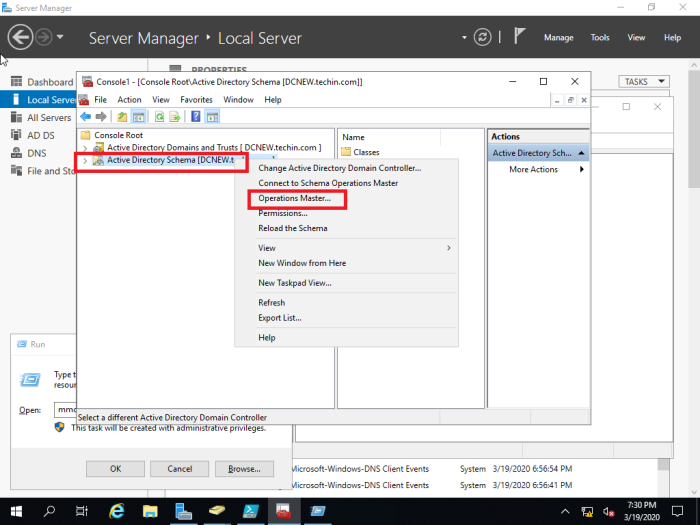
42- In the console1, right click Active Directory Schema (Server2019.xpertstec.local) and then select Operations Master.
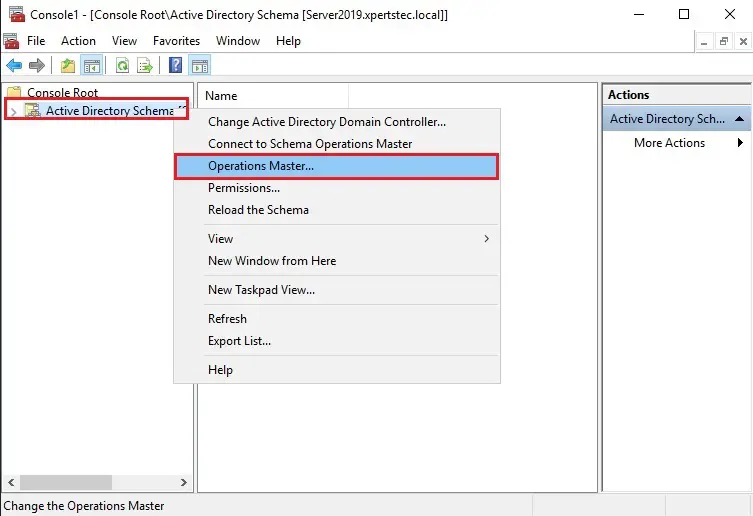
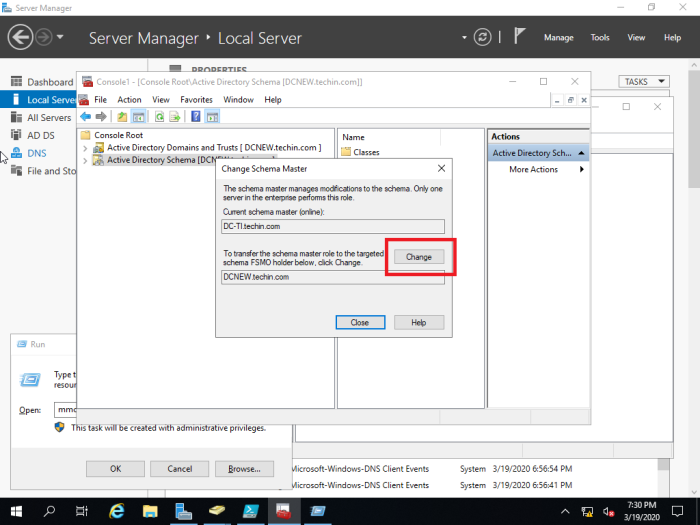
43- Select the Change button.
44- then click Yes.
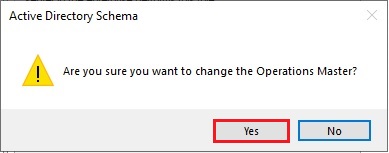
45- The active directory schema Operations Master successfully transferred then click ok.
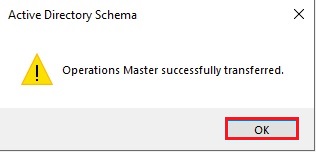
46- Now confirm your current schema master which is Server2019 and then click Close.
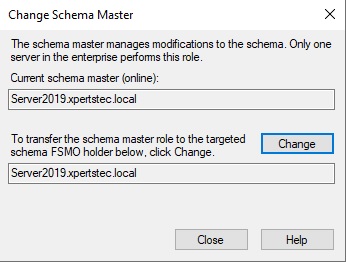
47- Now run the Netdom query fsmo command, so we can now see that our roles have been moved to our Windows Server 2019 Additional Domain Controller.
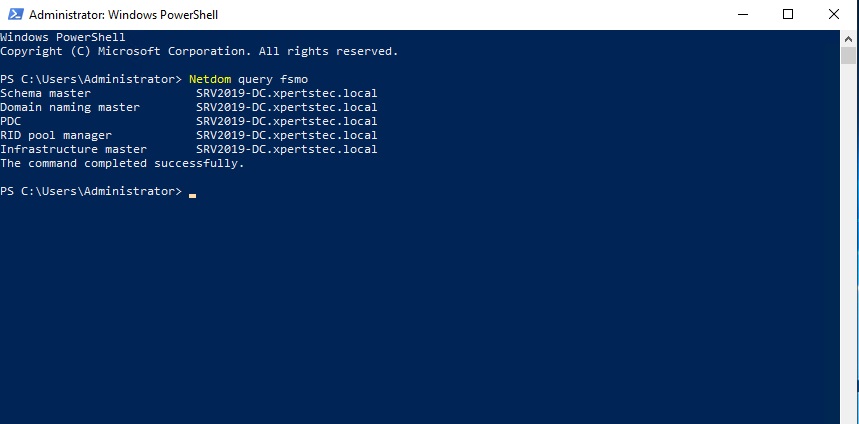
48- Now change the DNS address of our additional Domain Controller server to be the IP address of our Windows Server 2019 Domain Controller server.
After completing Active Directory Migration, Now the ultimate step is to get rid of (uninstalling) server2008 Active Directory domain controller.
Remove Active Directory Domain Controller 2008
49- Open command prompt Type dcpromo and then hit Enter.
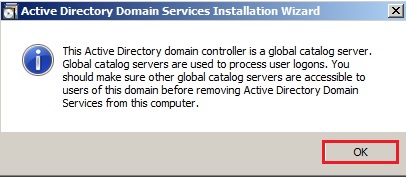
50- Click Next.
51- The Active Directory domain controller has the global catalog service, make sure your primary DC also has the service enabled and click on ok.
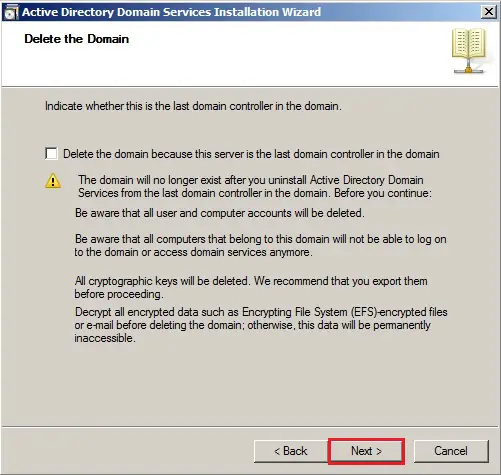
52- Confirmed that the delete this domain, because this server is the last domain controller in the domain, is UNCHECKED and then click next.
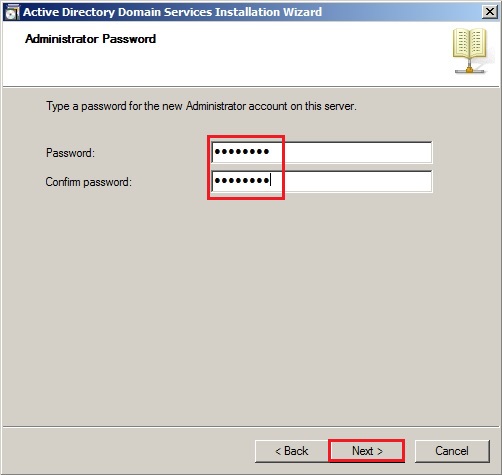
53- Type a password for the new Administrator account on this server and click next.
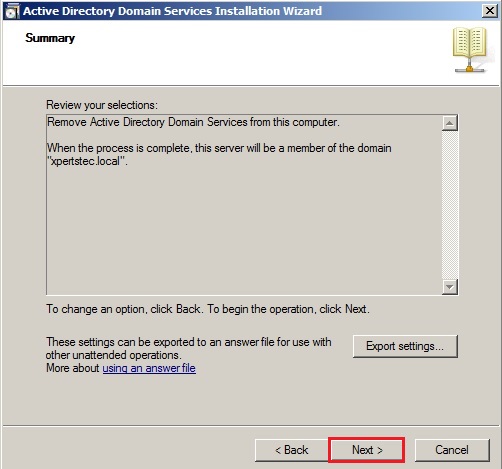
54- Review the remove active directory domain services Summary and click Next.
55- Check the Reboot on completion box to restart the server after the service has been removed

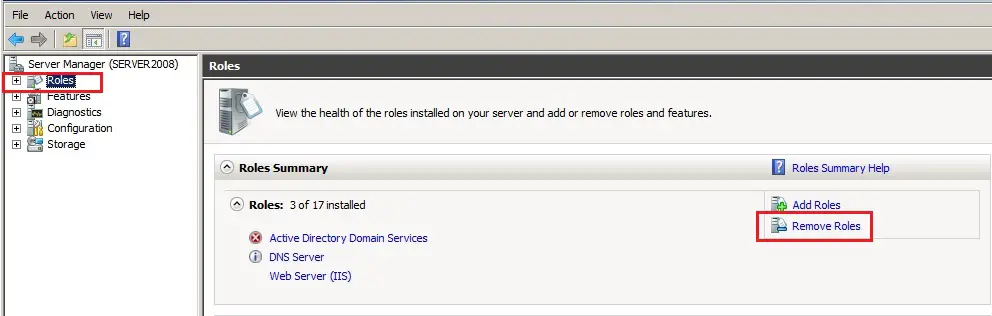
56- After rebooting server2008 DC. Now log in with the local administrator account and then open Server Manager.

57- In Server Manager click Roles under Roles Summary and click Remove Roles.
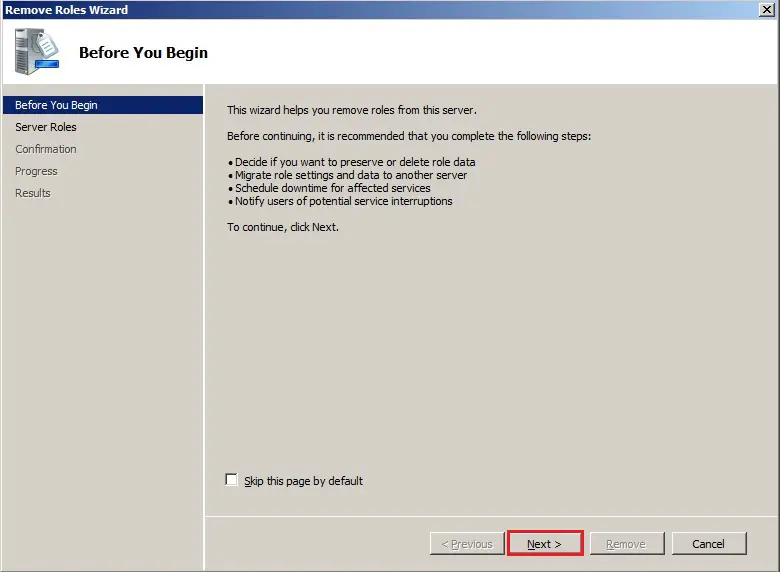
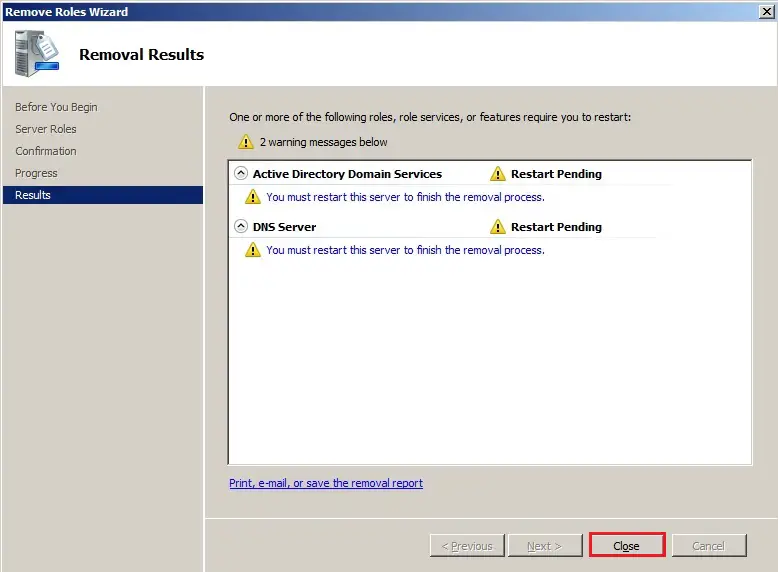
58- Remove active directory domain controller 2008 Roles wizard, click next.
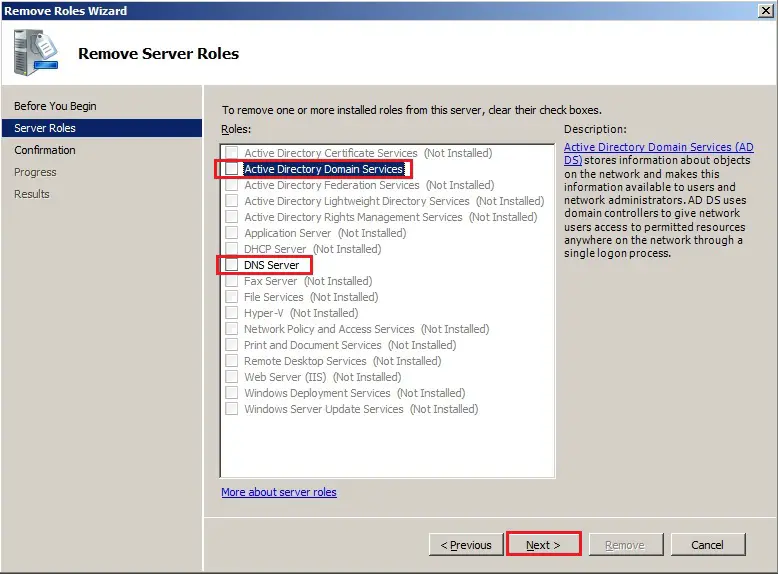
59- Uncheck Active Directory Domain Services and DNS Server box and click next.
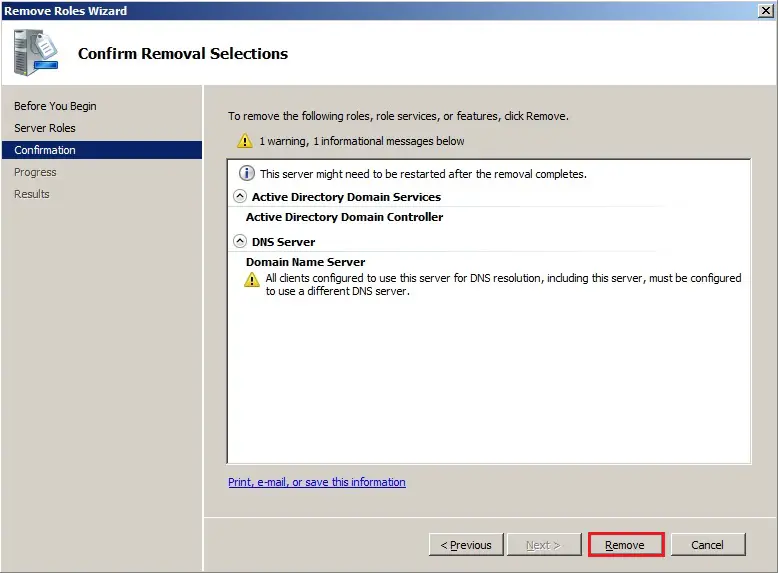
60- Click Remove.
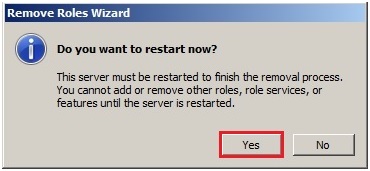
61- Now click Close.
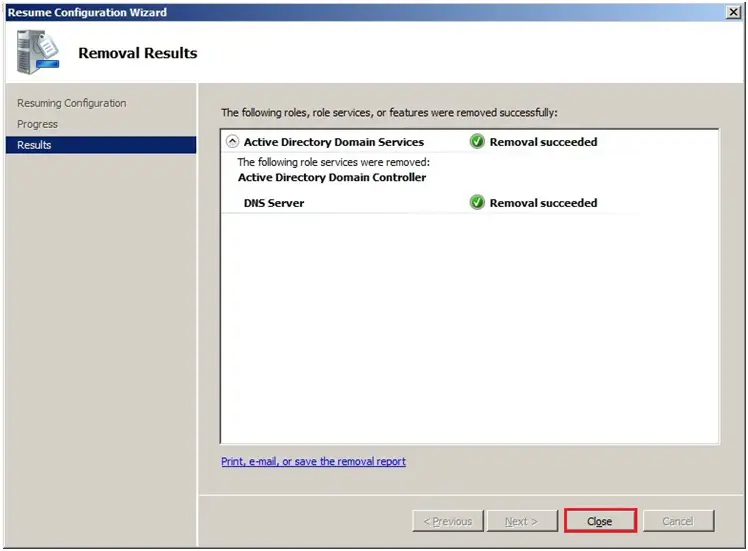
62- Do you want to restart now so click on Yes.
63- After rebooting server Log back to server2008, active directory domain services removal succeeded and click Close.
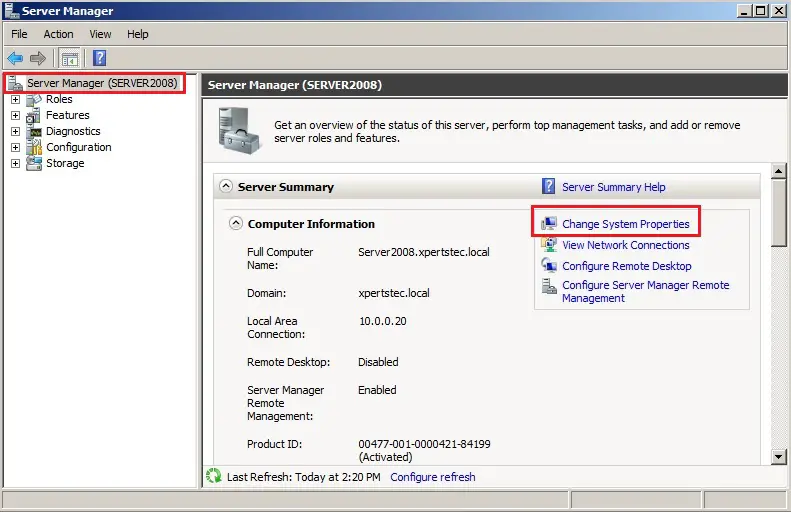
64- Disjoin the machine from the domain
Join to Workgroup
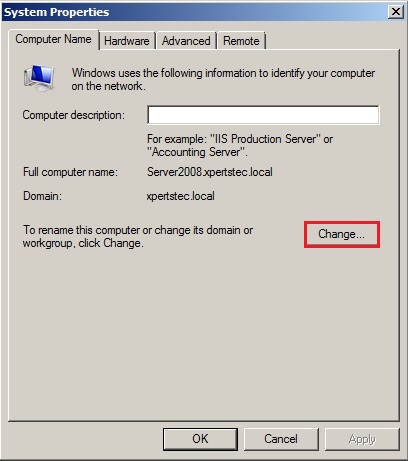
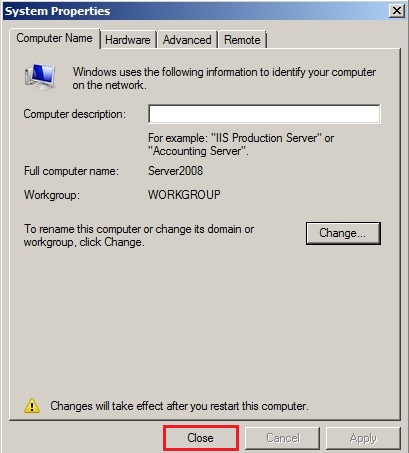
In the Server Manager, under Server Summary and click Change System Properties.
65- On the System Properties and click the change button.
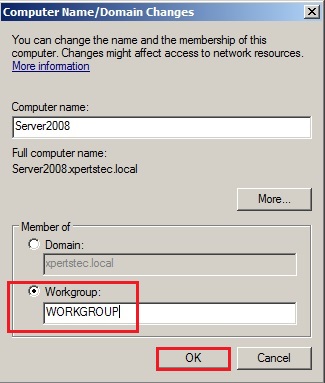
66- Select Workgroup type in a workgroup name and then click on ok.
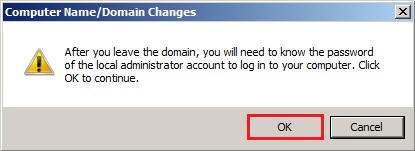
67- After leaving the domain Warning message so click ok.
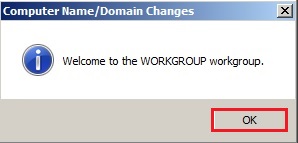
68- Welcome to the workgroup and click on ok.
69- Click OK to restart the server.
70- System Properties, click Close.
71- Click Restart Now or Restart Later and shut down this server.
Like and subscribe our YouTube channel to watch updated videos.
For more information click here