When it comes to working with the assembly System.Windows.Form there really is a lot of Classes available to you which allows you to add elements to your GUI Form to make it more user friendly and functional; afterall the entire purpose of creating a GUI Form is to remove the users need to type in all those commands you have coded into your Script.
Given the number of Classes is quite large I will not be covering every option in this tutorial, and instead will focus on a handful, which I hope will illustrate to you the basic principals of using these classes to create a functional GUI Form.
We’ll start with a very simple Form, and slowly build on it as I did in Part 1 to help you come to grips with the way to create your GUI Form, and make you realize that while there is a certain amount of finger exercise to come, that it is not as difficult to do as one might imagine.
So let’s get started!
Open Windows PowerShell ISE and enter the following code into the Script pane:
Code:
# Load required assemblies
Add-Type -AssemblyName System.Windows.Forms
Add-Type -AssemblyName System.Drawing

# Create Form to contain elements
$Form = New-Object System.Windows.Forms.Form

# Set Form Titlebar text
$Form.Text = "Console to list Directories of chosen path"

# Set size of form
# Size(<length>,<height>) in pixels
$Form.Size = New-Object System.Drawing.Size(600,400)

# Initialize form and show it
# [void] used to suppress other messages generated by Form actions
[void] $Form.ShowDialog()
After typing or copy & pasting the above code into the script pane click File > Run

- As you can see we now have a Blank Form which we’ll be able to build on.
- At this build we’ve set the Forms title bar text using $Form.Text
- Unlike in Part 1, this time we used a new assembly class to control the size of our Form (System.Drawing.Size).
- The Size() takes integer values to determine the size of the object being drawn in the format: Size(<length>,<height>) e.g. Size(600,400)
- Note: We’ve initialized our Form slightly differently that in Part 1
- [void] $Form.ShowDialog()
- [void] suppresses other messages generated by the Form. If we do not use [void], then, for example, if the user closes the Form the word «Cancel» appears in the console. We do not need that information, nor do they.
Add some elements to make the GUI Form functional
A User Input Textbox
We can add textbox to our GUI Form which takes input from the User. by adding the following code block to our Script:
Code:
# Create an Input textbox
$inputBox = New-Object System.Windows.Forms.TextBox

# Size(<length>,<height) in pixels
# .Location will position the textbox in a position relative to the
# base Form based on the Forms size(600,400)
# In this case location is 20 pixels in from Form boundary, and 50 pixels down from Form boundary
$inputBox.Location = New-Object System.Drawing.Size(20,50)

# Size(<length>,<height) in pixels
# .Size determines the actual size of the textbox
$inputBox.Size = New-Object System.Drawing.Size(150,20)

# Initialize the textbox inside the Form
$Form.Controls.Add($inputBox)
I’ve added comments to the code block to help explain each snippet, but here is a break down of what it does:
- First we create a variable $inputBox to assign our new object to. You can name your variable whatever you wish, but it helps when later analyzing your scripts to use a descriptive name.
- Next we assign a new object using the cmdlet New-Object and passing it our assembly Class System.Windows.Forms.TextBox
- Now using our $inputBox variable we append the .Location method in order to assign a new Drawing object by making using of the assembly class System.Drawing.Size(<length>,<height>)
- The System.Drawing.Size class takes two integer arguments: <length> and <height> which represent the number of pixels to draw the new textbox in from a specific location which is relative to the boundary walls of the GUI Form
- In the code above we are instructing the textbox be drawn 20 pixels in from the left boundary wall of GUI Form and 50 pixels down from the top boundary wall of our GUI Form
- Next we set the size of the textbox using the .Size method and assigning the System.Drawing.Size(<length>,<height>) class which takes integer values to represent the length and height (in pixels) of the object being drawn. In our case that will be 150 pixels wide by 20 pixels high)
- Finally, we need to initialize the textbox so it can be seen on the GUI Form. We do this by the snippet: $Form.Controls.Add($inputBox) which adds the Control element we pass to it (in this case our $inputBox variable which is storing our object.)
So now we need to add this to our current Script in the Windows PowerShell ISE Script Pane:

If we click File > Save, then File > Run we get:
It would be great to add a label to help the User understand what to do with that input field. To do that we simply add, the following code block before we initialize the $inputBox
Code:
# Create Instruction Label for inputBox
$Label = New-Object System.Windows.Forms.Label
$Label.Text = "Type Path here: e.g C:Users"
$Label.Location = New-Object System.Drawing.Size(20,30)
$Label.BackColor = "Transparent"
$Label.AutoSize = $true

# Initialize Label
$Form.Controls.Add($Label)

When we run our updated script we get:
The label helps user understand the purpose of the input field
- The message for the user was placed onto the Label using $Label.Text
- We positioned the Label using $Label.Location = New Object System.Drawing.Size(20,30) i.e. 20 pixels in from left boundary wall of the GUI Form and 30 pixels down from top boundary wall of the GUI Form
- Just as in Part 1 of this tutorial we made the Label itself transparent, using $Label.BackColor = «Transparent» so as not to distract the eye from the input field.
- We initialized the $Label so it can be seen on the GUI Form using $Form.Controls.Add($Label) to pass our $Label variable storing the object via Controls.Add(<variable) to our $Form.
Supply feedback using an Output Textbox
Now we want to add an Output Textbox which will provide information to the User.
As the information may contain more than a single line of information we will make our new Textbox a multi-line field. This will be done by using the following code block:
Code:
# Create an Output textbox, 10 pixels in from Form Boundary and 150 pixels down
# As we want a multiline output set textbox size to 565 px x 200 px
# .Multiline declares the textbox is multi-line
$outputBox = New-Object System.Windows.Forms.TextBox
$outputBox.Location = New-Object System.Drawing.Size(10,150)
$outputBox.Size = New-Object System.Drawing.Size(565,200)
$outputBox.MultiLine = $True

# Initialize the textbox inside the Form
$Form.Controls.Add($OutputBox)- So we start by creating a variable $outputBox which we can name whatever we like as before. We will assign this variable a new Textbox object by using the cmdlet New-Object and passing the assembly class System.Windows.Forms.Textbox to it.
- Next we position the textbox as we did before with our input textbox.
- Next, also as before with the input textbox, we set its size. In this example, it will be 565 pixels wide by 200 pixels high.
- Now we declare that our textbox will be Multi-lined. To do this we use the boolean .MultiLine and as it is a boolean we assign $true to confirm its to be a multi-lined textbox who’s information is stored inside the variable $outputBox
- Finally, we need to initialize the textbox so it can be seen on the GUI Form
Now we add this to our current Script:

Then we save the changes, and click File > Run to get:
So now out GUI Form has a Textbox for the User to input data, and an Output Textbox that is multi-lined to report back data to the User. But how do we get the User input results to the Output Textbox?
Add an Action Button to GUI Form
To get the User input activated we can use a Button element which the User can click to start processing what they typed into the Input field, so a result can be displayed into the Output field.
To add this button we will use the following code block:
Code:
# Add a Button which can be used to generate an action from our textboxes
$Button = New-Object System.Windows.Forms.Button
$Button.Location = New-Object System.Drawing.Size(400,30)

# Button size(length>,<height>) in pixels
$Button.Size = New-Object System.Drawing.Size(110,80)

# Label the button
$Button.Text = "Click to view Directories"

# Declare the action to occur when button clicked
$Button.Add_Click( { GetDirectories } )

# Initialize the button inside the Form
$Form.Controls.Add($Button)- So as before we start by creating a variable to assign our new button object to, and as before we can name that variable whatever we like. In this example I used $Button for the variable and then used the cmdlet New-Object and then the assembly Class System.Windows.Forms.Button
- Then we position the button on the GUI Form using the .Location method appended to our variable. So the button will be 400 pixels from the left boundary wall of our GUI Form and 30 pixels down from the top boundary wall of our GUI Form.
- Now we set the size of the button by appending the .Size method to our variable then assigning the new object obtained by using the assembly Class System.Drawing.Size(<length>,height>)
- We add some text on our Button using $Button.Text = <String> which in this example is an instruction to tell User to click the button to view the Directories in the Path they just typed into their Input field.
- Next we need to code what action to take when the button is clicked. To do this we append the .Add_Click to our $Button variable so it knows the action to detect is the button being clicked, then we provide an Function to go seek, which contains the instructions on what action to take when button is clicked.
- Note: This function does not exist yet.
- Finally, we need to initialize our Button so it can be seen on the GUI Form
Now we add this code block to our Script, then save the changes:

After saving the changes we click File > Run to get:
Our GUI Form now has an Input & Output textbox, and a Button
Add a Function to process input, and show output by using Button Click action
The Form is almost ready now, but without a Function nothing will happen if the User typed a path into the Input Field, then clicked the button.
Functions are a code block normally placed at the top of a Script, or at least before the elements they are designed to provide actions to, in this case, our input, output and button.
Take a look at the code block for a Function that will bring our GUI Form to life:
Code:
# Create a Function to make use of textboxes
function GetDirectories {

  # Variable to store what user types into Input textbox
  $Input = $inputBox.Text

  # Set path to user's input
  Set-Location $Input

  # Variable to store results of actioning the Input
  $Result = $Input | Get-ChildItem -Directory  | Out-String

  # Assign Result to OutputBox
  $outputBox.Text = $Result
}- Our Function is named GetDirectories { }
- The parameters we will assign this function are the variables we created for our GUI Form, and some cmdlets we will use to generate an action.
- So we start by declaring a function: function GetDirectories {
- Now we create a new variable $Input that will have the User’s input assigned to it. To get the User’s input we call the .Text method by appending it to the $inputBox variable which is where the User is typing their data.
- Now we use the cmdlet Set-Location <variable> which in this example is our new $Input variable that stores the path the User typed into the $inputBox. This instruction changes the current directory to the directory the User chose to type into their textbox.
- Now we create another new variable $Result which will ultimately store the data gathered by processing the $Input we piped to the Get-ChildItem cmdlet then filter result using parameter -Directory which only supplies directories and not all other files, then piped to the cmdlet Out-String
- To get the information stored in our $Result variable to the $outputBox we append the method .Text to our $outputBox and then assign the $Result to that.
- Then we close our function with }
Let’s add this code block to our Script:

After saving the change and then clicking File > Run, our GUI Form now has life.
Example: User types C:WindowsSystem32 into the Input field & clicks button
Have you spotted the problem yet?
No, its not that ugly formatting on the Sub-directory names (although we could tidy that up too.) Click inside the Output textbox then use your down arrow. As you get to last entry viewable more content will begin to appear. Our Textbox for the output is not big enough.
Now we could increase the size, but how can we possibly guess what is the correct size for a user; after all, we do not know if they’ve added their own custom sub-folders or not. What about using formatting to create two columns or more. Well that could work, but our textbox is not wide enough to avoid truncation of the result (you know, those …‘s).
What about adding a scrollbar? That does two things for us:
- It makes it very clear to the user they may need to scroll down to view all content, and
- It makes it a lot easier to actually scroll as now they can use their mouse.
Add a scrollbar to textbox
We know its our $outputBox than needs the ability to scroll, so that means we’ll need to edit the block of code relating to this textbox.
We know when we want to add to an object (in this case $outputBox) we need to append what we create to that object.
So this is how easy it is to fix our problem:
Code:
$outputBox.Scrollbars = "Vertical"
Add that to our Script:

Save the edit, then click File > Run and we get this if we enter C:Windows and click the button:
So at this point you have created your own filtered version of File Explorer. Filtered, because you are only displaying sub-folders of a path you enter.
If you wanted to filter it to show files and not sub-folders, then you’d change this code snippet: $Result = $Input | Get-ChildItem -Directory | Out-String
- To view files only, and not sub-folders:
Code:
$Result = $Input | Get-ChildItem -File | Out-String- To view files and sub-folders:
Code:
$Result = $Input | Get-ChildItem | Out-StringDrag & Drop Feature
Something a lot of users love in Windows is the ability to drag and drop files.
For example, people drag an executable to their Command Prompt to quickly run it.
You can offer this feature in your GUI Form in PowerShell too.
To illustrate this I’m going to redesign our GUI Form, and create a left and right pane. The left pane will contain our File Explorer, and the right pane will contain a Listbox. You’ll be able to drag en element from the left pane to the Listbox in the right pane which will record the elements full path into a variable which will also be piped to a text file that will be saved to the Desktop.
So let’s get to the coding!
Code:
# Load required assemblies
Add-Type -AssemblyName System.Windows.Forms
Add-Type -AssemblyName System.Drawing

# Create a Function to make use of textboxes
function GetDirectories {

  # Variable to store what user types into Input textbox
  $Input = $inputBox.Text

  # Set path to user's input
  Set-Location $Input

  # Variable to store results of actioning the Input
  $Result = $Input | Get-ChildItem | Out-String

  # Assign Result to OutputBox
  $outputBox.Text = $Result
}

# Create Form to contain elements
$Form = New-Object System.Windows.Forms.Form

# Set Form Titlebar text
$Form.Text = "Console to list Files & Directories of chosen path and Drag & Drop to Listbox"

# Set size of form
# Size(<length>,<height>) in pixels
$Form.Size = New-Object System.Drawing.Size(800,600)

# Create an Input textbox
$inputBox = New-Object System.Windows.Forms.TextBox

# Size(<length>,<height) in pixels
# .Location will position the textbox in a position relative to the
# base Form based on the Forms size(800,600)
# In this case location is 20 pixels in from Form boundary, and 50 pixels down from Form boundary
$inputBox.Location = New-Object System.Drawing.Size(20,50)

# Size(<length>,<height) in pixels
# .Size determines the actual size of the textbox
$inputBox.Size = New-Object System.Drawing.Size(300,20)

# Create Instruction Label for inputBox
$Label = New-Object System.Windows.Forms.Label
$Label.Text = "Type Path here: e.g C:Users"
$Label.Location = New-Object System.Drawing.Size(20,30)
$Label.BackColor = "Transparent"
$Label.AutoSize = $true

# Initialize Label
$Form.Controls.Add($Label)

# Initialize the textbox inside the Form
$Form.Controls.Add($inputBox)

# Create an Output textbox, 10 pixels in from Form Boundary and 150 pixels down
# As we want a multiline output set textbox size to 440 px x 400 px
# .Multiline declares the textbox is multi-line
# Declare vertical scrollbars
$outputBox = New-Object System.Windows.Forms.TextBox
$outputBox.Location = New-Object System.Drawing.Size(10,150)
$outputBox.Size = New-Object System.Drawing.Size(440,400)
$outputBox.MultiLine = $True
$outputBox.ScrollBars = "Vertical"

# Initialize the textbox inside the Form
$Form.Controls.Add($OutputBox)

# Add a Button which can be used to generate an action from our textboxes
$Button = New-Object System.Windows.Forms.Button
$Button.Location = New-Object System.Drawing.Size(20,90)

# Button size(length>,<height>) in pixels
$Button.Size = New-Object System.Drawing.Size(200,20)

# Label the button
$Button.Text = "Click to view Files `&& Directories"

# Declare the action to occur when button clicked
$Button.Add_Click( { GetDirectories } )

# Initialize the button inside the Form
$Form.Controls.Add($Button)

# Initialize form and show it
# [void] used to suppress other messages generated by Form actions
[void] $Form.ShowDialog()
Our edited Form now lists Files and Directories of the Path entered by user.
Note: I’ve left room on the right side for the Listbox yet to be created, which is what we’ll drag and drop to.
If above code and enter C:WindowsSystem32 then click the button we get:

I will not explain the above again, as apart from some minor manipulation of the original Script to relocate, resize and re-label items, everything ought to be self-explanatory.
Add the listbox
Adding a listbot is no different to adding a textbox. Take a look at the code:
Code:
# Create a Listbox to drag items to
$listBox = New-Object Windows.Forms.ListBox
$listBox.Location = '480,100'
$listBox.Size = New-Object System.Drawing.Size(295,450)
$listBox.Anchor = (
  [System.Windows.Forms.AnchorStyles]::Bottom -bor
  [System.Windows.Forms.AnchorStyles]::Left -bor
  [System.Windows.Forms.AnchorStyles]::Right -bor
  [System.Windows.Forms.AnchorStyles]::Top
)
$listBox.IntegralHeight = $False
$listBox.AllowDrop = $True

# Initialize Listbox
$form.Controls.Add($listBox)- Most of this will be familiar to you.
- We’ve used the assembly Class Windows.Forms.ListBox
- The only subtle difference here is the use of the parameter -bor which stands for Bitwise OR (inclusive) in conjunction with specific borders which are piped via the assembly Class [System.Windows.Forms.AnchorStyles].
There are five choices for this class. Top, Bottom, Left, Right & None.
The control (e.g. Listbox) is anchored to the Bottom, left, right and top.
If I instead chose None then the control would not be anchored to any border.
While this was not truly needed in this code, I’ve shown it as an alternate way to position a control on your GUI Form.
- $listBox.IntegralHeight = $False
$True indicates that the text box resizes itself to display only complete items (default). $False indicates that the text box does not resize itself even if the item is too tall to display completely.
The IntegralHeight property relates to the height of the text box, just as the AutoSize property relates to the width of the text box.
If IntegralHeight is $True, the text box automatically resizes when necessary to show full rows. If False, the text box remains a fixed size; if items are taller than the available space in the text box, the entire item is not shown.
- $listBox.AllowDrop = $True — This boolean allows us to drop a dragged item into the ListBox
So let’s add our Listbox code block to the Script:

Now save the changes, then click File > Run and we get:
Label the listbox
We can add a descriptive label to our Listbox to help the User understand its purpose, by using the code block:
Code:
# Create Instruction Label for Listbox
$Label2 = New-Object System.Windows.Forms.Label
$Label2.Text = "Drag files or directories from Output field and drop here"
$Label2.Location = New-Object System.Drawing.Size(480,80)
$Label2.BackColor = "Transparent"
$Label2.AutoSize = $true

# Initialize Label2
$Form.Controls.Add($Label2)
Add this code to our Script:

Save the changes, then click File > Run to get:
Add a Button & Checkbox for our Listbox
Now we want to add a Button that when clicked will produce a text file saved to the Desktop of the contents of the ListBox.
We will also offer a checkBox that if checked will clear the ListBox once the button has been activated.
Take a look at the following code blocks to achieve this:
Code:
# Add a button for the Listbox
$Button2 = New-Object System.Windows.Forms.Button
$Button2.Location = '480,30'
$Button2.Size = New-Object System.Drawing.Size(180,20)
$Button2.Text = "Save as Listbox.txt on Desktop"

# Initialize Button2
$Form.Controls.Add($Button2)

# Add a checkbox to allow User to clear listbox if desired
# Will clear if checked and button is clicked
$Checkbox = New-Object Windows.Forms.Checkbox
$Checkbox.Location = '680,30'
$Checkbox.AutoSize = $True
$Checkbox.Text = "Clear Listbox"

# Initialize checkbox
$Form.Controls.Add($Checkbox)
Now add this code to our Script:

Save the changes, then click File > Run to get:
The easy bit is over — Let’s add a little colour to our Form to help highlight buttons, and differentiate from the OutputBox and ListBox fields (both of which are a TextBox). While we are at it let’s give the user some filter options to select all files, or a particular file type to view from the folder path they select.
To do all this we will make use of the BackColor and ForeColor methods with the listBox and outputBox and button variables. For example:
Code:
$listBox.BackColor = "#9a94be"
$listBox.ForeColor = "#000000"
This sets the BackColor of our listBox to #9a94be (a lilac shade) and the ForeColor to #000000 which is ‘black‘ — So the field is lilac and the font that appears in the listBox will be black.
We can set the font face, size and style too. For example:
Code:
$listBox.Font = "Microsoft Sans Serif,10"
This sets the font face for our listBox to Microsoft Sans Serif. The size is 10 pt.
I did not do it here, but if you wanted to, after the size you could add ,style=bold:
Code:
$listBox.Font = "Microsoft Sans Serif,10,style=bold"
This would make the 10 pt Microsoft Sans Serif font appear in bold within the listBox.
We can add buttons for file types to our Form using code blocks like:
Code:
$button2 = New-Object system.windows.Forms.Button
$button2.BackColor = "#000000"
$button2.Text = "EXE"
$button2.ForeColor = "#ffffff"
$button2.Width = 60
$button2.Height = 30
$button2.location = new-object system.drawing.point(90,100)
$button2.Font = "Microsoft Sans Serif,12"
This creates a black button, with EXE on the button in a white font color, located 90 pixels in from the left and 100 pixels down from the top of form. The button itself is 60 pixels wide x 30 pixels high.
Each of these file type buttons needs its own function to allow it to instruct the computer what to do when clicked. For example:
Code:
# All Executable files in selected path explored
Function ExeFileExplorer {

  # Variable to store what user types into Input textbox
  $Input = $inputBox.Text

  # Set path to user's input
  Set-Location $Input

  # Create Temporary File
  foreach ($item in $outputBox) {
    # Set filepaths
    $str = Get-ChildItem -Filter *.exe
  }
  $outputBox.Text = $str.FullName
  # Save Temporary file to Desktop
  $outputBox.Text.Split() | Out-File $env:USERPROFILEDesktopFilePath.txt -Append
  $outputBox.Clear()

  # Variable to store results of actioning the Input
  $Result = Get-ChildItem -Name $Input -Filter *.exe | Out-String

  # Assign Result to OutputBox
  $outputBox.Text = $Result
}
We need to call our Function for the buttons. This is easy; for example:
Code:
$button2.Add_Click({ ExeFileExplorer })When $button2 is clicked it calls the Function ExeFileExplorer which controls the actions to take place when button is clicked. In this case it will filter the results to display any executable file in the filepath supplied by the User into out $outputBox
So after these modifications and other similar modifications for other control items in the form we end up with a form looking like the following:
Event Handlers
So we have a few bells now, but still no whistles. We need to add some event handlers in order to make it possible to drag items from $outputBox (the left pane) to our $listBox (the right pane).
There are three ways to approach this, but for this we’ll use a relatively pain free method. I’ll go into more advanced details in a later tutorial.
For our basic form simple is best to achieve the goal of Drag & Drop capabilities.
I’ll make use of three events — MouseDown, DragEnter, DragDrop — and some Functions to inject some life into our Form. We also need to declare a new boolean to be true, to be able to make this work.
Boolean
To be able to drag and drop anything into your ListBox, we first need to declare true a boolean to allow DragDrop to even work. To do this we simply need to add one more line to our $listBox properties:
Code:
$listBox.AllowDrop = $trueThis makes use of the boolean AllowDrop to declare that any item dragged can be dropped into the ListBox.
MouseEventHandler MouseDown coupled with DragDropEffects
In order to be able to drag the text contents of our $outputBox we make use of the [System.Windows.Forms.MouseEventHandler] coupled with [System.Windows.Forms.DragDropEffects]. Again this is a nice tidy code block to add to our code:
Code:
<#
   ------------------------------------------------------------
   OutputBox Event Handler
   Allows 1 or more items to be selected and dragged to listBox
   ------------------------------------------------------------ #>
$outputBox_MouseDown = [System.Windows.Forms.MouseEventHandler] {
  $outputBox.DoDragDrop($outputBox.Text,[System.Windows.Forms.DragDropEffects]::Copy)
}- We declare our MouseDown event by appending _MouseDown to the $outputBox variable.
- This is event is assigned as a MouseEventHandler by adding = [System.Windows.Forms.MouseEventHandler] { }
- The action to take place on MouseDown [ i.e. left mouse button pressed and held as you drag ] is placed inside the { } braces.
- We append the method: DoDragDrop() to our $outputBox then pass two arguments through this method.
(1) SoutputBox.Text instructs that the text inside the TextBox $outputBox is the focus of the action to be taken.
(2) The second argument is the action to take. In this case we parse the Text contents of the TextBox $outputBox through the [System.Windows.Forms.DragDropEffects] class and instruct that it is to be copied :: Copy. Ultimately it will be copied to our ListBox, but first we need to provide Event Handlers for our ListBox and some functions to deal with the copied text data.
Drag & Drop requires two event handlers: The first deals with the Effect — DragEventHandler DragEnter for the ListBox
We made it possible to drop a dragged item into our ListBox using the boolean AllowDrop = $true.
If we left that as is, and provided no Event Handler to deal with our MouseDown then you could drag items from anywhere on your computer to the ListBox, however, that is not the plan with this project. We already have a TextBox that stored the data we want to drag to our ListBox.
Thus we need to create some Event Handlers for the ListBox to reflect this.
First, we want to handle what happens after we press and hold our left mouse button down and drag the cursor from the TextBox to our ListBox [i.e. what happens when we enter the ListBox with our mouse cursor ].
Code:
<#
   ----------------------------------------------------------------------------------
   ListBox Event Handlers
   Sets the only location a dragged item can enter.  In this case that is the ListBox
   ----------------------------------------------------------------------------------  #>
$listBox_DragEnter = [System.Windows.Forms.DragEventHandler] {
  $_.Effect = $_.AllowedEffect
}- As explained in the comments within this code block, when we append _DragEnter to out ListBox $listBox and assign [System.Windows.Forms.DragEventHandler] class to it, then declare that this.Effect = this.AllowedEffect (remember in PowerShell this is represented by $_) we are instructing the computer to only allow a dragged item from our TextBox $outputBox to be dropped into the ListBox $listBox.
When you run this program you’ll see as you drag from the TextBox the mouse cursor will remain a Circle with a diagonal line, until it Enters inside the ListBox then the cursor will change and the user will know they can release their mouse button to drop the dragged content into the ListBox.
- The AllowedEffect in this case is to Copy the Text from our $outputBox into our $listBox which as you will recall you set with the previous MouseEventHandler MouseDown coupled with DoDragDrop and [System.Windows.Forms.DragEventHandler]::Copy.
Drag & Drop requires two event handlers: The second deals with the Drop itself — DragEventHandler DragEnter for the ListBox
Code:
<#
   ------------------------------------------------------------------------
   > Set how to drop selected item(s) into ListBox
   > Makes use of [System.IO.File] to read each line
     of a file, then add each line to the ListBox.

     Required to prevent multiple items from a multiline TextBox
     appearing as one long line inside ListBox, rather than a list of items
     ---------------------------------------------------------------------- #>
$listBox_DragDrop = [System.Windows.Forms.DragEventHandler] {

  # Read Temorary File back into ListBox
  [string[]] $lines =  [System.IO.File]::ReadAllLines("$env:USERPROFILEDesktopFilePath.txt")
  [string] $line

  foreach ($line in $lines) {
    $listBox.Text = $listBox.Items.Add($line)
  }
  # Clear OutputBox
  $outputBox.Clear()

  # Delete Temporary File
  Remove-Item "C:UsersRegedit32DesktopFilePath.txt"
}- We declare _DragDrop and assign it as a [System.Windows.Form.DragEventHandler]
- Now we pass our instructions between the { } braces. In this case we’ll be making use of Functions we have called on. I’ll show these next.
- [String[]] $lines creates a String array called $lines
- = [System.IO.File] assigns an assembly class System Input/Output File
- ::ReadAllLines instructs that the file being passed as the ReadAllLines() method will have all lines of text in it read
- («$env:USERPROFILEDesktopFilePath.txt») is the argument being passed through the ReadAllLines() method which in this case is pointing a temporary file created on the Users Desktop named FilePath.txt
- [string] $line declares a new String variable $line
- foreach ($line in $lines) { $listBox.Text = $listBox.Items.Add($line) } is a conditional loop which continues until there are no more new lines of text in our file $FilePath.txt. For each new line in FilePath.txt assign that line of text to our [String] $line. Now add this $line to our ListBox.
Without this snippet of code when we copy the data from $outputBox to $listBox, all lines would appear as a single long line in our ListBox. Using this Array conditional loop approach allows us to take one line at a time and add it to the ListBox.
- $outputBox.Clear() instructs in this case to clear the TextBox $outputBox of its contents once the conditional loop has completed.
- Remove-Item «C:UsersRegedit32DesktopFilePath.txt» will delete the temporary file on User’s Desktop named FilePath.txt when the actions of the conditional loop have completed and thus populated our dragged text from the TextBox to our ListBox.
Note: You’ll notice if you run this Script the TextBox $outputBox contains a list of names of a particular file extension the User chose, for example regedit.exe
However, after we drag this list to our ListBox that Text data miraculously changes to a full file path to the file, e.g. C:Windowsregedit.exe
This occurs because of another conditional loop coded earlier that is contained in each of the supporting Functions for the file type the User chooses to explore.
I will not re-explain this here as (1) it is very similar to the conditional loop already explained above, and (2) the Function its included in while supporting the clicking of the EXE button in our Form, is simply using standard snippets of code explained in previous Tutorials. If you need help understanding the support functions in this Script ask and I’ll go through it step by step.
Remove and/or Initialize these control event handlers
As one last piece of house maintenance, we need to add our event handlers to the Form, and also remove them as the Form is closed ( Disposed() ).
Code:
$form_FormClosed = {
  try {
    $Form.remove_FormClosed($Form_Cleanup_FormClosed)
    $outputBox.remove_MouseDown($outputBox_MouseDown)
    $listBox.remove_DragEnter($listBox_DragEnter)
    $listBox.remove_DragDrop($listBox_DragDrop)
  }
  catch [Exception] {}
}
#Initialize Events
$Form.Add_Click($button6_Click)
$button1.Add_Click($button1_Click)
$button2.Add_Click($button2_Click)
$button3.Add_Click($button3_Click)
$button4.Add_Click($button4_Click)
$button5.Add_Click($button5_Click)
$button6.Add_Click($button6_Click)
$outputBox.Add_MouseDown($outputBox_MouseDown)
$listBox.Add_DragEnter($listBox_DragEnter)
$listBox.Add_DragDrop($listBox_DragDrop)

$Form.Add_FormClosed($Form_FormClosed)
Again, I’ve explained these techniques in previous tutorials, so I will not repeat myself, but as you can see in the code block above, you do need to add each event handler and remove them too for Form Opening and Closure.
If you need help understanding this code block, just ask and I’ll give a detailed break down of what its doing.
The Full Script Code is below:
Code:
<#
__          ___           _                  __  ___  ______
         / (_)         | |                /_ |/ _ |  ____|
   /  / / _ _ __   __| | _____      _____| | | | | |__ ___  _ __ _   _ _ __ ___  ___   ___ ___  _ __ ___
   /  / / | | '_  / _` |/ _   / / / __| | | | |  __/ _ | '__| | | | '_ ` _ / __| / __/ _ | '_ ` _
     /  /  | | | | | (_| | (_)  V  V /__  | |_| | | | (_) | |  | |_| | | | | | __ | (_| (_) | | | | | |
    /  /   |_|_| |_|__,_|___/ _/_/ |___/_|___/|_|  ___/|_|   __,_|_| |_| |_|___(_)______/|_| |_| |_|


PowerShell Script Repository: https://www.windows10forums.com/articles/categories/powershell-scripts.8/
Author: Regedit32
#>

Add-Type -AssemblyName System.Windows.Forms

# All file types explored
Function AllFileExplorer {

  # Variable to store what user types into Input textbox
  $Input = $inputBox.Text

  # Set path to user's input
  Set-Location $Input

  # Create Temporary File
  foreach ($item in $outputBox) {
    # Set filepaths
    $str = Get-ChildItem -Filter *.*
  }
  $outputBox.Text = $str.FullName
  # Save Temporary file to Desktop
  $outputBox.Text.Split() | Out-File $env:USERPROFILEDesktopFilePath.txt -Append
  $outputBox.Clear()

  # Variable to store results of actioning the Input
  $Result = Get-ChildItem -Name $Input -Filter *.* | Out-String


  # Assign Result to OutputBox
  $outputBox.Text = $Result
}

# All Executable files in selected path explored
Function ExeFileExplorer {

  # Variable to store what user types into Input textbox
  $Input = $inputBox.Text

  # Set path to user's input
  Set-Location $Input

  # Create Temporary File
  foreach ($item in $outputBox) {
    # Set filepaths
    $str = Get-ChildItem -Filter *.exe
  }
  $outputBox.Text = $str.FullName
  # Save Temporary file to Desktop
  $outputBox.Text.Split() | Out-File $env:USERPROFILEDesktopFilePath.txt -Append
  $outputBox.Clear()

  # Variable to store results of actioning the Input
  $Result = Get-ChildItem -Name $Input -Filter *.exe | Out-String

  # Assign Result to OutputBox
  $outputBox.Text = $Result
}

# All DLL files in seleced path explored
Function DllFileExplorer {

  # Variable to store what user types into Input textbox
  $Input = $inputBox.Text

  # Set path to user's input
  Set-Location $Input

  # Create Temporary File
  foreach ($item in $outputBox) {
    # Set filepaths
    $str = Get-ChildItem -Filter *.dll
  }
  $outputBox.Text = $str.FullName
  # Save Temporary file to Desktop
  $outputBox.Text.Split() | Out-File $env:USERPROFILEDesktopFilePath.txt -Append
  $outputBox.Clear()

  # Variable to store results of actioning the Input
  $Result = Get-ChildItem -Name $Input -Filter *.dll | Out-String

  # Assign Result to OutputBox
  $outputBox.Text = $Result
}


# All SYS files of selected path explorered
Function SysFileExplorer {

  # Variable to store what user types into Input textbox
  $Input = $inputBox.Text

  # Set path to user's input
  Set-Location $Input

  # Create Temporary File
  foreach ($item in $outputBox) {
    # Set filepaths
    $str = Get-ChildItem -Filter *.sys
  }
  $outputBox.Text = $str.FullName
  # Save Temporary file to Desktop
  $outputBox.Text.Split() | Out-File $env:USERPROFILEDesktopFilePath.txt -Append
  $outputBox.Clear()

  # Variable to store results of actioning the Input
  $Result = Get-ChildItem -Name $Input -Filter *.sys | Out-String
  $str = Get-ChildItem -Filter *.sys

  # Assign Result to OutputBox
  $outputBox.Text = $Result

  Return $str
}

# All TXT files of selected path explored
Function TxtFileExplorer {

  # Variable to store what user types into Input textbox
  $Input = $inputBox.Text

  # Set path to user's input
  Set-Location $Input

  # Create Temporary File
  foreach ($item in $outputBox) {
    # Set filepaths
    $str = Get-ChildItem -Filter *.txt
  }
  $outputBox.Text = $str.FullName
  # Save Temporary file to Desktop
  $outputBox.Text.Split() | Out-File $env:USERPROFILEDesktopFilePath.txt -Append
  $outputBox.Clear()

  # Variable to store results of actioning the Input
  $Result = Get-ChildItem -Name $Input -Filter *.txt | Out-String

  # Assign Result to OutputBox
  $outputBox.Text = $Result
}

$Form = New-Object system.Windows.Forms.Form
$Form.Text = "Drag & Drop Files to listBox"
$Form.TopMost = $true
$Form.Width = 800
$Form.Height = 600

$listBox = New-Object system.windows.Forms.ListBox
$listBox.BackColor = "#9a94be"
$listBox.ForeColor = "#000000"
$listBox.Size = New-Object System.Drawing.Size(360,404)
$listBox.location = new-object system.drawing.point(400,137)
$listBox.Font = "Microsoft Sans Serif,10"
$listBox.AllowDrop = $true

$label2 = New-Object system.windows.Forms.Label
$label2.Text = "Drag `&& Drop Files or Directories Here"
$label2.AutoSize = $true
$label2.Width = 360
$label2.Height = 20
$label2.location = new-object system.drawing.point(400,100)
$label2.Font = "Microsoft Sans Serif,14"

$checkBox = New-Object system.windows.Forms.CheckBox
$checkBox.Text = "Clear "
$checkBox.AutoSize = $true
$checkBox.Width = 95
$checkBox.Height = 30
$checkBox.location = new-object system.drawing.point(710,60)
$checkBox.Font = "Microsoft Sans Serif,12,style=Bold"

# Create an Output textbox, 10 pixels in from Form Boundary and 150 pixels down
# As we want a multiline output set textbox size to 360 px x 400 px
# .Multiline declares the textbox is multi-line
# Declare vertical scrollbars
$outputBox = New-Object System.Windows.Forms.TextBox
$outputBox.Location = New-Object System.Drawing.Size(20,140)
$outputBox.Size = New-Object System.Drawing.Size(360,400)
$outputBox.MultiLine = $true
$outputBox.ScrollBars = "Vertical"
$outputBox.Font = "Microsoft Sans Serif,10"

# Buttons
$button1 = New-Object system.windows.Forms.Button
$button1.BackColor = "#000000"
$button1.Text = "*.*"
$button1.ForeColor = "#ffffff"
$button1.Width = 60
$button1.Height = 30
$button1.location = new-object system.drawing.point(20,100)
$button1.Font = "Microsoft Sans Serif,12"

$button2 = New-Object system.windows.Forms.Button
$button2.BackColor = "#000000"
$button2.Text = "EXE"
$button2.ForeColor = "#ffffff"
$button2.Width = 60
$button2.Height = 30
$button2.location = new-object system.drawing.point(90,100)
$button2.Font = "Microsoft Sans Serif,12"

$button3 = New-Object system.windows.Forms.Button
$button3.BackColor = "#000000"
$button3.Text = "DLL"
$button3.ForeColor = "#ffffff"
$button3.Width = 60
$button3.Height = 30
$button3.location = new-object system.drawing.point(160,100)
$button3.Font = "Microsoft Sans Serif,12"

$button4 = New-Object system.windows.Forms.Button
$button4.BackColor = "#000000"
$button4.Text = "SYS"
$button4.ForeColor = "#ffffff"
$button4.Width = 60
$button4.Height = 30
$button4.location = new-object system.drawing.point(230,100)
$button4.Font = "Microsoft Sans Serif,12"

$button5 = New-Object system.windows.Forms.Button
$button5.BackColor = "#000000"
$button5.Text = "TXT"
$button5.ForeColor = "#ffffff"
$button5.Width = 60
$button5.Height = 30
$button5.location = new-object system.drawing.point(300,100)
$button5.Font = "Microsoft Sans Serif,12"

$button6 = New-Object system.windows.Forms.Button
$button6.BackColor = "#4d194b"
$button6.Text = "Click to save as listBox.txt to Desktop"
$button6.ForeColor = "#ffffff"
$button6.Width = 300
$button6.Height = 30
$button6.location = new-object system.drawing.point(400,60)
$button6.Font = "Microsoft Sans Serif,12"

# Declare the action to occur when buttons clicked
$button1.Add_Click({ AllFileExplorer })
$button2.Add_Click({ ExeFileExplorer })
$button3.Add_Click({ DllFileExplorer })
$button4.Add_Click({ SysFileExplorer })
$button5.Add_Click({ TxtFileExplorer })
$button6.Add_Click($button6_Click)

# Input Box
$inputBox = New-Object system.windows.Forms.TextBox
$inputBox.Width = 360
$inputBox.Height = 20
$inputBox.location = new-object system.drawing.point(20,40)
$inputBox.Font = "Microsoft Sans Serif,10"

# Labels
$label1 = New-Object system.windows.Forms.Label
$label1.Text = "  Type Directory View (e.g. C:Windows)  "
$label1.BackColor = "#b41c1f"
$label1.AutoSize = $true
$label1.ForeColor = "#ffffff"
$label1.Width = 360
$label1.Height = 30
$label1.location = new-object system.drawing.point(20,10)
$label1.Font = "Microsoft Sans Serif,14"

$label3 = New-Object system.windows.Forms.Label
$label3.Text = "Select File Extension to view"
$label3.AutoSize = $true
$label3.Width = 360
$label3.Height = 30
$label3.location = new-object system.drawing.point(20,70)
$label3.Font = "Microsoft Sans Serif,14"

# Add controls to form
$Form.SuspendLayout()
$Form.Controls.Add($button1)
$Form.Controls.Add($button2)
$Form.Controls.Add($button3)
$Form.Controls.Add($button4)
$Form.Controls.Add($button5)
$Form.Controls.Add($button6)
$Form.Controls.Add($checkBox)
$Form.Controls.Add($label1)
$Form.Controls.Add($label2)
$Form.Controls.Add($label3)
$Form.Controls.Add($inputBox)
$Form.Controls.Add($outputBox)
$Form.Controls.Add($listBox)
$Form.ResumeLayout()
# Event handlers
$button6_Click = {
  foreach ($item in $listBox) {
    # Save listBox to Desktop
    $listBox.Items | Out-File $env:USERPROFILEDesktopListBox.txt -Append
  }
  if ($checkBox = 'Checked') {
    $listBox.Items.Clear()
  }
}

<#
   ------------------------------------------------------------
   OutputBox Event Handler
   Allows 1 or more items to be selected and dragged to listBox
   ------------------------------------------------------------ #>
$outputBox_MouseDown = [System.Windows.Forms.MouseEventHandler] {
  $outputBox.DoDragDrop($outputBox.Text,[System.Windows.Forms.DragDropEffects]::Copy)
}

<#
   ----------------------------------------------------------------------------------
   ListBox Event Handlers
   Sets the only location a dragged item can enter.  In this case that is the ListBox
   ----------------------------------------------------------------------------------  #>
$listBox_DragEnter = [System.Windows.Forms.DragEventHandler] {
  $_.Effect = $_.AllowedEffect
}

<#
   ------------------------------------------------------------------------
   > Set how to drop selected item(s) into ListBox
   > Makes use of [System.IO.File] to read each line
     of a file, then add each line to the ListBox.

     Required to prevent multiple items from a multiline TextBox
     appearing as one long line inside ListBox, rather than a list of items
     ---------------------------------------------------------------------- #>
$listBox_DragDrop = [System.Windows.Forms.DragEventHandler] {

  # Read Temorary File back into ListBox
  [string[]] $lines =  [System.IO.File]::ReadAllLines("$env:USERPROFILEDesktopFilePath.txt")
  [string] $line

  foreach ($line in $lines) {
    $listBox.Text = $listBox.Items.Add($line)
  }
  # Clear OutputBox
  $outputBox.Clear()

  # Delete Temporary File
  Remove-Item "$env:USERPROFILEDesktopFilePath.txt"
}

$form_FormClosed = {
  try {
    $Form.remove_FormClosed($Form_Cleanup_FormClosed)
    $outputBox.remove_MouseDown($outputBox_MouseDown)
    $listBox.remove_DragEnter($listBox_DragEnter)
    $listBox.remove_DragDrop($listBox_DragDrop)
  }
  catch [Exception] {}
}
#Initialize Events
$Form.Add_Click($button6_Click)
$button1.Add_Click($button1_Click)
$button2.Add_Click($button2_Click)
$button3.Add_Click($button3_Click)
$button4.Add_Click($button4_Click)
$button5.Add_Click($button5_Click)
$button6.Add_Click($button6_Click)
$outputBox.Add_MouseDown($outputBox_MouseDown)
$listBox.Add_DragEnter($listBox_DragEnter)
$listBox.Add_DragDrop($listBox_DragDrop)

$Form.Add_FormClosed($Form_FormClosed)

# Initialize Form
[void]$Form.ShowDialog()
$Form.Dispose()
Well that is it for now. In Part 3 of this tutorial, I’ll be showing you are much more User Friendly GUI for the Drag&DropGUI we’ve just been looking at.
I’ll be also going into more examples of Drag & Drop to illustrate the various ways to acheive this in PowerShell, including the use of custom templates.
Got a Question? Ask away? Got a request for things to add or a new tutorial topic, let us know in the Discussion section. Want to contribute your own tutorials on PowerShell? Please do!
Regards,
Regedit32
I’ve been using Powershell and want to start using C#. My plan is to start by converting some powershell code to C#. The first thing I am trying is a file dialog box. Simple I thought.
Powershell(which works):
$fd = New-Object system.windows.forms.openfiledialog
I tried various things in C# but it seems to come down to :
using System.Windows.Forms; //»Forms» underlines red in Visual Studio 2017
Compiler message :
The type or namespace name ‘Forms’ does not exist in the namespace ‘System.Windows’ (are you missing an assembly reference?)
Do I have version issues and how might I fix?
Here is «About» for Visual Studio
Microsoft Visual Studio Community 2017
Version 15.9.4
VisualStudio.15.Release/15.9.4+28307.222
Microsoft .NET Framework
Version 4.8.03752
Installed Version: Community
Application Insights Tools for Visual Studio Package 8.14.11009.1
Application Insights Tools for Visual Studio
ASP.NET and Web Tools 2017 15.9.04012.0
ASP.NET and Web Tools 2017
ASP.NET Core Razor Language Services 15.8.31590
Provides languages services for ASP.NET Core Razor.
ASP.NET Web Frameworks and Tools 2017 5.2.60913.0
For additional information, visit https://www.asp.net/
Azure App Service Tools v3.0.0 15.9.03024.0
Azure App Service Tools v3.0.0
Azure Functions and Web Jobs Tools 15.9.02046.0
Azure Functions and Web Jobs Tools
C# Tools 2.10.0-beta2-63501-03+b9fb1610c87cccc8ceb74a770dba261a58e39c4a
C# components used in the IDE. Depending on your project type and settings, a different version of the compiler may be used.
Common Azure Tools 1.10
Provides common services for use by Azure Mobile Services and Microsoft Azure Tools.
JavaScript Language Service 2.0
JavaScript Language Service
Microsoft Azure Tools 2.9
Microsoft Azure Tools for Microsoft Visual Studio 2017 — v2.9.10730.2
Microsoft Continuous Delivery Tools for Visual Studio 0.4
Simplifying the configuration of Azure DevOps pipelines from within the Visual Studio IDE.
Microsoft JVM Debugger 1.0
Provides support for connecting the Visual Studio debugger to JDWP compatible Java Virtual Machines
Microsoft Library Manager 1.0
Install client-side libraries easily to any web project
Microsoft MI-Based Debugger 1.0
Provides support for connecting Visual Studio to MI compatible debuggers
Microsoft Visual Studio Tools for Containers 1.1
Develop, run, validate your ASP.NET Core applications in the target environment. F5 your application directly into a container with debugging, or CTRL + F5 to edit & refresh your app without having to rebuild the container.
NuGet Package Manager 4.6.0
NuGet Package Manager in Visual Studio. For more information about NuGet, visit http://docs.nuget.org/.
ProjectServicesPackage Extension 1.0
ProjectServicesPackage Visual Studio Extension Detailed Info
ResourcePackage Extension 1.0
ResourcePackage Visual Studio Extension Detailed Info
ResourcePackage Extension 1.0
ResourcePackage Visual Studio Extension Detailed Info
SQL Server Data Tools 15.1.61810.11040
Microsoft SQL Server Data Tools
TypeScript Tools 15.9.20918.2001
TypeScript Tools for Microsoft Visual Studio
Visual Basic Tools 2.10.0-beta2-63501-03+b9fb1610c87cccc8ceb74a770dba261a58e39c4a
Visual Basic components used in the IDE. Depending on your project type and settings, a different version of the compiler may be used.
Visual F# Tools 10.2 for F# 4.5 15.8.0.0. Commit Hash: 6e26c5bacc8c4201e962f5bdde0a177f82f88691.
Microsoft Visual F# Tools 10.2 for F# 4.5
Visual Studio Code Debug Adapter Host Package 1.0
Interop layer for hosting Visual Studio Code debug adapters in Visual Studio
Visual Studio Tools for Containers 1.0
Visual Studio Tools for Containers
Thanks
Most people know by now that System.Reflection.Assembly.LoadWithPartialName is deprecated, but it turns out that Add-Type -AssemblyName Microsoft.VisualBasic does not behave much better than LoadWithPartialName:
Rather than make any attempt to parse your request in the context of
your system, [Add-Type] looks at a static, internal table to translate the
«partial name» to a «full name».If your «partial name» doesn’t appear in their table, your script will
fail.If you have multiple versions of the assembly installed on your
computer, there is no intelligent algorithm to choose between them.
You are going to get whichever one appears in their table, probably
the older, outdated one.If the versions you have installed are all newer than the obsolete one
in the table, your script will fail.Add-Type has no intelligent parser of «partial names» like
.LoadWithPartialNames.
What Microsoft’s .Net teams says you’re actually supposed to do is something like this:
Add-Type -AssemblyName 'Microsoft.VisualBasic, Version=10.0.0.0, Culture=neutral, PublicKeyToken=b03f5f7f11d50a3a'
Or, if you know the path, something like this:
Add-Type -Path 'C:WINDOWSMicrosoft.NetassemblyGAC_MSILMicrosoft.VisualBasicv4.0_10.0.0.0__b03f5f7f11d50a3aMicrosoft.VisualBasic.dll'
That long name given for the assembly is known as the strong name, which is both unique to the version and the assembly, and is also sometimes known as the full name.
But this leaves a couple questions unanswered:
-
How do I determine the strong name of what’s actually being loaded on my system with a given partial name?
[System.Reflection.Assembly]::LoadWithPartialName($TypeName).Location;
[System.Reflection.Assembly]::LoadWithPartialName($TypeName).FullName;
These should also work:
Add-Type -AssemblyName $TypeName -PassThru | Select-Object -ExpandProperty Assembly | Select-Object -ExpandProperty FullName -Unique
-
If I want my script to always use a specific version of a .dll but I can’t be certain of where it’s installed, how do I determine what the strong name is from the .dll?
[System.Reflection.AssemblyName]::GetAssemblyName($Path).FullName;
Or:
Add-Type $Path -PassThru | Select-Object -ExpandProperty Assembly | Select-Object -ExpandProperty FullName -Unique
-
If I know the strong name, how do I determine the .dll path?
[Reflection.Assembly]::Load('Microsoft.VisualBasic, Version=10.0.0.0, Culture=neutral, PublicKeyToken=b03f5f7f11d50a3a').Location; -
And, on a similar vein, if I know the type name of what I’m using, how do I know what assembly it’s coming from?
[Reflection.Assembly]::GetAssembly([Type]).Location
[Reflection.Assembly]::GetAssembly([Type]).FullName -
How do I see what assemblies are available?
I suggest the GAC PowerShell module. Get-GacAssembly -Name 'Microsoft.SqlServer.Smo*' | Select Name, Version, FullName works pretty well.
- How can I see the list that
Add-Typeuses?
This is a bit more complex. I can describe how to access it for any version of PowerShell with a .Net reflector (see the update below for PowerShell Core 6.0).
First, figure out which library Add-Type comes from:
Get-Command -Name Add-Type | Select-Object -Property DLL
Open the resulting DLL with your reflector. I’ve used ILSpy for this because it’s FLOSS, but any C# reflector should work. Open that library, and look in Microsoft.Powershell.Commands.Utility. Under Microsoft.Powershell.Commands, there should be AddTypeCommand.
In the code listing for that, there is a private class, InitializeStrongNameDictionary(). That lists the dictionary that maps the short names to the strong names. There’s almost 750 entries in the library I’ve looked at.
Update: Now that PowerShell Core 6.0 is open source. For that version, you can skip the above steps and see the code directly online in their GitHub repository. I can’t guarantee that that code matches any other version of PowerShell, however.
Update 2: Powershell 7+ does not appear to have the hash table lookup any longer. Instead they use a LoadAssemblyHelper() method which the comments call «the closest approximation possible» to LoadWithPartialName. Basically, they do this:
loadedAssembly = Assembly.Load(new AssemblyName(assemblyName));
Now, the comments also say «users can just say Add-Type -AssemblyName Forms
(instead of System.Windows.Forms)». However, that’s not what I see in Powershell v7.0.3 on Windows 10 2004.
# Returns an error
Add-Type -AssemblyName Forms

# Returns an error
[System.Reflection.Assembly]::Load([System.Reflection.AssemblyName]::new('Forms'))

# Works fine
Add-Type -AssemblyName System.Windows.Forms

# Works fine
[System.Reflection.Assembly]::Load([System.Reflection.AssemblyName]::new('System.Windows.Forms'))
So the comments appear to be a bit of a mystery.
I don’t know exactly what the logic is in Assembly.Load(AssemblyName) when there is no version or public key token specified. I would expect that this has many of the same problems that LoadWithPartialName does like potentially loading the wrong version of the assembly if you have multiple installed.
Powershell может использовать классы .NET. Один из таких классов, NotifyIcon, может выводить привычный баннер в нижней части экрана. В этой статье будет рассмотрен способ создания такого баннера с вашим текстом, а так же разные варианты его использования.
В итоге этой статьи можно будет создать баннер с похожим уведомлением:

Оно так же будет оставаться в панели уведомлений.
Где можно использовать
Обычно такие баннеры можно видеть при обновлении, освобождении места, почтовые уведомления и т.д. Учитывая, что Powershell хорошо интегрирован с серверными ролями — такой баннер может отлично подойти под разные мониторинги сервисов. Например вы можете проверять заблокированных пользователей и выводить их если это произошло.
Сложность, с которой я столкнулся, связана с удаленным выполнением такого скрипта средствами Powershell (WinRM). Вывод каких либо окон у удаленного пользователя, используя Powershell и .NET, задача не такая простая.
Самый простой и интересный способ выводить такие окна массово — использование REST. В предыдущих статьях был пример создания такого сервиса на Pode.
Если баннер у вас не выводится — возможно у вас отключены уведомления. В моем случае причиной оказалось следующая настройка, но она не единственная которая может повлиять на вывод:

Создание баннера
Первым делом мы должны импортировать класс «System.Windows.Forms» через Add-Type. Без этой команды у вас может появиться ошибка. Далее мы создаем объект (копию/инстанс) из класса ‘NotifyIcon’:
Add-Type -AssemblyName System.Windows.Forms

$banner = New-Object System.Windows.Forms.NotifyIcon
После создания объекта баннера — нам нужно указать у него 4 свойства:
- Icon — иконка, которая будет отображаться вместе с баннером;
- BalloonTipIcon — уровень уведомлений: ошибка (Error), предупреждение (Warning), уведомление (Info) или None;
- BalloonTipText — текст, который будет выводиться в баннере;
- BalloonTipTitle — заголовок в баннере;
- Visible — отображение;
Иконку можно указать 2-мя способами: указав прямой путь до файла с расширением ‘*.ico’ или скопировать ее у одного из приложений:
# импортируем класс для иконки
Add-Type -AssemblyName System.Drawing

# 1) Указываем путь до существующей картинки формата '.ico'
$ico = 'G:banner.ico'
$banner.Icon = New-Object System.Drawing.Icon($ico)

# 2) или вытаскиваем иконку с существующего приложения
# (в данном примере Powershell)
$ico = "$env:WINDIRsystem32WindowsPowerShellv1.0powershell.exe"
$banner.Icon = [System.Drawing.Icon]::ExtractAssociatedIcon($ico)
Так же объявим остальные свойства описанные выше:
# Уровень сообщения
$banner.BalloonTipIcon  = [System.Windows.Forms.ToolTipIcon]'Info'
$banner.BalloonTipTitle = 'Заголовок'
$banner.BalloonTipText  = 'Наше сообщение'
# будет ли выводится баннер
$banner.Visible = $true
Для вызова баннера используется метод «ShowBalloonTip», в котором нужно указать длительность отображения баннера. В примере ниже стоит 200 миллисекунд. По истечении этого времени баннер исчезнет:
$banner.ShowBalloonTip(200)
Скрытие иконки
Одна из проблем кода выше заключается в иконке, которая выводятся вместе с баннером. Она не исчезает после вывода баннера. Ее так же нельзя скрыть по нажатию. Единственный способ закрыть их — завершить сессию Powershell в которой она была создана (закрыв окно).
Правильным способом скрытием иконки будет вызов метода ‘dispose’, который предназначен именно для этого. Этот метод будет вызываться при событии (тригере) в виде двойного нажатия на иконку в трейе.
Событие создается с помощью ‘Register-ObjectEvent’. В нем мы должны указать объект (NotifyIcon), событие на которое необходима реакция (двойное нажатие мышки) и название. При нажатии мы выполняем блок прописанный в ‘Action’:
Add-Type -AssemblyName System.Windows.Forms

if (-NOT $banner) {
    $banner = New-Object System.Windows.Forms.NotifyIcon
    [void](Register-ObjectEvent -InputObject $banner -EventName MouseDoubleClick -SourceIdentifier BannerClick -Action {
        # При двойном клике удаляем все созданные объекты
        $banner.dispose()
        Unregister-Event -SourceIdentifier BannerClick
        Remove-Job -Name BannerClick
        Remove-Variable -Name banner
    })
}

# ...
# Остальной код
# ...
Альтернативно можно закрыть баннер вызвав метод «$banner.dispose()» в конце скрипта, но в этом случае иконка вместе с сообщением пропадет полностью после указанного времени.
Готовая команда
Целый скрипт находится на GitHub. Его можно использовать разными способами. Вы можете поместить его в папку с модулями или импортировать:
Import-Module "F:powershellbannerInvoke-Banner.ps1"Варианты использования:
# информационное сообщение
Invoke-Banner -Title 'Заголовок' -Text 'Простое информационное сообщение'

# вывод ошибки
Invoke-Banner -Title 'Заголовок' -Text 'Ошибка' -Type Error

# указываем длительность работы баннера и свою иконку
Invoke-Banner -Title 'Заголовок' -Text 'Простое информационное сообщение' -Type Error -Duration 700 -Icon "G:banner.ico"
Дополнительные возможности
Сам класс ‘NotifyIcon’ предназначен не только для вывода баннера. Основная работа класса связана с взаимодействием с иконкой. К этой иконке можно привязать контекстное меню и вызвать какие-то другие функции. Для примера возьмем команды, которые выведут список процессов в GUI:
Get-Process | Out-GridView
Мы можем создать контекстное меню с вызовом этой команды. Для этого добавим следующий код к предыдущему скрипту:
    $banner.BalloonTipText  = $Text
    # --- предыдущий код ---
    # создаем объект с меню
    $menu = New-Object System.Windows.Forms.ContextMenuStrip
    # создаем кнопку с названием
    $exit = $menu.Items.Add('Вывод процессов')
    # привязываем событие, которое сработает при нажатии на кнопку
    $exit.add_Click({
        Get-Process | Out-GridView
        # Закрытие работы приложения
        $appContext.ExitThread()
    })
    # привязываем меню к кнопке
    $banner.ContextMenuStrip = $menu
    $banner.Visible = $true
    $banner.ShowBalloonTip($Duration)
    # запускаем как приложение
    $appContext = New-Object System.Windows.Forms.ApplicationContext
    [void][System.Windows.Forms.Application]::Run($appContext)

}
Можно установить другие события скрывающие иконку или выполняющие определенные действия. Все из них можно увидеть следующим образом:
Add-Type -AssemblyName System.Windows.Forms
$banner = New-Object System.Windows.Forms.NotifyIcon
$banner | Get-Member
NotifyAction это класс .NET и вы можете почитать документацию для поиска других применений.
Использование удаленно
Вызывать подобный скрипт удаленно, используя WinRM (PSRemoting), не получится. Это связано с разными сеансами, в которых работает сам пользователи и Powershell. Если вы ищете простой вариант вывода сообщений удаленно — вам может больше подойти статься по программе msg и ее использование в Powershell, которая работает в этом случае исправно.
Можно использовать программу ‘psexec’ от SysInternals, но это так же достаточно сложный процесс. В первую очередь мы должны узнать номер сессии в которой работает пользователь. Самый простой способ сделать это — использовать ‘quser’:
# локально
quser

# удалено
quser /server:localhost
О quser и другие способах подключения описывалось в предыдущих статьях. Удаленный вариант, с quser, сработает только в том случае, если вы являетесь привилегированным пользователем для подключения к удаленному компьютеру. Использовать эту команду с WinRM, скорее всего, приведет к проблемам с кодировками. Из результата работы команды вам нужно значение с ID.
Имея этот идентификатор и скаченную утилиту ‘psexec’, вы сможете запустить командлет следующим образом:
$module_path = "C:banner.ps1"
$command = "Invoke-Banner -Title Hello -Text World"
$session_id = 2

.PsExec64.exe -s -i $session_id \192.168.2.111 -u domainадминистратор -p пароль /accepteula cmd /c "powershell -command Import-Module $module_path; $command"
Пример, который я сделал для видео:
…
Теги:
#powershell
Windows Forms (Win Forms ) using PowerShell
Windows Forms is a set of managed libraries in the .NET Framework. Win-form is designed to develop client applications and it provides different kinds of controls, such as text-boxes, buttons, and web pages along with options to create custom controls.
Here I am showing how to create a GUI using win-from. This is an older way of form creation, but the base of all GUI applications.
Loading Assemblies is the first step in creating a windows form. There are two main assemblies that are required in our form creation (It may work without loading assemblies in Powershell hosts like ISE, but it won’t work if you are converting PS Scripts to . Exe and running desperately). The best practice is to load those classes in the initial stage to avoid errors
Add-Type -AssemblyName System.Windows.Forms
Add-Type -AssemblyName System.Drawing
Object Creation: We have to create a new object. This object type may differ based on our requirements. Once you create a form you have to call the form. Below is the basic example of a new object creation for a form
PART – 1 Basic of form creation
$Form = New-Object system.Windows.Forms.Form
Get member cmdlet ( $Form | gm ) will provide the details of property and method of this object and we can call the form to view the GUI using the below cmdlet
$Form.ShowDialog()
Now Combine it all together and run it from PowerShell ISE or any other host and see the output.
Add-Type -AssemblyName System.Windows.Forms
Add-Type -AssemblyName System.Drawing
$Form = New-Object system.Windows.Forms.Form
$Form.ShowDialog()
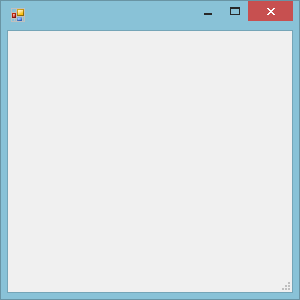
The above form is a blank one as we have not added any items to it, now we are going to add some controls on the form. Follow the below steps.
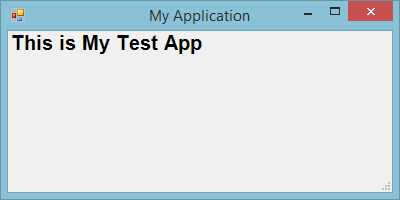
First we are defining the size of the form using the below cmdlet, we used multiple ways for defining the form size, also there is an option to set the auto-size option
$Form = New-Object system.Windows.Forms.Form
$Form.Size = New-Object System.Drawing.Size(400,200)
#You can use the below method as well
#$Form.Width = 400#$Form.Height = 200#
$Form.AutoSize = $True
$Form.AutoSizeMode = "GrowAndShrink"
$Form.Text = "My Application"
If we are using auto size with auto-size mode growandshrink, form size will automatically adjust as per the data controls that you are adding to the form.
Label Creation and customization.
$Label = New-Object System.Windows.Forms.Label
$Label.AutoSize = $true
$Font = New-Object System.Drawing.Font("Arial",15,[System.Drawing.FontStyle]::Bold)
$form.Font = $Font
$Label.Text = "This is My Test App"
Method of Adding $Label object into $From object
$Form.Controls.Add($Label)
$Form.ShowDialog()
What we learned in 1st Part ???
Loading assembly
Creating different objects for forms
Customizing form ( By giving size and text )
Creating and customizing label and call the form for GUI
PART – 2 Form Customization:
In part-2 of form creation, we are covering the below topics.
- Creation of form closing actions
- Form Icon creation
- Form Button creation
First, add the Base form creation cmdlet
$Form = New-Object system.Windows.Forms.Form
$Form.Size = New-Object System.Drawing.Size(400,200)
$Form.Text = "My Application"
1 – Creation of form’s closing actions
$Form.Add_KeyDown({if ($_.KeyCode -eq "Enter") {$Form.Close()}})
$Form.Add_KeyDown({if ($_.KeyCode -eq "Escape") {$Form.Close()}})
As per the above example, the form will be closed if you press Enter or Escape button. You can include letters as well to close the form (We should give only capital letters). As per the below example, the form will be closed if you press the V letter on the keyboard.
$Form.Add_KeyDown({if ($_.KeyCode -eq "V") {$Form.Close()}})
2 – Form Icon Creation
We have to create a .ICO image for our form button. Either you can generate from Photoshop or you can create from online icon creation websites.
Please note the below cmdlet which is pointing to a path of the icon file.
$formIcon = New-Object system.drawing.icon ("C:vivekred.ico")
$form.Icon = $formicon
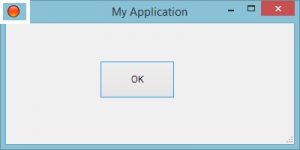
3 – Button Creation
$Okbutton = New-Object System.Windows.Forms.Button
$Okbutton.Location = New-Object System.Drawing.Size(125,50)
$Okbutton.Size = New-Object System.Drawing.Size(100,50)
$Okbutton.Text = "OK"
$Okbutton.Add_Click({$Form.Close()})
$Form.Controls.Add($Okbutton)
$Form.ShowDialog()
Now our form is ready with the Form icon and Button
Putting all the commands together: PART – 1 And PART – 2
#### I have commented out the Form ICON lines… You can enable if you have a downloaded ICON pic by providing a proper name and icon’s path ###
Add-Type -AssemblyName System.Windows.Forms
Add-Type -AssemblyName System.Drawing
$Form = New-Object system.Windows.Forms.Form
$Form.Size = New-Object System.Drawing.Size(400,200)
$Form.AutoSizeMode = "GrowAndShrink"
$Form.Text = "My Application"

$Label = New-Object System.Windows.Forms.Label
$Label.AutoSize = $true
$Font = New-Object System.Drawing.Font("Arial",15,[System.Drawing.FontStyle]::Bold)
$form.Font = $Font
$Label.Text = "This is My Test App"
$Form.Controls.Add($Label)

$Form.Add_KeyDown({if ($_.KeyCode -eq "Enter") {$Form.Close()}})
$Form.Add_KeyDown({if ($_.KeyCode -eq "Escape") {$Form.Close()}})

#$formIcon = New-Object system.drawing.icon ("C:vivekred.ico")
#$form.Icon = $formicon

$Okbutton = New-Object System.Windows.Forms.Button
$Okbutton.Location = New-Object System.Drawing.Size(125,50)
$Okbutton.Size = New-Object System.Drawing.Size(100,50)
$Okbutton.Text = "OK"

$Okbutton.Add_Click({$Form.Close()})
$Form.Controls.Add($Okbutton)

$Form.ShowDialog()
PART – 3 Creation of Button’s Click Action:
We have different options to connect the button to our script. In the previous part, I have used close() command in button click action to close the form. Now I am going to change the click action…
$Okbutton = New-Object System.Windows.Forms.Button
Method – 1
Use the cmdlet directly inside the script block
$Okbutton = New-Object System.Windows.Forms.Button
$Okbutton.Location = New-Object System.Drawing.Size(125,50)
$Okbutton.Size = New-Object System.Drawing.Size(200,50)
$Okbutton.Text = "Get-Service"
$Okbutton.Add_Click({Get-Service | Out-GridView})
$Form.Controls.Add($Okbutton)
Method – 2
Using function – We can define our script under a function and then we can call the function inside the click action. once you click on the button the function will be called and execute.
function Service
{
Get-Service | Out-GridView
}
$Okbutton = New-Object System.Windows.Forms.Button
$Okbutton.Location = New-Object System.Drawing.Size(125,50)
$Okbutton.Size = New-Object System.Drawing.Size(200,50)
$Okbutton.Text = "Get-Service"
$Okbutton.Add_Click({Service})
$Form.Controls.Add($Okbutton)
Method – 3
Calling script file (PS1) – Using this method we can call a PS1 file that is saved on your machine when you click on any controls (Buttons), in the back end the script you defined will be called and execute.
$Okbutton.Location = New-Object System.Drawing.Size(125,50)
$Okbutton.Size = New-Object System.Drawing.Size(200,50)
$Okbutton.Text = "Get-Service"
$Okbutton.Add_Click({
Invoke-Expression -Command "C:Vivekservice.ps1"
})
Note: Windows form is a traditional method of form creation. We have many alternatives to create the form, like WPF with XAML, Powershell Studio from Sapien – I will be sharing the WPF method of form creation shortly-
The open file/folder dialog box is a great way to receive input for your scripts interactively. It provides a file browser that makes for a much more user-friendly approach than merely prompting for a path. In this post I show you how can use OpenFileDialog in your PowerShell scripts.
- Author
- Recent Posts

Adam Bertram is a 20-year IT veteran, Microsoft MVP, blogger, and trainer.
When you’re using a Windows application and need to provide input for a file or folder, you’ve probably seen the standard open file dialog.

Open file dialog
This dialog box is standard across lots of Windows applications. The software you’re using to invoke this dialog box uses a .NET assembly called System.Windows.Forms with a class inside called OpenFileDialog. Did you know you can get input to your PowerShell scripts this way too? Since PowerShell lies directly on top of .NET, we can invoke any .NET class we need, which means we can also bring up the open file dialog box.
To do this, we’ll first need to load the System.Windows.Forms assembly manually using the Add-Type cmdlet. Lots of .NET assemblies are typically loaded for you, but in this case, we have to do it manually.
Add-Type -AssemblyName System.Windows.Forms
Once we’ve loaded the assembly, we can instantiate an OpenFileDialog object using New-Object.
$FileBrowser = New-Object System.Windows.Forms.OpenFileDialog -Property @{ InitialDirectory = [Environment]::GetFolderPath('Desktop') }
You can see above that the OpenFileDialog class constructor has an InitialDirectory argument. This tells the OpenFileDialog class which folder to display when the dialog box comes up. In this case, I have the dialog box to display the desktop.
At this point, the dialog box will not display. We’re just instantiating the object. To show the dialog box, we’ll have to use the ShowDialog() method.
$null = $FileBrowser.ShowDialog()
This will display the dialog box. I’m assigning the output of ShowDialog() to $null. This is because the output does not return anything useful for our purposes. You might expect the output to return the chosen file name, but it doesn’t. The system then stores the file information in the OpenFileDialog object itself.
PS C:> $FileBrowser

CheckFileExists              : True
Multiselect                  : False
ReadOnlyChecked              : False
ShowReadOnly                 : False
SafeFileName                 : Thumbs.db
SafeFileNames                : {Thumbs.db}
AddExtension                 : True
CheckPathExists              : True
DefaultExt                   :
DereferenceLinks             : True
FileName                     : \MacHomeDesktopThumbs.db
FileNames                    : {\MacHomeDesktopThumbs.db}
Filter                       :
FilterIndex                  : 0
InitialDirectory             : \MacHomeDesktop
RestoreDirectory             : False
ShowHelp                     : False
SupportMultiDottedExtensions : False
Title                        :
ValidateNames                : True
CustomPlaces                 : {}
AutoUpgradeEnabled           : True
Tag                          :
Site                         :
Container                    :
You can see above that the OpenFileDialog object now contains all the information gathered from the file chosen.
The above example allows me to choose any file we’d like, but we also can limit the input by file type too using the Filter property.
$FileBrowser = New-Object System.Windows.Forms.OpenFileDialog -Property @{
    InitialDirectory = [Environment]::GetFolderPath('Desktop')
    Filter = 'Documents (*.docx)|*.docx|SpreadSheet (*.xlsx)|*.xlsx'
}
$null = $FileBrowser.ShowDialog()
Now when the dialog box displays, you can see below that the only options are to choose between Word and Excel documents.
Subscribe to 4sysops newsletter!

Filtering by file
For more information about this method of receiving file location input from users, refer to the Microsoft MSDN information.
Powershell notifications with Windows Forms
What do we get more than anything, notifications. I’m a fan of turning them off (when I can), but if you wanted to show notifications through Powershell, here’s a way how to do that.
") |
| A notification in Windows 10 |
Adding Windows Forms
We are going to leverage the NotifyIcon class built into Windows Forms in order to display our notification in Powershell. This is possible through the Add-Type cmdlet available in Powershell.
With the Add-Type cmdlet, we can add the Windows.Forms assembly directly into our Powershell instance and use types like we would in code. This can be done with the following code.
Add-Type -AssemblyName System.Windows.Forms
Once this assembly is loaded into memory, we can begin to set the properties of the NotifyIcon and display it from Powershell.
Setting the properties
Before we set the properties on our notification, we need to create a NotifyIcon first. This can be done with the New-Object cmdlet.
$notification = New-Object System.Windows.Forms.NotifyIcon
We are storing a reference of the object in a variable so that we can set properties on our NotifyIcon.
We can now set all of the properties we need for our notification.
$path = (Get-Process -id $pid).Path
$notification.Icon = [System.Drawing.Icon]::ExtractAssociatedIcon($path)
$notification.BalloonTipIcon = [System.Windows.Forms.ToolTipIcon]::Error
$notification.BalloonTipText = "A Powershell error, oh no!!"
$notification.BalloonTipTitle = "ERROR"
$notification.Visible = $true
$notification.ShowBalloonTip(3000)
The Icon grabs the image for the Powershell application. The BalloonTipIcon is the icon associated with the notification (using any valid value from the ToolTipIcon enumeration). The text and title are pretty self-explanatory. We also ensure the NotifyIcon is visible and is visible for 3 seconds (3000 miliseconds).
This is what our notification looks like.
 |
| Our Powershell error |
Small notes
I wanted to call out two pieces of the above script which justify a little more explanation. First is the code that is returning the icon of the notification. You will notice above that we are calling Get-Process to pull the path of the current process. The $pid is an automatic variable that automatically is the value of the current process of the executing Powershell session.
When we use the path of the current executing Powershell session (which for me happens to be «C:WindowsSystem32WindowsPowerShellv1.0powershell.exe»), we are using it to call a static method on the System.Drawing.Icon class. In Powershell, when we encounter square brackets around a variable, Powershell knows that this variable is a .NET class and interprets as such. The two colons after the brackets indicate we are calling a static method, ExtractAssociatedIcon.
Full script
The full script is below, with additional comments. Enjoy!
# Add the Windows.Forms assembly
Add-Type -AssemblyName System.Windows.Forms

# Create an object to hold a reference to a NotifyIcon
$notification = New-Object System.Windows.Forms.NotifyIcon

# Set the icon of the notification
$path = (Get-Process -id $pid).Path
$notification.Icon = [System.Drawing.Icon]::ExtractAssociatedIcon($path)

# Set the balloon icon
$notification.BalloonTipIcon = [System.Windows.Forms.ToolTipIcon]::Error

# Set the text & title
$notification.BalloonTipText = "A Powershell error, oh no!!"
$notification.BalloonTipTitle = "ERROR"

# Ensure this notification is visible
$notification.Visible = $true

# Show the notification for 3 (3000 miliseconds) seconds
$notification.ShowBalloonTip(3000)