If your PC is running slowly, the following suggestions might help speed things up. The tips are listed in order, so start with the first one, see if that helps, and then continue to the next one if it doesn’t.
One of the best ways to get the most out of your PC is to make sure you have the latest version of Windows 11 installed. When you check for updates, your PC will also search for the latest device drivers, which can also help improve your PC’s performance.
To check for updates
-
Do one of the following:
-
If the status says «You’re up to date,» continue and check for optional updates.
-
If the status says «Updates are available,» once they are downloaded, select Install now.
-
-
Select the updates you want to install, then select Install.
-
Restart your PC and see if it seems to run better.
Sometimes an optional update, like a new non-critical driver, will be available that may help.
To check for optional updates
-
Select the Start button, then select Settings > Windows Update > Advanced options > Optional updates.
-
If additional updates are available, select them and then select Download & install.
-
Restart your PC and see if it seems to run better.
For more info about updates, including how you can have them installed automatically, see the Windows Update FAQ.
For Windows Update troubleshooting info, see Update Windows and Troubleshoot problems updating Windows.
If your PC still runs slowly, continue to the next tip.
Having many apps, programs, web browsers, and so on open at once can slow down your PC. Having a lot of browser tabs open at once can also slow it down quite a bit. If this is happening, close any apps, browser tabs, etc., that you don’t need and see if that helps speed up your PC. If it doesn’t seem to help, restart your PC and then open just the apps, programs and browser windows you need.
To restart your PC
-
Select the Start button, then select Power > Restart .
-
After your PC restarts, open just the apps you need, then close them when you’re done.
Sometimes apps that were made for an earlier version of Windows will still run on Windows 11, but they might slow down your PC. If this happens after you open a certain program, check the software company’s website for an updated version, or run the Program Compatibility Troubleshooter.
To run the Program Compatibility Troubleshooter
-
Select Search , type troubleshoot in the search box, then select Troubleshoot settings > Other troubleshooters .
-
Under Other, select the Run button next to Program Compatibility Troubleshooter .
-
Select the program that you’re having problems with, then select Next and continue through the troubleshooter.
PC still running slowly? Continue to the next tip.
ReadyBoost lets you use a removable drive, like a USB flash drive, to improve your PC’s performance without opening your PC and adding more memory (RAM). To use ReadyBoost, you’ll need a USB flash drive or a memory card that has at least 500 MB free and a high data transfer rate.
To use ReadyBoost
-
Insert the USB flash drive into a USB port on your PC.
-
Select File Explorer from the taskbar.
-
Press and hold (or right-click) the USB flash drive (or SD card if you used one instead), then select Properties.
-
Select the ReadyBoost tab, then select Use this device.
Windows determines if the device can use ReadyBoost. If it can’t, it’ll let you know. -
After Windows determines how much free space to use to optimize memory, select OK to reserve this space so ReadyBoost can use it.
When you look at the contents of the USB flash drive in File Explorer, you’ll see a file named ReadyBoost.sfcache on the flash drive. This file shows how much space is reserved for ReadyBoost.
Note: ReadyBoost can’t be used if Windows is installed on a solid state drive (SSD). An SSD is already fast, and ReadyBoost won’t be able to improve its performance.
The paging file is an area on your hard disk that Windows uses like memory. There’s a setting in Windows 11 that manages the page file size automatically, which can help improve your PC’s performance.
To make sure automatic page file management is turned on
-
Select Search on the taskbar, type advanced system in the search box, and then select View advanced system settings, which has Control panel listed underneath it.
-
In System Properties, select the Advanced tab, then select Settings in the Performance area.
-
In Performance Options, select the Advanced tab, then select Change in the Virtual memory area.
-
Make sure the Automatically manage paging file size for all drives check box is selected. If it is, continue to the next tip. If it’s not, select it and then restart your PC by selecting Start > Power > Restart .
Use your PC and see if it’s running better. If it’s not, try the next tip.
You may improve performance if you free some disk space on your PC.
To check for low disk space
-
Your drives will be listed in the Storage area. Note the amount of free space and total size for each drive.
Note: If your PC is not low on space, try the next tip.
You can use Storage Sense to delete unnecessary or temporary files from your device, which can also free up space.
If you turn on Storage Sense, Windows will automatically free up space by getting rid of unnecessary files—including files in your recycle bin—when you’re low on disk space or at intervals you specify. The instructions below show you how to delete temporary files and how to turn on and configure Storage Sense.
If you can’t find Storage Sense on your device using the following steps, see the «Free up space with Disk cleanup» section below instead.
Note: You may not want to delete temporary files to improve performance. While these files may not be used at the moment, they help your apps load and run faster.
To delete temporary files with Storage Sense
-
Select Temporary files in the storage breakdown. Note: If you don’t see Temporary files listed, select Show more categories.
-
Windows will take a few moments to determine what files and apps are taking up the most space on your PC.
-
Select the items you want to delete, and then select Remove files.
To see what’s in your Recycle Bin before you empty it, open it from your desktop. If you don’t see the Recycle Bin icon on your desktop, in the search bar on the taskbar, type recycle bin, then select Recycle Bin from the list of results.
Note: Windows moves files you delete to the Recycle Bin in case you change your mind and need them again in the future. You might be able to free up a significant amount of space by deleting Recycle Bin files to permanently remove files you’ve previously deleted.
To turn on and configure Storage Sense
-
In the Storage management area, turn on Storage Sense.
-
Select the for Storage Sense to configure it.
-
Under Cleanup of temporary files, ensure Keep Windows running smoothly by automatically cleaning up temporary system and app files is checked.
-
Under Configure cleanup schedules, choose how often you want Storage Sense to run.
-
For the files you want Storage Sense to delete (your choices are files in your Recycle Bin and in your Downloads folder), select the preferred time intervals, or select Never if you want Storage Sense to leave those types of files alone.
-
Scroll down and select Run Storage Sense now.
-
Windows will take a few moments to clean up your files, and then you’ll see a message indicating how much disk space has been freed up.
If your system doesn’t have Storage Sense, you can use the Disk Cleanup tool to delete temporary files and system files from your device.
To run Disk Cleanup
-
Select Search , type disk cleanup, then select Disk Cleanup from the list of results.
-
Select the checkbox next to the type of files you want to delete. (To view a description of each type of file, select the name.) By default, Downloaded Program Files, Temporary Internet Files, and Thumbnails are selected. Be sure to clear those check boxes if you don’t want to delete those files.
-
To free up even more space, select Clean up system files. Disk Cleanup will take a few moments to calculate the amount of space that a can be freed up.
Note: If it’s been fewer than 10 days since you upgraded to Windows 11, your previous version of Windows will be listed as a system file you can delete. If you need to free up drive space, you can delete it, but keep in mind that you’ll be deleting your Windows.old folder, which contains files that give you the option to go back to your previous version of Windows. If you delete your previous version of Windows, this can’t be undone. (You won’t be able to go back to your previous version of Windows.)
-
Select the types of files you want to delete, select OK, then select Delete files in the confirmation window to start the cleanup.
If your PC still runs slowly, try uninstalling apps you don’t use anymore.
To uninstall apps you don’t use anymore
-
Search for a specific app or sort them to see which ones are using the most space.
-
When you find an app to remove, select the More icon next to it and, if possible, select Uninstall.
-
Restart your PC and see if performance has improved.
If your PC still runs slowly, try moving files to another drive.
If you have photos, music, or other files that you want to keep but don’t use often, consider saving them to removable media, like a USB drive. You’ll still be able to use them when the drive is connected, but they won’t take up space on your PC.
To move files to another drive
-
Connect the removable media to your PC.
-
Select File Explorer from the taskbar and find the files you want to move.
-
Select the files, then on the taskbar, select Cut .
-
Select your removable media from the location list, then select Paste .
-
When the move is complete, restart your PC and see if performance has improved.
Get more info about freeing drive space in Windows.
If your PC still runs slowly, try the next tip.
Windows 11 includes many visual effects, such as animations and shadow effects. These look great, but they can also use additional system resources and can slow down your PC. This is especially true if you have a PC with a smaller amount of memory (RAM).
To adjust the visual effects in Windows
-
Select Search , type performance, then select Adjust the appearance and performance of Windows in the list of results.
-
On the Visual Effects tab, select Adjust for best performance > Apply.
-
Restart your PC and see if that speeds up your PC.
If your PC still runs slowly, continue to the next tip.
Your PC settings let you choose where files will be saved by default. You can save files on your PC or to OneDrive by default and sync files between the two locations. This lets you get to your files from any device that can connect to the internet, and it helps make sure your files are backed up in case your PC is ever damaged or lost. However, files must sync between your PC and OneDrive, and syncing can slow down your PC. You can pause OneDrive syncing temporarily and see if it helps improve your PC performance.
To pause syncing to OneDrive
-
On the taskbar, look for OneDrive near the notification area.
-
Select OneDrive > Help & Settings > Pause syncing, and then choose how long you want to pause syncing your files.
-
Restart your PC and see if your performance issues have improved with syncing paused.
-
To resume syncing your files, select OneDrive > Help & Settings > Resume syncing.
You can also visit Fix OneDrive sync problems to check for any sync issues.
When you turn on your PC, some programs start automatically and run in the background. You can disable these programs so they don’t run when your PC starts.
Many programs are designed to start automatically when Windows does. You don’t realize they’re running, but they’ll open quickly when you go to use them. This is helpful for programs you use a lot, but not for programs you don’t use often because it increases the time it takes Windows to start.
Find the programs that start automatically
Sometimes you can determine which programs start automatically by looking at the program icons in the notification area on the far right of the taskbar. Check there first to see if there are any programs running that you don’t want to start automatically. To try to find out the name of the program, point to the icon with your mouse pointer. Make sure you select Show hidden icons , so you don’t miss any programs.
Even after you check the notification area, you might still miss some programs that run automatically at startup. Here’s how you can find all the programs that start automatically, and stop the ones that you don’t want to start automatically when Windows starts.
To stop a program from starting automatically
-
In the Startup Apps area, find the program you want to stop from starting automatically and set it to Off.
Note: If you turn off a program and it continues to start automatically when Windows starts, you should scan for viruses and malware. See the next section for more info.
A virus, malware, or malicious software could cause your PC to run slowly. Other symptoms include unexpected pop-up messages, programs that unexpectedly start automatically, or the sound of your hard disk constantly working.
The best way to handle viruses and malicious software is to try to prevent them by running antimalware and antivirus software and keeping it up to date. However, even if you take precautions, your PC can still become infected.
You can scan your PC for viruses or other malicious software by using Windows Security (formerly Windows Defender Security Center), which is included in Windows 11. For more info, see How to protect your Windows PC.
Notes:
-
If you’re using other antivirus or anti-malware software, see the documentation for that program to learn how to scan for viruses. Also, make sure multiple antivirus programs aren’t running at the same time. If they are, choose the one you want to run, and then disable or uninstall any others.
-
If you have another antivirus program installed and turned on, Windows Security will be turned off by default.
To scan for viruses using Windows Security
-
Select Virus & threat protection, then select Protection updates under Virus & threat protection updates.
-
On the Protection updates screen, select Check for updates to make sure you have the most recent updates.
-
Select Virus & threat protection, then select Quick scan.
Wait for Windows Security to finish scanning for viruses and malware.
-
Do one of the following, depending on the results of the scan:
-
Run the recommended advanced scan. This scan takes longer but searches more extensively for threats on your PC.
-
If Windows Security finds a virus or malware and can’t remove or quarantine it, contact Microsoft Support for help.
-
If no viruses are found, restart your PC and try to reproduce the performance problem you were having with your PC.
-
Note: If Windows Security doesn’t open, can’t update the definition file, or can’t finish scanning for viruses, try running Microsoft Defender Antivirus (offline scan), which is explained below.
To scan for malware and viruses with Microsoft Defender Antivirus (offline scan)
-
Save any documents or anything else you might have open on your PC.
-
Select Virus & threat protection, and then under Current threats, select Scan options > Microsoft Defender Antivirus (offline scan) > Scan now.
Your PC will restart, and Microsoft Defender Antivirus (offline scan) will run and scan for viruses and malware. The scan might take 15 minutes or so, and your PC will restart again after that.
-
Try to reproduce the performance issue.
If your PC still runs slowly, continue to the next tip.
Restoring your PC undoes recent changes that might be causing problems. If you think a recently installed app, driver, or update for Windows could be causing problems, you might get things running normally again by restoring your PC to an earlier point, called a restore point.
Notes:
-
Restoring from a restore point won’t affect your personal files, but it will remove apps, drivers, and updates that were installed after the restore point was created.
-
System restore works for changes made in the last 7 to 14 days.
To restore your PC from a restore point
-
Select Search on the taskbar, type advanced system, then select View advanced system settings from the list of results.
-
On the System Protection tab, select System Restore.
-
Select Recommended restore to go with the most recent restore point Windows has made automatically, or Choose a different restore point to select one yourself, then select Next.
-
If you chose to select a different restore point, select one, then select Next. Either way, select Finish to begin restoring.
-
Once the restore is completed, restart your PC and see if performance has improved.
If you don’t see any restore points, it might be because system protection isn’t turned on.
To turn on system protection
-
In the search box on the taskbar, type create a restore point, then select Create a restore point from the list of results.
-
On the System Protection tab, select Configure.
-
Select Turn on system protection > OK.
If your PC is running slowly, the following suggestions might help speed things up. The tips are listed in order, so start with the first one, see if that helps, and then continue to the next one if it doesn’t.
One of the best ways to get the most out of your PC is to make sure you have the latest version of Windows 10 installed. When you check for updates, your PC will also search for the latest device drivers, which can also help improve your PC’s performance.
To check for updates
-
Select the Start button, then select Settings > Update & Security > Windows Update > Check for updates.
Check for Windows updates
-
Do one of the following:
-
If the status says «You’re up to date,» go to the next tip.
-
If the status says «Updates are available,» select Install now.
-
-
Select the updates you want to install, then select Install.
-
Restart your PC and see if it seems to run better.
For more info about updates, including how you can have them installed automatically, see the Windows Update FAQ.
For Windows Update troubleshooting info, see Update Windows 10 and Troubleshoot problems updating Windows 10.
If your PC still runs slowly, continue to the next tip.
Having many apps, programs, web browsers, and so on open at once can slow down your PC. Having a lot of browser tabs open at once can also slow it down quite a bit. If this is happening, close any apps, browser tabs, etc., that you don’t need and see if that helps speed up your PC. If it doesn’t seem to help, restart your PC and then open just the apps, programs and browser windows you need.
To restart your PC
-
Select the Start button, then select Power > Restart.
-
After your PC restarts, open just the apps you need, then close them when you’re done.
Sometimes apps that were made for an earlier version of Windows will still run on Windows 10, but they might slow down your PC. If this happens after you open a certain program, check the software company’s website for an updated version, or run the Program Compatibility Troubleshooter.
To run the Program Compatibility Troubleshooter
-
In the search box on the taskbar, type troubleshoot, then select Troubleshoot settings, which has System settings listed underneath it.
-
In the list of troubleshooters, select Program Compatibility Troubleshooter > Run the troubleshooter.
-
Select the program that you’re having problems with, then select Next and continue through the troubleshooter.
PC still running slowly? Continue to the next tip.
ReadyBoost lets you use a removable drive, like a USB flash drive, to improve your PC’s performance without opening your PC and adding more memory (RAM). To use ReadyBoost, you’ll need a USB flash drive or a memory card that has at least 500 MB free and a high data transfer rate.
To use ReadyBoost
-
Insert the USB flash drive into a USB port on your PC.
-
Select File Explorer from the taskbar.
-
Press and hold (or right-click) the USB flash drive (or SD card if you used one instead), then select Properties.
-
Select the ReadyBoost tab, then select Use this device.
Windows determines if the device can use ReadyBoost. If it can’t, it’ll let you know. -
After Windows determines how much free space to use to optimize memory, select OK to reserve this space so ReadyBoost can use it.
When you look at the contents of the USB flash drive in File Explorer, you’ll see a file named ReadyBoost.sfcache on the flash drive. This file shows how much space is reserved for ReadyBoost.
Note: ReadyBoost can’t be used if Windows is installed on a solid state drive (SSD). An SSD is already fast, and ReadyBoost won’t be able to improve its performance.
The paging file is an area on your hard disk that Windows uses like memory. There’s a setting in Windows 10 that manages the page file size automatically, which can help improve your PC’s performance.
To make sure automatic page file management is turned on
-
In the search box on the taskbar, type advanced system, and then select View advanced system settings, which has Control panel listed underneath it.
-
In System Properties, select the Advanced tab, then select Settings in the Performance area.
-
In Performance Options, select the Advanced tab, then select Change in the Virtual memory area.
-
Make sure the Automatically manage paging file size for all drives check box is selected. If it is, continue to the next tip. If it’s not, select it and then restart your PC by selecting the Start button > Power > Restart.
Use your PC and see if it’s running better. If it’s not, try the next tip.
You may improve performance if you free some disk space on your PC.
To check for low disk space
-
Your drives will be listed in the Storage area. Note the amount of free space and total size for each drive.
Note: If your PC is not low on space, try the next tip.
You can use Storage Sense to delete unnecessary or temporary files from your device, which can also free up space.
If you turn on Storage Sense, Windows will automatically free up space by getting rid of unnecessary files—including files in your recycle bin—when you’re low on disk space or at intervals you specify. The instructions below show you how to delete temporary files and how to turn on and configure Storage Sense.
If you can’t find Storage Sense on your device using the following steps, see the «Free up space with Disk cleanup» section below instead.
Note: You may not want to delete temporary files to improve performance. While these files may not be used at the moment, they help your apps load and run faster.
To delete temporary files with Storage Sense
-
Select Temporary files in the storage breakdown. Note: If you don’t see Temporary files listed, select Show more categories.
-
Windows will take a few moments to determine what files and apps are taking up the most space on your PC.
-
Select the items you want to delete, and then select Remove files.
To see what’s in your Recycle Bin before you empty it, open it from your desktop. If you don’t see the Recycle Bin icon on your desktop, in the search bar on the taskbar, type recycle bin, then select Recycle Bin from the list of results.
Note: Windows moves files you delete to the Recycle Bin in case you change your mind and need them again in the future. You might be able to free up a significant amount of space by deleting Recycle Bin files to permanently remove files you’ve previously deleted.
To turn on and configure Storage Sense
-
In the Storage area, turn on Storage Sense.
-
Select Configure Storage Sense or run it now.
-
In the Storage Sense area, choose how often you want Storage Sense to run.
-
In the Temporary Files area, select Delete temporary files that my apps aren’t using.
-
Select which files you want Storage Sense to delete (your choices are files in your Recycle Bin and in your Downloads folder), then select the corresponding time intervals.
-
Scroll down and select Clean now.
-
Windows will take a few moment to clean up your files, and then you’ll see a message indicating how much disk space has been freed up.
If your system doesn’t have Storage Sense, you can use the Disk Cleanup tool to delete temporary files and system files from your device.
To run Disk Cleanup
-
In the search box on the taskbar, type disk cleanup, then select Disk Cleanup from the list of results.
-
Select the checkbox next to the type of files you want to delete. (To view a description of each type of file, select the name.) By default, Downloaded Program Files, Temporary Internet Files, and Thumbnails are selected. Be sure to clear those check boxes if you don’t want to delete those files.
-
To free up even more space, select Clean up system files.Disk Cleanup will take a few moments to calculate the amount of space that a can be freed up.
Note: If it’s been fewer than 10 days since you upgraded to Windows 10, your previous version of Windows will be listed as a system file you can delete. If you need to free up drive space, you can delete it, but keep in mind that you’ll be deleting your Windows.old folder, which contains files that give you the option to go back to your previous version of Windows. If you delete your previous version of Windows, this can’t be undone. (You won’t be able to go back to your previous version of Windows.)
-
Select the types of files you want to delete, select OK, then select Delete files in the confirmation window to start the cleanup.
If your PC still runs slowly, try uninstalling apps you don’t use anymore.
To uninstall apps you don’t use anymore
-
Search for a specific app or sort them to see which ones are using the most space.
-
When you find an app to remove, choose it from the list and select Uninstall.
-
Restart your PC and see if performance has improved.
If your PC still runs slowly, try moving files to another drive.
If you have photos, music, or other files that you want to keep but don’t use often, consider saving them to removable media, like a USB drive. You’ll still be able to use them when the drive is connected, but they won’t take up space on your PC.
To move files to another drive
-
Connect the removable media to your PC.
-
Select File Explorer from the taskbar and find the files you want to move.
-
Select the files, go to Home, then select Move to >Choose location.
-
Select your removable media from the location list, then select Move.
-
Restart your PC and see if performance has improved.
Get more info about freeing drive space in Windows 10.
If your PC still runs slowly, try the next tip.
Windows 10 includes many visual effects, such as animations and shadow effects. These look great, but they can also use additional system resources and can slow down your PC. This is especially true if you have a PC with a smaller amount of memory (RAM).
To adjust the visual effects in Windows
-
In the search box on the taskbar, type performance, then select Adjust the appearance and performance of Windows in the list of results.
-
On the Visual Effects tab, select Adjust for best performance > Apply.
-
Restart your PC and see if that speeds up your PC.
If your PC still runs slowly, continue to the next tip.
Your PC settings let you choose where files will be saved by default. You can save files on your PC or to OneDrive by default and sync files between the two locations. This lets you get to your files from any device that can connect to the internet, and it helps make sure your files are backed up in case your PC is ever damaged or lost. However, files must sync between your PC and OneDrive, and syncing can slow down your PC. You can pause OneDrive syncing temporarily and see if it helps improve your PC performance.
To pause syncing to OneDrive
-
On the taskbar, look for OneDrive near the notification area.
-
Select OneDrive > More > Pause syncing, and then choose how long you want to pause syncing your files.
-
Restart your PC and see if your performance issues have improved with syncing paused.
-
To resume syncing your files, select OneDrive > More >Resume syncing.
You can also visit Fix OneDrive sync problems to check for any sync issues.
Notes:
-
If you have Window 10 version 1709 or higher, you can use OneDrive Files On-Demand to choose which files you want to sync and always keep on your PC. This can help improve PC performance if you reduce the number of files that are synced to your PC. To see which version of Windows 10 your device is currently running, select the Start button, then select Settings > System > About.
Open About settings -
For more info on OneDrive Files On-Demand, see Learn about OneDrive Files On-Demand.
When you turn on your PC, some programs start automatically and run in the background. You can disable these programs so they don’t run when your PC starts.
Many programs are designed to start automatically when Windows does. You don’t realize they’re running, but they’ll open quickly when you go to use them. This is helpful for programs you use a lot, but not for programs you don’t use often because it increases the time it takes Windows to start.
Find the programs that start automatically
Sometimes you can determine which programs start automatically by looking at the program icons in the notification area on the far right of the taskbar. Check there first to see if there are any programs running that you don’t want to start automatically. To try to find out the name of the program, point to the icon with your mouse pointer. Make sure you select Show hidden icons , so you don’t miss any programs.
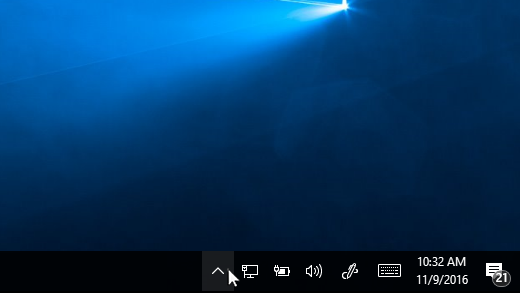
Notification area with mouse pointing to show hidden icons
Even after you check the notification area, you might still miss some programs that run automatically at startup. Here’s how you can find all the programs that start automatically, and stop the ones that you don’t want to start automatically when Windows starts.
To stop a program from starting automatically
-
In the Startup Apps area, find the program you want to stop from starting automatically and set it to Off.
Notes:
-
If you turn off a program and it continues to start automatically when Windows starts, you should scan for viruses and malware. See the next section for more info.
-
To use the procedure above to stop a program from starting automatically, you need to have Windows 10 (Version 1803 or higher) installed. To see which version of Windows 10 your device is currently running, select the Start button, then select Settings > System > About.
Open About settings -
If you have Windows 10 (Version 1709 or earlier) installed, press Ctrl + Alt + Delete, select Task Manager, select Startup, select the program you want to stop from starting automatically, then select Disable.
A virus, malware, or malicious software could cause your PC to run slowly. Other symptoms include unexpected pop-up messages, programs that unexpectedly start automatically, or the sound of your hard disk constantly working.
The best way to handle viruses and malicious software is to try to prevent them by running antimalware and antivirus software and keeping it up to date. However, even if you take precautions, your PC can still become infected.
You can scan your PC for viruses or other malicious software by using Windows Security (formerly Windows Defender Security Center), which is included in Windows 10. For more info, see How to protect your Windows 10 PC.
Notes:
-
If you’re using other antivirus or anti-malware software, see the documentation for that program to learn how to scan for viruses. Also, make sure multiple antivirus programs aren’t running at the same time. If they are, choose the one you want to run, and then disable or uninstall any others.
-
If you have another antivirus program installed and turned on, Windows Security will be turned off by default.
To scan for viruses using Windows Security (Windows 10 Version 1809 or later)
-
Select Virus & threat protection, then select Check for updates under Virus & threat protection updates.
-
On the Protection updates screen, select Check for updates to make sure you have the most recent updates.
-
Select Virus & threat protection, then select Quick scan.
Wait for Windows Security to finish scanning for viruses and malware.
-
Do one of the following, depending on the results of the scan:
-
Run the recommended advanced scan. This scan takes longer but searches more extensively for threats on your PC.
-
If Windows Security finds a virus or malware and can’t remove or quarantine it, contact Microsoft Support for help.
-
If no viruses are found, restart your PC and try to reproduce the performance problem you were having with your PC.
-
Notes:
-
If Windows Security doesn’t open, can’t update the definition file, or can’t finish scanning for viruses, try running Windows Defender Offline, which is explained below in To scan for malware and viruses with Windows Defender Offline (Windows 10 Version 1809 or later).
-
To see which version of Windows 10 your device is currently running, select the Start button, then select Settings > System > About.
Open About settings
To scan for viruses using Windows Defender Security Center (Windows 10 Version 1803)
-
Select Virus & threat protection, then select Virus & threat protection updates > Check for updates to make sure you have the latest definition file.
-
Select the Virus & threat protection tab, then select Scan now.
Wait for Windows Defender Security Center to finish scanning for viruses and malware.
-
Do one of the following, depending on the results of the scan:
-
Run the recommended advanced scan. This scan takes longer but searches more extensively for threats on your PC.
-
If Windows Defender Security Center finds a virus or malware and can’t remove or quarantine it, contact Microsoft Support for help.
-
If no viruses are found, restart your PC and try to reproduce the performance problem you were having with your PC.
-
Notes:
-
If Windows Defender Security Center doesn’t open, can’t update the definition file, or can’t finish scanning for viruses, try running Windows Defender in Offline Mode, which is explained below in To scan for malware and viruses with Windows Defender Offline (Windows 10 Version 1803).
-
To see which version of Windows 10 your device is currently running, select the Start button, then select Settings > System > About.
Open About settings
To scan for malware and viruses with Windows Defender Offline (Windows 10 Version 1809 or later)
-
Save any documents or anything else you might have open on your PC.
-
Select Virus & threat protection, and then under Current threats, select Scan options > Windows Defender Offline scan > Scan now.
Your PC will restart, and Windows Defender Offline will run and scan for viruses and malware. The scan might take 15 minutes or so, and your PC will restart again after that.
-
Try to reproduce the performance issue.
If your PC still runs slowly, continue to the next tip.
To scan for malware and viruses with Windows Defender Offline (Windows 10 Version 1803)
-
Save any documents or anything else you might have open on your PC.
-
Select Virus & threat protection, then select Run a new advanced scan > Windows Defender Offline scan > Scan now.
Your PC will restart, and Windows Defender Offline will run and scan for viruses and malware. The scan might take 15 minutes or so, and your PC will restart again after that.
-
Try to reproduce the performance issue.
If your PC still runs slowly, continue to the next tip.
Restoring your PC undoes recent changes that might be causing problems. If you think a recently installed app, driver, or update for Windows could be causing problems, you might get things running normally again by restoring your PC to an earlier point, called a restore point.
Notes:
-
Restoring from a restore point won’t affect your personal files, but it will remove apps, drivers, and updates that were installed after the restore point was created.
-
System restore works for changes made in the last 7 to 14 days.
To restore your PC from a restore point
-
In the search box on the taskbar, type restore point, then select Create a restore point from the list of results.
-
On the System Protection tab, select System Restore.
-
Select Next, then choose the restore point related to the app, driver, or update that might be causing the problem. Then select Next > Finish.
-
Restart your PC and see if performance has improved.
If you don’t see any restore points, it might be because system protection isn’t turned on.
To turn on system protection
-
In the search box on the taskbar, type restore point, then select Create a restore point from the list of results.
-
On the System Protection tab, select Configure.
-
Select Turn on system protection > OK.
Laptop Running very slow after the windows 10 22H2 update? Does system freeze for a long time at startup or does windows 10 not responding mouse clicks after the 22H2 update? For some others, Windows 10 fails to boot after Update, crashes with different Blue screen errors or is stuck at black screen with a cursor. All these problems indicate updates not installed properly, the recent update is not compatible with your current system, Windows System files get corrupted etc. If you are also struggling with this problem, “windows 10 very slow and unresponsive” here are some effective tips to help speed up Windows 10 performance.
Microsoft regularly releases cumulative updates with refinements. Install the latest windows update that may contain the bug fix causing windows not responding or freeze.
- Press Windows + I to open windows settings,
- Click Update & security then Windows update,
- Now click the check for updates button to install the latest windows updates.
- After that restart windows and check windows running smoothly.
 A virus, malware, or malicious software also causes your PC to run slowly. Other symptoms include unexpected pop-up messages, programs that unexpectedly start automatically, or the sound of your hard disk constantly working. The best way to handle viruses and malicious software is to try to prevent them by running antimalware and antivirus software and keeping it up to date.
Perform a clean boot
A clean boot is performed to start Windows by using a minimal set of drivers and startup programs. This helps eliminate software conflicts that occur when you install a program or an update or when you run a program in Windows 10. You may also troubleshoot or determine what conflict is causing the problem by performing a clean boot.
- Press Windows + R, type msconfig and ok to open the system configuration utility
- On the General tab, click Selective startup.
- Clear the Load startup items check box.
- Click the Services tab.
- Select the Hide all Microsoft services checkbox (at the bottom).
- Click Disable all, and click OK.
- Restart Windows, and check windows running smoothly.
- If yes then one of the services causing the problem.
Repair Corrupt System Files
Most of the time Corrupt system files cause a number of problems to the windows 10 system like a blue screen error, the system not responding, apps not open, show different error codes while opening explorer or any application. And may this windows 10 not responding problem occur due to corrupt system files. We recommend checking your system files using the windows system file checker Utility.
- Type cmd on the start menu search,
- from the search results Right-click on the command prompt and select run as administrator,
- Type the command sfc /scannow and press enter key.
- This will start scanning windows system files for corruption.
- If found any the sfc utility attempts to repair it by copying a cached copy of each corrupted file from the %WinDir% system32dllcache folder.
- Wait until 100% complete the scanning process.

If no corrupted system files were found in the previous state, then I suggest you try the following steps:
- Again open the command prompt and run the DISM command below
DISM.exe /Online /Cleanup-image /Restorehealth
- This will repair Windows images, including those used for Windows PE, Windows Recovery Environment (Windows RE), and Windows Setup.
- Close the command prompt and restart the PC and check if it works.
Disable background apps
Microsoft is a big fan of its native universal apps, which might be why it allows them to run in the background even when you haven’t actually launched them. That means you can access their features more quickly, but it’s a waste of system resources. And when most of the system resources are used by background apps then also system may cause windows 10 not responding problems.
- Press Windows + I to open windows settings,
- Click on privacy then Background apps,
- Turn off the toggle switches next to the apps you don’t want to have running all the time.
- Of course, you can still launch these programs manually if you need them.

Change the paging file size to improve performance
The paging file is an area on your hard disk that Windows uses like memory. Increasing the paging file size can help improve your PC’s performance.
- In the search box on the taskbar, type advanced system, and then select View advanced system settings, which has Control panel listed underneath it.
- In System Properties, on the Advanced tab, select Settings in the Performance area.
- In Performance Options, select Advanced > Change in the Virtual memory area.
- Clear the Automatically manage paging file size for all drives check box.
- Select a Custom size, then enter an initial size (in MB) and maximum size in the corresponding boxes.
- Select Set > OK.
- Restart your PC by selecting Start > Power > Restart.
Use your PC then see if it’s running better. If it’s not, try the next tip.
Note: To Calculate the pagefile size always Initial size is one and a half (1.5) x the amount of total system memory. The maximum size is three (3) x the initial size. So let’s say you have 4 GB (1 GB = 1,024 MB x 4 = 4,096 MB) of memory. The initial size would be 1.5 x 4,096 = 6,144 MB and the maximum size would be 3 x 4,096 = 12,207 MB.

Adjust the appearance and performance of Windows
Windows 10 includes many visual effects, such as animations and shadow effects. These look great, but they can also use additional system resources and can slow down your PC—this is especially true if you have a PC with a smaller amount of memory (RAM).
To adjust the visual effects in Windows
- In the search box on the taskbar, type performance, then select Adjust the appearance and performance of Windows.
- On the Visual Effects tab, select Adjust for best performance > Apply.
- Restart your PC and see if that speeds up your PC.

Update Installed Device Driver
After Upgrade to Windows 10 22H2 update, Some of your programs and drivers may work without issues, but some may just become incompatible of which the most common one affected is the Video/Graphics driver. There are other causes as well aside from Video/Graphics drivers but since this is the most common one. We recommend to check and install the latest driver software for your current windows version.
- Press Windows + X key on the keyboard,
- Go to device manager,
- Expand Display Adapter,
Right-click on the installed graphics driver, select Update Driver Software,
- Click Search automatically for updated driver software and let windows to check and install the latest driver software for you.

Or visit the device manufacturers’ website, download and install the latest display/graphic/video and audio/sound/Realtek drivers. Restart windows and check windows running smoothly.
Did these solutions help to optimize windows 10 1903 performance? Let us know on comments below, also read:
- Fix Microsoft edge not Responding keeps freezing on Windows 10
- How to fix windows 10 settings app not working, does not open or launch
- Solved: System Thread Exception Not Handled Windows 10 BSOD Error
- Windows 10 Critical Structure Corruption BSOD Error (5 Working solutions)
- Windows 10 file system error (-2147416359) when opening photos

Optimize Windows 10 Performance by tweaking Visual Effects
- Press Windows Key + X combination to see the following menu.
- In the System window, in the left pane, Click on Advanced system settings.
- In the System Properties window, pick Settings for Performance.
- In the Performance Options window, you will see 3 options:
How can I optimize my computer performance?
Here are some tips to help you optimize Windows 7 for faster performance.
- Try the Performance troubleshooter.
- Delete programs you never use.
- Limit how many programs run at startup.
- Clean up your hard disk.
- Run fewer programs at the same time.
- Turn off visual effects.
- Restart regularly.
- Change the size of virtual memory.
How can I improve the performance of Windows 10?
In the search box on the taskbar, type performance, then select Adjust the appearance and performance of Windows. On the Visual Effects tab, select Adjust for best performance > Apply. Restart your PC and see if that speeds up your PC.
How do I optimize my laptop Windows 10?
15 tips to increase performance on Windows 10
- Disable startup applications.
- Remove unnecessary applications.
- Choose applications wisely.
- Reclaim disk space.
- Upgrade to a faster drive.
- Check computer for malware.
- Install latest update.
- Change current power plan.
How can I increase my system speed?
Here are some tips to help you optimize Windows 7 for faster performance.
- Try the Performance troubleshooter.
- Delete programs you never use.
- Limit how many programs run at startup.
- Clean up your hard disk.
- Run fewer programs at the same time.
- Turn off visual effects.
- Restart regularly.
- Change the size of virtual memory.
How do I optimize memory in Windows 10?
3. Adjust your Windows 10 for the best performance
- Right click on “Computer” icon and select “Properties.”
- Select “Advanced System settings.”
- Go to the “System properties.”
- Select “Settings”
- Choose “Adjust for best performance” and “Apply.”
- Click “OK” and Restart your computer.
How do I run a performance test on Windows 10?
Open Start, do a search for Performance Monitor, and click the result. Use the Windows key + R keyboard shortcut to open the Run command, type perfmon, and click OK to open. Use the Windows key + X keyboard shortcut to open the Power User menu, select Computer Management, and click on Performance.
How do I optimize my laptop performance?
Here are some tips to help you optimize Windows 7 for faster performance.
- Try the Performance troubleshooter.
- Delete programs you never use.
- Limit how many programs run at startup.
- Clean up your hard disk.
- Run fewer programs at the same time.
- Turn off visual effects.
- Restart regularly.
- Change the size of virtual memory.
How do I optimize Windows 10 for gaming?
Here are several ways to optimize your Windows 10 PC for gaming.
- Optimize Windows 10 With Gaming Mode.
- Disable Nagle’s Algorithm.
- Disable Automatic Update and Restart.
- Prevent Steam From Auto-Updating Games.
- Adjust Windows 10 Visual Effects.
- Max Power Plan to Improve Windows 10 Gaming.
- Keep Your Drivers Up-to-Date.
How do I make Windows 10 tweak faster?
- Change your power settings.
- Disable programs that run on startup.
- Shut Off Windows Tips and Tricks.
- Stop OneDrive from Synching.
- Turn off search indexing.
- Clean out your Registry.
- Disable shadows, animations and visual effects.
- Launch the Windows troubleshooter.
How can I improve the performance of my computer Windows 10?
In the search box on the taskbar, type performance, then select Adjust the appearance and performance of Windows. On the Visual Effects tab, select Adjust for best performance > Apply. Restart your PC and see if that speeds up your PC.
Why does Windows 10 run so slow?
One of the most common reasons for a slow computer are programs running in the background. Remove or disable any TSRs and startup programs that automatically start each time the computer boots. To see what programs are running in the background and how much memory and CPU they are using, open Task Manager.
How do I optimize Windows 10 for Daw?
20 ways to optimize your Windows 10 PC for music production
- Disable system sounds.
- Adjust your processor scheduling to Background Services.
- Adjust your PC’s power options to high performance.
- 4. Make sure your PC doesn’t suspend your USB devices.
- Disable Windows Background Apps.
- Disable Windows Updates.
- Turn of Windows Firewall and anti-virus apps.
- Switch off animated windows.
How do I fix a slow laptop with Windows 10?
How to fix Windows 10 Slow performance:
- Open Start Menu and find the Control Panel. Click on it.
- Here in the Control Panel, go to the Search field at the top-right of the window and type Performance. Now hit Enter.
- Now find Adjust the appearance and performance of Windows.
- Go to the Advanced tab and click on Change in the Virtual Memory section.
How can I speed up my laptop Windows 10?
How to speed up Windows 10
- Restart your PC. While this may seem an obvious step, many users keep their machines running for weeks at a time.
- Update, Update, Update.
- Check startup apps.
- Run Disk Cleanup.
- Remove unused software.
- Disable special effects.
- Disable transparency effects.
- Upgrade your RAM.
How can I make games run faster on Windows 10?
Help Your Games Run Better With Windows 10 Game Mode
- In the Gaming Settings window, select Game Mode from the sidebar on the left. On the right, you’ll see the option labeled Use Game Mode.
- Enable Game Mode for a Specific Game. The steps above turn Game Mode on system-wide.
- Just launch your desired game and press the keyboard shortcut Windows Key + G.
How do I make Windows 10 update faster?
If you want to allow Windows 10 to use the total bandwidth available on your device to download Insider preview builds faster, follow these steps:
- Open Settings.
- Click on Update & Security.
- Click the Advanced options link.
- Click the Delivery Optimization link.
- Turn on the Allow downloads from other PCs toggle switch.
How do I change my processor speed Windows 10?
How to Use Maximum CPU Power in Windows 10
- Right click the Start menu and select Control Panel.
- Click Hardware and Sound.
- Select Power Options.
- Find Processor power management and open the menu for Minimum processor state.
- Change the setting for on battery to 100%.
- Change the setting for plugged in to 100%.
What should virtual memory be set at Windows 10?
Increasing Virtual Memory in Windows 10
- Go to the Start Menu and click on Settings.
- Type performance.
- Choose Adjust the appearance and performance of Windows.
- In the new window, go to the Advanced tab and under the Virtual memory section, click on Change.
How do I block unnecessary processes in Windows 10?
Stopping some programs from starting up will speed up the OS. To find this option, right-click the taskbar and choose Task Manager. Tap ‘more details’ and then click on the Startup tab. Here you can disable the programs you don’t want to start up.
Why is my PC running slow?
One of the most common reasons for a slow computer are programs running in the background. Remove or disable any TSRs and startup programs that automatically start each time the computer boots. To see what programs are running in the background and how much memory and CPU they are using, open Task Manager.
Is Windows 10 better for gaming?
Windows 10 handles windowed gaming quite well. While not a quality that every PC gamer will be head over heels for, the fact that Windows 10 handles windowed gaming better than any other iteration of the Windows Operating System is still something that makes Windows 10 good for gaming.
How do I completely optimize my PC for gaming?
How to increase FPS on your PC or laptop to improve gaming performance:
- Update your graphics drivers.
- Give your GPU a slight overclock.
- Boost your PC with an optimization tool.
- Upgrade your graphics card to a newer model.
- Switch out that old HDD and get yourself an SSD.
- Turn off Superfetch and Prefetch.
How do I optimize my Internet for gaming?
Network care can get pretty technical, but here are some of the most common ways to make sure your network is optimized for gaming.
- Upgrade Your Connection. Sometimes the only solution is to just throw more bandwidth at the problem.
- Upgrade Your Router.
- Go From Wireless To Wired.
- Minimize Latency.
- Keep Drivers Up to Date.
Photo in the article by “Flickr” https://www.flickr.com/photos/usembassyta/24308975841
Time and Speed are Everything, whether you are searching for a file on the internet, Creating a Graphic Template Design or Working in other Jobs. Windows 10 is pretty fast, but it can make to run even more quickly with some tips and tricks. Those people have a Perfect Computer with Perfect hardware; they are not after an article such as How to Optimize Windows 10 For Better Performance?, infect those who have faced the Speed Problem, they need this Article. So, I hope It would be helpful for You.
These tactics which I am introducing to you, are the most important tactics for an Operating System, if this doesn’t work on your system, then you have to upgrade your RAM, and change your Hard Drive from HDD to SSD. I know these will cast you very much but instead, it will make your computer as much fast that you won’t believe.
1. Check For Updates
For a healthy and wealthy Operating System, nothing is better than the Updates of An Operating System. Because Updates brings the new features and with features, it also improves your PC Performance.
Press Windows+I to open Settings of Windows 10. select Update and Security- Windows Update then select check for updates.
If the status said your PC is up to date then you have the latest Updates of windows If the status said Updates are available, click install now to install the Update.
2. Disable Startup Unnecessary Programs
Sometimes you may have Focused that your computer takes too much time to start. Have you ever searched for it Why? There are many reasons but one of them is Startup Programs.
Startup Programs are those Programs which starts with Operating and they run in the Background. Actually many programs are designed to be started when Windows starts, that’s why many of those programs start easily, this is only helpful for programs which you are using a lot, then it is terrible for PC Performance which slows down.
To Disable Startup Programs follow these Procedures:
Step 1. Press Ctrl+Shift+Esc to open Task Manager.
Step 2. When the Task Manager Opens Visit the Startup Tab.
Step 3. Right-click on the Programmes which seems to you unnecessary and select Disable.
Many Programs running at the same time also affects the performance of your PC. First, exit the Unnecessary Background Application by visiting the show hidden Icons from the Taskbar. Also if you are logged in with a Microsoft Account, Many Applications will try to Update Automatically and they run in the background on the store, so visit the start and stop them from running.
- Stop Windows 10 Background Apps and Services
3. Check for Corrupted Windows System files
System File Checker (SFC) is a utility which scans for corrupted Files of Windows, if any windows files are deleted It restores them from a cached version of the Windows on your PC. This Utility was introduced with Windows 98 and all the Windows NT editions. Taking From Windows 7 up to Windows 10 SFC is integrated with Windows Resource Protection (WRP), which Protects registry keys, folder, and Critical System Files. SFC in Windows Vesta used to search for Specific Folder Paths, which includes the Windows Folder and the BootFolder.
There are four commands for SFC:
- Scannow: it scans all protected system files and repairs files with problems when possible.
- VerifyOnly: It only for all protected system files It will not apply any repair operation.
- ScanFile: It Scans for the referenced file, repairs file if problems are identified.
- VerifyFile: It only Verifies the integrity of the file with full path.
Follow the Procedures to Maintain Windows 10 Performance:
Step 1. Open Cmd as Admin.
Step 2. Type their SFC /Scannow and Press enter.
Note: For Complete Syntaxes and Explanations type SFC /? on Cmd, that must be run as Administrator.
Note 1: Sometimes SFC /Scannow won’t work, and it doesn’t have the ability, that time Microsoft is saying you can use the Deployment Image Service and Management Tool (DISM).
How to Use the Dism For Maintaining Windows 10?
Dism is cmdlet which enumerates, installs, uninstalls, configures, and updates features and packages in Windows images. The available commands depend on the image being serviced and whether the image is offline or running. Dism Searches for corrupted files, and when it finds them it will search for the Files Online, and when it finds them it will fix those files.
Step 1. Open cmd as Administrator.
Step 2. Type their dism.exe /Online /Cleanup-image /Restorehealth and press Enter.
Note: For Complete syntaxes of the Dism, type Dism /? On cmd which must be run as Administrator.
4. Adjust the Appearance and Performance of Windows
Windows 10 has many features inside it, including Visual Effects. Visual Effects in Windows 10 are those Effects which give to the Windows a Better look, such as Animations and shadow effects. It Effects at that time your computer has less RAM.
Follow the Procedures to Disable the Visual Effects:
Step 1. in the search box on the Taskbar type Performance, After that Select, Adjust the appearance and performance of Windows. Or Open Run Dialog Box and type Sysdm.cpl, this will the System Properties, then visit the Advanced Tab and select settings.
Step 2. When the Visual Effects Page opens, you can see that there are three options for you. Select the third option, which is Adjust for best Performance and click ok.
5. Change the Paging file Size to Improve Performance
Paging File which is also called swap file, pagefile, or paging file, is a file on your hard drive. By default, it is hidden and is located in C:Pagefile.sys, but you are not allowed to visit it. Our computer stores files, programs, and other data in the RAM because it’s much faster to read from RAM than a HardDisk or in other words, it supports system crush Dumps which enables the system to use Physical RAM.
Follow the Procedures to change the Page File Size.
Step 1. In the Search box on the Taskbar, type advanced system then select View advanced system settings.
Step 2. On the Advanced Tab select Settings, then on the Performance tab visit the Advanced tab.
Step 3. On the Virtual Memory section, select Change.
Step 4. Clear the Automatically manage paging file size for all drives checkbox.
Step 5. Select Custom size, then enter an initial size (in MB) and maximum capacity in the corresponding boxes.
Step 6. When all the settings are done click set and click ok.
6. Turn On Game Mode
If you are playing too many games or in other words, you are a gamer, then you have to use this feature. When Windows 10 Creator Updates was Released, Microsoft Included a New Feature inside the settings of Windows 10, which is Gaming especially if you are using Xbox. Inside the Gaming, on the Settings, it has a Features called Game Mode. If you turn on this Features, it will help you to play the game even more smoothly.
Step 1. Press Windows+I to open settings.
Step 2. Select Gaming, Gaming and choose Turn on the feature called Use Game Mode.
Conclusion:
That’s all, and I hope this article helped you with How to Optimize Windows 10 For Better Performance? If you liked this article, then please subscribe to our YouTube Channel, follow and like us on Twitter and Facebook.
hp-concentra-wrapper-portlet
![]()
Actions
Perform regular maintenance to improve the performance of your computer.
Optimize the PC with HP Performance Tune Up Check
Use HP Performance Tune Up Check in HP Support Assistant to optimize system performance for your computer.
-
In Windows, search for and open HP Support Assistant, or click the app icon
 in the taskbar.
If the app is not installed on your computer, download the latest version from the HP Support Assistant website.
-
If the tool does not automatically open, select your device, click Troubleshooting and fixes, and then click Performance Tune-up Check.
-
Under Additional Options, select Empty Recycle Bin and Clean Web-browsers history, cookies and cache, and then click Optimize.
Free up space on the hard drive
Increase the amount of unused space (free space) on the hard drive to prevent low disk space errors and improve system performance.

-
In Windows, search for and open Storage settings.
-
View how much space is available on the hard drive (C: drive is the most common).
For best performance, the drive should have at least 15% free space. If the hard disk drive has less than 15% free space,
continue with these steps -
Under the C: drive, select each category to determine where you can free up the most space. The most common categories where
you can free up space are Apps & games, Temporary files, Documents, and Pictures.CAUTION:
RECOVERY (D:) or FACTORY_IMAGE (D:) hard drives are reserved for system recovery and removing files from these drives can
damage your computer.
-
Move any files you want to keep to a USB drive or external hard drive to help free up space. This is highly recommended for
larger files not needed for daily use, such as pictures and videos. -
Remove any unwanted files and applications, and then restart the computer.
Update the PC with HP Support Assistant
Use HP Support Assistant to find and install updates, including BIOS updates, for your computer with Windows.
-
In Windows, search for and open HP Support Assistant, or click the app icon
in the taskbar.
If the app is not installed on your computer, download the latest version from the HP Support Assistant website.
-
On the My devices tab, find your computer, and then click Updates.
-
Click Check for updates and messages to get the latest updates.
-
Wait while HP Support Assistant analyzes the system.
-
After the analysis completes, select the listed updates, download and install the updates, and then follow any on-screen instructions.
-
If prompted, restart the computer, and then close the tool.
Update hardware drivers
Use Device Manager to update hardware drivers such as the graphics, audio, wireless, or other drivers for your computer.
-
In Windows, search for and open Device Manager.
-
In the list of devices, select each category.
-
Right-click the device, select Update driver, and then follow the instructions to install the updated driver.
-
Restart the computer to complete installation of the updates.
Empty the Recycle Bin
Empty the Recycle Bin to increase the amount of unused space (free space) on the hard drive.
-
On the Windows desktop, double-click the Recycle Bin icon
.
-
To restore any mistakenly deleted items, right-click the file(s), and then select Restore.
-
Click the Manage tab, and then select Empty Recycle Bin.
-
Select Yes to confirm.
Windows removes the contents of the Recycle Bin from the hard drive.
Delete temporary files and directories
Delete temporary files and folders to increase hard drive space and reduce the time Windows takes to access the hard drive.
-
In Windows, search for and open Disk Cleanup.
-
Select the drive you want to delete the files from, and then click OK.
-
Wait while Disk Cleanup calculates how much space you can free on the selected drive.
-
After the analysis completes, select the check box next to the types of files you want Disk Cleanup to delete.
CAUTION:
Selecting some options can have a negative effect. For example, selecting Setup Log Files deletes the files that online phone
support agents use to help troubleshoot setup problems. Click a file type, such as Temporary Internet Files, to display a
description. Do not delete files until you know the files are unnecessary for using your computer. -
Click OK, and then click Delete Files when prompted.
Disk Cleanup deletes the selected files.
Check for hard drive errors
Check the hard drive for errors that might impact system performance.
-
Close all open software applications on your computer.
-
In Windows, search for and open File Explorer, or click the app icon
on the taskbar.
-
After File Explorer opens, right-click the hard drive you want to check, and then click Properties.
-
On the Properties window, select the Tools tab.
-
Under Error Checking, click Check.
If a window displays prompting you for an administrator password or confirmation, type the requested credentials.
-
On the Error Checking window, select Scan drive.
-
Wait while Windows checks the drive for errors, and then follow the prompts to fix any issues.
If a window displays with a Windows can’t check the disk while it’s in use message, click Schedule disk check. Follow the on-screen instructions to restart the computer, and then scan the drive for errors.
Defragment the hard disk drive
Defragment the hard disk drive with the Optimize Drives tool to organize the hard drive and improve the performance of the
system.
CAUTION:
These steps do not apply for computers with solid state drives (SSD). Never defrag an SSD, as this does not improve performance
and might harm the drive.
-
In Windows, search for and open Defragment and Optimize drives.
If Optimize Drives repeatedly starts, a hidden background program might still be accessing the hard drive. Restart the computer
in safe mode, and then try again. -
Select the drive you want to defrag, and then click Optimize.
-
Wait while the tool defrags the drive. This could take a few minutes or a few hours, depending on the amount of data on your
hard disk drive. If you need to stop the tool, click Stop.
Run Windows Update
Update your Windows 11 or Windows 10 computer using Windows Update.
-
In Windows, search for and open Check for updates.
If there are any available updates, they begin automatically.
Note:
To download and install optional updates, use the following instructions for your operating system:
-
In Windows 11, select Advanced options > Optional updates, select the updates that you want to install, and then click Download & install.
-
In Windows 10, select View all optional updates, select the updates that you want to install, and then click Download and install.
-
-
After the updates install, restart your computer when prompted.
Remove viruses and spyware
Remove adware, spyware, or virus that might be installed on the computer.
Scanning for and removing viruses and spyware from the PC (Windows 10)
Use Windows Security to scan for and remove any viruses, spyware, or other malware from the computer.
-
Quick scan: A quick scan checks the places on the hard disk drive that malware is most likely to infect.
-
Full scan: A full scan checks all files on your hard disk drive and all currently running applications. If you suspect that malware
has infected your computer, run a full scan. The scan might take over an hour to complete, and the computer might run slowly
during the scan. -
Custom scan: A custom scan checks specific computer drives and files that you select.
-
Windows Defender Offline scan: A Windows Defender Offline scan checks for rootkits or highly persistent malware on your computer. Select this option to
check for malware outside of the normal Windows system. The scan might take 15 minutes to complete, and the computer restarts
as part of the scan.Note:
HP recommends using the Windows Defender Offline scan if you suspect your computer is infected with malware or a virus.
-
In Windows, search for and open Windows Security, and then select Virus & threat protection
.
-
Click Quick scan, Scan options, or Run an advanced scan, and then select the type of scan you want to run.
-
If you choose Quick scan, the scan begins.
-
If you choose Scan options, continue with these steps to run a full system scan, a custom scan, or a Windows Defender Offline scan.
-
-
Select one of the following options, and then click .
-
If you choose Full scan, the scan begins.
-
If you chooseCustom scan, select the specific drives or folders to scan, and then click Select Folder.
-
If you choose Windows Defender Offline scan, save any open files, and then click Scan. If a User Account Control window opens, click Yes.
Note:
The computer restarts when an offline scan completes.
-
-
Wait for the scan to finish, and then view the results.
If your computer restarted during the scan, search for and open Virus & threat protection, and then click .
Protection history provides a list of all threat Windows Security has ever identified for the computer.
Note:
For earlier versions of Windows 10, click Threat history.
-
For additional information, click See full history.
-
If no threats were detected, no action is necessary.
-
If threats were detected, choose from the options that display, such as Clean threats or Start actions, to resolve the threat.
-
Find and replace corrupted system files
Use the Microsoft System File Checker (SFC) to repair corrupted or damaged system files.
-
In Windows, search for Command Prompt.
-
In the list of search results, right-click Command Prompt, select Run as administrator, and then click Yes to open the window.
-
Type sfc /scannow. Make sure to include the space between sfc and the forward slash /.
-
Press Enter to start the scan.
-
If corrupted files were found, wait for the tool to replace the files, and then restart the computer.
-
If no corrupted files were found, corrupted could not be replaced, or if the issue persists, continue with these steps.
-
-
Make sure your computer is connected to a network with an active internet connection.
-
In the Command Prompt window, type dism.exe /Online /Cleanup-image /Restorehealth. Make sure to include the space before each forward slash /.
-
Press Enter, to start the Deployment Image Servicing and Management (DISM) scan.
-
Wait for the tool to replace any corrupted files, and then restart the computer.
Open only needed apps
Restart your computer, and then open only the apps you need.
-
In Windows, select Start, select Power, and then select Restart.
-
After the computer restarts, open only the apps or programs you need.
-
After you finish using an app, click the X to close the app.
Use the Program Compatibility Troubleshooter
Some apps that were designed for an earlier version of Windows might not work as expected with current versions of Windows
10.
-
In Windows, search for and open Troubleshoot.
-
Scroll down the screen, select Program Compatibility Troubleshooter, and then click Run the troubleshooter.
-
Select the app you want to check, and then click Next.
-
Select an option, and then follow the on-screen instructions to test or change the compatibility settings.
Find apps that use excessive system resources
Use Task Manager to find and stop processes or applications using an excessive amount of system resources.
-
In Windows, search for and open Task Manager.
Task Manager displays currently-running applications.
-
Click More Details, and then select a tab for more information.
-
Processes: Displays all the currently-running operations and how much of the system resources are being used by each process. Some
processes are necessary and should not be stopped. If you are unsure if a process is necessary, search for details about it
on the internet. -
Performance: Displays a visual representation of the overall system performance. Click Open Resource Monitor for an even more detailed view of individual processes.
-
-
On the Processes tab, if you want to close an app, or if the app is listed as Not Running, click End Task.
Select apps to open when Windows starts
A startup application is software that opens when Windows opens. Over time, as you install more and more apps, the number
of startup applications increases. Common apps that load and run in the background are instant messaging apps, multimedia
apps, game launchers, and toolbars. You can improve system performance by stopping some of these apps from opening, or by
changing their settings.
-
In Windows, search for and open Task Manager.
-
Click More details, and then select the Startup tab.
-
Select any startup items that do not contribute to the system and are unwanted, then click Disable.
CAUTION:
Disable only those startup items that are known and unwanted.
-
Restart the computer.
-
If Windows or other software stops working after you disable a startup item, reverse these steps to enable the item.
Turn off non-essential graphical features
Turn off graphical features and applications that use a lot of system resources or that you do not need or want.
-
In Windows, search for and open Adjust the appearance and performance of Windows.
-
On the Performance Options window, select Adjust for best performance, and then click OK.
Windows turns off all visual effects, such as animation of the taskbar and windows elements, displaying shadows under windows,
displaying window contents while dragging, etc.
Prevent memory allocation problems
Isolate apps or processes that are no longer in use that might be using unnecessary memory resources.
Memory is allocated to processes in device drivers and applications during normal use. The allocated memory is made available
again when the process is no longer running. However, sometimes memory remains allocated. This is known as a memory leak.
On rare occasions, an incompatible app might continue to allocate memory while it is running, causing the system to slow down
and eventually lock up.
-
Close all open software applications or programs, making sure to allow apps time to fully open before closing them.
HP recommends waiting five seconds after an app opens before you close it, even if the app was opened unintentionally.
-
Restart the computer.
-
In Windows, search for and open Task Manager.
-
Click More details, select the Performance tab, and then select Memory.
-
Click Open Resource Monitor to view how your computer uses memory.
If a window displays prompting you for an administrator password or confirmation, type the requested credentials.
-
On the Overview tab, open the Memory section, and then scroll down the list to view which apps are using memory.
-
Open an app suspected of causing the computer to run slowly, review the percentage of Used Physical Memory, and then write down the information.
-
Close and reopen a suspected app repeatedly, and then check the percentage of Used Physical Memory, comparing this number
to the one recorded. Each time, wait about 10 seconds before opening the app again.-
If the Used Physical Memory percentage returns to the same numbers or similar each time, the suspected app is probably not
creating a memory leak. -
If the percentage of Used Physical Memory continues to increase, there is a memory leak. Contact the software manufacturer
for available patches or fixes.
-
Use ReadyBoost
Use ReadyBoost with a removable drive to improve system performance without adding more RAM to the computer.
-
Make sure you have a removable drive, such as a USB flash drive, with a high data transfer rate and at least 500 MB of free
space. -
Insert the removable drive into the appropriate port on the computer.
-
In Windows, search for and open File Explorer.
-
In File Explorer, right-click the removable drive, and then select Properties.
-
On the Properties window, select the ReadyBoost tab, and then selectReadyBoost.
-
Move the slider to the set the space to reserve for system speed, reserving at least 9048 MB for optimal performance.
-
Click OK to reserve the space on the removable drive for ReadyBoost and save the settings.
On the removable drive, the space reserved for ReadyBoost is saved in a file named ReadyBoost.sfcache.
Change the paging file size
The paging file is an area on your hard drive that Windows uses like memory. Increasing the paging file size can help speed
up the computer and improve performance.
-
In Windows, search for and open Control panel.
-
In the search field, type System, and then select System from the results.
-
Select Advanced system settings.
-
In System Properties, select the Advanced tab, and then click Settings.
-
In Performance Options, select the Advanced tab, and then click Change.
-
Clear the check mark from Automatically manage paging file size for all drives.
-
Select Custom size, and then type a minimum and maximum size. Use the minimum allowed, recommended allowed, and currently allocated paging file
sizes listed at the bottom of the window to choose a size. -
Close the system windows, and then restart the computer.
Reduce heat inside the computer
When temperatures inside the computer rise above 35º C (95º F), the risk of damaging important internal components increases.
Decrease the risk by reducing the heat inside the computer.
Clean the desktop air vents
Clean the desktop air vents to remove any dust or debris that might have accumulated in and around the air vents over time,
obstructing the airflow and causing the fans to work harder than normal to remove the heat.
-
Turn off the computer, disconnect the power cord and cables, and then wait for the computer to cool down.
-
Use a vacuum to clean all exterior vents, especially around the power supply vent.
CAUTION:
To avoid damaging internal components, do not use the vacuum inside the computer.
-
Remove the side panel back from the computer.
-
Use canned air to clean the fans and components inside the computer.
-
Replace the side panel, reconnect the power cord, and then turn on the computer.
Clean the notebook air vents
Clean the notebook air vents to remove any dust or debris that might have accumulated in and around the air vents over time,
obstructing the airflow and causing the fans to work harder than normal to remove the heat.
-
Turn off the computer, disconnect the power cord and cables, and then wait for the computer to cool down.
-
Move any objects near the computer.
-
Find the vents on your laptop. They are usually underneath and on the sides of the computer.
-
Use canned air to remove the dust from the vents.
-
Wait for the computer to cool down, approximately 10 minutes.
-
Reconnect the power cord, and then turn on the computer.
Upgrade memory
Upgrading the random-access memory (RAM) in your computer can improve system performance, increase browsing speed, or provide
a for better gaming experience.
Find memory specifications
Use the Maintenance and Service Guide to find installed memory information for your computer .
-
Go to HP Customer Support.
-
Scroll down the page to type your computer model in the search field, and then click Submit.
-
Select User Guides, and then select the Maintenance and Service Guide for your computer.
If the Maintenance and Service Guide is not listed, select the specifications document for your computer.
-
Consult the Memory section for more information about the following items:
-
Memory module specifications
CAUTION:
Some motherboards are not able to configure memory modules with different manufacturers, or different CAS or density values.
Make sure all SO-DIMMs have the same part number to ensure compatibility. -
Memory module spare part numbers
-
Compatible processors
-
Types of RAM
-
Number of memory slots
-
Amount of memory installed
-
Maximum memory supported
-
Type of memory, including speed
-
Turn off OneDrive file sync
Turn off automatic syncing of files between your computer and OneDrive.
-
In the Notification area of the taskbar, click OneDrive
.
-
In the OneDrive options, click More
, and then select Pause Syncing from the menu.
-
In the Pause syncing menu, select a length of time to pause syncing.
-
Restart your computer.
HP PCs — Reset the computer
The Windows 10 reset feature reinstalls the operating system without losing any of your personal data and customizations.
Back up personal files on the PC
Back up the personal files on your Windows 10 computer.
-
Connect an external drive to the computer.
-
In Windows, search for and open Backup settings.
-
Click Add a drive, and then select a drive.
-
Click More options.
-
Click Back up now, and then wait for the back up to complete. This might take a few minutes or a few hours, depending on the size of the files.
Reset the PC (Windows 10)
Reset your computer with a fresh installation of Windows 10.
-
In Windows, search for and open Recovery options.
-
In the Recovery screen under Reset this PC, click Get started.
-
Follow the instructions to reset your computer. This might take a few minutes.
Restore personal files on the PC
Restore the personal files on your Windows 10 computer.
-
Connect an external backup drive to the computer.
-
In Windows, search for and open Backup settings.
-
Click More options.
-
Scroll to the bottom of the Backup options screen, and then click Restore files from a current backup.
-
Select the files you want to restore, click the Restore button, and then wait for Windows to restore your personal files. This might take a few minutes or a few hours, depending
on the size of the files.