- 06.09.2019
В Windows Server 2016 существует возможность апгрейта (обновления) до Windows Server 2019, все настройки и файлы при этом сохраняются. Установка Windows Server 2019 возможна так же к примеру из под Windows 10, но в этом случае сохранить личные файлы при данном способе обновления будет невозможно.
1) Прежде чем приступить к обновлению убедитесь в следующих важных аспектах:
1. Не обслуживает ли сторонняя компания данный сервер? У них могут быть свои ньюансы, уточните пожалуйста, если Вы не главный администратор данного сервера.
2. Не защищены ли диски данного сервера шифрованием BitLocker? Иначе при обновлении необходимо будет их расшифрование.
3. Не является ли сервер одной частью отказоустойчивого кластера?
4. Есть ли свободное место на жестком диске для обновления (Минимум 8гб HDD).
5. Обязательно сделайте резервное копирование данного сервера.
6. Убедитесь, что сервер полностью исправлен. Настоятельно рекомендуется, что бы на данном сервере как железо, так и с софтверной частью все корректно работало.
2) Скачайте и запустите установочный файл Windows Server 2019. Скачать можете на следующей странице.
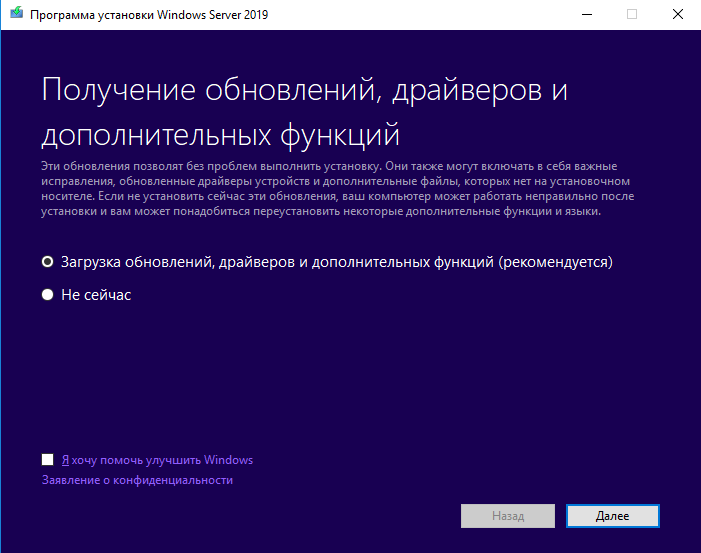
3) Рекомендуется загрузить обновления сразу, так же загрузятся автоматически драйверы и дополнительные функции.
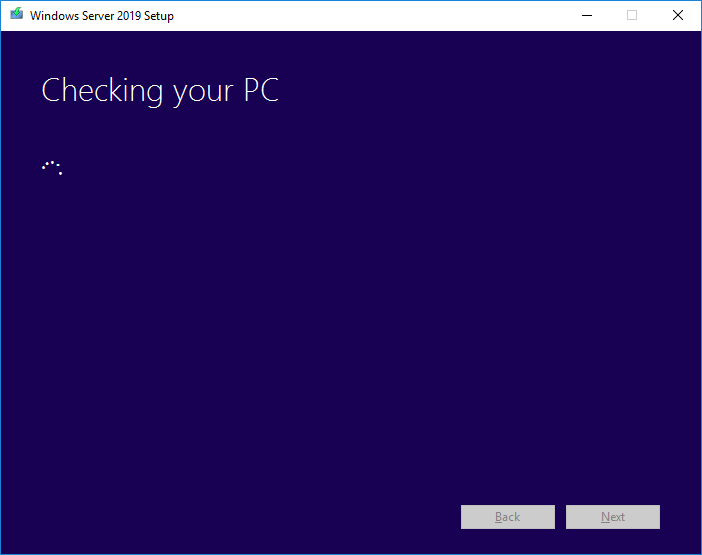
4) Программа установки проверит конфигурацию Вашего компьютера (сервера).
5) На следующем этапе в зависимости от Вашей исходной операционной системы у Вас может запросить лицензионный ключ активации для Windows Server 2019, что бы продолжить дальше.
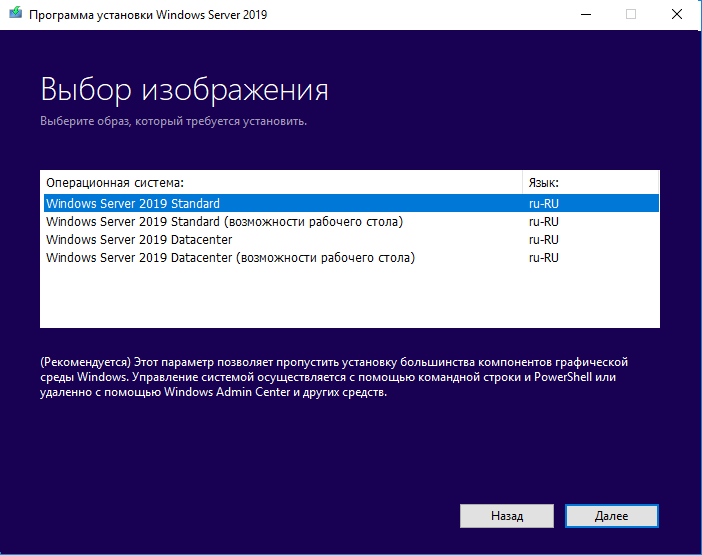
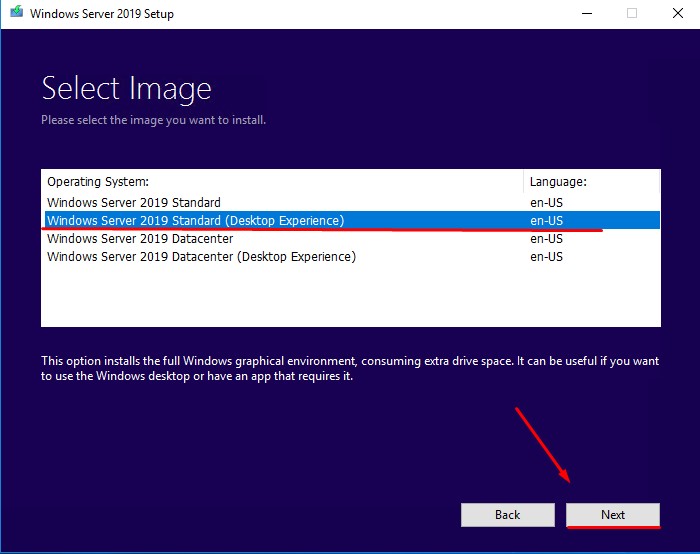
6) На данном этапе Вам предложат выбрать нужную Вам редакцию Windows Server 2019.
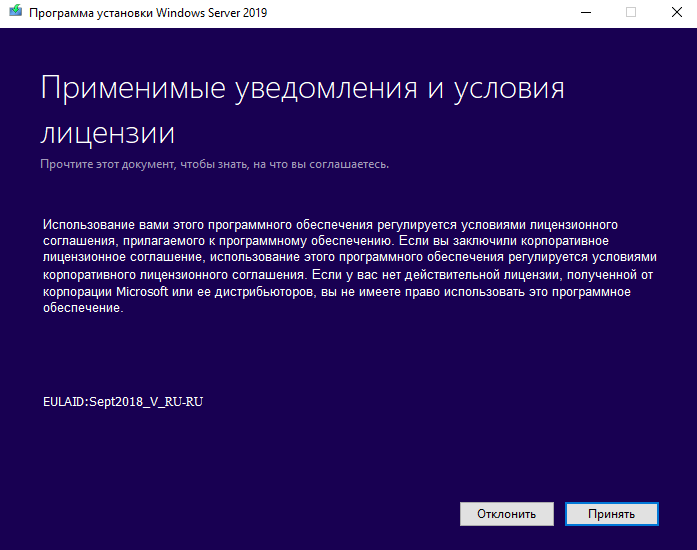
7) Принимаете лицензионное соглашение.
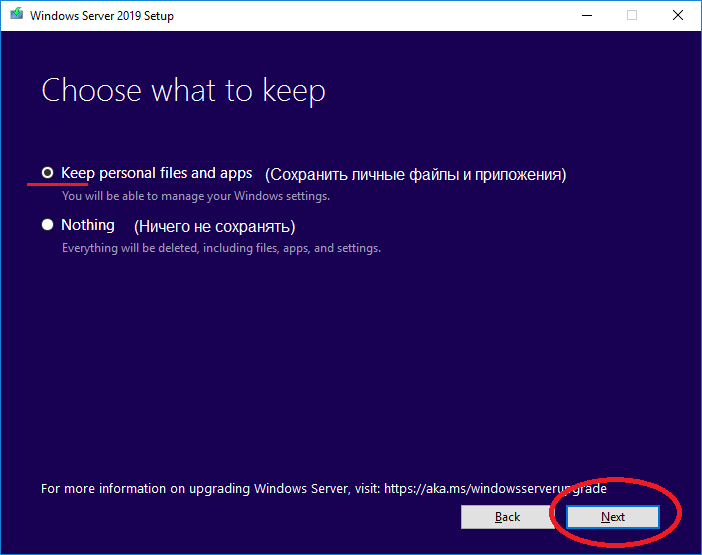
 Выбираете первый вариант для сохранения личных файлов и приложений при обновлении.
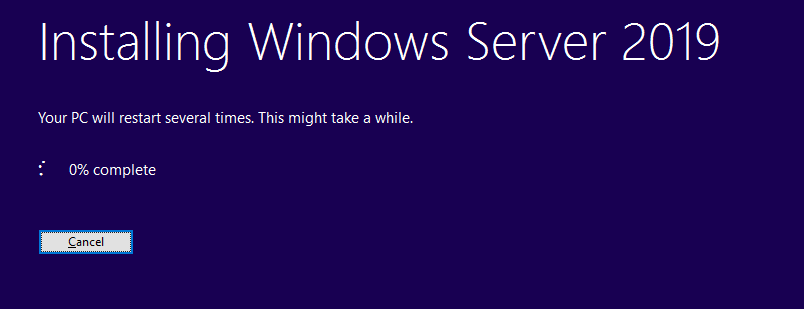
9) Устанавливаем обновление. Сервер несколько раз перезагрузится до завершения обновления.

После установки и завершения обновления, зайдите в свойства системы и убедитесь, что обновление произведено до Windows Server 2019.
Задача: Проработать обновление Windows Server 2016 до Windows Server 2019
Как по мне использовать обновление серверной операционной системы Windows с одного релиза на другой с установленными сервисами – это обрекать себя на получение дополнительных проблем и порой не понимания, а почему сервисы перестали работать. Уж лучше развернуть их заново с нуля по своим наработкам, да долго и время, но так Вы будете уверены, что работает как нужно. Я хочу в тестовых условиях под Debian 10 + Proxmox 6 проработать процедуру обновления виртуальной машины Windows Server 2016 Standard установленной из образа: SW_DVD9_Win_Server_STD_CORE_2016_64Bit_English_-4_DC_STD_MLF_X21-70526.ISO. Возможно и буду использовать данную заметку, а возможно и нет, все решит случай.
Требования:
RAM: не менее 4GbHDD: на логическом диске C: должно быть свободно не менее 40GbEth: потребуется выход в интернет или доступ к WSUS сервису для выкачивания обновлений.Права локального администратора в системеСлужба Windows Updates должна быть включена
Шаг №1: Запускаю VM srv-s2016 под Debian 10 + Proxmox 6
Шаг №2: Копирую дистрибутив Windows Server 2019 в систему.
У меня в моей локальной сети есть ресурс где лежат книги, программы, образа. С этого ресурса копирую образ Windows Server 2019 Std (SW_DVD9_Win_Server_STD_CORE_2019_1809.18_64Bit_English_DC_STD_MLF_X22-74330.ISO)
Шаг №3: Проверяю, что VM той редакции, которая нужна:
|
C:Windowssystem32>reg query «HKLMSOFTWAREMicrosoftWindows NTCurrentVersion» /v EditionID HKEY_LOCAL_MACHINESOFTWAREMicrosoftWindows NTCurrentVersion EditionID REG_SZ ServerStandard C:Windowssystem32>systeminfo | findstr /I «OS Name» Host Name: WIN—AAURVT4CB0C OS Name: Microsoft Windows Server 2016 Standard OS Version: 10.0.14393 N/A Build 14393 OS Manufacturer: Microsoft Corporation OS Configuration: Standalone Server OS Build Type: Multiprocessor Free BIOS Version: SeaBIOS rel—1.14.0—0—g155821a1990b—prebuilt.qemu.org, 4/1/2014 Time Zone: (UTC+03:00) Moscow, St. Petersburg, Volgograd Connection Name: Ethernet |
Все правильно.
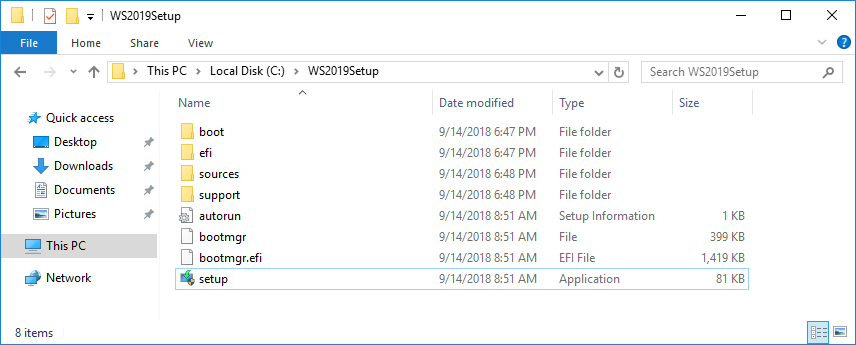
Шаг №4: Распаковываю образ Windows Server 2019 Std, понадобится архиватор 7zip и запускаю процедуру обновления:
Запускаю C:SoftSW_DVD9_Win_Server_STD_CORE_2019_1809.18_64Bit_English_DC_STD_MLF_X22-74330setup.exe – Run as Administrator — выбираю вариант "Download updates, drivers and optional features (recommended) / Скачать обновления, драйверы и дополнительные компоненты (рекомендуется)"
I want to help make the installation for Windows better Privacy statement: снимаю галочку
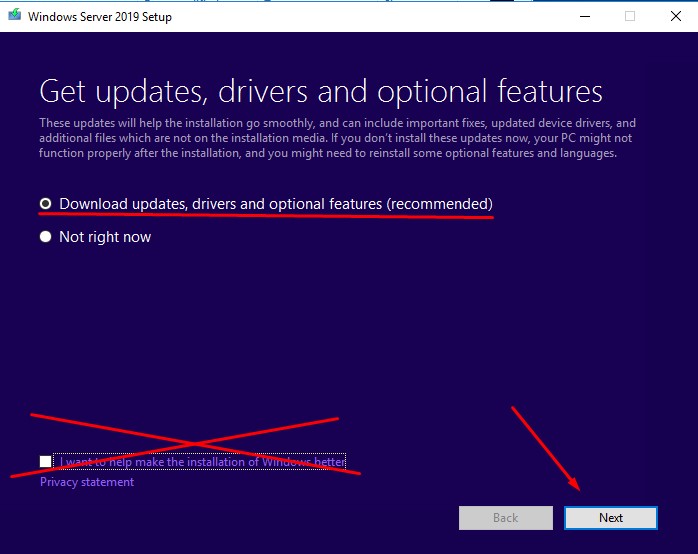
И нажимаю Next
Выбираю выпуск Windows Server 2019 который в итоге будет, для меня это Windows Server 2019 Standard (Desktop Experience) и нажимаю Next
Нажимаю Accept
Choose what to keep: выбираю Keep personal files and apps (Сохранить личные файлы и приложения)
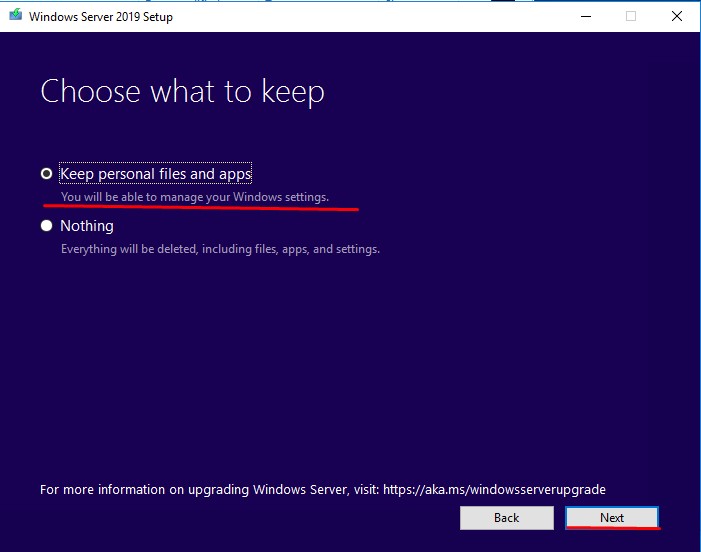
И нажимаю Next
Ожидаю, идет проверка
Getting updates
This may take a few minutes.
В итоге проверка завершается успешно, и установщик готов приступить
Ready to install
You won’t be able to use your PC while Windows installs. Save and close your files before you begin.
To recap, you’ve chosen to:
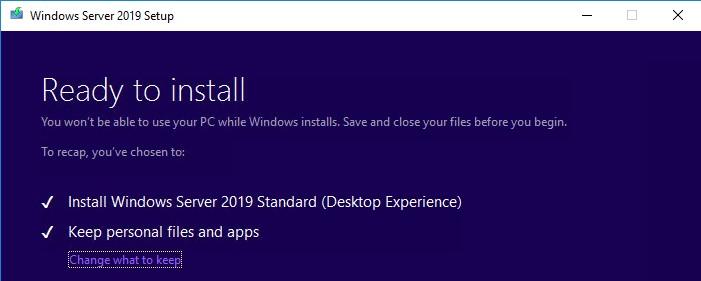
И нажимаю Install
Система по завершении самостоятельно отправится в перезагрузку
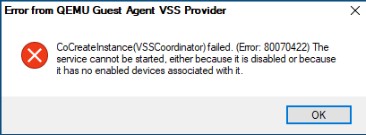
Вот что я получил в консоли Proxmox по этой VM, когда наблюдал за процессом обновления, но после снова продолжился процесс обновления как ни в чем не бывало.
Шаг №5: Система загрузилась, и я проверяю какая сейчас редакция:
|
C:UsersAdministrator>systeminfo | findstr /I «OS Name» Host Name: WIN—AAURVT4CB0C OS Name: Microsoft Windows Server 2019 Standard OS Version: 10.0.17763 N/A Build 17763 OS Manufacturer: Microsoft Corporation OS Configuration: Standalone Server OS Build Type: Multiprocessor Free BIOS Version: SeaBIOS rel—1.14.0—0—g155821a1990b—prebuilt.qemu.org, 4/1/2014 Time Zone: (UTC+03:00) Moscow, St. Petersburg Connection Name: Ethernet |
Отлично в тестовых условиях процесс обновления прошел успешно, а что до боевого, ну знаете я, пожалуй, пасс. Лучше работающий сервис чем после обновления не работающий вовсе. На этом заметка завершена, с уважением автор блога Олло Александр aka ekzorchik.
Introduction
This document provides information about upgrading Windows Server 2016 to Windows Server 2019. Before you begin, ensure that you have a valid Windows Server 2019 key and the installation media. You can perform the upgrade from DVD, from a mounted ISO, or from files extracted from an ISO image.
Direct upgrades from Windows Server 2008 R2 to Windows Server 2019 are not supported.
Before You Begin
The Windows Server 2019 Setup wizard is straightforward and requires the following input:
| Download Updates | Select if you want to download Windows updates during the installation. |
| Product Key | Enter your Windows Server 2019 product key. |
| Select Image | Select Windows Server 2019 Standard (Desktop Experience). |
| Notices and license terms | Read and accept the Windows Server 2019 notice and license agreement. |
| Choose what to keep |
Keep personal files and apps (in-place upgrade) or keep nothing (fresh install). If you are upgrading an existing LogRhythm system, select Keep personal files and apps. If you are performing an upgrade, the setup wizard asks you to confirm your selection later. |
| Confirm installation options | Before starting the installation of Windows Server 2019, you will be prompted to confirm your image and upgrade/fresh install selection. |
System Requirements
LogRhythm 7.9.0 or later is required before upgrading Windows Server. LogRhythm 7.9.0 introduced support for Windows Server 2019 on standard deployments; however, Windows Server 2019 is not required. Before upgrading to Windows Server 2019, upgrade to LogRhythm 7.9.0 or later.
High Availability and Disaster Recovery
Upgrading Windows Server to 2019 on existing High Availability (HA) and Disaster Recovery (DR) environments is not supported.
Microsoft Licensing
LogRhythm customers may or may not be entitled to an update to Windows Server 2019.
LogRhythm appliances are shipped using the latest operating system license available at the time of purchase. However, appliances may be shipped with older operating systems depending on software support at the time of shipment.
- If you purchased hardware from LogRhythm on or after Nov. 1, 2020, you purchased a Server 2019 license from LogRhythm. This license can be used to upgrade the operating system. You can use and validate your license by looking at the license sticker on top of the server. If you are unable to locate the license, you can open a support case.
-
If you purchased hardware prior to Nov. 1, 2020, you must provide your own Server 2019 license to upgrade.*

*Customer-provided Windows Server licenses fall outside the scope of LogRhythm Support. LogRhythm will no longer be able to work with Microsoft or Dell on behalf of the customer should there be any operating system issues. Customers will need to work directly with Microsoft.
Upgrade Instructions
To upgrade Windows Server 2016 to Windows Server 2019, do the following:
- Log in as an administrator on the server you want to upgrade.
- Insert the Windows Server 2019 DVD or mount the installation ISO.
- Browse to the root of the installation media and double-click setup.exe.
The Windows Server 2019 Setup window appears. -
Follow the steps in the wizard according to the guidance in the Before You Begin section above. Note the following:
-
If you are upgrading from a DVD, you may be prompted to boot from DVD. You can let the request time out and the upgrade will continue.
-
When the upgrade is almost finished, a screen will indicate that settings are being finalized. When the upgrade is finished, you will be presented with the Windows Server 2019 login screen.
-
-
After logging in, verify that all LogRhythm services have started and are functioning normally.
In this blog I am sharing how I upgraded my Windows Server 2016 Hyper-V host that been running an Intel NUC for a solid 3 years now to Windows Server 2019. Before anything else I’m taking my collecting my current server info (reference link: here)
- Open a command prompt and type systeminfo.exe.

- Copy, paste the info to a notepad or OneNote save to another device or storage other than the machine that will be upgrading.
- Type ipconfig /all and take note of the IP settings.
- Open the Registry Editor this this hive:
HKLMSOFTWAREMicrosoftWindows NTCurrentVersionand take note the Windows Server BuildLabEx (version) and EditionID (edition).
It’s also worth the trouble to that we backup the operating system, apps, and virtual machines.

As you can see above, we can’t have any virtual machines running during the in-place upgrade process, so we have to make sure that they are turned off.
Now, after this checklist are met, it’s time to launch the Windows Server 2019 installer.

If you are prompted a UAC – click Yes.

The next screen will ask for either Download updates, drivers and optional features (recommended) or Not right now options, if your device is internet-connected you may select the first option and then select Next.

Enter your Windows Server 2019 Product, in this example I have a Standard License (you won’t see any Datacenter options here).
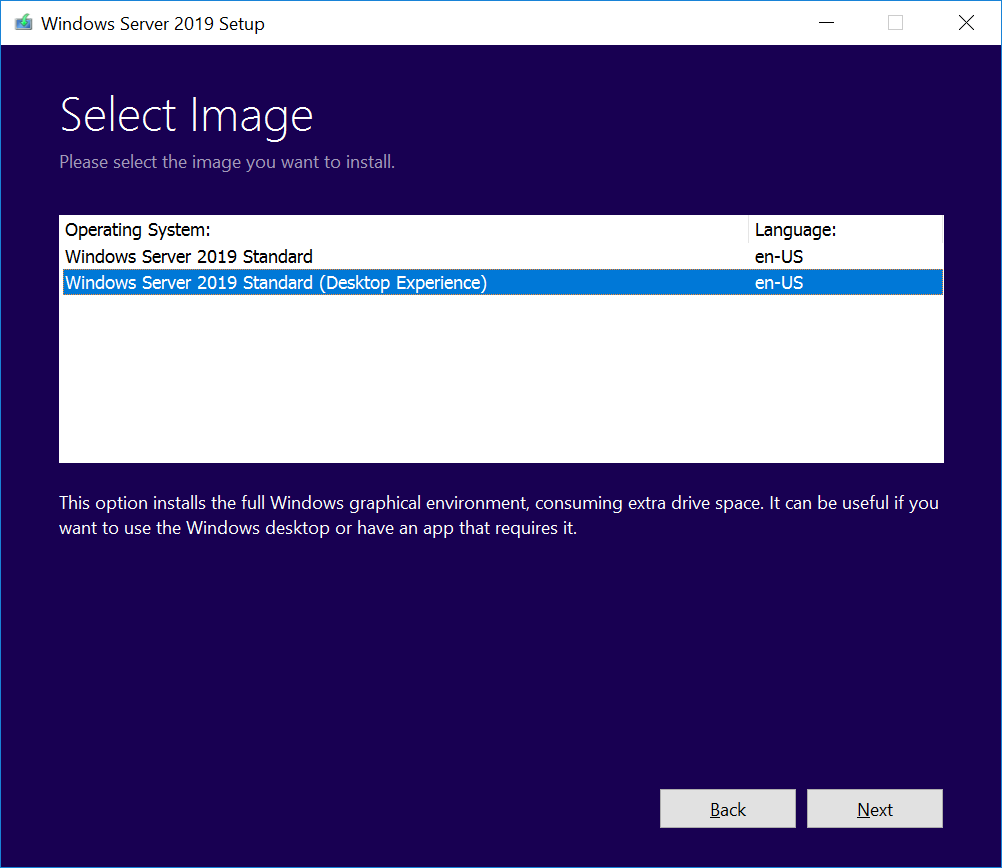
I selected the Windows Server 2019 Standard (Desktop Experience) then clicked Next.

Select Accept to accept the terms of your licensing agreement

On the next screen you may select to Keep your personal files and apps or just wipe everything, I have chosen the keep my files, then I clicked Next.

The setup will then analyzes the device and will call your attention if needed (same in the example above of the running VMs), once all is good to go it will prompt you to proceed with the Installation.

Click install to proceed.

After the upgrade is completed, verify that the upgrade to Windows Server 2019 was successful by going the the System Properties.

Now this Windows Server 2019 is ready.

The Windows Server 2016 is a cloud-ready operating system that delivers new layers of security and Azure-inspired innovation for the applications and infrastructure. If you would like to try this out in a lab environment, download it here. In some of my other posts, We have gone through the installation of Windows Server 2016 and the installation of Windows Server 2019. Also, I have configured and deployed Windows 10 via Windows Deployment Services (WDS).
See these guides for more information on how to set up a VM via PXE boot on a Generation 1 VM and how to set up a VM via PXE boot on a Generation 2 VM. Note: You can do an in-place upgrade from Windows Server 2012 R2 to Server 2019.
On my Windows Server 2016 lab VM. I mounted the Windows Server 2019 iso file, so let’s upgrade. In my next article, I will be demonstrating how a server can be upgraded from WS 2012 to 2019. As you can see below, we are currently running Windows Server 2016, Datacenter Evaluation Edition.

Here are the Windows Server 2019 Install Options;
– Server Core: It’s a smaller installation that includes the core components of Windows Server and supports all server roles, but does not include a graphical user interface (GUI).
– Server with Desktop Experience: This is the complete installation and includes a full GUI for customers.
Windows Server 2016 requires a direct upgrade process unlike Windows Server 2012. We will be proceeding with the installation as shown below.
– Mount the WS 2019 ISO Image on WS 2016 VM as shown below. Download Virtual Clone in order to do this.

Double click on the mounted ISO in order to continue the setup

This will open up the Windows Server 2019 setup as shown below
– Click on Download Updates, drivers and Optional features (recommended).
– Click on Next

This will check for updates and also check your PC

This will launch the setup “Select Image” window as shown below
– Click on Next

Accept the License as shown below

This will open up a new window instructing you on what to keep. I will go with “Nothing”
– Click on Next

When you choose nothing, this will prompt you to select yes in order to be very sure you want to continue

Windows will collect updates and when prepare the system for installation.


This will make sure your system has enough space to install the Operating System and ensure everything is ok.

This will prompt the Read to Install Window as shown below
– Click on Install as shown below.

Now the server upgrade process begins as shown below. This can take a while!


The following windows below show Windows Server 2019 is still installing.
– Note: Your server will restart multiple times.


Let customise the server by entering the following information as it relates to you.
– When you are done, click on Next

Enter the password to your Administrators account as shown below
– This step will finalise the Windows Server 2016 to Windows Server 2019 Upgrade

When Windows is done applying settings, you can now log on to your server a shown below.

Now we are logged on to the server, lets access the server system properties as shown below.

Now we are done upgrading to Windows Server 2019. You can install additional roles and features needed to make this server operational. For some examples, see the following links below. how to set up a Domain Controller, how to add a second Domain Controller to your environment, how to install and configure Active Directory Federation Service (ADFS) in Windows Server, and how to install Dynamic Host Configuration Protocol on Windows Server 2019.
Here you can have a look at the basic settings such as the time zone, ITÉ security setting, firewall, and Remote Desktop, etc. For the configuration of a new server, see this guide “Post-installation of this server“.

To ensure everything was successfully upgraded, we need to access the registry.
On the server, run RegEdit. Check the value of the HKEY_LOCAL_MACHINESOFTWAREMicrosoftWindowsNTCurrentVersion hive. The version should show Windows Server 2019. See the following articles below for more information about the Windows registry.
- How to search through the Windows registry.
- For what Registry Editor is and how to access the registry hives.
I hope you found this blog post helpful. If you have any questions, please let me know in the comment session.
It is always a good idea to start a new Windows Server 2016 / 2019 installation on a new slate. However, in some instances, you may be working on a site that will force you to upgrade from the current installation to the latest version.
The routines described here apply to the server versions of Windows 2016 and 2019. This article describes moving to Windows Server 2016 / 2019 from different lower server platforms.
The path to the new Operating System (OS) depends on the current system and configurations that you are running.
That being the case, the following terms define activities you are likely to encounter when deploying the 2016 Server.
Installation
The simplest way of installing a new OS to work on your hardware, and get a clean installation, demands that you delete the previous Operating System.
Migration
To move system settings to the new Windows Server using a virtual machine is what we call migration. The process also varies depending on the roles and system configurations already running.
Cluster OS Rolling Upgrade
This feature is new in Windows Server 2016, and its role is to make sure the Administrator can upgrade the Operating System of all nodes running Windows Server 2012 R2 to Windows Server 2016, without interfering with the Hyper-V or Scale-Out File Server workloads.
The feature also helps in reducing downtime, which may affect Service Level Agreements.
License Conversion
Some Operating Systems use releases that allow the conversion of one edition to another without so much struggling.
What you need is a simple command issued alongside a license key, and you end doing the license conversion.
Upgrade
When you want to use the latest software that comes with the newer versions, then you have to do an upgrade.
In-place upgrades mean using the same hardware for installing the new Operating System. For example, you can upgrade from evaluation to retail version or from a volume license to an ordinary retail edition.
NOTE 1: An upgrade will work well in virtual machines if you do not need specific OEM hardware drivers.
NOTE 2: Following the Windows Server 2016 release, you can only perform an upgrade on a version installed using the Desktop Experience (not a server core option).
NOTE 3: If you use NIC teaming, disable it before you perform an upgrade; and when the upgrade is complete, re-enable it.
Upgrade Retail Versions of Windows Server to Windows Server 2016 / 2019
Note the following general principles:
- Upgrading a 32-bit to 64-bit architectures is not possible. Note that all Windows Server 2016 versions are only available in 64-bit.
- You cannot upgrade from one language to another.
- If you are running a domain controller, make sure you can handle the task, or read the following article: Upgrade Domain Controllers to Windows Server 2012 R2 and Windows Server 2012.
- You cannot upgrade from a preview version.
- You cannot switch from Server Core installation to a Server with a Desktop installation.
- You cannot upgrade from a Previous Windows Server installation to an evaluation copy of Windows Server.
You can read from the table below that shows a summary of Windows Operating Systems available for upgrade. If you are unable to upgrade your current Windows version, then upgrading to Windows Server 2016 is impossible
| Current Windows Edition | Possible Upgrade Edition |
|
|
|
|
|
|
|
|
|
|
|
|
|
|
|
|
|
|
Per-Server-Role Considerations for Upgrading
It’s important to consider server roles before performing an upgrade.
For example, some server roles are part of the newer Windows versions and may only need additional preparation or actions to get the desired intent.
Converting Current Evaluation Version to Current Retail Version
It is possible to convert the trial version of Windows Server 2016 Standard to a Data 2016 Standard Server or a Datacenter version. The two conversions can be retail versions. You can also convert Windows Server 2016 Datacenter to the retail version.
Before making any conversion attempts to the retail version, ensure that your server is running an evaluation version; you can confirm this by following these steps:
- From the administrator’s command prompt, run
slmgr.vbs /dlv;
- The evaluation versions will include “EVAL” as the output
- Open the control panel
- Then click on System and Security
- Click on System
- View the activation status found on the activation area of the System page
- Click view details, and you will see more information on your Windows Status
- If your Windows is activated, you will see information showing the remaining time for the evaluation period.
If you are running a retail version, you will see the “Upgrading previous retail versions of Windows Server 2016” message prompting you to upgrade to Windows Server 2016.
In Windows Server 2016 Essentials, the conversion to retail version is possible if you have a retail volume license or OEM key in the command slmgr.vbs
In case you are running an evaluation version of Windows Server 2016 Standard or Windows Server 2016 Datacenter, the following conversions can help you:
- If the server is a domain controller, it cannot change to the retail version. First, install another domain controller on a server that runs a retail version and remove the AD DS from the domain controller that has the evaluation version.
- Read the license terms
- From the administrator’s command prompt, enter this command to get the current edition:
DISM /online /Get-CurrentEdition
Note the edition ID, the abbreviation form of the edition name, and then run the following command:
DISM /online /Set-Edition:<edition ID> /ProductKey:XXXXX-XXXXX-XXXXX-XXXXX-XXXXX /AcceptEula
Once you get the ID and product key, the server should restart twice.
You can convert the evaluation version of Windows Server 2016 Standard to the retail version of Windows Server 2016 Datacenter using the same command and product key.
Converting Current Retail Edition to a Different Current Retail Edition
After successful installation of Windows Server 2016, you can run setup to repair the installation using a process called “repair in place” that converts it to a different edition.
In case of Windows Server 2016 Standard, you can convert the system to Windows Server 2016 Datacenter by:
- From the administrator’s command prompt, use the following command to determine the existing edition:
DISM /online /Get-CurrentEdition
- Run this command to get the ID of the edition you want to upgrade to:
DISM /online /Get-TargetEditions
- Note the ID edition, the name of the edition, and then run this command:
DISM /online /Set-Edition:<edition ID> /ProductKey:XXXXX-XXXXX-XXXXX-XXXXX-XXXXX /AcceptEula
- Once you get the ID and product key, the server should restart twice.
Converting Current Retail Version to Current Volume Licensed Version
Once you have Windows Server 2016 running, you can convert it to a retail version, an OEM version, or a volume-licensed version. The edition will not change.
If the starting point was an evaluation version, change it to retail version and then do as follows:
- From the administrator’s command, run this command:
slmgr /ipk <key>
- Insert the appropriate volume license, OEM or retail key instead of <key>
Conclusion
Upgrading Windows Server is a complicated process; therefore, Microsoft suggests that you migrate all roles and settings to Windows Server 2016 to avoid costly mistakes.
This post will help you if you are planning to perform Windows Server 2019 in-place upgrade. We know that Windows Server 2019 is released and organizations are now looking to upgrade server OS to Windows Server 2019. In my previous post, I covered the steps to deploy Server 2019 using SCCM.
Scenario – We have SCCM 1810 setup with multiple distribution points across globe. Most of the distribution points are running on Windows Server 2012 R2. A very few DP’s are running on Windows Server 2016. I am picking one of the DP running on Server 2016 for upgrade. Ensure you go through Windows Server 2019 system requirements once.
So I will be doing an in-place upgrade of Windows Server 2016 to Server 2019. The distribution point server is running on a VM and I have a full backup of the server. Just in case something goes wrong, I can restore the backup.

Most of all the In-place upgrade is supported for Windows Server 2016 on physical hardware and Virtual Machines. But what if the VM is not on-prem and hosted in cloud ?. Well, as per Microsoft you must first check with your cloud provider about the upgrade options.
You can perform direct in-place upgrade to Windows Server 2019 from either of these server OS :-
- Windows Server 2012 R2
- Windows Server 2016
Prior to 2012 R2 OS, no other server OS supports “direct” in-place upgrade to Windows Server 2019. Here is some more information about upgrade process to Windows Server 2019.
| Current Server OS | Upgrade To | How to |
| Windows Server 2008 R2 | WS 2019 |
|
| Windows Server 2012 | WS 2019 |
|
| Windows Server 2012 R2 | WS 2019 | Single/Direct upgrade process |
| Windows Server 2016 | WS 2019 | Single/Direct upgrade process |
Windows Server 2019 Install Options
- Server Core – It’s a smaller installation that includes the core components of Windows Server and supports all server roles, but does not include a local graphical user interface (GUI).
- Server with Desktop Experience – This is the complete installation and includes a full GUI for customers.
Windows Server 2019 Edition In-place upgrade supported paths
So now you might be thinking about supported paths for Windows Server 2019 in-place upgrade. This is important because you might be running either standard or datacenter edition of server. The below table will help you in understanding the right upgrade paths.
| Current Operating System | Upgrade Version and Edition |
| Windows Server 2012 R2 Standard | Windows Server 2019 Standard or Datacenter |
| WS 2012 R2 Datacenter | WS 2019 Datacenter |
| Windows Server 2016 Standard | Windows Server 2019 Standard or Datacenter |
| WS 2016 Datacenter | WS 2019 Datacenter |
Features removed from Windows Server 2019
We have seen this in the past that Microsoft removes certain features and adds new features to the new builds. Here are the list of features and functionalities that’s removed in Windows Server 2019.
- Business Scanning (Distributed Scan Management)
- Internet Storage Name Service (iSNS)
- Print components
- Remote Desktop Connection Broker and Remote Desktop Virtualization Host in a Server Core installation
Before proceeding with In-place Upgrade
The process to perform server in-place upgrade is easy however there are many things a system admin needs to look into before upgrading. Microsoft has also listed some important checks that can be checked prior to server upgrade. You must collect the information about all the below listed points and then decide to upgrade.
- Check if the server is a production-critical server – Good to find out how critical is the server. What all is running on this server and can there a downtime approved for this server.
- Find out the maintenance window for upgrading this server – This is really important because you can’t perform the upgrade while the server is being used. This might affect the applications hosted on the server plus the users who are connected to the server.
- Perform test upgrade on similar non-production server – This might give you a fair idea on how well the upgrade goes before actually performing on production server.
- Find the Server Usage – You must find out who is using this server. It could be internal users, external users, or even both.
- Find Roles, Features, Applications running on the production server.
- BitLocker encryption – Log in to the server and check if the disks are encrypted.
- Is the server part of a Failover Cluster ? – If yes, the good news is cluster OS rolling upgrade can be used to upgrade Server 2016 to Server 2019.
- Server backups – Find out backup strategy. Were those backups successful at-least since a month. As an admin you also have the responsibility to find if backups have ever been successfully restored to the server or applications.
- Power Supply – Ensure there is no interruption in power supply during the upgrade. If you are performing the server OS upgrade on physical hardware, check if you have backup power supply.
- Is the server patched – Check if the server is patched before you begin the server OS upgrade.
Prepare your Server for In-place Upgrade
In addition to the points mentioned above, always check the Server edition first. As mentioned earlier, the distribution point is running on Windows Server 2016 Standard edition. During the upgrade, I will entering a key that will allow me to upgrade Windows Server 2016 Standard to Windows Server 2019 Datacenter edition.

Patch your server with latest update. This holds true for any in-place upgrades that you perform.

Perform the Windows Server 2019 In-Place Upgrade
We will perform the Windows Server 2019 in-place upgrade. Mount the Windows Server 2019 ISO file. Run the Setup and wait for the setup screen to appear. You see two options.
- Download updates, drivers and optional features
- Not right now
Select the first option. Click Next.

I am using MSDN copy of Server 2019, hence I need to enter the product key. Click Next.

Select Windows Server 2019 Datacenter (Desktop Experience). Click Next.

Accept the license terms.

Among the two options, go with the first option, keep personal files and apps. Click Next.

The server upgrade process begins once you click Install.

The time required to upgrade the server varies. So have patience while the upgrade process is running. Expect multiple restarts during this process.

Post Server Upgrade
Finally the server upgrade is successful. The distribution point is now running fine on Windows Server 2019 Datacenter.
 An alternate method to find out the successful upgrade is using registry. On the server, run RegEdit. Check the value of the HKEY_LOCAL_MACHINESOFTWAREMicrosoftWindowsNTCurrentVersion hive. The version should show Windows Server 2019.

Prajwal Desai is a Microsoft MVP in Enterprise Mobility. He writes articles on SCCM, Intune, Configuration Manager, Microsoft Intune, Azure, Windows Server, Windows 11, WordPress and other topics, with the goal of providing people with useful information.