 После обновления до Windows 10 многие сталкиваются с проблемой: при попытке установить официальный драйвер NVidia происходит сбой и драйвера не устанавливаются. При чистой установке системы проблема обычно себя не проявляет, но в некоторых обстоятельствах может также оказаться, что драйвер не устанавливается. В результате, пользователи ищут, где скачать драйвер видеокарты NVidia для Windows 10, подчас используя сомнительные источники, а проблема не решается.
Если вы столкнулись с описанной ситуацией, ниже — простой путь решения, который срабатывает в большинстве случаев. Отмечу, что после чистой установки, Windows 10 автоматически устанавливает драйвера видеокарты (во всяком случае, для многих NVidia GeForce), причем официальные, однако — далеко не самые последние. А потому, даже если у вас нет проблем с драйверами после установки, может иметь смысл проделать описанную ниже процедуру и установить последние доступные драйвера видеокарты. См. также: Как узнать, какая видеокарта на компьютере или ноутбуке в Windows 10, 8 и Windows 7.
Прежде чем начать, рекомендую скачать драйвера для вашей модели видеокарты с официального сайта nvidia.ru в разделе драйверы — загрузка драйверов. Сохраните установщик у себя на компьютере, он понадобится позже.
Удаление имеющихся драйверов
Первый шаг при возникновении сбоев при установке драйверов видеокарт NVidia GeForce — удалить все имеющиеся драйвера и программы и не дать заодно Windows 10 заново их скачать и установить их из своих источников.
Можно попробовать удалить имеющиеся драйвера вручную, через панель управления — программы и компоненты (удалив в списке установленных программ все, что имеет отношение к NVidia). Затем перезагрузить компьютер.
Есть более надежный способ, полностью вычищающий все имеющиеся драйвера видеокарты с компьютера — Display Driver Uninstaller (DDU), представляющая собой бесплатную утилиту именно для этих целей. Скачать программу можно с официального сайта www.guru3d.com (представляет собой самораспаковывающийся архив, не требует установки). Подробнее: Как удалить драйвера видеокарты.
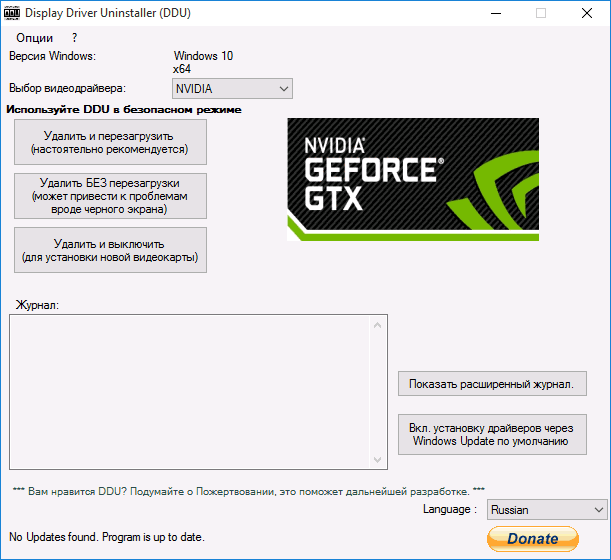
После запуска DDU (рекомендуется выполнять в безопасном режиме, см. Как зайти в безопасный режим Windows 10), просто выберите видеодрайвер NVIDIA, затем нажмите «Удалить и перезагрузить». Все драйвера NVidia GeForce и связанные программы будут удалены с компьютера.
Устанавливаем драйвера видеокарты NVidia GeForce в Windows 10
Дальнейшие шаги очевидны — после перезагрузки компьютера (лучше, с отключенным интернет-подключением), запустите загруженный ранее файл для установки драйверов на компьютер: в этот раз сбоя установки NVidia произойти не должно.

По завершении установки вам потребуется очередная перезагрузка Windows 10, после которой в системе будут установлены последние официальные драйвера видеокарты с автоматическим обновлением (если, конечно, вы его не отключили в настройках) и всем сопутствующим софтом, таким как GeForce Experience.
Внимание: если после установки драйвера ваш экран стал черным и ничего не отображается — подождите 5-10 минут, нажмите клавиши Windows + R и вслепую наберите (в английской раскладке) shutdown /r затем нажмите Enter, а через 10 секунд (или после звука) — еще раз Enter. Подождите минуту, компьютер должен будет перезагрузиться и все, вероятнее всего, заработает. Если перезагрузка не произошла, принудительно выключите компьютер или ноутбук, удерживая кнопку питания несколько секунд. После повторного включения все должно работать. Дополнительная информация по проблеме в статье Черный экран Windows 10.
Содержание
- Обновление драйверов NVIDIA
- Способ 1: GeForce Experience
- Способ 2: «Диспетчер устройств»
- Способ 3: ручное обновление
- Вопросы и ответы
Обновление драйверов для видеокарты NVIDIA – дело добровольное и не всегда обязательное, но с выходом новых редакций ПО мы можем получить дополнительные «плюшки» в виде лучшей оптимизации, увеличения производительности в некоторых играх и приложениях. Кроме того, в свежих версиях исправляются различные ошибки и недочеты в коде.
В данной статье рассмотрим несколько способов обновления драйверов. Все они являются «правильными» и приводят к одинаковым результатам. Если не сработал один, а такое случается, то можно попробовать другой.
Способ 1: GeForce Experience
GeForce Experience входит в состав ПО NVIDIA и устанавливается вместе с драйвером при ручной инсталляции скачанного с официального сайта пакета. Функций у софта много, в том числе и отслеживание выхода новых версий программного обеспечения.
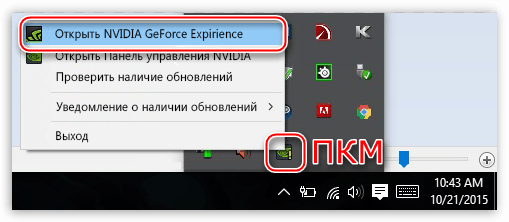
Получить доступ к программе можно из системного трея либо из папки, в которую она была установлена по умолчанию.
- Системный трей.
Здесь все просто: нужно открыть лоток и найти в нем соответствующий значок. Желтый восклицательный знак говорит о том, что в сети имеется новая версия драйвера или другого ПО NVIDIA. Для того, чтобы открыть программу, нужно кликнуть правой кнопкой мыши по иконке и выбрать пункт «Открыть NVIDIA GeForce Experience».

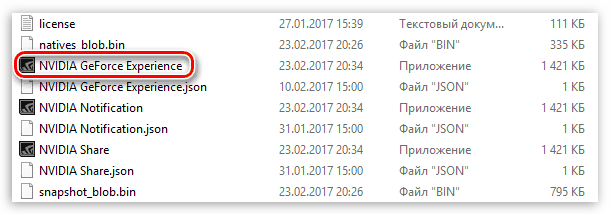
- Папка на жестком диске.
Данное программное обеспечение по умолчанию устанавливается в папку «Program Files (x86)» на системном диске, то есть на том, где находится папка «Windows». Путь такой:
C:Program Files (x86)NVIDIA CorporationNVIDIA GeForce ExperienceЕсли Вы пользуетесь 32-разрядной операционной системой, то папка будет другая, без приписки «х86»:
C:Program FilesNVIDIA CorporationNVIDIA GeForce ExperienceЗдесь необходимо найти исполняемый файл программы и запустить его.

Процесс инсталляции происходит следующим образом:
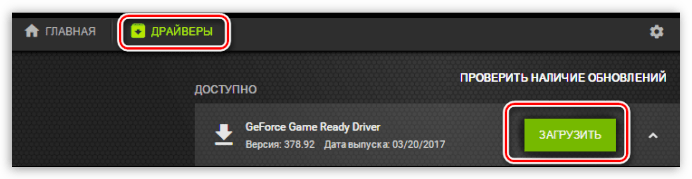
- После запуска программы переходим на вкладку «Драйверы» и нажимаем зеленую кнопку «Загрузить».

- Далее необходимо дождаться завершения загрузки пакета.

- После окончания процесса нужно выбрать тип установки. Если нет уверенности в том, какие компоненты требуется установить, то доверяемся софту и выбираем «Экспресс».

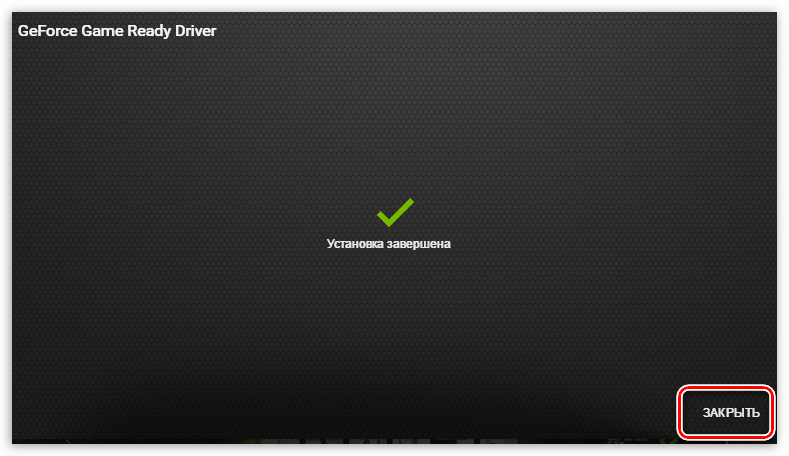
- По завершению успешного обновления программного обеспечения следует закрыть GeForce Experience и перезагрузить компьютер.


Способ 2: «Диспетчер устройств»
В операционной системе Windows имеется функция автоматического поиска и обновления драйверов для всех устройств, в том числе и видеокарты. Для того, чтобы ею воспользоваться, нужно добраться до «Диспетчера устройств».
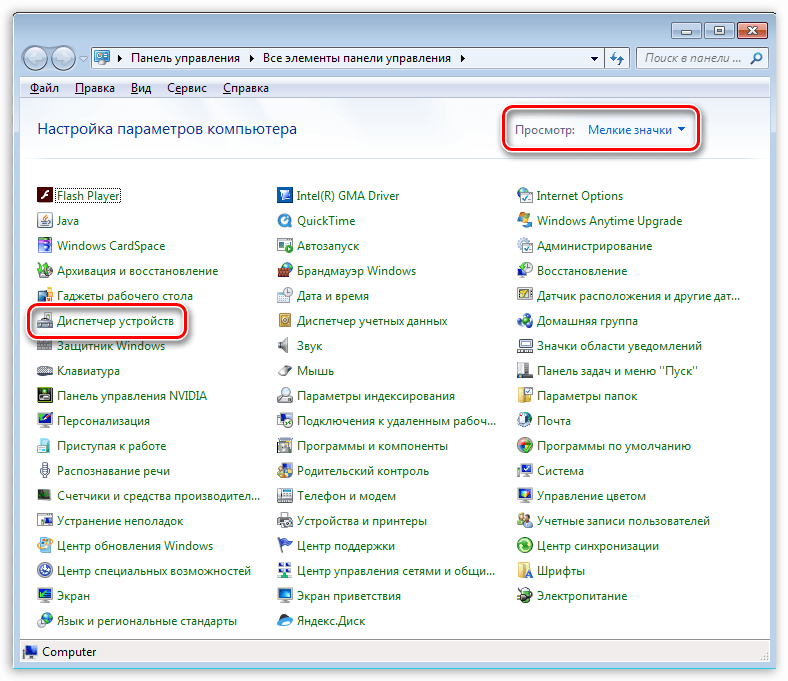
- Вызываем «Панель управления» Windows, переключаемся в режим просмотра «Мелкие значки» и находим нужный пункт.

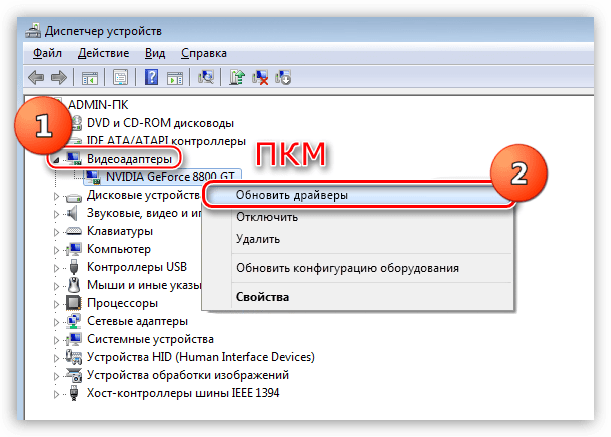
- Далее в блоке с видеоадаптерами находим свою видеокарту NVIDIA, нажимаем на нее правой кнопкой мыши и в открывшемся контекстном меню выбираем пункт «Обновить драйверы».

- После совершенных выше действий мы получим доступ непосредственно к самой функции. Здесь нам нужно выбрать «Автоматический поиск обновленных драйверов».

- Теперь Windows сама осуществит все операции по поиску ПО в интернете и его установке, нам останется только наблюдать, а затем закрыть все окна и выполнить перезагрузку.

Способ 3: ручное обновление
Ручное обновление драйверов подразумевает самостоятельный их поиск на сайте NVIDA. Этим способом можно воспользоваться в том случае, если все другие не принесли результата, то есть, возникли какие-либо ошибки или неполадки.
Читайте также: Почему не устанавливаются драйвера на видеокарту
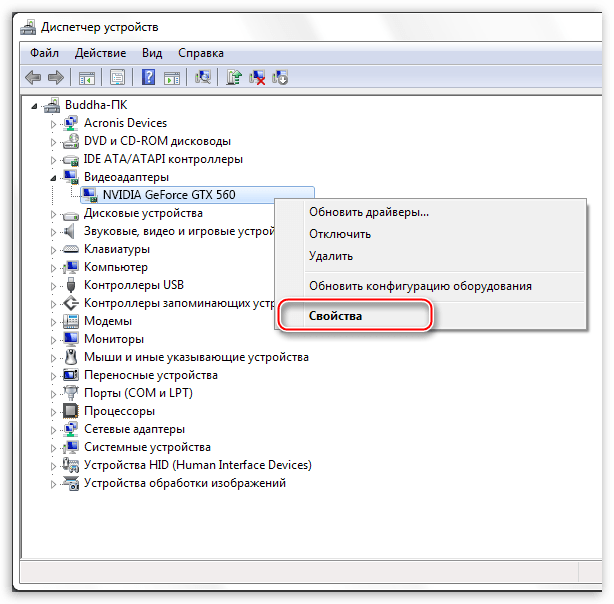
Прежде чем устанавливать скачанный драйвер, необходимо убедиться в том, что на сайте производителя лежит более новое ПО, чем то, которое инсталлировано в Вашей системе. Сделать это можно, перейдя в «Диспетчер устройств», где следует найти свой видеоадаптер (см. выше), кликнуть по нему ПКМ и выбрать пункт «Свойства».

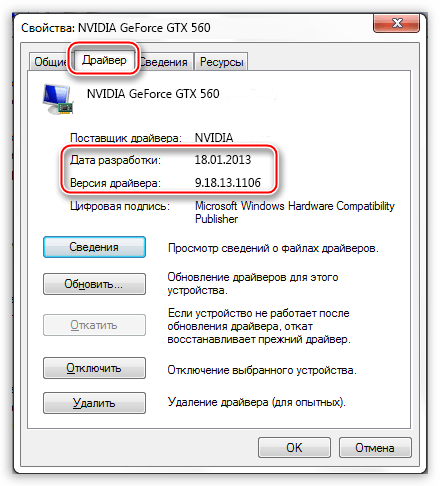
Здесь, на вкладке «Драйвер» мы видим версию программного обеспечения и дату разработки. Именно дата нас и интересует. Теперь можно заняться поиском.
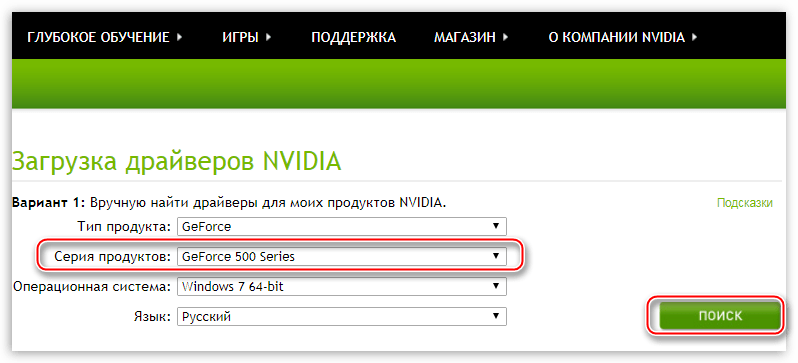
- Идем на официальный сайт NVIDIA, в раздел загрузки драйверов.
Страница загрузки
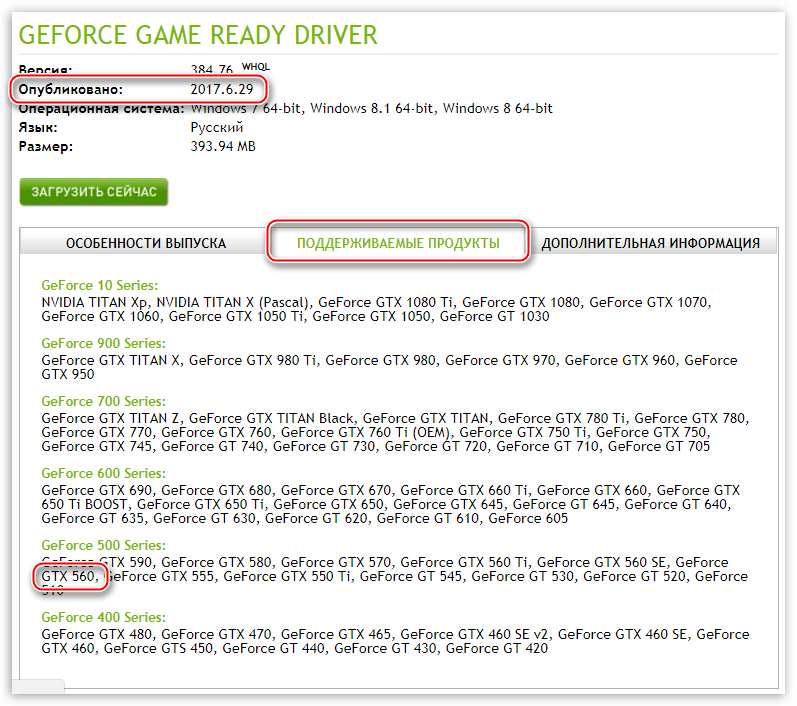
- Здесь нам нужно выбрать серию и модель видеокарты. У нас серия адаптера 500 (GTX 560). В данном случае нет необходимости выбирать семейство, то есть, непосредственно название модели. Затем нажимаем «Поиск».
Читайте также: Как узнать серию продукта видеокарты Nvidia

- Следующая страница несет информацию о редакции программного обеспечения. Нас интересует дата релиза. Для надежности, на вкладке «Поддерживаемые продукты» можно проверить, совместим ли драйвер с нашим оборудованием.

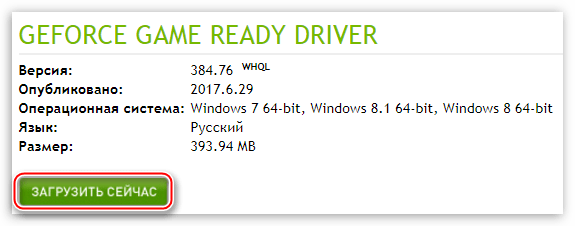
- Как видим, дата выпуска драйвера в «Диспетчере устройств» и на сайте отличаются (на сайте новее), значит, можно обновиться до новой версии. Жмем «Загрузить сейчас».

- После перехода на следующую страницу нажимаем «Принять и скачать».


По завершению скачивания можно переходить к инсталляции, предварительно закрыв все программы – они могут помешать нормальной установке драйвера.
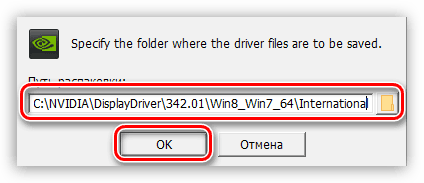
- Запускаем установщик. В первом окне нам будет предложено поменять путь распаковки. Если не уверены в правильности своих действий, то ничего не трогаем, просто жмем ОК.

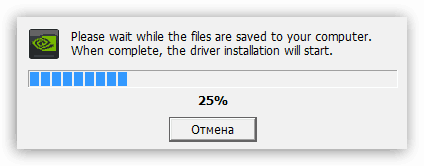
- Дожидаемся завершения копирования установочных файлов.

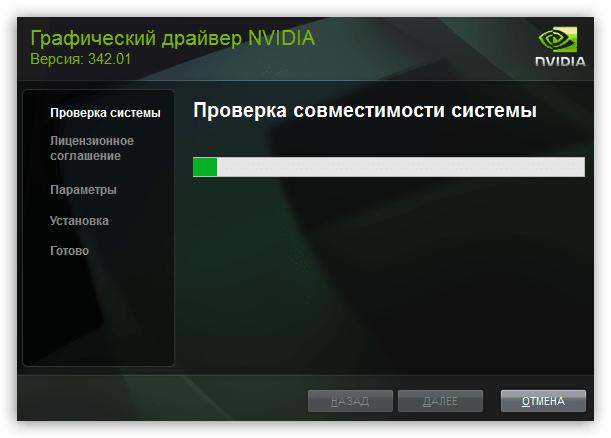
- Далее Мастер установки осуществит проверку системы на наличие необходимого оборудования (видеокарты), которое совместимо с данной редакцией.

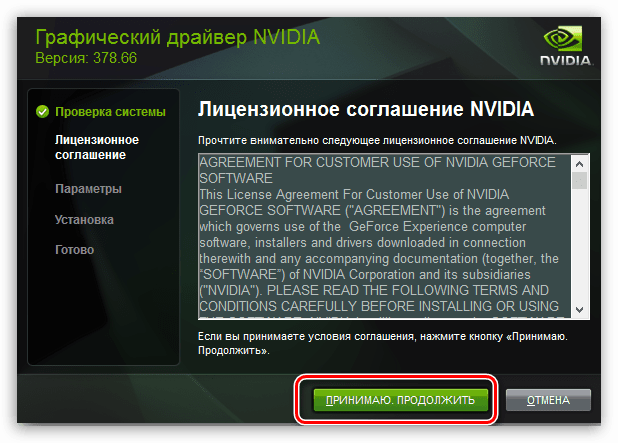
- Следующее окно установщика содержит лицензионное соглашение, которое нужно принять, нажав кнопку «Принимаю, продолжить».

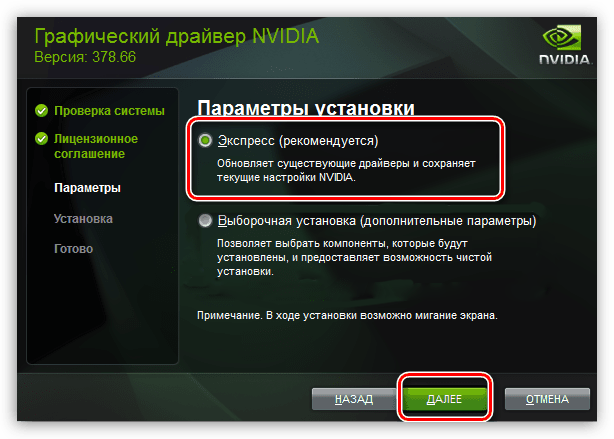
- Следующий шаг – выбор типа установки. Здесь также оставляем параметр по умолчанию и продолжаем, нажав «Далее».

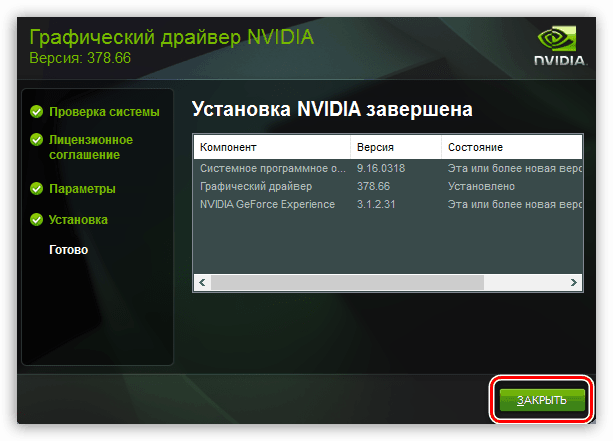
- Больше от нас ничего не требуется, программа сама выполнит все необходимые действия и перезагрузит систему. После ребута мы увидим сообщение об успешной установке.

На этом варианты обновления драйверов для видеокарты NVIDIA исчерпаны. Совершать данную операцию можно 1 раз в 2 — 3 месяца, следя за появлением свежего программного обеспечения на официальном сайте либо в программе GeForce Experience.
Еще статьи по данной теме:
Помогла ли Вам статья?
![]()
Download Article
![]()
Download Article
Nvidia is constantly tweaking the underlying software that controls Nvidia graphics cards. Updated drivers are often released every few weeks. Installing the latest drivers will ensure that you get the best performance out of your games.
Things You Should Know
- Update your drivers manually by going to the Nvidia site and download the appropriate driver.
- Download and use the GeForce Experience to automatically download the appropriate drivers when you download updates.
- To download Ubuntu drivers, go to «Additional Drivers,» select a Nvidia driver, and click «Apply Changes».
-

1
Open the DirectX Diagnostic tool. This is the quickest way to find your exact graphics card model. Skip this step if you already know your graphics card model.[1]
- Press ⊞ Win+R and type dxdiag.
- Click the Display tab. Look at the «Chip Type» entry. This is your graphics card model.
- Click the System tab. Look at the «Operating System» entry to see if you’re running a 32-bit or 64-bit version of Windows.
-
2
Visit the Nvidia GeForce website. You can download the latest drivers from the GeForce website (geforce.com).[2]
Advertisement
-
3
Click the «Drivers» tab. Most Nvidia cards are «GeForce» cards. Visit the nvidia.com website instead if your card is from another line.
-
4
Select your graphics card. There are three ways that you can select your drivers:
- Automatic Driver Updates — Use the Nvidia GeForce Experience program to manage driver updates. Click here for more details.
- Manual Driver Search — Use the information from Step 1 to select the correct driver. The four most recent drivers will be shown.
- Auto-Detect Your GPU — The Nvidia website will use a Java applet to detect your graphics card and display the correct drivers. You will need Java installed to run it. The current applet is out of date, which may cause problems with some browsers. You’ll have an easier time using one of the other two methods in this step.
-
5
Download the latest drivers. Click the link to download the latest version of the driver. You should always download the latest version unless you specifically need an older one. The latest version will often give the best performance.
-
6
Run the installer. Run the downloaded installer to update your drivers. The installer will automatically remove the old drivers and install the updated ones.
- Most users can choose the «Express» option during installation.
- Your screen may flicker or go black for a short time during installation.
-
7
Use System Restore if the new driver causes problems. When the driver update is installed, a system restore point will be created automatically. This will allow you to roll your system back to before the driver was installed.
- Click here for more details on using system restore.


Advertisement
-
1
Download and install the GeForce Experience program. This is an Nvidia program which manages your Nvidia drivers and game settings.[3]
You can download the installer from geforce.com/geforce-experience.- The installer will scan your system for supported hardware. You will likely encounter an error during installation if you don’t have an Nvidia graphics card or are using an older product.
- Launch the program after the installation has completed.
-
2
Allow GeForce Experience to update. When you start GeForce Experience, it will check for any available updates.
-
3
Click the «Drivers» tab. Any available driver updates will be displayed. Click the «Check for updates» button if GeForce Experience hasn’t checked recently.
- Once you have the application installed, you’ll be automatically notified when new drivers are released.[4]
- Once you have the application installed, you’ll be automatically notified when new drivers are released.[4]
-
4
Click the «Download driver» button to download an available update. GeForce Experience may have already downloaded the files.[5]
-
5
Click the «Express Installation» button. Advanced users can choose the Custom option. Most users will be fine with the express installation.
- The custom installation will allow you to choose which of the drivers you want to install.
-
6
Wait for the driver to install. GeForce Experience will handle all of the installation work. Your screen may flicker or shut off for a moment during installation.
-
7
Use the System Restore tool to roll back if something goes wrong. Windows will create a system restore point when your Nvidia drivers are updated. You can boot into Safe Mode and run the system restore utility to roll back to before the drivers were updated.
- Click here for a guide on using the System Restore tool.


Advertisement
-
1
Open the Additional Drivers window. Nvidia drivers are not automatically installed when you use Ubuntu. Instead, Ubuntu uses open-source drivers which aren’t as powerful. You can install the Nvidia drivers through the Additional Drivers window.
- Launch the Dash and type «drivers» to open the Additional Drivers window.
-
2
Wait for the list of available drivers to load. This may take a few moments.
-
3
Select the latest driver from the list. Make sure it is the driver from Nvidia, and not the «Nouveau» driver. Select the driver to begin downloading the files.
-
4
Click the «Apply Changes» button. The Nvidia driver will be installed. Your screen may flicker or shut off during the installation process.
-
5
Reboot your computer. Reboot your computer to complete the installation process.[6]


Advertisement
Add New Question
-
Question
What can I do if I can’t update my Nvidia driver on Windows 10?

Stan Kats is a Professional Technologist and the COO and Chief Technologist for The STG IT Consulting Group in West Hollywood, California. Stan provides comprehensive technology solutions to businesses through managed IT services, and for individuals through his consumer service business, Stan’s Tech Garage. Stan holds a BA in International Relations from The University of Southern California. He began his career working in the Fortune 500 IT world. Stan founded his companies to offer an enterprise-level of expertise for small businesses and individuals.
Professional Technologist
Expert Answer
You can always go to Nvidia’s website and download the drivers directly from them. If Windows isn’t letting you update the driver though, it’s probably because it’s already up to date. There simply may not be an update you need.
-
Question
What is GeForce Experience? Can I uninstall it?
Stan Kats is a Professional Technologist and the COO and Chief Technologist for The STG IT Consulting Group in West Hollywood, California. Stan provides comprehensive technology solutions to businesses through managed IT services, and for individuals through his consumer service business, Stan’s Tech Garage. Stan holds a BA in International Relations from The University of Southern California. He began his career working in the Fortune 500 IT world. Stan founded his companies to offer an enterprise-level of expertise for small businesses and individuals.
Professional Technologist
Expert Answer
It’s definitely optional, so feel free to uninstall it if you’d like. It’s a program that offers a bunch of customization options. It’s helpful to have if you do any kind of PC gaming, but your drivers will be fine if you uninstall it.
-
Question
How do I turn off the GeForce notifications?
Stan Kats is a Professional Technologist and the COO and Chief Technologist for The STG IT Consulting Group in West Hollywood, California. Stan provides comprehensive technology solutions to businesses through managed IT services, and for individuals through his consumer service business, Stan’s Tech Garage. Stan holds a BA in International Relations from The University of Southern California. He began his career working in the Fortune 500 IT world. Stan founded his companies to offer an enterprise-level of expertise for small businesses and individuals.
Professional Technologist
Expert Answer
You should be able to do that in the program’s settings, but if GeForce Experience is causing notifications to pop up, they’re worth looking at. They may be letting you know your graphics settings aren’t optimized, or they may be letting you know there’s an update you need.

See more answers
Ask a Question
200 characters left
Include your email address to get a message when this question is answered.
Submit
Advertisement
Video
About This Article
Article SummaryX
1. Open the Windows search bar.
2. Type dxdiag and press Enter.
3. Click Display and write down your ″chip type.″
4. Go to geforce.com in a web browser.
5. Click Drivers.
6. Search for your drivers.
7. Download the drivers.
8. Run the downloaded file to update.
Did this summary help you?
Thanks to all authors for creating a page that has been read 819,345 times.
Is this article up to date?
![]()
Download Article
![]()
Download Article
Nvidia is constantly tweaking the underlying software that controls Nvidia graphics cards. Updated drivers are often released every few weeks. Installing the latest drivers will ensure that you get the best performance out of your games.
Things You Should Know
- Update your drivers manually by going to the Nvidia site and download the appropriate driver.
- Download and use the GeForce Experience to automatically download the appropriate drivers when you download updates.
- To download Ubuntu drivers, go to «Additional Drivers,» select a Nvidia driver, and click «Apply Changes».
-
1
Open the DirectX Diagnostic tool. This is the quickest way to find your exact graphics card model. Skip this step if you already know your graphics card model.[1]
- Press ⊞ Win+R and type dxdiag.
- Click the Display tab. Look at the «Chip Type» entry. This is your graphics card model.
- Click the System tab. Look at the «Operating System» entry to see if you’re running a 32-bit or 64-bit version of Windows.
-
2
Visit the Nvidia GeForce website. You can download the latest drivers from the GeForce website (geforce.com).[2]
Advertisement
-
3
Click the «Drivers» tab. Most Nvidia cards are «GeForce» cards. Visit the nvidia.com website instead if your card is from another line.
-
4
Select your graphics card. There are three ways that you can select your drivers:
- Automatic Driver Updates — Use the Nvidia GeForce Experience program to manage driver updates. Click here for more details.
- Manual Driver Search — Use the information from Step 1 to select the correct driver. The four most recent drivers will be shown.
- Auto-Detect Your GPU — The Nvidia website will use a Java applet to detect your graphics card and display the correct drivers. You will need Java installed to run it. The current applet is out of date, which may cause problems with some browsers. You’ll have an easier time using one of the other two methods in this step.
-
5
Download the latest drivers. Click the link to download the latest version of the driver. You should always download the latest version unless you specifically need an older one. The latest version will often give the best performance.
-
6
Run the installer. Run the downloaded installer to update your drivers. The installer will automatically remove the old drivers and install the updated ones.
- Most users can choose the «Express» option during installation.
- Your screen may flicker or go black for a short time during installation.
-
7
Use System Restore if the new driver causes problems. When the driver update is installed, a system restore point will be created automatically. This will allow you to roll your system back to before the driver was installed.
- Click here for more details on using system restore.
Advertisement
-
1
Download and install the GeForce Experience program. This is an Nvidia program which manages your Nvidia drivers and game settings.[3]
You can download the installer from geforce.com/geforce-experience.- The installer will scan your system for supported hardware. You will likely encounter an error during installation if you don’t have an Nvidia graphics card or are using an older product.
- Launch the program after the installation has completed.
-
2
Allow GeForce Experience to update. When you start GeForce Experience, it will check for any available updates.
-
3
Click the «Drivers» tab. Any available driver updates will be displayed. Click the «Check for updates» button if GeForce Experience hasn’t checked recently.
- Once you have the application installed, you’ll be automatically notified when new drivers are released.[4]
- Once you have the application installed, you’ll be automatically notified when new drivers are released.[4]
-
4
Click the «Download driver» button to download an available update. GeForce Experience may have already downloaded the files.[5]
-
5
Click the «Express Installation» button. Advanced users can choose the Custom option. Most users will be fine with the express installation.
- The custom installation will allow you to choose which of the drivers you want to install.
-
6
Wait for the driver to install. GeForce Experience will handle all of the installation work. Your screen may flicker or shut off for a moment during installation.
-
7
Use the System Restore tool to roll back if something goes wrong. Windows will create a system restore point when your Nvidia drivers are updated. You can boot into Safe Mode and run the system restore utility to roll back to before the drivers were updated.
- Click here for a guide on using the System Restore tool.
Advertisement
-
1
Open the Additional Drivers window. Nvidia drivers are not automatically installed when you use Ubuntu. Instead, Ubuntu uses open-source drivers which aren’t as powerful. You can install the Nvidia drivers through the Additional Drivers window.
- Launch the Dash and type «drivers» to open the Additional Drivers window.
-
2
Wait for the list of available drivers to load. This may take a few moments.
-
3
Select the latest driver from the list. Make sure it is the driver from Nvidia, and not the «Nouveau» driver. Select the driver to begin downloading the files.
-
4
Click the «Apply Changes» button. The Nvidia driver will be installed. Your screen may flicker or shut off during the installation process.
-
5
Reboot your computer. Reboot your computer to complete the installation process.[6]
Advertisement
Add New Question
-
Question
What can I do if I can’t update my Nvidia driver on Windows 10?
Stan Kats is a Professional Technologist and the COO and Chief Technologist for The STG IT Consulting Group in West Hollywood, California. Stan provides comprehensive technology solutions to businesses through managed IT services, and for individuals through his consumer service business, Stan’s Tech Garage. Stan holds a BA in International Relations from The University of Southern California. He began his career working in the Fortune 500 IT world. Stan founded his companies to offer an enterprise-level of expertise for small businesses and individuals.
Professional Technologist
Expert Answer
You can always go to Nvidia’s website and download the drivers directly from them. If Windows isn’t letting you update the driver though, it’s probably because it’s already up to date. There simply may not be an update you need.
-
Question
What is GeForce Experience? Can I uninstall it?
Stan Kats is a Professional Technologist and the COO and Chief Technologist for The STG IT Consulting Group in West Hollywood, California. Stan provides comprehensive technology solutions to businesses through managed IT services, and for individuals through his consumer service business, Stan’s Tech Garage. Stan holds a BA in International Relations from The University of Southern California. He began his career working in the Fortune 500 IT world. Stan founded his companies to offer an enterprise-level of expertise for small businesses and individuals.
Professional Technologist
Expert Answer
It’s definitely optional, so feel free to uninstall it if you’d like. It’s a program that offers a bunch of customization options. It’s helpful to have if you do any kind of PC gaming, but your drivers will be fine if you uninstall it.
-
Question
How do I turn off the GeForce notifications?
Stan Kats is a Professional Technologist and the COO and Chief Technologist for The STG IT Consulting Group in West Hollywood, California. Stan provides comprehensive technology solutions to businesses through managed IT services, and for individuals through his consumer service business, Stan’s Tech Garage. Stan holds a BA in International Relations from The University of Southern California. He began his career working in the Fortune 500 IT world. Stan founded his companies to offer an enterprise-level of expertise for small businesses and individuals.
Professional Technologist
Expert Answer
You should be able to do that in the program’s settings, but if GeForce Experience is causing notifications to pop up, they’re worth looking at. They may be letting you know your graphics settings aren’t optimized, or they may be letting you know there’s an update you need.
See more answers
Ask a Question
200 characters left
Include your email address to get a message when this question is answered.
Submit
Advertisement
Video
About This Article
Article SummaryX
1. Open the Windows search bar.
2. Type dxdiag and press Enter.
3. Click Display and write down your ″chip type.″
4. Go to geforce.com in a web browser.
5. Click Drivers.
6. Search for your drivers.
7. Download the drivers.
8. Run the downloaded file to update.
Did this summary help you?
Thanks to all authors for creating a page that has been read 819,345 times.
Is this article up to date?
Обновляйте ваши драйверы автоматически
 • Название программы: GeForce Experience
• Категория: Драйвера
• Разработчик: NVIDIA (США)
• Язык интерфейса: Многоязычный
• Статус программы: Бесплатная
• Операционная система: Windows
• Официальный сайт: www.nvidia.com
Играете ли вы в самые популярные игры или работаете с новейшими творческими приложениями, драйверы NVIDIA созданы специально для обеспечения наилучшего взаимодействия.
Если вы геймер, для которого в день запуска важна поддержка новейших игр, исправлений и DLC, выберите Game Ready Drivers. Если вы являетесь создателем контента, который уделяет первостепенное внимание надежности творческих рабочих процессов, включая редактирование видео, анимацию, фотографию, графический дизайн и прямую трансляцию, выберите Studio Drivers.
Сделать понемногу и того, и другого? Не беспокойтесь, он также поддерживает запуск лучших игр и творческих приложений.
NVIDIA превратила графический процессор в платформу для ускоренных вычислений с полным стеком, предназначенную для удовлетворения требований сегодняшних рабочих нагрузок машинного обучения и искусственного интеллекта (ИИ).
GeForce Experience автоматически уведомляет вас о новых выпусках драйверов от NVIDIA. Одним щелчком мыши вы можете обновить драйвер напрямую, не покидая рабочего стола.
Nvidia — американская технологическая компания, разработчик графических процессоров и систем на чипе (SoC). Разработки компании получили распространение в индустрии видеоигр, сфере профессиональной визуализации, области высокопроизводительных вычислений и автомобильной промышленности, где бортовые компьютеры Nvidia используются в качестве основы для беспилотных автомобилей.
Скачать GeForce Experience
(Официальный сайт)
Загрузка драйверов NVIDIA.
Чтобы определить подходящий NVIDIA драйвер