Если Отправить меню отображается, но какой-то конкретный элемент, например Сжатая (заархивированная) папка отсутствует в меню «Отправить» в Windows 10, следуйте этому сообщению, чтобы исправить проблему. Если меню «Отправить» не отображается или не работает, вы можете быстро решить проблему. Однако вам нужно сделать немного больше, чтобы вернуть недостающие предметы в Отправить меню.
Есть несколько причин, по которым Сжатая (заархивированная) папка вариант может пропасть. Если вы подключили устройство Bluetooth, но оно было повреждено по каким-либо причинам, есть небольшая вероятность, что ваш Сжатая (заархивированная) папка вариант может быть невидимым для вас. Вредоносное ПО также может привести к его исчезновению. Другая причина — это .ZFSendToTarget файловая ассоциация, необходимая для его появления.
Сжатая (заархивированная) папка отсутствует в меню «Отправить в»
Если сжатая (заархивированная) папка отсутствует в меню Отправить в Windows 10, одно из этих предложений наверняка решит проблему для вас:
- Показать сжатую (заархивированную) папку
- Копировать из учетной записи пользователя по умолчанию
- Удалить ярлык Bluetooth размером 0 КБ
- Исправить ассоциацию файлов .ZFSendToTarget.
Давайте посмотрим на шаги подробно.
1]Показать сжатую (заархивированную) папку
Если элемент сжатой (заархивированной) папки скрыт, вы не получите его в меню «Отправить». Вам нужно показать это вручную. Для этого вам необходимо выполнить следующие действия.
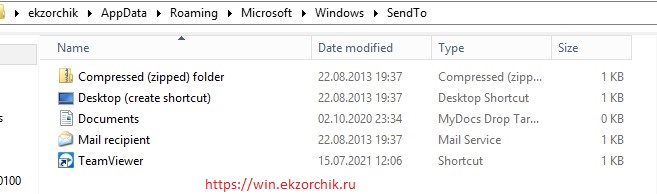
Отобразите скрытые файлы и папки и откройте Отправить папку в проводнике. Вы можете перейти по этому пути:
C: Users ваше_имя_пользователя AppData Roaming Microsoft Windows SendTo
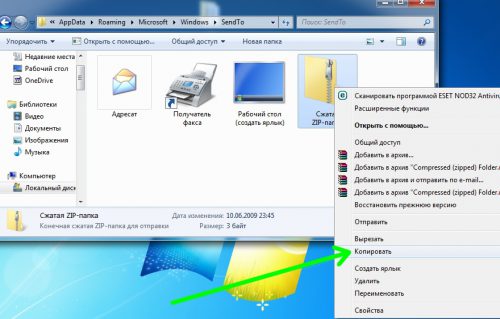
Не забудьте заменить ваш логин с вашим исходным именем пользователя. Убедитесь, что в папке SendTo отображается элемент сжатой (заархивированной) папки. Если он в настоящее время неактивен, это означает, что для этого элемента установлено значение «Скрыть». Вам нужно щелкнуть правой кнопкой мыши по этому элементу и выбрать Характеристики.
После этого снимите галочку с Скрытый флажок и щелкните Подать заявление и Ok кнопки соответственно.
Теперь проверьте, отображается ли в меню «Отправить» параметр «Сжатая (заархивированная) папка».
2]Копировать из учетной записи пользователя по умолчанию
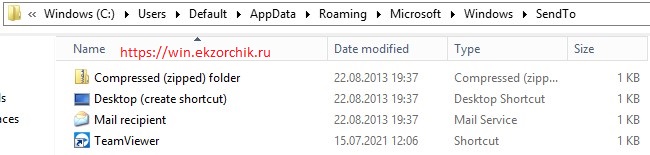
Если вы открыли папку SendTo, но элемент сжатой (заархивированной) папки здесь не отображается, вам следует скопировать его из другого места. Вы можете сделать это из Дефолт учетная запись пользователя. Для этого перейдите по этому пути:
C: Users Default AppData Roaming Microsoft Windows SendTo
Скопируйте Сжатая (заархивированная) папка вариант и вставьте его в следующую папку:
C: Users ваше_имя_пользователя AppData Roaming Microsoft Windows SendTo
Теперь проверьте, видите ли вы параметр Сжатая (заархивированная) папка в меню «Отправить» или нет.
3]Удалить ярлык Bluetooth размером 0 КБ
Если ваше соединение Bluetooth было повреждено ранее, есть вероятность столкнуться с этой проблемой на вашем компьютере. В этом случае вам необходимо удалить ярлык Bluetooth размером 0 КБ. Это не что иное, как ярлык ранее подключенного устройства Bluetooth. Хотя это случается очень редко, ярлык может занимать пространство сжатой (заархивированной) папки в меню «Отправить» и соответственно создавать конфликт. Поэтому, если вы можете найти предмет с именем Bluetooth размером 0 КБ его нужно удалить. При этом не следует удалять элементы, размер которых не менее 1 КБ.
4]Исправить ассоциацию файлов .ZFSendToTarget
.ZFSendToTarget помогает вашей системе работать с различными элементами в меню «Отправить». Однако, если он поврежден, вы можете столкнуться с проблемами. Самый быстрый способ распознать ошибку ассоциации файлов — это проверить значок сжатой (заархивированной) папки в папке SendTo. По умолчанию он показывает значок zip-файла, но может отображать общий значок из-за повреждения. В этом случае вам нужно открыть командную строку с правами администратора и выполнить эту команду;
assoc.zfsendtotarget=CLSID{888DCA60-FC0A-11CF-8F0F-00C04FD7D062}
После этого проверьте, можете ли вы найти опцию Сжатая (заархивированная) папка в меню «Отправить».
Надеюсь, этот пост вам поможет.
Contents
- How to Unhide Missing Items in the Send To Menu in Windows 10
- How to Fix Compressed (Zipped) Folder Is Missing From the Send To Menu in Windows 10
- How to Fix the Compressed (Zipped) Folder Option Is Not Available in the Windows 10 Send To Menu
- Fix 1: Make the Compressed (Zipped) Folder Option Visible
- Fix Two: Add the Compressed (Zipped) Folder Icon to the SendTo Folder
- Fix 3: Correct the .ZFSendToTarget File Association Error
- Fix 4: Delete an Empty Bluetooth Shortcut
- How to Add/Remove Send To Menu Items in Windows 10
- Remove Unwanted Items From the Send To Menu in Windows 10
- Add New Items to the Send To Menu in Windows 10
- Adding a Folder
- Adding an Application

The Windows 10 Send To menu in File Explorer allows you to quickly perform functions such as opening a file in a program or sending it to a location on your PC or external device. It is a shortcut to quickly reach the resource you need to perform an operation on the selected file.
The Send To menu is one of the holdovers from the earliest versions of Windows, and everyone still loves to have it. It is not hard to see why. Anything that enables the user to get things done quicker is a welcome development. You just need to right-click a file and hover the pointer over the Send To option in the context menu. The option expands, allowing you to select one of several applications, locations or devices depending on the configuration of your Send To menu.
However, many people have simply moved on from the Send To menu because it mostly contains options they no longer find useful. I mean, who still uses the “Fax recipient” option? Not you, obviously.
Others simply decided that the Send To option was broken when their favourite selection, such as “Compressed (zipped) folder”, simply disappeared. It is the nature of humans to find alternatives if something doesn’t work.
If you fall into either category, there is good news for you. You can add new options to the Send To menu. You can also unhide any option that has disappeared. This guide is here to show you the way.
The disappearance of a useful item or two from the Send To menu can quickly turn away people from making further use of the feature in Windows 10. If you’re the more persistent sort and would like to recover the missing item, you can easily do so using this guide.
We will focus on the “Compressed (zipped) folder” option in the menu as this is one feature a lot of people use. If another feature, such as Mail recipient, is missing instead, you can follow the same broad steps to recover it.
If the Compressed (zipped) folder option is absent when you expand the Send To menu, you won’t be able to quickly add a file to a zipped folder without using a third-party tool.
This is Windows we’re talking about and anything goes. Sometimes features go missing for no reason, only to reappear after a reboot. In the specific case of the Compressed (zipped) folder option disappearing, it could be due to interference from a corrupted Bluetooth device. It is quite possible, though not common, that the installed device became messed up and somehow took over the space meant to be occupied by the Compressed (zipped) folder option.
Another trigger for the disappearance of this option from the Send To menu in Windows 10 is malware. This can manifest itself either as damage to the relevant registry key that governs the option or corruption of the shortcut in the SendTo folder, where all the options are stored.
If you suspect malware, run a full scan with a trusted antivirus program. Windows Defender has something of a blind spot when it comes to detecting issues with default Windows files. A Microsoft-approved security program like Auslogics Anti-Malware gives you a better chance of fishing out the infection from wherever it might be lurking on your system.
If the Compressed (zipped) folder is hidden, you won’t be able to use it and neither will it show up in the Send To menu. Simply making it visible should fix the error, but not if the issue has to do with the F2SendToTarget file association. You’d need to run a command in an elevated Command Prompt in that case.
There are four easy steps you can take to bring back the option to send files to a zipped folder via the Send To menu. The fifth is to create a new profile, but there is no need to do anything that drastic just yet. The steps below should be more than sufficient to bring back the disappeared item.
Fix 1: Make the Compressed (Zipped) Folder Option Visible
There is a possibility that the option has been hidden and this is stopping it from showing up in the Send To menu. You need to reverse whatever process made it hidden so it can be visible once more.
Before you can manually unhide the feature, you must make sure that the option to show all hidden files, folders and drives is enabled on your Windows 10 PC. Open Control Panel by searching for it and selecting the top result. Next, change the View by mode to Category to arrange the items in the Control Panel by functional groups. Select the Appearance and Personalization option and click the File Explorer Options option in the next window.
When the File Explorer window pops up, switch to the View tab and look for the “Hidden files and folders” option in the Advanced Settings list. You will find two options here. Make sure that you’ve ticked the option “Show hidden files, folders and drives”. Click Apply and then OK to close the window and then exit Control Panel.
Now you will be able to see the hidden Send To option in its native folder. You must navigate to the SendTo folder, where all the options in the Send To menu are actually located. There are multiple ways to do this. One way is to type the following into the Run dialog and click OK:
%AppData%
File Explorer will open in the AppData/Roaming folder. From here, go to Microsoft > Windows > SendTo.
Another method is to manually navigate to the following location via File Explorer:
C:Usersyour_usernameAppDataRoamingMicrosoftWindowsSendTo
The third method involves using this special shell command, which you will type in the address bar of File Explorer:
shell: sendto
Whichever option you go with eventually leads you to the SendTo folder. Here, you’ll find the shortcuts and icons that appear in the Send To menu. You won’t see fixed options, such as drives, as those remain permanent unless the physical drives are removed.
Now, check whether the Compressed (zipped) folder is visible in the SendTo folder. If it is dimmed or grayed out, it has been hidden, but you can change that. Right-click the option and select Properties. In the General tab, untick the Hidden attribute and then click Apply and Okay.
That’s all. Next time you expand the Send To menu, the Compressed (zipped) folder option will be displayed as well.
Fix Two: Add the Compressed (Zipped) Folder Icon to the SendTo Folder
At times, the option you’re trying to fix isn’t visible at all in the SendTo folder. It has either been deleted or magically disappeared. Not to worry though. You can simply copy it from elsewhere — in this case, the SendTo folder in the default user account — and everything will be fine.
Simply navigate to the following location via File Explorer:
C:UsersDefaultAppDataRoamingMicrosoftWindowsSendTo
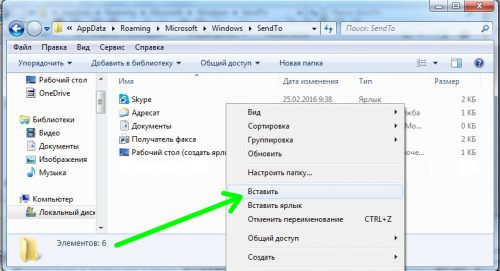
Copy the Compressed (zipped) folder in there and paste it into the SendTo folder of your current user account. You don’t need to do anything else.
After this, you should be able to quickly add files or folders to a compressed folder via the Send To menu.
Fix 3: Correct the .ZFSendToTarget File Association Error
Windows has a system to automatically match files to the programs that can open them. This system of file associations usually proceeds without a hitch, and you don’t have to do anything or even know about it. The options in the Send To menu use this as well to automatically match the selected file with the program(s) or locations it can be sent to or opened with.
If .ZFSendToTarget is corrupted, the inability to bring up certain options, such as the Compressed (zipped) folder option, may be the least of your worries. Even if you can see the icon in the SendTo menu, it may still refuse to work.
Usually, the icon should be a Zip file icon. If it is something else, such as a generic icon, this may be the issue.
Solving this involves using an elevated Command Prompt. Select Command Prompt (Admin) from the hidden Windows 10 menu (Win Key+X) and run the following command:
assoc.zfsendtotarget=CLSID{888DCA60-FC0A-11CF-8F0F-00C04FD7D062}
That’s it. Now check that you can find the Compressed (zipped) folder option in the Send To menu.
Fix 4: Delete an Empty Bluetooth Shortcut
If you’ve previously added a Bluetooth device that later became corrupted, there is a slim possibility it caused the disappearance of the Compressed (zipped) folder option. If you find a Bluetooth shortcut that is zero kilobytes in size anywhere on your system, get rid of it. Particularly, check the SendTo folder for any instance of such a shortcut. Make sure what you’re deleting is actually 0kb in size, otherwise you might end up removing a useful shortcut instead.
Now you know how to unhide an item that disappeared from the SendTo menu. But what if you wish to remove some items altogether? Perhaps the menu is full of options you don’t need, and there are too many of them, causing clutter. You can easily delete the offending ones and make your SendTo menu simple and pleasing to the eye.
We mentioned earlier how many people find the default options in the Send To menu unsatisfying and have stopped using it as a result. Do you know you can add folders, applications and extra locations to the Send To menu easily? Is there a folder you love to transfer newly downloaded files to? Simply add it to the Send To menu and easily move the files there. Let’s explain how to carry out either action.
By now, you should be familiar with the location of this menu on your system. If you need any reminding, it is in “C:Usersyour_usernameAppDataRoamingMicrosoftWindowsSendTo” where “your_username” refers to the name of your current user profile.
Once in the menu, you can perform the simple delete operation to remove those items you don’t want to retain. Right-click the item and select Delete. Simple.
You can make the Send To menu more useful by customizing it to suit your needs. As long as an application or folder or location on your system is navigable via a path, it can be added to the Send To menu. Be careful not to add too many items though. We don’t want the menu looking like an actual menu list in a downtown restaurant.
-
Adding a Folder
Want an easy way to move your photos to the Pictures folder? Perhaps you would appreciate a quicker way to organize project materials by moving them to the folder designed for them after you download them. Simply add the folder shortcut to the Send To menu. Here’s how to do it:
- Open the SendTo folder for your user profile. Open the Run dialog, type “shell:sendto” (without the quotes) and hit the Enter key.
- Open another instance of File Explorer and navigate to the home directory of the folder you wish to add.
- Right-click the folder and select Copy.
- Return to the SendTo window, right-click an empty space and select “Paste shortcut”. Rename the shortcut if you wish.
Next time you expand the Send To menu, your newly created option will appear, allowing you to quickly transfer the chosen file to the selected folder.
-
Adding an Application
Basically, every kind of file on your system has a default program for opening it. Sometimes, you have multiple programs that can open one file type. You may retain one as the default but use the other occasionally or to carry out specialized operations.
You can use the “Open with” feature to choose another program to open a file. You can also create an entry for the application in the Send To menu. Here’s what you need to do:
- As before, open the SendTo folder for your user profile. Open the Run dialog, type “shell:sendto” (without the quotes) and hit the Enter key.
- Next, navigate to the folder of the application you wish to add. Most app folders can be found inC:Program Files (x86).
- Open the application folder and look for the file labeled “Application_Name.exe”. For example, the Adobe Photoshop executable will be “Photoshop.exe”.
- Right-click the application file and select Copy.
- Return to the SendTo window, right-click an empty space and select “Paste shortcut”. Rename the shortcut if you wish.
What you’ve just done simply adds the application to the list of Send To options. You can now choose a photo and quickly open it in your favourite image app or quickly add a file as an attachment in a niche email service. The options are limitless.
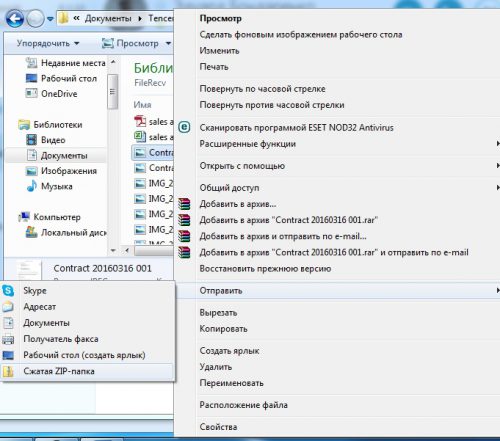
 При нажатии правой кнопкой мыши по файлу или папке в открывшемся контекстном меню присутствует пункт «Отправить», позволяющий быстро создать ярлык на рабочем столе, скопировать файл на флешку, добавить данные в ZIP-архив. При желании, вы можете добавить свои пункты в меню «Отправить» или удалить уже имеющиеся, а также, если требуется — изменить иконки этих пунктов, о чем и пойдет речь в инструкции.
Описываемое возможно реализовать как вручную средствами Windows 10, 8 или Windows 7, так и с помощью сторонних бесплатных программ, оба варианта будут рассмотрены. Обратите внимание, что в Windows 10 в контекстном меню присутствует два пункта «Отправить», первый из них, служит для «отправки» с помощью приложений из магазина Windows 10 и при желании его можно удалить (см. Как удалить «Отправить» из контекстного меню Windows 10). Также может быть интересно: Как убрать пункты из контекстного меню Windows 10.
Как удалить или добавить пункт в контекстное меню «Отправить» в проводнике
Основные пункты контекстного меню «Отправить» в Windows 10, 8 и 7 хранятся в специальной папке C:Usersимя_пользователяAppDataRoamingMicrosoftWindowsSendTo
При желании, вы можете удалить отдельные пункты из этой папки или добавить собственные ярлыки, которые появятся в меню «Отправить». К примеру, если вы хотите добавить пункт для отправки файла в блокнот, шаги будут следующими:
- В проводнике введите в адресную строку shell:sendto и нажмите Enter (это автоматически переведет вас в указанную выше папку).

- В пустом месте папки нажмите правой кнопкой мыши — создать — ярлык — notepad.exe и укажите имя «Блокнот». При необходимости вы можете создать ярлык на папку для быстрой отправки файлов в эту папку с помощью меню.
- Сохраните ярлык, соответствующий пункт в меню «Отправить» появится сразу, без перезагрузки компьютера.

При желании, вы можете изменить ярлыки имеющихся (но в данном случае — не всех, только для тех, которые являются ярлыками с соответствующей стрелочкой у значка) пунктов меню в свойствах ярлыков.
Для изменения иконок других пунктов меню вы можете использовать редактор реестра:
- Перейдите в раздел реестра
HKEY_CURRENT_USERSoftwareClassesCLSID
- Создайте подраздел, соответствующий нужном пункту контекстного меню (список будет далее), а в нем — подраздел DefaultIcon.
- Для значения «По умолчанию» укажите путь к иконке.

- Перезагрузите компьютер или выйдите из Windows и снова зайдите.
Список имен подразделов для пунктов контекстного меню «Отправить»:
- {9E56BE60-C50F-11CF-9A2C-00A0C90A90CE} — Адресат
- {888DCA60-FC0A-11CF-8F0F-00C04FD7D062} — Сжатая ZIP-папка
- {ECF03A32-103D-11d2-854D-006008059367} — Документы
- {9E56BE61-C50F-11CF-9A2C-00A0C90A90CE} — Рабочий стол (создать ярлык)
Редактирование меню «Отправить» с помощью сторонних программ
Существует достаточно большое количество бесплатных программ, позволяющих добавлять или удалять пункты из контекстного меню «Отправить». Среди тех, что можно рекомендовать — SendTo Menu Editor и Send To Toys, причем русский язык интерфейса поддерживается только в первой из них.
SendTo Menu Editor не требует установки на компьютер и очень проста в использовании (не забудьте переключить язык на русский в Options — Languages): в ней вы можете удалить или отключить имеющиеся пункты, добавить новые, а через контекстное меню — изменить иконки или переименовать ярлыки.
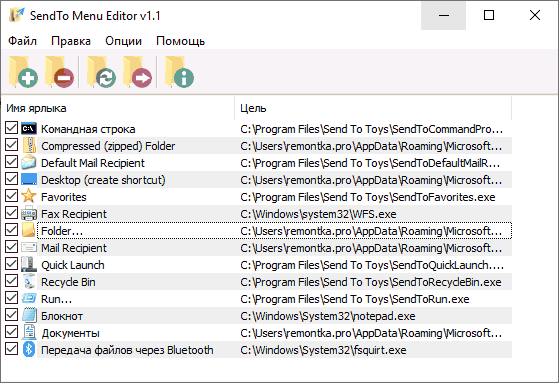
Скачать SenTo Menu Editor можно с официального сайта https://www.sordum.org/10830/sendto-menu-editor-v1-1/ (кнопка загрузки находится внизу страницы).
Дополнительная информация
Если вы хотите полностью удалить пункт «Отправить» в контекстном меню, используйте редактор реестра: перейдите к разделу
HKEY_CLASSES_ROOTAllFilesystemObjectsshellexContextMenuHandlersSend To
Очистите данные из значения «По умолчанию» и перезагрузите компьютер. И, наоборот, если пункт «Отправить» не отображается, убедитесь, что указанный раздел существует и значение по умолчанию установлено в {7BA4C740-9E81-11CF-99D3-00AA004AE837}

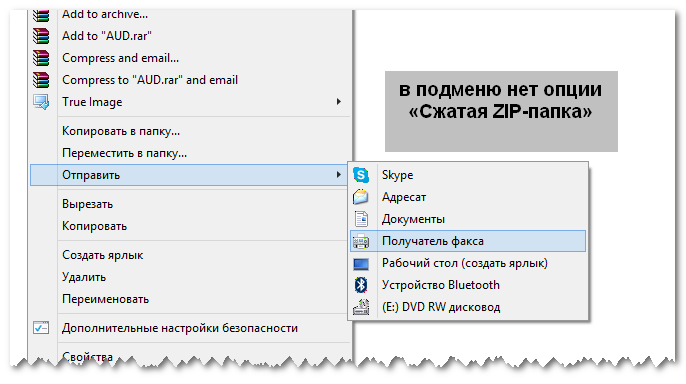
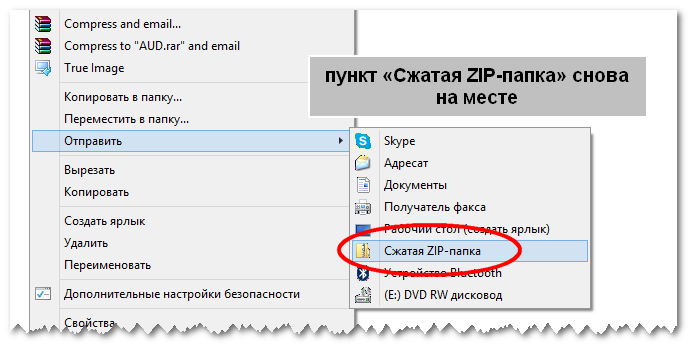
Возможность запаковывать файлы и папки в ZIP-архивы без использования сторонних утилит появилась в Windows очень давно — поддержка ZIP-архивации существовала ещё в версии Millennium Edition. Сегодня формат ZIP поддерживают все без исключения популярные версии системы. Чтобы создать архив, пользователю достаточно кликнуть по архивируемому объекту правой кнопкой мыши и выбрать в контекстном меню опцию «Отправить» -> «Сжатая ZIP-папка».
Тем не менее, в некоторых случаях этот пункт по каким-то причинам может отсутствовать в меню. Иногда он пропадает вследствие ошибок в файловой системе, действия вирусов или в результате неосторожной работы с программами-тиккерами. Но в любом случае его очень просто восстановить и как раз сегодня мы узнаем, как это можно сделать.
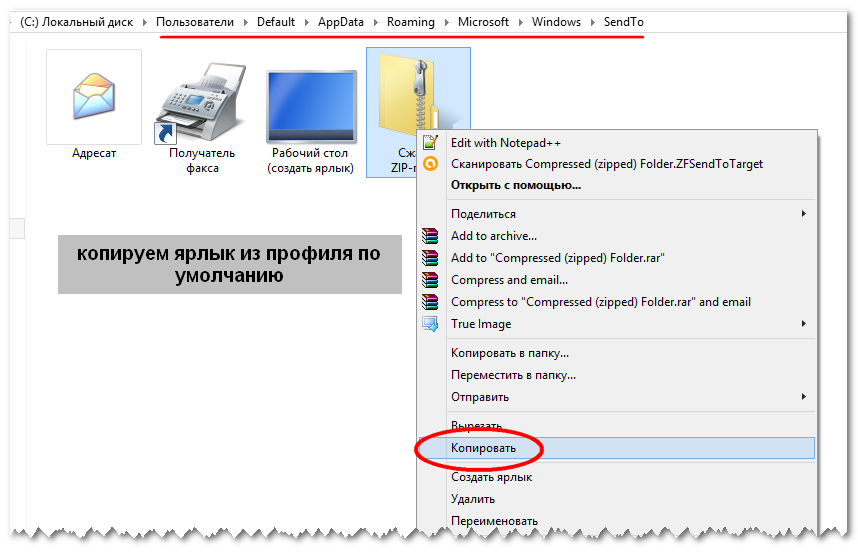
Если элемент меню «Сжатая ZIP-папка» пропал в вашем профиле, это ещё не значит, что тоже самое с ним должно случиться в профиле пользователя по умолчанию. Следовательно, его можно оттуда скопировать.
Чтобы попасть в нужное место профиля вставьте в адресную строку Проводника C:UsersDefaultAppDataRoamingMicrosoftWindowsSendTo и выполните переход. В каталоге SendTo вы увидите несколько ярлыков, в том числе и «Сжатая ZIP-папка». Скопируйте его обычным способом и вставьте в расположение %USERPROFILE%AppDataRoamingMicrosoftWindowsSendTo.
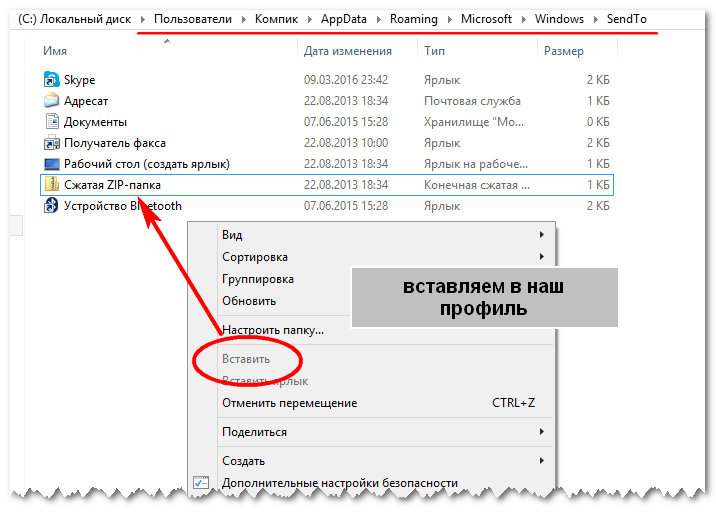
После этого пункт «Сжатая ZIP-папка» появится в вашем контекстном меню.
Описанный здесь способ работает во всех популярных версиях Windows. Также использовать его можно для восстановления (добавления) других элементов подменю «Отправить».
Оцените Статью:
 (Пока оценок нет)
![]() Загрузка…
Загрузка…
5.04.2016 — 21:29 обсудить 2573+
размер текста
Поддержка архивов ZIP средствами системы была реализована очень давно, начиная еще с Windows Me. Естественно, эта функция присутствует во всех версиях современных ОС.
Как сделать ZIP-архив
Для создания архива с помощью системных средств Windows следует просто кликнуть правой кнопкой по выделенному файлу или группе файлов, затем в контекстном меню выбрать «Отправить»-«Сжатая ZIP-папка».
В этой же папке по окончании операции мы получим требуемый ZIP-архив.
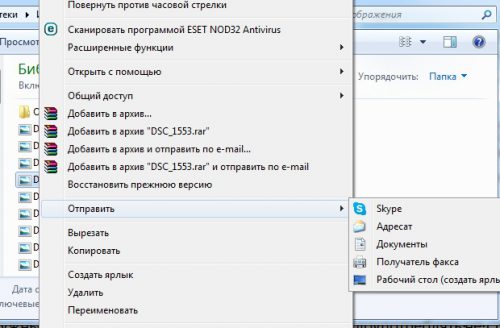
Если пункт «Сжатая ZIP-папка» пропал из меню
Как показывает статистика, данный пункт из контекстного меню часто исчезает. Чаще всего это происходит при чрезмерном увлечении «твикования» системы, причиной также может быть «глюки» файловой системы или даже вирусная атака. Если вы столкнулись с тем, что «Сжатая ZIP-папка» отсутствует в меню – не отчаивайтесь, ситуацию достаточно легко исправить.
В большинстве случаев, данный элемент меню должен остаться в default-профиле, скопируем его оттуда. Чтобы попасть в нужное место, вводим в проводнике следующий адрес:
C:UsersDefaultAppDataRoamingMicrosoftWindowsSendTo
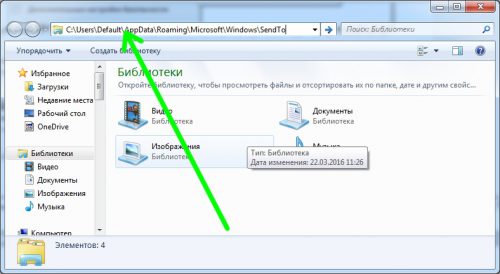
Переходим в соответствующий каталог, находим там искомый ярлык и копируем его.
Переходим в папку по адресу %USERPROFILE%AppDataRoamingMicrosoftWindowsSendTo.
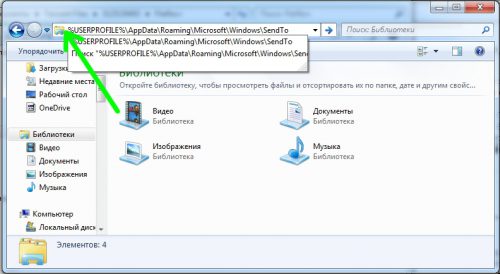
И вставляем туда ярлык.
После этих действия ярлык для ZIP-папки должен снова появиться в контекстном меню.
Вместо послесловия
С помощью описанного выше способа можно вернуть и другие пропавшие ярлыки в пункт контекстного меню «Отправить».
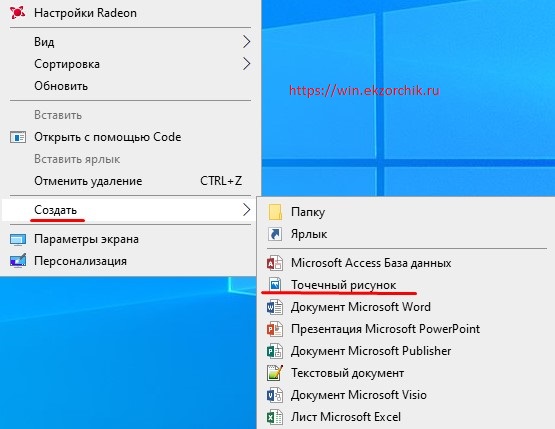
У некоторых сотрудников на Windows 10 Pro при щелчке правой кнопкой мыши на рабочем столе и вызове меню "Создать" — отсутствует выбор "Точечный рисунок"
C:UsersekzorchikAppDataRoamingMicrosoftWindowsSendTo
C:UsersDefaultAppDataRoamingMicrosoftWindowsSendTo
А где же скрывается "Точечный рисунок"?
Решение:
На компьютере у сотрудника отсутствует раздел HKCR.bmp если его нет, то нет возможности вызвать приложение "Точечный рисунок"
|
1 2 3 4 5 6 7 8 9 10 11 12 13 14 15 16 17 18 19 20 21 22 23 24 |
Windows Registry Editor Version 5.00 [HKEY_CLASSES_ROOT.bmp] @=«Paint.Picture» «PerceivedType»=«image» «Content Type»=«image/bmp» [HKEY_CLASSES_ROOT.bmpOpenWithList] [HKEY_CLASSES_ROOT.bmpOpenWithListMSPaint.exe] @=«» [HKEY_CLASSES_ROOT.bmpOpenWithProgids] «Paint.Picture»=«» [HKEY_CLASSES_ROOT.bmpPersistentHandler] @=«{098f2470-bae0-11cd-b579-08002b30bfeb}» [HKEY_CLASSES_ROOT.bmpShellNew] «ItemName»=hex(2):40,00,25,00,73,00,79,00,73,00,74,00,65,00,6d,00,72,00,6f,00, 6f,00,74,00,25,00,5c,00,73,00,79,00,73,00,74,00,65,00,6d,00,33,00,32,00,5c, 00,6d,00,73,00,70,00,61,00,69,00,6e,00,74,00,2e,00,65,00,78,00,65,00,2c,00, 2d,00,35,00,39,00,34,00,31,00,34,00,00,00 «NullFile»=«» |
После импорта данного reg файла (W:ownloadtips_reg>bmp.reg — это я себе в хранилище наработок OwnCloud 10.8.0 сохранил на будущее), возможность выбора приложения "Точечный рисунок" возобновляется.

Именуем его и через правый клик мышью на нем выбираем "Изменить (Edit)" и в редактор Paint вставляем или рисуем.
Задача выполнена. На этом пока все, с уважением автор блога Олло Александр aka ekzorchik.