Problem Statement- I want to copy some files from remote machine (linux) to my windows machine. I know I can do it using pscp.
I tried looking on the internet, I found several articles, but in those articles I was not able to understand and I was having lot of problems in copying the files from Linx box to Windows.
Can anyone provide me step by step method here, so that I can follow that to transfer files. That will be of great help to me.
I am connected to host cli.vip.host.com using putty and that is linux with username- rkost and password as- password. And I want to copy file a.txt from linux to windows.
![]()
AKIWEB
18.5k66 gold badges177 silver badges287 bronze badges
asked Jun 28, 2012 at 18:49
![]()
-
Download PSCP from below link
https://www.chiark.greenend.org.uk/~sgtatham/putty/latest.html
-
Run PSCP
-
Got to command prompt
-
Use the below code
Copy single file
pscp user@host:remote_path/file_name host_pathfile_name

eg: pscp user1@192.168.1.10:/home/user2/a.txt c:Desktopa.txt
Copy all files in a folder
pscp user@host:remote_path/* host_path

eg: pscp user1@192.168.1.10:/home/user2/* c:Desktoptest
Copy all files & folders in a folder
pscp -r user@host:remote_path/ host_path

eg: pscp -r user1@192.168.1.10:/home/user2/ c:Desktoptest
answered Jan 5, 2018 at 6:09
![]()
pvrforpranavvrpvrforpranavvr
2,5482 gold badges23 silver badges33 bronze badges
3
For this kind of problem I use all the time netcat. First, you start netcat as server on a machine with an ip IP_address, and afterwards you send the file from the other machine.
nc -l -p <port-number> > out_file
will start it as server in «listen» state, and will save what you send to it in the file «out_file».(check the man page of your version for more parameters.)
From the other machine you send the file something like this:
< file_to_send nc IP_address
(If you want to send an whole directory, you use tar )
I never used it under Windows (because I work as linux engineer). But you can find nc for windows, that work the same as in linux…
![]()
Jon Lin
141k29 gold badges216 silver badges219 bronze badges
answered Jun 28, 2012 at 19:11
![]()
alinsoaralinsoar
15.1k4 gold badges55 silver badges72 bronze badges
1
if you want to use pscp, you can do this:
pscp -pw password rkost@cli.vip.host.com:/path/to/file c:path
if this doesn’t work try to add enviroment variable:
set PATH=C:pathtoputtydirectory;%PATH%
answered Apr 4, 2014 at 7:26
![]()
After installing POWERSHELL
wow64_microsoft-windows-powershell-exe
you can open the terminal and execute this command line
pscp -r -P Port user@IP:path WINDOWS path
example:
pscp -r -P 2222 user@MyDommain.com:/var/www/html C:2023HTML
answered 2 days ago
![]()
- Make sure you are connected to your vpn server, (i.e. cli.vip.host.com)
-
use following command from your windows machine
pscp -v rkost@remote_ip_addr:/path/to/file/a.txt c:/some_location/ -
you can see the verbose with -v flag.
- If you wants to copy directory from remote linux machine to your windows
just refer my answer in this
PSCP copy files from godaddy to my windows machine
![]()
answered Jan 16, 2017 at 11:36
![]()
Windows 10 now has OpenSSH built in.
https://docs.microsoft.com/en-us/windows-server/administration/openssh/openssh_install_firstuse
Get an admin command prompt
Open PowerShell as an Administrator.
Check available versions
Get-WindowsCapability -Online | ? Name -like 'OpenSSH*'
Install client
Add-WindowsCapability -Online -Name OpenSSH.Client~~~~0.0.1.0
Install server
Add-WindowsCapability -Online -Name OpenSSH.Server~~~~0.0.1.0
Start server and enable at boot
Start-Service sshd
Set-Service -Name sshd -StartupType 'Automatic'
Find your Windows IP address
ipconfig
On your remote (Linux) machine, find your IP address.
ifconfig
Create a public SSH key
ssh-keygen.exe
Copy public key from local (Windows) to remote (Linux) machine so you don’t have to type in a password all the time.
Note that ssh-copy-id is not currently available on Windows.
cat C:UsersYOU/.ssh/id_rsa.pub | ssh USER@REMOTE_IP 'mkdir -p ~/.ssh && cat >> ~/.ssh/authorized_keys'
Do the same on your Linux machine (Note, ssh-copy-id does not work)
ssh-keygen # if needed
cat ~/.ssh/id_rsa.pub | ssh USER@WINDOWS_IP 'mkdir -p ~/.ssh && type con >> C:/Users/YOU/.ssh/authorized_keys'
-
The method above did not work for me, so I ended up manually SCPing the public key over and pasting it into the C:/Users/YOU/.ssh/authorized_keys file.
-
That still did not work, so I had to modify the sshd_config file.
-
Open Notepad as Administrator
-
Open %programdata%sshsshd_config
-
Add the following lines:
-
        Match User YOU
             AuthorizedKeysFile C:/Users/YOU/.ssh/authorized_keys
- Reboot
Create a password on Windows if you don’t already have one
System Settings...Sign-in options
— Note, you can still disable the Windows login screen by a) Setting the ‘Require sign-in’ option to never and b) Using the ‘netplwiz’ command and unticking the ‘Users must enter password…’ checkbox.
Now you should be able to SSH or SCP from your Linux machine
scp FILE WINDOWS_IP:C:/Users/YOU/Desktop
предыдущая глава | содержание | следующая глава
- 5.1 Starting PSCP
- 5.2 PSCP Usage
- 5.2.1 The basics
- 5.2.2 Options
- 5.2.3 Return value
- 5.2.4 Using public key authentication with PSCP
PSCP, the PuTTY Secure Copy client, is a tool for transferring files securely between computers using an SSH connection.
If you have an SSH-2 server, you might prefer PSFTP (see chapter 6) for interactive use. PSFTP does not in general work with SSH-1 servers, however.
5.1 Starting PSCP
PSCP is a command line application. This means that you cannot just double-click on its icon to run it and instead you have to bring up a console window. With Windows 95, 98, and ME, this is called an «MS-DOS Prompt» and with Windows NT, 2000, and XP, it is called a «Command Prompt». It should be available from the Programs section of your Start Menu.
To start PSCP it will need either to be on your PATH or in your current directory. To add the directory containing PSCP to your PATH environment variable, type into the console window:
set PATH=C:pathtoputtydirectory;%PATH%
This will only work for the lifetime of that particular console window. To set your PATH more permanently on Windows NT, 2000, and XP, use the Environment tab of the System Control Panel. On Windows 95, 98, and ME, you will need to edit your AUTOEXEC.BAT to include a set command like the one above.
5.2 PSCP Usage
Once you’ve got a console window to type into, you can just type pscp on its own to bring up a usage message. This tells you the version of PSCP you’re using, and gives you a brief summary of how to use PSCP:
Z:owendadmin>pscp
PuTTY Secure Copy client
Release 0.73
Usage: pscp [options] [user@]host:source target
       pscp [options] source [source...] [user@]host:target
       pscp [options] -ls [user@]host:filespec
Options:
  -V        print version information and exit
  -pgpfp    print PGP key fingerprints and exit
  -p        preserve file attributes
  -q        quiet, don't show statistics
  -r        copy directories recursively
  -v        show verbose messages
  -load sessname  Load settings from saved session
  -P port   connect to specified port
  -l user   connect with specified username
  -pw passw login with specified password
  -1 -2     force use of particular SSH protocol version
  -4 -6     force use of IPv4 or IPv6
  -C        enable compression
  -i key    private key file for user authentication
  -noagent  disable use of Pageant
  -agent    enable use of Pageant
  -hostkey aa:bb:cc:...
            manually specify a host key (may be repeated)
  -batch    disable all interactive prompts
  -no-sanitise-stderr  don't strip control chars from standard error
  -proxycmd command
            use 'command' as local proxy
  -unsafe   allow server-side wildcards (DANGEROUS)
  -sftp     force use of SFTP protocol
  -scp      force use of SCP protocol
  -sshlog file
  -sshrawlog file
            log protocol details to a file
(PSCP’s interface is much like the Unix scp command, if you’re familiar with that.)
5.2.1 The basics
To receive (a) file(s) from a remote server:
pscp [options] [user@]host:source target
So to copy the file /etc/hosts from the server example.com as user fred to the file c:tempexample-hosts.txt, you would type:
pscp fred@example.com:/etc/hosts c:tempexample-hosts.txt
To send (a) file(s) to a remote server:
pscp [options] source [source...] [user@]host:target
So to copy the local file c:documentsfoo.txt to the server example.com as user fred to the file /tmp/foo you would type:
pscp c:documentsfoo.txt fred@example.com:/tmp/foo
You can use wildcards to transfer multiple files in either direction, like this:
pscp c:documents*.doc fred@example.com:docfiles
pscp fred@example.com:source/*.c c:source
However, in the second case (using a wildcard for multiple remote files) you may see a warning saying something like «warning: remote host tried to write to a file called «terminal.c» when we requested a file called «*.c». If this is a wildcard, consider upgrading to SSH-2 or using the «-unsafe» option. Renaming of this file has been disallowed».
This is due to a fundamental insecurity in the old-style SCP protocol: the client sends the wildcard string (*.c) to the server, and the server sends back a sequence of file names that match the wildcard pattern. However, there is nothing to stop the server sending back a different pattern and writing over one of your other files: if you request *.c, the server might send back the file name AUTOEXEC.BAT and install a virus for you. Since the wildcard matching rules are decided by the server, the client cannot reliably verify that the filenames sent back match the pattern.
PSCP will attempt to use the newer SFTP protocol (part of SSH-2) where possible, which does not suffer from this security flaw. If you are talking to an SSH-2 server which supports SFTP, you will never see this warning. (You can force use of the SFTP protocol, if available, with -sftp — see section 5.2.2.6.)
If you really need to use a server-side wildcard with an SSH-1 server, you can use the -unsafe command line option with PSCP:
pscp -unsafe fred@example.com:source/*.c c:source
This will suppress the warning message and the file transfer will happen. However, you should be aware that by using this option you are giving the server the ability to write to any file in the target directory, so you should only use this option if you trust the server administrator not to be malicious (and not to let the server machine be cracked by malicious people). Alternatively, do any such download in a newly created empty directory. (Even in «unsafe» mode, PSCP will still protect you against the server trying to get out of that directory using pathnames including «..».)
5.2.1.1 user
The login name on the remote server. If this is omitted, and host is a PuTTY saved session, PSCP will use any username specified by that saved session. Otherwise, PSCP will attempt to use the local Windows username.
5.2.1.2 host
The name of the remote server, or the name of an existing PuTTY saved session. In the latter case, the session’s settings for hostname, port number, cipher type and username will be used.
5.2.1.3 source
One or more source files. Wildcards are allowed. The syntax of wildcards depends on the system to which they apply, so if you are copying from a Windows system to a UNIX system, you should use Windows wildcard syntax (e.g. *.*), but if you are copying from a UNIX system to a Windows system, you would use the wildcard syntax allowed by your UNIX shell (e.g. *).
If the source is a remote server and you do not specify a full pathname (in UNIX, a pathname beginning with a / (slash) character), what you specify as a source will be interpreted relative to your home directory on the remote server.
5.2.1.4 target
The filename or directory to put the file(s). When copying from a remote server to a local host, you may wish simply to place the file(s) in the current directory. To do this, you should specify a target of .. For example:
pscp fred@example.com:/home/tom/.emacs .
…would copy /home/tom/.emacs on the remote server to the current directory.
As with the source parameter, if the target is on a remote server and is not a full path name, it is interpreted relative to your home directory on the remote server.
5.2.2 Options
PSCP accepts all the general command line options supported by the PuTTY tools, except the ones which make no sense in a file transfer utility. See section 3.8.3 for a description of these options. (The ones not supported by PSCP are clearly marked.)
PSCP also supports some of its own options. The following sections describe PSCP’s specific command-line options.
5.2.2.1 -ls list remote files
If the -ls option is given, no files are transferred; instead, remote files are listed. Only a hostname specification and optional remote file specification need be given. For example:
pscp -ls fred@example.com:dir1
The SCP protocol does not contain within itself a means of listing files. If SCP is in use, this option therefore assumes that the server responds appropriately to the command ls -la; this may not work with all servers.
If SFTP is in use, this option should work with all servers.
5.2.2.2 -p preserve file attributes
By default, files copied with PSCP are timestamped with the date and time they were copied. The -p option preserves the original timestamp on copied files.
5.2.2.3 -q quiet, don’t show statistics
By default, PSCP displays a meter displaying the progress of the current transfer:
mibs.tar | 168 kB | 84.0 kB/s | ETA: 00:00:13 | 13%
The fields in this display are (from left to right), filename, size (in kilobytes) of file transferred so far, estimate of how fast the file is being transferred (in kilobytes per second), estimated time that the transfer will be complete, and percentage of the file so far transferred. The -q option to PSCP suppresses the printing of these statistics.
5.2.2.4 -r copies directories recursively
By default, PSCP will only copy files. Any directories you specify to copy will be skipped, as will their contents. The -r option tells PSCP to descend into any directories you specify, and to copy them and their contents. This allows you to use PSCP to transfer whole directory structures between machines.
5.2.2.5 -batch avoid interactive prompts
If you use the -batch option, PSCP will never give an interactive prompt while establishing the connection. If the server’s host key is invalid, for example (see section 2.2), then the connection will simply be abandoned instead of asking you what to do next.
This may help PSCP’s behaviour when it is used in automated scripts: using -batch, if something goes wrong at connection time, the batch job will fail rather than hang.
5.2.2.6 -sftp, -scp force use of particular protocol
As mentioned in section 5.2.1, there are two different file transfer protocols in use with SSH. Despite its name, PSCP (like many other ostensible scp clients) can use either of these protocols.
The older SCP protocol does not have a written specification and leaves a lot of detail to the server platform. Wildcards are expanded on the server. The simple design means that any wildcard specification supported by the server platform (such as brace expansion) can be used, but also leads to interoperability issues such as with filename quoting (for instance, where filenames contain spaces), and also the security issue described in section 5.2.1.
The newer SFTP protocol, which is usually associated with SSH-2 servers, is specified in a more platform independent way, and leaves issues such as wildcard syntax up to the client. (PuTTY’s SFTP wildcard syntax is described in section 6.2.2.) This makes it more consistent across platforms, more suitable for scripting and automation, and avoids security issues with wildcard matching.
Normally PSCP will attempt to use the SFTP protocol, and only fall back to the SCP protocol if SFTP is not available on the server.
The -scp option forces PSCP to use the SCP protocol or quit.
The -sftp option forces PSCP to use the SFTP protocol or quit. When this option is specified, PSCP looks harder for an SFTP server, which may allow use of SFTP with SSH-1 depending on server setup.
5.2.2.7 -no-sanitise-stderr: control error message sanitisation
The -no-sanitise-stderr option will cause PSCP to pass through the server’s standard-error stream literally, without stripping control characters from it first. This might be useful if the server were sending coloured error messages, but it also gives the server the ability to have unexpected effects on your terminal display. For more discussion, see section 7.2.3.5.
5.2.3 Return value
PSCP returns an ERRORLEVEL of zero (success) only if the files were correctly transferred. You can test for this in a batch file, using code such as this:
pscp file*.* user@hostname:
if errorlevel 1 echo There was an error
5.2.4 Using public key authentication with PSCP
Like PuTTY, PSCP can authenticate using a public key instead of a password. There are three ways you can do this.
Firstly, PSCP can use PuTTY saved sessions in place of hostnames (see section 5.2.1.2). So you would do this:
- Run PuTTY, and create a PuTTY saved session (see section 4.1.2) which specifies your private key file (see section 4.23.8). You will probably also want to specify a username to log in as (see section 4.15.1).
- In PSCP, you can now use the name of the session instead of a hostname: type
pscp sessionname:file localfile, wheresessionnameis replaced by the name of your saved session.
Secondly, you can supply the name of a private key file on the command line, with the -i option. See section 3.8.3.18 for more information.
Thirdly, PSCP will attempt to authenticate using Pageant if Pageant is running (see chapter 9). So you would do this:
- Ensure Pageant is running, and has your private key stored in it.
- Specify a user and host name to PSCP as normal. PSCP will automatically detect Pageant and try to use the keys within it.
For more general information on public-key authentication, see chapter 8.
Use the PSCP tool from the putty download page:
http://www.chiark.greenend.org.uk/~sgtatham/putty/download.html
PSCP is the putty version of scp which is a cp (copy) over ssh command.
PSCP needs to be installed on your windows computer (just downloaded, really, there is no install process. In the Packaged Files section, pscp.exe is already included). Nothing needs to be installed on the school’s servers. PSCP and scp both use ssh to connect.
To answer the usage question from the comments:
To upload from your computer to a remote server:
c:pscp c:somepathtoafile.txt user@remote:homeusersomepath
This will upload the file file.txt to the specified directory on the server.
If the final part of the destination path is NOT a directory, it will be the new file name. You could also do this to upload the file with a different name:
c:pscp c:somepathtoafile.txt user@remote:homeusersomepathnewname.txt
To download a file from a remote server to your computer:
c:pscp user@remote:homeusersomefile.txt c:somepathtoa
or
c:pscp user@remote:homeusersomefile.txt c:somepathtoanewfile.txt
or
c:pscp user@remote:homeusersomefile.txt .
With a lone dot at the end there. This will download the specified file to the current directory.
Since the comment is too far down, I should also point out here that WinSCP exists providing a GUI for all this, if that’s of interest: http://winscp.net/eng/download.php
В статье мы расскажем, как копировать файлы в Windows и Linux-системах, и покажем основные команды, с помощью которых происходит передача файлов по SSH.
Для копирования файлов по SSH в Linux-системах и Windows используют разные инструменты:
- scp (Secure CoPy) — утилита для безопасного копирования данных между Linux-системами по протоколу SSH. Она входит в состав OpenSSH, поэтому для работы с утилитой не нужно устанавливать дополнительное ПО;
- pscp.exe — утилита для загрузки файлов по SSH в ОС Windows. Она обладает теми же возможностями, что и scp. Утилита входит в состав программы Putty — SSH-клиента для Windows. Скачать программу можно по ссылке.
Обратите внимание
Если файл, который вы хотите скопировать, уже существует на целевом хосте, при копировании он будет перезаписан.
Копирование файлов по SSH на Linux
Для Linux копирование файлов по SSH происходит с использованием команды scp. С её помощью можно копировать файлы:
- с локального компьютера на удалённый сервер,
- с удалённого сервера на локальный компьютер,
- с одного удалённого сервера на другой.
Общий вид команды:
scp [опция] [источник] [получатель]Обратите внимание
Для подключения к удалённому серверу вам понадобится логин и пароль пользователя.
Как скопировать файл по SSH с локальной машины на удалённый сервер
Как загрузить файл на сервер по SSH? Для этого используйте команду вида:
scp [путь к файлу] [имя пользователя]@[имя сервера/ip-адрес]:[путь к файлу]Пример команды:
scp /home/test.txt root@123.123.123.123:/directoryФайл test.txt будет скопирован на хост 123.123.123.123 в директорию «/directory».
Как скопировать файлы с удалённого сервера на локальный компьютер
При подключённом SSH скачать файл на локальный компьютер с удалённого сервера можно с помощью команды:
scp [имя пользователя]@[имя сервера/ip-адрес]:[путь к файлу] [путь к файлу]Пример команды:
scp root@123.123.123.123:/home/test.txt /directoryФайл test.txt будет загружен с сервера 123.123.123.123 на локальный компьютер в папку «/directory».
Как скопировать файл по SSH с одного удалённого сервера на другой
Подключитесь по SSH к серверу, на котором расположен файл. Затем выполните команду:
scp [путь к файлу] [имя пользователя]@[имя сервера/ip-адрес]:[путь к файлу]Пример команды:
scp /home/test.txt root@123.123.123.123:/directoryФайл test.txt будет скопирован на хост 123.123.123.123 в директорию «/directory».
Как скачать папку со всеми файлами и подпапками
Если вы хотите скачать папку со всеми файлами и подпапками, используйте ключ -r:
scp -r [источник] [получатель]Как подключиться к серверу по нестандартному порту
Бывает, что для подключения по SSH нужно указать нестандартный порт. Без указания порта команда подключается к серверу по стандартному 22 порту. Чтобы указать нестандартный порт, введите команду с ключом -P:
scp -P [источник] [получатель]Пример команды:
scp -P 12345 /home/test.txt root@123.123.123.123:/directoryЭта команда подключается по порту 12345 к серверу 123.123.123.123 и копирует на него файл «test.txt» с локального компьютера в директорию «/directory».
Как передать и скачать файлы по SSH на Windows
Скопировать файл по SSH на сервер можно командой:
pscp [путь к файлу] [имя пользователя]@[имя сервера/ip-адрес]:[путь к файлу]Скачать файл по SSH с сервера командой:
pscp [имя пользователя]@[имя сервера/ip-адрес]:[путь к файлу] [путь к файлу]Увидеть список папок и файлов на сервере можно через pscp.exe. Для этого введите:
pscp -ls [имя пользователя]@[имя сервера/ip-адрес]:[путь]Если в пути или в названии файла есть пробелы, используйте кавычки:
pscp “C:files or docsfile name” root@123.123.123.123:/homeСодержание
- Копирование файлов через SSH
- Копирование файлов по SSH на Linux
- Как скопировать файл по SSH с локальной машины на удалённый сервер
- Как скопировать файлы с удалённого сервера на локальный компьютер
- Как скачать папку со всеми файлами и подпапками
- Как подключиться к серверу по нестандартному порту
- Как передать и скачать файлы по SSH на Windows
- Копирование файлов scp
- Что такое SCP?
- Копирование файлов scp
- Выводы
Копирование файлов через SSH
В статье мы расскажем, как копировать файлы в Windows и Linux-системах, и покажем основные команды, с помощью которых происходит передача файлов по SSH.
Для копирования файлов по SSH в Linux-системах и Windows используют разные инструменты:
Копирование файлов по SSH на Linux
Для Linux копирование файлов по SSH происходит с использованием команды scp. С её помощью можно копировать файлы:
scp [опция] [источник] [получатель]
Как скопировать файл по SSH с локальной машины на удалённый сервер
Как загрузить файл на сервер по SSH? Для этого используйте команду вида:
scp [путь к файлу] [имя пользователя]@[имя сервера/ip-адрес]:[путь к файлу]
scp /home/test.txt root@123.123.123.123:/directory
Файл test.txt будет скопирован на хост 123.123.123.123 в директорию «/directory».
Как скопировать файлы с удалённого сервера на локальный компьютер
При подключённом SSH скачать файл на локальный компьютер с удалённого сервера можно с помощью команды:
scp [имя пользователя]@[имя сервера/ip-адрес]:[путь к файлу] [путь к файлу]
scp root@123.123.123.123:/home/test.txt /directory
Файл test.txt будет загружен с сервера 123.123.123.123 на локальный компьютер в папку «/directory».
Как скачать папку со всеми файлами и подпапками
Если вы хотите скачать папку со всеми файлами и подпапками, используйте ключ -r:
Как подключиться к серверу по нестандартному порту
Бывает, что для подключения по SSH нужно указать нестандартный порт. Без указания порта команда подключается к серверу по стандартному 22 порту. Чтобы указать нестандартный порт, введите команду с ключём -P:
Эта команда подключается по порту 12345 к серверу 123.123.123.123 и копирует на него файл «test.txt» с локального компьютера в директорию «/directory».
Как передать и скачать файлы по SSH на Windows
Скопировать файл по SSH на сервер можно командой:
pscp [путь к файлу] [имя пользователя]@[имя сервера/ip-адрес]:[путь к файлу]
Скачать файл по SSH с сервера командой:
pscp [имя пользователя]@[имя сервера/ip-адрес]:[путь к файлу] [путь к файлу]
Увидеть список папок и файлов на сервере можно через pscp.exe. Для этого введите:
Если в пути или в названии файла есть пробелы, используйте кавычки:
pscp “C:files or docsfile name” root@123.123.123.123:/home
Источник
Копирование файлов scp
Если у вас есть домашний сервер или сервер в интернете, то вам понадобится способ для безопасного перемещения файлов между машинами. Между локальными машинами мы могли бы просто переносить данные с помощью флешки, но на удаленный сервер нужно передавать данные только через сеть. Есть много способов реализации этой задачи.
В этой статье мы рассмотрим как выполняется копирование файлов с помощью утилиты scp (Secure Copy Command), а также что из себя представляет команда Linux scp. При передаче файлы шифруются, так что больше никто не сможет получить к ним доступ и самое интересное, что вам не нужно настраивать FTP или другое дополнительное программное обеспечение. Будет достаточно сервера SSH.
Что такое SCP?
Копирование файлов scp
Эта статья рассчитана в первую очередь на начинающих, поэтому я попытаюсь объяснять все как можно подробнее. Перед тем, как мы перейдем к практике, нужно рассмотреть общий синтаксис команды:
$ scp опции пользователь1@хост1 : файл пользователь2@хост2: файл
Опции утилиты больше касаются протокола SSH и настраивают общее ее поведение. Дальше следует адрес первого и второго файла. Каждый из них может быть расположен как на локальной, так и на удаленной машине. А теперь рассмотрим основные опции, которые могут нам понадобиться:
scp /home/sergiy/file root@losst.ru:/root/

В качестве пользователя нужно использовать любого пользователя, который есть на сервере. Вместо IP вы можете также домен сервера. Только необходимо, чтобы у выбранного пользователя были права записи в указанную папку.

Убедитесь, что у исходного каталога нет косой черты, а у каталога назначения она должна обязательно быть. Немного изменив синтаксис с косой чертой можно передать все файлы из каталога на удаленный сервер:

Если поменять местами локальный путь и сервер, то вы сможете копировать файлы scp c удаленного сервера на локальный компьютер:
scp root@losst.ru:/root/file /home/sergiy/
Таким же самым образом вы можете копирование файлов scp или папок с сервера:

Обратите внимание, что папка, в которую вы собираетесь копировать должна завершаться косой чертой, иначе папка, которую вы копируете запишется вместо той, в которую нужно скопировать.
Чтобы скачать файл scp из одного сервера на другой, просто необходимо указать данные аутентификации на каждом из них. Например, скопируем один файл:
scp root@losst.ru:/home/root/index.html root@losst.ru:/home/root/www/
Скопируем папку с того же удаленного сервера:
scp root@losst.ru:/root/photos root@losst.ru:/home/root/www/
Выводы
В этой статье мы рассмотрели как выполняется передача файлов scp, как это работает и что вы можете сделать с помощью этой утилиты. Как вы видите, перемещать файлы с одного сервера на другой очень просто. В Linux достаточно понять основы чтобы начать работать эффективнее! А команда scp один из таких инструментов.
Источник
Secure data transfer via SCP
In the last article I showed you how to transfer data to a Ubuntu system via FTP. Nowadays FTP is not secure enough for internet use. Therefore I will show you SCP today. SCP is based on the SSH protocol. Therefore you need a user who can also access the server via SSH. As with SSH, you can use SSH keys to establish SCP connections. How to create SSH keys and store them on your server is shown in this article.
Since Linux servers can also be managed from a Windows client, I will also show you the free program WinSCP in the course of this article, with which you can also transfer data from Windows to Linux servers via SCP.
Prepare Server
Since SCP or SSH as a client is a fixed part of every Linux distribution, you don’t need any further preparation on the client side. On the server side, depending on the distribution, you may need to install the SSH server service.
As before any installation, you should update your server to the latest version. For operating systems based on Debian (such as Ubuntu or Kubuntu), use the following command:
Copyapt -y update && apt -y upgrade && apt -y dist-upgrade
For CentOS or Red Hat or similar distributions YUM is used as package manager. Therefore, the command is as follows:
Copyyum update
To update your Fedora system, use the following command.
Copydnf update && dnf upgrade
Then start the installation with the following command:
Debian / Ubuntu
Copyapt -y install openssh-server
CentOS / RHEL
Copyyum install openssh-server
Fedora
Copydnf install openssh-server
Establishing a SSH connection
To test if the setup was successful, connect to your server via SSH. Open a terminal from your Linux or Apple client and execute the following command:
Copyssh <username>@<IPorDomainofServer>
Example:
Copyssh root@10.10.0.12
If you are using an SSH key, enter the password for your key now. Otherwise, the password for the user on the remote computer must be specified.
If everything is set up, the console of the remote computer should now be visible. If not, check your firewall settings. SSH requires port 22/tcp. You can also check the config of the SSH server and make sure that your user has the appropriate permissions.
Once you have successfully established the connection, you can close it again. Simply enter the command exit.
Copyexit
Transfer a file via SCP
For testing purposes, it is best to create a test file.
Copytouch /test.file
To transfer the file test.file to the other server use the following command:
Copyscp /path/to/file <benutzername>@<IPorDomainofServer>:/Path/to/destionationfolder/
Example:
Copyscp /test.file root@10.10.0.12:/root/secret/test.file
The file is now transferred to /root/secret on the server with IP 10.10.0.12.
If you want to download a file from a remote computer, you can also use SCP. The structure of the command has to be reversed.
Copyscp <username>@<IPorDomainofServer>:/Path/to/file/destination/path
Example:
Copyscp root@10.10.0.12:/root/secret/test.file /root/lokalsecrets/test.file
Make sure that the directories already exist.
You can also use SCP to transfer files from one server to another, from your client.
The syntax will look like this.
Copyscp <username>@<IPorDomainofServer>:/path/to/file <username>@<IPorDomainofServer>:/Path/to/destination
Example:
Copyscp root@10.10.0.12:/test.datei root@10.10.0.13/root/secret/test.file
If you use Windows 10 as client (from version 16.07) you can install the Linux subsystem and get a Ubuntu Bash including APT. With this you can use the syntax already shown.
Right-click “Start”, then on “Programs and Features” or for version 1703 “Apps and Features” and then on “Programs and Features”, then on “Activate or deactivate Windows features”. In the now open window, look for “Windows subsystem for Linux (beta)”. Afterwards the developer mode must be activated under Start -> Settings -> Update and security -> For developers. After the installation run cmd and type the command bash.
bash
Then confirm the installation with Y and type in a user name and password after a short wait.
If you are using an older version of Windows, you can take a look at the WinSCP program. You can find the current release here.
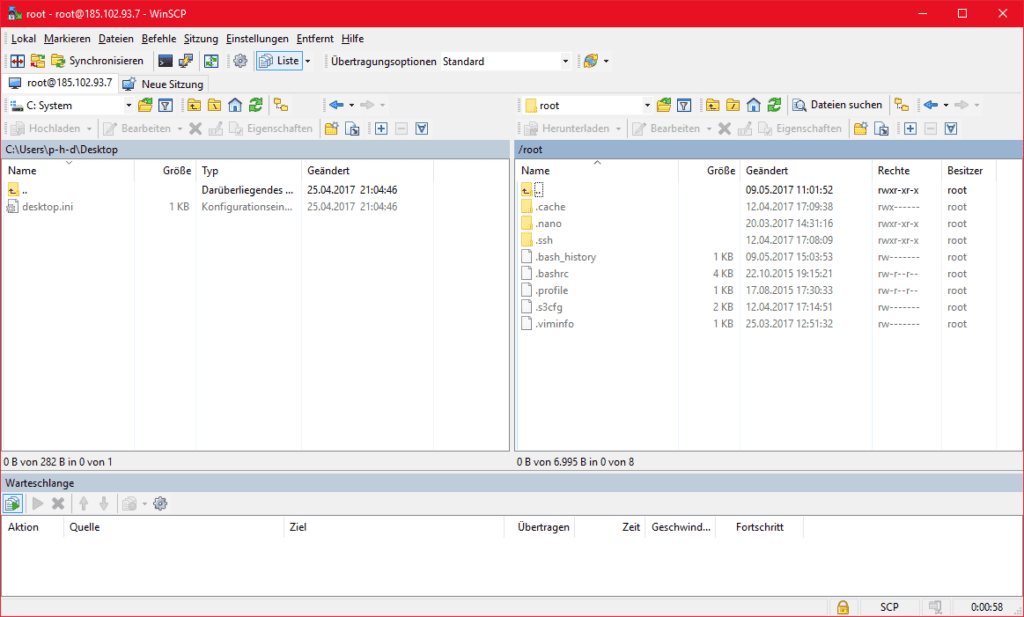
The setup of the tool is quite simple. Select Total Commander mode during installation. So on the left side of the window you will see your Local Folder Structure and on the right side the one of the server you have connected to. Files can be moved back and forth via Drag ‘n Drop and renamed, executed or deleted with a right click.
Conclusion
SCP is fairly quick to learn and reliably transmits even large amounts of data securely over the Internet. SCP is unfortunately very Linux-heavy – that means – Windows as client is no problem, but as soon as you use Windows as server, it becomes very difficult. As an alternative you can use WebDAV for example. I’ll show you how this works in this article. So if you work with different operating systems, you should take a look at both techniques.
SCP (Secure Copy) is a command-line utility that allows you to securely copy files from one computer to another over a secure, encrypted connection. It uses the SSH protocol to provide a secure connection to the remote system.
With the scp command you can securely copy files or directories in the following ways:
- From your local system to a remote system
- From a remote system to your local system
- Between two remote systems, while sending the commands from your local system.
The SCP command-line utility is available in most Linux distributions.
In this tutorial we’ll cover how to use the scp command in various scenarios to securely transfer files from one computer to another, using practical examples. We’ll also show you some of the most frequent options that you can use with the scp command to customize your file transfers.
SCP is usually used to refer to both SCP (the command-line utility, developed by the OpenSSH Project), as well as Secure Copy Protocol, which is the protocol used by the utility.
SCP is based on the Secure Shell (SSH) protocol, and it comes with a similar set of options, and is provided in most SSH implementations.
It uses credentials (such as passwords or SSH keys) for authentication, and it secures your transfers by encrypting both passwords and the transferred data, so your contents should be impervious to snooping.
A related protocol is SFTP (Secure File Transfer Protocol), however SCP does not have some of the capabilities that SFTP does, such as resuming broken transfers or remote file manipulation, like deletion.
SCP is similar to rsync, but unlike rsync, scp can only securely copy files and cannot sync directories.
Table of Contents
- About the SCP Command
- Before You Begin
- Requirements
- Useful Info
- SCP Command Syntax
- Securely Copy Files and Directories Between Two Hosts With the SCP Command
- 1. Copy a Local File to a Remote Host Using SCP Command
- Copy Multiple Local Files to a Remote Host
- 2. Copy a Remote File to Your Local Machine Using SCP Command
- Copy Multiple Remote Files to Your Local Machine
- 3. Copy a File between Two Remote Hosts Using the SCP Command
- Copy Files Between Two Remote Hosts That Are Not in The Same Network
- 5. Copy Files with Certain Extensions With the SCP Command
- 6. Copy a Directory Recursively With the SCP Command
- 1. Copy a Local File to a Remote Host Using SCP Command
- SCP Options
- SCP Verbose Mode (-v, -vv, -vvv)
- Transfer and Compress Files on The Fly (-C)
- Limit Bandwidth Usage (-l)
- Specify Port Number (-P)
- Set a Different Cipher (-c)
- Force SCP to Use IPv4 or IPv6 Addresses (-4 / -6)
- Automate File Transfers Using a SCP Shell Script
- SSH Key (Identity File) Path (-i) with the SCP Command
- Using Multiple SCP Command Options
- Preserve File Modification/Access Times and Modes With the SCP Command (-p)
- How to Resume Interrupted SCP File Transfers
- Resume Interrupted File Transfers with SFTP Reget or Reput
- Installing SCP (Optional)
- Install SCP on Linux
- Install SCP on Debian-based Distros
- Install SCP on RHEL-based Distros
- Install SCP on Windows
- pscp (Putty) – Windows SCP via Command-line
- Copy Files from Windows to Linux with PSCP
- Copy Files from Linux to Windows with PSCP
- WinSCP – GUI Version of SCP
- Install SCP on Linux
- Conclusion
Before You Begin
Requirements
- To be able to transfer files from/to remote hosts via
scp, you need the user’s authentication credentials – such as user/password or SSH keys. - To be able to transfer files between systems you must have at least read permissions on the source file and write permissions on the destination system.
Useful Info
By default, scp operates on port 22 unless you change it using a command-line option.
You can use SCP with Linux, Mac, and Windows.
SCP should already be installed on Linux and Mac, however on Windows you have to install it – if you’re on Windows please see the section below on installing SCP on Windows.
When transferring large files, you’ll probably have to wait some time for the transfers to finish. For various reasons, you may not want to have to keep the command line open for hours. A solution here is running the scp command inside a terminal multiplexer such as screen or tmux, which allow you to leave commands running even if you log off.
SCP Command Syntax
The basic syntax of the SCP command is the following.
scp [OPTIONS] [[[email protected]]SOURCE_HOST:]file1 [[[email protected]]DESTINATION_HOST:]file2
Let’s break down and explain what the above expression means:
[OPTIONS]: Options alter the scp command’s behavior, such as changing the encryption cipher, ssh_config location, identity file location, limit bandwidth, change SSH port, recursive copy, and others.
You can check all available options by running man scp in the command line or read the scp man page online.
[[[email protected]]SOURCE_HOST:]file1: This is the source file, the file to be copied.
If you’re copying from your local machine then you should just specify the relative (~/file1) or absolute path (/home/edxd/file1).
If the source file is located on a remote system, then you’ll have to specify the user and host ([email protected]_source_ip) followed by the colon (:) separator, and then the file’s absolute or relative path.
For example: [email protected]:/var/www/file1.txt
[[[email protected]]DESTINATION_HOST:]file2: This is the destination file, where the file is going to be copied.
If you’re copying to a remote host, it should include the user and host specification [email protected]_destination_ip:/path/to/file2.
If you’re copying from a remote host to your machine, the absolute or relative path where you want the file copied, such as just /path/to/file2.
There are a few ways you can handle the remote user and host specifications.
You can use:
- an IP address:
[email protected] - a domain name:
[email protected] - a host defined in the
/etc/hostsfile - a host defined in
~/.ssh/config(or%userprofile%.sshconfigon Windows, usuallyC:Usersyour_user.sshconfig)
Securely Copy Files and Directories Between Two Hosts With the SCP Command
1. Copy a Local File to a Remote Host Using SCP Command
It’s one of the most straightforward SCP commands you can carry out. We’re copying a single file (example.txt) from our computer to our remote host, which has .
To copy a local file to a remote host run a command like:
scp /path/to/example.txt [email protected]:/remote/path
Let’s quickly explain the above command.
/path/to/example.txt is the path to the file you want to copy from your local computer, remote_user is the user on the remote server, 121.134.21.14 is the IP of the remote host.
Next, comes a colon : after which you can specify the path where you want the file to be copied (/remote/path/). The copied file will retain it’s original name.
Here is a video to illustrate how this works. I’ll run the following command:
scp example.txt [email protected]:/home/stelixd
In the video below, on the left, we have a terminal on our local computer, and on the right we have the terminal of an Ubuntu remote server.
1. SCP Command — Copy a file from your local computer to a remote host
If you are connecting to your remote host for the first time, you will see the prompt Are you sure you want to continue connecting (Yes/no)?.
Assuming you trust the remote server, type Yes, press Enter, and fill in the user password (if you’re not using SSH keys).
When we execute the ls command on the remote server, you can see the example.txt was successfully copied.
You can also specify a new name for the file (/remote/path/file1_new_name):
scp /path/to/file1 [email protected]:/remote/path/file1_new_name
Copy Multiple Local Files to a Remote Host
You can also copy multiple files on our remote host in a single command. In my case I’ll transfer movie1.mp4, movie2.mp4, movie3.mp4, and movie4.mp4.
To transfer multiple files with the scp command just include all of them in the command, separated by a space:
scp movie1.mp4 movie2.mp4 movie3.mp4 movie4.mp4 [email protected]:/home/stelixd
2. Copy a Remote File to Your Local Machine Using SCP Command
To copy a remote file to your local machine using the scp command, just use the remote location as the source file, and the local location as the destination:
scp [email protected]:/home/stelixd/example.txt example.txt
Copy Multiple Remote Files to Your Local Machine
To copy multiple files from our remote host to our local machine, use the following syntax:
scp [email protected]_destination:/some/remote/directory/{file1,file2,file 3} /some/local/directory
Where [email protected]_destination is your remote host details, /some/remote/directory/ is a directory on your remote host, and {file1,file2,file3} are the files we want to transfer, separated by a comma, in escaped () curly braces {}.
Escaping is a method that allows us to tell a computer to do something special with the text we supply or to ignore the special function of a character. To tell the computer that it should expect an escape character we use a special escape marker, we usually make use of the backslash , such as we have done with the curly braces ({, }).
Here is an example of me transferring 3 empty files from a remote server to a local computer:
scp mrtest:/home/edxd/{file1,file2,file3} /home/stelixd/
Output
file1 100% 5120KB 2.5MB/s 00:01
file2 100% 11MB 8.1MB/s 00:01
file3 100% 8192KB 8.0MB/s 00:00
3. Copy a File between Two Remote Hosts Using the SCP Command
With the scp command you can securely copy files from a remote host directly to another remote host, all without having to SSH into any of them.
You’ll just send the command from a third machine, such as your local computer. The following command will copy file1 between two remote machines:
scp [email protected]_host_1:/var/www/file1 [email protected]_host_2:/var/www/file2
Video Demo
Here is an example where I copy a file between two remote hosts with scp:
scp [email protected]:/home/edxd/my_file [email protected]:/home/stelixd
5. SCP Command — Copy Files Across Remote Hosts
Important: In some cases scp hangs, and doesn’t prompt you for both passwords so it can proceed with the transfer, and I’m not yet sure the reason for this.
One solution for this is setting up SSH-key based authentication between the computer issuing the command, and both the remote hosts.
Copy Files Between Two Remote Hosts That Are Not in The Same Network
Usually you can transfer files between remote machines with the scp command because they are on the same network, with routers between them that route the traffic.
But there are instances where you need to transfer files between remote machines that aren’t on the same network, because there are no routers between them, however you can connect to both of them from your computer.
With the scp command you have an option to transfer files through the third machine sending the command, such as your local computer. You can do this with the -3 option.
The following command will copy files from two machines through the machine that is sending the command.
scp -3 [email protected]_host_1:/var/www/file1 [email protected]_host_2:/var/www/file2
Video Demo
An example of the above command.
scp -3 [email protected]:/home/edxd/my_file [email protected]:/home/stelixd
5. SCP Command — Copy Files Across Remote Hosts (Route)
5. Copy Files with Certain Extensions With the SCP Command
To securely copy files of a specific type using the scp command you can run a command such as:
scp [email protected]_host:'/directory/*.{html,php}' /destination/folder
Important Note: Please note the pair of single quotes ', along with the * wildcard, and curly braces with comma separated extensions. This will cause the shell to turn the expression into:
scp [email protected]_host:/directory/*.html [email protected]_host:/directory/*.php /destination/folder
6. Copy a Directory Recursively With the SCP Command
To copy a directory along with all its contents, we will include the -r (recursive) parameter in our SCP command. This command will copy a directory and all its contents:
scp -r transfer_folder [email protected]_host:/remote/path/
Let’s copy the transfer_folder directory on our local computer to our remote host.
scp -r transfer_folder [email protected]:/home/stelixd
Video Demo
3. SCP Command — Copy a Directory Recursively
SCP Options
You can easily view the scp command’s options in your command-line by running man scp. We’ll explore a few of these options here.
SCP Verbose Mode (-v, -vv, -vvv)
By enabling verbose mode with the scp command, you can see debug information for SCP – essentially you’re seeing everything happening behind the scenes.
The more -v you use, the more verbose the output will be. The maximum number of -v is 3.
Video Demo
For our example we’ll copy a few files movie1.mp4, movie2.mp4, movie3.mp4 and movie4.mp4 using -v.
4. SCP Command — Copy Files Verbose Mode
Transfer and Compress Files on The Fly (-C)
If you are copying a large file or multiple files over a slow network, you can use the -C parameter, which will enable the scp command to compress the files before transferring them over the internet.
That may also save on your bandwidth if bandwidth is an issue. On reasonably fast connections, this might just slow things down, however.
Note: We have included the -v (verbose) parameter in the command below to see what is happening behind the scenes.
scp -vC example_file [email protected]:/home/stelixd
Video Demo
6. SCP Command — Compress and Copy Files
Limit Bandwidth Usage (-l)
When you’re copying a file from your local computer to a remote host, think of it as an upload process. Now, if the upload bandwidth used by the SCP command is high, it might impact the network or other processes and devices also uploading data.
Luckily, we can use the -l parameter and specify the bandwidth used by the SCP command in Kilobits/sec (kbps).
Important: Even though we specify the transfer rate in Kilobits/sec (kbps), the transfer rate will be displayed in Kilobytes/sec (KB/s). A Kilobyte is made up of 8 Kilobits. So when we specify, say scp -l 1600, we’re saying we want a transfer rate of 1600 Kilobits, which in KB/s means 1600 / 8 = 200 KB/s. As another example, if you want to limit transfer to 300 KB/s, you multiply 300 * 8 = 2400 Kilobits. So we run scp -l 2400.
In the command below, we will set our SCP transfer bandwidth to 800 Kb/s (800 * 8 = 6400 Kilobits/sec).
scp -l 6400 example_file [email protected]:/home/stelixd
7. SCP Command — Limit Bandwidth Usage
Specify Port Number (-P)
By default, SSH uses port 22.
For security reasons and other related measures, some people prefer changing this default port and configuring a custom port to work with the SSh service. You will need to specify the custom SSH port in your SCP command using the -P parameter in such a situation.
We haven’t configured any custom port in our case, and we will just enter port 22.
scp -P 22 example_file [email protected]:/home/stelixd
8. SCP Command — Specify Port Number
Set a Different Cipher (-c)
To securely copy files securely over a network, scp uses the AES encryption algorithm. To specify a different algorithm, use the -c parameter. For this example, we will use the aes128-ctr cipher. Some ciphers are more secure and others are faster than others.
Note: This -c parameter is a lowercase character, unlike our -C (uppercase) used for file compression.
scp -c aes128-ctr example_file [email protected]:/home/stelixd
9. SCP Command — Set a Different Cipher
Force SCP to Use IPv4 or IPv6 Addresses (-4 / -6)
You can specify whether the scp command should use IPv4 or IPv6, with the -4 and -6 options.
To use IPv4:
scp -4 /path/to/file1 [email protected]_host:/remote/path/
To use IPv6:
scp -6 /path/to/file1 [email protected]:/remote/path/
Automate File Transfers Using a SCP Shell Script
If you have files or directories that you copy regularly, you can create a simple bash script and save the time of writing those long commands on the terminal.
There are various ways you can write scripts to use the SCP command.
In this example I’ll create a simple script that requests a target file or directory that I manually input, then it loops through some destinations in a file (that I’ve set beforehand), and transfers the file I entered to those destinations.
I created a file called destination_address.txt in the /tmp directory. This text file will hold the [email protected]_address:/destination of our remote host. In this case, I want to transfer files to my remote server, in the ~/remote_transfers folder.
[email protected]:~/remote_transfers/
Now let’s create our bash script:
echo "=================="
echo "Running SCP Script"
echo "=================="
echo -e "Enter the path to the file you wish to copy:c"
read file

for dest in cat /tmp/destination_address.txt; do
scp -r $file ${dest}

done
We will save our script as scp_script.sh. To make the script executable, remember to run the command chmod +x scp_script.sh.
To run it I’ll run:
sudo bash scp_script.sh
10. SCP Command — Automate File Transfers Using a SCP Shell Script
SSH Key (Identity File) Path (-i) with the SCP Command
If you have configured SSH key-based authentication, you can use the -i option and specify the path to the identity file.
Identity files come in different formats, depending on your setup and environment. For example .pub is the file format used by SSH, .pem can be used for AWS when you created your key-pair.
The following command connects to a remote host using an SSH Key.
scp -i /path/to/ssh_key.pub /path/to/local_file [email protected]_host:path/to/remote/file
Using Multiple SCP Command Options
You can use multiple options in the same command. Some flags can be combined. If you check man scp you should see the scp command’s full syntax, which should give you a good idea on what flags you can combine:
scp [-346BCpqrTv] [-c cipher] [-F ssh_config] [-i identity_file] [-J destination] [-l limit] [-o ssh_option] [-P port] [-S program] source ... target
Preserve File Modification/Access Times and Modes With the SCP Command (-p)
To preserve modification times, access times, and modes with the scp command you can use the -p flag:
scp -p /path/to/example.txt [email protected]:/remote/path
How to Resume Interrupted SCP File Transfers
The scp command does not understand range-request or partial transfer, such as HTTP does. As such, scp implementations, such as our command-line utility can’t resume interrupted downloads.
However, there are simple ways to resume interrupted scp transfers, by using other utilities that have this capability.
A very easy and straightforward way of resuming aborted downloads is using the sftp interactive commands reput and reget.
Resume Interrupted File Transfers with SFTP Reget or Reput
SFTP (SSH File Transfer Protocol) is a related secure transfer protocol, which is used to access, manage and transfer files using SSH.
To read more on sftp and its’ options you can run man sftp or read the sftp manual page online.
It works a little different than the scp command, as it offers an option to run interactive commands after connecting to a remote server.
The two interactive commands that can help us resume interrupted downloads or uploads are:
1. reget: resumes downloads
2. reput: resumes upload
In the following example we start downloading a 700 mebgabyte file called bytexd.txt from a remote server, that we interrupt by pressing Ctrl + C, when it’s at 9%:
scp [email protected]_host:/remote/directory/bytexd.txt bytexd.txt
Output
bytexd.txt 9% 65MB 3.1MB/s 03:34 ETA
To continue the download we’ll have to connect to the remote host using sftp:
sftp [email protected]_host
You will have to authenticate, such as you would with scp or ssh.
When you’re logged in with sftp you’ll notice your prompt has changed into:
sftp>
Now we can run interactive commands.
You can also run commands such as cd and ls to navigate and find your files. Read more on all available interactive commands in the man page.
To resume the download, we’ll run the reget interactive command, followed by the file path on the remote directory:
sftp> reget /remote/directory/bytexd.com
Output
Resuming /remote/directory/bytexd.txt to bytexd.txt
/remote/directory/bytexd.txt 10% 73MB 771.1KB/s 13:53 ETA
Installing SCP (Optional)
On Linux and Mac, scp is usually already installed, and on Windows you’ll most likely have to install it yourself.
Install SCP on Linux
Installing scp will different, depending on your distro.
Install SCP on Debian-based Distros
To install scp on Debian-based distros (such as Debian, Ubuntu, Linux Mint, and others) run:
sudo apt install openssh-client
Install SCP on RHEL-based Distros
To install scp on RHEL-based distros (such as CentOS, Fedora, Rocky Linux, AlmaLinux, and others) run:
sudo dnf install openssh-clients
Install SCP on Windows
The scp command doesn’t come installed on Windows so we’ll have to install it ourselves. We’ll cover two common ways. There are probably more out there, but these two are popular and tested.
pscp (Putty) – Windows SCP via Command-line
PSCP (PuTTY Secure Copy) is similar to scp and comes bundled with PuTTY, probably the most used SSH client for Windows. It is free and open-source.
You can download and install Putty from the developer’s (Simon Tatham) website, if you don’t have it already.
You can also download and install pscp.exe separately, if you prefer.
After installing it, open a new command shell (like cmd.exe) and run:
pscp
You should see something like:
PuTTY Secure Copy client
Release 0.74
Usage: pscp [options] [[email protected]]host:source target
       pscp [options] source [source...] [[email protected]]host:target
       pscp [options] -ls [[email protected]]host:filespec
Options:
  -V        print version information and exit
  -pgpfp    print PGP key fingerprints and exit
  -p        preserve file attributes
  -q        quiet, don't show statistics
  -r        copy directories recursively
  -v        show verbose messages
  -load sessname  Load settings from saved session
  -P port   connect to specified port
  -l user   connect with specified username
  -pw passw login with specified password
  -1 -2     force use of particular SSH protocol version
  -4 -6     force use of IPv4 or IPv6
  -C        enable compression
  -i key    private key file for user authentication
  -noagent  disable use of Pageant
  -agent    enable use of Pageant
  -hostkey aa:bb:cc:...
            manually specify a host key (may be repeated)
  -batch    disable all interactive prompts
  -no-sanitise-stderr  don't strip control chars from standard error
  -proxycmd command
            use 'command' as local proxy
  -unsafe   allow server-side wildcards (DANGEROUS)
  -sftp     force use of SFTP protocol
  -scp      force use of SCP protocol
  -sshlog file
  -sshrawlog file
            log protocol details to a file
File path notation is different for Windows that for Linux. With pscp you must specify the file paths appropriately for each operating system.
Copy Files from Windows to Linux with PSCP
To copy files from Windows to Linux, using pscp you can run something like:
pscp c:pathtofile [email protected]_host:/path/to/file
Copy Files from Linux to Windows with PSCP
To copy files from Linux to Windows using pscp:
pscp [email protected]_host:/path/to/file c:pathtofile
WinSCP – GUI Version of SCP
WinSCP is a very popular GUI (graphical user interface) software, for Windows, that allows copying files between local and remote hosts, and supports the following file transfer protocols – SCP, FTP, FTPS, SFTP, WebDAV and S3.
It’s very straightforward and easy to use. To install it follow the instructions in the install guide , and you can read about its features and other useful information in the Documentation.
Many Windows users prefer WinSCP since it mainly offers a graphical user interface and offers functionalities such as:
- Drag & Drop: Simply using the interface to drag/drop files to copy them from the local to the remote system, and vice versa.
- Synchronizing: Which synchronizes content of a local directory onto the remote directory, vice versa, or even full sync which means that any modification made on either system, it will be applied to the other system.
- Resuming Transfers
- .. many more that you can find in the WinSCP Docs
Conclusion
This post has given you a detailed guide on using the scp command to transfer files securely, and how to use some of the most common options. To easily see all the scp command options, along with their explanations, you can run the man scp command in your command-line, or you can read them online.
If you have any questions or requests, then feel free to let us know in the comments section and we’ll get back to you as soon as we can.