Create React App 

Create React apps with no build configuration.
- Creating an App – How to create a new app.
- User Guide – How to develop apps bootstrapped with Create React App.
Create React App works on macOS, Windows, and Linux.
If something doesn’t work, please file an issue.
If you have questions or need help, please ask in GitHub Discussions.
Quick Overview
npx create-react-app my-app
cd my-app
npm start
If you’ve previously installed create-react-app globally via npm install -g create-react-app, we recommend you uninstall the package using npm uninstall -g create-react-app or yarn global remove create-react-app to ensure that npx always uses the latest version.
(npx comes with npm 5.2+ and higher, see instructions for older npm versions)
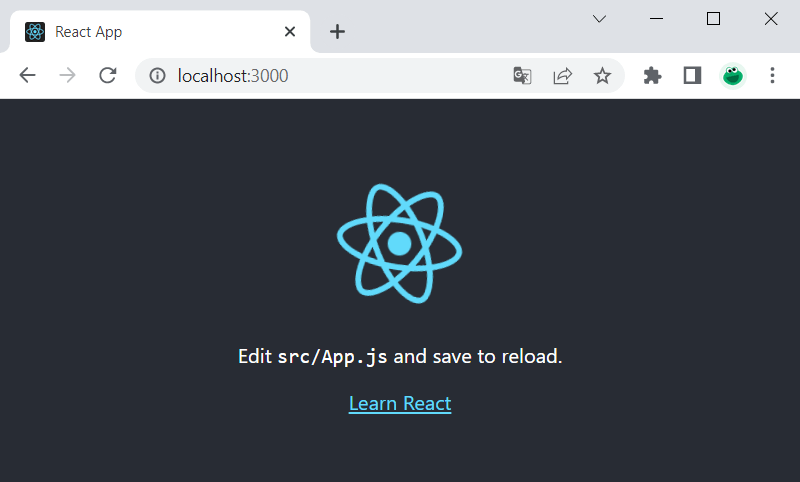
Then open http://localhost:3000/ to see your app.
When you’re ready to deploy to production, create a minified bundle with npm run build.

Get Started Immediately
You don’t need to install or configure tools like webpack or Babel.
They are preconfigured and hidden so that you can focus on the code.
Create a project, and you’re good to go.
Creating an App
You’ll need to have Node 14.0.0 or later version on your local development machine (but it’s not required on the server). We recommend using the latest LTS version. You can use nvm (macOS/Linux) or nvm-windows to switch Node versions between different projects.
To create a new app, you may choose one of the following methods:
npx
npx create-react-app my-app
(npx is a package runner tool that comes with npm 5.2+ and higher, see instructions for older npm versions)
npm
npm init react-app my-app
npm init <initializer> is available in npm 6+
Yarn
yarn create react-app my-app
yarn create <starter-kit-package> is available in Yarn 0.25+
It will create a directory called my-app inside the current folder.
Inside that directory, it will generate the initial project structure and install the transitive dependencies:
my-app
├── README.md
├── node_modules
├── package.json
├── .gitignore
├── public
│   ├── favicon.ico
│   ├── index.html
│   └── manifest.json
└── src
    ├── App.css
    ├── App.js
    ├── App.test.js
    ├── index.css
    ├── index.js
    ├── logo.svg
    └── serviceWorker.js
    └── setupTests.js
No configuration or complicated folder structures, only the files you need to build your app.
Once the installation is done, you can open your project folder:
Inside the newly created project, you can run some built-in commands:
npm start or yarn start
Runs the app in development mode.
Open http://localhost:3000 to view it in the browser.
The page will automatically reload if you make changes to the code.
You will see the build errors and lint warnings in the console.
npm test or yarn test
Runs the test watcher in an interactive mode.
By default, runs tests related to files changed since the last commit.
Read more about testing.
npm run build or yarn build
Builds the app for production to the build folder.
It correctly bundles React in production mode and optimizes the build for the best performance.
The build is minified and the filenames include the hashes.
Your app is ready to be deployed.
User Guide
You can find detailed instructions on using Create React App and many tips in its documentation.
How to Update to New Versions?
Please refer to the User Guide for this and other information.
Philosophy
-
One Dependency: There is only one build dependency. It uses webpack, Babel, ESLint, and other amazing projects, but provides a cohesive curated experience on top of them.
-
No Configuration Required: You don’t need to configure anything. A reasonably good configuration of both development and production builds is handled for you so you can focus on writing code.
-
No Lock-In: You can “eject” to a custom setup at any time. Run a single command, and all the configuration and build dependencies will be moved directly into your project, so you can pick up right where you left off.
What’s Included?
Your environment will have everything you need to build a modern single-page React app:
- React, JSX, ES6, TypeScript and Flow syntax support.
- Language extras beyond ES6 like the object spread operator.
- Autoprefixed CSS, so you don’t need
-webkit-or other prefixes. - A fast interactive unit test runner with built-in support for coverage reporting.
- A live development server that warns about common mistakes.
- A build script to bundle JS, CSS, and images for production, with hashes and sourcemaps.
- An offline-first service worker and a web app manifest, meeting all the Progressive Web App criteria. (Note: Using the service worker is opt-in as of
react-scripts@2.0.0and higher) - Hassle-free updates for the above tools with a single dependency.
Check out this guide for an overview of how these tools fit together.
The tradeoff is that these tools are preconfigured to work in a specific way. If your project needs more customization, you can «eject» and customize it, but then you will need to maintain this configuration.
Popular Alternatives
Create React App is a great fit for:
- Learning React in a comfortable and feature-rich development environment.
- Starting new single-page React applications.
- Creating examples with React for your libraries and components.
Here are a few common cases where you might want to try something else:
-
If you want to try React without hundreds of transitive build tool dependencies, consider using a single HTML file or an online sandbox instead.
-
If you need to integrate React code with a server-side template framework like Rails, Django or Symfony, or if you’re not building a single-page app, consider using nwb, or Neutrino which are more flexible. For Rails specifically, you can use Rails Webpacker. For Symfony, try Symfony’s webpack Encore.
-
If you need to publish a React component, nwb can also do this, as well as Neutrino’s react-components preset.
-
If you want to do server rendering with React and Node.js, check out Next.js or Razzle. Create React App is agnostic of the backend, and only produces static HTML/JS/CSS bundles.
-
If your website is mostly static (for example, a portfolio or a blog), consider using Gatsby or Next.js. Unlike Create React App, Gatsby pre-renders the website into HTML at build time. Next.js supports both server rendering and pre-rendering.
-
Finally, if you need more customization, check out Neutrino and its React preset.
All of the above tools can work with little to no configuration.
If you prefer configuring the build yourself, follow this guide.
React Native
Looking for something similar, but for React Native?
Check out Expo CLI.
Contributing
We’d love to have your helping hand on create-react-app! See CONTRIBUTING.md for more information on what we’re looking for and how to get started.
Supporting Create React App
Create React App is a community maintained project and all contributors are volunteers. If you’d like to support the future development of Create React App then please consider donating to our Open Collective.
Credits
This project exists thanks to all the people who contribute.
Thanks to Netlify for hosting our documentation.
Acknowledgements
We are grateful to the authors of existing related projects for their ideas and collaboration:
- @eanplatter
- @insin
- @mxstbr
License
Create React App is open source software licensed as MIT. The Create React App logo is licensed under a Creative Commons Attribution 4.0 International license.
Tried to fire up a new react app yesterday using create-react-app. Unfortunately, when I used the command npx create-react-app my-app, it says «Create React App requires Node 14 or higher.» However, when I try to update to Node 14 or any later version, it says Windows 8 or higher is required to update. Since I’m on a work PC, it is a slow process to get my computer upgraded to Windows 10 and might affect other software I have on my computer.
I’ve been trying to understand Webpack and Babel but having a lot of issues that don’t pop up with create-react-app. Is there any way to use create-react-app on Windows 7?
Thanks in advance.
asked Dec 16, 2021 at 14:34
![]()
6
The current latest release of the create-react-app project is v5.0.0 where support for Node 10 & 12 was dropped.
The only solution you have here, other that upgrading to a newer version of Windows and installing Node 14 is to use an older version of create-react-app.
The newest version that supports Node 10 & 12 is v3.4.0.
You can initialise your project using the older version with this command:
npx create-react-app@3.4.0 my-app
Note that this is not the latest version, and therefore is outdated and will not include the latest features of create-react-app.
answered Dec 16, 2021 at 16:38
![]()
gunwingunwin
4,3224 gold badges36 silver badges57 bronze badges
1
Is you want to Use Node and react Js on Windows 7 32 bit system.Then just install following versions of node and create-react-app.
use Node 13.12.0
and to create react app use create-react-app version 3.4.0
npx create-react-app@3.4.0 my-app
this is working without any error and tested till installations
Otherwise consider upgrading your system as well as your software.
answered Jan 20, 2022 at 19:09
![]()
В этой статье изучим, как с помощью инструмента Create React App создать новое одностраничное приложение на React. После этого подробно разберём файловую структуру созданного проекта и команды для управления им.
Для полноценного создания пользовательских интерфейсов на React или каком-нибудь другом инструменте перед веб-разработчиком в большинстве случаев стоит задача в выборе необходимых средств для этого (webpack, Babel, ESLint, и т.д.) и корректной их настройки.
К счастью, разработчики React подготовили для нас готовый инструмент, который позволяет всё это сделать автоматически. Называется он Create React App.
Итак, Create React App (сокращенно CRA) – это инструмент, который позволяет нам настроить среду для создания одностраничных веб-приложений на основе React, посредством выполнения всего одной команды. Также можно отметить, что этот инструмент официально поддерживается командой React.
Одностраничное приложение (Single Page Application или сокращённо SPA) – это приложение, содержащее всего одну единственную HTML-страницу, контент которой динамически обновляется с помощью JavaScript. Т.е. SPA состоит из одной страницы, контент для которой загружается и изменяется посредством JavaScript без её полной перезагрузки.
Это программа имеет открытый исходный код и расположена она на Github.
Требования
Чтобы использовать Create React App, необходимо убедиться, что у вас на компьютере установлена программа Node.js.
Для проверки её наличия, можно запросить версию:
node -v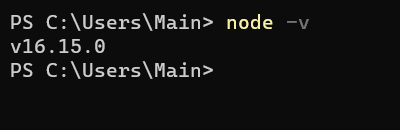
Для разработки на локальном компьютере необходим «Node.js» версии не ниже 14 и npm не ниже 5.6. При установке «Node.js» также устанавливает программу npm.
npm (сокращенно от Node Package Manager) – это пакетный менеджер, который позволяет нам устанавливать и удалять JavaScript пакеты, управлять их версиями и зависимостями. Проверить установленную версию npm можно так:
npm -v
В качестве альтернативы вы можете использовать пакетный менеджер Yarn. Yarn – это инструмент аналогичный npm, т.е. он также предназначен для установки пакетов и управления ими. Причём он их берёт из того же репозитория, что npm.
Чтобы использовать Yarn, его необходимо установить:
npm install -g yarnСоздание нового React-приложения
Для создания нового проекта посредством create-react-app необходимо перейти в нужную папку и ввести в терминале следующую команду:
# через npm
npx create-react-app my-app
# через yarn
yarn create react-app my-app
npx – это инструмент, который появился в npm, начиная с версии 5.2.0. С его помощью мы можем, например, запустить пакет create-react-app без необходимости его глобальной установки:
npm install -g create-react-appКоманда npx create-react-app my-app создаст нам новое React-приложение.
В результате у нас появится каталог внутри текущей папки и в нём все необходимые файлы. В данном случае каталог my-app. Он будет содержать всё необходимое для разработки этого проекта на React.
Откроем только что созданный проект в редакторе коде, например, Visual Studio Code, и рассмотрим его структуру.
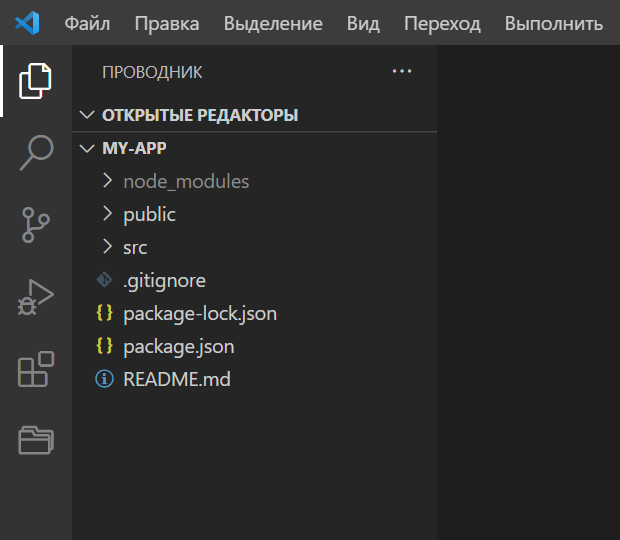
Структура проекта
В корне проекта расположены следующие файлы и папки:
node_modules/
public/
src/
.gitignore
package-lock.json
package.json
README.md- node-modules – это папка, которая содержит пакеты (зависимости), которые требуются нашему приложению. Их загружает и обновляет
npm. - public – это папка, в которой находится страница
index.html, определяющая HTML шаблон всего нашего приложения; кроме этого она ещё содержит некоторые другие файлы для нашего приложения (favicon.ico,manifest.json,robots.txtи т.д.), а также в неё при необходимости можно поместить любые другие файлы, которые должны быть скопированы в папкуbuildнетронутыми, т.е. без обработки их с помощью webpack. - src (сокращенно от source) – каталог, содержащий исходный код приложения. Разработка проекта практически ведётся здесь.
- .gitignore – нужен для скрытия файлов и папок от системы контроля версий GIT. Этот файл содержит все необходимые записи, каким-то определённым образом его настраивать не нужно.
- package.json – это набор метаданных о вашем приложении: название проекта, версия, пакеты от которых зависит проект и т.д.
package.jsonявляется ключевым файлом для любых приложений, основанных на Node.js. - package-lock.json – файл, который создаёт
npmавтоматически при установке зависимостей. Он содержит в себе полную информацию обо всех установленных зависимостях, включая их точные версии. Кромеpackage-lock.jsonу вас может быть ещёyarn.lock, если вы используетеYarnдля установки пакетов. - README.md — это краткая справочное руководство по использованию инструмента
create-react-app.
В файле package.json в ключе dependencies перечислены зависимости, т.е. библиотеки, которые необходимы приложению. Среди основных:
reactиreact-dom– ядро проекта на React (в предыдущей теме мы их подключали через CDN);react-scripts– набор скриптов, которые используются для разработки, сборки и тестирования приложения. Они выполняют настройку среды разработки, запуск сервера с живой перезагрузкой, подключают необходимые зависимости, модули и т.д.
Команды для управления проектом
В файле package.json в свойстве script определены ключи для запуска различных команд, посредством которых мы можем определённым образом управлять нашим приложением.
1. Запуск проекта. Осуществляется с помощью команды start:
npm startЭту команду можно ввести прямо в терминале Visual Studio Code, если вы его используете в качестве текстового редактора:
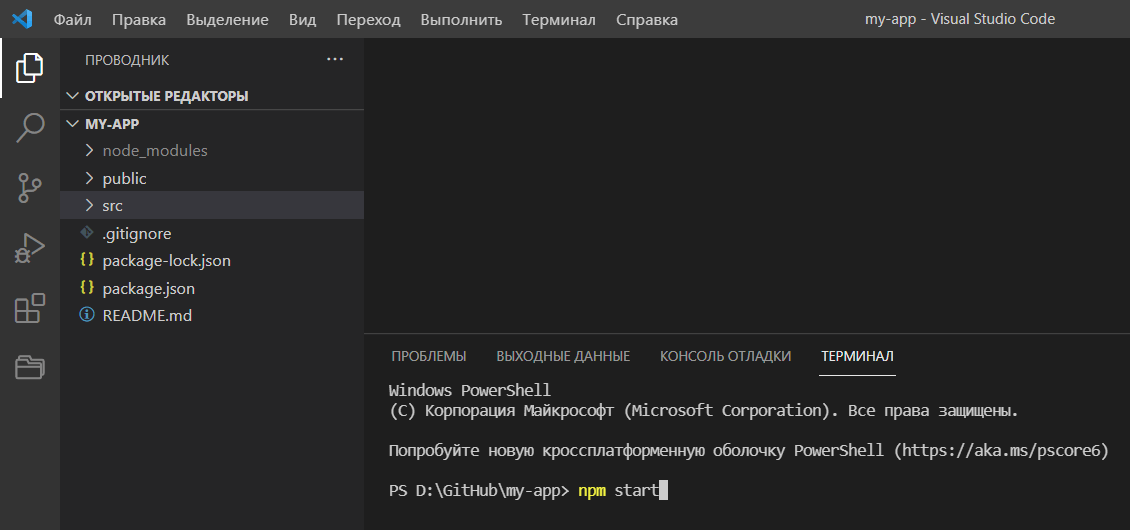
Эта команда запускает приложение в режиме разработки. В результате запускается сервер и открывается браузер с адресом http://localhost:3000, в котором показывается рабочее React-приложение. При внесении изменения в код, страница автоматически перезагружается. Все ошибки и предупреждения выводятся в консоль.
2. Сборка приложения:
npm run buildЭту команду обычно запускают после завершения разработки проекта. Она выполняет сборку приложения из исходных файлов для продакшена. Полученные оптимизированные файлы помещаются в папку build и они отвечают за функционал всего приложения. После сборки вы можете приступать к развертыванию приложения.
3. Запуск тестов:
npm test4. Команда, которая позволяет извлечь все файлы конфигурации и зависимости непосредственно в проект:
npm run ejectЭту команду можно ввести только один раз. После этого поддержание всей этой конфигурации и сценариев вы выполняете самостоятельно. Обычно это используется, когда вы хотите настроить конфигурацию проекта так как вам это нужно.
Содержимое папки public
В папке public находятся:
favicon.ico,logo192.png,logo512.png– иконки;index.html– HTML шаблон страницы;manifest.json– манифест веб-приложения;robots.txt– текстовый файл, который содержит указания для роботов поисковых систем;
Кроме этого, в эту папку можно поместить другие файлы, которые необходимо скопировать в каталог build нетронутыми (т.е. без обработки).
Чтобы ссылаться на ресурсы в public, необходимо использовать переменную с именем PUBLIC_URL:
<link rel="manifest" href="%PUBLIC_URL%/manifest.json" />При запуске npm run build инструмент Create React App заменит %PUBLIC_URL% правильным абсолютным путем, чтобы ваш проект работал, даже если вы используете маршрутизацию на стороне клиента или размещаете его по некорневому URL-адресу.
index.html
Инструмент create-react-app, как мы уже отмечали выше, выполняет генерацию проекта для разработки одностраничных приложений на React. В нём файл index.html как раз является той единственной страницей, которая будет входной для всего нашего приложения. Изменить название этого файла нельзя.
Содержимое файла index.html:
<!DOCTYPE html>
<html lang="en">
  <head>
    <meta charset="utf-8" />
    <link rel="icon" href="%PUBLIC_URL%/favicon.ico" />
    <meta name="viewport" content="width=device-width, initial-scale=1" />
    <meta name="theme-color" content="#000000" />
    <meta
      name="description"
      content="Web site created using create-react-app"
    />
    <link rel="apple-touch-icon" href="%PUBLIC_URL%/logo192.png" />
    <!--
      manifest.json provides metadata used when your web app is installed on a
      user's mobile device or desktop. See https://developers.google.com/web/fundamentals/web-app-manifest/
    -->
    <link rel="manifest" href="%PUBLIC_URL%/manifest.json" />
    <!--
      Notice the use of %PUBLIC_URL% in the tags above.
      It will be replaced with the URL of the `public` folder during the build.
      Only files inside the `public` folder can be referenced from the HTML.

      Unlike "/favicon.ico" or "favicon.ico", "%PUBLIC_URL%/favicon.ico" will
      work correctly both with client-side routing and a non-root public URL.
      Learn how to configure a non-root public URL by running `npm run build`.
    -->
    <title>React App</title>
  </head>
  <body>
    <noscript>You need to enable JavaScript to run this app.</noscript>
    <div id="root"></div>
    <!--
      This HTML file is a template.
      If you open it directly in the browser, you will see an empty page.

      You can add webfonts, meta tags, or analytics to this file.
      The build step will place the bundled scripts into the <body> tag.

      To begin the development, run `npm start` or `yarn start`.
      To create a production bundle, use `npm run build` or `yarn build`.
    -->
  </body>
</html>
В этом файле устанавливаются некоторые базовые настройки для нашего приложения: язык, кодировка, favicon, viewport, заголовок, manifest, title, description и т.д.
С помощью тега <noscript> отображается контент на странице, который сообщает пользователю, что в браузере необходимо включить JavaScript для запуска этого приложения.
Но самое важное на что необходимо обратить внимание – это на тег <div id="root"></div>. Это корневой элемент, в который будет выводиться весь контент нашего приложения. Здесь нам необходимо запомнить его id, т.к. в JavaScript мы будем использовать его для получения этого элемента.
Как можете заметить здесь нет подключённых скриптов. Они будут добавляться инструментом create-react-app автоматически. Т.е. как-то самостоятельно их подключать здесь не нужно.
При необходимости вы можете в этом файле подключить другие ресурсы. Например, стили, шрифты и т.д. Но в большинстве случаев так делать не нужно, рекомендуется это выполнять в JavaScript через import.
manifest.json
manifest.json – это манифест, в котором описывается информация о веб-приложении. Он представляет собой текстовый файл, который в формате JSON содержит название приложения, некоторое количество иконок, стартовый URL, как оно будет выглядеть и некоторые другие параметры.
Содержимое файла manifest.json:
{
  "short_name": "React App",
  "name": "Create React App Sample",
  "icons": [
    {
      "src": "favicon.ico",
      "sizes": "64x64 32x32 24x24 16x16",
      "type": "image/x-icon"
    },
    {
      "src": "logo192.png",
      "type": "image/png",
      "sizes": "192x192"
    },
    {
      "src": "logo512.png",
      "type": "image/png",
      "sizes": "512x512"
    }
  ],
  "start_url": ".",
  "display": "standalone",
  "theme_color": "#000000",
  "background_color": "#ffffff"
}
При этом манифест является частью веб-технологии, который называется PWA (сокращено от Progressive Web Apps). Этот файл позволяет установить PWA на главный экран смартфона, предоставляя пользователю более быстрый доступ к приложению.
Содержимое папки src
Папка src (сокращенно от source) – это место, в котором хранятся исходные коды разрабатываемого проекта и где веб-разработчик проводит почти всё время работая над ним.
В этой папке имеется файл index.js. Этому файлу нельзя изменять имя, т.к. он является точкой входа для JavaScript. Т.е. так же как public/index.html.
При необходимости вы можете удалить или переименовать другие файлы, но названия public/index.html и src/index.js в структуре проекта нужно оставить так как они есть.
index.js
Изначально файл src/index.js содержит следующий код:
import React from 'react';
import ReactDOM from 'react-dom/client';
import './index.css';
import App from './App';
import reportWebVitals from './reportWebVitals';

const root = ReactDOM.createRoot(document.getElementById('root'));
root.render(
  <React.StrictMode>
    <App />
  </React.StrictMode>
);

// If you want to start measuring performance in your app, pass a function
// to log results (for example: reportWebVitals(console.log))
// or send to an analytics endpoint. Learn more: https://bit.ly/CRA-vitals
reportWebVitals();
Начинается файл с импорта модулей JavaScript и других ресурсов. import позволяют index.js использовать код, определенный в другом месте. На первой строчке импортируется библиотека React, а на второй – ReactDOM, которая предоставляет методы для взаимодействия с DOM или другими словами с HTML-страницей. Эти две библиотеки составляют ядро React.
Далее импортируются стили, которые применяются ко всему нашему приложению:
import './index.css';Затем – React-компонент App из App.js:
import App from './App';На следующей строчке – функция reportWebVitals, которая позволяет нам получить результаты производительности нашего приложения с использованием различных метрик. Для их измерения используется сторонняя библиотека web-vitals.
Например, для отправки результатов в консоль необходимо передать ссылку на метод console.log в качестве аргумента этой функции:
reportWebVitals(console.log);После этого создаётся корень приложения посредством вызова метода ReactDOM.createRoot(), которому в качестве аргумента передаем DOM-элемент, который мы получили с помощью document.getElementById('root').
Затем выполняется рендеринг React-компонента <App /> в DOM:
root.render(
  <React.StrictMode>
    <App />
  </React.StrictMode>
);
React.StrictMode – это инструмент, который в данном случае включает строгий режим для всего приложения. Он упрощает определение потенциальных проблем в приложении.
React-компонент App
React-компонент App, который используется в src/index.js, находится в src/App.js. Этот компонент в данном случае представляет всё наше приложение, которое мы видим в браузере:
import logo from './logo.svg';
import './App.css';

function App() {
  return (
    <div className="App">
      <header className="App-header">
        <img src={logo} className="App-logo" alt="logo" />
        <p>
          Edit <code>src/App.js</code> and save to reload.
        </p>
        <a
          className="App-link"
          href="https://reactjs.org"
          target="_blank"
          rel="noopener noreferrer"
        >
          Learn React
        </a>
      </header>
    </div>
  );
}

export default App;
Этот файл можно разделить на 3 основные части: импорт различных ресурсов, компонент App и инструкция export для экспортирования App.
C помощью import выполняется импорт логотипа из ./logo.svg и CSS, связанный с нашим компонентом.
Далее расположена простая функция с именем App. Эта функция используется для создания простого React-компонента, в данном случае App.
В самом низу файла инструкция export default App делает компонент App доступным для других модулей.
Компонент App
Код простого React-компонента:
function App() {
  return (
    <div className="App">
      <header className="App-header">
        <img src={logo} className="App-logo" alt="logo" />
        <p>
          Edit <code>src/App.js</code> and save to reload.
        </p>
        <a
          className="App-link"
          href="https://reactjs.org"
          target="_blank"
          rel="noopener noreferrer"
        >
          Learn React
        </a>
      </header>
    </div>
  );
}
В качестве результата с помощью оператора return эта функция возвращает React-элементы для отображения их на странице.
Именование React-компонентов осуществляется в стиле PascalCase. Т.е. их название всегда начинаются с заглавной буквы, а другие слова, которые являются частью его названия тоже начинаются с большой буквы. Не допускается пробелов, тире и других знаков, т.е. всё пишется слитно.
После return внутри круглых скобках мы описываем, по сути, HTML, который будет отображать этот компонент на странице. Но на самом деле это не HTML, а JSX – специальное расширение языка JavaScript, с помощью которого мы производим элементы.
Конструкция {logo} выводит значение переменной logo.
Изменение React-приложения
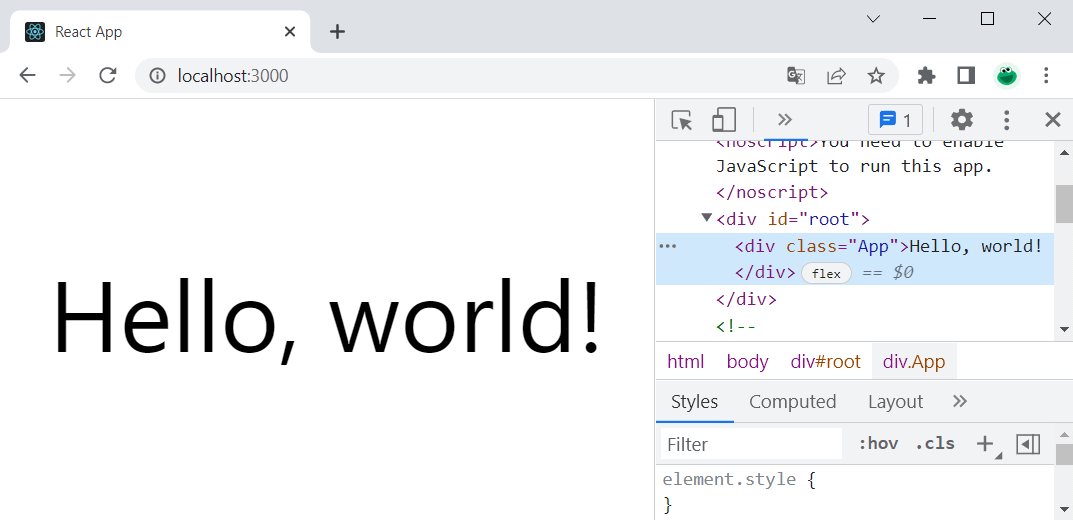
Изменим компонент App так, чтобы он выводил Hello, world!.
Для этого откроем файл src/App.js и заменим всё содержимое в return на <div className="App">Hello, world!</div>:
import './App.css';

function App() {
  return (
    <div className="App">Hello, world!</div>
  );
}

export default App;
Также удалим файлы с SVG-изображением logo.svg и файлы, связанные с тестами.
Содержимое файла App.css, отвечающего за стили компонента App, изменим на следующий код:
.App {
  display: flex;
  justify-content: center;
  align-items: center;
  min-height: 100vh;
  font-size: 5rem;
}
После выполненных изменений, сохраним файлы App.css и App.js путём нажатия Ctrl+S и перейдём в браузер.
В браузере мы увидим изменённое приложение, причём даже без перезагрузки страницы благодаря функции горячей перезагрузки проекта:
Hi everyone! We just released what we hope to be the last beta before v2 is marked stable and tagged latest on npm tomorrow.
Please try it as soon as possible and let us know if you run into any issues!
Create new application:
$ npx [email protected] [email protected] test-next
Upgrade existing:
$ npm install [email protected] --save
$ # or
$ yarn add [email protected]
Here’s a draft of the release notes:
Create React App v2.0.1
New Features
- Updated tooling: Babel 7, webpack 4, Jest 23
- Packages using new JavaScript features in
node_modulesnow work - Automatic vendor bundles and long term caching
- CSS Modules
- Sass Support
- SVGs as React Components
- Babel Macros
- Targetable CSS support, with automatic polyfills and prefixing
Migrating from 1.1.15 to 2.0.1
Inside any created project that has not been ejected, run:
$ npm install --save --save-exact [email protected]
$ # or
$ yarn add --exact [email protected]
Next, follow the migration instructions below that are relevant to you.
You may no longer code split with require.ensure()
We previously allowed code splitting with a webpack-specific directive, require.ensure(). It is now disabled in favor of import().
To switch to import(), follow the examples below:
Single Module
require.ensure(['module-a'], function() {
  var a = require('module-a');
  // ...
});

// Replace with:
import('module-a').then(a => {
  // ...
});
Multiple Module
require.ensure(['module-a', 'module-b'], function() {
  var a = require('module-a');
  var b = require('module-b');
  // ...
});

// Replace with:
Promise.all([import('module-a'), import('module-b')]).then(([a, b]) => {
  // ...
});
The default Jest environment was changed to jsdom
Look at the test entry in the scripts section of your package.json.
Here’s a table how to change it from «before» and «after», depending on what you have there:
| 1.x (if you have this…) | 2.x (…change it to this!) |
| — | — |
| react-scripts test --env=jsdom | react-scripts test |
| react-scripts test | react-scripts test --env=node |
.mjs file extension support was removed
Change the extension of any files in your project using .mjs to just .js.
It was removed because of inconsistent support from underlying tools. We will add it back after it stops being experimental, and Jest gets built-in support for it.
Move advanced proxy configuration to src/setupProxy.js
This change is only required for individuals who used the advanced proxy configuration in v1.
To check if action is required, look for the proxy key in package.json. Then, follow the table below.
- I couldn’t find a
proxykey inpackage.json- No action is required!
- The value of
proxyis a string (e.g.http://localhost:5000)- No action is required!
- The value of
proxyis an object- Follow the migration instructions below.
If your proxy is an object, that means you are using the advanced proxy configuration.
Again, if your proxy field is a string, e.g. http://localhost:5000, you do not need to do anything. This feature is still supported and has the same behavior.
First, install http-proxy-middleware using npm or Yarn:
$ npm install http-proxy-middleware --save
$ # or
$ yarn add http-proxy-middleware
Next, create src/setupProxy.js and place the following contents in it:
const proxy = require('http-proxy-middleware')

module.exports = function(app) {
  // ...
}
Now, migrate each entry in your proxy object one by one, e.g.:
"proxy": {
  "/api": {
    "target": "http://localhost:5000/"
    },
  "/*.svg": {
    "target": "http://localhost:5000/"
  }
}
Place entries into src/setupProxy.js like so:
const proxy = require('http-proxy-middleware')

module.exports = function(app) {
  app.use(proxy('/api', { target: 'http://localhost:5000/' }))
  app.use(proxy('/*.svg', { target: 'http://localhost:5000/' }))
}
You can also use completely custom logic there now! This wasn’t possible before.
Internet Explorer is no longer supported by default (but you can opt in!)
We have dropped default support for Internet Explorer 9, 10, and 11. If you still need to support these browsers, follow the instructions below.
First, install react-app-polyfill:
$ npm install react-app-polyfill --save
$ # or
$ yarn add react-app-polyfill
Next, place one of the following lines at the very top of src/index.js:
import 'react-app-polyfill/ie9'; // For IE 9-11 support
import 'react-app-polyfill/ie11'; // For IE 11 support
You can read more about these polyfills here.
The behavior of a CommonJS import() has changed
Webpack 4 changed the behavior of import() to be closer in line with the specification.
Previously, importing a CommonJS module did not require you specify the default export. In most cases, this is now required.
If you see errors in your application about ... is not a function, you likely need to update your dynamic import, e.g.:
const throttle = await import("lodash/throttle");
// replace with
const throttle = await import("lodash/throttle").then(m => m.default);
Anything missing?
This was a large release, and we might have missed something.
Please file an issue and we will try to help.
Migrating from 2.0.0-next.xyz
If you used 2.x alphas, please follow these instructions.
Detailed Changelog
>> TODO <<
issue: announcement
In this tutorial, we will learn how to install React JS in Windows.
React is a library that helps us to build and create front-end interfaces for Single page applications and it utilizes the power of virtual DOM. usereducer in react will make you understand better about React hooks.
React was an in-house project of Facebook, and it was made open to the public in the year 2013. The adoption of ReactJS has seen an upward curve since its advantages have been realized. Various startups and established organizations are now adopting the technology and upgrading their technology stack. For information, check out Full Stack Developer courses.
1. Prerequisite for Windows
To install React on Windows, your system will require the minimum configuration as below:
- Windows XP, Windows 7 (32/64 bit) or higher
- Minimum 4 GB RAM and higher
- 10 GB available space on the hard disk
- At least one Internet Browser e.g. Chrome, Firefox, Microsoft Edge etc.
- Node.js
- Active internet connection minimum speed 512kbps and above.
- At least one installed code Editor to test and debug your code e.g.
- Atom
- Sublime
- Visual studio code
2. Introduction to React.js
ReactJS is a library written in TypeScript. It utilises the syntax of the modern version of JavaScript as described by ES6 and its higher version.
Applications built using ReactJS use the Single reusability principle. This advocates the idea of building web pages and applications using components and unidirectional flow. In React we have the concept of states and the concept of immutability. Components have hierarchy in terms of Parent and Child components. A component in case of React can be thought of as a piece of code which is based on the principle of pure functions. We will look into the pure component later. First, let’s understand what a state is. For e.g. To become a member of a service, the user fills his information on the registration page. While filling the details there can be many states of the form, for e.g. When the form field is empty or when the form field has witnessed some error on some particular field, which needs to be corrected; or when after correction, the form data has been validated and is ready for submission. So, at a broad level, the registration form has been through various states. These states represent at which level the application is, in terms of interacting with the end-user. Each level of interaction for this form is represented by the state, from an empty form to being a fully filled form with a display of an error for certain fields and the validated form. In React, we have the component based on the pure function. A pure function can be memorised as a piece of code, which does one task and does it pretty well. For a certain input, it always returns the same output, so this means we are increasing predictability of the code. Since React.js follows a certain code pattern and principles in order to work, it lowers the curve of the knowledge gap; whether you are one-person or a team of developers working mutually.
3. Introduction to Node.js and NPM on Windows 10
To run ReactJS we will require Node.js on our system.Node.js is a server which will help us to run the React code. It is based on non-blocking input and output and the Chrome V8 JavaScript engine. The Node.js code is open source.
NPM which is an abbreviation of Node package manager, npmjs.com is supported by various developers around the world. It has various node modules, using which developers can host and publish their modules on the open-source community. It hosts modules in private and public visibility. A module carries code which exists to serve high or low level functionalities. In terms of code adoption and availability of various modules it gives an edge and tries to make the developer more productive.
We can plug in and plug out the module. Some modules are dependent on other modules; which is defined as dependency among modules.
While building an application, a developer can pick the module, tweak and remix it to suit the application needs, and can then release to the open-source community. So, instead of reinventing the wheel, it is like picking a wheel (npm module) from npmjs.com, giving it further momentum and giving it back to the open source community.
4. Download and Install Node.js
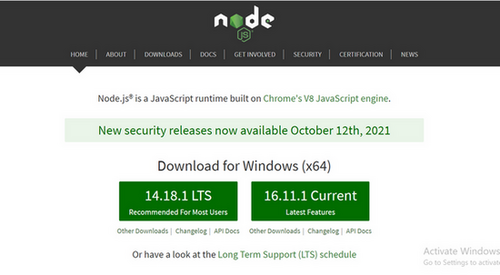
To install Node.js we need to go to the URL
.jpg&w=3840&q=75)
Depending upon our Windows OS version in terms of 32 Bit or 64 Bit, we can pick the installer and install that version.
In this tutorial I am using Windows 8, 64 Bit.
The Node.js installer includes NPM. It is best to install the even numbered version of NPM.
Depending upon your operating system, the Nodejs.org home page will show the Download button and recommended LTS version.
After the download is complete we will go to the downloads folder and run the installer.
The installer will show the below Setup Wizard. Click next.
.jpg&w=3840&q=75)
The next screen will ask for the End-user License Agreement. Select the checkbox at the bottom right to provide your consent and click on Next to proceed with the installation.
.jpg&w=3840&q=75)
The installer will ask for Destination folder and the default path set by installation is C:Program Filesnodejs
Click on Next button
.jpg&w=3840&q=75)
.jpg&w=3840&q=75)
The above screen is an important step in the installation process. And if you see closely it also sets the environmental path variables to command prompt on Windows. To begin your journey in web development, learn Web Development.
Click on Next to continue with the installation.
The Windows OS may ask you to allow Node.js installation and make changes.Click on Yes button.
.jpg&w=3840&q=75)
During the installation, if you have allowed for Chocolatey and required modules installation for C++ and Python, you will see the UI below in the command prompt. This installation requires 3 Gb of free disk space. In this tutorial this step is not required, so we are skipping this step by closing the window.
If you are interested in installing it, press Enter to continue.
.jpg&w=3840&q=75)
Once the installation is complete you need to verify the Node.js installation.
For this, we will use the command prompt.
To run command prompt
Press keys Win+R
And type cmd in the window below.
Next Click on Ok or Press Enter on the keyboard.
.jpg&w=3840&q=75)
5. Installation of React
After installation of Node.js, we need to install React. To check the Node.js version, open the Windows command prompt.
Press Win+R and type cmd.
In the command line, type
node -v to see its version.
We can also check for npm version, which is installed with Node.js, with the following command
npm -v
After running these commands, we can check the node version v14.15.1 and npm version 6.14.8
.jpg&w=3840&q=75)
As we have confirmed the Node.js installation we can proceed to the next steps.
While in the command prompt, we have navigated to a folder called Codefactory by following the command cd Codefactory
In this folder, we have created a folder called react-windows by using the command mkdir react-windows.
.jpg&w=3840&q=75)
After the folder react-windows has been created, we will change the directory to react-windows with the command
cd react-windows
ReactJS can be installed in various ways.
Now, we will type npm init. It will ask for the below configuration line by line.
Insert your input, followed by Enter keypress to proceed with the next configuration.
At the end of the configuration it will confirm for the inputs you have entered. If you are happy with the configuration data, type yes and enter to continue.
.jpg&w=3840&q=75)
The npm init will help us to create a package.json file.
.jpg&w=3840&q=75)
Now, the next step to install React requires us to go to the command prompt and type the following command in the react-windows directory.
npm install —save react
.jpg&w=3840&q=75)
.jpg&w=3840&q=75)
And after the above command npm install —save react-dom
.jpg&w=3840&q=75)
Behind the scene, these commands fetch the specified module from npmjs.com and download it in the local codebase.
Let’s have a look at the react-windows folder. Here we can see some newly created directories in node_modules.
.jpg&w=3840&q=75)
So, in this tutorial, we have learned to install React and reactDOM.
But to see the ReactJS SPA (single page app) there is more work to be done in the above code.
As an alternative and fast approach we can do it via create-react-app
Let us move to Codefactory folder and with the command cd.. create another folder react-cli
Next, type the following command mkdir react-cli
.jpg&w=3840&q=75)
Now we will use create-react-app module and type the following command
Please note that my-fast-app is the name of your app. This is an example and you can be creative in choosing your own name.
npx create-react-app my-fast-app
If we see closely it will take care of the rest of the installation steps, and react, react-dom and other related modules are installed automatically.
This process is a little data intensive, so please be patient while the download and installation happens
.jpg&w=3840&q=75)
When the above step gets completed the command prompt displays the below output.
.jpg&w=3840&q=75)
Now, let us run our first react app, by navigating to my-fast-app directory as below
cd my-fast-app
And enter the next command as npm start
%20(1).jpg&w=3840&q=75)
The npm command will show the application in the browser. http://localhost:3000
And if you are running node.js for the first time using npm command, it will ask for permission to allow access and we need to allow access to run.
As we are using a code editor we can have a look at the directory structure and some of the important files, such as index.html in the public folder, in src folder the index.js and App.js. The src folder contains the react component which we can build further on this codebase.
index.js is the js invocation point for react app.This index.js is linked with the App.js, which is responsible for showing the content in the browser. That’s what we see on the demo page.
.jpg&w=3840&q=75)
Let’s edit the App.js by going to line 10 and adding the following code
Talk is cheap, show me the <code>Code</code>
Once you save the file by Ctrl+S
The code will be auto refreshed in the browser, after compiling.
.jpg&w=3840&q=75)
It will show us the following output.
So, now feel free to change messages and alter the page layout and structure for experimentation.
If you are familiar with CSS, you may also change the page style using App.css and tinker with the code as well.
.jpg&w=3840&q=75)
Summary
In this tutorial, we have introduced you to React JS. Its impact in terms of building modern front end interfaces using component-based architecture is significant. We have also touched upon the concept of states, immutability and pure functions.
We have got a brief introduction to the Node.js server and NPM modules, the capabilities of Node.js server and the power of the open source community in the npmjs.com.
To install React in Windows, Node.js installation is a prerequisite.
There are various methods for installation. Once we have installed Node.js, React can be installed either by npm commands or by using the create-react-app module.
React JS -React is an open-source component-based front-end JavaScript library. It is used to create fast and interactive user interfaces for web and mobile applications. It is easy to create a dynamic application in React because it requires less coding and offer more functionality. It is used by big MNC and fresh new startups
Features of React:
- Reusable Components: A single React app consists of many components each component have their own logic and code but we can easily reuse components any number of time hence reducing the developers time and increasing the efficiency of work
- Debugging: React app can be easily debug using “react developer tools”.It’s a browser extension that can be used for both chrome as well as Firefox.
Installation Reactjs on Windows:
Step 1: Install Node.js installer for windows. Click on this link. Here install the LTS version (the one present on the left). Once downloaded open NodeJS without disturbing other settings, click on the Next button until it’s completely installed.
Install the 14.18.1 LTS
Step 2: Open command prompt to check whether it is completely installed or not type the command –>
node -v
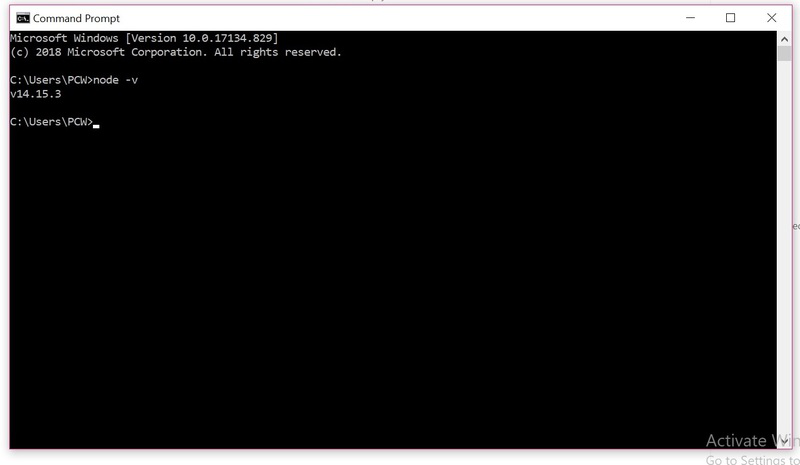
Node Version is v14.15.3
If the installation went well it will give you the version you have installed
Step 3: Now in the terminal run the below command:
npm install -g create-react-app
Installation will take few seconds
It will globally install react app for you. To check everything went well run the command
create-react-app --version
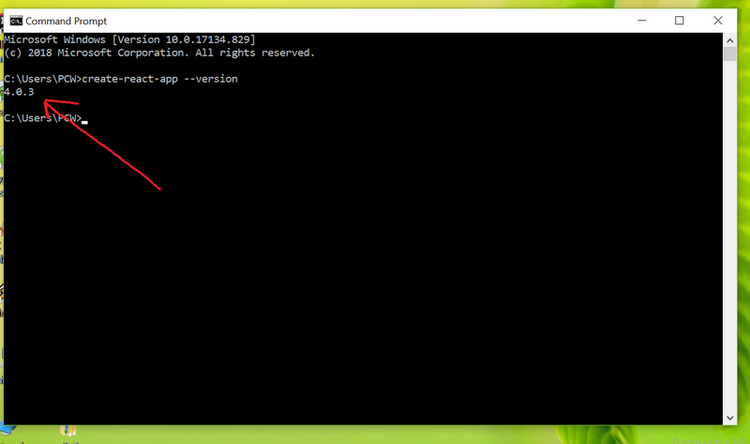
version 4.0.3
If everything went well it will give you the installed version of react app
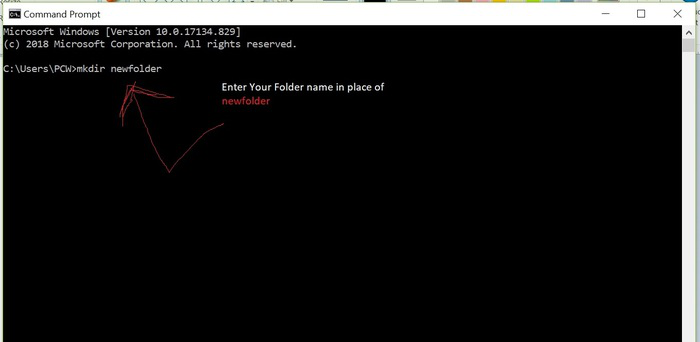
Step 4:Now Create a new folder where you want to make your react app using the below command:
mkdir newfolder
Note: The newfolder in the above command is the name of the folder and can be anything.
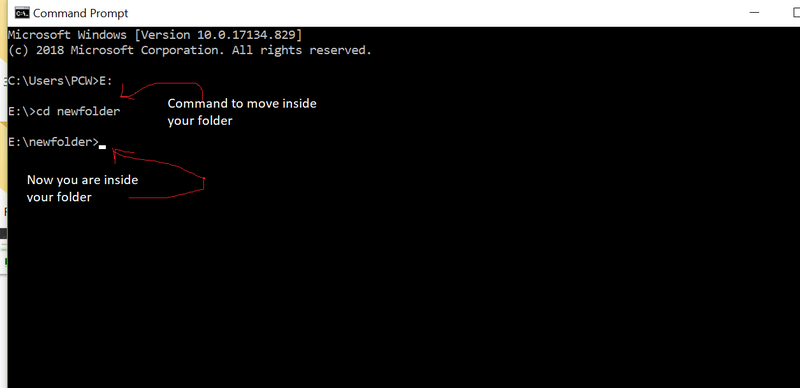
Move inside the same folder using the below command:
cd newfolder (your folder name)
Step 5: Now inside this folder run the command –>
create-react-app reactfirst YOUR_APP_NAME
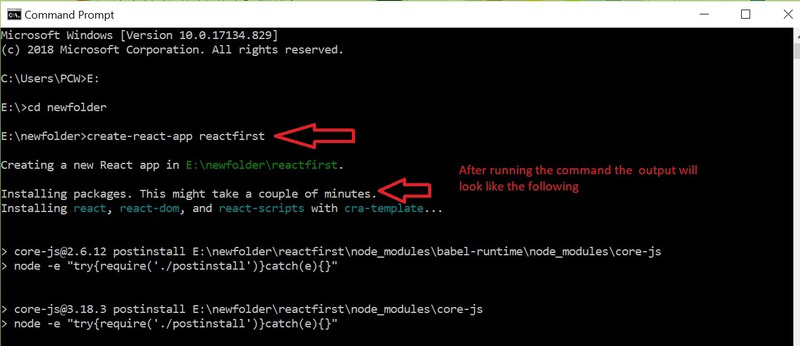
It will take some time to install the required dependencies
NOTE: Due to npm naming restrictions, names can no longer contain capital letters, thus type your app’s name in lowercase.

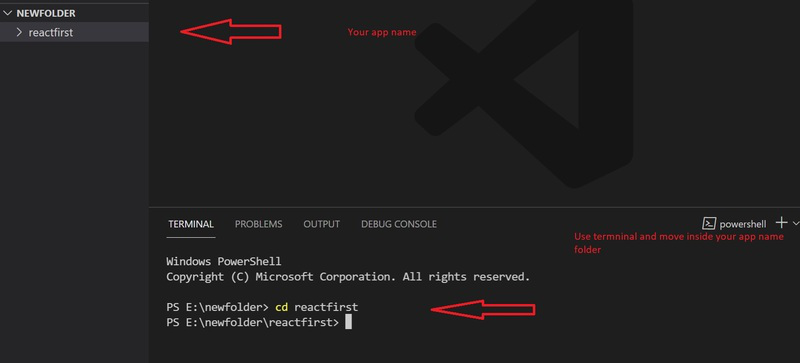
Step 6: Now open the IDE of your choice for eg. Visual studio code and open the folder where you have installed the react app newolder (in the above example) inside the folder you will see your app’s name reactapp (In our example). Use the terminal and move inside your app name folder.Use command cd reactapp (your app name)
Step 7: To start your app run the below command :
npm start
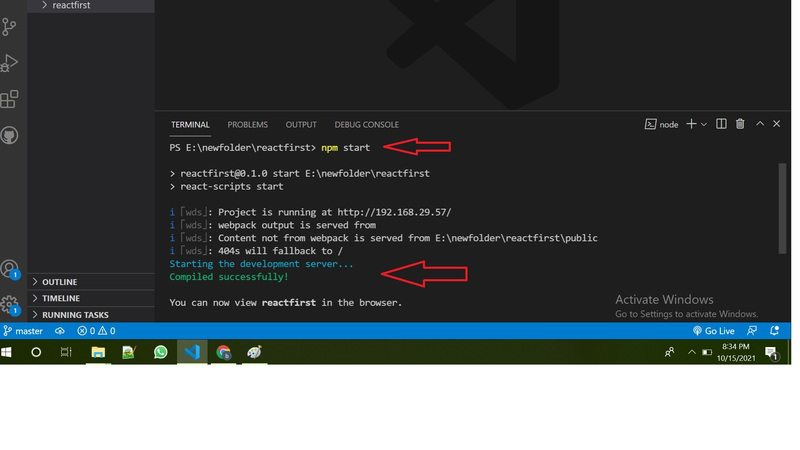
Once you run the above command a new tab will open in your browser showing React logo as shown below :
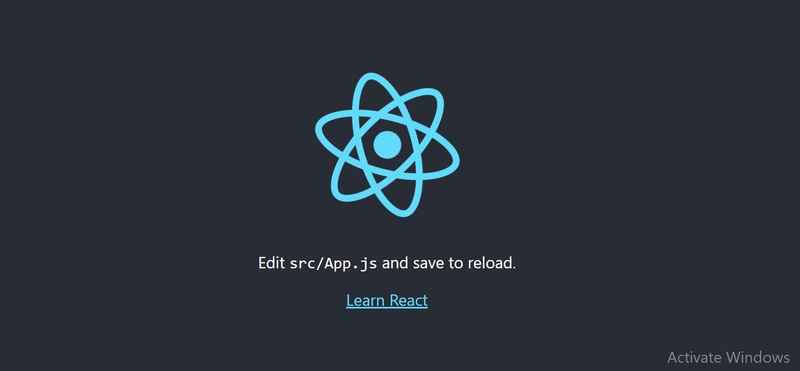
Congratulation you have successfully installed the react-app and are ready to build awesome websites and app
How to Install React JS on Windows. React JS is a powerful and advanced library developed with the JavaScript programming language. The library was launched by Facebook in 2013 as open source. Since then, with the help of the JavaScript developer community, React JS has grown day by day and is now one of the most popular JavaScript libraries.
In this article, we will teach you how to install React JS on Windows.
Buy Windows Virtual Private Server
Install Node.js
The first step is to download the Node.js installer for Windows. Use the latest Long Term Support (LTS) version for Windows and choose the 64-bit version, using the Windows Installer icon.
Run the Node.js installer after the download is complete. Follow the steps below until the installation process is complete:
1
2
3
4
5
6
Now that Node.js has been successfully installed, we can move on to the next step.
The Command Prompt Environment
We’ll need to use the command prompt to interact with Node.js and the Node Package Manager (NPM) to install React. Below are the basic commands we will need to get around and create folders/directories:
1.How to list directory contents:
dir dir <directory_name>Result: Lists the contents of the current directory, or the directory specified.
2. How to change to a Directory:
cd <directory_name>Result: Changes to the specified directory. Note the Command prompt will change to show the current directory.
3. How to change to a Previous Directory:
cd..Result: Changes to the directory immediately above the current one.
4. How to Make Directory:
mkdir <directory_name>Result:Creates a new directory with the name specified.
Open a Command Prompt in Windows
a) Open the Start menu, type command, and search.
b) Choose either Command Prompt or the Node.js command prompt.
c) Either choice will work.
As in C:Users<username>, a window will open in which <username> on your system will be the user you are logged in as.
In the following example, we run one of the above commands to see the result:
dirLet’s look at the contents of the downloads folder with this command:
dir downloadsThe path shows we are still in the directory C:UsersReactUser>, however, we are looking at the contents of C:UsersReactUserdownloads, and we see that it has one file.
Move to the downloads directory with following command:
cd downloadsWe’ve changed to the downloads folder as the command prompt shows C:UsersReactUserDownloads>. You can use the dir command to see the contents of this directory/folder. Next, back to the previous directory with this command:
cd..Create a new directory for our first project and name it reactproject1. We’ll use the following command:
mkdir reactproject1Again, we use the dir command to list the files within our current folder:
dirIf you want to learn more about commands, please check out this Microsoft link.
There are two ways to install React for your projects. We teach both methods so you can choose which method is suitable for you.
The first method
This install option allows you to full control over everything that is installed and defined as dependencies.
1. In the first step, open the command prompt.
2. Create a project folder named reactproject1.
mkdir reactproject1Press Enter to execute the command.
3. Move to the project folder, using cd reactproject1, so you can install React into it.
cd reactproject14. Create a package.json file using the following command.
npm init5. Install React and other modules using npm install — save react, this will install React into your project and update the package.json file with dependencies.
npm install --save reactYou can install additional packages using npm install — save and the name of the package you want to install.
Here we are installing react-dom:
npm install --save react-domThe second method
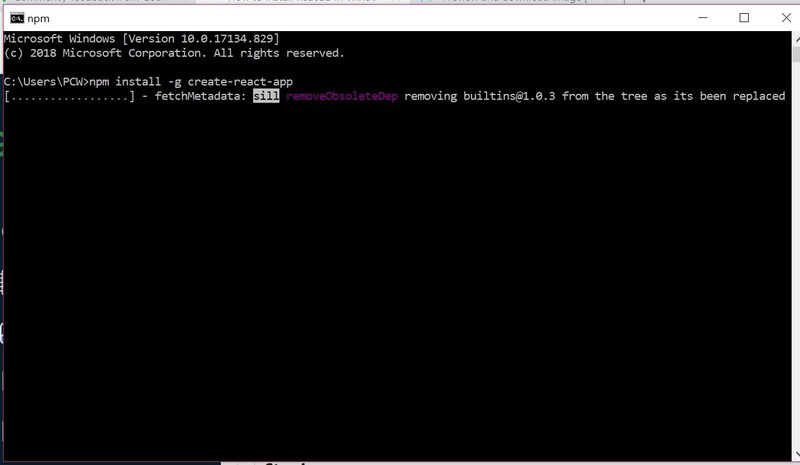
1. In the first step, open the command prompt and type npm install -g create-react-app. This installs the Create-React-App module which makes it very easy to create and deploy React into projects with a single command.
npm install -g create-react-appCreate-React-App is installed in the following location:
C:Users<username>AppDataRoamingnpmnode_modulescreate-react-app
To make sure you are in the desired directory when creating a new project, you can use dir to see where you are, and cd <directory_name> or cd.. to get to the desired location.
2. Step 2: To create a new project and deploy React into it, run create-react-app <project_name>. Do this to create reactproject2.
create-react-app reactproject2The entire process is automated and begins with creating a new React app folder for the project, then installs packages and dependencies.
The default packages include react, react-dom, and react-scripts. The installation will take a few minutes.
Run a React Project Application
To do this, you need to use the command prompt to change to the project folder, then start it. The cd reactproject2 command will take us to the reactproject2 folder.
cd reactproject2npm start will run the project application.
The default browser will open and load the project:
Dear user, we hope you would enjoy this tutorial, you can ask questions about this training in the comments section, or to solve other problems in the field of Eldernode training, refer to the Ask page section and raise your problem in it as soon as possible. Make time for other users and experts to answer your questions.
How to Install React JS on Windows.
Goodluck.