Is there a manual for cross-compiling a C++ application from Linux to Windows?
Just that. I would like some information (links, reference, examples…) to guide me to do that.
I don’t even know if it’s possible.
My objective is to compile a program in Linux and get a .exe file that I can run under Windows.
![]()
asked Oct 8, 2008 at 12:09
![]()
Pablo HerreroPablo Herrero
1,7145 gold badges18 silver badges23 bronze badges
The basics are not too difficult:
sudo apt-get install mingw32
cat > main.c <<EOF
int main()
{
  printf("Hello, World!");
}
EOF
i586-mingw32msvc-cc main.c -o hello.exe
Replace apt-get with yum, or whatever your Linux distro uses. That will generate a hello.exe for Windows.
Once you get your head around that, you could use autotools, and set CC=i586-mingw32msvc-cc
CC=i586-mingw32msvc-cc ./configure && make
Or use CMake and a toolchain file to manage the build. More difficult still is adding native cross libraries. Usually they are stored in /usr/cross/i586-mingw32msvc/{include,lib} and you would need to add those paths in separately in the configure step of the build process.
![]()
Sam DeHaan
10.1k2 gold badges38 silver badges46 bronze badges
answered Oct 8, 2008 at 12:21
![]()
5
It depends on what you mean (I couldn’t really say).
-
If you mean that you want to use an existing Linux application on Windows, then you could try compiling it using Cygwin on Windows. This however does not give you a Windows executable free from all dependencies towards Cygwin (your executable still depends on the
cygwin.dllfile) — and it still may need some porting before it will work. See http://www.cygwin.com. -
If you mean that you want to be able to perform the actual compilation of a Windows application on Linux and produce a .exe file that is executable on Windows — thus using your Linux box for development and/or compilation then you should look into MinGW for Linux which is a tool for crosscompiling for Windows on Linux. See http://www.mingw.org/wiki/LinuxCrossMinGW.
Best regards!
![]()
answered Oct 8, 2008 at 12:25
![]()
Anders HanssonAnders Hansson
3,7363 gold badges28 silver badges27 bronze badges
I suggest you give the following, GUB (Grand Unified Builder) a try as it cross-compiles several packages with their dependencies and assembles them into a single installation package for currently 11 architectures. You can download a prebuilt iso for installation in a VM from here and follow the source here. It can currently be used to cross-compile GNU LilyPond/ GNU Denemo / Inkscape and OpenOffice.org.
The target architectures are:
- darwin-ppc — tar.bz2 file for Darwin 7 (MacOS 10.3)/PowerPC
- darwin-x86 — tar.bz2 file for Darwin 8 (MacOS 10.4)/x86
- mingw — mingw executable for Windows32
- linux-x86 — shar archive for Linux/x86
- linux-64 — shar archive for Linux/x86_64
- linux-ppc — shar archive for Linux/PowerPC
- freebsd-x86 — shar archive for FreeBSD 4/x86
- freebsd-64 — shar archive for FreeBSD 6/x86_64
- cygwin — .tar.bz2 packages for Cygwin/Windows32
- arm — shar archive for Linux/ARM (largely untested)
- debian — shar archive for Debian (largely untested)
answered Aug 25, 2010 at 23:15
![]()
1.01pm1.01pm
8411 gold badge12 silver badges23 bronze badges
TLDRDownload links and install instructions
are at the end of this article.
Preface & Content
You want to have a GCC toolchain to compile C/C++ programs for Linux, while you work on your Windows machine?
You already use Cygwin on Windows and have Windows 7 / 8 or Windows 10 and do not want to use a slow Virtual Machine?
- Then you could either switch to use Windows Subsystem for Linux on Windows 10, which provides a more modern alternative provided by Microsoft.
Just search for «Ubuntu» or the name of your favourite Linux distribution in the Microsoft Store and click on install. - Or you can follow this tutorial to build a GCC Cross-Compiler in Cygwin if you don’t want to or can’t switch to WSL.
This will be a complete walktrough of the process to create a cross-compile toolchain for cygwin with linux 32 bit (i686) or 64 bit (x86_64) as target.
The speed of this process depends on your internet connection and your hardware. The complete procedure takes about 3 hours on an Intel I7-4720H 2.60GHz CPU with 16GB 1600 MHz DDR3 RAM and a Samsung 850 EVO mSata SSD.
- Installation of Cygwin and needed tools
- Building of crosstool-ng
- Allowing a case sensitive file system
- Building the target toolchain
- Creating a tarball
- Installation of the toolchain
- Testing the toolchain
- Files
Cygwin tool installation
Download the cygwin installer setup-x86_64.exe from cygwin.com. The crosstool-ng build will need some utilities to succeed. Install the following packages via the graphical installer or use the command line below.
- tar
- wget
- gcc-core
- gcc-g++
- binutils
- make
- cmake
- automake
- autoconf
- git
- patch
- unzip
- flex
- bison
- gperf
- help2man
- libtool
- gettext
- libgmp10
- libgmp-devel
- libmpfr6
- libmpfr-devel
- libmpc3
- libmpc-devel
- libncurses-devel
- libintl-devel
setup-x86_64.exe -a x86_64 -d -q -P "tar,wget,gcc-core,gcc-g++,binutils,make,cmake,automake,autoconf,git,patch,unzip,flex,bison,gperf,help2man,libtool,gettext,libgmp10,libgmp-devel,libmpfr6,libmpfr-devel,libmpc3,libmpc-devel,libncurses-devel,libintl-devel"
Building crosstool-ng
Open a bash prompt — named ‘Cygwin64 Terminal’ in the start menu — and execute the following steps. This should build and install crosstools-ng from source and allows the build of recent gcc versions. A benefit of using crosstool-ng is the support for parallel compilation of the target toolchain. This results in an optimal CPU usage of 100% during compilation.
Allowing a case-sensitive file system
Execute the follwing script with a bash prompt (Cygwin64 Terminal) as Administrator (Right-click the shortcut in the start menu. Then select «Run as Administrator»). This configures the Windows file system to allow case-sensitive filenames. You can read more here.
Reboot your PC after this step!
reg ADD "HKLM\SYSTEM\CurrentControlSet\Control\Session Manager\Kernel" /v obcaseinsensitive /t REG_DWORD /d 0 /f
BugActivating the case-sensitivity may break WSL!
Building the toolchain
Start the configuration with the following code snipped. This will create a new directory named compile-cs on your C-drive and mount this folder as case-sensitive file system under /usr/compile. You will need administrator rights on your PC to create a folder directly on your root of the hard drive. So adjust the source path as desired.
The next step is to configure the created toolchain.
Select the following under Path and misc options:
- Local Tarballs: /usr/compile/src
- Work Directory: /usr/compile/.build
- Prefix Directory: /usr/compile/x-tools/${CT_TARGET}
Select under Operating System:
- Target OS: linux
Activate C++ Support under C compiler:
- C++
Select the Target options as desired:
i686-unknown-linux-gnu
- Architecture: x86
- Architecture Bitness: 32
- Architecture Level: i686
x86_64-unknown-linux-gnu
- Architecture: x86
- Architecture Bitness: 64
powerpc64-unknown-linux-gnu
- Architecture: powerpc
- Architecture Bitness: 64
Build additional libraries under C Compiler (optional):
- Compile libssp: Yes
- Compile libsanitizer: yes
Save the configuration and start the build with the following command:
ct-ng build
This will take some time.
So be prepared to do something else meanwhile.
Creating a tarball
Execute the following script via bash prompt (Cygwin64 Terminal) to create a final archive. This will contain the complete toolchain including system libraries (libc, libcxx) and linux headers.
Installing the toolchain
Add the folder /usr/local/${TOOLCHAIN_NAME}/bin to your path environment variable (Replace ${TOOLCHAIN_NAME} with the toolchain-name).
Testing the toolchain
Download the gcc-test.zip archive and run make main_i686 or make main_x86_64. This will build both test applications below via make (c and c++ version) and analyze the generated files.
The respective .txt file contains the generated signature and import table of each application. The content should be similar to the displayed below. You will need a linux machine to run the generated binary files. This can be accomplished with a virtual machine.
Files
TLDRDownload i686-unknown-linux-gnu.tar.gz
or x86_64-unknown-linux-gnu.tar.gz
and execute the steps in
Installation of the toolchain
- gcc-test.zip
gcc 10.2.0 for cygwin64 3.1.7
-
MEGA (fast): x86_64-unknown-linux-gnu-10.2.0.tar.gz
Direct (slow): x86_64-unknown-linux-gnu-10.2.0.tar.gzCRC32: 1E2F522D
MD5: 9A65DB473B74640846703EEDE0452F2D
SHA-1: 5116FD2CEC0D22EFCE6E2974BC6A216C60E69258 -
MEGA (fast): i686-unknown-linux-gnu-10.2.0.tar.gz
Direct (slow): i686-unknown-linux-gnu-10.2.0.tar.gzCRC32: A47ACD7F
MD5: D04CE11D701BADC5473257376E9EC78E
SHA-1: 8E95FF3A74A65F03D7ADD571B59ED2EADCEBC52E -
MEGA (fast): powerpc64-unknown-linux-gnu-10.2.0.tar.gz
Direct (slow): powerpc64-unknown-linux-gnu-10.2.0.tar.gzCRC32: EB17E80A
MD5: 7EB210193F5D138225C3EFB66D855582
SHA-1: 7FA2CA109A54FF23452B97861B85371A1F3E4B10
gcc 9.2.0 for cygwin64 3.0.7
-
MEGA (fast): x86_64-unknown-linux-gnu-9.2.0.tar.gz
Direct (slow): x86_64-unknown-linux-gnu-9.2.0.tar.gzCRC32: DAFB720E
MD5: BCB53C0ED67F4BAE62853085DAE9619C
SHA-1: 748582624CD9F966967DDFE12F0D68EA03D82BD2 -
MEGA (fast): i686-unknown-linux-gnu-9.2.0.tar.gz
Direct (slow): i686-unknown-linux-gnu-9.2.0.tar.gzCRC32: 8CBA67BE
MD5: 53FBE54F911C695758126968BB8CF640
SHA-1: AC983963036957B420F763FC03CCF670EDCF66EE
gcc 7.2.0 for cygwin64 2.9.0
-
MEGA (fast): x86_64-unknown-linux-gnu-7.2.0.tar.gz
Direct (slow): x86_64-unknown-linux-gnu-7.2.0.tar.gzCRC32: 7B60472F
MD5: 1385EEB518EC8B72DEA63BFB27D6451C
SHA-1: 6F8BC037B74F904EE36752AEF75239F525A37218 -
MEGA (fast): i686-unknown-linux-gnu-7.2.0.tar.gz
Direct (slow): i686-unknown-linux-gnu-7.2.0.tar.gzCRC32: C0AAEF50
MD5: 0E8539E0C63854A0EB6827F4F3917C78
SHA-1: 613C3B8E7E6A95887F46F765673DC9641774D36B
(Un-)License
See https://www.gnu.org/ and https://github.com/crosstool-ng/crosstool-ng for the applying licenses regarding the used software.
Regarding the used scripts / code on this page:
This is free and unencumbered software released into the public domain.
Anyone is free to copy, modify, publish, use, compile, sell, or
distribute this software, either in source code form or as a compiled
binary, for any purpose, commercial or non-commercial, and by any
means.
In jurisdictions that recognize copyright laws, the author or authors
of this software dedicate any and all copyright interest in the
software to the public domain. We make this dedication for the benefit
of the public at large and to the detriment of our heirs and
successors. We intend this dedication to be an overt act of
relinquishment in perpetuity of all present and future rights to this
software under copyright law.
THE SOFTWARE IS PROVIDED «AS IS», WITHOUT WARRANTY OF ANY KIND,
EXPRESS OR IMPLIED, INCLUDING BUT NOT LIMITED TO THE WARRANTIES OF
MERCHANTABILITY, FITNESS FOR A PARTICULAR PURPOSE AND NONINFRINGEMENT.
IN NO EVENT SHALL THE AUTHORS BE LIABLE FOR ANY CLAIM, DAMAGES OR
OTHER LIABILITY, WHETHER IN AN ACTION OF CONTRACT, TORT OR OTHERWISE,
ARISING FROM, OUT OF OR IN CONNECTION WITH THE SOFTWARE OR THE USE OR
OTHER DEALINGS IN THE SOFTWARE.
For more information, please refer to http://unlicense.org/
Cross-compiling for windows (from linux) — Part 1
This article explains how to cross-compile a 64-bit windows application
from linux. This means that you don’t need to have a windows build-machine,
and you can use all linux based development tools. This is great for
developers who feel more comfortable in linux.
For some time, I knew that this was technically possible, but always
assumed it would be either too difficult, or otherwise buggy and cumbersome.
That I would eventually give up, and porting the compilation to windows,
using a build machine running windows.
After two days of working at this problem, I’m eager to explain and
share my experience with it. I’ll try to do so in two parts:
Part 1:
- Install the mingw cross-compilation tools.
- Compile hello_world.exe.
- A SCons based build system, that will be used in part 2.
Part 2:
- Cross-compile SDL. Cross-compile a program that links to,
and initializes SDL. - Repeat the process for similar libraries:
- SDL_image, together with libjpg and libpng.
- SDL_mixer, with libogg and libvorbis
- SDL_ttf, with libfreetype
- GLEW
1. Getting mingw, the cross-compiler tools
To cross-compile, I’ll use the mingw-project, in
partuclar, the 64 bit gcc-like build tools. On ubuntu, I installed these with
If you’re relying on c++11 features, you might want to verify that
the mingw-g++ compiler is version 4.7 or newer.
To check out which version you have:
2. Hello_World.exe
In order to cross-compile a hello world program, all you need to do is:
It works fine.
The
—static
makes sure all necessary libraries get
packed into the
exe
.
Without it, you’ll get
an error message.
3. Simple SCons build system
Since a project usually consists of more than a main.cpp,
you want an exensible build system. Preferably, one with the ability
to easy switch between target platforms, and manage the differences between
them.
I’ll be using SCons.
It is based on python, and easy to understand and customize. In fact, I
don’t think you need to know anything about SCons or python
to make sense of the scripts (which rarely is the case for make and cmake)
To follow along, grab a
copy of the repo
(and check out the «basic» branch)
The SCons «Makefile», aka SConsctruct
This sets it up so we can use —win64 flag to specify that we
want a windows build. With this enabled, x86_64-w64-mingw32-g++ is
used as the compiler, instead of g++.
Additionally, the SConstruct script asks SCons to
put all files created by the build in ./build/linux/ or ./build/windows/. This
keeps things tidy, and we also don’t need to rebuild everything when alternating
building for the two platforms.
Lastly, is does whatherver the SCons build script src/SConscript
(together with the environment we set up) tells it to do. But, before I show that, I want to show
the two python scripts that will be used to differentiate the details
between the target platforms:
Linux (utils/linux_build.py)
Windows (utils/win_build.py)
The SCons build script, src/SConscript
Building with SCons
Using the SCons setup, we can build a
linux executable (./bin/main) with:
To build a windows executable (
./bin/main.exe
):
If you want to clean up, add
-c
at the end, e.g.:
scons —win64 -c
To be continued … (part 2)
│
English (en) │
General
![]()
Note: Rewrite in progress, original content is down below, will pop up here again as its reviewed and updated as necessary
One of the FPC features is is ability to cross compile. Its very useful to be able to make Windows (32bit and 64bit) from your Linux workstation. Everything we do here relates to FPC, no changes are needed to Lazarus.
Its very important to note that these instructions apply to a FPC that was installed from packages from SourceForge, if you are using packages from your Linux Distribution then they will almost certainly not work, in fact, in many cases, Linux Distribution Repository packages may not support building cross compiles. Please consider uninstalling the Distribution’s packages and replacing them with ones from the official FPC/Lazarus SourceForge repository. https://sourceforge.net/projects/lazarus/files/Lazarus
These instructions have been tested on Linux Ubuntu 21.04 and SUSE Leap 15.3.
Install FPC/Lazarus
If you already have a working FPC/Lazarus install obtained from SourceForge, skip the this step. Install FPC and Lazarus Using the SourceForge method as detailed in https://wiki.freepascal.org/Installing_Lazarus_on_Linux#Build_Lazarus_from_Source Good idea to fire it up and make sure you can build and compile a simple app.
Setting up a 64bit Linux to Windows Cross Compile.
Note, we, assume fpc 3.2.2, if not, put the right numbers in yourself !
The process here is to build the pre compiled FPC units to suit Windows (both 32bit and 64bit) and, of course the Windows compilers, ppcross386 and ppcross64. We then put a symlink to the compilers in the right place and make sure your FPC config files knows about the Windows pre compiled units.
Now to make a cross compiler, the following needs to be done as root, its easier (but slightly riskier) to sudo (or su) and stay as root for the whole process. So, please be careful. We will set a temporary env variable containing the FPC version number to make copy and pasting easy (assuming you are using FPC3.2.2) —
sudo -i
export FPCVER="3.2.2"
cd /usr/share/fpcsrc/"$FPCVER"/
make clean all OS_TARGET=win64 CPU_TARGET=x86_64
make clean all OS_TARGET=win32 CPU_TARGET=i386
Those steps take awhile each, watch for errors as the compile report scrolls by. It builds Windows versions of the units in the FPC-SRC tree. The next lines are pretty quick, they copies the units to /usr/lib/fpc/3.2.2/units and the ones after that makes a symlinks to the crosscompilers.
make crossinstall OS_TARGET=win64 CPU_TARGET=x86_64 INSTALL_PREFIX=/usr
make crossinstall OS_TARGET=win32 CPU_TARGET=i386 INSTALL_PREFIX=/usr
ln -sf /usr/lib/fpc/"$FPCVER"/ppcrossx64 /usr/bin/ppcrossx64
ln -sf /usr/lib/fpc/"$FPCVER"/ppcross386 /usr/bin/ppcross386
Right, assuming you did not see any errors, does your fpc.cfg file need attention ?
Does the result listed include «-Fu/usr/lib/fpc/$fpcversion/units/$fpctarget/*» ? If not, you need to fire up your favorite editor and add it. Look for the first line in the sample below, when you find it, add the second line as shown.
# searchpath for units and other system dependent things
-Fu/usr/lib/fpc/$fpcversion/units/$fpctarget/*
Thats it, press Control-D, to get out of the risky root mode. And test it out.
Testing
Fire up Lazarus, open a new project, then
- Project->ProjectOptions->ConfigAndTarget and Set Target OS (-T) to Win64
- Project->ProjectOptions->ConfigAndTarget, Set LCLWidgetType» to Win32
- Run->Build
- Project->ProjectOptions->ConfigAndTarget and Set Target OS (-T) to Win32
- Project->ProjectOptions->ConfigAndTarget and Set Target CPU Family (-P) to i386
- Project->ProjectOptions->AdditionsAndOverRides, Set LCLWidgetType» to Win32
- Run->Build
Obviously, you cannot ‘run’ that binary but if one is made, its almost certainly OK.
Lazarus/LCL
Cross compiling the LCL and Lazarus components
The IDE automatically cross compiles all used packages when you change the target of your project and build it.
Cross compiling a project
Lazarus Projects can have ‘Modes’ and its convenient to set a mode for each compile you want to do. So, here, now you can make Linux64 binaries and Windows 32bit and 64bit executables, so make a mode for each and apply the appropriate settings to each mode.
In Project->ProjectOptions->ConfigAndTarget, set the Target OS to ‘win64’ and in «Additions and Overrides» click Set LCL WidgetType and select win32. That’s all. The next time you build, you will create a win64 executable.
Similarly, to make a Win32 executable, do the above but also set Project->ProjectOptions->ConfigAndTarget and Set Target CPU Family (-P) to i386
The IDE will rescan for the Windows units, so that ‘Find declaration’ and code completion features will now work with the win32 rtl instead of the linux rtl.
Hints for Cross compiling and Lazarus
If you create an application/package for multiple targets, you will often do the following: Fix a bug, compile and test it under Linux, then compile and test it under win32, .. . Because normally you overwrite your .ppu files, you have to recompile everything, everytime you switch. This is not necessary. The Lazarus IDE supports macros.
Example 1: Cross compiling a project for linux and win32.
Set Project -> Compiler Options -> Paths -> Unit Output directory to $(TargetOS). This macro will be replaced by the value in Code -> TargetOS in lowercase (i.e. «linux» for Linux and «win32» for Win32).
The output directory is relative to your project directory (the directory where your .lpi is). Create a linux and win32 directory in your project directory.
When you click on the «Show Options» button at the bottom of the compiler options, you will see a -FElinux/ or -FEwin32/. This option tells the compiler where to write the output (e.g. .ppu/.o files).
Example 2: Cross compiling a project for various platforms and widget sets.
Set the Unit output directory to
$(TargetCPU)/$(TargetOS)/$(LCLWidgetType)
and create the sub directories for all targets. This path construction is also used by the LCL.
The same can be done for packages.
Cross compiling and Lazarus Packages
Lazarus packages are not limited to libraries. They can be used to compile nearly everything. And the IDE automatically recompiles them if needed.
Packages can inherit compiler options. For example: A project that uses a package inherits the output directory of the package. In other words: the output directory of the package is added to unit search path of the project. See in the IDE: Project -> Compiler options -> Inherited.
Inheritance normally works only one way, but there are exceptions:
The target platform (OS and CPU) of the project overrides the target for all used packages. That means, if you set the Target OS of the project to «win32» and compile the project, the IDE will check if the used packages need to be recompiled for this Target OS.
For example:
Package A has as output directory: lib/$(TargetOS)
Project uses A.
- The project is built for linux. The IDE compiles A for linux in <PackageDirOfA>/lib/linux/, then it compiles the project for linux.
- The project is built for win32. The IDE compiles A for win32 in <PackageDirOfA>/lib/win32/, then it compiles the project for win32.
- The project is built again for linux. The IDE checks A for linux and does not recompile it. Then it compiles the project for linux.
So, using the macros saves a lot of time.
Legacy (for now)
This is information that is possibly out of date and unnecessary. It might be deleted some time in the future so, if you find something still valuable, consider moving it up above the above heading.
Introduction — knowing, what you are doing
Note : If your FPC has come from your Linux Distribution Repository, it is likely it won’t have everything needed to be turned into a cross compiler. Please see Installing the Free Pascal Compiler — Linux.
This is a short introduction for newbies.
The following sections describe how to set up a Linux system to cross compile, creating Win32 executables (or FreeBSD or Darwin/macOS, or …).
Why cross compiling? Free Pascal is a compiler and basically converts source into binaries (machine language). These binaries also contain information about how the operating system should start the executable. Therefore these binaries are platform specific.
Free Pascal itself does not need much setup. It can create binaries for many platforms. Just tell it to do so. But the compiler is only one part.
There is also the assembler and the linker. And these tools are not able to create cross-platform code. That’s why we have to create a special linker ‘ld’ and assembler ‘as’ for every target platform. These are the binutils.
After creating the cross tools, all the FPC Pascal units will be cross compiled. For example, there will then be one system.ppu file for every target platform.
Next, your FPC config file (fpc.cfg) will be set up, so that cross compilation becomes so easy, that you can forget all the boring details.
The same will be done for the LCL — the Lazarus Component Library.
And after this you can cross compile Pascal programs for Win32. Either start them with wine or copy them to a Windows machine and test them there.
Free Pascal
Why *nix to Windows and not the other way around
The main reason for this is that generating Linux/Unix binaries on a foreign platform (even another Unix or Linux system) is more complicated. Static linking is already complicated, let alone shared.
You would need the used libraries from the target platform (gtk, glib, libc etc), and a lot of additional configuring for ld (library paths, dynlinker path etc).
This has been partially done (for the static case), but it is hard since it needs manual postediting of linker files and linker commandline, and a deep understanding about what makes Unix binaries tick.
Newer FPCs — 2.1.1 and newer
If you are compiling a 2.1.1 or newer version of FPC you can just do:
$ make all OS_TARGET=win32 CPU_TARGET=i386
and then
$ su -c "make crossinstall OS_TARGET=win32 CPU_TARGET=i386"
![]()
Note:
make crossinstall by default installs all files in /usr/local/lib/fpc/$fpcversion/units directory, that’s why you will need to add to /etc/fpc.cfg file a new search path:
-Fu/usr/local/lib/fpc/$fpcversion/units/$fpctarget/*.
Another option is to use INSTALL_PREFIX=/usr while performing crossinstall. In this case, you will not need to change anything in /etc/fpc.cfg file because all will be installed in /usr/lib/fpc/$fpcversion/units which is already there
![]()
Note:
To build for win64 the make command is: make all OS_TARGET=win64 CPU_TARGET=x86_64
The reason for this simplicity is the internal linker included in this version of fpc.
An example under Bunsen Labs (Debian 

— Cross-compile to Win32 and Win64 using FPC 3.0.0 and Lazarus 1.6.2
— Open up your terminal and execute the following commands (Many thanks to Handoko and Leledumbo for this, you are awesome).
# Navigate to the fpc source folder.
cd /usr/share/fpcsrc/3.0.0

# Compile the cross-compiler.
sudo make clean all OS_TARGET=win32 CPU_TARGET=i386

# Install the cross-compiler.
sudo make crossinstall OS_TARGET=win32 CPU_TARGET=i386 INSTALL_PREFIX=/usr

# Link the cross-compiler and place the link where Lazarus can see it.
sudo ln -sf /usr/lib/fpc/3.0.0/ppcross386 /usr/bin/ppcross386

# Do the same using x64 as target
sudo make clean all OS_TARGET=win64 CPU_TARGET=x86_64
sudo make crossinstall OS_TARGET=win64 CPU_TARGET=x86_64 INSTALL_PREFIX=/usr
sudo ln -sf /usr/lib/fpc/3.0.0/ppcrossx64 /usr/bin/ppcrossx64
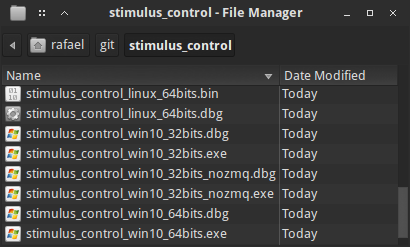
— Make sure your cross-compilers are alive: (Note, the links to the cross compiling binaries appear in /usr/bin rather than /usr/lib as shown in the images below).
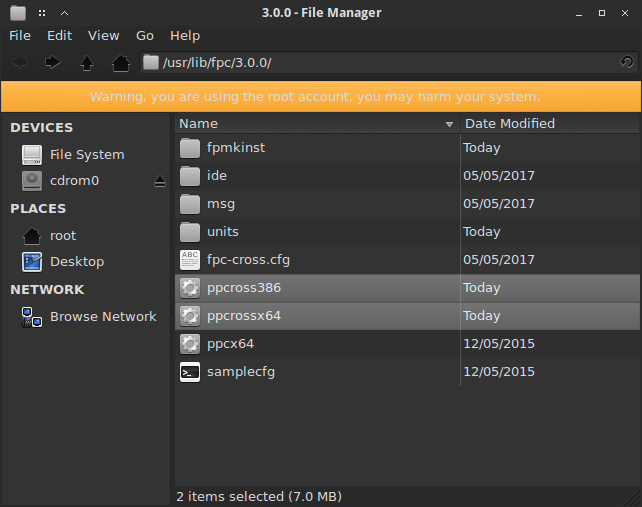
— Make sure your cross-compilers were properly linked:

— Now open Lazarus.
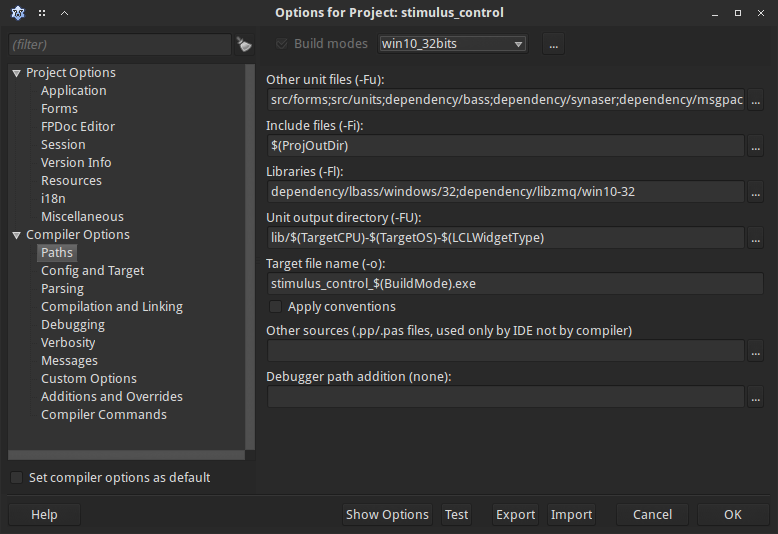
— Find the «Paths» item in the right list of the «Project Options» window. Press Ctrl+Shift+F11 or navigate through the Projects->Project Options->Paths menus.
— For each build, configure your paths so that all necessary libraries are reacheable and all output files can be generated by Lazarus/FPC with no overriding. I have chosen to use macros in the «Unit output path» and «Target file name».
— Create builds and edit build names in the «Build Mode: [BuildName]» window (click in the upper […] button to open it).
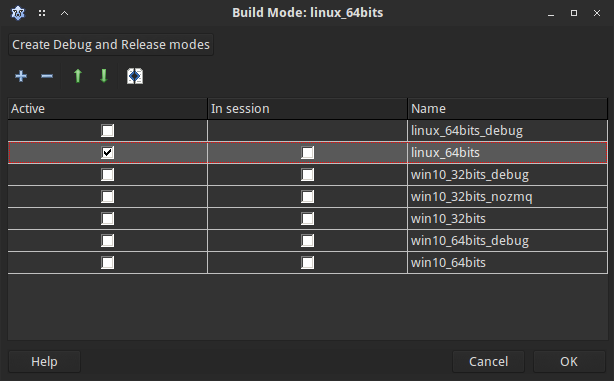
— Click ok when your done.
— Now go to Run -> «Build Many Modes». Press ok. Wait until Lazarus and FPC finishes their work.
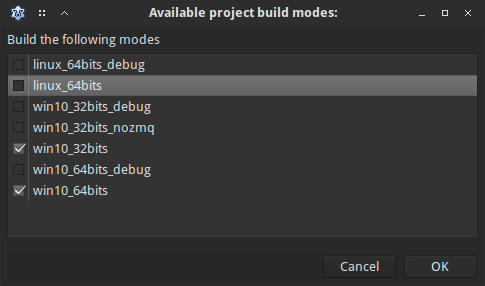
— Go to your project folder and enjoy!
FPC older than 2.1.1
For FPC versions older than 2.1.1, please see the History link (version before 19 August 2014) to see the steps needed
See also
- Cross compiling
- crossnotes Notes about cross compiling
- buildfaq
Aug 7, 2014
5 minute read
linux
- Platforms
- Cross-compiling for Linux
- Cross-compiling for OSX
- Cross-compiling for Windows
- Autotools
- Autotools philosophy
- Cross-compiling for Windows with Autotools
- Side-note about temporary programs
- Cross-compiling for OSX with Autotools
- CMake
- CMake philosophy
- CMake usage
- Cross-compiling for Windows with CMake
- Cross-compiling for OSX with CMake
- Runtime dependencies
- Find dynamically linked libraries on Linux
- Find dynamically linked libraries on OSX
- Find dynamically linked libraries on Windows
Contents
I’ll keep updating this article as I go, just to put stuff in all the
same place.
Platforms
Cross-compiling for Linux
I’m pretty sure it’s possible to cross-compile for Linux on other OSes,
seeing as everything is open-source, but I have never done it — and why
would I want to? Linux is the friendliest to build on, so it’s better to
use it as a build environment.
Cross-compiling for OSX
I’ve had success using xchain to compile for OSX from Linux, but it’s
a really long and painful experience.
The steps involve:
- Extracting SDKs from XCode dmg install images
- Building Apple’s version of cctools
- A big mess with 32 & 64-bit (ld64 linker, etc.)
- Compiling GCC by hand (that was fun — for some version of fun)
Basically, information that’s out there gets outdated almost as soon as
it’s published, so even if I did put out a step-by-step guide, it would
be outdated in no time.
I remember problems with libstdc++ for C++ compilation. I haven’t tried
building a cross LLVM-GCC yet.
Compiling for both 32-bit & 64-bit means two separate compilations, unlike
natively on OSX where you can just use xcodebuild to get fat executables.
In summary, not sure whether it’s worth the trouble, it’s long to get running,
fragile, and involves a lot of hand-holding.
Cross-compiling for Windows
mingw and msys on Windows are basically ‘GCC on Windows’, which works fine
most of the time, and even includes tools like bash, some Unix utils (even vim!),
but let me state that once and for all: mingw on Windows is slow as fuck.
A much better solution, in fact, is to use mingw on Linux (or others) to produce
Windows executables. Apparently, mingw-w64 is a more up-to-date version (fork?)
that also supports building 64-bit Windows executables.
Debian testing & upper contains a mingw-w64 package that’ll get you started.
Cross-compilation means:
- Prefixed tools, for example
i686-w64-mingw32-gccinstead ofgcc - A different sysroot & prefix, e.g.
/usr/i686-w64-mingw32that has
include,lib,bin, etc. - Generated executables are not necessarily executable on the platform
you’re building from (e.g. .exe on Linux)
In the next sections, I’ll just assume we’re cross-compiling from Linux to
Windows using mingw-w64.
Autotools
Autotools philosophy
Autotools’ principle is that:
- As a developer you run
autoreconf -i -f(or something of the sort), which
in turn runsautomakeand generatesMakefile.infiles fromMakefile.am
andconfigurefromconfigure.ac— these files are portable. - As a user, you run
./configurewhich generates a system-specificMakefile
(recursively into each needed directory) - Then you can run
makeandmake install
Notes:
- Most packages will work with just
make installas it depends on building
targets. - While running
make, if some files have changed, autotools might reinvoke
itself — for example,aclocal-1.14. - MinGW on Windows, at the time of this writing, has outdated versions of
automake (1.11) — runningautoreconfon another platform first and re-running
it with an older version might not work. The main complaint seems to be the
automake macroAM_PROG_ARwhich appeared in 1.11.2 or 1.12 — sometimes it’s
not used and it’s enough to comment it inconfigure.ac
About out-of-tree builds:
- You can make a build directory to build outside of the source directory —
for examplecd build && ../yourpackage/configure [OPTIONS]. The configure
script will only populate the build directory with build artifacts rather
than polluting the build directory. - Some packages don’t support out-of-tree builds, notably,
libjitdoesn’t.
In that case, it’s wise to make a copy of the source tree to build cleanly,
and keep the original clean somewhere.
I haven’t yet found a case where ./autogen.sh or ./auto_gen.sh are actually
needed — if you have recent autotools installed, it’s fine.
Cross-compiling for Windows with Autotools
When running configure, use the --host=HOST option. There’s also --build
and others, but I’m confused about those and never had to use them except when
cross-compiling GCC for another platform. There’s a reasonably good explanation
in the automake docs.
Example HOST values:
i686-linux-gnu.i686-w64-mingw32,x86_64-w64-mingw32i686-apple-darwin11
It’s a good idea to cross-compile into a prefix so you don’t mix native
and foreign libraries. So most of the times, the build process might look
something like:
mkdir build
cd build
../yourpackage/configure --host=i686-w64-mingw32 --prefix=$HOME/i686-w64-mingw32-prefix
make
make install
Side-note about temporary programs
Some packages compile executables that are run during the build process — such
as tests, or libjit’s opcode generator.
Sometimes, they’ll be configured such as these will be built for the build
architecture (Linux) instead of the host architecture (Windows), which is
perfect.
But if they’re not, chances are you’ll get an error about some missing executable
and find an .exe in its place.
And if you’re really unlucky, the package’s Makefile.am files will invoke
directly util instead of util$(EXEEXT) — you might need to fix that too.
To be able to run .exe directly from Linux, on Debian you can do the following:
sudo apt-get install wine binfmt-support
sudo /usr/sbin/update-binfmts --package wine --install wine /usr/bin/wine --magic MZ
If you’re lucky, the temporary programs will run just fine and everything will
work out. If it doesn’t, time to read the autotools docs to know how to generate
those tools for the build platform, not the host platform.
If running these with wine messes up your terminal (when pressing enter you see
‘^M’), running reset should fix it in no time.
Cross-compiling for OSX with Autotools
Same principle, use --host=i686-apple-darwin11 or whatever your cross
toolchain is.
CMake
CMake philosophy
CMake is basically a build file generator — it can generate for:
- GNU make
- ninja (make alternative)
- XCode (command-line: xcodebuild)
- Microsoft Visual C++ / Studio (command-line: msbuild)
- And god knows what else
CMake usage
The cmake command takes as argument the folder of a CMake project, ie.
where the CMakeLists.txt file lives (casing may differ).
That means out-of-tree builds are possible as well. To specify variables
like the prefix, use the -D option. Example run:
mkdir build
cmake ../yourpackage -DCMAKE_INSTALL_PREFIX=$HOME/prefix
make
make install
In fact, out-of-tree builds are the recommended way to go for CMake projects
in general. Sometimes the build folders are created inside the source distribution,
but if it’s just a dependency and not your project, it’s a bad habit in my
opinion.
Cross-compiling for Windows with CMake
As far as I can tell, CMake has no built-in cross-compiling support like autotools
does. However, it does support toolchain files. Here’s how a toolchain file
for mingw-w64 might look like:
SET(CMAKE_SYSTEM_NAME Windows)

SET(CMAKE_C_COMPILER ${TARGET_ARCH}-gcc)
SET(CMAKE_CXX_COMPILER ${TARGET_ARCH}-g++)
SET(CMAKE_RC_COMPILER_INIT ${TARGET_ARCH}-windres)

SET(QT_MOC_EXECUTABLE ${MINGW_INSTALL_PREFIX}/bin/moc)
SET(QT_RCC_EXECUTABLE ${MINGW_INSTALL_PREFIX}/bin/rcc)
SET(QT_UIC_EXECUTABLE ${MINGW_INSTALL_PREFIX}/bin/uic)

SET(CMAKE_SYSTEM_PROGRAM_PATH ${CMAKE_INSTALL_PREFIX}/bin)
SET(CMAKE_FIND_ROOT_PATH ${MINGW_INSTALL_PREFIX})
SET(CMAKE_INSTALL_PREFIX ${MINGW_INSTALL_PREFIX})

SET(CMAKE_FIND_ROOT_PATH_MODE_PROGRAM NEVER)
SET(CMAKE_FIND_ROOT_PATH_MODE_LIBRARY ONLY)
SET(CMAKE_FIND_ROOT_PATH_MODE_INCLUDE ONLY)
Cross-compiling for OSX with CMake
Same principle, you can find toolchains on the internet.
Runtime dependencies
Find dynamically linked libraries on Linux
To know which dynamic libraries a Linux executable is linked against, one
can simply run ldd EXEC
$ ldd ~/Dev/ooc/jit-tests/libjit1
        linux-vdso.so.1 (0x00007fff8c3fe000)
        libjit.so.0 => not found
        libc.so.6 => /lib/x86_64-linux-gnu/libc.so.6 (0x00007f9d5468a000)
        /lib64/ld-linux-x86-64.so.2 (0x00007f9d54a5a000)
ldd is nice, because it respects LD_LIBRARY_PATH and works recursively —
as long as it can find all the dependencies:
$ LD_LIBRARY_PATH=~/Dev/ooc/jit-tests/prefix/lib ldd ~/Dev/ooc/jit-tests/libjit1
        linux-vdso.so.1 (0x00007fff2fba2000)
        libjit.so.0 => ~/Dev/ooc/jit-tests/prefix/lib/libjit.so.0 (0x00007f99eaa1b000)
        libc.so.6 => /lib/x86_64-linux-gnu/libc.so.6 (0x00007f99ea64d000)
        libpthread.so.0 => /lib/x86_64-linux-gnu/libpthread.so.0 (0x00007f99ea42f000)
        libdl.so.2 => /lib/x86_64-linux-gnu/libdl.so.2 (0x00007f99ea22b000)
        libm.so.6 => /lib/x86_64-linux-gnu/libm.so.6 (0x00007f99e9f2a000)
        /lib64/ld-linux-x86-64.so.2 (0x00007f99eacac000)
(Here, libjit was in a local prefix, and libm/libdl were dependencies of libjit,
not the executable itself).
Find dynamically linked libraries on OSX
On OSX, use otool -L:
$ otool -L bin/pug
bin/pug:
  ~/Dev/pug/pug/deps/prefix/lib/libcollections.0.dylib (compatibility version 1.0.0, current version 1.0.0)
  /usr/lib/libSystem.B.dylib (compatibility version 1.0.0, current version 1197.1.1)
A few notes about otool:
- Unlike
ldd, it will not do a recursive search — in the case above, maybe
libcollections.0.dylibhas other dependencies, but otool won’t tell you that,
unless you call it onlibcollections.0.dylibitself. You can pretty easily
make a script to do that for you. - I think I remember that it doesn’t respect
DYLD_LIBRARY_PATH, but I might
be mistaken.
Find dynamically linked libraries on Windows
On Windows, one can use the Dependency Walker to figure out
which DLLs are loaded — it’ll even go so far as monitor the executable while
it’s running to know which DLLs are not linked against, but still loaded
dynamically (with LoadLibrary).
On Linux, you can run i686-w64-mingw32-objdump -p executable.exe — the
output is a bit verbose, so you might want to pipe that into grep 'DLL Name'
sh
$ i686-w64-mingw32-objdump -p bin/pug.exe | grep 'DLL Name'
        DLL Name: KERNEL32.dll
        DLL Name: msvcrt.dll
        DLL Name: USER32.dll
And that’s it.
Latest video
View all

C++ vs Rust: which is faster?
Jan 17, 2023
21 minute watch
I ported some Advent of Code solutions from C/C++ to Rust, and used the
opportunity to compare performance. When I couldn’t explain why they performed
differently, I had no choice but to disassemble both and look at what the
codegen was like!
Watch now
Building for i386 on an x86_64 machine
Reminder: If when compiling from source you decide you’d like to recompile with a different set of options, or stop the build in order to change some of the options you’ve selected, you must first run `make distclean` (`make clean` only removes object files) in order to remove generated configuration files before you run the configure script again with your new options. If you accidentally stop the build (by hitting ctrl-c or something) and do not wish to change any of the options, you can safely restart the build by simply typing the `make` command and it will continue right where it left off.
%debian
if ./configure complains about not being able to find gtk-config, install the ‘libgtk2.0-dev’ package
%%
If the compile fails with the error «had to relocate PCH», try adding «—disable-precomp-headers’ to your ./configure line.
You can create windows binaries without even booting to Windows! see Cross-Compiling Under Linux.
See also this page about Build System Management.
You may need to build 32-bit apps on an x86_64 Linux box (Suse or RHEL WS3 which is what I have).
On my box at least, the 32-bit gtk libs aren’t installed, so I opted to build the plain X11 version,
but the config below should work for either one.
Configure like this:
 mkdir build_ia32
 cd build_ia32
 ../configure CC='gcc -m32' CXX='g++ -m32' --x-libraries=/usr/X11R6/lib ...options...
 make
On RHEL WS 3, there are some missing lib symlinks in /usr/lib, e.g. no libX11.so (should be a symlink to libX11.so.X.Y). You’ll have to make those manually. They should be pretty obvious config or build failures.
Also, the configure script tries to search in /usr/lib64 and /usr/X11R6/lib64; remove those from SEARCH_LIBS near the top of the configure script (not doing this would make it try to link with e.g. -lXinerama, which exists but only in the 64 bit world.)
Cross-compiling under Linux for MS Windows
- Install The Mingw Cross-Compiler.
- Compile wxWidgets
- Download wxWidgets source
- Compile with ./configure —prefix=/usr/local/i586-mingw32 —host=i586-mingw32msvc —build=i686-linux —your_optional_switches
    make
    make install
Host string differs depending on mingw installations, you should check your mingw cross compiler for the exact value. Build option can also be different if you’re not using Linux on x86, of course. For example, if you use mingw32 from Debian or Ubuntu packages under Linux on x86-64 architecture the command would be:
./configure —prefix=/usr/local/i586-mingw32msvc —host=i586-mingw32msvc —build=x86_64-linux —your_optional_switches
You may use ‘checkinstall make install’ instead of ‘make install’ in order to create a package and allow clean removal of the binaries.
See also:
- Embedding icons in your cross-compiled binary: Cross-Compiling Windows Resources
- Embedding other files: Embedding PNG Images
- Several tips, tricks and workarounds as well as Eclipse configuration: wxWindows application compile (for Linux) and cross-compile (for Windows) under Linux/Eclipse/CDT
- IBM DeveloperWorks article
- Cross compiling RLS AVON with MinGW on Linux (simple instructions for installing environment, compiling wxWidgets, and compiling an certain wxWidgets application)
Note: The SDL scripts and these directions cannot be mixed.
Note: By disabling threads (with —disable-threads), you can avoid a dependency on the ming dll
Example usage
Once installed, save the following file as winhello.c (stolen from Installing and Using the MinGW Cross-Compiler on Mac OS X):
/*
 * Hello, World for Win32
 * gcc winhello.c -o winhello.exe
 */

#include <windows.h>
int main(int argc, char *argv[])
{
	MessageBox(NULL, "Hello, world!", "Hello, world!", MB_OK);
	return 0;
}
To build the example, execute the following command:
$ i386-mingw32-gcc winhello.c -o winhello.exe
and run it, for example, with wine: wine winhello.exe
Contrib libraries
Couldn’t compile the contrib directory with the wxMSW 2.4.2 sources, use the latest cvs.
Flags
You might need these flags when compiling:
-Wl,--subsystem,windows -mwindows
-DWINVER=0x0400 -D__WIN95__ -D__GNUWIN32__
-DSTRICT -DHAVE_W32API_H -D__WXMSW__ -D__WINDOWS__
And these while linking:
-lregex -lpng -ljpeg -lzlib -ltiff -lstdc++ -lgcc -lodbc32 -lwsock32 -lwinspool -lwinmm -lshell32
-lcomctl32 -lctl3d32 -lodbc32 -ladvapi32 -lodbc32 -lwsock32 -lopengl32 -lglu32 -lole32 -loleaut32
-luuid
environment variables
VZ: Note that this is unnecessary when using autoconf cross-compilation support.
In order to use the cross-compiler tools you need to replace the normal tools in makefiles. This is easier to do just exporting some environment variables before running configure/make:
  export CC=i586-mingw32msvc-gcc
  export CXX=i586-mingw32msvc-c++
  export LD=i586-mingw32msvc-ld
  export AR=i586-mingw32msvc-ar
  export AS=i586-mingw32msvc-as
  export NM=i586-mingw32msvc-nm
  export STRIP=i586-mingw32msvc-strip
  export RANLIB=i586-mingw32msvc-ranlib
  export DLLTOOL=i586-mingw32msvc-dlltool
  export OBJDUMP=i586-mingw32msvc-objdump
  export RESCOMP=i586-mingw32msvc-windres
  export WINDRES=i586-mingw32msvc-windres
SDL’s Script
See also: BuildCVS.txt in the tar of the SDL scripts
http://www.libsdl.org/extras/win32/cross/ contains scripts that automate the compiler build process described above.
Download build-cross.sh, cross-configure.sh, and cross-make.sh.
Run the script build-cross.sh.
Download the CVS version wxAll and uncompress it.
Copy cross-configure.sh and cross-make.sh to the wxWidgets-2.5.2 directory.
Run cross-configure.sh and cross-make.sh and you should be done. 
MXE
From MXE page — «MXE (M cross environment) is a GNU Makefile that compiles a cross compiler and cross compiles many free libraries such as SDL and Qt.»
MXE can be used to cross-compile wxWidgets projects. You can install MXE according to the steps in the tutorial, go to the MXE directory and issue the following command:
make cc wxwidgets
Now, ensure that you have <MXE location>/usr/bin in the PATH and compile your project with the following command:
i686-w64-mingw32.static-gcc main.cpp $(i686-w64-mingw32.static-wx-config --cxxflags --libs) -o main.exe -std=c++11 -lstdc++
Note about WINE
Make sure to turn off binfmt support before running configure (Debian: /etc/init.d/binfmt-support stop), which invokes wine for .exe files; otherwise configure will think it does NOT use a cross-compiler.
Autoconf/Automake unit testing suites
(maybe this section should go somewhere else?)
It is possible to autotest your code using wine (you are using unit tests, right?). This makes it very easy to script code under Unix to build multiple platforms, then test, without intervention. This section focusses on testing console-able objects.
First familiarise yourself with building test binaries with autoconf and automake. I recommend cppunit (for C++ systems). There’s plentiful documentation on cppunit’s website on integrating cppunit with Makefile.am. One show-stopping step is the ability to test msw binaries in the same way (make check) one tests unix binaries.
To take advantage of wine (running your tests automatically with wine), first make sure that wine may run headless. If you have access to a graphical terminal then this isn’t important (if you’re Ok with having wine spout gobbledygock to a window with every run). Make sure your test-directory Makefile.am’s have all TESTS tokens suffixed with $(EXEEXT):
TESTS = TestFoo$(EXEEXT)
check_PROGRAMS = TestFoo
…and so on.
Next add a configure.ac (you have upgraded to using .ac instead of .in, right?) line manipulating the macro TESTS_ENVIRONMENT:
AC_SUBST([TESTS_ENVIRONMENT], [$WINE])
In this I assume that WINE has been set with AC_CHECK_PROGS or something (even `WINE = wine’). This will have all tests run in the following format:
$(TESTS_ENVIRONMENT) $${dir}$$tst
Where dir is the path and tst is the test name (remember that EXEEXT). That’s it: wine will return the exit code of your running binary. You can also put a special shell or other token in there, but that exceeds the focus of this documentation. This assumed automake-1.9 and autoconf-2.57 but I’m fairly certain it works in earlier versions of both (uncertain about autoconf-2.13 style).
Testing the created executables
To test your mingw32 installation with a sample not using wxWidgets, look above («Example usage»).
To test your mingw32 installation with a real wxWidgets example, take minimal.cpp from the official examples. Fortunately, I didn’t have to fiddle around with the flags myself, I use wx-config for that — not the system-wide one, but the one compiled with the cross-Windows libraries below /usr/local/i586-mingw32!
i586-mingw32msvc-g++ -c -o minimal.o minimal.cpp
  `/usr/local/i586-mingw32/bin/wx-config --cxxflags`
i586-mingw32msvc-g++ -o minimal.exe minimal.o
  `/usr/local/i586-mingw32/bin/wx-config --libs`
Attention, there are are two caveats here that could cost you lots of time (it did cost me lots of time, hope I’ll save yours 
- When compiling, be sure to include the -c option. -o with an .o object file isn’t enough, mingw32 will try to link!
- When linking, be sure to include first your object files and then the libraries (given by wx-config). When compiling, the order isn’t too important, but if you exchange libraries and object files at the linking stage, you’ll get lots of undefined references. The reason is that a linker processes the libraries in order of their appearance (see documentation of «-l» at http://sourceware.org/binutils/docs/ld/Options.html).
Finally, when executing your program with wine, qemu (works great!) or even on a real Windows box, don’t forget that even if you linked everything statically, you’ll also need mingwm10.dll in addition to your executable. Put in in the same directory and execute the binary from there, and everything works. I found mingwm10.dll gzipped in /usr/share/doc/mingw32-runtime/
Why did I not know about this? It’s like I just discovered the screw driver!
On Debian and variants (from tinc’s windows cross-compilation page),
sudo apt-get install mingw-w64

# C
i686-w64-mingw32-gcc hello.c -o hello32.exe      # 32-bit
x86_64-w64-mingw32-gcc hello.c -o hello64.exe    # 64-bit

# C++
i686-w64-mingw32-g++ hello.cc -o hello32.exe     # 32-bit
x86_64-w64-mingw32-g++ hello.cc -o hello64.exe   # 64-bit

Granted, this isn’t a silver bullet, but rather a quick way to get a Windows build of platform independent code that you might already have running in Linux. I’ve found that this approach makes it easy to get binaries out the door in a hurry when it’s hard to get a project building with Visual Studio or even on the Windows platform itself (due to, say, a complex build system).
I cover some quick solutions to the most common caveats I’ve run into, below.
Caveats
MinGW GCC vc GCC: Not as Smart with Templates
Whatever the reason, the Debian-packaged mingw flavor of gcc has a tendency to omit the instantiation of templates in many cases leading to missing symbols when linking. For instance, something like the following might sometimes complain that variants of scale can’t be found on link,
template  void scale(ty a, ty *X, unsigned n) {
  for (int i = 0; i < n; i++) X[i] = a * X[i];
}
void scale_ALL_the_things(float *A, int *B, unsigned n) {
  scale(2.0, A, n);
  scale(  3, B, n);
}
A horrible (but effective) solution I’ve found is to push the compile along with a dead function containing references to the template instantiations that you need,
void __force_compile() {
  scale(0, 0, NULL);
  scale(0, 0, NULL);
}
C/C++ Standard Library Dependencies
When compiling C projects, use {i686,x86_64}-w64-mingw32-gcc. The resulting binary will depend on at least KERNEL32.DLL and whatever MSVCRT.DLL is on clients’ systems. Therefore, you’ll need to make sure clients have the Microsoft C Runtime installed to use your software.
When compiling a C++ project, you must use {i686,x86_64}-w64-mingw32-g++ to at least link. Otherwise, you’ll find you are missing LIBSTDC++-6.DLL and/or LIBGCC_S_SJLJ-1.DLL.
When shipping a C++ project, you’ll need to include LIBSTDC++-6.DLL and/or LIBGCC_S_SJLJ-1.DLL with your install. You can grab these from your Linux install where you’re performing the build in the associated MinGW directory, e.g., /usr/lib/gcc/x86_64-w64-mingw32/4.6/. Note that you can have gcc include these libraries statically by including the flags, -static-libgcc and -static-libstdc++.
External Dependencies
If your project depends on external libraries, you’ll need them available on your Linux machine during your build. I give some quick notes for the case where you’d like to use a pre-built (mingw) windows library and specific notes for Boost.
Note that except for purely C external libraries, the libraries themselves must have been built with MinGW. The naming conventions of C++ symbols differ between MingGW and Visual Studio.
Getting a MinGW build going for each project you might want to use is different. tinc’s cross compilation page gives instructions for a few libraries that it requires. You’ll need to consult the documentation on a project-by-project basis for each of your dependencies.
Using a Prebuilt DLL From Windows (libpng)
LibPNG provides pre-built windows binaries (albeit ancient). To build with the library, download both the binary and developer packages and extract into the same directory. Do the same for zlib since LibPNG depends on it, as well.
To build, give the compiler access to the appropriate include directories and link to the seemingly static .dll.a files. Do not attempt to link to the .dll files. Recall that linking to DLL’s on Windows requires a .lib file at build-time; by convention (at least for GNU projects), these are named with a .dll.a extension,
i686-w64-mingw32-gcc -Ilibpng/include -Izlib/include -o pngwriter.exe pngwriter.cc -Llibpng/lib -lpng -Lzlib/lib -lz
MinGW and Boost
I give notes on Boost, here, as it’s a popular library and — since much of it is header-based — does not require a build before use in many instances.
If on Debian, you’ll need a fresh copy of Boost. When building with Debian’s stock version of Boost, MinGW complains of missing headers. Once you’ve obtained Boost, you’re ready to go,
wget 'http://sourceforge.net/projects/boost/files/latest/download?source=files' -O boost.tar.gz
tar xzfp boost.tar.gz
x86_64-w64-mingw32-g++ -Iboost hello.cc -o hello64.exe