Содержание
- How do I disable BIOS memory options such as caching or shadowing in Windows 7?
- How do I disable BIOS memory in Windows 7?
- How do I disable BIOS memory options such as caching and shadowing?
- How do I disable BIOS memory options such as caching or shadowing in Windows XP?
- Can you disable ram in BIOS?
- How do I disable BIOS at startup?
- How do I bypass BIOS memory?
- How do I change my BIOS memory settings?
- How do I change BIOS memory options?
- How do I disable EMS in BIOS?
- How do I stop my RAM from caching?
- How do I reset my BIOS to factory settings?
- How do I disable caching and shadowing in Windows 7?
- How do I disable BIOS caching and shadowing in Windows 7?
- How do I disable BIOS memory options Dell Windows 7?
- How do I disable memory test at startup?
- What does disabling memory cache do?
- How do I disable BIOS at startup?
- How do I turn off BIOS?
- How can I remove BIOS password?
- How do I disable my RAM cache?
- What are bios in computer?
- How do I disable the memory diagnostic tool in Windows 7?
- How do I turn off diagnostic boot?
- How do I get into the BIOS in Windows 10?
- What happens when cache memory is full?
- What happens if cache is deleted?
- How do I clear my RAM?
- How do I disable BIOS memory caching and shadowing in Windows 7?
- How do I disable BIOS memory options such as caching or shadowing in Windows 7?
- How do I disable BIOS caching and shadowing?
- How do I disable BIOS memory options Dell Windows 7?
- How do I disable memory test at startup?
- How do I disable BIOS at startup?
- How do I turn off BIOS?
- How do I clear my BIOS cache?
- How can I remove BIOS password?
- How do I disable my RAM cache?
- What are bios in computer?
- How do I fix BIOS shadowed?
- How do I change my BIOS security settings Windows 10?
- How do I disable the memory diagnostic tool in Windows 7?
- How do I turn off diagnostic boot?
- Как отключить кеширование или затенение BIOS (01.16.23)
- YouTube видео: Как отключить кеширование или затенение BIOS
How do I disable BIOS memory options such as caching or shadowing in Windows 7?
Restart the computer, and press the F2 or Del key to get into the BIOS. Then go to Advanced Section, and look for the memory option. It is commonly marked as Caching or Shadowing. Please turn it off, and restart the computer.
How do I disable BIOS memory in Windows 7?
Disabling Memory Options
- Go to the “Advanced” page. Select Advanced at the top of the screen by pressing the → arrow key, then press ↵ Enter . …
- Look for the memory option you want to disable. …
- Select a memory item you want to disabled. …
- Press the “Change” key. …
- Press the Esc key. …
- Press ↵ Enter when prompted.
How do I disable BIOS memory options such as caching and shadowing?
Steps to Disable the BIOS Cache or Shadowing
- Step 1: Access the BIOS. Restart your computer. Go to the Start menu, click the Power icon, and choose Restart. …
- Step 2: Disable Memory Options. Go to the Advanced section by selecting the Advanced option at the top-most part of the screen. Hit Enter.
How do I disable BIOS memory options such as caching or shadowing in Windows XP?
Hit the key several times during bootup. When you see the Windows logo you know it didn’t work, try again. Once in the BIOS you should find an option to enable or disable BIOS caching or BIOS shadowing. The option could be called ‘XXX is cachable (Enable/Disable)’.
Can you disable ram in BIOS?
Select Advanced at the top of the screen by pressing the → arrow key, then press ↵ Enter . This will open the Advanced page of the BIOS. Look for the memory option you want to disable.
How do I disable BIOS at startup?
Access the BIOS and look for anything that refers to turning on, on/off, or showing the splash screen (the wording differs by BIOS version). Set the option to disabled or enabled, whichever is opposite of how it is currently set.
How do I bypass BIOS memory?
Enabling or disabling Extended Memory Test
- From the System Utilities screen, select System Configuration > BIOS/Platform Configuration (RBSU) > System Options > Boot Time Optimizations > Extended Memory Test and press Enter.
- Enabled—Enables Extended Memory Test. Disabled—Disables Extended Memory Test.
How do I change my BIOS memory settings?
Look for the “Settings” or “Hardware” menu and click on it. Review the amount of RAM listed in the computer’s BIOS. Make sure that the amount of memory reflects your recent upgrade. Press the appropriate key to save the BIOS settings and exit.
How do I change BIOS memory options?
Press the “F2” key to access the BIOS. Highlight the “System” menu option and hit “Enter.” This will bring up a list of different performance options that relate to the BIOS, including memory and caching-related options. Highlight the option you want to disable.
How do I disable EMS in BIOS?
a. Click start, type “msconfig” in the search box and hit enter. c. Delete EMS from the box in that tab.
How do I stop my RAM from caching?
Right-click the drive on which you want to turn disk write caching on or off, and then click Properties. Click the Policies tab. Click to select or clear the Enable write caching on the disk check box as appropriate. Click OK.
How do I reset my BIOS to factory settings?
Reset the BIOS to Default Settings (BIOS)
- Access the BIOS Setup utility. See Accessing BIOS.
- Press the F9 key to automatically load the factory default settings. …
- Confirm the changes by highlighting OK, then press Enter. …
- To save the changes and exit the BIOS Setup utility, press the F10 key.
Источник
How do I disable caching and shadowing in Windows 7?
Restart the computer, and press the F2 or Del key to get into the BIOS. Then go to Advanced Section, and look for the memory option. It is commonly marked as Caching or Shadowing. Please turn it off, and restart the computer.
How do I disable BIOS caching and shadowing in Windows 7?
Navigate to the Advanced settings menu by pressing the left and right arrow keys. Use the up and down arrow keys to highlight the settings for Shadowing and RAM Cacheable. Press Enter after highlighting both entries and select the Disabled option. Press Esc then press Y to exit and save changes.
How do I disable BIOS memory options Dell Windows 7?
Turn on the Dell computer. Press the “F2” key to access the BIOS. Highlight the “System” menu option and hit “Enter.” This will bring up a list of different performance options that relate to the BIOS, including memory and caching-related options. Highlight the option you want to disable.
How do I disable memory test at startup?
From the System Utilities screen, select System Configuration > BIOS/Platform Configuration (RBSU) > System Options > Boot Time Optimizations > Extended Memory Test and press Enter. Select a setting and press Enter.
What does disabling memory cache do?
If the cache were disabled or removed, the system or device associated with the cache would be handicapped and have to go back to the source of the data that otherwise would be cached on a disk, or out on the network. A data transfer that could be performed hundreds of times a second might take a few seconds.
How do I disable BIOS at startup?
Access the BIOS utility. Go to Advanced settings, and choose the Boot settings. Disable Fast Boot, save changes and restart your PC.
How do I turn off BIOS?
Access the BIOS and look for anything that refers to turning on, on/off, or showing the splash screen (the wording differs by BIOS version). Set the option to disabled or enabled, whichever is opposite of how it is currently set. When set to disabled, the screen no longer appears.
How can I remove BIOS password?
On the computer motherboard, locate the BIOS clear or password jumper or DIP switch and change its position. This jumper is often labeled CLEAR, CLEAR CMOS, JCMOS1, CLR, CLRPWD, PASSWD, PASSWORD, PSWD or PWD. To clear, remove the jumper from the two pins currently covered, and place it over the two remaining jumpers.
How do I disable my RAM cache?
Follow this procedure to disable Disk Write Caching. Open Computer folder > C Drive > Properties > Hardware tab > Select the Disk Drive > Click on Properties button > Policies tab. Here you can uncheck Enable write caching on the device. Click Apply/OK > Exit.
What are bios in computer?
As your PC’s most important startup program, BIOS, or Basic Input/Output System, is the built-in core processor software responsible for booting up your system. Typically embedded into your computer as a motherboard chip, the BIOS functions as a catalyst for PC functionality action.
GO TO CONTROL PANEL—GO TO ADMINISTRATIVE TOOLS—GO TO TASK SCHEDULER—GO TO WINDOWS MEMORY DIAGNOSTIC—KILL IT DEAD…………… Delete any Reference to the Windows Memory Diagnostic and you should be OK……………………………………………………………….
How do I turn off diagnostic boot?
Disable startup items, and restart Windows:
- Choose Start > Run.
- Type msconfig in the Open text box, and then press Enter.
- On the General tab, click Diagnostic Startup.
- On the Services tab, select any services that your product requires. …
- Click OK and choose Restart in the System Configuration dialog box.
How do I get into the BIOS in Windows 10?
After your PC boots back up, you will be met with a special menu that gives you the option to “Use a device,” “Continue,” “Turn off your PC,” or “Troubleshoot.” Within this window, select “Advanced options” then select “UEFI Firmware Settings.” This will allow you to enter BIOS on your Windows 10 PC.
What happens when cache memory is full?
This prevents valuable cache memory space being occupied by data unnecessarily.) This begs the question of what happens if the cache memory is already full. The answer is that some of the contents of the cache memory has to be “evicted” to make room for the new information that needs to be written there.
What happens if cache is deleted?
When the app cache is cleared, all of the mentioned data is cleared. Then, the application stores more vital information like user settings, databases, and login information as data. More drastically, when you clear the data, both cache and data are removed.
How do I clear my RAM?
- From any Home screen, tap Apps.
- Scroll to and tap Task Manager.
- Choose one of the following options: …
- Tap the Menu key, and then tap Settings.
- To automatically clear your RAM: …
- To prevent automatic clearing of RAM, clear the Auto clear RAM check box.
Источник
How do I disable BIOS memory caching and shadowing in Windows 7?
Navigate to the Advanced settings menu by pressing the left and right arrow keys. Use the up and down arrow keys to highlight the settings for Shadowing and RAM Cacheable. Press Enter after highlighting both entries and select the Disabled option. Press Esc then press Y to exit and save changes.
How do I disable BIOS memory options such as caching or shadowing in Windows 7?
Disabling Memory Options
- Go to the “Advanced” page. Select Advanced at the top of the screen by pressing the → arrow key, then press ↵ Enter . …
- Look for the memory option you want to disable. …
- Select a memory item you want to disabled. …
- Press the “Change” key. …
- Press the Esc key. …
- Press ↵ Enter when prompted.
How do I disable BIOS caching and shadowing?
Restart the computer, and press the F2 or Del key to get into the BIOS. Then go to Advanced Section, and look for the memory option. It is commonly marked as Caching or Shadowing. Please turn it off, and restart the computer.
How do I disable BIOS memory options Dell Windows 7?
Turn on the Dell computer. Press the “F2” key to access the BIOS. Highlight the “System” menu option and hit “Enter.” This will bring up a list of different performance options that relate to the BIOS, including memory and caching-related options. Highlight the option you want to disable.
How do I disable memory test at startup?
From the System Utilities screen, select System Configuration > BIOS/Platform Configuration (RBSU) > System Options > Boot Time Optimizations > Extended Memory Test and press Enter. Select a setting and press Enter.
How do I disable BIOS at startup?
Access the BIOS utility. Go to Advanced settings, and choose the Boot settings. Disable Fast Boot, save changes and restart your PC.
How do I turn off BIOS?
Access the BIOS and look for anything that refers to turning on, on/off, or showing the splash screen (the wording differs by BIOS version). Set the option to disabled or enabled, whichever is opposite of how it is currently set. When set to disabled, the screen no longer appears.
How do I clear my BIOS cache?
Within the BIOS, look for the Reset option. It may be named Reset to default, Load factory defaults, Clear BIOS settings, Load setup defaults, or something similar. Select it with your arrow keys, press Enter, and confirm the operation.
How can I remove BIOS password?
On the computer motherboard, locate the BIOS clear or password jumper or DIP switch and change its position. This jumper is often labeled CLEAR, CLEAR CMOS, JCMOS1, CLR, CLRPWD, PASSWD, PASSWORD, PSWD or PWD. To clear, remove the jumper from the two pins currently covered, and place it over the two remaining jumpers.
How do I disable my RAM cache?
Follow this procedure to disable Disk Write Caching. Open Computer folder > C Drive > Properties > Hardware tab > Select the Disk Drive > Click on Properties button > Policies tab. Here you can uncheck Enable write caching on the device. Click Apply/OK > Exit.
What are bios in computer?
As your PC’s most important startup program, BIOS, or Basic Input/Output System, is the built-in core processor software responsible for booting up your system. Typically embedded into your computer as a motherboard chip, the BIOS functions as a catalyst for PC functionality action.
How do I fix BIOS shadowed?
– Start by doing a hard reboot, remove the battery and unplug the AC adapter then press and hold the power button for 20 seconds and try booting it back up. – If it doesn’t work, do try to set BIOS to its default. – While in BIOS press F9 and it should set it to default then exit.
How do I change my BIOS security settings Windows 10?
How to access BIOS Windows 10
- Open ‘Settings. ‘ You’ll find ‘Settings’ under the Windows start menu in the bottom left corner.
- Select ‘Update & security. ‘ …
- Under the ‘Recovery’ tab, choose ‘Restart now. ‘ …
- Select ‘Troubleshoot. ‘ …
- Click on ‘Advanced options.’
- Select ‘UEFI Firmware Settings. ‘
GO TO CONTROL PANEL—GO TO ADMINISTRATIVE TOOLS—GO TO TASK SCHEDULER—GO TO WINDOWS MEMORY DIAGNOSTIC—KILL IT DEAD…………… Delete any Reference to the Windows Memory Diagnostic and you should be OK……………………………………………………………….
How do I turn off diagnostic boot?
Disable startup items, and restart Windows:
- Choose Start > Run.
- Type msconfig in the Open text box, and then press Enter.
- On the General tab, click Diagnostic Startup.
- On the Services tab, select any services that your product requires. …
- Click OK and choose Restart in the System Configuration dialog box.
Источник
Как отключить кеширование или затенение BIOS (01.16.23)
Когда система сталкивается с такой проблемой, как «синие экраны смерти» (BSOD), она выдает сообщения об ошибках при запуске. Эти сообщения могут быть созданы системным BIOS или самой Windows. Но прежде чем говорить обо всех технических вопросах, давайте начнем с основного. Что такое BIOS?
BIOS: что вы должны знать
Сокращенно от Basic Input Output System, BIOS — это микросхема, встроенная в материнскую плату. Он позволяет пользователям получать доступ и настраивать свои внешние периферийные устройства на самых простых уровнях.
BIOS содержит инструкции по загрузке некоторых распространенных компьютерных аппаратных средств. Он также включает самотестирование при включении (POST), которое используется для проверки того, соответствует ли компьютер определенным требованиям для правильной загрузки. Если компьютер не проходит тест, пользователи часто слышат комбинацию звуковых сигналов, что указывает на проблему.
Чтобы узнать версию BIOS на вашем устройстве, просто войдите в программу настройки BIOS. Здесь должен отображаться тип BIOS вашего устройства.
Совет для профессионалов: просканируйте свой компьютер на наличие проблем с производительностью, нежелательных файлов, вредоносных приложений и угроз безопасности
, которые могут вызвать системные проблемы или снижение производительности.
Бесплатное сканирование для ПК: проблемы с загрузкой 3.145.873Совместимость с: Windows 10, Windows 7, Windows 8
Специальное предложение. Об Outbyte, инструкции по удалению, лицензионное соглашение, политика конфиденциальности.
К сожалению, как и с другими компонентами компьютера, BIOS также подвержен проблемам. Вот почему некоторые пользователи отключают некоторые из его компонентов в целях устранения неполадок.
Среди общих параметров памяти BIOS, которые отключаются, является кэш BIOS или теневое копирование.
Чтобы узнать о кеше BIOS или затенение, а также как отключить параметры памяти BIOS, просто читайте. Мы создали эту статью специально для вас.
Что такое кэш BIOS или теневое копирование?
Все материнские платы имеют фиксированное хранилище только для чтения, называемое ПЗУ. Он содержит микропрограммное обеспечение и необходимые инструкции, необходимые для чтения и запуска аппаратных компонентов компьютера.
Теперь бывают случаи, когда ПЗУ становятся медленными. В этом случае OEM-производители предлагают загружать ОЗУ вместе с ПЗУ для более быстрого выполнения команд. Этот случай обычно происходит во время процесса запуска. И в подобных ситуациях также рекомендуется отключить кэш BIOS.
Что дает отключение кеша BIOS?
Когда вы сталкиваетесь с BSOD или какой-либо проблемой с памятью, технические специалисты Windows часто предлагают отключить кеширование или теневое копирование.
Кэш BIOS — это высокоскоростное статическое ОЗУ. Это играет решающую роль, потому что многие программы повторно обращаются к инструкциям или данным в этой части. Благодаря кэш-памяти BIOS компьютер может непрерывно получать доступ к необходимой информации, не влияя на производительность системы.
После отключения кеша BIOS пользователи, скорее всего, столкнутся с низкой производительностью системы.
Действия по отключению кеша или теневого копирования BIOS
В этом разделе мы научим вас отключать параметры памяти в BIOS. Однако прежде чем мы начнем, имейте в виду, что меню BIOS отличается для каждого устройства. Это означает, что ваш компьютер может не иметь тех же параметров и настроек, что и другие устройства. Это также говорит о том, что вы также не сможете отключить параметры памяти BIOS.
В любом случае, вот как отключить параметры памяти BIOS:
Шаг 1. Доступ к BIOS
- Затенение или кеширование — если вы столкнулись с синим экраном или проблемой, связанной с памятью, отключение этого параметра может решить проблему.
- RAM — если вы установили пользовательскую RAM и он не работает, вы можете отключить его в BIOS, не удаляя его физически со своего компьютера.
Если вы не можете отключить настройки BIOS и у вас возникли проблемы с памятью, мы предлагаем попробовать любое из следующих решений.
Решение №1: используйте очиститель реестра
Если поврежденный раздел реестра вызывает ошибку BSOD, то с помощью очистителя реестра должно быть достаточно. Чтобы использовать его, загрузите и установите надежный очиститель реестра. Убедитесь, что вы выполняете загрузку с законных и безопасных сайтов, чтобы убедиться, что все ошибки, связанные с реестром, исправлены.
Решение №2. Выполните восстановление системы.
Вы также можете выполнить восстановление системы, чтобы вернуть компьютер к более раннему состоянию. Это решение очень эффективно, но оно работает только в том случае, если точки восстановления были созданы ранее.
Чтобы выполнить восстановление системы, сделайте следующее:
YouTube видео: Как отключить кеширование или затенение BIOS
Источник
![]()
Загрузить PDF
![]()
Загрузить PDF
Из данной статьи вы узнаете, как в BIOS отключить некоторые опции памяти, например, кэширование или использование дополнительного модуля. Имейте в виду, что опции BIOS зависят от производителя материнской платы компьютера, поэтому на вашем компьютере может не быть некоторых опций, которые доступны на других компьютерах. Таким образом, у вас, возможно, не получится отключить некоторые опции памяти в BIOS.
-

1
Перезагрузите компьютер. Откройте меню «Пуск»
, щелкните по значку питания
и нажмите «Перезагрузка».
- Если компьютер заблокирован, щелкните по экрану блокировки, потом щелкните по значку питания (в нижнем правом углу экрана), а затем нажмите «Перезагрузка».
- Если компьютер выключен, нажмите на кнопку включения.
-
2
Дождитесь, когда на экране отобразится логотип производителя материнской платы или компьютера. Теперь необходимо нажать клавишу для входа в BIOS.
- Если в нижней части экрана отобразилось что-то вроде «Press [key] to enter setup» (Нажмите [клавиша], чтобы войти в BIOS), а затем исчезло, перезагрузите компьютер и повторите попытку.
-
3
Зажмите клавишу Del или F2, чтобы войти в BIOS. Возможно, на вашем компьютере нужно нажать другую клавишу.
- Как правило, нужно нажать одну из F-клавиш, чтобы войти в BIOS. F-клавиши находятся в верхней части клавиатуры.
- Возможно, на вашем компьютере сначала нужно зажать клавишу Fn, а затем нажать одну из F-клавиш.
- Чтобы выяснить, какую клавишу нажимать, почитайте инструкцию к компьютеру или к материнской плате или посмотрите соответствующие сайты.
-
4
Дождитесь, когда вы войдете в BIOS. Затем найдите раздел с опциями памяти.
Реклама


-
1
Перейдите на страницу «Advanced» (Дополнительные) в верхней части экрана. Для этого несколько раз нажмите клавишу →, а затем нажмите ↵ Enter. Откроется страница с дополнительными опциями BIOS.
-
2
Найдите опцию памяти, которую нужно отключить. Общими опциями памяти являются:
- Caching (Кэширование) или Shadowing (Теневое ОЗУ). Если система вылетает в «синий экран» или имеют место проблемы с памятью, отключите кэширование памяти, чтобы решить проблемы.
- RAM (ОЗУ). Если вы установили дополнительный модуль памяти, который не работает, его можно отключить в BIOS, то есть его не нужно извлекать из корпуса компьютера.
- Доступные опции памяти зависят от версии BIOS. Например, на вашем компьютере могут быть такие опции памяти, которых нет на других компьютерах (и наоборот).
- Если вам не удается найти нужную опцию памяти, попробуйте найти ее на другой странице, например, на странице General (Основные).
-
3
Выделите значение опции памяти, которую нужно отключить. С помощью клавиш со стрелками переместитесь на значение «Enabled» (Включено), которое расположено справа от соответствующей опции памяти. Так вы выделите значение опции.
-
4
Нажмите «Change» (Изменить). Так вы отключите выбранную опцию памяти. Название и расположение клавиши «Изменить» зависит от версии BIOS, но в любом случае в правом нижнем углу экрана будет отображаться список клавиш и их назначение.
- Например, вам, возможно, нужно нажать ↵ Enter, чтобы изменить значение с «Включено» на «Выключено».
-
5
Нажмите клавишу Esc. Это означает, что вы готовы выйти из BIOS.
-
6
Нажмите ↵ Enter, когда появится запрос. Так вы сохраните внесенные изменения и выйдете из BIOS. Выбранная опция памяти будет отключена.
- Обязательно выберите вариант «Save and Exit» (Сохранить и выйти) или нажмите Y, если будет предложено сохранить изменения.
Реклама


Советы
- Если у вас не получается найти опцию памяти, которую нужно отключить, почитайте инструкцию к компьютеру или материнской плате или соответствующие сайты. Возможно, существует альтернативная или дополнительная опция, которой можно воспользоваться.
Реклама
Предупреждения
- Отключение любых опций в BIOS может привести к неработоспособности компьютера. Не отключайте опции, назначение которых вам не известно.
Реклама
Об этой статье
Эту страницу просматривали 85 854 раза.
Была ли эта статья полезной?
Содержание
- Не могу поставить винду, STOP: 0x0000007E
- Disable bios memory options such as caching or shadowing как исправить windows 7
- Asked by:
- Question
- Disable bios memory options such as caching or shadowing как исправить windows 7
- Как отключить кеширование или теневое копирование BIOS?
- Что такое BIOS Cache или Shadowing?
- Как отключить кэш или теневое копирование BIOS
- синий экран. достал уже.
Не могу поставить винду, STOP: 0x0000007E
A problem has been detected and Windows has been shut down to prevent damage to you computer.
If this is the first time you’ve seen this stop error screen, restart your computer. If this screen
appears again, follow these steps:
Chek to be sure you have adequte disk space. If a driver is identified in the stop message, disable the driver
or check with the manufacturer for driver updates. Try changing video adapters.
Check with your hardware vendor for any BIOS updates. Disable BIOS memory options such as caching or shadowing.
If you need to use safe mode to remove or disable componets, restart your computer, presss F8 to select advanced
startup options, and then select safe mode.
Beginning dumb of physical memory
Physical memory dump complete.
Contact your system administrator or technical support group for further assistance.
Вроде бы это проблема со звуковым драйвером. Скорее всего в дистрибутив интегрированы не подходящие вам звуковые драйвера. Попробуйте установку без интегрированных драйверов.
Или перед установкой в BIOS отключите Onboard Audio.
A problem has been detected and Windows has been shut down to prevent damage to you computer.
If this is the first time you’ve seen this stop error screen, restart your computer. If this screen
appears again, follow these steps:
Chek to be sure you have adequte disk space. If a driver is identified in the stop message, disable the driver
or check with the manufacturer for driver updates. Try changing video adapters.
Check with your hardware vendor for any BIOS updates. Disable BIOS memory options such as caching or shadowing.
If you need to use safe mode to remove or disable componets, restart your computer, presss F8 to select advanced
startup options, and then select safe mode.
Beginning dumb of physical memory
Physical memory dump complete.
Contact your system administrator or technical support group for further assistance.
================================================== ================================================== ================================================== ================
Проблема не с дровами, я с ней уже сталкивался не раз, проблема в DVD приводе, он не хочет читать диск с программами. Его надо или пере прошить, или заменить, или подсоединить внешний, может быть проблема с авто запуском, она решается:
Нажмите кнопку Пуск и выберите пункт Выполнить.
Введите команду regedit и нажмите кнопку ОК.
Найдите и выделите следующий раздел реестра:
HKEY_LOCAL_MACHINESystemCurrentControlSetServic esCDRom
.Выполните одно из следующих действий.
Если значение параметра Autorun равно 1, переходите к шагу 3.
Если значение параметра Autorun равно 0, правой кнопкой мыши щелкните параметр Autorun и выберите команду Изменить. В поле Значение введите 1 и нажмите кнопку ОК.
Найдите и выделите следующий подраздел реестра:
HKEY_CURRENT_USERSoftwareMicrosoftWindowsCurre ntVersionPoliciesExplorerf.
Обратите внимание на значение параметра NoDriveTypeAutoRun. Значение 0xb5 отключает функцию автоматического запуска для дисководов для компакт-дисков. Для включения функции автозапуска щелкните правой кнопкой мыши параметр NoDriveTypeAutoRun, выберите команду Изменить, введите 91 в поле Значение, выберите шестнадцатеричное представление и нажмите кнопку OK.
Источник
Disable bios memory options such as caching or shadowing как исправить windows 7
This forum has migrated to Microsoft Q&A. Visit Microsoft Q&A to post new questions.
Asked by:

Question
Disable BIOS memory options Caching or shadowing
I have an Dell R530 and when certain programs run on my computer the following message comes up on a blue screen:
A problem has been detected and windows has been shut down to prevent damage to your computer
If this is the first time you’ve seen this stop error screen, restart your computer.
If You this screen appears again follow these steps:
Check to make sure any new hardware is properly installed. If this is a new installation
check with your hardware of software manufacturer for any windows updates you might
If problem continue, disable or remove any new hardware or software installed. Disable
BIOS Memory options such as caching or shadowing. If you need to use Safe Mode to
remove or disable any components, restart your computer, press F-8 to select Advanced
startup options, then select Safe Mode.
*** STOP: 0x000000AB (0x000000000000000A, 0x0000000000000350, 0x0000000000000000, 0x0000000000000001)
Collecting data for crashdump.
Initializing disk for crash dump.
Physical memory dump complete.
Contact your System Administrator or technical support group for further assistance.
Источник
Disable bios memory options such as caching or shadowing как исправить windows 7
Доброго времени суток.
Кто что может посоветовать по следующему поводу.
Выбивает синий экран. Если 2 года назад экран выбивал 1 раз в месяц. то в том месяца у меня каждый день выбивал по 3-5 раз за день! Я думал что Винде пришла торба. сегдня с устра переустановил виндовс. но бока продолжаются.
Вот что пишется на синем экране. может кто то разберается и сразу скажет что у меня накопытилось или даст толковый совет как исправить синий экран.
A problem has been detected and Windows has been shut down to prevent damage to your computer.
If this is the first time you’ve seen this Stop error screen, restart your computer.
If this screen appears again, follow thease steps:
Check to be sure you have adequate disk space. If a driver is
identified in the Stop message, disable the driver or check
with the manufacturer for driver updates. Try changing video
adapters.
Check with your hardware vendor for any BIOS updates. Disable
BIOS memory options such as caching or shadowing. If you need
to use Safe Mode to remove or disable components, restart your
computer, press F8 to select Advanced Startup Options, and then
select Safe Mode.
Beginning dump of physical memory physical memory dump complete.
contact your system administrator or technical support group for further assistance.
Что я считаю может быть полезным. выскакивает синий экран в любой момент времени. посреди игры. лазаешь в интерете. говоришь по аське. смотришь видео.
Проц разогнан, озуха разогнана. видуха разгонялась давно, но также давно я вернул в штатные частоты. Нигде напряжение не повышено.
Буду очень благодарен за помощь.
Будете в Днепре с меня пиво и красоты Днепра!)))
Источник
Как отключить кеширование или теневое копирование BIOS?
Некоторые пользователи сообщают о появлении синего экрана смерти, на котором им предлагается отключить Кэш BIOS или же Затенение BIOS. Этот пост поможет вам понять суть сообщения и решить его.
Что такое BIOS Cache или Shadowing?
Материнские платы имеют фиксированное или доступное только для чтения хранилище, называемое ПЗУ. В нем находится прошивка, которая запускает микросхемы или оборудование на компьютере. Однако ПЗУ медленные, и OEM-производители предлагают метод, при котором ПЗУ загружается в ОЗУ для более быстрого выполнения команд. Это происходит при загрузке компьютера. Раздел ОЗУ, содержащий коды ПЗУ, называется теневым ОЗУ.

Как отключить кэш или теневое копирование BIOS
Большинство производителей ПК имеют эту опцию по умолчанию. Хотя в большинстве случаев это работает, некоторые пользователи сообщают о BSOD. Хорошо, что это можно отключить в BIOS. Вы можете выполнить следующие шаги, но они могут отличаться, поскольку каждый OEM-производитель использует свой способ реализации.
Перезагрузите компьютер и нажмите F2 или же Из ключ для входа в BIOS.
Затем перейдите в Расширенный раздел, и ищите вариант памяти. Обычно обозначается как Кеширование или же Затенение. Выключите его и перезагрузите компьютер. После этого у вас не должно появиться синего экрана смерти.
Тем не менее, важно знать, что изменение параметров в BIOS может привести к большему количеству проблем.
Хотя это не означает, что вы потеряете все данные, убедитесь, что вы знаете, что вы собираетесь изменить. Если вы не чувствуете себя достаточно уверенно, обратитесь в техподдержку, чтобы это изменить.
Надеюсь, этот пост помог вам понять, что такое кэш или теневое копирование BIOS и как они помогают компьютеру быстрее выполнять работу на аппаратном уровне. Однако влияние может быть небольшим, и его отключение может не сильно повлиять на производительность.
Источник
синий экран. достал уже.
вот тот самый текст, который вылазит на синем экране
A problem has been detected and windows has been shut down to prevent damage
to your computer.
If this is the first time you ve seen this Stop error screen,
restart your computer. If this screen appears again, follow
These steps:
Check to make sure any new hardware or software is properly installed.
If this is a new installation, ask your hardware or software manufacturer
For any windows updates you might need.
If problems continue, disable or remove any newly installed hardware
or software. Disable BIOS memory options such as caching or shadowing.
If you need to use Safe Mode to remove or disable components, restart
your computer, press F8 to select Advanced Startup Options, and then
Select Safe Mode.
Technical information:
STOP: 0X000000D1 (0X00000000, 0X0000001C, 0X00000001, 0X8077574C)
Beginning dump fo physical memory
Phisical memory dump complete.
Contact your system administrator or technical support group for further
assistence.
Проблема была обнаружена и окна были закрыты, чтобы предотвратить повреждение
к компьютеру.
Если это первый раз, когда вы видели этот экран неустранимой ошибке,
перезагрузите компьютер. Если этот экран появляется снова, следовать
Эти шаги:
Убедитесь, что новое оборудование или программное обеспечение установлено правильно.
Если это новая установка, спросите вашего оборудования или программного обеспечения производителя
Для любого окна обновления может понадобиться.
Если проблемы по-прежнему, отключите или удалите все недавно установленные аппаратные средства
или программного обеспечения. Отключить BIOS памяти варианты, такие как кэширование или затенение.
Если вам нужно использовать безопасном режиме, чтобы удалить или отключить компоненты, перезапустите
компьютер, нажмите F8 чтобы выбрать дополнительные параметры запуска, а затем
Выберите пункт Безопасный режим.
Техническая информация:
STOP: 0x000000D1 (0x00000000, 0X0000001C, 0x00000001, 0X8077574C)
Начало дамп физической памяти
Физические полный дамп памяти.
Обратитесь к вашему системному администратору или в группу технической поддержки для дальнейшего
Помощь.
Помощь в написании контрольных, курсовых и дипломных работ здесь.
Источник
Перейдите в меню дополнительных настроек, нажимая клавиши со стрелками влево и вправо. Используйте клавиши со стрелками вверх и вниз, чтобы выделить настройки для теневого копирования и кэширования ОЗУ. Нажмите Enter, выделив обе записи, и выберите опцию Disabled. Нажмите Esc, затем нажмите Y, чтобы выйти и сохранить изменения.
Отключение параметров памяти
- Перейдите на страницу «Дополнительно». Выберите Advanced в верхней части экрана, нажав кнопку со стрелкой →, затем нажмите ↵ Enter. …
- Найдите параметр памяти, который хотите отключить. …
- Выберите элемент памяти, который нужно отключить. …
- Нажмите кнопку «Изменить». …
- Нажмите клавишу Esc. …
- При появлении запроса нажмите ↵ Enter.
4 мар. 2020 г.
Как отключить кеширование и затенение BIOS?
Перезагрузите компьютер и нажмите клавишу F2 или Del, чтобы войти в BIOS. Затем перейдите в расширенный раздел и найдите вариант памяти. Обычно это обозначается как кэширование или затенение. Выключите его и перезагрузите компьютер.
Как отключить параметры памяти BIOS Dell Windows 7?
Включите компьютер Dell. Нажмите клавишу «F2», чтобы войти в BIOS. Выделите пункт меню «Система» и нажмите «Ввод». Откроется список различных параметров производительности, связанных с BIOS, включая параметры, связанные с памятью и кешированием. Выделите параметр, который хотите отключить.
Как отключить тест памяти при запуске?
На экране «Системные утилиты» выберите «Конфигурация системы»> «Конфигурация BIOS / платформы (RBSU)»> «Параметры системы»> «Оптимизация времени загрузки»> «Расширенный тест памяти» и нажмите «Ввод». Выберите настройку и нажмите Enter.
Как отключить BIOS при запуске?
Откройте утилиту BIOS. Перейдите в Дополнительные настройки и выберите Настройки загрузки. Отключите быструю загрузку, сохраните изменения и перезагрузите компьютер.
Как выключить BIOS?
Войдите в BIOS и найдите все, что относится к включению, включению / выключению или отображению заставки (формулировка зависит от версии BIOS). Установите для параметра значение отключено или включено, в зависимости от того, что противоположно текущему значению. При отключении экран больше не появляется.
Как очистить кеш BIOS?
В BIOS найдите параметр «Сброс». Он может называться «Сбросить по умолчанию», «Загрузить заводские настройки по умолчанию», «Очистить настройки BIOS», «Загрузить настройки по умолчанию» или что-то подобное. Выберите его с помощью клавиш со стрелками, нажмите Enter и подтвердите операцию.
Как я могу удалить пароль BIOS?
На материнской плате компьютера найдите перемычку сброса BIOS или пароля или DIP-переключатель и измените ее положение. Эта перемычка часто обозначается CLEAR, CLEAR CMOS, JCMOS1, CLR, CLRPWD, PASSWD, PASSWORD, PSWD или PWD. Чтобы очистить, снимите перемычку с двух контактов, которые в данный момент закрыты, и поместите ее над двумя оставшимися перемычками.
Как отключить кеш RAM?
Выполните эту процедуру, чтобы отключить кэширование записи на диск. Откройте папку «Компьютер»> «Диск C»> «Свойства»> «Аппаратное обеспечение»> «Выберите дисковый накопитель»> «Нажмите кнопку« Свойства »>« Политики ». Здесь вы можете снять флажок Включить кэширование записи на устройстве. Нажмите Применить / ОК> Выйти.
Что такое биос в компьютере?
BIOS или базовая система ввода-вывода, самая важная программа запуска вашего ПК, — это встроенное программное обеспечение базового процессора, отвечающее за загрузку вашей системы. Обычно BIOS встраивается в ваш компьютер в виде микросхемы материнской платы и играет роль катализатора функциональных возможностей ПК.
Как исправить затенение BIOS?
— Начните с полной перезагрузки, извлеките аккумулятор и отсоедините адаптер переменного тока, затем нажмите и удерживайте кнопку питания в течение 20 секунд и попробуйте снова загрузить его. — Если это не сработает, попробуйте установить BIOS по умолчанию. — Находясь в BIOS, нажмите F9, он должен установить значение по умолчанию, а затем выйти.
Как изменить настройки безопасности BIOS в Windows 10?
Как получить доступ к BIOS Windows 10
- Открыть настройки. «Вы найдете« Настройки »в меню« Пуск »Windows в нижнем левом углу.
- Выберите «Обновление и безопасность». ‘…
- На вкладке «Восстановление» выберите «Перезагрузить сейчас». ‘…
- Выберите «Устранение неполадок. ‘…
- Щелкните «Дополнительные параметры».
- Выберите «Настройки прошивки UEFI». ‘
11 ян. 2019 г.
ПЕРЕЙДИТЕ В ПАНЕЛЬ УПРАВЛЕНИЯ — К АДМИНИСТРАТИВНЫМ ИНСТРУМЕНТАМ — ПЕРЕЙТИ К РАСПИСАНИЮ ЗАДАЧ — К ДИАГНОСТИКЕ ПАМЯТИ WINDOWS — УБИТЬ ЭТО МЕРТВО …………… Удалите все ссылки на диагностику памяти Windows, и все будет в порядке …………………… ………………………………………….
Как отключить диагностическую загрузку?
Отключите элементы автозагрузки и перезапустите Windows:
- Выберите Пуск> Выполнить.
- Введите msconfig в текстовое поле Открыть и нажмите клавишу ВВОД.
- На вкладке Общие щелкните Диагностический запуск.
- На вкладке «Службы» выберите любые службы, которые требуются вашему продукту. …
- Нажмите ОК и выберите «Перезагрузить» в диалоговом окне «Конфигурация системы».
1 колода 2016 г.
“The secret of success is to do the common thing uncommonly well.”
— John D. Rockefeller Jr.
Basic Input/Output System, which is also known as the System BIOS, ROM BIOS or PC BIOS, is non-volatile firmware used to perform hardware initialization during the booting process (power-on startup) and to provide runtime services for operating systems and programs.
Turning off BIOS memory options is different for each computer. So, your computer may not have the same configuration as other computers, and you may not be able to disable BIOS memory options on your PC. Note that disabling these options will not affect the stability of your computer. These options are put in place to make sure that your PC is operating normally. Actually, it has been recorded that your machine will boot up faster when this option is disabled.
In this article, we will show you how to disable bios caching and shadowing (Windows 7):
Restart your computer:
- Click on the Start on Home button.
- Select the arrow beside the Shutdown button to expand it.
- Select Restart from the available options.
- If your computer is locked, click on the power button and select Restart.
- Switch on your computer if it is off by pressing the power on button.
- Press your computer’s setup key when you see its first startup screen. It may be different for various computers. Most often it is the Del or F2 key. You will see this message: “Press [key] to enter setup”.
- If you fail to press the button, you will need to restart your PC and try again. If you are not sure of which key to press, you can check your computer’s model manual or on the internet to confirm it.
- Once you are in the BIOS setup, you need to look for the memory item you want to disable.
- Navigate to the Advanced tab by pressing the right arrow key, then press Enter. This opens the BIOS Advanced Options page.
- In this page, we will show you how to disable bios memory options such as caching:
- Cashing or Shadowing – this helps if you are encountering problems such as the blue screen of death (BSOD) or having problems with memory
RAM – If the RAM you installed in your PC is not working, you may be able to disable it from here without physically removing it from your computer.
Note that some computers may have additional options that others don’t have. It depends on the manufacturer of your PC.
If you can’t find these options under the Advanced tab, try looking for them under other tabs.
10. Select the memory item you want to disable using the arrow keys. You will be able to turn it off, using an allocated key on your keyboard. This key will also vary depending on your computer’s BIOS. But the instructions of changing options in the BIOS settings are usually present on the screen. So, you will find little difficulty navigating through.
11. Once you have disabled the BIOS, press Esc on your keyboard to exit BIOS settings. You will be prompted to save the changes you made. Press Y on your keyboard to accept.
12. Your computer will restart.
Is your computer running slow or suffering system glitches? If so, it may need maintenance. Try running a dedicated PC optimization tool to check the health of your PC and apply the necessary fixes.
If you can’t disable BIOS settings and you are experiencing the blue screen of death or memory problems, we recommend you try the methods below:
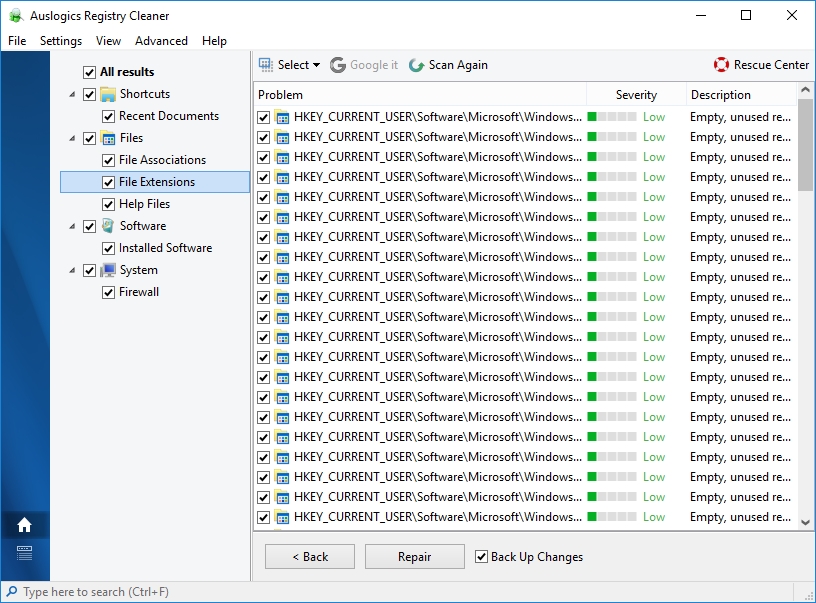
- Download and install Auslogics Registry Cleaner. This tool is very simple and easy to use. It will fix all the errors in your registry which may be causing your PC to malfunction. It ensures the smooth running of your computer and eliminates crashes. Furthermore, it is 100% free.

- You can also try to restore your computer to an earlier date. This method is very effective, but it will work only if you created restore points previously.
- Run the built-in blue screen of death troubleshooter. Microsoft provided this tool to troubleshoot the BSOD because it is a common problem encountered by Windows users.
- Scan your computer for corrupt system files, using Command prompt.
- Check your memory, using Windows Memory Diagnostic.
We hope that this article has taught you how to disable BIOS memory options on Windows 7.
We appreciate your comments and ideas.
We are ready to provide you with more details regarding the extra methods provided above.
Некоторые пользователи сообщают о появлении синего экрана смерти, на котором им предлагается отключить Кэш BIOS или же Затенение BIOS. Этот пост поможет вам понять суть сообщения и решить его.
Что такое BIOS Cache или Shadowing?
Материнские платы имеют фиксированное или доступное только для чтения хранилище, называемое ПЗУ. В нем находится прошивка, которая запускает микросхемы или оборудование на компьютере. Однако ПЗУ медленные, и OEM-производители предлагают метод, при котором ПЗУ загружается в ОЗУ для более быстрого выполнения команд. Это происходит при загрузке компьютера. Раздел ОЗУ, содержащий коды ПЗУ, называется теневым ОЗУ.

Большинство производителей ПК имеют эту опцию по умолчанию. Хотя в большинстве случаев это работает, некоторые пользователи сообщают о BSOD. Хорошо, что это можно отключить в BIOS. Вы можете выполнить следующие шаги, но они могут отличаться, поскольку каждый OEM-производитель использует свой способ реализации.
Перезагрузите компьютер и нажмите F2 или же Из ключ для входа в BIOS.
Затем перейдите в Расширенный раздел, и ищите вариант памяти. Обычно обозначается как Кеширование или же Затенение. Выключите его и перезагрузите компьютер. После этого у вас не должно появиться синего экрана смерти.
Тем не менее, важно знать, что изменение параметров в BIOS может привести к большему количеству проблем.
Хотя это не означает, что вы потеряете все данные, убедитесь, что вы знаете, что вы собираетесь изменить. Если вы не чувствуете себя достаточно уверенно, обратитесь в техподдержку, чтобы это изменить.
Надеюсь, этот пост помог вам понять, что такое кэш или теневое копирование BIOS и как они помогают компьютеру быстрее выполнять работу на аппаратном уровне. Однако влияние может быть небольшим, и его отключение может не сильно повлиять на производительность.
When a system encounters a problem like Blue Screens of Death (BSODs), it will throw error messages upon startup. These messages may possibly be generated by the system BIOS or by Windows itself. But before we talk about all the technical stuff, let’s begin with the basic one. What is BIOS?
BIOS: What You Should Know
Short for Basic Input Output System, BIOS is a chip embedded on a motherboard. It allows users to access and set up their external peripherals at the most basic levels.
The BIOS contains instructions on how to load some common computer hardware. It also includes the Power-On Self-Test (POST), which is used to verify if the computer meets the specific requirements for proper booting. If a computer fails the test, users often hear a combination of beeps, which is an indication of a problem.
To figure out the BIOS version on your device, simply access the BIOS setup. Here, your device’s BIOS type should be displayed.
Unfortunately, as with other components of the computer, the BIOS is also prone to problems. This is why some users disable some of its components for troubleshooting purposes.
Among the common BIOS memory options that are being disabled is the BIOS cache or shadowing.
To learn about BIOS cache or shadowing, as well as how to disable BIOS memory options, simply read on. We have created this article just for you.
What Is BIOS Cache or Shadowing?
All motherboards have fixed read-only storage called ROM. It contains the firmware and necessary instructions that are needed to read and run computer hardware components.
Now, there are instances when the ROMs become slow. In this case, OEMs suggest loading the RAM with the ROM to execute commands faster. This instance usually happens during the startup process. And in situations like this, disabling the BIOS cache is also recommended.
What Does Disabling BIOS Cache Do?
When you are faced with a BSOD or any memory problem, Windows technicians often suggest disabling caching or shadowing.
The BIOS cache is a high-speed static RAM. It plays a crucial role because many programs repeatedly access the instructions or data in this portion. Thanks to the BIOS cache, a computer can continuously access the information it needs without affecting the system performance.
Once the BIOS cache is disabled, it is likely that users experience a slow system performance.
Steps to Disable the BIOS Cache or Shadowing
In this section, we teach you how to disable BIOS memory options. However, before we begin, keep in mind that the BIOS menu differs for each device. This means that your computer may not have the same options and settings that other devices have. This also suggests that you might not be able to disable the BIOS memory options as well.
Regardless of the case, here’s how to disable the BIOS memory options:
Step 1: Access the BIOS
- Restart your computer. Go to the Start menu, click the Power icon, and choose Restart.
- Wait for the startup screen to show. Once it appears, press the displayed setup key. It should be flashed at the bottom of your screen.
- Press and hold the F2 or Del key to enter setup.
- Wait for the BIOS to load. You can then start looking for the memory item you wish to disable.
Step 2: Disable Memory Options
- Go to the Advanced section by selecting the Advanced option at the top-most part of the screen.
- Hit Enter. The Advanced section of the BIOS should now appear.
- Next, locate the memory option you wish to disable. There are two common memory options. These include:
- Shadowing or caching – If you encounter a blue screen or a memory-related issue, then disabling this option may resolve the problem.
- RAM – If you installed a custom RAM and it’s not working, you can disable it from the BIOS without removing it physically from your computer.
- Again, the available memory options vary from one computer to another. Some computers may have more memory options, while others don’t have that much. If you can’t find the particular memory option you are looking for, then go to the General section.
- To select a memory item to disable, use the arrow keys. Make sure the selection box next to the item is disabled.
- After that, hit the Change key. This will disable the selected memory option.
- Exit the BIOS menu by pressing the ESC key.
- Finally, hit Enter to save your changes.
What to Do When You Can’t Disable the BIOS Cache
If you cannot disable the BIOS settings and you are experiencing memory problems, then we suggest trying any of the solutions below.
Solution #1: Use a registry cleaner
If a damaged registry key is causing the BSOD error, then using a registry cleaner should do the trick. To use one, download and install a trusted registry cleaner. Make sure to download from legit and safe sites to ensure all registry-related errors are fixed.
Solution #2: Perform a System Restore
You can also perform a System Restore to revert your computer to an earlier date. This solution is very effective, but it only works if restore points have been previously created.
To perform a System Restore, do the following:
- Into the search field, input control panel. Click on the top-most search result.
- Once the Control Panel window opens, input recovery into the search field.
- Navigate to Recovery and select Open System Restore.
- Hit Next in the Restore system files and setting box.
- Choose a restore point.
- Click the Scan for affected programs option.
- At this point, you will see a list of items that will be removed if you choose such a restore point. If you are happy with deleting them, click Close.
- Proceed by hitting Next.
- Finally, hit Finish.
Solution #3: Run the online BSOD troubleshooter
Microsoft has created two BSOD troubleshooter for Windows devices. One can be accessed online, while the other is built-in on your device.
To use the online BSOD troubleshooter by Microsoft, follow these instructions:
- Go to the Troubleshoot blue screen errors section on Microsoft’s website.
- Answer the questions and follow the instructions to troubleshoot the problem.
To use the built-in BSOD troubleshooter on your Windows 10/11 device, do the following:
- Launch Control Panel.
- Click on the Troubleshooting icon.
- Tap on the View All link.
- Right-click on the Blue Screen Troubleshooter option.
- Select Run as Administrator.
- Click Advanced.
- Tick the box next to the Apply repairs automatically option.
- Hit Next to proceed.
- The BSOD troubleshooter will now begin identifying what’s causing BSOD problems. If it detects any, follow the on-screen instructions. Otherwise, tap on the View detailed information section to read the report.
Solution #4: Scan your system for damaged or corrupt system files
You may perform an SFC scan to fix any corrupt system files that are causing the BSOD error. Here’s how:
- Press the Windows key to launch the Start menu.
- Into the search field, type cmd. Right-click on the top-most result and select Run as Administrator.
- Enter your administrator password.
- Into the command line, input the sfc /scannow command and hit Enter.
- Wait for the scan to complete. Hopefully, it resolves the BSOD error.
Wrapping Up
We may have properly outlined and discussed everything about BIOS cache or shadowing, but it is important to understand that committing a mistake in the BIOS or changing some options may result in more issues. So, in case you are not confident enough, do not hesitate to get in touch with your device’s tech support.
We hope this post helped you better understand what BIOS shadowing or cache is. We also hope that you were able to understand how computers work at the hardware level. Now, we’d like to hear your thoughts about this post. Let us know in the comment section!

Vic is a certified gadget freak who feels the need to surround himself with cutting-edge technology. And this passion has helped him a lot in creating content that informs and guides users on using and troubleshooting the latest technology. He is an avid researcher who is always hungry for the latest news and updates on the most cutting-edge technology.
Vic is the one in charge of keeping our website running smoothly and efficiently, to make sure that our readers have a wonderful experience while visiting the website. He’s good at troubleshooting errors and fixing Windows issues that come up either when playing games or working on the computer.

подскажите в чём причина и как от неё избавится, сдавала в сервисный центр 2раза и бесполезно. говорят, что внутри всё в порядке, нужно было несколько неустановленных драйверов, но после их установки всё-равно экран не исчез, а выключ моментально, даже если только зашла в ситему….на счёт системы, переустанавливала 3 раза, и даже пробовала загружаться с другого жёсткого диска и всё-равно……в диспетчере устройств вроде все дрова установлены, кроме одного, подписано, как -другие устройства-неизвестное устройство………как быть подскажите??????
вот тот самый текст, который вылазит на синем экране
A problem has been detected and windows has been shut down to prevent damage
to your computer.
DRIVER_IRQL_NOT_LESS_OR_EQUAL
If this is the first time you ve seen this Stop error screen,
restart your computer. If this screen appears again, follow
These steps:
Check to make sure any new hardware or software is properly installed.
If this is a new installation, ask your hardware or software manufacturer
For any windows updates you might need.
If problems continue, disable or remove any newly installed hardware
or software. Disable BIOS memory options such as caching or shadowing.
If you need to use Safe Mode to remove or disable components, restart
your computer, press F8 to select Advanced Startup Options, and then
Select Safe Mode.
Technical information:
STOP: 0X000000D1 (0X00000000, 0X0000001C, 0X00000001, 0X8077574C)
Beginning dump fo physical memory
Phisical memory dump complete.
Contact your system administrator or technical support group for further
assistence.
перевод
Проблема была обнаружена и окна были закрыты, чтобы предотвратить повреждение
к компьютеру.
DRIVER_IRQL_NOT_LESS_OR_EQUAL
Если это первый раз, когда вы видели этот экран неустранимой ошибке,
перезагрузите компьютер. Если этот экран появляется снова, следовать
Эти шаги:
Убедитесь, что новое оборудование или программное обеспечение установлено правильно.
Если это новая установка, спросите вашего оборудования или программного обеспечения производителя
Для любого окна обновления может понадобиться.
Если проблемы по-прежнему, отключите или удалите все недавно установленные аппаратные средства
или программного обеспечения. Отключить BIOS памяти варианты, такие как кэширование или затенение.
Если вам нужно использовать безопасном режиме, чтобы удалить или отключить компоненты, перезапустите
компьютер, нажмите F8 чтобы выбрать дополнительные параметры запуска, а затем
Выберите пункт Безопасный режим.
Техническая информация:
STOP: 0x000000D1 (0x00000000, 0X0000001C, 0x00000001, 0X8077574C)
Начало дамп физической памяти
Физические полный дамп памяти.
Обратитесь к вашему системному администратору или в группу технической поддержки для дальнейшего
Помощь.
__________________
Помощь в написании контрольных, курсовых и дипломных работ, диссертаций здесь