Install a complete Ubuntu terminal environment in minutes on Windows with Windows Subsystem for Linux (WSL).
Access the Linux terminal on Windows, develop cross-platform applications, and manage IT infrastructure without leaving Windows.
Download from the Microsoft Store
Install Ubuntu on WSL ›

Deploying WSL at your company?
We help companies achieve a seamless integration with their WSL deployments. Contact us to learn more about how we support enterprises on the Windows Subsystem for Linux.
Contact us
What you never thought was possible on Windows
-
Editors
Run your choice of Linux text editors, including vim, emacs, and nano
-
Servers
Spin up Node.js, install your dependencies with npm, and start testing your web app
-
Development
Install compilers and libraries from the Ubuntu repository, maintained by Canonical
-
Systemd
Develop and run service applications and use snap packages to run popular workflow tools
-
Containers
Work with LXD and Docker containers on Windows
-
Scripting
Automate Linux and Windows tasks with advanced bash scripting
-
Network hardening
Leverage Linux security tools to test and harden your network
-
Data
Crunch big numbers with tools for R and Python
-
Kubernetes
Build, test, and deploy Kubernetes clusters on Windows
Why Ubuntu WSL?
Develop Graphical Applications
Develop and preview web and graphical applications on Linux using WSLg. Create multiplatform graphical applications using popular open source development frameworks like Flutter or React Native.
Learn how to run graphical apps with Ubuntu on WSL ›
Enterprise support
Ubuntu is certified on WSL through close collaboration with Microsoft. Enterprise support is provided for Ubuntu from Azure to Windows workstations creating a seamless operating environment.
Get in touch
Video Guides
An introduction to numerical computation applications using Ubuntu WSL
Tips for working with web services on Ubuntu WSL
Ubuntu on WSL: An FAQ for data scientists and developers
WSL: Partnering with Canonical to support systemd
Ubuntu Summit 2022 | The Windows Subsystem for Linux WSL Latest updates and future improvements
Latest Ubuntu WSL news from
our blog ›
Под GNU/Linux-дистрибутивы создано огромное количество полезных и удобных инструментов и приложений для обычных пользователей и разработчиков. Далеко не всё из этого доступно на Windows, но, к счастью, для ОС от Microsoft есть решения, исправляющие эту проблему.
WSL — официальная подсистема Linux внутри Windows
В Windows 10 существует крайне полезная вещь под названием Windows Subsystem for Linux (WSL). Она позволяет использовать GNU/Linux-среду прямо в Windows и запускать не только команды, но и, например, Bash-скрипты. Для использования WSL необходимо следовать инструкции ниже.
Шаг 1. Проверьте, подходит ли текущая версия Windows требованиям. Для этого нажмите сочетание клавиш Win+R, затем введите winver. Найдите строку «Сборка ОС» — она должна быть свежее версии 14316.
Шаг 2. Запустите стандартную утилиту PowerShell от имени администратора и введите в ней команду для включения WSL:
dism.exe /online /enable-feature /featurename:Microsoft-Windows-Subsystem-Linux /all /norestart
Шаг 3. Если версия Windows, определённая в первом пункте, свежее 18362, вы можете установить WSL 2, который в разы быстрее первой версии и обладает доработанным ядром. Введите команду ниже, если нужно установить WSL 2:
dism.exe /online /enable-feature /featurename:VirtualMachinePlatform /all /norestart
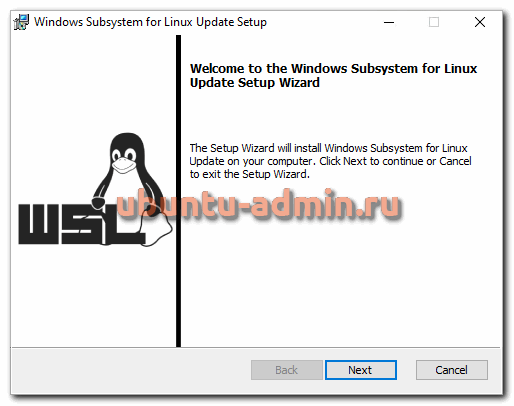
После этого скачайте и установите пакет обновления с официального сайта.
Шаг 4. Перезагрузите компьютер. Если была произведена установка WSL 2, введите в PowerShell от имени администратора следующую команду:
wsl —set-default-version 2
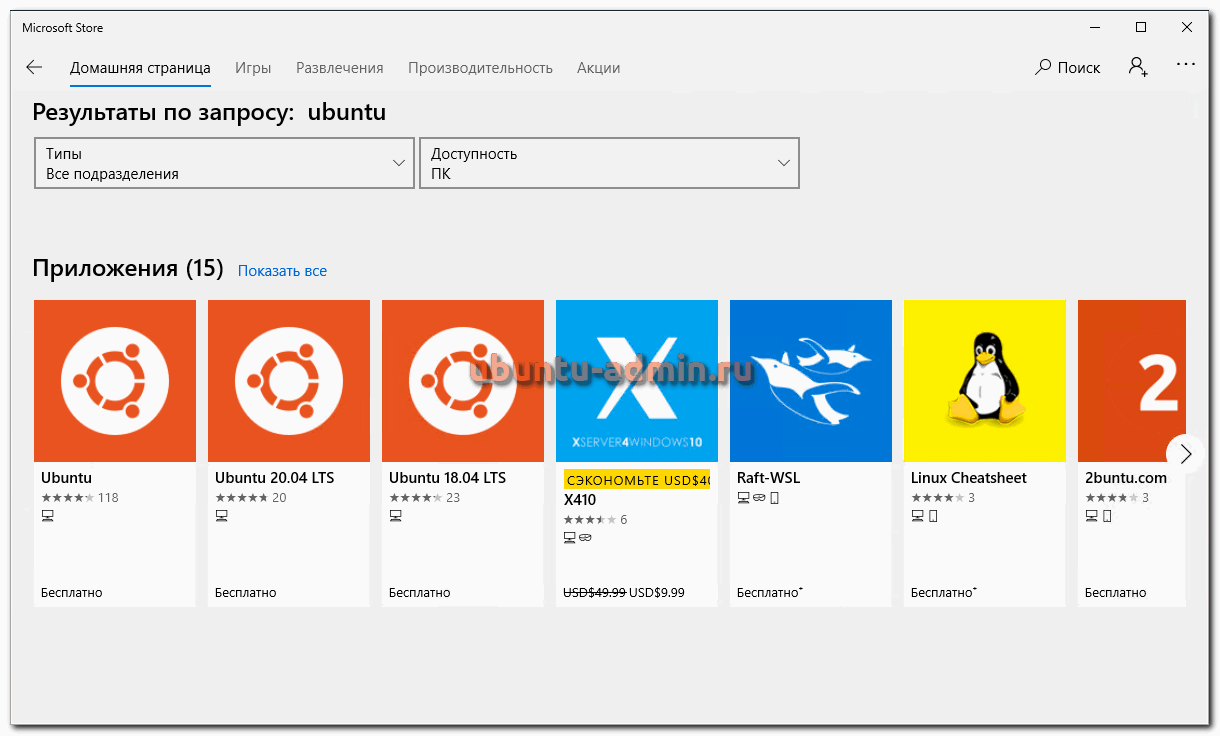
Шаг 5. После перезагрузки откройте фирменный магазин приложений Microsoft Store и найдите подходящий GNU/Linux-дистрибутив. Самым популярным является Ubuntu — вы можете установить любую версию из представленных в Microsoft Store.
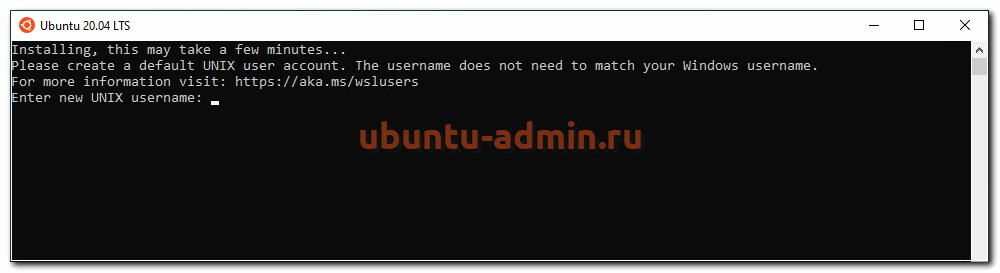
Шаг 6. Как только установка завершится, найдите дистрибутив в меню «Пуск» и запустите его.
Шаг 7. Пройдите этап первоначальной настройки, введя имя нового пользователя и придумав пароль.
Шаг 8. Теперь различные GNU/Linux-команды можно выполнять, запустив дистрибутив, либо введя в командной строке wsl <команда>. Например, для просмотра всех файлов в текущей директории достаточно в командной строке выполнить wsl ls -a.
Обращу внимание на то, что путь к дискам в WSL отличается от такового в Windows. Вместо привычного C:/ используйте /mnt/c/. Также не забывайте про экранирование пробелов с помощью символа — это также пригодится при вводе путей к файлам.
Помимо выполнения базовых команд, с помощью WSL можно даже запускать приложения с графическим интерфейсом. Правда, рассчитывать на большое количество поддерживаемых подобных программ не стоит.
Шаг 1. Загрузите X-сервер и установите его.
Шаг 2. Запустите его с помощью ярлыка на рабочем столе. В открывшемся окне выберите вариант Multiple windows, затем Start no client. Завершите настройку кнопкой Finish.
Шаг 3. Откройте дистрибутив через меню Пуск и выполните команду export DISPLAY=:0
Шаг 4. Запустив приложение с графическим интерфейсом в WSL, вы увидите новое окно прямо в Windows.
CoreUtils — лёгкий инструмент для запуска базовых команд
Плюс данной утилиты — возможность запуска не только на Windows 10, но и на более старых версиях ОС. Кроме того, она легка и не занимает много места. Не обошлось без недостатков — программа скудна на функционал и не обновлялась очень давно. Она не только не умеет запускать скрипты и приложения с GUI, но и поддерживает лишь самые базовые GNU/Linux-команды. Установка CoreUtils весьма проста.
Шаг 1. Скачайте утилиту с официального сайта.
Шаг 2. Следуйте инструкциям установщика.
Шаг 3. Откройте «Панель управления», в разделе «Система и безопасность» выберите пункт «Система». На панели слева откройте «Дополнительные параметры системы». Нажмите кнопку «Переменные среды» и в открывшемся окне найдите область с заголовком «Системные переменные». В случае, когда там есть переменная Path, выберите её, нажмите «Изменить» и далее создайте новую строку. Содержимым этой строки должен быть путь к папке, который был указан при установке. Если вы ничего не меняли, то введите следующее:
C:Program Files (x86)GnuWin32bin
Переменной Path нет? Тогда для начала создайте её кнопкой «Создать», затем в поле имени введите Path, а в поле значения — строку выше.
Шаг 4. Запустите командную строку и выполняйте команды прямо там.
Cygwin — запуск команд и Bash-скриптов
Ещё одна утилита, схожая с CoreUtils, но обладающая более широким функционалом — в том числе и возможностью запуска скриптов. Из минусов — немалый вес и более сложная установка. Разумеется, не идёт ни в какое сравнение с максимально удобным WSL, но для базовых команд вполне подойдёт.
Шаг 1. Загрузите Cygwin и запустите установку.
Шаг 2. Выберите Install from Internet, укажите директории для установки и загрузки пакетов, а также любой подходящий сайт из списка для скачивания файлов.
Шаг 3. В процессе установки можете выбрать необходимые пакеты, либо сразу нажать «Далее», оставив базовый набор.
Шаг 4. Откройте «Панель управления», в разделе «Система и безопасность» выберите пункт «Система». На панели слева откройте «Дополнительные параметры системы». Нажмите кнопку «Переменные среды» и в открывшемся окне найдите область с заголовком «Системные переменные». В случае, когда там есть переменная Path, выберите её, нажмите «Изменить» и далее создайте новую строку. Содержимым этой строки должен быть путь к папке, который был указан при установке. Если вы ничего не меняли, то введите следующее:
C:cygwin64bin
Переменной Path нет? Тогда для начала создайте её кнопкой «Создать», затем в поле имени введите Path, а в поле значения — строку выше.
Шаг 5. Команды можно выполнять как через командную строку, так и через специальный терминал.
Шаг 6. Для удаления Cygwin достаточно удалить папку, в которую программа была установлена, а также (по желанию) значение из переменной Path по методу, обратному тому, что был описан в 4 шаге (не удаляйте саму переменную).
Linux on Windows is a reality, thanks to the partnership between Canonical (parent company of Ubuntu) and Microsoft.
When Microsoft’s CEO announced that the Bash shell was coming to Windows, several people couldn’t believe it. #BashOnWindows trended on Twitter for days; such was the impact of this news.
But Bash on Windows (or Windows Subsystem for Linux) was not available to everyone immediately. People had to install the Windows 10 technical preview to install Linux on Windows 10.
That’s not the case anymore; it is pretty easy to install and use WSL now!
📋
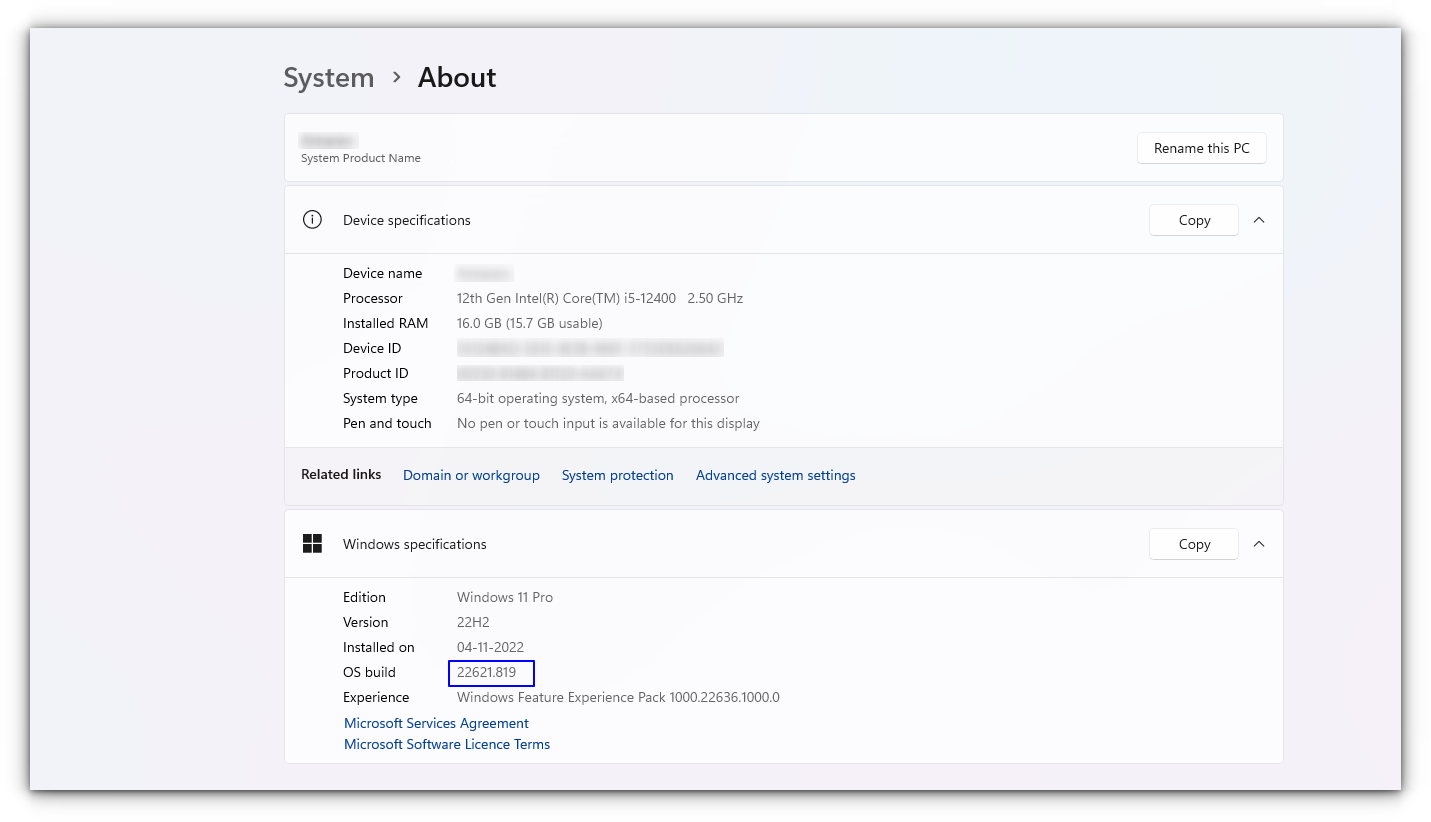
This tutorial was tested with the latest Windows 11 version 22H2, and build 22621.819. You might need to update your Windows installation if you have an older build to follow everything in this tutorial.
What is Bash on Windows?
Bash on Windows provides a Windows subsystem, and Linux runs atop it. It is not a virtual machine or an application like Cygwin. It is a complete Linux system inside Windows 10/11. It allows you to run the same Bash shell you find on Linux. You can run Linux commands inside Windows without installing a virtual machine or dual-boot Linux and Windows.
You install Linux inside Windows like a regular application. This is a good option if your main aim is to learn Linux/UNIX commands.
Check for System Compatibility
You must be running specific versions of Windows for the different features described in this article. Requirements necessary for a particular feature to work are described under its titles. To check your Windows version, search for about in the start menu.
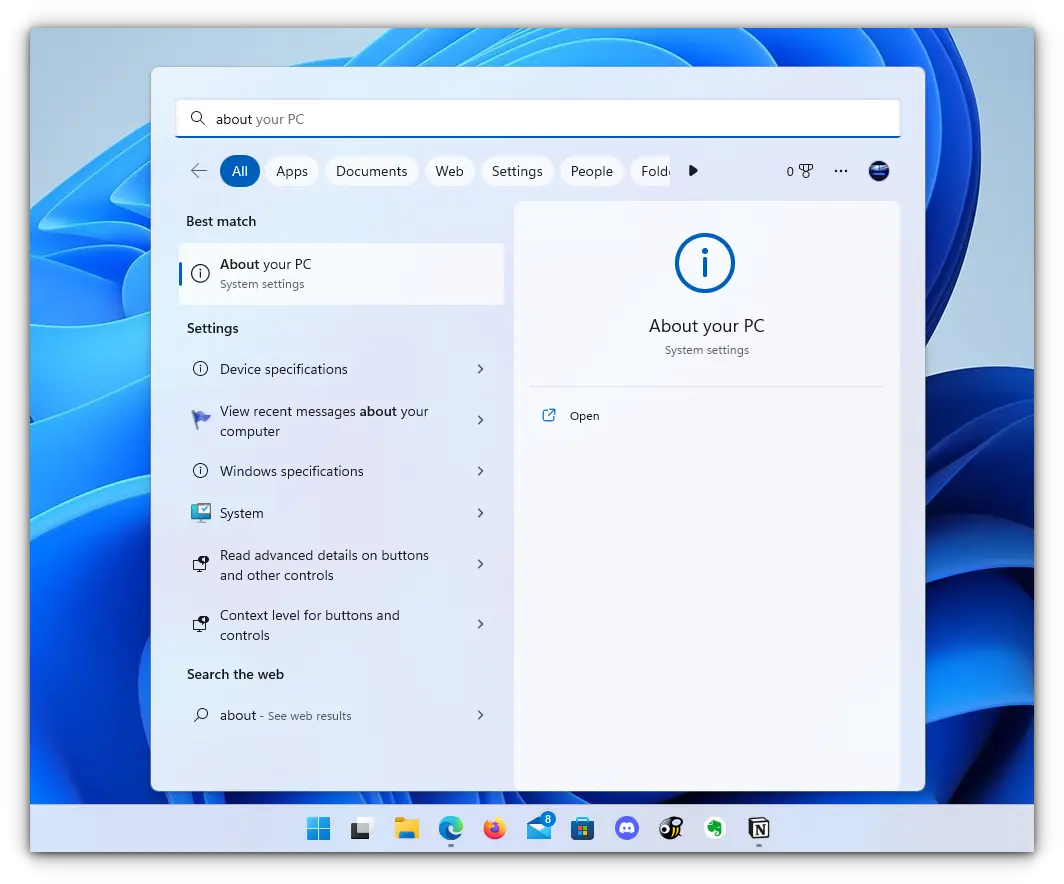
Here, you can see the build of your PC, as shown in the screenshot below. Make sure it is matching with the respective requirements described under various sub-headings here in this article.
- You must be running Windows 10 version 1607 (the Anniversary update) or above.
- WSL only runs on 64-bit versions 32-bit versions are not supported.
Install Bash in Newer Windows 10 and 11
The good thing is that the latest set of upgrades, including the stable release of WSL v1.0 released from Windows, makes it easier to install Bash on Windows.
There are two ways you can go about it:
- You can get it in one click from Windows Store.
- Choose to use the command-line.
1. Install WSL Using the Microsoft Store
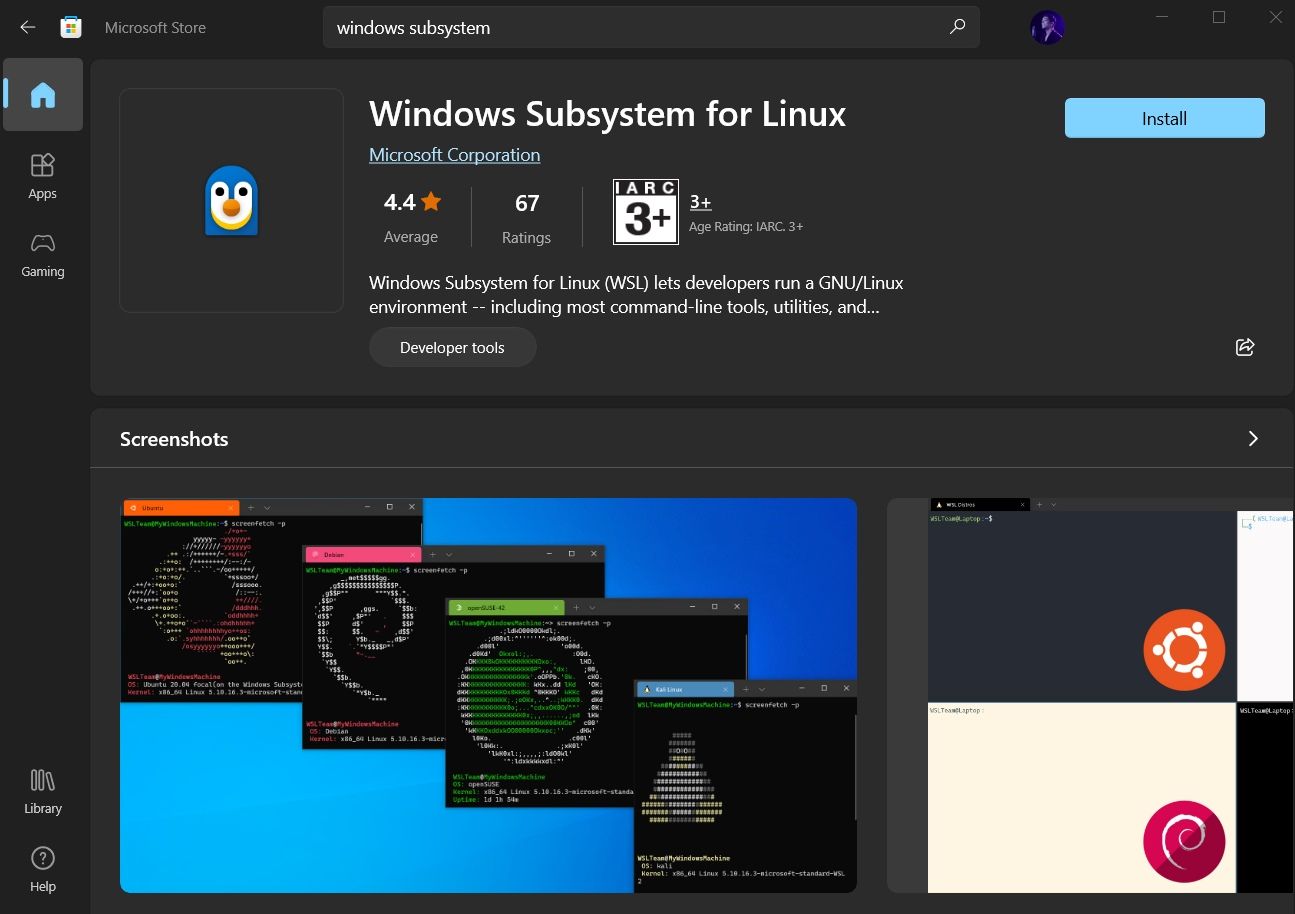
Launch the Microsoft Store and search for «Windows subsystem«.
Install it, and you’re done with the first step. Next, you have to install a Linux distribution.
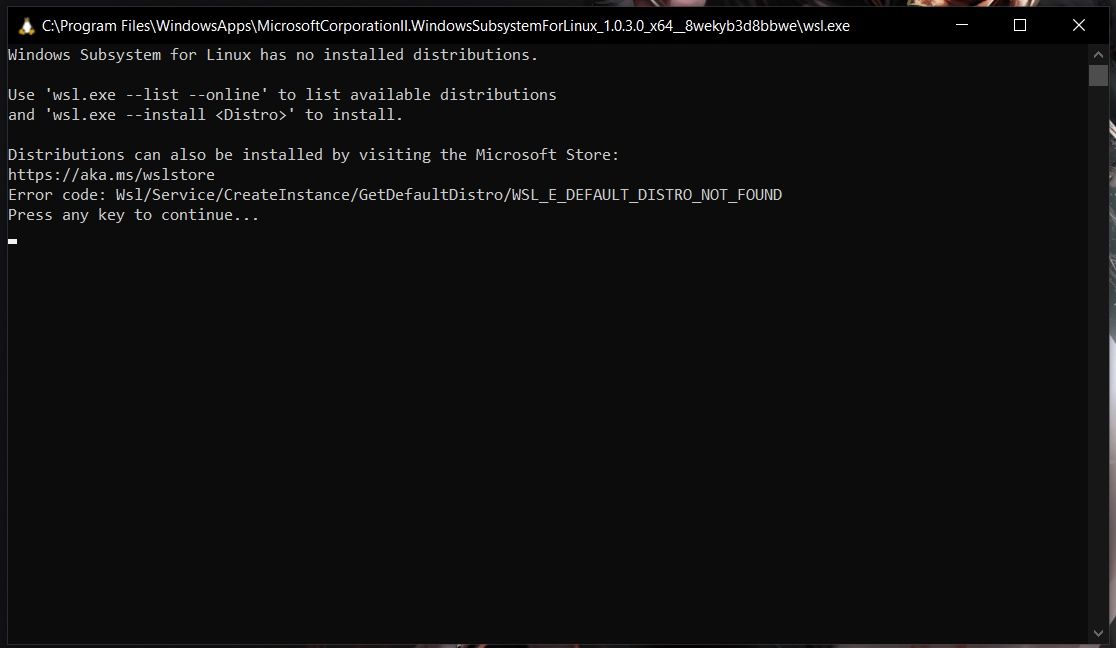
So, if you try to open WSL, you will get to see a window informing you that no distribution is installed.
Similar to WSL, search for the distribution on Microsoft Store, and then install it.
For instance, I installed Ubuntu from the store as shown in the image below:
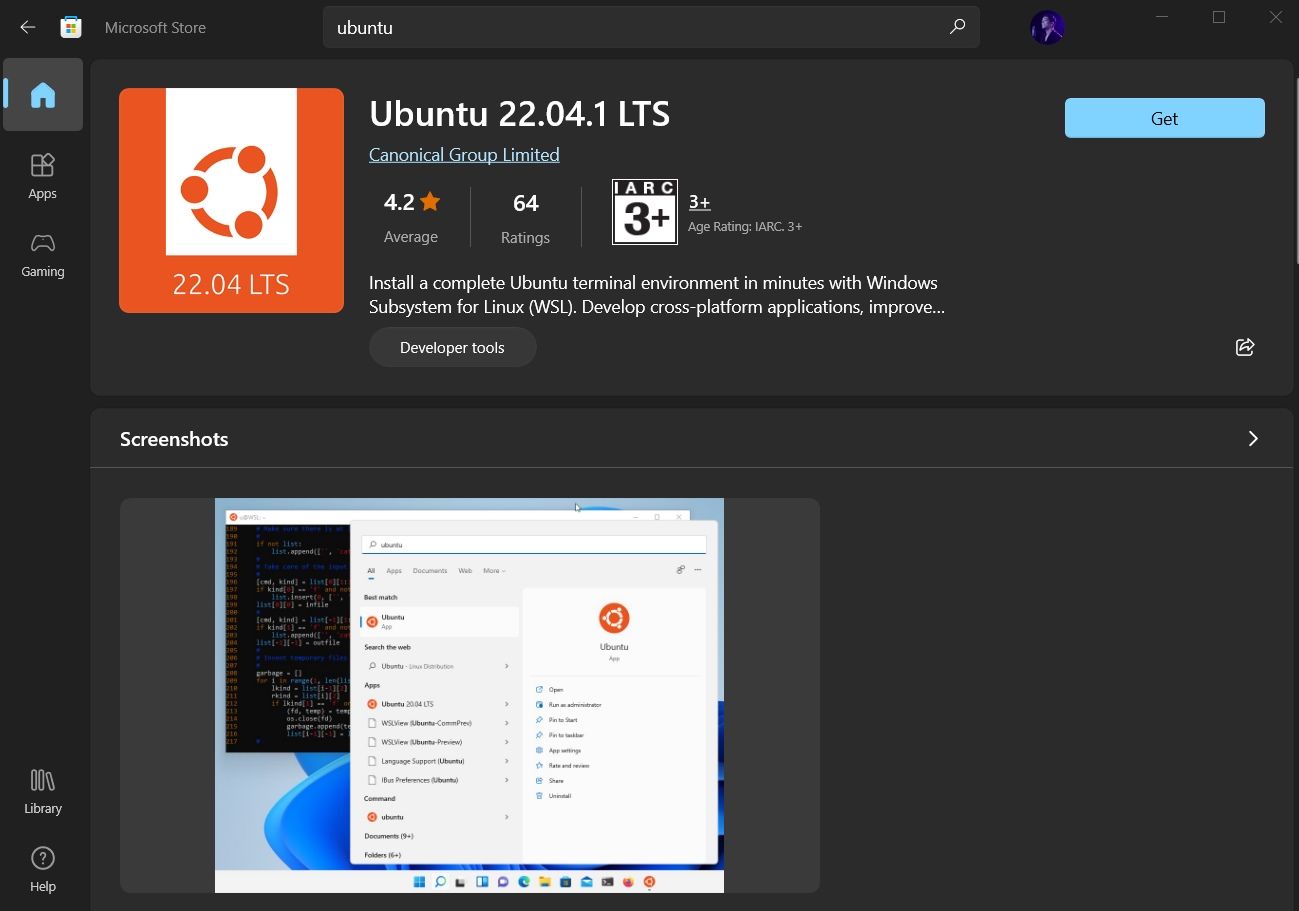
And, then proceed to «Open» it and it will automatically start installing. The procedure is same for any distribution you choose.
We then have to configure it, which is discussed right after installing it through the command line.
2. Install WSL and the default distribution using the command-line
In WSL, the default distribution is Ubuntu (which can be changed). To install, open Powershell as an administrator.
For this, search for Powershell in the start menu, right-click on Powershell and select Run as Administrator.
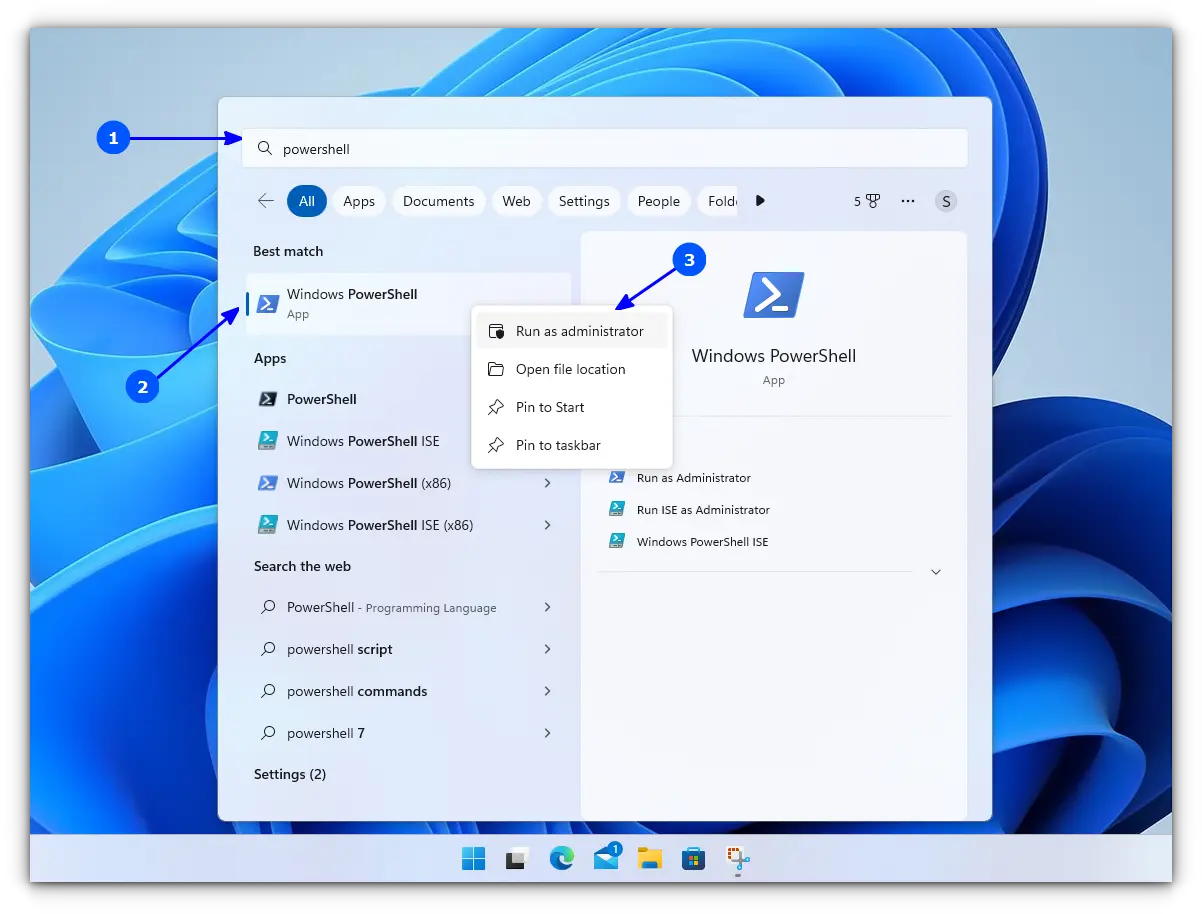
Inside Powershell, enter the following command to install WSL, along with all necessary features and the default distribution, that is, Ubuntu.
wsl --installOnce finished downloading and installing, you need to reboot to apply the changes.
Whether you installed WSL and Ubuntu using the Microsoft Store or the command line, you need to configure it.
Here’s how it is done:
🛠️ Configure the newly installed Ubuntu
After rebooting, search for Ubuntu in Start Menu and open it.

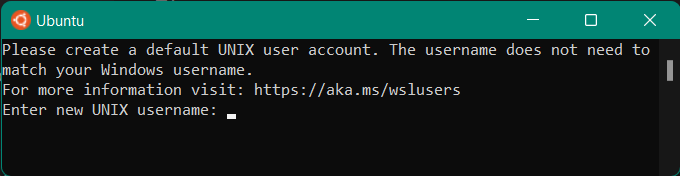
It will ask you to enter a UNIX Username and Password. Enter these details and press enter key.
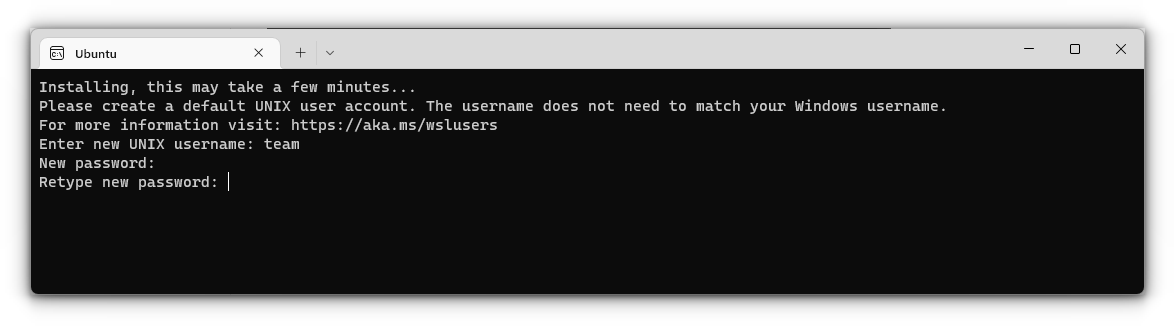
You will now be inside the terminal window of Ubuntu.
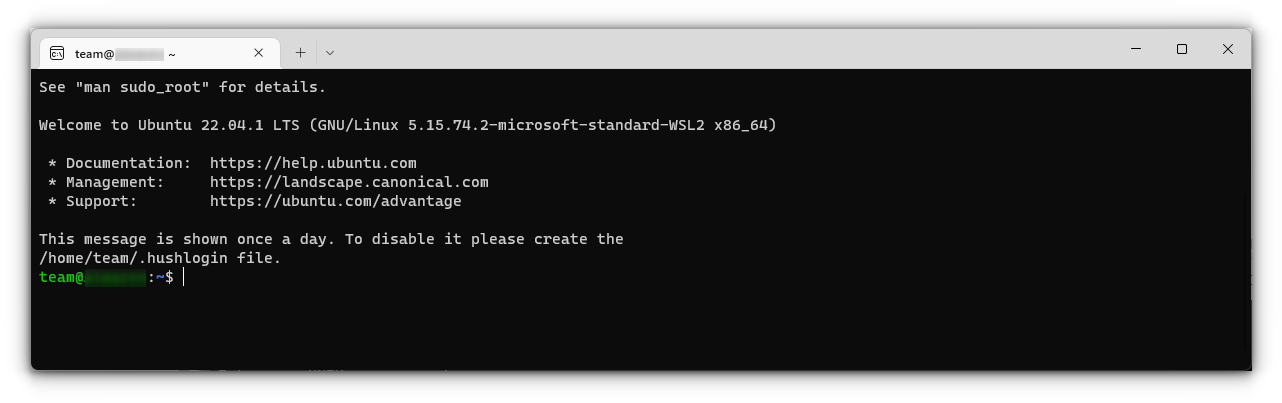
Once logged in, you need to update the installed Ubuntu. For this, enter the following commands one by one:
sudo apt update
sudo apt full-upgrade
After completing the update, you are good to go with Ubuntu in WSL.
Install Bash on Older Windows
If you have the minimum requirements mentioned in the beginning but are running an older Windows build, the previous method may not be supported. So there is a manual installation method.
Also, there are both WSL1 and WSL2 available. WSL2 offers some upgraded functionalities but has some minimum requirements to run:
- For x64 systems: Version 1903 or later, with Build 18362 or later.
- For ARM64 systems: Version 2004 or later, with Build 19041 or later.
So this brings us to two possibilities to install:
- Install Ubuntu with WSL1
- Install Ubuntu with WSL2
1. Install Ubuntu with WSL 1
This is a relatively simple procedure for those with a system incompatible with WSL2. First, you need to enable the Windows Subsystem for the Linux feature. This can be done through the command line. Open Powershell as an administrator and enter the following command:
dism.exe /online /enable-feature /featurename:Microsoft-Windows-Subsystem-Linux /all /norestartOr, to do this via GUI, follow the steps below:
- Search for Windows Features in Start Menu.
- Turn on Windows Subsystem for the Linux feature.
- Reboot your system.
- Open the Windows store and search for the distribution of your choice to install.
Once installation is completed, open the Ubuntu app from the start menu. It will take a couple of seconds to install. You will be prompted to enter a username and password. Provide those credentials, and you are good to go with Ubuntu in WSL1.
2. Install Ubuntu with WSL 2
It is recommended to use WSL2 instead of WSL1 if you have support. To install Ubuntu with WSL2, you need to make sure that the Windows Subsystem for Linux feature is turned on. For this, as in the above case, execute the following command in an elevated Powershell:
dism.exe /online /enable-feature /featurename:Microsoft-Windows-Subsystem-Linux /all /norestartReboot the device once the command is completed.
After this, you need to enable the Virtual Machine Platform feature. Open the Powershell with admin privileges and enter the following command:
dism.exe /online /enable-feature /featurename:VirtualMachinePlatform /all /norestartOnce again, restart the device to complete the WSL install and update to WSL 2.
Now, download the Linux Kernel Update Package for x64 machines from the official website. If you are using ARM64 devices, use this link to download the latest kernel update package.
If you are not sure about the device architecture, enter the command below in Powershell to get the type:
systeminfo | find "System Type"When the file is downloaded, double-click on it and finish the installation of the Kernel update package.
Now, open PowerShell and run this command to set WSL 2 as the default version when installing a new Linux distribution:
wsl --set-default-version 2Once WSL2 is set as the default version, you can now install the Linux distribution of your choice.
Go to Windows Store and install Ubuntu, as described in the earlier steps. and the rest of the procedure is already described above.
Enjoy Linux inside Windows.
🔧 Troubleshooting Tip 1
«The WSL optional component is not enabled. Please enable it and try again.»
You may see an error like this when you try to run Linux inside Windows 10:
The WSL optional component is not enabled. Please enable it and try again.
See https://aka.ms/wslinstall for details.
Error: 0x8007007e
Press any key to continue...
And when you press any key, the application closes immediately.
The reason here is that the Windows Subsystem for Linux is not enabled in your case. You should enable it as explained in this guide. You can do that even after you have installed Linux.
🔧 Troubleshooting Tip 2
Installation failed with error 0x80070003
This is because Windows Subsystem for Linux only runs on the system drive i.e. the C drive. You should ensure that when you download Linux from the Windows Store, it is stored and installed in the C Drive.
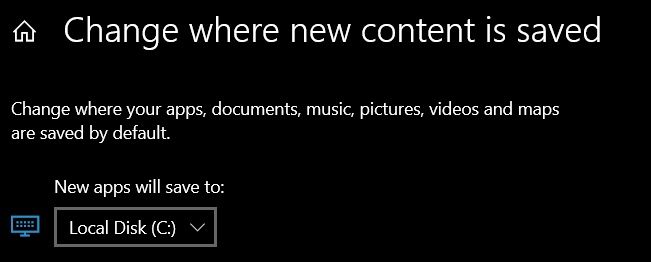
On Windows 10, go to Settings -> Storage -> More Storage Settings -> Where new content is saved: Change where new content is saved and select C Drive here.
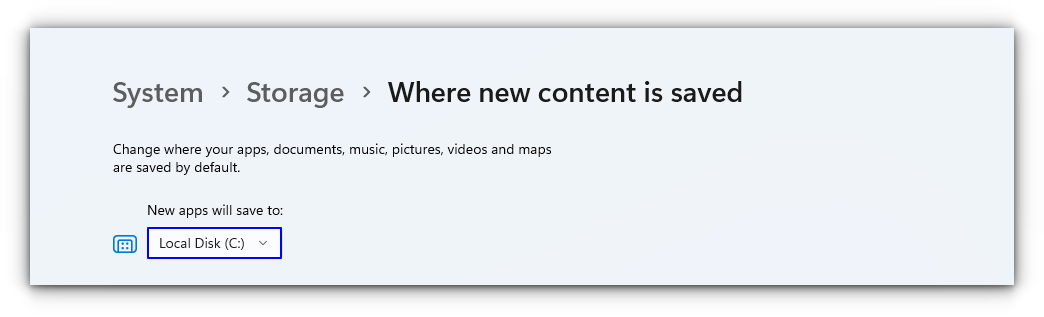
On Windows 11, go to Settings -> System -> Storage -> Advanced storage settings -> Where new content is saved and select C Drive here.
🔧 Troubleshooting Tip 3
«Failed to attach disk Error»
Sometimes, this error will appear when we reinstall the Ubuntu in WSL.
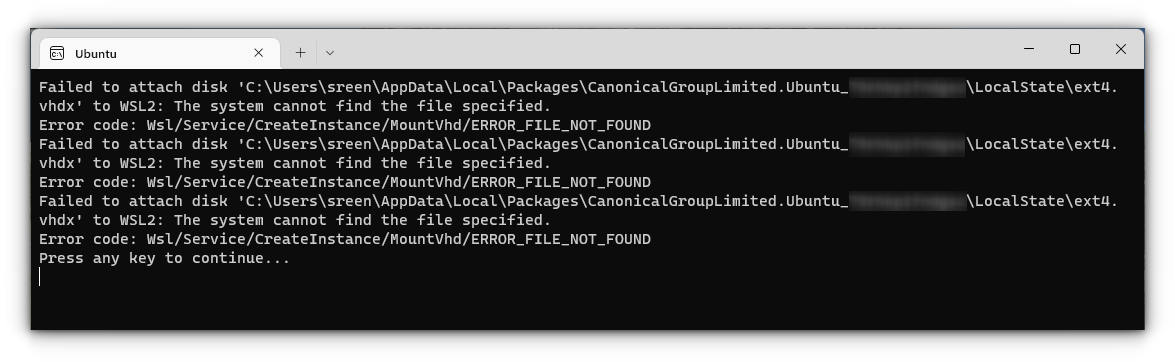
In this case, open Powershell and run the following command:
wsl -l -vThis will list the installed Linux systems. Find the name of the system, that is throwing the error, in my case Ubuntu. Now run the following command:
wsl --unregister UbuntuYou can restart the ubuntu app and it will run without any issues.
You can refer to more common troubleshooting methods from the official website.
Run GUI Apps On Windows Subsystem for Linux
The ability to run GUI apps on Windows Subsystem for Linux was introduced with the WSL 2 release in May 2020.
Windows Subsystem for Linux (WSL) with WSL2 now supports running Linux GUI applications (X11 and Wayland) on Windows in a fully integrated desktop experience. This allows you to install Linux applications and seamlessly integrate them into Windows desktop, including features like “pin to taskbar”.
📋
One crucial point is that you must be on Windows 10 Build 19044+ or Windows 11 to access this feature.
Step 1: Enable/Update WSL 2
This procedure has been explained in the above section and you can refer to it.
Step 2: Download and Install Graphics drivers
To run GUI apps, you need to install appropriate graphics drivers. You can use the following link to download the drivers according to your provider.
- Intel GPU Driver for WSL
- AMD GPU Driver for WSL
- NVIDIA GPU Driver for WSL
Once installed, you are all done.
Step 3: Install some GUI Apps
Now, go to your Ubuntu app and install any GUI app using the APT package manager. You should note that running apps from other sources like flatpak are problematic within WSL.
For this article, I installed the Gedit text editor using the following command:
sudo apt install gedit -yThis will install several MB of packages including required libraries. Once completed, you can run the following command to start the GUI Gedit app in Windows.:
gedit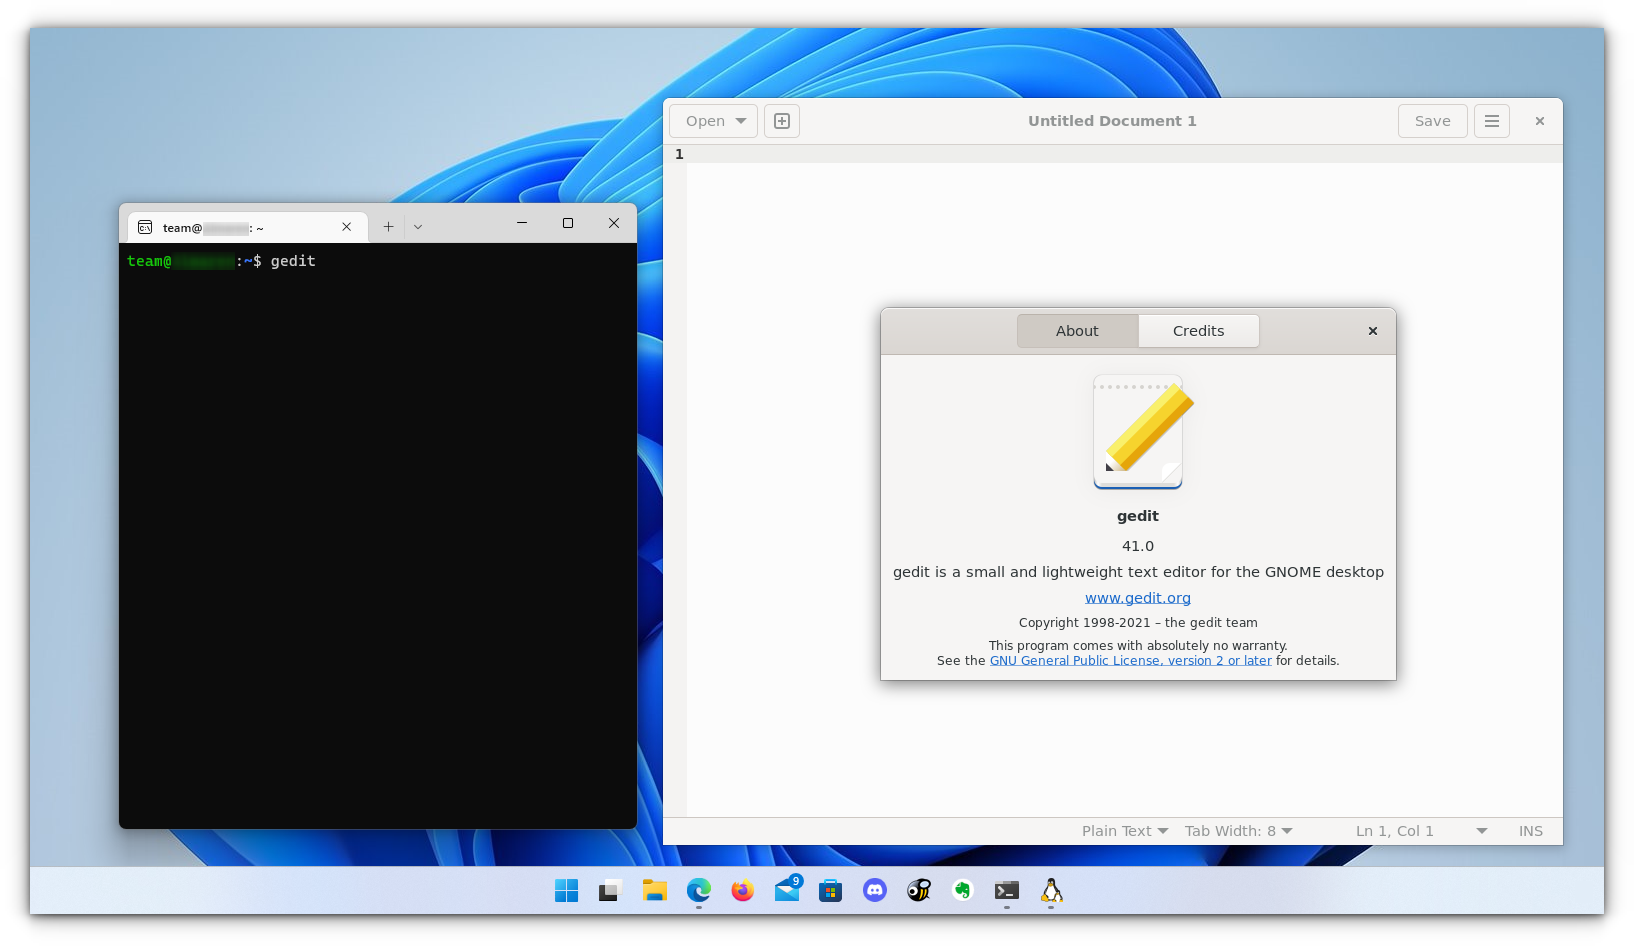
Similarly, you can install all the popular applications available to Linux, including Nautilus file manager, GIMP, etc. For more about running GUI applications in WSL, you can refer to the official documentation.
Install Linux Bash Shell on other older Windows 10
If you cannot get the Fall Creator’s update on Windows 10 for some reason, you can still install it if you have the Anniversary update of Windows 10. But here, you’ll have to enable developer mode. I still recommend upgrading to the Fall Creator’s update or the latest Windows 10 2004 version update though.
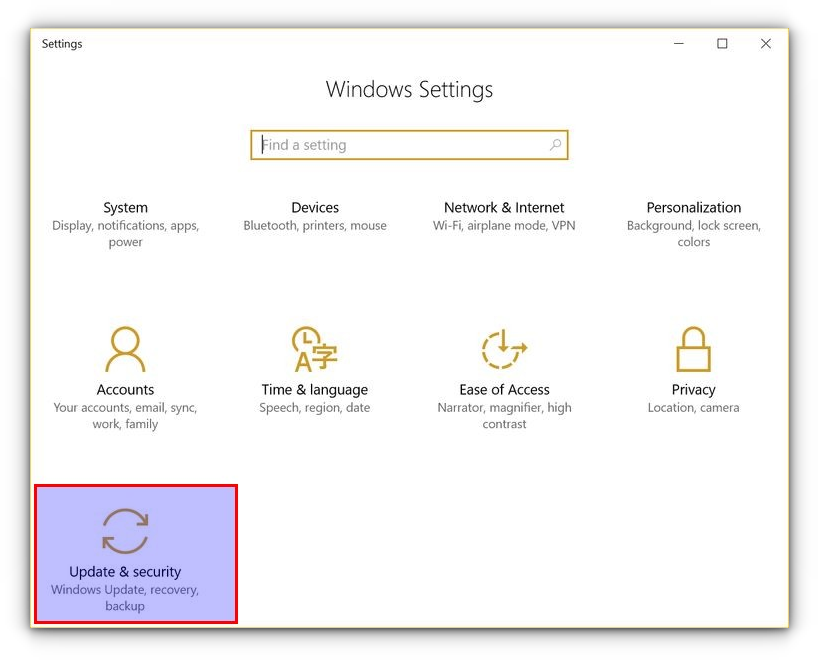
Press Windows Key + I to access Windows system settings. Here, go to Update & Security:
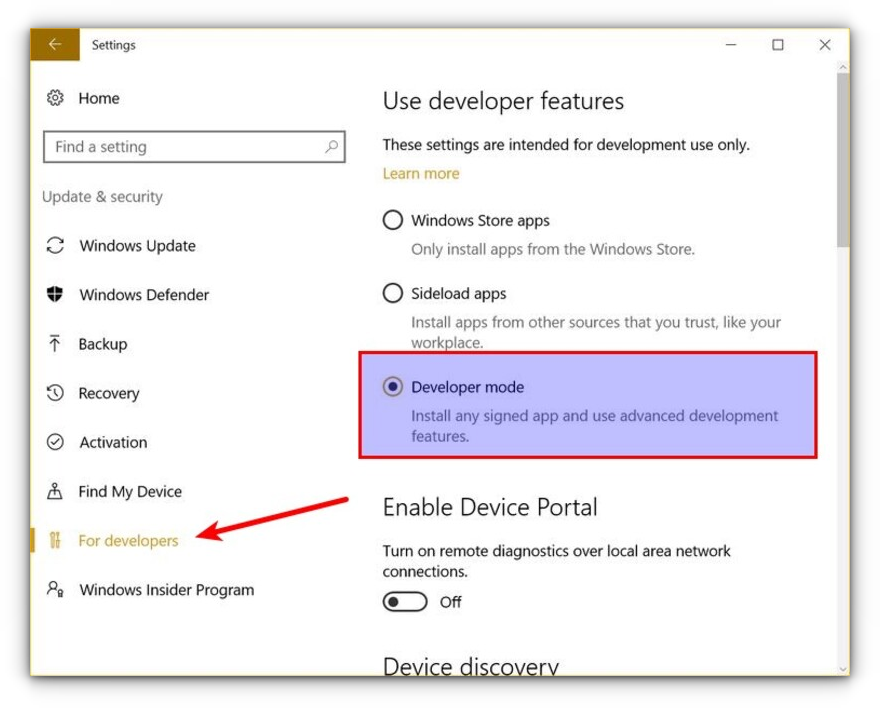
From the left side pane, choose “For developers.” You’ll see an option for “Developer mode.” Enable it.
Now search for Control Panel and in Control Panel, click on “Programs”:
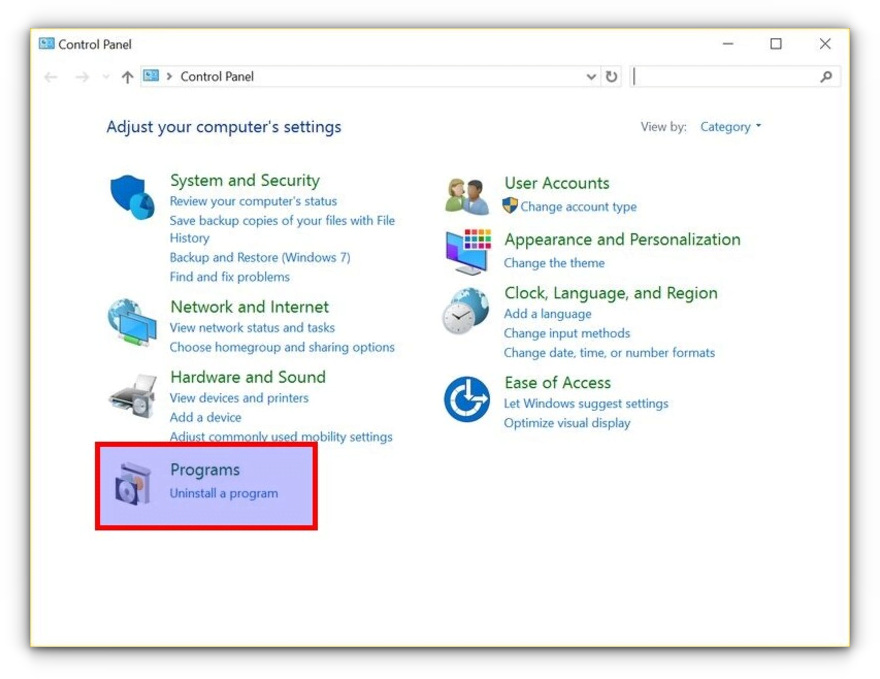
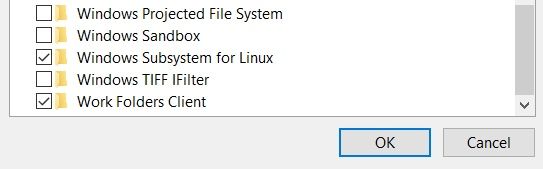
In Programs, click “Turn Windows features on or off”:
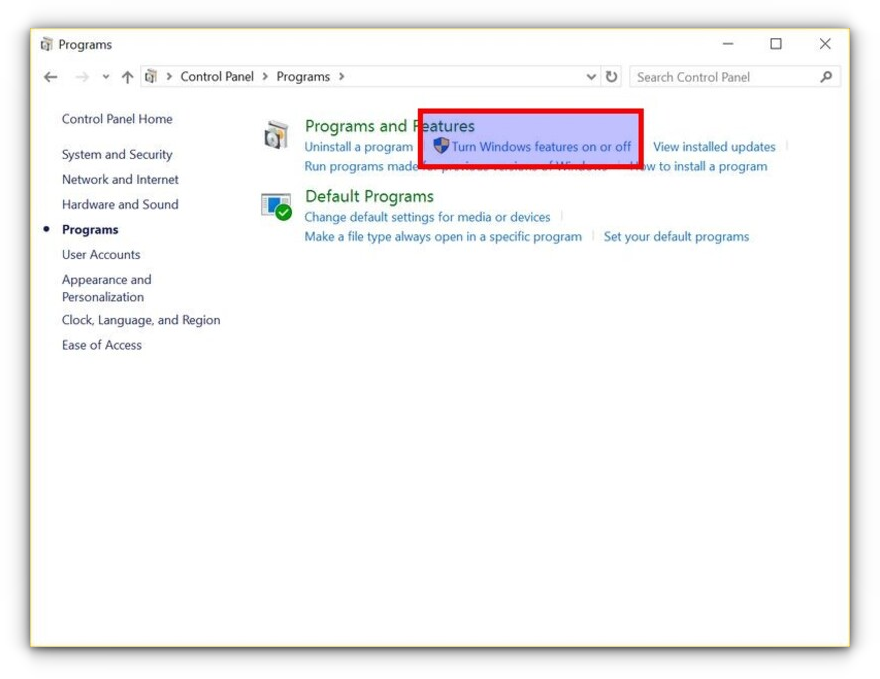
When you do this, you’ll see several Windows features. Look for “Windows Subsystem for Linux” and enable it.
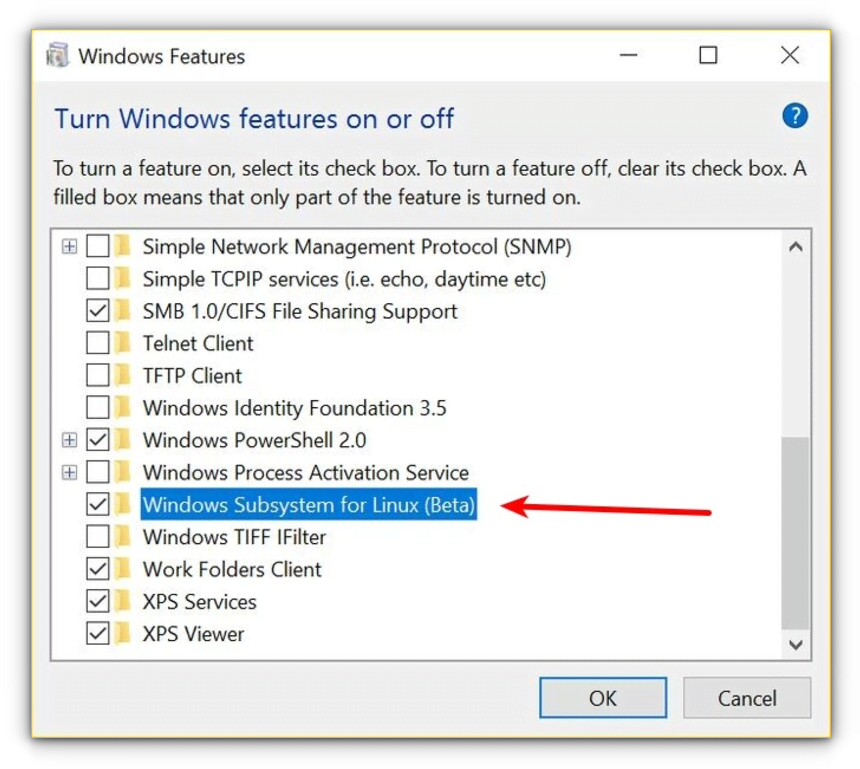
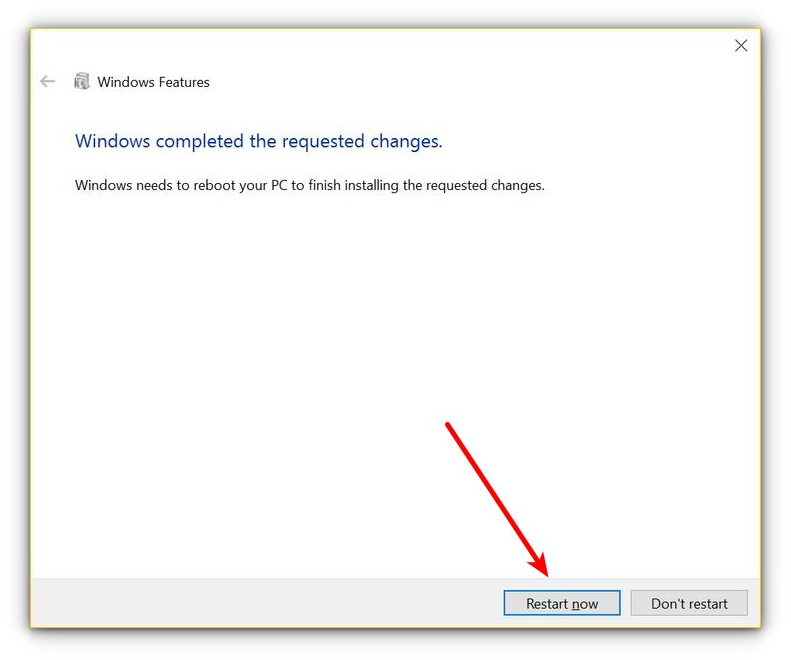
You’ll need to restart the system after doing this.
After restarting the computer, click the start button and search for “bash”.
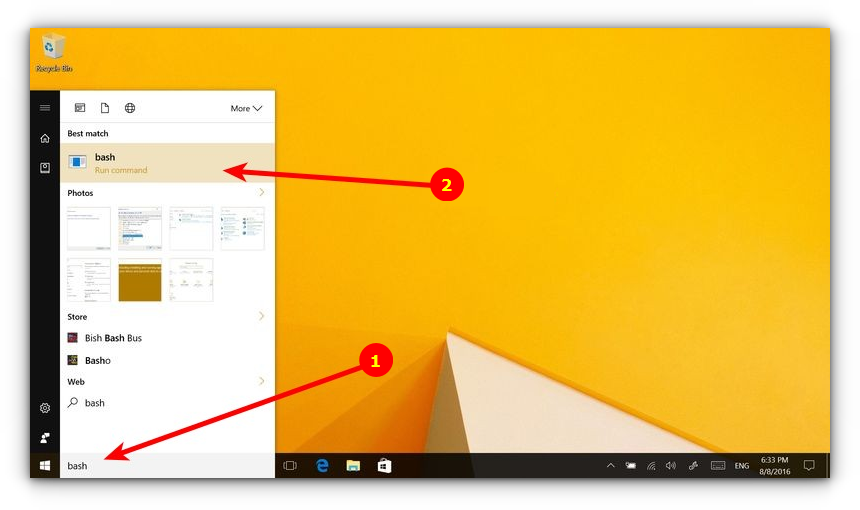
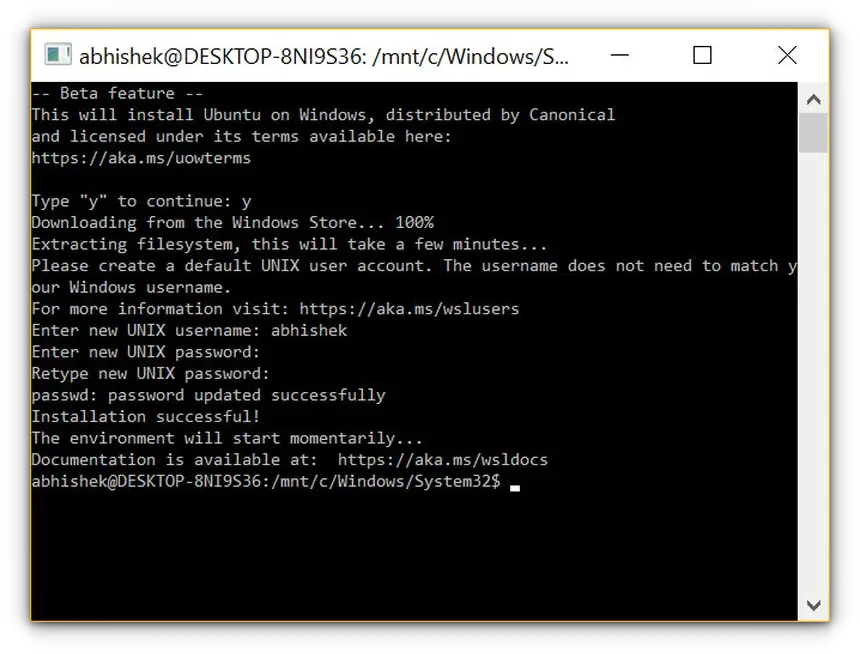
When you run it for the first time, you’ll be given the option to download and install Ubuntu. You’ll be asked to create a username and password during this process. It will install an entire Ubuntu Linux system, so have patience as it will take some time in downloading and installing Linux on Windows.
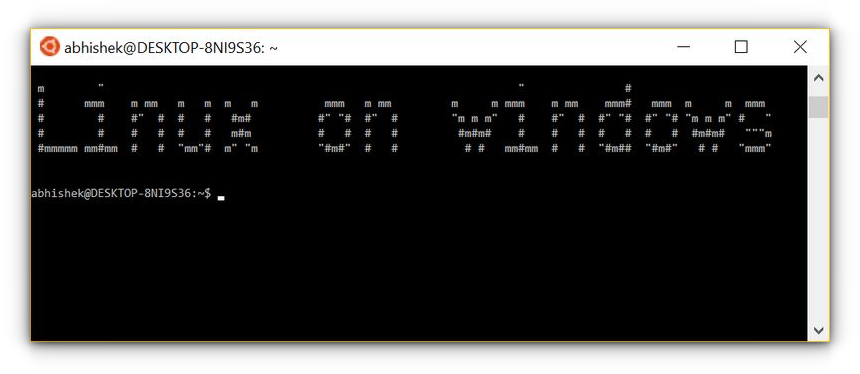
Once this is done, go back to the Start menu and search for Ubuntu or Bash.
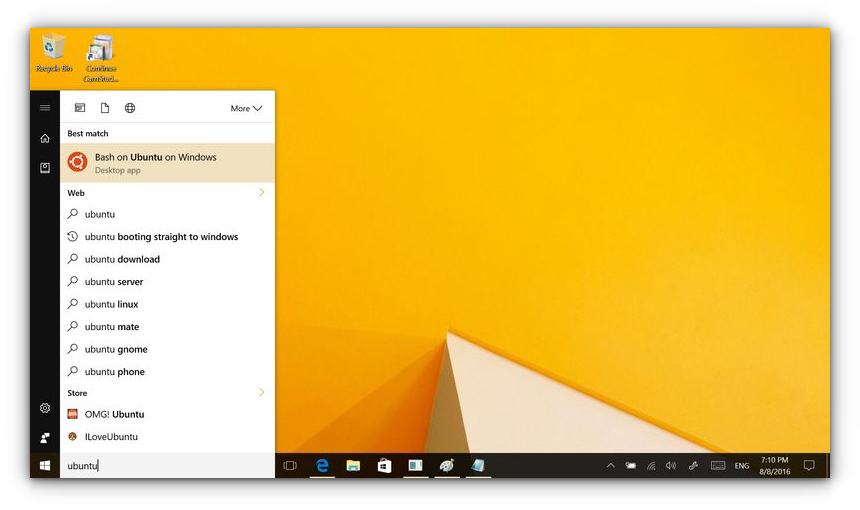
Now you have a command line version of Ubuntu Linux. You can use apt to install various command line tools in it.
💬 I hope you find this tutorial helpful for installing bash on Windows and experimenting with Linux GUI apps on Windows. No wonder WSL lets you play with Linux inside of Windows. If you have questions or suggestions, feel free to ask.
У пользователей Windows 10 есть необычная возможность установить операционную систему Ubuntu на свой компьютер. Механизм, обеспечивающий такую возможность, называется WSL — Windows Subsystem for Linux. Далее я расскажу, как с помощью WSL установить полноценную Ubuntu на Win 10 штатными средствами системы.
Для начала кратко поясню, что такое WSL на практике. Это некий слой абстракции, который позволяет запускать linux приложения в среде windows. И это не виртуальная машина. И Linux, и Windows приложения работают в рамках одной операционной системы с совместным доступом к данным на дисках. Вы прозрачно можете запустить приложение на ubuntu и открыть им файл в директории windows.
Для примера, расскажу, где ubuntu под wsl версии 1 хранит свои файлы — C:Usersuser1AppDataLocallxss.
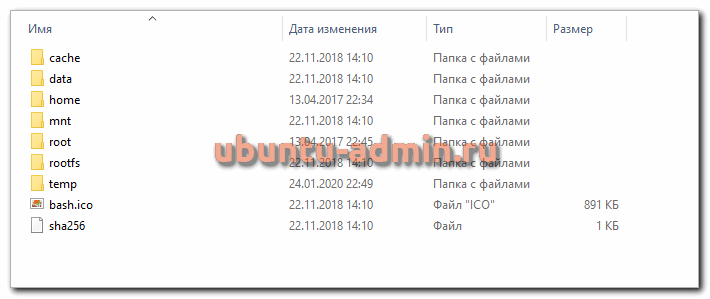
Тут и корень системы, и директории пользователей. Посмотреть содержимое можно из-под windows. Только не рекомендуется их редактировать. Работа linux системы может быть нарушена. На примере доступа к файлам видно, что это не виртуальная машина. Важно понимать это отличие.
А вот то же самое можно сделать из-под ubuntu, открыв файлы из директории windows.
С помощью данной технологии, вы условно сможете запустить полноценный Ubuntu Server на своем компьютере. Читайте мой обзор на Ubuntu, чтобы иметь представление о том, чем он отличается от остальных linux дистрибутивов.
Зачем нужна Ubuntu WSL на Windows
Поговорим немного о том, зачем может понадобиться установка Ubuntu WSL в Windows 10. Можно в небольшой список это вынести и перечислить по пунктам:
- Первое и самое очевидное — для использования линуксовых утилит — git, ansible, cron, rsync и т.д. Речь в первую очередь идет о том софте, которого нет в windows, либо которое затруднительно или неудобно запускать.
- Настройка привычного web окружения в виде lamp (linux, apache, mysql, php) или lemp (то же самое, только с nginx). Особенно это актуально для разработчиков.
- Для обычного знакомства и изучения linux. Нет нужды разбираться с виртуализацией или рядом с windows устанавливать отдельно linux. Тут все в комплекте, можно без проблем переключаться между системами в режиме реального времени. В общем, это удобно.
Это то, что первое приходит в голову. Думаю, есть и другие причины, для чего может быть полезно установить ubuntu wsl. Делитесь своим мнением в комментариях. Может я что-то важное упускаю.
Установка Ubuntu WSL под Win 10
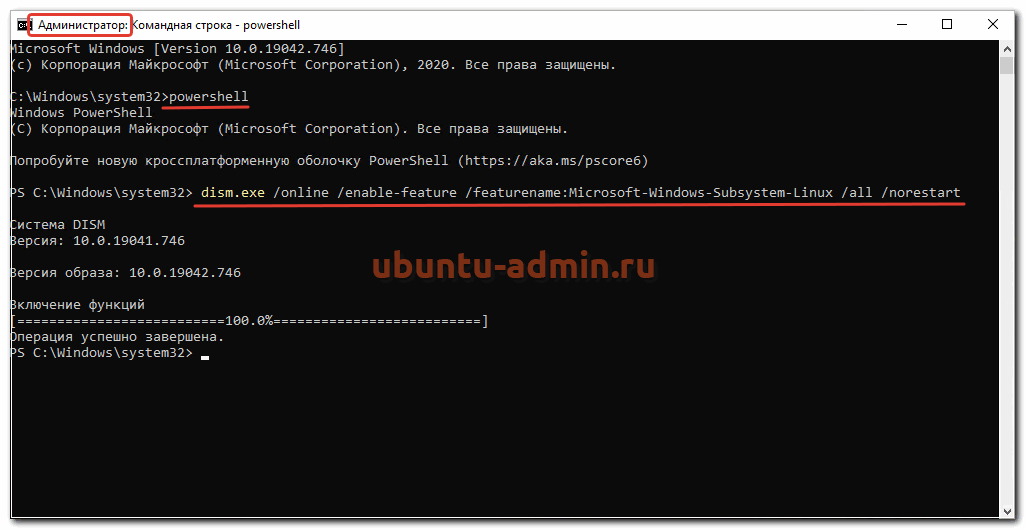
Установка подсистемы Windows для Linux в Windows 10 неплохо описана в официальном руководстве от Microsoft. Чтобы установить Ubuntu WSL на Windows, надо для начала включить компонент системы Windows под названием Windows-Subsystem-Linux. Для этого запускаем cmd с правами администратора (это важно!) и переходим в powershell. Там выполняем:
dism.exe /online /enable-feature /featurename:Microsoft-Windows-Subsystem-Linux /all /norestart
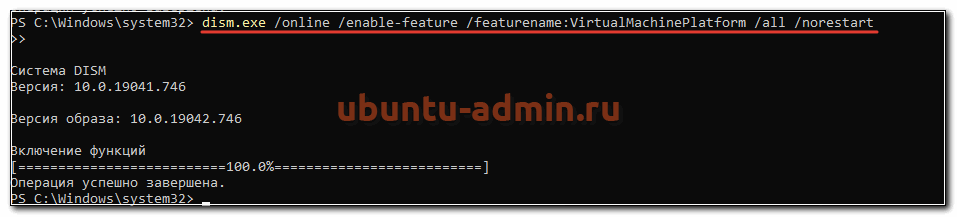
После этого активируем компонент Платформа виртуальных машин.
dism.exe /online /enable-feature /featurename:VirtualMachinePlatform /all /norestart
Далее обязательно перезагрузить систему, иначе дальше будут ошибки. После перезагрузки продолжаем ставить ubuntu под wsl.
Cкачиваем и устанавливаем Пакет обновления ядра Linux в WSL 2 для 64-разрядных компьютеров — https://wslstorestorage.blob.core.windows.net/wslblob/wsl_update_x64.msi
Дальше устанавливаем версию WSL 2 по умолчанию. Она более продвинутая и быстрая, по сравнению с первой.
wsl --set-default-version 2

Теперь идем в Windows Store и ищем там необходимую вам версию Ubuntu WSL. Я просто в строку поиска ввел название дистрибутива и получил все доступные версии.
После установки в меню Пуск можно запустить Ubuntu WSL. При первом запуске вам предложат задать имя пользователя для Linux системы.
Вот и все. Заходим в свежеустановленную Ubuntu 20 LTS на Win 10.
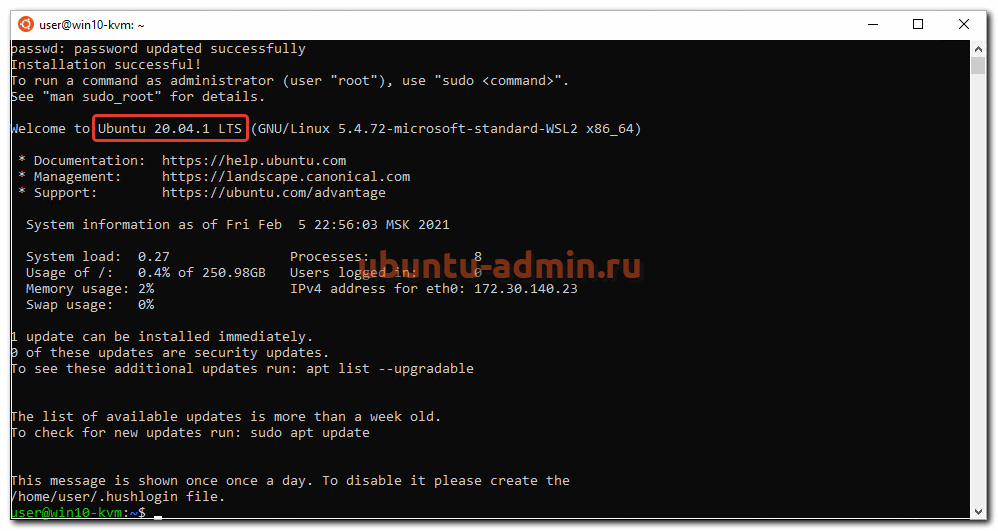
У вас под рукой практически полноценная linux система, работающая нативно под windows.
Настройка Ubuntu WSL
Выполним первоначальную настройку Ubuntu WSL, чтобы с ней удобнее было далее работать. Начнем с подключения по SSH.
Настройка ssh
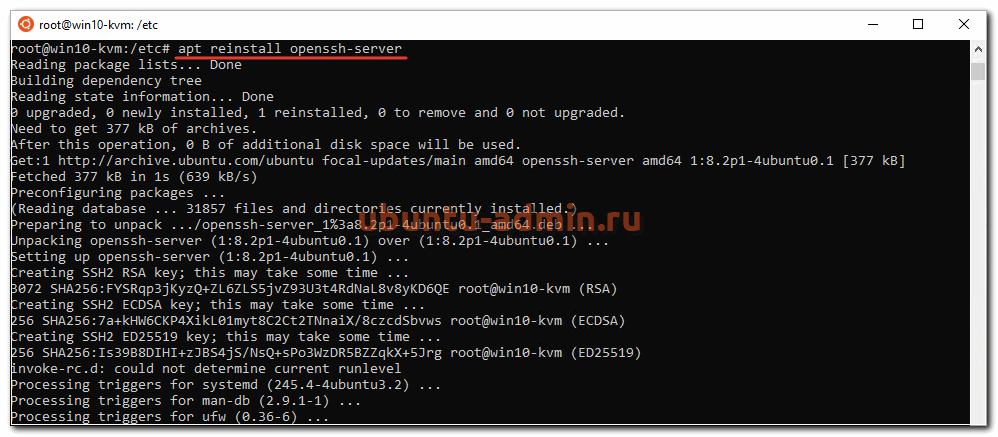
Терминал Windows не очень удобен и привычен. Так что если вы привыкли подключаться по ssh через какой-нибудь другой менеджер подключений, вам нужно будет на wsl системе настроить ssh. Это не совсем очевидная процедура. Чтобы заставить нормально работать openssh server, его надо переустановить. Делаем это:
# sudo apt reinstall openssh-server
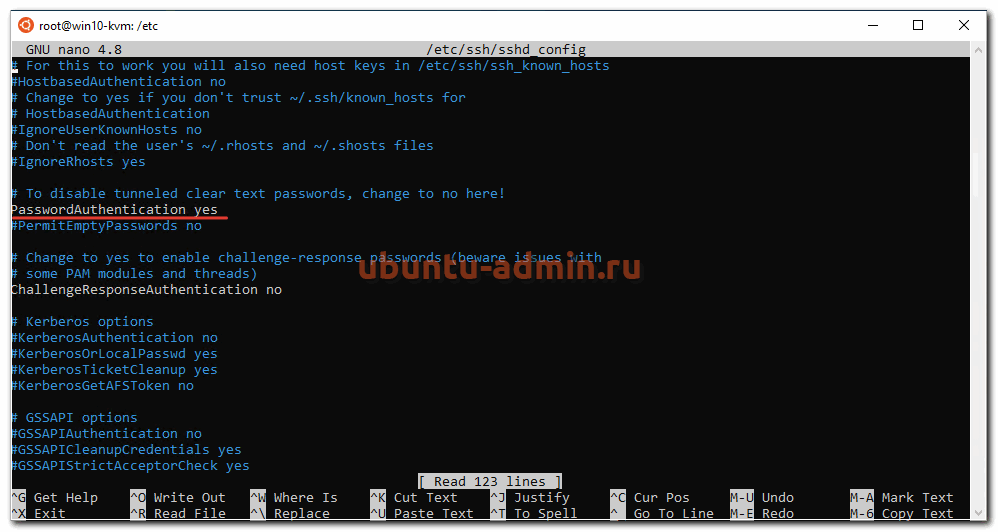
Теперь сразу разрешим подключаться с использованием паролей. Для этого открываем конфиг /etc/ssh/sshd_config и разкомментируем настройку:
PasswordAuthentication yes
После этого перезапустите службу sshd
sudo service ssh restart
Мы закончили настройку ssh в ubuntu. Теперь к ней можно подключиться, например, через putty. Используем адрес 127.0.0.1 и порт 22.
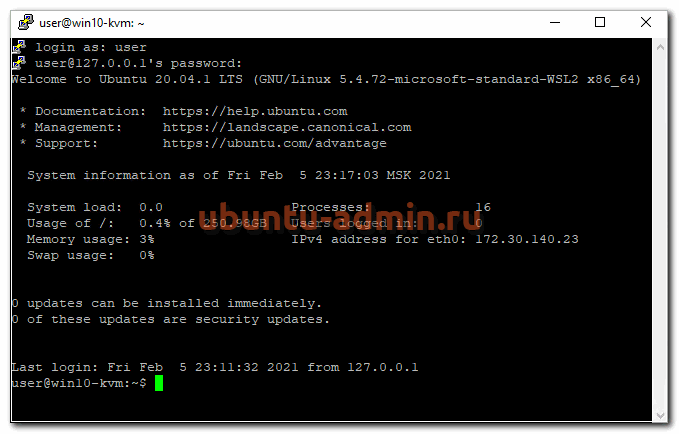
Вот и все. Можете использовать любой другой ssh клиент.
Обновление
Для того, чтобы обновить Ubuntu WSL на Windows 10 достаточно внутри linux системы запустить стандатрное средство обновления пакетов — apt.
sudo apt update
sudo apt full-upgrade
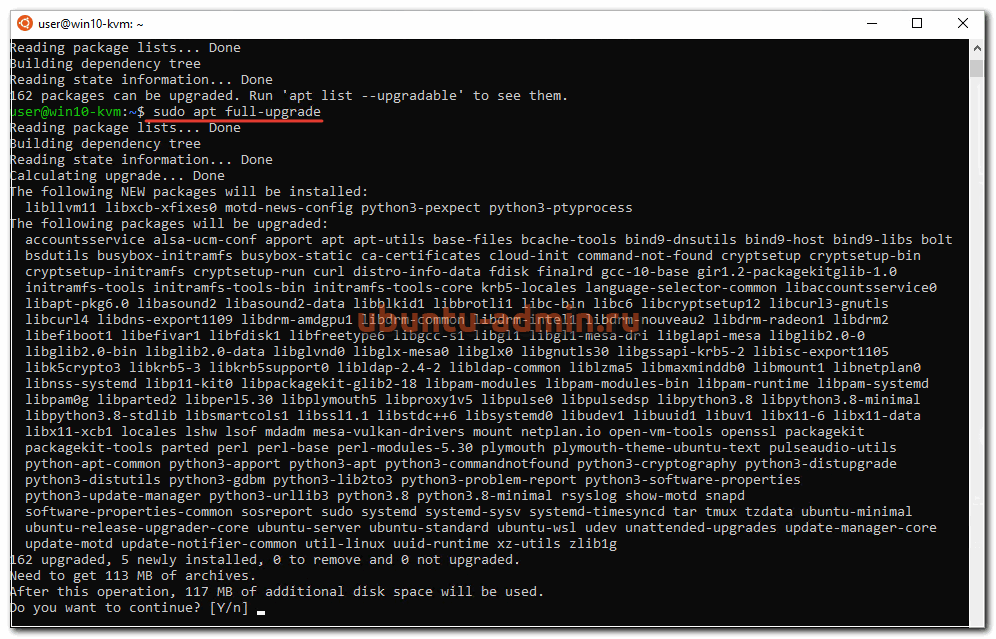
В общем случае этого достаточно для обновления системы. Если же вы хотите выполнить обновление до следующего релиза, то лучше это сделать через Windows Store, установив нужную версию ubuntu.
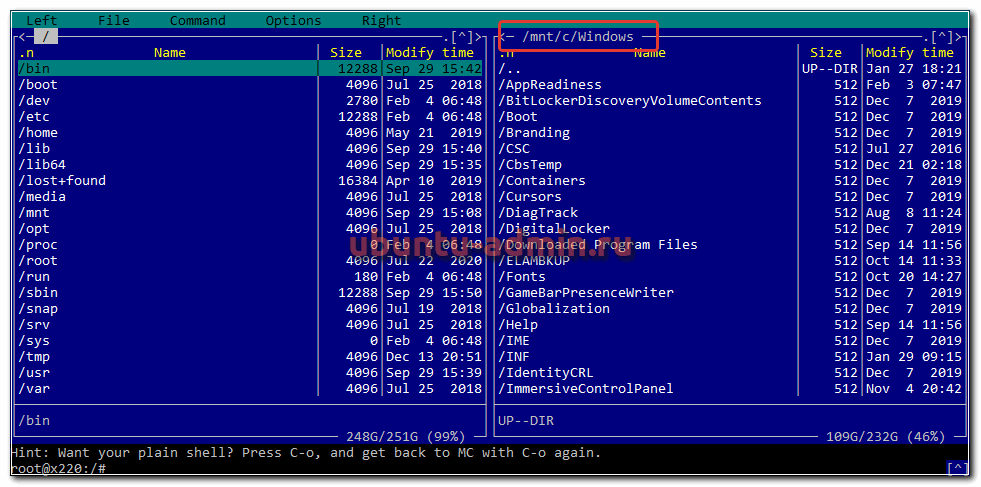
Установка MC
Для того, чтобы установить популярный в linux среде файловый менеджер Midhight Commander или коротко MC, необходимо опять же воспользоваться пакетным менеджером apt.
sudo apt install mc
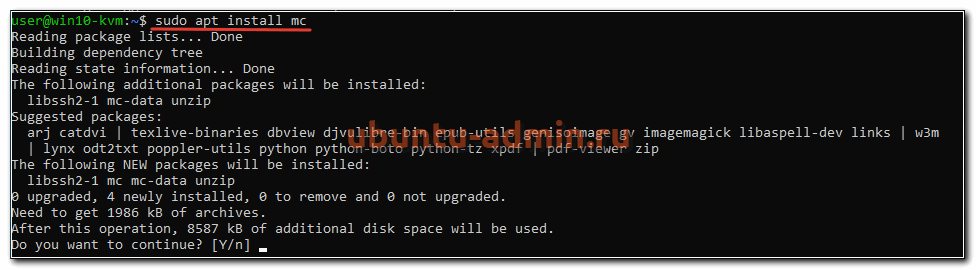
При этом вы сможете без проблем перемещаться не только внутри ubuntu, но и открывать файлы windows. Традиционные диски C:, D: и т.д. смонтированы в /mnt.
Войти под root
Для того, чтобы в Ubuntu WSL зайти под ученой записью root, необходимо под пользователем выполнить в консоли:
sudo su
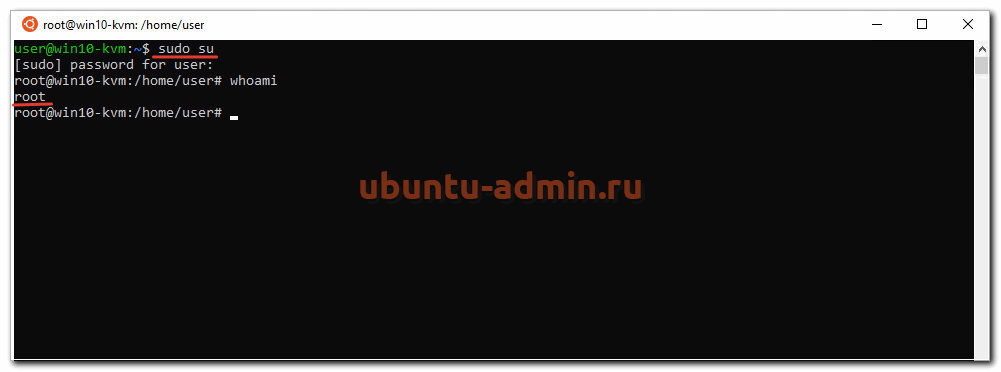
Теперь вы полноценный root пользователь и можете запускать команды с повышенными привилегиями без sudo.
Автозапуск служб
В Ubuntu WSL не работает systemd и возникает закономерный вопрос, а как же тогда настроить автозапуск нужных служб. Тут есть два принципиально разных подхода по автозапуску служб:
- Служба в wsl запускается автоматически после запуска компьютера.
- Служба wsl запускается автоматически после первого входа в bash установленного linux.
Для первого случая проще всего воспользоваться готовым скриптом wsl-autostart — https://github.com/troytse/wsl-autostart. С его помощью вы можете выбрать любые программы из ubuntu, которые захотите запустить при старте компьютера.
Если вы хотите выполнить какую-то команду при первом входе в wsl, то просто добавьте ее в файл .bashrc домашнего каталога пользователя. Например, добавим туда вывод фразы Hello World! Для этого добавляем в самый конец:
echo "Hello World"
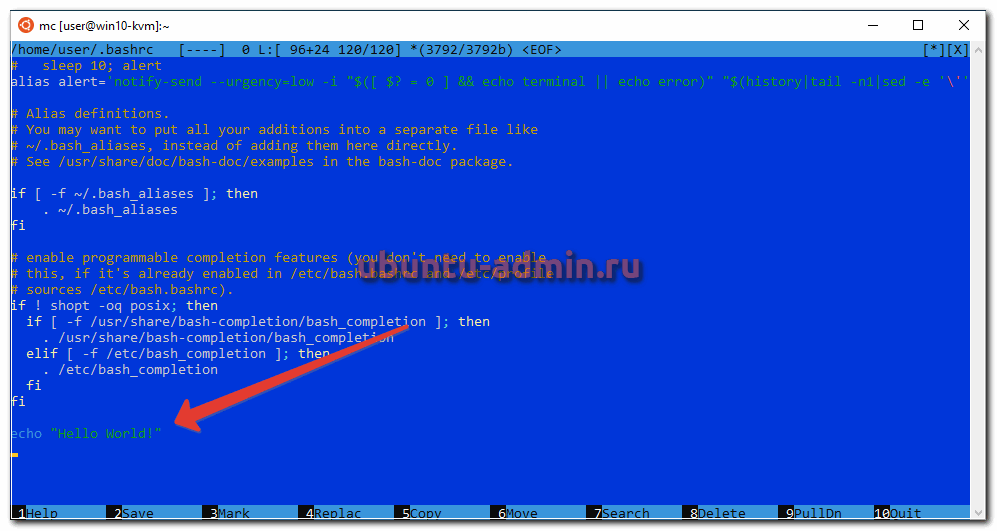
Теперь при запуске терминала wsl, вы увидите свое сообщение.
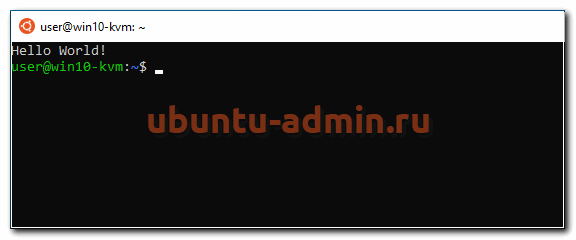
Вместо команды echo можете написать любую другую. Например, запуск MC:
/usr/bin/mc
Теперь при запуске терминала ubuntu wsl у вас автоматически будет запускаться файловый менеджер MC.
Обновление WSL до WSL2
Во время установки любой WSL системы у вас есть возможность выбора ее версии. Вторая версия более современная и быстрая, так что в общем случае рекомендуется использовать ее. Но возможно вам по какой-то причине понадобится первая. Например, в WSL 1 файловая система linux в открытом виде в виде файлов в директории C:Usersuser1AppDataLocallxss, а во второй версии в виде единого виртуального диска. Разница принципиальна.
Для того, чтобы обновить WSL1 до WSL2 необходимо через powershell активировать компонент VirtualMachinePlatform:
dism.exe /online /enable-feature /featurename:VirtualMachinePlatform /all /norestart
Далее скачать и установить обновленный пакет ярда Linux (msi установщик) — https://wslstorestorage.blob.core.windows.net/wslblob/wsl_update_x64.msi.
Указать версию WLS2 как дефолтную:
wsl --set-default-version 2
В завершении проапгрейдить установленный дистрибутив до WSL2 или поставить новый.
wsl --set-version <distribution name> <versionNumber>
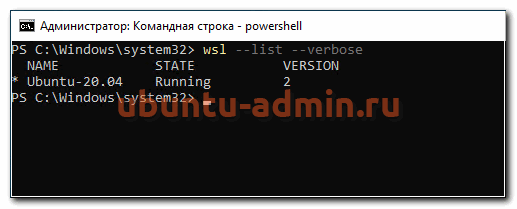
Версии WSL можно переключать в любое время. Узнать distribution name можно с помощью команды:
wsl --list --verbose
Reboot Ubuntu WSL
Работа в Windows 10 с Ubuntu несколько необычна, поэтому сходу не понятные даже такие простые вещи, как перезагрузка linux системы. Как сделать reboot в Ubuntu WSL? Для того, чтобы перезагрузить систему, достаточно выполнить в консоли powershell команду:
wsl.exe --shutdown
Все экземпляры wsl будут завершены. После запуска терминала ubuntu wsl она запустится заново, что будет равнозначно обычной перезагрузки системы.
Если вы используете первую версию WSL, то перезапуск linux систем выполняется перезапуском службы, которая их обслуживает. Выполняется так же в консоли windows^
net stop LxssManager
net start LxssManager
Как удалить Ubuntu WSL
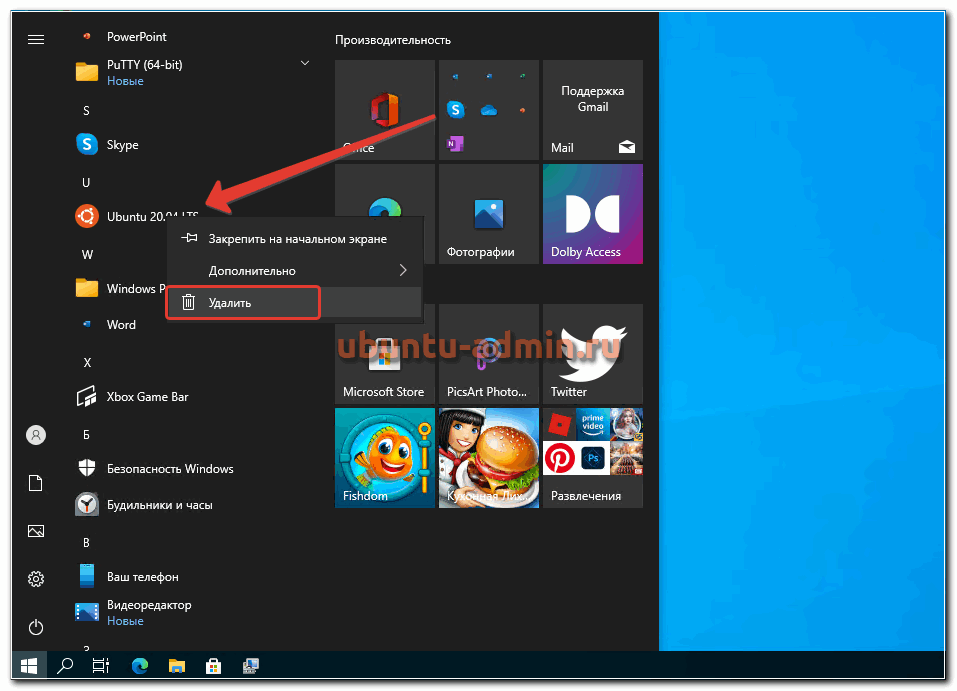
Если вам нужно удалить Ubuntu WSL из Windows 10, то сделать это можно точно так же, как любое другое приложение, установленное из Магазина. Выбираете Ubuntu WSL через пуск и нажимаете Удалить.
То же самое можно сделать и через консоль powershell
wsl --unregister <distribution name>
Список установленных систем смотрим командой:
wsl --list --verbose
Ничего сложного, система удаляется фактически в одну команду. Для повторной установки достаточно еще раз установить ubuntu через Магазин.
Table of Contents
Зачем нужен Windows Subsystem for Linux 2 (WSL2)? Самый частый ответ — простое использованое Linux программ в среде Windows. Docker самая распространенная причина для установки WSL2.
Что надо для WSL2
- убедиться что в BIOS включена виртуализация, ищите пункт меню:
- процессор Intel: VT-x, Intel Virtualization Technology, VTx
- процессор AMD: SVM Mode, AMD-V, Virtualization Technology
- версия Windows 11 или 10 не ниже версии 2004 (сборка 19041 ~декабрь 2019)
- права администратора
Всего несколько команд
Установим само ядро wsl и запустим дистрибутив Ubuntu для работы в консоли.
Открывайте PowerShell с правами Администратора. Самый простой вариант по мне -> WIN+X и выбрать Терминал Windows (Администратор).
Выполняйте команду:
По-умолчанию, установится WSL2 с GUI и Ubuntu . Установка займет определенное время, подождите.
Если ошибка 0x80072eff
В процессе, можете увидеть ошибку Во время установки произошла ошибка, но установка может быть продолжена. Компонент: 'Ядро WSL' код ошибки: 0x80072eff.
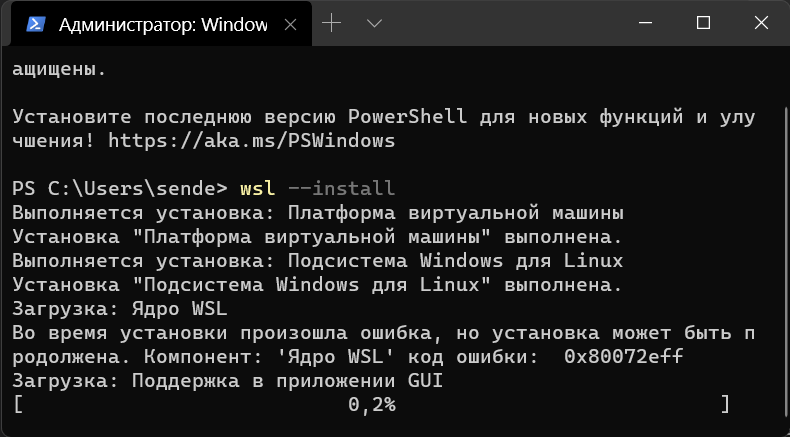
А значит, все автоматически не сработало, не беда. Перезагружайтесь и снова запустите PowerShell от Администратора.
- Запустите обновление wsl
- Завершите работу wsl
- Запустите заново wsl
- Запустите установку Ubuntu (если надо более специфический дистр, посмотрите все варианты
wsl -l -o)
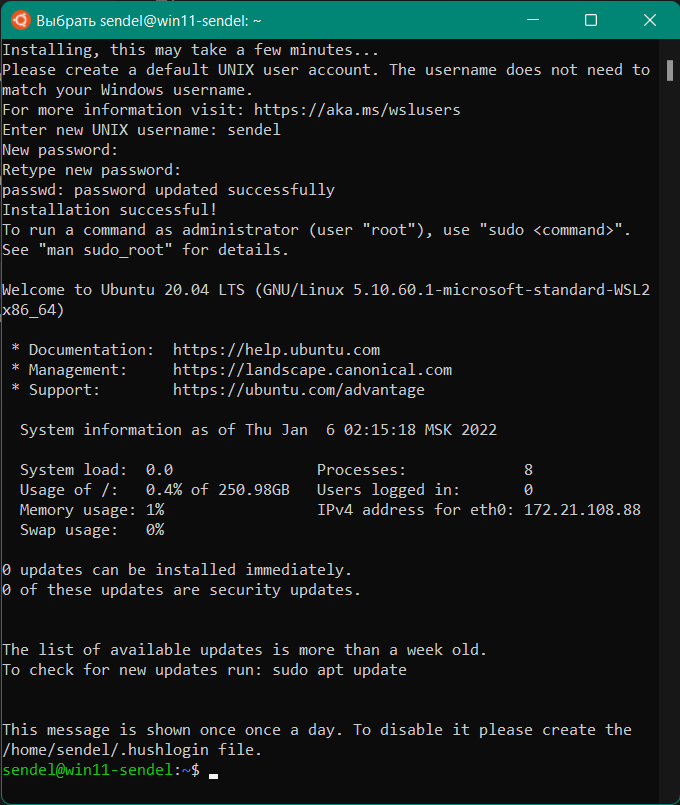
Успешная установка Ubuntu
После установки, введите имя пользователя и пароль для Ubuntu, и вам будет доступна среда Linux.
Рекомендуется сделать одну команду, обновить список пакетов:
и наслаждаться 
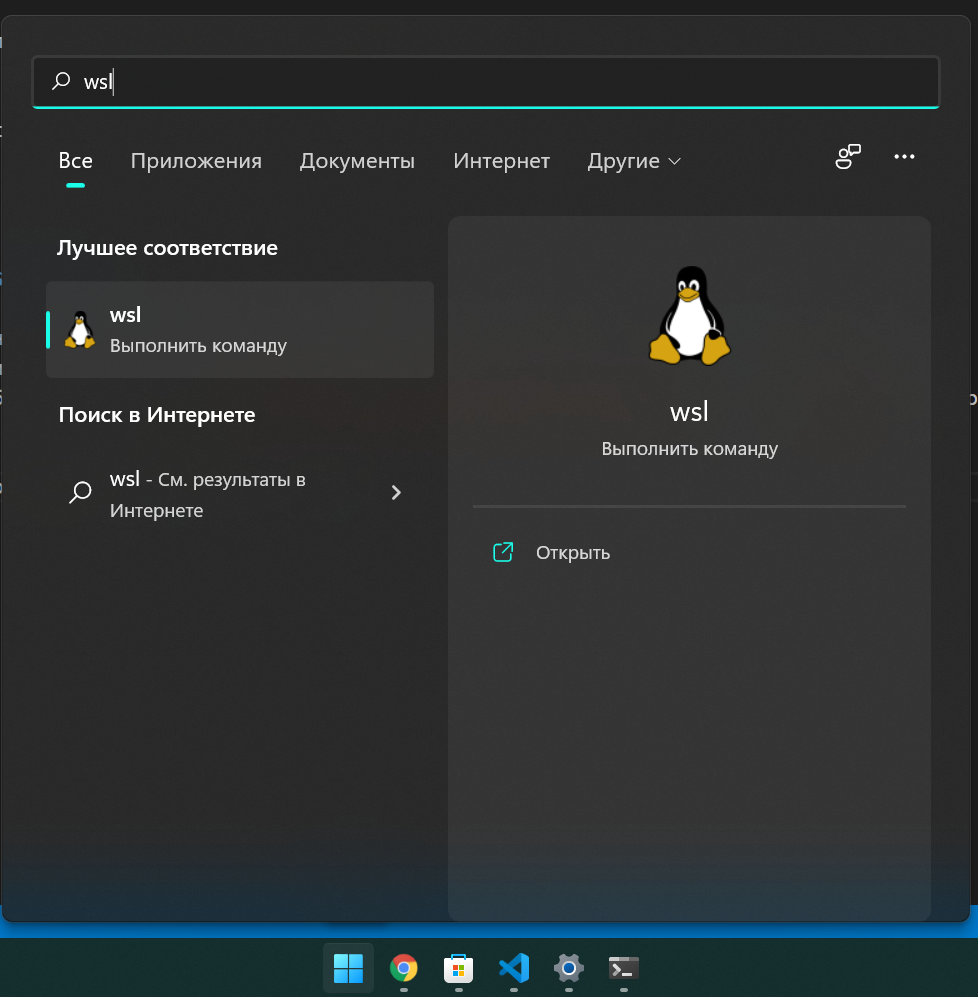
Как зайти в WSL консоль
- запускайте команду
wsl. (например, в настройках среды разработки указать wsl это для терминала по-умолчанию) - можете вынести из Пуска, ярлык Ubuntu на панель задач.
- или поставить обновленный Microsoft Terminal, и в нем настроить при запуске сразу открывать консоль wsl, рекомендую.

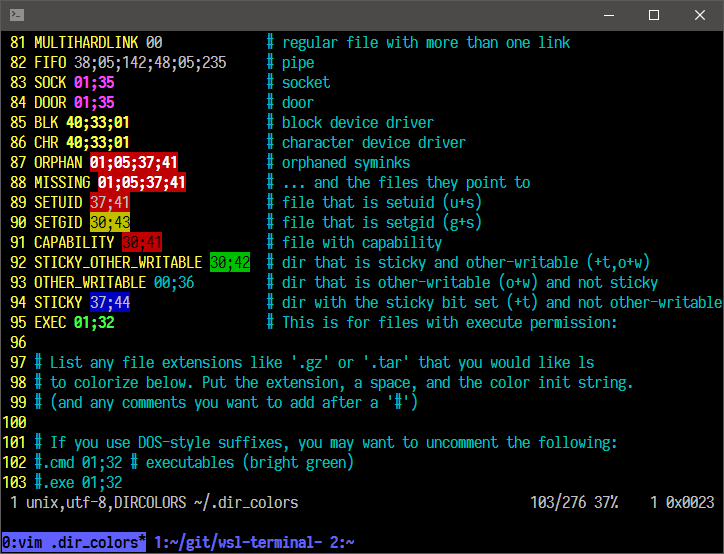
wsl-terminal
A terminal emulator for Windows Subsystem for Linux (WSL), based on mintty, fatty and wslbridge2.
All emojis designed by OpenMoji – the open-source emoji and icon project. License: CC BY-SA 4.0
中文页面(The Chinese README is no longer maintained)
Screenshot
More screenshots here.
Usage
-
Make sure you have 7z installed. On Ubuntu run:
sudo apt install p7zip-full, on Archlinux: runpacman -S p7zip -
Change the directory to the folder where you want to install wsl-terminal to.
Make sure to install wsl-terminal in a the windows filesystem and not in the wsl filesistem. The installation folder needs to be on a local NTFS volume.
- Option 1: If you’re in cmd.exe run:
wsl bash -c "$(wget https://raw.githubusercontent.com/mskyaxl/wsl-terminal/master/scripts/install.sh -qO -)"
- Option 2: If you’re in wsl already run
bash -c "$(wget https://raw.githubusercontent.com/mskyaxl/wsl-terminal/master/scripts/install.sh -qO -)"
If you want to install the tabbed version you have to add a -t as parameter as shown bellow
bash -c "$(wget https://raw.githubusercontent.com/mskyaxl/wsl-terminal/master/scripts/install.sh -qO -)" '' -t
-
Run
open-wsl.exeto open a WSL terminal in current directory. -
Run
tools/1-add-open-wsl-terminal-here-menu.js(help) to add aOpen wsl-terminal Herecontext menu toexplorer.exe(Runtools/1-remove-open-wsl-terminal-here-menu.jsto remove it). If you are using Total Commander, Use wsl-terminal with Total Commander may help you. -
run-wsl-file.execan run any.sh(or any others like.py.pl) script files in wsl-terminal, supportOpen Withcontext menu inexplorer.exe. -
vim.execan open any files with vim (in wsl-terminal), supportOpen Withcontext menu inexplorer.exe.vim.execan be renamed toemacs.exenvim.exenano.exe...to open files inemacsnvimnano....
Keyboard shortcuts
| key | function |
|---|---|
Alt + Enter |
Fullscreen |
Alt + F2 |
New window |
Alt + F3 |
Search text |
Ctrl + [Shift] + Tab |
Switch window |
Ctrl + = + - 0 |
Zoom |
Ctrl + Click |
Open URL or dir/file under the cursor |
Ctrl + Right Click |
Open context menu |
Bind wsl-terminal to a hotkey.
Params
open-wsl
Usage: open-wsl [OPTION]...
  -a: activate an existing wsl-terminal window.
      if use_tmux=1, attach the running tmux session.
  -l: start a login shell and cd to $HOME (doesn't work with use_tmux=1).
  -c command: run command (e.g. -c "echo a b; echo c; cat").
  -e commands: run commands (e.g. -e echo a b; echo c; cat).
  -C dir: change directory to a WSL dir (e.g. /home/username).
  -W dir: change directory to a Windows dir (e.g. c:Usersusername).
  -d distro: switch distros.
  -b "options": pass additional options to wslbridge.
  -B "options": pass additional options to mintty.
  -h: show help.
For -B and -b, see also mintty params and wslbridge2 params.
cmdtool (run it in WSL)
Usage: cmdtool [OPTION]...
  wcmd: run Windows programs with cmd.exe /c.
  wstart: run Windows programs with cmd.exe /c start.
  wstartex file|url: like wstart, but use WSL file path.
  update: check the latest wsl-terminal version, and upgrade it.
  killall: kill all WSL processes.
  install dash: install Cygwin dash (for debugging).
  install busybox: install Cygwin busybox (for debugging).
Tools
Files in tools directory:
| filename | function |
|---|---|
| 1-add-open-wsl-terminal-here-menu.js | Add Open wsl-terminal Here context menu to explorer.exe. |
| 1-remove-open-wsl-terminal-here-menu.js | Remove Open wsl-terminal Here context menu. |
| 2-add-wsl-terminal-dir-to-path.js | Add wsl-terminal directory to Path environment variable. |
| 2-remove-wsl-terminal-dir-from-path.js | Remove wsl-terminal directory from Path environment variable. |
| 3-write-distro-to-config-file.js | Write distro guids to etc/wsl-terminal.conf. |
| 4-create-start-menu-shortcut.js | Create a start menu shortcut to open-wsl -C ~. |
| 4-create-start-menu-shortcut-login-shell.js | Create a start menu shortcut to open-wsl -l. |
| 4-remove-all-start-menu-shortcuts.js | Remove all wsl-terminal start menu shortcuts. |
| 5-add-open-with-vim-menu.js | Add Open with vim in wsl-terminal context menu. |
| 5-remove-open-with-vim-menu.js | Remove Open with vim in wsl-terminal context menu. |
| 6-set-default-shell.bat | Set shell in etc/wsl-terminal.conf to the default shell in WSL. |
Double click any .js file to run it. If it was open by any editor, open it with Microsoft (R) Windows Based Script Host, or open a cmd.exe in tools directory and run wscript xxx.js.
Configuration files
etc/wsl-terminal.conf is wsl-terminal config file.
[config]
title="my title"
shell=/bin/bash
use_tmux=0
;icon=
;distro=
etc/themes/* are theme files, use themes.
etc/minttyrc is mintty config file, mintty tips.
Upgrade
Open open-wsl.exe in wsl-terminal directory, run ./cmdtool update to check the latest wsl-terminal version and upgrade it. If the download speed is too slow, you can download wsl-terminal-v{version}.7z from releases with other tools, and put it into wsl-terminal directory, then run ./cmdtool update.
wget and 7z commands are needed (Ubuntu: apt install wget p7zip-full, Archlinux: pacman -S wget p7zip) .
Config files won’t be overridden, etc/wsl-terminal.conf and etc/minttyrc will be placed to etc/wsl-terminal.conf.pacnew and etc/minttyrc.pacnew. Some .bak files will be left in bin, because they are running, those files will be removed after the next upgrading.
Use tmux
- Install tmux in WSL.
- Set
use_tmux=1inetc/wsl-terminal.conf. And setattach_tmux_locally=1if the version number is less than0.8.1. - Add these lines to
~/.bashrc(shell=/bin/bashin config) or~/.zshrc(shell=/bin/zshin config):
[[ -z "$TMUX" && -n "$USE_TMUX" ]] && {
    [[ -n "$ATTACH_ONLY" ]] && {
        tmux a 2>/dev/null || {
            cd && exec tmux
        }
        exit
    }

    tmux new-window -c "$PWD" 2>/dev/null && exec tmux a
    exec tmux
}
If you’re using fish then update your ‘~/.config/fish/config.fish’ (shell=/bin/fish in config) with
if [ -z "$TMUX" ]; and [ -n "$USE_TMUX" ]
    if [ -n "$ATTACH_ONLY" ]
        if not tmux a 2>/dev/null
            cd; and exec tmux
        end
        exit
    end

    tmux new-window -c "$PWD" 2>/dev/null; and exec tmux a
    exec tmux
end
Then open-wsl will use tmux.
Switch distros
Use open-wsl -d distro to switch distros:
# list all distros
> wslconfig /l
Legacy (Default)
Ubuntu

# use Ubuntu (will run wslconfig /s Ubuntu before mintty)
> open-wsl -d Ubuntu

# Ubuntu is the default distro now
> wslconfig /l
Ubuntu (Default)
kali-linux
Or set distro in wsl-terminal.conf (Won’t change the default distro).
Run tools/3-write-distro-to-config-file.js (help), then a msgbox will show the result:
result has been written to ..etcwsl-terminal.conf:

;distro=kali-linux

;distro=Ubuntu

remove the ; before distro to use the distro.
If you want to pass the distro_guid to open-wsl in cmdline:
# pass the distro guid to wslbridge
> open-wsl -b "-d Ubuntu"
Links
FAQ
Issues
Releases
Wiki
Build
Prerequisites
- Install WSL and make sure
wgettarxzgzipp7zipare available (Ubuntu: runapt install wget tar xz-utils gzip p7zip-full, Archlinux: runpacman -S wget tar xz gzip p7zip) are installed in WSL. - for the tabbed version: cygwin x64 with the following packages installed
gcc-g++,make,w32api-headers(for compiling fatty)
Build steps
-
clone the repo in WSL(to maintain the linux EOL characters) but on windows drive eg (
/mnt/c/Users/<userName>/work/wsl-terminal) -
use build.sh to build with the appropiate parameters.
➜  wsl-terminal git:(master) scripts/build.sh -h
Usage:
    build.sh -h                 Display this help message.
    build.sh -a                 Builds wsl-terminal and wsl-terminal-tabbed.
    build.sh -t                 Builds only wsl-terminal-tabbed(cygwin is required).
    build.sh                    Builds only wsl-terminal.
Roadmap
- Bug fixing
- add x11 support
License
MIT