You can use the drag-and-drop feature to move files and directories, email attachments, plain text, formatted text, and images between the host system and virtual machines.
You can drag files or directories between the following locations.
- File managers, such as Windows Explorer, on the host system and virtual machines.
- A file manager to an application that supports drag-and-drop.
- Applications, such as zip file managers, which support drag-and-drop extraction of individual files.
- Different virtual machines.
When you drag a file or folder between the host and a virtual machine, Workstation Pro copies the file or folder to the location where you drop it. For example, if you drop a file on the desktop icon of a word processor, the word processor opens a copy of the original file. The original file does not include changes that you make to the copy.
Initially, the application opens a copy of the file that is stored in the temp directory. On Windows, the temp directory is specified in the %TEMP% environment variable. On Linux and Solaris, the temp directory is /tmp/VMwareDnD. Save the file in a different directory to protect changes that you make.
I’ve setup a CentOS 7 VM on my Windows 7 laptop. In the VM settings I have both boxes checked for «Enable drag and drop» and «Enable copy and paste» and yet I’m still not able to move over even a small test file or copy from the host into the VM.
Is there anything else I need to do?
![]()
Hennes
64.3k7 gold badges110 silver badges165 bronze badges
asked Mar 13, 2015 at 15:31
![]()
My VMware host is a Windows 7 machine, and I’m running Workstation 10.
This has worked for me on several VMs where I had the same problem, including my Windows 10 VM:
- Completely shut down the VM on which you want to change the settings, close all other VMs that you have open, and exit out of VMware.
- Start VMware by clicking ‘Run as Administrator’.
- Before starting the VM, disable both ‘Enable drag and drop’ and ‘Enable copy and paste’ in the VM’s ‘Guest Isolation’ setting on the Options tab.
- Exit from the settings GUI.
- Do step 3 again but enable them instead.
- Start the VM. This should allow the copy and paste to work.
Sometimes I’ve had to follow these steps a few times before it would work, but this ultimately solved the problem each time I tried it.
answered Nov 12, 2015 at 0:40
![]()
SuzanneSuzanne
861 silver badge2 bronze badges
2
I noticed there is an incompatibility with Wayland when Copy-Paste files into VM desktop when using GDM.
To fix that (remove Wayland) edit your custom configuration file
/etc/gdm3/custom.conf
or
/etc/gdm/custom.conf
replace comment char ‘#’ from the line:
#WaylandEnable=false
to:
WaylandEnable=false
save file and reboot!
answered Dec 26, 2020 at 22:21
![]()
I’d be surprised if drag and drop worked across OS types. It did work for me when both host and guest were Windows. And even in Windows it was somewhat finicky — for example, I could copy files from Explorer in the host to Explorer in the guest, but not from Explorer in the host to Outlook in the guest.
For getting your files into/out of Linux, you might have to resort to old-fashioned ways of FTP, SCP etc. On the positive side, these days there are decent GUI clients for those protocols.
answered Mar 19, 2015 at 20:14
![]()
user55502user55502
1931 gold badge1 silver badge2 bronze badges

Nowadays lot of administrators have running their own lab environment within their laptop and desktop. VMware Workstation makes this feasible with cheap cost without need of dedicated system or OS to run the lab environment. We all are busy in testing lot of features in our VMware workstation lab environment. We may need to transfer lot of files or just need to copy and paste the quick commands from your laptop to your workstation virtual machine but when it is not possible we may need to manually type or use some other operating system file transfer method to bring the file inside the VMware Workstation virtual Machine.
How do you feel, if your files or your command can be placed with simple drag and drop or just a copy paste between your laptop windows OS and your VMware Workstation windows virtual Machine? Life is Easy rite?. This posts explains you to enable copy/paste, Drag and Drop between your Laptop or desktop OS and your Workstation Virtual Machine Windows Guest OS. You can Drag and drop any individual files or folders.When you drag a file or folder from the Laptop or desktop to VMware Workstation virtual machine or vice versa , Workstation copies the file or folder to the location where you drop the file or folder.
Enable Copy/Paste & Drag and Drop for VMware Workstation Virtual Machine
1. Open your VMware Workstation
2. Select your Virtual Machine
3. Click Edit Virtual Machine settings
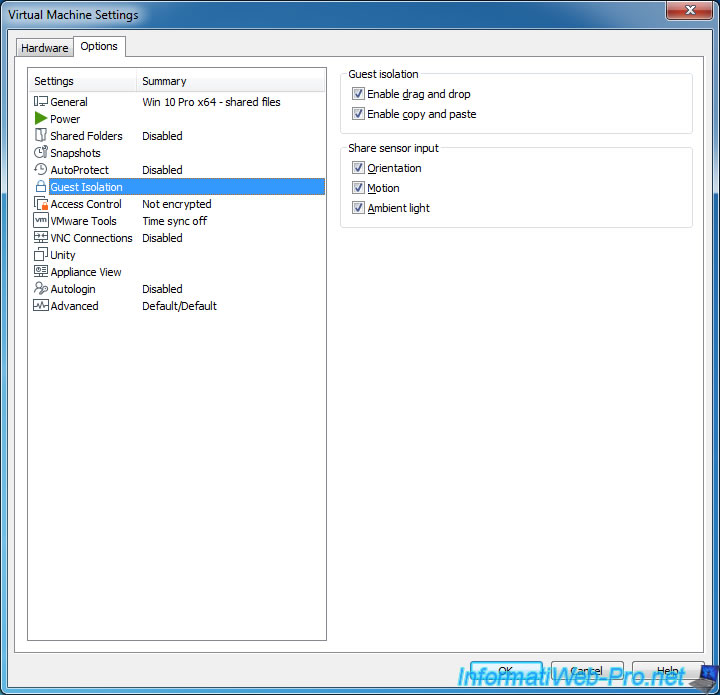
4.Click Option Tab and Select Guest Isolation
5. Select “Enable drag and drop” and “Enable Copy and Paste” check mark

6.Click Ok to apply the settings.
Now, you will be able to Copy/Paste, drag and drop the files between your host and virtual machine.
Thanks for Reading !!!!!
With VMware Workstation VMware Tools available for many types of operating systems, you can easily transfer folders and files from your physical computer to a virtual machine and vice versa.
For this, you can use :
- drag and drop
- VMware Workstation folder shares
Note that in both cases, you will need the VMware Tools in the guest OS and activate the corresponding option in the settings of your virtual machine.
- Windows file transfer
- Drag and drop and copy/paste
- VMware file sharing on Windows
- File transfer on Linux (Debian / Ubuntu)
- Drag and drop and copy/paste
- VMware file sharing on Linux
1. Windows file transfer
1.1. Drag and drop and copy/paste
To begin, you can easily transfer files from the physical PC to the virtual machine with a simple drag and drop.
But, you can also use copy/paste in both directions (physical machine to virtual machine and vice versa).
However, to do this, make sure that these features are enabled in the settings of your virtual machine.
By default, these options are enabled and are available in the «Guest isolation» section :
- Enable drag and drop
- Enable copy and paste
Note : if these options are disabled and dimmed, shut down the virtual machine to enable them.
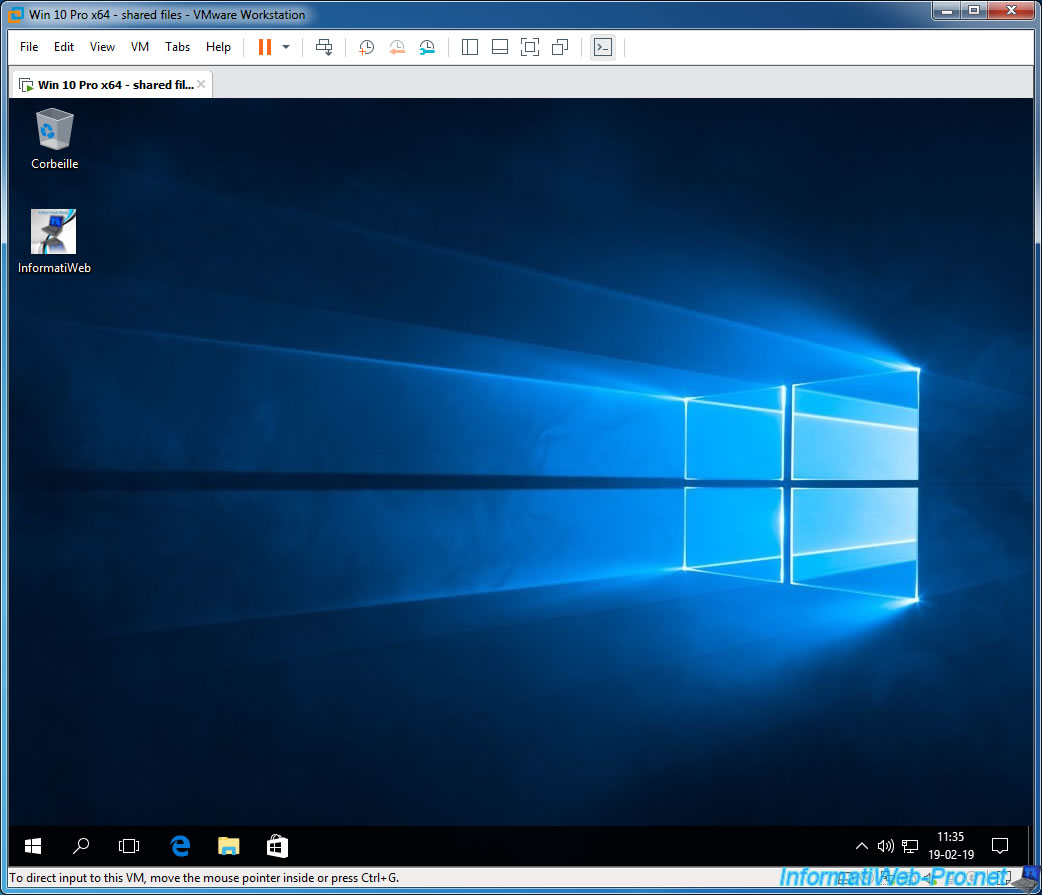
To transfer a file from the physical computer to the virtual machine, simply drag it to the virtual machine window (where the guest OS is displayed).
You can also right-click «Copy» on the physical computer and right-click «Paste» in the guest OS.
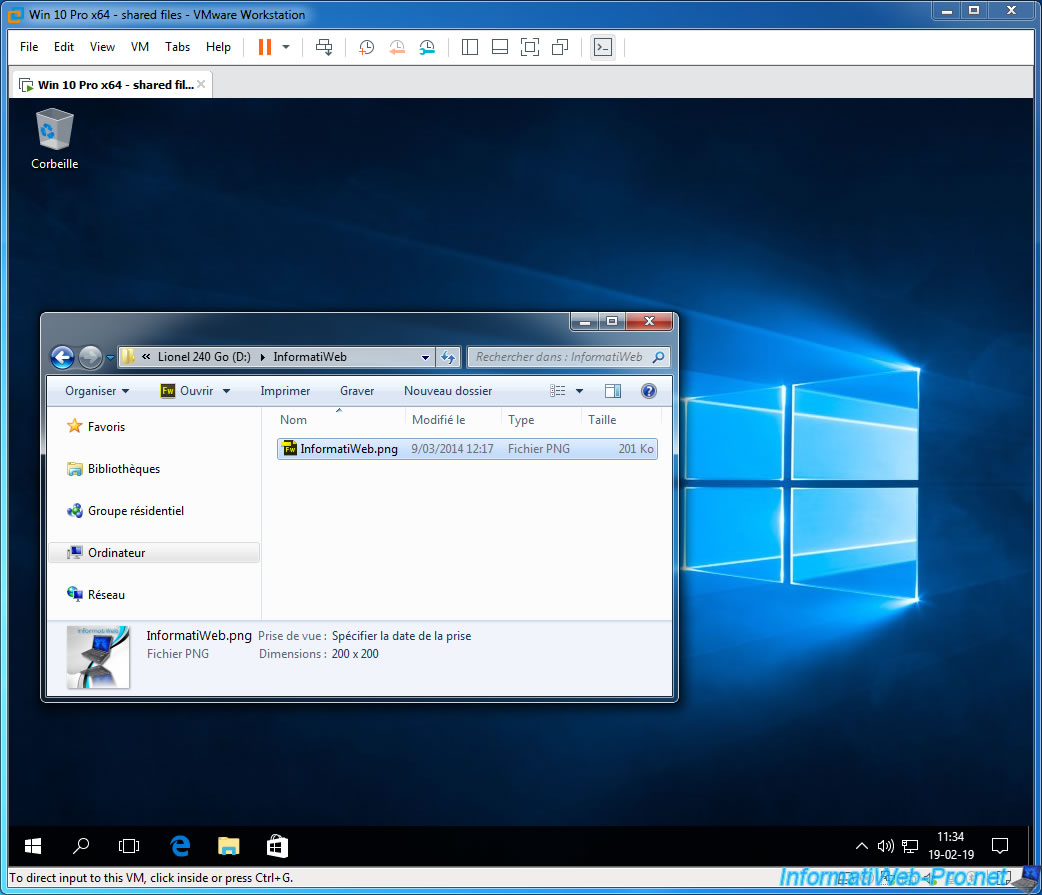
A VMware transfer window will be displayed and another will be displayed by the guest OS.
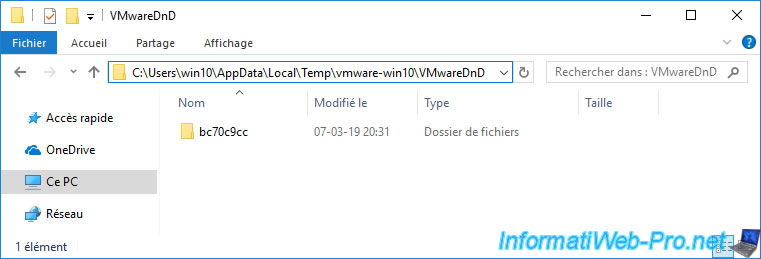
As you can see, the files or folders dragged/dropped will be copied by the guest OS from a folder with a weird name.
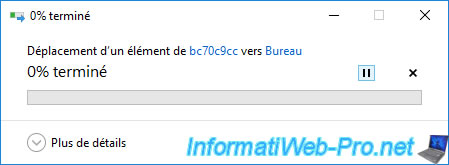
In fact, when you use drag and drop, the VMware tools temporarily copy the data into a subfolder «vmware-xxxxVMwareDnD» of the temporary folder of the guest OS.
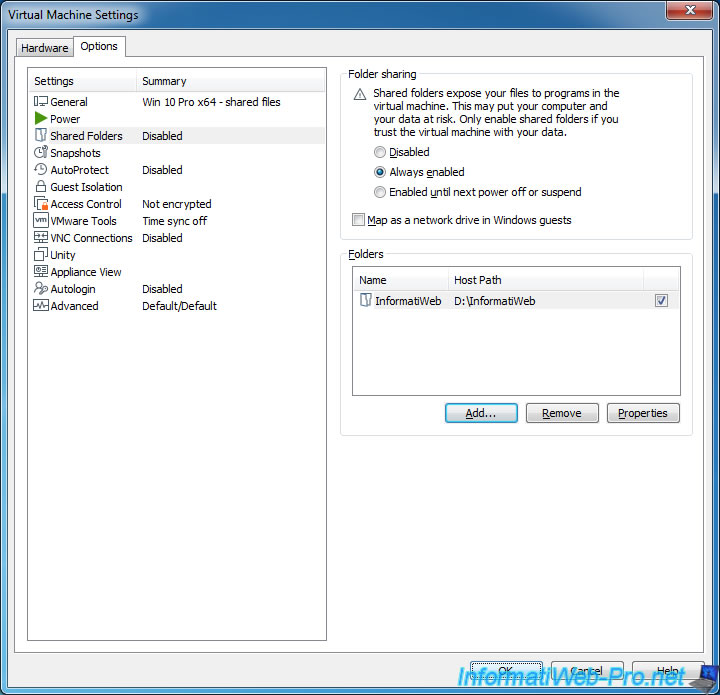
1.2. VMware file sharing on Windows
To share folders on your physical PC to make them read-only (for security) or read/write (if needed) by the virtual machine.
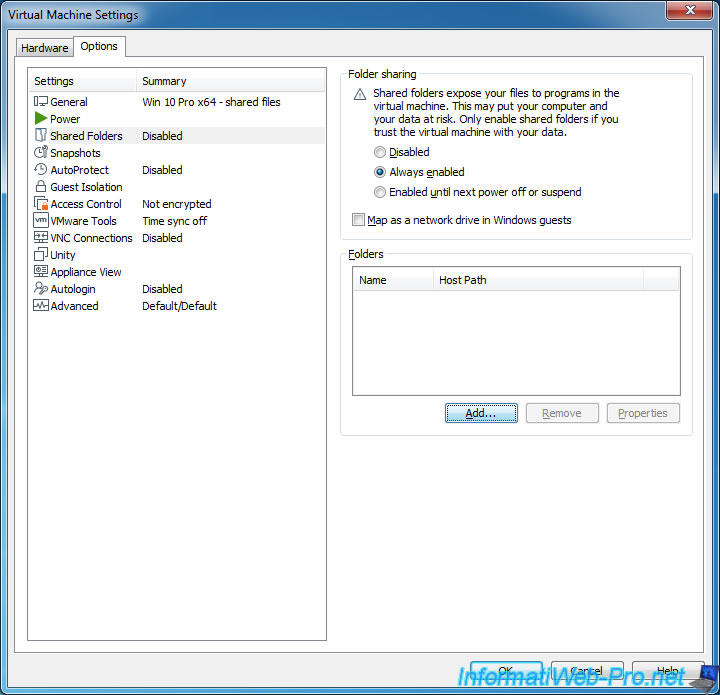
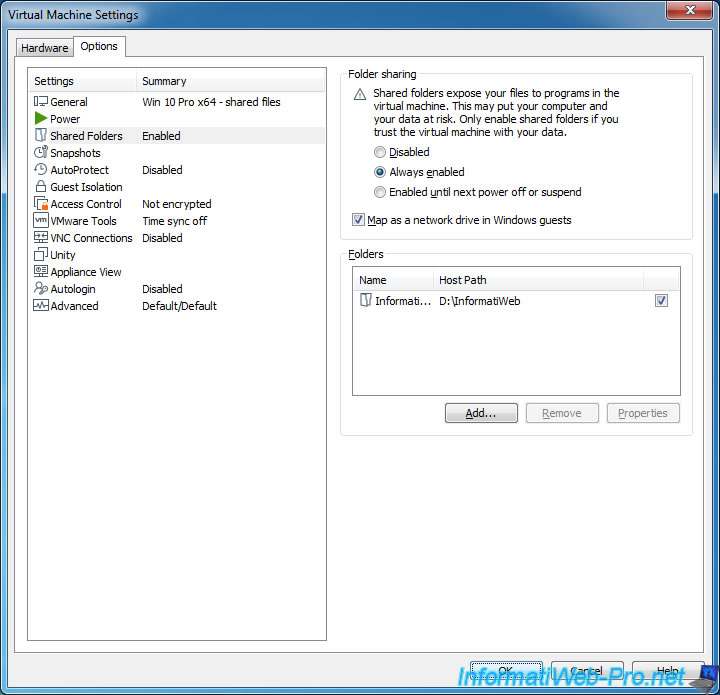
To do this, open the settings of the virtual machine and go to the «Shared Folders» section and select the desired option :
- Disabled : VMware file sharing disabled (default value)
- Always enabled : always enabled (for this virtual machine)
- Enabled until next power off or suspend : activated until the virtual machine is power off or paused
- Map as a network drive in Windows guests : Automatically create a network drive where you will find all the shares created here. Which makes it easier to access these shares.
Click Add to create a new share.
The Add Shared Folder Wizard appears.
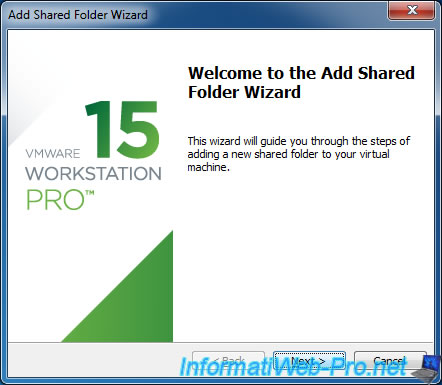
Click Browse to select the folder you want to share and make available to the virtual machine.
Then, enter the name under which this share will appear in the guest OS.

Enable sharing by checking the «Enable this share» box and check the «Read-only» box if you want this share to be read only.
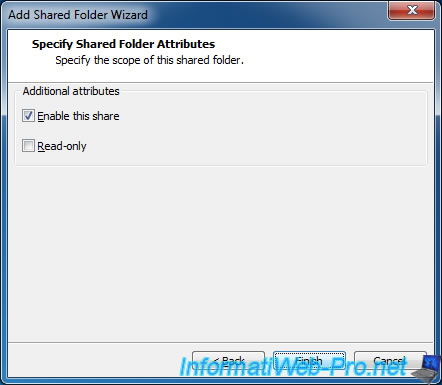
Save the settings and click Yes.
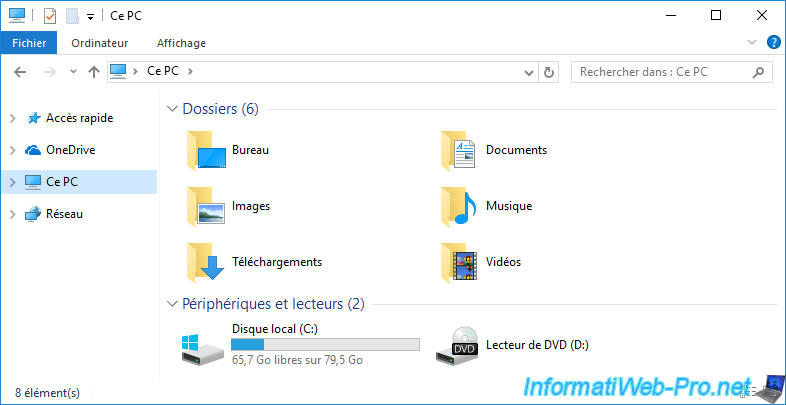
If you don’t check the «Map as a network drive …» box, the share will not appear in Computer (or This PC) by default.
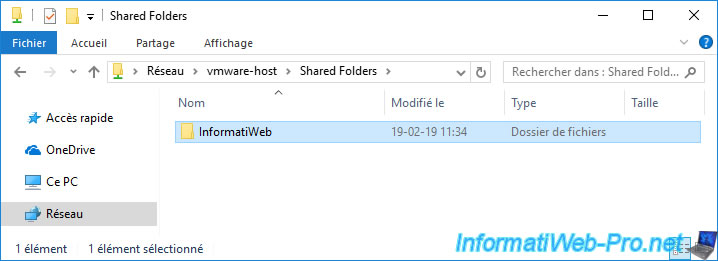
In order to access it, you will have to go through the network option (but you will probably encounter a network discovery disabled by default error).
To access them without problem, type : \vmware-hostShared Folders
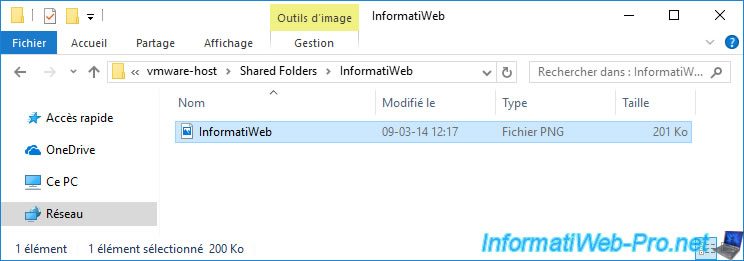
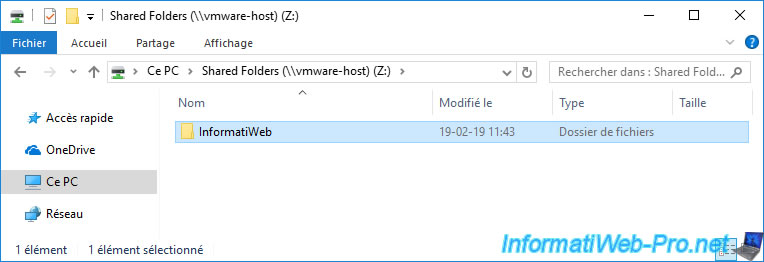
As you can see, our InformatiWeb share appears.
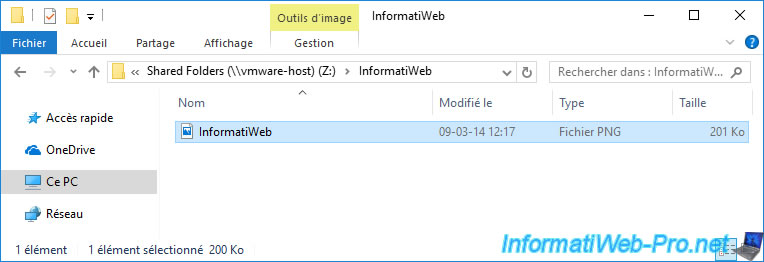
In this folder, we find the files of this shared folder.
To make your life easier, we recommend that you check the «Map as a network drive in Windows guests» box to have VMware Workstation automatically create a network drive whose contents will match the list of shared folders here.
In Computer (or This PC), you will see a «Shared Folders» network drive that is accessible with the letter Z and is mapped to \vmware-hostShared Folders.
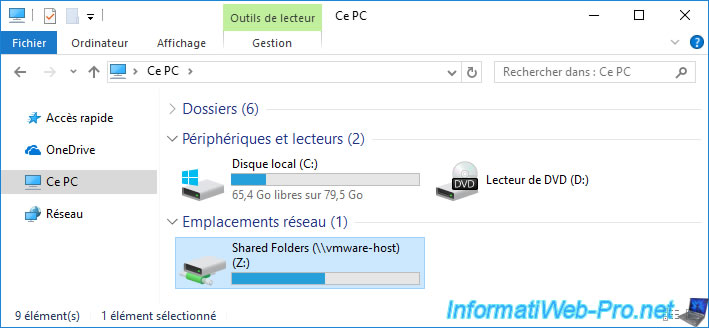
As expected, you will have access to the list of shares created in the virtual machine settings.
It was working to me , that i could drag a file / folder from Ubuntu virtual machine and drop it on windows 7 desktop , but for no know reason it stopped working .
How to fix this issue ?
asked Feb 25, 2014 at 18:50
![]()
nuxnux
36.6k34 gold badges116 silver badges131 bronze badges
1
I found a solution :
Reinstall Vmware-Tools and , that will uninstall the old installation .
Then restart your machine .
answered Feb 26, 2014 at 22:00
![]()
nuxnux
36.6k34 gold badges116 silver badges131 bronze badges
0
If you do not have time to restart your guest or reinstall vmware-tools, you can try to start again the vmware-user-loader like example:
sudo /usr/lib/vmware-tools/bin32/vmware-user-loader &
answered Jul 28, 2014 at 9:16
![]()
1
I restarted the virtual machine and it (drag & drop) worked!
answered Aug 24, 2016 at 9:15
![]()
Drag files out the bottom (and/or maybe right side?) of the Ubuntu window. In 18.04, the top and left side have menu bar and dock which seem to interfere with dragging out.
![]()
Kulfy
17.1k26 gold badges62 silver badges102 bronze badges
answered Apr 29, 2019 at 21:56
![]()
VMWARE and virtual machines in general should be a very important part of your tool kit. Virtual environments allow you to better familiarize yourself with different operating systems or test without affecting your real environment or equipment. Applications such as GNS3, Packet Tracer are great network simulators and VMWARE and VBOX are examples of computer operating system emulators.
I thought I would share what I figured out when working with VMWARE workstation and Microsoft Windows guest operating system.
After installing Windows 7, I realized that I could not drag and drop files into that virtual environment. This is a major issue since dragging and dropping files to a guest operating system is the most efficient way to work.
>> Read Now: How to Overcome Packet Capture Challenges in the Cloud [Free Whitepaper]
What’s the Problem?
The way to typically fix this is to install VMWARE tools but then I noticed that I could not install the VMWARE tools and the option was greyed out.
Never had this happen before so I was confused and getting frustrated.
I searched online and most suggestions were to reinstall VMWARE, which didn’t work for me. To sum it up, I couldn’t find a solution for my specific problem. I did run across a vague article suggesting I ensure that my floppy and CD virtual machine settings were correct, which they were. Out of curiosity, I started playing around with the different floppy options and found that changing it to «Use Physical Drive» and «Autoconnect» fixed my problem.
Here’s the Fix:
Check out this solution in this quick fix video, I hope it helps you out:
Looking to add visibility to your cloud deployment, but not sure where to start? Join us for a brief network Design-IT consultation or demo. No obligation — it’s what we love to do!

- Remove From My Forums
-
Вопрос
-
I have Vmware client verion installed on my Windows 7 OS.I am unable to copy and paste or drag and drop from host (Windows 7) to virtual machine.But vice versa is possible.I have drag and drop feature selected on virtual machine,but still I am unable to
drag and drop.I was able to use the above mentioned features in Win XP and Vista.Possibly something is bloking in Windows7,dont know what.Please help.
I have one more question.How can I change my Windows 7 interface to look like Windows XP?
Best Regards, Parveen Chauhan Email-parveenc@hcl.in Mobile: +91-9811629793
Ответы
-
Hi Parveen,
It is recommended contact
VMware Support to confirm if there is any known issue.Also, here are some articles and threads about drag and drop in WMware:
Drag & Drop, Copy & Paste—Best of the Docs
Drag and Drop
Using Drag and Drop
Please Note: The third-party product discussed here is manufactured by a company that is independent of Microsoft. We make no warranty, implied or otherwise,
regarding this product’s performance or reliability.
Please remember to click “Mark as Answer” on the post that helps you, and to click “Unmark as Answer” if a marked post does not actually answer your question. This can be beneficial to other community members reading the thread. ”
-
Помечено в качестве ответа
8 августа 2010 г. 4:46
-
Помечено в качестве ответа
Virtual machines allow you to run a different operating system in an isolated environment. Because virtual machines, by nature, are isolated, you cannot directly access files on your host PC.
Copying text or files from the host PC to the guest, or vice-versa, is often a major sticking point for virtual machine users. Although it may seem complicated, the actual process to move files from VM to host and back again is straightforward.
Let’s look at the different methods for transferring files between your virtual machine guest operating system and host PC using VirtualBox or VMware.
How To Transfer Files From Virtual Machine To Host
A virtual machine is a software environment that emulates the hardware required to install an operating system (OS). In very general terms, this lets you install an operating system on an existing OS, much like you would an app.
The options for sharing data between a host PC and guest operating system running in a virtual machine are what you might expect:
- Drag and drop (also known as copy and paste)
- USB drive
- Shared Folder
Each of these methods is ideally suited for a specific type of data and expected use. For example, copy and paste is best for sharing text and small files, such as copying code from a browser on your host PC into a terminal session in the guest OS.
Below, we’ll look at sharing data using these three methods on virtual machines running on Oracle VirtualBox and VMware Workstation Player.
The simplest option to transfer files between your host PC and a virtual machine is to set up a shared clipboard and/or drag and drop. This will allow you to use a common clipboard, meaning you will be free to copy/paste text/images and files between the virtual machine and your host PC.
Shared Clipboard in VirtualBox
If you’re using Oracle VirtualBox, then you can set up a Shared Clipboard and Drag’n’Drop in just a few quick steps:
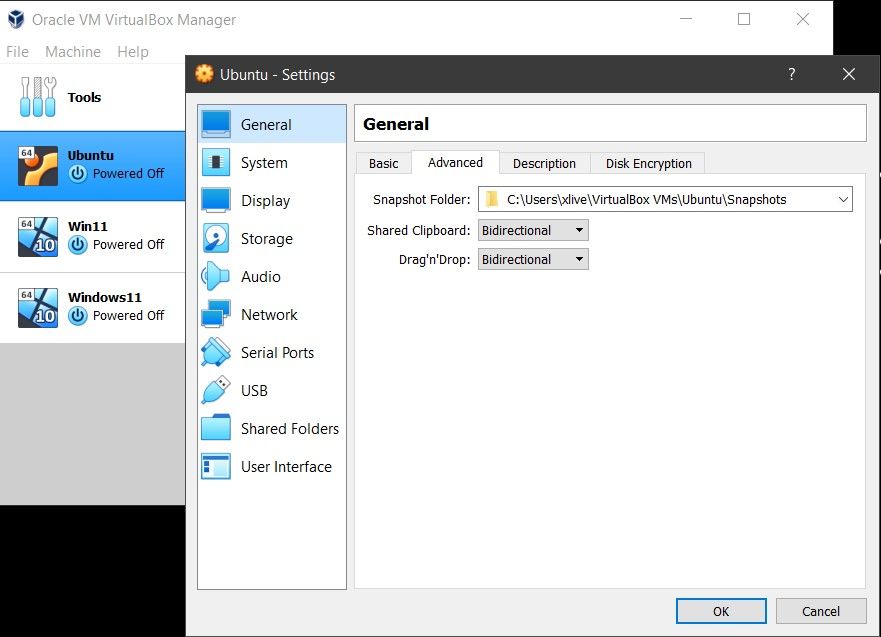
- Select your virtual machine, right-click and select Settings.
- In the window that pops up, click on General and then click on the Advanced tab.
- You should now see the Shared Clipboard and Drag’n’Drop dropdown options.
You can choose from Host to Guest, Guest to Host, and Bidirectional. There’s also the default option, Disabled, which prevents your attempts to copy files to VirtualBox.
Select Bidirectional in both drop-down boxes to enable two-way file sharing.
How to Copy and Paste Data in VMware
Similar to the VirtualBox functionality, you can also set up a shared clipboard or enable drag and drop in VMware. But you might need first to install the VMware Tools package, which brings additional features.
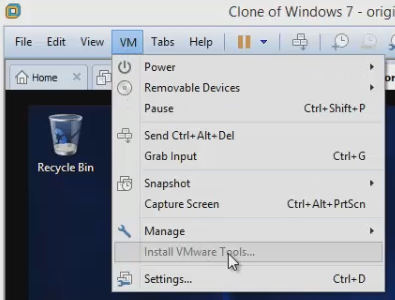
- With VMware running, navigate to VM > Install VMware Tools. If you haven’t already downloaded VMware Tools, instructions for doing so will be given.
- Enable copy and paste in VM > Settings > Options.
- Select Guest Isolation
- Here, Enable copy and paste and Enable drag and drop.
- Confirm with OK.
Sharing data between the guest and host operating systems in this way is best suited for smaller files. You might also share text strings, URLs, that sort of thing. Steer clear of large files, though—you have other options for those.
2. Copy Files from VM to the Local Machine On a USB Stick
Using a USB stick to transfer data between two physical machines is a time-honored tradition. Although not ideal, a USB stick can transfer files between the host PC and virtual machine. Let’s look at how you can use a USB drive to share data between a virtual machine and your host PC.
Transfer Files From Host To VirtualBox Using A USB stick
To be able to access USB devices from within VirtualBox, you’ll need to enable USB access. For this, you need to download the VirtualBox Extension Pack
Once you have downloaded the extension pack:
- Insert the USB device you wish to use.
- Launch VirtualBox and click File > Preferences, then Extensions and click +.
- Browse to the downloaded Extension Pack, click Open, then when prompted, Install.
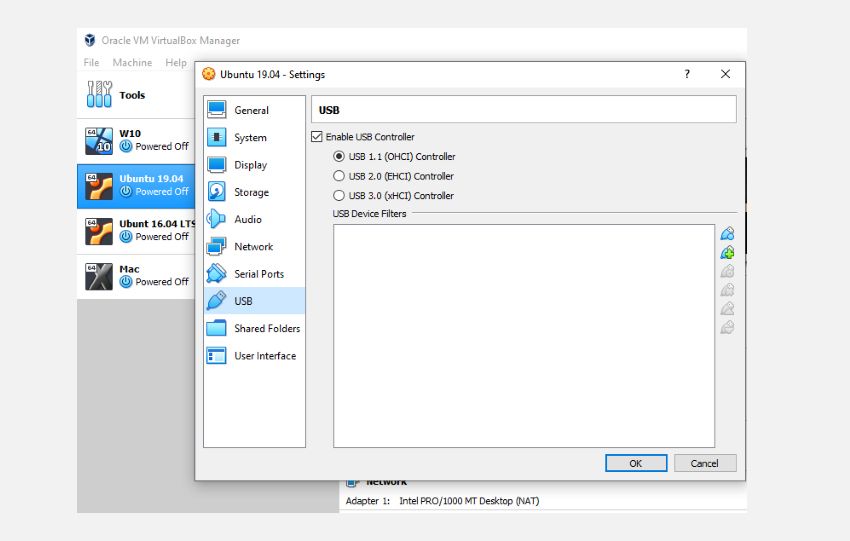
- Follow the prompts to complete the process. You can then check to confirm USB is enabled in Settings > USB.
- Right-click the VM you plan to use and select Settings > USB.
- Click + then browse for the USB device, which will be available when you launch the VM. Additional drives can be added in the same way.
You can then use the USB device for file transfer in VirtualBox.
How To Transfer Files To VMware With A USB Stick
With VMware, when a USB device is connected and the VM is the active window, the device is detected. However, it will not be detected by the host PC in this scenario. For this to happen, remove the drive, minimize the VM, then reconnect.
It’s simple but can get messy if you forget which operating system the USB stick is connected to.
This option is best if you want to copy large files from VM to host with VMware. Of course, you’re limited by the capacity of the USB device, so keep that in mind. Whatever VM software you use, safe ejection of USB devices is recommended on both host and guest virtual machines.
Your third option for copying files from host to guest PC is to set up a network share. This means designating a portion of your PC’s hard disk drive as accessible over the local network. With this setup, the VM can then connect to the network and access the drive.
Although physically all on the same computer, this adds higher capacity to your virtual machine data sharing.
How to Transfer Files from VirtualBox to Host Using a Shared Folder
You should have already downloaded VirtualBox Guest Additions. This should be installed via Devices > Install Guest Additions, where you should browse for the appropriate EXE file. Follow the steps to the end, choosing the default options, then Finish.
Launch VirtualBox, then:
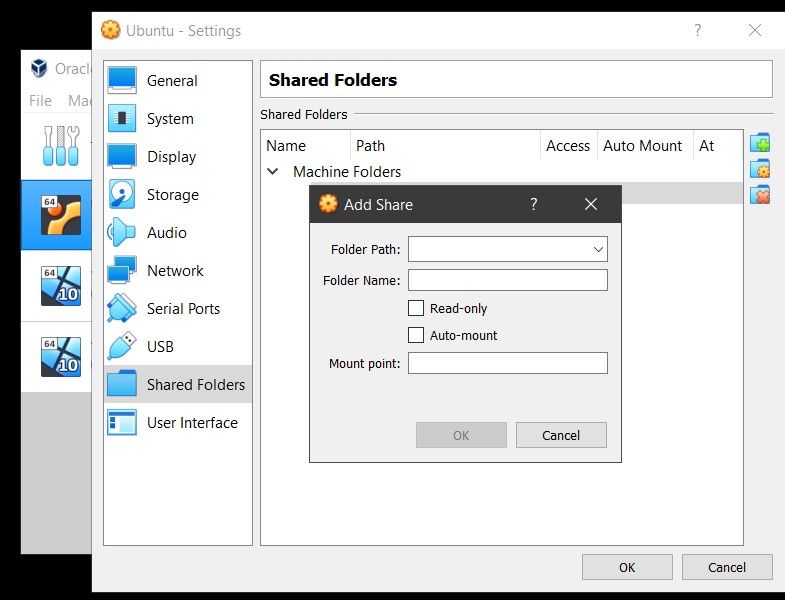
- Open Devices > Shared Folders > Shared Folders Settings.
- Click +, then in Folder Path, click the arrow and select Other.
- Browse for the folder you plan to share, and click Select Folder.
- In Add Share, give the share a name you can use in both operating systems.
- Check Auto-mount and Make permanent, then OK. From the guest OS, you’ll find the share set up in the usual location for network shares. For example, in Windows 10, this will be under Network Locations in Windows Explorer.
The process of creating a shared folder on VMware is straightforward:
- Within VMware Workstation, choose your virtual machine and click on Player > Manage > Virtual Machine Settings
- Click on Options > Shared Folders. You can then choose a sharing option under Folder Sharing
- Click on Add to set up your shared folder and follow the on-screen instructions in the Add Shared Folder Wizard.
- You can then type the Host path to the directory you want to share and name your folder.
- Once you click Next, you decide the folder access (Read-only or Enable this share, the latter allows both host and the virtual machine complete access to the shared folder).
- Click on Finish to create your shared folder.
Linux users can view the shared folder under the /mnt/hgfs directory.
While this is the most complicated option to set up, you will be able to share larger files effortlessly. These might include installers, disk image files, and hi-res videos.
Transfer Files Between Virtual Machine and Host
Whether you’re using VirtualBox or VMware, sharing data between your physical PC and a virtual machine is surprisingly simple.
If you’re not copying files from the host to the guest OS, there’s reason to copy data from the VM. This is typically when you’re about to destroy the VM and want to back up your data.
Learning how to share data between a VM and host OS will help super-charge your VM use.