Доступ с различных платформ
Работает на ПК, ноутбуках, мобильных устройствах и Apple или Android TV.
Защита, общий доступ и совместная работа
Пароли, ограничение срока действия, разрешения на доступ. Все это в вашем распоряжении.
Удобная навигация
Быстрый поиск нужных снимков благодаря понятному оформлению и расширенным фильтрам.
Сортировка и систематизация
Создавайте альбомы так, как вам нравится. Кроме того, доступно резервное копирование фотографий на вашем телефоне.
Доступ к вашим фотографиям с любой платформы
Переживите важные для вас моменты снова, открыв любой браузер, находясь в пути или комфортно устроившись на диване в гостиной.

Счастье — это то, чем стоит делиться
Не нужно выбирать между удобством в использовании платформы и ее безопасностью. С Synology Photos делиться альбомами просто и безопасно.
Доступ к определенному контенту
Оживите в памяти воспоминания членов семьи и друзей, связанные с одним снимком, видеофайлом или целым альбомом, отправив уникальную ссылку для перехода.
Защита от несанкционированного доступа
Ограничьте список получателей, которые могут просматривать файлы и альбомы, установив пароли доступа или сроки истечения действия для общих ссылок.
Общее пространство для больших возможностей
Придерживайтесь выверенного подхода и работайте совместно с определенными пользователями в полной, упорядоченной по папкам библиотеке мультимедиа, создав общее пространство.
Полный контроль
Устанавливайте в общем пространстве права доступа и редактирования на уровне папки. Это идеальное решение для крупных совместных проектов или работающих с клиентами фрилансеров.
Просмотр со скоростью света
Мгновенно находите свои фотографии с помощью отзывчивого и интуитивно понятного интерфейса.
Удобное оформление
Используйте временную шкалу или режим просмотра папок, чтобы быстро находить наилучшее фото для вашего клиента. Расширенные фильтры для метаданных включают такие аспекты, как камера, объективы данные о местоположении, лица и многое другое.
Все фотографии
Храните все в полном разрешении или даже формате RAW на устройстве Synology NAS. Емкость системы хранения легко увеличить без повышения платы за подписку.
Высокая производительность
Упростите выделение ресурсов благодаря интеллектуальной предварительной обработке и разгрузке ресурсоемких задач, например создание миниатюр и преобразования файлов на другое устройство.
Быстрое и эффективное управление фотографиями
Сортируйте, систематизируйте и создавайте красивые альбомы так, как удобно вам.
Интеллектуальная организация
Synology Photos позволяет с легкостью управлять любым количеством файлов независимо от того, идет ли речь о сотне или десятках тысяч файлов.
Удобный просмотр
Просматривайте коллекции с помощью гибких опций просмотра и фильтров.
Обеспечение безопасности фото
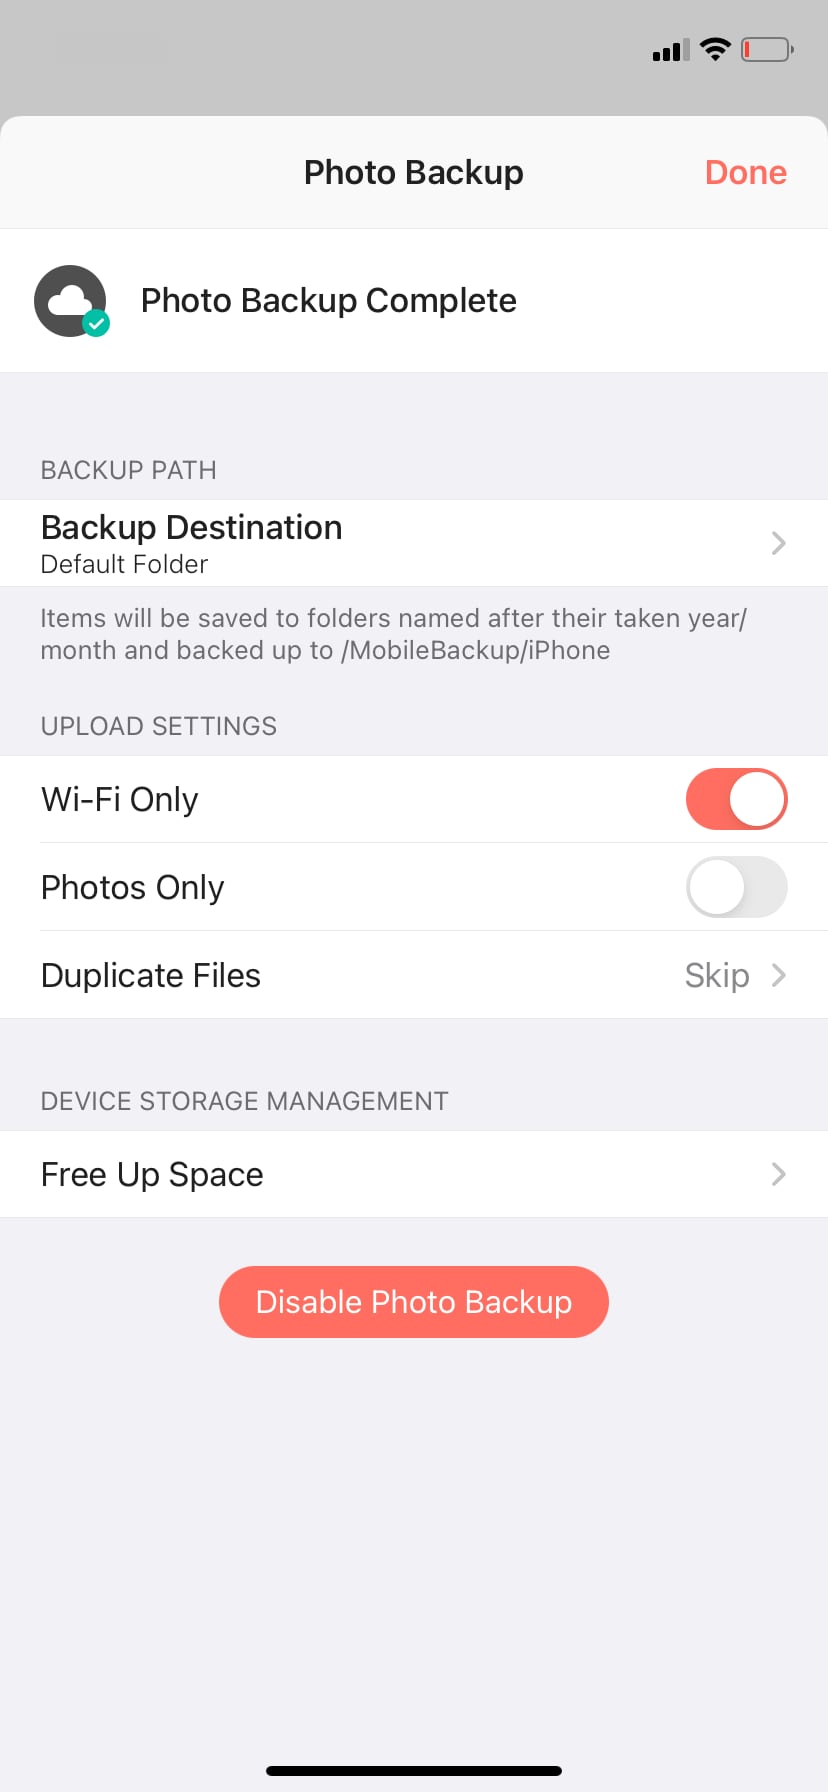
Включите автоматическое резервное копирование в мобильном приложении Synology Photos для сохранения дополнительных копий на Synology NAS. Можно с легкостью выполнять резервное копирование устройства NAS в различные местоположения, что позволит дополнительно усилить защиту данных. Подробнее

Ваша частная библиотека
Воспользуйтесь преимуществом комплексного решения для хранения фотографий и управления ими.
-
Абсолютное право собственности на данные и полная конфиденциальность
-
Просмотр и загрузка — быстро и без ограничений
-
Никаких подписок и реклам
-
Хранение фото в полном разрешении с поддержкой файлов RAW

Хотите начать работу с приложением?
Установите Synology Photos на устройство Synology NAS под управлением DSM 7.0. Затем скачайте приложение Synology Photos в Apple App Store или Google Play для начала резервного копирования и экономии места на смартфоне.
Примечание. Synology Photos заменяет Synology Photo Station и Moments и требует использования DSM 7.0 или более поздней версии. Подробнее

Android

iOS
✔ What’s Cool
1. Organising your photos is easy: with traditional albums, using tags to create virtual albums or with a simple tap with the timeline mode! Better yet, download albums to the iDevice to view them even when no network connection is available, and use the Photo Backup to effortlessly upload your photos taken with your iDevice onto your own personal cloud.
Software Screenshots

Download and install DS photo on your computer
Hurray! Seems an app like ds photo is available for Windows! Download below:
| SN | App | Download | Review | Maker |
|---|---|---|---|---|
| 1. | DS photo
|
Download | 3.4/5 88 Reviews 3.4 |
Synology Inc. |
| 2. | DSLR Camera Photo Effects
|
Download | 4.9/5 36 Reviews 4.9 |
Photo Cool Apps |
| 3. | DSLR Camera Photo Effect
|
Download
|
3.5/5 213 Reviews 3.5 |
Fruit Candy |
Not satisfied? Check for compatible PC Apps or Alternatives
Or follow the guide below to use on PC:
Select Windows version:
- Windows 7-10
- Windows 11
Learn how to install and use the DS photo app on your PC or Mac in 4 simple steps below:
- Download an Android emulator for PC and Mac:
Get either Bluestacks or the Nox App >> . We recommend Bluestacks because you can easily find solutions online if you run into problems while using it. Download Bluestacks Pc or Mac software Here >> . - Install the emulator on your PC or Mac:
On your computer, goto the Downloads folder » click to install Bluestacks.exe or Nox.exe » Accept the License Agreements » Follow the on-screen prompts to complete installation. - Using DS photo on PC [Windows 7/ 8/8.1/ 10/ 11]:
- Open the Emulator app you installed » goto its search bar and search «DS photo»
- The search will reveal the DS photo app icon. Open, then click «Install».
- Once DS photo is downloaded inside the emulator, locate/click the «All apps» icon to access a page containing all your installed applications including DS photo.
- Now enjoy DS photo on PC.
- Using DS photo on Mac OS:
Install DS photo on your Mac using the same steps for Windows OS above.
Need help? contact us here →
How to download and install DS photo on Windows 11
To use DS photo mobile app on Windows 11, install the Amazon Appstore. This enables you browse and install android apps from a curated catalog. Here’s how:
- Check device compatibility
- RAM: 8GB (minimum), 16GB (recommended)
- Storage: SSD
- Processor: Intel Core i3 8th Gen (minimum), AMD Ryzen 3000 (minimum) or Qualcomm Snapdragon 8c (minimum)
- Processor architecture: x64 or ARM64
- Check if there’s a native DS photo Windows app ». If none, proceed to next step.
- Install the Amazon-Appstore ».
- Click on «Get» to begin installation. It also automatically installs Windows Subsystem for Android.
- After installation, Goto Windows Start Menu or Apps list » Open the Amazon Appstore » Login (with Amazon account)
- Install DS photo on Windows 11:
- After login, search «DS photo» in search bar. On the results page, open and install DS photo.
- After installing, Goto Start menu » Recommended section » DS photo. OR Goto Start menu » «All apps».
DS photo On iTunes
| Download | Developer | Rating | Score | Current version | Adult Ranking |
|---|---|---|---|---|---|
| Free On iTunes | Synology Inc. | 99 | 2.30303 | 4.15.2 | 4+ |
Download on Android
Download Android
Thank you for reading this tutorial. Have a nice day!
Software Features and Description
*You must own a Synology NAS to run DS photo and be running the latest Photo Station 6.6.0 package to get the complete set of features**
this app allows you to browse through the photo collection on your Synology NAS server on the go, as well as interact with friends using the comments in real time. Organising your photos is easy: with traditional albums, using tags to create virtual albums or with a simple tap with the timeline mode! Better yet, download albums to the iDevice to view them even when no network connection is available, and use the Photo Backup to effortlessly upload your photos taken with your iDevice onto your own personal cloud.
Find all detailed features about DS photo on our website:
www.synology.com > NAS > DSM 6.0 > Apps > Mobile Apps > Software Specs
https://www.synology.com/dsm/software_spec/mobile#DSphoto
Top Pcmac Reviews
-
Missing Many Simple Features
By BrianFromCali (Pcmac user)
— This app seems to stop uploading content in the background for unknown reasons, even though background app refresh is on. I will leave the app and come back to it a while later to find it is still close to where I left off for uploading.
— It can’t upload slow-mo videos unless you keep the original file name.
— It doesn’t offer a quick retry option for files that fail to upload due to what is almost always an “unknown error.”
— You can’t drag to select a group of photos, you can only select all or one at a time.
— There’s no pause/retry button if an upload stalls, only the option to cancel; this means you have to close and reopen the app if it stalls.
— The app doesn’t keep the screen active when it seems to need to have the screen unlocked and the app on screen.
— Similarly, you have to keep your screen active and unlocked while it prepares photos to upload or it will stop and freeze.
— Has a “preparing” pause before EACH PHOTO that is uploaded. This pause can be longer than it takes to upload the photo.
— Can’t seem to simply select an album and start a slideshow for that album.Overall, this app could use some attention to get some simple additions and changes made. Not sure what separates this from using the app File, for example.
-
okay but needs more functions
By Squirf1 (Pcmac user)
My family has a Synology so we use this for photo backup. As a general photo storage app it’s OK, but it’s not great for searching and viewing photos on the go (takes forever to load photos on both WiFi and data). Photo uploads are also very, very slow.
-
Needs to support native HEIF/HEIC aka Live Photos
By phireph0x (Pcmac user)
This app works very well except for one thing: lack of support for Live Photos, or HEIF/HEIC format that Apple has used since iOS 11. Currently, the app Photos converts these files to JPG and a MOV for the movie. This isn’t ideal and the native format should be supported. With HEIC this app would receive 5 stars.
-
Excellent
By CompMedMil (Pcmac user)
This app is excellent and extremely easy to use. Some of the less than 5 star reviews are definitely under rating this app.
- Home
- Windows
- Digital Photo Software
- Digital Photo Tools
- DS photo for Windows 10

The Download Now link directs you to the Windows Store, where you can continue the download process. You must have an active Microsoft account to download the application. This download may not be available in some countries.
Developer’s Description
You must own a Synology NAS to run this app and be running Photo Station 6.5.0 to get the complete set of features. DS photo allows you to easily browse through the photos and videos of your Photo Station library as well as manage it: creating albums, editing picture information, uploading and downloading, all this can be done on the go from your Windows Phone. DS photo also provides comments editing, slideshows as well as a map view to display albums or individual photos/videos to see where they were taken. Find all detailed features about the app on our website: www.synology.com > NAS > DSM 5.2 > Mobile Apps > Software Specs https://www.synology.com/dsm/5.2/software_spec#DSphoto.
Full Specifications
What’s new in version
General
Release July 4, 2017
Date Added June 1, 2017
Operating Systems
Operating Systems Windows, Windows 10
Additional Requirements Available for Windows 10, Windows 10 Mobile, Windows Phone 8.1, Windows Phone 8 (ARM, x86, x64)
Popularity
Total Downloads 1,889
Downloads Last Week 15
Report Software
Related Software

Turn digital photos into drawings or paintings.
FotoSketcher

Get the most out of your scanner by improving its productivity and quality.
VueScan
Convert, resize, rename, and edit photos in batch mode; automate editing with profiles and scripts.
BatchPhoto

Create and edit animated GIF images quickly and easily.
GifCam
📢
UPDATE: 01/12/2022 — As of today, Synology Photos is also available for Android TV
📢
UPDATE: 24/11/2022 — Synology Photos for Apple TV has been released!
Synology has released (finally!) Photos app for the Apple TV platform. Accessible via the official App Store.

📢
UPDATE: 08/11/2022 — new Photos version is here with a few new features and fixes.
Version: 1.3.1-0326
(2022-11-08)
What’s New
- Supports deleting original files in albums.
- Supports moving and copying photos in the search results.
- Supports showing the detailed copy, skip and renaming status in the task queue.
Bug fixed
- Fixed an issue where DS414j models cannot run Synology Photos after updating to DSM 7.1.1.
- Fixed an issue where domain/LDAP users might not be able to use Synology Photos.
- Fixed an issue where performing a large amount of tasks might slow the user interface.
- Fixed an issue where long file names might not be completely displayed in the task queue.
- Fixed an issue where additional folders might be created when the subject of Photo Request ends with a space.
- Minor bug fixes.
📢
UPDATE: 19/7/2022 — NEW Synology Photos version 1.3.0-0317 is out bringing a cool new Photo Request feature and a few fixes.
Version: 1.3.0-0317
(2022-07-19)
What’s New
- Supports creating Photo Request links to collect photos from other users and guests.
- Supports using customized domain names as the prefix of share links.
Bug Fixed
- Enhance the speed of merging facial recognition results.
- Fixed an issue where running the package might cause high system resource usage.
- Fixed an issue where photos might not be indexed properly.
- Fixed an issue where letter case might affect search results.
- Fixed an issue where labels might not be added to photos correctly.
- Minor bug fixes.
📢
UPDATE: 3/05/2022 — NEW mobile version 1.2.1 of Synology Photos is out bringing some new feature and fixes
Compatibility & Installation
- Updated to be compatible with Advanced Media Extensions (AME) 2.0.
What’s New
- Supports changing folder covers.
- Supports searching for folders.
- Supports showing the albums shared by others in search results.
- Allows users to select albums shared by others to which they have Provider permissions when adding photos to albums.
Bug Fixed
- Fixed an issue where switching networks might stop the backup when users sign in via QuickConnect.
- Fixed an issue where the date and time in the photo information page might not follow the formats specified in the device settings.
- Fixed an issue where the Enable Sleep Time Backup button might not work properly on iPhone SE (2016) models.
- Fixed an issue where users might not be able to view password-protected folders.
- Fixed an issue where photos from iOS Files might not be uploaded properly.
- Fixed an issue where cached thumbnails might be deleted by the iOS system.
- Fixed an issue where the scroll-up and scroll-down speed might be inconsistent.
- Minor bug fixes.
Intro
In Synology history, several apps went through an evolution period, and during that period they were updated, changed, rebranded, and eventually replaced by a new platform.
Years back, Synology started with their «XXXX station» app naming convention. So we had (and in some cases still do), File Station, Download Station, Audio Station, Photo Station, etc.
Each app was targeted to function as a platform for a specific task, so for photo management, there was Photo Station.
PS got until version 6 when Synology introduced Moments, a more modern, selfy, and mobile-friendly photo platform featuring face detection and offering users to simply view and share their photos but not so much to organize and edit them.
So with PS and Moments fighting for dominance, Synology decided to pull the plug and merge those two platforms into one, Synology Photos.
With the upcoming DSM 7 and all of its new apps and features, Photos should take center stage when it comes to having your photos organized, accessible on all devices, and easy to share with your friends, family, or coworkers.
Synology Photos — PhotoStation and Moments fusion
Considering that Photos are accessible for over 9 months already (and still in beta), why did I wait so long to write about them?
There are two reasons for this. First, I have waited for this platform to mature a bit more and didn’t want to start with Moments and then migrate to Photos when the time comes. Now at the moment, I use the Apple Photos app for all my needs, but that limits me with having access to all my photos on every platform. Yes, I could use iCloud, but I don’t so that’s that.
Another reason is I want to have my photos on my devices and accessible on my terms. Also, no need to pay for storage then you have a NAS right?
As I said before, Photos is a love child of PhotoStation and Moments, but is it any good? As someone that has never used either of those platforms before I would like to give my honest opinion of it. Also, before I continue, I am no photo ninja (from a collection standpoint or editing), just a regular user that has a decent library of both photos and videos, and I want to have them all accessible all the time regardless of my client platform or storage size.
Start using Photos
Once you get DSM 7 up and running you will have the option to install the Photos app from the Package Center.
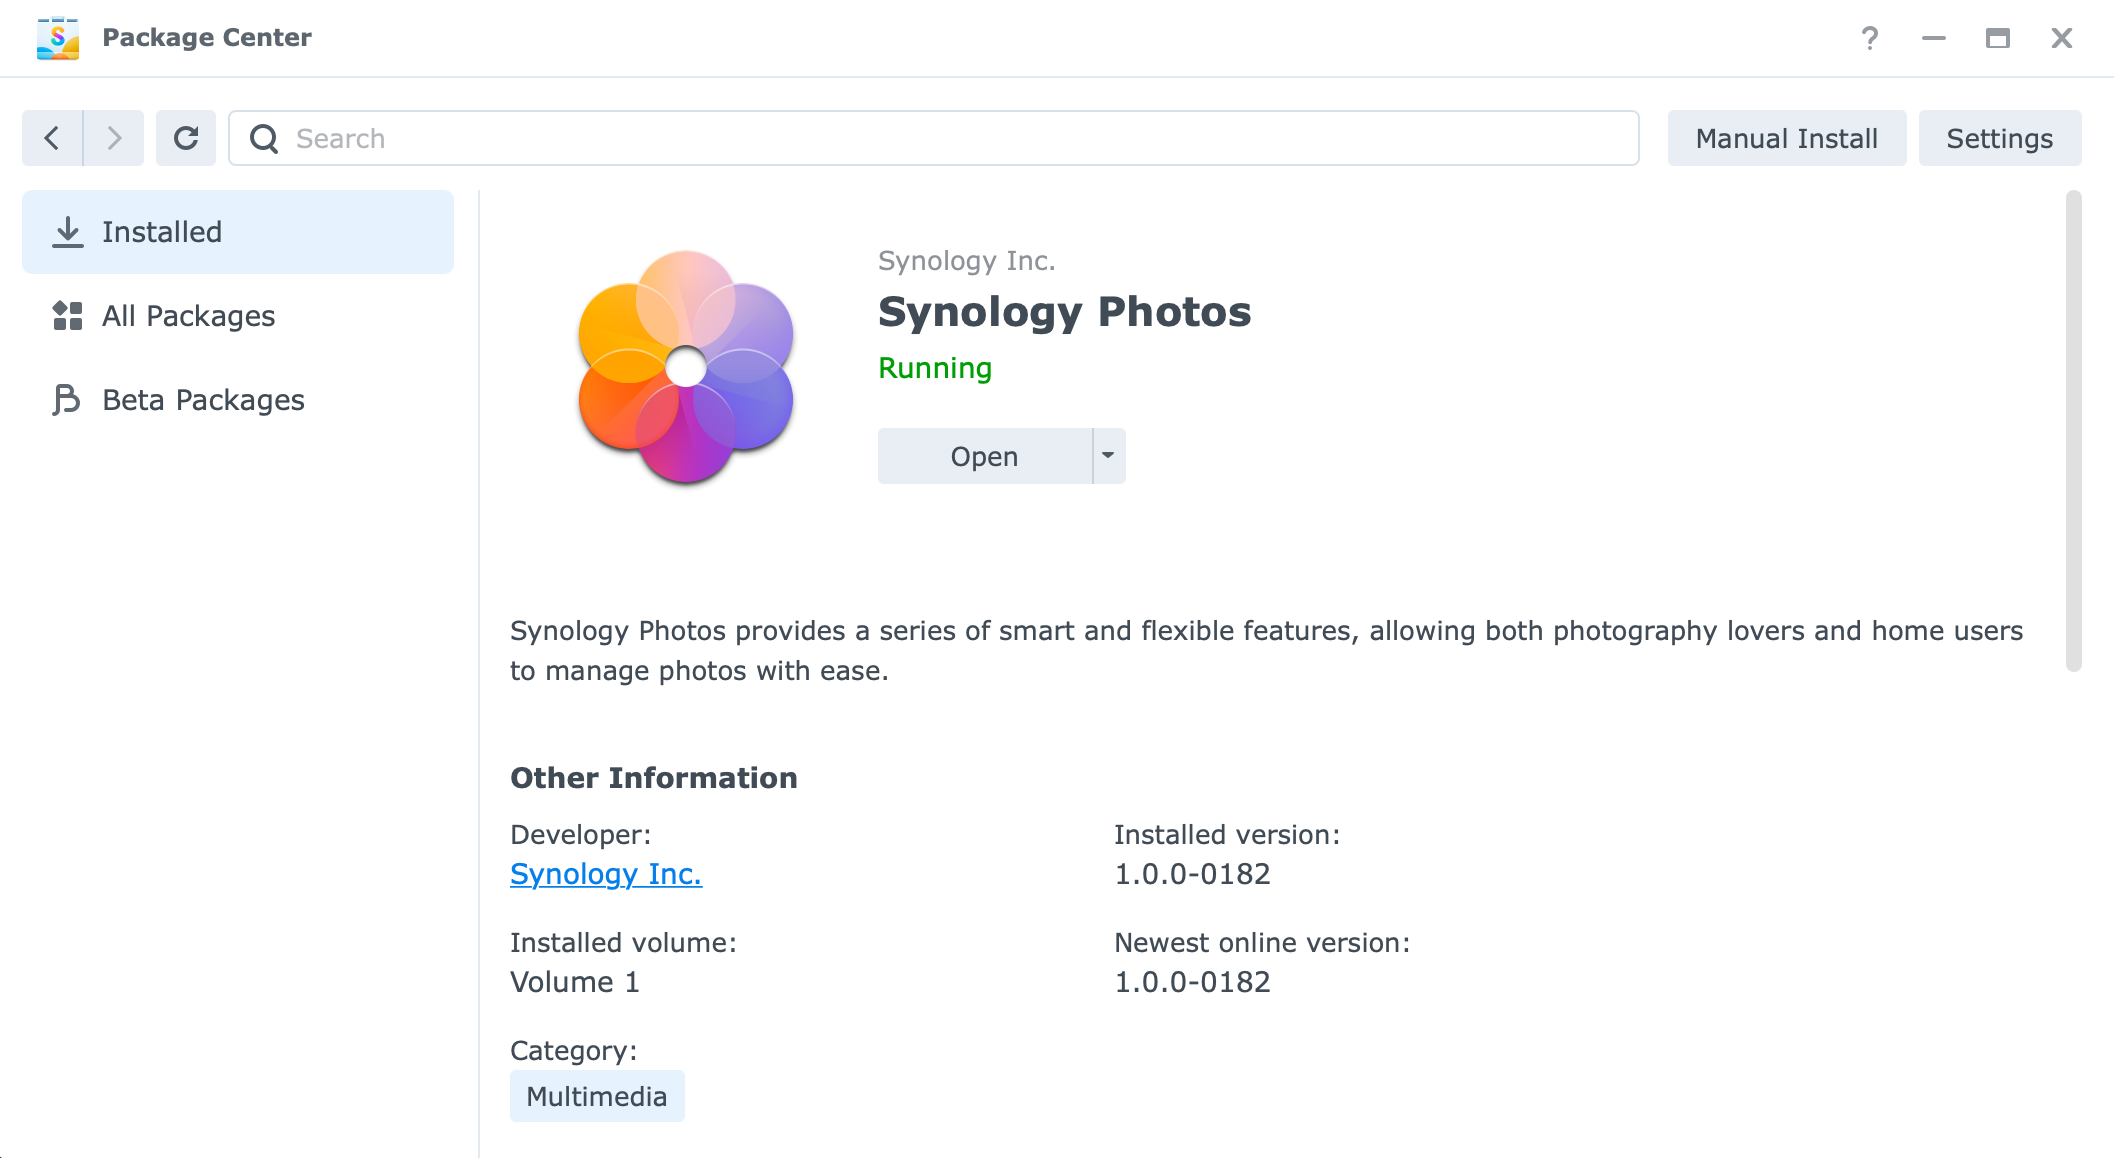
The first time you access Phots you will be greeted with a welcome wizard that will inform you of some of the features that Photos offer.
Upon first access, you will see a very simple UI that Photos offers, but then again you don’t need anything too complicated, to begin with.
How to import, organize and use Photos
Once you have opened your Photos app for the first time, one thing will happen in the background. On your NAS you will get the Photos folder created at the root of your user folder:
/volume1/homes/<username>/Photos

All the content that you will be importing into Photos will «live» inside the Photos folder. This means that you can also prepare the content by folders and they will appear in the Photos app. So no need to explicitly use the web UI of the Photos app to begin importing your content.
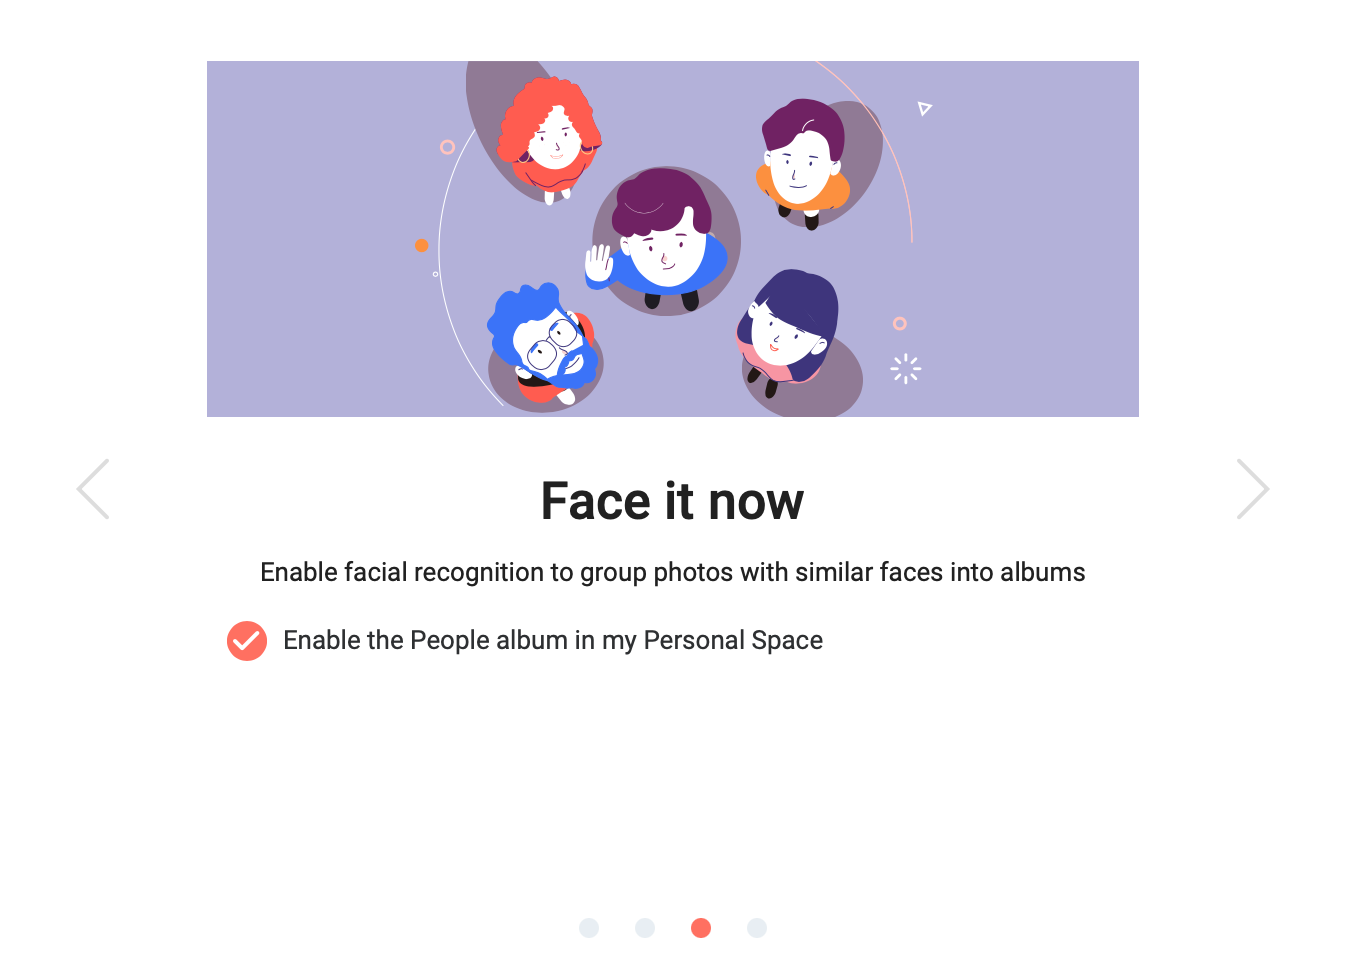
So from that point of view very simple and easy. Also, you will not stress your NAS that much with importing using the web UI, but it will start to index the images and at that point, your NAS starts to work much more than you are probably used to, especially if there are images that will have people on it. More on this a bit later.
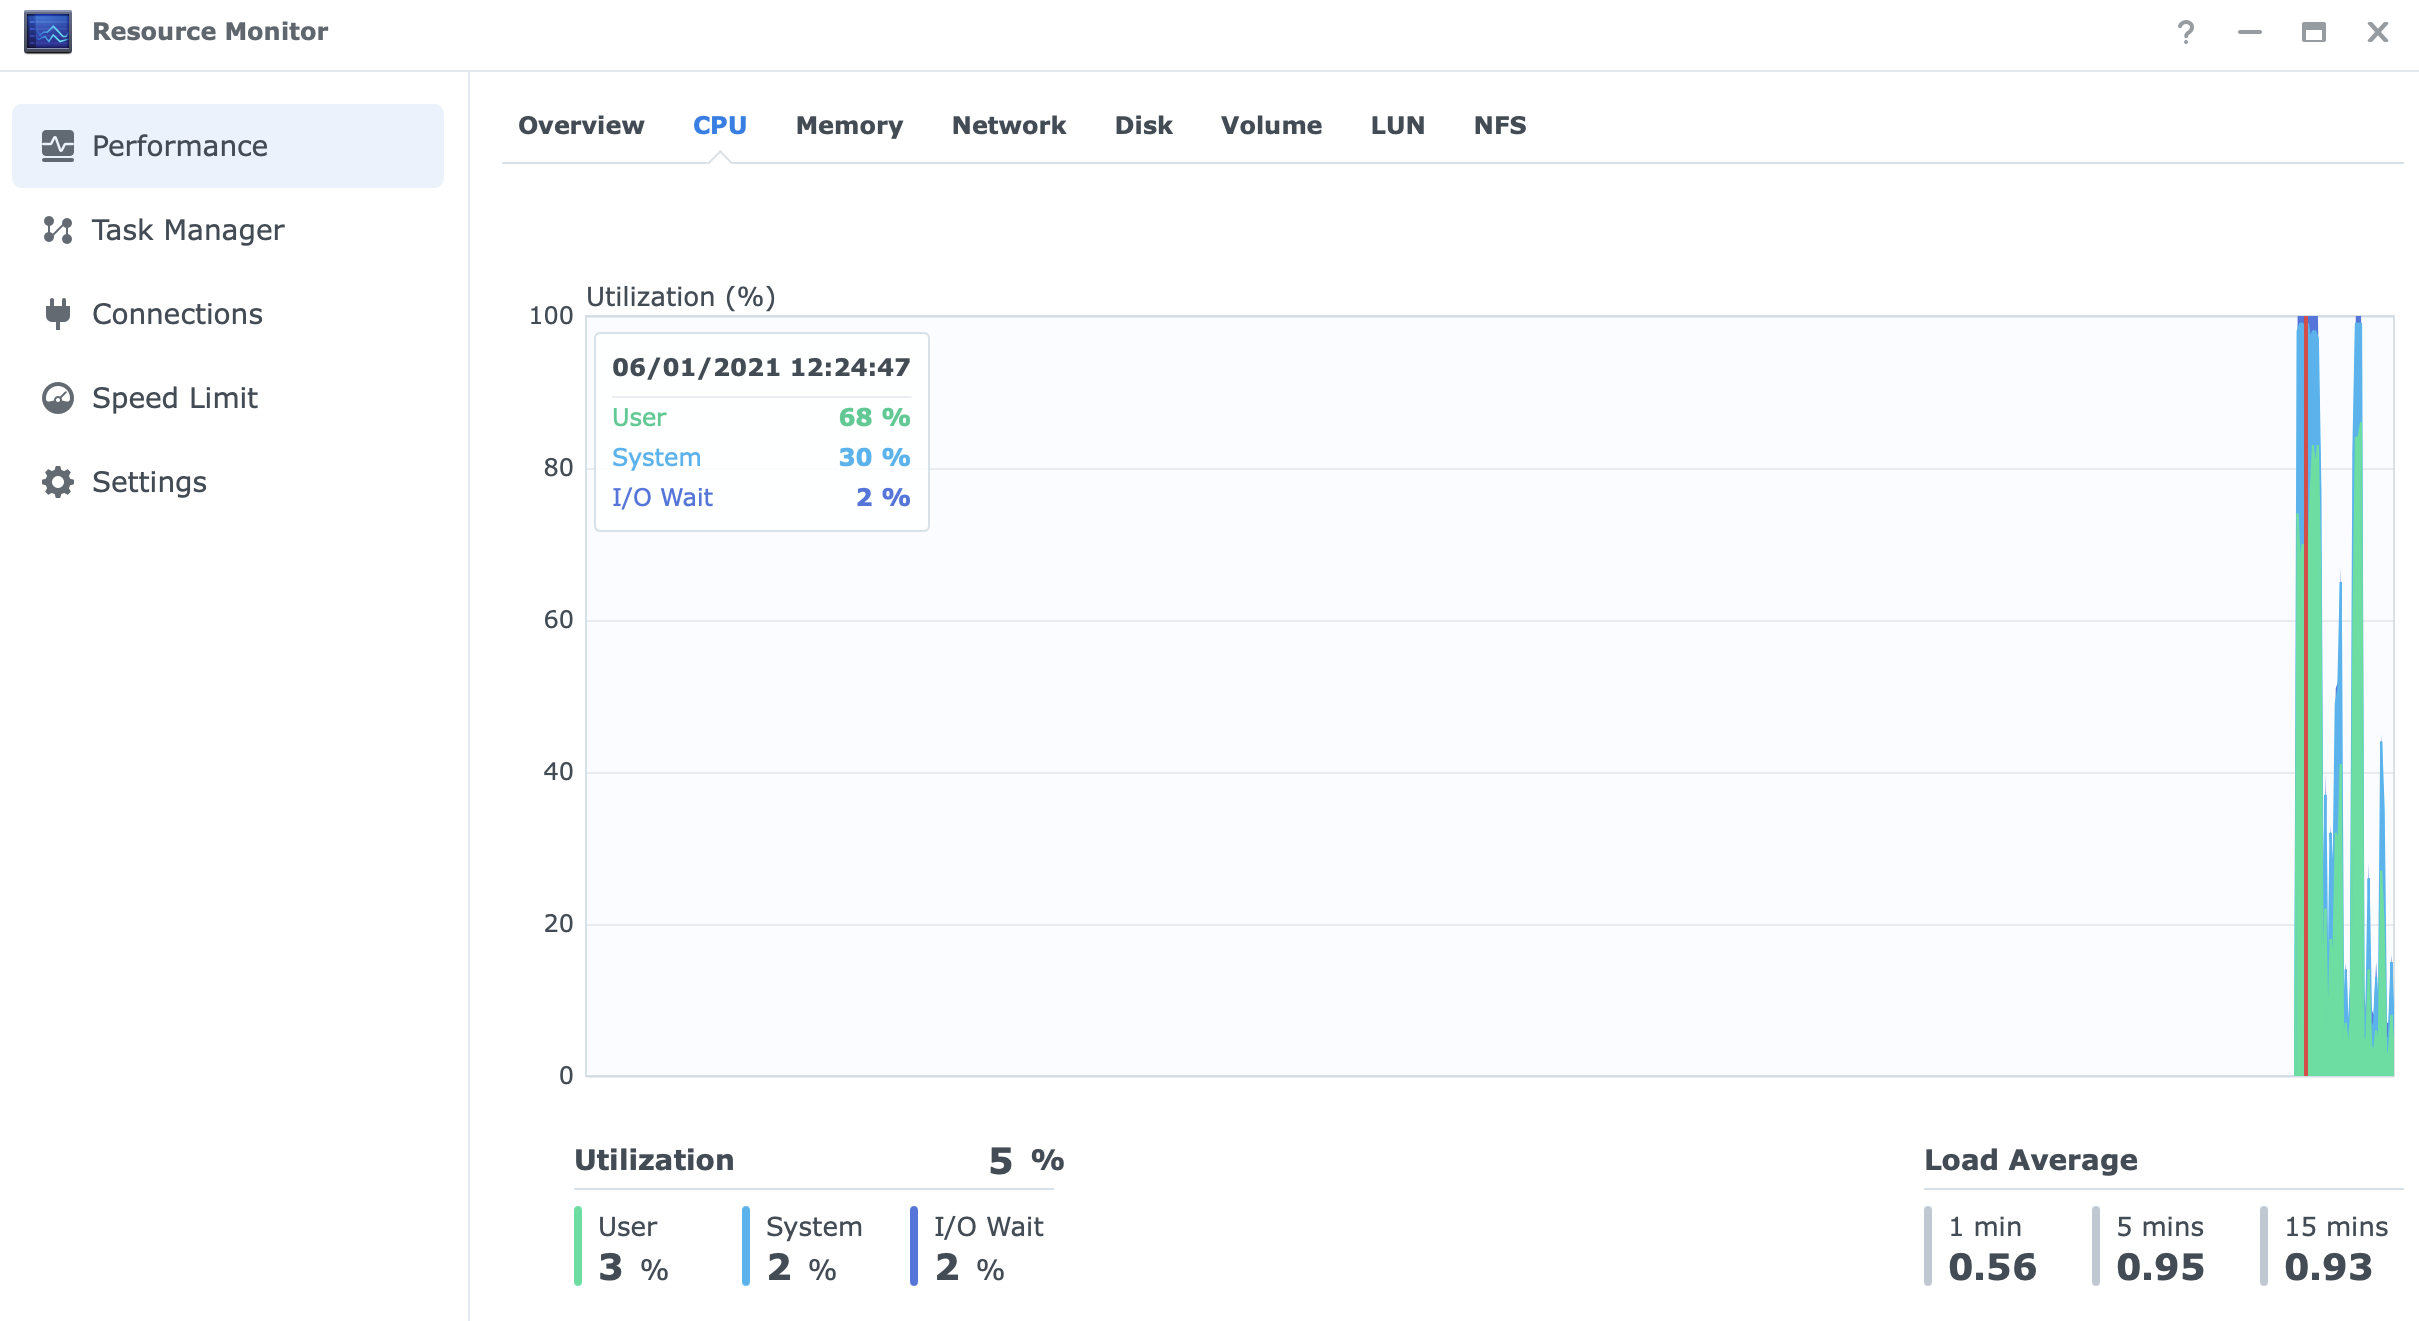
🗒️
NOTE: these performance images are from a virtual DSM running Photos with a single CPU core and 2GB of RAM
The reason why I showed these images is that people think importing 10k images will be a speedy and effortless process for their «J» series NAS. No, it won’t.
Do not underestimate the Photos app and your NAS horsepower. Each image will be inspected, tagged, indexed, and if a person will be detected, face detection will kick in. Let’s just say your first import might be a longer process than you expect.
During that time be sure that your NAS is not doing anything else, and have patience.
Saying all this, do not think your Photo browsing experience will be bad. From my testing, this platform runs well. Truth be told I do run it on an SSD-only NAS but even on regular HDDs, the test was nothing slower, and the experience was very satisfactory.
Using and accessing your photos
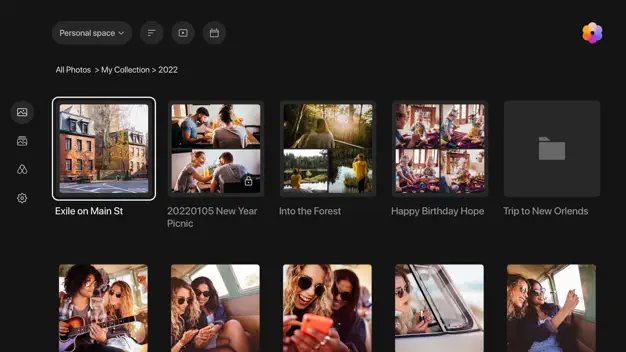
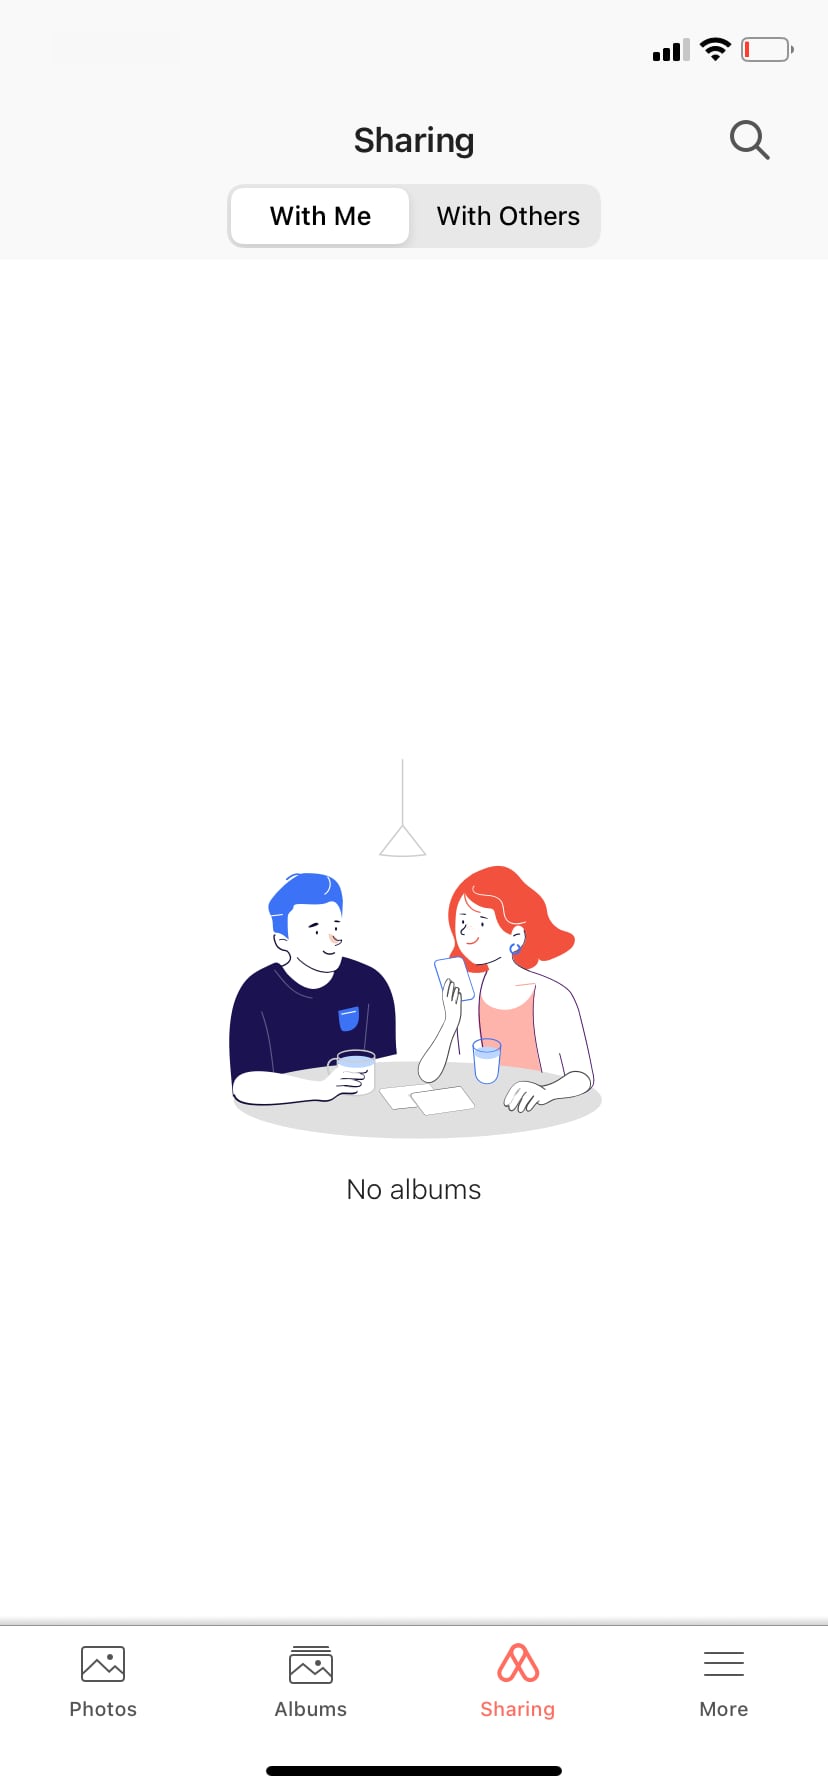
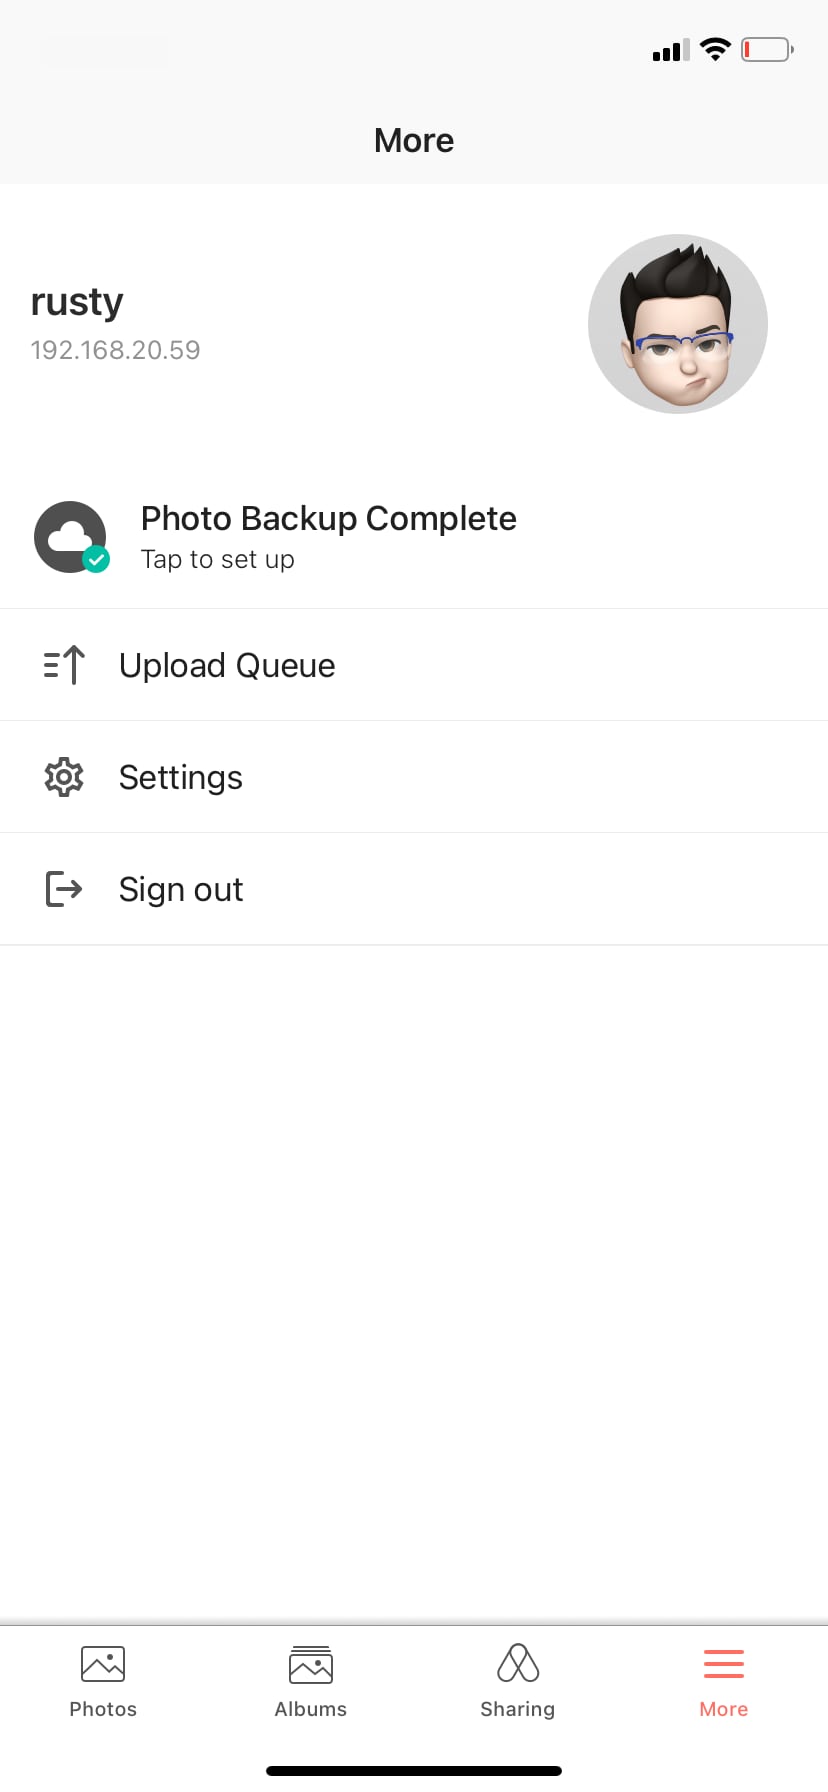
Along the top margin of the app, there are three main elements: Photos, Albums, and Sharing.
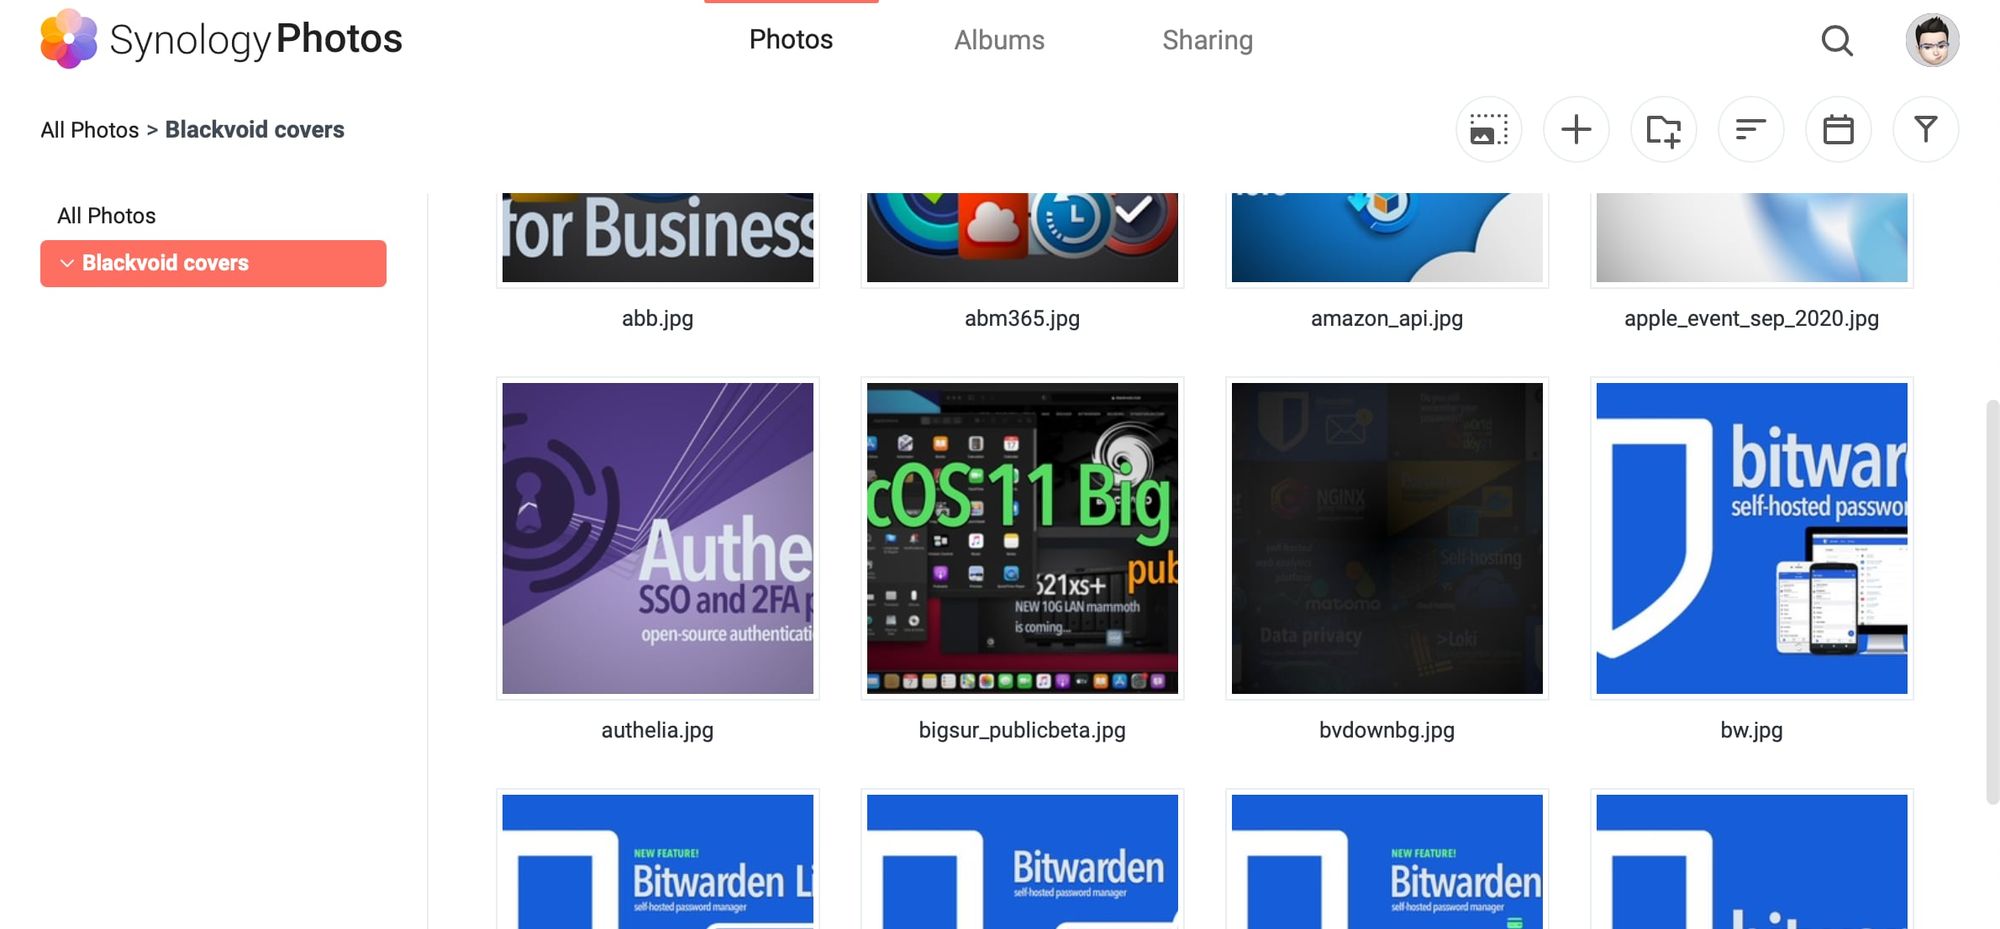
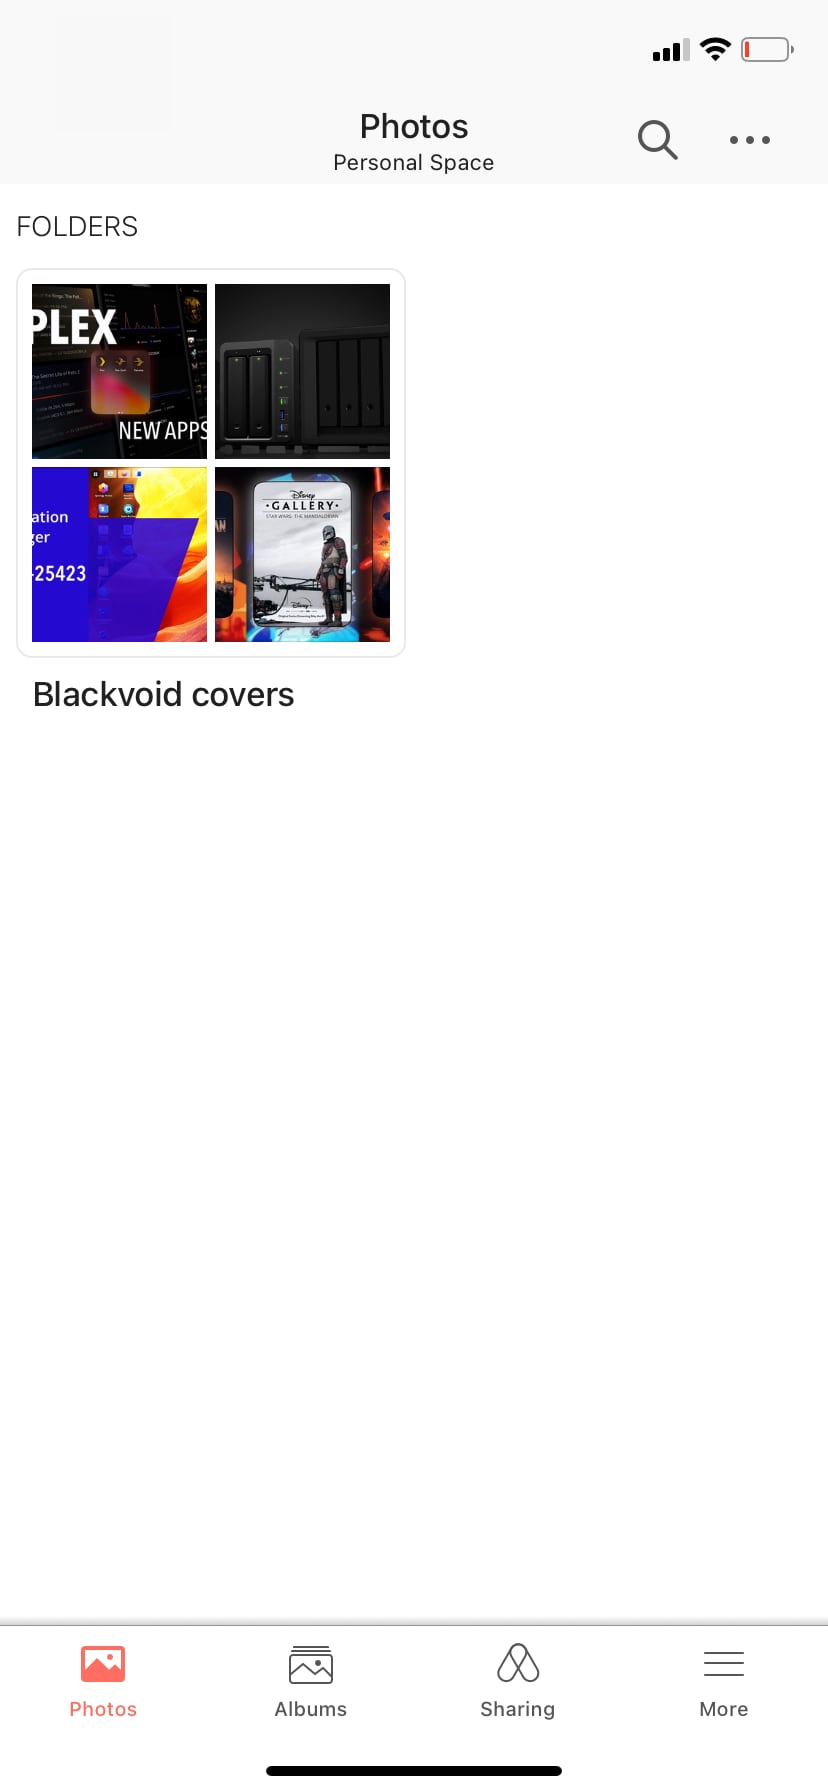
The first one, Photos, allows you to view your photos and videos using two main views. Folder View or Timeline View.
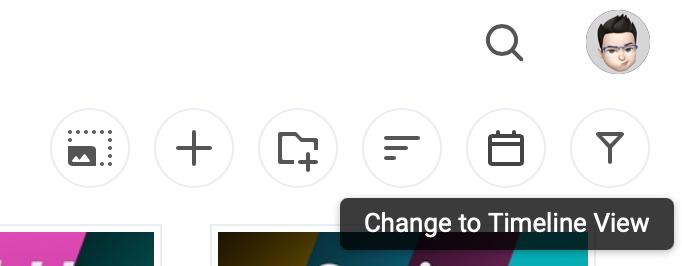
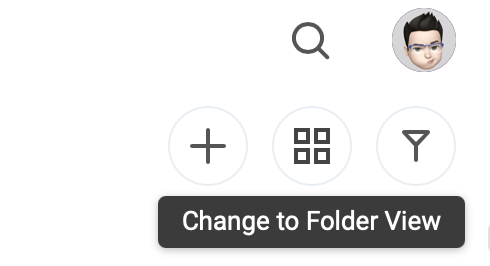
In the timeline view, you will (unlike in folder view), see all of your photos in a chronological manner (something that Moments offered). With the folder view, you will view each folder individually (how PhotoStation did it).
In any case, you will also have the Quick filter option on the far right. Accessing it you will be able to quickly filter your content by year, type, people, and any other filter you activate.
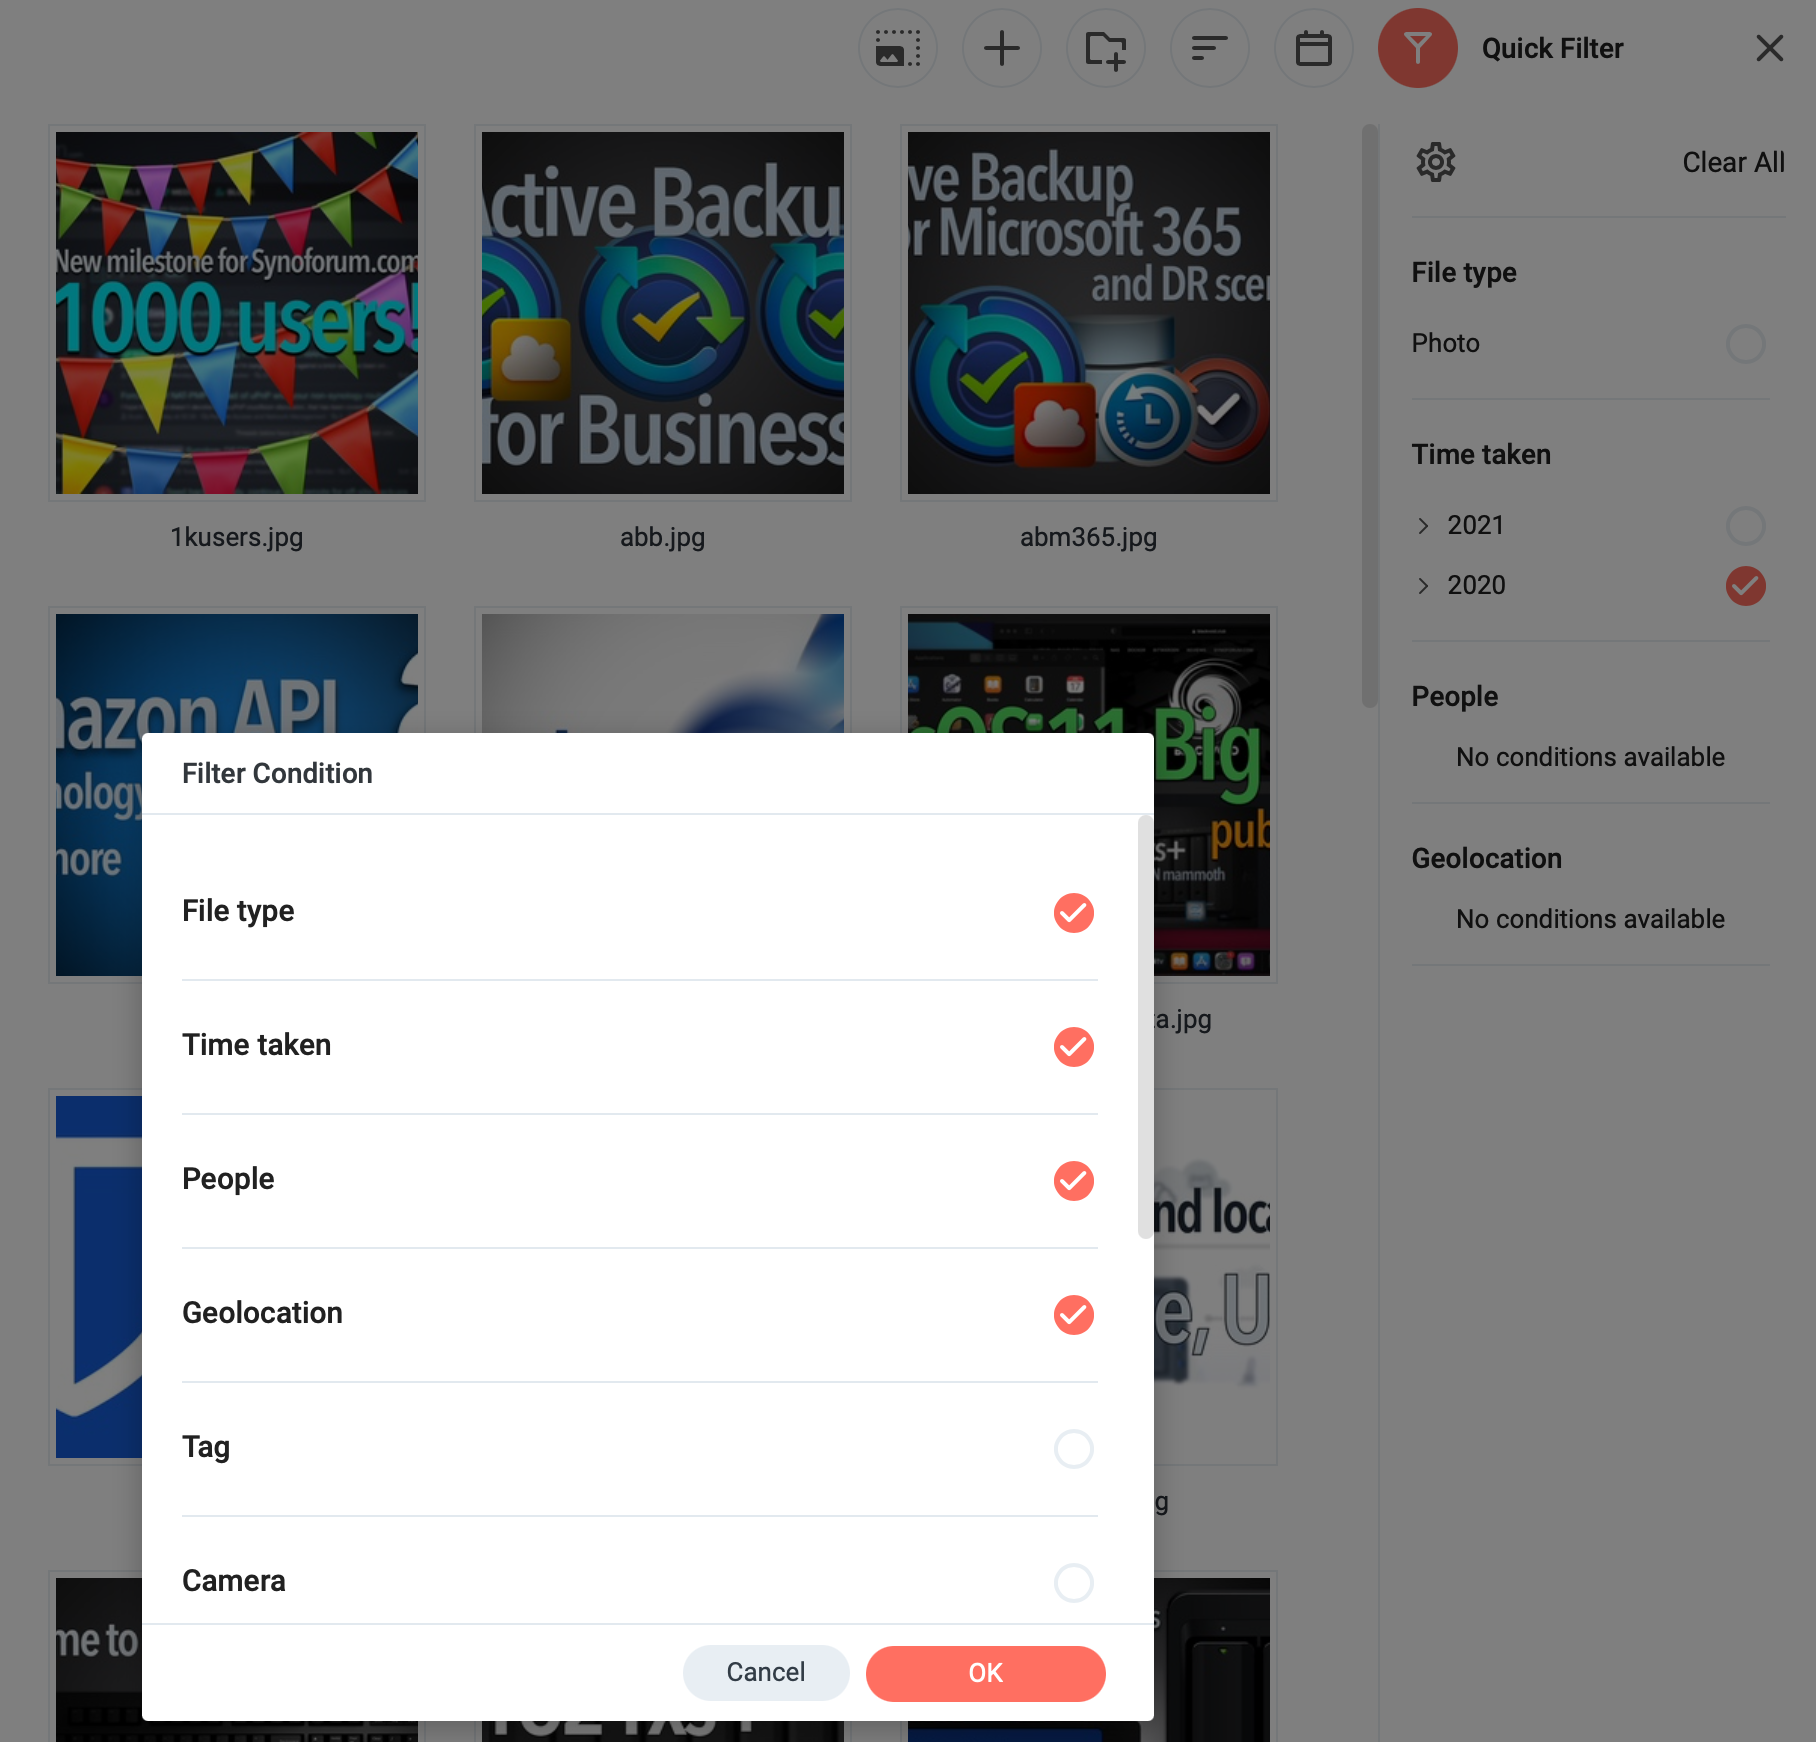
Once you start viewing your photos you will have several tools at your disposal including share, zoom, info, delete, and more options. Depending on the meta content of your photos the info section will have a lot of information that you can also edit and alter (another feature of PhotoStation).
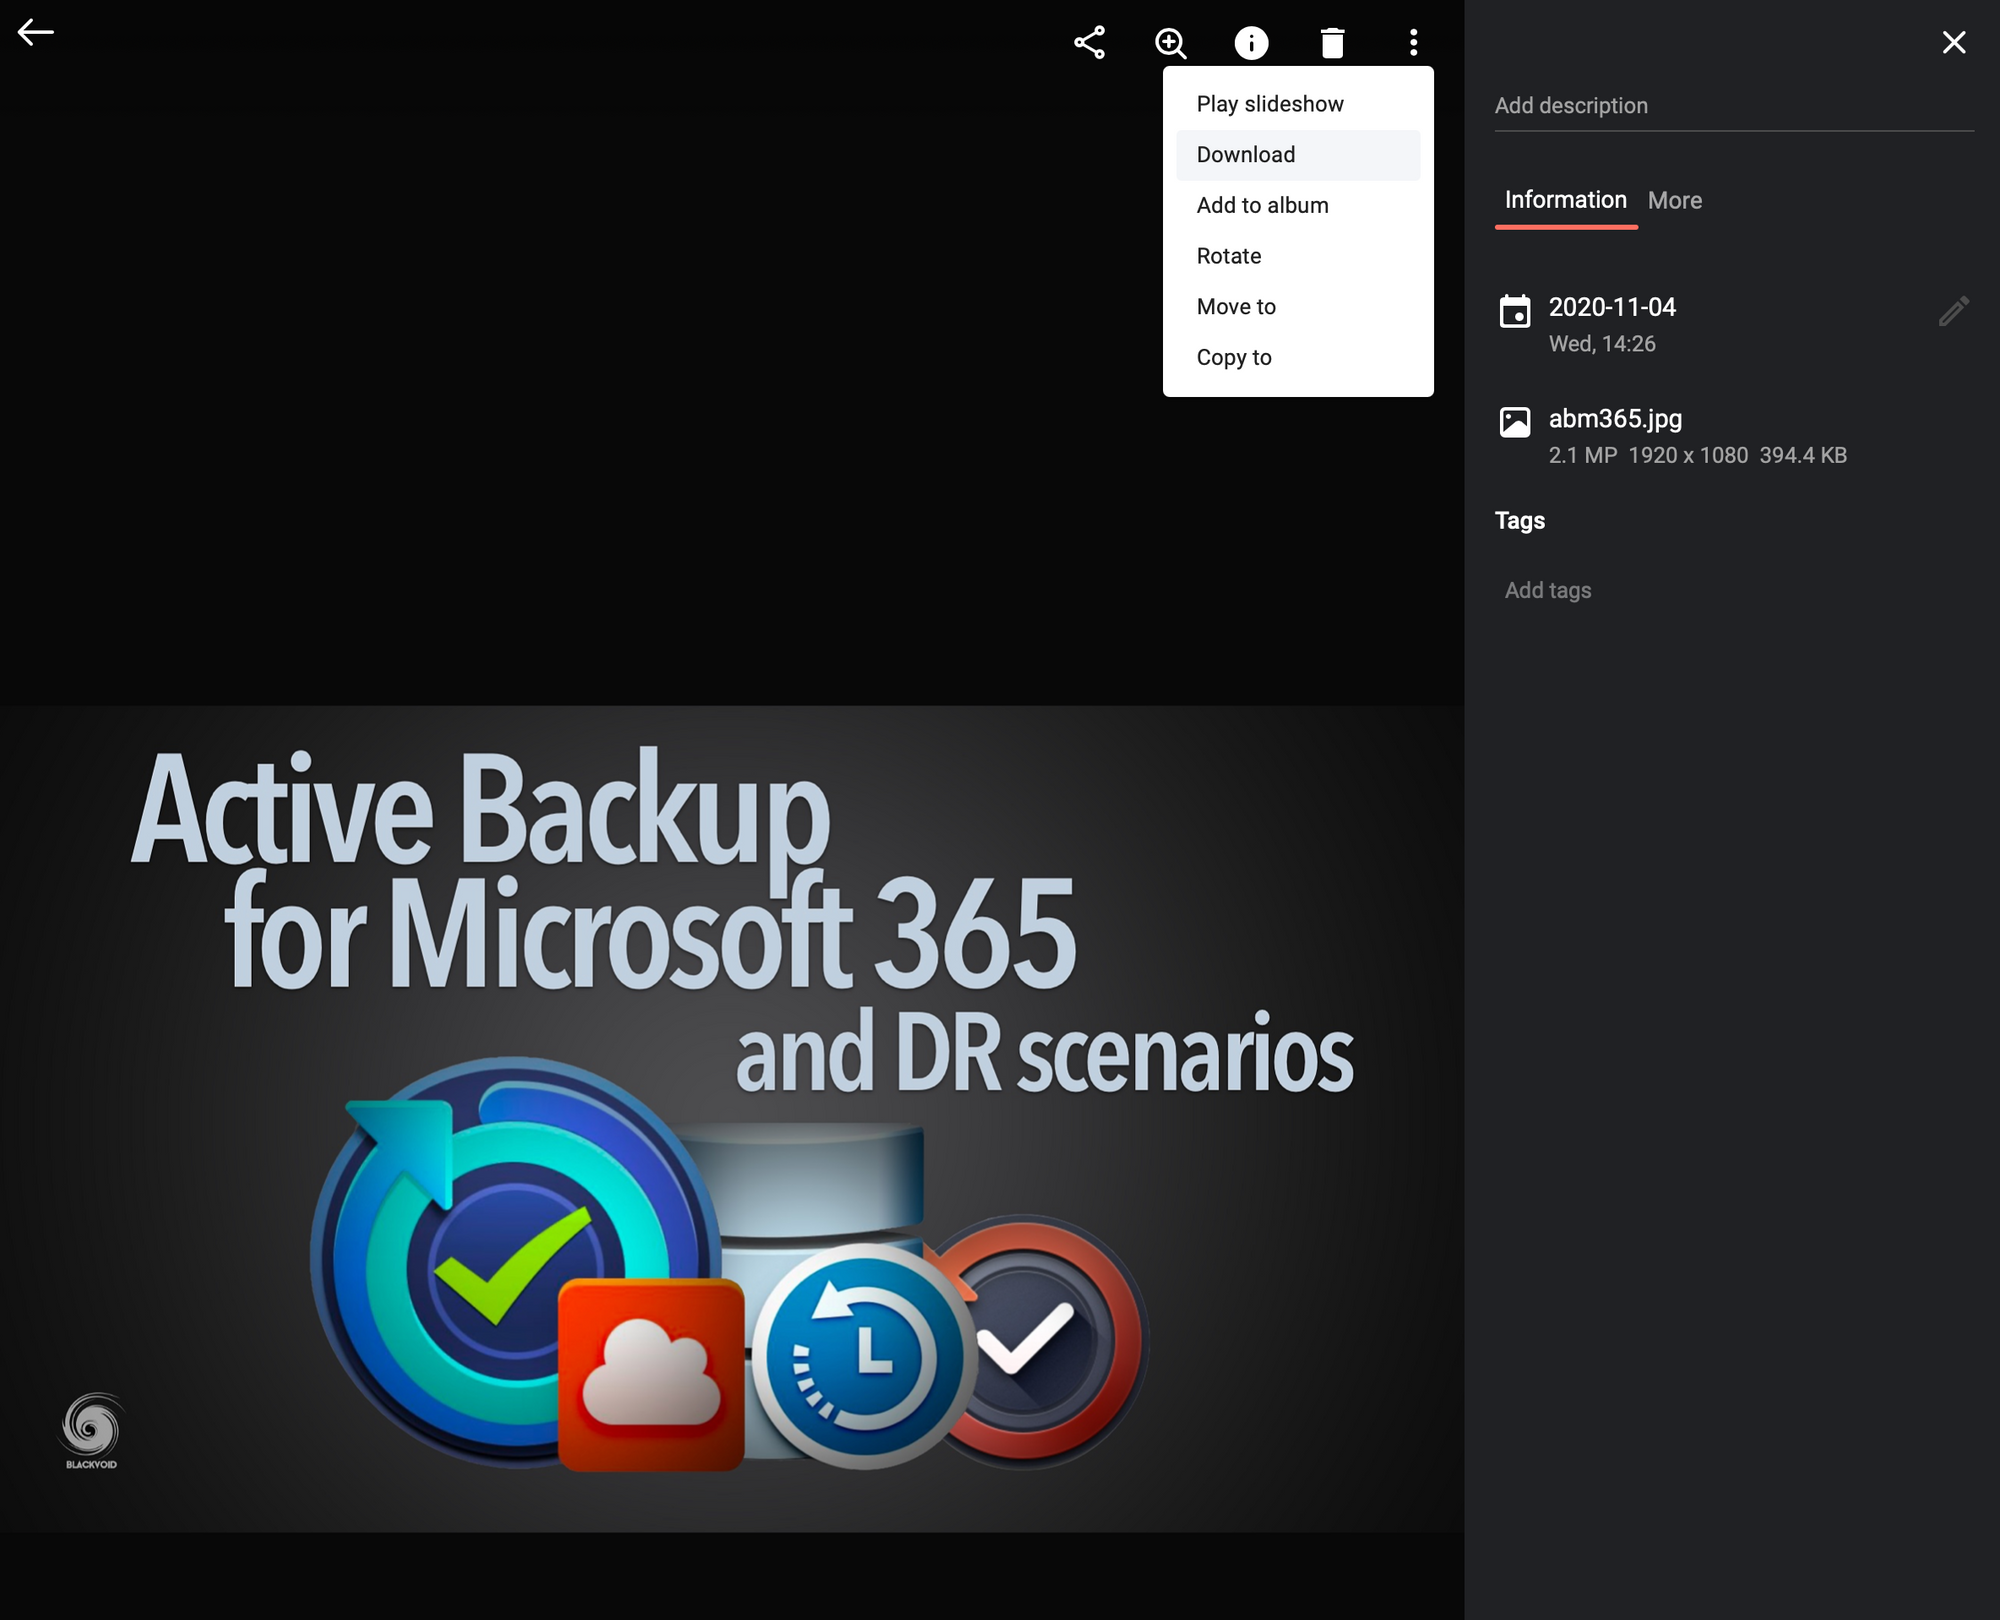
Photos app works well with your keyboard so if you want you can use your arrow keys to navigate the slideshow and escape from the view mode back into your Photos with the ESC key.
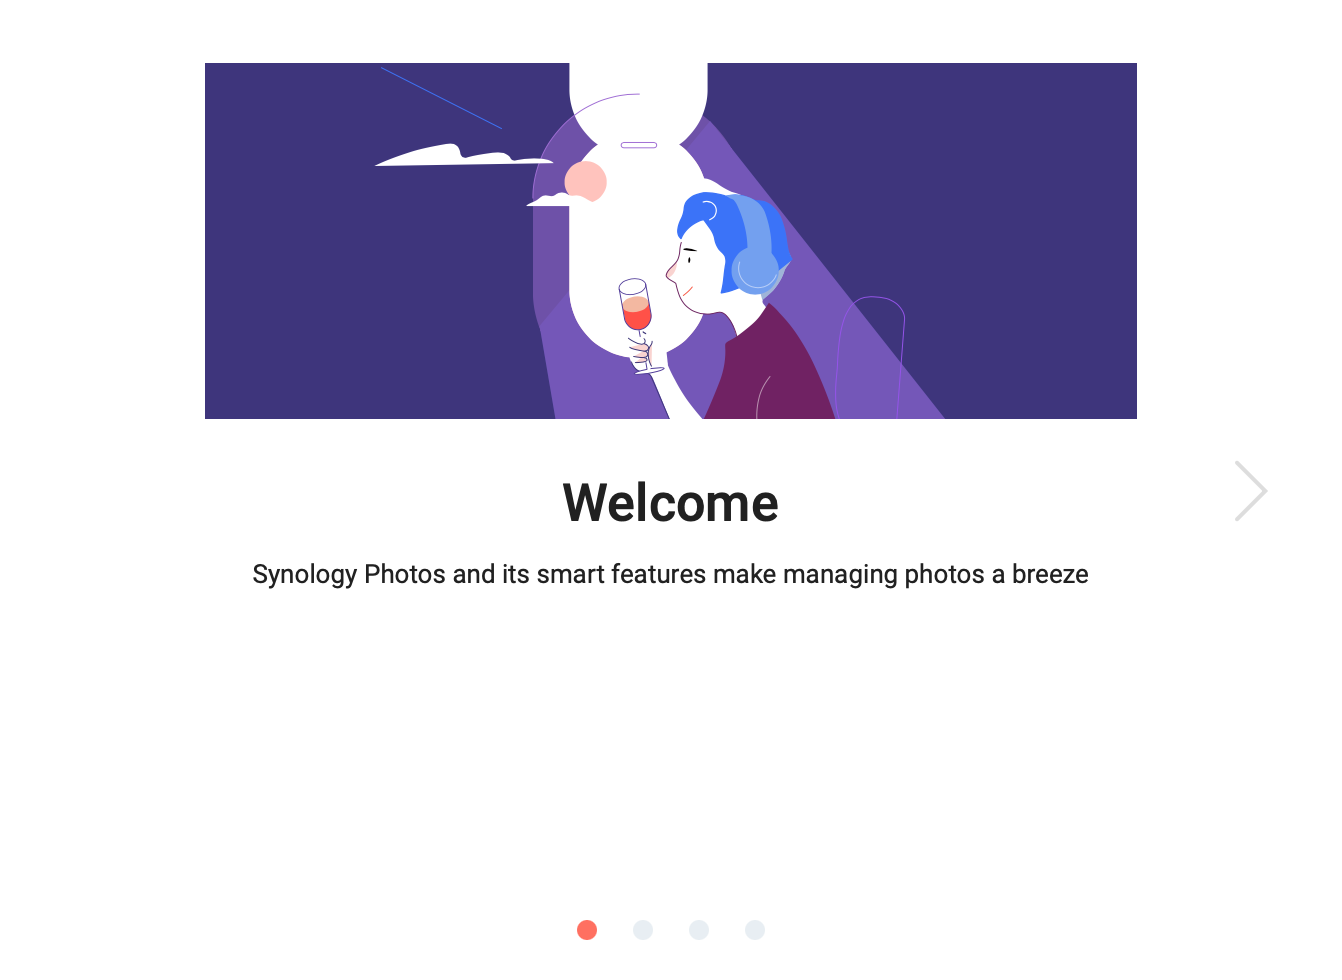
Virtual albums and sharing
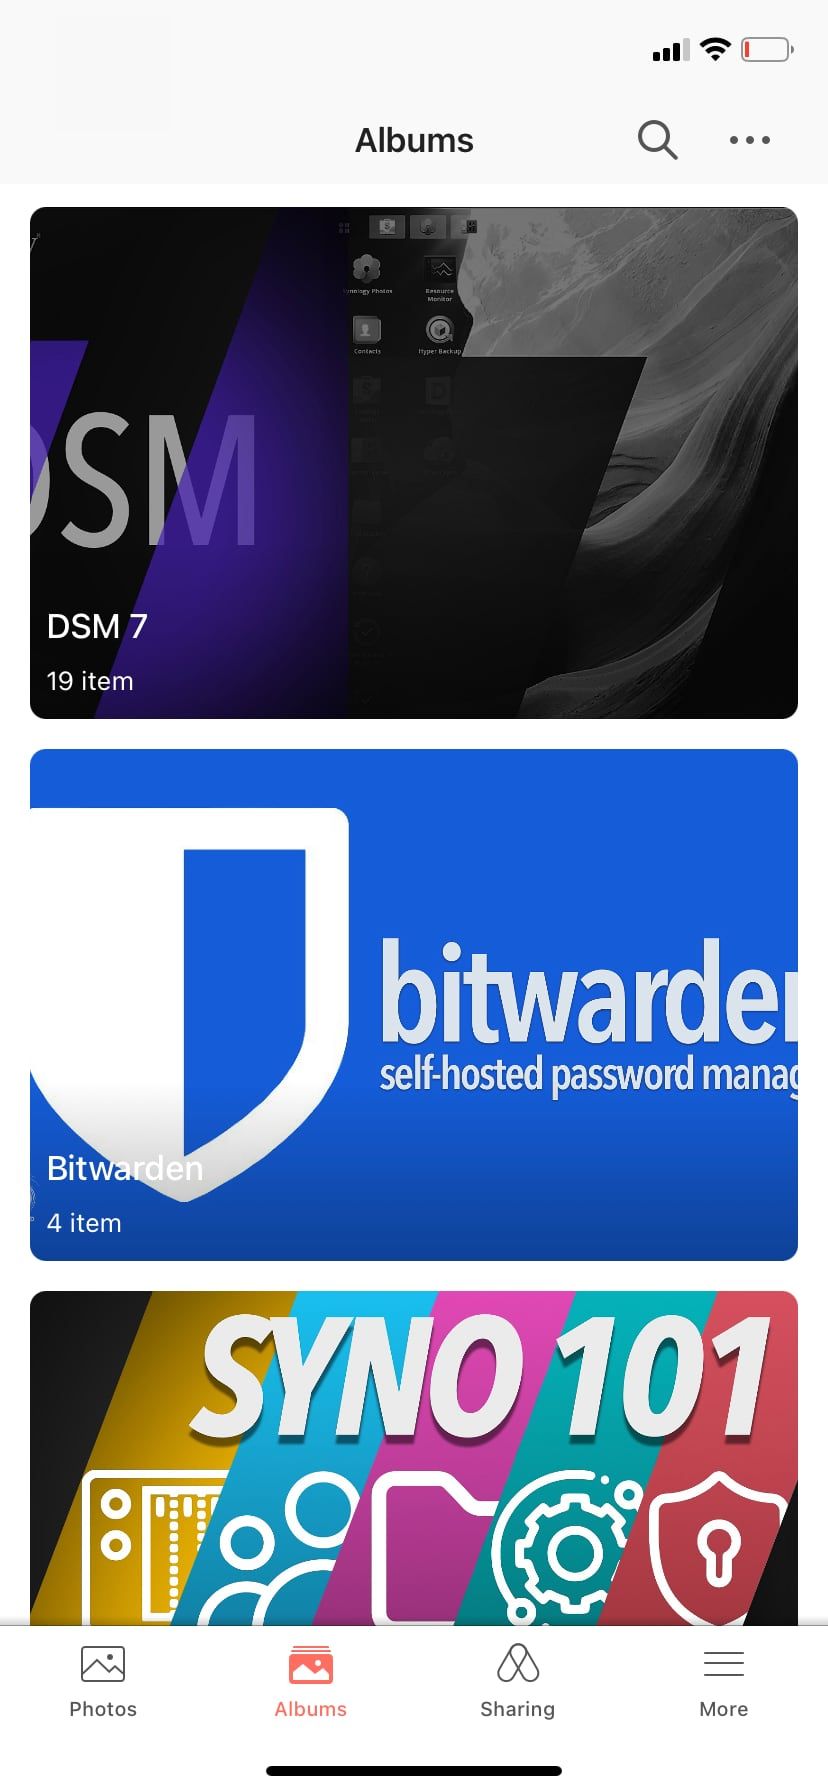
As I said before there are two more main sections to the Photos app, Albums, and Sharing.
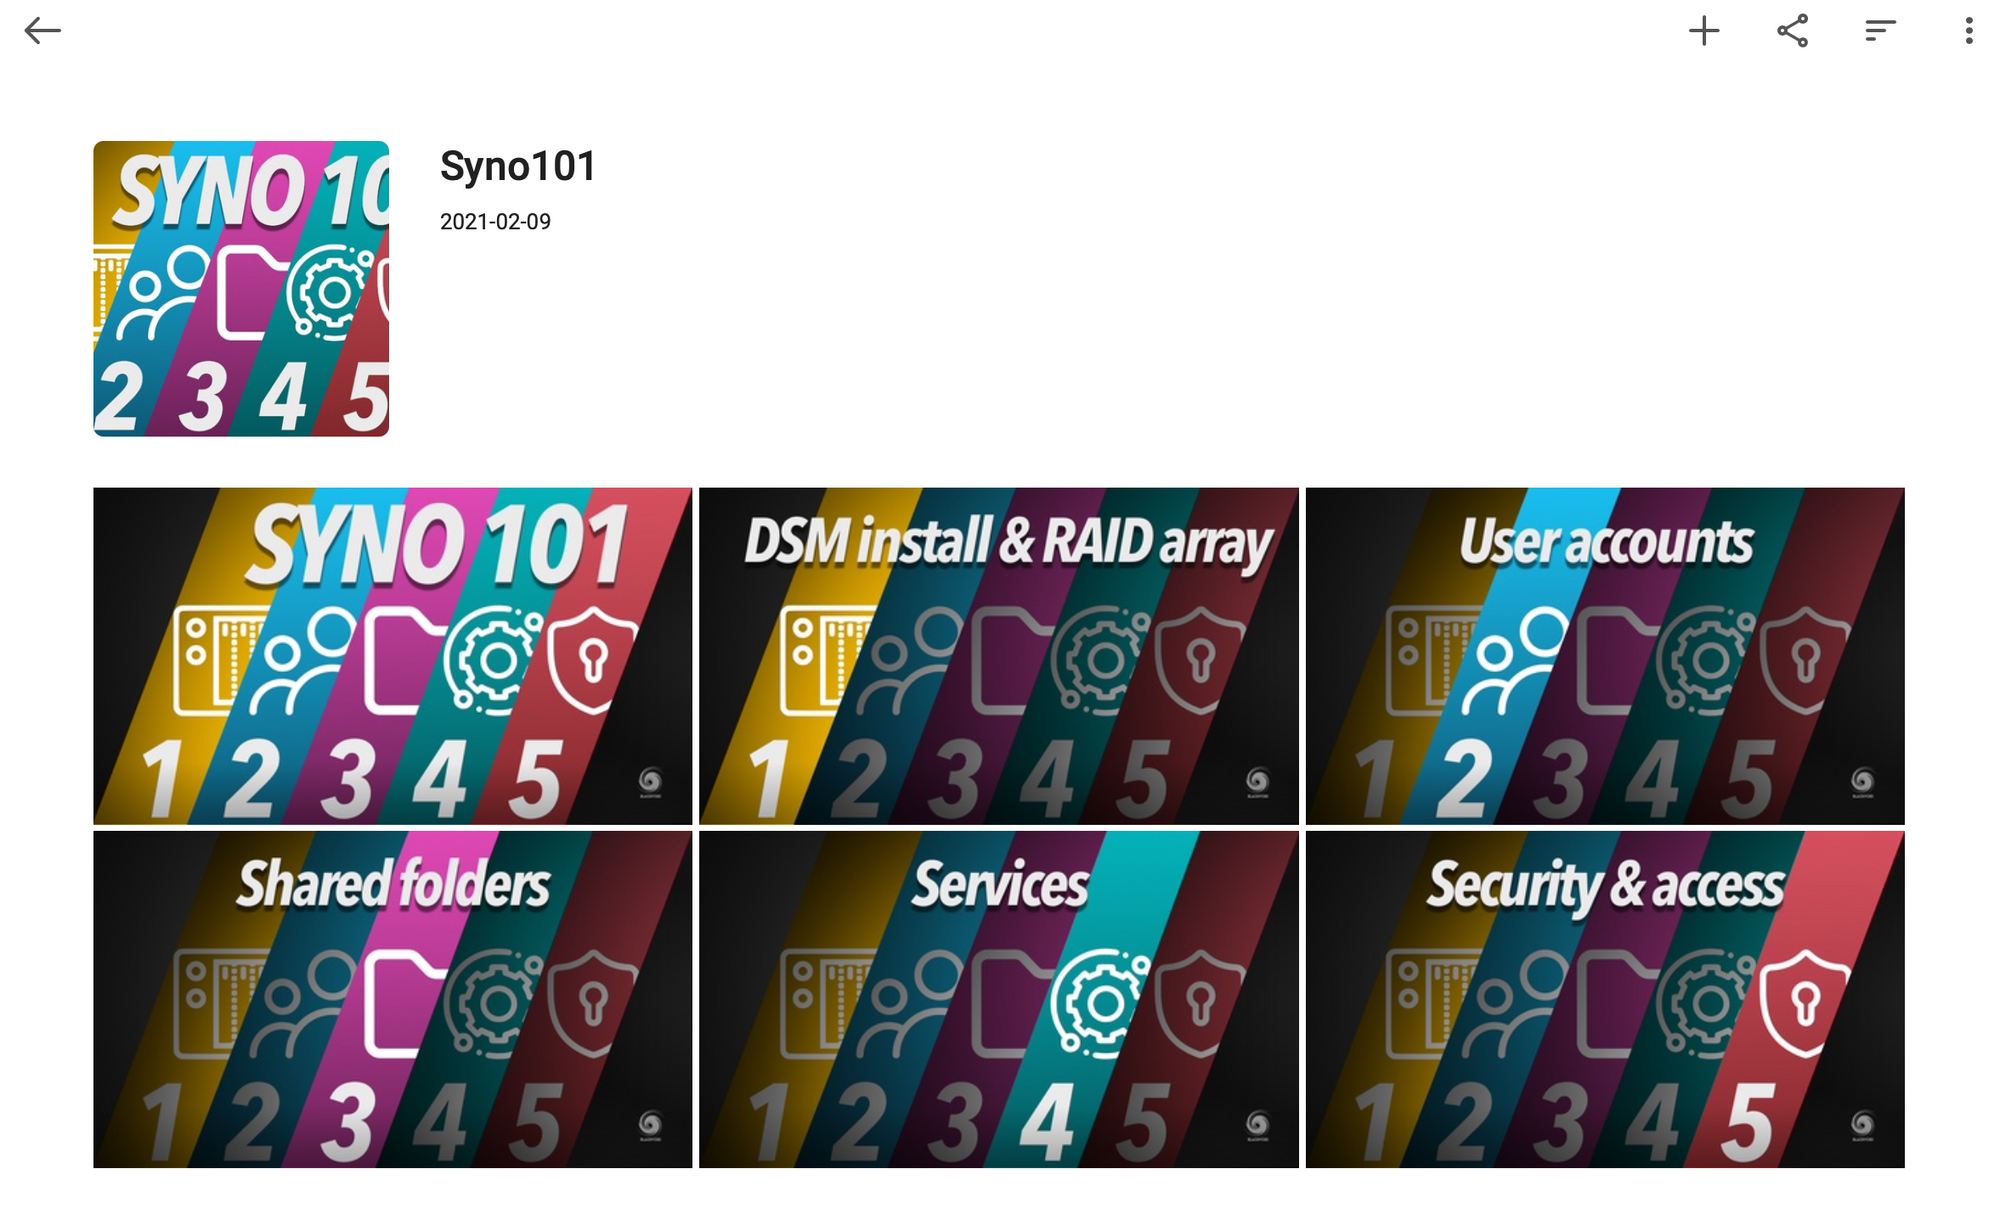
Albums is a great feature that will allow you to make «virtual» albums without duplicating your existing folders/albums. What this means is this.
For example, let’s say you have imported a folder full of photos into the Photos app. It is already organized by having those photos in a single folder, but what if you want to group some photos under special albums? Or maybe combine multiple images from different folders under a single album without mixing the actual content?
That’s where virtual «albums» come into play. Simply select photos you want to group, choose the name of the album, and boom, done!
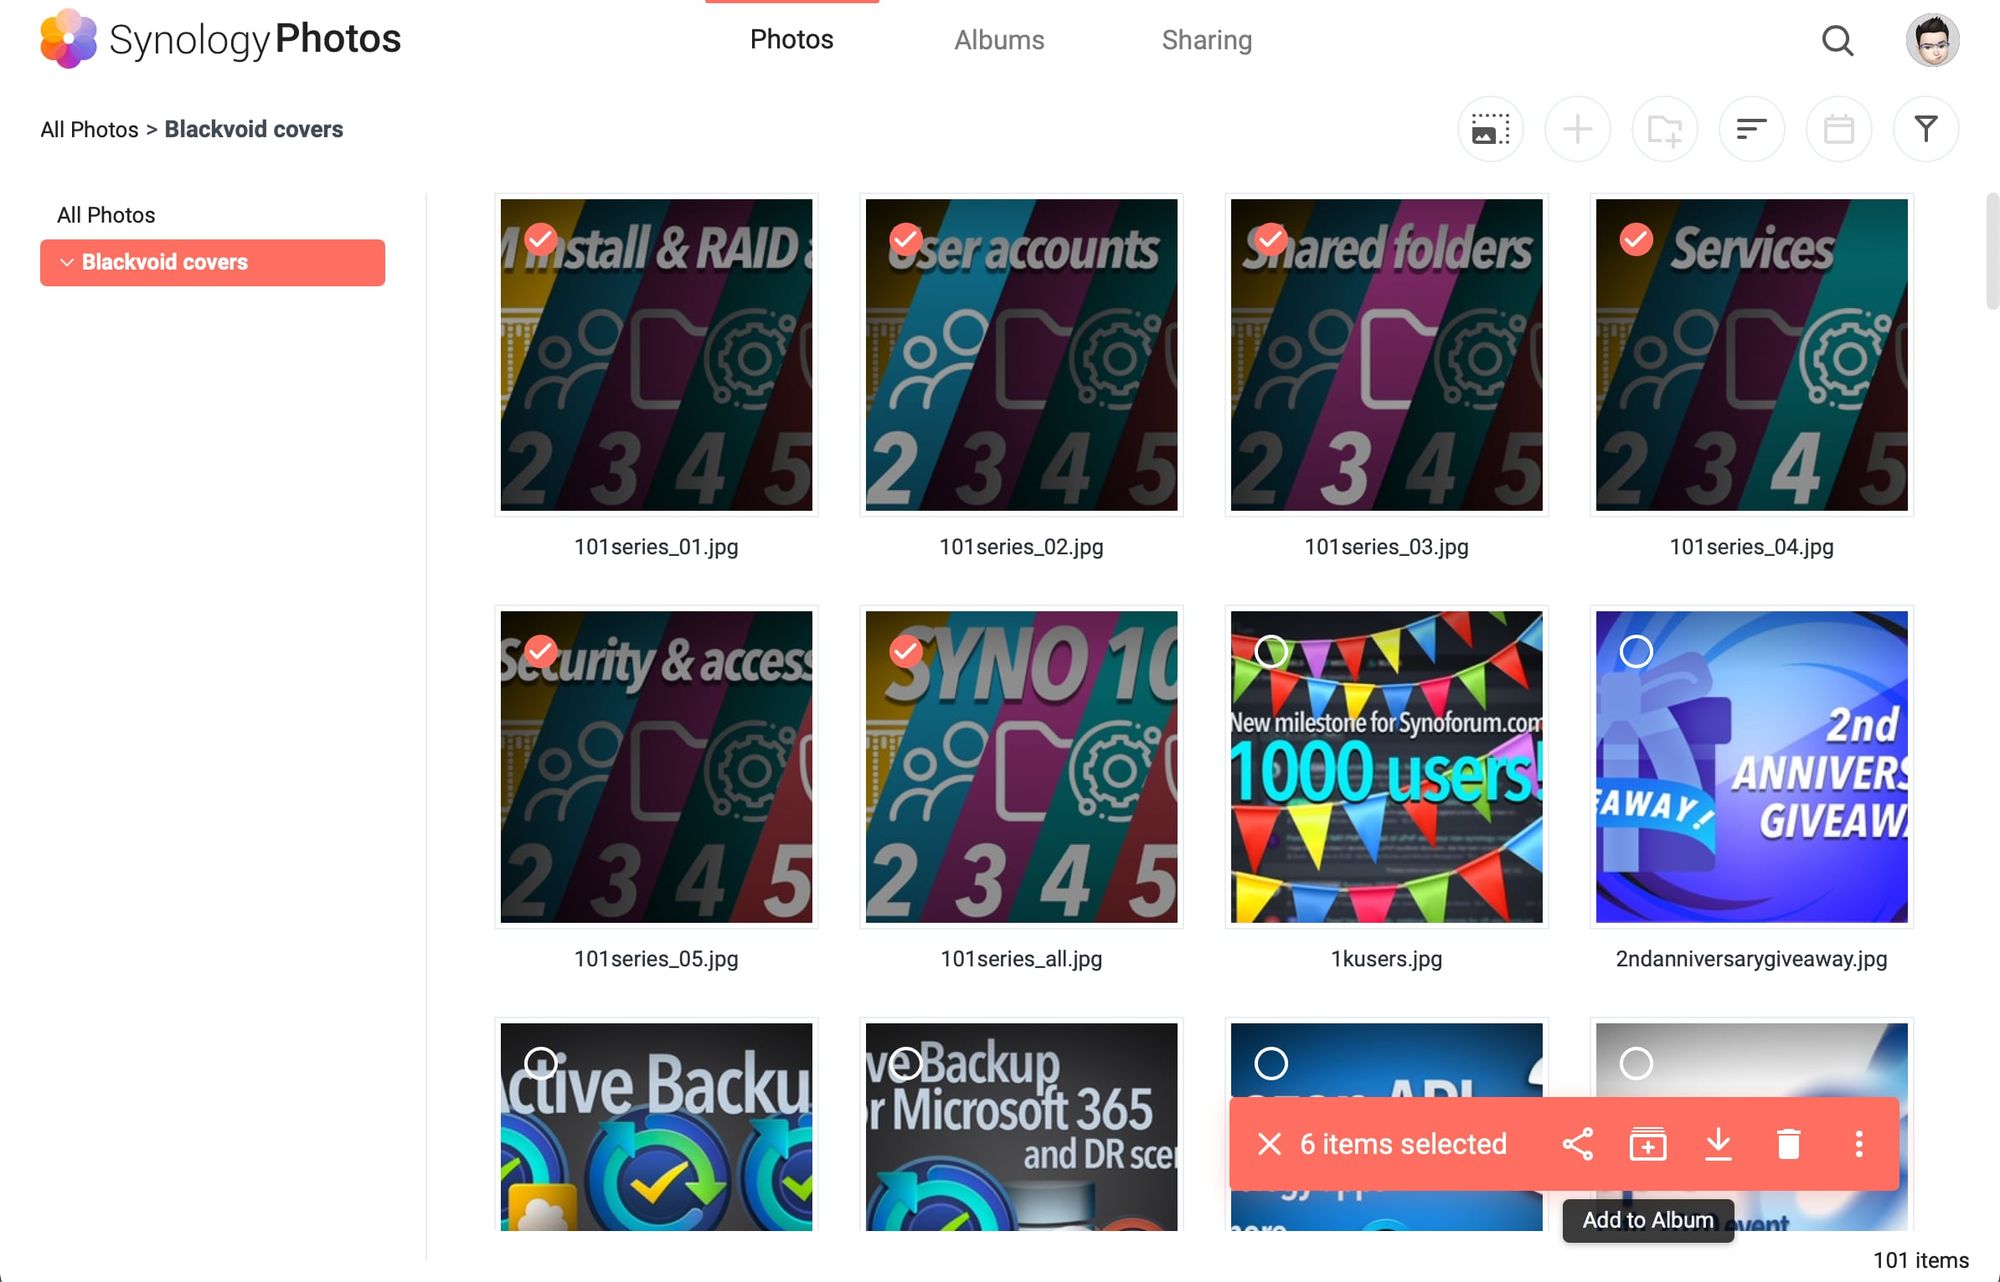

Opening the album will allow you to view it, share it, add photos to it, or download all the images at the same time.
I love this feature as it is very practical, you don’t waste space by making duplicate content, and you can delete them, alter them any time you want, how you want to.
Now one big thing with Photos and getting to your content is sharing and remote access.
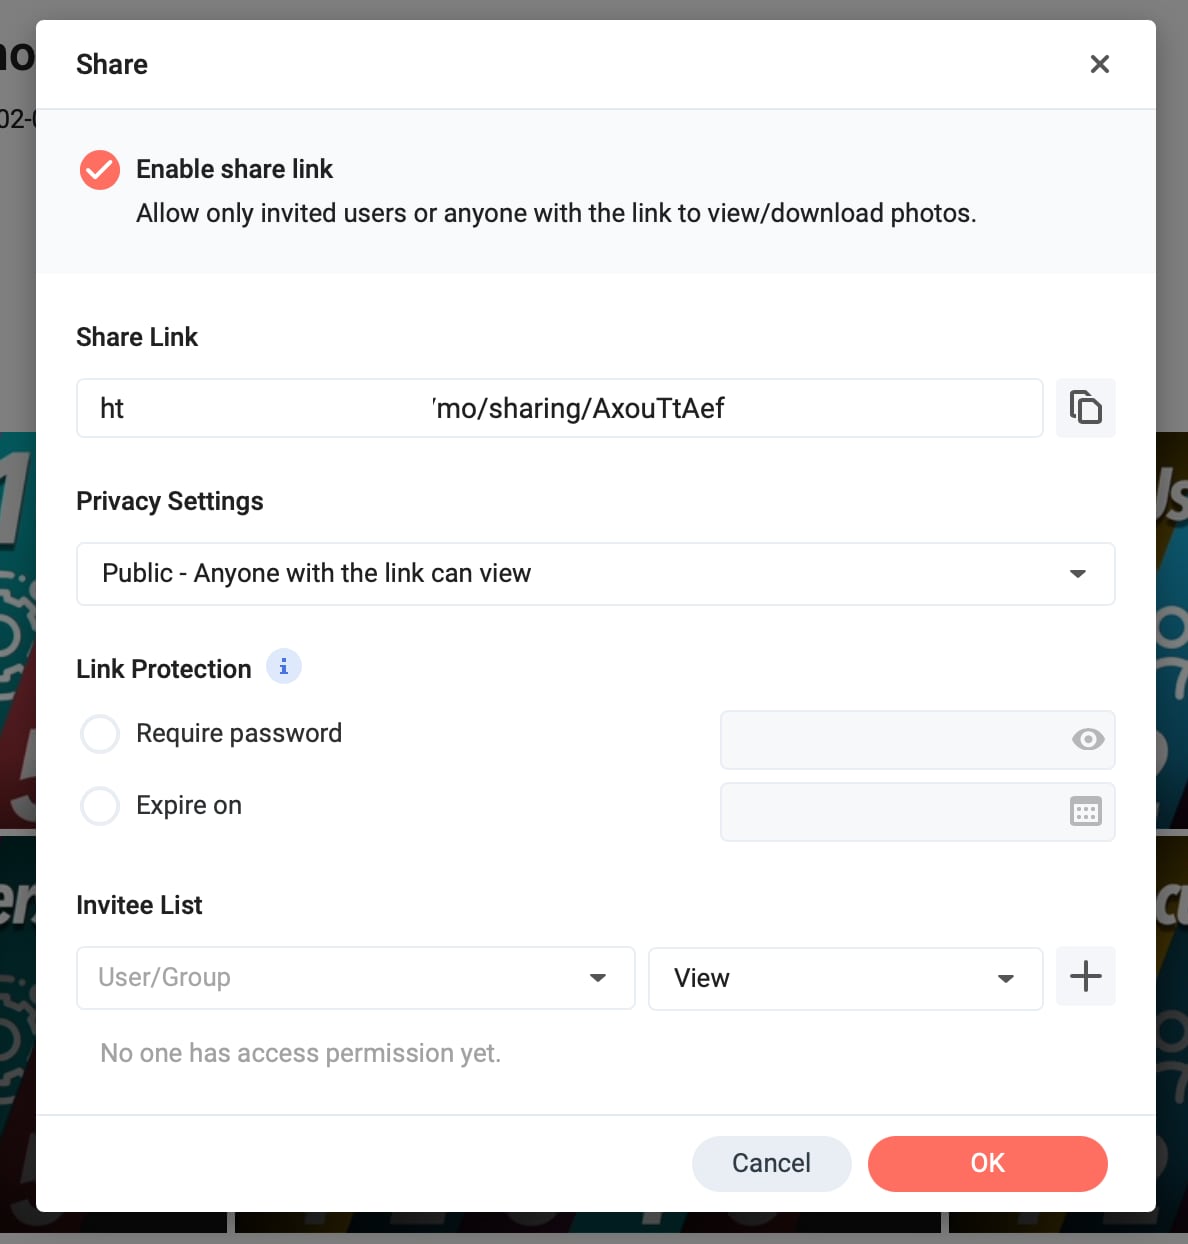
Sharing is very simple and presented by the three-dot icon throughout the app. Click it you will get options to share your generated link, set permission, optional password, or time of expiration as well as who can view, delete, or add content.
Shared Spaces
One specific thing that Photos offers is sharing your content with other users. This works with photo folders that you created and specific albums that you have.
So for example let’s say you have the need to share several photos, folders, or albums with some users, how do you do that?
In this example let’s say that you have your family as your «members» that you want to share content with.
The first thing you need to do is make sure that they have their DSM accounts and permissions to access the Photos app set. If you want help with that, have a look at my articles in the Syno101 section here (specifically Part 2 — User accounts).
Once each member has their account and can log into Photos it is time to configure the access to some shared content.
To make this work you will first need to enable the Shared Spaces feature. Start by going to your profile Settings, and then on the Shared Space tab.
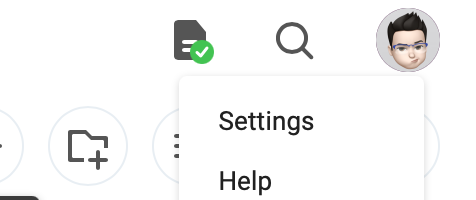
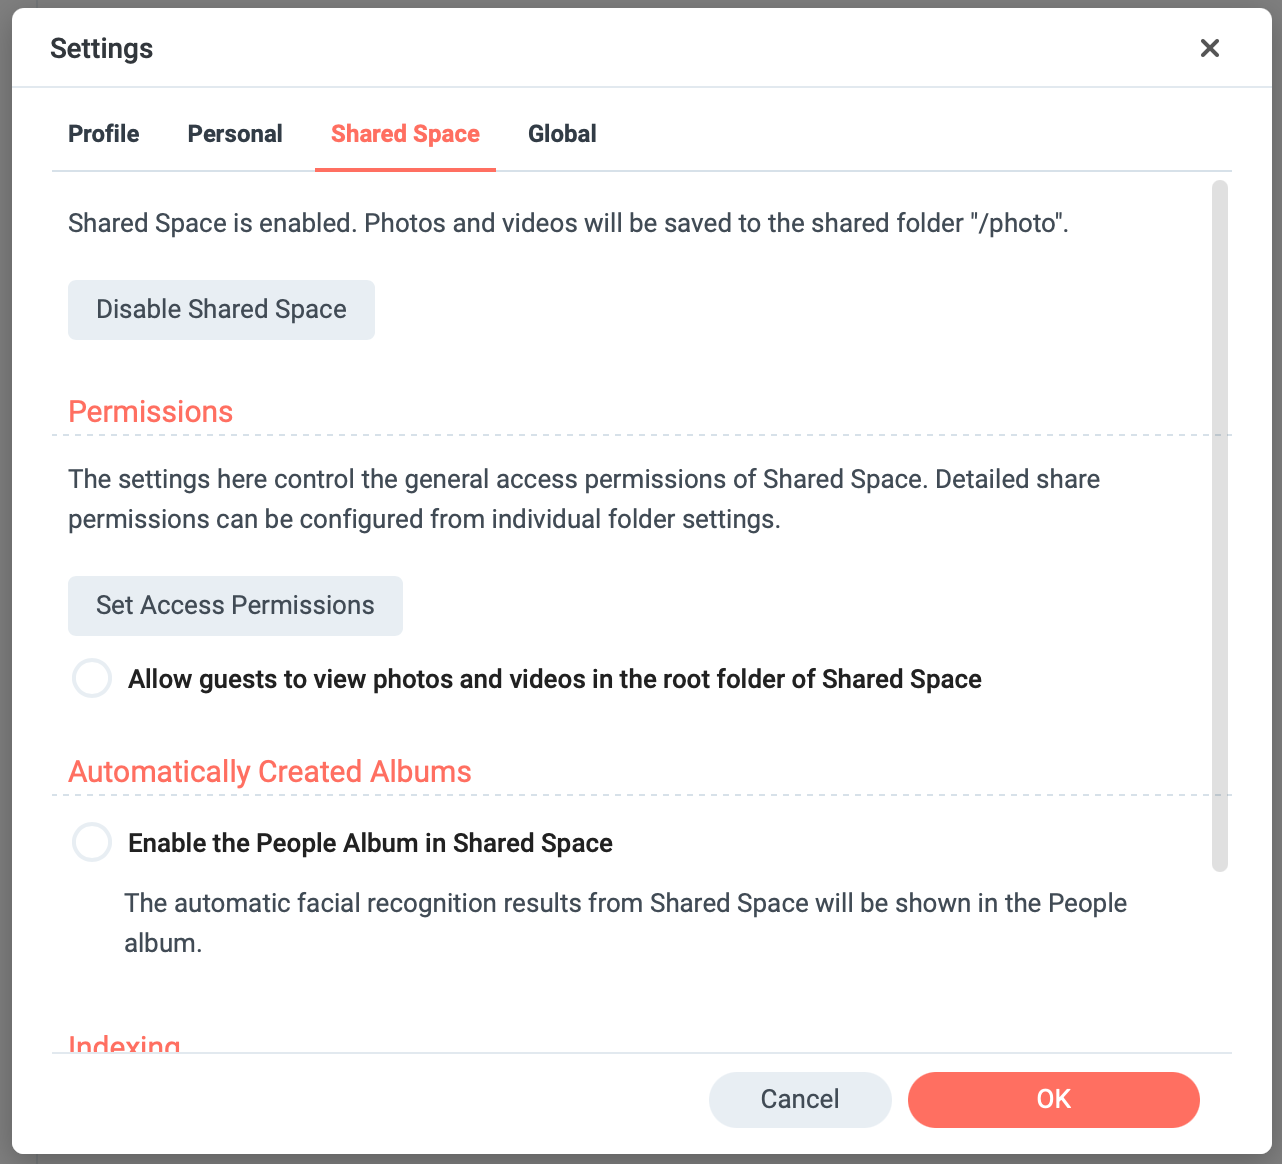
Once you have enabled Shared Space, be sure to click the Set Access Permissions button to add your family members (DSM users) to the shared space allow list.
🗒️
NOTE: Keep in mind that all shared content that you or anyone else creates will «live» in the root photo folder on your volume! Personal content will still be in home/<username>/Photos location.
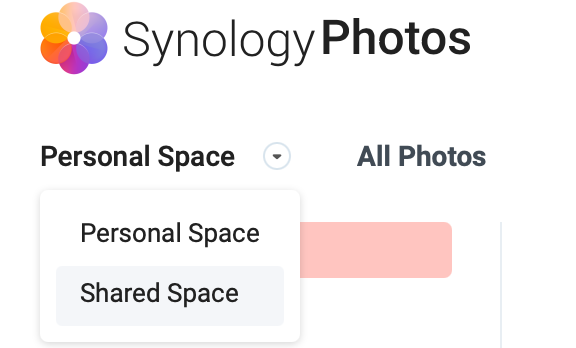
Now that we have done that, you are ready to use Shared Spaces. Going back to the main Photos page, you will see in the upper left-hand corner options to switch from your Personal to Shared space.
Sharing content with specific users
To share some content with a specific user you simply do the following. Click on your folder of choice and click the Set share permissions icon.
Enable the share link option and select your user from the Invitee List menu on the bottom. Select the level of permissions that the user can have, and click OK.
With the option to switch from personal to shared space, you can be certain that there will be no clutter and confusion about what content is your personal one, and what is shared with others.
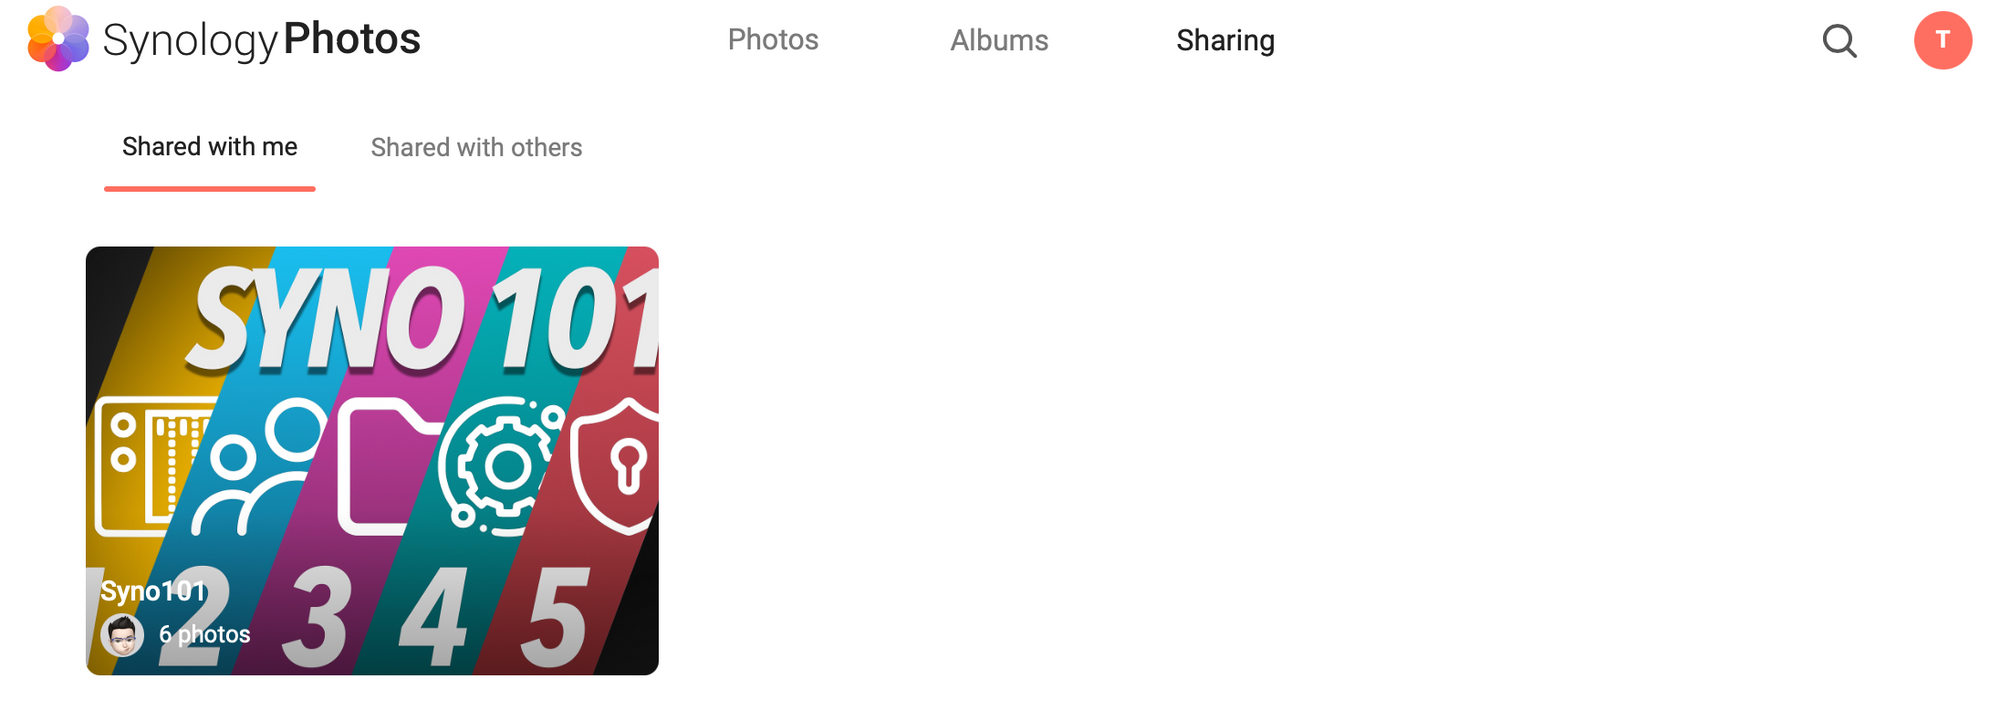
Users that have folders and albums shared with them will see the folder content on the main page of their Photos app under Photos tab, and albums will be visible using the Sharing tab.
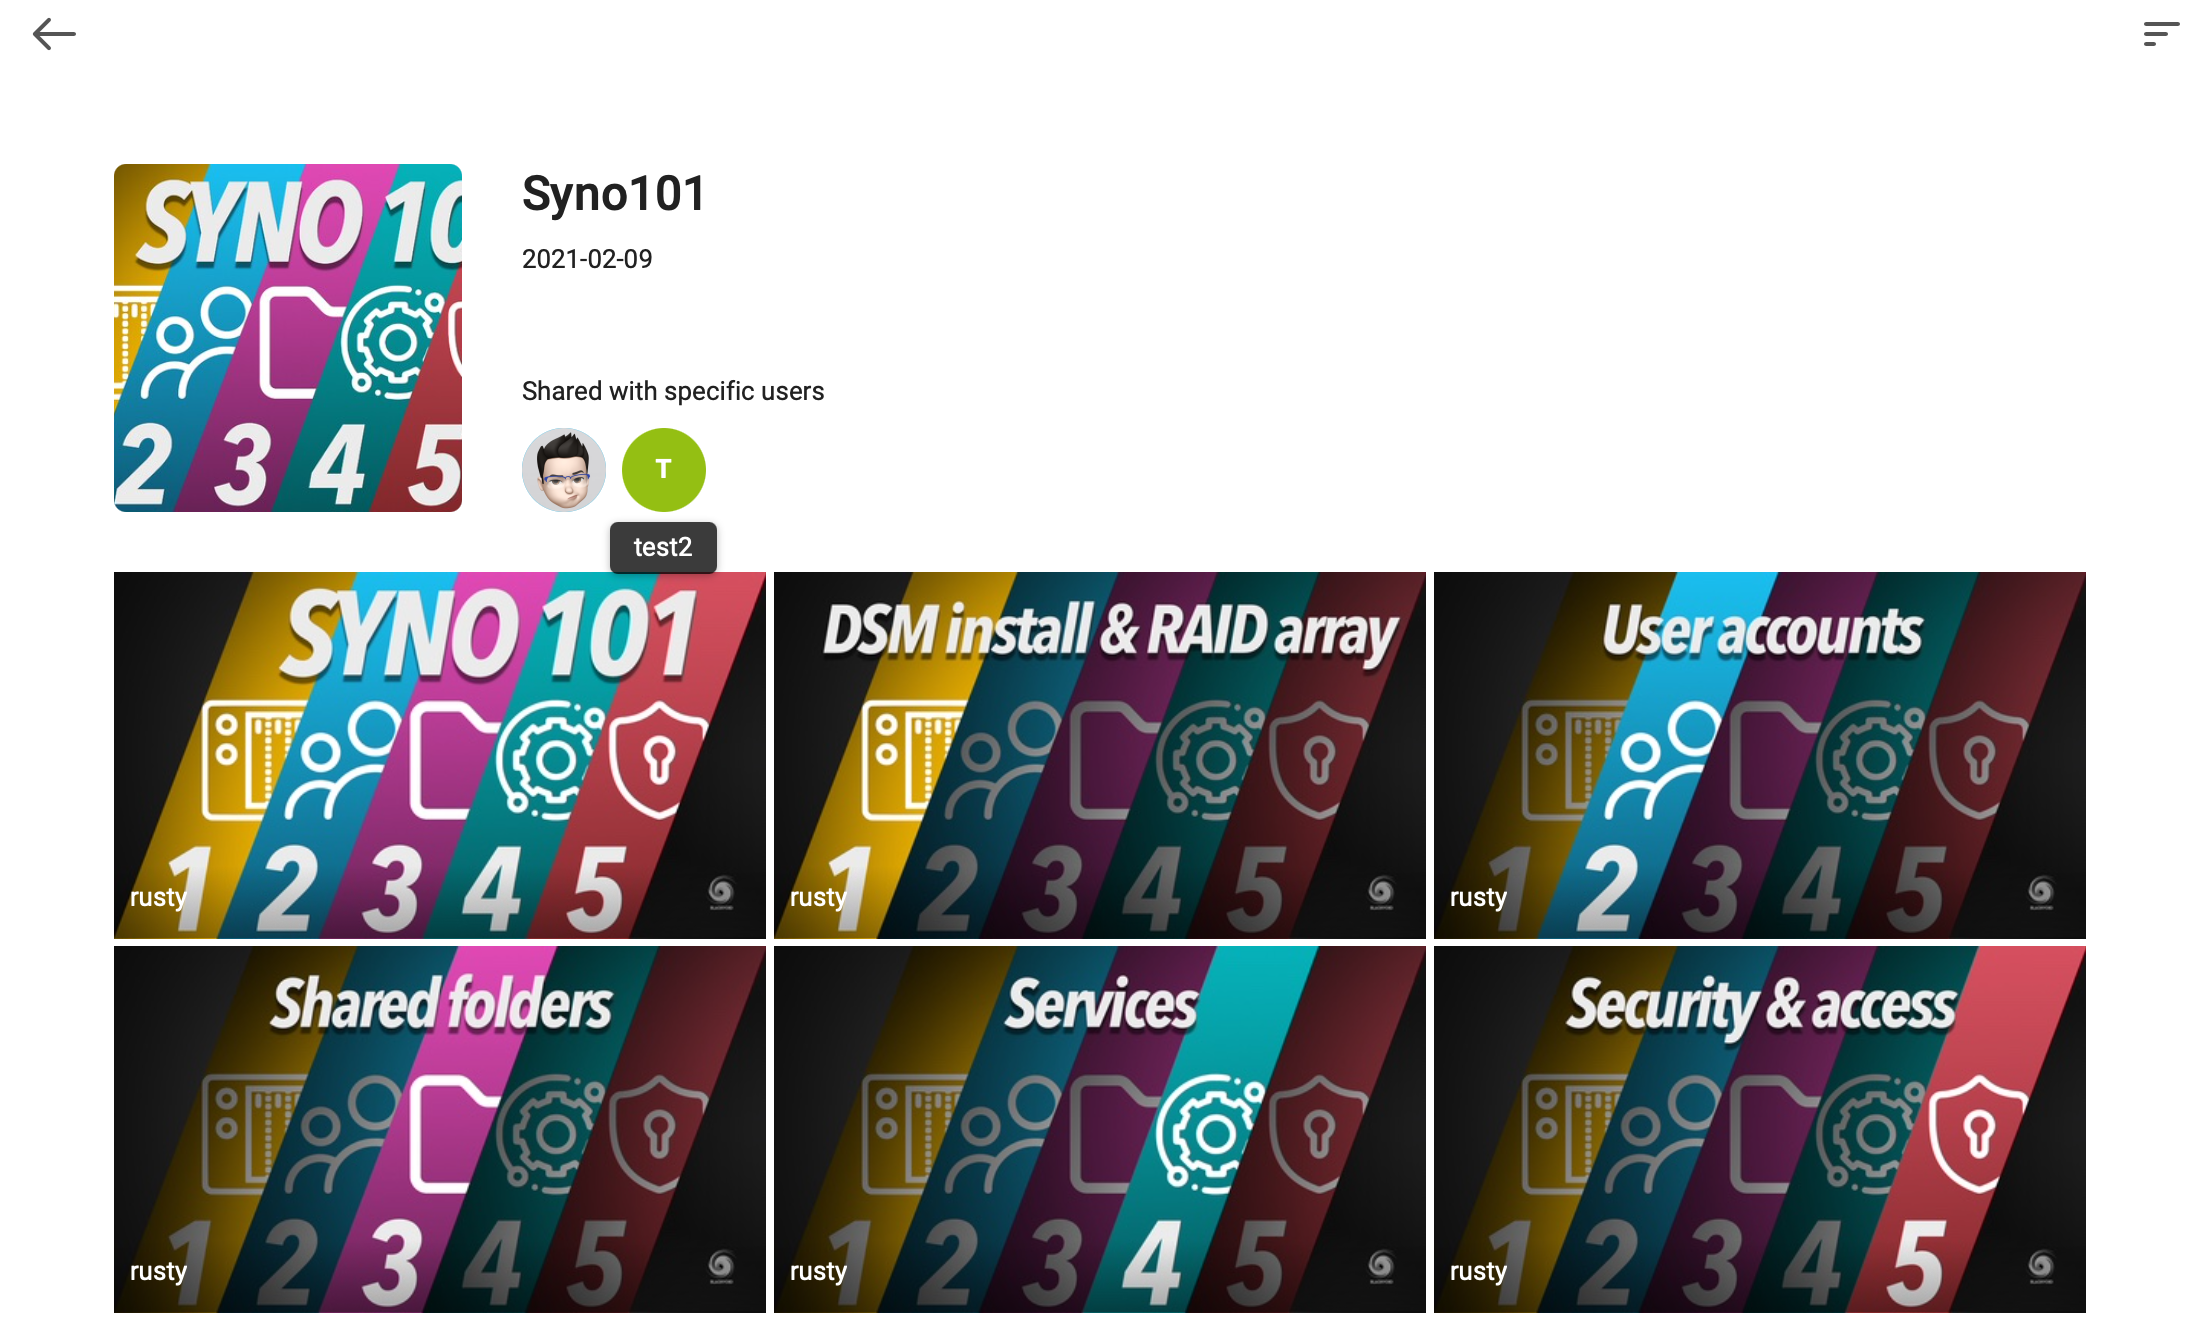
That’s it! You can use the same principle with any number of folders, albums, or just specific items.
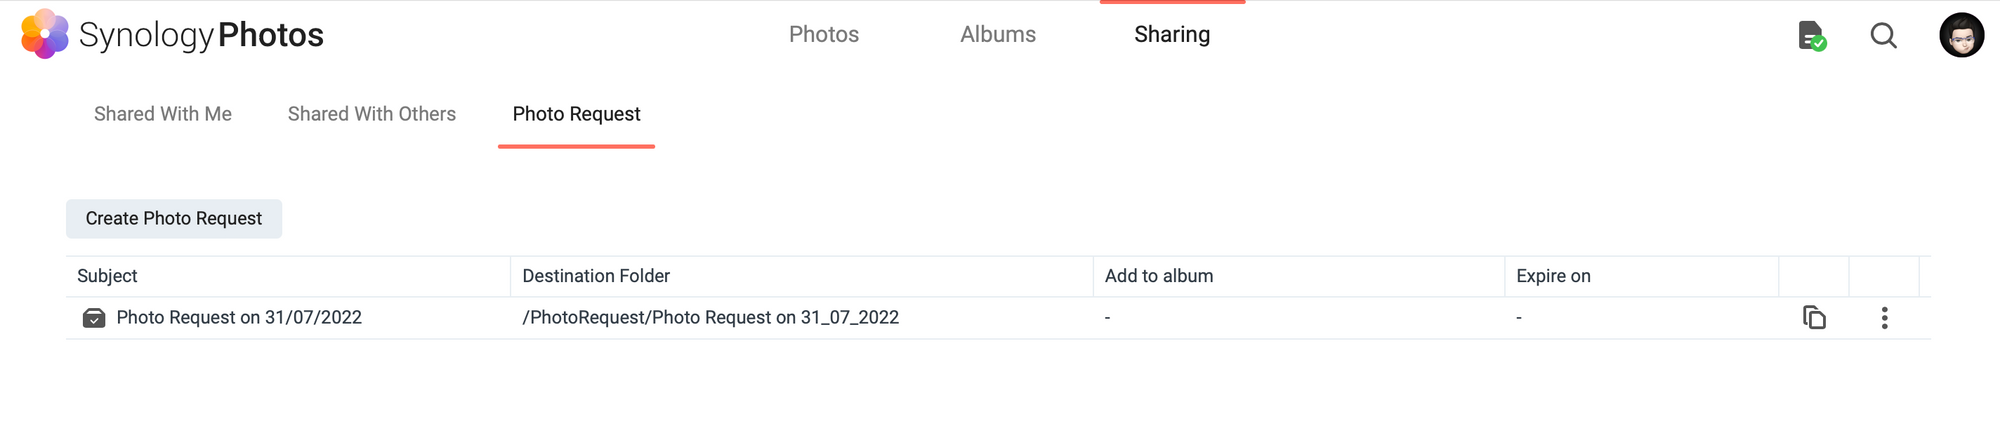
Photo Request
The final option that you will have when using the Sharing tab is Photo Request.
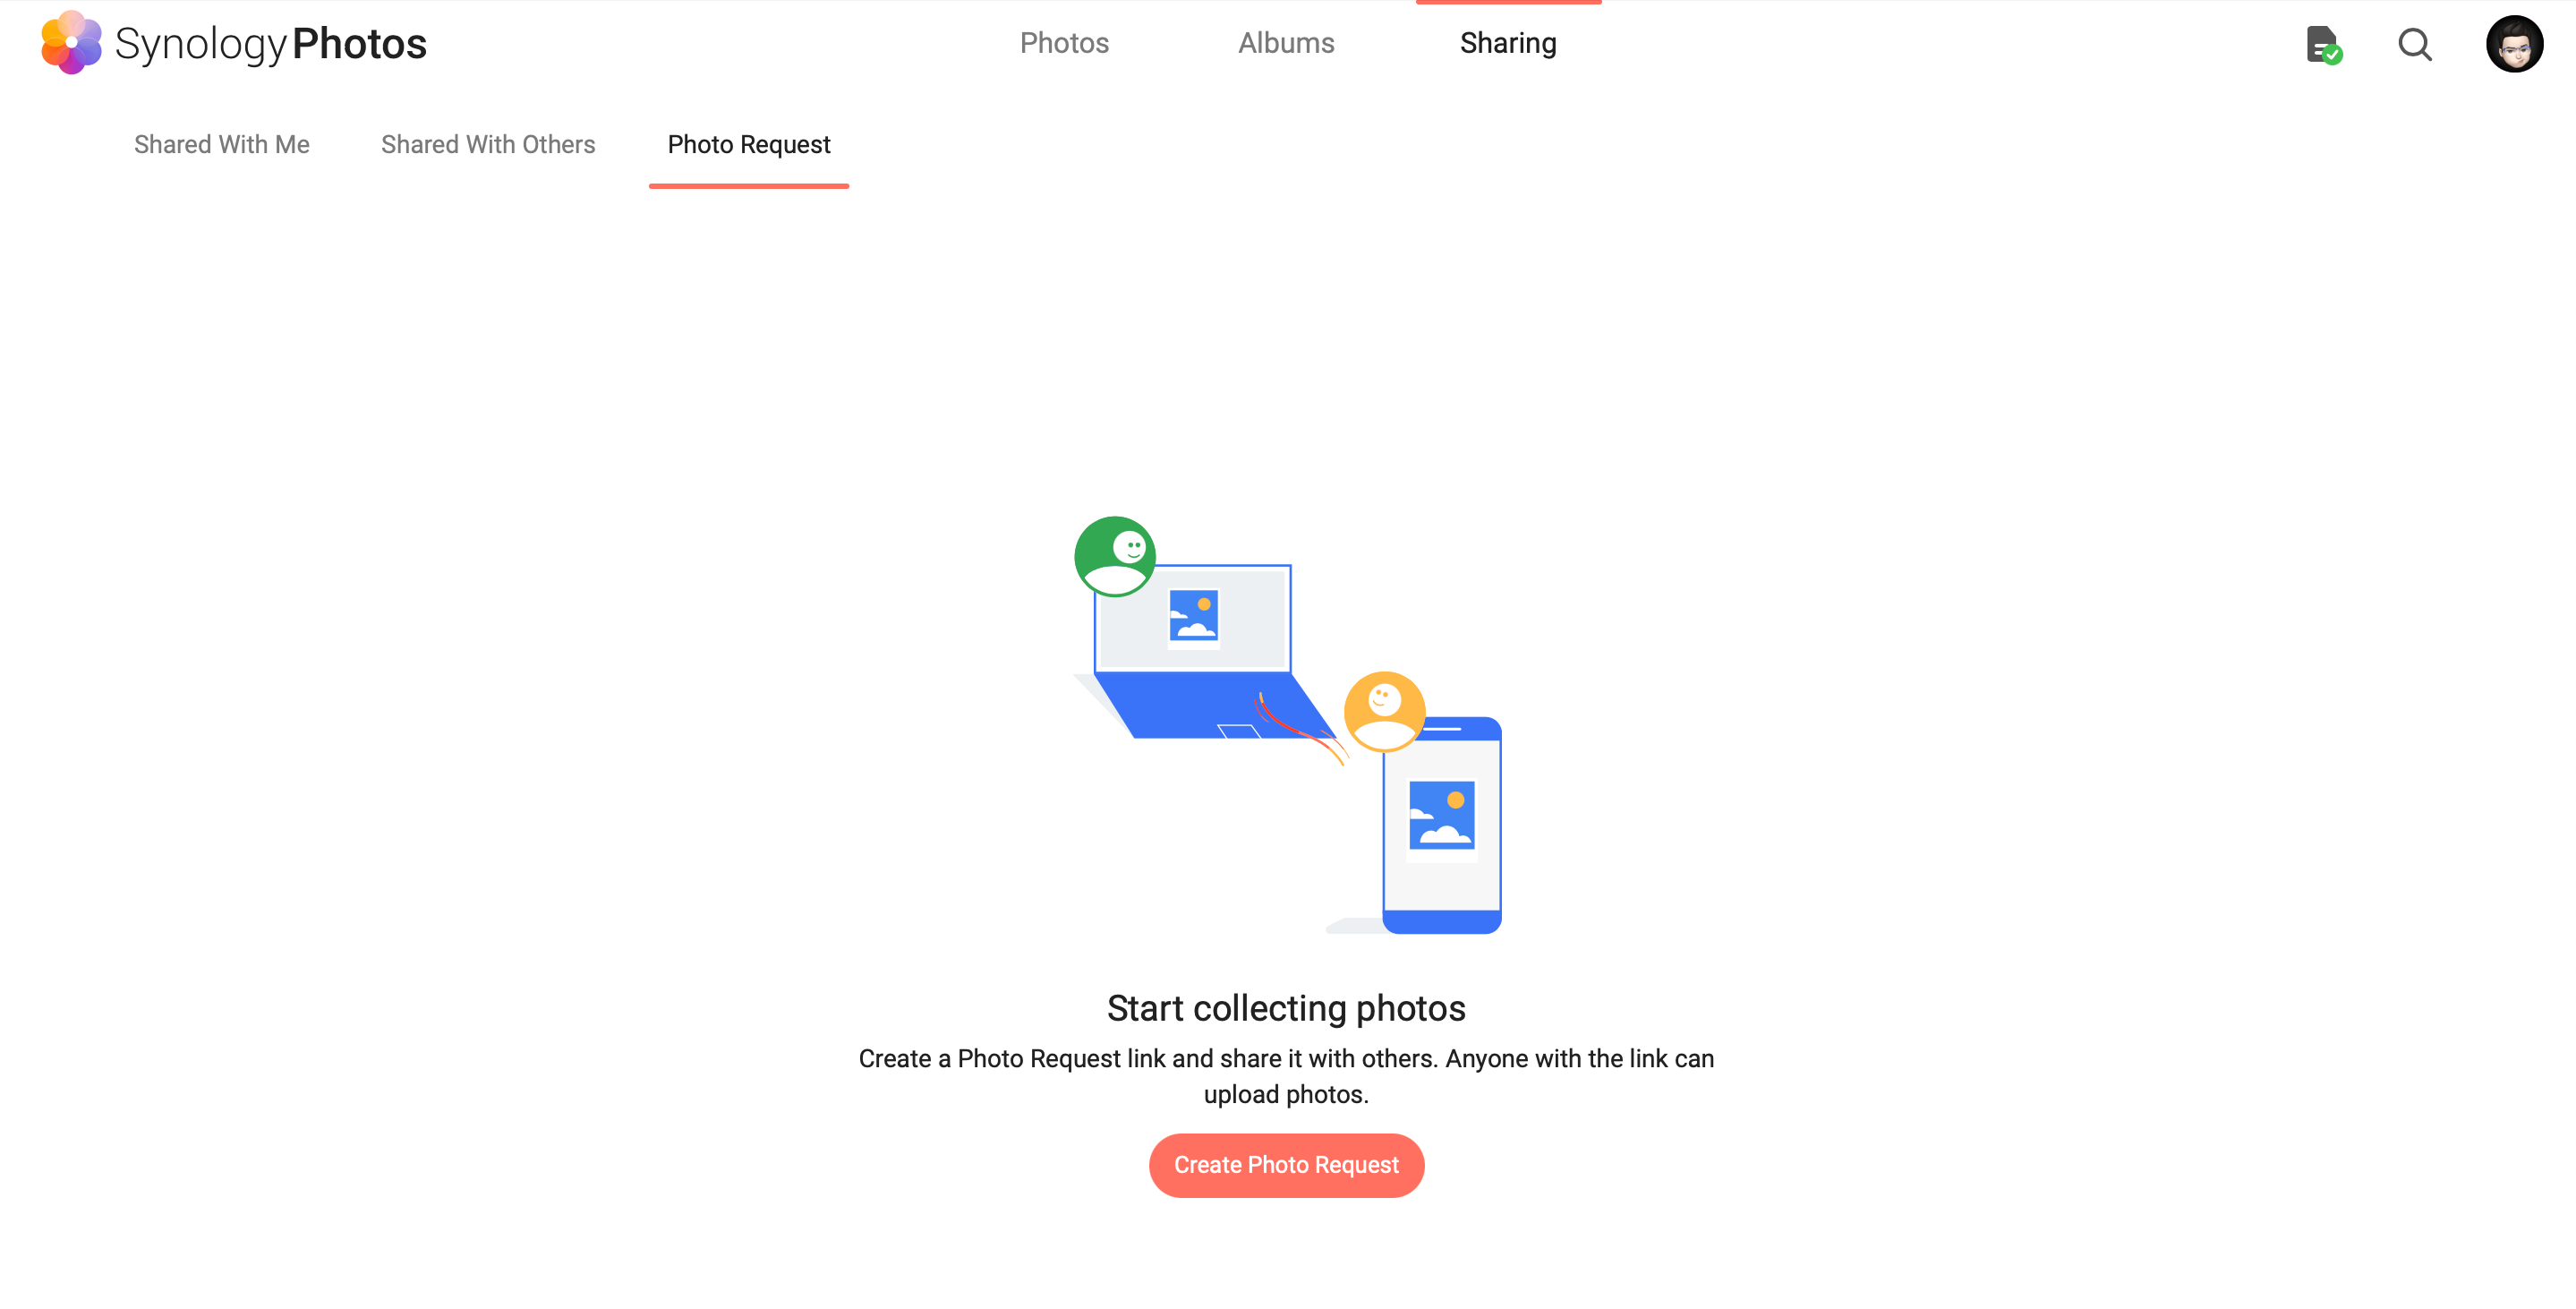
This will allow us to send a link out that any recipient will be able to use to upload images. The content will end up in a folder of your choice and you can also select the option to automatically add those images to an album as well.
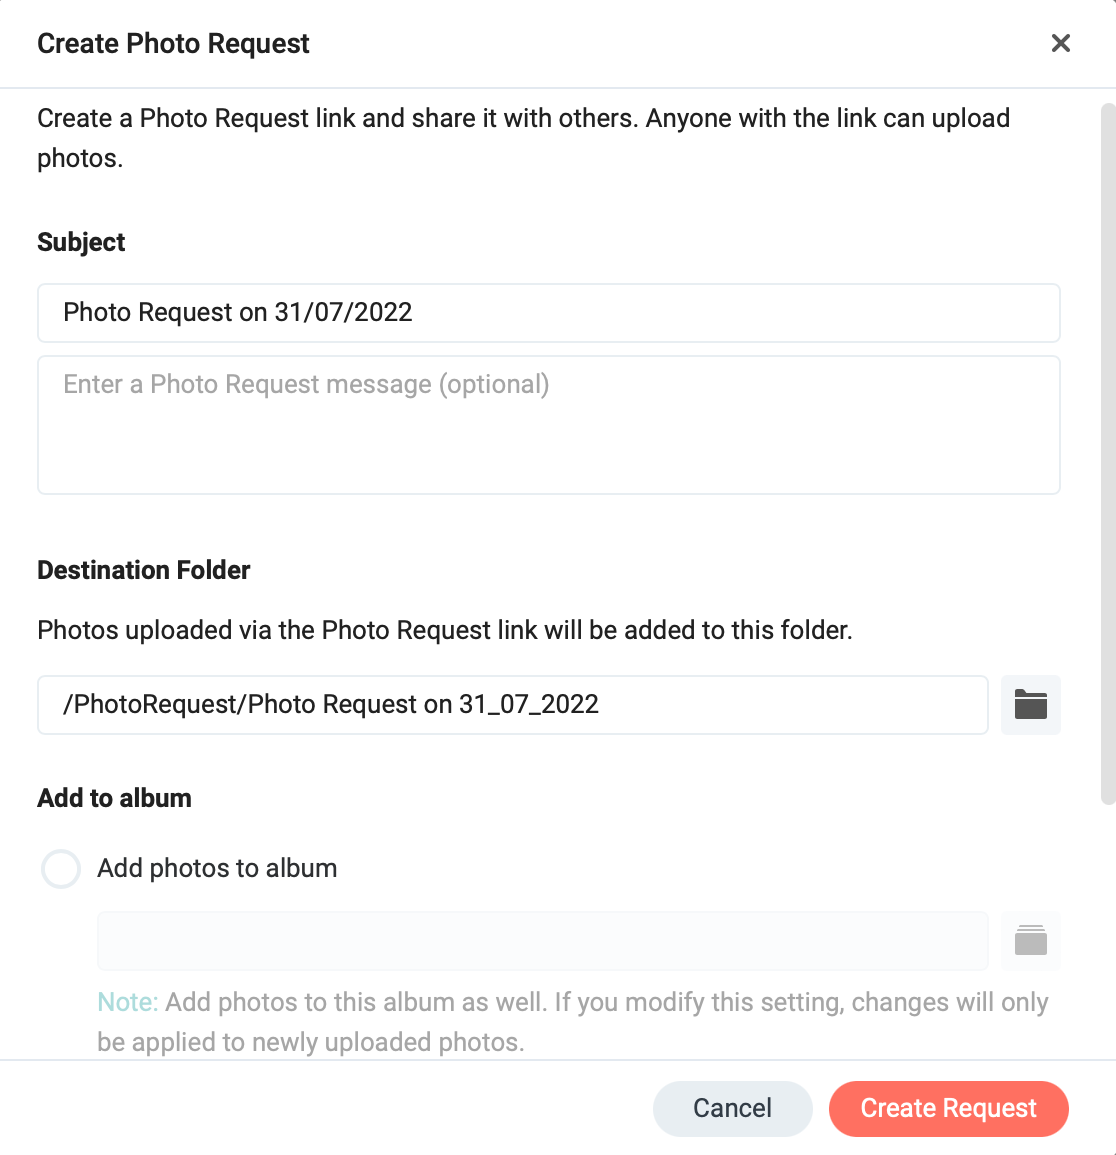
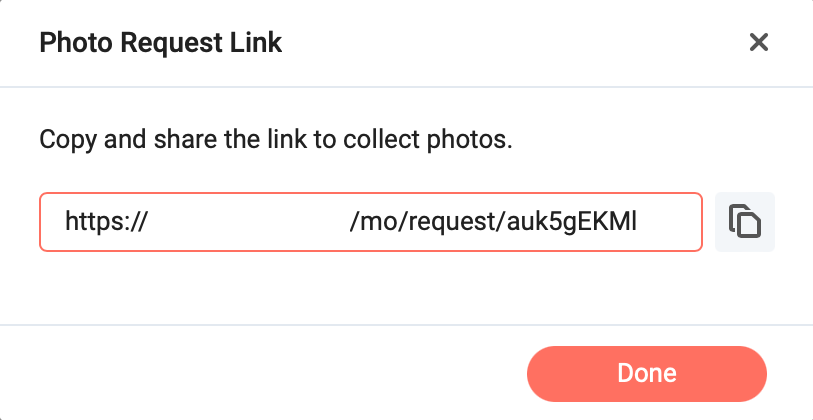
After the link has been created you will be redirected to the link requests page where you can alter your existing links or make new ones.
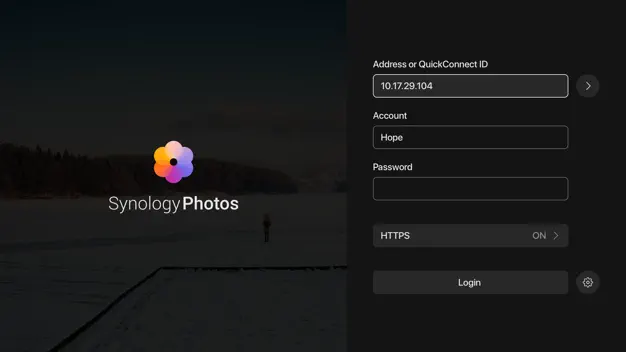
Remote and mobile access
Using your desktop device is one way of getting to your content but most times you will access your content from a remote location and using your mobile app. As I said before, there are mobile apps for both iOS and Android OS and those work well.
Accessing your photos from a remote location will require you to have remote access to your NAS using either QuickConnect, DDNS, or via Reverse Proxy.
Now that you have the remote URL, just enter it on your mobile app, as well as your username and password, and you are done.
Conclusion
So how am I satisfied with the app so far? Very well I have to say. Haven’t had any problems so far. Do keep in mind that I have started fresh with no previous migrations. There are people out there that have had their share of problems with this platform, but then again, it is the same with any app on any platform.
One thing I would like to mention here is the recent events of Google killing their Google Photos unlimited storage plan. It might not be a bad time to consider using your NAS as your «personal cloud» space for all your media content if you don’t want to continue paying to some 3rd party cloud storage to keep your hi-def images of your kids and pets.
Using your NAS just for this purpose alone will be worth it in the long run, trust me. Yes, it might take more administration and maintenance, but you will have peace of mind and a huge amount of storage that you can always expand later on.
Another reason to consider using your NAS as a «private cloud» in case running it as your personal «Google Photos» alternative is not enough, is that you can run almost anything on these machines today. More on this here.
Will you start using Photos as your main platform for photo management?

Subscribe to Blackvoid
Get the latest posts delivered right to your inbox
Great! Check your inbox and click the link to confirm your subscription.
Please enter a valid email address!
Давно хотел написать про то как я храню свои файлы, как делаю бэкапы, но все никак не доходили руки. Недавно тут появилась статья, в чем-то похожую на мою но с другим подходом.
Сама статья.
Я уже много лет пытаюсь найти идеальный для себя метод для хранения файлов. Думаю я его нашел, но всегда есть что улучшить, если есть какие-то мысли как сделать лучше, с удовольствием почитаю.
Начну с того что расскажу пару слов о себе, я занимаюсь веб разработкой и в свободное время фотографирую. Отсюда вывод что хранить мне нужно рабочие и личные проекты, фото, видео ну и другие файлы.
У меня где-то 680 GB файлов, из них процентов 90 это фото и видео.
Круговорот файлов в моих хранилищах:

Тут примерная схема того как и где хранятся все мои файлы.
Теперь подробнее.
Как видно, сердцем всего является мой NAS, а именно Synology DS214, один из самых простых NAS-ов у компании Synology, тем не менее со всем что мне нужно он справляется.
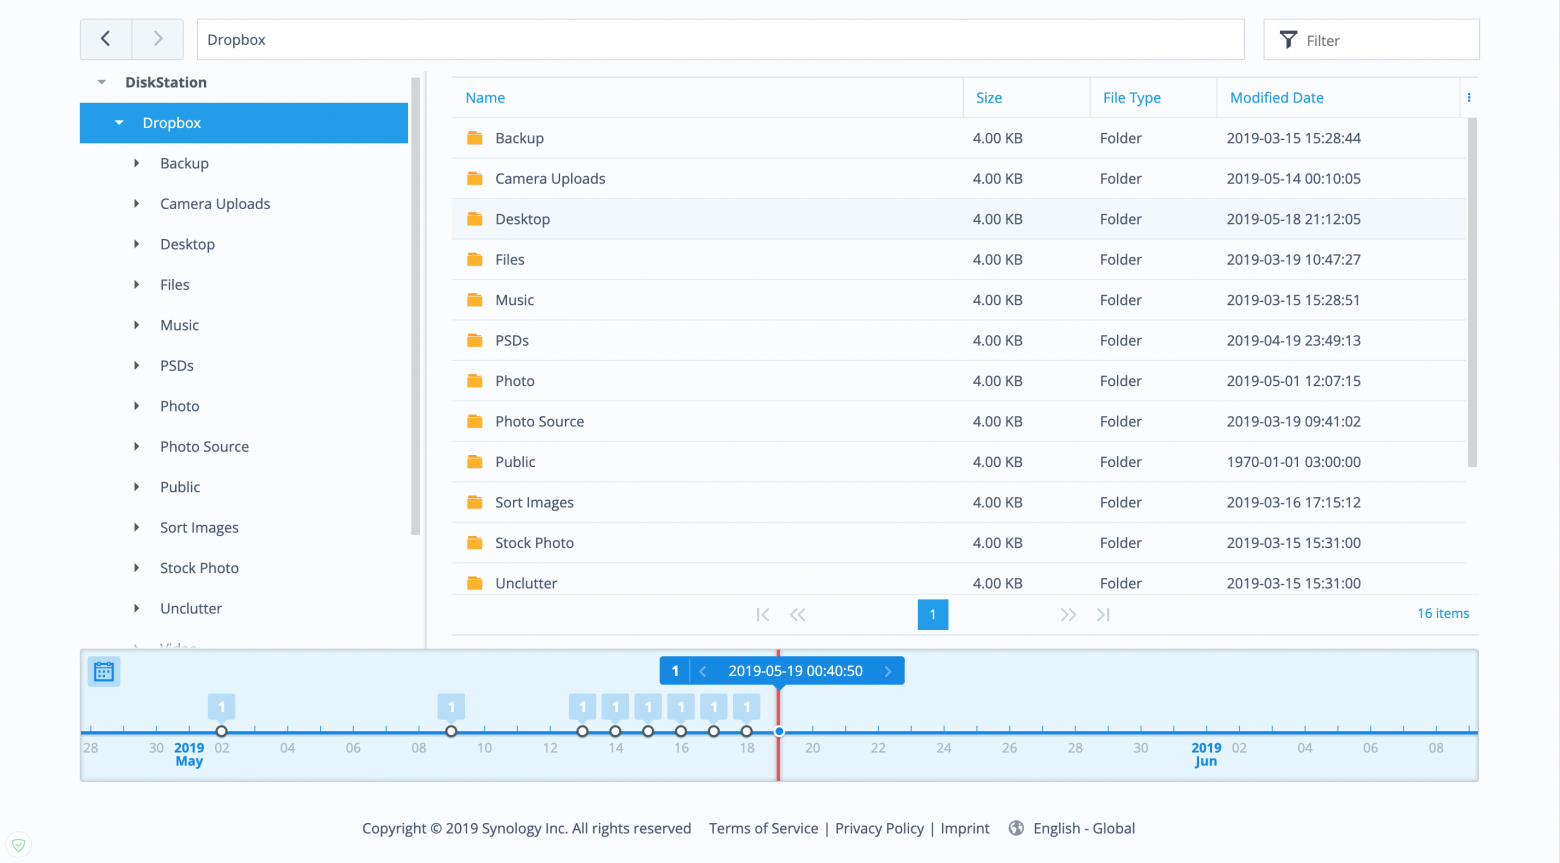
Dropbox
Рабочая машина у меня macbook pro 13, 2015 года. У меня там 512GB но помещаются само собой не все файлы, храню только то что нужно на данный момент. Все свои личные файлы и папки синхронизирую с Dropbox-ом, знаю что это не очень надежно, но он выполняет только функцию синхронизации. И делает он это лучше всего, по крайней мере из того что я перепробовал. А перепробовал я все знаменитые и не очень облака.
У Synology так же есть свое облако, можно его развернуть на своем NAS-е, я несколько раз пробовал пересесть с Dropbox на Synology Cloud Station, но там всегда были проблемы с синхронизацией, всегда какие-то ошибки, или не все синхронизировал.
Все важные файлы хранятся в папке Dropbox, иногда я сохраняю что-то на рабочий стол, чтоб что-то не потерять сделал симлинк в папку Dropbox при помощи программы MacDropAny.
Папка Download у меня никак не синхронизируется но там и нет ничего важного, только временные файлы. Если качаю что-то важное, то копирую в соответствующую папку в Dropbox.
Мои приключения с Dropbox
Когда-то давно, где-то в 2013-2014 я хранил все файлы в Dropbox-e и только в нем, не было никаких бэкапов. Тогда у меня не было 1Тb, то есть я не платил за него, у меня было где-то 25Gb, которые я заработал путем приглашения друзей или других заданий.
В одно прекрасное утро я включил компьютер и все мои файлы исчезли, так же получил письмо от Dropbox где они извиняются и что файлы мои пропали по их вине. Они дали мне ссылку по которой я мог восстановить свои файлы но само собой ничего не восстановились. За то они подарили мне на год 1Tb, после чего я стал их клиентом, как бы странно это не звучало, но никогда им не доверял.
Как писал выше, не смог найти более подходящее для меня облако, во первых еще не было проблем синхронизации, во вторых много всяких сервисов работают только с Dropbox.
Git
Файлы по работе хранятся на рабочем сервере, личные проекты на GitLab-е, тут все просто.
Time Machine
Так же я делаю бэкап всей системы, исключая папку Dropbox и Downloads само собой, чтоб не занимать зря место. Бэкап системы делаю через Time Machine, отличный инструмент, не раз выручал. Делаю на том же NAS-е, благо там есть такая функция. Можно делать и на внешний HDD конечно, но это не так удобно. Нужно каждый раз подключать внешний диск и самому запускать Time Machine. Из-за лени, часто такие бэкапы делал раз в несколько недель. На сервер же он автоматом делает бэкап, я даже не замечаю когда он это делает. Я работаю из дому, так что у меня всегда есть свежая резервная копия всей моей системы. Делаются копию несколько раз за день, не считал сколько раз и как часто.
NAS
Тут и происходит вся магия.
У Synology есть отличный инструмент, называется он Cloud Sync, думаю по названию понятно что он делает.
Он может синхронизировать многие облачные системы между собой, если точнее то синхронизировать файлы с сервера NAS c другими облаками. Обзор данной программы думаю есть в сети. не буду вдаваться в подробности. Лучше опишу как я ее использую.

На сервере у меня есть папка диск под названием Dropbox, она является копией моего Dropbox аккаунта, синхронизацией всего этого занимается Cloud Sync. Если в Dropbox-е что-то произошло с файлами, это произойдет и на сервере, не важно, едитудалениесоздание. В общем классическая синхронизация.
Яндекс диск
Далее, все эти файлы я кидаю на свой Яндекс диск, его я использую как самодельный бэкап диск, то есть файлы туда кидаю но ничего не удаляю оттуда, получается такая свалка файлов, но пару раз выручало.
Google Drive
Туда я отправляю только папку «Photos», так же в режиме синхронизации, делаю я это только для удобного просмотра фото в гугл фото и с возможностью удаления оттуда фото и они удаляются везде (кроме яндекс диска само собой). Про фото я напишу ниже, там вообще можно отдельную статью написать.
HyperBackup
Но все это не очень надежно, если случайно удалил файл то он везде удалится и можно считать его потерянным. Можно конечно восстановить из яндекс диска, но во первых бэкап в одном месте не очень надежен сам по себе, да и сам яндекс диск, не тот сервис в котором можно быть уверенным на 100%, хоть с ним еще ни разу не было проблем.
Поэтому я всегда старался хранить файлы еще где-то, уже с нормальной системой бэкапов.

У Synology так же есть инструмент для этого, называется он HyperBackup, он делает бэкап файлов либо на другие серверы Synology, либо на какие-то клауд решения от сторонних производителей.
Также он умеет делать бэкап на внешние диски, подключенные к NAS-y, так я и делал до недавних пор. Но это тоже не надежно, к примеру если пожар то конец и серверу и HDD.
Synology C2
Тут мы плавно подходим к другому сервису, уже от самой Synology. У нее есть свои облака для хранения бэкапов. Заточен он именно под HyperBackup, он делает туда бэкап каждый день, но это уже продуманный backup, там есть версии файлов, таймлайн и даже клиенты для windows и mac os.
На этом, с хранением файлов все, надеюсь мои файлы в сохранности.
Теперь перейдем к сортингу файлов.
Обычные файлы, книги, сканы документов и другие маловажные файлы я как и все сортирую по папкам руками. Обычно их не много и открываю я их редко.
Самое сложное с сортировкой фото и видео, у меня их много.
Фото я делаю от нескольких десятков до несколько сотен в месяц. Снимаю на зеркалку, на дрон и иногда на телефоне. Фото бывают личные и для стоков. Также иногда снимаю домашнее видео (не то что вы подумали, просто семейные видео, чаще с дочкой). Его тоже надо как-то хранить и сортировать, чтоб не была каша.
У меня есть папка в том же Dropbox-е, под названием Sort Images, там есть подпапки куда попадают все фото и видео, оттуда они берутся и сортируются куда надо.

Сортировка происходит на сервере NAS, там работают bash скрипты которые автоматом запускаются раз в сутки и делают свою работу. За их запуск также отвечает NAS, там есть планировщик задач который и отвечает за запуск всех скриптов и других задач. Можно настроить как часто и когда будут запускаться задачи, крон с интерфейсом если проще.
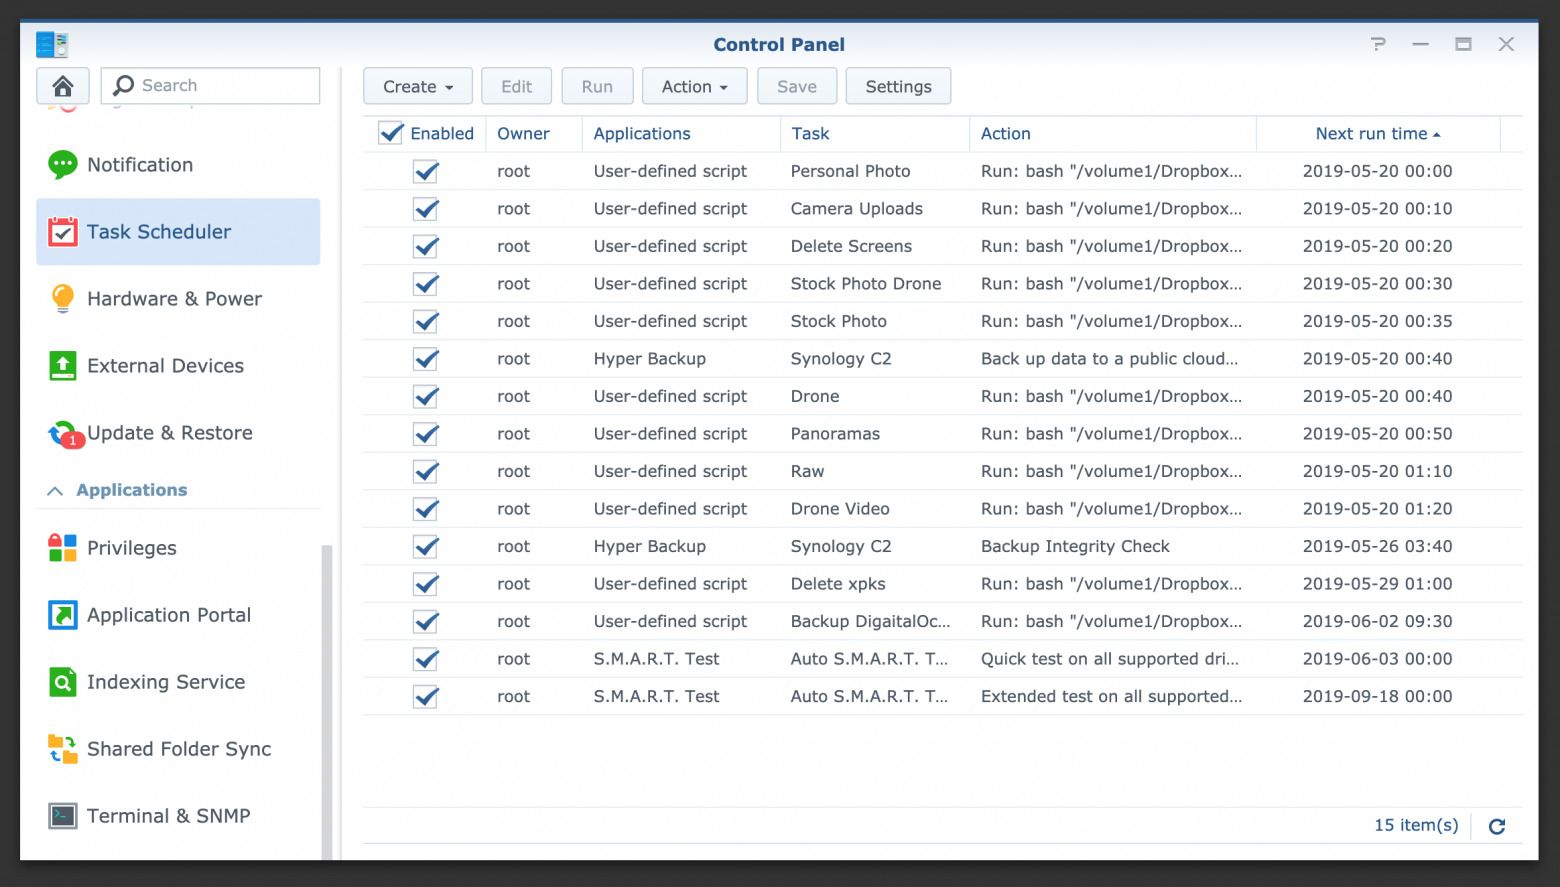
Для каждой папки есть свой скрипт. Теперь подробнее о папках:
Drone — тут попадают фото с дрона которые я снял в личных целях. Сначала я обрабатываю все фото в lightroom, потом делаю экспорт JPG в эту папку. оттуда они попадают в другую папку Dropbox, «Photo».
Там есть папка «Drone» и там уже они сортируются по годам и месяцам. Скрипты сами создают необходимые папки и переименовывают сами фото по моему шаблону, обычно это дата и время снятия фото, так же добавляю в конце рандомную цифру, чтоб не получались файлы с одним и тем же именем. Не помню почему для этих целей не подходило выставление секунд в имени файла.
Дерево имеет такой вид: Photo/Drone/2019/05 — May/01 — May — 2019_19.25.53_37.jpg

Drone Video — я пока что не снимаю видео дроном, там нужно многое учить, нет для этого сейчас времени, но папку уже создал.
Images Operations — тут внутри две папки, когда файлы там попадаются то они просто либо сжимаются по максимальной стороне до 2000px для публикации в интернете либо делается флип картинок, это уже мне не нужно, но пока что папку не удалил.
Panoramas — тут попадают как не сложно догадаться панорамы, их я храню отдельно так как это специфический вид фото, обычно делаю их дроном. Я делаю и обычные панорамы но так же делаю 360 панорамы и иногда сферы, такой вид панорам как маленькие планеты, делаю так же дроном. Из этой папки все фото попадают также в Photo/Panoramas/2019/01 — May — 2019_19.25.53_37.jpg. Тут я не делаю сортировку по месяцам так как панорам не так уж много.
Personal Photo — Тут попадают фото которые делаю на зеркалку, обычно это семейные фото или же путешествия, в общем фото которые делаются на память и для себя. Так же сырые фото обрабатываю а lightroom-е и потом экспортирую сюда.
Отсюда они попадают сюда: Photo/2019/05 — May/01 — May — 2019_19.25.53_37.jpg
Если же я снял какой-то торжество или еще что-то что лучше бы хранить отдельно то в папке 2019 создаю папку с названием торжества и копирую туда фото руками.
RAW — тут попадают исходники фото. я всегда снимаю в RAW, все фото храню в JPG но иногда хочется хранить также и RAW файлы, иногда хочется по другому обработать какой-то кадр. Обычно это природа и туда попадают только лучшие кадры, не все подряд.
Stock Photo — сюда я скидываю фото для стоков, которые делаю либо на зеркалку, либо на дрон. Сортировка такая же как и на других фото, просто в свою отдельную папку.
В корневой директории Dropbox, есть папка Camera Uploads, это дефолтная папка в которую мобильное приложение Dropbox скидывает туда все фото и видео. Все фото жены с телефона скидываются таким образом. Я так же все свои фото и видео с телефона скидываю сюда и отсюда уже сортирую в отдельную папку. Но я делаю это иным способом, более удобным для меня. Есть такая программа для Android, FolderSync, она позволяет брать все фото с мобилы, закачать их на Dropbox и потом удалить их с телефона. Там множество настроек, рекомендую. В эту папку попадают и видео с телефона, они также сортируются как и все фото, по годам и месяцам.
Все скрипты я собрал сам из всяких инструкций в интернете, готовых решений не нашел. Я вообще ничего не знаю про баш скрипты, возможно есть какие-то ошибки или какие-то вещи можно было бы сделать лучше, но самое главное — для меня, они справляются со своей работой и делают то что мне надо.
Скрипты залил на гитхаб: https://github.com/pelinoleg/bash-scripts
Раньше для сортировки фото, видео я использовал Hazel под mac os, там само собой все легче, там все задачи создаются визуально, не надо писать код, но тут есть два минуса. Во первых нужно держать все папки на компьютере, чтоб все хорошо работало и второе, если вдруг пересяду на windows или linux то там нет таких программ. Пробовал искать альтернативу но все они были ни о чем. А решение со скриптами на сервере более универсальное решение.
Все скрипты настроены чтобы выполнялись раз в сутки, обычно ночью. Но если нет времени ждать и нужно как-то выполнить нужный скрипт сейчас, есть два решения, подключиться по SSH к серверу и выполнить нужный скрипт или же зайти в админку и так же мануально запустить нужный скрипт. Все это мне кажется не удобным, поэтому я нашел третье решение. Есть программа под Android, она может отправлять команды ssh. Я создал несколько команд, для каждой есть своя кнопка и теперь если мне нужно отсортировать например фото которые сделал с дрона то просто нажимаю одну кнопку и скрипт срабатывает. Программа называется SSHing, есть и другие похожие, но для меня эта самая удобная.

Так же у меня несколько своих сайтов, они больше для галочки, туда практически никто не заходит но все же backup делать не помешает. Сайты я держу на DigitalOcean, там установил панель aaPanel. Там есть возможность сделать резервные копии всех файлов и всех баз данных, но на том же диске.
Хранить бэкап на том же диске не дело, поэтому я так же через bash скрипт стучусь туда и копирую все на свой сервер, архивируя все в одном архиве с датой в названии.
Надеюсь хоть кому-то помогут способы, что я использую и какими поделился.
Как видно из статьи, я люблю автоматизацию и стараюсь автоматизировать что все что только можно, я многие вещи не описывал с точки зрения автоматизации, так как это уже другие темы и другие статьи.