Bugs listed in italics indicate the bug has been moved to another project.
Provides all the steps required to install Eclipse for Java Development on Windows 10 and getting started with Java development using the Hello World example.
Eclipse is the most popular IDE used for Java application development. The other popular options for Java development include IntelliJ IDEA, VSCode, and NetBeans.
Notes: It assumes that Java is already installed on the system. You may also be interested in How To Install OpenJDK 13 On Windows and How To Install Java 11 On Windows. You can also follow How To Install IntelliJ IDEA for Java on Windows to install IntelliJ IDEA on Windows 10.
Download Eclipse For Java
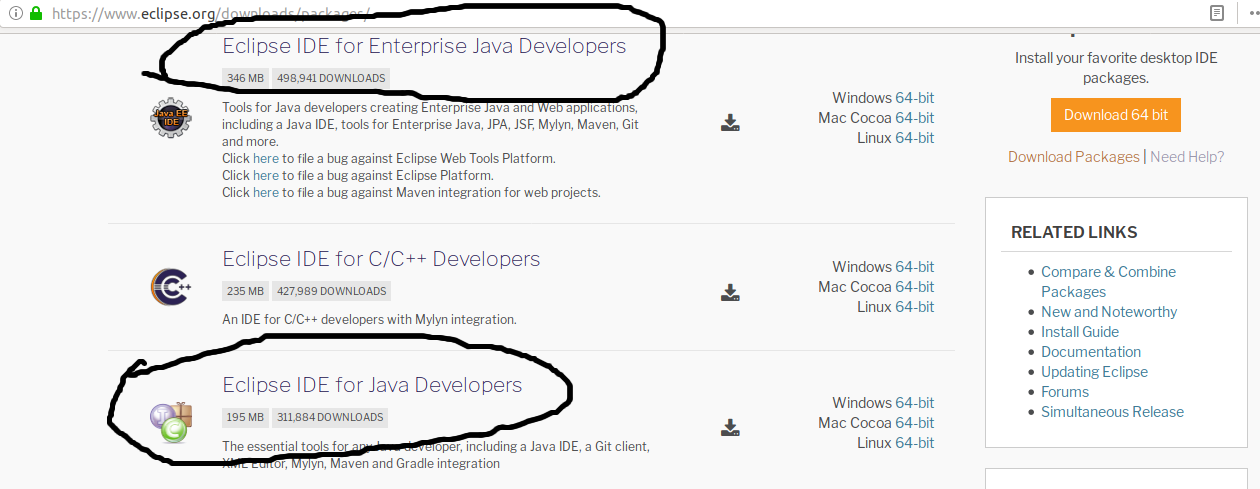
Open the Eclipse Packages Page to view the various Eclipse packages distributed by the Eclipse community. It lists the Java packages as shown in Fig 1.
Fig 1
Eclipse IDE for Enterprise Java Development and Eclipse IDE for Java Developers are the popular Java packages distributed by the Eclipse Foundation. I will cover the installation of Eclipse IDE for Java Developers and creating the Hello World Project to print Hello Java !! on the console. The same steps can be followed to install Eclipse IDE for Enterprise Java Development.
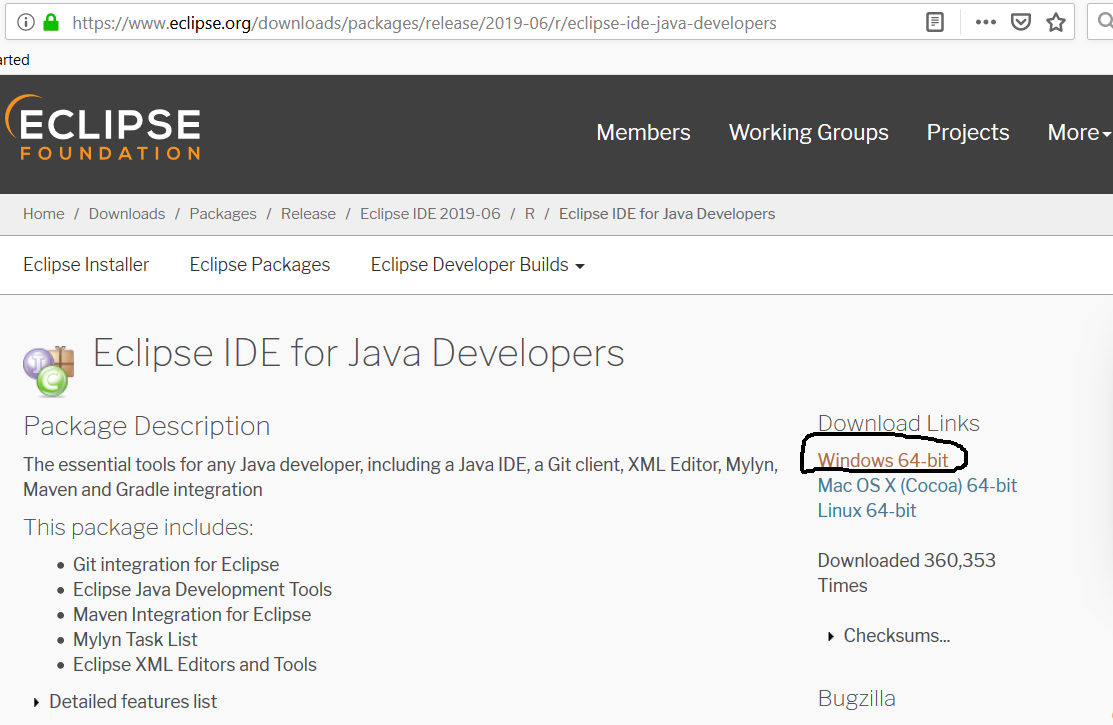
Click on the link Eclipse IDE for Java Developers to view the description, features, and download options as shown in Fig 2.
Fig 2
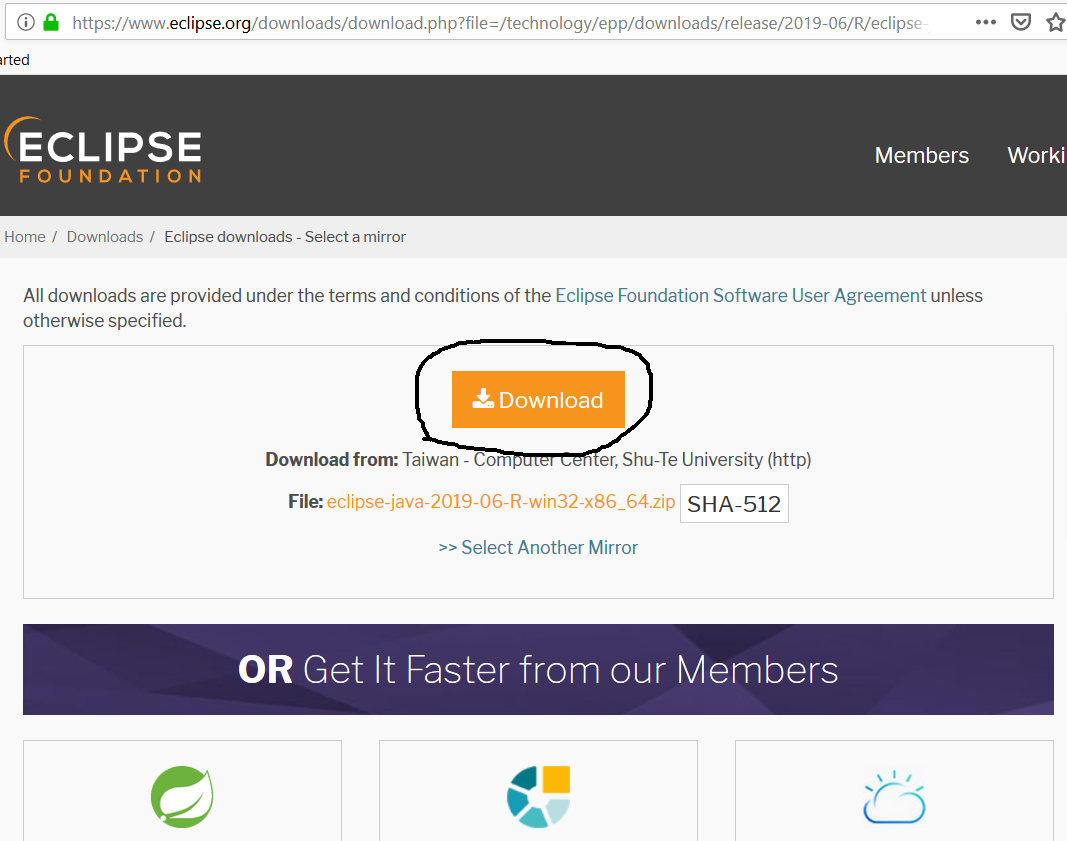
Click on the Windows 64-bit Link to view the download locations for Eclipse For Java Developers as shown in Fig 3.
Fig 3
Click on the Download Button to start the download.
Install Eclipse For Java Developers
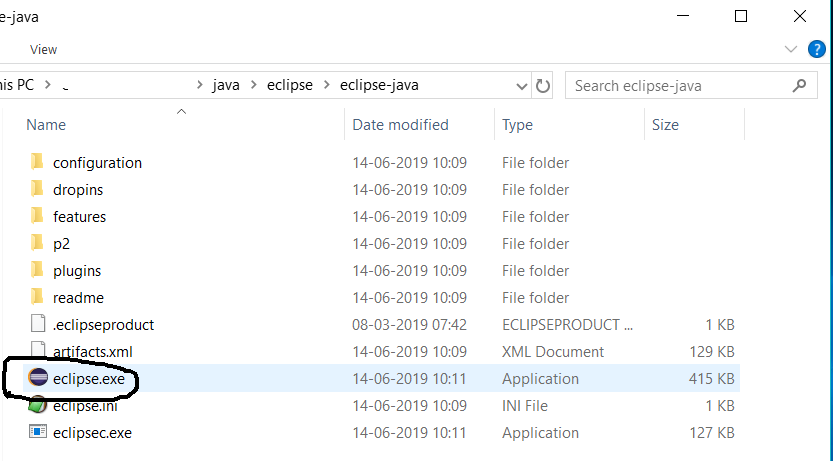
In this step, we will install Eclipse for Java as downloaded by us in the previous step. Extract the Eclipse file downloaded by us to the preferred location. It should be similar to the one as shown in Fig 4.
Fig 4
You may also create the Desktop Shortcut to launch it from the desktop.
Launch Eclipse and Configure Workspace
In this step, we will execute the Eclipse and configure the workspace. A workspace is a collection of projects and arrangement of the development IDE.
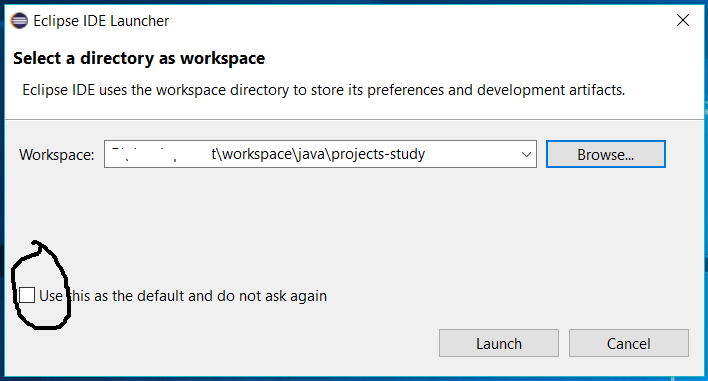
Start Eclipse by either clicking the executable file from installation path or the desktop shortcut icon created by us. It will show the splash screen and show the dialog to choose workspace as shown in Fig 5.
Fig 5
Make sure that you have kept the checkbox to choose workspace at start of Eclipse as unchecked so that we can select a different workspace at the start of Eclipse.
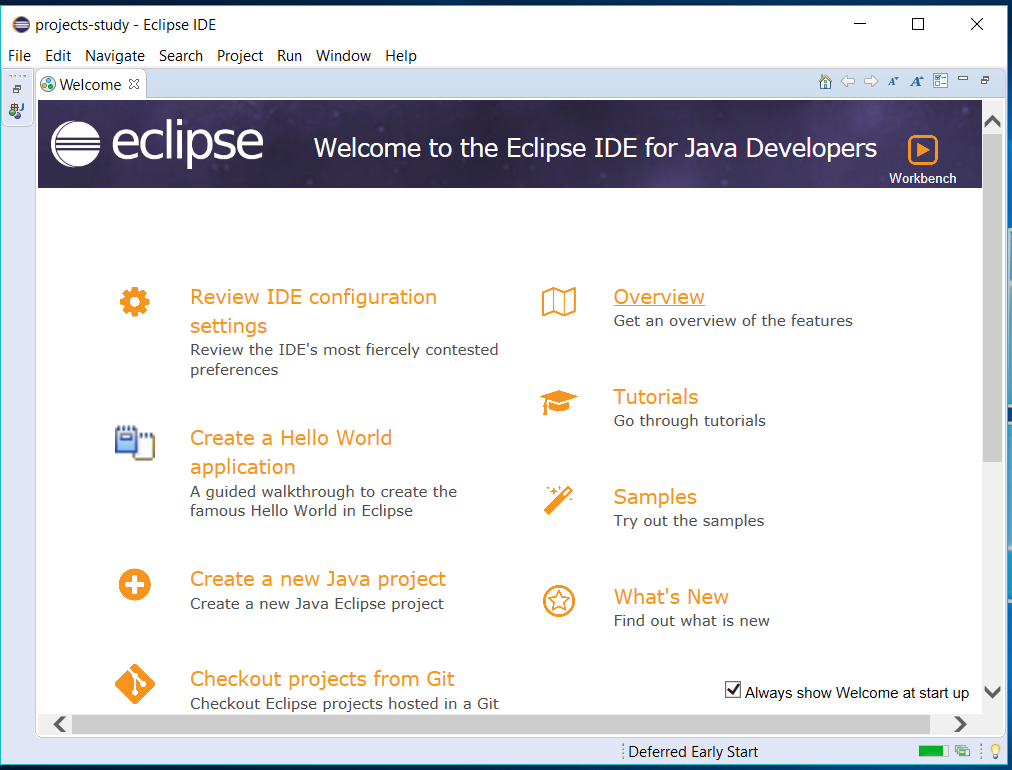
Now click on the Launch Button to launch the Eclipse IDE with the selected workspace. The Eclipse will show the welcome screen as shown in Fig 6.
Fig 6
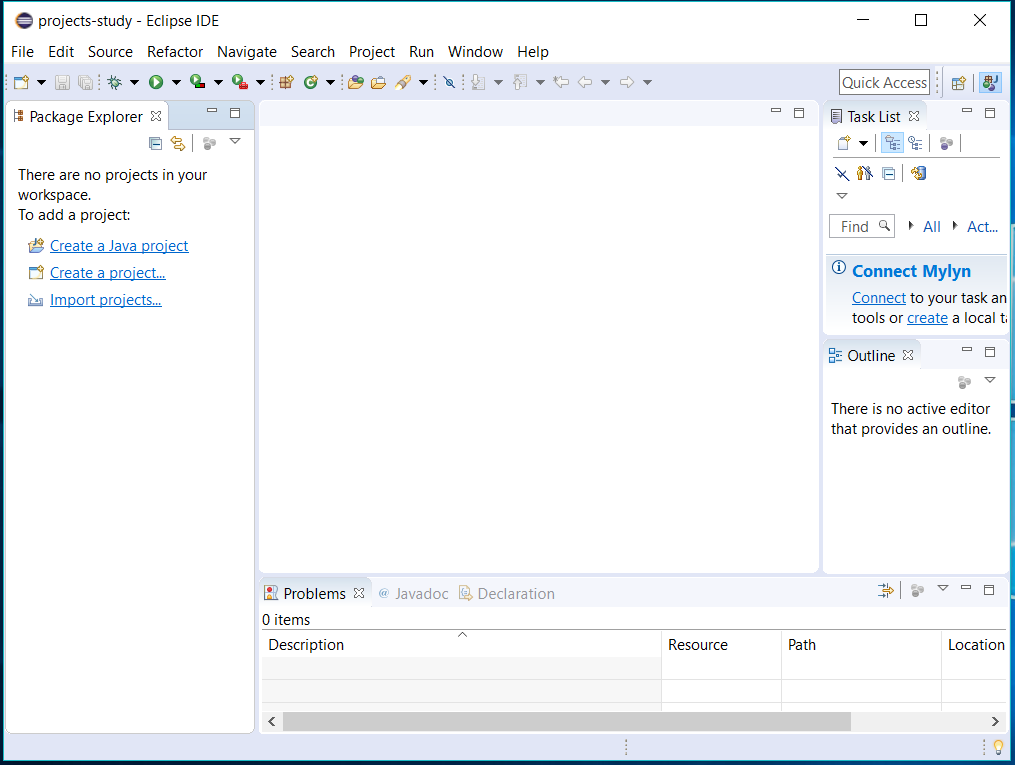
Close the Welcome Screen. The default workspace looks like the one as shown in Fig 7.
Fig 7
Hello World Project
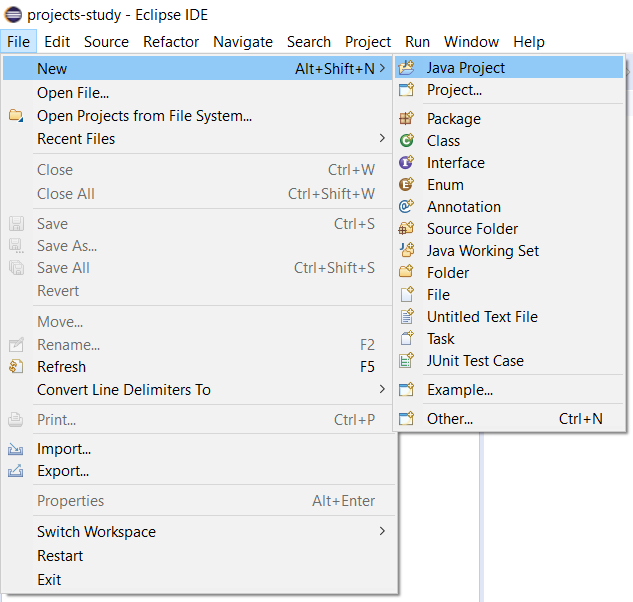
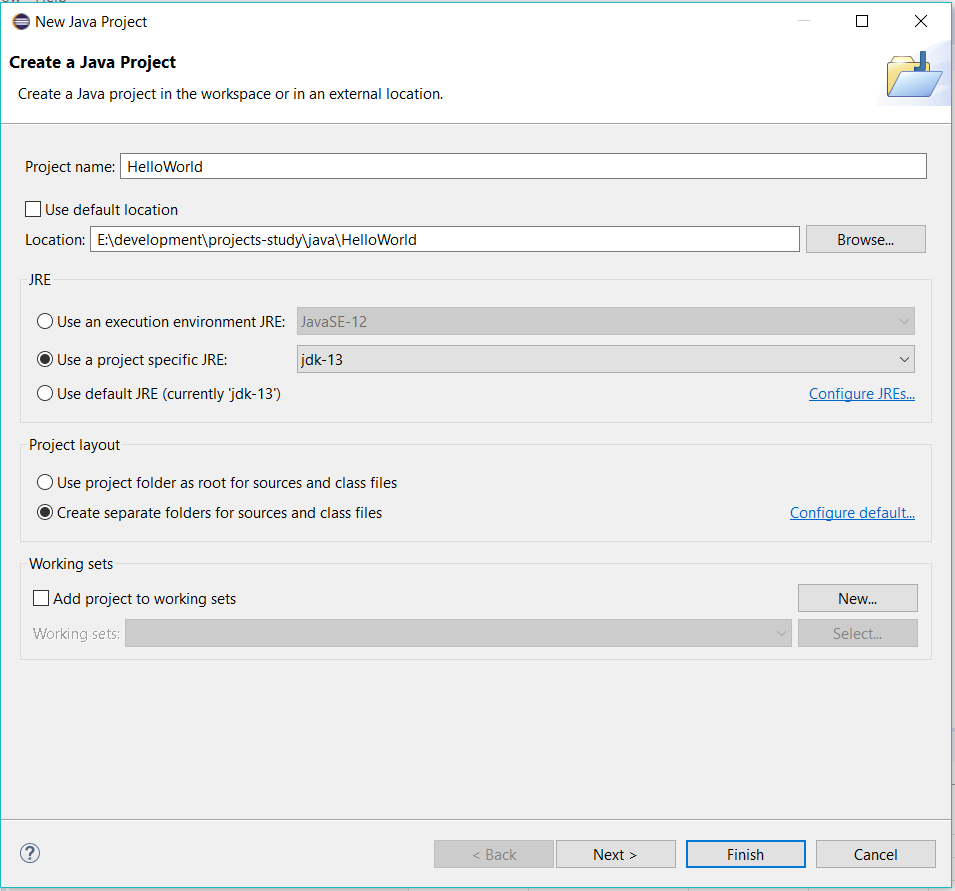
In this step, we will create the Hello World Project and print Hello Java !! on Console. Click on File -> New -> Java Project to start creating the project. It will show the Create Java Project Wizard as shown in Fig 8 and Fig 9.
Fig 8
Fig 9
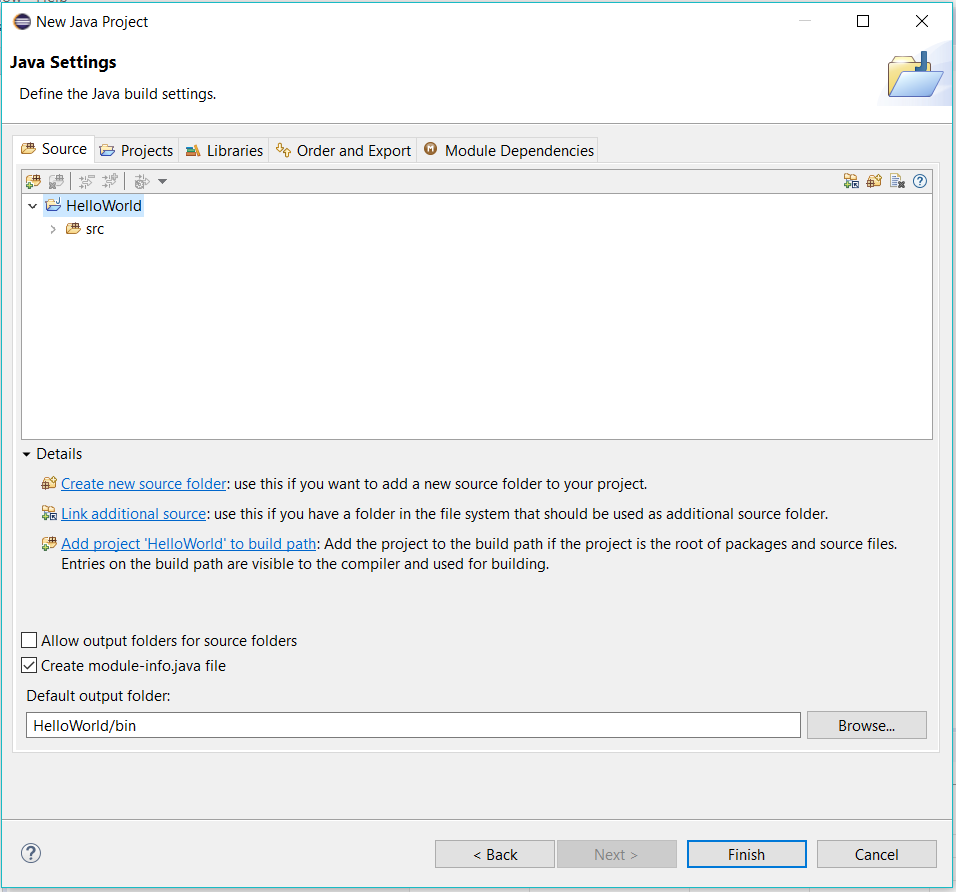
Click on the Next Button to continue with Java Settings as shown in Fig 10.
Fig 10
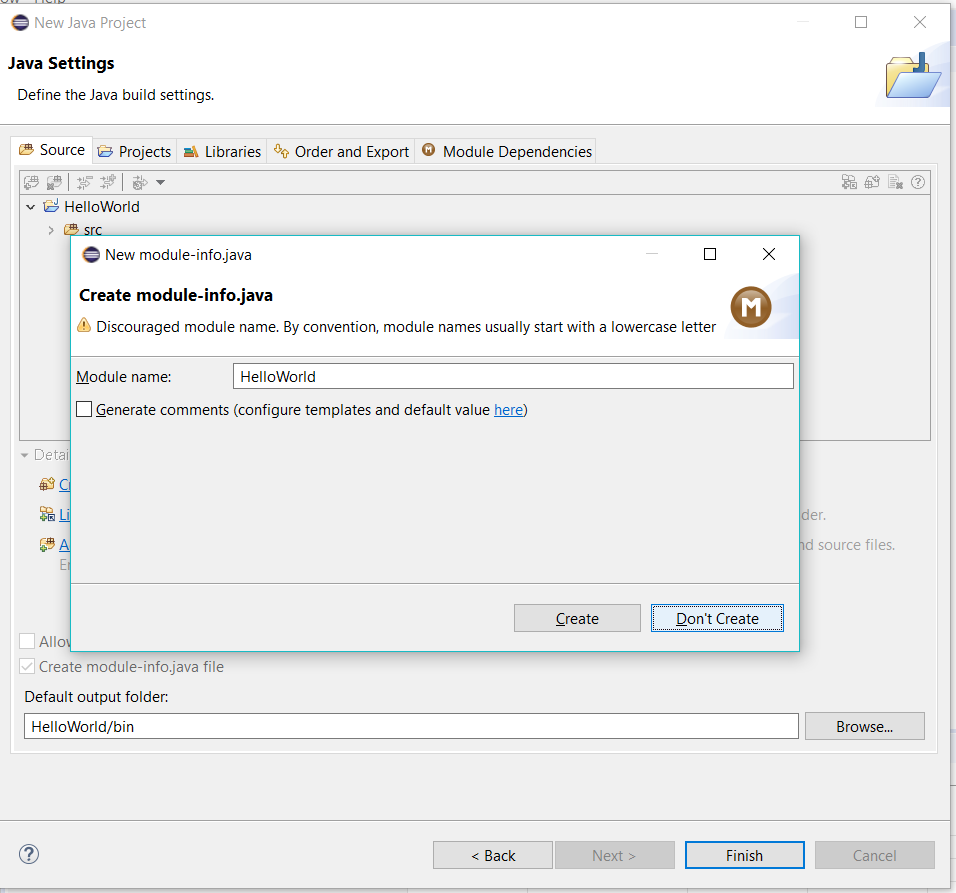
Now click on the Finish Button to create the Project. It will also ask to create the Module as shown in Fig 11.
Fig 11
I have skipped creating the module as part of this tutorial. Finally, it will create the project and show it on the Projects Panel as shown in Fig 12.
Fig 12
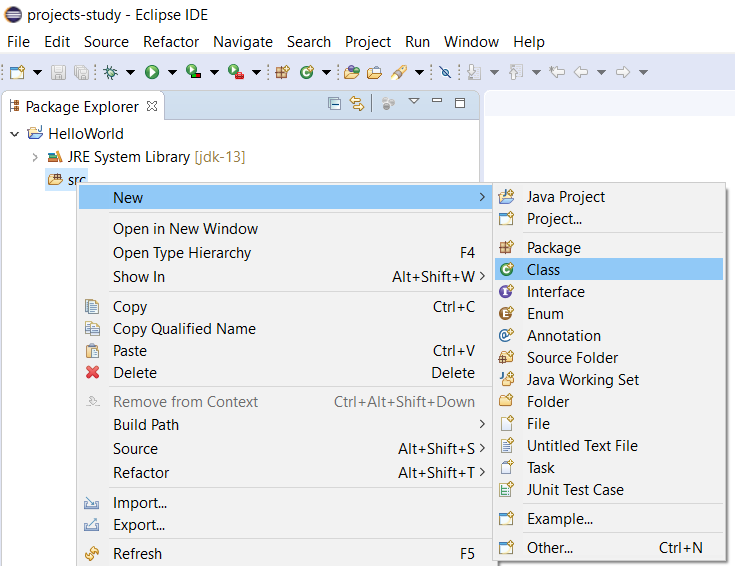
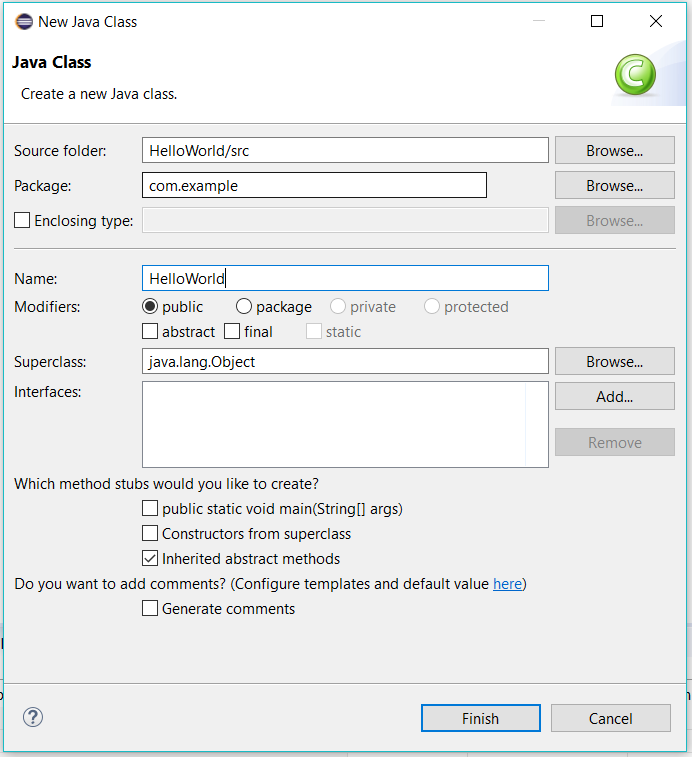
Now we will create the java file HelloJava.java. Right-click on the src folder, select New and click on the Class option to start creating the Java class file. It will show the New Java Class Dialog as shown in Fig 13 and Fig 14.
Fig 13
Fig 14
Click on the Finish Button to create the Java Class using the class package as shown in Fig 15.
Notes: In case you have installed the most recent version of Java i.e. JDK 13, you might see errors specific to the build path. You can fall back to using the JDK 12 or older versions of JDK.
Fig 15
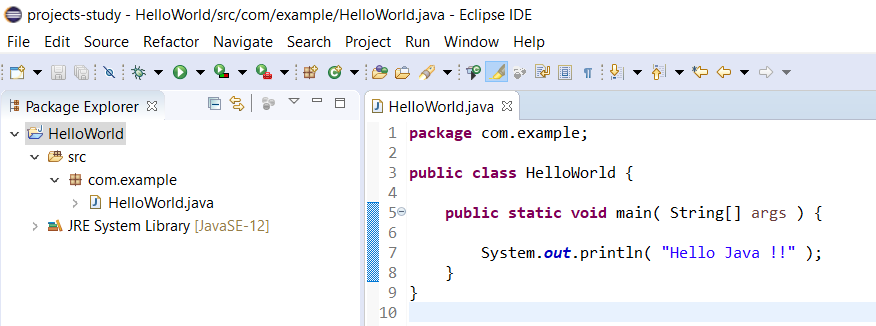
Now update the HelloWorld class as shown in Fig 16.
Fig 16
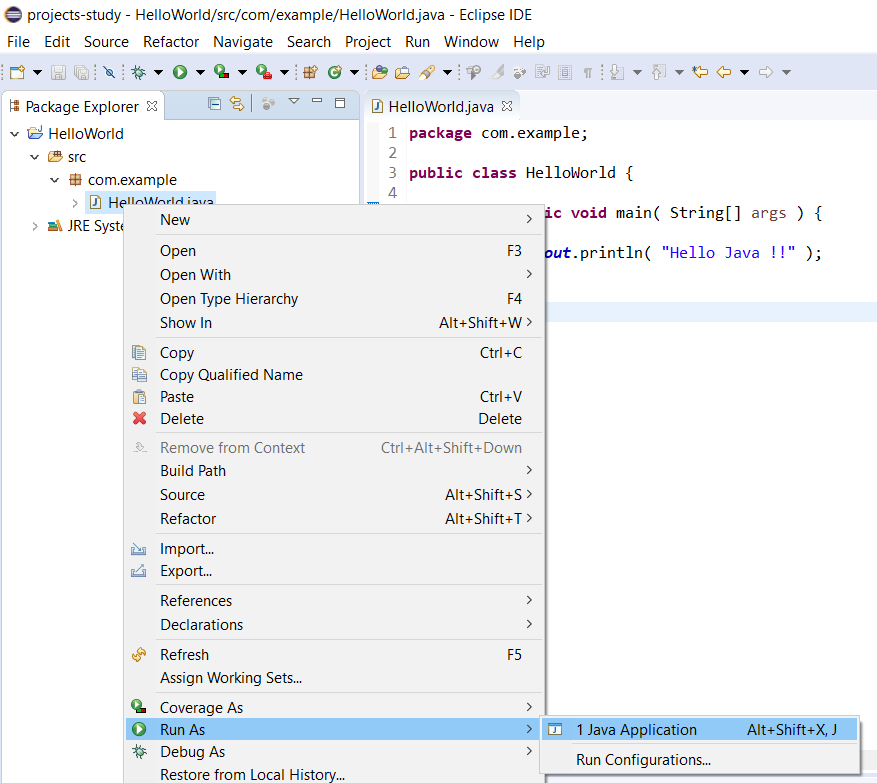
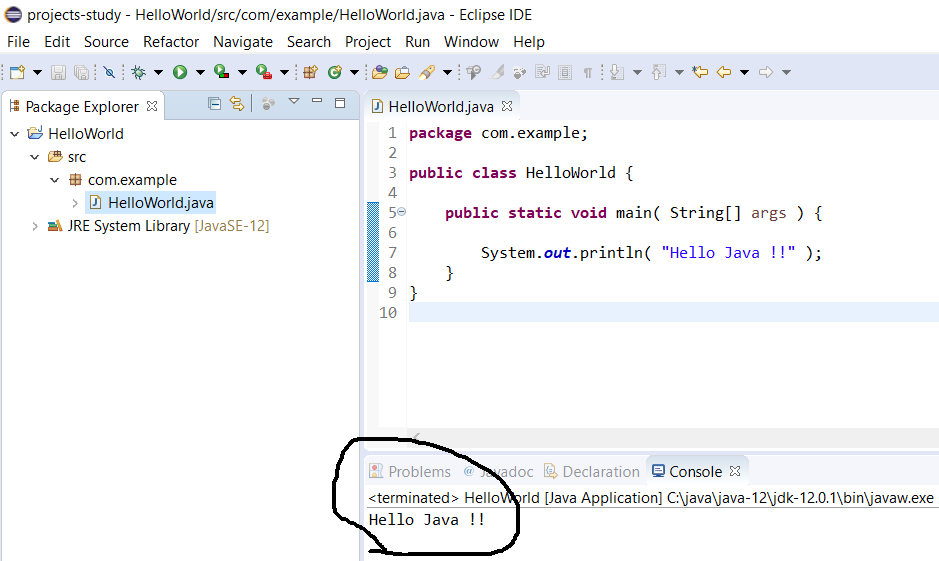
Now right click on the HelloWorld.java and choose File -> Run As -> Java Application to compile and execute the program. It will show the output on Console as shown in Fig 17 and Fig 18.
Fig 17
Fig 18
This is how we can install Eclipse for Java Developers on the Windows systems and create the project and execute Java programs.
The Eclipse IDE is famous for Java Integrated Development Environment (IDE), but it has a number of pretty cool IDEs, including C/C++ IDE, JavaScript/TypeScript IDE, PHP IDE, and more. You can easily combine multiple language support and other features into any of the default packages, and the Eclipse Marketplace allows for virtually unlimited customization and extension. The Eclipse IDE delivers what you need to rapidly innovate.
Develop your software wherever you go. It’ll be there, in the cloud, right where you left it. Use your browser to develop with hosted workspaces or install desktop packaging to experience a modern development environment for Java, JavaScript, CSS, and HTML.
Create the next generation of developer tooling with these extensible platforms. Use your imagination to build services and tools that can be assembled into new IDEs or packages tailored to your identity. It provides multiple platforms to build plug-ins for desktop tools, distributed services used by cloud IDEs, and browser interfaces. You can then publish plug-ins to Eclipse Marketplace of 1000s.
An impressive collection of tools can be easily installed into your Eclipse desktop IDE, including GUI builders and tools for modeling, charting and reporting, testing, and more. Use the Eclipse Marketplace Client to find, install, and vote for new plug-ins from a vast ecosystem of providers. Extend the desktop and web-based IDEs by writing your own plug-ins using the Plug-in Development Environment (PDE), or mash up features to build the web IDE of your dreams.
Features and Highlights
Major performance improvements
Continued focus on performance for these past few releases. Eclipse 2020-12 feels snappy and starts fast!
Community-powered
More and more, the IDE is being powered by individual contributors all around the world.
Improved Java development tooling
Support for subword and subtype code completion and non-blocking Java content assist. Improved support for lambda debugging.
Dark theme improvements
The welcome screen and the help system now look much better on the dark theme.
Proven extensibility
A huge variety of platform plug-ins.
Free and open source
Free and open-source released under the terms of the Public License 2.0.
Note: Requires Java Runtime Environment.
Also Available: Download Eclipse IDE for Mac

