Windows Subsystem for Linux (WSL) — подсистема ОС Windows 10, позволяющая разработчикам, тестировщикам запускать нативные приложения Linux, писать скрипты, выполнять команды непосредственно из Windows. В обновлённой Windows 10 (2004) появилась 2я версия WSL, в которой используется полноценное ядро Linux с возможностью запуска приложений и контейнеров Docker, реализована высокая скорость загрузки, небольшой объем потребляемых ресурсов, управление в фоновом режиме, обновление ядра. Таким образом вы сможете запускать ELF64 программы, которые могут получать доступ к файловой системе Windows без использования сторонних порто (таких как Cygwin).
Образ ядра Linux (версия ядра 4.19) в Windows 10 представляет собой легкую виртуальную машину, для запуска которой не нужно ставить полноценную роль Hyper-V. Системные вызовы Linux транслируются на лету в вызовы Windows без использования эмулятора (в отличии от WSL1).
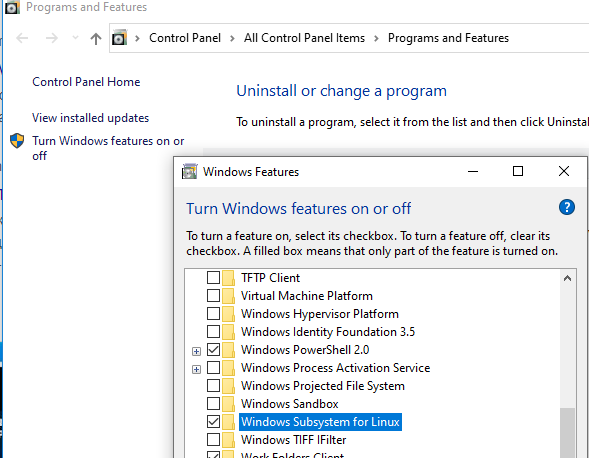
Изначально компонент WSL отключен. Чтобы его включить, вам необходимо зайти в Пуск -> Панель управления -> Программы и компоненты -> Включение и отключение компонентов Windows (Control PanelAll Control Panel ItemsPrograms and FeaturesTurn Windows features on or off), активировать галочку Подсистема Windows для Linux (Windows Subsystem for Linux), нажать кнопку ОК, и перезагрузить компьютер.
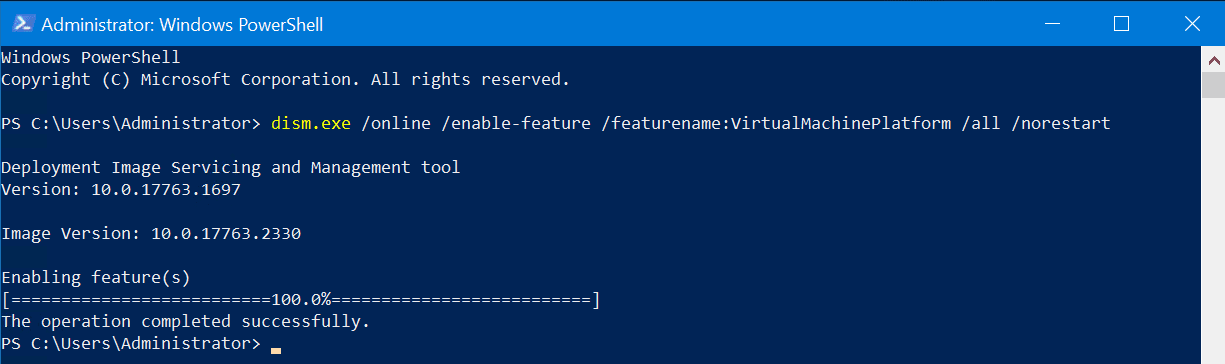
Вы можете включить компоненты WSL в Windows 10 с помощью dism:
dism.exe /online /enable-feature /featurename:VirtualMachinePlatform /all /norestart
dism.exe /online /enable-feature /featurename:Microsoft-Windows-Subsystem-Linux /all /norestart
или PowerShell
Enable-WindowsOptionalFeature -Online -FeatureName Microsoft-Windows-Subsystem-Linux
Enable-WindowsOptionalFeature -Online -FeatureName VirtualMachinePlatform
В Windows Server 2004 Semi-Annual Channel (SAC) для установки компонента WSL используется командлет Install-WindowsFeature:
Install-WindowsFeature -Name Microsoft-Windows-Subsystem-Linux
После этого также необходимо перезагрузить компьютер.
В настройка BIOS/UEFI компьютера должна быть включена поддержка аппаратной виртуализации: Intel VT (Intel Virtualization Technology) или AMD-V.
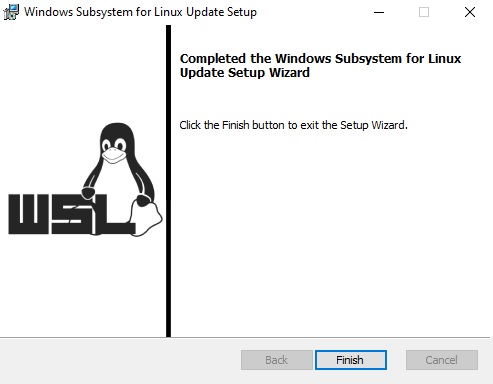
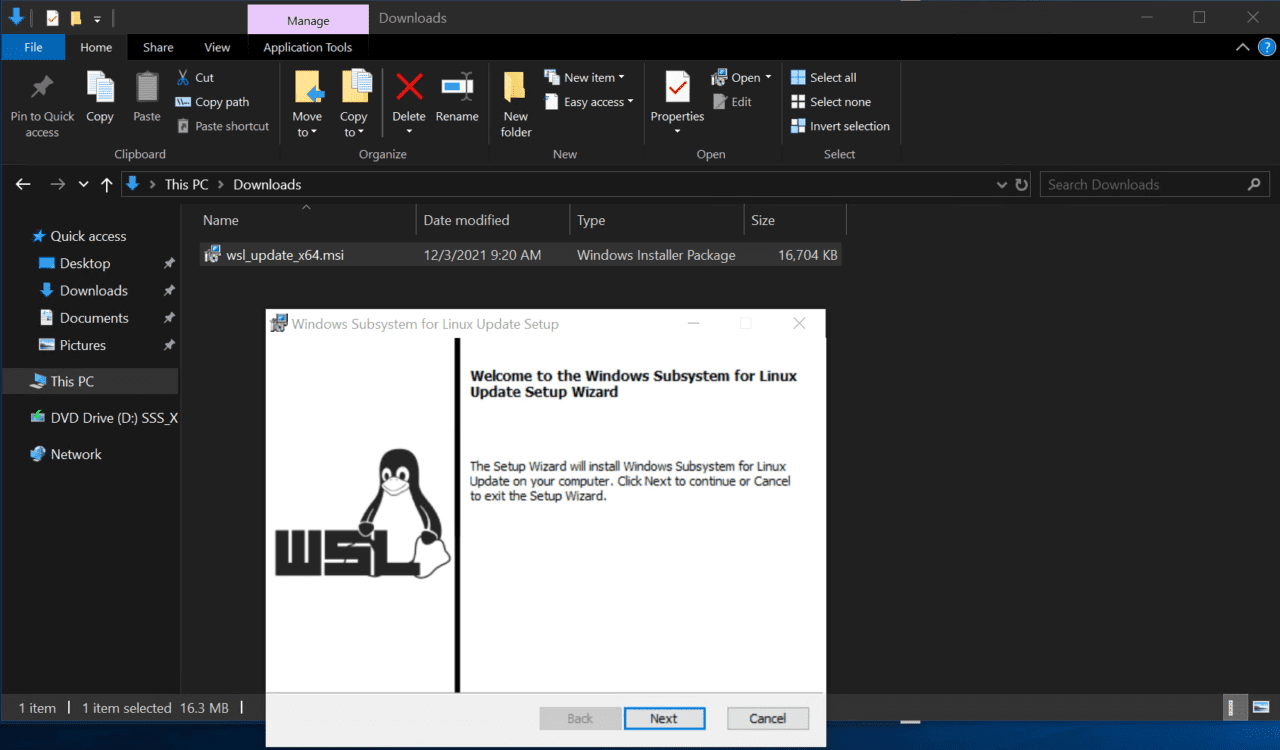
Теперь вам нужно выполнить обновление WSL до версии 2. Для этого требуется зайти на сайт https://docs.microsoft.com/ru-ru/windows/wsl/wsl2-kernel, скачать файл wsl_update_x64.msi, установить его. По завершении увидите картинку
Чтобы сделать WSL2 архитектурой по умолчанию для новых дистрибутивов, в PowerShell выполните команду:
wsl --set-default-version 2
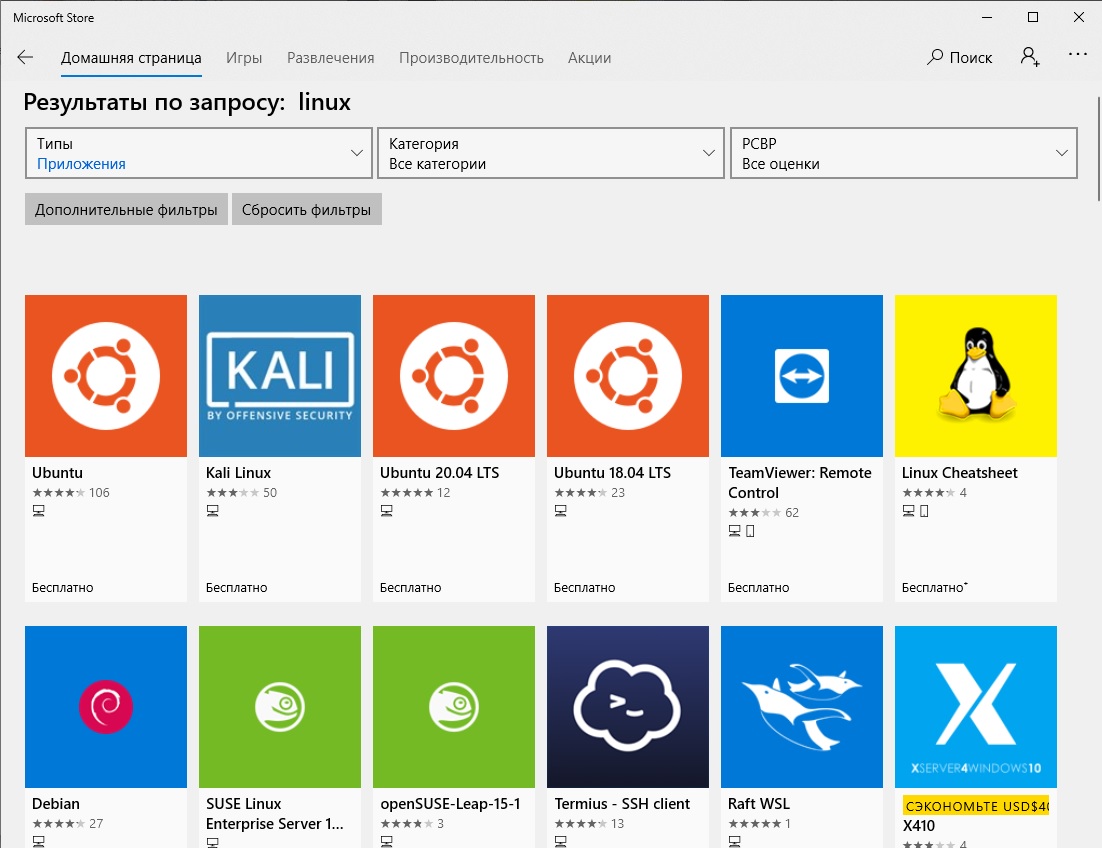
Далее вам необходимо открыть Microsoft Store, в поиске ввести слово “Linux”. В появившемся списке выберите нужный дистрибутив. Доступные Ubuntu, Debian, Kali Linux, Linux Cheatsheet, SUSE Linux Enterprise Server15, openSUSE Leap 15-1, Pengwin Enterprise, Fedora Remix for WSL или другие. В нашем примере мы будем использовать Ubuntu 20.04 LTS, нажмите кнопку Получить.
Если у вас отключен Windows Store или вы хотите установить дистрибутив WSL в Core редакции Windows Server, вы можете скачать дистрибутив Ubuntu с помощью PowerShell командлета Invoke-WebRequest:
Invoke-WebRequest https://aka.ms/wslubuntu2004 -OutFile ubuntu-2004.zip –UseBasicParsing
Распакуйте архив:
Expand-Archive -Path .ubuntu-2004.zip
Запустите установку образа Linux с помощью файла Ubuntu.exe.
Также вы можете скачать образ в виде appx файла и установить его с помощью командлета Add-AppxPackage.
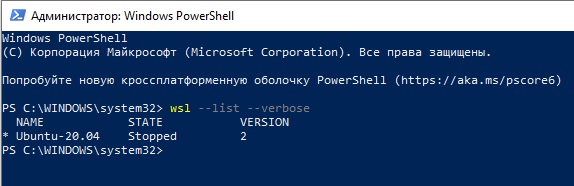
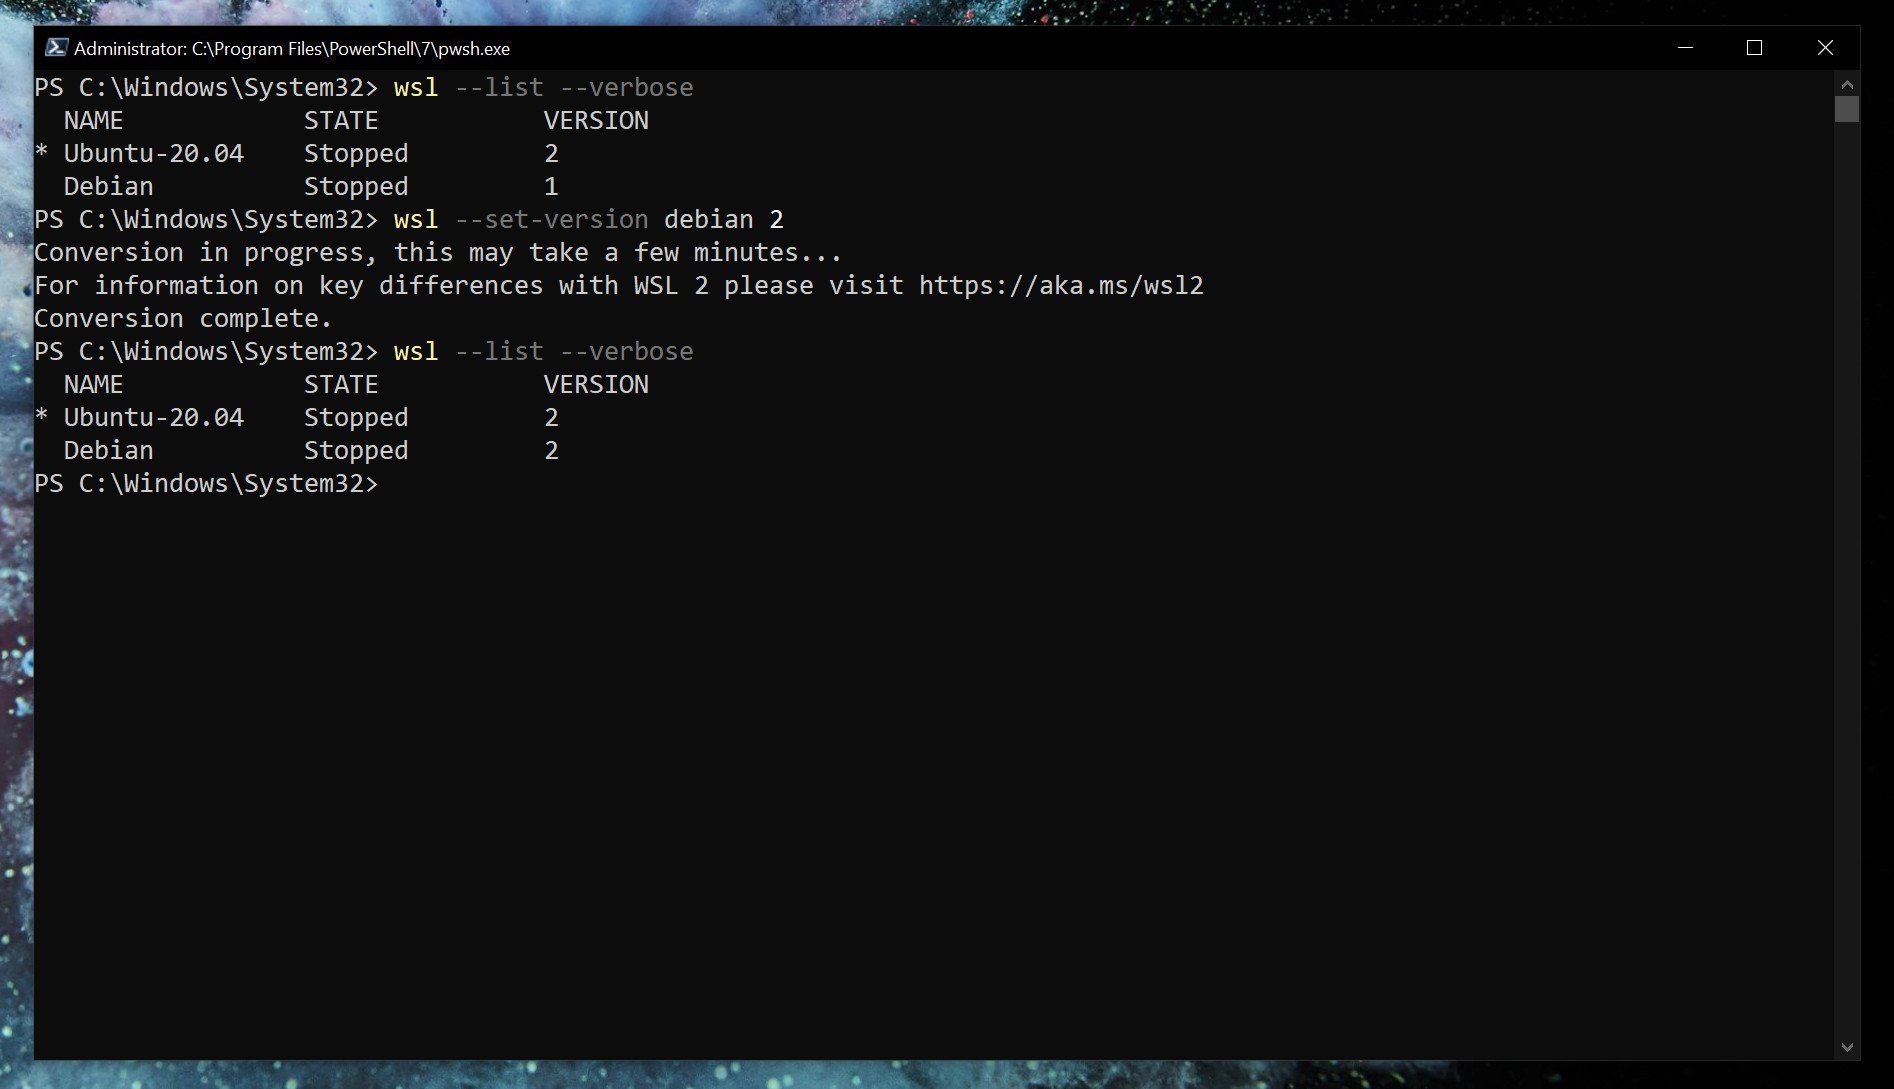
После установки можно проверить используемую версию WSL с помощью команды
wsl --list –-verbose
Если у вашей среды Linux указана версия 1, нужно изменить ее на WSL2 командой:
wsl --set-version Ubuntu-20.04 2
Файл жёсткого диска с образом виртуальной машины ОС Linux Ubuntu 20.04 будет располагаться в профиле пользователя: C:Users234AppDataLocalPackagesCanonicalGroupLimited.Ubuntu20.04onWindows_79rhkp1fndgscLocalState.
После установки дистрибутива в стартовом меню появляется ярлык на него. Для запуска Ubuntu зайдите в меню Пуск, нажмите на соответствующем ярлыке и получите в отдельном окне полноценную командную оболочку Bash. Запускать WSL можно и с помощью команды wsl. При первом запуске образа в командной строке Bash вам будет предложено создать пользователя и пароль (которые не должны совпадать с учётной записью Windows). Чтобы выполнять команды с правами root, необходимо использовать дополнительный ключ (префикс) sudo. В WSL есть общие команды для Bash и CMD, и тут нужно не забывать, что система Linux чувствительна к регистру.
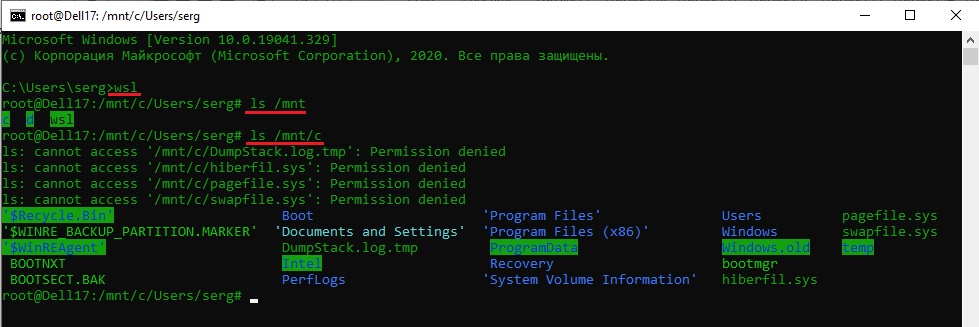
Вы можете выполнить Linux-команды из CMD. Для этого необходимо вначале указать “WSL”. Например, для просмотра списка файлов и папок в каталоге Windows, выполните:
wsl
ls /mnt
ls/mnt/c
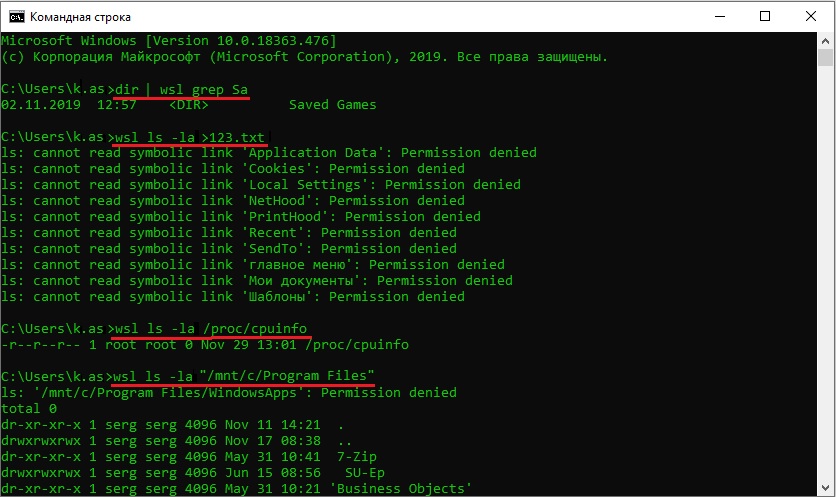
dir | wsl grep Sa
wsl ls ‑la > 123.txt
wsl ls ‑la /proc/cpuinfo
wsl ls ‑la “/mnt/c/Program Files”
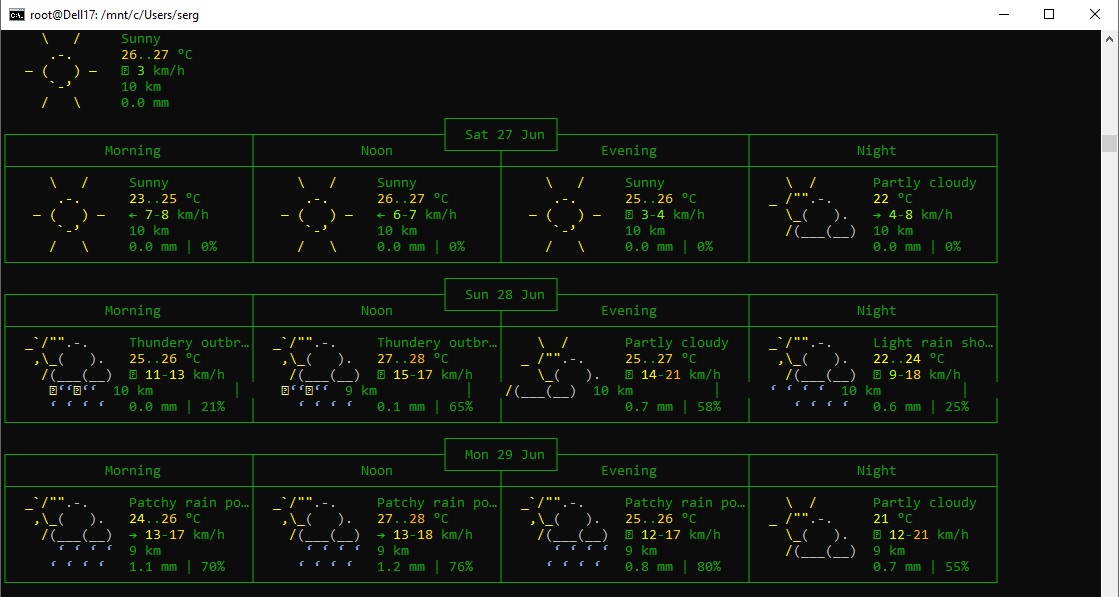
Также вы можете открыть проводник командой explorer.exe, калькулятор – calc.exe, блокнот – notepad.exe, paint – mspaint.exe, календарь – cal, погоду – curl wttr.in
Ещё один пример взаимосвязи 2х систем – вы можете открыть в Windows файл из WSL-дистрибутива по сетевому пути. Для этого в CMD наберите путь к файлу:
notepad \wsl$Ubuntu-20.04home1122.txt
Из окна консоли вы можете обновить список пакетов в Ubuntu с помощью команд:
sudo apt-get update
sudo apt-get upgrade
После обновления Ubuntu папка …/LocalState будет занимать 1.5 Гб.
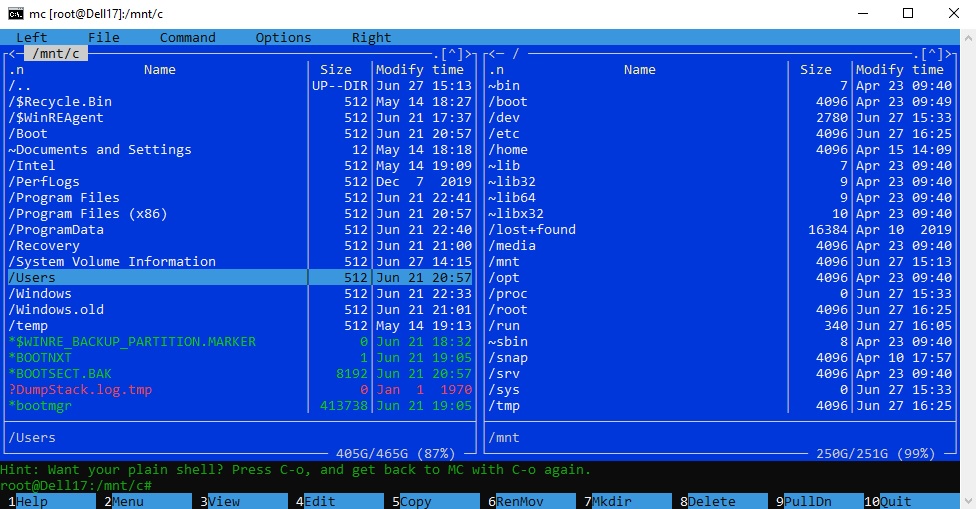
Из командной строки Linux можно не только просмотреть Windows-файлы и каталоги, но и получить к ним доступ. Чтобы удобнее копировать файлы, просматривать директории и их содержимое, установите файловый менеджер Midnight Commander с помощью команды
sudo apt-get install mc
Вы можете запустить Midnight Commander как в командной оболочке Bash, так и внутри CMD. На скриншоте ниже показано, что в двух панелях MC показывается список файлов с обеих ОС.
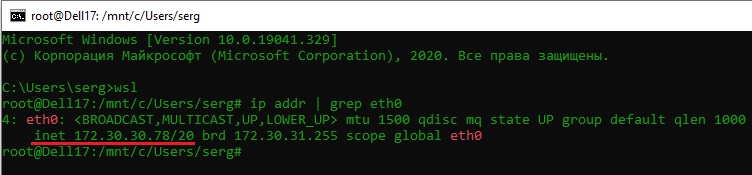
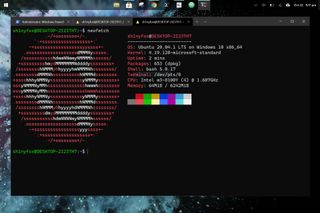
Можно отобрахить сетевые настройки (IP адрес) IP-адрес Linux-системы:
ip addr | grep eth0
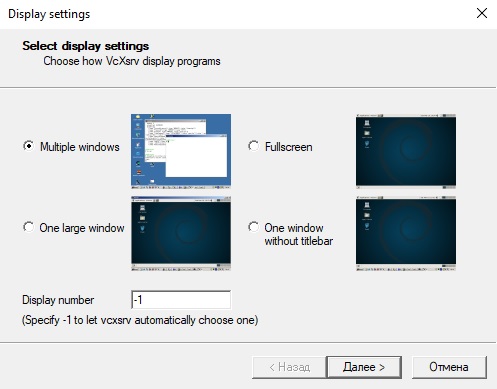
В WSL не предусмотрена работа приложений с графическим интерфейсом. Тем не менее вы можете попробовать их установить и использовать. Чтобы запускать графические приложения в Linux, нужно скачать и установить в Windows программу VcXsrv Windows X Server (https://sourceforge.net/projects/vcxsrv/).
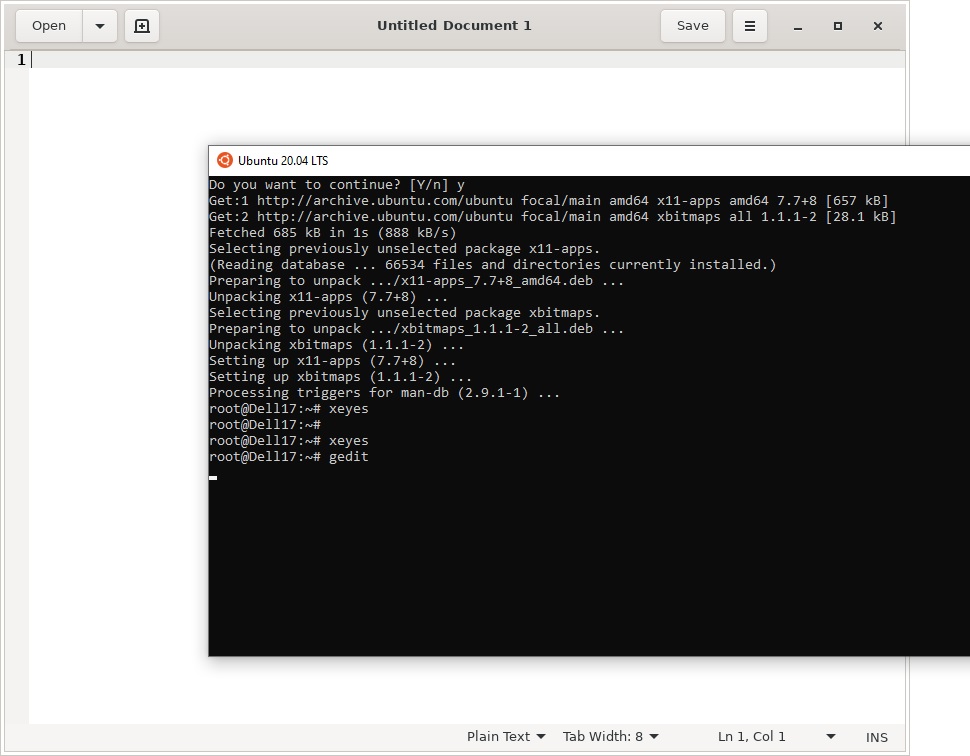
С помощью пакетного менеджера apt-get установим несколько графических программ: например, браузер, текстовый редактор или что-то ещё:
sudo apt-get install gedit
sudo apt-get install firefox
sudo apt-get install x11-app
Затем создайте файл в директории root:
cd /~
vim .bash_login
впишите строку
export DISPLAY=$(cat /etc/resolv.conf | grep nameserver | awk '{print $2}'):0
сохраните запись
Esc -> :wr -> :q
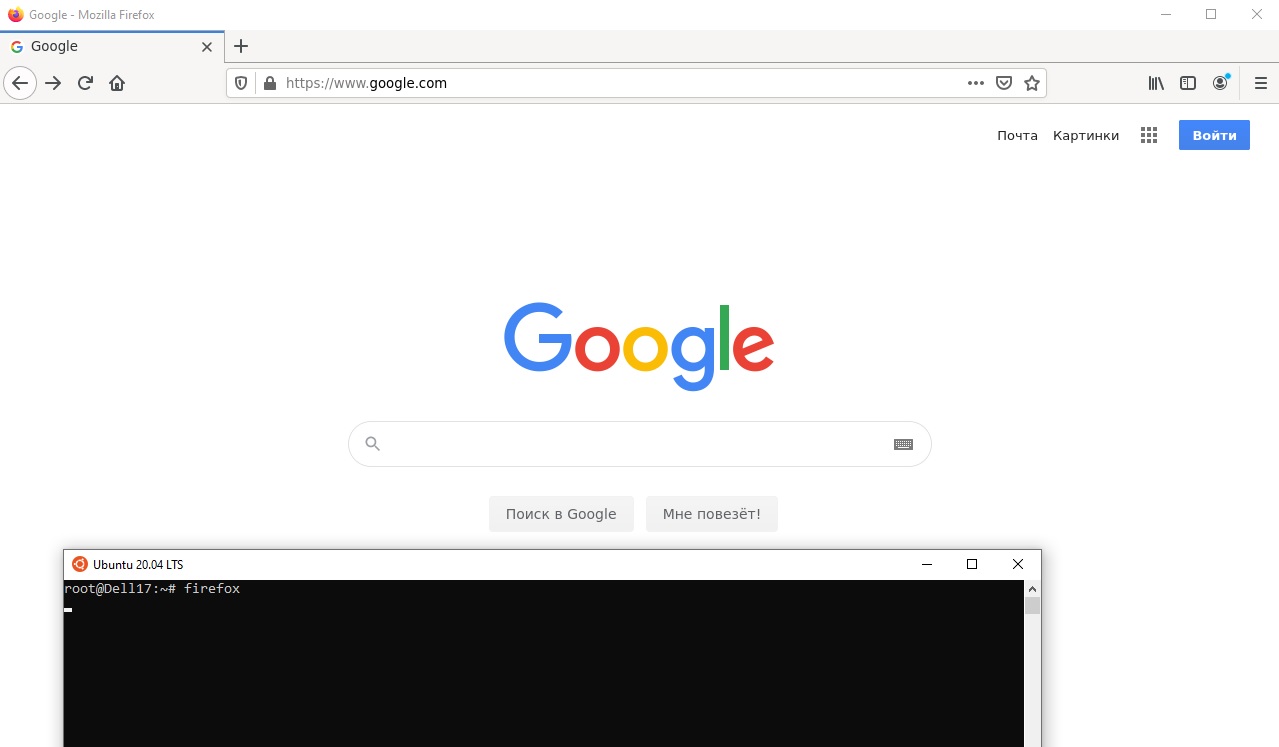
Теперь можете запустить графические программы Linux через WSL командами:
firefox
или
gedit
Вы можете установить в Windows 10 несколько дистрибутивов Linux и запускать одновременно в разных окнах WSL. Вывести весь перечень установленных дистрибутивов можете с помощью команды:
wsl --list –all
чтобы завершить работу всех запущенных дистрибутивов и ядра WSL 2, выполните команду:
wsl --shutdown
Microsoft dropped plenty of jaws when it launched the Windows Subsystem for Linux, a way to run actual Linux inside Windows without the need to set up a virtual machine. The project has seen a ton of support, and WSL2 is the latest and greatest.
It takes things a little further and adds yet more awesomeness to the Linux experience on Windows 10 and Windows 11. Now, with the release of version 1.0, it has never been easier to set up WSL2 on your Windows machine, with GUI apps now even supported on Windows 10, too.
Simplified setup of WSL2 on Windows 10 and Windows 11
There is now a new, extremely simplified way to get WSL2 up and running on your Windows 10 and Windows 11 PC. To get the very latest version you need to be running Windows 10 version 21H1, 21H2, or 22H2, or on Windows 11 21H2 with all of the November updates applied.
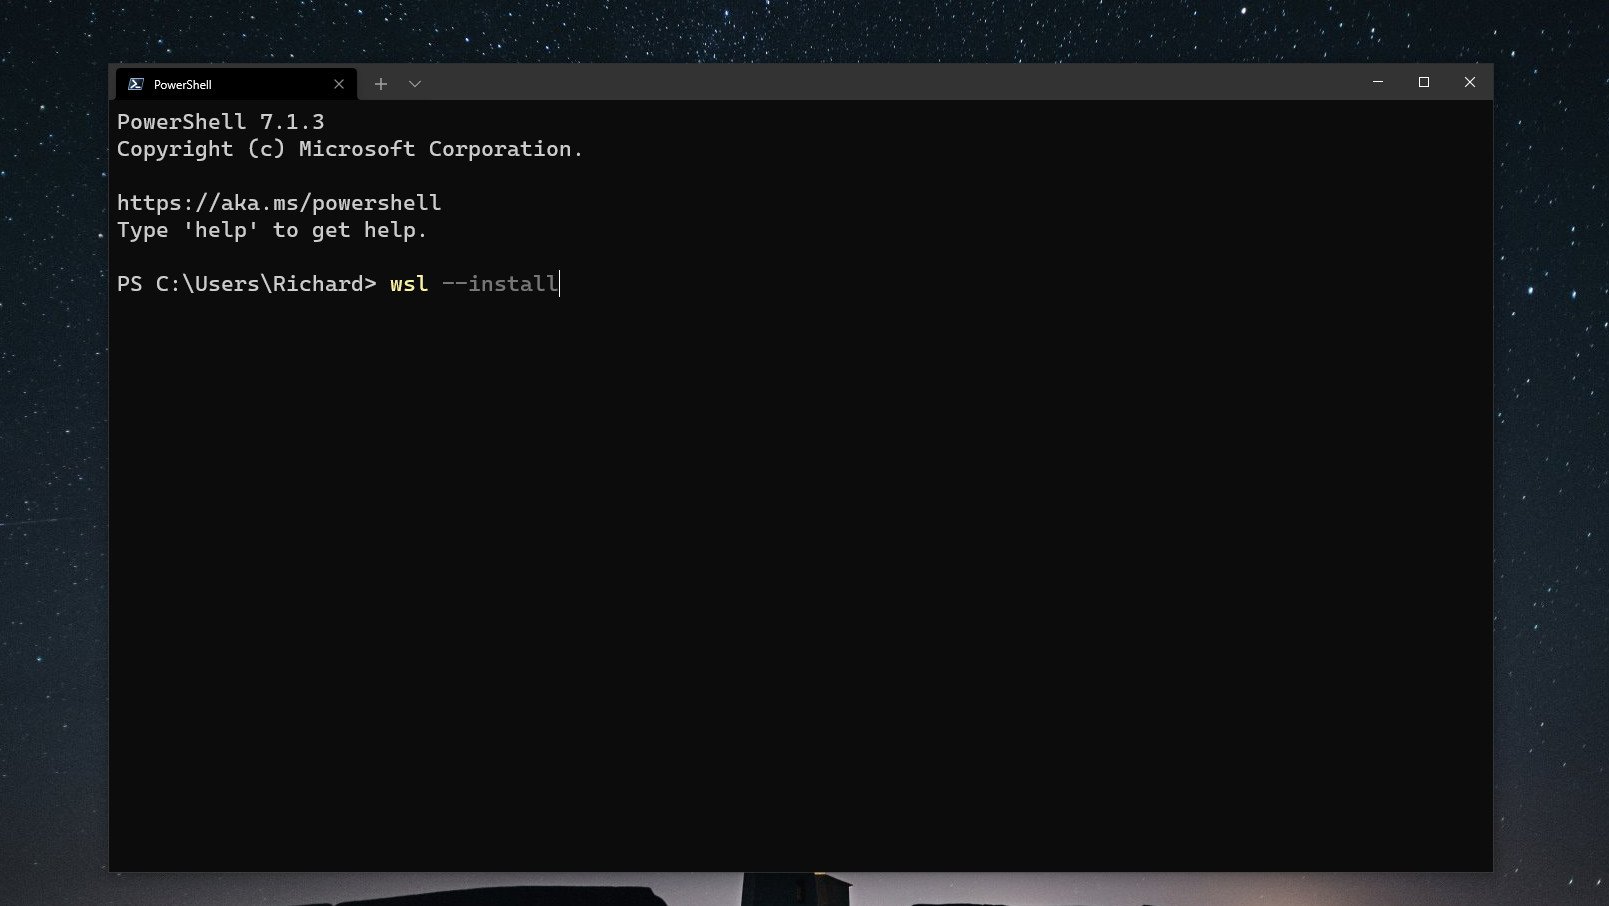
Once this is in place, open up PowerShell and enter this command:
wsl --installThat’s it. The setup process will begin and you can relax until it’s finished. By default, WSL will enable all system features required and it will download and install Ubuntu. If you don’t want a distribution installed during setup you can add the — no-distribution tag to the installation command.
WSL is now distributed through the Microsoft Store and the simplified installation process will pull this version in. Alternatively, you can download it directly from its Microsoft Store listing (opens in new tab).
You will also require the optional Windows Subsystem for Linux component if you wish to also use WSL 1 alongside WSL 2.
How to enable Windows Subsystem for Linux optional component for WSL 1
WSL2 is now the standard, but if for any reason you also want to use WSL1 alongside it, you’ll need the optional Windows Subsystem for Linux component enabling. Fortunately, you can do this in two ways. The first is by adding —enable-wsl1 to the install command used above.
But you can also enable the component at any time, even after you already have WSL2 up and running. Open PowerShell as administrator and enter this command:
dism.exe /online /enable-feature /featurename:Microsoft-Windows-Subsystem-Linux /all /norestartEventually, you will need to reboot your PC, adding norestart means you won’t be immediately kicked out of whatever you’re doing. If you want to reboot immediately, simply omit this from the end of the command.
Setting WSL2 for your Linux distros
The good thing about WSL2 is that it doesn’t replace WSL1. It just runs alongside it. This means you can run Linux installs with a combination of different versions. You’re able to set either as default as well as setting a version specifically to each Linux distro you have on your PC.
Let’s break down some of the key commands to use in PowerShell that you’ll need to know.
Setting WSL2 as default
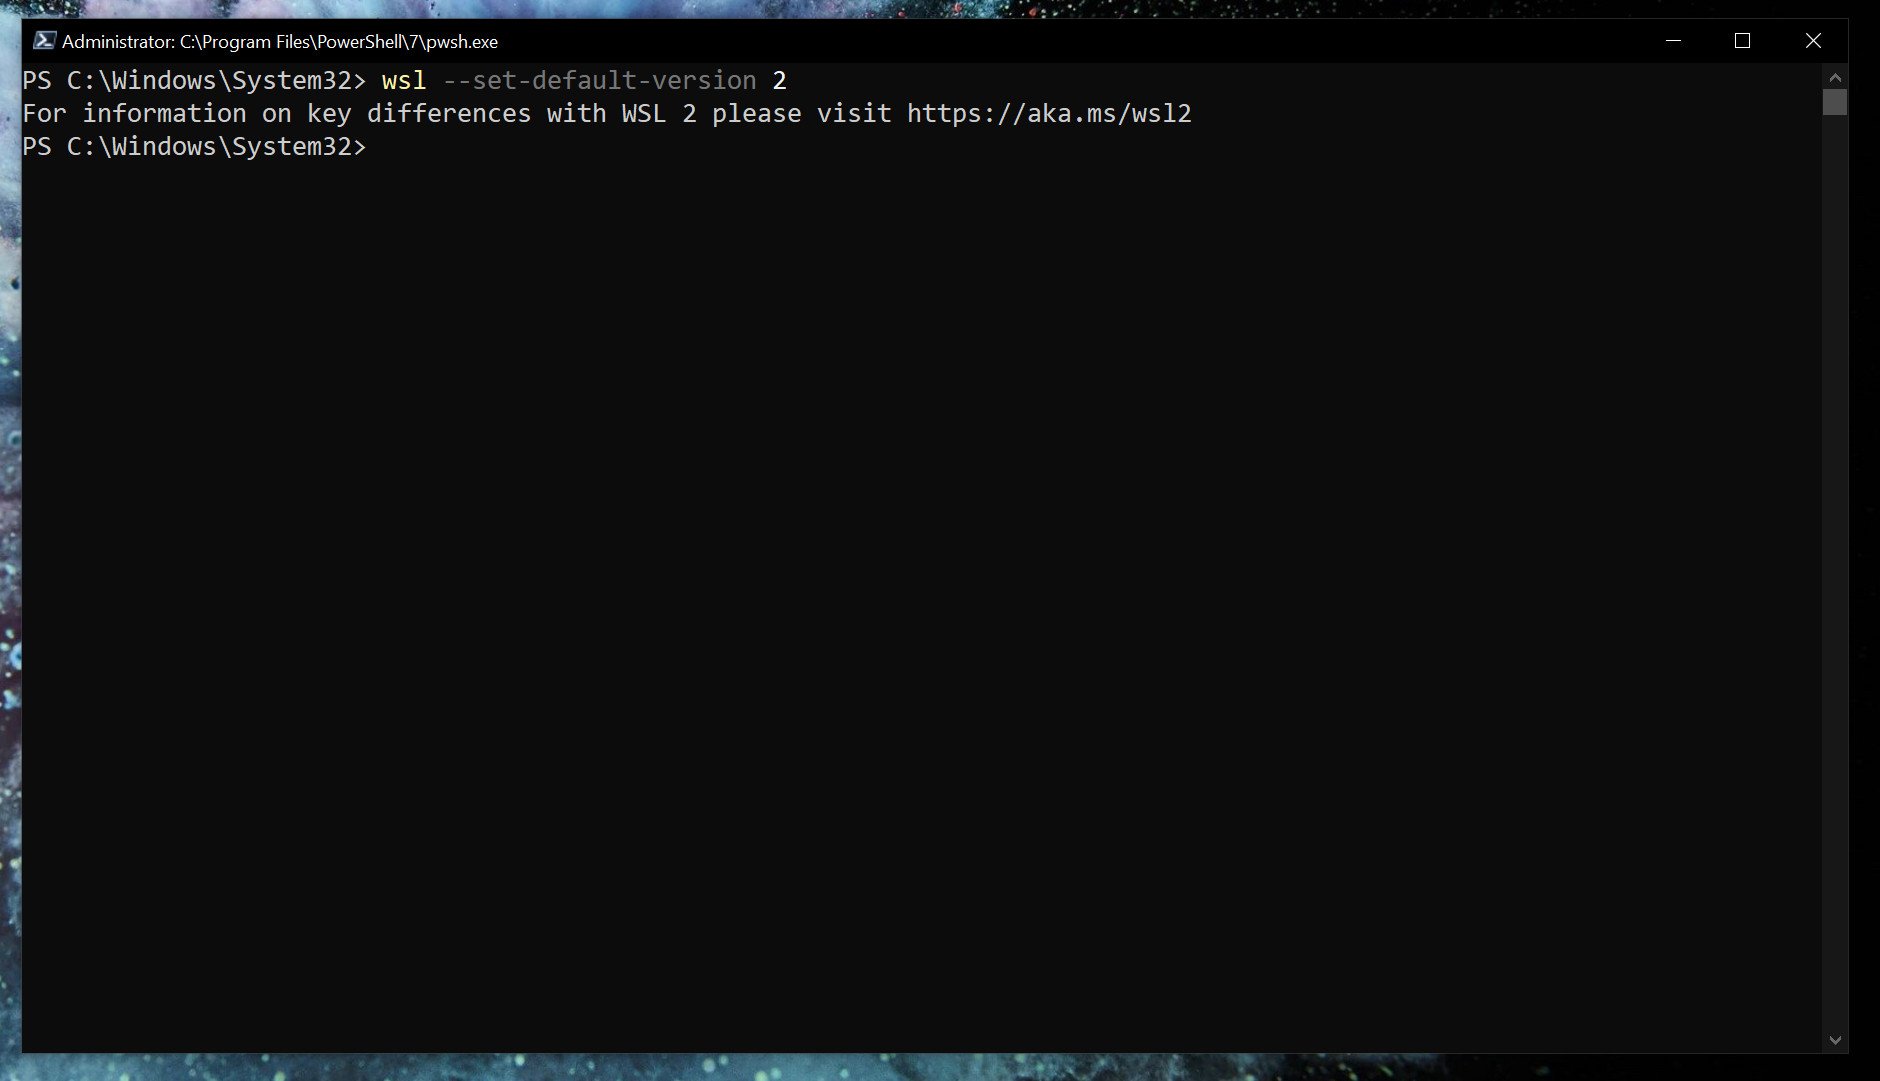
If you want everything to run on WSL2 as soon as you install it, you can set it as the default version.
wsl --set-default-version 2Listing installed Linux distros and their WSL version
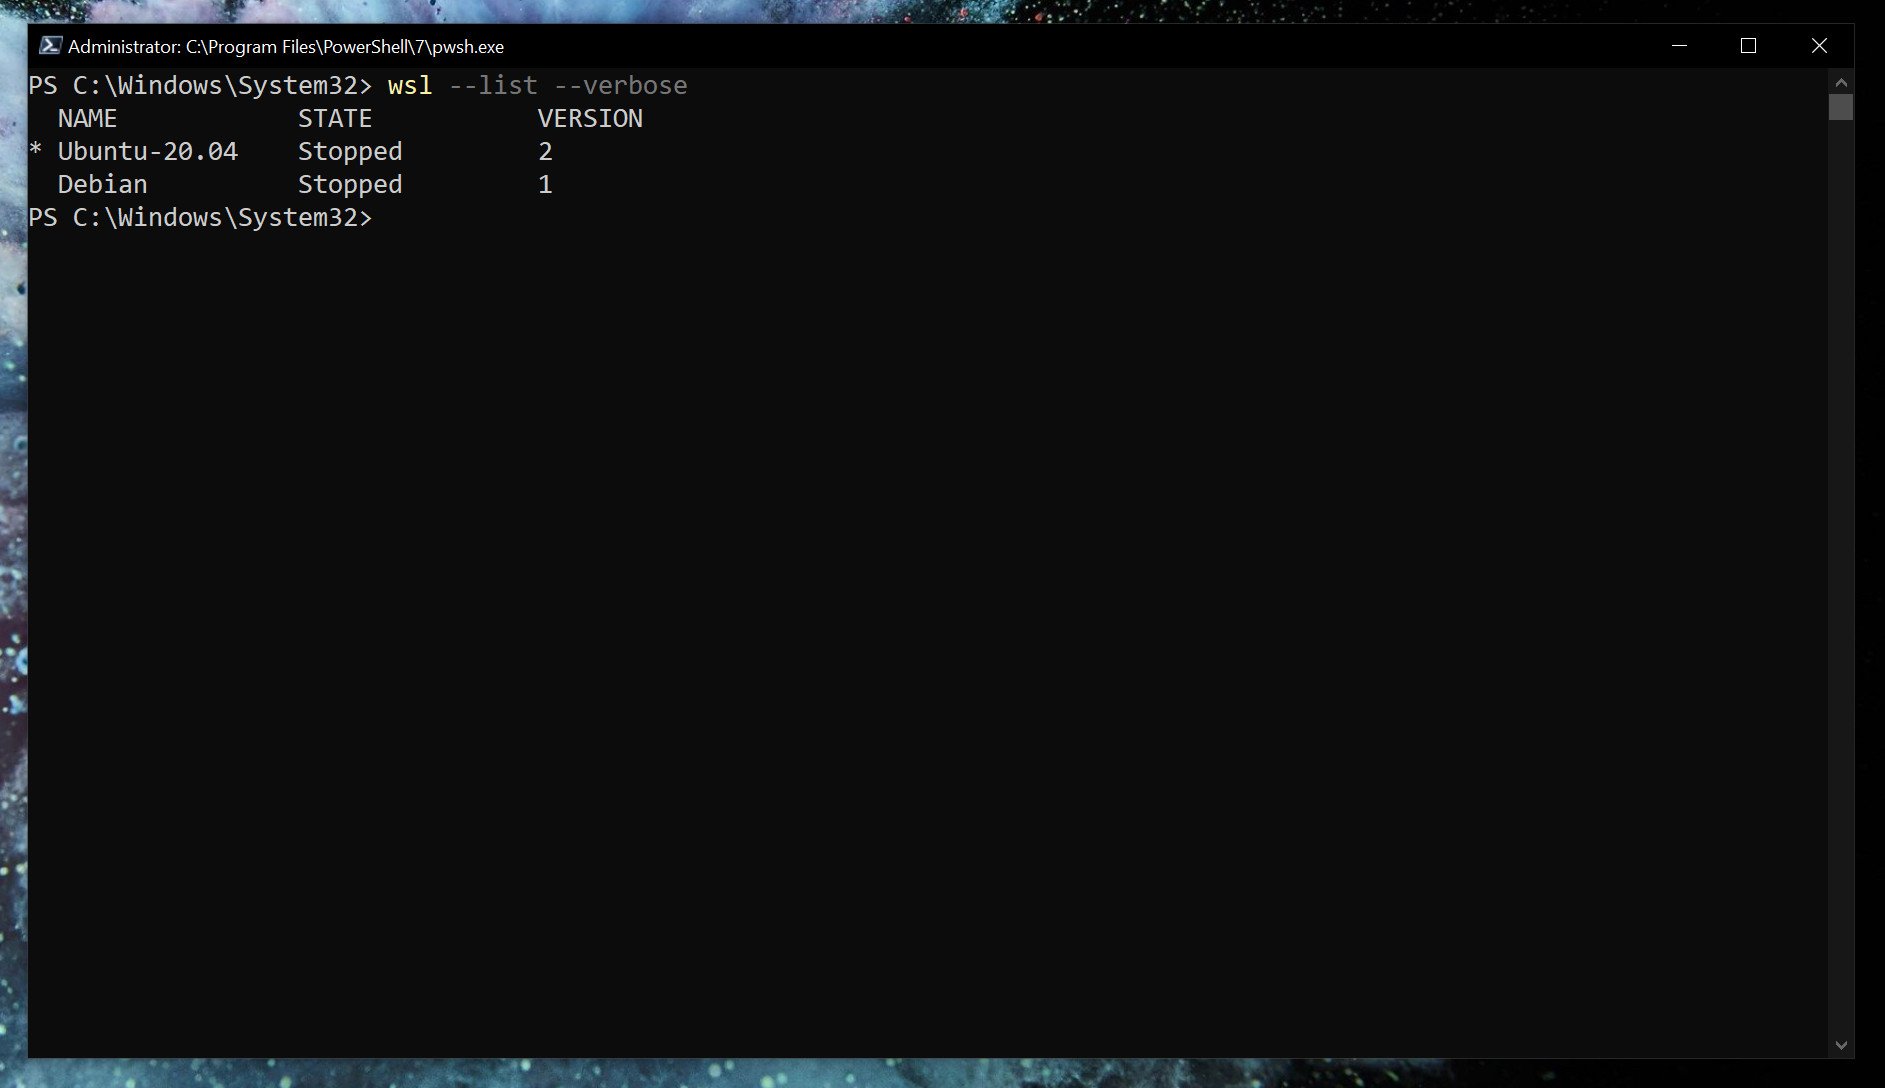
With WSL2 set as default, any Linux installs after that will use it automatically. You can easily check which version of WSL your installed Linux distros are using.
wsl --list --verbose Using the verbose flag will give you the breakdown of which version of WSL is attached to which Linux installation. Without it, you’ll simply get a list of the versions of Linux you have installed.
Changing the version of WSL per Linux installation
While setting WSL2 as default will apply it to anything you install afterward. If you’re already set up, you’ll need to manually convert. Likewise, if you wish to go between versions 1 and 2 or run a mixture on your system, you can do that.
wsl --set-version <distribution name=""> <versionnumber></versionnumber></distribution>So, as an example, if you have a Debian installation on WSL that you need to convert to WSL2, you’d enter
wsl --set-version debian 2Launch specific Linux installations in PowerShell
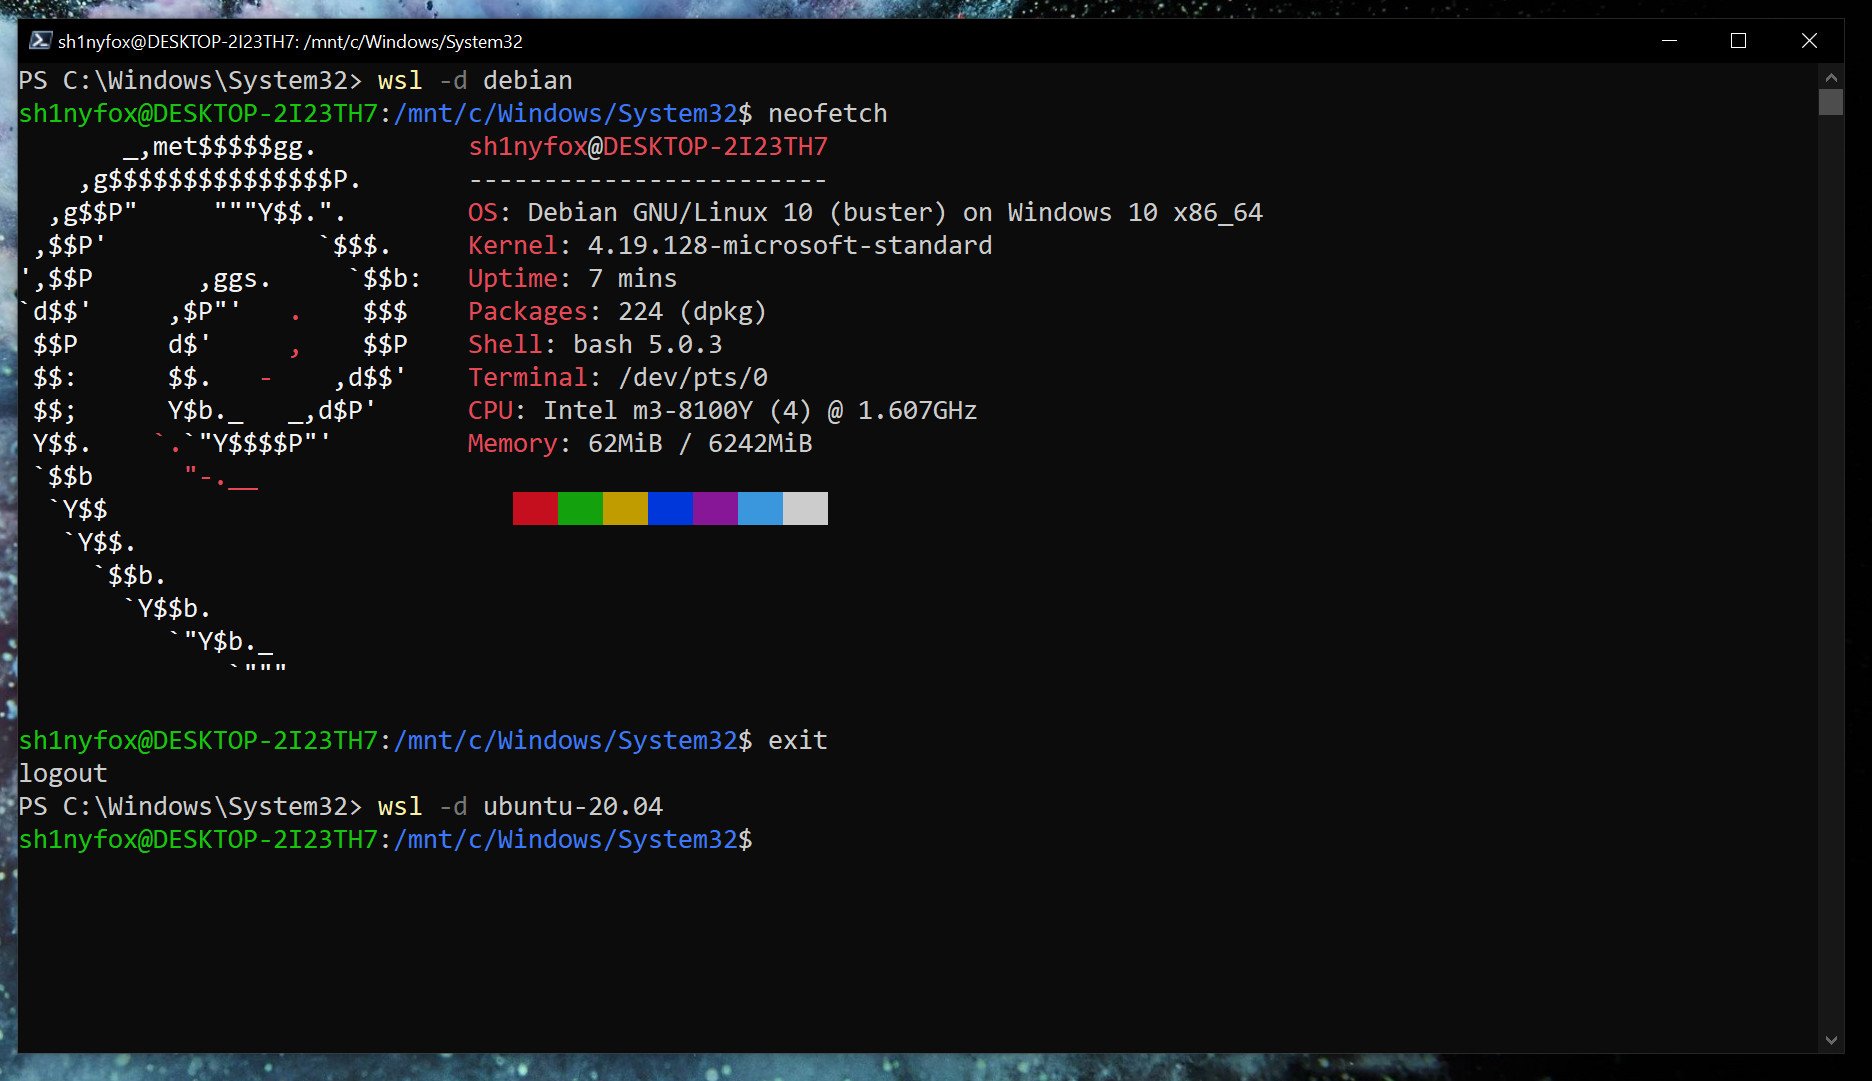
If you only have one version of Linux installed, simply typing
wslin PowerShell will launch you into the associated bash shell. But if you have multiple, you can launch a specific distro with this command.
wsl -d <distribution name=""></distribution>Once you’re done, typing
exitwill take you back into PowerShell.
From here on out, you’re ready to go forth and install all the Linux you want. Our full guide will help you along the way, but once WSL2 is set up how you like it, it just fades into the background.
It’s also worth grabbing the Windows Terminal app from the Microsoft Store if you’re using WSL. While you can just use the standard terminal installed with each or launch through PowerShell as shown above, Windows Terminal has a neat tabbed interface that lets you run multiple shells at once. Have PowerShell, Linux, Azure Cloud Shell, and even Command Prompt, all open together side-by-side in one window.

(opens in new tab)
Cutting-edge operating system
A refreshed design in Windows 11 enables you to do what you want effortlessly and safely, with biometric logins for encrypted authentication and advanced antivirus defenses.
Get the best of Windows Central in in your inbox, every day!
Richard Devine is a Managing Editor at Windows Central with over a decade of experience. A former Project Manager and long-term tech addict, he joined Mobile Nations in 2011 and has been found on Android Central and iMore as well as Windows Central. Currently, you’ll find him steering the site’s coverage of all manner of PC hardware and reviews. Find him on Mastodon at mstdn.social/@richdevine


WSL allows you to run applications natively as Linux processes on Windows. Learn how to install and use WSL on Windows Server here.
Table of Contents
- Which versions of Windows Server support WSL?
- How does installing WSL differ on Windows Server?
- Install the Windows Subsystem for Linux in Windows Server
- WSL in Windows Server 2019
- WSL in Windows Server 2022
- Download a Linux distribution
- Install a Linux distribution on Windows Server
- Launch and log in to your Linux distribution
- WSL 2 is not supported in Windows Server 2019 or Windows Server 2022
Which versions of Windows Server support WSL?
According to Microsoft documentation, the Windows Subsystem for Linux (WSL) is available for installation on Windows Server 2019 (1709) and above. This includes the few Windows Server Semi-Annual Channel (SAC) releases (versions 1909, 2004, 20H1, 20H2, etc.) and Windows Server 2022.
For more information on how to run Linux GUI apps using WSL, check out How to Install Linux GUI Apps in Windows 10 and Windows 11 with WSL on Petri.
How does installing WSL differ on Windows Server?
Well, this is an interesting question. Depending on what version of Windows Server you’re using will dictate how you install WSL. And, unfortunately, there is one underlying platform difference in running WSL on Windows Server vs Windows 10 and Windows 11.
As you’ll read at the end of my post, WSL 2 distributions are not available and not supported on Windows Server 2019 and 2022. Aside from that glaring omission, there are no other real differences in using WSL on Windows Server vs. say Windows 10 or Windows 11. It’s similar to Hyper-V. Enabling Hyper-V on Windows 10 and 11, and Windows Server is very similar. Once it’s installed, you fire up the Hyper-V Manager and start building virtual machines (VM). This is the same with WSL on Windows client or Windows Server.
Install the Windows Subsystem for Linux in Windows Server
Remember what I said about the differences in how you install WSL on Windows Server? This will be a wonderful example of the advances Microsoft has made with installing WSL in Windows Server 2019 and Windows Server 2022. To all the Linux fans out there…this might just persuade you to build a few Windows Server 2022 servers to play around with.
Install WSL in Windows Server in 3 steps:
- Install the WSL optional feature using PowerShell
Enable-WindowsOptionalFeature -Online -FeatureName Microsoft-Windows-Subsystem-Linux - Enable the Virtual Machine Platform
dism.exe /online /enable-feature /featurename:VirtualMachinePlatform /all /norestart - Download and run the Linux kernel update package.
Now let’s look at the process in more detail for Windows Server 2019 and Windows Server 2022.
WSL in Windows Server 2019
Step #1. Install the optional feature, Windows Subsystem for Linux, via PowerShell:
Enable-WindowsOptionalFeature -Online -FeatureName Microsoft-Windows-Subsystem-Linux

After this completes, press ‘Y’ to restart your server.
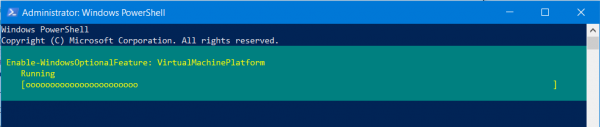
Step #2. We need to enable the Virtual Machine Platform feature by running this command:
dism.exe /online /enable-feature /featurename:VirtualMachinePlatform /all /norestart
Go ahead and reboot for safe measure.
Step #3. Download and run the Linux kernel update package.
Note: Windows Server versions/SKUs do not support WSL version 2 distributions. However, you can still use WSL version 1 for all your distributions.
WSL in Windows Server 2022
Alright, so, this may give you a chuckle…open an administrative PowerShell window or command prompt and run this fabulous command!
wsl --install
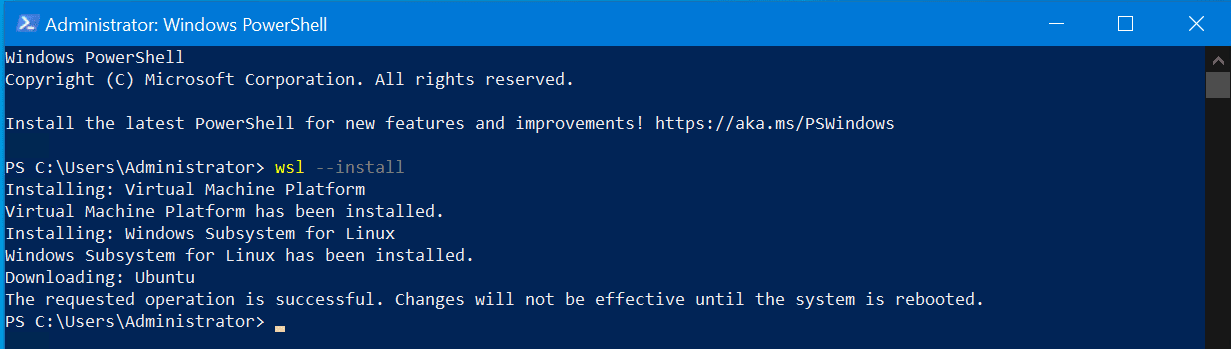
That’s right. This single command installs the Virtual Machine Platform feature, the Windows Subsystem for Linux, and downloads an Ubuntu distribution for you! Next, reboot.
After a reboot, the Ubuntu distribution starts to load. But, before we continue with that, we first need to update the kernel for WSL by running this command:
wsl --update
If that doesn’t work for whatever reason, you can run the Linux kernel update package from above.
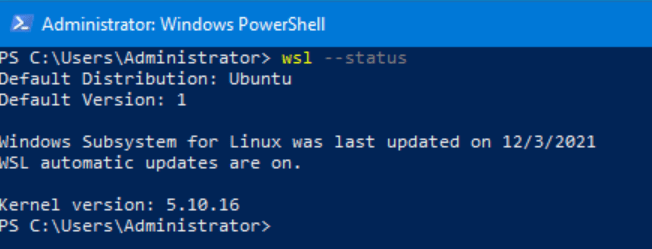
But then, we run into an issue that has been around since the various Insider preview builds of Windows Server 2022 earlier in 2021. When you try to change the default version for distributions to ‘2’, the command simply doesn’t work. Even the help included with ‘wsl’ shows the command to use. Yet, I have never been able to make this work. I ran this command to first check status:
wsl --status
Then, I tried the version command:
wsl --set-default-version 2
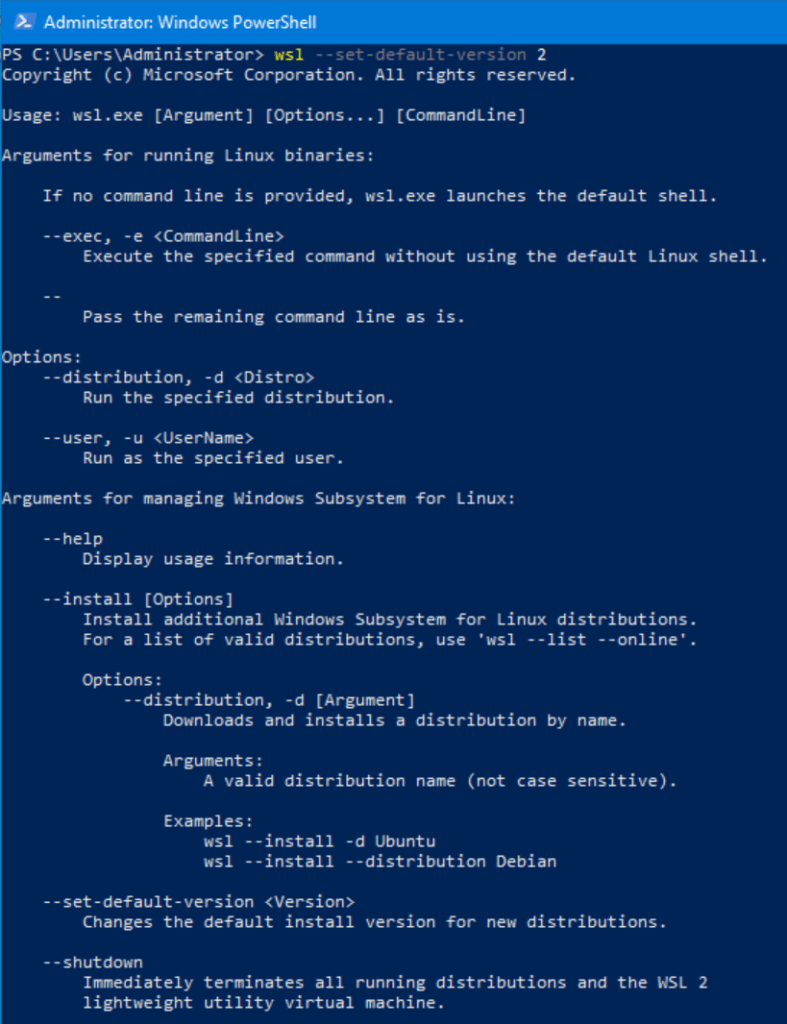
As you can see from the output, Windows interprets it as an incorrectly formed command. Yet, below in the help file, you can see the exact command I ran! Anyway, as you’ll see at the end of this article, I discovered through more digging than I feel is necessary the fact that ‘WSL 2’ is not compatible with Windows Server at all. It’s not a terribly huge deal, but it’s disappointing nonetheless. Well, let’s move on!
Download a Linux distribution
Again, I’ll show you the basics here depending on what version of Windows Server you’re using. You can do everything from the ‘wsl’ command in 2022, but there are manual steps if you’re running 2019. Microsoft documentation includes the various download links to distributions but PowerShell, again, simplifies things for us. For example, to download ‘Ubuntu 20.04’, open PowerShell and type:
Invoke-WebRequest -Uri https://aka.ms/wslubuntu2004 -OutFile Ubuntu.appx -UseBasicParsing
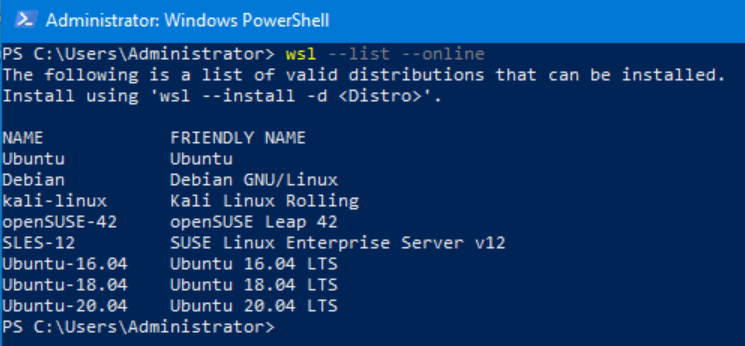
If you’re using Windows Server 2022, you can list the available distributions using the ‘wsl’ command again:
wsl --list --online
And to download and install for example SUSE Linux Enterprise Server v12, type this:
wsl --install -d SLES-12
Install a Linux distribution on Windows Server
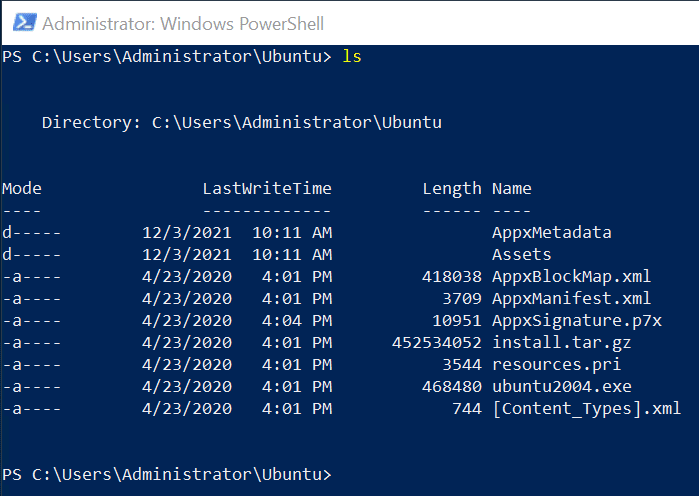
After the download completes, run these PowerShell commands to rename the file, and then extract the contents:
Rename-Item .Ubuntu.appx .Ubuntu.zip
Expand-Archive .Ubuntu.zip .Ubuntu
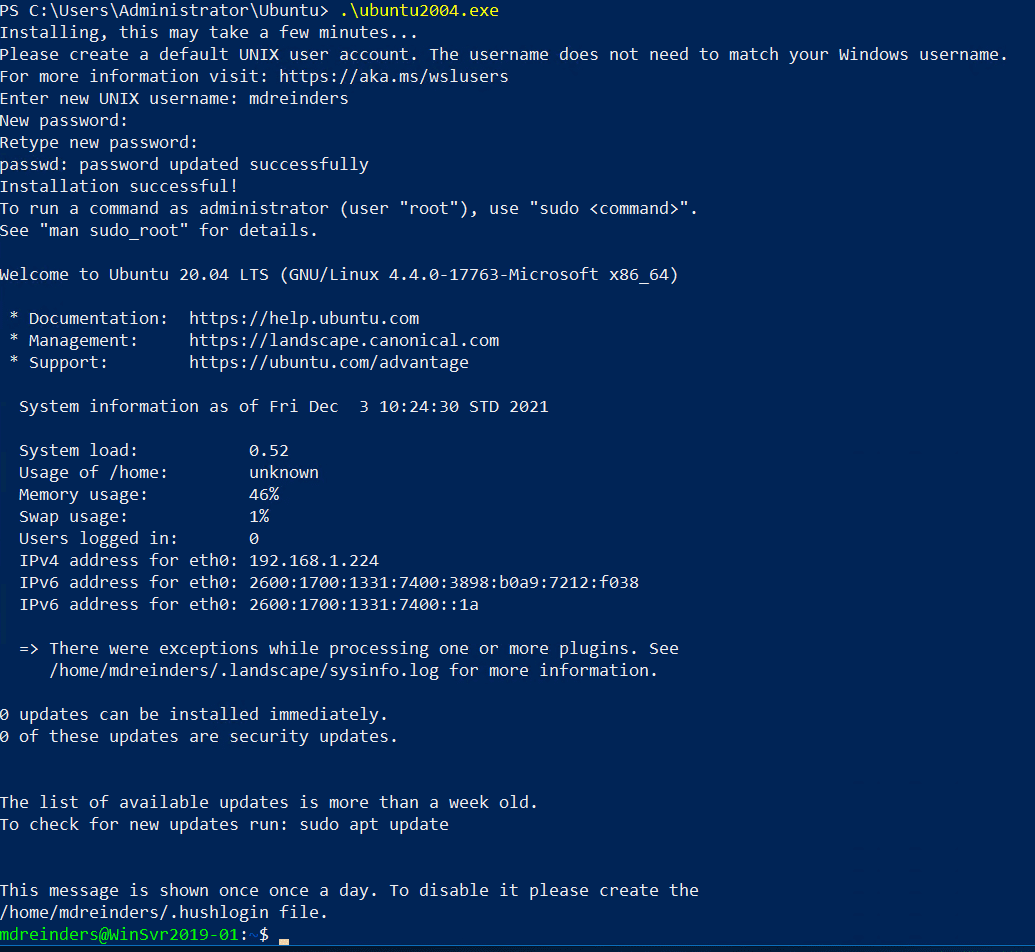
To install the distribution, simply run the ‘ubuntu2004.exe’ file.
Launch and log in to your Linux distribution
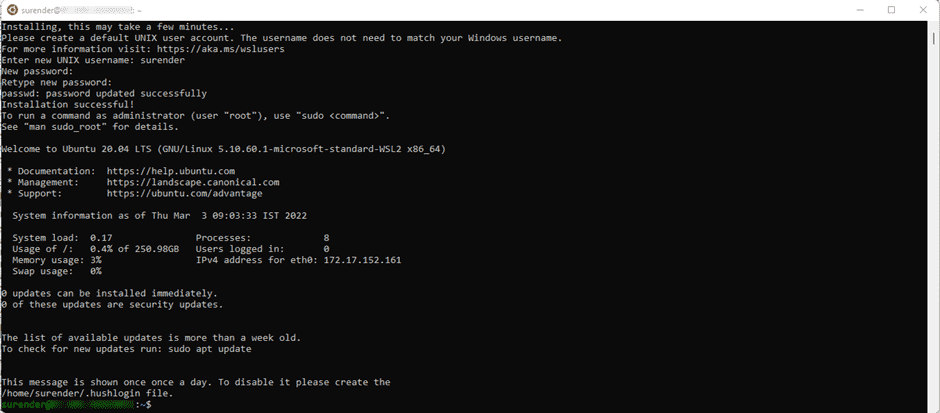
There are various methods you can use to launch your distributions. And yes, efficiencies abound in 2022 vs 2019. In Windows Server 2022, each distribution you install gives you a shortcut in your Start Menu. In Windows Server 2019, there are ways to manually create that shortcut. But, an easy way is to just run the name of the distribution at a command prompt. The first step is to create your UNIX user account.
After entering your UNIX username and giving it a password, you are done! You have free reign over this ‘container‘ process that runs a pseudo virtualization infrastructure under the hood. It is very lightweight and it essentially allows you to run a real Linux kernel in Windows!
Let me finish this post by giving you a suggestion to update all the software packages in your distribution. Run these commands to achieve this:
sudo apt-get update
sudo apt-get upgrade
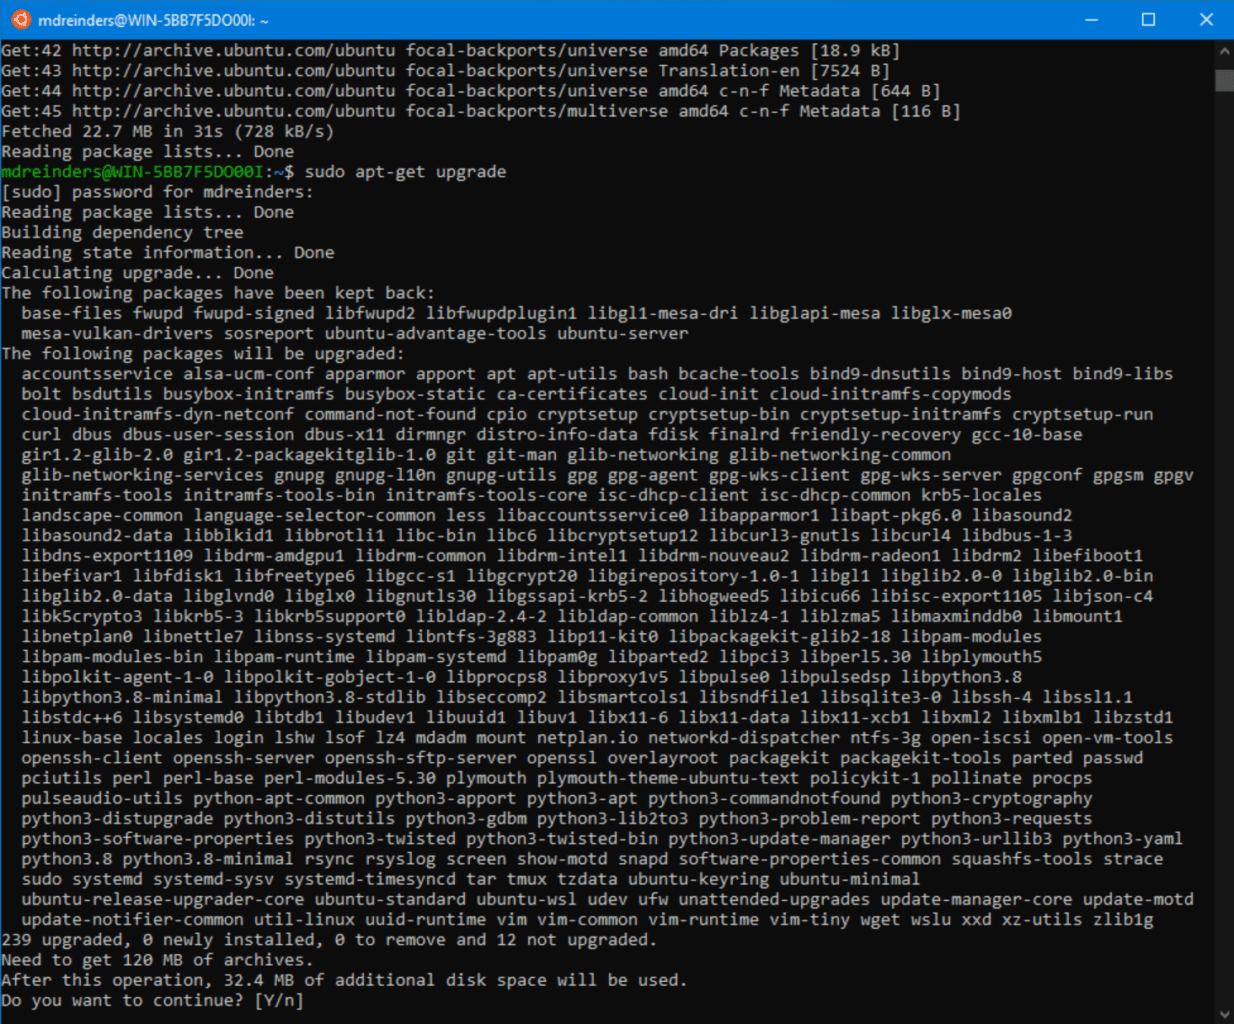
And there you have it! I must say, if you’re familiar with WSL and have used WSL 2 (version 2) distributions on Windows 10 or Windows 11, you’ll right away notice the slower disk I/O inherent in WSL 1 distributions. As of this writing, I am unable to convert my distributions on Windows Server 2022 to version 2. It’s a shame.
WSL 2 is not supported in Windows Server 2019 or Windows Server 2022
Late-breaking update: I finally did find on GitHub a post by a Microsoft engineer/PM stating that WSL 2 distributions are NOT supported on Windows Server. Oh well…
WSL 2 or Windows Subsystem for Linux 2 is an iterative update to Windows Subsystem for Linux 1. Being so much better than WSL 1, it is obvious that one must upgrade to WSL 2. That is what we will be checking out in this guide.

The following are the requirements that your computer must fulfill for Windows Subsystem for Linux 2 to run properly:
- Windows 10 Build 18917 or newer
- Hyper-V Virtualization
To install Windows Subsystem for Linux 2 on Windows 11/10, follow these steps:
- Enable the Optional feature.
- Install a distro.
- Enable Virtual Machine Platform optional feature.
- Configure the installed distro.
1] Enable the Optional feature
In order to enable the WSL Optional feature, open Windows PowerShell with Administrator privileges.

Execute the following command:
Enable-WindowsOptionalFeature -Online -FeatureName Microsoft-Windows-Subsystem-Linux
If will ask for a confirmation if you want to reboot your computer, hit Y to do it straight away or to reboot it manually, hit N.
2] Install a distro
You can try to download and install a suitable Linux distro for your computer from the Microsoft Store.
3] Enable Virtual Machine Platform optional feature
Open Windows PowerShell as an Administrator and execute the following command:
Enable-WindowsOptionalFeature -Online -FeatureName VirtualMachinePlatform
If it asks for a confirmation, to reboot your computer, hit Y to do it straight away or to do it later, hit N.
4] Configure the installed distro
Finally, we have to configure the installed distro to WSL 2.
Open Windows PowerShell and execute this command to list all the available WSL distros on your computer:
wsl -l -v
Set the desired distro to WSL 2. execute the following command:
wsl --set-version DistroName 2
Finally, set the selected distro as default by executing the following command:
wsl --set-default-version 2
You would be experiencing the new seamless and faster experience with Windows Subsystem for Linux.
This new update to the command line utility brings in the new architecture. This will drastically improve the file system performance and the full system call compatibility. This new update is based on virtualization (which is based on Hyper – V) which works on a real Linux kernel.
How do I get WSL 2 on Windows 11/10?
To get WSL or Windows Subsystem for Linux 2 on Windows 11/10 computer, you must have Windows 10 Build 18917 or newer version, and Hyper-V virtualization enabled. Following that, you can follow the aforementioned steps one after one. You need to enable the Optional feature first. Then, you need to install a distribution, allow the Virtual Machine Platform optional feature, and configure the Linux distribution.
How do I get Linux subsystem on Windows 11/10?
To get Linux Subsystem on Windows 11/10, you need to use Windows PowerShell. Enter this command to enable the optional feature: Enable-WindowsOptionalFeature -Online -FeatureName Microsoft-Windows-Subsystem-Linux. Then, download a Linux distribution from the Microsoft Store and turn on the Virtual Machine Platform optional feature using Windows PowerShell by entering this command: Enable-WindowsOptionalFeature -Online -FeatureName VirtualMachinePlatform. Following that, you can configure the installation as you like.
You should be all set now!
TIP: You can install Windows Subsystem for Linux with a single command on Windows 11.
Ubuntu is a Linux based distribution that is totally free and open source. The program also provides support for Windows 10 and is used by a lot of people for software developing purposes. However, quite recently a lot of reports have been coming in where users are unable to use it and the Error “The WSL Optional Component is not Enabled. Please Enable it and Try Again” is seen while trying to do so.
What Causes “The WSL Optional Component is Not Enabled. Please Enable it and Try Again” Error on Ubuntu?
After receiving numerous reports from multiple users, we decided to investigate the issue and devised a set of solutions to fix eradicate it completely. Also, we looked into the reason due to which this issue is triggered and listed it as follows.
- Disabled Component: As the error message indicates, the error is triggered if the Windows Subsystem for Linux is disabled. Windows Subsystem for Linux is a very important feature and needs to be enabled in order for Ubuntu to work properly on Windows 10 because it provides all the important configurations and distributions needed for Ubuntu to run correctly.
Now that you have a basic understanding of the nature of the problem, we will move on towards the solutions. Make sure to implement the solutions carefully, in order to avoid conflict.
Method 1: Turning WSL ON Through Control Panel
There are a couple of methods which we can apply to rectify the problem. However, in this step, we will be taking the easiest route and enable WSL through the Control Panel. For that:
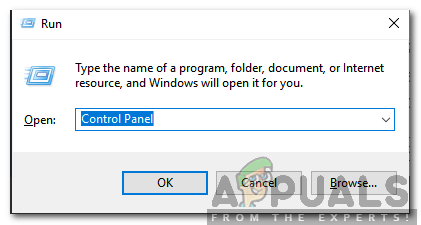
- Press “Windows” + “R” keys simultaneously to open the Run prompt.
- Type in “Control Panel” and press “Shift” + “Ctrl” + “Enter” to provide administrative privileges.

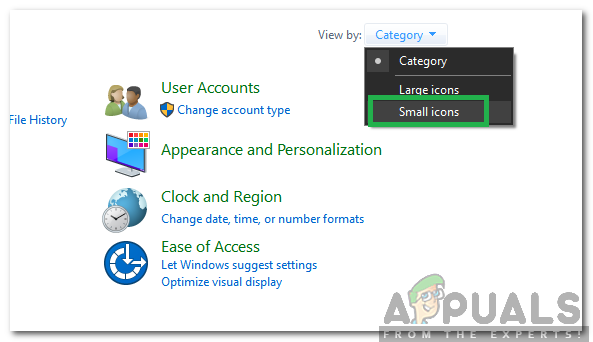
Typing in “Control Panel” and pressing “Shift” + “Ctrl” + “Enter” to provide administrative privileges - Click on the “View By” option and select “Small Icons“.

Clicking on “View By” and selecting “Small Icons” - Click on the “Programs and Features” option.
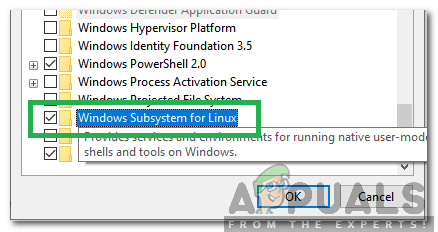
- Select the “Turn Windows Features On or OFF” option in the left pane.
- Scroll down and select “Windows Subsystem for Linux“.

Checking the “Windows Subsystem for Linux” option” - Click on “OK” to enable the feature.
- Check to see if the issue persists.
Solution 2: Turning WSL ON Through PowerShell
We can also enable the WSL Feature by using the Command Prompt. Therefore, in this step, we will be implementing a command in the command prompt to enable the WSL Feature. For that:
- Press “Windows” + “R” keys simultaneously to open the Run prompt.
- Type in “Powershell” and press “Shift“+ “Ctrl” + “Enter” to provide administrative privileges.
- Type in the following command and press “Enter“.
Enable-WindowsOptionalFeature -Online -FeatureName Microsoft-Windows-Subsystem-Linux
- Wait for the command to be executed and check to see if the issue persists.

Enabling WSL


Kevin Arrows
Kevin is a dynamic and self-motivated information technology professional, with a Thorough knowledge of all facets pertaining to network infrastructure design, implementation and administration. Superior record of delivering simultaneous large-scale mission critical projects on time and under budget.
Back to top button
Ever since Windows added the support for Windows Subsystem for Linux (WSL), it has become easy for admins, developers, and power users to step into the world of Linux. Before WSL support was added, users had to rely on heavy virtualization tools (such as VirtualBox, VMware Workstation, and Hyper-V) or even dual-boot configurations to run a Linux instance.
Contents
- Introduction to Windows Subsystem for Linux
- Differences between WSL and traditional VM
- When to choose WSL 2
- When to choose a traditional VM
- Prerequisites for WSL
- Install WSL in Windows 11
- Manually install Windows Subsystem for Linux
- Install and manage Linux distros in WSL
- List the available Linux distros
- Install a Linux distro
- List installed Linux distros
- Change the default WSL Distro
- Run and terminate Linux distros
- Change the WSL version
- Remove a Linux distro
- Mount a disk in WSL 2
- Update the WSL Linux kernel
- File sharing between Windows and the WSL distro
- Author
- Recent Posts

Surender Kumar has more than twelve years of experience in server and network administration. His fields of interest are Windows Servers, Active Directory, PowerShell, web servers, networking, Linux, virtualization, and penetration testing. He loves writing for his blog.
Latest posts by Surender Kumar (see all)
- Extending LVM space in Ubuntu — Thu, Feb 2 2023
- Backup in Proxmox VE — Thu, Jan 26 2023
- Snapshots in Proxmox VE — Wed, Jan 25 2023
In this article, I will cover the basics of Windows Subsystem for Linux, how to install it in Windows 11, and how to run an Ubuntu Linux container in WSL. You can also run any other version of Linux in WSL.
Introduction to Windows Subsystem for Linux
Windows Subsystem for Linux is an optional feature added to Windows 10 and later versions that allows users to run a Linux instance, including most command-line tools and applications, directly on Windows without using any traditional virtual machine or dual-boot configuration.
The WSL feature was originally added to Windows 10 version 1607 (Anniversary Update) and requires an x64-bit version of Windows. On Server operating systems, it is available for installation in Server 2016 version 1803.
The initial version of WSL (now known as WSL v1 or WSL 1) does not use the real Linux kernel. Instead, a translation layer between the Linux distribution and the Windows NT kernel translates and handles all the kernel-level operations.

Windows Subsystem for Linux v1 architecture
A lot has changed since the initial launch of WSL. The newer version (known as WSL v2 or WSL 2) was released with Windows 10 version 1903, build 18362 (May 2019 Update); it included various architectural and performance improvements, particularly the use of the real Linux kernel. In WSL 2, in place of the translation layer, a real Linux kernel runs inside a lightweight utility virtual machine (VM), though this is not a traditional VM. This new architecture has resulted in a significant increase in file system performance and full system call compatibility.

Windows Subsystem for Linux v2 architecture
Differences between WSL and traditional VM
While WSL 2 uses Microsoft’s Hyper-V as a hypervisor under the hood to run the utility VM, it does not require you to enable Windows’ Hyper-V role or feature; WSL works perfectly fine without it.
Please remember that WSL is not a full replacement for a traditional VM. Let me tell you why.
With the help of a hypervisor, a traditional VM creates an isolated environment in your host system that acts as a separate virtual computer with all the hardware components, such as CPU, RAM, and storage. This architecture allows a user to have a completely isolated system with a guest operating system.
However, this is not the case with WSL. While WSL 2 does run a real Linux kernel in a Hyper-V–based utility VM, it works completely behind the scenes; hence, the user does not need to install and manage the operating system or any other resources as with a traditional VM.
When to choose WSL 2
- You have a less powerful computer.
- You need a smaller memory or storage footprint.
- You need faster I/O performance.
- You don’t want to waste your time installing and managing the virtual machine.
- You need to run a Linux distribution (distro) for development and testing purposes.
When to choose a traditional VM
- You have a powerful computer for which resources (such as memory, CPU, and storage) are not a concern.
- You need to run an operating system other than GNU/Linux.
- You need a completely isolated and full-fledged system environment.
- You want to manage the operating system, applications, and resources.
- You want to run production-level workloads.
- You need advanced virtualization features, such as snapshots and load balancing.
In a nutshell, both WSL and traditional VM have several pros and cons; whether you want to run a Linux distro within WSL or within a traditional virtualization platform (such as VirtualBox, Hyper-V, or VMware Workstation) depends entirely on your interest and use case. I hope the aforementioned points will help you make an informed decision.
Prerequisites for WSL
Your system must have certain prerequisites before you can run WSL.
- It must have x64-bit and ARM64 processors.
- To run WSL 1 on an x64 system, it must be running at least Windows 10 version 1607 (Anniversary Update).
- To run WSL 2 on an x64 system, it must be running at least Windows 10 version 1903, build 18362 (May 2019 Update).
- To run WSL 2 on an ARM64 system, it must be running at least Windows 10 version 2004 (build 19041 or higher).
To check the operating system version and build number, you can type the winver command in the RUN dialog and press Enter.
Install WSL in Windows 11
If your system is running Windows 10 version 2004 (build 19041 or higher) or Windows 11, Microsoft has made it incredibly easy to install WSL 2. Just launch the PowerShell console with an elevated privilege and run the following command:
wsl --install
This command enables the optional Windows features required for WSL, downloads the latest Linux kernel, sets WSL 2 as the default, and installs the Ubuntu Linux distro for you.

Install WSL using PowerShell The latest method
Once the command is finished, you can restart your computer using the Restart-Computer -Force command.
After the restart, the WSL installation will resume automatically, and you will see an Ubuntu Linux terminal, which will ask you to set the username and password for the Ubuntu WSL instance.
Ubuntu Linux running in the WSL instance
Manually install Windows Subsystem for Linux
If you are running an older Windows 10 build or prefer installing WSL manually, you can follow the manual installation steps laid out below.
Launch the Windows PowerShell console with an elevated privilege and run the following command:
Enable-WindowsOptionalFeature -Online -FeatureName 'Microsoft-Windows-Subsystem-Linux' -All -NoRestart

Enable the WSL feature using PowerShell The manual method
Many people still prefer using WSL 1. If you also want the same, you can restart your system at this stage and directly jump to Point 5 after rebooting. If you would rather use WSL 2, please continue to the next point. Make sure your system meets the prerequisites for running WSL 2.
The next step is to run the following command:
Enable-WindowsOptionalFeature -Online -FeatureName 'VirtualMachinePlatform' -All -NoRestart

Enable the Virtual Machine Platform feature using PowerShell The manual method
Now use the following command to restart your system:
Restart-Computer -Force
After the system has restarted, download the latest kernel package for your system using the following links and install the package:
- WSL 2 Linux kernel for x64 systems
- WSL 2 Linux kernel for ARM64 systems
Once the kernel package is installed, your system should be running WSL 1 by default. To change the default version to WSL 2, run the following command in an elevated PowerShell console:
wsl --set-default-version 2
Now you can install any Linux distro of your choice. We will cover that in the next section.
Install and manage Linux distros in WSL
Now that you have installed WSL in your system, you can run and manage your Linux distros using PowerShell. Launch the PowerShell console with an elevated privilege and use the commands mentioned in this section.
List the available Linux distros
To see the list of all the Linux distros available for installation with WSL in the online store, you can use the following command:
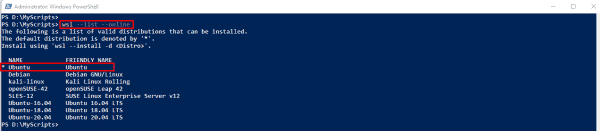
wsl --list --online
WSL list online
You can also use the short-version command wsl -l -o, which will yield a list of all the supported Linux distros available online for installation in your system.
If you’re thinking that this list is quite small and that you cannot see the distro of your choice, rest assured that there is a way you can import any Linux distro in WSL. But that is a manual method involving multiple steps. Hopefully, we’ll discuss that later.
Install a Linux distro
Once you have the list of available distros for your system, you can use the following command for installation:
wsl --install -d kali-linux

Install a Linux distro in WSL
This command installs Kali Linux in WSL. Of course, you can replace kali-linux with the name of the distro you want to install. Once installed, Kali Linux will be launched in a terminal.

Kali Linux in WSL Initial setup
List installed Linux distros
To see the list of all the Linux distros installed in your system, you can use the following command:
wsl --list --verbose

WSL list verbose
You can also use the short-version command wsl -l -v, which will show a list of all the Linux distros installed in your system.
To list only the instances that are currently running, you can use the following command:
wsl --list --running

List of only the running instances in WSL
Change the default WSL Distro
Have you noticed a small asterisk (*) right next to the distro name when you run the wsl -l -v command? This asterisk represents the default distro for WSL. The wsl —status command also shows the current default distro. The default distro is the one that runs when you run wsl in a command line without specifying the —distribution (or -d) parameter.
For example, in my system, docker-desktop is set as the default distro. Changing the default distro to kali-linux can be done with the following command:
wsl --set-default kali-linux

Changing the default distro in WSL
Run and terminate Linux distros
To run any distro and connect to it, you can directly use the following command in PowerShell or the command prompt:
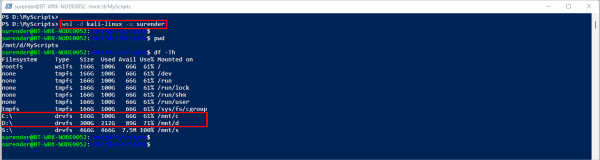
wsl --distribution kali-linux --user surender
Run and connect a WSL distro with a specific user
Run and connect a WSL distro with a specific user.
After using the above command, you will be directly logged in to the Kali Linux bash shell. The good thing is that your Windows drives are automatically mounted under /mnt, so you can seamlessly transfer the files between Windows and the WSL instance.
To terminate (or stop) a WSL instance, you can use the following command:
wsl --terminate kali-linux

Terminate or stop a single WSL instance
This command stops a particular Linux distro (Kali Linux in this case). If your system has multiple Linux distros that are running, you can use the following command to stop them all at once:
wsl --shutdown
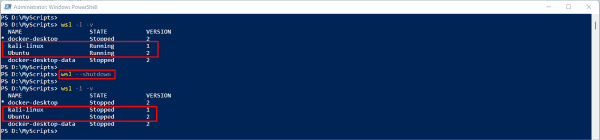
Stop all Linux instances using WSL shutdown
This command immediately stops all the running Linux distros as well as the utility VM.
Change the WSL version
As mentioned earlier, WSL 1 runs by default after installation. To change the WSL version globally, you can use the following command:
wsl --set-default-version 2

Set the default WSL version
This command changes the default WSL to WSL 2. If you want to use WSL 1, you can type 1 instead of 2 in the command. Setting the default version to WSL 2 means that every Linux distro you will install in this system will be running in WSL 2.
Apart from changing the WSL version globally, which will affect all future WSL instances, you can set the WSL version specifically for the selected Linux distro. To do this, use the following command:
wsl --set-version kali-linux 1
This command converts the Kali Linux distro to WSL 1. It could take a while for the conversion process to finish and for the change to be verified; you will see the VERSION column of the wsl -l -v command, as shown in the following image:

Change the WSL version for a particular distro
Please note that the WSL instance will be stopped during the version change process.
Remove a Linux distro
To remove or uninstall a Linux distro from WSL, you need to unregister the distro using the following command:
wsl --unregister ubuntu

Unregister a distro from WSL
This command unregisters a Linux distro (Ubuntu in this case). Please note that this command will permanently erase all the data, settings, and applications within that distro.
Mount a disk in WSL 2
A cool feature available in WSL 2 is the ability to mount disks that are not supported by Windows. Please note that this feature is available only in WSL 2 running on Windows 11 (build 22000 or higher). Furthermore, the Linux distro in which you plan to mount the disk should be running in WSL 2.
This feature is particularly useful when you want to access the contents of a disk formatted with a Linux file system that is not supported by Windows. To do this, you can mount the disk using the wsl —mount command and then access the contents using WSL.
A quick overview—Windows can recognize FAT, NTFS, ReFS, exFAT, and a few other file systems, but the EXT3 and EXT4 file systems are not supported. exFAT is a cross-platform file system that is equally supported on Windows, Linux, and MacOS.
For demonstration purposes, I just connected a virtual disk formatted with the EXT4 file system. As this disk is formatted in EXT4, Windows won’t recognize it, and nothing will show up in File Explorer.
To access its contents, we can mount this storage device and make it available for Linux distros. However, before mounting the disk, we need to get the device ID for the particular disk using the following PowerShell command:
Get-CimInstance -query 'SELECT * from Win32_DiskDrive'

The Get CimInstance command used to obtain the device ID
Note down the device ID returned by the above command and use it to mount the disk using the following command:
wsl --mount <DeviceID>
This command mounts the specified disk and makes it available to all the Linux distros in WSL. You can use the —bare parameter to make the disk available in WSL without mounting it to all distros. The —type parameter can be used to specify the file system for the disk. If you don’t know the file system, you can skip this parameter.
The image below displays the commands I used:

Mount and access a disk in WSL
After entering the bash terminal, I used the lsblkid command to list the partitions available on the disk. Once I obtained the partition’s name, I mounted the partition inside the /mnt/vdisk/ directory using the regular mount command. Following this, I could read the contents of the disk.
Once you finish accessing the contents and want to unmount the disk, you can use the following command:
wsl --unmount <DeviceID>

Unmount the disk in WSL
Update the WSL Linux kernel
By default, the WSL Linux kernel will be automatically updated with Windows updates. However, to manually check and update the kernel, you can use the following commands:
wsl --status
This command shows the status of WSL, including the default distro name, WSL version, and kernel version.
wsl --update
This command forcefully checks and updates the kernel version if an update is available.

Check and update the kernel in WSL
File sharing between Windows and the WSL distro
As mentioned above, your Windows drives are automatically mounted under /mnt inside the Linux distro; hence, you can seamlessly transfer files between Windows and the WSL instance. To transfer files, you should navigate to the mounted drive and start accessing the files as you normally would in the Linux terminal.
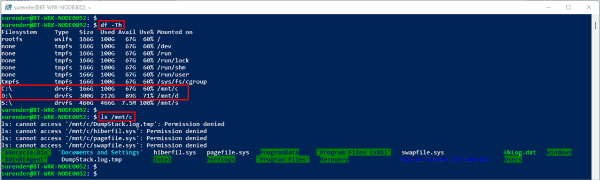
Access Windows drives in WSL
If you would like to view the Linux files directly inside Windows File Explorer, you can use the following command in the bash terminal of the Linux distro:
explorer.exe .
Please make sure you don’t miss the period (.) at the end of the command.

Launch File Explorer in WSL
This will open File Explorer in Windows directly inside your current working directory in the Linux distro.

Open File Explorer in WSL
This is extremely helpful if you’re a developer. You can use this trick to manage your projects and files in Windows as well as in Linux distros, taking advantage of Linux build tools that are not normally available in Windows.
And that’s the end of this guide.
Subscribe to 4sysops newsletter!
In the next article, we will discuss how you can export your favorite Linux distro and make it available in WSL 2, assuming the distro is not available for installation from the Microsoft online store by default.
Contents
-
What is WSL?
- What is WSL 1?
- What is WSL 2?
-
Enabling WSL in Windows 10
- Using the GUI for enabling Windows features
- Using PowerShell
- Additional Installation Resources
-
Ubuntu on WSL
- Installing Ubuntu on WSL via the Microsoft Store (Recommended)
- Installing Ubuntu on WSL via rootfs
- Installing Ubuntu on WSL by sideloading the .appx
-
Running Ubuntu on WSL
- Starting Ubuntu on WSL
- Installing Packages on Ubuntu
- Keeping Ubuntu Updated in WSL
- Hello World
-
Advanced Topics
- Performance
- Running Graphical Applications
- Enabling Sound
-
Getting Help
- Common Issues
- Reporting Windows Subsystem for Linux-specific Issues
- Reporting Issues in Ubuntu
- Reporting Issues in the Ubuntu WSL Apps
- Additional Resources
What is WSL?
Windows Subsystem for Linux (WSL) allows users to run a Linux terminal environment, install packages from the Ubuntu archive, and run Linux applications and workflows on Windows 10.
What is WSL 1?
The original WSL is now known as WSL1. WSL1 is a compatibility layer for running Linux binary executables (ELF) natively on Windows 10. No re-compilation or ‘porting’ of applications is required. WSL1 provides a Linux-compatible kernel interface developed by Microsoft that allows a user to choose a Linux distribution to install from the Microsoft Store. WSL1 executes unmodified Linux ELF64 binaries by operating a Linux kernel interface on top of the Windows kernel in Windows 10. The WSL1 interface translates Linux system calls from the binaries into Windows system calls and then executes them at native speed. Linux applications run within the Linux distribution which provides the application’s dependencies and package management in a container-like environment. WSL provides an interface to mount drives within WSL.
What is WSL 2?
WSL2 was announced at Microsoft Build 2019. WSL2 features a Linux kernel running inside Windows 10 and is built on the core technology of Hyper-V to provide better Linux application support and improved file performance. Transitioning to WSL2 is seamless. To update to WSL 2 you need Windows 10 version 1903 or higher, with Build 18362 or higher.
-
Announcing WSL2 — Microsoft blog announcing WSL2
-
The new Windows subsystem for Linux architecture: a deep dive — WSL2 presentation at Microsoft Build 2019
-
WSL2-Linux-Kernel — The source for the Linux kernel used in Windows Subsystem for Linux 2.
Enabling WSL in Windows 10
Before you can install Ubuntu on WSL, WSL has to be enabled in one of the following ways:
Using the GUI for enabling Windows features
-
Open the Start Menu and search Turn Windows features on or off
-
Select Windows Subsystem for Linux
-
Click OK
- Restart your computer when prompted
Using PowerShell
-
Open PowerShell as Administrator and run:
1 Enable-WindowsOptionalFeature -Online -FeatureName Microsoft-Windows-Subsystem-Linux - Restart your computer when prompted
Additional Installation Resources
-
WSL Installation Guide from Microsoft
-
Windows Server Installation Guide from Microsoft
Ubuntu on WSL
Installing Ubuntu on WSL via the Microsoft Store (Recommended)
The recommended way to install Ubuntu on WSL is through the Microsoft Store.
The following Ubuntu releases are available as apps on the Microsoft Store:
-
Ubuntu 16.04 LTS (Xenial) is the first release available for WSL. It supports the x64 architecture only. (offline installer: x64)
-
Ubuntu 18.04 LTS (Bionic) is the second LTS release and the first one supporting ARM64 systems, too. (offline installers: x64, ARM64)
-
Ubuntu 20.04 LTS (Focal) is the current LTS release, supporting both x64 and ARM64 architecture.
-
Ubuntu (without the release version) always follows the recommended release, switching over to the next one when it gets the first point release. Right now it installs Ubuntu 20.04 LTS.
Each app creates a separate root file system in which Ubuntu shells are opened but app updates don’t change the root file system afterwards. Installing a different app in parallel creates a different root file system allowing you to have both Ubuntu LTS releases installed and running in case you need it for keeping compatibility with other external systems. You can also upgrade your Ubuntu 16.04 to 18.04 by running ‘do-release-upgrade’ and have three different systems running in parallel, separating production and sandboxes for experiments.
Installing Ubuntu on WSL via rootfs
Ubuntu WSL distribution rootfs daily builds are available for download:
-
Ubuntu 16.04 LTS (Xenial)
-
Ubuntu 18.04 LTS (Bionic)
-
Ubuntu 19.10 (Eoan)
-
Ubuntu 20.04 LTS (Focal)
They can be installed using the wsl command:
-
1 wsl --import <DistributionName> <InstallLocation> <FileName>
Installing Ubuntu on WSL by sideloading the .appx
Ubuntu WSL distribution .appx builds are available for download:
-
Ubuntu 20.04 LTS (Focal)
-
Ubuntu 20.04 LTS arm64
-
Ubuntu 18.04 LTS (Bionic)
-
Ubuntu 18.04 LTS arm64
-
Ubuntu 16.04 LTS (Xenial)
They can be installed by enabling sideloading in Windows 10 and double-clicking the .appx and clicking Install or with PowerShell:
1 Add-AppxPackage .CanonicalGroupLimited.Ubuntu18.04onWindows_1804.2018.817.0_x64__79rhkp1fndgsc.Appx
Running Ubuntu on WSL
Starting Ubuntu on WSL
The Ubuntu on WSL terminal can be started via:
- The app tile in the Windows Start menu (or pinned to your taskbar)
-
WSL — Remote extension for Visual Studio Code.
-
The wsl command on the Windows command prompt or PowerShell
-
By running ubuntu1804.exe, etc. on the Windows command prompt or PowerShell
Installing Packages on Ubuntu
Package management on Ubuntu on WSL works the same as on desktop Ubuntu, using the apt package manager. apt will download and install packages from the Ubuntu archive.
First we check for updates:
We use sudo because installing packages is an administrator task and requires elevated privileges. Enter the UNIX password you created when you installed Ubuntu on WSL. This will not be your Windows password.
Next we can install a package:
For more information on managing packages with apt, see the following additional resources:
-
apt — Official Ubuntu documentation
-
InstallingSoftware
Keeping Ubuntu Updated in WSL
WSL runs its own specialized init system instead of SystemD and does not run standard Ubuntu services. Due to the services not running software updates are not applied automatically. Please keep your WSL installation using APT maintenance commands regularly. This can be accomplished with an occasional:
   1 sudo apt update
   2 sudo apt upgrade -y
Hello World
Lets write and compile a very simple Linux application on WSL. It will announce ‘Hello World!’ and then count to 10.
First, we will update apt and then install the necessary tools, often called dependencies:
   1 sudo apt update
   2 sudo apt install nim
Next, we will create and open a file named helloworld.nim:
Copy and paste the following code snippet (click ‘Toggle Line Numbers’ to hide line numbers). You can paste into the Ubuntu on WSL terminal by right-clicking with the mouse or Shift+Ctrl+’V’:
   1 echo "Hello World!"
   2 for i in countup(1, 10):
   3   echo i
Exit nano with Control+’X’ then press ‘Y’ and Enter.
Next we will compile our application back at our shell prompt:
1 nim compile helloworld.nim
This compiles our Nim code snippet to C and then into a Linux binary named helloworld.
Then we can run our Linux binary:
You should see:
   1 Hello World
   2 1
   3 2
   4 3
   5 4
   6 5
   7 6
   8 7
   9 8
  10 9
  11 10
But we are not just on Linux, we are on WSL.
We can build and test on both Linux and Windows at the same time, including compiling our Hello World application for Windows.
To do this we need to add a dependency, mingw-w64:
1 sudo apt install mingw-w64
Let’s compile our application again, this time creating a Windows binary:
1 nim compile --gcc.exe:x86_64-w64-mingw32-gcc --gcc.linkerexe:x86_64-w64-mingw32-gcc --cpu:amd64 --os:windows --out:helloworld.exe helloworld.nim
Then move our binary to Windows and run it from within WSL (your path by vary based on your Windows username):
   1 mv helloworld.exe /mnt/c/Users/Hayden/OneDrive/Desktop/
   2 cmd.exe /c "C:UsersHaydenOneDriveDesktophelloworld.exe"
Learn more about Nim.
Advanced Topics
Performance
Ubuntu’s performance in WSL1 can be close to bare metal Ubuntu installations in mostly CPU-intensive tasks but file operations are much slower in WSL (see tests on Windows 10 April 2018 Update and on Windows builds from 2019). In WSL 2, CPU intensive tasks are measured to be slightly slower and file operations are generally faster than on WSL1.
Intra-WSL filesystem I/O will always be faster than WSL<->Windows filesystem I/O. It is recommended to move large files and git repos over to WSL to work with them on WSL. To improve performance of the file operations some sites suggest disabling anti-virus software. This puts your system at risk and we highly recommend against doing so.
Running Graphical Applications
The X Window System Architecture allows running the X server and the X clients on separate systems and in WSL’s case the X server can be a native Windows server providing even OpenGL acceleration and the clients can be the graphical Linux applications running in the WSL environment.
Install one from several X servers available for Windows and start it before entering the WSL environment:
-
X410
-
VcXsrv
-
MobaXTerm
-
Cygwin/C
If graphical applications can’t connect to the running X server automatically paste the following commands to the terminal before starting the applications or set them on every login by adding them to ~/.bashrc:
-
   1  export DISPLAY=:0
   2  export DISPLAY=$(awk '/nameserver / {print $2; exit}' /etc/resolv.conf 2>/dev/null):0
   3  export LIBGL_ALWAYS_INDIRECT=1
Alternatively one can start the XServer (e.g., vcxsrv.exe using a saved config.xlaunch) and start a XWindows session from a Windows DOS batch file. Using this method, one can use DOS ipconfig to determine the virtual ethernet WSL2 IP and set the DISPLAY environment variable before starting the session. This is useful because the virtual ethernet IP will CHANGE with each Windows reboot (thus the need for the use of awk in the export DISPLAY above). Name the batch file whatever seems best for the purpose (note comments in this batch file code) and execute from same directory where the config.xlaunch file is (in this script c:bin):
-
   1 @echo off
   2
   3 rem Works ONLY if Ethernet adapter vEthernet (WSL): is the LAST "adapter" in
   4 rem the ipconfig output; that is, this for loop assigns the IPs from first to
   5 rem last from the ipconfig printed output, so the WSL virtual adapter must be the
   6 rem last one in the ipconfig output for this to work correctly.
   7 rem If you have excellent DOS batch file skills, you may find a better
   8 rem way of doing this.
   9
  10 for /f "tokens=1-2 delims=:" %%a in ('ipconfig^|find "IPv4"') do set ip==%%b
  11 set ipAddress=%ip:~1%
  12
  13 rem Trim whitespace
  14
  15 call :TRIM %ipAddress% ipAddress
  16
  17 rem Use this for testing
  18
  19 rem echo IP Address: %ipAddress%
  20
  21 rem Start up the xServer using saved xlaunch configuration
  22 rem This configuration creates a single large window
  23
  24 start /B config_one_window.xlaunch
  25
  26 rem Start up PulseAudio server, will accept audio from external
  27 rem source, i.e., from the X server
  28
  29 start "" /B "C:binpulseaudio-5.0-rev18pulsepulseaudio.exe"
  30
  31 rem Call ubuntu.exe, have it run what is essentially a startup
  32 rem script that sets two ENV variables using the ipAddress variable
  33 rem created above, which is the virtual IP to which services
  34 rem INSIDE the running X server can connect; these are the
  35 rem link between WSL2 and Windows 10
  36 rem Initiate an xfce4 session with dbus-launch
  37 rem when the X server is killed, do cleanup by
  38 rem killing pulseadio and vcxsrv
  39
  40 <PATH_TO_UBUNTU_EXE>ubuntu.exe run "export DISPLAY="%ipAddress%:0.0"; export PULSE_SERVER="%ipAddress%"; if [ -z "$(pidof xfce4-session)" ]; then  dbus-launch --exit-with-session ~/.xsession; pkill '(gpg|ssh)-agent'; taskkill.exe /IM pulseaudio.exe /F; taskkill.exe /IM vcxsrv.exe; fi;"
  41
  42 rem Function to trim white space or the export VARIABLE will fail
  43
  44 :TRIM
  45 SET %2=%1
  46 GOTO :EOF
Enabling Sound
The WSL environment does not support audio, but it can be enabled by installing the PulseAudio server on Windows following this guide. With the latest wslu package installed the starting Ubuntu app detects the running PulseAudio server and enables audio.
Getting Help
Common Issues
-
‘WSL 2 requires an update to its kernel component.’ Solution
-
Error codes, e.g. ‘Error: 0x80070002’ Solution
Reporting Windows Subsystem for Linux-specific Issues
Please report general WSL issues on GitHub.
Reporting Issues in Ubuntu
Please use the standard Ubuntu channels described in ReportingBugs.
Reporting Issues in the Ubuntu WSL Apps
Please report issues related to WSL-specific features in Ubuntu on WSL here.
Additional Resources
-
Official Microsoft Documentation for WSL
-
wsl.exe command line reference
-
Awesome-WSL
- ##windows-wsl on Freenode