Как и в любом другом USB-устройстве, в принтере Epson может возникнуть неисправность, приводящая к невозможности его определения компьютером. Причин тому — множество. Некоторые неполадки можно устранить самостоятельно, другие — только при помощи специалистов. Среди наиболее часто встречающихся неисправностей, приводящих к тому, что компьютер не реагирует на подключение принтера, отметим:
- Отсутствие или неполадки в работе драйвера принтера.
- Сбои в работе программного обеспечения операционной системы компьютера (в нашем случае — Windows).
- Сбои в работе прошивки (встроенного программного обеспечения) принтера.
- Повреждение соединительного USB-кабеля или USB-порта принтера и прочие аппаратные неисправности.
Рассмотрим подробнее возможные причины возникновения данных неисправностей и способы их устранения.
Отсутствие или неполадки в работе драйвера принтера Epson
Драйверы всегда являлись слабым местом любого компьютерного оборудования или операционной системы (кому как удобней). Очередное обновление Windows, установка какой-нибудь программы, подключение нового устройства — эти и прочие действия могут привести к неполадкам в работе драйвера (и необязательно от принтера, а вообще от любого устройства).
Перед тем, как проводить любые манипуляции с драйверами, нужно убедиться, не выключено ли оно программно в системе Windows:
- Сначала нужно запустить приложение «Диспетчер задач». Нажмите на клавиатуре клавиши «Win + R», затем впишите в отобразившееся окошко «Выполнить» команду «msc» (без кавычек) и нажмите кнопку «ОК».

- Найдите в списке «Диспетчера устройств» название принтера. Оно может быть расположено в разделе «Очереди печати» или другом месте (а может их быть и несколько). Кликните по названию правой кнопкой мыши. Если в выпадающем меню обнаружится пункт «Включить устройство», значит, оно все же было выключено. Выберите этот пункт, чтобы включить принтер, затем попробуйте распечатать что-нибудь.

Если это не помогает или в «Диспетчере устройств» отсутствует название принтера, двигаемся дальше.
Наиболее эффективный способ устранения проблем с драйверами является их переустановка. Но можно начать и с его обновления при помощи специализированных программ (менеджеров драйверов). Это наиболее простой вариант устранения проблемы, хоть и не всегда действенный. Менеджеров драйверов — полно. Можно воспользоваться, к примеру, бесплатным менеджером драйверов DriverHub. Им несложно пользоваться:
- Запускаем программу и нажимаем кнопку «Найти сейчас».

- Дожидаемся, пока программа просканирует компьютер. После чего на экране отобразятся устройства, драйверы которых можно обновить (или установить, если они отсутствуют).

- Можно включить «Экспертный режим» и обновить/установить только драйвер для принтера. На скриншоте выше выбрана установка драйвера первого попавшегося устройства, но это не имеет не значения.
- После выбора устройства (принтера Epson) останется нажать кнопку «Установить». Программа сама скачает и установит выбранный драйвер.
Менеджер DriverHub можно использовать и для решения проблем с неполадками драйверов Epson путем их полной переустановки. Но при необходимости требуемое программное обеспечение можно скачать и с официального сайта производителя. Начнем именно с этого:
- Перейдите по ссылке, что ведет к электронному каталогу принтеров Epson.
- В левой верхней части страницы в поле «Быстрый поиск продукта» впишите модель принтера (например, «Epson L132»). Сразу под полем ввода поискового запроса отобразится ссылка — кликните по ней, чтобы попасть на страницу искомого принтера.

- Под изображением принтера перейдите по ссылке «Драйверы, ПО и руководства», затем раскройте блок «Драйверы, утилиты», выберите операционную систему (обычно определяется автоматически) и нажмите кнопку «Загрузить».

Т.к. переустановка драйвера предполагает удаление уже установленного, с этого и начнем процедуру:
- Здесь нам также потребуется приложение «Диспетчер устройств», которое мы запускали ранее. Если по инструкции в самом начале этого раздела статьи принтер отсутствовал в списке устройств, сразу переходите к последнему шагу. Если же принтер там был, выполните сначала следующий шаг.
- Кликните правой кнопкой по названию принтера и выберите из меню пункт «Удалить устройство», затем согласитесь с удалением.

- Отсоедините USB-кабель принтера от компьютера и подключите его обратно.
- Установите скачанный драйвер, следуя инструкциям.
Сбои в работе Windows
Драйвер — не единственное, что требуется операционной системе для взаимодействия с внешними устройствами. Здесь также задействуется большое число различных системных файлов и приложений, повреждение или отсутствие одного из которых может привести к самым различным последствиям. Порой гораздо легче обнулить настройки или даже полностью переустановить систему, чем заниматься поиском и восстановлением неисправных системных файлов. Но кое-что все же проверить и исправить можно.
Речь идет о системной службе «Диспетчер печати», отвечающей за отправку документов на печать. По разнообразным причинам она может внезапно прекратить свою работу, т.е. попросту выключиться. По умолчанию данная служба запускается вместе с операционной системой, но, как и у большинства других служб, эту опцию «Диспетчера печати» можно заблокировать.
Чтобы проверить текущий статус интересующей нас службы и, если потребуется, включить ее, заодно задействовав опцию автозапуска, нужно проделать следующее:
- Для выполнения операции нужно запустить системное приложение «Службы». Быстрее всего это сделать из уже знакомого нам приложения «Выполнить»: нажимаем клавиши «Win + R», вводим в окно команду «msc» без кавычек и нажимаем «ОК».

- Далее ищем в столбце «Имя» службу «Диспетчер печати» (иногда указывается как «Print Spooler»). Если в столбце «Состояние» напротив имени службы ничего не указано, значит, в данный момент не работает. Кликните по ней правой кнопкой мыши и выберите в появившемся контекстном меню пункт «Запустить».

- Сразу попробуйте что-нибудь распечатать. Если процесс пошел, не торопитесь закрывать окно «Службы». Обратите внимание на столбец «Тип запуска» напротив названия службы. Там должно быть указано «Автоматически» (при запущенной службе).
- Если это не так, кликните по имени службы два раза мышкой. В открывшемся окне раскройте список «Тип запуска» и выберите в нем вариант «Автоматически», после чего нажмите кнопку «ОК».

Сбои в работе прошивки принтера Epson
Как и в случае с драйвером или операционной системой, неполадки с прошивкой принтера могут проявляться по большому количеству причин. Самый простой способ решения этой проблемы — сброс настроек встроенного ПО печатающей машины до заводских значений. Более сложный способ — перепрошивка принтера (т.е. переустановка встроенного ПО).
У каждой отдельной модели принтеров Epson сброс настроек осуществляется по-разному. По крайней мере, существует три способа сделать это — путем запуска соответствующей функции с LCD-панели принтера, путем использования веб-интерфейса (для случаев, когда сбои прошивки связаны с сетевыми настройками) и путем обновления драйверов/прошивки при помощи фирменной утилиты Epson (вместе с этим сбрасываются и настройки).
Чтобы сбросить внутренние настройки принтера, сначала лучше воспользоваться стандартным (первым) способом. Как именно это сделать, можно найти в документации к конкретной модели оборудования Epson. Но в большинстве случаев у принтеров, оснащенных LCD-дисплеем, сброс осуществляется следующим образом:
- Откройте главное меню панели управления принтера нажатием кнопки с изображением домика.

- Используя стрелки влево и вправо, выделите меню «Setup» (Настройки/Установки), затем нажмите кнопку «ОК».
- При помощи стрелок найдите опцию «Restore Default Settings» (Восстановить настройки по умолчанию) и нажмите «ОК», затем согласитесь со сбросом.
- Если принтер поддерживает работу через сеть, заодно можно сбросить и сетевые параметры, выбрав в меню «Setup» опцию «Restore Network Settings» (Восстановить сетевые настройки).
Следующий способ предполагает выполнение аппаратного сброса сетевых настроек. Сразу скажем, что лучше не браться за него, т.к. процесс потребует входа в веб-интерфейс машины, откуда и выполняется сброс. Важно, чтобы принтер был подключен к компьютеру сетевым кабелем или к Wi-Fi-роутеру (в этом случае компьютер не потребуется).
- Установите один лист в лоток.
- Подготовьте тонкий предмет (зубочистка или спичка, например).
- Выключите принтер и осмотрите заднюю его часть (там, куда подключается кабель питания).
- Найдите небольшое отверстие с надписью «Reset». Внутри него на некотором углублении вмонтирована кнопка — ее следует нажать и удерживать при помощи подготовленным тонким предметом.

- Удерживая кнопку, включите принтер.
- Дождитесь, пока не будет распечатана страница. На ней будет указан IP-адрес веб-интерфейса принтера. Кнопку можно отпустить.
- Запустите любой браузер, впишите в него распечатанный IP-адрес и перейдите по нему.
- Для входа в веб-интерфейс потребуется логин и пароль. По умолчанию — это «epson» и «epson».
- Веб-интерфейс представляет собой обычную веб-страницу. Дизайн может быть разным. Например, таким:

- В данном конкретном случае нужно войти в раздел «Reset», где находится кнопка обнуления сетевых параметров принтера.
Для сброса параметров принтеров Epson путем обновления его программного обеспечения и/или прошивки нужно сделать следующее:
- Откройте «Панель управления» из меню «Пуск» и перейдите в нем в раздел «Оборудование и звук», затем в подраздел «Устройства и принтеры».
- Кликните правой кнопкой мыши по значку принтера, затем выберите в меню пункт «Настройка печати».

- В появившемся окне перейдите во вкладку «Сервис» и нажмите кнопку «Обновление программного обеспечения».

- Откроется еще одно окно, дождитесь, пока будет выполняться проверка наличия обновления для ПО принтера.

- В таблице «Важные обновления для устройств» отобразится список доступных обновлений (и прошивки в частности). В нашем случае этих обновлений, к сожалению, нет. Зато есть возможность установки программы Epson Printer Connection, при помощи которой также можно выполнить сброс параметров прошивки. Установите ее, если с обновлением прошивки не вышло (отметьте галочкой и нажмите «Установить элемент»).

- На рабочем столе появится значок программы Epson Printer Connection. Запустите ее.
- Сначала программа попробует устранить неполадки самостоятельно. Но т.к.принтер компьютером не определяется, откроется дополнительное окно:

- Нажмите кнопку «Перенастройте принтер». Откроется еще одно окно «Install Navi», в котором нужно принять лицензионное соглашение и нажать кнопку «Далее».

- Как только дойдете до выбора программного обеспечения, которое следует установить/переустановить/обновить, выберите вариант «Переустановить базовое программное обеспечение». Следуйте дальнейшим инструкциям — они на русском, потому возникнуть сложностей не должно.

Аппаратные неисправности принтера
Большинство аппаратных неисправностей принтеров (в особенности те, что вызваны попаданием жидкости внутрь корпуса) устранить в домашних/офисных условиях не представляется возможным. Но среди всего спектра неполадок довольно часто встречается такая банальная проблема, как повреждение соединительного USB-кабеля. Все, что можно тут сделать (если нового кабеля в наличии нет) — продиагностировать шнур, для чего понадобится мультиметр, какой-нибудь простейший ампервольтметр или даже самодельный тестер, собранный из батареек, проводок и светодиода. Диагностика даст понять, стоит ли менять кабель. Состоит она из двух этапов:
- Выявление обрывов в кабеле. Производится путем подключения тестера к USB-контактам кабеля с обеих сторон.
- Выявление замыканий между отдельными контактами. Производится путем подключения щупов мультиметра/вольтметра к соседним контактам одного из USB-коннекторов (между контактами должна отсутствовать электрическая связь).
Существует и другая частая, но более сложная в устранении неисправность — поломка USB-порта принтера (куда подключается кабель) — обычно возникающая вследствие неосторожного извлечения USB-шнура. Процедура по восстановлению USB-порта потребует разборки принтера и перепайки коннектора. С этим смогут справиться только те пользователи, у которых имеется хотя бы небольшой опыт в ремонте электроники. Во всех остальных случаях лучше обратиться в сервисный центр Epson, если таковой имеется в городе, или в любую мастерскую.
-
#1
Have not been able to get a driver for the Epson stylus photo R300. According to Epson, the driver is automatically installed when the printer is connected, however, windows does not find the printer. I had no problems prior to upgrading. Any help will be appreciated.
Advertisements

-
#2
Go to Control Panel -> Devices and Printers.
Right click any and all instances of that printer and choose remove.
Go to Control Panel -> Programs and Features
Remove any associated Epson Software (driver packages and such) for that printer.
Unplug the USB cable from the Printer or the Computer, whichever is easiest to get to.
Reboot your Computer.
Make sure that the printer is on and in an error free state (doesn’t need paper, ink, whatever).
Plug the USB cable back into whichever end you unplugged.
The printer should automatically be recognized and commence an install.
If you are prompted for a driver select Epson on the left column and then click the Windows Update Button
Give it some time, it takes a while to come back and populate a list of native driver support
Then again, click Epson on the left and scroll down to the Epson Stylus Photo 300 (M)….. not sure what the (M) actually means but that should do it.
-
#3
Go to Control Panel -> Devices and Printers.
Right click any and all instances of that printer and choose remove.
Go to Control Panel -> Programs and Features
Remove any associated Epson Software (driver packages and such) for that printer.
Unplug the USB cable from the Printer or the Computer, whichever is easiest to get to.
Reboot your Computer.
Make sure that the printer is on and in an error free state (doesn’t need paper, ink, whatever).
Plug the USB cable back into whichever end you unplugged.
The printer should automatically be recognized and commence an install.
If you are prompted for a driver select Epson on the left column and then click the Windows Update Button
Give it some time, it takes a while to come back and populate a list of native driver support
Then again, click Epson on the left and scroll down to the Epson Stylus Photo 300 (M)….. not sure what the (M) actually means but that should do it.
Thankyou for your help, unfortunately none of this has worked. When printer is connected, I get the usual windows sound but windows states there is no driver installed. Troubleshooting does not resolve the issue either.
-
#4
Then you have to install the driver, as I’ve described above.
-
#5
Then you have to install the driver, as I’ve described above.
Hi, tried going through it all again with same result. I have contacted microsoft support and they are going to ring me NEXT WEDNESDAY, how quick is that. lol.
Thankyou for your help anyway.
-
#6
Hi, I have exactly the same problem. I have done all the suggested fixes but no luck. It installs it as USB2.0 MFP(Hi-Speed).
Would like to know what Microsoft say.
Advertisements
-
#7
If it is being installed as something that it is not you will need to change the driver that is being used.
If you go to Control Panel -> Devices and Printers
Right click the problem printer and choose «Printer Properties» from the approximate middle of the right click menu.
In the Printer Properties page under the General tab, click the button at the bottom that says «Change Properties»
Now select the «Advanced» tab and click the «New Driver» button.
Click the next button
Click the Windows Update button
Wait……….
When the list finally re-populates select Epson from the column on the left and then your printer from the column on the right.
Does that work or change anything for you??
-
#8
If it is being installed as something that it is not you will need to change the driver that is being used.
If you go to Control Panel -> Devices and Printers
Right click the problem printer and choose «Printer Properties» from the approximate middle of the right click menu.
In the Printer Properties page under the General tab, click the button at the bottom that says «Change Properties»
Now select the «Advanced» tab and click the «New Driver» button.
Click the next button
Click the Windows Update button
Wait……….
When the list finally re-populates select Epson from the column on the left and then your printer from the column on the right.Does that work or change anything for you??
Hi,
right click menu does not give option to change properties.
-
#9
Hi,
right click menu does not give option to change properties.
So……
If you go to Control Panel -> Devices and Printers
Right click the problem printer and choose «Printer Properties» from the approximate middle of the right click menu, does not produce this???

-
#10
So……
If you go to Control Panel -> Devices and Printers
Right click the problem printer and choose «Printer Properties» from the approximate middle of the right click menu, does not produce this???Sorry to be a pest but does not produce this.
-
#11
Windows finally recognised printer.
Advertisements
-
#12
Same problem here tried all you’ve said & it tells me windows found a driver but encountered a problem trying to install it am well stumped
-
#13
Same problem here tried all you’ve said & it tells me windows found a driver but encountered a problem trying to install it am well stumped
I know it’s been a month but I had the same problem, it turned out to be the version of the driver windows was installing. When I chose the 2nd newest driver it installed fine and remaned the MFP printer to
«Epson Stylus Photo R300 (M) «
hth,
-
#14
I have had this same problem with my Epson Stylus Photo R300 printer since I switched to Window 10. I got no help from Microsoft or Epson Tech Support. You give me hope, though, that this problem should be fixable.
I have gone through all of the steps to reconnect the printer and this latest suggestion. I have received the following message and do not know how to proceed:
«Please provide a printer INF that contains the core printer driver.»
«Type the path where the file is located, and then type OK.»
I don’t know how to locate this information. Any suggestions?
-
#15
«Please provide a printer INF that contains the core printer driver.»
«Type the path where the file is located, and then type OK.»
Use Internet Explorer and go here
http://catalog.update.microsoft.com/v7/site/Search.aspx?q=Epson Stylus Photo R300
The slightly larger of the two drivers available (4.7 MB) is for 64 bit versions of Windows, while the smaller (4.6 MB) is for 32 bit versions of Windows. Be sure to choose the correct version for your system architecture.
Download it put it in a new folder on your desktop.
That will provide a folder containing
AMD64-all-5098_a1b99bb764e2c49ac8170f9e96164a608254a9e5.cab
NOW
You need to install something like 7zip from here http://www.7-zip.org/
After you have that installed it will add a 7zip feature to your right click context menu.
Right click the cabinet file and select 7zip -> extract here
That will provide you the prnep00d.inf file that you will need to browse to when you are prompted with the message you indicate above.
-
#16
Have not been able to get a driver for the Epson stylus photo R300. According to Epson, the driver is automatically installed when the printer is connected, however, windows does not find the printer. I had no problems prior to upgrading. Any help will be appreciated.
Hi Sandoug,
I had the same problem and have found a solution from another forum:
Windows10 Control Panel
-> Open ‘Devices and Printers’
-> Click ‘Add a Printer’, which is a button found at the top of the window
-> Click ‘The printer that I want isn’t listed’, at the bottom of the window
-> Select ‘Add a local printer or network printer with manual settings’
-> Select ‘Use an existing port: USB0001 (Virtual printer port for USB)’
-> Select ‘EPSON’ in the left window and ‘Epson Stylus Photo R300 (M)’ in the right window
-> Select ‘Use the driver that is currently installed (recommended)’
-> Chose a name for the printer
It should then appear on your printers and devices and work properly..!
Advertisements
-
#17
Hello Tom06 and welcome to the forum.
I’m glad to hear that you’ve found a solution that worked for you and thank you for sharing that information.
Much appreciated.
Regards
Randy
-
#18
Hello Tom06
I used your solution and have successfully managed to get my cherished R300 working again!
I am most grateful to you.
Gambi53
-
#19
Hi Sandoug,
I had the same problem and have found a solution from another forum:
Windows10 Control Panel
-> Open ‘Devices and Printers’
-> Click ‘Add a Printer’, which is a button found at the top of the window
-> Click ‘The printer that I want isn’t listed’, at the bottom of the window
-> Select ‘Add a local printer or network printer with manual settings’
-> Select ‘Use an existing port: USB0001 (Virtual printer port for USB)’
-> Select ‘EPSON’ in the left window and ‘Epson Stylus Photo R300 (M)’ in the right window
-> Select ‘Use the driver that is currently installed (recommended)’
-> Chose a name for the printerIt should then appear on your printers and devices and work properly..!
Advertisements
-
#20
Hello, Tom06
Thank you so much for the instructions. It works!!!
OK, it is unable to retrieve ink levels, but this is minor, because I am able to print.
Thanks again
Этот блок для тех, кто впервые попал на страницы нашего сайта. В форуме рассмотрены различные вопросы возникающие при ремонте бытовой и промышленной аппаратуры. Всю предоставленную информацию можно разбить на несколько пунктов:
Учитывайте, что некоторые неисправности являются не причиной, а следствием другой неисправности, либо не правильной настройки. Подробную информацию Вы найдете в соответствующих разделах.
Все неисправности по их проявлению можно разделить на два вида — стабильные и периодические. Наиболее часто рассматриваются следующие:
Если у Вас есть свой вопрос по определению дефекта, способу его устранения, либо поиску и замене запчастей, Вы должны создать свою, новую тему в соответствующем разделе.
Краткие сокращения
При подаче информации, на форуме принято использование сокращений и аббревиатур, например:
| Сокращение | Краткое описание |
|---|---|
| LED | Light Emitting Diode — Светодиод (Светоизлучающий диод) |
| MOSFET | Metal Oxide Semiconductor Field Effect Transistor — Полевой транзистор с МОП структурой затвора |
| EEPROM | Electrically Erasable Programmable Read-Only Memory — Электрически стираемая память |
| eMMC | embedded Multimedia Memory Card — Встроенная мультимедийная карта памяти |
| LCD | Liquid Crystal Display — Жидкокристаллический дисплей (экран) |
| SCL | Serial Clock — Шина интерфейса I2C для передачи тактового сигнала |
| SDA | Serial Data — Шина интерфейса I2C для обмена данными |
| ICSP | In-Circuit Serial Programming – Протокол для внутрисхемного последовательного программирования |
| IIC, I2C | Inter-Integrated Circuit — Двухпроводный интерфейс обмена данными между микросхемами |
| PCB | Printed Circuit Board — Печатная плата |
| PWM | Pulse Width Modulation — Широтно-импульсная модуляция |
| SPI | Serial Peripheral Interface Protocol — Протокол последовательного периферийного интерфейса |
| USB | Universal Serial Bus — Универсальная последовательная шина |
| DMA | Direct Memory Access — Модуль для считывания и записи RAM без задействования процессора |
| AC | Alternating Current — Переменный ток |
| DC | Direct Current — Постоянный ток |
| FM | Frequency Modulation — Частотная модуляция (ЧМ) |
| AFC | Automatic Frequency Control — Автоматическое управление частотой |
Частые вопросы
После регистрации аккаунта на сайте Вы сможете опубликовать свой вопрос или отвечать в существующих темах. Участие абсолютно бесплатное.
Кто отвечает в форуме на вопросы ?
Ответ в тему epson stylus photo r300- usb? как и все другие советы публикуются всем сообществом. Большинство участников это профессиональные мастера по ремонту и специалисты в области электроники.
Как найти нужную информацию по форуму ?
Возможность поиска по всему сайту и файловому архиву появится после регистрации. В верхнем правом углу будет отображаться форма поиска по сайту.
По каким еще маркам можно спросить ?
По любым. Наиболее частые ответы по популярным брэндам — LG, Samsung, Philips, Toshiba, Sony, Panasonic, Xiaomi, Sharp, JVC, DEXP, TCL, Hisense, и многие другие в том числе китайские модели.
Какие еще файлы я смогу здесь скачать ?
При активном участии в форуме Вам будут доступны дополнительные файлы и разделы, которые не отображаются гостям — схемы, прошивки, справочники, методы и секреты ремонта, типовые неисправности, сервисная информация.
Полезные ссылки
Здесь просто полезные ссылки для мастеров. Ссылки периодически обновляемые, в зависимости от востребованности тем.
Источник
Устранение проблем, связанных с подключением через USB
Если у вас возникли трудности в использовании вашего принтера при подключении через USB, прочтите информацию в данном разделе.
Убедитесь, что ваш компьютер является моделью с предварительно установленной операционной системой Windows Me, 98, XP или 2000
Ваш компьютер должен быть моделью с предварительно установленными Windows Me, 98, XP или 2000. Вам, возможно, не удастся установить или запустить драйвер принтера USB на компьютере, не снабженном портом USB, или компьютере, который был модернизирован с Windows 95 до Windows Me, 98, XP или 2000.
Свяжитесь с вашим дилером, чтобы узнать подробности о вашем компьютере.
Убедитесь, что в меню Device Manager (Диспетчер устройств) появляется EPSON USB Printer Devices (только для Windows Me и Windows 98)
Если вы прервали установку драйвера методом plug-and-play («подключи-и-работай») до того, как процедура была завершена, то драйвер устройства принтера USB или драйвер принтера могут быть неверно установлены.
Чтобы проверить установку и переустановить драйверы, выполните следующие действия:
 |
Включите принтер и подсоедините кабель USB к принтеру и к компьютеру. |
 |
Правой кнопкой мыши щелкните по значку My Computer (Мой компьютер) на вашем рабочем столе, затем щелкните Properties (Свойства) . |
 |
Щелкните по закладке Device Manager (Устройства) . |
Если ваши драйверы установлены верно, то в меню Device Manager (Устройства) должно появиться EPSON USB Printer Devices (Принтеры USB Epson) .

Если EPSON USB Printer Devices не появляется в меню Device Manager (Устройства), щелкните на значке «плюс» (+), который находится рядом с Other devices (Другие устройства) чтобы посмотреть, какие устройства установлены.

Если USB Printer появляется в списке Other devices (Другие устройства) , значит, драйвер принтера USB установлен неверно. Если появляется EPSON LQ-630 , это означает, что драйвер принтера установлен неверно.
Если ни USB Printer , ни EPSON LQ-630 не появляются в списке Other devices (Другие устройства) , щелкните кнопку Refresh (Обновить) или выдерните кабель USB из принтера, а затем снова воткните его в принтер.
 |
Под Other devices (Другие устройства) выберите USB Printer или EPSON LQ-630 и щелкните Remove (Удалить) . Затем щелкните OK . |

 |
Когда появится следующее диалоговое окно, щелкните OK . Затем щелкните OK еще раз, чтобы закрыть диалоговое окно System Properties (Свойства системы). |

 |
Выключите принтер и перезапустите ваш компьютер. Затем переустановите драйверы, начиная с самого начала, следуя инструкциям, приведенным в Руководстве по установке. |
Принтер неправильно работает с кабелем USB
Если ваш принтер неправильно работает с кабелем USB, попробуйте применить одно или несколько из следующих решений:
- Убедитесь, что используемый вами кабель является стандартным экранированным кабелем USB.
- Если вы используете концентратор USB, подключите принтер к концентратору первого уровня, или подключите принтер напрямую к порту USB компьютера.
Источник
Форум по СНПЧ: Ремонт Usb Epson R300 — Форум по СНПЧ
Ремонт Usb Epson R300 Не определяется компьютером
| Сообщение #1 Отправлено 02 сентября 2009 — 11:52 Daewoo LANOS
| Сообщение #2 Отправлено 02 сентября 2009 — 13:49 Episode
| Сообщение #3 Отправлено 02 сентября 2009 — 16:36 Daewoo LANOS
Извините, да просто рассказывать собственно нечего, постоянный клиент принес свой R300, говорит не определяется устройство компьютером, действительно, подключил ничего комп не увидел, до этого человек поменял на нем печатающую головку (я сначало на это грешил, думал что через сервисную прогу надо инициализацию порта сделать, где то я вычитал такое, хотя может не правельно понял, но в итоге ничего не получилось т.к. программа тоже не увидела этот принтер), вобщем суть такова что что-то с электроникой скорее всего, пожет знатоки знают кого выпаивать надо, а еще самое главное, что на место впаять:)
Да и еще человек не в курсе на старой голове определялся или нет:(
| Сообщение #4 Отправлено 02 сентября 2009 — 20:51 mag54
| Сообщение #5 Отправлено 02 сентября 2009 — 21:39 Д. Дмитрий
 mag54 (2nd September 2009 — 09:51 PM) писал:
| Сообщение #6 Отправлено 03 сентября 2009 — 07:46 Daewoo LANOS
Спасибо всем отозвавшимся!
Сам разъем я прозванивал-все ок, а в схеме до контроллера сомнение у меня вызвал транзистор Q1, но к сожелению пока не могу найти ему замену(аналог или оригинал).
А может всетаки кто-то ремонтировал такое и знает точное решение, может кто знает где взять хотя бы аналог q1, а то чет мои поиски не дали результатов.
| Сообщение #7 Отправлено 03 сентября 2009 — 14:32 mag54
| Сообщение #8 Отправлено 03 сентября 2009 — 21:22 Daewoo LANOS
| Сообщение #9 Отправлено 04 сентября 2009 — 07:51 mag54
| Сообщение #10 Отправлено 08 сентября 2009 — 16:57 Daewoo LANOS
| Сообщение #11 Отправлено 08 сентября 2009 — 17:29 mag54
| Сообщение #12 Отправлено 09 сентября 2009 — 20:23 Daewoo LANOS
Я резкнул, доверился, но к сожелению ничего не получилось, сначала плавно уменьшали сопротивление, а потом закоротили, но аппарат так и не захотел определяться.
Но этот электронщик рассеянный слегка, надо дать пусть еще смотрит, потому что жалко, аппарату только вставили новую ПГ за 800 грн.
Источник
by Radu Tyrsina
Radu Tyrsina has been a Windows fan ever since he got his first PC, a Pentium III (a monster at that time). For most of the kids of… read more
Published on February 9, 2022
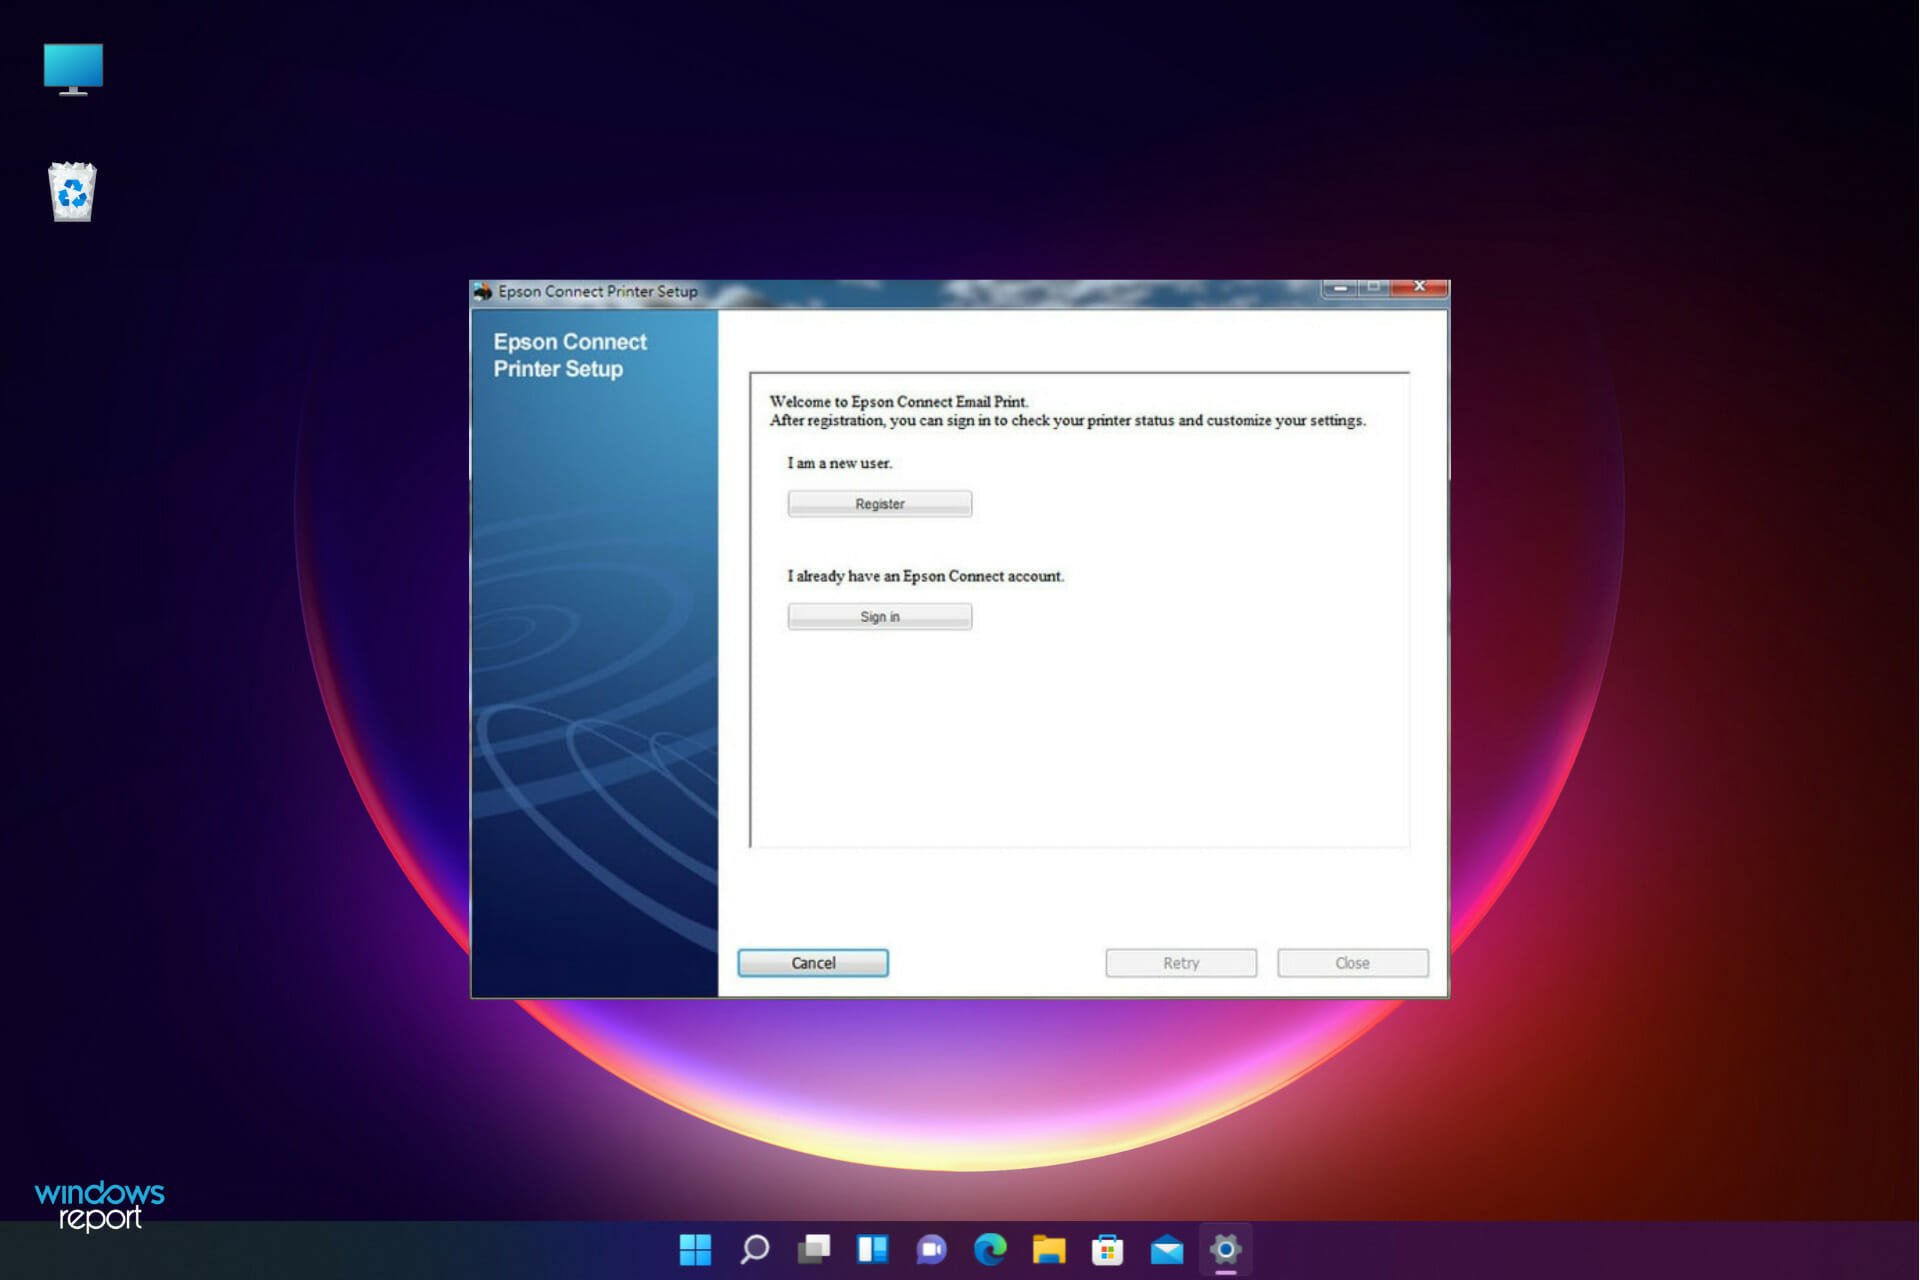
- If the setup file is corrupted or missing, the Epson printer setup cannot find the printer.
- Note that you have to download the setup from the official Epson website.
- Internet connection is needed to register and use the setup locally successfully.
- Before you register a printer or create an account, you are required to connect the printer to the network so that it can be used from your PC.
XINSTALL BY CLICKING THE DOWNLOAD FILE
This software will repair common computer errors, protect you from file loss, malware, hardware failure and optimize your PC for maximum performance. Fix PC issues and remove viruses now in 3 easy steps:
- Download Restoro PC Repair Tool that comes with Patented Technologies (patent available here).
- Click Start Scan to find Windows issues that could be causing PC problems.
- Click Repair All to fix issues affecting your computer’s security and performance
- Restoro has been downloaded by 0 readers this month.
Some users fail to register the Epson printer setup correctly when installing Epson printers on their systems. This makes them not have the best user experience.
Whether it’s a wired or wireless printer not connecting to your Windows PC, the problem can be due to technical issues during the setup.
Additionally, you can experience this inconvenience while setting up a connection, and some users might wonder why they can’t use it on Windows 11. Luckily, there are several ways you can resolve the issue.
Why does the Epson printer setup cannot find the printer on Windows 11?
The reasons why your printer setup is not connecting to the printer can range from technical to network issues and here we are to show you how to fix them. Here are some of them:
➡ The Epson printer is not connected
Perhaps it’s a simple solution that we always ignore. Your printer might be turned off, or it’s not correctly connected to the power source.
The best way to know if the printer is connected is a green light that it illuminates, or if it’s locally shared, you will see the connection icon on your Windows 11’s taskbar.
➡ Outdated or corrupted software
The print software is a communication conduit between your printer and the computer. Note that it tells the printer which documents to print. This software can be a problem, especially for network printers.
Without the printer software driver, you can’t send document data for printing. Therefore, it is crucial to check the printer driver and see if it’s updated. If you recently updated your OS, you must also update the printer driver.
➡ Disabled File and printer sharing option
The File and printer sharing option is disabled on Windows 11. So, you need to enable it to allow Epson printer setup to detect the printer – there is no way a computer can access the printer if this option is disabled.
Some PC issues are hard to tackle, especially when it comes to corrupted repositories or missing Windows files. If you are having troubles fixing an error, your system may be partially broken.
We recommend installing Restoro, a tool that will scan your machine and identify what the fault is.
Click here to download and start repairing.
To turn on File and printer sharing option, use the following steps:
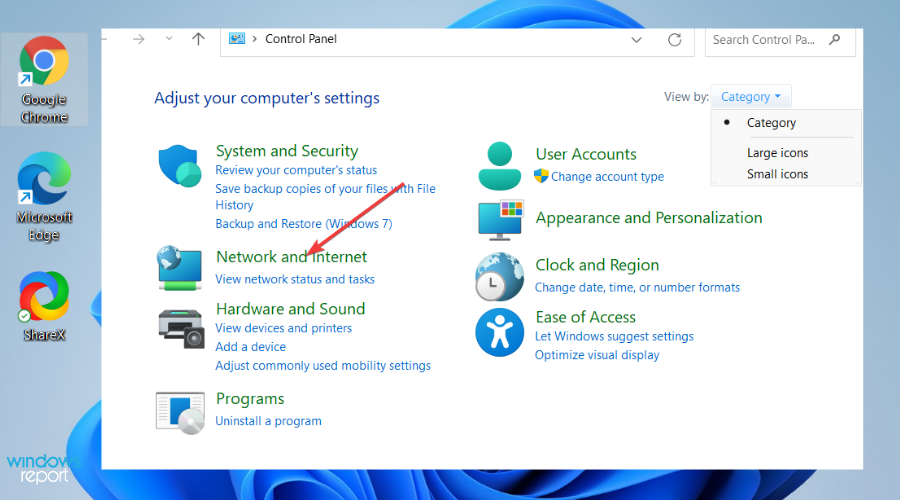
- Click on the Search box, then type Control panel and press Enter.


- On the left side of the window, you will see View by. Just choose Category from the drop-down menu.
- Select Network and Internet.
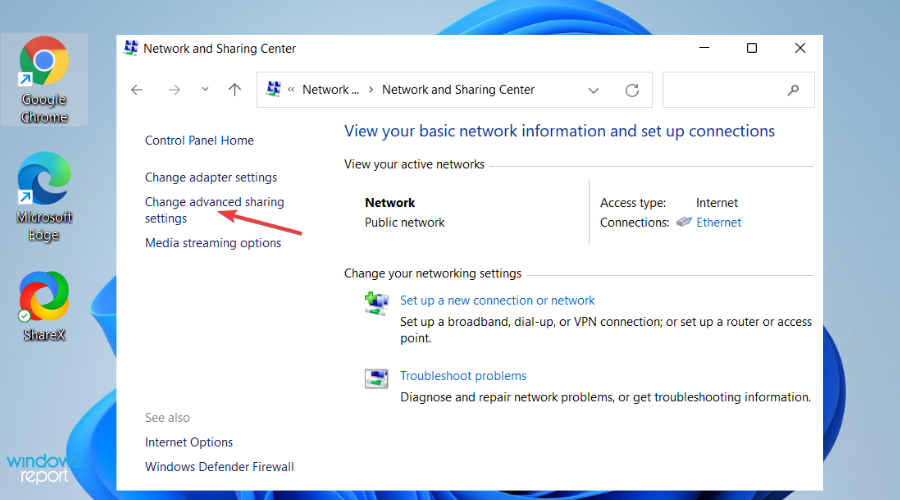
- Double click on the Network and Sharing Center, then Change Advanced Sharing Settings.
- On this page, navigate to Private.
- Under the private option, click on the File and printer sharing to enable it.
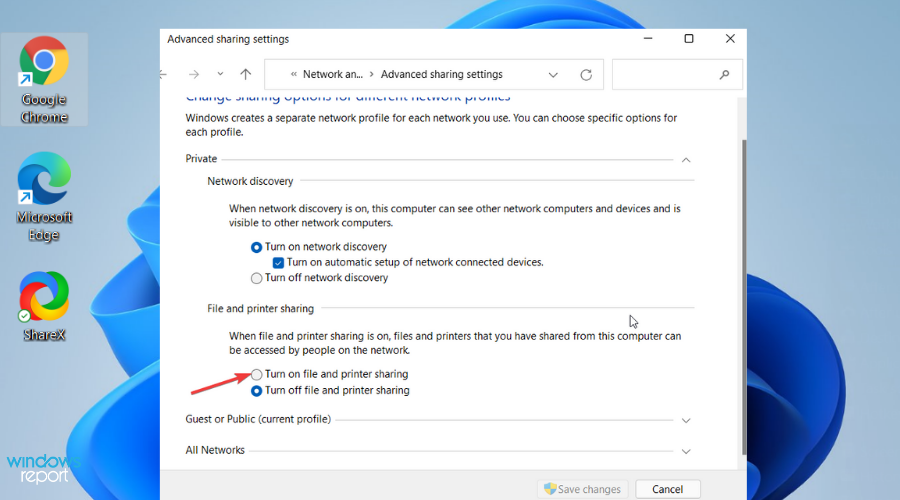
Do not enable File and printer sharing for the public network. This will expose your computer data to other users on the same shared network, inviting malicious attacks and data theft.
➡ Not connected to the local network
Maybe the reason why your Epson printer setup cannot find a printer is disconnected WiFi or cables. Ensure all cables are correctly connected, your Wi-Fi is on, and that your password hasn’t changed.
What can I do if the Epson printer setup cannot find the printer?
1. Uninstall and reinstall your printer
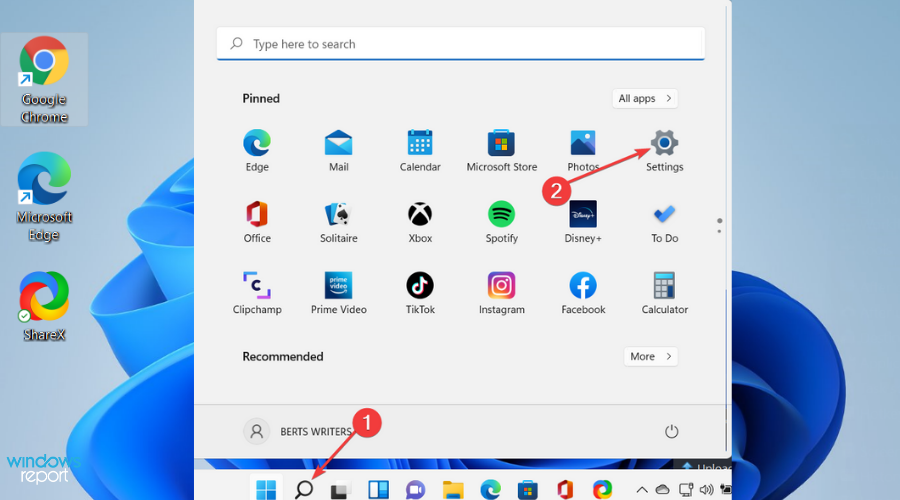
- Click on the Start button and select Settings.
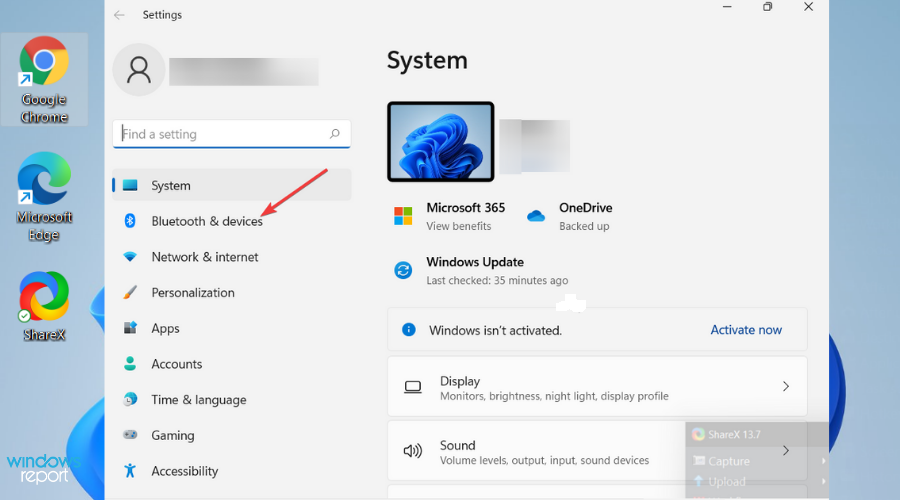
- Choose Bluetooth and Devices on the Settings window.
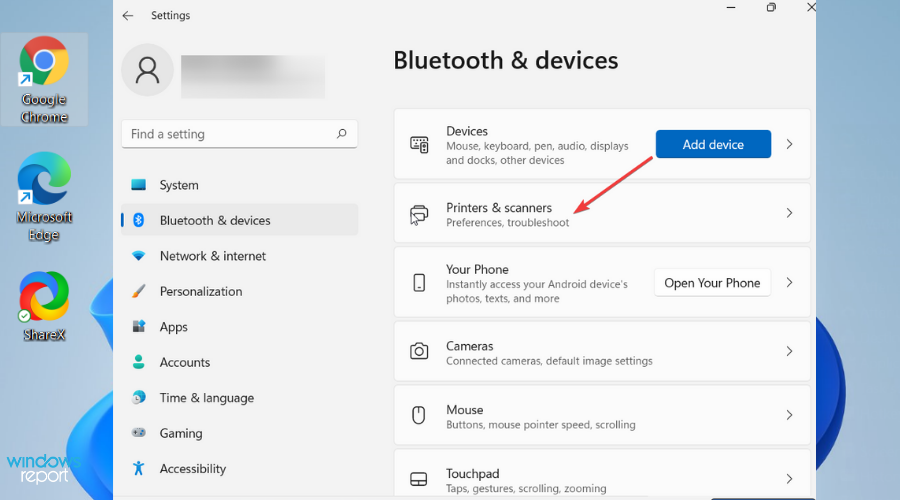
- On the left side, select Printers & Scanners.
- Select your printer on the Printers and Scanners window and click on Remove device.

To reinstall your wireless printer on Windows 11 PC:
- Click on the Start button. Select Settings and then choose Bluetooth and Devices.
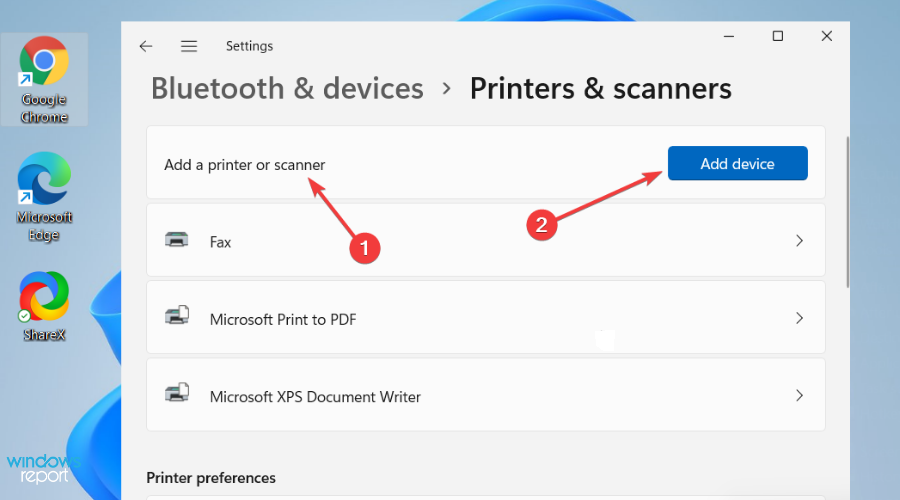
- Select Printers & Scanners on the left side of your screen.

- Select Add a printer or scanner. Wait for your PC to find available printers. Choose the one you want and click on Add device.
Your Windows 11 PC should find all the printers that are turned on and connected to your network. The available printers on your network include wireless printers, Bluetooth printers, or those connected to a computer on the shared network.
However, you might need permission to install some printers on the network connection.
Make sure your computer is connected to the same network as the printer, especially if you use wireless access points, multiple wireless routers, or extenders with different SSIDs. To test if your printer is working, you can print a test page to ensure it’s working correctly.
To reinstall your local printer on Windows 11 PC:
- Click on the Start button. Select Settings and then choose Bluetooth and Devices.
- Select Printers & Scanners on the left side of your screen.
- Select Add a printer or scanner. Wait for your PC to find available printers. Choose the one you want and click on Add device.
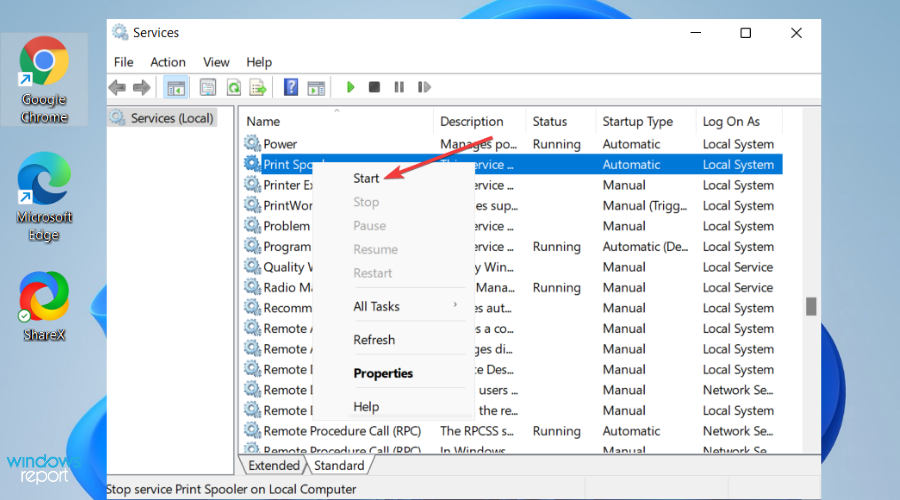
2. Clear and reset the print spooler
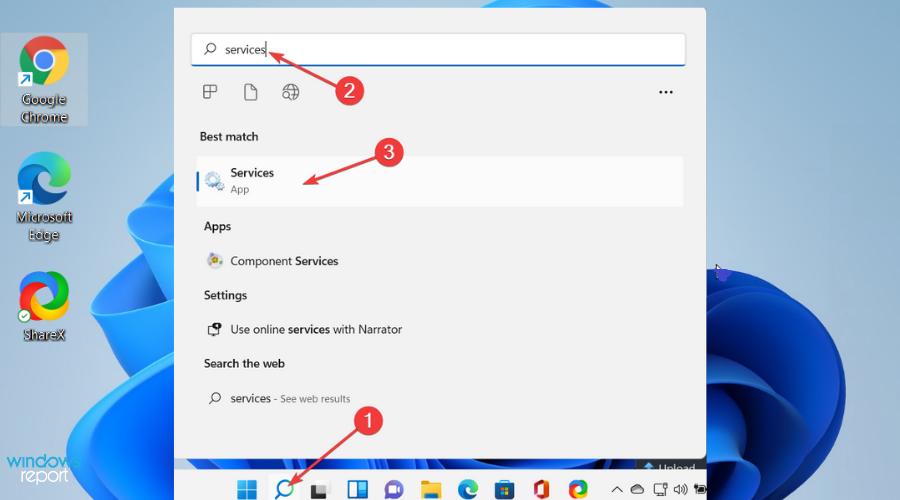
- Type Services on the search box. Select Services on the search results.
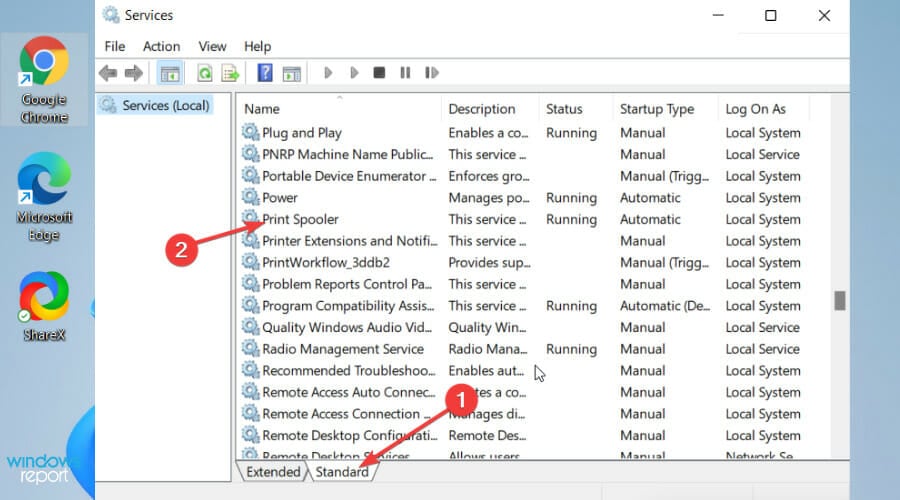
- Click on the Standards tab, then double-click on the Print spooler on the list.
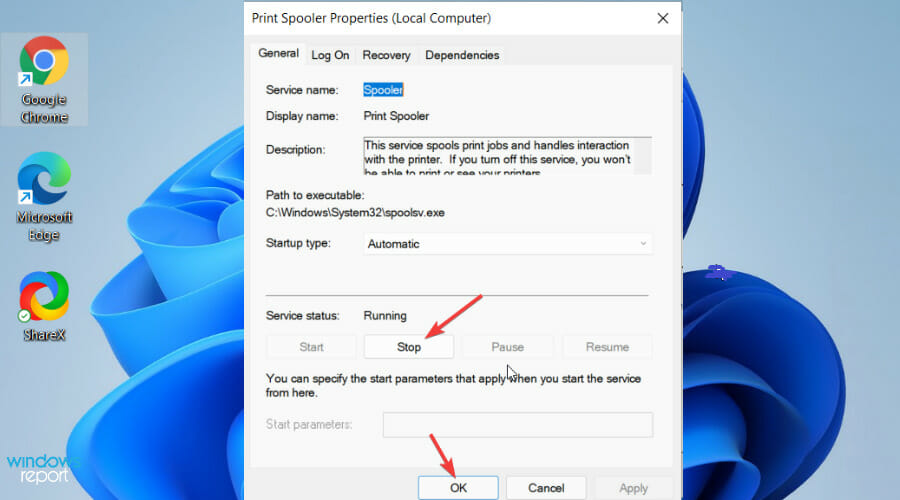
- Click Stop and then choose OK.
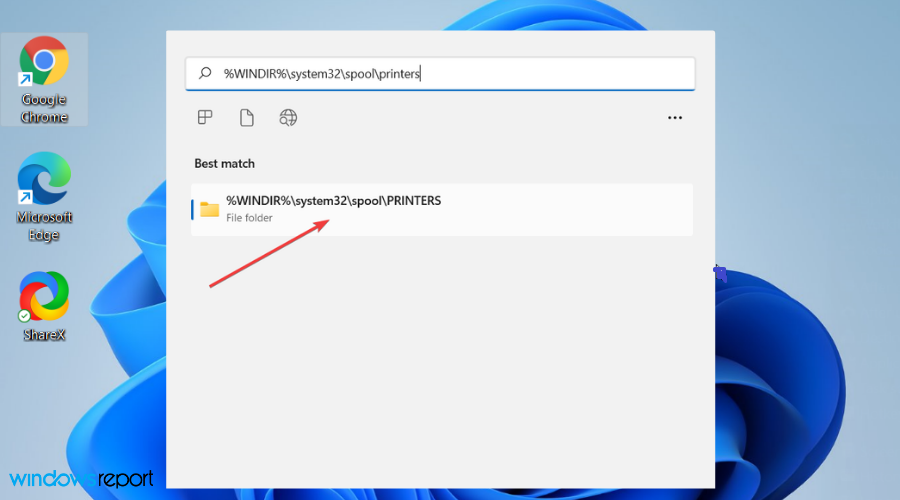
- Enter the following in the search and then select the correct result:
%WINDIR%system32spoolprinters - Type Services on the search box. Select Services on the search results.
- Click on the Standards tab, then double-click on the Print spooler on the list.
- Click Start and select Automatic in the Startup type dialog box. Click OK.
Find out more about the Epson printer setup on Windows 11
As we mentioned earlier, some users have had problems with the Epson printer setup because they didn’t install the software correctly. Here is the best way to correct that:
- Ensure the Epson printer is connected to the Wi-Fi or Ethernet before proceeding with this setup.
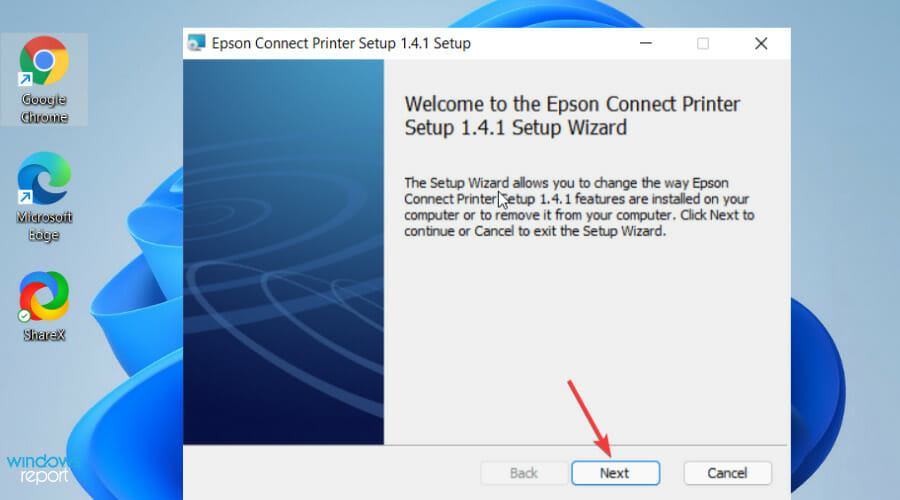
- Press the power button on your printer to switch it on, then open the official Epson website to download the Epson printer setup utility.
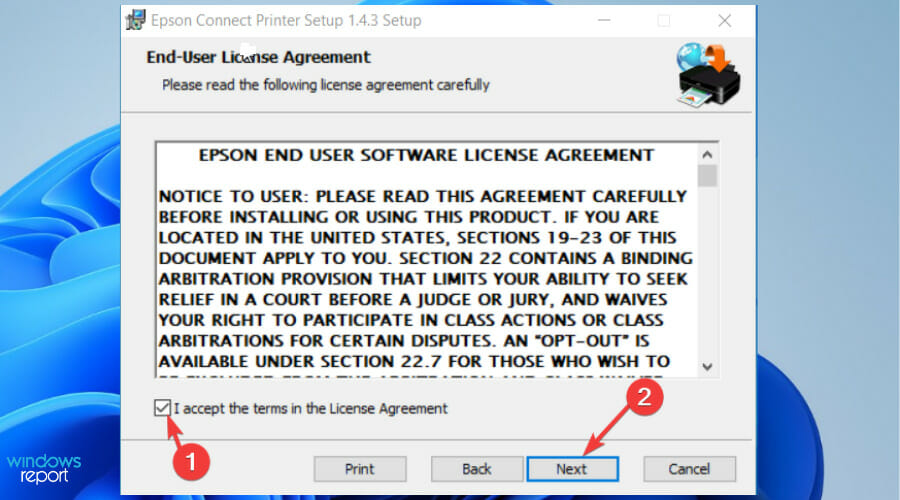
- Once the file is downloaded, open and run it. The End-User Licence Agreement will show up— check the box against I accept the terms in the License Agreement button. Click Next to continue.
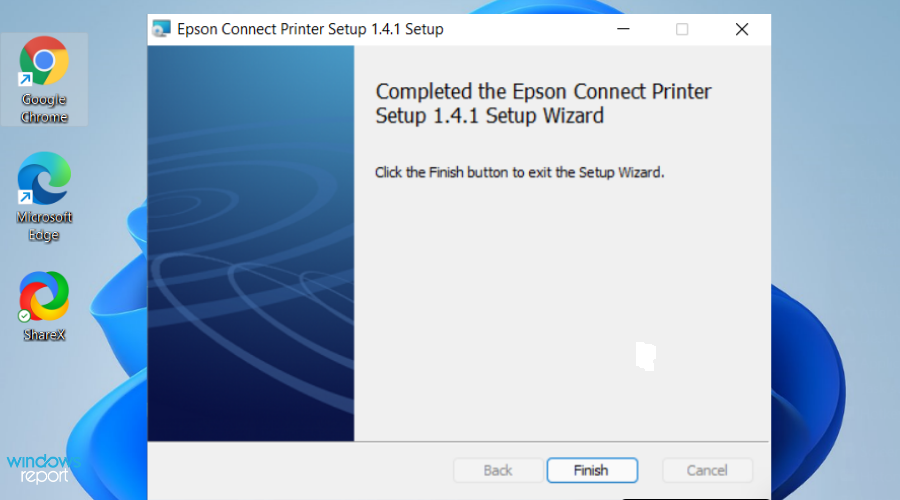
- Click Install, then Finish. Once the installation is over, open the program.
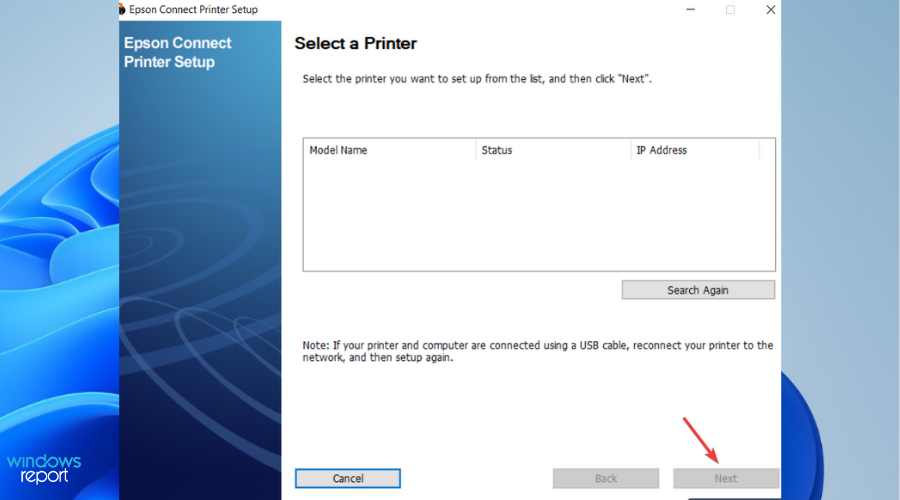
- On the setup window, choose Epson product from Select a Printer.
- Click Next and then Printer Registration on the new window. Click Next.
- Accept the License agreement and privacy statement by clicking Agree. Hit on Next.
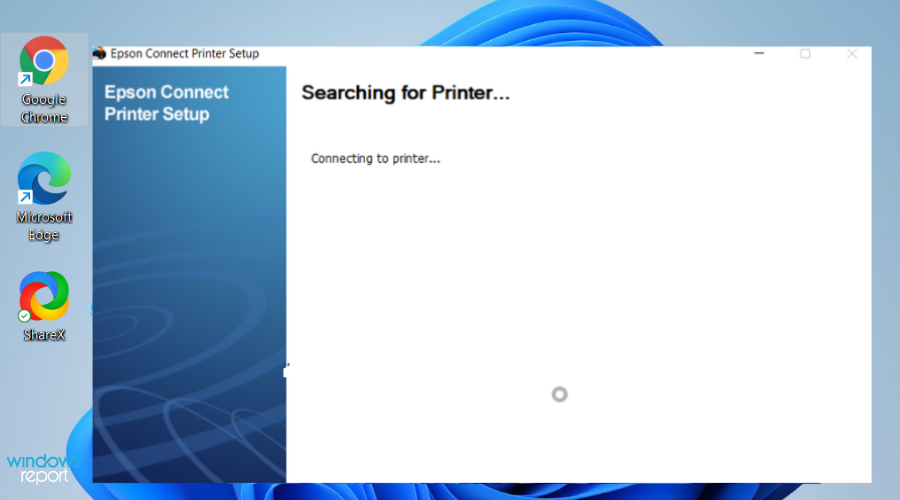
- Follow the onscreen direction by clicking Next and Finish.
- Epson Connect setup will search for all available printers on your network. Click on your preferred printer from the list then Next to connect and start printing.
You may also be interested in knowing why your printer is not working on Windows 11 or what to do if the printer is not responding.
We hope the solutions in this article solved your problem. We would love to hear from you so don’t hesitate to use the comments section below.
![]()
Newsletter
by Radu Tyrsina
Radu Tyrsina has been a Windows fan ever since he got his first PC, a Pentium III (a monster at that time). For most of the kids of… read more
Published on February 9, 2022
- If the setup file is corrupted or missing, the Epson printer setup cannot find the printer.
- Note that you have to download the setup from the official Epson website.
- Internet connection is needed to register and use the setup locally successfully.
- Before you register a printer or create an account, you are required to connect the printer to the network so that it can be used from your PC.
XINSTALL BY CLICKING THE DOWNLOAD FILE
This software will repair common computer errors, protect you from file loss, malware, hardware failure and optimize your PC for maximum performance. Fix PC issues and remove viruses now in 3 easy steps:
- Download Restoro PC Repair Tool that comes with Patented Technologies (patent available here).
- Click Start Scan to find Windows issues that could be causing PC problems.
- Click Repair All to fix issues affecting your computer’s security and performance
- Restoro has been downloaded by 0 readers this month.
Some users fail to register the Epson printer setup correctly when installing Epson printers on their systems. This makes them not have the best user experience.
Whether it’s a wired or wireless printer not connecting to your Windows PC, the problem can be due to technical issues during the setup.
Additionally, you can experience this inconvenience while setting up a connection, and some users might wonder why they can’t use it on Windows 11. Luckily, there are several ways you can resolve the issue.
Why does the Epson printer setup cannot find the printer on Windows 11?
The reasons why your printer setup is not connecting to the printer can range from technical to network issues and here we are to show you how to fix them. Here are some of them:
➡ The Epson printer is not connected
Perhaps it’s a simple solution that we always ignore. Your printer might be turned off, or it’s not correctly connected to the power source.
The best way to know if the printer is connected is a green light that it illuminates, or if it’s locally shared, you will see the connection icon on your Windows 11’s taskbar.
➡ Outdated or corrupted software
The print software is a communication conduit between your printer and the computer. Note that it tells the printer which documents to print. This software can be a problem, especially for network printers.
Without the printer software driver, you can’t send document data for printing. Therefore, it is crucial to check the printer driver and see if it’s updated. If you recently updated your OS, you must also update the printer driver.
➡ Disabled File and printer sharing option
The File and printer sharing option is disabled on Windows 11. So, you need to enable it to allow Epson printer setup to detect the printer – there is no way a computer can access the printer if this option is disabled.
Some PC issues are hard to tackle, especially when it comes to corrupted repositories or missing Windows files. If you are having troubles fixing an error, your system may be partially broken.
We recommend installing Restoro, a tool that will scan your machine and identify what the fault is.
Click here to download and start repairing.
To turn on File and printer sharing option, use the following steps:
- Click on the Search box, then type Control panel and press Enter.
- On the left side of the window, you will see View by. Just choose Category from the drop-down menu.
- Select Network and Internet.
- Double click on the Network and Sharing Center, then Change Advanced Sharing Settings.
- On this page, navigate to Private.
- Under the private option, click on the File and printer sharing to enable it.
Do not enable File and printer sharing for the public network. This will expose your computer data to other users on the same shared network, inviting malicious attacks and data theft.
➡ Not connected to the local network
Maybe the reason why your Epson printer setup cannot find a printer is disconnected WiFi or cables. Ensure all cables are correctly connected, your Wi-Fi is on, and that your password hasn’t changed.
What can I do if the Epson printer setup cannot find the printer?
1. Uninstall and reinstall your printer
- Click on the Start button and select Settings.
- Choose Bluetooth and Devices on the Settings window.
- On the left side, select Printers & Scanners.
- Select your printer on the Printers and Scanners window and click on Remove device.
To reinstall your wireless printer on Windows 11 PC:
- Click on the Start button. Select Settings and then choose Bluetooth and Devices.
- Select Printers & Scanners on the left side of your screen.
- Select Add a printer or scanner. Wait for your PC to find available printers. Choose the one you want and click on Add device.
Your Windows 11 PC should find all the printers that are turned on and connected to your network. The available printers on your network include wireless printers, Bluetooth printers, or those connected to a computer on the shared network.
However, you might need permission to install some printers on the network connection.
Make sure your computer is connected to the same network as the printer, especially if you use wireless access points, multiple wireless routers, or extenders with different SSIDs. To test if your printer is working, you can print a test page to ensure it’s working correctly.
To reinstall your local printer on Windows 11 PC:
- Click on the Start button. Select Settings and then choose Bluetooth and Devices.
- Select Printers & Scanners on the left side of your screen.
- Select Add a printer or scanner. Wait for your PC to find available printers. Choose the one you want and click on Add device.
2. Clear and reset the print spooler
- Type Services on the search box. Select Services on the search results.
- Click on the Standards tab, then double-click on the Print spooler on the list.
- Click Stop and then choose OK.
- Enter the following in the search and then select the correct result:
%WINDIR%system32spoolprinters - Type Services on the search box. Select Services on the search results.
- Click on the Standards tab, then double-click on the Print spooler on the list.
- Click Start and select Automatic in the Startup type dialog box. Click OK.
Find out more about the Epson printer setup on Windows 11
As we mentioned earlier, some users have had problems with the Epson printer setup because they didn’t install the software correctly. Here is the best way to correct that:
- Ensure the Epson printer is connected to the Wi-Fi or Ethernet before proceeding with this setup.
- Press the power button on your printer to switch it on, then open the official Epson website to download the Epson printer setup utility.
- Once the file is downloaded, open and run it. The End-User Licence Agreement will show up— check the box against I accept the terms in the License Agreement button. Click Next to continue.
- Click Install, then Finish. Once the installation is over, open the program.
- On the setup window, choose Epson product from Select a Printer.
- Click Next and then Printer Registration on the new window. Click Next.
- Accept the License agreement and privacy statement by clicking Agree. Hit on Next.
- Follow the onscreen direction by clicking Next and Finish.
- Epson Connect setup will search for all available printers on your network. Click on your preferred printer from the list then Next to connect and start printing.
You may also be interested in knowing why your printer is not working on Windows 11 or what to do if the printer is not responding.
We hope the solutions in this article solved your problem. We would love to hear from you so don’t hesitate to use the comments section below.
![]()
Newsletter
Обновлено 03.10.2019

Не работает принтер на windows 10-01
Всем привет сегодня поговорим про ситуацию, когда не работает принтер на windows 10. После обновления до Windows 10 многие пользователи столкнулись с проблемами своих принтеров и МФУ, которые либо не видит система, либо они не определяются как принтер, либо попросту не печатают так, как это было в предыдущей версии ОС, самое смешное, что с каждым новым обновлением, количество старых устройств, которые поддерживает данная операционная система все уменьшается, так, что не удивляйтесь, если в какой то момент, ваш старый принтер не заведется.
Если и у вас не работает должным образом принтер в Windows 10, в этой инструкции — один официальный и несколько дополнительных способов, которые могут помочь исправить возникшую проблему. Также приведу дополнительную информацию, касающуюся поддержки принтеров популярных марок в Windows 10 (в конце статьи).
Диагностика проблем с принтером от Microsoft (Print Spooler Cleanup Diagnostic Tool)
Прежде всего, можно попробовать автоматическое решение проблем с принтером, используя утилиту диагностики в панели управления Windows 10 (Print Spooler Cleanup Diagnostic Tool), либо скачав ее с официального сайта Microsoft (отмечу, что я точно не знаю, будет ли отличаться результат, но насколько смог понять, оба варианта равнозначны).
Подробное описание утилиты Print Spooler Cleanup Diagnostic Tool https://support.microsoft.com/en-us/help/2768706/sdp3-45b23d1b-c3e1-469c-8743-f9cf5867e60c-print-spooler-cleanup-diagno#appliesto
Для запуска из панели управления, зайдите в нее, затем откройте пункт Устранение неполадок,
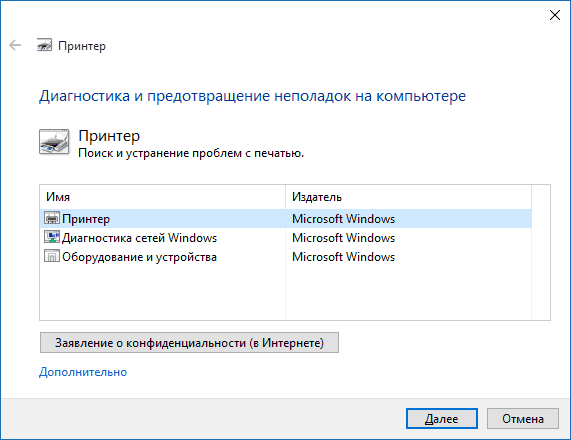
затем в разделе Оборудование и звук выберите пункт Использование принтера (еще один путь — зайти в устройства и принтеры, а затем, кликнув по нужному принтеру, если он есть в списке, выбрать Устранение неполадок).
Также для запуска инструмента устранения неполадок принтера можно скачать файл с официального сайта Microsoft или здесь.
В результате запустится диагностическая утилита, которая в автоматическом режиме проверит наличие всех типичных проблем, которые могут препятствовать правильной работе вашего принтера и при обнаружении таких проблем исправит их.
В числе прочего будет проверено: наличие драйверов и ошибки драйверов, работы необходимых служб, проблемы соединения с принтером и очереди печати. Несмотря на то, что гарантировать положительный результат тут нельзя, рекомендую попробовать использовать этот способ в первую очередь.
Добавление принтера в Windows 10
Если автоматическая диагностика не работает или же ваш принтер и вовсе не отображается в списке устройств, можно попробовать добавить его вручную, причем для старых принтеров в Windows 10 имеются дополнительные возможности обнаружения, если windows 10 блокирует установку принтера напишите комментарий я вам помогу поставить.
Кликните по значку уведомлений и выберите «Все параметры»
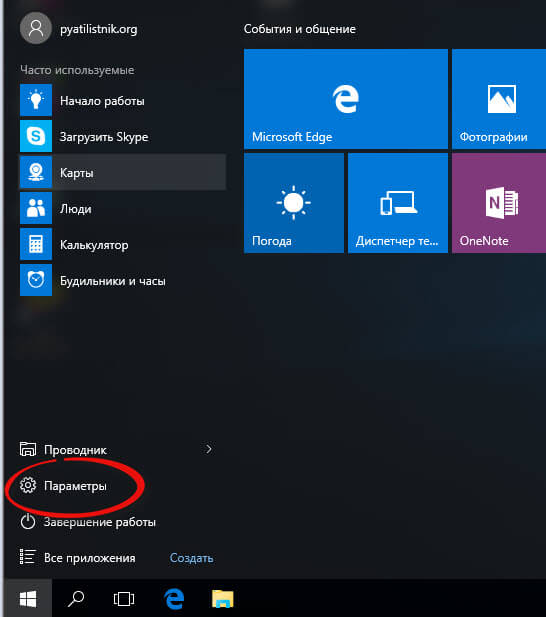
Не работает принтер на windows 10-01
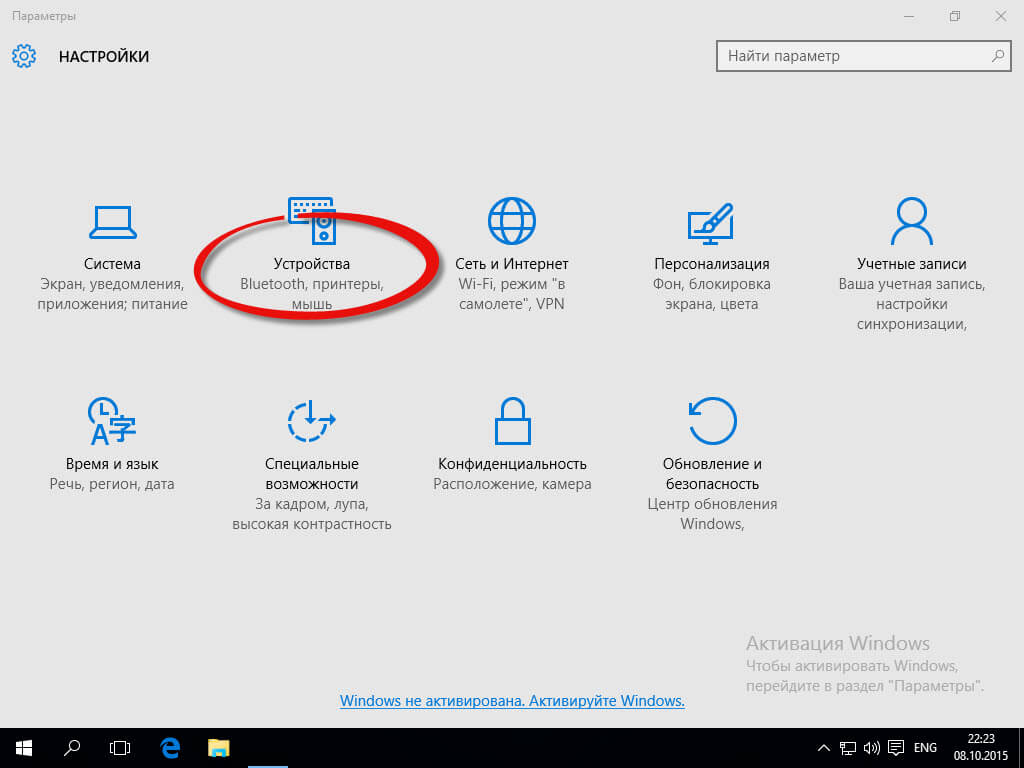
(а можно нажать клавиши Win + I), затем выберите «Устройства» — «Принтеры и сканеры».
Не работает принтер на windows 10-02
Нажмите кнопку «Добавить принтер или сканер» и подождите: возможно, Windows 10 сама обнаружит принтер и установит драйвера для него (желательно, чтобы Интернет был подключен), возможно и нет.
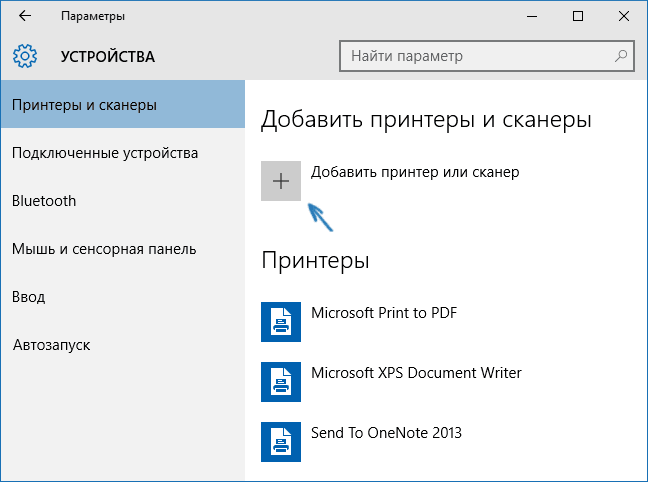
Не работает принтер на windows 10-03
Во втором случае, нажмите по пункту Необходимый принтер отсутствует в списке, который появится под индикатором процесса поиска. У вас появится возможность выполнить установку принтера по другим параметрам: указать его адрес в сети, отметить что ваш принтер уже стар (в этом случае его поиск системой будет осуществлен с измененными параметрами), добавить беспроводный принтер.
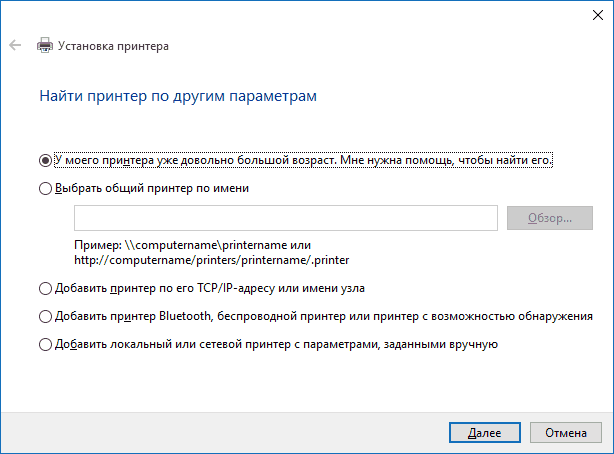
Не работает принтер на windows 10-04
Не исключено, что данный способ сработает для вашей ситуации.
Установка драйверов принтера вручную
Если пока ничего не помогло, зайдите на официальный сайт производителя вашего принтера и найдите в разделе «Поддержка» (Support) доступные драйвера для вашего принтера. Хорошо, если они для Windows 10. Если же таковые отсутствуют, можно попробовать для 8 или даже 7. Скачайте их себе на компьютер.
Прежде чем запускать установку, рекомендую зайти в Панель управления — устройства и принтеры и, если там уже имеется ваш принтер (т.е. он определяется, но не работает), кликнуть по нему правой клавишей мыши и удалить из системы. И уже после этого запускать установщик драйвера.
Информация по поддержке Windows 10 от производителей принтеров
Ниже я собрал информацию о том, что пишут популярные производители принтеров и МФУ о работе своих устройств в Windows 10.
- HP (Hewlett-Packard) — компания обещает, что большинство ее принтеров будут работать. Те, которые работали в Windows 7 и 8.1 не потребуют обновления драйверов. В случае возникновения проблем, можно будет загрузить драйвер для Windows 10 с официального сайта. Дополнительно, на сайте HP имеется инструкция по решению проблем с принтерами этого производителя в новых ОС:http://support.hp.com/ru-ru/document/c04755521
- Epson — обещают поддержку принтеров и МФУ в Windows Необходимые драйверы для новой системы можно загрузить со специальной страницы http://www.epson.com/cgi-bin/Store/support/SupportWindows10.jsp
- Canon — по информации производителя, большинство принтеров будут поддерживать новую ОС. Драйверы можно скачать с официального сайта, выбрав нужную модель принтера.
- Panasonic — обещают выпустить драйверы для Windows 10 в ближайшем будущем.
- Xerox — пишут об отсутствии проблем с работой их устройств печати в новой ОС.
Чтобы искоренить все проблемы мешающие нормальной печати в вашей Windows 10, запустите Print-Spooler-Repair-Tool от имени администратора и нажмите кнопку «Repair», результат вы получите, через минуту, в подавляющем числе случаев, ваш принтер на десятке начинает работать, как новенький.

В дополнение, еще советую вам очистить ваш spooler, вот этим скриптом, чтобы не было застрявших заданий.
Если ничто из вышеописанного не помогло, рекомендую воспользоваться поиском Google (причем рекомендую именно этот поиск для данной цели) по запросу, состоящего из названия марки и модели вашего принтера и «Windows 10». Очень вероятно, что на каких-либо форумах уже обсуждалась ваша проблема и было найдено ее решение. Не бойтесь заглядывать на англоязычные сайты: на них решение попадается чаще, а даже автоматический перевод в браузере позволяет понять, о чем идет речь.
Использование специализированных утилит
В Windows 10, принтер может не работать по ряду причин, еще одним методом исправить ситуацию, это воспользоваться фирменными утилитами от производителей, приведу пример у компании HP. У него есть утилита HP Print and Scan Doctor. Скачать HP Print and Scan Doctor можно по ссылке снизу:
https://support.hp.com/ru-ru/document/c03287502
Запустите утилиту HP Print and Scan Doctor. У нее алгоритм очень простой. На первом шаге она ищет установленные принтеры, а на втором устраняет причину, почему он не работает в вашей Windows 10.
Вот так вот выглядит процесс сканирования операционной системы на предмет наличия в ней принтеров.
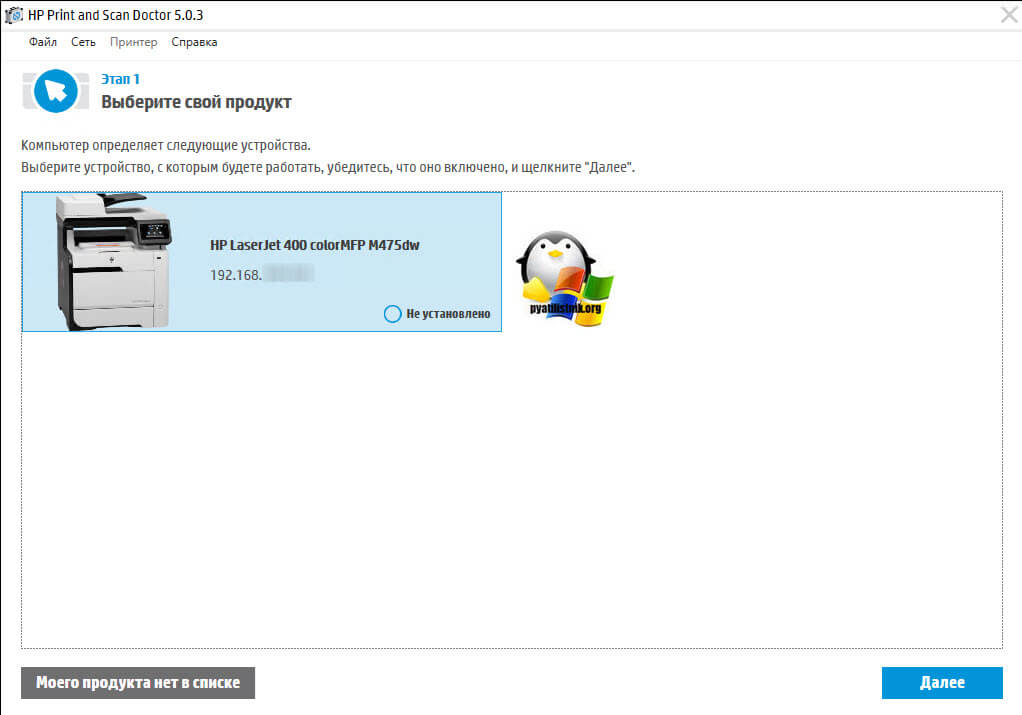
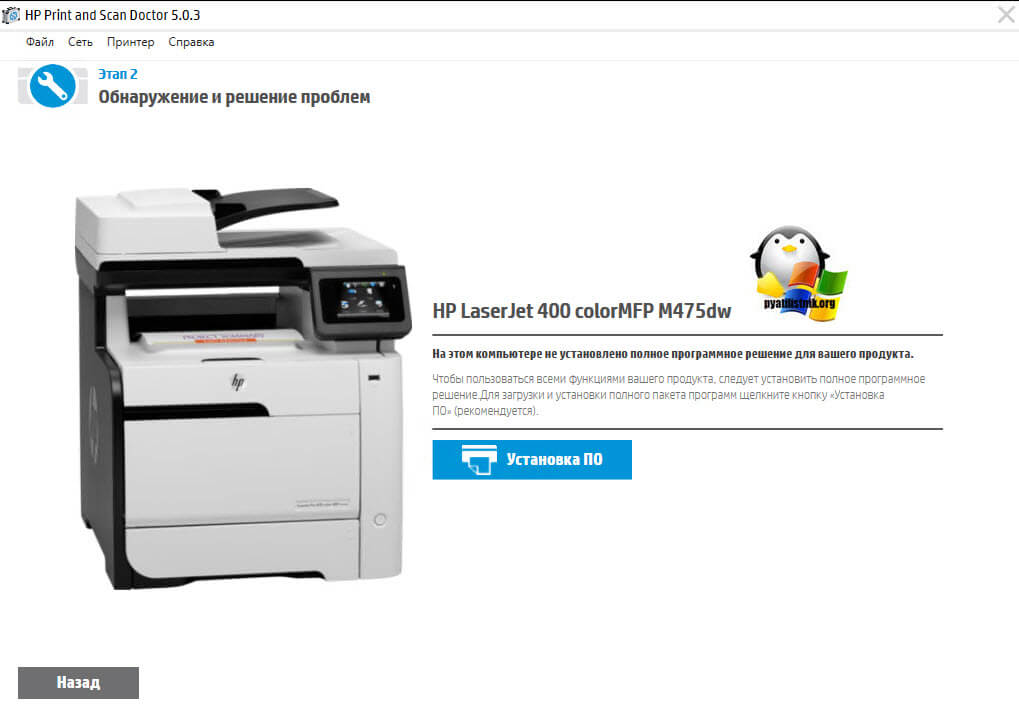
Вот так вот просто производится настройка сетевого принтера windows 10 и когда windows 10 не видит принтер hp. У меня в системе нашелся HP LaserJet 400, я его выбираю.
После поиска проблем, вам выдают решение вашей проблемы, почему не работает принтер в windows 10. Далее делаем, что говорит мастер диагностики HP Print and Scan Doctor.
У компании OKI, утилита называется brmainte, ее можно скачать по ссылке:
У компании Epson, утилита диагностики EPSON Status Monitor
http://www.epson.ru/es/upload/ManualTypes/100189/ref_g/trble_1.htm#epson%20status%20monitor%20b
Отключение SNMP
В ряде случаев, когда принтер подключен по WIFI или LAN сети, у вас с компьютера может не проходить сетевой трафик SNMP от принтера, из-за чего, он может быть недоступен. Решение, это отключить SNMP проверку.
Обновление 03.10.2019
26 сентября компания Microsoft выпустила очередное обновление с кодом KB4517211, оно починило звук, но сломало диспетчер печати, так что если у вас не работает принтер на Windows 10, то проверьте установлено ли у вас обновление KB4517211 и удаляйте его. Симптомы могут быть и зависшие задания или отмененные самой системой. Сроки выхода патча не известны пока. Материал сайта pyatilistnik.org
Содержание
- Драйвер для Epson Stylus Photo R300
- Установка драйвера в Windows 10
- Epson Stylus Photo R300
- Downloads
- Recommended For You
- Printer Driver
- Drivers
- Printer Driver
- Utilities
- Epson Print CD v2.42
- Common Updater for Apple Software Update v2.18
- Epson Stylus Photo R300
- Downloads
- Recommended For You
- Printer Driver
- Drivers
- Printer Driver
- Utilities
- Epson Print CD v2.44
- Epson EasyPrint v3.10
- Epson r300 windows 10 driver
- Quick Links
- Contact Us
- Thank you!
- NEED HELP? YOU’RE IN THE RIGHT PLACE
- Find your model
- Drivers, manuals and software for your product
- Product Setup
- Epson Software updater 4.6.2.0 04-Oct-2022 5.54 MBs
- Drivers
- EPSON Bluetooth Printing Application NOKIA 3650 22-Dec-2004 2.58 MBs
- EPSON Bluetooth Printing Application NOKIA 3660 22-Dec-2004 2.58 MBs
- EPSON Bluetooth Printing Application NOKIA 6600 22-Dec-2004 2.60 MBs
- EPSON Bluetooth Printing Application NOKIA 7610 22-Dec-2004 2.60 MBs
- EPSON Bluetooth Printing Application NOKIA 7650 22-Dec-2004 2.58 MBs
- Creativity Software
- EPSON Print CD 2.44 05-Aug-2016 72.84 MBs
- EPSON Print CD 2.41.00 04-Sep-2015 72.84 MBs
- Network Utilities
- EpsonNet Print 3.1.4 14-Sep-2020 7.61 MBs
- Other Software
- EPSON Print CD 2.20.00 10-Dec-2012 44.70 MBs
Драйвер для Epson Stylus Photo R300

Epson Stylus Photo R300
Windows 2000/XP/Vista/7/8/8.1/10 — для принтера
Чтобы установить драйвер и немного подождите. Возможно, драйвера установятся самостоятельно. Если вдруг драйвера не установятся, то следуйте инструкции ниже.
Установка драйвера в Windows 10
Рассмотрим установку драйвера для принтера Epson Stylus Photo R300. Сразу следует отметить, что делается она непривычным способом. Качать дистрибутив не требуется. Поскольку принтер является «морально устаревшим», но прекрасным образцом техники, драйвера для него предустановлены в ОС. Но произвести их окончательную установку надлежит нам.
Итак, откроем «панель управления». Либо запустив меню «Пуск» и найдя нужный пункт с помощью поиска или вручную. Либо же клацнув правой кнопкой мыши по «Пуск» и выбрав «Панель управления» (для Windows 10).

В «Панель управления» находим раздел «Оборудование и звук». Открываем его и нажимаем на «Устройства и принтеры» (Для Windows 7). Либо (для Windows 10) сразу нажимаем «Просмотр устройств и принтеров».
Открывается окно «Устройства и принтеры». В нём следует выбрать и нажать кнопку «Добавление принтера».
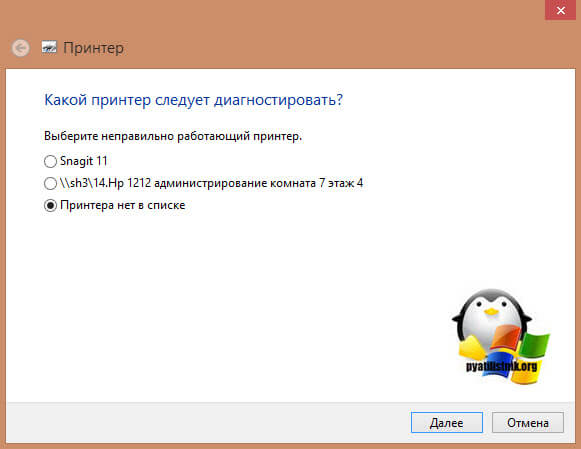
После этого запускается определение принтеров. Не дожидаясь завершения процесса кликаем по кнопке-ссылке «Необходимый принтер отсутствует в списке».

Теперь нужно указать каким способом подключён принтер. Избегая лишних действий ставим отметку в поле «Добавить локальный или сетевой принтер…». Необходимый пункт является последним в списке. Нажимаем «Далее».
Тратить время на выбор порта не будем. Оставляем всё как есть и жмём «далее».
Перед нами разбитый на 2 колонки перечень доступных драйверов для принтера, нажмите на «Центр обновления». Для этого требуется подключение к Интернет.
Не всегда «Центр обновления» может найти и установить нужный драйвер. Поэтому выбираем производителя принтера в левой колонке. В правой обновится список принтеров. Сделав выбор нажимаем «Далее».
От нас требуют ввести «Имя принтера». Можно вписать что угодно. Можно просто нажать «далее».
Система рапортует о том, что установка завершена. Нажимаем кнопку «готово».
Если принтер не опознаётся и не печатает повторяем процедуру установки, но пробуем другой драйвер. Сам же принтер следует удалить. Переходим к окну «Устройства и принтеры» (по шагам описанным выше) и нажимаем правой кнопкой мыши по принтеру.
Выбираем «Удалить устройство». Требуются права администратора.
И подтверждаем удаление нажатием на кнопку «Да».
Основная сложность процедуры в том, что может потребоваться несколько раз её повторить. Тогда принтер будет работать.
Источник
Epson Stylus Photo R300
Downloads
Downloads not available on mobile devices.
Recommended For You
Printer Driver
The latest printer driver for this product is available from Apple’s Software Update. Here’s how to get it:
| USB: | Connect your product to your Mac using a USB cable and make sure the product is turned on. |
| Wireless: | Make sure your product is turned on. Connect your product to your wireless network. |
| Ethernet: | Connect your product to your Mac using an Ethernet cable and make sure the product is turned on. |
In the screen that appears, select your printer model as below:
USB connection: Select the EPSON Series (USB) product.
Wireless or Ethernet connection: Select the EPSON Series (Bonjour) product.
Select your EPSON Series product in the Use or Print Using drop-down list, then click the Add button.
Note: Apple Software Update may find multiple updates for your system. You may choose to install all or some of the updates.
Drivers
Printer Driver
The latest printer driver for this product is available from Apple’s Software Update. Here’s how to get it:
| USB: | Connect your product to your Mac using a USB cable and make sure the product is turned on. |
| Wireless: | Make sure your product is turned on. Connect your product to your wireless network. |
| Ethernet: | Connect your product to your Mac using an Ethernet cable and make sure the product is turned on. |
In the screen that appears, select your printer model as below:
USB connection: Select the EPSON Series (USB) product.
Wireless or Ethernet connection: Select the EPSON Series (Bonjour) product.
Select your EPSON Series product in the Use or Print Using drop-down list, then click the Add button.
Note: Apple Software Update may find multiple updates for your system. You may choose to install all or some of the updates.
Utilities
Epson Print CD v2.42
This file contains the Epson Print CD Software v2.42.
Epson Print CD is used for designing labels for CD/DVDs, and directly print them onto the CD/DVD. You can also create and print the CD/DVD jackets in addition to CD/DVD labels.
macOS 11.x, macOS 10.15.x, macOS 10.14.x, macOS 10.13.x, macOS 10.12.x, Mac OS X 10.11.x, Mac OS X 10.10.x, Mac OS X 10.9.x, Mac OS X 10.8.x, Mac OS X 10.7.x, Mac OS X 10.6.x, Mac OS X 10.5.x
This file applies to numerous Epson products and may be compatible with operating systems that your model is not.
Common Updater for Apple Software Update v2.18
This file contains the Common Updater utility v2.18. This utility corrects a possible issue when printing with a USB connection after installing drivers via Apple Software Update in OS X 10.6, 10.7, 10.8 and 10.9.
macOS 10.14.x, macOS 10.13.x, macOS 10.12.x, Mac OS X 10.11.x, Mac OS X 10.10.x, Mac OS X 10.9.x, Mac OS X 10.8.x, Mac OS X 10.7.x, Mac OS X 10.6.x
** By downloading from this website, you are agreeing to abide by the terms and conditions of Epson’s Software License Agreement.
Источник
Epson Stylus Photo R300
Downloads
Downloads not available on mobile devices.
Recommended For You
Printer Driver
Windows 7 printer drivers for this model are included in the Windows 7 operating system. Follow the instructions below to install the Windows 7 printer driver.
Windows 7 32-bit, Windows 7 64-bit
Drivers
Printer Driver
Windows 7 printer drivers for this model are included in the Windows 7 operating system. Follow the instructions below to install the Windows 7 printer driver.
Windows 7 32-bit, Windows 7 64-bit
Utilities
Epson Print CD v2.44
This file contains the Epson Print CD Software v2.44.
Epson Print CD is used for designing labels for CD/DVDs, and directly print them onto the CD/DVD. You can also create and print the CD/DVD jackets in addition to CD/DVD labels.
Windows 10 32-bit, Windows 10 64-bit, Windows 8.1 32-bit, Windows 8.1 64-bit, Windows 8 32-bit, Windows 8 64-bit, Windows 7 32-bit, Windows 7 64-bit, Windows XP 32-bit, Windows XP 64-bit, Windows Vista 32-bit, Windows Vista 64-bit
This file applies to numerous Epson products and may be compatible with operating systems that your model is not.
Epson EasyPrint v3.10
Epson EasyPrint is a software utility that makes it easier for you to adjust printer settings. You can select printer settings directly from the Print window, without having to click the Properties button. Epson EasyPrint is already included with Epson Smart Panel 3.2 and Epson Copy Utility 3.0.
Windows 8.1 32-bit, Windows 8.1 64-bit, Windows 8 32-bit, Windows 8 64-bit, Windows 7 32-bit, Windows 7 64-bit, Windows XP 32-bit, Windows XP 64-bit, Windows Vista 32-bit, Windows Vista 64-bit, Windows 2000
This file applies to numerous Epson products and may be compatible with operating systems that your model is not.
** By downloading from this website, you are agreeing to abide by the terms and conditions of Epson’s Software License Agreement.
Источник
Epson r300 windows 10 driver
Драйвер для принтера Epson Stylus Photo R300.

Здесь Вы можете скачать драйвер для различных операционных систем для принтера Epson Stylus Photo R300.
Скачать Вы можете бесплатно и без регистрации.
Интерфейс драйвера Русский, Английский. Тип Файла ZIP. 6,4 Мб.
Интерфейс драйвера Русский, Английский. Тип Файла ZIP. 8,7 Мб.
Интерфейс драйвера Английский. Тип файла SIT. 8,1 Мб.
Как установить драйвер на компьютер мы покажем на примере Epson Expression Home XP33. Устанавливать будем на Windows 7, 32bit.
Подключаем принтер (МФУ) к сети, включаем его, подсоединяем USB к принтеру (МФУ) и компьютеру.
Скачиваем архив с драйверами на компьютер, разархивируем его, заходим в папку, находим файл SETUP.EXE, щелкаем на него дважды, рисунок 1.

Вам откроется окно «Утилита установки драйвера принтера Epson», выбираем нужный Вам принтер, в нашем случае Epson XP33, нажимаем OK, рисунок 2.

Выбираем нужный язык, в нашем случае Русский, нажимаем OK, рисунок 3.

Читаем ЛИЦЕНЗИОННОЕ СОГЛАШЕНИЕ НА ПРОГРАММНОЕ ОБЕСПЕЧЕНИЕ SEIKO EPSON CORPORATION, нажимаем на «Согласен» и OK, рисунок 4.

Далее у Вас появляется окошко «Утилита установки драйвера принтера Epson», где и происходит установка драйверов на компьютер, рисунок 5.

Если принтер включен и подсоединен к компьютеру, то установка произойдет успешно, нажимаем OK, рисунок 6.

Copyright © 2013 Epson.su Все права защищены.
Упомянутые на сайте название торговых марок, логотипов, принадлежат этой компаниии и используются только в целях идентификации продукции этой компании.
Источник
Quick Links
Submit your contact details below and an Epson expert will be in touch:
Thank you!
For more information on how Epson treats your personal data, please read our Privacy Information Statement.
NEED HELP? YOU’RE IN THE RIGHT PLACE
See below to find answers to frequently asked questions, information about warranties and repair centres, and downloads for your products
Find your model
Drivers, manuals and software for your product
Have we recognised your operating system correctly?
Product Setup
Epson Software updater 4.6.2.0 04-Oct-2022 5.54 MBs
Epson Software Updater allows you to update Epson software as well as download 3rd party applications.
Please Note: To use this updater, your Epson product must be turned on and connected to a computer with Internet access.
Drivers
EPSON Bluetooth Printing Application NOKIA 3650 22-Dec-2004 2.58 MBs
Additional Information
Mobile Phone : Nokia Series 60 ver.2.0 platform 6630 6680/6881 N70
This application allows you to print various kind of contents saved to your phone such as contacts, photos, messages, etc…
EPSON Bluetooth Printing Application NOKIA 3660 22-Dec-2004 2.58 MBs
Additional Information
Mobile Phone : Nokia Series 60 ver.2.0 platform 6630 6680/6881 N70
This application allows you to print various kind of contents saved to your phone such as contacts, photos, messages, etc…
EPSON Bluetooth Printing Application NOKIA 6600 22-Dec-2004 2.60 MBs
Additional Information
Mobile Phone : Nokia Series 60 ver.2.0 platform 6630 6680/6881 N70
This application allows you to print various kind of contents saved to your phone such as contacts, photos, messages, etc…
EPSON Bluetooth Printing Application NOKIA 7610 22-Dec-2004 2.60 MBs
Additional Information
Mobile Phone : Nokia Series 60 ver.2.0 platform 6630 6680/6881 N70
This application allows you to print various kind of contents saved to your phone such as contacts, photos, messages, etc…
EPSON Bluetooth Printing Application NOKIA 7650 22-Dec-2004 2.58 MBs
Additional Information
Mobile Phone : Nokia Series 60 ver.2.0 platform 6630 6680/6881 N70
This application allows you to print various kind of contents saved to your phone such as contacts, photos, messages, etc…
Creativity Software
EPSON Print CD 2.44 05-Aug-2016 72.84 MBs
EPSON Print CD bundled with this printer allows you to create images to print directly onto the disc. After you create the CD/DVD label data, you can print on 12-cm CD/DVD and 8-cm CD/DVD with compatible EPSON printers
EPSON Print CD 2.41.00 04-Sep-2015 72.84 MBs
EPSON Print CD bundled with this printer allows you to create images to print directly onto the disc. After you create the CD/DVD label data, you can print on 12-cm CD/DVD and 8-cm CD/DVD with compatible EPSON printers
Network Utilities
EpsonNet Print 3.1.4 14-Sep-2020 7.61 MBs
Additional Information
EpsonNet Print is utility software that provides printing that does not require a dedicated server for printing using a TCP/IP network (peer to peer printing). Normally when printing via a network with a Win 9x OS, a server (such as Windows NT Server, Novell Netware etc.) is required to manage the print queue in the network environment. However, by installing this software on the user PC, this restriction is eliminated. Since 1997 EPSON has made available similar functions with the TCP/IP direct printing function in EPSON Printer Window! 2 (overseas name: EPSON Status Monitor 2) and EpsonNet Direct Print, however this software is now positioned as the successor to these peer to peer printing tools (EPSON standard network printing tool), and it has the following features.
Other Software
EPSON Print CD 2.20.00 10-Dec-2012 44.70 MBs
EPSON Print CD bundled with this printer allows you to create images to print directly onto the disc. After you create the CD/DVD label data, you can print on 12-cm CD/DVD and 8-cm CD/DVD with compatible EPSON printers
Источник