Forum rules
Before you post please read how to get help. Topics in this forum are automatically closed 6 months after creation.
-
Boarnads
Samba | Failed to mount Windows share: Permission denied
Hi there,
I’ve been trying to setup samba via webmin and have run into several permission problems. I’m trying to setup several shares that require no authentication.
Below are the current problematic shared folders and their status:
‘/media/username/My Book’
Visible in network but get the following when trying to access it
Unable to mount location. Failed to mount Windows share: Permission denied
‘/home/username/Videos’
I can access this from the network but I cannot access any of the individual files, I can only browse through the folders.
smb.conf
Code: Select all
#
# Sample configuration file for the Samba suite for Debian GNU/Linux.
#
#
# This is the main Samba configuration file. You should read the
# smb.conf(5) manual page in order to understand the options listed
# here. Samba has a huge number of configurable options most of which
# are not shown in this example
#
# Some options that are often worth tuning have been included as
# commented-out examples in this file.
#  - When such options are commented with ";", the proposed setting
#    differs from the default Samba behaviour
#  - When commented with "#", the proposed setting is the default
#    behaviour of Samba but the option is considered important
#    enough to be mentioned here
#
# NOTE: Whenever you modify this file you should run the command
# "testparm" to check that you have not made any basic syntactic
# errors.

#======================= Global Settings =======================

[global]

## Browsing/Identification ###

# Change this to the workgroup/NT-domain name your Samba server will part of
	workgroup = workgroup

# server string is the equivalent of the NT Description field
	server string = %h server (Samba, Linux Mint)

# Windows Internet Name Serving Support Section:
# WINS Support - Tells the NMBD component of Samba to enable its WINS Server
#   wins support = no

# WINS Server - Tells the NMBD components of Samba to be a WINS Client
# Note: Samba can be either a WINS Server, or a WINS Client, but NOT both
;   wins server = w.x.y.z

# This will prevent nmbd to search for NetBIOS names through DNS.
	dns proxy = no

#### Networking ####

# The specific set of interfaces / networks to bind to
# This can be either the interface name or an IP address/netmask;
# interface names are normally preferred
;   interfaces = 127.0.0.0/8 eth0

# Only bind to the named interfaces and/or networks; you must use the
# 'interfaces' option above to use this.
# It is recommended that you enable this feature if your Samba machine is
# not protected by a firewall or is a firewall itself.  However, this
# option cannot handle dynamic or non-broadcast interfaces correctly.
;   bind interfaces only = yes


#### Debugging/Accounting ####

# This tells Samba to use a separate log file for each machine
# that connects
	log file = /var/log/samba/log.%m

# Cap the size of the individual log files (in KiB).
	max log size = 1000

# If you want Samba to only log through syslog then set the following
# parameter to 'yes'.
#   syslog only = no

# We want Samba to log a minimum amount of information to syslog. Everything
# should go to /var/log/samba/log.{smbd,nmbd} instead. If you want to log
# through syslog you should set the following parameter to something higher.
	syslog = 0

# Do something sensible when Samba crashes: mail the admin a backtrace
	panic action = /usr/share/samba/panic-action %d


####### Authentication #######

# Server role. Defines in which mode Samba will operate. Possible
# values are "standalone server", "member server", "classic primary
# domain controller", "classic backup domain controller", "active
# directory domain controller".
#
# Most people will want "standalone sever" or "member server".
# Running as "active directory domain controller" will require first
# running "samba-tool domain provision" to wipe databases and create a
# new domain.
	server role = standalone server

# If you are using encrypted passwords, Samba will need to know what
# password database type you are using.
;	passdb backend = tdbsam

	obey pam restrictions = yes

# This boolean parameter controls whether Samba attempts to sync the Unix
# password with the SMB password when the encrypted SMB password in the
# passdb is changed.
	unix password sync = yes

# For Unix password sync to work on a Debian GNU/Linux system, the following
# parameters must be set (thanks to Ian Kahan <<kahan@informatik.tu-muenchen.de> for
# sending the correct chat script for the passwd program in Debian Sarge).
	passwd program = /usr/bin/passwd %u
	passwd chat = *Entersnews*spassword:* %nn *Retypesnews*spassword:* %nn *passwordsupdatedssuccessfully* .

# This boolean controls whether PAM will be used for password changes
# when requested by an SMB client instead of the program listed in
# 'passwd program'. The default is 'no'.
	pam password change = yes

# This option controls how unsuccessful authentication attempts are mapped
# to anonymous connections
	map to guest = bad user

########## Domains ###########

#
# The following settings only takes effect if 'server role = primary
# classic domain controller', 'server role = backup domain controller'
# or 'domain logons' is set
#

# It specifies the location of the user's
# profile directory from the client point of view) The following
# required a [profiles] share to be setup on the samba server (see
# below)
;   logon path = \%Nprofiles%U
# Another common choice is storing the profile in the user's home directory
# (this is Samba's default)
#   logon path = \%N%Uprofile

# The following setting only takes effect if 'domain logons' is set
# It specifies the location of a user's home directory (from the client
# point of view)
;   logon drive = H:
#   logon home = \%N%U

# The following setting only takes effect if 'domain logons' is set
# It specifies the script to run during logon. The script must be stored
# in the [netlogon] share
# NOTE: Must be store in 'DOS' file format convention
;   logon script = logon.cmd

# This allows Unix users to be created on the domain controller via the SAMR
# RPC pipe.  The example command creates a user account with a disabled Unix
# password; please adapt to your needs
; add user script = /usr/sbin/adduser --quiet --disabled-password --gecos "" %u

# This allows machine accounts to be created on the domain controller via the
# SAMR RPC pipe.
# The following assumes a "machines" group exists on the system
; add machine script  = /usr/sbin/useradd -g machines -c "%u machine account" -d /var/lib/samba -s /bin/false %u

# This allows Unix groups to be created on the domain controller via the SAMR
# RPC pipe.
; add group script = /usr/sbin/addgroup --force-badname %g

############ Misc ############

# Using the following line enables you to customise your configuration
# on a per machine basis. The %m gets replaced with the netbios name
# of the machine that is connecting
;   include = /home/samba/etc/smb.conf.%m

# Some defaults for winbind (make sure you're not using the ranges
# for something else.)
;   idmap uid = 10000-20000
;   idmap gid = 10000-20000
;   template shell = /bin/bash

# Setup usershare options to enable non-root users to share folders
# with the net usershare command.

# Maximum number of usershare. 0 (default) means that usershare is disabled.
;	usershare max shares = 100

# Allow users who've been granted usershare privileges to create
# public shares, not just authenticated ones
	usershare allow guests = yes
	username map = /etc/samba/smbusers
	security = user
;	encrypt passwords = yes
	guest ok = yes
;	guest account = nobody

#======================= Share Definitions =======================

# Un-comment the following (and tweak the other settings below to suit)
# to enable the default home directory shares. This will share each
# user's home directory as \serverusername
;[homes]
;   comment = Home Directories
;   browseable = no

# By default, the home directories are exported read-only. Change the
# next parameter to 'no' if you want to be able to write to them.
;   read only = yes

# File creation mask is set to 0700 for security reasons. If you want to
# create files with group=rw permissions, set next parameter to 0775.
;   create mask = 0700

# Directory creation mask is set to 0700 for security reasons. If you want to
# create dirs. with group=rw permissions, set next parameter to 0775.
;   directory mask = 0700

# By default, \serverusername shares can be connected to by anyone
# with access to the samba server.
# Un-comment the following parameter to make sure that only "username"
# can connect to \serverusername
# This might need tweaking when using external authentication schemes
;   valid users = %S

# Un-comment the following and create the netlogon directory for Domain Logons
# (you need to configure Samba to act as a domain controller too.)
;[netlogon]
;   comment = Network Logon Service
;   path = /home/samba/netlogon
;   guest ok = yes
;   read only = yes

# Un-comment the following and create the profiles directory to store
# users profiles (see the "logon path" option above)
# (you need to configure Samba to act as a domain controller too.)
# The path below should be writable by all users so that their
# profile directory may be created the first time they log on
;[profiles]
;   comment = Users profiles
;   path = /home/samba/profiles
;   guest ok = no
;   browseable = no
;   create mask = 0600
;   directory mask = 0700

[printers]
	comment = All Printers
	browseable = no
	path = /var/spool/samba
	printable = yes
;	guest ok = no
;	read only = yes
	create mask = 0700

# Windows clients look for this share name as a source of downloadable
# printer drivers
[print$]
	comment = Printer Drivers
	path = /var/lib/samba/printers
;	browseable = yes
;	read only = yes
;	guest ok = no
# Uncomment to allow remote administration of Windows print drivers.
# You may need to replace 'lpadmin' with the name of the group your
# admin users are members of.
# Please note that you also need to set appropriate Unix permissions
# to the drivers directory for these users to have write rights in it
;   write list = root, @lpadmin


[Pictures]
	path = /home/username/Pictures
	valid users = username
;	writeable = No
;	browseable = yes

[Videos]
	guest ok = yes
	path = /home/username/Videos
;	writeable = No
;	browseable = yes


[WDShare]
	path = /media/username/My Book
	writeable = yes
;	browseable = yes
	guest ok = yes
‘ls -l’ gives me the following
drwx—— 1 username username 8192 Feb 17 02:18 My Book
drwxr-xr-x 9 username username 4096 Feb 18 04:48 Videos
I also tried chmod 777 for My Book prior to ls -l command, it appeared to complete successfully although the permissions dont seem to have changed.
Any help in resolving this issus would be greatly appreciated
Regards,
Boarnads
Last edited by LockBot on Wed Dec 28, 2022 7:16 am, edited 1 time in total.
Reason: Topic automatically closed 6 months after creation. New replies are no longer allowed.
-

Pjotr
- Level 23

- Posts: 18553
- Joined: Mon Mar 07, 2011 10:18 am
- Location: The Netherlands (Holland) 🇳🇱
- Contact:


-
altair4
- Level 20
- Posts: 11021
- Joined: Tue Feb 03, 2009 10:27 am
Re: Samba | Failed to mount Windows share: Permission denied
Post
by altair4 » Wed Feb 18, 2015 7:19 am
You might be able to fix both problems by forcing the remote quest to appear to be you — at least for your samba shares anyway:
Edit smb.conf and under the workgroup = workgroup line add this line:
I’m using your reference to «username» so change that to whatever your real user name is.
Then restart smbd:
Please add a [SOLVED] at the end of your original subject header if your question has been answered and solved.
-
altair4
- Level 20
- Posts: 11021
- Joined: Tue Feb 03, 2009 10:27 am
Re: Samba | Failed to mount Windows share: Permission denied
Post
by altair4 » Wed Feb 18, 2015 3:31 pm
Based on this posting I had assumed it was NTFS because of the permissions
drwx—— 1 username username 8192 Feb 17 02:18 My Book
That’s why I suggested «force user = username» since both shares are guest shares.
Please add a [SOLVED] at the end of your original subject header if your question has been answered and solved.
-
Boarnads
Re: Samba | Failed to mount Windows share: Permission denied
Post
by Boarnads » Wed Feb 18, 2015 9:45 pm
The hdd is NTFS but Ive gotten the shares to work before with NTFS drives without the ‘force user’, I just cant remember what I did.
However I’m now using ‘force user = username’ which seems to have fixed the problem, I’m just wondering are there any negatives to ‘force user’, would I be better off getting the permissions working, especially for the ‘Videos’ share?
Thank you all very much for your help.
-
altair4
- Level 20
- Posts: 11021
- Joined: Tue Feb 03, 2009 10:27 am
Re: Samba | Failed to mount Windows share: Permission denied
Post
by altair4 » Thu Feb 19, 2015 7:47 am
Warning: This is going to be an unbelievably long answer ![]()
Let’s take the worst case scenario and assume the client machine is running Windows and that the user on that machine is named «bob».
When bob tries to access your Mint machine Windows automatically passes his user name to Samba. If there is no match in the samba password database for «bob» the «map to guest = Bad User» parameter is invoked and changes «bob» to the default guest user in Mint which is literally «nobody».
«nobody» doesn’t have access to «/media/username/My Book» at all ( actually no one has access to that folder except «username» ) and only has read access to /home/username/Videos. «force user» makes «nobody» «username» so he now does have access to both. Depending on how you create the samba share definition it still has a gatekeeper function in that if you set it up to be read only the Windows client cannot write even though he is now «username».
If however the user name on the Windows machine is also «username» and his name does appear in the samba password database then he is no longer a «Bad User» and he comes across as «username» and the situation is resolved. If this is the case then you could add yourself ( username ) to the samba password database:
Now the Windows user is also the Linux user and he has access to both shares without the need for «force user». But this will only work for the Windows user «username». You would still need the «force user» if you have many windows clients.
If however the client machine is running Linux the situation changes.
The Linux samba client doesn’t pass a user name when it tries to access the Mint machine because … well …. Linux thinks that’s goofy. The Linux client will always come across as «nobody» unless the share requires credentials. In this scenario — for a guest share — «force user» is the easiest way to resolve the situation without changing the guest share to a private share requiring credentials.
Either way «force user» doesn’t give the remote user full access to your entire box only to the samba shares and only within the parameters set in the share definition for those shares.
Edited for spelling — I just can’t spell
Last edited by altair4 on Thu Feb 19, 2015 7:04 pm, edited 5 times in total.
Please add a [SOLVED] at the end of your original subject header if your question has been answered and solved.
-
deleted
Re: Samba | Failed to mount Windows share: Permission denied
Post
by deleted » Thu Feb 19, 2015 8:46 am
Setting up a Simple Samba Server is easy on Linux if you assume your samba share user have an account on your Linux workstation.
This will automatically share user homes
edit the original /etc/samba/smb.conf (don’t start with an empty smb.conf)
In the [global] section:
add
Code: Select all
    follow symlinks=yes
    wide links=yes
    unix extensions=no
    client lanman auth = yes
    client ntlmv2 auth = no
This allows samba clients (like Windows) to follow the symbolic links (symlinks) defined on your SolydXK samba server.
In the [homes] section:
change
and uncomment ( remove the leading ; )
restart samba to reload smb.conf
add your samba users using smbpasswd.
In your case where you want to share:
/media/username/My Book
just do:
ln -s /media/username/My Book /home/username/My Book
That will symbolically link /media/username/My Book to My Book in username’s home where samba can see it and follow the link.
-Hinto
-
altair4
- Level 20
- Posts: 11021
- Joined: Tue Feb 03, 2009 10:27 am
Re: Samba | Failed to mount Windows share: Permission denied
Post
by altair4 » Thu Feb 19, 2015 9:09 am
And my advice is to ignore the previous post. It won’t work.
Gosh, we have had this dance so many times before ……………..
[1] Mint is not SolydXK
[2] There is no [homes] share defined in Mint, the standard Ubuntu desktop, or any of it’s derivatives.
[3] You are forcing credentials being passed when all the user has is guest accessible shares.
[4] Even if the homes share were defined you are allowing access to the entire home directory not just the folders desired.
[5] Did I already mention that the user only has guess accessible shares?
[6] And this command:
ln -s /media/username/My Book /home/username/My Book
Will only result in a broken link since you forgot about the space.
Please add a [SOLVED] at the end of your original subject header if your question has been answered and solved.
-
deleted
Re: Samba | Failed to mount Windows share: Permission denied
Post
by deleted » Thu Feb 19, 2015 10:51 am
I did the exact same thing on Mint, RHEL, Fedora, Ubuntu, Debian, #!, Siduction, Suse, OpenSuse.
And there is a [homes] section, it’s commented out (so uncomment it, too)
No sweat.
The key is smb.conf mods.
It’s nothing mystical.
-H
-
altair4
- Level 20
- Posts: 11021
- Joined: Tue Feb 03, 2009 10:27 am
Re: Samba | Failed to mount Windows share: Permission denied
Post
by altair4 » Thu Feb 19, 2015 11:33 am
And I would encourage you to continue to use it — on your own systems. For Mint it will not work. And please read the original posts in a given topic so you get a sense of the user’s requirements.
Someone one said: «Insanity is doing the same thing over and over again and expecting a different result»
You keep posting this thing expecting this time it will work and I won’t comment.
Every time you post it I do in fact respond expecting you to fix it.
Ain’t we a pair. We’re going to end up in adjoining rooms at the asylum.
Last edited by altair4 on Thu Feb 19, 2015 11:37 am, edited 1 time in total.
Please add a [SOLVED] at the end of your original subject header if your question has been answered and solved.
-
deleted
Re: Samba | Failed to mount Windows share: Permission denied
Post
by deleted » Thu Feb 19, 2015 11:36 am
Actually it works on my 5 different mint 17.1 systems, but don’t tell them.
My idea is to take something *known* to work, then modify it for your purposes instead of starting from scratch every time.
On _any_ distro I hop to (which isn’t hard either) I make those mods and there are no problems, even on Mint. As a matter of fact, it was Mint that I actually flushed the steps out on.
-H
 Most of the time I access my home NAS via samba shares. For increased security and performance I force it to use SMB v3 protocol. And therein lies the issue.
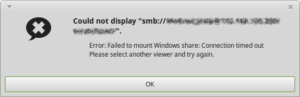
Whenever I tried to access my NAS from Linux Mint machine using Caja browser, I would get the same error: «Failed to mount Windows share: Connection timed out.» And it wasn’t connectivity issues as everything would work if I dropped my NAS to SMB v2. And it wasn’t unsupported feature either as Linux supports SMB3 for a while now.
It was just a case of a bit unfortunate default configuration. Albeit man pages tell client max protocol is SMB3, something simply doesn’t click. However, if one manually specifies only SMB3 is to be used, everything starts magically working.
Configuring it is easy; in /etc/samba/smb.conf, within [global], one needs to add
client min protocol = SMB3
client max protocol = SMB3
Alternatively, this can also be done with the following one-liner:
$ sudo sed -i "/\[global\]/a client min protocol = SMB3nclient max protocol = SMB3" /etc/samba/smb.confOnce these settings are in, share is accessible.
A couple of things to check out. I do something similar and you can test mount it directly using the mount command to make sure you have things setup right.
Permissions on credentials file
Make sure that this file is permissioned right.
$ sudo ls -l /etc/smb_credentials.txt
-rw-------. 1 root root 54 Mar 24 13:19 /etc/smb_credentials.txt
Verbose mount
You can coax more info out of mount using the -v switch which will often times show you where things are getting tripped up.
$ sudo mount -v -t cifs //server/share /mnt
    -o credentials=/etc/smb_credentials.txt
Resulting in this output if it works:
mount.cifs kernel mount options: ip=192.168.1.14,unc=\servershare,credentials=/etc/smb_credentials.txt,ver=1,user=someuser,domain=somedom,pass=********
Check the logs
After running the above mount command take a look inside your dmesg and /var/log/messages or /var/log/syslog files for any error messages that may have been generated when you attempted the mount.
Type of security
You can pass a lot of extra options via the -o .. switch to mount. These options are technology specific, so in your case they’re applicable to mount.cifs specifically. Take a look at the mount.cifs man page for more on all the options you can pass.
I would suspect you’re missing an option to sec=.... Specifically one of these options:
   sec=
       Security mode. Allowed values are:
       ·   none - attempt to connection as a null user (no name)
       ·   krb5 - Use Kerberos version 5 authentication
       ·   krb5i - Use Kerberos authentication and forcibly enable packet
           signing
       ·   ntlm - Use NTLM password hashing
       ·   ntlmi - Use NTLM password hashing and force packet signing
       ·   ntlmv2 - Use NTLMv2 password hashing
       ·   ntlmv2i - Use NTLMv2 password hashing and force packet signing
       ·   ntlmssp - Use NTLMv2 password hashing encapsulated in Raw NTLMSSP
           message
       ·   ntlmsspi - Use NTLMv2 password hashing encapsulated in Raw
           NTLMSSP message, and force packet signing

       The default in mainline kernel versions prior to v3.8 was sec=ntlm.
       In v3.8, the default was changed to sec=ntlmssp.
You may need to adjust the sec=... option so that it’s either sec=ntlm or sec=ntlmssp.
References
- Thread: mount -t cifs results gives mount error(13): Permission denied
Для работы бывает необходимо подключаться из Linux к общей папке Windows, чтобы забрать или передать файлы. В организациях в 99% используются компьютеры под управлением Windows, поэтому приходится подключаться из Linux к Windows.
Установка Samba клиента в Linux
sudo apt-get update
sudo apt-get install samba-client
sudo apt-get install cifs-utils
Для удобства просмотра сетевого окружения в GUI удобен файловый менеджер Nautilus с дополнением Nautilus-share
sudo apt-get install nautilus nautilus-shareПросмотр общих сетевых ресурсов с помощью командной строки
Вызов клиента Samba для просмотра ресурсов сервера из командной строки:
1) просмотр общих папок, предоставленных в общий доступ по сети для локальных пользователей сервера
smbclient -L //192.168.100.10 -U Username%Passwordлибо
smbclient -L //servername -U Username%Passwordгде: 192.168.100.10 — IP адрес сервера, servername — имя сервера, Username — локальный пользователь сервера, Password — пароль пользователя Username
2) просмотр общих папок, предоставленных в общий доступ по сети для пользователей домена
smbclient -L //192.168.100.10 -U Domain/Username%Passwordлибо
smbclient -L //192.168.100.10 -U Username%Password -W Domainили по имени
smbclient -L //servername -U Username%Password -W Domainгде Domain — имя домена Active Directory.
Либо (чтобы каждый раз не сообщать пароль в параметрах команды) создать файл ~/.smbcredentials
с данными входа:
username=имя_пользователя
password=пароль
domain=имя_standalone_сервера_или_домена
Тогда, присоединение к сетевому каталогу:
smbclient //server/share --authentication-file=/home/vladimir/.smbcredentials Подключение к общей папке Samba в интерактивном режиме
То же самое, но без ключа -L, но с параметром — именем общей папки, в данном случае «share»
smbclient //192.168.100.10/share -U Domain/Username%Passwordлибо
smbclient //servername/share -U Domain/Username%Passwordлибо
smbclient //servername/share -U Username%Password -W DomainПосле успешного входа появится приглашение
smb: >можно вводить команды, например, help или dir. Интерфейс для управления smbclient с помощью команд напоминает ftp клиент.
Подключение к общим папкам с помощью файлового менеджера Nautilus
После запуска nautilus, выберите в левой части окна «+ Другие места» — откроется просмотр локальной сети, где можно просматривать компьютеры в сети, у которых имеются общие папки.
Решение проблемы с подключением: избавляемся от ошибки -13 Access Denied, либо NT_STATUS_ACCESS_DENIED
Ошибка: CIFS: VFS: cifs_mount failed w/return code = -13"
Данную ошибку можно решить только настройкой прав на сервере. Чтобы открыть общую папку на просмотр, нужны три условия:
1) Пользователь указан среди пользователей сервера или домена (либо доступ типа guest разрешён)
2) Предоставлен (не ограничен) доступ к файловой системе.
3) Дан доступ к конкретной сетевой папке — например, пользователь входит в группу пользователей, к которой дан доступ к общей папке.
Последнее, третье условие самое строгое. Нужно, чтобы Администратор сервера предоставил права пользователю (включил его в группу пользователей общей папки).
Самое интересное, что права Администратора не гарантируют даже ему полных прав доступа к общей папке, т.к. необходимо, чтобы пользователь «Администратор» входил в группу, которой предоставлены права к данной сетевой папке. В этом плане администратор не отличается от группы other/nobody: получит ошибку mount error(13): Permission denied, потому что он не входит в группу пользователей сетевой папки.
Использование команды «mount»
Вместо smbclient можно использовать команду mount.
Вначале нужно создать точки монтирования и дать права доступа к папке, например:
sudo mkdir /mnt/cifs
sudo chmod 0777 /mnt/cifs
Примеры использования команды mount с сетевым папками:
sudo mount -t cifs //192.168.20.222/share /mnt/cifs -o user=Vlad,pass=Str0ngPa$$word
ls  /mnt/cifs
sudo umount //192.168.20.222/share
ls  /mnt/cifs
Либо то же самое с файлом .smbcredentials :
sudo mount -t cifs //192.168.20.222/share /mnt/cifs -o credentials=/home/vladimir/.smbcredentialsЕсли имя сетевой папки содержит пробелы («share with spaces in name»), нужно вводить следующим образом:
sudo mount -t cifs //192.168.20.222/share with spaces in name /mnt/cifs -o credentials=/home/vladimir/.smbcredentialsПримечание: Чтобы после выполнения команды mount примонтированная папка работала бы не только на чтение, но и на запись в удалённую общую папку, нужно сопоставить удаленного пользователя с локальным пользователем Linux, при помощи параметров uid=1000,gid-1000. Где 1000 — заменить на uid и gid пользователя Linux (выводятся командой id).
Либо добавить в параметры -o noperm,iocharset=utf8.
В ключах команды можно задать версию Samba, которую используем для подключения. Например,
для SMB2: vers=2.0 или для SMB3 vers=3.0.
Примеры:
sudo mount -t cifs //192.168.20.222/share with spaces in name /mnt/cifs -o user=username,pass=password,uid=1000,gid=1000

sudo mount -t cifs //192.168.20.222/share with spaces in name /mnt/cifs -o credentials=/home/vladimir/.smbcredentials,vers=2.0,noperm
Если заданная версия Samba (например, SMB3) не поддерживается сервером, будет выведена ошибка "mount error(95): Operation not supported.".
Добавление параметра «nofail» пригодится, когда не известно, включен ли удалённый компьютер (сервер) или нет.
Монтирование сетевой папки во время загрузки (файл /etc/fstab)
Синтаксис строки в /etc/fstab:
//[URL]/[sharename] /mnt/[mountpoint] cifs vers=3.0,credentials=/home/username/.sharelogin,iocharset=utf8,file_mode=0777,dir_mode=0777,uid=[username],gid=[username],nofail 0 0где:
//[URL]/[sharename] — имя сервера и сетевой папки
/mnt/[mountpoint] — точка монтирования на локальном компьютере
vers=3.0 — принудительно установить версию протокола SMB3 (либо vers=2.0 — если клиент и сервер поддерживают лишь SMB2)
credentials=/home/username/.sharelogin — указание файла с именем пользователя, паролем и доменом для входа
iocharset=utf8 — прямое указание набора символов utf8 (не обязательно, если без него работает)
file_mode=0777,dir_mode=0777 — права доступа при выполнении mount
uid=[username],gid=[username] — данные uid и gid из результата вывода команды cat /etc/passwd | grep username
nofail — загрузка ОС будет продолжена даже в случае недоступности сервера URL
Другие параметры:
defaults — включает опции rw, suid, dev, exec, auto, nouser, and async. Обычно идёт первой, т.к. можно переопределить отдельные опции в строке позднее, например: defaults, noexec, ro — нет исполнения, только чтение.
rw — очевидно, чтение-запись со стороны клиента (является противоположностью ro — только чтение (защита от записи).
suid — запрещает использование бит полномочий SUID (Set-User-IDentifier — установка идентификатора владельца) или SGID (Set-Group-IDentifier). Грубо говоря, запрещает передачу части прав при помощи битов SUID и SGID — права должны быть заданы явно.
auto — используется в /etc/fstab — разрешает автоматическое монтирование сетевых ресурсов при выполнении команды mount -a
noauto — запрет для fstab монтировать папку автоматически при выполнении команды mount -a.
nouser — прямой запрет на «ручное» монтирование всеми пользователями, кроме root (не влияет на монтирование во время загрузки ОС)
guest — для доступа к «гостевым» общим папкам, которые доступны по сети без указания имени пользователя и пароля.
async — запись данных в сетевую папку производится по мере возможности — значение по умолчанию. Повышает производительность.
sync — немедленная запись на удаленный компьютер (без использования буферов), не рекомендуется.
noperm — отключает встроенную в клиент проверку прав. Используют noperm в том случае, если права вроде бы есть, но создать файл на запись, например, программно, не получается, из-за несовместимости в реализации CIFS на клиенте и сервере.
noexec — прямой запрет запуска исполнимых файлов из сетевой папки
noatime — не обновлять время создания файла (повышает производительность, но понижает информативность)
nounix — отключение расширений Linux: не использовать символические ссылки. Используется, чтобы отключить символьные ссылки для обеспечения совместимости с Windows.
mfsymlinks — ключ для символьных ссылок в стиле Minshall+French. Этот стиль ссылок поддерживается Windows и Mac.
Примеры строки в fstab (где данные входа указаны в файле /etc/.smbcredentials):
//192.168.20.222/share_name rw,auto,nofail,credentials=/etc/.smbcredentials 0 0Если в /etc/hosts или локальном DNS сервере прописаны имена машин, вместо IP-адреса можно подключать общую папку по имени: //server/share .
Команда для монтирования на основе fstab:
sudo mount -aБудет перемонтированы все диски на основе /etc/fstab за исключением помеченных параметром «noauto».
Краткая информация по настройки Samba в Windows (протоколы SMB1, SMB2, SMB3)
Samba протокол имеет три версии 1, 2 и 3.
Протокол SMB1 включают, если в организации имеются машины под Windows XP. В остальных случаях стараются отключить SMB1 как небезопасный.
Включение и выключение в Windows 7 и Windows Server 2008r2 производится с помощью реестра, параметры
HKEY_LOCAL_MACHINESYSTEMCurrentControlSetservicesLanmanServerParameters
параметры типа DWORD
SMB1=0
SMB2=1
В Windows 8, Windows 10, 11, Windows Server 2012, 2016 и выше используется командлет PowerShell
Get-SmbServerConfiguration | select EnableSMB1Protocol,EnableSMB2Protocol
Set-SmbServerConfiguration -EnableSMB2Protocol $true
Указанные командлеты не работают в ранний версиях Windows 7 и Windows Server 2008r2.
Также, SMB3 не работает в Win7 — подробнее см. здесь — сайт winitpro.ru.
Ссылки:
- man mount.cifs
Похожие публикации
There are a couple of ways how to mount a CIFS/Samba share on a Linux client. However some tutorials are outdated and meanwhile completely wrong. I just ran into a (stupid) case of a wrong mount.cifs syntax:
root@focal:~# mount -t cifs //server/Share /mnt -o rw,user=domainmyuser,password=secret
mount error(13): Permission denied
Refer to the mount.cifs(8) manual page (e.g. man mount.cifs) and kernel log messages (dmesg)
Unfortunately, the additional output in dmesg is not helpful to figure out the problem:
root@focal:~# dmesg
[…]
[16444886.307684] CIFS: Attempting to mount //server/Share
[16444886.307717] No dialect specified on mount. Default has changed to a more secure dialect, SMB2.1 or later (e.g. SMB3), from CIFS (SMB1). To use the less secure SMB1 dialect to access old servers which do not support SMB3 (or SMB2.1) specify vers=1.0 on mount.
[16444886.539770] Status code returned 0xc000006d STATUS_LOGON_FAILURE
[16444886.539795] CIFS VFS: \server Send error in SessSetup = -13
[16444886.539901] CIFS VFS: cifs_mount failed w/return code = -13
After additional try and errors (and looking up a recent share mount from the history), the problem turned out to be the user=domainmyuser syntax. This way of combining the domain/workgroup and the username is not working (anymore).
Note: Both user= and username= are accepted in the options.
Instead use:
root@focal:~# mount -t cifs «//server/Share» /mnt -o «user=myuser,password=secret,workgroup=DOMAIN»
root@focal:~# ll /mnt/
total 0
drwxr-xr-x 2 root root 0 Sep 1 2020 _Archiv
drwxr-xr-x 2 root root 0 Aug 9 12:10 Client
[..]
This way it worked.
Of course the password should not be used on the command line, so for the final (and automatic) mount of the share use the following entry in /etc/fstab:
root@focal:~# cat /etc/fstab
[…]
# Mount CIFS share from server
//server/Share /mnt cifs rw,relatime,vers=3.1.1,credentials=/etc/samba/servershare.conf,uid=0 0 0
Where /etc/samba/servershare.conf contains the credentials:
root@focal:~# cat /etc/samba/servershare.conf
user=myuser
password=secret
domain=DOMAIN
Add a comment
Show form to leave a comment
Comments (newest first)
Ed from wrote on Jan 27th, 2023:
In my case (mounting win 2019 share in RHEL9) when using double apostrophe: «user=myuser…» was outputing:
«bash: !,workgroup=$MY_DOMAIN: event not found»
Switching to single apostrophe ‘user=mysers…’ did the trick
ck from Switzerland wrote on Nov 29th, 2022:
Keith, make sure you have the cifs-utils and smbclient packages installed on your Ubuntu. Still an error? Try to connect to the share using the smbclient command. It could also be a SMB protocol mismatch. Check out this article, describing Samba protocol configuration on the client.
Keith from United States wrote on Nov 29th, 2022:
I’ve tried for the past 3 hours, 5AM in the morning now, and I’ve tried everything from every other website and this one and still get the exact same errors. Tried it with just sudo, then root. Same thing. Host OS is ubuntu server trying to mount a network share from my Synology NAS.
AJav from wrote on Sep 19th, 2022:
very good, Thanks !
simonpunk2016 from wrote on Aug 1st, 2022:
Thank you sir, never know the mount option has changed, because I just successfully mounted the cifs last month, thought my Manjaro has come to an end.
simonpunk2016 from wrote on Jul 29th, 2022:
Thank you sir, never know the mount option has changed, because I just successfully mounted the cifs last month, thought my Manjaro has come to an end.
Jesko from wrote on Feb 10th, 2022:
I had exact the same error, but different reason. On a freshly installed (old) Ubuntu 16.04 LTS (last 32Bit version). My reason was: There was no cifs-utils installed! so «sudo apt install cifs-utils» was the solution. I just write here because I crawled through hundreds of comments.
Fix mount error(95): solved! Operation not supported SMB
15 Jan 2022 |
Fix mount error(95): solved! Operation not supported SMB |
Mounts SMB/CIFS shares with Linux
It’s common practice to mount Windows file shares on Linux using the SMB (Samba) implementation on Linux. the command is fairly straight forward.
# Install the required libraries if you  haven't done that yet
sudo apt update
sudo apt install cifs-utils

#Next mount the folder you want
sudo mount -t cifs -o username=user_name //server_name_or_ip/share_name /mnt/share_name
The command above would:
- mount a server with the server_name or ip in the //server_name/share_name
- to a local /mnt/share_name folder
- so once the mount is complete you can access the shares contents by accessing the /mnt/share_name folder locally.
There are all sorts of options using this command , and when the share is created on the server , things like file access and permissions can be set. You can find a more complete description here on how to access and setup windows shares in Linux
The issue with Samba/Cifs mounts (on Synology and other SMB servers) error 95
Apparently there has been a change to the SMB (Samba) protocol . SMB1 was the default, which may not be sufficient because of upgraded security requirement tof SMB2 . So try setting the version to SMB2 with ver=2.0 Or ver=3.0 , more specifically in my case, Synology updated their SMB server and increased the security , and for those of us that do not keep up to date with the changes may find that our once working mount commands, are not failing with a message such as ..
mount error(95): Operation not supported
This obscure message with its “operation not supported” doesn’t shed light on the true cause of the issue. Online documentation is I was able to find online such as this Samba.Org mount.cifs document doesn’t really help much either. The trick is you can try dmesg to give you a more precise message.
mount error(95): Operation not supported
Refer to the mount.cifs(8) manual page (e.g. man mount.cifs) and kernel log messages (dmesg)
You can try dmesg to give you a more precise message
CIFS: VFS: Use of the less secure dialect ver=1.0 is not
recommended unless required for access to very old servers
CIFS: VFS: cifs_mount failed w/return code = -95
So if you haven’t a version set in your configuration (Your connection string) it will assume your client uses SMB1 as default, which may not be sufficient if the server you’re trying to connect to has upgraded there requirement to SMB2 . So try setting the version to SMB2 with ver=2.0 to see if it resolves the issue, as it did in my case,
So my Old error connection string
sudo mount -t cifs -o username=user_name //server_name/share_name /mnt/share_name
Revised working connection string. use vers=2.0 as part of your -0 witch attributes.
sudo mount -t cifs -o vers=2.0,username=user_name,password=password //server_name/share_name /mnt/share_name
Anyways this was just a quick post as it was a pain in the ass as to why all of a sudden my mounts to my Synology began failing.. hope it helps.
If you found this post useful , leave a comment below!
- Index
- » Newbie Corner
- » Samba — Failed to mount Windows share: Permission denied.
#1 2014-09-18 14:32:55
- svxiii
- Member

- Registered: 2014-09-17
- Posts: 21

Samba — Failed to mount Windows share: Permission denied.
I’m trying to access a samba share on my own machine (and from another one running debian) using thunar, I keep getting this error:
Failed to mount Windows share: Permission denied.My smb.conf looks like this:
 [global]
   workgroup = WORKGROUP
   server string = Samba Server
   usershare path = /var/lib/samba/usershare
   usershare max shares = 100
   usershare allow guests = yes
   usershare owner only = yes
   hosts allow = 10.0.0. 127.
   printcap name = /etc/printcap
   load printers = yes
   log file = /var/log/samba/%m.log
   max log size = 50
   security = user
   domain master = auto
   dns proxy = no
[homes]
   comment = Home Directories
   browseable = no
   writable = yes
[printers]
   comment = All Printers
   path = /var/spool/samba
   browseable = no
   guest ok = no
   writable = no
   printable = yes
This is the same config file i’ve used on a laptop running arch a few months ago without problems.
I must be missing something. Any ideas?
#2 2019-01-19 15:46:01
- Gotit
- Member
- From: New England, USA
- Registered: 2017-04-27
- Posts: 66
Re: Samba — Failed to mount Windows share: Permission denied.
Try adding in the Global section
force user = your_user_nameof course put your real user name where it says «your_user_name» ![]()
This is what I had to do with recent installs. I have other older non-Arch machines that work fine without the force user parameter.
Oops, just realized how old this post is. Didn’t mean to necrobump.
Last edited by Gotit (2019-01-19 15:50:16)
#3 2019-01-19 16:08:40
- V1del
- Forum Moderator

- Registered: 2012-10-16
- Posts: 18,248

Re: Samba — Failed to mount Windows share: Permission denied.
Closing.
- Печать
Страницы: [1] Вниз

Тема: Не удается смонтировать windows share (Прочитано 1075 раз)
0 Пользователей и 1 Гость просматривают эту тему.
garett

Добрый день! Возможно, банальный вопрос, но пока не смог разобраться  В общем, есть сервер на Убунте, там крутится Postgre, дампы баз каждый день бросаю в папку /backup (по дням недели). Теперь нужно бросать не локально, а на сервер с бэкапами (он на базе Windows). Есть расшаренный ресурс, winbackup, права выданы только админу домена. Делаю так:
sudo mount -t cifs //backup.domain.ru/winbackup /mnt/winbackup/ -o username=administrator@domain.ru,password=PASS
Думает и выдает:
mount error(13): Permission denied
Refer to the mount.cifs( manual page (e.g. man mount.cifs)
Пароль точно правильный — несколько раз проверил. Заранее установил cifs-utils. Что тут не так? Заранее благодарен 
ALiEN175
ASUS P5K-C :: Intel Xeon E5450 @ 3.00GHz :: 8 GB DDR2 :: Radeon R7 260X :: XFCE
ACER 5750G :: Intel Core i5-2450M @ 2.50GHz :: 6 GB DDR3 :: GeForce GT 630M :: XFCE
garett
По smbtree вижу список машин домена:
DOMAIN
\WIN7
\MAIL
\DC
\DATA
\BACKUP
\1CSERVER
Вывод smbtree -d2:
И так далее по каждой из машин домена domain.ru. Что предпринять?
1.4. Листинги и содержимое текстовых файлов следует добавлять в сообщение с помощью тегов
или [code]…[/code], либо прикреплять к сообщению в виде отдельного файла.Показать скрытое содержание…
—toZen
« Последнее редактирование: 19 Января 2018, 10:56:03 от τοΖεη »
AnrDaemon
Для начала попробуйте
sudo smbtree -d2, чтобы мусора меньше было.
Хотите получить помощь? Потрудитесь представить запрошенную информацию в полном объёме.
Прежде чем [Отправить], нажми [Просмотр] и прочти собственное сообщение. Сам-то понял, что написал?…
garett
sudo smbtree -d2
1.4. Листинги и содержимое текстовых файлов следует добавлять в сообщение с помощью тегов
или [code]…[/code], либо прикреплять к сообщению в виде отдельного файла.Показать скрытое содержание…
Постарайтесь придерживаться Правил Форума пожалуйста.
—toZen
В общем-то, всё верно, и имена машин, и их IP-адреса. Но почему не удается смонтировать расшаренный каталог?
« Последнее редактирование: 19 Января 2018, 10:57:53 от τοΖεη »
AnrDaemon
Попробуйте просто username=administrator
А вообще смотрите настройки связывания, в каком формате там задаётся домен.
Хотите получить помощь? Потрудитесь представить запрошенную информацию в полном объёме.
Прежде чем [Отправить], нажми [Просмотр] и прочти собственное сообщение. Сам-то понял, что написал?…
garett
Действительно, помогло — если просто administrator указать Попутно еще уточнить хотел — имеет ли смысл дописывать iocharset=utf8,file_mode=0777,dir_mode=0777 ? В примерах часто указывают.
AnrDaemon
iocharset — да.
Моды — никогда не делайте таких ошибок.
Права должны управляться правами.
И всё таки смените пользователя на шаре.
Администратор домена должен использоваться только для одной цели — администрирования домена.
И единственное место, где допустимо хранить его пароль — в сейфе, в конвертике с надписью «вскрыть в случае моей смерти».
Хотите получить помощь? Потрудитесь представить запрошенную информацию в полном объёме.
Прежде чем [Отправить], нажми [Просмотр] и прочти собственное сообщение. Сам-то понял, что написал?…
garett
Извините за беспокойство — не удается все-таки в смонтированный раздел забэкапить базу:
postgres pg_dump buh_actual > /mnt/winbackup/Thursday/buh_actual.sql
-bash: /mnt/winbackup/Thursday/buh_actual.sql: Permission denied
Посмотрел ls -lh:
drwxr-xr-x 2 root root 0 jan 25 17:14 Thursday
А надо выдать postgres postgres, использую chmod, но не удается права на каталог сменить. Как быть? Дамп сбрасывается только в каталог с правами postgres’a.
« Последнее редактирование: 25 Января 2018, 17:40:11 от garett »
ALiEN175
какой-такой chmod на примонтированной шаре? 
в опциях монтирования добавьте
uid=postgres,gid=postgres
ASUS P5K-C :: Intel Xeon E5450 @ 3.00GHz :: 8 GB DDR2 :: Radeon R7 260X :: XFCE
ACER 5750G :: Intel Core i5-2450M @ 2.50GHz :: 6 GB DDR3 :: GeForce GT 630M :: XFCE
garett
Что-то не того… Перемонтировал, вот так выглядит mount:
//backup.domain.ru/winbackup on /mnt/winbackup type cifs (rw,relatime,vers=1.0,cache=strict,username=administrator,domain=DOMAIN,uid=111,forceuid,gid=118,forcegid,addr=192.168.10.55,file_mode=0755,dir_mode=0755,nounix,serverino,mapposix,rsize=61440,wsize=65536,echo_interval=60,actimeo=1)
По ls -lh видно, что:
total 0
drwxr-xr-x 2 postgres postgres 0 jan 25 17:14 winbackup
Но дамп базы все равно не проходит:
postgres pg_dump buh_actual > /mnt/winbackup/Friday/buh_actual.sql
-bash: /mnt/winbackup/Friday/buh_actual.sql: Permission denied
Соответственно, crontab тоже не может записать ничего в этот каталог. Что еще я упустил?
ALiEN175
garett,
1. на backup.domain.ru запись в папку разрешена?
2. точно права должны быть postgres:postgres? А не юзера, кто запускает команду?
C postgres не работал, понятия не имею что там и как. 
+ еще опций монтирования у вас как китайцев в китае. Правда все-все нужны?
ASUS P5K-C :: Intel Xeon E5450 @ 3.00GHz :: 8 GB DDR2 :: Radeon R7 260X :: XFCE
ACER 5750G :: Intel Core i5-2450M @ 2.50GHz :: 6 GB DDR3 :: GeForce GT 630M :: XFCE
AnrDaemon
Хотите получить помощь? Потрудитесь представить запрошенную информацию в полном объёме.
Прежде чем [Отправить], нажми [Просмотр] и прочти собственное сообщение. Сам-то понял, что написал?…
- Печать
Страницы: [1] Вверх