In Windows 11, you decide when and how to get the latest updates to keep your device running smoothly and securely. This article will help you answer questions and troubleshoot common problems with your Windows 11 update.
If you’re looking for info on how to activate Windows 11 or to verify that your installation of Windows 11 is activated, see
Activate Windows
.
Have issues installing Windows updates? Start here.
Your device may not be able to update to the latest version of Windows 11 for a few reasons. The following tips can help you pinpoint the issue affecting your device.
Before you begin, make sure your device is plugged into a power source and connected to the internet. Then, try the steps listed below to get your PC to update.
Some updates require administrator access. If your account doesn’t have administrator access, see
Create a local user or administrator account in Windows
. Or if someone else at home or in your office has an administrator account on your device, try asking them to install the updates.
Important:
-
Before trying any of the solutions below, make sure you back up your personal files. You can
use File History
to back up your files to another drive, or insert a USB drive and use File Explorer to drag and copy important files to the USB drive. If you’re signing into Windows with a Microsoft account, your system settings will be automatically restored after updating, once you’re connected to the internet. -
You can also back up your files with OneDrive. For more info, go to
Back up your Documents, Pictures, and Desktop folders with OneDrive
.
-
Learn more about Windows Update
Make sure that your device has enough space.
Your device requires at least 16 GB of free space to upgrade a 32-bit OS, or 20 GB for a 64-bit OS. If your device has a small hard drive, you may need to insert a USB drive to update it.
If your PC is running low on storage, try the techniques at
Free up drive space in Windows
.
Many updates require you to restart your device. Save your work and close all open applications. Then, select
Start
>
Power
, and select either
Update and restart
or
Update and shut down
.
Even if you have downloaded some updates, there may be more available. After trying the preceding steps, run Windows Update again by selecting
Start
>
Settings
>
Windows Update
>
Check for updates
. Download and install any new updates.
Check for updates in Settings
Remove any external storage devices and drives, docks, and other hardware plugged into your device that aren’t needed for basic functionality. Then try to run updates again and see if this resolved your issue. If it didn’t, continue to the next tip.
If you’ve added hardware to your device, check for third-party driver updates and installation instructions on the hardware manufacturer’s website. Update any drivers, then try to run updates again and see if this resolved your issue. If it didn’t, continue to the next tip.
-
In the search box on the taskbar, type
device manager
, then select
Device Manager
from the list of results. -
In the window that appears, look for any device with a yellow exclamation mark next to it. (You may have to select each category to view the list of devices.) Select the device name.
-
Select
Action
, and then choose either
Update driver
or
Uninstall
to correct the errors.
Common troubleshooting questions
The time required to download and install updates depends on connection speed, network settings, and the size of the update. If the installation remains stuck at the same percentage, try checking for updates again or running the
Windows Update Troubleshooter
.
To check for updates, select
Start
>
Settings
>
Windows Update
>
Check for updates
.
To get help, in the search box on the taskbar, type
get help
, then select
Get Help
from the list of results. To leave feedback if you run into further problems, in the search box on the taskbar, type
feedback hub
, then select
Feedback Hub
from the list of results.
You will only receive a notification when it’s time to restart your computer to apply the installed updates.
Monthly quality updates on Windows 11 are quite small and have a minimal impact on data usage. Feature updates typically happen twice per year, and you can control when to install them. They require more data but are less frequent.
If you’re on a metered connection, some updates for Windows won’t be installed automatically.
Metered connections in Windows
Your computer might be slow for a number of reasons, but updating to the latest version of Windows 11 can improve its performance. For help with a slow computer, see
Tips to improve PC performance in Windows
.
Advanced
Warning:
Microsoft only recommends trying the procedures in this section if you’re comfortable working in the command line. These procedures require administrator permissions on your device.
-
In the search box on the taskbar, type
command prompt
, then select
Run as administrator
from the list of options. Select
Yes
. Next, in the window that appears, type the following commands one at a time, including the spaces as shown. After you type each command, press
Enter
. Then let each command complete before you type the next command.
net stop bits
net stop wuauserv
ren %systemroot%softwaredistribution softwaredistribution.bak
ren %systemroot%system32catroot2 catroot2.bak
net start bits
net start wuauserv
-
After all these commands are completed, close the Command Prompt window and restart your computer.
In some instances, third-party antivirus or security software can cause errors when you try to update to the latest version of Windows 11. You can temporarily uninstall this software, update your PC, and then reinstall the software after your device is up to date. We recommend using third-party antivirus or security software that’s compatible with the latest version of Windows 11. You can check compatibility by visiting the software manufacturer’s website.
Note:
Before uninstalling software, make sure you know how to reinstall your programs and that you have any necessary product keys.
In the search box on the taskbar, type
command prompt,
and then select
Run as administrator
from the list of options. Select
Yes
. In the window that appears, type the following command, including the space as shown:
chkdsk/f C:
and then press
Enter
. Repairs will automatically start on your hard drive, and you’ll be asked to restart your device.
A clean restart starts Windows with a minimal set of drivers and startup programs. This helps eliminate software conflicts that occur when you install a program or an update that may cause issues updating your PC.
Learn how to do a clean restart
-
In the search box on the taskbar, type
command prompt
, then select
Run as administrator
from the list of options. -
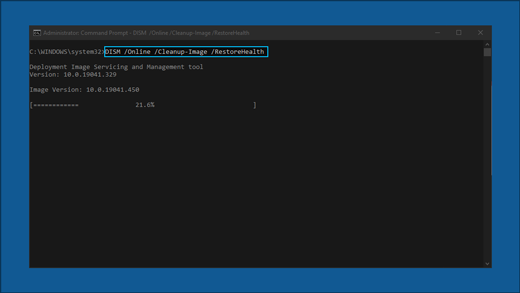
In the window that appears, type this command including spaces as shown:
DISM.exe /Online /Cleanup-image /Restorehealth
-
Press
Enter
. When the command operation has run successfully, you’ll see a confirmation message from Command Prompt that says, “The restore operation completed successfully” or “The operation completed successfully”.
Note: If you don’t see a confirmation message, retype the command and try again. -
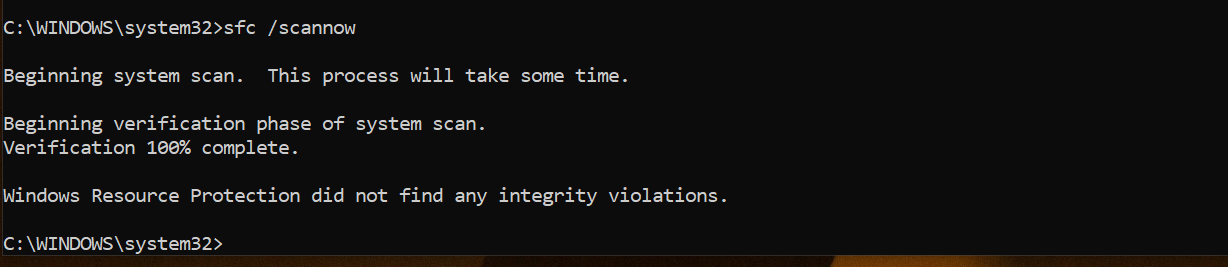
Next, type this command, including the space as shown:
sfc /scannow
-
Press
Enter
. Wait until the
sfc
scan verification reaches 100% completion, and then close Command Prompt. -
Try running the Windows Update again.
Learn how to repair a Windows image
Go to
the software download page
and select
Download tool now
to download the clean installation tool. Make sure to carefully read the notes on the software download page before using the tool.
In Windows 10, you decide when and how to get the latest updates to keep your device running smoothly and securely. This article will help you answer questions and troubleshoot common problems with your Windows 10 update.
If you’re looking for info on how to activate Windows 10 or to verify that your installation of Windows 10 is activated, see
Activate Windows
.
Have issues installing Windows updates? Start here.
Your device may not be able to update to the latest version of Windows 10 for a few reasons. The following tips can help you pinpoint the issue affecting your device.
Before you begin, make sure your device is plugged into a power source and connected to the internet. Then, try the steps listed below to get your PC to update.
Some updates require administrator access. If your account doesn’t have administrator access, see
Create a local user or administrator account in Windows
. Or if someone else at home or in your office has an administrator account on your device, try asking them to install the updates.
Important:
-
Before trying any of the solutions below, make sure you back up your personal files. You can
use File History
to back up your files to another drive, or insert a USB drive and use File Explorer to drag and copy important files to the USB drive. If you’re signing into Windows with a Microsoft account, your system settings will be automatically restored after updating, once you’re connected to the internet. -
You can also back up your files with OneDrive. For more info, go to
Back up your Documents, Pictures, and Desktop folders with OneDrive
.
-
Learn more about Windows Update
-
Serviced versions of Windows 10: Frequently asked questions
Make sure that your device has enough space.
Your device requires at least 16 GB of free space to upgrade a 32-bit OS, or 20 GB for a 64-bit OS. If your device has a small hard drive, you may need to insert a USB drive to update it.
If your PC is running low on storage, try the techniques at
Free up drive space in Windows
.
Many updates require you to restart your device. Save your work and close all open applications. Then, select
Start
>
Power
, and select either
Update and restart
or
Update and shut down
.
Even if you have downloaded some updates, there may be more available. After trying the preceding steps, run Windows Update again by selecting
Start
>
Settings
>
Update & Security
>
Windows Update
>
Check for updates
. Download and install any new updates.
Check for updates in Settings
Remove any external storage devices and drives, docks, and other hardware plugged into your device that aren’t needed for basic functionality. Then try to run updates again and see if this resolved your issue. If it didn’t, continue to the next tip.
If you’ve added hardware to your device, check for third-party driver updates and installation instructions on the hardware manufacturer’s website. Update any drivers, then try to run updates again and see if this resolved your issue. If it didn’t, continue to the next tip.
-
In the search box on the taskbar, type
device manager
, then select
Device Manager
from the list of results. -
In the window that appears, look for any device with a yellow exclamation mark next to it. (You may have to select each category to view the list of devices.) Select the device name.
-
Select
Action
, and then choose either
Update driver
or
Uninstall
to correct the errors.
Common troubleshooting questions
The time required to download and install updates depends on connection speed, network settings, and the size of the update. If the installation remains stuck at the same percentage, try checking for updates again or running the
Windows Update Troubleshooter
.
To check for updates, select
Start
>
Settings
>
Update & Security
>
Windows Update
>
Check for updates.
To get help, in the search box on the task bar, type
get help
, then select
Get Help
from the list of results. To leave feedback if you run into further problems, in the search box on the taskbar, type
feedback hub
, then select
Feedback Hub
from the list of results.
You will only receive a notification when it’s time to restart your computer to apply the installed updates.
Tips:
-
If you need to know where you left off in your work after an update, use Timeline to jump back in.
-
To get started with Timeline, select
Task View
on the taskbar, or press the Windows logo key
+Tab and select the activity you want to resume.
Monthly quality updates on Windows 10 are quite small and have a minimal impact on data usage. Feature updates typically happen twice per year, and you can control when to install them. They require more data but are less frequent.
If you’re on a metered connection, some updates for Windows won’t be installed automatically.
Metered connections in Windows
Your computer might be slow for a number of reasons, but updating to the latest version of Windows 10 can improve its performance. For help with a slow computer, see
Tips to improve PC performance in Windows
.
Advanced
Warning:
Microsoft only recommends trying the procedures in this section if you’re comfortable working in the command line. These procedures require administrator permissions on your device.
-
In the search box on the taskbar, type
command prompt
, then select
Run as administrator
from the list of options. Select
Yes
. Next, in the window that appears, type the following commands one at a time, including the spaces as shown. After you type each command, press
Enter
. Then let each command complete before you type the next command.
net stop bits
net stop wuauserv
ren %systemroot%softwaredistribution softwaredistribution.bak
ren %systemroot%system32catroot2 catroot2.bak
net start bits
net start wuauserv
-
After all these commands are completed, close the Command Prompt window and restart your computer.
In some instances, third-party antivirus or security software can cause errors when you try to update to the latest version of Windows 10. You can temporarily uninstall this software, update your PC, and then reinstall the software after your device is up to date. We recommend using third-party antivirus or security software that’s compatible with the latest version of Windows 10. You can check compatibility by visiting the software manufacturer’s website.
Note:
Before uninstalling software, make sure you know how to reinstall your programs and that you have any necessary product keys.
In the search box on the taskbar, type
command prompt,
and then select
Run as administrator
from the list of options. Select
Yes
.
In the window that appears, type the following command, including the space as shown:
chkdsk/f C:
and then press
Enter
. Repairs will automatically start on your hard drive, and you’ll be asked to restart your device.
A clean restart starts Windows with a minimal set of drivers and startup programs. This helps eliminate software conflicts that occur when you install a program or an update that may cause issues updating your PC.
Learn how to do a clean restart
-
In the search box on the taskbar, type
command prompt
, then select
Run as administrator
from the list of options. -
In the window that appears, type this command including spaces as shown:
DISM.exe /Online /Cleanup-image /Restorehealth
-
Press
Enter
. When the command operation has run successfully, you’ll see a confirmation message from Command Prompt that says, “The restore operation completed successfully” or “The operation completed successfully”.
Note: If you don’t see a confirmation message, retype the command and try again. -
Next, type this command, including the space as shown:
sfc /scannow
-
Press
Enter
. Wait until the
sfc
scan verification reaches 100% completion, and then close Command Prompt. -
Try running the Windows Update again.
Learn how to repair a Windows image
Go to
the software download page
and select
Download tool now
to download the clean installation tool. Make sure to carefully read the notes on the software download page before using the tool.
Still stuck?
Contact
Microsoft support
if you continue to have problems with your Windows updates.
Need more help?
Windows update failed errors are frustrating for anyone who uses Windows. Whenever you experience Windows update failing repeatedly and see a blue screen with a message indicating problems updating Windows, this article will help guide you through fixing Windows update errors.
Why Windows Updates Fail?
The Windows 10 update failure to install is not uncommon but what causes win 10 update errors? There are several reasons why Windows updates keep failing:
Corrupt Update Files. In this case, try deleting the flawed file and see if that resolves the issue.
Overload in Update Queue. Perhaps, Windows require several updates at a time. Try rebooting the machine to troubleshoot the issue.
Limited Space on Your Drive. The lack of free space on your drive can be a reason why Windows update keeps failing. See if you can free up some space on your drives and try running the Windows update once again.
Conflict with Drives or Hardware. Try disconnecting any connected devices such as drives, USB, or printers that may be causing Windows updates to fail every time.
t
It automatically installs crucial drivers and updates whenever they are available. To keep Windows endpoints up to date, the best practice is to automatically install Windows updates.
How to Fix Update Error
When you wonder how you can install Windows update that keeps failing, there are certain steps you should try to finally update OS on your computer. Give a go the steps described below in the following order until your Windows update error is fixed.
1. Restart the Computer and Run Windows Update Again
Most updates run smoothly, but from time to time, several updates might queue and try to run at the same time, causing Windows update failure. For instance, a servicing stack update has to install first, and then you have to reboot the machine before running the next update installation.
2. Check for Driver or Hardware Conflict
As mentioned earlier, the connected peripheral devices may cause conflicts and be the reason why Windows is unable to update. Disconnect all printers, USBs, webcams, reboot your machine, and then try to run Windows update again.
3. Vacate Space on Your Drive
It is possible that your drive simply lacks free storage space to install the update. See if you can make space by decluttering or using an exernal drive, reboot the machine, and give a Windows update another go.
4. Try the Windows Update Troubleshooter Tool
Windows 10 comes with a designated tool to assist in troubleshooting Microsoft updates issues. Access it easily by simply typing troubleshoot in the taskbar search field. Go to the settings and click Windows Update, then Run the Troubleshooter. Then follow the prompts with instructions.
5. Stop Updates
Step 1 — Go to Settings
Step 2 — Click Update & Security
Step 3 — Click Windows Update
Step 4 — Click Advanced Options button
Step 5 — Switch the Pause Updates toggle off
Step 6 — Restart your computer
Step 7 — Rerun Windows Update
6. Erase Software Distribution Log
Step 1 — Restart computer in safe mode
Step 2 — Open File Explorer, and navigate to C:Windows
Step 3 — Locate and delete the Software Distribution folder
Step 4 — Restart your computer, and run Windows Update
7. Download the Latest Feature Update from Microsoft
When Windows Update keeps failing, you should consider visiting the Microsoft site to download the update file. Once you have downloaded the update, run it manually.
8. Run the System File Checker (SFC) Scan
The System File Checker is a default tool in Windows 10. Also known as “SFC scan,” it’s your fastest method to fix corrupted system files and other problems. Run it to attempt to fix any potential issues with Windows installation.
9. Restore Windows 10 from a Backup
If you are not successful at fixing failed Windows updates, we suggest that you check for a Restore Point on your system. Use it to restore the device to a state when the Windows Update was installed correctly. You can then update the OS to the latest version from that point.
Why Installing Windows Updates?
Microsoft regularly rolls out updates that include bug fixes, feature upgrades, and security patches to improve Windows operating systems usability and security.
Operating system updates patches protect from newly uncovered security vulnerabilities that hackers can exploit. Essentially, by delaying updating your system, you increase the risks of vulnerability exploitation.
Can I Skip Windows Update?
As a standard directive, it is advised to consistently install Windows updates once they become available. However, there are certain exceptions. If you happen to have a problematic update, then you might want to pick between bypassing the update and performing an installation of Windows 10 from scratch.
Consider Action1 RMM for Remote Update Deployment
Give Action1 RMM a try if you need to install Windows updates to remote endpoints. Action1 remote monitoring and management solution is developed to simplify and automate distributions of patches and updates and boost IT management efficiency. Action1 RMM is free to use on up to 100 endpoints and is easy to onboard in minutes.
Windows 10 is one of the latest operating systems released with millions of users over the globe. However, despite its popularity, there are plenty of issues that you can run into on a daily basis when using the system. One of these errors is the Windows Update feature failing over and over, making you unable to update Windows 10
There are many possible causes of errors like this. If you’re dealing with the Windows Update keeps failing on Windows 10, our article is the perfect place to start troubleshooting.

Keeping your operating system up to date is extremely important. Microsoft rolls out new updates for Windows 10 to fix issues, roll out new features, or further optimize performance. These updates can patch up crucial security holes and reduce the risk of exploits, or make your computer run better and smoother.
Many users run into error messages related to the Windows Update failing. These include error pop-ups such as “Windows Update failed to install” or “Install failed.” Some reports say there is no error message, but the update process is stuck and doesn’t proceed even after a long time.
What causes the Windows Update failing error?
When it comes to issues such as the Windows Update failing over and over, many possible things can produce the error. We compiled a list of the most common causes based on user reports.
- Corrupt or missing system files. System files are crucial to make sure everything works on your device. There’s a possibility that your system files were corrupted or deleted recently, which causes Windows Update to fail.
- Outdated drivers. Drivers are needed to handle components that don’t natively come with Windows 10 compatibility such as graphic cards, network cards, and so on. If a driver related to this issue hasn’t been updated in a while, it can cause issues with Windows Update.
- An issue with the Windows Update service. There’s a possibility that something is wrong with your update service itself. If this is the case, you can find alternative ways to download the latest Windows 10 update below.
Keep in mind — the list above doesn’t contain all possible causes. You might be experiencing the error due to a unique issue on your computer. However, our methods below will surely help you fix this error with ease, no matter what caused it in the first place.
If you can’t update Windows 10 because of update errors, don’t panic. Such errors can be easily fixed by following our detailed guides below.
Note: You will be required to use an administrator account to be able to perform all of the steps described below. Don’t have access to an administrator account? Watch GlobalIT Resolution’s video titled “How to Create a New Administrator User Account in Windows 10.”
Methods to fix Windows Update failing errors
- Run the Windows Update Troubleshooter tool
- Restart Windows Update related services
- Run the System File Checker (SFC) scan
- Execute the DISM command
- Temporarily disable your antivirus
- Restore Windows 10 from a backup
Method 1: Run the Windows Update Troubleshooter tool
Microsoft themselves have issued a designated tool to help fix issues with Windows 10’s updates. This tool is free and available for download to anyone, even without a Microsoft Account. All you have to do is simply run the tool and see if it’s able to identify and fix any errors.
- Download the Windows Update Troubleshooter. This download link is directly from Microsoft’s website, which is verified as trustworthy and entirely safe.
- Open the WindowsUpdate.diagcab file you just downloaded by double-clicking on it. This will launch the troubleshooter window.
- Follow the on-screen instructions. If the troubleshooter is able to identify any issues, simply click on them to automatically apply a fix or get more information on your issue.
Note that the Windows Update Troubleshooter is not perfect. Even if it’s unable to find any errors on its own, you should continue with our methods until you find something that works to fix the Windows Update failing error.
Method 2: Restore Windows Update related services
If a service related to Windows Update is experiencing issues, has been turned off, or is set to incorrect settings, it’s possible that it’s the cause of your errors. Luckily, you can simply fix this by executing some commands which reset your services that work with delivering updates.
- Press the Windows + R keys on your keyboard to launch the Run utility. Type in “cmd” and press Ctrl + Shift + Enter. This is going to launch the Command Prompt with administrative permissions.
- If prompted, make sure to allow the Command Prompt to make changes on your device. This means that you might need to log into an administrator account.
- Next, you need to stop the services related to downloading and installing Windows Update files. Within the Command Prompt, enter the following lines, pressing the Enter key in-between each new line:
- net stop bits
- net stop wuauserv
- net stop appidsvc
- net stop cryptsvc
4. After stopping the services, input the following two commands, pressing the Enter key after each line:
- Ren %systemroot%SoftwareDistribution SoftwareDistribution.old
- Ren %systemroot%system32catroot2 catroot2.old
5. Lastly, restart Windows Update related services using the following commands. Again, press Enter after each new line to execute the command:
- net start bits
- net start wuauserv
- net start appidsvc
- net start cryptsvc
6. Close the Command Prompt and check if your Windows Update has been fixed after executing these commands.
Method 3: Run the System File Checker (SFC) scan

The System File Checker is a tool available in Windows 10 by default. It’s also called an “SFC scan,” and it’s your quickest way to automatically fix corrupted system files and other issues.
Some users have reported that running this scan fixed their issues with Windows Update failing, getting stuck, or not starting.
- Press the Windows + R keys on your keyboard. This is going to bring up the Run utility.
- Type in “cmd” and press the Ctrl + Shift + Enter keys on your keyboard. Doing so, you’re launching the Command Prompt with administrative permissions.
- If prompted, click Yes to allow the Command Prompt to make changes on your device.
- Once in the Command Prompt, type in the following command and press Enter to execute it: sfc /scannow
- Wait for the SFC scan to finish scanning your computer and repairing corrupt files. This may take a long time; ensure that you don’t close the Command Prompt or shut your computer down.
- Restart your device after the scan is complete. Check if you’re able to update Windows 10 after the restart has finished.
Method 4: Execute the DISM command
The DISM tool allows you to identify and fix issues with your system by simply running commands. It checks for corruption on your system and automatically applies fixes to restore damaged or missing files.
You can use this tool to repair Windows Update and finally get the latest version of Windows 10.
- Press the Windows + R keys on your keyboard. This is going to bring up the Run utility.
- Type in “cmd” and press the Ctrl + Shift + Enter keys on your keyboard. Doing so, you’re launching the Command Prompt with administrative permissions.
- If prompted, click Yes to allow the Command Prompt to make changes on your device.
- Once in the Command Prompt, you need to start the DISM scan which will run and look for issues system-wide. Type in the following command and press Enter to execute it: DISM.exe /Online /Cleanup-image /Scanhealth
- Next, you need to execute a command to fix any issues found on your system. Simply type in the following line and press Enter again: DISM.exe /Online /Cleanup-image /Restorehealth
- Wait for the process to finish. Upon completion, close the Command Prompt window and restart your device. Check if the Windows Update error still comes up now.
Method 5: Temporarily disable your antivirus
Antivirus applications are known to cause issues with Windows 10’s network and internet connections. This means they might interfere with your download process when attempting to update the system.
You can easily test whether or not your antivirus software is interfering with connections by temporarily disabling it.
Note: Make sure you turn on Windows Defender while operating your system without a third-party antivirus. It’s Windows 10’s integrated security solution that doesn’t cause issues and provides basic protection against most threats.
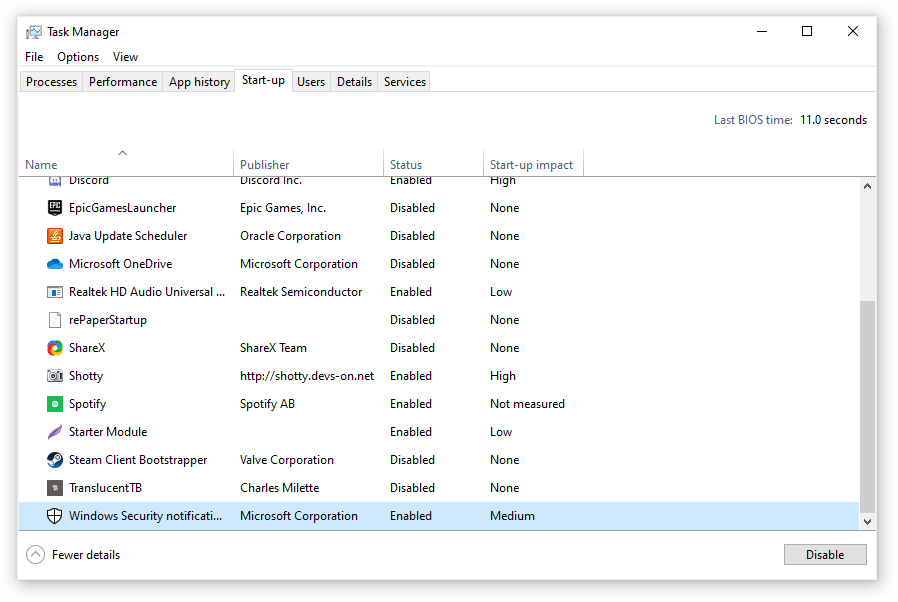
- Right-click on an empty space in your taskbar and choose Task Manager.
- If the Task Manager launched in compact mode, make sure to expand details by clicking on the “More Details” button.
- Switch to the Start-up tab using the header menu located at the top of the window.
- Find your antivirus application from the list and select it by clicking on it once.
- Click on the Disable button now visible in the bottom-right of the window. This will disable the application from launching when you start your device.
- Restart your computer and see if Windows Update works after disabling your antivirus. If it does, you may need to customize the application to stop interfering with Windows Update in the future.
Method 6: Restore Windows 10 from a backup
If all else fails, we recommend checking for a Restore Point on your system. Utilize this to restore your computer to a state when Windows Updates were able to download and install properly, then update to the latest version from this state.
- Press the Windows + S keys on your keyboard to bring up the search bar.
- Type in the word “restore” and open “Create a restore point” from the results. This is going to open a System Properties window.
- In the “System Protection” tab, click on the button that displays “System Restore.” Doing so will open up another new dialog window.
- Follow the on-screen instructions to find a previous restore point stored on your device. You can simply restore it and attempt to update your system once again.
We hope that this guide was able to help you troubleshoot the “Windows Update keeps failing” error on your Windows 10 system.
If you notice in the future that your system is experiencing similar issues, feel free to return to our article and apply some other fixes. If nothing works, we recommend turning to either Microsoft’s customer support team or looking for an IT specialist in regards to your PC’s health.
Are you interested in learning more about Windows 10? Do you need help fixing any other Windows 10 errors and issues? You can browse our dedicated Help Center section and find articles about everything related to Microsoft’s groundbreaking operating system. Click here to proceed.
 Windows 7 по-прежнему остается популярной операционной системой в корпоративной среде, несмотря на то, что уже вышли две новые версии клиентских ОС. Расширенная поддержка «семёрки» закончится лишь 14 января 2020 г., а это значит, что ближайшие 4 года для нее будут выходить обновления, исправляющие обнаруженные уязвимости.
Существует правило – если есть обновления, то есть и проблемы с их установкой. Давайте разберем, какие основные проблемы возникают при обновлении Windows 7 через Windows Server Update Services (WSUS) и как их исправить с наименьшими затратами.
Ошибка #1. Failed to find updates with error code 80244010
Эту ошибку вы практически гарантированно будете наблюдать на любой системе, впервые обратившейся к серверу WSUS. В WindowsUpdate.log также встретится предупреждение:
WARNING: Exceeded max server round trips
Причина проблемы в том, что список обновлений стал слишком большим, и клиент не может принять его за один заход. Подробности — blogs.technet.microsoft.com/sus/2008/09/18/wsus-clients-fail-with-warning-syncserverupdatesinternal-failed-0x80244010
Какое решение предлагает Microsoft? Если после ошибки запустить повторный поиск обновлений, то процесс загрузки метаданных продолжится с момента возникновения ошибки. Терпение господа, терпение. Три, пять попыток wuauclt /detectnow – и все образуется. Не забудьте при повторном поиске дождаться окончания предыдущего цикла поиска, иначе магия не сработает!
Ошибка #2. Не устанавливаются обновления Windows с ошибкой 0x80070308
Встречается эпизодически, и в одном случае из 100 у нее есть единственное и очень специфическое решение — удалить ключ
HKLMComponentsPendingRequired=1
Перезагрузиться. Здесь важно не переусердствовать, не следует удалять никакие другие ключи в этом разделе, даже если они вам очень не нравятся, потому что после этого обновления прекратят ставиться навсегда.
Ошибка #3. Все другие ошибки
Практически 100% других ошибок может решить System Update Readiness Tool (SURT) из статьи support.microsoft.com/en-us/kb/947821
Скачиваете пакет для вашей системы, устанавливаете, читаете лог %windir%LogsCBSCheckSUR.log и если он заканчивается примерно так:
Summary:
Seconds executed: 1164
Found 16 errors
Fixed 4 errors
то вы наш клиент.
Проблема заключается в том, что во время установки обновлений в системе могут появиться битые файлы. Что является причиной — неисправная сеть, диск, оперативная память, сам Windows Update – выяснить не получится, а исправить ошибки для установки последующих обновлений придется.
Как правило, повреждаются *.cat, *.mum, *.manifest файлы. У кого-то повреждаются *.dll, но я на практике не сталкивался. И вроде бы средство SURT должно само исправить ошибки, поскольку внутри него есть огромный каталог эталонных файлов. Только в последний раз SURT обновлялся в октябре 2014 года, а исправлений на операционную систему с тех пор вышло бесчисленное множество, и многих файлов в каталоге не хватает.
Ниже я опишу последовательность действий, необходимых для исправления ошибок установки обновлений на Windows 7 x64 с использованием SURT. Для редакции x86 просто потребуется другой пакет SURT из KB947821.
Последовательность действий будет следующая.
1. Запустить первый проход Windows6.1-KB947821-v34-x64.msu
Пользователя от работы отвлекать не потребуется, все сделаем удаленно. Создаем следующий командный файл и запускаем его:
set machine=BUHWKS02
xcopy Windows6.1-KB947821-v34-x64.msu \%machine%admin$temp
psexec -s \%machine% wusa "c:windowstempWindows6.1-KB947821-v34-x64.msu" /quiet /norestart
pause
где BUHWKS02 – целевая машина.
Когда скрипт отработает и встанет на паузу, проверяем %windir%LogsCBSCheckSUR.log
Если ошибок не найдено – дело не в битых обновлениях.
Если он заканчивается
Summary:
Seconds executed: 1164
Found 16 errors
Fixed 4 errors
CSI Manifest All Zeros Total count: 6
CSI Catalog Corrupt Total count: 3
Fixed: CSI Catalog Corrupt. Total count: 3
CBS MUM Corrupt Total count: 3
CBS Catalog Corrupt Total count: 3
CSI Catalog Thumbprint Invalid Total count: 1
Fixed: CSI Catalog Thumbprint Invalid. Total count: 1
Unavailable repair files:
winsxsmanifestswow64_microsoft-windows-gdi32_31bf3856ad364e35_6.1.7601.19091_none_c19fa2719495aca9.manifest
winsxsmanifestsamd64_microsoft-windows-capi2-weakcrypto_31bf3856ad364e35_6.1.7601.23290_none_5e936c9c5ce2e8e6.manifest
winsxsmanifestswow64_microsoft-windows-gdi32_31bf3856ad364e35_6.1.7601.23290_none_c22840d8adb43043.manifest
winsxsmanifestsamd64_microsoft-windows-gdi32_31bf3856ad364e35_6.1.7601.19091_none_b74af81f6034eaae.manifest
winsxsmanifestsamd64_microsoft-windows-capi2-weakcrypto_31bf3856ad364e35_6.1.7601.19091_none_5e0ace3543c4654c.manifest
winsxsmanifestsamd64_microsoft-windows-gdi32_31bf3856ad364e35_6.1.7601.23290_none_b7d3968679536e48.manifest
servicingpackagesPackage_2_for_KB3123479~31bf3856ad364e35~amd64~~6.1.1.0.mum
servicingpackagesPackage_2_for_KB3123479~31bf3856ad364e35~amd64~~6.1.1.0.mum
servicingpackagesPackage_for_KB3123479_SP1~31bf3856ad364e35~amd64~~6.1.1.0.mum
то будем исправлять.
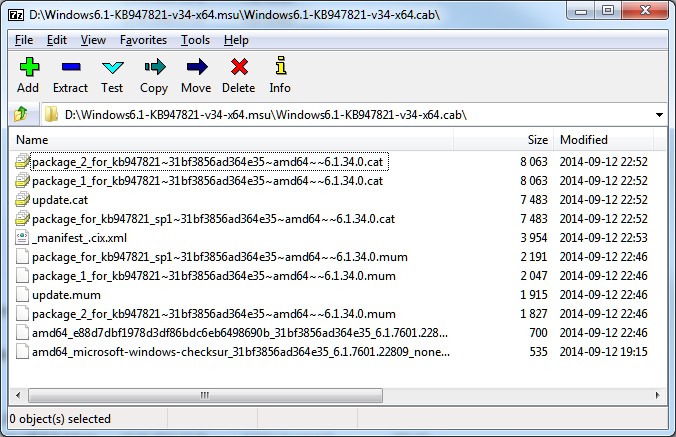
2. Копируем эталонные файлы на целевую машину
Microsoft предлагает нам длинную, путанную процедуру с извлечением хороших файлов из обновлений и размещением их в определенные каталоги средства SURT. При этом пути в статьях неверные. Где-то и вовсе рекомендуют подкладывать оригинальные msu файлы.
Самый простой и правильный вариант следующий — скопировать эталонные файлы с рабочей системы:
*.mum and *.cat из C:WindowsservicingPackages складываются в %windir%TempCheckSURservicingpackages
*.manifest из C:WindowswinsxsManifests складываются в %windir%TempCheckSURwinsxsmanifests
Проблема в том, что битых файлов обычно десятки, и их очень сложно выбрать и скопировать. Тогда на помощь приходит следующий скрипт PowerShell (эталонной считается машина, с которой вы запускаете скрипт)
cls
$flag = $false
$destPC = "\BUHWKS02"
$log=get-content $($destPC + "admin$LogsCBSCheckSUR.log")
$MUMCATSource = "C:WindowsservicingPackages"
$MUMCATDest = $destpc + "admin$TempCheckSURservicingPackages"
$MANIFESTSource = "C:WindowswinsxsManifests"
$MANIFESTDest = $destpc + "admin$TempCheckSURwinsxsManifests"
If ((Test-Path -Path $MUMCATDest -PathType Container) -eq $false) {New-Item -Path $MUMCATDest -ItemType directory }
If ((Test-Path -Path $MANIFESTDest -PathType Container) -eq $false) {New-Item -Path $MANIFESTDest -ItemType directory}
foreach ($line in $log) {
    if ($flag -eq $True){
        if ($line.trim().Length -ne 0) {
            $fileArray=$($line.Split(""))
            $file = $FileArray[$FileArray.Length-1]
            $extArray = $file.split(".")
            $ext = $extArray[$extArray.length-1]
            if ($ext -eq "manifest") {
                Write-Warning $("Copying " + $($MANIFESTSource+$file)+" to " + $MANIFESTDest)
                Copy-Item $($MANIFESTSource+$file) $($MANIFESTDest+$file)
            }
            if (($ext -eq "mum") -or ($ext -eq "cat") ) {
                Write-Warning $("Copying " + $($MUMCATSource+$file)+" to " + $MUMCATDest)
                Copy-Item $($MUMCATSource+$file) $($MUMCATDest+$file)
            }
        }
    }
    if ($line -eq "Unavailable repair files:") {$flag = $true}
}
Как видите, скрипт прост и может быть легко заточен напильником под вашу инфраструктуру.
3. Запускаем второй проход Windows6.1-KB947821-v34-x64.msu
После копирования файлов мы повторно запускаем SURT, используя командный файл из первого шага. При повторном запуске средство сможет подхватить скопированные нами эталонные файлы из %windir%TempCheckSUR и заменить ими испорченные.
Если мы сделали все правильно, то %windir%LogsCBSCheckSUR.log примет следующий вид:
=================================
Checking System Update Readiness.
Binary Version 6.1.7601.22471
Package Version 26.0
2016-03-03 09:15
Checking Windows Servicing Packages
Checking Package Manifests and Catalogs
Checking Package Watchlist
Checking Component Watchlist
Checking Packages
Checking Component Store
Summary:
Seconds executed: 1435
No errors detected
Теперь можно продолжить установку обновлений на целевую машину, например, следующими командными файлами:
set machine= BUHWKS02

psexec -i -s \%machine% wuauclt /detectnow

pause
set machine= BUHWKS02
psexec -i -s \%machine% wuauclt /updatenow
pause
Ошибка #4. Если SURT отработал нормально, а обновления все равно не ставятся
Попробуйте прибегнуть к старому приему – сбросить службу Windows Update в исходное состояние. Для этого необходимо удалить каталог %windir%SoftwareDistribution.
Создаем файл WU-cleanupCMD.cmd:
net stop wuauserv

rmdir /s /q %windir%SoftwareDistribution

net start wuauserv

wuauclt /detectnow
Запускаем:
set machine= BUHWKS02

psexec -c -s \%machine% WU-cleanupCMD.cmd

pause
После этого возникнет Ошибка #1, но как бороться с ней мы уже знаем.
Ошибка #5
Клиент исчезает из консоли WSUS. Любопытная ошибка, связанная с неправильным клонированием машин и задвоением (затроением и т.д.) идентификаторов клиентов. Решается так:
net stop wuauserv
REG DELETE "HKLMSOFTWAREMicrosoftWindowsCurrentVersionWindowsUpdate" /v SusClientId /f
REG DELETE "HKLMSOFTWAREMicrosoftWindowsCurrentVersionWindowsUpdate" /v SusClientIdValidation /f
net start wuauserv
wuauclt /resetauthorization /detectnow /reportnow
Ошибка #6
GetCookie failure, error = 0x8024400D, soap client error = 7, soap error code = 300, HTTP status code = 200
SyncUpdates failure, error = 0x80072EE2, soap client error = 5, soap error code = 0, HTTP status code = 200
Windows Update Client failed to detect with error 0x80072ee2
Ошибка связана с нехваткой ресурсов в AppPool WSUS. Решение — снять лимит на потребляемую память. Как это сделать — статья.
Коротко: Открываем IIS, Application Pools, WsusPool, Advanced Settings.
Параметр Private Memory Limit устанавливаем в 0.
Продолжение темы настройки WSUS — в моей следующей статье: https://habrahabr.ru/post/329440/
PS:
Многие ошибки решены в новом клиенте WSUS:
1. KB3125574 «Windows 7 post SP1 Convenience Rollup Update». Внимательно ознакомьтесь с разделом Known issues!
Предварительно необходимо установить KB3020369 «April 2015 servicing stack update for Windows 7 and Windows Server 2008 R2».
Удачного администрирования!
Windows 10 is a live service, which means it’s not finished. There are regular updates, both core and feature, that improve your Windows experience. In a perfect world, these updates would be flawless. From critical functions to useful features, everything would work as expected.
But, as with everything, there are some big kinks to them. As a result, updates on Windows fail quite often. That said, Windows updates don’t often fail for random reasons. The following are common reasons why updates on Windows fail.
1. Low Storage

If you’ve ever seen Windows warn you that “the storage is running low, some system functions may not work,” you should take it seriously. Several of Windows’ critical system functions either stop or partially run when there is not much storage to work with.
Updating Windows is one of the functions that can stop when your PC is low on storage space.
When there is an update available, Windows needs some free storage to download the update files. These are the files that Windows installs when you restart your PC and run the updater. If there is not enough storage space, Windows can’t download all critical files leading to a failed installation.
Therefore, before you update your PC’s OS, make sure there is enough room on board.
2. Multiple Updates in the Queue
Microsoft updates Windows quite frequently. As a result, the operating system continuously improves with each new update. From the core functions to individual features, the monthly updates deliver new features and fix issues that the community reports.
Essentially, there are two types of updates: one that addresses core system components and the other that addresses features built on top of these core components.
When you have multiple updates lined up, you first need to install the ones that are meant to polish critical system components. For instance, if you have a Servicing Stack Update available and you don’t install it, chances are quite high that all the following updates will fail.
Servicing Stack Updates are meant to fix issues with Windows Updates Service. These updates ensure that everything is in order before Microsoft can push important feature updates.
In other words, the tools and processes that manage updates on Windows need servicing and bug fixes. Otherwise, they can “prevent patching some other part of the OS with the monthly latest cumulative update (LCU),” according to Microsoft’s John Wilcox.
In short, because Windows is a component-based OS, different components require maintenance. So, the component that manages updates also requires servicing from time to time. So, update regularly and you won’t have to worry about botched updates in the future.
3. Driver Conflicts
The main function of an operating system is to manage the different hardware devices connected to the computer. An OS does this through drivers that come packed with every hardware device that you connect to your PC.
Although drivers are necessary, they can cause conflicts. For instance, drivers for your GPU might not be playing nice with your RAM. The results of such issues can range from general system instability and failed updates to critical system failure.
Long story short, updates can fail if there are bad drivers. You can get rid of bad drivers by updating the driver to the latest version or rolling back the driver to a more stable version.
4. Corrupt System Files
Windows has a lot of system files that are necessary for the OS to work. Any corruption among these files can have major consequences for the entire operating system. This includes failed updates.
Therefore, any time an update fails, you should run a System File Checker (SFC) scan.
A System File Checker scan checks the core system files for possible corruption and attempts to fix it.
In Windows 10, before running an SFC scan, it is always better to run a Deployment Image Servicing Scan (DISM) first. The DISM scan tries to pinpoint the issues with Windows’ component store. The component store keeps all Windows components for rolling back a change or repairing a corrupt file in Windows.
An SFC scan can’t repair files if the component store is itself corrupt. DISM resolves this corruption, so the SFC scan can do its job. You can run both of these scans from a CMD window with administrative privileges. Once you have run these scans, try updating again.
5. Windows Update Service Misbehaving
If not the biggest, one of the biggest causes of failed Windows updates is the underlying Windows Update Service.
The Windows Updates Service is responsible for automatically checking, downloading, and installing updates. If the update service is not running, it can cause updates to stall or even fail.
And this does happen. Whenever the Windows Updates Service is not running, the OS displays the message “Windows Update cannot currently check for updates, because the service is not running.” Unfortunately, this also means that the system will not download and install any updates.
To get the updates back on track when the update service itself is misbehaving, you have to restart the service. Restarting the service requires you to stop and start the service manually or by booting into safe mode. Booting into safe mode is the safer and quicker option. Once into safe mode, delete the update cache and restart your computer.
There Are Solid Reasons Why Windows Updates Fail
Windows updates are critical to the overall health of the operating system. Not only does the update fix bugs and improve the security, but they also introduce new features.
As we discussed, among the many reasons why updates on Windows fail, some of the common ones include low storage, multiple updates in the queue, driver conflicts, and corrupt system files.
Furthermore, the underlying Windows Update Service can also fail, leading to failed automatic updates. So, keep everything updated including the hardware drivers, and make sure that you have plenty of free storage.
Windows won’t update issue has been a common issue for many computer users. But to solve Windows 10 update problems has been a tough task. However, this article will introduce 7 solutions to the Windows 10 won’t update issue.
Why Windows 10 Won’t Update
Windows update is necessary for many computer users because updating new operating system can perfect the old one and overcome some bugs so as to protect computers and data safely. But some users complain that they have encountered Windows 10 won’t update issue.
Here we list some situations that may lead to Windows update failed.
- Windows 10 won’t download updates.
- Windows 10 update failed to install.
- Windows 10 update stuck.
- Windows 10 won’t update on restart.
- Windows 10 won’t update because of BIOS.
We just list some factors may lead to Windows 10 update failed. It is obvious that other reasons also can lead to Windows 10 upgrade errors. But no matter what causes lead to Windows 10 not updating problem, you can try to use the following 7 methods to have a try.
If you encounter the issue Windows 10 won’t update, you can try these solutions one by one.
Quick Video Guide:
Remove Third-party Security Software
First of all, a piece of third-party security software can protect your computer against virus attack or other security threats, but it also may lead to some application abnormal running.
Thus, if you have installed a piece of third-party security software, you can remove it temporarily and then run Windows Update again. Then we will talk about how to uninstall third-party software simply.
Step 1: Right-click Start menu, then choose Control Panel.
Step 2: Click Programs and Features, and choose the third-party software needing to be uninstalled, then right-click it and choose Uninstall to continue. After that, you can restart your computer and try to check whether Windows 10 won’t update issue is solved.
Check Windows Update Utility Manually
Windows Update is a Microsoft service for the Windows operating system, which automates downloading and installing software updates over the Internet. The service delivers software updates for Windows, as well as the various Microsoft antivirus products, including Windows Defender and Microsoft Security Essentials.
If Windows 10 won’t update, you can try to check whether the Windows Update Utility is working. Then we will introduce how to check Windows Update Utility.
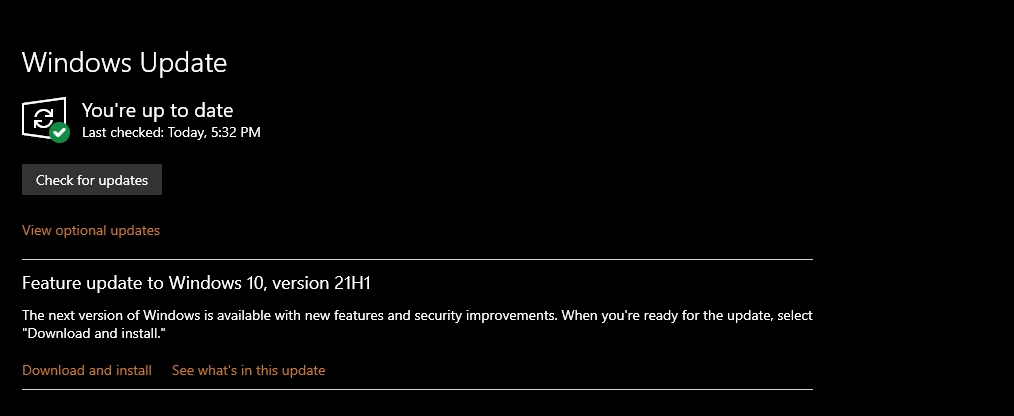
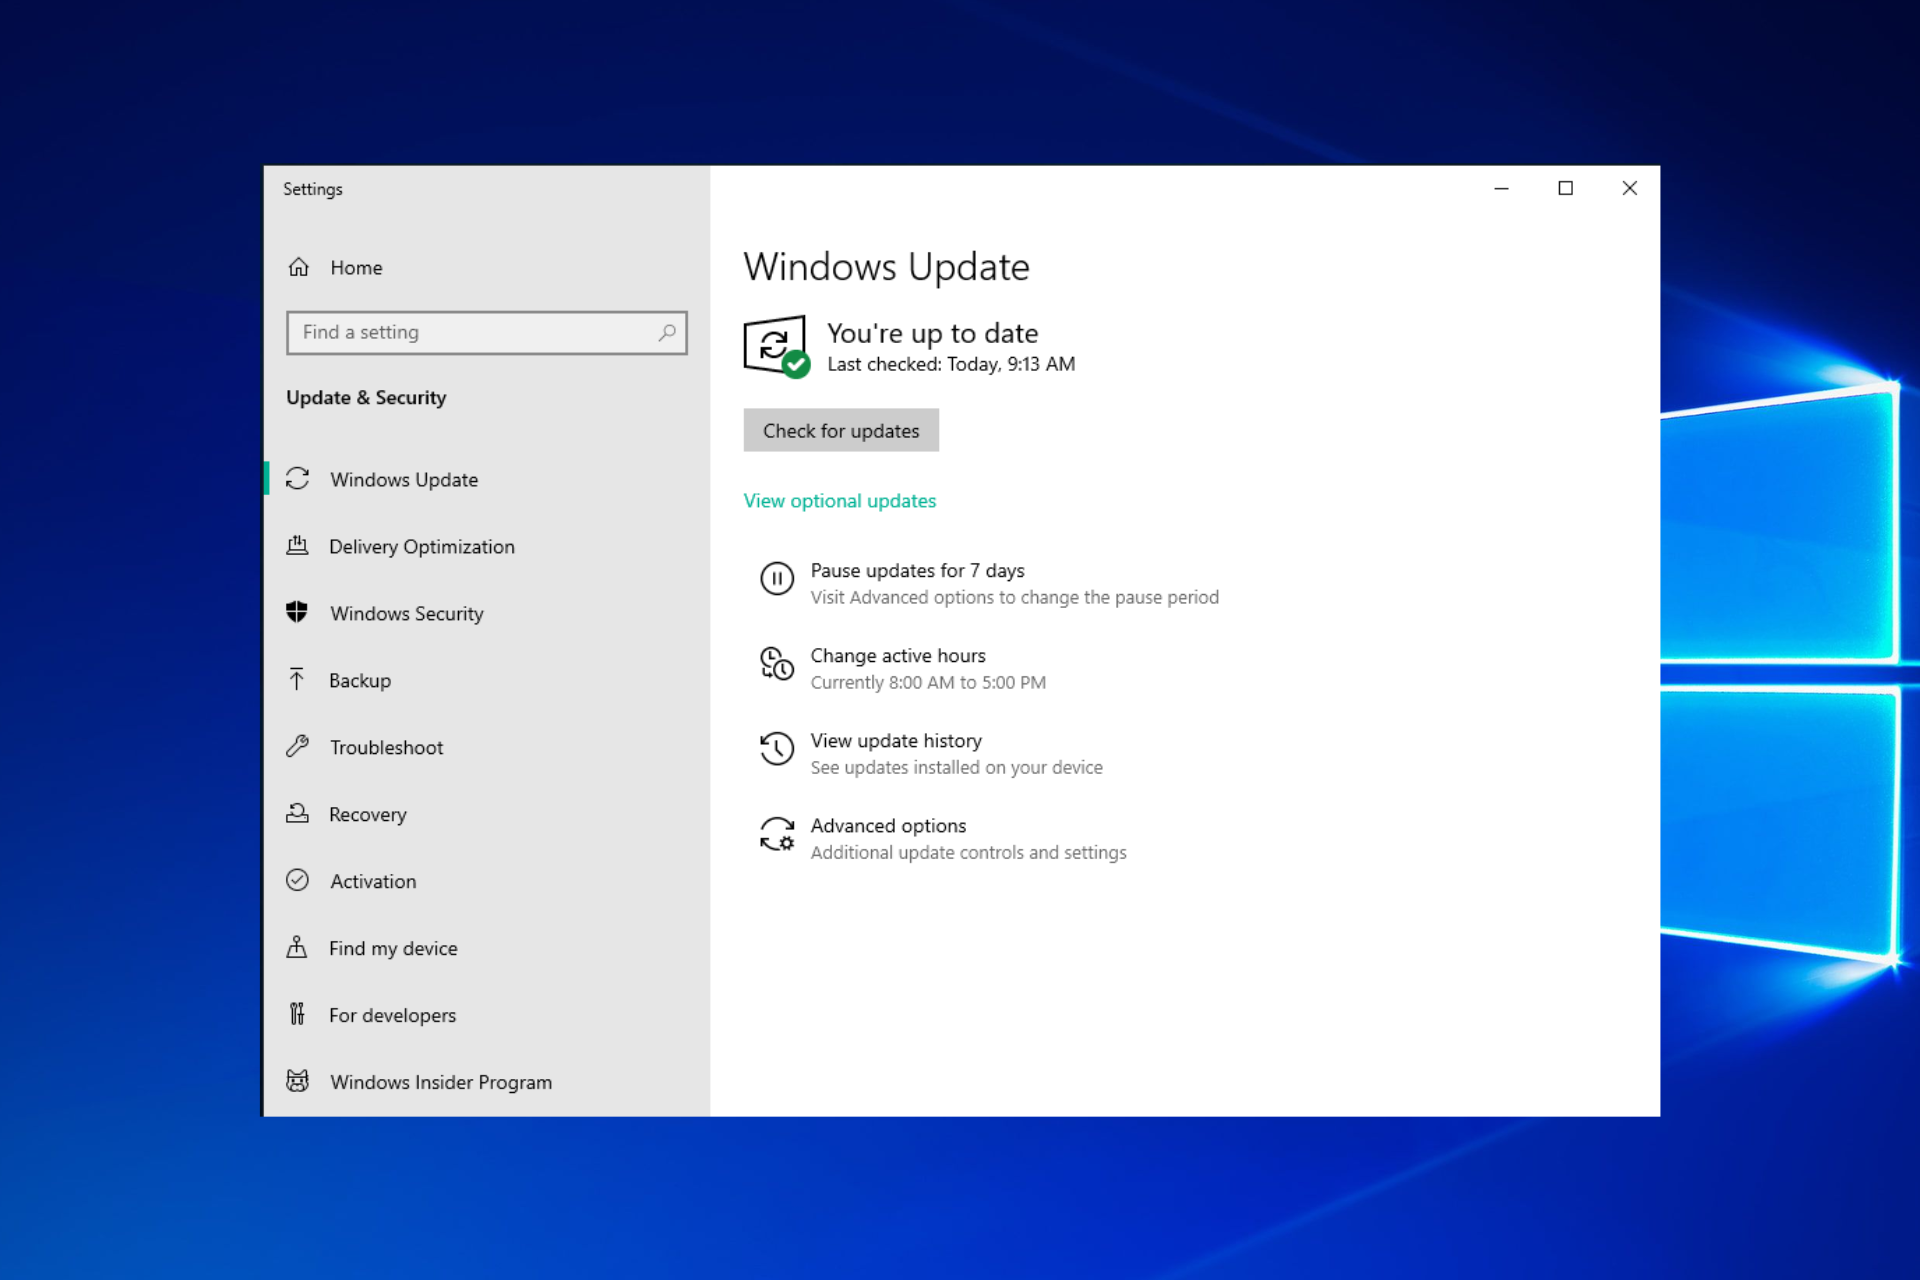
Step 1: Launch Settings app from the Windows 10 Start Menu or press Windows Key + I key together and click Update & Security.
Step 2: You will see the following popup window. If there’s something wrong and Windows knows what it is then you can find details here. Thus you need to click Fix issues and Windows Update utility will help to finish updating automatically.
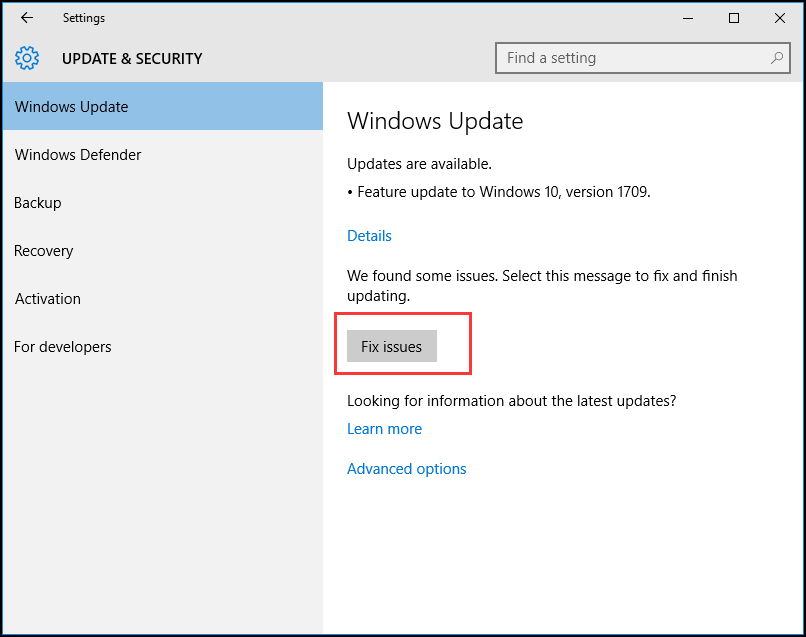
Step 3: You can also click the Advanced options to know more information. It is recommended to choose Automatic.

After all steps have been finished, you can try to restart our computers and check whether the problem Windows won’t download updates is solved.
Keep All Services about Windows Update Running
If all services about Windows update are not running, then you may also meet the issue Windows 10 won’t update.
Now, we will introduce how to keep all services about Windows update running step by step.
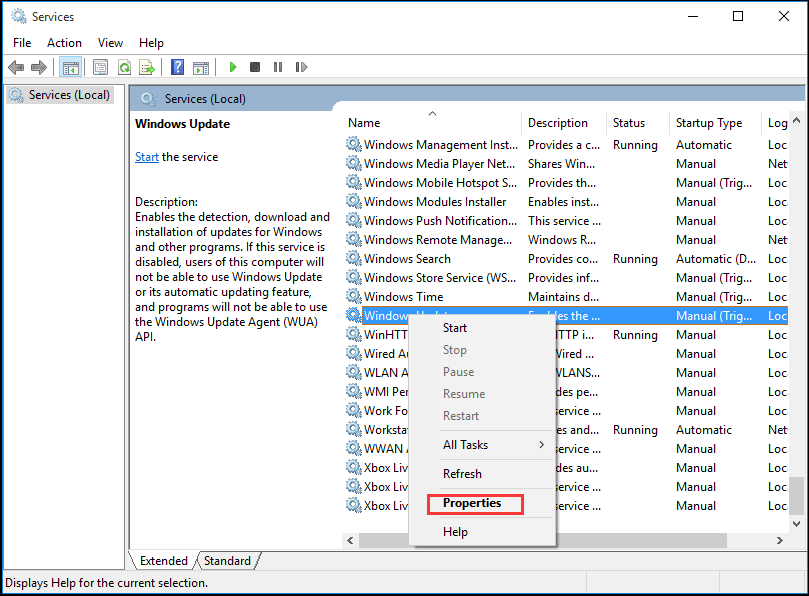
Step 1: Right-click the Start button of Windows and choose Run or press Windows + R keys. Then input services.msc in the box and click OK to continue.
Step 2: In the popup window, choose Windows Update and right-click, and then choose Properties.
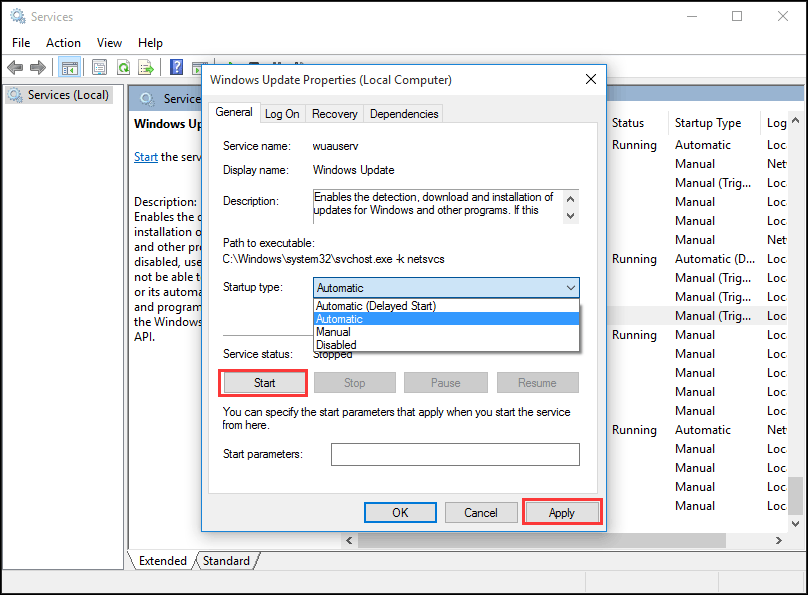
Step 3: In the popup window, set the Startup type as Automatic. If the Service Status is stopped, click Start to start it, and then click Apply and OK to confirm it.
Step 4: Locate and right-click Background Intelligent Transfer Service (BITS), then choose Properties. Here set Startup type as Automatic, and make sure the Service Status is Running. Then click OK to continue.
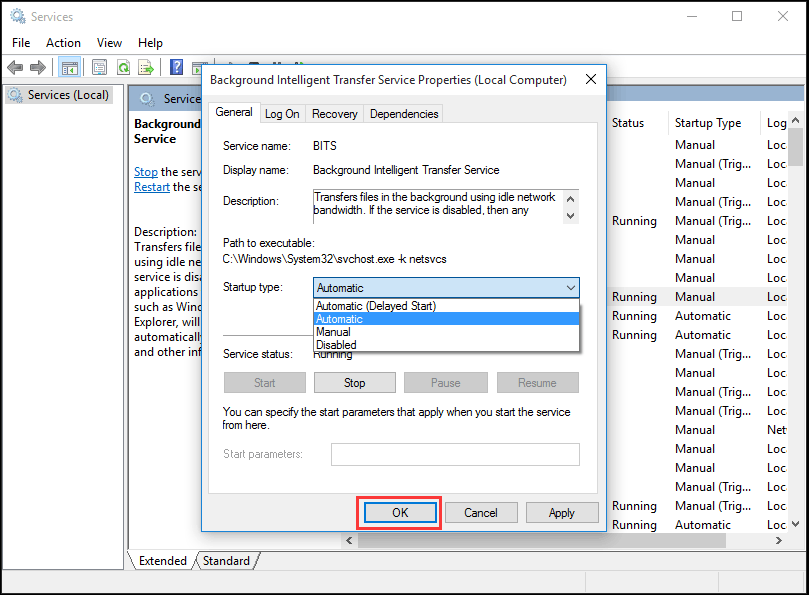
Step 5: Locate and right-click Cryptographic Service and choose Properties. Then set Startup type as Automatic. Then repeat the process to finish the setting.
When all steps have been finished, you can restart computers and check whether Windows 10 update error still occurs.
If Windows Update Utility is normal, but Windows 10 still won’t update, then you need to go to the next method to run Windows Update Troubleshooter.
RECOMMENDED: Should I Upgrade to Windows 10 – How to Decide?
Run Windows Update Troubleshooter
Microsoft provides an automated diagnostic tool called Windows Update Troubleshooter which can be used to fix Windows 10 won’t download updates issues. Now, we will introduce how to use Troubleshooter to fix Window 10 update error.
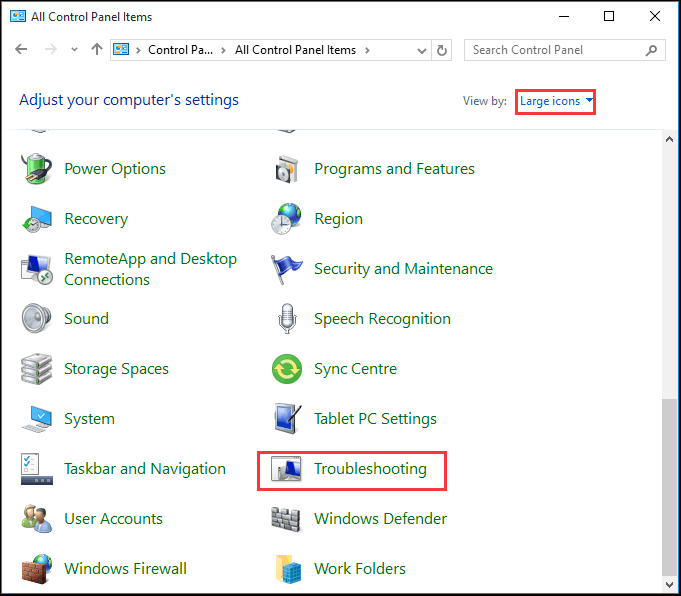
Step 1: Right-click Start menu and choose Control Panel to continue.
Step 2: On the upper right corner, switch the View by option to Large icons and choose Troubleshooting.
Step 3: Click View all to continue and choose Windows Update. Run it to enter the main interface, and then click Next to continue.

Step 4: Click Try troubleshooting as an administrator to continue.

Step 5: Wait for this software to detect and fix errors. Then click Close to exit Windows Update Troubleshooter.

Step 6: Exit Windows Update Troubleshooter, restart our computer and again try to update Windows 10.
Tip: If computer doesn’t install Windows Update Troubleshooter, try to click the link and download it.
Restart Windows Update Service by CMD
If Windows 10 is not updating, you can try to restart Windows Update services. The followings are the detailed operation methods.
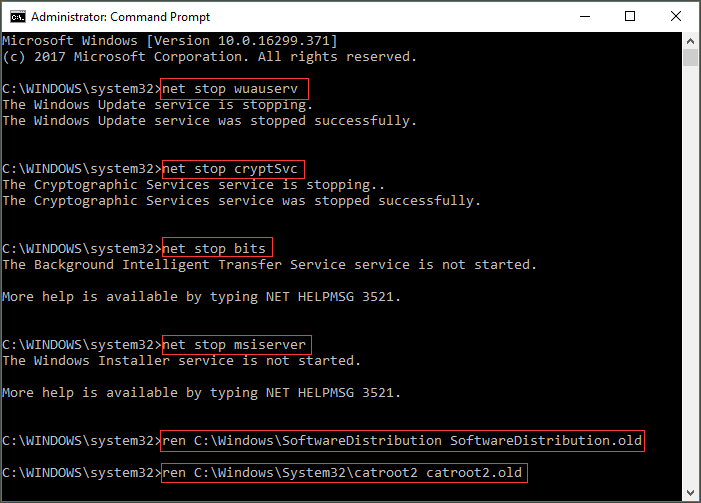
Step 1: Right-click the Start menu of Windows 10 or press Windows key + X key together, then choose Command Prompt(Admin).
Step 2: In the popup window, type the following command and press Enter after each command. Wait for each process to finish before continuing to the next one.
net stop wuauserv
net stop cryptSvc
net stop bits
net stop msiserver
ren C:WindowsSoftwareDistribution SoftwareDistribution.old
ren C:WindowsSystem32catroot2 catroot2.old
net start wuauserv
net start cryptSvc
net start bits
net start msiserver
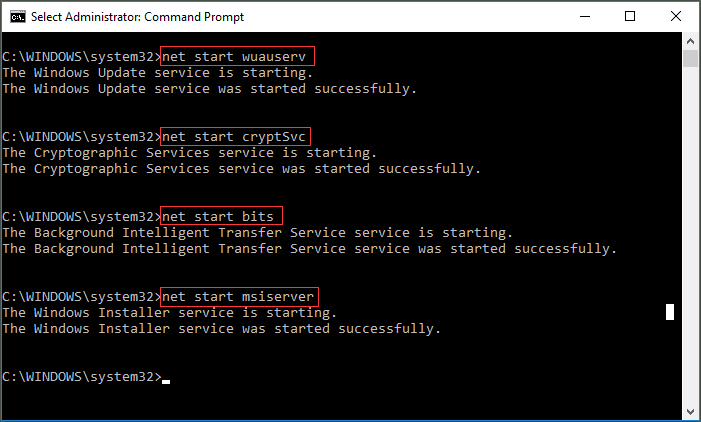
After we have finished all commands, we can restart our computer and try to check whether Windows 10 won’t download updates issue is solved.
Increase Free Space of System Drive
Sometimes, the problem Windows 10 won’t install or download update may be caused by small capacity of the system drive. Thus you had better increase the free space of the system drive in order to install Windows 10.
There are several ways to increase the capacity of system drive. We will introduce two ways, which are Disk Clean-up and Extend Partition.
Disk Clean-up
Disk Clean-up is very useful to free up disk space and remove some unnecessary files on a computer hard drive, which not only occupy the memory of system hard drive but also slow down our PC.
Then we will introduce how to clean up disk step by step.
Step 1: Right-click the Start menu of Windows 10 and choose Run, and input diskmgmt.msc in the box. Then click the OK or hit Enter to continue.

Step 2: Enter the main interface of Disk Management. Then choose the system drive and choose Properties from the context menu.
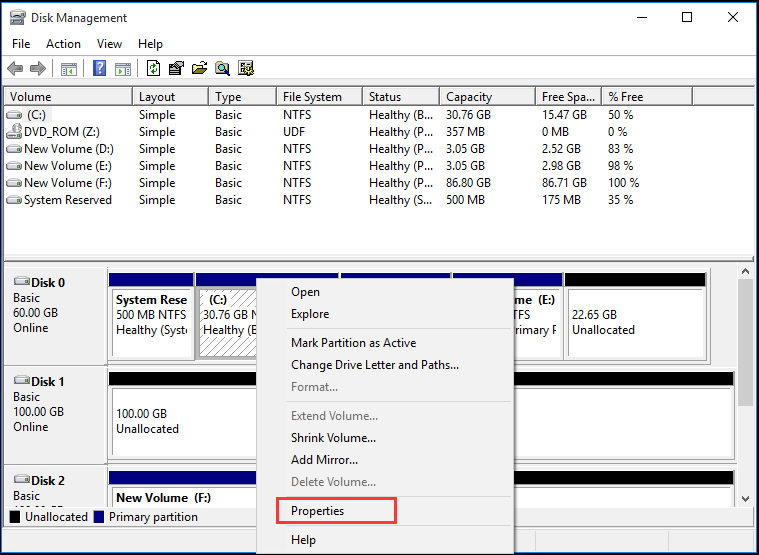
Step 3: You will see a popup window and click the Disk Clean-up to continue.

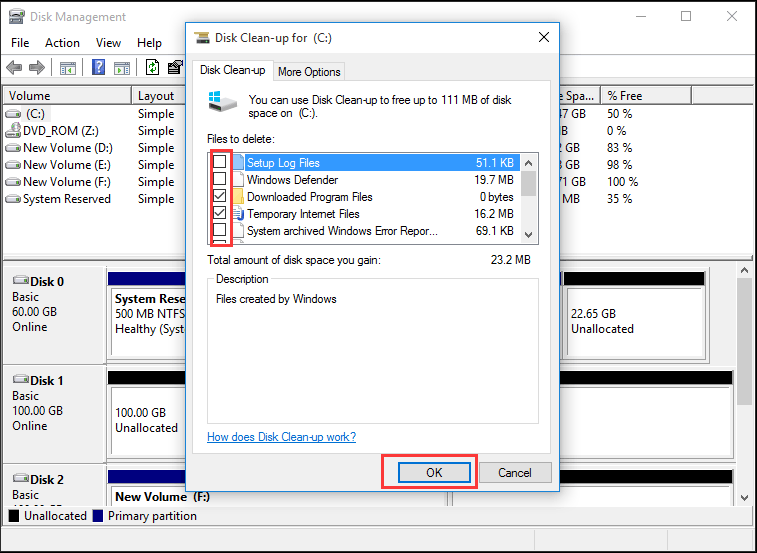
Step 4: Disk Clean-up will take a few minutes to calculate the free space but the specific time depends on how much files the disk has. Then you can tick the files needing to be deleted. Last, click OK to continue.
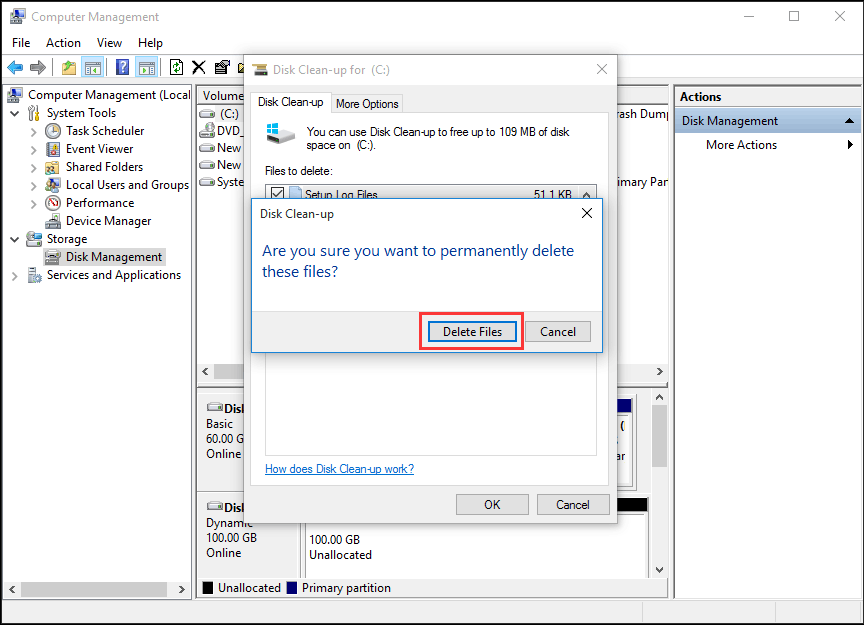
Step 5: You can see a popup message Are you sure to want to permanently delete these files and click Delete Files to continue. Then the Disk Clean-up can be completed.
MiniTool Partition Wizard
In fact, when cleaning up disk, you may find that the capacity of system drive only can be increased a little. If the size of new operating system is large, thus the capacity of system drive is not enough to install it (Here is an article which introduces the Windows 10 Size).
Therefore, applying best partition software to extend partition may be helpful. MiniTool Partition Wizard has been the choice of thousands of users. This high-performance tool helps make the optimal disk space distribution and ensure an ideal hard disk structure.
Buy Now
Step 1: To extend system partition, you had better use the bootable edition. So, launch MiniTool Partition Wizard to enter its main interface, Then click Bootable Media Builder to create a boot drive.
Step 2: Connect it to your computer and boot from it.
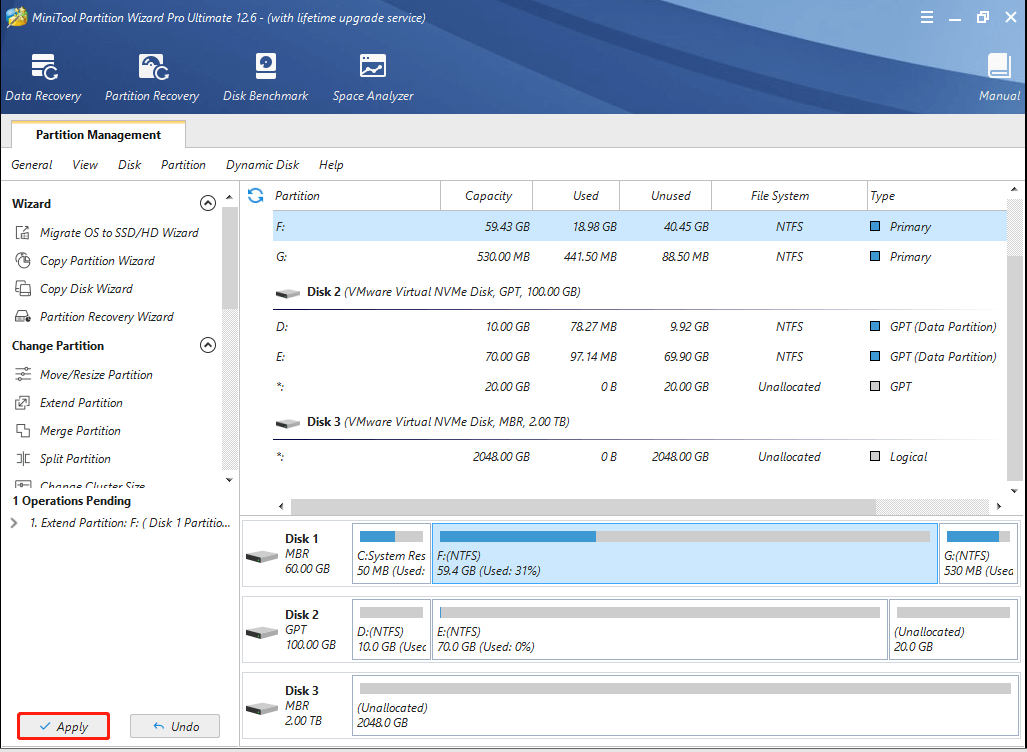
Step 3: Choose the system drive. Then choose Extend Partition from left pane or choose Extend from context menu.

Step 4: Then open the dropdown list from the Take Free Space from menu and choose any partition or unallocated space on the same drive to take free space.
Meanwhile, you also can drag the sliding handle to decide how much free space you want to take. Then press the OK button to continue.

Step 5: Choose the Apply button on the top of the menu to extend system partition.
That’s all operation methods of extending partition by MiniTool Partition Wizard Pro. It can extend partition without data loss.
Compared with extending volume by Disk Management, MiniTool Partition Wizard can extend partition even though there is no adjacent unallocated space on the right of the system partition. Therefore, MiniTool Partition Wizard is more convenient to extend partition.
After having increased the capacity of system drive, you can restart our computers and try to get the new Windows update to check whether the issue Windows 10 won’t update is solved.
“I used MiniTool Partition Wizard to help me extend my system drive without any data loss and I can update Windows 10. It can take space from the nonadjacent unallocated space.”Click to Tweet
Repair Corrupted System Files
The issue Windows 10 won’t update may be caused by the corrupted system files. So in order to solve this problem, you can run System File Checker to check and repair the corrupted system files.
And now, we will show you the detailed steps.
Step 1: Type Command Prompt in the search box of Windows 10 and right-click it to choose the Run as administrator.
Step 2: In the Command Prompt windows, type the command sfc /scannow and hit Enter to continue.
After that, the scanning process will begin and please do not close the command line window until you see the message verification 100% completed. When the process is finished, you can reboot your computer and check whether the issue computer won’t update Windows 10 is solved.
Related article: Quickly Fix – SFC Scannow Not Working (Focus on 2 Cases)
However, if none of above methods works, you may need to reinstall Windows 10.
“I have successfully fixed Windows 10 update problems after keeping all services about Windows Update running. And it is easy to operate.”Click to Tweet
Bottom Line
Are you still troubled by Windows 10 update error after reading this post? It’s your turn to have a try on above methods one by one. When you extend partition, try to use MiniTool Partition Wizard. At the same time, remember to back up all files before you want to have a try on any method so as to avoid an accident.
If you have any questions when you are using MiniTool Partition Wizard, you can contact us by sending email to [email protected]. Or if you have a nice solution to Windows 10 not upgrading, you can share it in the comment zone.
Windows 10 Won’t Update FAQ
What do I do if my Windows 10 won’t update?
- Remove third-party security software.
- Check Windows update utility manually.
- Keep all services about Windows update running.
- Run Windows update troubleshooter.
- Restart Windows update service by CMD.
- Increase free space of system drive.
- Repair corrupted system files.
How do I force Windows 10 to update?
- Open Command Prompt as an administrator.
- Type the command wuauclt.exe /updatenow and hit Enter to continue.
- Open Settings and choose Update & Security.
- Go to Windows Update tab and click Check for updates.
What to do if my computer is stuck updating?
- Wait or restart the computer.
- Free up disk space.
- Disable all non-Microsoft programs.
- Turn off Firewall temporarily.
- Run Windows update troubleshooter.
- Restart Windows update service.
- Run antivirus.
Why is Windows update taking so long?
Windows 10 update takes so long to complete because Microsoft is constantly addling larger files and features to them. And the new Windows update will fix some bugs. The biggest updates are usually released on the spring and fall of every year.
Microsoft regularly releases Windows updates, and it’s essential for keeping windows 11 secured. The company recently released Windows 11 KB5022287 which resolves a bug that affects Microsoft accounts (MSA) where the web dialog that you use to sign in or sign out might not appear. Also, there are fixes for Microsoft Store, Edge browser, Bluetooth audio headsets stop working and more. This is a mandatory update and Microsoft recommends downloading and install immediately when it is available for your device. Well sometimes while installing the update you may experience Windows 11 KB5022287 stuck downloading or windows 11 update failed to install with different errors.
Windows 11 update stuck downloading
The reason may differ, from slow internet connection to third-party antivirus software or Lack of drive space, corrupted update files, hardware or driver conflicts. Here in this post, we have effective solutions apply to fix windows 11 update problems.
Check for updates again
If the windows 11 update fails to install or is stuck downloading, check and make sure you have a working internet connection to download update files from the Microsoft server.
Ensure you have enough free space in your C drive to install the latest windows 11 updates and remove the external hard disk (if connected)
Temporarily disable or uninstall third-party antivirus and disconnect VPN if connected.
Restart your computer and Re-run the Windows updates again from Settings -> Windows Updates -> click on Check for updates.

Run Windows Update troubleshooter
Let’s run the built-in windows update troubleshooter that automatically detects and fix problems causing the windows 11 update stuck downloading or fail to install.
- Open the settings app using the Windows key + I
- Go to the System tab then on the right-hand side Scroll down and click on Troubleshoot then other troubleshooters

- Here you will get different troubleshooting options to fix internet connection, audio, printer issues etc.
- locate and select the windows update option then click the run option to launch the windows update troubleshooter,

- This will start to diagnose windows update issues, check windows update service status, corrupted update cache etc and try to resolve them itself.
Clear Windows update cache
Running the windows update troubleshooter typically deletes the update cache, including any potentially corrupted files or stuck downloads. But if it doesn’t you need to delete it by following the steps below.
- Restart your computer in safe mode,
- Press Windows key + E to open file explorer and navigate to C:WindowsSoftwareDistributionDownload
- Delete all files and folders inside the download folder to do this press Ctrl + A to select all and hit the del key

- Restart your computer and check for updates again from Settings -> Windows Updates -> click on Check for updates
Run Windows Update in Clean Boot State
Boot in Clean Boot State and run Windows Update and see if this helps. When you start the computer in clean boot, it will start windows using a pre-selected minimal set of driver and startup programs. and help if any driver conflict or startup program prevents install or apply windows updates.
- Press Windows key + R, type msconfig and press ok to open the system configuration utility,
- Go to the general tab then click selective startup, make sure to clear the load startup items checkbox and ensure the Load system services and Use original boot configuration are checked
- Next move to the services tab, select Hide all Microsoft services check box, now click disable all

- Click apply then ok and restart your computer
- Now again check for updates this time may you get success without any problems.
Download and install the latest update manually
If you are still having trouble installing the update, try to Download and install the latest update manually.
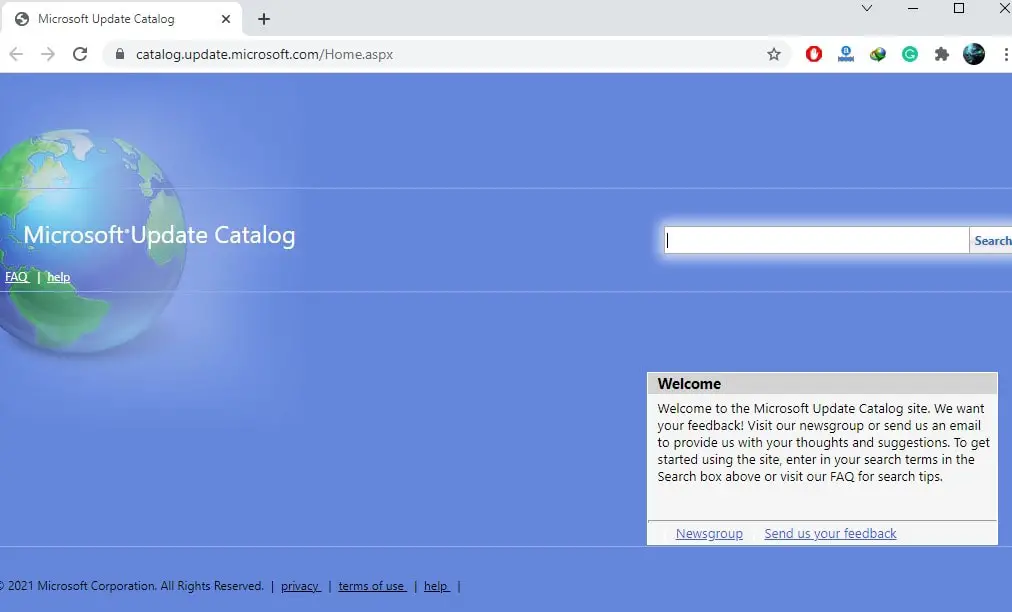
- To do this navigate to the Microsoft Update Catalog here,
- Search for the KB number of the security update that’s failing to install or is stuck download
- Save the update files to your computer, and run it as administrator after it finishes downloading.
Use the System File Checker
Sometimes corrupted system files or problems with your Windows 11 installation may prevent applying windows updates. Run the system file checker utility to check for and repair any issues.
- Open command prompt as administrator
- First, run DISM command DISM /Online /Cleanup-Image /RestoreHealth
- Let the command scan and execute 100% once done run the system file checker command sfc /scannow
- Again wait to complete the scanning and repair process, once done reboot your PC and check for updates again.
Also read:
- How to fix windows update when it gets stuck at 0 percent or 100
- Why is my computer running so slow? Reasons with Easy Solutions
- Spotify Won’t Open or not responding on Windows 10? Let’s fix the problem
- Solved: Error 0x8007007f when using Windows 11 Installation Assistant
- How to Download Windows 11 Media Creation Tool and its usage
Start by running the Windows Update troubleshooter
by Madalina Dinita
Madalina has been a Windows fan ever since she got her hands on her first Windows XP computer. She is interested in all things technology, especially emerging technologies… read more
Published on August 26, 2022
Reviewed by
Vlad Turiceanu

Passionate about technology, Windows, and everything that has a power button, he spent most of his time developing new skills and learning more about the tech world. Coming… read more
- Windows Update is not working? Microsoft’s troubleshooter is great for diagnosing the issue.
- A good idea if Windows update won’t load is to roll back to a previous Windows 10 instance.
- It is also imperative to check your system for possible malware that can cause this issue.
XINSTALL BY CLICKING THE DOWNLOAD FILE
This software will repair common computer errors, protect you from file loss, malware, hardware failure and optimize your PC for maximum performance. Fix PC issues and remove viruses now in 3 easy steps:
- Download Restoro PC Repair Tool that comes with Patented Technologies (patent available here).
- Click Start Scan to find Windows issues that could be causing PC problems.
- Click Repair All to fix issues affecting your computer’s security and performance
- Restoro has been downloaded by 0 readers this month.
Windows 10 is one of the biggest releases that Microsoft ever announced and Windows Update made a colossal difference to the overall user experience.
While they are supposed to download automatically, the process is not always as streamlined as intended and glitches can occur.
For some users, Windows Update not working issues occur frequently, while others may stumble across this problem occasionally when performing specific tasks.
Let’s quickly go through the most common scenarios for which Windows 10 updates won’t install and check out the culprits behind each of them.
Why is my Windows Update not working?
In the event that Windows is unable to finish installing an update, check to confirm that you are properly connected to the Internet and that your hard disk has sufficient free space, as these are the two most common causes.
You might also try restarting your computer, or you could check to make sure that Windows drivers were installed successfully.
Here is a list of the most common Windows Update errors that users reported getting in Windows 10:
- Windows 10 updates won’t install on restart – The update process gets stuck after performing a system restart.
- Windows Update not working in Safe Mode Windows 7/10/11 – Safe Mode only allows essential system programs to start up at boot. Installing Windows updates in Safe Mode is only recommended if you cannot start Windows normally.)
- Windows Update stuck on downloading – This error can also be found under this form: We couldn’t install this update 0x80070541. While the numeric part can vary, the description often reads We couldn’t install this update, but you can try again.
- Windows Update download button is not working or button is missing altogether – This error prevents you from force-downloading certain features. In some cases, Windows Update database corruption can occur and prevent you from installing updates.
- Windows 10 Update can’t find the necessary file – The error stating some update files are missing or have problems is usually caused by some corrupted Windows update caches.)
- Download error 0x80070002 – This error is usually triggered by deprecated apps.
- One of the Update services is not running properly in Windows 10 – One of the essential services on which WU relies, the Windows Update Service is not running at all.
- Windows Update not working through a proxy, after cloning hard drive – Even though it is a solid method to protect your privacy online, many users reported various issues while using a proxy.
- Windows Update, not enough space – This is a common problem, and it’s usually caused by the lack of space. To fix the issue, try removing unnecessary files and check if that resolves your problem.
- We couldn’t install updates because there’s a problem with the date and time information on your device
- Your device is missing important security and quality fixes – This error is sometimes caused by problematic recent updates.
- Windows Update messed up my computer 2022 – Uninstalling the latest Windows update is one of the best solutions in this case.
- Windows Update not up to date but no updates – Perhaps you will simply have to wait until the devs will push a new update.
This being said, let’s see what you can do if Windows 10 or 11 won’t install. If you still can’t seem to fix the issue, check out our last section with similar articles that cover more update-related errors.
What to do if Windows Update is not working?
- Why is my Windows Update not working?
- What to do if Windows Update is not working?
- 1. Run the Windows Update troubleshooter
- 2. Use System Restore to roll back and uninstall a bad update
- 3. Scan your PC for malware
- 4. Install a fresh version of Windows
- 5. Delete all files from the Software Distribution directory
- 5.1 Use the Windows Services
- 5.2 Use Command Prompt
- 6. Change your DNS
- How to delete Windows 10 updates that won’t install?
- What can I do if Windows Update is not working on Windows 11?
1. Run the Windows Update troubleshooter
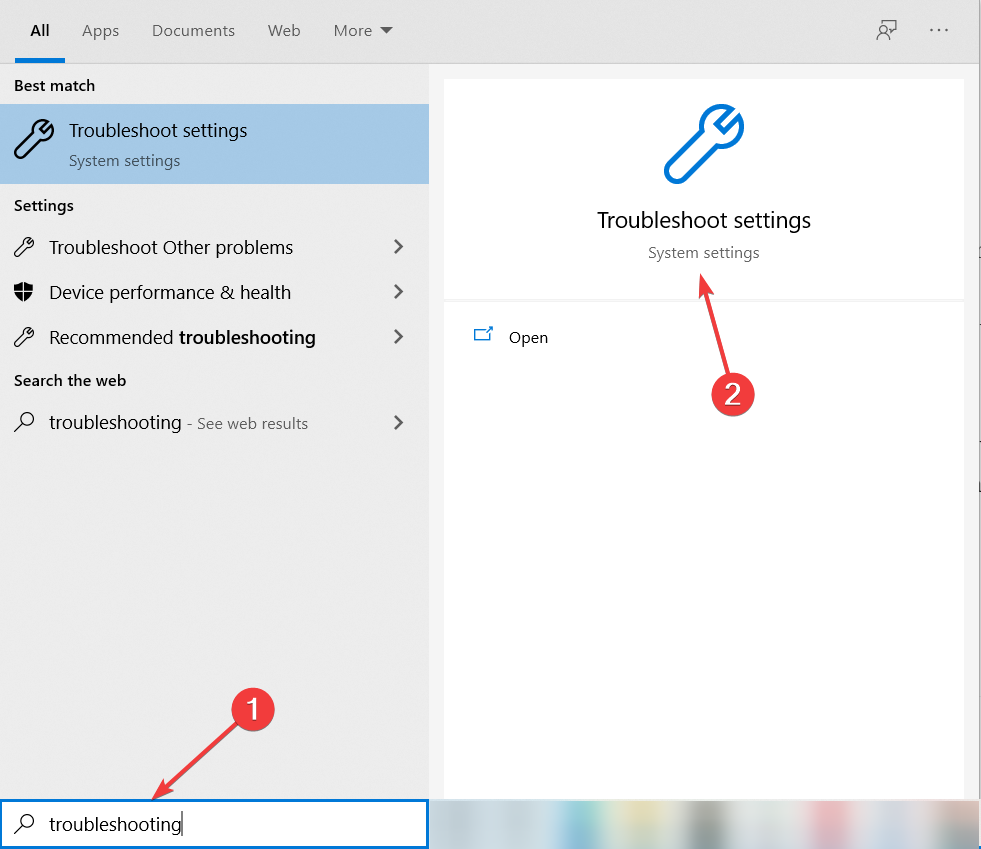
- Click on the Start button, type troubleshoot, and select Troubleshoot settings from the results.

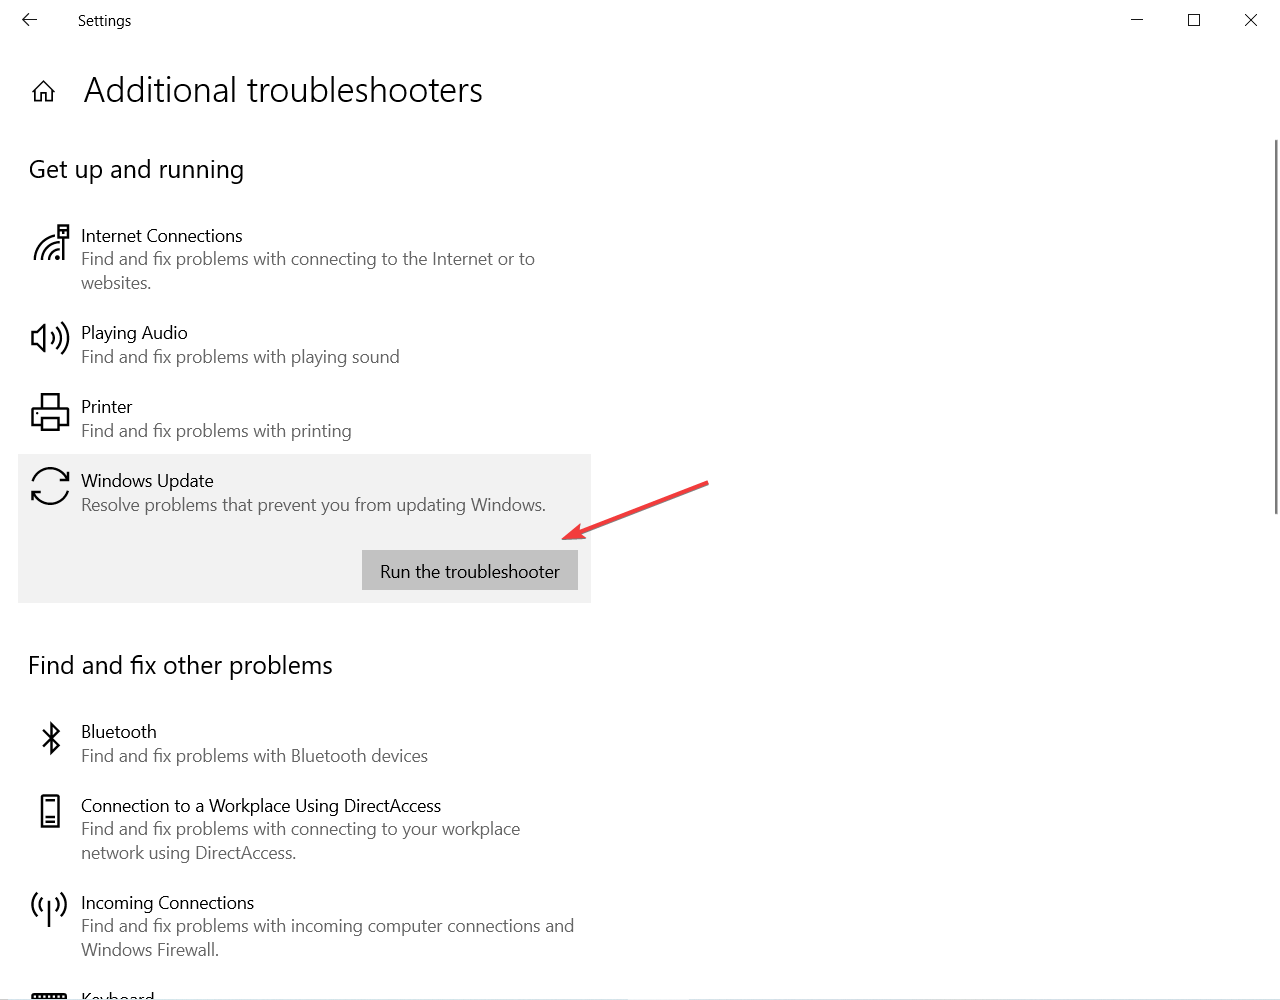
- Click on Aditional troubleshooters.
- Select Windows Update and then click on the Run the troubleshooter button.

Microsoft’s Windows Update Troubleshooter is a good way of knowing the problem if it is not much complex. It is almost everyone’s first choice whether a newbie or a professional.
Unfortunately, it does not always manage to solve the issue. In fact, it will most likely retrieve a result that resembles this description: Windows Update troubleshooting couldn’t identify the problem.
Whether it fixes your problem or not, it can surely provide you with useful information, so don’t be shy to use the Windows Update troubleshooter in Windows 10 or 11. Anyways, if Windows Troubleshooter is not working, move on to our next solution.
2. Use System Restore to roll back and uninstall a bad update
If Windows Update is not working, System Restore might be the best way to fix it. This makes your computer back into the past when it was working fine, so follow the steps above to get this done.
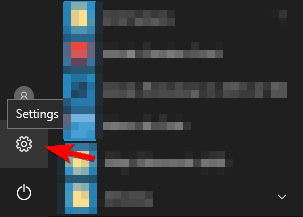
- Open Start Menu from the Taskbar at the bottom of the screen then click to open the Settings right above the Power button.
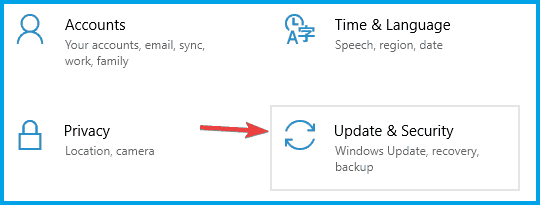
2. Click Update & Security.
3. In this new window, you need to select View update history and find the last successful update installed on your Windows.
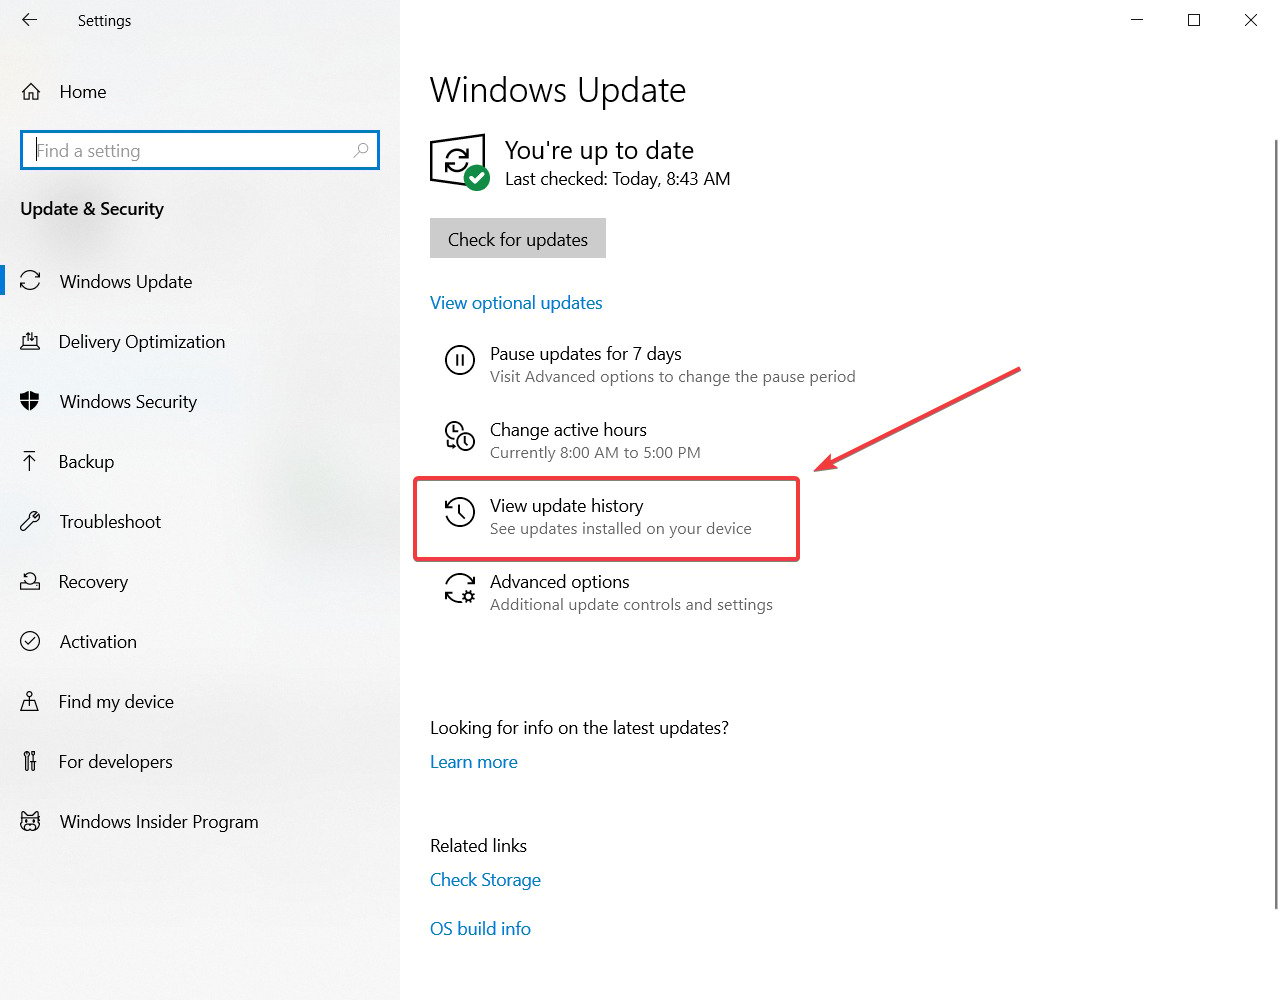
4. You will now see a list of updates installed on your system.
5. Click on the Uninstall updates at the top.
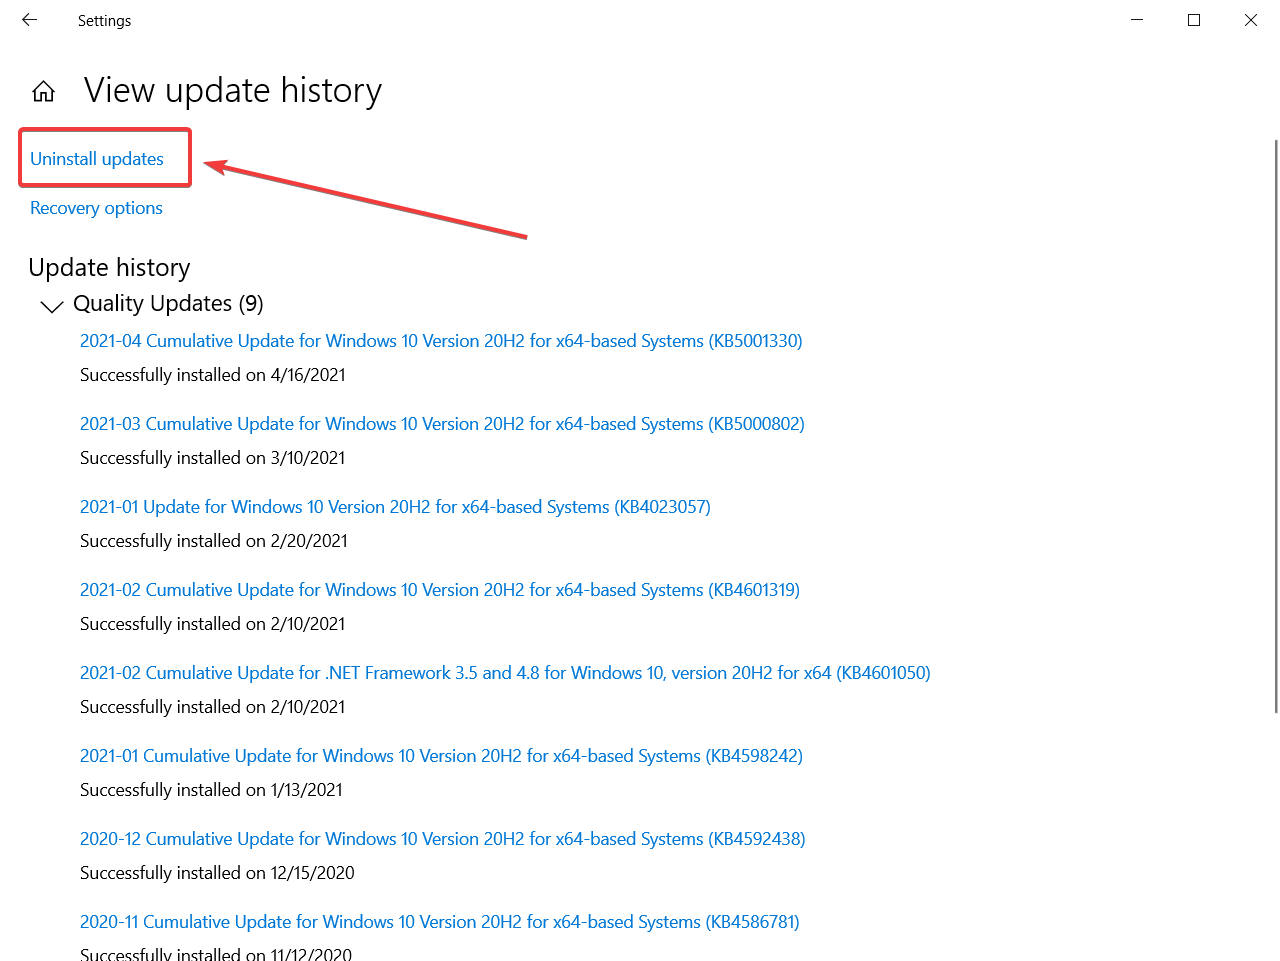
6. When you click Uninstall updates, a new window will pop up which shows the new updates that are installed on the PC.
7. You can choose to uninstall any of these updates but proceed with caution as uninstalling a critical update will lead to a PC that is full of bugs.
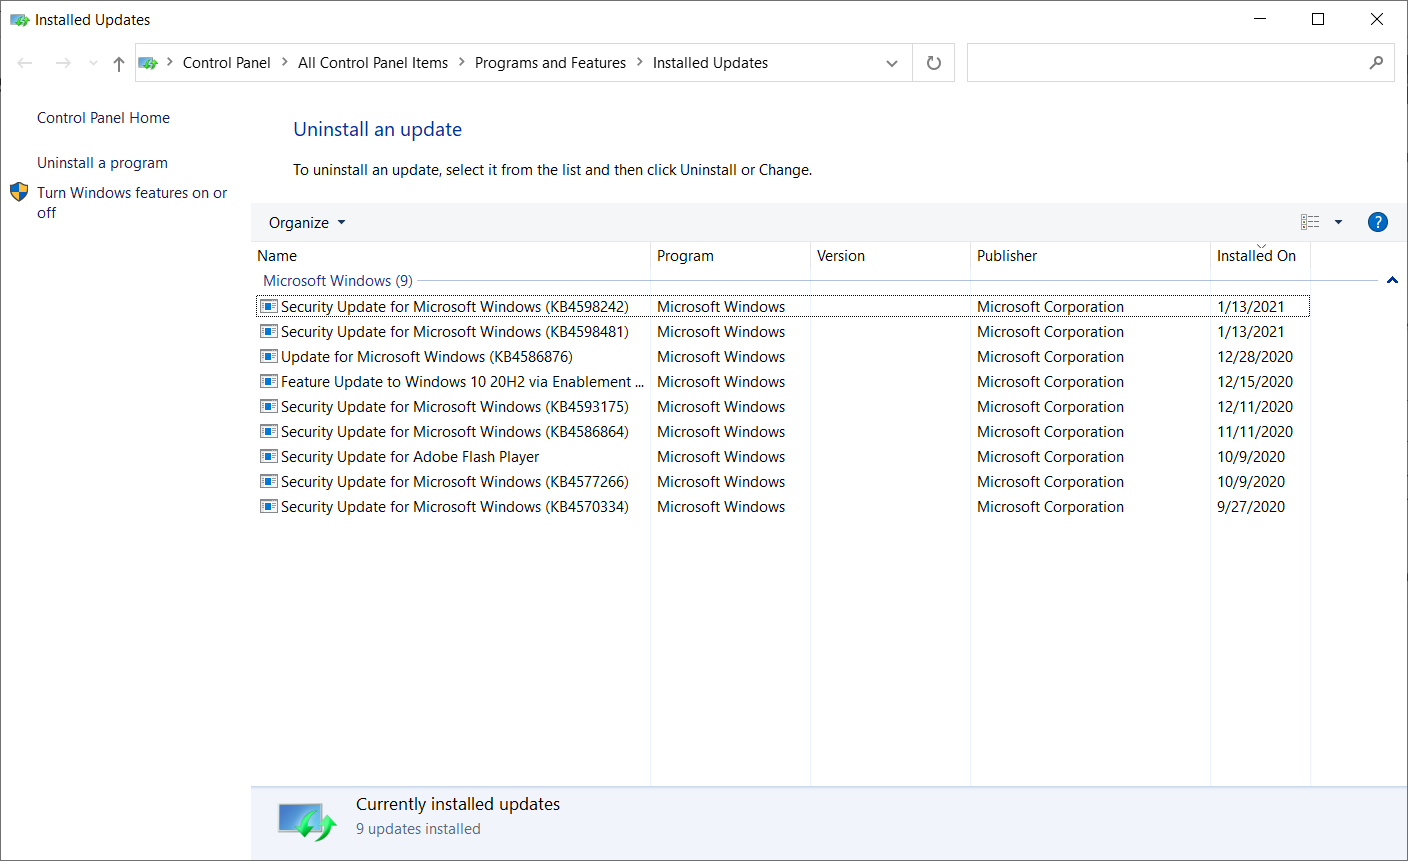
After the completion of the restore, your computer will work fine.
Needless to say, the solution implies you already have created a restore point to which you want to revert now. If you can’t find a restore point, you may need to create one manually.
One drawback of using Windows’ own Restore point is that, while it creates an identical picture of your PC’s contents at any given time, you may wind up copying data that is already flawed or corrupted.
To begin with, using a specialist tool like Restoro, which is totally automated and requires no scheduling or user input, can minimize the hassle.
Some PC issues are hard to tackle, especially when it comes to corrupted repositories or missing Windows files. If you are having troubles fixing an error, your system may be partially broken.
We recommend installing Restoro, a tool that will scan your machine and identify what the fault is.
Click here to download and start repairing.
Second, Restoro uses its own repositories to correct registry keys and files before producing its own restore points, so you always know that whichever restore point you pick during a rollback will be completely functioning.

Get Restoro
Create restore points in Windows using a program created specifically for this purpose.
3. Scan your PC for malware
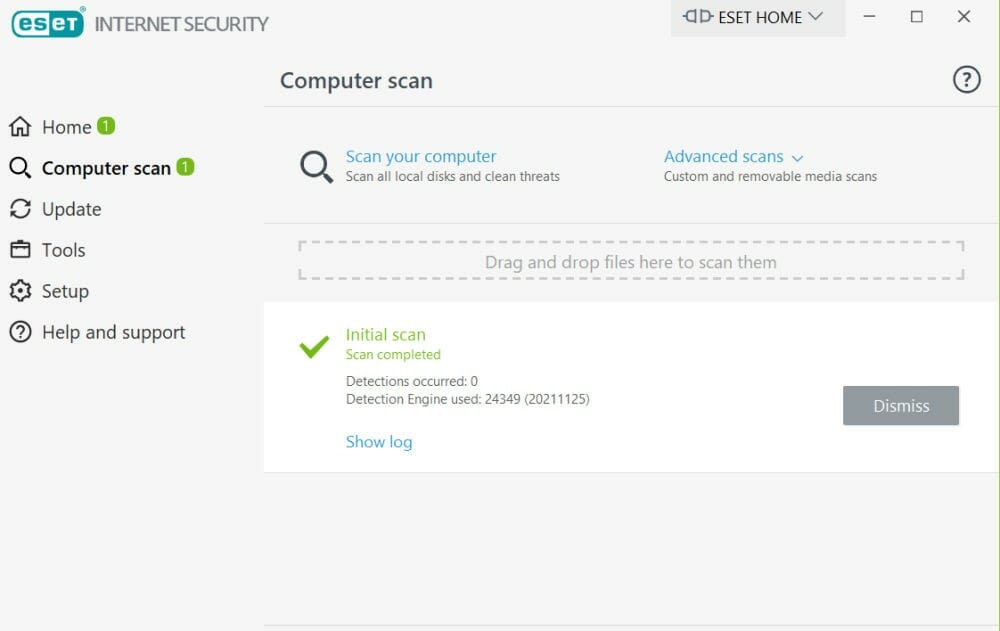
If Windows Update is not working, you will have to make sure your PC is clean and does not have any kind of malware.
To do so, you can either use the built-in tool, Microsoft Defender or download ESET Internet Security a professional malware scanner.
Whatever you choose, you need to make sure your security programs are up to date in order to keep your PC safe.
4. Install a fresh version of Windows
If nothing works for you, then it is a wise choice to install Windows freshly using the Microsoft 10 Install Drive.
For this option, it is very important that you create a backup of your data on an external drive because this option will erase all of it.
Moreover, the product ID of your license should be saved or should be written in a safe place before reinstalling your Windows.
5. Delete all files from the Software Distribution directory
5.1 Use the Windows Services
- Press Windows + R, enter services.msc, and press Enter or click OK.

- Locate Background Intelligent Transfer Service, right-click it, and choose Stop from the menu.
- Do the same for the Windows Update service.

- After disabling these services go to the following folder inside File Explorer:
C:WindowsSoftwareDistribution
- Select all files in the SoftwareDistribution directory and click on Delete.

- Go back to the Services window and start both Windows Update and Background Intelligent Transfer Services.
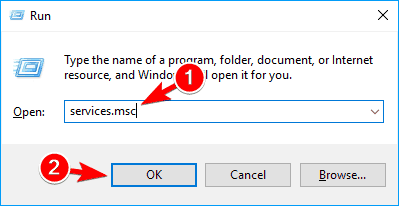
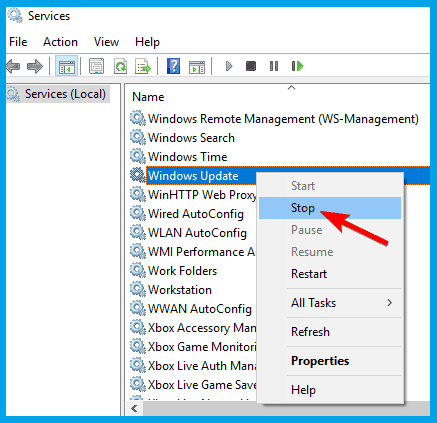
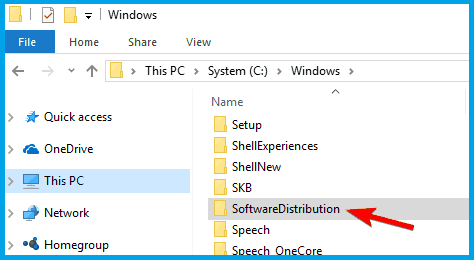
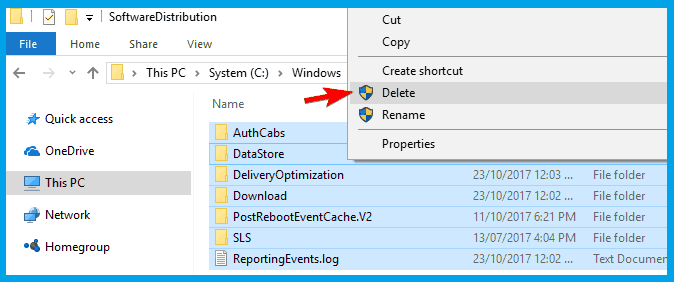
After doing that, try to download updates manually and check if the problem is resolved.
If Windows Update is not working on your PC, you might be able to solve the problem simply by deleting files from the SoftwareDistribution directory.
Sometimes files in this directory can become corrupted and that can cause this problem to appear.
5.2 Use Command Prompt
- Type cmd in the Search box and select Run as administrator to start Command Prompt with elevated privileges.

- Enter the following command lines and run them one by one by pressing Enter:
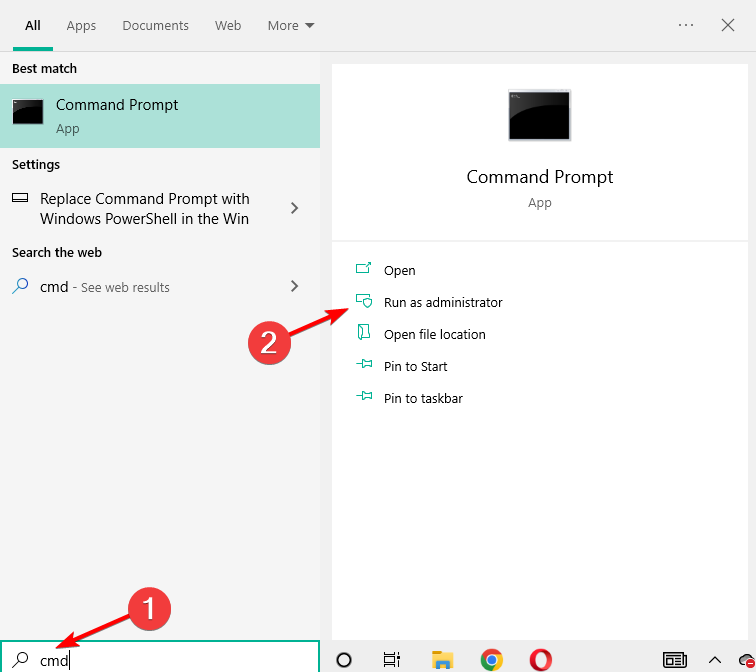
net stop wuauserv
net stop cryptSvc
net stop bits
net stop msiserver
ren C:WindowsSoftwareDistributionSoftwareDistribution.old
ren C:WindowsSystem32catroot2catroot2.old
net start wuauserv
net start cryptSvc
net start bits
net start msiserver
If you cannot run Command Prompt as an admin or if it is simply not available for whatever reason, you can also use PowerShell.
6. Change your DNS
- Right-click the network icon in the bottom right corner and choose Open Network and Sharing Center.

- In the left pane, click on Change adapter settings.

- Locate your network connection, right-click it, and choose Properties from the menu.

- Select Internet Protocol Version 4 (TCP/IPv4) and click on Properties.

- Select Use the following DNS server addresses and enter 8.8.8.8 as a Preferred DNS server and 8.8.4.4 as Alternate DNS server. Click OK to save changes.

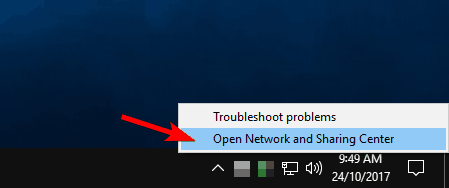
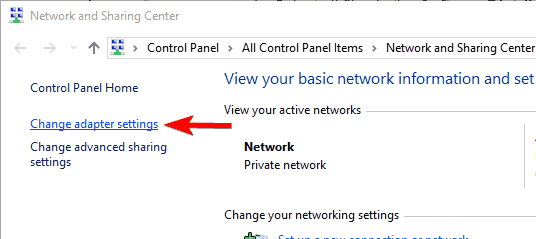
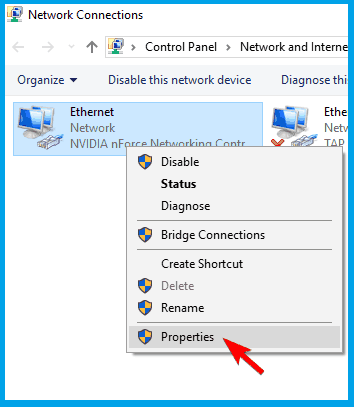
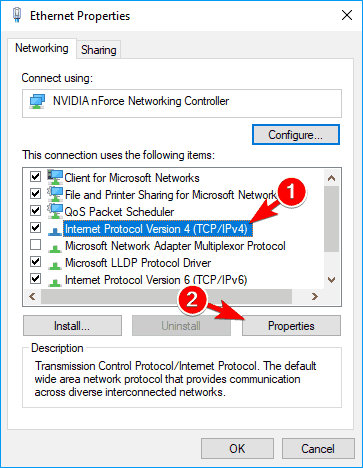
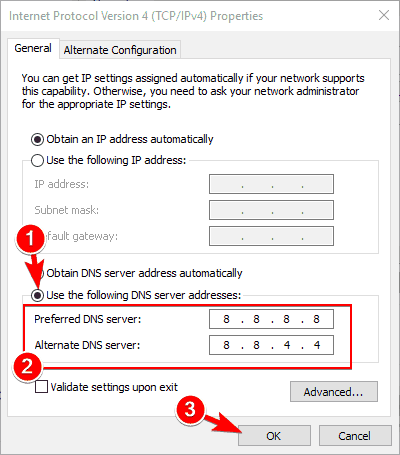
Sometimes, your default DNS might present specific issues such as the server not responding or others that prevent you from using Windows Update.
If Windows Update stopped working, changing your DNS server should solve the issue.
- Fix: Windows Update error code 0x80070003 in Windows 10/11
- Fix: Couldn’t connect to the update service on Windows 10/11
- Fix error code 0x800706be & install Windows updates smoothly
- Fix: Update error 0x8024001e on Windows 10/11 [Easy Guide]
- Fix: Windows Update not showing/missing button on Win 10/11
How to delete Windows 10 updates that won’t install?
- Click the Windows key and select Settings.
- Choose Update & Security.

- In the right section, click on View update history.

- In the new window, choose Uninstall updates.

- From the list that appears, click on the last update and uninstall it.
- After the process has finished, go to Windows Update and check for updates again in order to restart the process.
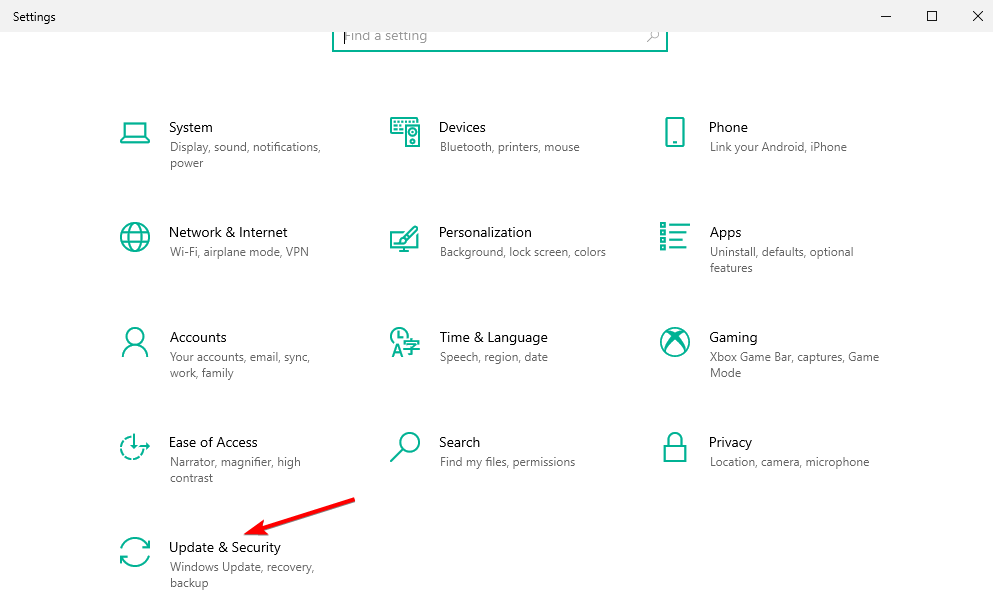
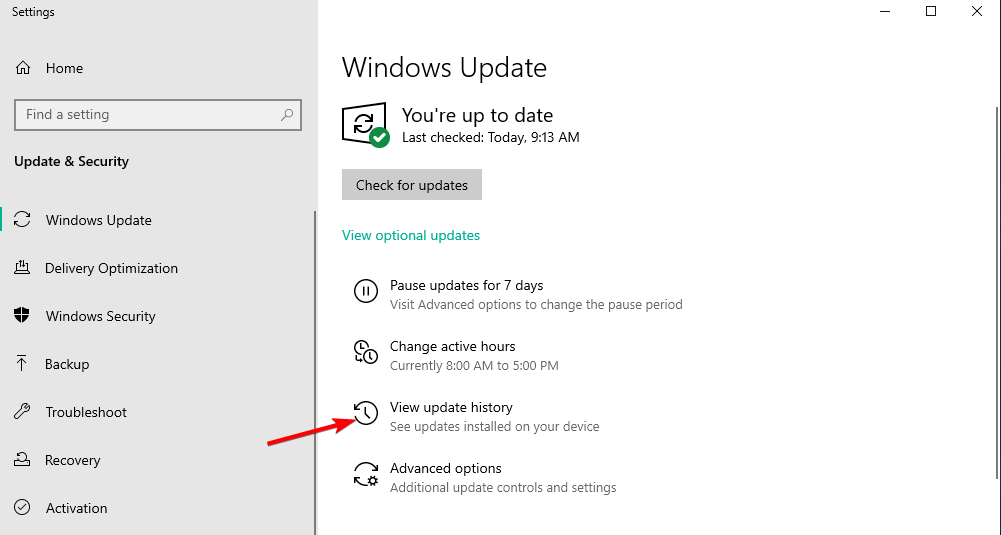
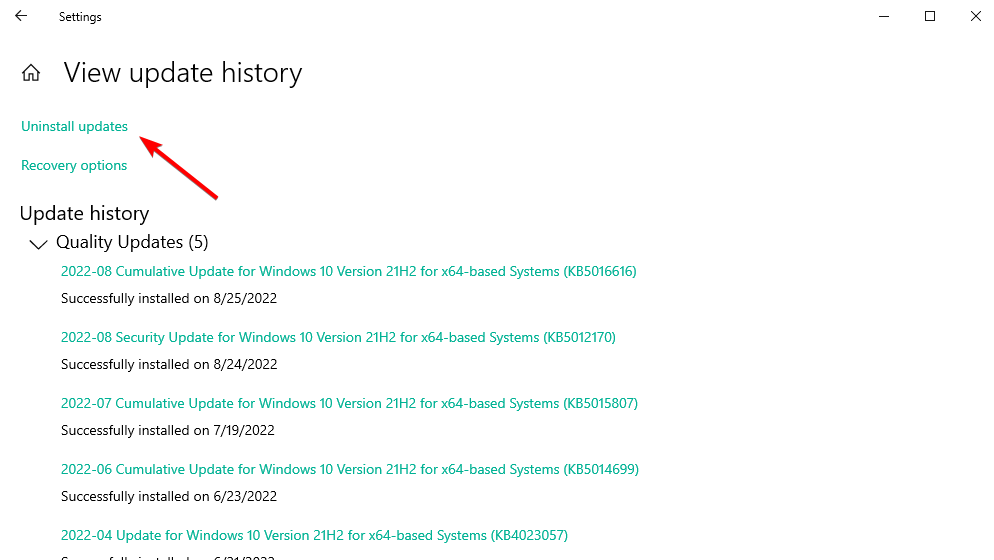

Tip
As always, file corruption is a potential culprit, so you might want to check your system for signs of deprecation.
We recommend you use a professional utility like Restoro to handle this task automatically, promptly, and most of all hassle-free.
Windows 10 saying you’re not up to date can be problematic, but we’re confident you will be able to get those updates running in no time with our tips.
What can I do if Windows Update is not working on Windows 11?
Windows 11 will automatically check for and install any available updates, helping to keep your computer’s operating system secure and reliable.
However, it is possible that these updates will not install properly, in which case you will see an error related to Windows 11 Windows Update.
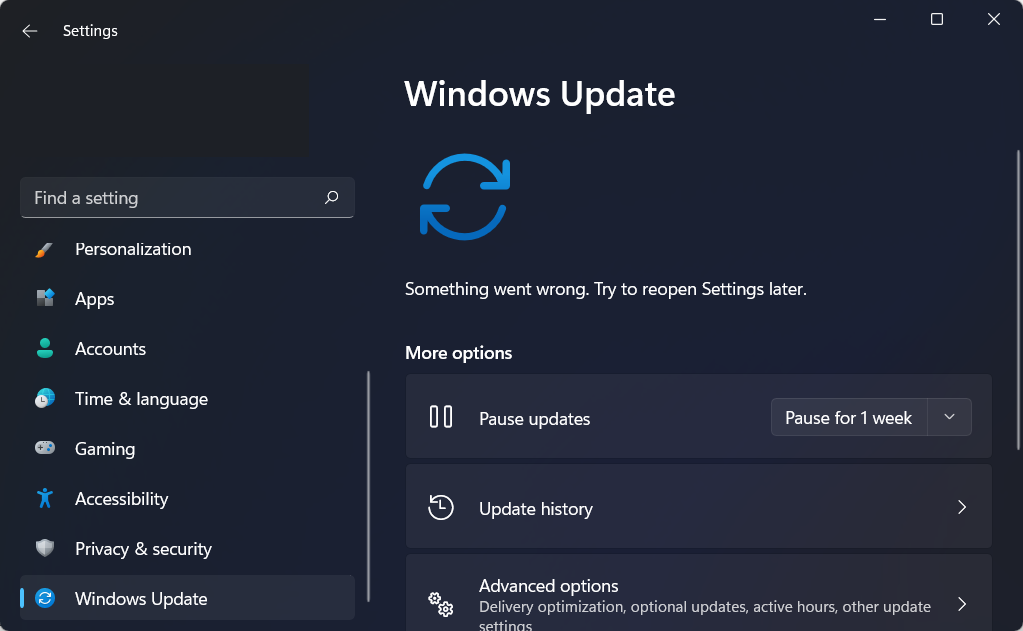
The term Windows Update error is a catch-all phrase that refers to a wide variety of glitches, complications, and blunders that prohibit the updating procedure from operating in an orderly fashion. Check out our post on 7 tips to fix the Windows Update in Windows 11.
Moreover, one of the most common errors is 0x80070057 that mostly occurs with Windows 10 but it’s easily moved to other apps, so you will definitely want to fix this as soon as possible.
Besides that, another error you may get when updating your OS is 0x800f081f, this error can easily be fixed by updating your drivers or performing a clean install.
Now, Windows Update errors come in many shapes and sizes. If you ever get stuck, help is no further than a click away.
Still having issues? Fix them with this tool:
SPONSORED
If the advices above haven’t solved your issue, your PC may experience deeper Windows problems. We recommend downloading this PC Repair tool (rated Great on TrustPilot.com) to easily address them. After installation, simply click the Start Scan button and then press on Repair All.
![]()
Newsletter
86
86 people found this article helpful
How to complete a Windows 10 update after failure
Updated on August 5, 2021
Windows 10 update failures can appear in many different ways and at various points in the update process. You’ll typically see a message like one of these:
- Your Windows Update failed. But don’t worry. We can help.
- We couldn’t complete the updates. Undoing changes. Don’t turn off your computer.
- Failure configuring Windows updates. Reverting changes. Do not turn off your computer.
In all of the above cases and other similar cases, the message appears on a blue screen unless you have made changes to Windows 10 color settings. Additionally, the message will appear after you have attempted an update, sometimes many minutes or even hours into the update.
Cause of Windows 10 Update Failures
If your Windows 10 update failed, the most common causes include:
- Multiple updates queued: One of the most common causes of this failure is when Windows needs more than one update. When that happens, simply rebooting and trying again will result in a successful update. You can also solve other unpredictable and minor issues with the same fix.
- Lack of drive space: If your computer doesn’t have enough free drive space to complete a Windows 10 update, the update will stop, and Windows will report a failed update. Clearing some space will usually do the trick.
- Corrupt update files: Deleting the bad update files will usually fix this problem. You may need to boot into Safe Mode to clear the files.
- Hardware conflicts: You may have a device connected that’s interrupting the update process. If you unplug all of your unnecessary peripherals, the update may be able to finish.
- Driver conflicts: This is a similar issue with an identical fix. Disconnect all of your peripherals, like printers and USB hubs, and try the update again.
Before you proceed, consider creating a Windows 10 backup. In a worst-case scenario, you can restore your backup and try again.
How to Fix Windows 10 Update Failed Errors
To fix your Windows 10 update failure and successfully update your operating system, try each of the following fixes in order. You don’t have to try all of them. If you successfully update Windows 10 after attempting a fix, then you can safely ignore the rest and go back to using your newly updated computer.
The following instructions are primarily intended for Windows 10 installed on physical hardware. If you’re trying to update a Windows 10 virtual machine, and the Windows image is on the older side, these instructions may still solve your problem. However, you may want to consider using a newer Windows image that already has the latest updates and security patches.
-
Try rerunning Windows Update. In many cases, simply rebooting your computer and rerunning the update will fix your problem. If Windows 10 has multiple updates queued, it’s pretty standard for one to fail during the initial update process. In that case, you can usually get things working again by rebooting and starting the update process again. If your Windows 10 installation is significantly out of date, you may need to perform the update process multiple times.
-
Unplug your peripherals and reboot. If rerunning the update doesn’t do the trick, you may have a hardware or driver conflict. Try unplugging all of your peripherals, like webcams, microphones, and scanners, before you reboot. Once only the bare minimum of a keyboard and mouse remain connected, run Windows Update.
-
Check your available drive space. One of the most common causes of failed Windows 10 updates is a lack of drive space. Windows 10 already reserves space for updates, but there’s always a chance that you could run out of room if you have very little available storage. Try clearing out everything you no longer need, or even hook up an external drive to move files to, and then attempt the update again.
-
Use the Windows 10 troubleshooting tool. Windows 10 includes a troubleshooter app that can help fix a lot of update problems. Try running the troubleshooter, and see if the update can complete.
To run the Windows 10 update troubleshooter:
- Type troubleshoot into the taskbar search field and select troubleshoot settings.
- Click Additional troubleshooters > Windows Update.
- Click Run the troubleshooter.
- Follow the on-screen prompts.
-
Pause Windows 10 Updates. This method momentarily pauses updates, which will typically delete update files from your computer, allowing you to download new files and hopefully complete the update process.
- Navigate to Settings > Update & Security > Windows Update.
- Click Advanced Options.
- Locate Pause Updates, and click the toggle to On.
- Restart your computer.
- Return to Settings > Updates & Security > Windows Update.
- Click Advanced Options.
- Click the Pause Updates toggle to Off.
- Try rerunning Windows Update.
-
Manually delete your Windows Update files. The previous step will typically delete your Windows Update files, including any potentially corrupt files or stuck downloads. If it doesn’t, you will need to delete your SoftwareDistribution directory manually.
- Restart your computer in Safe Mode.
- Open File Explorer, and navigate to C:Windows
- Locate and delete the SoftwareDistribution folder.
- Restart your computer, and run Windows Update.
-
Download and install the latest update manually. If you’re still failing to update Windows 10, navigate to the official Download Windows 10 page, and click update now. Save the update file to your computer, and run it after it finishes downloading.
This process will only work if you’re attempting a major feature update. If you’re trying a security update, navigate to the Microsoft Update Catalog, and search for the KB number of the security update that’s failing to install.
-
Use the System File Checker. At this point, there may likely be a problem with your Windows 10 installation. Run the System File Checker to check for, and hopefully repair, any issues. After it has finished, you can reboot your computer and attempt to update it.
-
Repair your Windows 10 installation. There may be a problem with your Windows 10 installation that the System File Checker can’t fix. If you wish to proceed, the next step is to perform a reset, or a reinstall, while keeping all of your files. It’s one step short of a clean install of Windows, so it’s a pretty drastic move.
Consider backing up your files and settings before you proceed, and make sure to select the keep my files option when performing the repair.
Is It Okay to Skip a Windows Update?
As a general rule of thumb, you should always install Windows updates. However, there are some exceptions. In the case of an especially problematic update, you may need to choose between skipping the update and performing a fresh installation of Windows 10. Additionally, some Windows 10 updates have been famously problematic, either being difficult for many people to install or even causing massive problems for specific hardware configurations.
While you should always make a solid effort to update Windows 10 to keep on top of the latest security patches and features, you may need to ignore an update and wait for the next one.
Thanks for letting us know!
Get the Latest Tech News Delivered Every Day
Subscribe