I was having some major problems with building for linux from windows, At the end of the day, it was fairly simple. I would comment on Alex’s post, but I can not as I am a stackoverflow newb.
As alex said, set the environment variables. This must be done as administrator (eg right click the «command prompt» or «Powershell» shortcut and click «Run as Administrator»)
set GOARCH=amd64
set GOOS=linux
If you use Powershell, use
$Env:GOOS = "linux"; $Env:GOARCH = "amd64"
If you dont do it as administrator, the variables wont take effect and you will just be building it for the OS & Architecture you are on at the moment.
I found its always good to check your go environment vars by running go env, which gives you the list of current go environment variables
go env
set GOARCH=amd64
set GOBIN=
set GOEXE=
set GOHOSTARCH=amd64
set GOHOSTOS=windows
set GOOS=linux
set GOPATH=T:Projectsgopath
set GORACE=
set GOROOT=C:Go
set GOTOOLDIR=C:Gopkgtoolwindows_amd64
set GCCGO=gccgo
set CC=gcc
set GOGCCFLAGS=-fPIC -m64 -fmessage-length=0
set CXX=g++
set CGO_ENABLED=0
set PKG_CONFIG=pkg-config
set CGO_CFLAGS=-g -O2
set CGO_CPPFLAGS=
set CGO_CXXFLAGS=-g -O2
set CGO_FFLAGS=-g -O2
set CGO_LDFLAGS=-g -O2
Make sure the GOOS & GOARCH are set to the values you specified earlier.
If thats all good, you should be able to navigate to the directory containing your go code, and from the command line run:
go build
Which will build the package for the system and the architecure that are set in the environment variables.
I encountered some other issues once I finally figured this out, but that is another matter not related to this issue.
Несмотря на то, что кроссплатформенность стала фактически стандартным атрибутом практически всех современных языков и библиотек, создавать по-настоящему кроссплатформенный продукт, всё равно было непросто. Компилируемые языки и сопутствующие библиотеки требовали сложной установки и настройки среды сборки и библиотек, а интерпретируемые — обязывали иметь или деплоить в составе необходимую версию интерпретатора. Есть немало проектов, пытающихся сделать этот процесс чуть более простым, но зачастую единственным решением оставалось устанавливать отдельный сервер и компилировать нативно.
В Go кросс-платформенность вышла на тот уровень, когда впервые можно смело отказаться от compile farms, специально настроенных dev-сред, виртуальных машин для сборки или chroot/docker-dev решений. И это ещё один серьезный game-changer, подробнее о котором я и хочу рассказать и показать на примерах
Поехали.

Как известно, в Go сознательно отказались от динамической линковки — по ряду причин, основная из которых очень схожа с обычным объяснением дизайна почти любого аспекта Go — «преимущества [динамической линковки] намного меньше её недостатков и сложности, которая она привносит в архитектуру». Что ж, главной причиной появления dynamic linking было желание экономить ресурсы — прежде всего диcковое пространство и память — которые сейчас достаточно дешевы, не только на серверах, но и в embedded-устройствах (коптеры, к примеру, несут на борту уже по 1-2 Гб RAM!). Вобщем, перечислять плюсы и минусы отдельного способа линковки — это потянет на отдельный пост, так что пока просто принимаем, как есть — в Go на выходе всегда имеем статический бинарник.
На данный момент для актуальной версии Go 1.4.1 реализована поддержка следующих платформ:
- Linux 2.61 и выше — amd64, 386, arm
- MacOS X 10.6 и выше — amd64, 386
- Windows XP и выше — amd64, 386
- FreeBSD 8 и выше — amd64, 386, arm
- NetBSD — amd64, 386, arm
- OpenBSD — amd64, 386
- DragonFly BSD — amd64, 386
- Plan 9 — amd64, 386
- Google Native Client — amd64p32, 386
- Android — arm
1 — официально поддерживаются ядра 2.6.23 и выше, но в реальности всё работает и на более ранних ядрах ветки 2.6 — к примеру немало людей используют Go на RHEL5/CentOS5 с 2.6.18.
В Go 1.5 ожидается поддержка iOS.
Еще примечательно, что изначально поддержки Windows в Go не было — команда маленькая, и
пачкать руки
заниматься имплементацией кода для Windows было некому, но благодаря тому, что проект открыли для open-source разработки — порт для Windows был очень быстро написан сторонними людьми и интегрирован в официальную кодовую базу.
Хотя описанные далее процессы будут абсолютно одинаковы для всех платформ (за исключеним, разве что, Android и Native Client (NaCl), для которых нужны лишние телодвижения), далее в статье будет по-умолчанию считаться, что вы используете одну из трех самых популярных десктопных платформ — Linux, MacOS X или Windows. Кроме того, для большей простоты я буду подразумевать, что мы пишем и используем исключительно Go-код, без необходимости линковаться с С-библиотеками (и, тем самым, без необходимости использовать cgo/gcc). Есть еще отдельный кейс — когда нужно использовать ряд функций из стандартной библиотеки, завязанных на cgo, но об этом я напишу отдельной главой в конце.
Подготовка toolchain
Первый шаг, который необходимо выполнить — это собрать toolchain для нужной платформы.
Переходим в директорию с исходным кодом Go (она же $GOROOT/src, она же всегда есть у вас на машине) и пересобираем под нужную платформу, скажем Windows/amd64:
cd $(go env GOROOT)/src
sudo GOOS=windows GOARCH=amd64 CGO_ENABLED=0 ./make.bash --no-clean
Процесс занимает на Macbook Air 2012 около 26 секунд. Скрипт make.bash — это стандартный скрипт сборки Go, которым бы вы инсталлировали Go, если бы ставили из исходников. Он собирает, собственно, Go, и всю стандартную библиотеку, только в этот раз — для платформы windows/amd64.
Также, по упомянутой выше причине, мы отключили поддержку CGO.
Значения GOOS и GOARCH
Таблица значений GOOS (если кто знает, как на Хабре сделать таблица в 50% ширины — подскажите):
| OS | $GOOS |
|---|---|
| Linux | linux |
| MacOS X | darwin |
| Windows | windows |
| FreeBSD | freebsd |
| NetBSD | netbsd |
| OpenBSD | openbsd |
| DragonFly BSD | dragonfly |
| Plan 9 | plan9 |
| Native Client | nacl |
| Android | android |
И GOARCH:
| Architecture | $GOARCH |
|---|---|
| x386 | 386 |
| AMD64 | amd64 |
| AMD64 с 32-указателями | amd64p32 |
| ARM | arm |
Пример 1. Веб-сервер, написанный и собранный в Linux для Windows
Напишем простенький веб-сервер, который в Go писать проще, чем в некоторых языках/библиотеках парсить командную строку.
package main
import (
"log"
"net/http"
)
func Handler(w http.ResponseWriter, r *http.Request) {
w.Write([]byte("Hello, worldn"))
}
func main() {
http.HandleFunc("/", Handler)
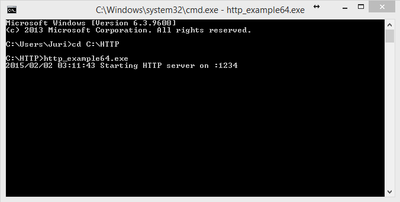
log.Println("Starting HTTP server on :1234")
log.Fatal(http.ListenAndServe(":1234", nil))
}
И соберем его для Windows 32- и 64-bit:
GOOS=windows GOARCH=386 go build -o http_example.exe
GOOS=windows GOARCH=amd64 go build -o http_example64.exe
Проверяем:
$ file http_example*.exe
http_example.exe:   PE32 executable for MS Windows (console) Intel 80386 32-bit
http_example64.exe: PE32+ executable for MS Windows (console) Mono/.Net assembly
Думаю, не нужно говорить, что оба бинарника готовы к копированию на целевую Windows-систему и будут работать.

Пример 2. Кросс-компиляция под ARM для телефона Nokia N9
Сразу скажу, что сейчас я с embedded-девайсами плотно не работаю, поэтому могу какие-то детали не знать — так что постараюсь не углубляться в эту тему, но в целом за ситуацией с Go на embedded слежу. Вообще говоря, Go не позиционировался как язык для embedded-платформ, что, впрочем, не помешало народу активно начать его использовать в этой области. Возможно, причина в том, что embedded-индустрия сделала скачок вперед, и теперь «встраиваемое» устройство уже не означает критически малое количество ресурсов, а возможно компромиссы не в пользу экономии памяти в Go оказались гораздо менее ощутимыми на практике, но факт есть факт — для Go уже создано масса проектов вроде Gobot (robotics-фреймворк для целой кучи платформ — от Arduino, Raspberry PI и Beaglebone Back до LeapMotion, Pebble и ArDrone) или EMBD (фреймворк для работы с hobby-бордами), а PayPal уже пару лет использует Go в своем beacon-девайсе для беспроводных чекинов и платежей.
Для примера возьмем Nokia N9 (или N950, кому повезло) — и соберем вышеприведенный пример для него:
GOOS=linux GOARCH=arm go build -o http_example_arm
scp http_example_arm developer@192.168.2.16:/home/user/

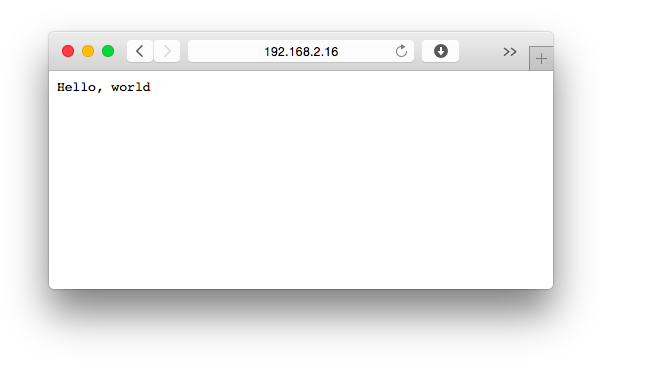
Вот так просто, да.
Для ARM-платформ, на самом деле, может понадобиться еще указывать флаг GOARM, но тут, если версия по-умолчанию не подходит, бинарник на целевой платформе выдаст понятное сообщение, вроде такого:
runtime: this CPU has no floating point hardware, so it cannot
run this GOARM=7 binary. Recompile using GOARM=5.
Автоматизируем процесс
Казалось бы, что может быть проще указания одной переменной перед go build. Но есть ситуации, когда код нужно собирать и деплоить на разные платформы по 100 раз в день. Для таких задач есть несколько проектов, для автоматизации процессов подготовки toolchain-ов и, непосредственно, сборки кода под нужную платформу.
Gox
Ссылка: github.com/mitchellh/gox
Инсталляция и подготовка сразу всех возможных toolchain-ов:
go get github.com/mitchellh/gox
gox -build-toolchain
...
Теперь, вместо «go build», пишем «gox»:
$ gox
Number of parallel builds: 4

-->      darwin/386: github.com/mitchellh/gox
-->    darwin/amd64: github.com/mitchellh/gox
-->       linux/386: github.com/mitchellh/gox
-->     linux/amd64: github.com/mitchellh/gox
-->       linux/arm: github.com/mitchellh/gox
-->     freebsd/386: github.com/mitchellh/gox
-->   freebsd/amd64: github.com/mitchellh/gox
-->     openbsd/386: github.com/mitchellh/gox
-->   openbsd/amd64: github.com/mitchellh/gox
-->     windows/386: github.com/mitchellh/gox
-->   windows/amd64: github.com/mitchellh/gox
-->     freebsd/arm: github.com/mitchellh/gox
-->      netbsd/386: github.com/mitchellh/gox
-->    netbsd/amd64: github.com/mitchellh/gox
-->      netbsd/arm: github.com/mitchellh/gox
-->       plan9/386: github.com/mitchellh/gox
Можно указывать конкретный пакет или конкретную платформу:
gox -os="linux"
gox -osarch="linux/amd64"
gox github.com/divan/gorilla-xmlrpc/xml
Остальные аргументы командной строки идентичны go build. Достаточно интуитивно.
GoCX
GoCX — это один из самых известных врапперов вокруг фич кросс-компиляции, но с упором на пакаджинг (умеет делать .deb даже) и различные плюшки для автоматизированных сборок. Сам не пользовал, поэтому, кому интересно, смотрите сайт и документацию.
github.com/laher/goxc
Разбираемся с CGO
Если кто-то смотрел видео с конференции GopherCon 2014, которая проходила прошлой весной в Денвере, то, возможно, помнит выступление Alan Shreve «Build Your Developer Tools in Go» — и одну из вещей, которую он говорит достаточно категорично: «не используйте кросс-компиляцию, компилируйте нативно». Дальше идет объяснение — причина в Cgo. Если вам не нужно использовать cgo — все окей. И на самом деле, очень малая часть очень специфичного кода в Go нуждается в сторонних С-библиотеках. В чем же проблема?
Проблема в том, что некоторые функции стандартной библиотеки зависят от cgo. Тоесть, если мы собираем Go с CGO_ENABLED=0, они просто не будут доступны и на этапе компиляции мы получим ошибку. Несмотря на то, что тут есть очень удобный и красивый workaround, давайте разберемся, что же именно в стандартной библиотеке зависит от cgo.
К счастью, сделать это просто:
# cd $(go env GOROOT)/src/
# grep  -re "^// +build.*[^!]cgo" *
crypto/x509/root_cgo_darwin.go:// +build cgo
net/cgo_android.go:// +build cgo,!netgo
net/cgo_linux.go:// +build !android,cgo,!netgo
net/cgo_netbsd.go:// +build cgo,!netgo
net/cgo_openbsd.go:// +build cgo,!netgo
net/cgo_unix_test.go:// +build cgo,!netgo
os/user/lookup_unix.go:// +build cgo
runtime/crash_cgo_test.go:// +build cgo
Вкратце пройдемся по этим файлам:
- crypto/x509/root_cgo_darwin.go — имплементирует одну функцию для получения корневых X.509 сертификатов в MacOS X. Если вы не используете явно эту фичу — ничего страшного, без cgo у вас все будет работать.
- net/cgo_android/linux/netbsd/openbsd/cgo_unix_test.go — код необходимый для использования нативного DNS-резолвера в разных unix-ах. Чуть ниже подробности.
- os/user/lookup_unix.go — функции из пакета os/user — для получения информации о текущем юзере (uid, gid, username). Используется getpwuid_r() для чтения passwd-записей
- runtime/crash_cgo_test.go — файл с тестами для хендлинга крешей, ничего релевантного
Теперь подробнее про DNS-resolver.
Каждый файл из того списка (который скомпилируется только для своей платформы благодаря тегам // +build) содержит имплементацию единственной функции cgoAddrInfoFlags(), которая, в свою очередь, используется в cgoLookupIP(), которая, используется в dnsclient_unix.go, в котором мы находим функцию goLookupIP(), которая служит fallback-вариантом при отсутствии cgo-enabled кода, и тут же находим объяснение:
// goLookupIP is the native Go implementation of LookupIP.
// Used only if cgoLookupIP refuses to handle the request
// (that is, only if cgoLookupIP is the stub in cgo_stub.go).
// Normally we let cgo use the C library resolver instead of
// depending on our lookup code, so that Go and C get the same
// answers.
goLookupIP фактически резолвит только по Hosts-файлу и по DNS-протоколу, что для большинства систем — ок. Но могут быть проблемы, если в системе будут использоваться нестандартные методы резолвинга имён. Полагаю, что в 99% случаев, hosts и dns будут более, чем достаточно.
В сухом остатке имеем — если ваш код не использует С/С++-библиотеки через Cgo, и не использует следующие две вещи:
- проверку x.509 сертификатов, которая должна работать на MacOS X
- гарантированно получать системную информацию о текущем юзере
то на все заморочки с Cgo можно забить.
Первая часть (с X.509) на самом деле не такая уж редкая. Если я правильно понимаю — этот код нужен, если ваша программа использует стандартный net/http.StartAndListenTLS() — и вы используете реальные сертификаты, которые реально нужно проверять.
Поэтому вкратце о простом workaround вокруг этой темы — называется он gonative, и делает одну простую вещь — скачивает с официального сайта бинарные версии golang нужной версии для нужной платформы, в которой уже есть скомпилированные бинарники всех стандартных пакетов и, фактически, завершает процесс «собрать toolchain с cgo-кодом».
Всё что нужно сделать, это установить её (go get github.com/inconshreveable/gonative) и выполнить одну простую команду:
gonative
И дальше использовать стандартные процедуры кросскомпиляции, как и раньше, ручками или через gox/gocx.
Подробнее о gonative тут: inconshreveable.com/04-30-2014/cross-compiling-golang-programs-with-native-libraries
Практическое применение
Теперь о главном — применении на практике. Я использовал в продакшене пока только три схемы — «сборка на darwin/amd64 -> деплой на linux/386», «linux/amd64 -> linux/386» и «linux/amd64 -> windows/amd64». Это продукты, которые уже больше года полноценно работают. Третий случай (деплой на windows) тогда меня вообще застал врасплох — был сервер, успешно бегущий на Linux, и тут вдруг резко понадобилось его запускать на Windows. Причем «вот срочно надо». Вспоминая бессонные ночи опыта с кросс- — да что там кросс, просто с компиляцией Qt для деплоя на Windows — 60-секундный процесс «гуглим как это делается → сборка toolchain → перекомпиляция проекта → деплой на windows» — стал просто шоком, я тогда даже не поверил глазам.
Но тут возникает следующий момент — раз кросс-компиляция и деплой становятся такими простыми и быстрыми, появляется стимул все зависимости от файлов — будь-то конфиги, сертификаты или что угодно еще — встраивать в бинарник тоже. Впрочем, это достаточно простая задача, даже для сторонних библиотек, благодаря эффективному использованию io.Reader интерфейса и пакету go-bindata, но это уже тема для отдельной статьи.
Надеюсь, ничего из главного не упустил.
Но в целом это на самом деле очень существенная разница со всем предыдущим опытом кросс-сборки. Если честно, я до сих пор не привык к этой перемене. Больше не нужны виртуалки с настроенной dev-средой, не нужны докер-имиджи для сборки — да вообще dev-environment отпадает как таковой. Это слишком резкий game changer, чтобы так быстро привыкнуть.
Ссылки
dave.cheney.net/2012/09/08/an-introduction-to-cross-compilation-with-go
blog.hashbangbash.com/2014/04/linking-golang-statically
www.limitlessfx.com/cross-compile-golang-app-for-windows-from-linux.html
Updated on January 23, 2023
How do you build Go binaries that target operating systems and architectures other than your own? This is called cross-compiling, and it’s easy to do with Go.
Programs written in Go can easily be compiled for a wide variety of target operating systems such as Windows, macOS, and Linux by using the GOARCH and GOOS environmental variables. These represent the compilation architecture and the name of the target operating system respectively, and are set to your host compilation architecture (GOHOSTARCH) and operating system (GOHOSTOS) by default.
You can use the go env command to view the values of these variables on your machine:
$ go env
...
GOARCH="amd64"
GOHOSTARCH="amd64"
GOHOSTOS="linux"
GOOS="linux"
...
Compile for Windows
Here’s the command you need to run to compile your Go project for a 64-bit Windows machine:
$ GOOS=windows GOARCH=amd64 go build -o bin/app-amd64.exe app.goIn this scenario, GOOS is windows, and GOARCH is amd64 indicating a 64-bit architecture. If you need to support a 32-bit architecture, all you need to do is change GOARCH to 386.
$ GOOS=windows GOARCH=386 go build -o bin/app-386.exe app.goCompile for macOS
The GOARCH values for Windows are also valid for macOS, but in this case the required GOOS value is darwin:
# 64-bit
$ GOOS=darwin GOARCH=amd64 go build -o bin/app-amd64-darwin app.go

# 32-bit
$ GOOS=darwin GOARCH=386 go build -o bin/app-386-darwin app.go
Compile for Linux
To build your Go program for Linux, use linux as the value of GOOS and the appropriate GOARCH value for your target CPU architecture:
# 64-bit
$ GOOS=linux GOARCH=amd64 go build -o bin/app-amd64-linux app.go

# 32-bit
$ GOOS=linux GOARCH=386 go build -o bin/app-386-linux app.go
Other operating systems and CPU architectures
Go supports a lot more OS and CPU architecture combinations than what I’ve described above, but these are the most used ones. If you need to compile for ARM, Android, Web Assembly, or other targets, please refer to the Go docs to see the combinations of GOOS and GOARCH that are available to you.
Thanks for reading, and happy coding!
- #golang
Этой заметкой открываю новую рублику по программированию на Go Lang. Один из первых вопросов, которые пришлось решить — как пользователю Windows 10 скомпилировать исполняемый файл для Linux сервера? Процесс сборки бинарного файла на системе одного типа для системы другого типа называется кросскомпиляцией. Ответ достаточно прост, сначала нужно задать константы:
set GOARCH=amd64
set GOOS=linux
Теперь можно компилировать:
go build turboapp.goЧерез несколько секунд получаем файл turboapp и закидываем его на сервер, и устанавливаем права доступа:
chmod +x turboappВсё, теперь можно запускать!
Данное решение работает для такой конфигурации сервера:
Linux server.developer 2.6.32-696.16.1.el6.x86_64 #1 SMP Wed Nov 15 16:51:15 UTC 2017 x86_64 x86_64 x86_64 GNU/LinuxНа windows системе установлен:
go version go1.10 windows/amd64Для компиляции под другие операционные системы и архитектуры используйте эти таблицы:
| OS | $GOOS |
|---|---|
| Linux | linux |
| MacOS X | darwin |
| Windows | windows |
| FreeBSD | freebsd |
| NetBSD | netbsd |
| OpenBSD | openbsd |
| DragonFly BSD | dragonfly |
| Plan 9 | plan9 |
| Native Client | nacl |
| Android | android |
| Architecture | $GOARCH |
|---|---|
| x386 | 386 |
| AMD64 | amd64 |
| AMD64 с 32-указателями | amd64p32 |
| ARM | arm |
Post Views:
2 439
This topic describes how to build and run Go from source code.
To install with an installer, see Download and install.
Introduction
Go is an open source project, distributed under a
BSD-style license.
This document explains how to check out the sources,
build them on your own machine, and run them.
Most users don’t need to do this, and will instead install
from precompiled binary packages as described in
Download and install,
a much simpler process.
If you want to help develop what goes into those precompiled
packages, though, read on.
There are two official Go compiler toolchains.
This document focuses on the gc Go
compiler and tools.
For information on how to work on gccgo, a more traditional
compiler using the GCC back end, see
Setting up and using gccgo.
The Go compilers support the following instruction sets:
-
amd64,386 -
The
x86instruction set, 64- and 32-bit. -
arm64,arm -
The
ARMinstruction set, 64-bit (AArch64) and 32-bit. -
loong64 - The 64-bit LoongArch instruction set.
-
mips64,mips64le,mips,mipsle -
The
MIPSinstruction set, big- and little-endian, 64- and 32-bit. -
ppc64,ppc64le - The 64-bit PowerPC instruction set, big- and little-endian.
-
riscv64 - The 64-bit RISC-V instruction set.
-
s390x - The IBM z/Architecture.
-
wasm - WebAssembly.
The compilers can target the AIX, Android, DragonFly BSD, FreeBSD,
Illumos, Linux, macOS/iOS (Darwin), NetBSD, OpenBSD, Plan 9, Solaris,
and Windows operating systems (although not all operating systems
support all architectures).
A list of ports which are considered «first class» is available at the
first class ports
wiki page.
The full set of supported combinations is listed in the
discussion of environment variables below.
See the main installation page for the overall system requirements.
The following additional constraints apply to systems that can be built only from source:
- For Linux on PowerPC 64-bit, the minimum supported kernel version is 2.6.37, meaning that
Go does not support CentOS 6 on these systems.
Install Go compiler binaries for bootstrap
The Go toolchain is written in Go. To build it, you need a Go compiler installed.
The scripts that do the initial build of the tools look for a «go» command
in $PATH, so as long as you have Go installed in your
system and configured in your $PATH, you are ready to build Go
from source.
Or if you prefer you can set $GOROOT_BOOTSTRAP to the
root of a Go installation to use to build the new Go toolchain;
$GOROOT_BOOTSTRAP/bin/go should be the go command to use.
There are four possible ways to obtain a bootstrap toolchain:
- Download a recent binary release of Go.
- Cross-compile a toolchain using a system with a working Go installation.
- Use gccgo.
- Compile a toolchain from Go 1.4, the last Go release with a compiler written in C.
These approaches are detailed below.
Bootstrap toolchain from binary release
To use a binary release as a bootstrap toolchain, see
the downloads page or use any other
packaged Go distribution.
Bootstrap toolchain from cross-compiled source
To cross-compile a bootstrap toolchain from source, which is
necessary on systems Go 1.4 did not target (for
example, linux/ppc64le), install Go on a different system
and run bootstrap.bash.
When run as (for example)
$ GOOS=linux GOARCH=ppc64 ./bootstrap.bash
bootstrap.bash cross-compiles a toolchain for that GOOS/GOARCH
combination, leaving the resulting tree in ../../go-${GOOS}-${GOARCH}-bootstrap.
That tree can be copied to a machine of the given target type
and used as GOROOT_BOOTSTRAP to bootstrap a local build.
Bootstrap toolchain using gccgo
To use gccgo as the bootstrap toolchain, you need to arrange
for $GOROOT_BOOTSTRAP/bin/go to be the go tool that comes
as part of gccgo 5. For example on Ubuntu Vivid:
$ sudo apt-get install gccgo-5
$ sudo update-alternatives --set go /usr/bin/go-5
$ GOROOT_BOOTSTRAP=/usr ./make.bash
Bootstrap toolchain from C source code
To build a bootstrap toolchain from C source code, use
either the git branch release-branch.go1.4 or
go1.4-bootstrap-20171003.tar.gz,
which contains the Go 1.4 source code plus accumulated fixes
to keep the tools running on newer operating systems.
(Go 1.4 was the last distribution in which the toolchain was written in C.)
After unpacking the Go 1.4 source, cd to
the src subdirectory, set CGO_ENABLED=0 in
the environment, and run make.bash (or,
on Windows, make.bat).
Once the Go 1.4 source has been unpacked into your GOROOT_BOOTSTRAP directory,
you must keep this git clone instance checked out to branch
release-branch.go1.4. Specifically, do not attempt to reuse
this git clone in the later step named «Fetch the repository.» The go1.4
bootstrap toolchain must be able to properly traverse the go1.4 sources
that it assumes are present under this repository root.
Note that Go 1.4 does not run on all systems that later versions of Go do.
In particular, Go 1.4 does not support current versions of macOS.
On such systems, the bootstrap toolchain must be obtained using one of the other methods.
Install Git, if needed
To perform the next step you must have Git installed. (Check that you
have a git command before proceeding.)
If you do not have a working Git installation,
follow the instructions on the
Git downloads page.
(Optional) Install a C compiler
To build a Go installation
with cgo support, which permits Go
programs to import C libraries, a C compiler such as gcc
or clang must be installed first. Do this using whatever
installation method is standard on the system.
To build without cgo, set the environment variable
CGO_ENABLED=0 before running all.bash or
make.bash.
Fetch the repository
Change to the directory where you intend to install Go, and make sure
the goroot directory does not exist. Then clone the repository
and check out the latest release tag (go1.12,
for example):
$ git clone https://go.googlesource.com/go goroot
$ cd goroot
$ git checkout <tag>
Where <tag> is the version string of the release.
Go will be installed in the directory where it is checked out. For example,
if Go is checked out in $HOME/goroot, executables will be installed
in $HOME/goroot/bin. The directory may have any name, but note
that if Go is checked out in $HOME/go, it will conflict with
the default location of $GOPATH.
See GOPATH below.
Reminder: If you opted to also compile the bootstrap binaries from source (in an
earlier section), you still need to git clone again at this point
(to checkout the latest <tag>), because you must keep your
go1.4 repository distinct.
(Optional) Switch to the master branch
If you intend to modify the go source code, and
contribute your changes
to the project, then move your repository
off the release tag, and onto the master (development) branch.
Otherwise, skip this step.
$ git checkout master
Install Go
To build the Go distribution, run
$ cd src
$ ./all.bash
(To build under Windows use all.bat.)
If all goes well, it will finish by printing output like:
ALL TESTS PASSED

---
Installed Go for linux/amd64 in /home/you/go.
Installed commands in /home/you/go/bin.
*** You need to add /home/you/go/bin to your $PATH. ***
where the details on the last few lines reflect the operating system,
architecture, and root directory used during the install.
For more information about ways to control the build, see the discussion of
environment variables below.
all.bash (or all.bat) runs important tests for Go,
which can take more time than simply building Go. If you do not want to run
the test suite use make.bash (or make.bat)
instead.
Testing your installation
Check that Go is installed correctly by building a simple program.
Create a file named hello.go and put the following program in it:
package main

import "fmt"

func main() {
	fmt.Printf("hello, worldn")
}
Then run it with the go tool:
$ go run hello.go
hello, world
If you see the «hello, world» message then Go is installed correctly.
Set up your work environment
You’re almost done.
You just need to do a little more setup.
How to Write Go Code
Learn how to set up and use the Go tools
The How to Write Go Code document
provides essential setup instructions for using the Go tools.
The source code for several Go tools (including gopls)
is kept in the golang.org/x/tools repository.
To install one of the tools (gopls in this case):
$ go install golang.org/x/tools/gopls@latest
The usual community resources listed on the help page have
active developers that can help you with problems with your installation or your
development work.
For those who wish to keep up to date,
there is another mailing list, golang-checkins,
that receives a message summarizing each checkin to the Go repository.
Bugs can be reported using the Go issue tracker.
Keeping up with releases
New releases are announced on the
golang-announce
mailing list.
Each announcement mentions the latest release tag, for instance,
go1.9.
To update an existing tree to the latest release, you can run:
$ cd go/src
$ git fetch
$ git checkout <tag>
$ ./all.bash
Where <tag> is the version string of the release.
Optional environment variables
The Go compilation environment can be customized by environment variables.
None is required by the build, but you may wish to set some
to override the defaults.
$GOROOTThe root of the Go tree, often
$HOME/go1.X.
Its value is built into the tree when it is compiled, and
defaults to the parent of the directory whereall.bashwas run.
There is no need to set this unless you want to switch between multiple
local copies of the repository.$GOROOT_FINALThe value assumed by installed binaries and scripts when
$GOROOTis not set explicitly.
It defaults to the value of$GOROOT.
If you want to build the Go tree in one location
but move it elsewhere after the build, set
$GOROOT_FINALto the eventual location.$GOPATHThe directory where Go projects outside the Go distribution are typically
checked out. For example,golang.org/x/toolsmight be checked out
to$GOPATH/src/golang.org/x/tools. Executables outside the
Go distribution are installed in$GOPATH/bin(or
$GOBIN, if set). Modules are downloaded and cached in
$GOPATH/pkg/mod.The default location of
$GOPATHis$HOME/go,
and it’s not usually necessary to setGOPATHexplicitly. However,
if you have checked out the Go distribution to$HOME/go,
you must setGOPATHto another location to avoid conflicts.$GOBINThe directory where executables outside the Go distribution are installed
using the go command. For example,
go install golang.org/x/tools/cmd/godoc@latestdownloads, builds,
and installs$GOBIN/godoc. By default,$GOBINis
$GOPATH/bin(or$HOME/go/binifGOPATH
is not set). After installing, you will want to add this directory to
your$PATHso you can use installed tools.Note that the Go distribution’s executables are installed in
$GOROOT/bin(for executables invoked by people) or
$GOTOOLDIR(for executables invoked by the go command;
defaults to$GOROOT/pkg/$GOOS_$GOARCH) instead of
$GOBIN.$GOOSand$GOARCHThe name of the target operating system and compilation architecture.
These default to the values of$GOHOSTOSand
$GOHOSTARCHrespectively (described below).Choices for
$GOOSare
android,darwin,dragonfly,
freebsd,illumos,ios,js,
linux,netbsd,openbsd,
plan9,solarisandwindows.Choices for
$GOARCHare
amd64(64-bit x86, the most mature port),
386(32-bit x86),arm(32-bit ARM),arm64(64-bit ARM),
ppc64le(PowerPC 64-bit, little-endian),ppc64(PowerPC 64-bit, big-endian),
mips64le(MIPS 64-bit, little-endian),mips64(MIPS 64-bit, big-endian),
mipsle(MIPS 32-bit, little-endian),mips(MIPS 32-bit, big-endian),
s390x(IBM System z 64-bit, big-endian), and
wasm(WebAssembly 32-bit).The valid combinations of
$GOOSand$GOARCHare:$GOOS$GOARCHaixppc64android386androidamd64androidarmandroidarm64darwinamd64darwinarm64dragonflyamd64freebsd386freebsdamd64freebsdarmillumosamd64iosarm64jswasmlinux386linuxamd64linuxarmlinuxarm64linuxloong64linuxmipslinuxmipslelinuxmips64linuxmips64lelinuxppc64linuxppc64lelinuxriscv64linuxs390xnetbsd386netbsdamd64netbsdarmopenbsd386openbsdamd64openbsdarmopenbsdarm64plan9386plan9amd64plan9armsolarisamd64windows386windowsamd64windowsarmwindowsarm64$GOHOSTOSand$GOHOSTARCHThe name of the host operating system and compilation architecture.
These default to the local system’s operating system and
architecture.Valid choices are the same as for
$GOOSand
$GOARCH, listed above.
The specified values must be compatible with the local system.
For example, you should not set$GOHOSTARCHto
armon an x86 system.$GO386(for386only, defaults tosse2)This variable controls how gc implements floating point computations.
GO386=softfloat: use software floating point operations; should support all x86 chips (Pentium MMX or later).GO386=sse2: use SSE2 for floating point operations; has better performance but only available on Pentium 4/Opteron/Athlon 64 or later.
$GOARM(forarmonly; default is auto-detected if building
on the target processor, 6 if not)This sets the ARM floating point co-processor architecture version the run-time
should target. If you are compiling on the target system, its value will be auto-detected.GOARM=5: use software floating point; when CPU doesn’t have VFP co-processorGOARM=6: use VFPv1 only; default if cross compiling; usually ARM11 or better cores (VFPv2 or better is also supported)GOARM=7: use VFPv3; usually Cortex-A cores
If in doubt, leave this variable unset, and adjust it if required
when you first run the Go executable.
The GoARM page
on the Go community wiki
contains further details regarding Go’s ARM support.$GOAMD64(foramd64only;
default isv1)This sets the microarchitecture level for which to compile.
Valid values arev1(default),v2,v3,
v4.
See the Go wiki
MinimumRequirements page for more information.$GOMIPS(formipsandmipsleonly)
$GOMIPS64(formips64andmips64leonly)These variables set whether to use floating point instructions. Set to «
hardfloat» to use floating point instructions; this is the default. Set to «softfloat» to use soft floating point.$GOPPC64(forppc64andppc64leonly)This variable sets the processor level (i.e. Instruction Set Architecture version)
for which the compiler will target. The default ispower8.GOPPC64=power8: generate ISA v2.07 instructionsGOPPC64=power9: generate ISA v3.00 instructions
$GOWASM(forwasmonly)This variable is a comma separated list of experimental WebAssembly features that the compiled WebAssembly binary is allowed to use.
The default is to use no experimental features.GOWASM=satconv: generate saturating (non-trapping) float-to-int conversionsGOWASM=signext: generate sign-extension operators
Note that $GOARCH and $GOOS identify the
target environment, not the environment you are running on.
In effect, you are always cross-compiling.
By architecture, we mean the kind of binaries
that the target environment can run:
an x86-64 system running a 32-bit-only operating system
must set GOARCH to 386,
not amd64.
If you choose to override the defaults,
set these variables in your shell profile ($HOME/.bashrc,
$HOME/.profile, or equivalent). The settings might look
something like this:
export GOARCH=amd64
export GOOS=linux
although, to reiterate, none of these variables needs to be set to build,
install, and develop the Go tree.
 A nice feature of the Go language is the ability to build binaries for multiple platforms directly from a single source system. As an example, even from a development Windows 7 32-bit machine, you can build binaries for both 64 bit Linux and Windows 2012 Servers.
Before Go 1.5, you needed a compiler for the target architecture, but now that the entire tool chain is written in Go, building for multiple architectures is easy.
And unlike other languages where additional external libraries need to be copied or downloaded on the target system, Go dependencies are generally statically linked [1,2,3,4] into a single binary which makes portability that much easier.
Building for default architecture
Let’s use a simple go file as an example. Assuming you have installed Go and have the proper environment variable setup, run the following commands on Ubuntu (or the equivalent on Windows):
$ cd $GOPATH
$ mkdir -p src/myarch
$ cd src/myarch
And then either copy the simple go file below, or download it directly from my github project.
// put at $GOPATH/src/myarch/myarch.go
package main

import "fmt"
import "runtime"

func main() {
    fmt.Printf("Hello from: %s %sn",runtime.GOOS,runtime.GOARCH)
}
Being on a 64 bit Ubuntu 14.04 host, doing either a default build or specifying a 64 bit binary explicitly results in:
$ go build
$ ./myarch
Hello from: linux amd64

$ env GOARCH=amd64 go build
$ ./myarch
Hello from linux amd64
And you can also verify the binary target architecture by having the ‘file’ command look at the header:
$ file ./myarch

./myarch: ELF 64-bit LSB  executable, x86-64, version 1 (SYSV), statically linked, not stripped
For Linux, to check if the binary is statically or dynamically linked, use the ‘ldd’ and ‘readelf’ utilities. The below output is for a statically linked binary.
$ ldd ./myarch
not a dynamic executable

# readelf should return empty if statically linked
$ readelf -l myarch | grep interpret
Alternatively, a dynamically linked binary would have return back results that look similar to:
$ldd ./mybinary
 linux-vdso.so.1 => (0x00007ffea676e000)
 libpthread.so.0 => /lib/x86_64-linux-gnu/libpthread.so.0 (0x00007fd8acfee000)
 libc.so.6 => /lib/x86_64-linux-gnu/libc.so.6 (0x00007fd8acc26000)
 /lib64/ld-linux-x86-64.so.2 (0x00007fd8ad20c000)

$ readelf -l mybinary | grep interpret
 [Requesting program interpreter: /lib64/ld-linux-x86-64.so.2]
To force a Go binary to be statically linked set the CGO_ENABLED environment variable to 0 before running the build:
$ export CGO_ENABLED=0
$ go build -a
Building for Linux 32 bit
If I needed to build a 32 bit Linux binary (even though my host server is a 64 bit Linux), I could specify a different target architecture.
$ env GOARCH=386 go build
$ ./myarch
Hello from: linux 386
And you can also verify the binary by having the ‘file’ command look at the header:
$ file ./myarch

./myarch: ELF 32-bit LSB  executable, Intel 80386, version 1 (SYSV), statically linked, not stripped
Building for Windows 32 bit
If I needed to build a 32 bit Windows binary (even though my host server is a 64 bit Linux), I could specify a different target architecture and OS.
$ env GOOS=windows GOARCH=386 go build
And you can also verify the binary by having the ‘file’ command look at the header:
$ file ./myarch

myarch.exe: PE32 executable (console) Intel 80386 (stripped to external PDB), for MS Windows
If you copy this file over to a Windows 32-bit host and run it:
> myarch.exe
hello from: windows 386
And if you try to run a 64 bit binary on a 32 bit Windows machine, you get an error saying that the exe is “is not compatible with the version of Windows you’re running”, as expected.
REFERENCES
https://github.com/golang/go/wiki/WindowsCrossCompiling
https://www.infoq.com/news/2015/08/go-1-5
http://stackoverflow.com/questions/33113190/how-to-create-a-statically-linked-golang-executable-with-go-1-5
Go executables are statically linked, except when they are not.
http://stackoverflow.com/questions/16747021/how-do-you-statically-link-a-c-library-in-go-using-cgo
https://www.osso.nl/blog/golang-statically-linked/
https://blog.codeship.com/building-minimal-docker-containers-for-go-applications/
https://stackoverflow.com/questions/16747021/how-do-you-statically-link-a-c-library-in-go-using-cgo
https://www.osso.nl/blog/golang-statically-linked/
https://golang.org/cmd/cgo/
https://github.com/golang/go/issues/12808
https://github.com/golang/go/issues/9530
https://news.ycombinator.com/item?id=7677699
https://stackoverflow.com/questions/33113190/how-to-create-a-statically-linked-golang-executable-with-go-1-5
dh1tw.de Tobias Wellnitz, cross-compling golang with static c libs using Docker
NOTES
go build -a -tags netgo (for further hint on static linking, but CGO_ENABLED=0 has been enough for me)
Go compilation basics
We already saw a way to generate binaries from your code on the first chapter of the
whole workshop: go get. There’s another command that also installs some package
and stores the resulting binary into $GOPATH/bin: that’s go install.
For this section we will use a different one that gives us more control on what and how
exactly we compile: go build.
Let’s start by opening a terminal window in the directory named
web-server under 2-building-artifacts and run:
This will generate an executable binary with the name of the directory (web-server)
and with an .exe extension if you are in a Windows environment.
You should be able to run it:
Visit http://localhost:8080 and you should be able to see a web server showing
the contents of the current directory.

You can send this directory to anyone else running the same platform as you, not matter
if they know anything about Go or not, and they should be able to simply run the binary.
No need to install extra dependencies or libraries!
Cross-compilation
But what if your friend uses a different platform, let’s say Windows?
Easy! Simply cross-compile to any platform by setting the GOOS and GOARCH variables.
$ GOOS=windows go build
$ file web-server.exe
web-server.exe: PE32+ executable (console) x86-64 (stripped to external PDB), for MS Windows
That’s it!
Conditional compilation
Sometimes you might need to write code that is only compiled for some specific platform.
To do so you have two complementary mechanisms at hand:
- file suffixes, and
- build constraints.
Conditional compilation with file suffixes
If you want a Go file that is only compiled for platforms where GOOS is windows,
you can simply add a _windows suffix to the file name!
So foo_windows.go will be compiled only when compiling for Windows, while foo_linux.go
will be used only for Linux and so on.
In the same way, you can also use an architecture
identifier as a suffix to constraint the compilation to only those platforms with the
given GOARCH: foo_amd64.go will be compiled on my laptop (it’s an amd64), but
foo_arm.go will be ignored.
You can also constraint the compilation to a specific combination of $GOOS and $GOARCH
by using the suffix _GOOS_GOARCH.go, such as foo_darwin_amd64.go.
Conditional compilation with build constraints
Build constraints are more expressive than the file suffixes presented above.
Rather than limiting the compilation to a single OS or architecture, here we can use
a large range of conditions.
They appear as comments at the beginning of a .go file with the syntax:
The code in this file will be compiled only if GOOS is set to linux. You can see
the current value of your GOOS by running:
In addition to the build tags related to GOOS and GOARCH, we can also use the version
of the Go compiler itself. For instance, we can ask for a file to be compiled only if
the compiler is before Go 1.8 or later by adding:
Or if we wanted to compile something if it has a version earlier than go1.7 we could use:
Finally, we can add any custom tags we might want to use, and defined them via build flags
we can pass to go build with the -tags flag.
You can see an example on how to enable/disable logging with zero cost at runtime by
the great Dave Cheney on this blog post.
And since we’re at it, let’s talk about build flags.
Build flags
You can find a full list of all the possible flags you can pass to go build
here, but we will
cover the most important ones here too.
List all the compiled packages with v
$ go build -v github.com/golang/example/hello
github.com/golang/example/hello
All the dependencies were up to date, so only hello was recompiled. You can force
recompiling all dependencies with -a:
$ go build -v -a github.com/golang/example/hello
internal/race
sync/atomic
internal/cpu
unicode/utf8
github.com/golang/example/stringutil
sync
math
io
syscall
time
strconv
internal/poll
reflect
os
fmt
github.com/golang/example/hello
One of my favorite flags is -race which enables the data race detector. We’ll discuss
what this implies when we talk about testing, but for now you can think about it as a
mode where the program will detect mistakes much easier … but it will also run way
slower.
If you want to call C programs from Go you will probably need to pass -LDFLAGS and -GCCFLAGS to gcc. To do so from the go tool we use ldflags and gccflags.
cgo is out of the scope for this workshop, but you can learn more about it with this
justforfunc video.
Exercise: build tags and constraints
Write a program that will print running RELEASE version when compiled with go build -tags release or running DEV version otherwise.
To do so you will need to use three different files, one of them is main.go, with the
following contents:
package main

import "fmt"

func main() {
	fmt.Println("running %s version", version)
}
It is up to you to define a constant named version whose value changes according to
the given build tags by adding the missing files in the exercise directory
under $GOPATH/src/github.com/campoy/go-tooling-workshop/2-building-artifacts/exercise.
Congratulations
You’re now an expert on … basic compilation of Go programs. But you’re already able
to cross-compile Go programs to other platforms!
Next, let’s talk about how to better understand the behavior of running programs in
the dynamic analysis section.
4 декабря, 2019 11:48 дп
2 905 views
| Комментариев нет
Development
При разработке программного обеспечения важно учитывать операционную систему и базовую архитектуру процессора, для которой нужно скомпилировать двоичный файл. Поскольку запуск двоичного файла на платформе с другой ОС или архитектурой зачастую происходит медленно (если его вообще возможно обработать), принято собирать двоичный код для множества различных платформ, чтобы максимально увеличить аудиторию программы. Однако это может быть сложно, если платформа, которую вы используете для разработки, отличается от платформы, на которой вы хотите развернуть свою программу. В прошлом, например, разработка программы для Windows и ее развертывание на Linux или macOS требовали настройки компьютеров сборки для каждой из этих сред, для которых нужно было собрать двоичные файлы. Вам также необходимо синхронизировать инструменты, а также обратить внимание на ряд других аспектов, которые могут повысить расход ресурсов и затруднить совместное тестирование и распространение.
Go решает эту проблему путем встроенной поддержки нескольких платформ непосредственно в инструмент сборки go build (и в остальную часть цепочки инструментов Go). Используя переменные среды и теги сборки, вы можете контролировать, для какой ОС и архитектуры создается окончательный двоичный файл (а также объединить рабочий процесс, что позволит быстро переключать добавление зависимого от платформы кода без изменения вашей кодовой базы).
В этом мануале мы соберем тестовое приложение, которое объединяет строки в путь к файлу, создает и выборочно включает зависимые от платформы фрагменты и собирает двоичные файлы для нескольких операционных систем и архитектур в своей системе. Так вы научитесь использовать эту мощную возможность языка программирования Go.
Требования
Для работы вам понадобится среда разработки Go:
- Установка Go и настройка локальной среды разработки в macOS
- Установка Go и настройка локальной среды разработки в Ubuntu 18.04
- Установка Go и настройка локальной среды разработки в Windows 10
Доступные платформы для GOOS и GOARCH
Прежде чем учиться управлять процессом сборки бинарных файлов для разных платформ, давайте посмотрим, для каких платформ Go может собирать файлы и как Go ссылается на эти платформы с помощью переменных среды GOOS и GOARCH.
Инструментарий Go содержит команду, которая может вывести список доступных платформ для Go. Этот список может меняться с каждым новым релизом Go, поэтому обсуждаемые здесь комбинации могут не совпадать в другой версией Go. На момент написания этого мануала последней является версия Go 1.13.
Чтобы просмотреть список платформ, выполните следующую команду:
go tool dist list
Вы получите подобный вывод:
aix/ppc64        freebsd/amd64   linux/mipsle   openbsd/386

android/386      freebsd/arm     linux/ppc64    openbsd/amd64

android/amd64    illumos/amd64   linux/ppc64le  openbsd/arm

android/arm      js/wasm         linux/s390x    openbsd/arm64

android/arm64    linux/386       nacl/386       plan9/386

darwin/386       linux/amd64     nacl/amd64p32  plan9/amd64

darwin/amd64     linux/arm       nacl/arm       plan9/arm

darwin/arm       linux/arm64     netbsd/386     solaris/amd64

darwin/arm64     linux/mips      netbsd/amd64   windows/386

dragonfly/amd64  linux/mips64    netbsd/arm     windows/amd64

freebsd/386      linux/mips64le  netbsd/arm64   windows/arm
Эти выходные данные представляют собой набор пар ключ-значение, разделенных символом /. Первая часть комбинации, перед слешем – это операционная система. В Go операционные системы являются доступными значениями для переменной среды GOOS, что означает Go Operating System. Вторая часть, после слеша, это архитектура. Эта часть показывает доступные значения для переменной среды GOARCH, что означает Go Architecture.
Давайте разберем одну из этих комбинаций, чтобы понять, что она означает и как она работает. Для примера можно взять пару linux/386. Пара ключ-значение начинается с GOOS, в этом примере это linux, что ссылается на ОС Linux. GOARCH здесь – 386, что указывает на микропроцессор Intel 80386.
Существует много платформ, доступных с помощью команды go build, но в основном в качестве значения GOOS вы будете использовать linux, windows или darwin. Они охватывают три большие платформы ОС: Linux, Windows и macOS, которая основаны на операционной системе Darwin и поэтому называются darwin. Однако Go может охватывать и менее распространенные платформы, такие как nacl, Google’s Native Client.
Когда вы запускаете команду типа go build, Go использует GOOS и GOARCH текущей платформы, чтобы определить, как собирать двоичный файл. Чтобы узнать, какая комбинация подходит вашей платформе, вы можете использовать команду go env и передать GOOS и GOARCH в качестве аргументов:
go env GOOS GOARCH
Мы запустили эту команду на macOS, на машине с архитектурой AMD64, поэтому мы получили такой вывод:
darwin

amd64
Здесь выходные данные команды говорят нам, что система имеет переменные GOOS=darwin и GOARCH=amd64.
Теперь вы знаете, что такое GOOS и GOARCH в Go, а также можете определять их допустимые значения. Далее мы соберем тестовую программу, чтобы показать, как использовать эти переменные среды, и создадим теги для сборки двоичных файлов для других платформ.
Создание зависимой от платформы программы с помощью filepath.Join()
Прежде чем приступить к созданию бинарных файлов для других платформ, давайте создадим простую тестовую программу. Для этого можно использовать функцию Join, которая доступна в пакете path/filepath стандартной библиотеки Go. Эта функция принимает несколько строк и возвращает одну строку, которая соединяется правильным разделителем пути к файлу.
Это хорошая тестовая программа, потому что ее работа зависит от того, на какой ОС она запускается. В Windows в качестве разделителя пути используется обратный слеш, , а в Unix-системах используется обычный слеш /.
Начнем с создания приложения, которое использует filepath.Join(). Позже вы напишете собственную реализацию функции Join(), которая настраивает код для двоичных файлов платформы.
Сначала в каталоге src создайте папку и назовите ее именем вашего приложения:
mkdir app
Перейдите в нее:
cd app
Затем создайте в текстовом редакторе новый файл по имени main.go.
nano main.go
Когда файл откроется, добавьте следующий код:
package main

import (

"fmt"

"path/filepath"

)

func main() {

s := filepath.Join("a", "b", "c")

fmt.Println(s)

}
Функция main() в этом файле использует filepath.Join() для объединения трех строк с помощью правильного, зависимого от платформы разделителя пути.
Сохраните и закройте файл, затем запустите программу:
go run main.go
При запуске этой программы вы получите уникальный вывод – он зависит от используемой вами платформы. В Windows вы увидите строки, разделенные обратным слешем, :
abc
В системах Unix, таких как macOS и Linux, вы получите следующее:
a/b/c
Как видите, из-за разных протоколов файловой системы, используемых в этих операционных системах, программе придется создавать разный код для разных платформ. Но поскольку программа уже использует разные разделители файлов в зависимости от ОС, мы знаем, что filepath.Join() уже учитывает разницу в платформах. Это связано с тем, что цепочка инструментов Go автоматически обнаруживает GOOS и GOARCH вашего компьютера и использует эту информацию для выбора фрагмента кода с правильными тегами сборки и разделителем файлов.
Давайте посмотрим, где функция filepath.Join() находит разделитель. Запустите следующую команду, чтобы проверить соответствующий фрагмент из стандартной библиотеки Go:
less /usr/local/go/src/os/path_unix.go
Эта команда вернет содержимое path_unix.go. Найдите в нем эту часть:
. . .

// +build aix darwin dragonfly freebsd js,wasm linux nacl netbsd openbsd solaris

package os

const (

PathSeparator     = '/' // OS-specific path separator

PathListSeparator = ':' // OS-specific path list separator

)

. . .
В этом разделе определяется PathSeparator для всех разновидностей Unix-подобных систем, которые поддерживает Go. Обратите внимание на все теги сборки в верхней части, которые отображают все доступные платформы Unix GOOS,. Когда GOOS соответствует этим условиям, ваша программа выдает разделитель пути к файлу в стиле Unix.
Нажмите q, чтобы вернуться в командную строку.
Затем откройте файл, который определяет поведение filepath.Join() в Windows:
less /usr/local/go/src/os/path_windows.go
Вы увидите следующее:
. . .

package os

const (

PathSeparator     = '\' // OS-specific path separator

PathListSeparator = ';'  // OS-specific path list separator

)

. . .
Хотя значение PathSeparator здесь \, код будет отображать один обратный слеш (), необходимый для файловых путей Windows, а первый слеш здесь используется только в качестве escape-символа.
Обратите внимание: в отличие от файла Unix, в верхней части этого файла нет тегов сборки. Это связано с тем, что GOOS и GOARCH можно также передать в сборку, добавив подчеркивание (_) и значение переменной среды в качестве суффикса к имени файла (о чем мы поговорим подробнее в следующих разделах мануала). Здесь часть _windows в path_windows.go заставляет файл действовать так, как если бы он имел тег сборки // +build windows в верхней части файла. Поэтому когда программа запускается в Windows, она будет использовать константы PathSeparator и PathListSeparator из фрагмента кода path_windows.go.
Чтобы вернуться в командную строку, нажмите q.
Итак, вы создали программу, которая показала, как Go автоматически преобразует GOOS и GOARCH в теги сборки. Имея это в виду, вы теперь можете обновить свою программу и написать собственную реализацию функции filepath.Join(), используя теги сборки, чтобы вручную установить правильный PathSeparator для платформ Windows и Unix.
Реализация функции, зависимой от платформы
Теперь, когда вы знаете, как стандартная библиотека Go реализует специфичный для платформы код, вы можете использовать теги сборки, чтобы сделать это в своей собственной программе. Для этого напишите собственную реализацию filepath.Join().
Откройте файл main.go:
nano main.go
Замените содержимое main.go на следующее, используя вашу собственную функцию Join():
package main

import (

"fmt"

"strings"

)

func Join(parts ...string) string {

return strings.Join(parts, PathSeparator)

}

func main() {

s := Join("a", "b", "c")

fmt.Println(s)

}
Функция Join принимает несколько parts и соединяет их вместе, используя метод strings.Join() из пакета strings, чтобы объединить части пути в одну строку с помощью PathSeparator.
Вы еще не определили PathSeparator. Сделайте это сейчас в другом файле. Сохраните и выйдите из main.go, откройте ваш редактор и создайте новый файл path.go:
nano path.go
Определите PathSeparator и задайте разделитель пути файла Unix, /:
package main

const PathSeparator = "/"
Скомпилируйте и запустите приложение:
go build

./app
Вы получите следующий вывод:
a/b/c
Все работает, и вы можете получить путь к файлу в стиле Unix. Но это не все, чего мы хотим: сейчас выводится только a/b/c, независимо от того, на какой платформе работает программа. Чтобы добавить функциональность для создания файловых путей в стиле Windows, вам необходимо добавить версию PathSeparator для Windows и сообщить команде go build, какую версию использовать. В следующем разделе мы применим теги сборки для достижения этой цели.
Использование тегов сборки GOOS или GOARCH
Для учета платформ Windows мы создадим альтернативный файл path.go и будем использовать теги сборки, чтобы фрагменты кода выполнялись только тогда, когда в GOOS и GOARCH указана подходящая платформа.
Сначала добавьте тег сборки в path.go, чтобы обозначить, что он собирается для всех платформ, кроме Windows. Откройте файл:
nano path.go
Добавьте следующий выделенный тег сборки в файл:
// +build !windows

package main

const PathSeparator = "/"
Теги сборки Go позволяют инвертировать (то есть вы можете настроить Go для сборки этого файла для любой платформы, кроме Windows). Чтобы инвертировать тег сборки, поместите перед ним восклицательный знак.
Сохраните и закройте файл.
Теперь, если вы запустите эту программу в Windows, вы получите следующую ошибку:
./main.go:9:29: undefined: PathSeparator
В этом случае Go не может включить path.go для определения переменной PathSeparator.
Теперь, когда вы убедились, что path.go не будет работать, если в GOOS указана система Windows, добавьте новый файл windows.go:
nano windows.go
В windows.go определите PathSeparator, а также тег сборки, чтобы команда go build знала, что это реализация Windows:
// +build windows

package main

const PathSeparator = "\"
Сохраните файл и выйдите из текстового редактора. Теперь приложение может компилироваться одним способом для Windows, а другим – для всех других платформ.
Хотя двоичные файлы теперь будут правильно собираться для разных платформ, необходимо внести дополнительные изменения, чтобы скомпилировать файлы для платформы, к которой у вас нет доступа. Для этого нужно изменить локальные переменные среды GOOS и GOARCH.
Использование локальных переменных GOOS и GOARCH
Ранее вы запускали команду go env GOOS GOARCH, чтобы выяснить, с какой ОС и архитектурой вы работали. Запущенная нами команда go env искала две переменные окружения GOOS и GOARCH; если она находит значения, она их использует, но если их нет, Go установит в них информацию для текущей платформы. Так вы можете изменить GOOS или GOARCH и установить значения, которые не относятся к вашей локальной ОС и архитектуре по умолчанию.
Команда go build ведет себя аналогично команде go env. Вы можете установить переменные среды GOOS или GOARCH для сборки для другой платформы, используя go build.
Если на локальной машине вы не используете систему Windows, создайте двоичный файл приложения, установив для переменной среды GOOS значение windows при запуске команды go build:
GOOS=windows go build
Теперь просмотрите файлы в вашем текущем каталоге:
ls
Вывод показывает, что в каталоге проекта теперь есть исполняемый файл app.exe для Windows:
app app.exe main.go path.go windows.go
С помощью команды file вы можете получить больше информации об этом файле, в том числе и о его сборке:
file app.exe

app.exe: PE32+ executable (console) x86-64 (stripped to external PDB), for MS Windows
Вы также можете установить одну или обе переменные среды во время сборки. Запустите следующее:
GOOS=linux GOARCH=ppc64 go build
Ваш исполняемый файл приложения будет заменен файлом для другой архитектуры. Запустите команду file для этого двоичного файла:
file app
Вы получите подобный вывод:
app: ELF 64-bit MSB executable, 64-bit PowerPC or cisco 7500, version 1 (SYSV), statically linked, not stripped
Установив локальные переменные среды GOOS и GOARCH, вы можете создавать двоичные файлы для любой из совместимых платформ Go без сложной конфигурации или настройки. Далее вы научитесь использовать соглашения об именах файлов, чтобы ваши файлы были аккуратно организованы и автоматически собирались для конкретных платформ без тегов сборки.
Суффиксы имен GOOS и GOARCH
Как вы видели ранее, стандартная библиотека Go активно использует теги сборки для упрощения кода путем разделения реализаций разных платформ на разные файлы. Когда вы открыли файл os/path_unix.go, вы видели тег сборки, перечисляющий все возможные комбинации, которые считаются Unix-подобными платформами. Однако файл os/path_windows.go не содержал тегов сборки, поскольку суффикса имени файла было достаточно, чтобы указать Go, для какой платформы предназначен файл.
Давайте посмотрим на синтаксис этой функции. При именовании файла .go вы можете добавить GOOS и GOARCH в качестве суффиксов к имени файла в указанном порядке. Значение должно разделяться подчеркиванием (_). Если у вас есть файл Go по имени filename.go, вы можете указать ОС и архитектуру, изменив имя файла на filename_GOOS_GOARCH.go. Например, если вы хотите скомпилировать файл для Windows с 64-битной архитектурой ARM, вы должны указать имя filename_windows_arm64.go. Это соглашение об именах помогает поддерживать код в чистоте и порядке.
Обновите вашу программу, добавьте суффиксы имен файлов вместо тегов сборки. Сначала переименуйте файлы path.go и windows.go, чтобы использовать соглашение пакета os:
mv path.go path_unix.go

mv windows.go path_windows.go
Изменив имена двух фалов, вы можете удалить тег сборки, который вы добавили в path_windows.go:
nano path_windows.go
Удалите // + build windows, чтобы ваш файл выглядел так:
package main

const PathSeparator = "\"
Поскольку unix не является действительным значением GOOS, суффикс _unix.go ничего не значит для компилятора Go. Однако он передает предполагаемую цель файла. Как и в os/path_unix.go, в файле path_unix.go должны использоваться теги сборки, поэтому оставьте этот файл без изменений.
Следуя соглашению имен, вы можете удалить ненужные теги сборки из кода и сделать файловую систему чище.
Заключение
Возможность генерировать для нескольких платформ двоичные файлы, не требующие зависимостей – важная функция набора инструментов Go. В этом мануале вы научились использовать эту возможность через теги сборки и суффиксы имен файлов. Это позволяет пометить определенные фрагменты кода для компиляции только в файлах определенных архитектур. Вы создали свою собственную зависимую от платформы программу, а затем с помощью переменных среды GOOS и GOARCH сгенерировали двоичные файлы для других платформ. Это ценный навык, поскольку его можно использовать в процессе непрерывной интеграции: он автоматически читает переменные среды для создания двоичных файлов для всех платформ.
Читайте также: Настройка бинарных файлов Go с помощью тегов сборки
Tags: Go, Golang