Hi Mits2020 and thank you for taking the time to write your reply. I’ve been away on vacation and here is what I’ve done.
Hardware:
Dell Precision Tower 3420
Processor: Intel(R) Core(TM) i7-6700 CPU @ 3.40GHz
Physical Cores: 4
Memory: 31.9 GB
Display Adapter: Intel(R) HD Graphics 530 AMD FirePro W2100 (FireGL V)
BIOS Name: BIOS Date: 06/14/19 02:44:12 Ver: 2.13.1
BIOS Version: 2.13.1
BIOS Release Date: 2019-06-13
Motherboard: Dell Inc. 08K0X7
1. First is the hardware. Since everything seemed to work OK for 3 years (and then for 2 months on WIn10), you may have a hardware degradation issue. Are you sure that the hard disk(s) where the host and guests are installed has good health (no bad sectors) and that the filesystem is intact (chkdsk)? Have you ever tested your RAM for defects with Memtest? How much RAM do you use and how much do you allocate to the guest(s)? Is the RAM you use on your motherboard’s Qualified Vendor List?
Response: I ran Dell full hardware diagnostics on all components, including exhaustive tests. It ran for hours. I also ran chkdsk, and checked the event logs for any obvious hardware, disk or file system errors and didn’t see anything obvious.
2. Since you have a vanilla Dell workstation I am assuming there is no exotic hardware in your PC like e.g the latest generation of Intel or AMD CPUs, weird network cards, scsi controllers etc, correct?
Response: Correct, this is a standard Dell build, no custom hardware or components.
3. Is your motherboard’s BIOS updated to the latest version? Are you using any kind of overclocking?
Response: Bios and all hardware drivers are completely updated, and no overclocking or any custom fans or anything. See Bios info above
4. Finally, do you have a decent power supply (or has it perhaps aged) that can handle all your hardware properly?
Response: This is the same basic 350 Watt power supply that shipped with the system. I have no reason to believe it’s faulty, since these problems basically began after I upgraded the Host OS to Windows 10 Professional.
5. Then is the software. Since everything seemed stable with Windows 7, then Windows 10 may be the issue,. Please provide details on how you are creating the Windows 10 virtual machines. Are you using original iso files from MS (checked with checksums), or are you using a CD or USB?
Response: For the Host I ran an in place upgrade using the Microsoft Windows Media Creation Tool. I’ve used this tool a bazillion times with no problems and the Host OS seems completely stable.
6. What build/flavor is this Windows? Have you tried using the latest ISO from Microsoft?
Response: The Host and VMs are running Windows 10 Professional. Remember that I upgraded the VMs from Windows 7 to Windows 10 first, and then let them run for weeks before performing the upgrade on the Host. So the in place upgrade on the VMs was successful and the VMs were stable for weeks after the Windows 10 upgrade. However, after we upgraded the host and stared having problems with the VMs, I actually created an entirely new Windows 10 Professional VM from scratch and it’s crashing as well. I don’t believe it’s the upgrade or installation media.
7. Are you using any exotic software on the host that requires intensive 3D graphics?
Response: No exotic software that is graphic intensive on the Host or the VMs.
8. Have you tried disabling 3D acceleration on the guests?
Response: Are you talking about in the VM configuration, disabling 3D Acceleration? No I have not disabled 3D Acceleration, I’ll try this tonight.
9. Finally, are you using default options for the CPU virtualization? In Virtual Machine Settings — Processors the three checkboxes for the Virtualisation Engine should be unchecked. Also how many cores has your CPU host and how many do you use in the VMs? Have you tried reducing the number of cores for the VMs (e.g 2 instead of 4) to allow possibly better scheduling for the host?
Response: This is how the VM guests are configured.
8GB RAM
Number of Processors: 1 (This was set to 2, I changed it to 1 but still crashing)
Number of Cores per processor: 2
Total Processor Cores: 2
Virtualization Intel VT-x/EPT or AMD-V/RVI is deselected
Virtualize CPU Performance counters is deselected
Additional Information: I also disabled VSS on the system drive so the VSS service is no longer writing recovery points for the drive the guests are on.
i appreciate the help
| title | description | ms.date | author | ms.author | manager | audience | ms.topic | ms.prod | localization_priority | ms.reviewer | ms.custom | ms.technology |
|---|---|---|---|---|---|---|---|---|---|---|---|---|
|
HAL_INITIALIZATION_FAILED error on VMware VM |
Provides a solution to fix a HAL_INITIALIZATION_FAILED error that occurs when you install Windows 8 or Microsoft Windows Server 2012 on VMware VM. |
09/09/2020 |
Deland-Han |
delhan |
dcscontentpm |
itpro |
troubleshooting |
windows-client |
medium |
kaushika, scottmca, ctimon |
sap:setup, csstroubleshoot |
windows-client-deployment |
Error HAL_INITIALIZATION_FAILED when you install Windows 8 or Windows Server 2012 on VMware VM
This article provides a solution to fix a HAL_INITIALIZATION_FAILED error that occurs when you install Windows 8 or Microsoft Windows Server 2012 on VMware VM.
Applies to: Windows 10 — all editions, Windows Server 2012 R2
Original KB number: 2814803
Symptoms
Consider the following scenarios:
Scenario 1
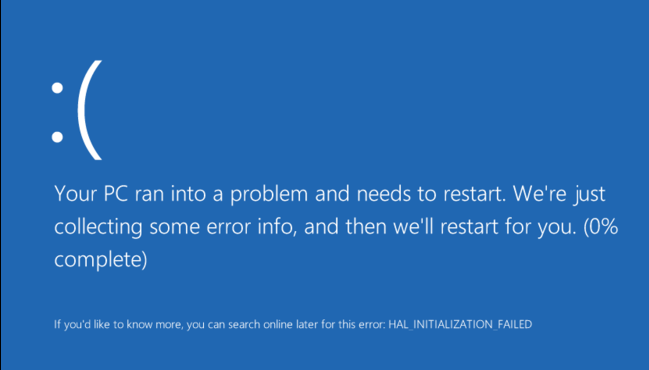
When installing Windows 8, Windows Server 2012, or booting using Windows PE 4.0 on a VMware 4.x virtual machine running a Windows operating system, you may encounter the following error:
Your PC ran into a problem and needs to restart. We’re just collecting some error info, and then we’ll restart for you. (0% complete)
If you would like to know more, you can search online later for this error: HAL_INITIALIZATION_FAILED
[!Note]
If you attempt to boot the x86 version of Windows PE 4.0, the system will hang.
Scenario 2
You attempt to execute an Offline P2V using System Center Virtual Machine Manager 2012 SP1 for a virtual machine (Windows operating system) running on a VMware ESX server 4.x, you experience the symptoms as mentioned in the Scenario 1.
Scenario 3
Assume that you install Windows 8 or Windows Server 2012 on a VMware virtual machine. In this situation, the VM crashes while booting and you may receive the following Stop error code:
STOP: 0x0000005D (parameter1, parameter2, parameter3, parameter4)
Cause
VMware 4.x doesn’t support Windows 8 or Windows Server 2012 as guest operating system. VMware 4.x also doesn’t support an Offline P2V of a virtual machine running a Windows operating system when using System Center Virtual Machine Manager (VMM) 2012 SP1. This version of VMM uses WinPE 4.0 when executing the Offline P2V process.
Resolution
Upgrade to later version of VMware (at least version 5.1).
For Scenario 2, the options include:
- Execute an Online P2V. This option may not be recommended for some virtual machines, such as those functioning as Domain Controllers, and or SQL servers.
- Execute a V2V
- Use the Microsoft Virtual Machine Converter solution — Microsoft Virtual Machine Converter
More information
You can also run into this issue in other scenarios involving WDS, SCCM, or other deployment technologies. For example, attempting to PXE boot a Windows 8 boot.wim.
For more information on support for Windows 8 and Windows Server 2012 in VMware, see the following article:
Windows 8 / Windows Server 2012 Operating System does not boot or install on ESXi or ESX (2006859).
For more information on support for operating systems in VMware Guests, see the following article:
VMware Compatibility Guide.
Hardware requirements for Windows 8 and Windows Server 2012:
PAE/NX/SSE2 Support Requirement Guide for Windows 8

- Remove From My Forums
-
Question
-
good afternoon,
I am trying to install the technical preview on a VMware box, ESXi 5.0,
upon installation, I get the windows logo, then the «your computer has encountered a problem and needs to restart» (or something to that effect)
error is HAL_INITIALIZATION_FAILED
any ideas?
John
All replies
-
I would suggest asking in the VMWare forums for ESXi, they probably have a
workaround.
Bob Comer
-
You didn’t say if you had the updates for ESXi 5 installed — VMware doesn’t support Windows 8/2012 on the RTM version of ESXi 5, which means it won’t support Windows 10 either —
more information here
Try updating your ESXi server first (I think you need at least Update 3 — but don’t quote me), then try creating a new Windows 10 VM
-
Proposed as answer by
Tuesday, January 20, 2015 9:49 AM
-
Proposed as answer by
by Milan Stanojevic
Milan has been enthusiastic about technology ever since his childhood days, and this led him to take interest in all PC-related technologies. He’s a PC enthusiast and he… read more
Updated on April 26, 2022
- If a certain driver is outdated or not compatible with your OS, you’ll encounter a HAL_INITIALIZATION_FAILED Windows 10 error.
- The HAL INSTALLATION FAILED error can also occur due to malfunctioning of unproperly connected hardware components.
- One of the best solutions to fix this problem is to use dedicated third-party repair software.
- The HAL INITIALIZATION FAILED stop code can also be fixed by updating the drivers.

XINSTALL BY CLICKING THE DOWNLOAD FILE
This software will repair common computer errors, protect you from file loss, malware, hardware failure and optimize your PC for maximum performance. Fix PC issues and remove viruses now in 3 easy steps:
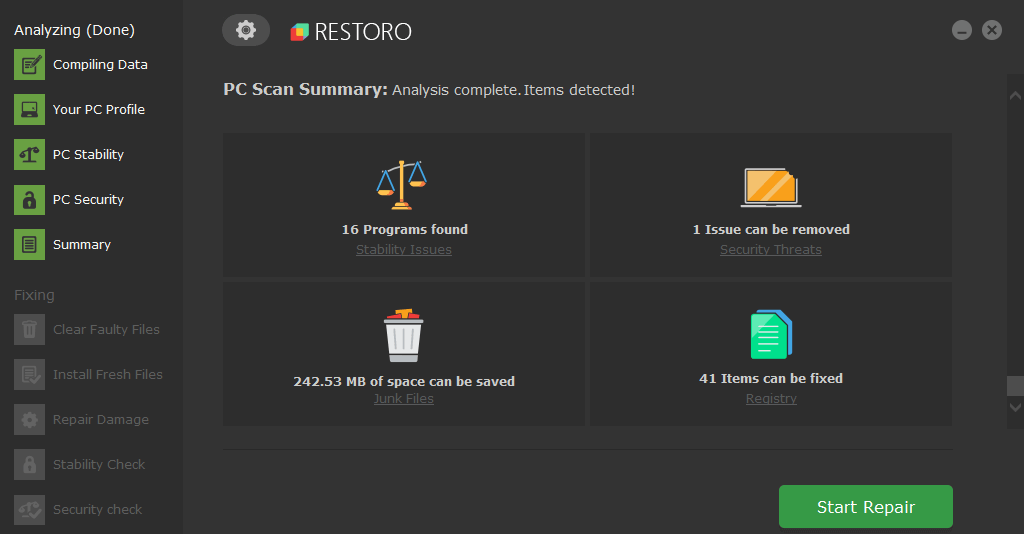
- Download Restoro PC Repair Tool that comes with Patented Technologies (patent available here).
- Click Start Scan to find Windows issues that could be causing PC problems.
- Click Repair All to fix issues affecting your computer’s security and performance
- Restoro has been downloaded by 0 readers this month.
There are all sorts of errors on Windows 10, but Blue Screen of Death errors are probably the most problematic.
These errors will constantly restart your computer in order to prevent damage, and that can be rather tiresome.
Since these errors are so serious, today we’re going to show you how to fix HAL INITIALIZATION FAILED error. We have to mention that our solutions also cover the VMware HAL INITIALIZATION FAILED issue.
How can I fix the HAL INITIALIZATION FAILED BSoD error?
- Use third-party repair software
- Check if your drivers and Windows 10 are up to date
- Run the BSOD Troubleshooter
- Run the SFC scan
- Run DISM
- Check the hard drive
- Check for problematic software
- Set UsePlatformClock to true
- Update your BIOS
- Reset Windows 10
- Check your hardware
1. Use third-party repair software
BSoD errors are not to be treated lightly as they can disturb all your workflow and can consume time and effort to fix.
However, there is an easier way to deal with them and especially with the HAL INITIALIZATION FAILED error. That is by using specialized software that can fix such errors automatically and quickly repair the system.
Restoro is powered by an online database that features the latest functional system files for Windows 10 PCs, allowing you to easily replace any elements that can cause a BSoD error.
This software can also help you by creating a restore point before starting the repairs, enabling you to easily restore the previous version of your system if something goes wrong.
This is how you can fix registry errors using Restoro:
- Download and install Restoro.
- Launch the application.
- Wait for the software to identify stability issues and possible corrupted files.
- Press Start Repair.
- Restart your PC for all the changes to take effect.
As soon as the fixing process is completed, your PC should work without problems, and you will not have to worry about BSoD errors or slow response times ever again.
⇒ Get Restoro
Disclaimer: This program needs to be upgraded from the free version in order to perform some specific actions.
2. Check if your drivers and Windows 10 are up to date
Many BSoD errors are caused by hardware or software incompatibility, and in order to fix this issue, it’s crucial to update Windows 10 frequently.
Microsoft is bringing new features through Windows Update, but in addition to new features, there are also many fixes designed to fix any hardware and software incompatibilities that you might have.
To avoid any BSoD errors, and to keep your computer safe and stable, make sure to update Windows 10 as frequently as you can.
Downloading Windows 10 updates is important, but it’s also crucial that you update your drivers.
Drivers allow Windows 10 to better utilize your hardware, and if the certain driver is outdated or not compatible with Windows 10, you’ll encounter a HAL INITIALIZATION FAILED BSoD error.
To update your drivers, all you have to do is to visit your hardware manufacturer’s website, locate the device you wish to update, and download the latest drivers for it.
After downloading the latest drivers, the BSoD error should be resolved.
Few users reported that this BSoD error was caused by their graphic card driver, therefore be sure to update your graphic card driver first and then move to other drivers.
To be sure that the error is fixed, try to update as many drivers as you can.
Update drivers automatically
Searching for drivers on your own can be time-consuming. So, we advise you to use a tool that will do this for you automatically.
Using an automatic driver updater will certainly save you from the hassle of searching for drivers manually, and it will always keep your system up to date with the latest drivers.
3. Run the BSoD troubleshooter
- Open the Settings app.
- Go to the Update & Security section.
- Select Troubleshoot from the left pane.
- Select BSoD from the right pane and click on Run the troubleshooter.

- Follow the instructions on the screen to complete the troubleshooter.
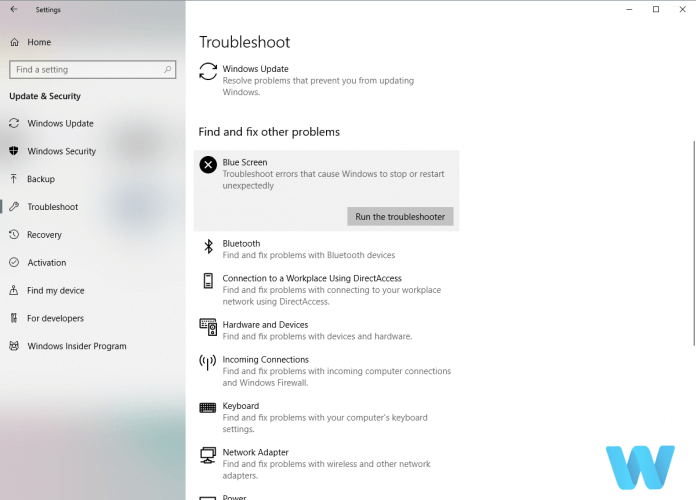
The next thing we’re going to try is running the built-in troubleshooter featured in Windows 10. This troubleshooter can help with all sorts of issues, including the BSOD errors.
So naturally, it could be helpful with resolving the HAL INITIALIZATION FAILED error, as well.
4. Run the SFC scan
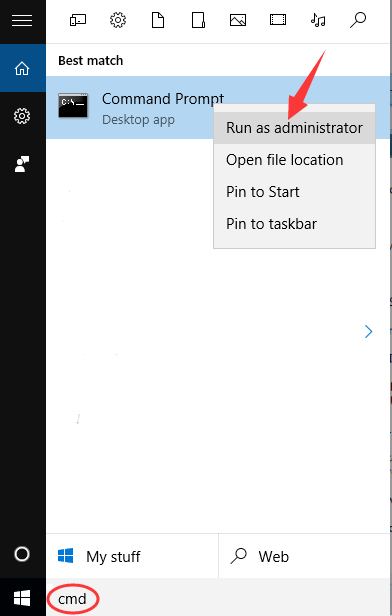
- Go to Search, type cmd, and open the Command Prompt as administrator.
- Enter the following line and press Enter: sfc/scannow

- Wait for the scan to complete (it will take a while).
- The tool will automatically resolve the problem, if possible.
- Close Command Prompt and restart your computer.
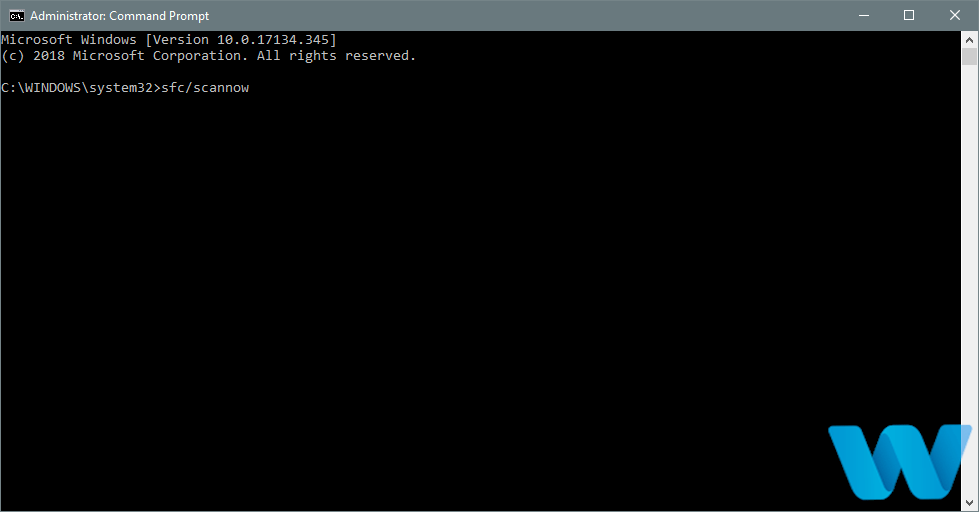
Another troubleshooter that could be helpful here is the SFC scan. This is a command-line tool that scans your system for potential flaws, and resolves them, if possible.
So, it could also resolve the HAL INITIALIZATION FAILED error.
5. Run DISM
5.1 Run DISM the standard way
- Open the Command Prompt as shown in the previous step.
- Paste the following command and press Enter:
DISM /Online /Cleanup-Image /RestoreHealth
- Wait until the scan is finished.
- Restart your computer and try updating again.

5.2 Run DISN using a Windows installation media
- Insert your Windows installation media.
- Start Command Prompt as shown in the previous solution.
- In the command line, type the following commands and press Enter after each:
dism /online /cleanup-image /scanhealthdism /online /cleanup-image /restorehealth
- Now, type the following command and press Enter:
DISM /Online /Cleanup-Image /RestoreHealth /source:WIM:X:SourcesInstall.wim:1 /LimitAccess
- Make sure to change an X value with the letter of the mounted drive with Windows 10 installation.
- After the procedure is finished, restart your computer.
And the third troubleshooting tool we’re going to use while trying to resolve the HAL INITIALIZATION FAILED error is DISM.
Deployment Image and Servicing (DISM), as its name says, re-deploys the system image, so it’s possible it will also resolve some potential issues along the way.
We’ll walk you through both standard and the procedure that utilizes the installation media above.
6. Check the hard drive
- Enter the Advanced Startup (Restart your computer while holding the Shift key).
- Go to Troubleshoot > Advanced Options.
- Select Command Prompt from the list of options.
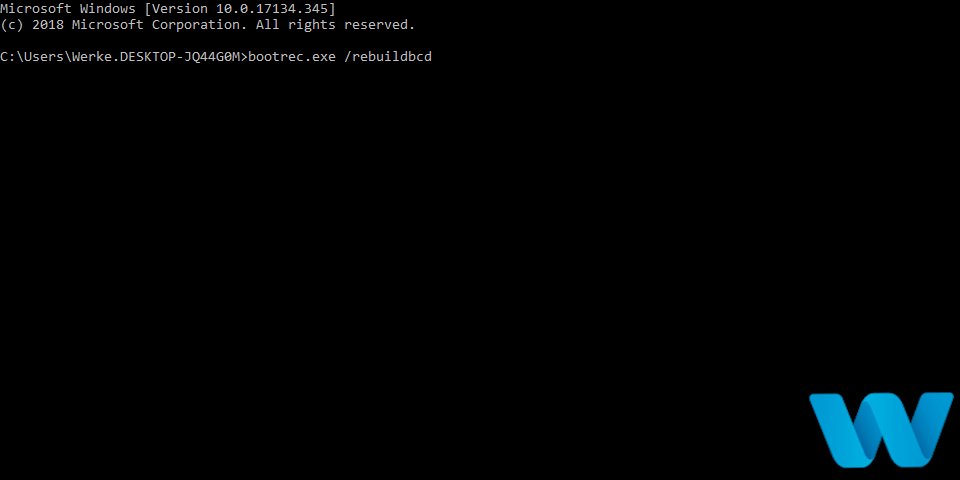
- When Command Prompt appears, enter the following lines and press Enter after each line:
- bootrec.exe /rebuildbcd

- bootrec.exe /fixmbr
- bootrec.exe /fixboot
- bootrec.exe /rebuildbcd
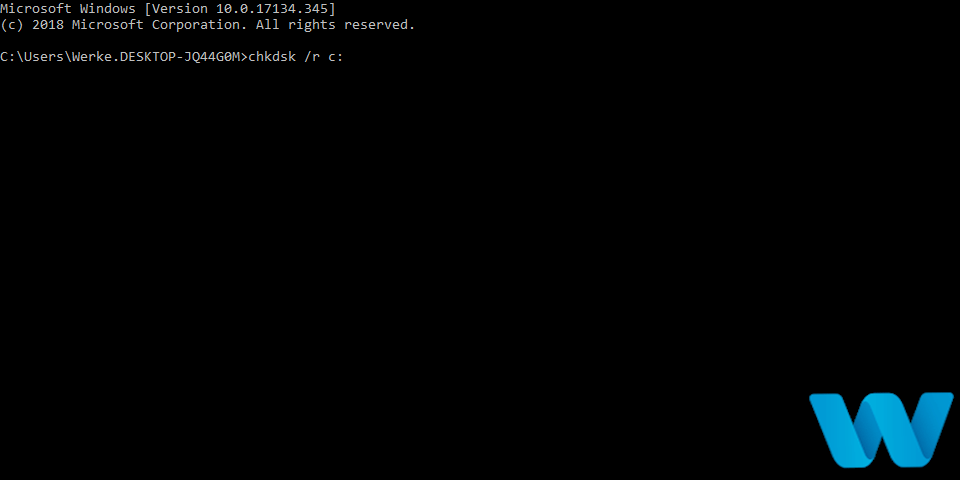
- Some users are also suggesting that you need to run additional chkdsk commands as well. To perform these commands, you need to know drive letters for all your hard drive partitions. In Command Prompt you should enter the following (but remember to use the letters that match your hard drive partitions on your PC):
- chkdsk /r c:
- chkdsk /r d:
- This is just our example, so keep in mind that you have to perform chkdsk command for every hard drive partition that you have.
- chkdsk /r c:
6. Restart your computer and check if the issue is resolved.
A broken hard drive is alarming. And the first warning messages come in the form of BSoD issues. So, go and check the current state of your hard drive.
To do that, you should run the chkdsk command. This command will scan your partitions, and apply solutions, if possible.
7. Check for problematic software
Often these types of problems can be caused by problematic software. And in order to fix HAL INITIALIZATION FAILED error, you’ll need to find the program that is causing this problem and disable/uninstall it.
Most commonly these types of errors are caused by your antivirus software, so be sure to uninstall your antivirus software.
If you’re concerned about your safety, you should know that Windows Defender will turn on automatically after you uninstall your antivirus program, so your PC won’t be without any protection.
It’s worth mentioning that almost any antivirus program can cause this error, so be sure to remove any third-party antivirus that you have installed.
In addition, in order to completely remove a certain antivirus, including registry entries and all files, it’s recommended to use a dedicated PC cleaning tool to analyze and remove junk files.
Many antivirus companies offer uninstaller tools for their software, so be sure to download them and use them.
However, sometimes there are files that are left behind after the installation and that can lead to other problems with your system and take up precious space.
The best way of wiping up an app is by using specialized software and CCleaner is perfect for this job. Not only that it will uninstall the app but it will delete any records from the registry and any other leftover files.
⇒ Get CCleaner
8. Set UsePlatformClock to true
8.1 Use Command Prompt
- Open Command Prompt as shown in step 4.
- Once the Command Prompt opens, enter the following and press Enter to run it:
bcdedit /set useplatformclock true
- Close Command Prompt.
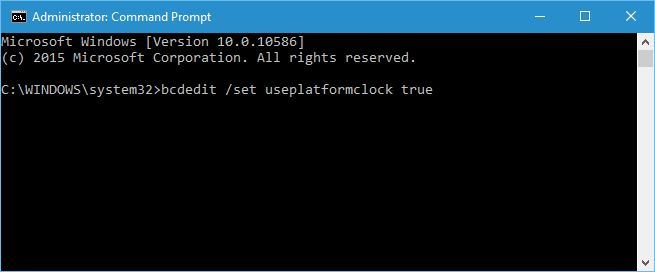
Users reported that performing the aforementioned steps fixed the BSoD error while waking up from Sleep Mode, so if you’re having a similar problem, be sure to try the steps above.
If you cannot access Windows 10 due to this error, you can try performing these steps from Safe Mode. To enter Safe Mode, follow the next steps.
8.2 Enter Safe Mode
- Restart your computer a few times while it boots. This should start Automatic Repair process.
- Choose Troubleshoot, select Advanced options, click on Startup Settings and click Restart.
- When your computer restarts you should see a list of options. Select Safe Mode with Networking by pressing 5 or F5.
- Once the Safe Mode starts, try running Command Prompt and performing the steps from the 8.1 solution.
9. Update your BIOS
Few users reporting that updating BIOS fixed the HAL INITIALIZATION FAILED error.
Updating BIOS is an advanced procedure, and if not performed properly it can permanently damage your motherboard, so be extra careful. To see how to properly update your BIOS check your motherboard manual.
As for the necessary files, you can download the latest BIOS from your motherboard manufacturer’s website.
10. Reset Windows 10
- Reset your computer a few times while it boots.
- Choose Troubleshoot, select Reset this PC and click on Remove everything.
- Now select Only the drive where Windows is installed and click on Just remove my files.
- Follow the instructions and wait for the reset process to finish.
If the problem persists even after Windows 10 reset, it means that the issue is most likely caused by a faulty or incompatible hardware.
If the problem is caused by a certain software, you can fix it by performing Windows 10 reset.

NOTE
Resetting Windows 10 will delete all files from your C drive, so be sure to create a backup.
11. Check your hardware
HAL INITIALIZATION FAILED can be often caused by incompatible hardware, therefore if you installed any new hardware recently, be sure to remove it or replace it and see if your PC works better without it.
If you didn’t install any new hardware, you might want to check if your hardware is working properly.
A most common cause for BSoD errors is your RAM, so be sure to test your RAM modules one by one.
In addition, you can also use tools such as MemTest86+ to check your RAM. If your RAM is not the problem, check your hard drive, graphics card, and motherboard.
Almost any hardware component can cause this error, so you’ll need to perform a thorough inspection.
HAL INITIALIZATION FAILED BSoD error can be problematic, but as you can see, this error can be relatively easy to fix if you use one of our solutions.
If you suceeded in fixing this BSoD error by using one of our solutions let us know in the comments section below.
![]()
Newsletter
HAL_INITIALIZATION_FAILED
чаще всего наблюдается, когда ваша система выходит из спящего режима. Это может быть вызвано проблемами с оборудованием или драйверами устройств и в основном случается со старыми компьютерами.
Обычно ваш компьютер перезагружается после синего экрана ошибки смерти, как показано на снимке экрана выше. Но если вы постоянно видите эту ошибку, пора исправить ее, поскольку это способ вашего компьютера сказать вам, что с ним что-то не так.
К счастью, решить эту проблему нетрудно. Прочтите и следуйте приведенным ниже инструкциям с четкими снимками экрана.
Как мне это исправить?
Вот 4 самых эффективных способа попробовать. Возможно, вам не придется пробовать их все; просто двигайтесь вниз, пока не найдете тот, который вам подходит.
Способ 1: Установите для useplatformclock значение True
Способ 2: Очистить ненужные файлы
Способ 3: Проверить повреждение жесткого диска
Метод 4: Обновите драйверы
Почему у меня появляется ошибка HAL_INITIALIZATION FAILED?
Старые, поврежденные или неправильно настроенные драйверы, заражение вредоносным ПО, поврежденные системные файлы или поврежденный жесткий диск могут быть основными причинами этой проблемы. Иногда, если вы используете виртуальную машину, причина тоже может быть в этом.
Если вы используете VMWare, рекомендуется обновить текущую версию до последней версии, которую вы можете найти на ее официальном сайте. Или вместо этого вы можете обратиться к виртуальной машине.
1. Установите для useplatformclock значение True
1) Тип cmd в поле поиска, а затем щелкните правой кнопкой мыши Командная строка вариант, который приходит и выбирает Запустить от имени администратора .
2) Выберите да в окне подсказки.
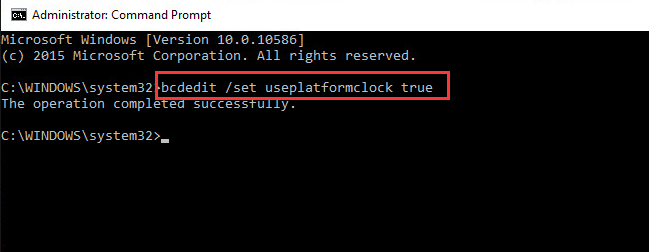
3) Затем введите команду bcdedit / set useplatformclock true . Обратите внимание, что перед «/» стоит пробел.
4) Чтобы убедиться, что useplatformblock включен / true, выполните следующую команду bcdedit / enum . Перед «/» тоже есть пробел.
Если вы видите useplatformclock Да в командной строке, тогда вы можете быть уверены, что этот процесс был выполнен.

5) Перезагрузите компьютер после этого изменения, чтобы увидеть, исчезла ли проблема.
2: Очистить ненужные файлы
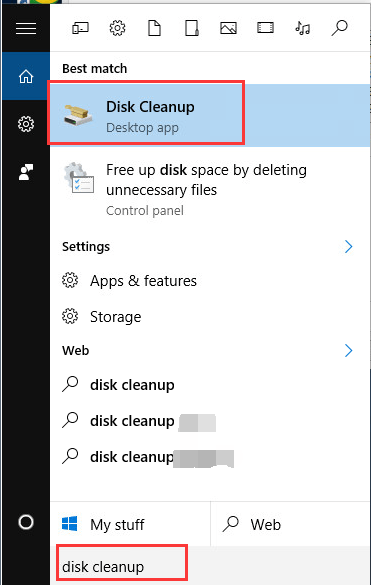
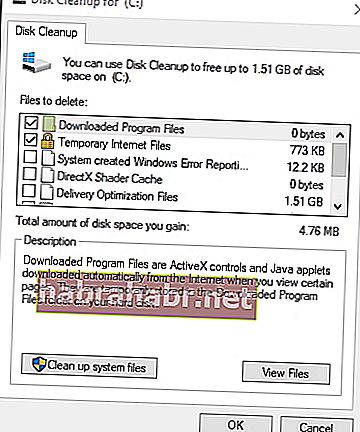
1) Щелкните значок Поиск кнопку в Windows 10, а затем введите очистка диска . Затем выберите Очистка диска вариант, который подойдет.
2) Подождите немного.
3) Потяните немного вниз, чтобы найти Временные файлы вариант. Поставьте галочку напротив него и выберите Хорошо .
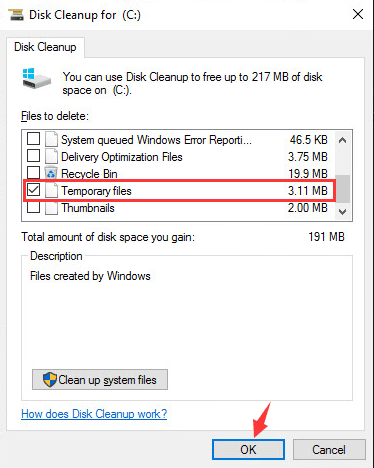
4) Если у вас есть больше места, которое вы хотели бы освободить, поставьте галочку напротив, чтобы очистить их.
5) Перезагрузите компьютер после этого шага.
3: проверьте повреждение жесткого диска
1)Тип cmd в поле поиска, а затем щелкните правой кнопкой мыши Командная строка вариант, который приходит и выбирает Запустить от имени администратора .
2) Выберите да в окне подсказки.
3) Введите chkdsk / f и ударил Войти .
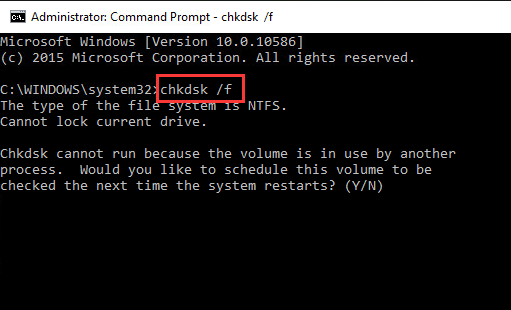
4) Он может перезапустить проверку жесткого диска или может потребоваться перезагрузка. Вам нужно нажать И и Войти двигаться дальше.
5) Перезагрузите компьютер сейчас.
4: Обновите драйверы
Обычно рекомендуется обновлять драйверы через Центр обновления Windows или перейдите в сайты производителей самостоятельно искать водителей, чтобы обеспечить безопасность водителей.
Если у вас нет времени, терпения или навыков работы с компьютером для обновления драйверов вручную, вы можете сделать это автоматически с помощью Водитель Easy .
Driver Easy автоматически распознает вашу систему и найдет для нее подходящие драйверы. Вам не нужно точно знать, в какой системе работает ваш компьютер, вам не нужно рисковать, загружая и устанавливая неправильный драйвер, и вам не нужно беспокоиться о том, что вы ошиблись при установке.
Вы можете автоматически обновлять драйверы с помощью БЕСПЛАТНОЙ или Pro версии Driver Easy. Но с версией Pro требуется всего 2 клика (и вы получаете полную поддержку и 30-дневную гарантию возврата денег):
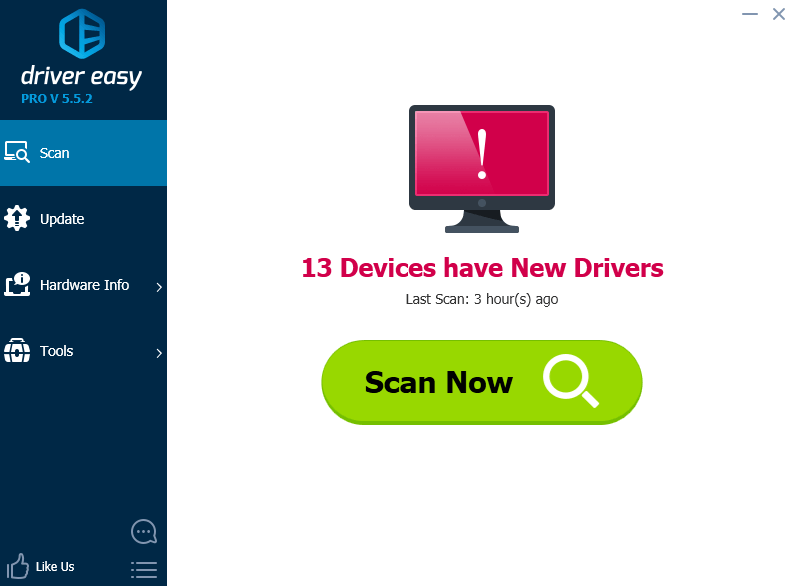
1) Скачать и установите Driver Easy.
2) Запустите Driver Easy и нажмите кнопку «Сканировать сейчас». Затем Driver Easy просканирует ваш компьютер и обнаружит проблемы с драйверами.
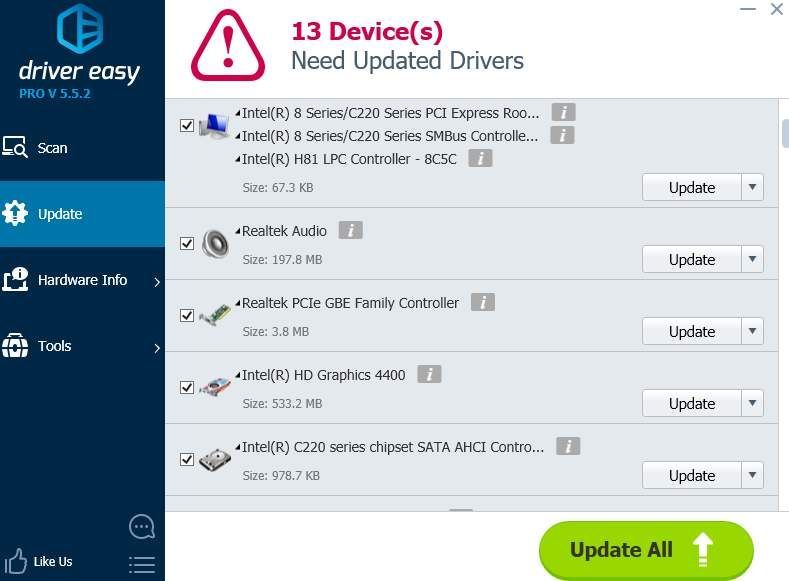
3) Щелкните значок Обновить рядом с отмеченным драйвером USB, чтобы автоматически загрузить и установить правильную версию этого драйвера (вы можете сделать это в БЕСПЛАТНОЙ версии).
Или нажмите Обновить все для автоматической загрузки и установки правильной версии всех драйверов, которые отсутствуют или устарели в вашей системе (для этого требуется Pro версия — вам будет предложено выполнить обновление, когда вы нажмете Обновить все ).
«Единственный раз, когда у меня проблемы, — это когда я сплю».
Тупак Шакур
Вы пробовали вывести систему из спящего режима и вдруг видите синий экран с сообщением об ошибке? Такая проблема, как HAL INITIALIZATION FAILED в Windows 10, вероятно, вызвана проблемами устройства или оборудования, особенно если у вас старый компьютер. Обычно это исчезает при перезагрузке компьютера. Однако, если вы начинаете замечать, что эта ошибка возникает чаще, то пора исправить ее. Вполне вероятно, что есть более серьезная проблема, которую вы должны решить немедленно.
Если вы хотите исправить ошибку HAL INITIALIZATION FAILED, важно знать, что вызывает проблему. Вот некоторые из основных причин, по которым возникает эта проблема:
- Поврежденные, устаревшие или неправильно настроенные драйверы
- Поврежденные системные файлы
- Заражение вредоносным ПО
- Поврежденный или поврежденный жесткий диск
Вы не единственный, кто пытался решить эту проблему. Таким образом, вы довольно часто можете найти множество способов исправить ошибку HAL INITIALIZATION FAILED. Продолжайте читать эту статью, чтобы избавиться от проблемы и без проблем вернуться к использованию компьютера.
Метод 1. Установка для useplatformclock значения True
Один из лучших способов избавиться от ошибки HAL_INITIALIZATION FAILED в Windows 10 — установить для useplatformclock значение True. С учетом сказанного, вот шаги, которым вы должны следовать:
- Щелкните значок поиска.
- Введите «cmd» (без кавычек).
- Щелкните правой кнопкой мыши командную строку результатов и выберите «Запуск от имени администратора».
- Если вам будет предложено дать разрешение приложению, нажмите Да.
- В командной строке введите «bcdedit / set useplatformclock true» (без кавычек).
- Следующее, что вам нужно сделать, это проверить, установлено ли для useplatformclock значение True. Вы можете сделать это, набрав «bcdedit / enum» (без кавычек) в командной строке. Вы должны увидеть «Да» рядом с useplatformclock.
- Вы можете перезагрузить компьютер и проверить, решена ли проблема.
Примечание. Если эта ошибка не позволяет вам получить доступ к операционной системе, мы рекомендуем выполнить действия в безопасном режиме.
- Перезагрузите компьютер.
- Пока он загружается, перезапустите его снова. Сделайте это несколько раз, чтобы запустить процесс автоматического восстановления.
- Выберите Устранение неполадок, затем перейдите в Дополнительные параметры.
- Оттуда щелкните Параметры запуска, затем щелкните Перезагрузить.
- После перезагрузки компьютера вы увидите список опций.
- Нажмите 5 или F5 на клавиатуре, чтобы выбрать безопасный режим с загрузкой сетевых драйверов.
- После того, как вы загрузили свой компьютер в безопасном режиме, запустите командную строку и выполните указанные выше действия.
Метод 2: очистка ненужных файлов
- Щелкните значок поиска.
- Введите «очистка диска» (без кавычек), затем нажмите Enter.
- Выберите диск, который вы хотите очистить, затем подождите, пока приложение рассчитает объем свободного места.
- Убедитесь, что выбраны временные файлы.
- Щелкните ОК.
- Если вы хотите освободить больше места, установите флажок рядом с опцией и нажмите OK.
- Перезагрузите компьютер и проверьте, устранена ли ошибка.
Метод 3: проверка, не поврежден ли ваш жесткий диск
- Щелкните значок поиска на панели задач и введите «cmd» (без кавычек).
- Щелкните правой кнопкой мыши командную строку и выберите «Запуск от имени администратора».
- Снова нажмите Да, если приложение предложит вам предоставить разрешение.
- В командной строке введите «chkdsk / f» (без кавычек), затем нажмите Enter.
- Если программе требуется перезапуск, просто нажмите Y и нажмите Enter.
- После завершения процесса перезагрузите компьютер и проверьте, исправлена ли ошибка.
Метод 4: Обновление драйверов
Многие ошибки с синей полосой смерти вызваны несовместимостью программного или аппаратного обеспечения. Вот почему так важно устанавливать обновления всякий раз, когда Microsoft выпускает их для Windows 10. Обновление вашей системы может исправить ошибки и ошибки, позволяя вам пользоваться всеми функциями вашего компьютера. То же самое и с вашими драйверами. Если вы будете поддерживать их в актуальном состоянии, ваш компьютер будет стабильным и безопасным. Более того, обновление драйверов позволяет максимально использовать оборудование.
Если вы хорошо разбираетесь в технологиях, вы можете сделать это вручную. Однако даже для экспертов это может занять много времени и быть сложным. В конце концов, вам нужно проверить веб-сайт производителя и просмотреть несколько установщиков, чтобы найти последние и совместимые версии для вашей системы. По этой причине мы рекомендуем использовать Auslogics Driver Updater для автоматизации процесса.
<
Одним нажатием кнопки этот инструмент распознает операционную систему, работающую на вашем компьютере. После этого он выполнит поиск совместимых драйверов, чтобы вы не смогли по ошибке установить неправильную версию. Более того, Auslogics Driver Updater позаботится обо всех неисправных или устаревших драйверах, а не только о тех, которые связаны с ошибкой HAL_INITIALIZATION FAILED. Итак, как только процесс будет завершен, вы сможете заметить значительное улучшение скорости и производительности вашего компьютера!
Вы пробовали какой-либо из методов, которыми мы поделились?
Сообщите нам, какой из них вы использовали, комментируя ниже!