Установка Windows 7
Установка Windows 7 — относительно несложный процесс. Чтобы начать ее, нужно загрузить компьютер с DVD-диска или USB-накопителя, подключиться к WDS-серверу или загрузить Windows РЕ, подключиться к общему ресурсу и запустить Setup.exe. С этого момента и начинается установка. Она может проходить в обычном или автоматическом (unattended) режиме. Разница между ними такова:
- Обычная установка.
В процессе обычной установки администратор отвечает на несколько вопросов, чтобы настроить развертывание Windows 7 на компьютере. Этот вариант установки удобен, когда вы устанавливаете Windows 7 на небольшом количестве компьютеров. - Автоматическая установка.
Она выполняется при помощи файлаUnattend.xml. В нем сохраняются ответы на вопросы, задаваемые Мастером установки (Setup Wizard). Когда вы запускаете процесс установки Windows 7, программа проверяет, не подключено ли к компьютеру USB-устройство с этим файлом в корневом каталоге. Автоматическая установка удобна, когда вам нужно развернуть Windows 7 на большом количестве компьютеров. Она избавляет от необходимости вручную отвечать на вопросы программы.
Чистая установка
Чистая установка (clean installation) — это установка ОС на компьютер, на котором ранее никакой ОС не было. Это может быть новый компьютер, только что прибывший с завода, или старый компьютер с новым жестким диском, на который вы хотите установить Windows 7. Чистая установка может выполняться с любого носителя. Вы детально освоите процесс чистой установки в одном из упражнений, а на следующих нескольких страницах описаны некоторые параметры и понятия, которые вам при этом понадобятся.
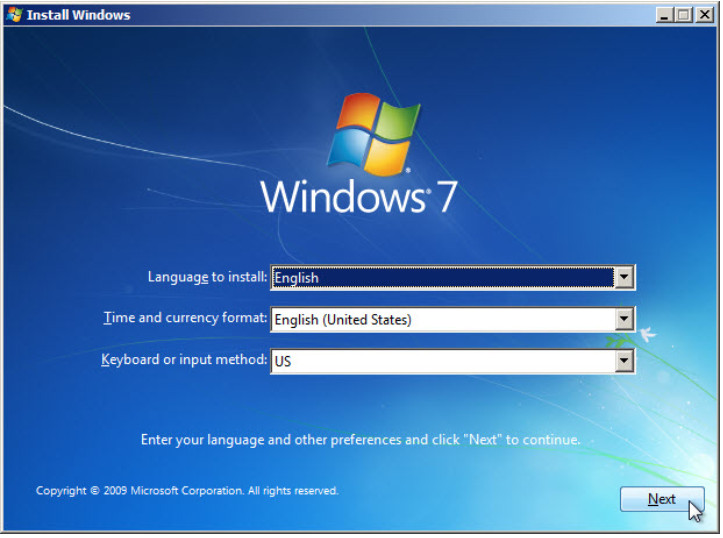
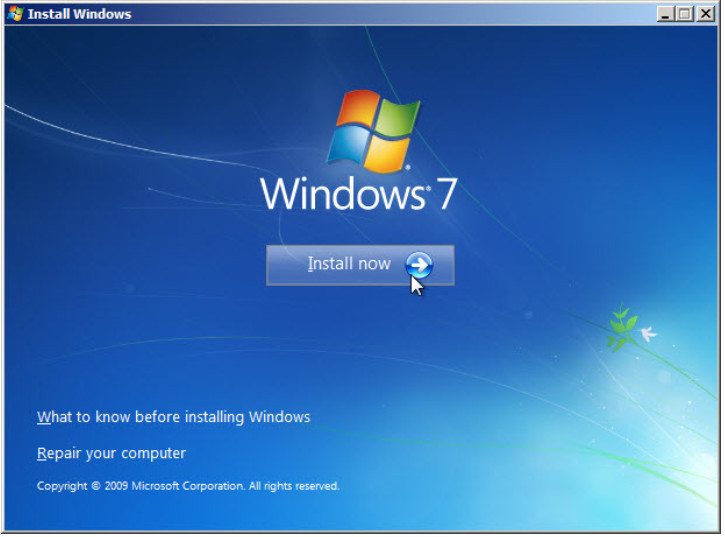
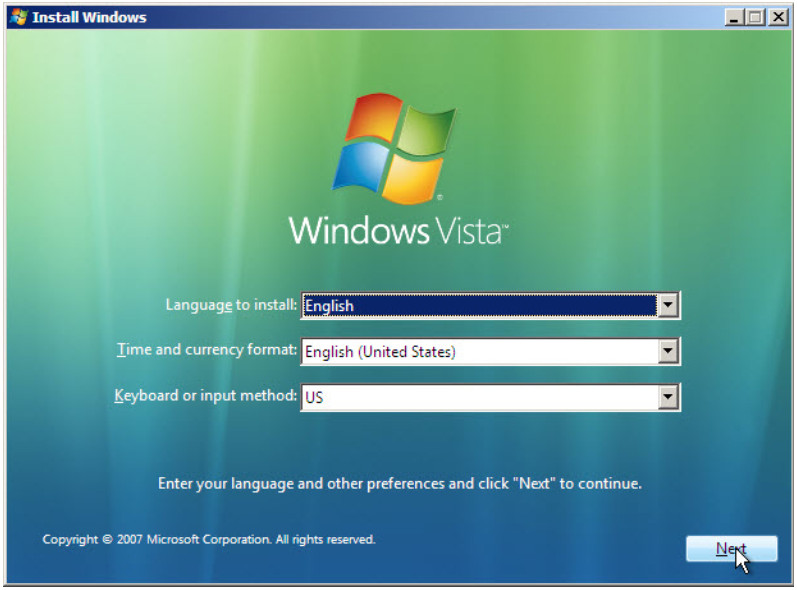
Первая страница программы установки предлагает вам выбрать язык установки, формат отображения времени и денежных сумм, а также клавиатуру и метод ввода, которые вы предпочитаете использовать в процессе установки. Если вы устанавливаете Windows 7 для пользователей, которым нужно работать с несколькими раскладками клавиатуры, эти раскладки можно будет добавить по окончанию процесса установки. Задав нужные параметры, щелкните Далее (Next). Чтобы начать установку, щелкните кнопку Установить (Install Now), показанную на рис. 1-1. Отсюда же вы можете получить доступ к некоторым инструментам для восстановления Windows 7, щелкнув ссылку Восстановление системы (Repair Your Computer).
О восстановлении системы вы более подробно узнаете из урока 14. Щелкните ссылку Что следует знать перед выполнением установки Windows (What То Know Before Installing Windows), чтобы познакомиться с основными рекомендациями по установке, например с минимальными аппаратными требованиями ОС.
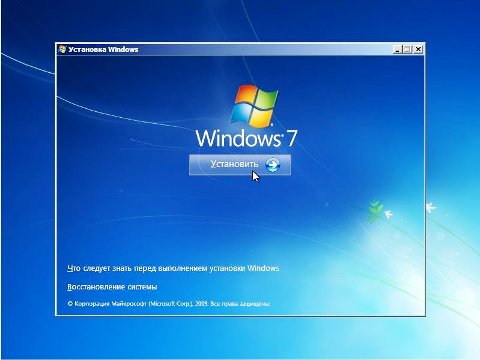
Рис. 1-1. Начало установки Windows
На следующем шаге необходимо ознакомиться с лицензионными требованиями Windows 7 и принять их. После этого вы выбираете нужный тип установки: Обновление (Upgrade) или Полная установка (Custom Advanced). Производя чистую установку, выбирайте второй вариант. Впрочем, к этому типу будут относиться практически все установки Windows 7. Обновление возможно лишь из Windows Vista или Windows 7. Подробнее об обновлении Windows 7 в занятии 2.
Следующий шаг — определение места для хранения файлов Windows 7. Системе требуется не менее 15 Гб дискового пространства, но, как правило, ей следует отводить больше места. На этой странице вы сможете разделить диск на меньшие тома, щелкнув команду Настройка (Drive Options (Advanced)). Программа установки автоматически распознает большую часть дисков IDE, SATA и SCSI. Если на вашем компьютере установлено специфическое дисковое оборудование, например массив RAID, вам, возможно, придется прибегнуть к команде Загрузка (Load Driver). Щелкните ее, только если диск, на который вы собираетесь установить Windows, не указан в списке возможных расположений для установки. Если диск присутствует в списке, Windows 7 уже загрузила необходимые драйверы. Когда вы выберете место для установки Windows 7, начинается собственно процесс установки.
После перезагрузки компьютера вам нужно будет задать имя пользователя и имя компьютера. Имя пользователя будет присвоено учетной записи администратора компьютера. Учетная запись Администратор (Administrator), применявшаяся в предыдущих версиях, по умолчанию отключена. Включить ее можно только посредством редактирования групповой политики. Теперь для учетной записи администратора вы вольны выбрать любое имя, но в крупных организациях, развертывающих Windows 7, следует выработать определенную политику назначения имен учетным записям. Как правило, человеку, работающему на компьютере, по соображениям безопасности не следует предоставлять полные административные полномочия. Наличие продуманной политики назначения имен также избавит ИТ-специалистов от необходимости угадывать имя локального администратора, когда им понадобится войти на компьютер с административными полномочиями. Также в организациях следует использовать и продуманные правила присвоения имен компьютерам. В именах пользователей и компьютеров не могут использоваться специальные символы рис. 1-2.
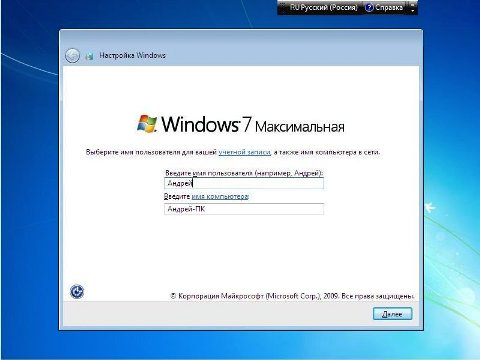
Рис. 1-2. Название компьютера и имя локального администратора
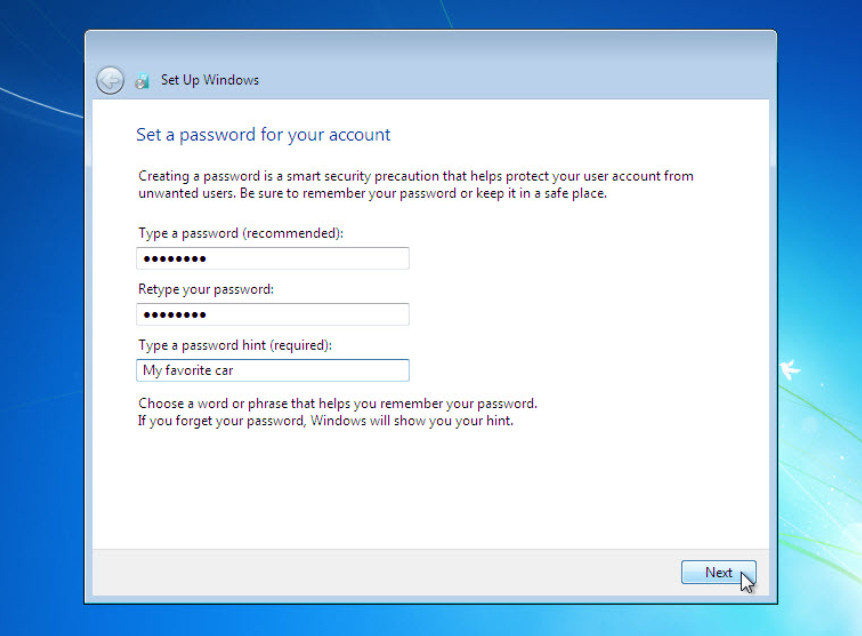
Задав имя пользователя и имя компьютера, введите пароль и подсказку для его напоминания. Поскольку создаваемая учетная запись станет записью администратора по умолчанию, подсказка не должна позволять постороннему угадать пароль. Подсказки локальных учетных записей видны всем пользователям в окне входа, что представляет потенциальную угрозу безопасности.
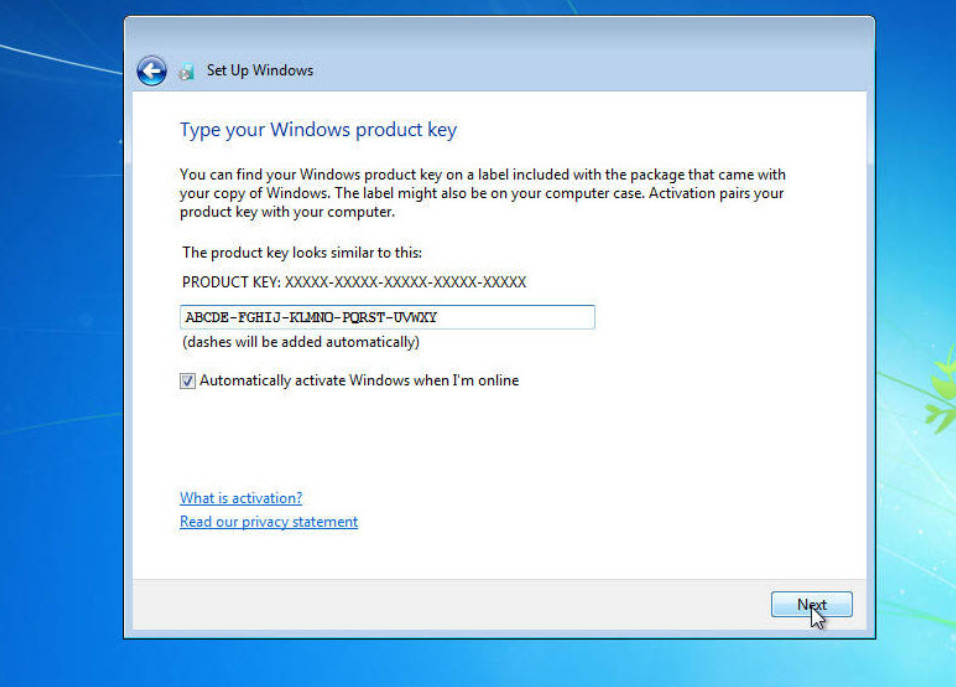
Далее вам предоставляется возможность ввести ключ продукта и настроить автоматическую активацию Windows после завершения установки и подключения к Интернету. Помните, что на активацию продукта вам дается 30 дней, поэтому активировать ОС сразу после установки не нужно. Вы можете в течение этих 30 дней проверить, устраивает ли вас работа ПО и оборудования компьютера. Не активируйте ОС, не убедившись в работоспособности компьютера.
Если вы на данном этапе введете ключ продукта, Windows 7 автоматически выберет соответствующее издание. Если вы решите не вводить ключ продукта, вам придется вручную указать издание Windows 7 для установки на компьютер. Будьте внимательны: ключ продукта можно использовать лишь с соответствующим изданием Windows 7. Если вы зададите установку Windows 7 Ultimate, а ключ у вас есть только для Windows 7 Home Premium, вам придется приобрести ключ к изданию Ultimate или полностью переустановить Windows 7.
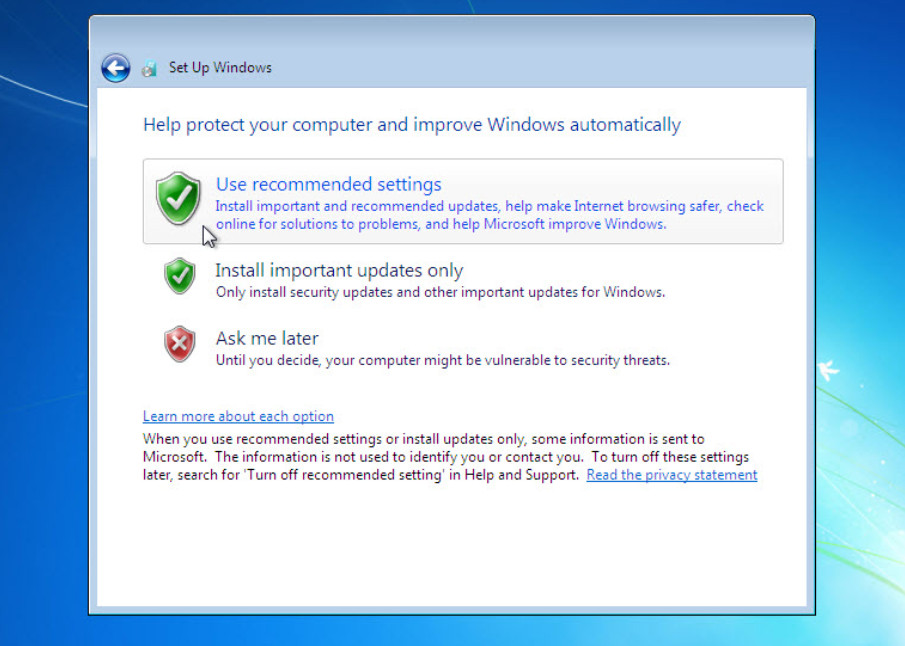
Далее на экране появляется окно Помогите автоматически защитить компьютер и улучшить Windows (Help Protect Your Computer And Improve Windows Automatically). Если вы выполняете установку в среде, где отсутствуют решения автоматического обновления, подобные WSUS (Windows Server Update Services), выберите вариант Использовать рекомендуемые параметры (Use Recommended Settings). Помните, что при выборе этого варианта компьютер под управлением Windows 7 использует подключение к Интернету для загрузки важных и рекомендуемых обновлений после завершения процесса установки. При установке Windows 7 на большом количестве компьютеров это может существенно повлиять на использование внешнего Интернет канала. Рассмотрите возможность развертывания WSUS или другого подобного решения. Можно также добавить обновления в образ установки перед его развертыванием. Подробнее о добавлении обновлений в установочный образ Windows 7 вы прочитаете в разделе 3. Обновление Windows 7 после развертывания описано в разделе 12.
Если программа установки обнаружила сеть, укажите тип сети — домашняя, рабочая или общественная.
Выбранный вами тип сети определяет, какие службы будут работать на компьютере Windows 7 и к каким сетевым расположениям у него будет доступ.
Если вы выберете вариант Домашняя сеть (Home Network), то сможете также указать, к каким библиотекам и устройствам должен быть предоставлен общий доступ в домашней группе. Подробнее о сетевых расположениях в разделе 6.
Завершив все эти настройки, вы входите в Windows 7 с учетной записью локального администратора. На этом этапе вам, возможно, придется вручную установить дополнительные драйверы, которые не были установлены автоматически. Подробнее о настройке драйверов устройств в Windows 7 — в главе 4.
Установка двух ОС
На одном компьютере можно установить две (или несколько) ОС, например Windows ХР и Windows 7 или Windows Vista и Windows 7. Если на компьютере установлено несколько ОС, выбор системы для загрузки осуществляется при запуске компьютера при помощи меню. Установка нескольких ОС на одном компьютере становится менее распространенной по мере развития приложений виртуализации, например, Microsoft Virtual PC 2007, которые, в частности, позволяют загружать старые ОС «изнутри» новых ОС. В наши дни двойная загрузка (dual-boot) используется, главным образом, по причинам, связанным с оборудованием. Например, если компьютер соответствует минимальным требованиям Windows 7 к памяти и вам нужно запускать программы, которые работают только в Windows ХР, вам придется прибегнуть к двойной загрузке, поскольку для запуска виртуального экземпляра Windows ХР у вас не хватит памяти. При настройке двойной загрузки следует размещать каждую ОС на собственном разделе или жестком диске. Если у вас нет свободного раздела или диска, воспользуйтесь инструментарием Windows Vista или Windows 7, чтобы создать новый том в свободном пространстве существующего тома. Доступ к этому инструментарию вы получите из консоли Управление дисками (Disk Management). Щелкните нужный том правой кнопкой и выберите команду Сжать том (Shrink Volume).
Чтобы использовать в качестве второй ОС Windows 7, вам понадобится создать новый том объемом не менее 15 Гб. Помните, что наличие достаточного свободного пространства на сжимаемом томе не означает, что вам удастся выделить все это пространство для новой ОС: Windows Vista не сможет переместить некоторые специальные файлы в другое место диска. В Windows ХР нет собственного инструмента для сжатия томов, но эта функция имеется в программных продуктах сторонних разработчиков.
Настраивая новый компьютер на загрузку нескольких операционных систем, необходимо устанавливать эти ОС в порядке старшинства версий. Например, если вам нужно загружать на новом компьютере Windows ХР и Windows 7, сначала установите Windows ХР, а потом Windows 7. Если вы установите Windows ХР после Windows 7, программа установки Windows ХР не распознает установку системы Windows 7, и на компьютере будет загружаться только Windows ХР. Конечно, эту проблему можно решить при помощи средств Windows 7 для восстановления при запуске, но гораздо проще устанавливать ОС в том порядке, в котором они выпускались Майкрософт.
Чтобы настроить на компьютере альтернативную загрузку Windows 7, можно либо загрузиться с установочного носителя Windows 7, либо запустить программу установки из предыдущей версии Windows. Когда вам будет предложено выбрать между обновлением или пользовательской установкой (рис. 1-3), выбирайте пользовательскую установку. Если вы выберете обновление с Windows ХР, программа установки завершит работу: обновить Windows ХР нельзя. Если вы выберете обновление с Windows Vista, система будет обновлена без настройки альтернативной загрузки. Если вы совершите эту ошибку, то сможете вернуться к исходной конфигурации, в которой вы успешно зарегистрировались в новой установке Windows 7.
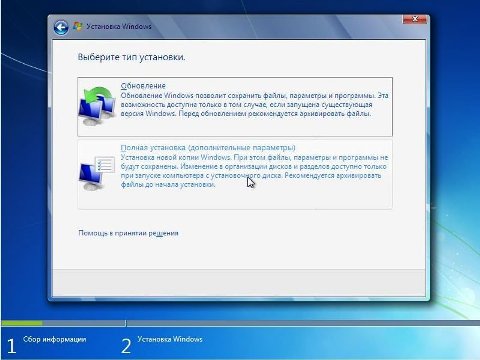
Рис. 1-3. Выбирайте пользовательскую установку, чтобы настроить альтернативную загрузку
Процесс установки при настройке альтернативной загрузки не отличается от чистой установки. Здесь главное — выбрать правильный диск или том, когда вы задаете место для размещения Windows 7. Если вы выберете том или диск, на котором размещена вторая ОС, то рискуете просто очистить этот том и заменить другую ОС новой установкой Windows 7. Когда установка завершится, вы сможете выбирать загружаемую систему, причем по умолчанию будет загружаться Windows 7. О настройке ОС по умолчанию вы узнаете чуть позже.
Двойная загрузка и виртуальные жесткие диски
У правила установки каждой ОС в отдельный раздел есть исключение — загрузка из VHD-файла. Из VHD-файлов можно устанавливать версии Windows 7 Enterprise и Ultimate, а также Windows Server 2008 R2. Загрузка из VHD возможна только на компьютерах с загрузочной средой Windows 7 или Windows Server 2008 R2. Это означает, что на компьютерах Windows ХР или Windows Vista вам не удастся настроить двойную загрузку, если Windows 7 установлена в VHD-файле. С другой стороны, вы сможете организовать тройную загрузку с использованием виртуального диска на компьютере, где уже настроена двойная загрузка прежней версии Windows и Windows 7. Это возможно, потому что на этом компьютере уже имеется загрузочная среда Windows 7. Об установке Windows 7 на VHD-диск вы узнаете из раздела 2.
Настройка ОС по умолчанию
Когда на компьютере настроена двойная загрузка, одна из ОС выбрана в качестве ОС по умолчанию. Это означает, что данная ОС загружается при условии, что во время загрузки пользователь явно не задал загрузку другой ОС. Чтобы изменить ОС по умолчанию при помощи графического интерфейса, выполните следующие действия:
- Щелкните кнопку
Пуск(Start) и откройте панель управления. Выберите в спискеПросмотр(View By) вариантМелкие значки(Small Icons). - Щелкните значок
Система(System) и командуДополнительные параметры системы(Advanced System Settings). Откроется диалоговое окноСвойства системы(System Properties). - На вкладке
Дополнительно(Advanced) щелкните кнопкуПараметры(Settings) в разделеЗагрузка и восстановление(Startup And Recovery). Откроется диалоговое окноЗагрузка и восстановление(Startup And Recovery). - Выберите в списке
Операционная система, загружаемая по умолчанию(Default Operating System) систему, которая должна загружаться по умолчанию.
Настроить ОС по умолчанию можно также из командной строки при помощи утилиты Bcdedit.exe. Выполните следующие действия:
- Откройте административную командную строку, щелкнув правой кнопкой команду
Командная строка(Command Prompt) в подменюСтандартные(Accessories) менюПуск(Start) и выберите командуЗапуск от имени администратора(Run As Administrator). ЩелкнитеДа(Yes) в диалоговом окнеКонтроль учетных записей пользователей(User Account Control). - Введите команду
bcdedit /enum, чтобы просмотреть текущий список элементов меню загрузки. - Чтобы изменить ОС по умолчанию, введите команду
bcdedit /defaultи идентификатор. Например, идентификатор может иметь значение{24cl2ea2-8f2b-lldf-b251-b59bldf6af31}.
Компьютер можно настроить на двойную загрузку Windows 7 и ОС из другого семейства, например, Linux или Mac OSX (на компьютере Macintosh при помощи специальных утилит).
Win7 install, Update: Recommended or important updates only?
-
Thread starterMuse
-
Start dateNov 16, 2010

-
- Jul 11, 2001
-
- 35,279
-
- 6,812
-
- 126
-
#1
1. Use recommended settings [Install important and recommended updates, help make Internet browsing safer, check online for solutions to problems, and help Microsoft improve Windows.]
2. Install important updates only [Only install security updates and other important updates for Windows.]
3. Ask me later [Until you decide, your computer might be vulnerable to security threats.]
Which should I choose? What do you do and why?

-
- Nov 30, 2004
-
- 56,250
-
- 6,267
-
- 126
-
#2
-
- Jul 11, 2001
-
- 35,279
-
- 6,812
-
- 126
-
#3
I choose 3. I want to review updates, and download them once I ok it. That way you know exactly what you’re downloading, and have an idea what happened if an update screws your system.
Well, do you download them one at a time? That’s the only way you’d know for sure which update screwed your system? Seems like a lot of work…
-
- Nov 30, 2004
-
- 56,250
-
- 6,267
-
- 126
-
#4
-
- Jul 11, 2001
-
- 35,279
-
- 6,812
-
- 126
-
#5
As long as you’re conscientious about updating, it poses no security risk, and you have a better idea about what’s going on with your machine.
Thanks. Windows said I can always change it, but for starters I chose the «recommended» automatic. WTH, I just installed, if it goes to hell the first day I’ll just reinstall. I’ve done two installs just today!
-
#6

-
#7
I would stick with option 1, you are safer that way.
I normally recommend Option 1 for desktops. The number of Windows Update problems on desktops over the years is pretty small and the consequences of non-updated PCs nowadays can be pretty big. I also make sure that «Microsoft Updates», rather than «Windows Updates» is being used. The former updates all Microsoft programs rather than just Windows.
Also, a daily system backup update, like Windows Home Server or others, will allow you to restore your system back to the previous day if disaster somehow strikes.

-
- Sep 15, 2008
-
- 5,021
-
- 157
-
- 116
-
#8
-
- Jul 11, 2001
-
- 35,279
-
- 6,812
-
- 126
-
#9
I would stick with option 1, you are safer that way. Plus make sure you have system restore enabled, Windows Update will always make a system restore point before it installs updates. Then, if you do have an update that borks your system, you restore the system restore point from before the updates and then selectively install the updates to see which one is the problem.
Is system restore enabled in the System Update utility itself or elsewhere? I’m having a devil of a time finding the usual stuff in Windows 7. For instance, to find Disk Management I had to resort to doing a search in Windows Help! It’s humiliating. When I open Control Panel it looks nothing like what I was used to in XP and Vista. Can’t find anything! There may be a setting to restore «Classic» GUI, but I haven’t encountered it yet. Even in Explorer options, I couldn’t find «Use Windows classic folders.»
Last edited: Nov 16, 2010

mechBgon
Super Moderator<br>Elite Member
-
#10
The one that makes my head spin is Event Viewer on Vista/7. TMI, TMI! That and the Taskbar in Win7, which thankfully can be wrestled into behaving like previous versions.
-
#11
Currently on my Win 7 X64 Ultimate machine I have all the updates available except the optional «Windows Live Essentials» and have seen no adverse effects.
- Advertising
- Cookies Policies
- Privacy
- Term & Conditions
- About us
-
This site uses cookies to help personalise content, tailor your experience and to keep you logged in if you register.
By continuing to use this site, you are consenting to our use of cookies.
Практическая работа №1. Установка MS Windows 7
Цель:
Установка операционной системы обычным (ручным) методом.
Задача:
Произвести установку операционной системы, чтобы проследить этапы установки.
Требования:
- Дистрибутив операционной системы Windows 7. Версию Enterprise с 90-дневным пробным периодом можно скачать по адресу http://technet.microsoft.com/ru-ru/evalcenter/cc442495.aspx. Все дальнейшие практические работы будут проходить на основе этого дистрибутива.
- Виртуальная машина VirtualPC 2007 SP1, или аналогичная — http://www.microsoft.com/downloads/details.aspx?FamilyId=28C97D22-6EB8-4A09-A7F7-F6C7A1F000B5&displaylang=en
- Обновление для виртуальной машины VirtualPC 2007 — http://www.microsoft.com/downloads/details.aspx?familyid=88DE1513-8D35-410F-8896-FE668F885CA0&displaylang=en
- Процессор Intel Pentium 4 и выше. Не менее 128 Мб оперативной памяти. 3,5 Гб на жестком диске.
Задача №1.
- Устанавливаем виртуальную машину. Это может быть продукт любой фирмы главное, чтобы можно было использовать iso образ в качестве компакт-диска. Сейчас и далее виртуальная среда будет создаваться при помощи программы VirtualPC 2007 SP 1 созданной компанией Microsoft. Запускаем файл Setup.exe.
- В окне приветствия жмем Next.
- Принимаем лицензионное соглашение (I accept the terms in the license agreement) и жмем Next.
- Снова Next. Затем Install.
- После установки приложения жмем Finish.
- Теперь необходимо установить обновление для виртуальной машины (VPC2007x86-KB969856.EXE).
- Запускаем файл VPC2007x86-KB969856.EXE. Установка производится автоматически. После установки в сообщении о необходимости перезагрузиться жмем Ок.
- Перезагрузка не происходит автоматически, поэтому делаем ее сами.
- Запускаем виртуальную машину – Microsoft Virtual PC.
- Жмем New.
- Next.
- Create a virtual machine. Next.
- Жмем Browser… и указываем, где будем хранить виртуальную машину. Создадим папку VirtualPC в ней папку Win7. Файл назовем Win7CL1.vmc. Нажимаем Сохранить.
- Жмем Next.
- Выбираем тип операционной системы. Так как Windows 7 в списке нету, а Windows Vista близка к ней по системным требованиям, то указываем Windows Vista. Смотрим, сколько оперативной памяти будет выделено под виртуальную машину. Нам необходимо только 512 Мб. При запуске данной виртуально машины на физическом компьютере будет израсходовано именно это количество оперативной памяти. Next.
- Оставляем опцию Using the recommend RAM. Next.
- В окне Virtual Hard Disk Options выбираем A new virtual hard disk. Next.
- В следующем окне указано, где будет храниться виртуальный диск. По умолчанию он хранится там же, где и файл конфигурации виртуальной машины. Необходимо, чтобы было свободно как минимум 16 Гб на этом жестком диске, для успешного завершения процесса установки. Параметр Maximum virtual hard disk size указывает максимальный размер виртуального диска. Параметр Virtual hard disk size позволяет задать максимальный размер данного виртуального диска. Его размер должен быть не меньше 16 Гб для успешной установки. Вообще сам файл изначально практически не занимает места, однако по мере записи на данный виртуальный диск размер файла будет увеличиваться до значения Virtual hard disk size. Это называется динамически изменяемый диск. Так же есть диск фиксированного размера. Он сразу занимает все необходимое пространство. Итак, оставляем значение по умолчанию: 65536 Мб. Жмем Next.
- Finish. Теперь у нас есть виртуальная машина.
- Запускаем виртуальную машину кнопкой Start.
- Сразу после запуска в панели инструментов выбираем CD -> Capture ISO Image … и указываем iso образ (в моем случае это образ скачанный по ссылке выше — 7600.16385.090713-1255_x86fre_enterprise_en-us_EVAL_Eval_Enterprise-GRMCENEVAL_EN_DVD.iso ). Если вдруг вы не успели указать диск, то можно перезагрузить виртуальную машину Action -> Reset.
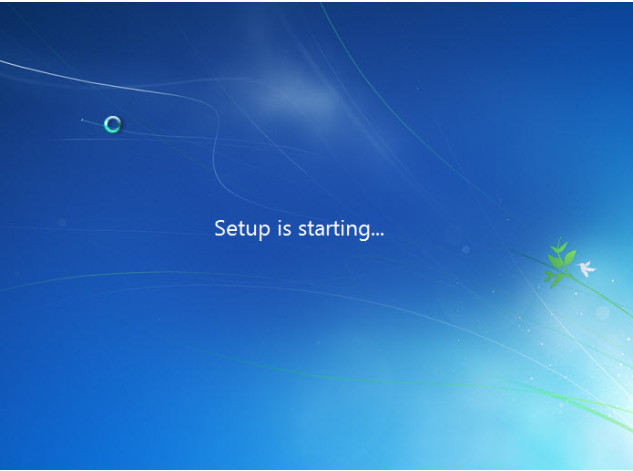
- Начинается подготовка к процессу установки операционной системы.
- После загрузки среды предустановки (Windows PE) сразу же запускается программа установки Windows. Если нажать Shift+F10 появится командная строка, позволяющая выполнить необходимые подготовительные действия. Как только вы переходите в экран виртуальной машины, у Вас автоматически захватывается мышка, чтобы выйти из режима захвата мыши, необходимо нажать правый Alt.
- Выбираем язык программы установки Windows и региональные настройки. В моем случае доступен только English, в дальнейшем мы исправим этот недочет. Для перехода к следующему окну жмем Next.
- На следующем шаге у нас есть выбор: начать установку сейчас (Install now); прочитать документ, содержащий информацию необходимую для начала установки(What to know before installing Windows); выбрать опцию восстановление компьютера (Repair your computer). Выбираем Install now.
- Подтверждаем лицензионное соглашение, поставив галочку напротив «I accept the license terms». Жмем Next.
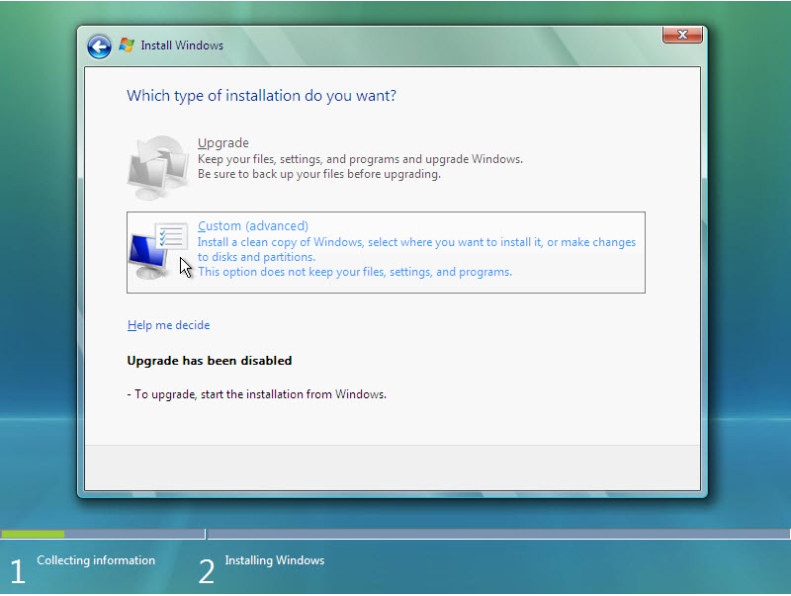
- Перед нами появляется окно выбора: Upgrade и Custom (advanced). Выбираем Custom (advanced), т.к. мы производим чистую установку.
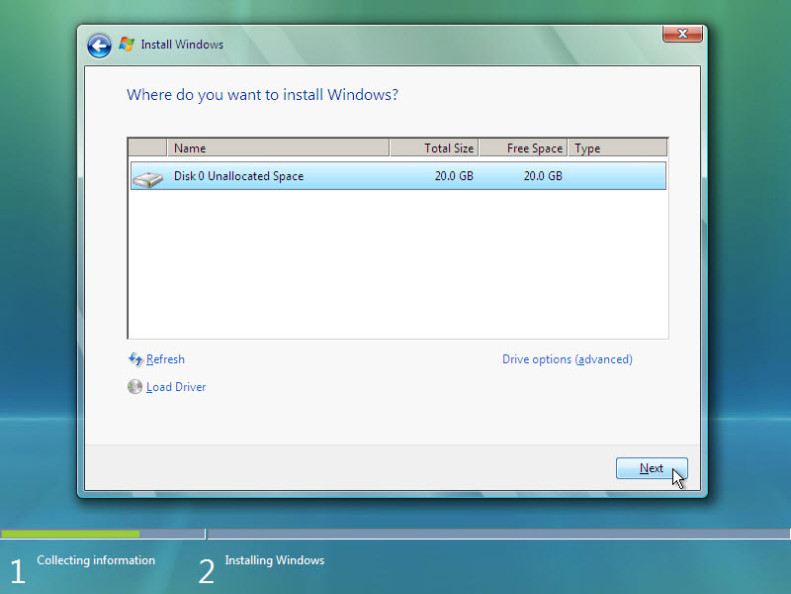
- Перед нами появляется окно разбивки дисков (Where do you want to install Windows?). Так как у нас один диск и он пустой, мы всецело доверяем автоматическую разбивку диска программе установки Windows нажатием кнопки Next.
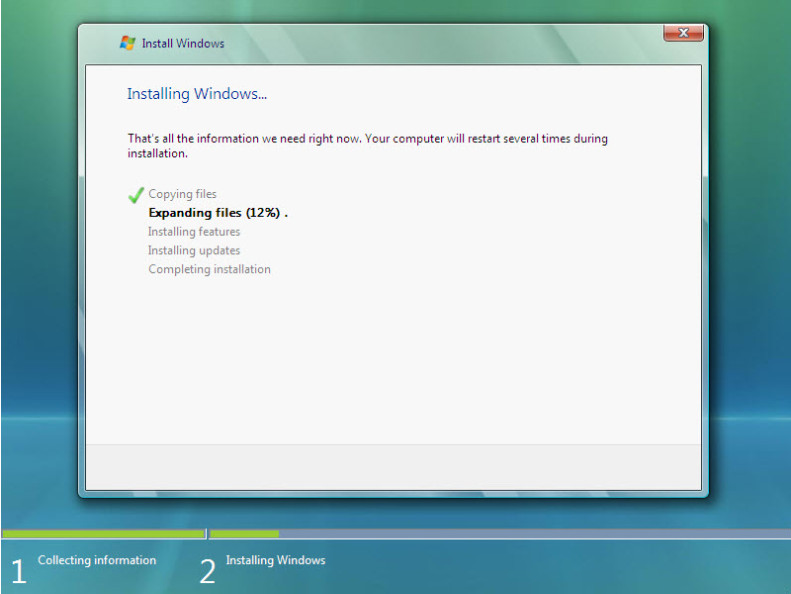
- Первый этап конфигурирования закончен. Программа установки производит установку операционной системы, в данный момент наша помощь ей не нужна. Необходимо дождаться окончания двух перезагрузок.
- После окончания процесса установки запускается мастер настройки, вводит имя пользователя – test, имя компьютера – test-pc. Next.
- В следующем окне необходимо указать пароль, сейчас мы пропускаем этот пункт нажатием кнопки Next.
- В окне Help protect your computer and improve Windows automatically указываем параметры обновления – Ask me later.
- Далее необходимо указать временную зону. В этом задании мы не будем ее менять. Next.
- Если компьютер подключен к сети, то в окне Select your computer’s current location необходимо указать тип сети (Home, Work, Public). Указываем Work.
- Производится применение указанных ранее параметров и осуществляется первый вход пользователя в данную систему.
hp-concentra-wrapper-portlet
![]()
Actions
Issue
When you try to install the HP software in Windows 7, a ‘The Operating System on This Computer is Not Supported.‘ message displays under Details in the System Requirements Results window.

Solution one: Download and install the HP software
Follow these steps to download the latest HP software, and then install it.
-
Turn on the printer.
-
Disconnect the USB cable from the printer, if necessary. The software installation prompts you to connect the cable if needed.
-
If a Let’s identify your product to get started page displays, click Printer, type your printer model number, and then click Submit.
-
If you need to change the operating system, click Change, select your version, and then click Change.
-
Under the Driver heading, click Download for the full software package, or click Basic Drivers for other driver options.
Solution two: Install the basic product driver using Windows Update
Some HP products do not have a full feature solution available to download. Windows Update searches for and installs a driver for your product if one is available.
note:
Make sure the computer has an active Internet connection. Windows Update does not function if the computer is not connected to the Internet.
- If you have not installed Windows 7, follow the instructions in method one to configure Windows Update.
- If you have installed Windows 7, follow the steps in method two to configure Windows Update.
Method one: Select ‘Use recommended settings’ when you install Windows 7
When you install Windows 7, select Use recommended settings in the Help protect your computer and improve Windows automatically window.
Method two: Set Windows Update to automatic
Follow these steps to configure Windows Update to automatically search for and install a basic product driver.
-
On the taskbar, click the Windows icon (
 ).
). -
In the Search Programs and Files box, type change device installation.
-
Click Change device installation settings. The Device Installation Settings window opens.
-
If it is not already selected, select Yes, do this automatically (recommended), and then click Save Changes.
note:
Windows 7 might prompt you to restart the computer. Make sure that you bookmark this page so that you can quickly access again.
 ).
).Install the product driver
When you connect the product to the computer, Windows 7 detects the hardware and automatically installs the correct driver. A notification lets you know when installation begins and when it is complete. You do not have to download any software or insert the product CD.
Follow these steps to install the basic driver in Windows 7.
-
Make sure that the product power is off.
-
Connect the Universal Serial Bus (USB) cable to the printer, and then to the computer.
-
Turn the product on.
note:
Windows Update searches online for the most recent product driver on the Windows Update site. If the online driver is more recent than the driver stored in Windows 7, the computer downloads and installs the updated driver.
The Windows Update process takes place automatically. Therefore, you might not notice that the process is in progress.
-
A Your devices are ready to use window might display on the screen. If the window displays and does not close automatically, click Close to close the window.

Your basic Windows 7 driver is now installed. Some functions might not be available, but you can use the following workaround procedures instead.
Workaround procedures
The basic driver in Windows 7 is enough for printing from a software program and importing and viewing images on a memory card.
Use these steps to print from a software program.
-
Open the document to be printed in the software program in which it was created.
-
Click File, and then click Print.
Import and view images on a memory card
If your product has a memory card slot, follow these steps to access images on a memory card.
-
Insert the memory card into the appropriate memory card slot on the product.
note:
If the memory card is already inserted, remove it, and then reinsert it.
-
On the Autoplay window that opens, click Import Pictures, View Pictures, or Open folder to view files.
-
Follow the on-screen instructions.

United States
hp-detect-load-my-device-portlet
![]()
Actions
5.2.1.7 Lab – Install Windows 7 or Vista (Answers)
Introduction
In this lab, you will install the Windows 7 or Vista operating system.
Recommended Equipment
- A computer with a blank hard disk drive
- Windows 7 or Vista installation DVD or USB flash drive
Part 1: Windows 7 Installation
Step 1: Starting the Installation Media
a. Insert the Windows 7 installation DVD into the DVD-ROM drive or plug the USB flash drive into a USB port.
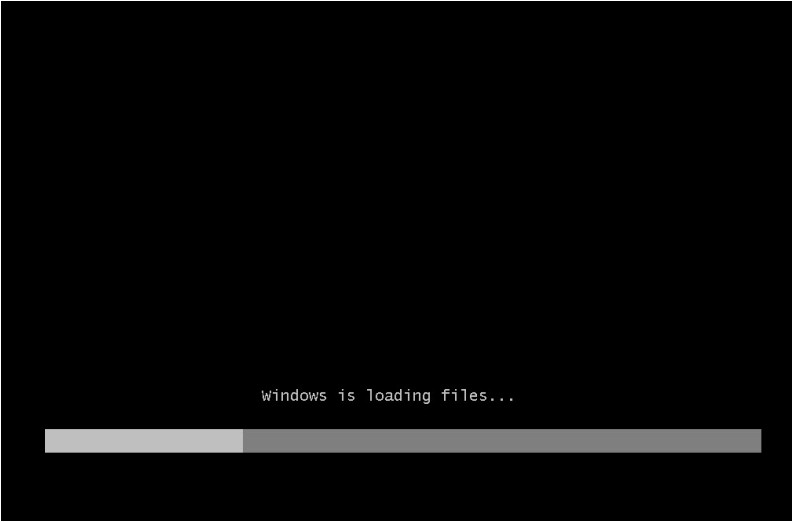
b. When the computer starts up, watch for the message Press any key to boot from CD or DVD. If the message appears, press any key on the keyboard to boot the computer from the DVD. If the press any key message does not appear, the computer automatically starts loading files from the DVD.

c. The computer starts loading files from the DVD or USB flash drive.
d. The Windows 7 boot screen appears.
Step 2: Configuring Initial Settings
a. The Install Windows window opens. Press Next unless you need to change the default settings.
b. Press Install now to continue.
Step 3: Collecting Information
a. The Setup is starting… screen appears.
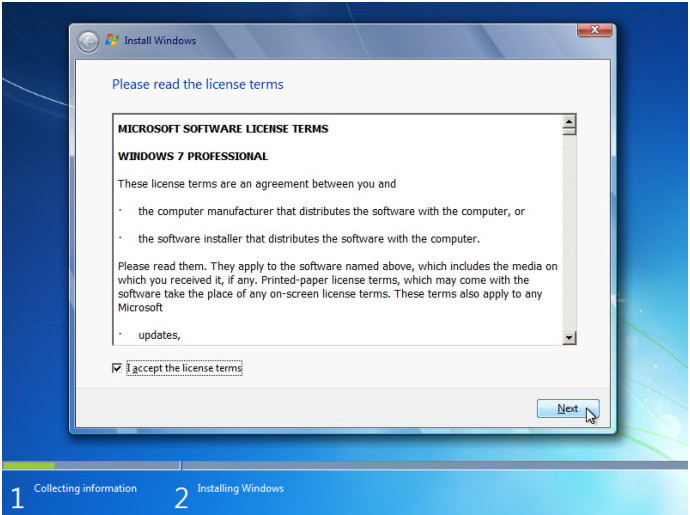
b. The Please read the license terms window opens. Read and confirm that you accept the license by selecting I accept the license terms. Click Next.
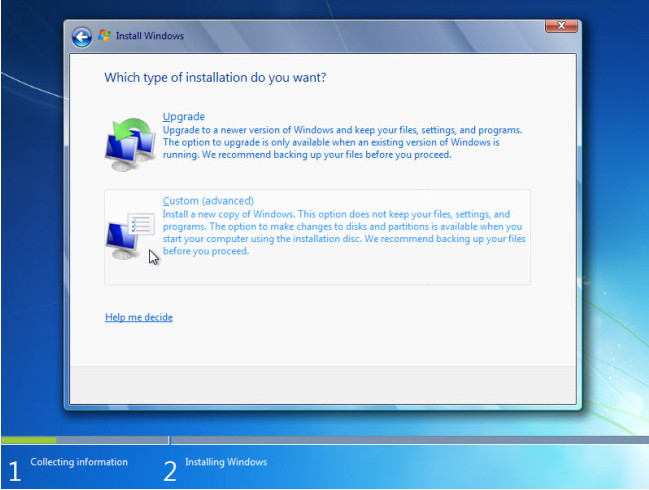
c. When the Which type of installation do you want? window opens, click Custom (advanced) to continue.
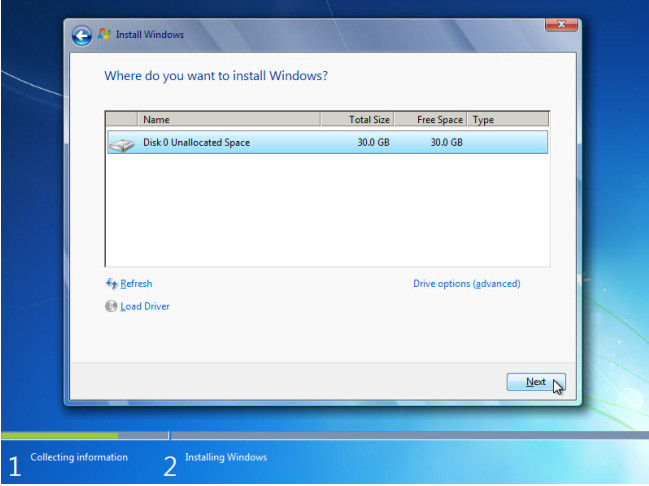
d. The Where do you want to install Windows? window opens. Select the hard drive or partition on which Windows 7 will be installed. Click Next to select Disk 0 Unallocated Space, which is the default setting.
Step 4: Installing Windows
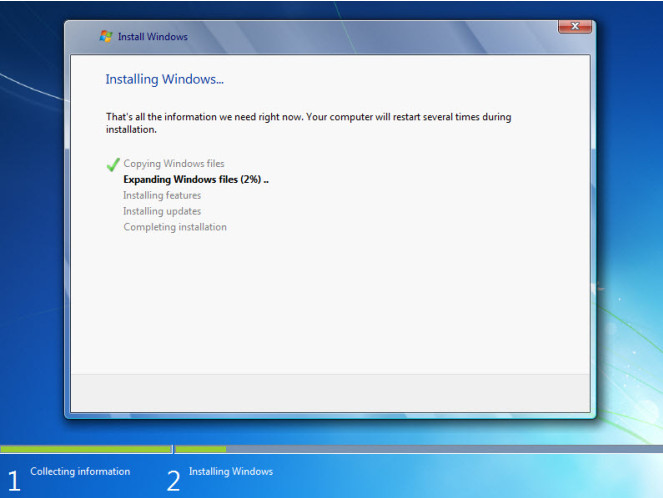
a. The Installing Windows… window opens. Windows 7 Setup may take up to 50 minutes to configure your computer.
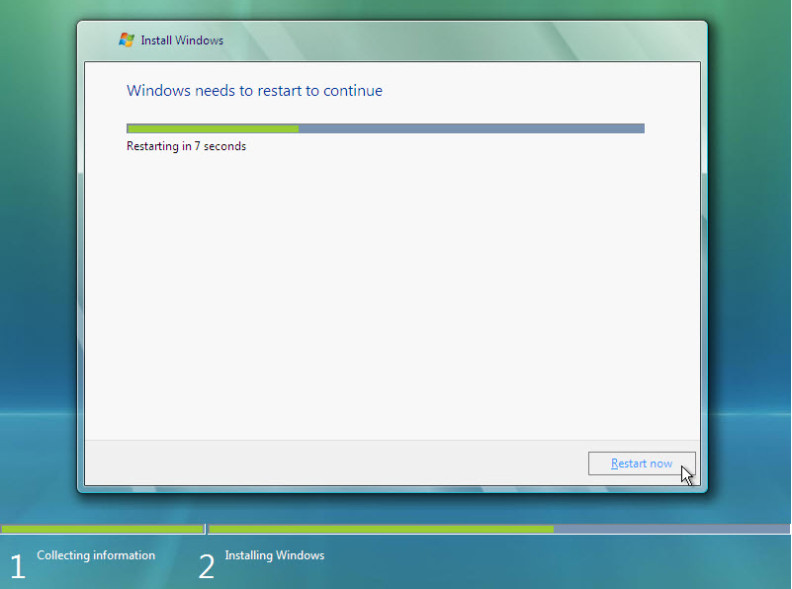
b. The Windows needs to restart to continue window opens. Your computer will automatically restart or you can click Restart now.
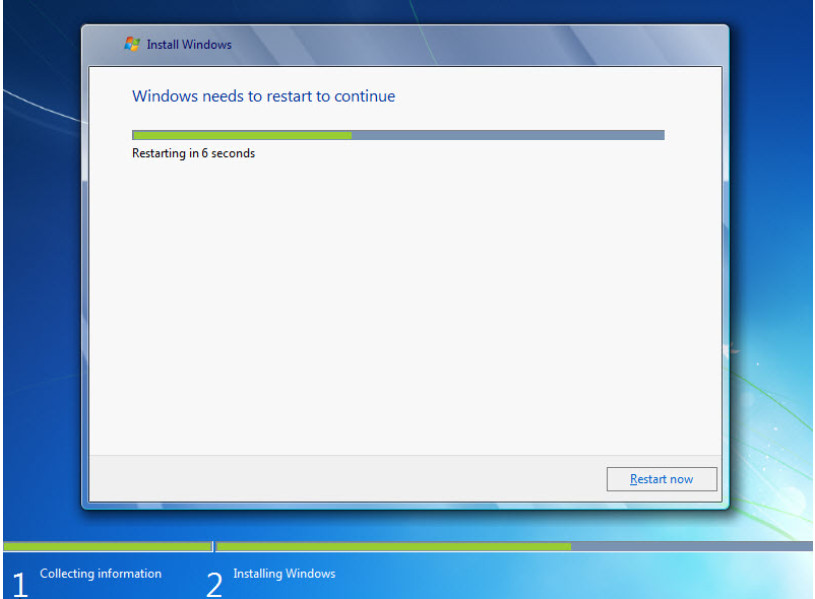
c. If you get the message Press any key to boot from CD or DVD…, do not press any key and Windows will boot from the hard disk to continue the installation.

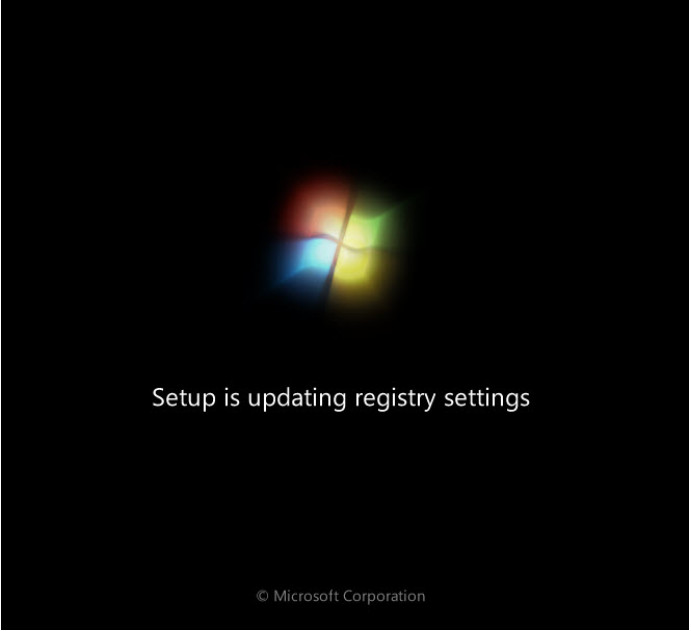
d. The Setup is updating registry settings screen appears.
e. The Setup is starting services screen appears.

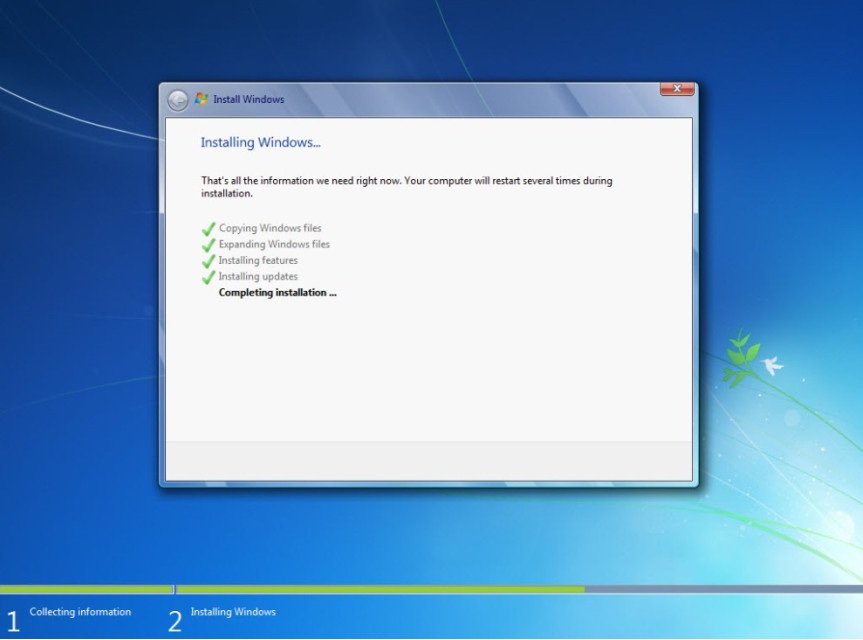
f. The Installing Windows… window opens. Windows may reboot a few more times. This may take several minutes.
Step 5: Setting up Windows
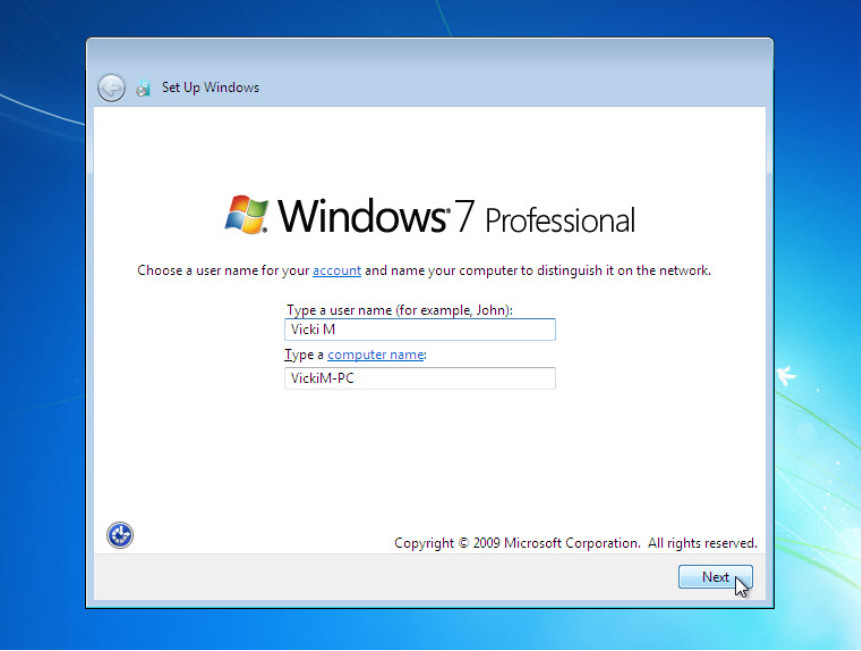
a. Type the user name and computer name provided by your instructor. Click Next.
b. The Set a password for your account window opens. Type the password provided by your instructor. Retype the password and enter the password hint. Click Next.
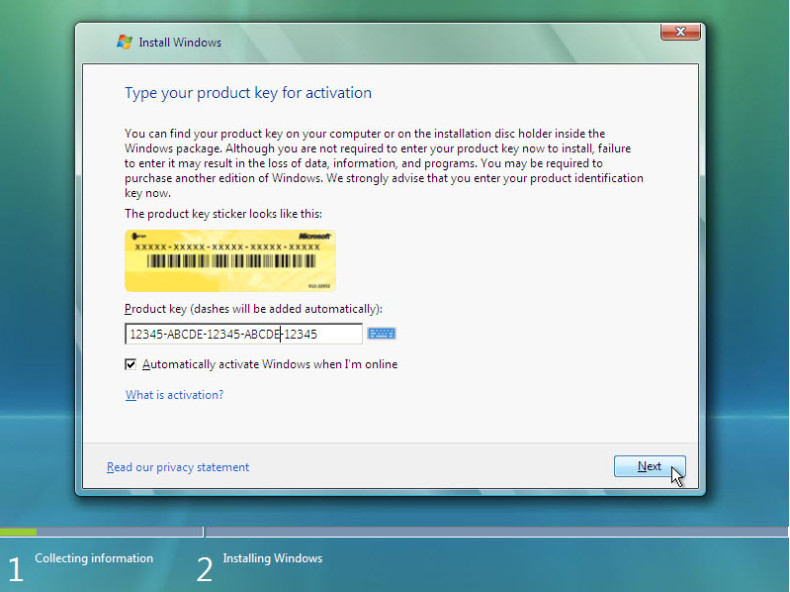
c. The Type your Windows product key window opens. On this page, type your product key. Click Next.
Note: You can find the product key on the case or sleeve in which the Windows DVD was packaged, or you can get it from your instructor.
Note: If you entered your product key, Setup will not ask you the following:
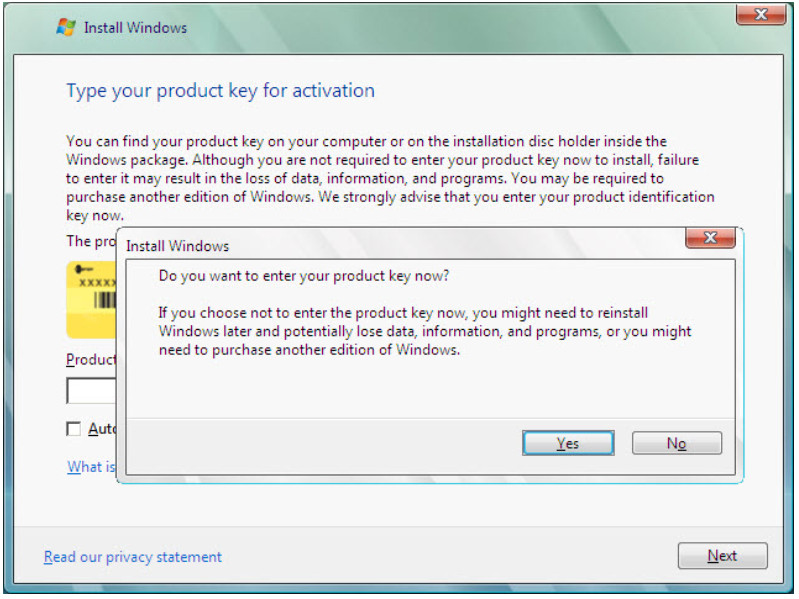
Do you want to enter your product key now? If you were instructed not to enter a product key, click No.
d. In the Help protect your computer and improve Windows automatically window, click Use recommended settings.
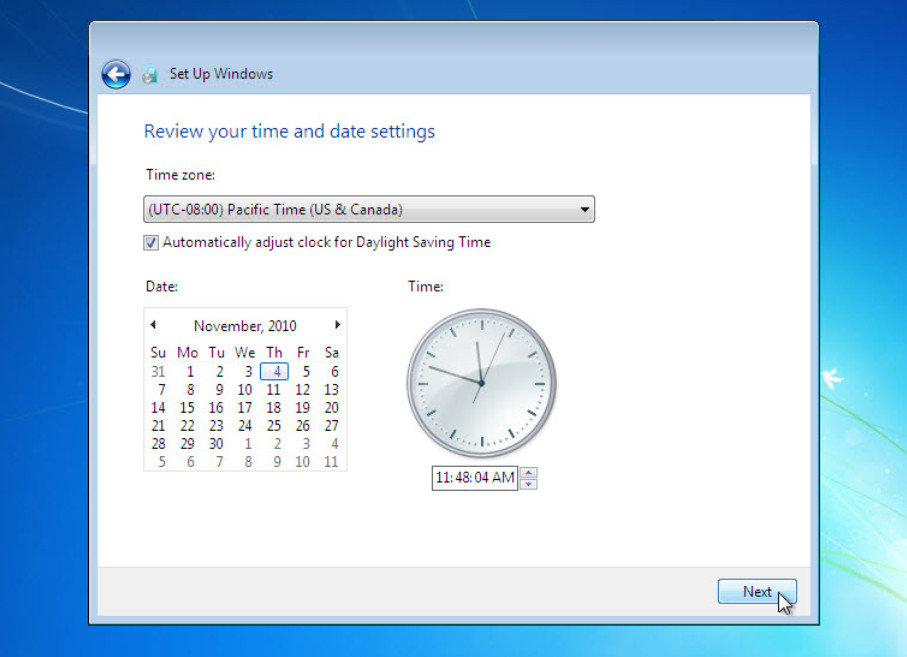
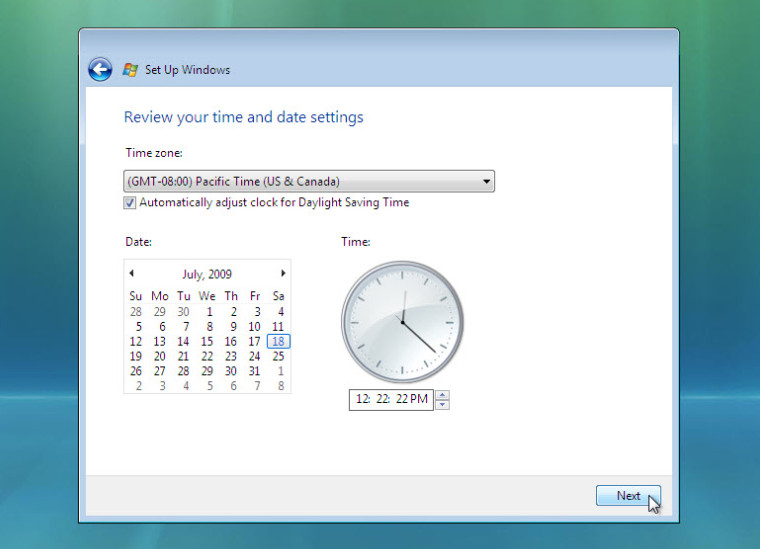
e. In the Review your time and date settings window, configure the computer clock to match your local date, time, and time zone. Click Next.
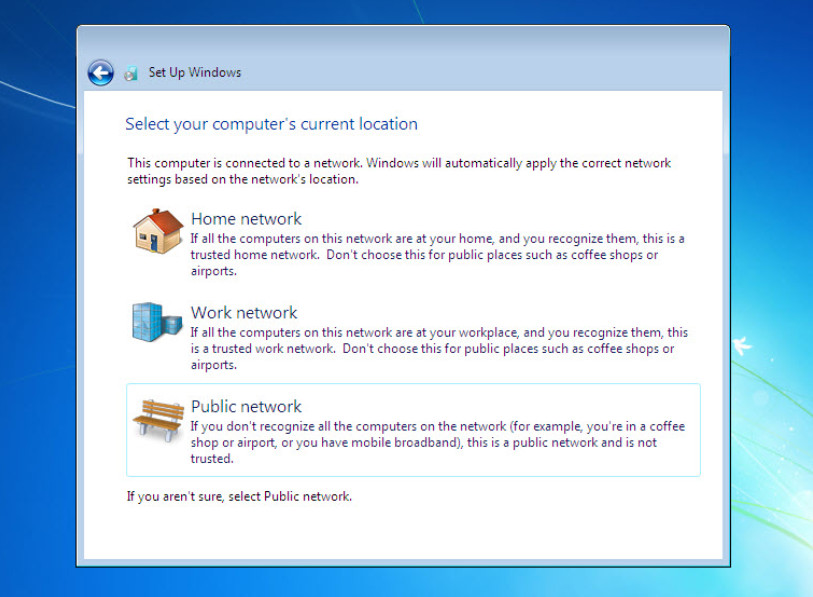
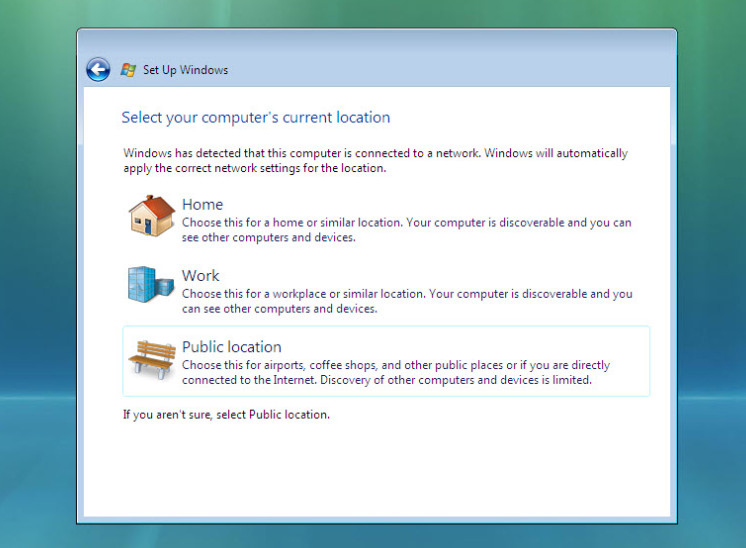
f. The Select your computer’s current location window opens. Select the option provided by your instructor.
Note: This window will not show up if the installation did not correctly install drivers for the network card.
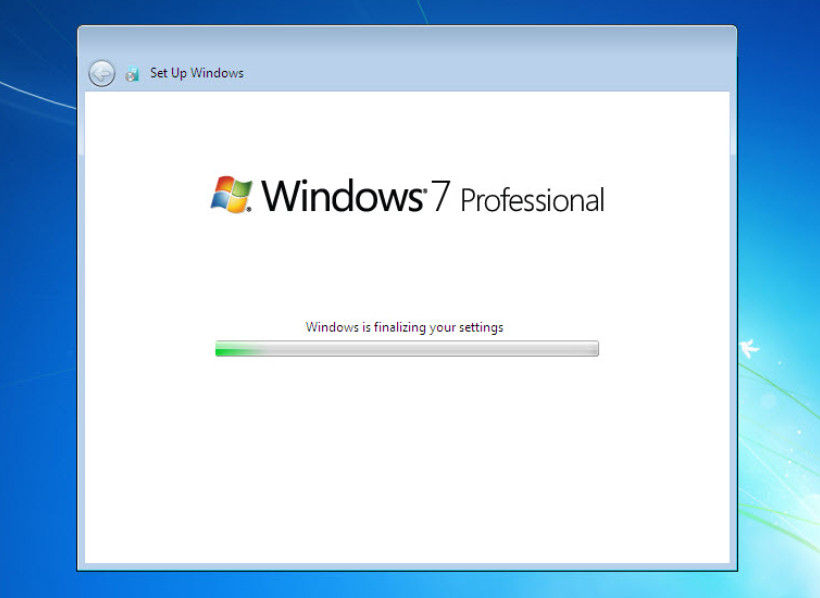
g. The Windows is finalizing your settings window opens.
Step 6: Logging into Windows
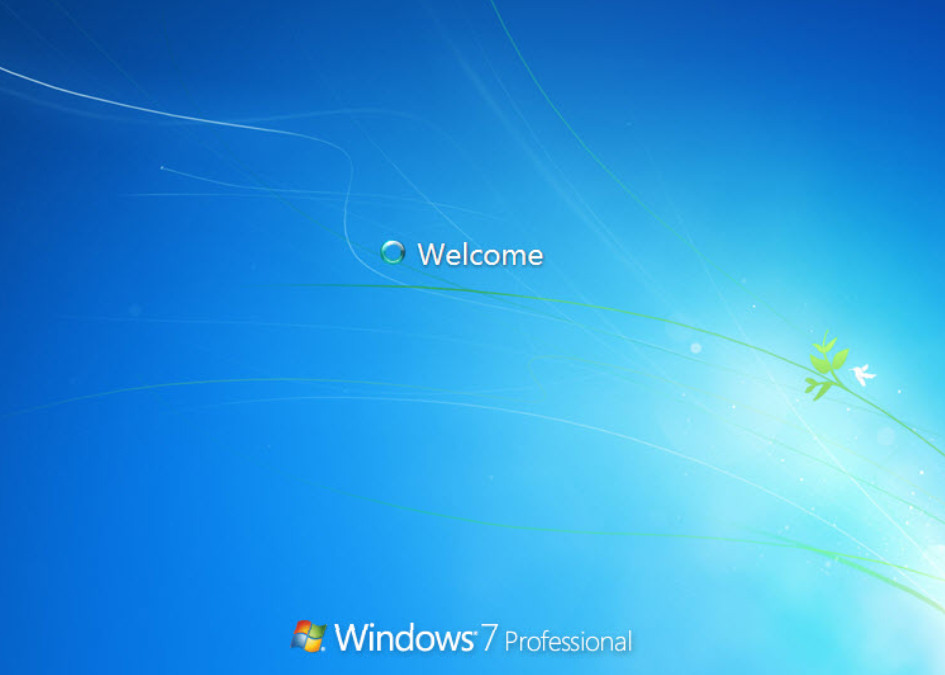
a. The Welcome screen appears.
b. The Preparing your desktop… screen appears.
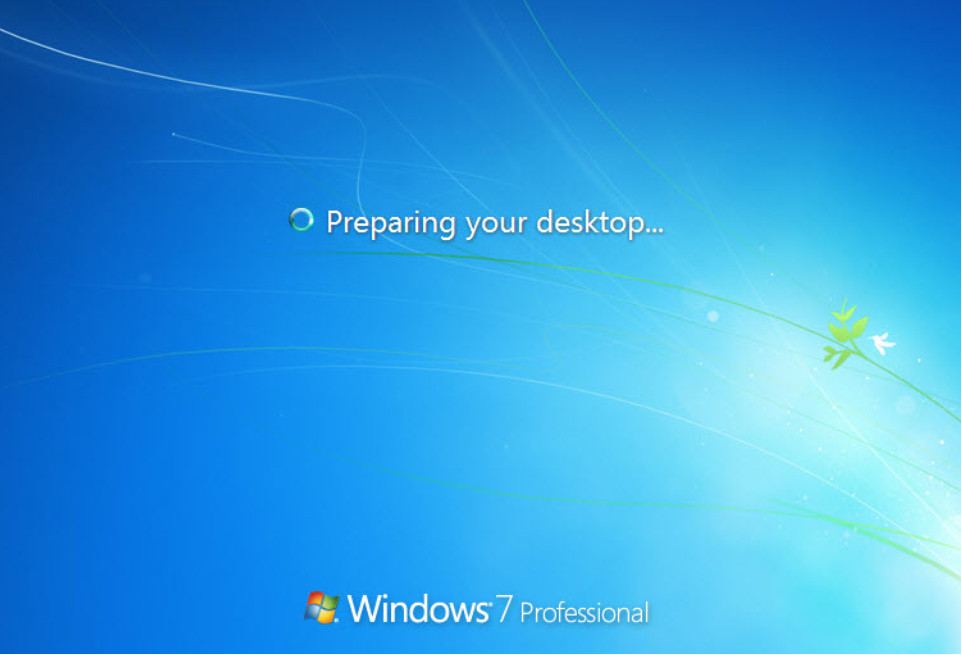
c. You are logged on to Windows 7 for the first time.
Part 2: Windows Vista Installation
Step 1: Starting the Installation Media
a. Insert the Windows Vista installation DVD into the DVD-ROM drive or plug the USB flash drive into a USB port.
b. When the computer starts up, watch for the message Press any key to boot from CD or DVD. Press any key to continue.
If the press any key message does not appear, the computer automatically starts loading files from the
DVD.

c. The computer starts loading files from the DVD or USB flash drive.
d. The Windows Vista boot screen appears.
Step 2: Configuring the Initial Settings
a. The Install Windows window opens. Press Next unless you need to change the default settings.
b. Click Install now to continue.

Step 3: Collecting Information
a. The Type your product key for activation screen appears. On this page, type your product key. Click Next.
Note: You can find the product key on the case or sleeve in which the Windows DVD was packaged, or
you can get it from your instructor.
Note: If you entered your product key, Setup will determine the Vista product edition to install and will not display the next two screens. Skip to step d.
b. Because you have left the product key field blank, the Do you want to enter your product key now? window opens. If you were instructed not to enter a product key, click No.
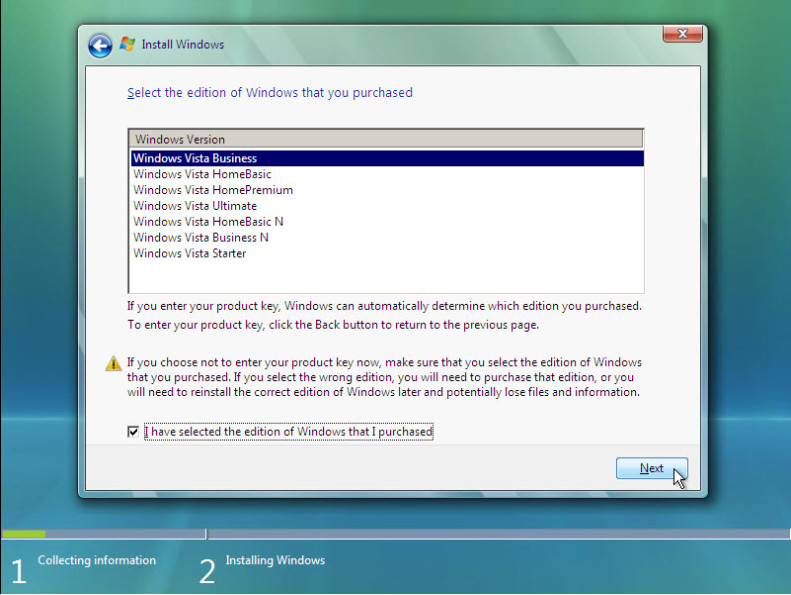
c. Setup now prompts you to select the Vista version you purchased. In general, you should choose the version you purchased, but note that you can install any Vista version listed and experiment with it for a limited time before product activation requires you to activate the version you purchased.
Note: Your product key will only activate the version of Vista you purchased.
d. Select the Windows Vista version that will be installed, check the item title I have selected the edition of Windows that I purchased, and then click Next.
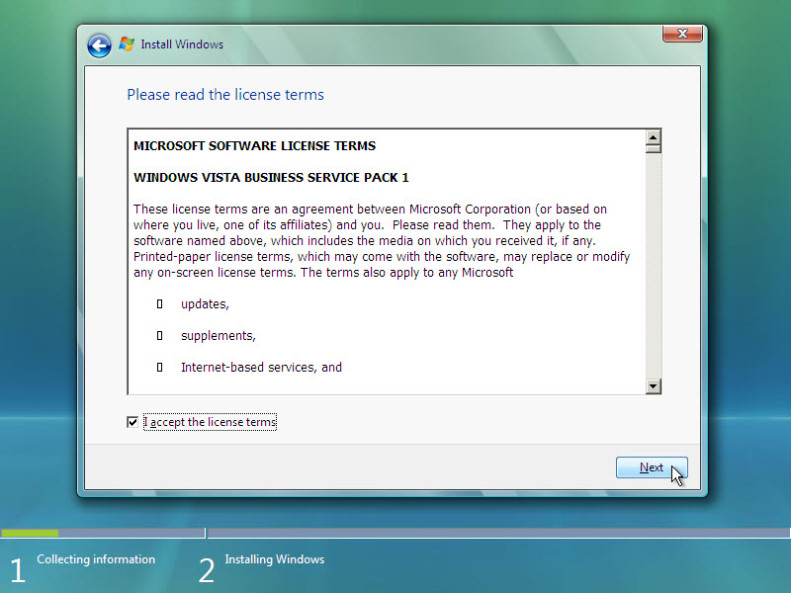
e. The Please read the license terms window opens. Read and confirm that you accept the license by selecting the box I accept the license terms. Click Next to continue.
f. The Which type of installation do you want? window opens. Click Custom (advanced).
g. The Where do you want to install Windows? window opens. Select the hard drive or partition on which Windows Vista will be installed. Click Next to select Disk 0 Unallocated Space, which is the default setting.
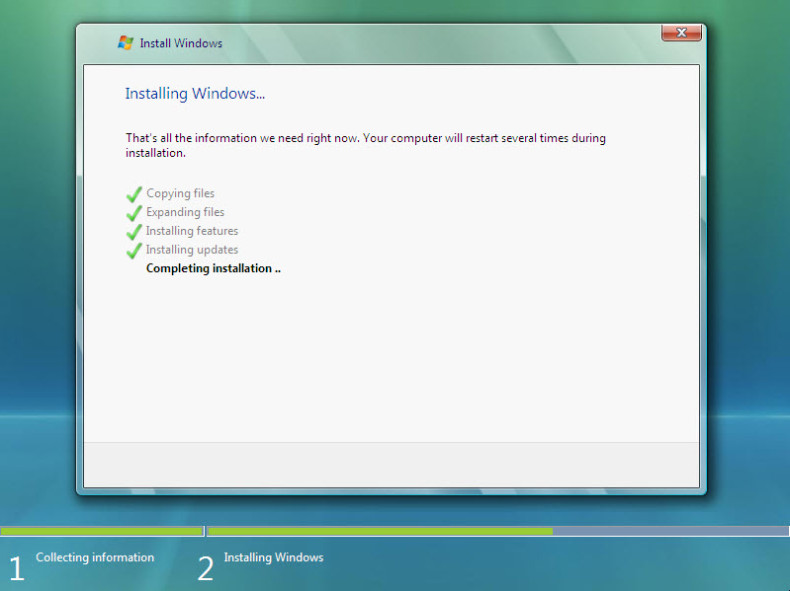
Step 4: Installing Windows Vista
a. The Installing Windows … window opens. Windows Vista Setup may take up to 50 minutes to configure your computer.
b. The Windows needs to restart to continue window opens. Your computer will automatically restart or you can click Restart now.
c. If you get the message Press any key to boot from CD or DVD, do not press any key and Windows will boot from the hard disk to continue the installation.

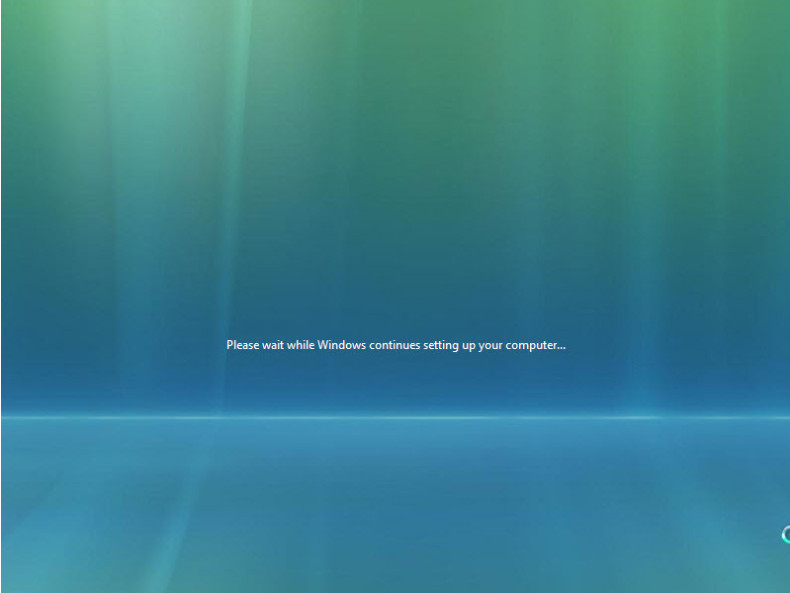
d. The Please wait while Windows continues setting up your computer … screen appears.
e. The Installing Windows … window opens. Windows may reboot a few more times. This may take several minutes.
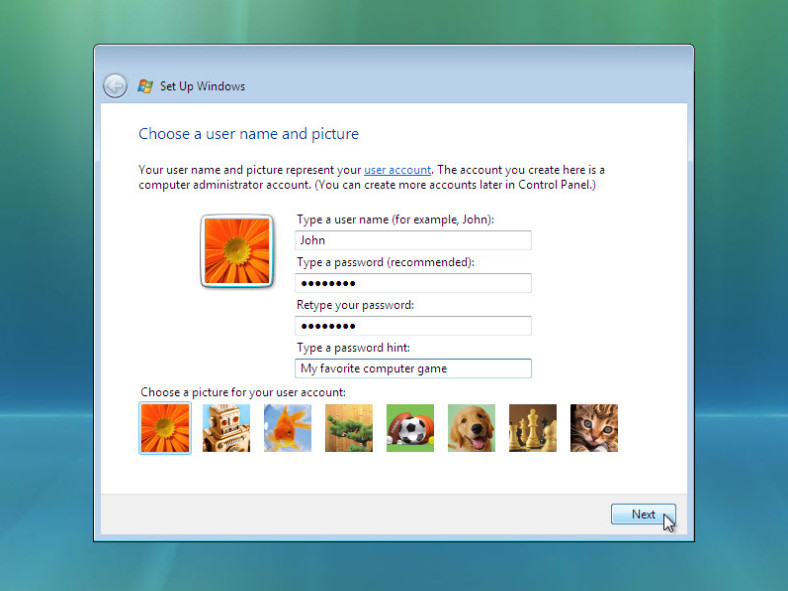
Step 5: Setting up Windows
a. The Choose a user name and picture window opens. Type the name provided by your instructor. Type the Administrator password provided by your instructor. When you type in a password, two new fields will appear. Retype the password and the password hint. Click Next.
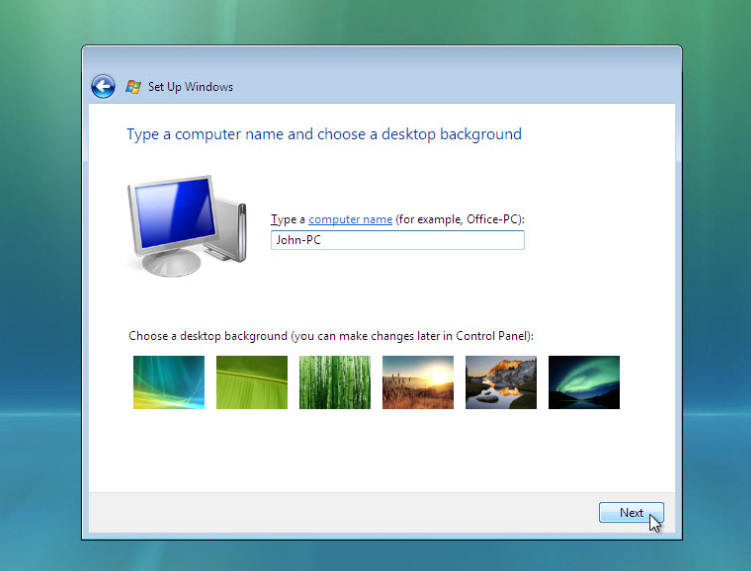
b. The Type a computer name and choose a desktop background window opens. Type the computer name provided by your instructor. Click Next.
c. In the Help protect Windows automatically window, click Use recommended setting.

d. In the Review your time and date settings window, configure the computer clock to match your local date, time, and time zone. Click Next.
e. The Select your computer’s current location window opens. Select the option provided by your instructor.
Note: This screen will not show up if the installation did not correctly install drivers for the network card.
f. In the Thank you window, click Start.
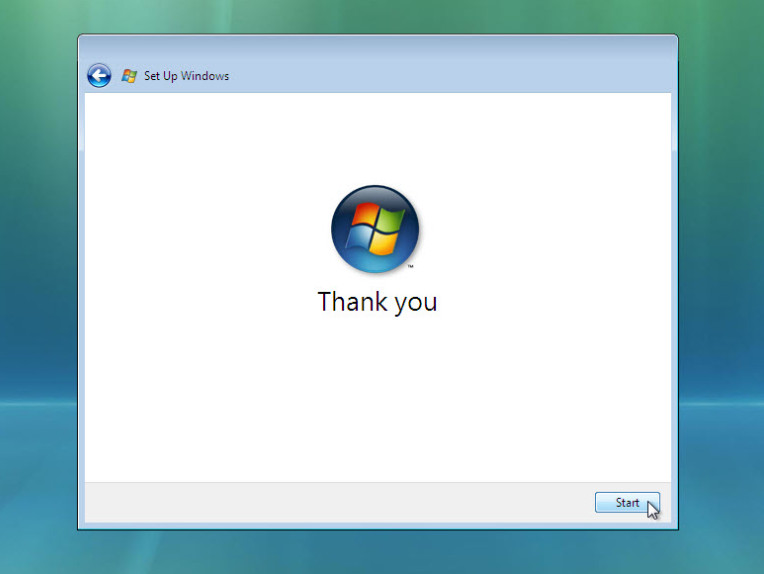
g. The Set Up Windows section is completed.
h. The Please wait while Windows checks your computer’s performance screen appears.

i. Windows Vista boots for the first time.
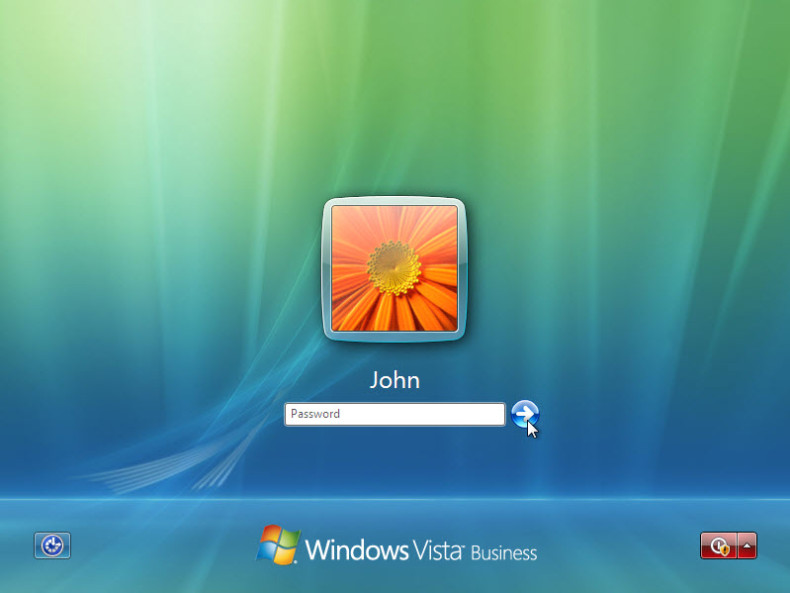
j. The login screen appears. Enter the password that you used during the install process and click the blue arrow to login.
k. The Preparing your desktop … screen appears. Your account profile is created and configured.
l. The Welcome screen appears. Windows Vista is now installed.

Download 5.2.1.7 Lab – Install Windows 7 or Vista .PDF file:
[sociallocker id=”54558″]
[/sociallocker]
I created an answer file using the Windows System Image Manager. I need assistance in adding some additional settings to my answer file. Can someone guide me on how to do that using Windows System Image Manager? I do not know xml so
it would be easier for me to make the changes using the tool. Below is are the settings that I require and what I already have in my answer file:
1) sets an automatic admin username and password
2) Sets regional time settings = Eastern Standard Time
3) Select your computer location = Work
=============================================================================
<?xml version=»1.0″ encoding=»utf-8″?>
<unattend xmlns=»urn:schemas-microsoft-com:unattend»>
<settings pass=»oobeSystem»>
<component name=»Microsoft-Windows-Deployment» processorArchitecture=»x86″ publicKeyToken=»31bf3856ad364e35″ language=»neutral»
versionScope=»nonSxS» xmlns:wcm=»http://schemas.microsoft.com/WMIConfig/2002/State» xmlns:xsi=»http://www.w3.org/2001/XMLSchema-instance»>
<Reseal>
<Mode>OOBE</Mode>
</Reseal>
</component>
<component name=»Microsoft-Windows-Shell-Setup» processorArchitecture=»x86″ publicKeyToken=»31bf3856ad364e35″ language=»neutral»
versionScope=»nonSxS» xmlns:wcm=»http://schemas.microsoft.com/WMIConfig/2002/State» xmlns:xsi=»http://www.w3.org/2001/XMLSchema-instance»>
<OOBE>
<HideEULAPage>true</HideEULAPage>
<ProtectYourPC>3</ProtectYourPC>
<SkipUserOOBE>true</SkipUserOOBE>
<HideWirelessSetupInOOBE>true</HideWirelessSetupInOOBE>
<NetworkLocation>Work</NetworkLocation>
<SkipMachineOOBE>true</SkipMachineOOBE>
</OOBE>
</component>
</settings>
<settings pass=»windowsPE»>
<component name=»Microsoft-Windows-International-Core-WinPE» processorArchitecture=»x86″ publicKeyToken=»31bf3856ad364e35″
language=»neutral» versionScope=»nonSxS» xmlns:wcm=»http://schemas.microsoft.com/WMIConfig/2002/State»
xmlns:xsi=»http://www.w3.org/2001/XMLSchema-instance»>
<SetupUILanguage>
<UILanguage>en-US</UILanguage>
</SetupUILanguage>
<InputLocale>en-US</InputLocale>
<SystemLocale>en-US</SystemLocale>
<UILanguage>en-US</UILanguage>
<UserLocale>en-US</UserLocale>
</component>
<component name=»Microsoft-Windows-Setup» processorArchitecture=»x86″ publicKeyToken=»31bf3856ad364e35″ language=»neutral»
versionScope=»nonSxS» xmlns:wcm=»http://schemas.microsoft.com/WMIConfig/2002/State» xmlns:xsi=»http://www.w3.org/2001/XMLSchema-instance»>
<DiskConfiguration>
<Disk wcm:action=»add»>
<CreatePartitions>
<CreatePartition wcm:action=»add»>
<Order>1</Order>
<Size>200</Size>
<Type>Primary</Type>
</CreatePartition>
<CreatePartition wcm:action=»add»>
<Extend>true</Extend>
<Order>2</Order>
<Type>Primary</Type>
</CreatePartition>
</CreatePartitions>
<ModifyPartitions>
<ModifyPartition wcm:action=»add»>
<Active>true</Active>
<Format>NTFS</Format>
<Label>System</Label>
<Order>1</Order>
<PartitionID>1</PartitionID>
</ModifyPartition>
<ModifyPartition wcm:action=»add»>
<Format>NTFS</Format>
<Label>Windows</Label>
<Order>2</Order>
<PartitionID>2</PartitionID>
</ModifyPartition>
</ModifyPartitions>
<DiskID>0</DiskID>
<WillWipeDisk>true</WillWipeDisk>
</Disk>
<WillShowUI>OnError</WillShowUI>
</DiskConfiguration>
<ImageInstall>
<OSImage>
<InstallTo>
<DiskID>0</DiskID>
<PartitionID>2</PartitionID>
</InstallTo>
<InstallToAvailablePartition>false</InstallToAvailablePartition>
<WillShowUI>OnError</WillShowUI>
</OSImage>
</ImageInstall>
<UserData>
<ProductKey>
<WillShowUI>OnError</WillShowUI>
</ProductKey>
</UserData>
</component>
</settings>
<settings pass=»specialize»>
<component name=»Microsoft-Windows-IE-InternetExplorer» processorArchitecture=»amd64″ publicKeyToken=»31bf3856ad364e35″
language=»neutral» versionScope=»nonSxS» xmlns:wcm=»http://schemas.microsoft.com/WMIConfig/2002/State»
xmlns:xsi=»http://www.w3.org/2001/XMLSchema-instance»>
<Accelerators />
<FavoriteBarItems />
<FavoritesList />
<FeedList />
<InstalledBHOList />
<InstalledBrowserExtensions />
<InstalledToolbarsList />
<PreApprovedAddons />
<QuickLinkList />
<SearchScopes />
<StartPages />
<BlockPopups>yes</BlockPopups>
<DisableAccelerators>true</DisableAccelerators>
<DisableDataExecutionPrevention>true</DisableDataExecutionPrevention>
<DisableDevTools>true</DisableDevTools>
<DisableFirstRunWizard>true</DisableFirstRunWizard>
<DisableOOBAccelerators>true</DisableOOBAccelerators>
<IntranetCompatibilityMode>false</IntranetCompatibilityMode>
<Home_Page>http://www.google/</Home_Page>
<CompanyName>Housing Preservation Development</CompanyName>
</component>
</settings>
<cpi:offlineImage cpi:source=»wim:c:/windows%20aik%20distribution%20share/install.wim#Windows 7 PROFESSIONAL» xmlns:cpi=»urn:schemas-
microsoft-com:cpi» />
</unattend>