Does your Highscreen Boost 3 phone not connecting to a PC? or a Computer is not recognizing Highscreen Boost 3 when connected using a USB cable? It can be because of the missing Highscreen Boost 3 USB Driver or corrupted Android USB Driver. To fix the problem, download Highscreen Boost 3 USB Drivers and install them on your Windows computer.
Highscreen USB Drivers are necessary to connect Highscreen Boost 3 to a Computer or Laptop via USB data cable. On this page, you can download official Highscreen Boost 3 USB Drivers for Windows 11, Windows 10, Windows 7, Windows 8.1, and Windows 8. Along with the official USB Driver for Highscreen Boost 3, we have also shared Highscreen Boost 3 ADB interface drivers and Fastboot drivers.
Highscreen Boost 3 Android USB Drivers helps in establishing a secure connection between your computer and mobile phone. It helps to transfer data like images, videos, documents, and other files to and from your mobile to computer through MTP (Media Transfer Protocol).
The Highscreen Boost 3 ADB driver and Fastboot driver allow you to pass ADB commands and Fastboot commands from your computer to your phone and perform certain operations.
Table of Contents
- 1 Download Highscreen Boost 3 USB Driver
- 1.1 Highscreen Boost 3 CDC Driver for Flashing Firmware
- 1.2 Highscreen Boost 3 VCOM Driver for Flashing Firmware
- 1.3 Highscreen Boost 3 USB Driver for normal connecting to PC
- 1.4 Highscreen Boost 3 ADB and Fastboot Drivers
- 2 How to Install Highscreen Boost 3 CDC Drivers
- 3 How to Install Highscreen Boost 3 VCOM Drivers
- 4 How to Install Highscreen Boost 3 USB Drivers Manually
- 5 How to Install Highscreen Boost 3 ADB and Fastboot Drivers
The Highscreen Mobile drivers shared here can be used to flash stock firmware, stock recovery, TWRP recovery, CWM recovery, unlock the bootloader, etc. They can also be used for general purposes like transferring media, documents, and other files to and from phone to computer.
Highscreen Boost 3 CDC Driver for Flashing Firmware
Download Now
How to install: Follow Tutorial
Highscreen Boost 3 VCOM Driver for Flashing Firmware
Download Now
How to install: Follow Tutorial
Highscreen Boost 3 USB Driver for normal connecting to PC
Download Now
How to install: Follow Tutorial
The Highscreen Boost 3 Fastboot and ADB drivers can be downloaded below.
Highscreen Boost 3 ADB and Fastboot Drivers
Download Now
How to install: Follow Tutorial
[!] Note: If you face Driver Signature Error while installing the USB Driver, then watch this video to fix the problem.
Also Download: Highscreen Pure J USB Drivers
How to Install Highscreen Boost 3 CDC Drivers
- Download and extract the latest Google Android CDC Driver (android-cdc-driver.zip) on your computer.

- Launch Device Manager on your computer by right-clicking Windows Start Button and selecting Device Manager.

- Once the Device Manager window loads, click on your Computer name.

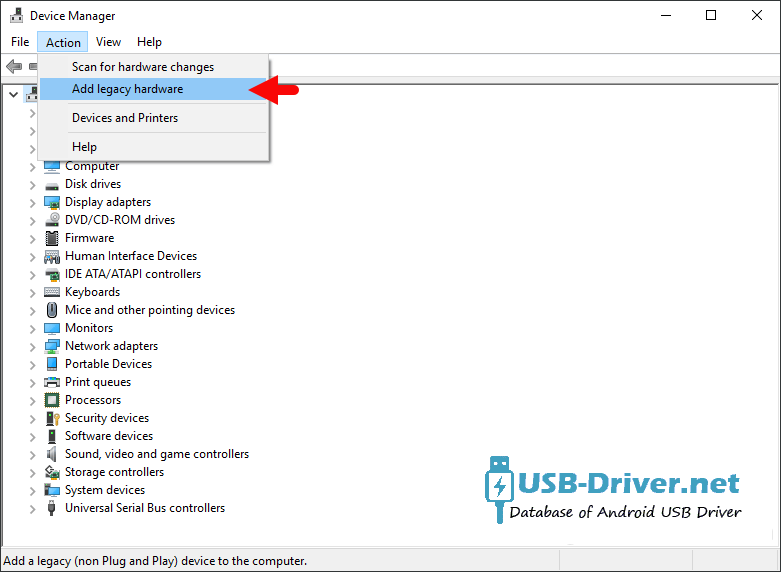
- Now click on Action and then select Add legacy hardware.

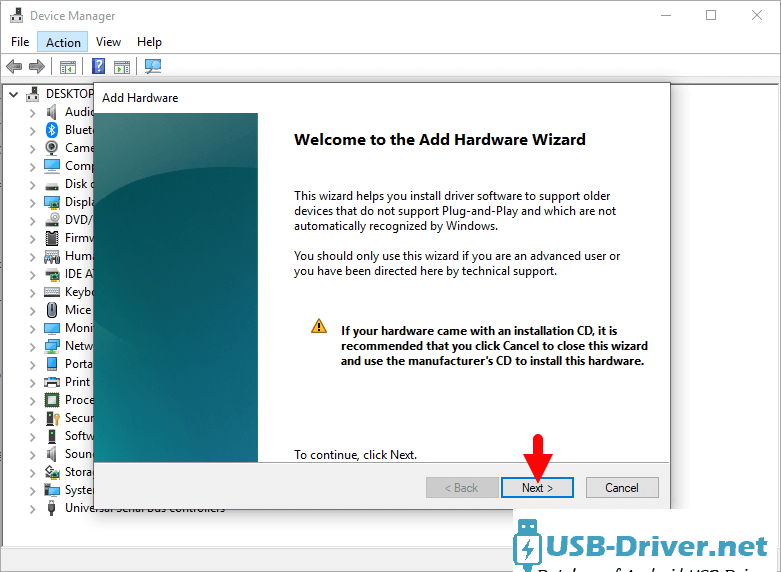
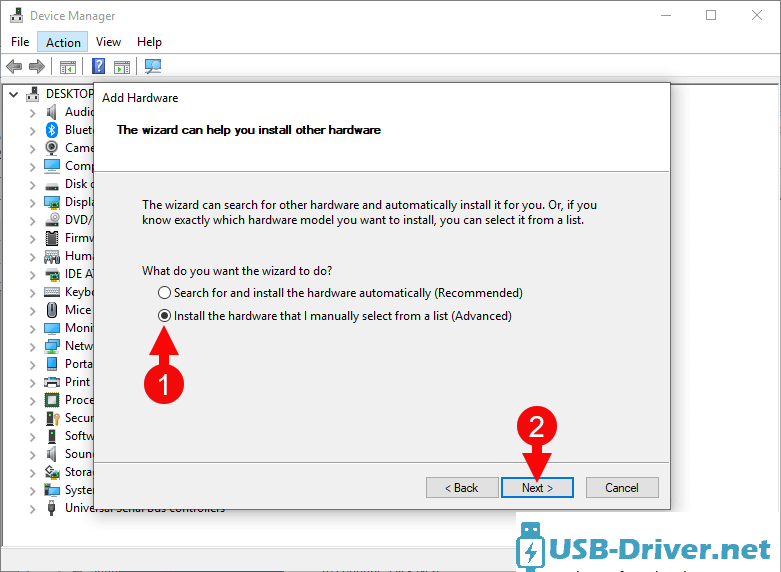
- Now Add Hardware Wizard window should open. Click on Next to continue.

- Select Install the hardware that I manually select from a list (Advanced) option and click on Next.
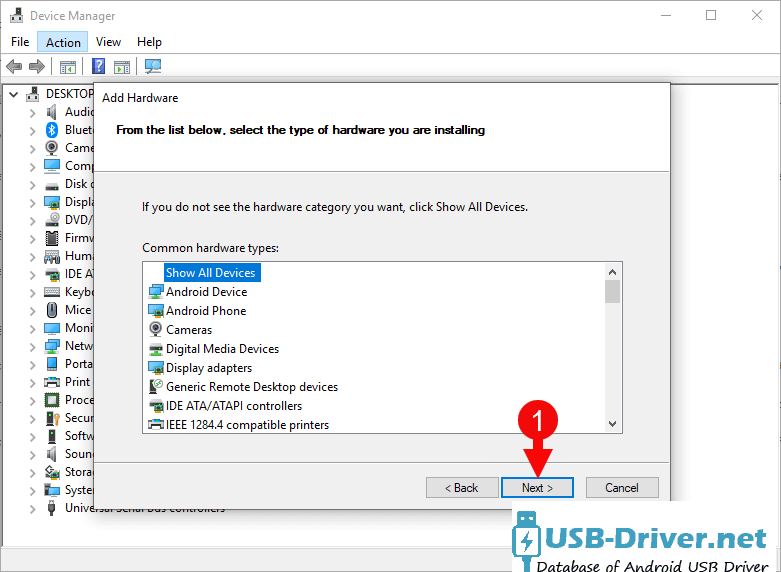
- Now select Show All Devices and click on Next.
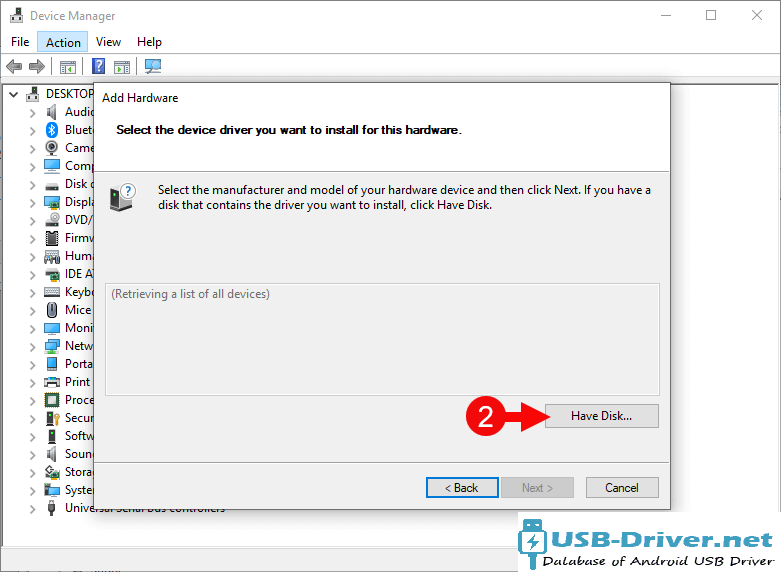
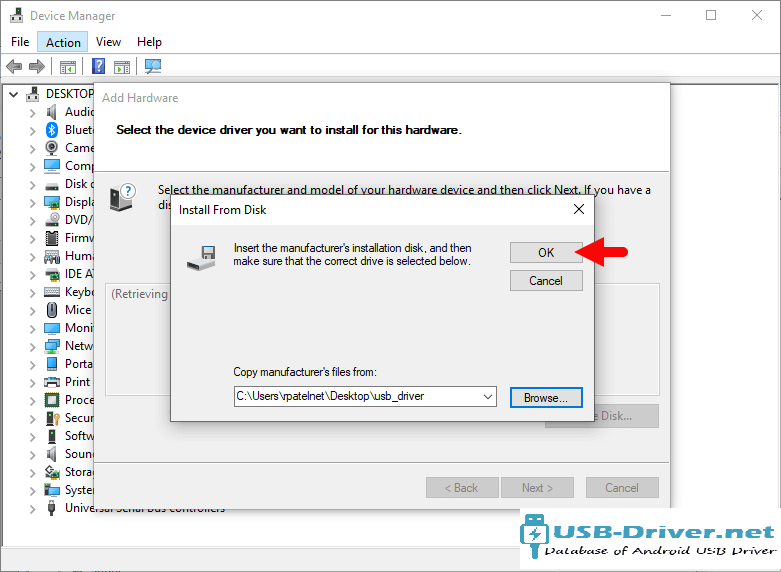
- Now click on Have Disk… to launch the Install From Disk window.
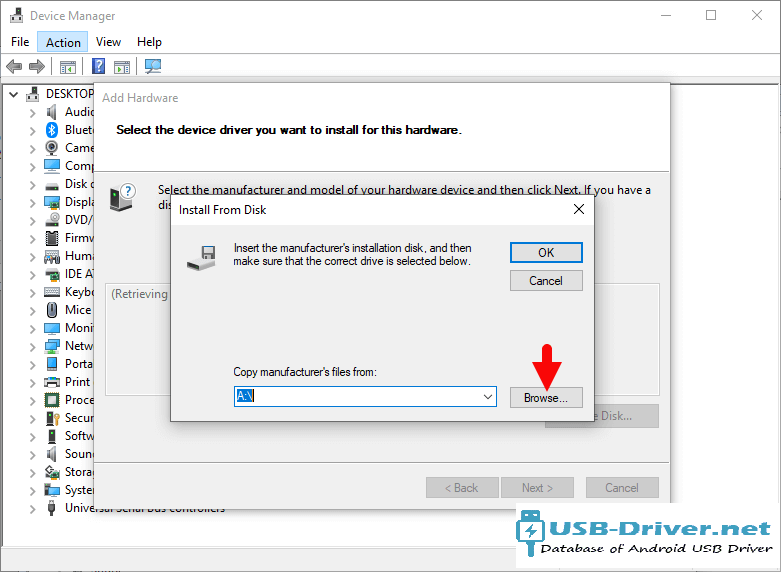
- Now click on Browse… from the Install From Disk window and navigate to the folder where you have extracted the drivers in Step #1.

- Now select Android_Gadget_CDC_driver.inf driver file and click on Open and then on OK.

- Select the Android Gadget VCOM Driver from the list and click on Next.
- Confirm the Hardware driver to install and click on Next to begin the installation process.
- Once installed, click on Finish.
- Follow Steps #3 to #13 again and install the Gadget Serial, MediaTek PreLoader USB VCOM (Android), and MediaTek USB Port drivers.
- Once all the listed drivers are installed, restart your computer.


How to Install Highscreen Boost 3 VCOM Drivers
- Download and extract the android-vcom-driver.zip to Desktop on your computer.

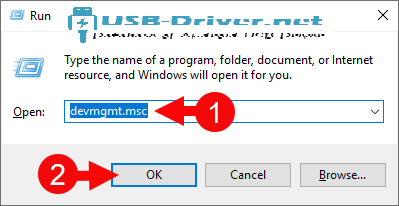
- Open the Device Manager on your computer by searching device manager (devmgmt.msc) from Windows Start Menu.

- When the Device Manager window opens, click on your Computer name.
- Now click on Action and then click on Add legacy hardware.
- Now Add Hardware Wizard window should open. Click on Next to continue.
- Now select Install the hardware that I manually select from a list (Advanced) option and click on Next.
- Now click on Show All Devices from the list and click on Next.
- Now click on Have Disk… to open the Install From Disk window.
- In the Install From Disk window, click on Browse… and navigate to the folder where you have extracted the drivers in Step #1.
- Now open Win 7 folder and select usb2ser_Win764.inf driver file if you have the 64-bit version of Windows, otherwise choose usb2ser_Win7.inf file if you have the 32-bit version of Windows. Once selected, click on Open and then on OK.
- Now select the MediaTek DA USB VCOM Port driver from the list and click on Next.
- In the next screen, confirm the Hardware driver to install and click on Next to begin the installation process.
- Once installed, click on Finish.
- Follow Steps #3 to #13 again and install the MediaTek PreLoader USB VCOM Port, MTK USB Debug Port, MTK USB Modem Port, and MTK USB Port drivers.
- Once all the listed drivers are installed, reboot your computer.


How to Install Highscreen Boost 3 USB Drivers Manually
- Download and extract the latest Android USB Driver (latest_usb_driver_windows.zip) file to Desktop on your computer.

- Now open the Device Manager on your computer by right-clicking Windows Start Button and selecting Device Manager.
- Now click on your Computer name in the Device Manager window.
- Now click on Action and then click on Add legacy hardware.
- Now Add Hardware Wizard window should open. Click on Next to continue.
- Select Install the hardware that I manually select from a list (Advanced) option and click on Next.
- Select Show All Devices from the list and click on Next.
- In the next screen, click on Have Disk… to open the Install From Disk window.
- In the Install From Disk window, click on Browse… and navigate to the folder where you have extracted the drivers in Step #1.
- Now select android_winusb.inf driver file and click on Open and then on OK.
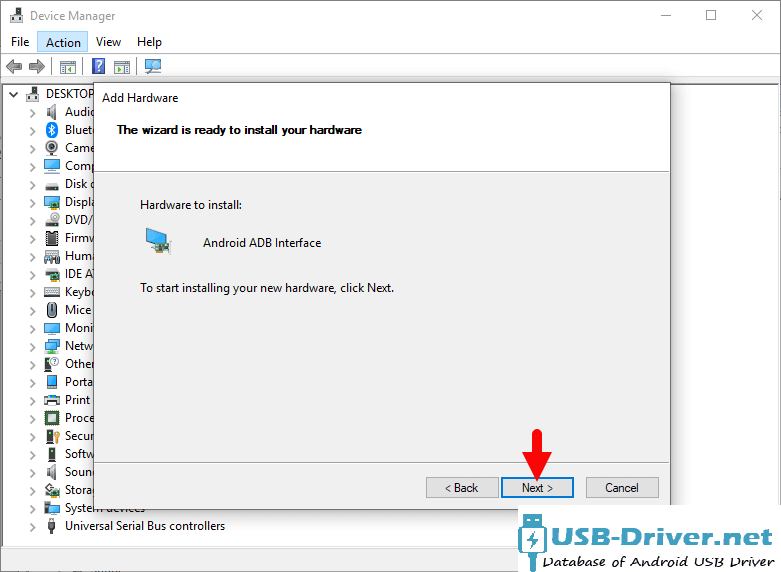
- Now select the Android ADB Interface driver from the list and click on Next.
- Confirm the Hardware driver to install and click on Next to begin the installation process.
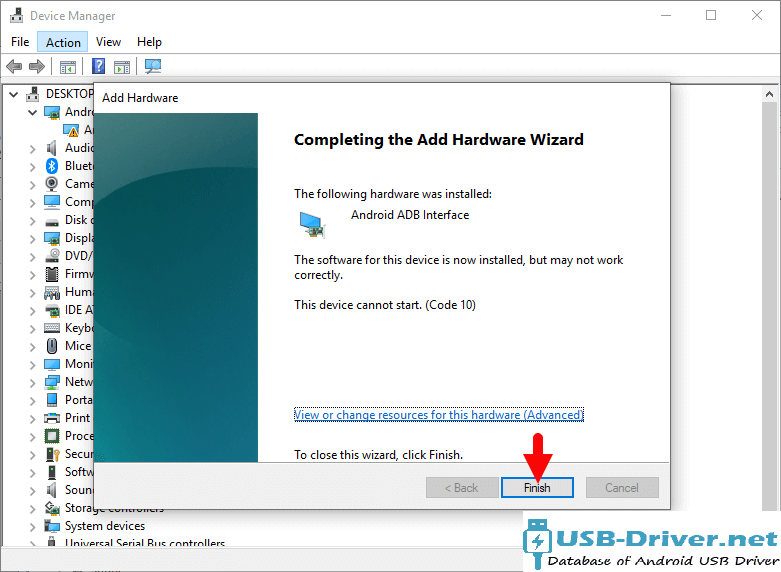
- Once installed, click on Finish.
- Follow Steps #3 to #13 again and install the Android Bootloader Interface driver and Android Composite ADB Interface driver.
- Once all the listed drivers are installed, reboot your computer.


How to Install Highscreen Boost 3 ADB and Fastboot Drivers
- Download and extract the 15 Seconds ADB installer zip file on your computer. Once extracted, you’ll find the ADB driver installer setup file.
- Right-click on the ADB installer setup file and select Run as administrator.

- Now 15 seconds ADB driver installer command prompt window should open on your computer.

- It should ask whether you want to install the ADB driver and Fastboot driver. Press the Y key and then press Enter.
- Now, it should ask whether you want to install the ADB driver system-wide. Press the Y key again and hit Enter.
- Now, the ADB and Fastboot driver installation process should begin.
- When the ADB driver installation is finished, it will ask whether you want to install device drivers. Press the Y key and then press Enter.
- Now the «Device Driver Installation Wizard» window should pop-up.
- Click on Next to begin installing Google USB Drivers (WinUSB).

- Once the installation process is completed, click on Finish and restart your computer.


Important Notes:
[*] Driver Signature Error: If you got Driver Signature Error While installing the Driver then See this Video to fix this problem.
[*] Broken link: Report here.
[*] Have we missed any device model? Let us know by contacting us via Contact Us page.
Reader Interactions

On this page, we have managed to share the official USB driver of the Highscreen Boost 3 Device. If you were already searching for the USB driver of the device, then this page will help you out.
There are 2 USB drivers available for the device, i.e., Mediatek Driver and ADB Driver. The Mediatek Driver is compatible with all the Mediatek Flash Tool, and the ADB Driver can be useful for establishing a connection between the mobile and the computer.
Highscreen Boost 3 Mediatek Driver
The Mediatek Driver is compatible with the SP Flash Tool, MTK Flash Tool, SP MDT Tool, and the SN Write Tool and can be helpful if you are trying to install firmware (ROM) on the device.
Driver Name: Mediatek Driver
Package Name: Mediatek_Driver_Auto_Installer_v1.1352.zip
Driver Size: 9.56 MB
How to Install: Follow Guidelines
Get Driver
Highscreen Boost 3 ADB Driver
You can use the ADB Driver to connect the mobile (powered by android) to the computer and transfer data between the mobile and the computer.
Driver Name: Android ADB Driver
Package Name: usb_driver_r13-windows.zip
Driver Size: 8.27 MB
How to Install: Follow Guidelines
Get Driver
How to Install any USB Driver Manually
- Download and extract the USB driver on the computer.
- Open Device Manager (devmgmt.msc) and Click on the Computer Name > Action Menu > Add Legacy Hardware.
- Click on the Next button.
- Select the Install the hardware that I manually Select from a list checkbox and Click on the Next button.
- Again, Click on the Next button.
- Click on the Have Disk > Browse > Locate the .inf file (found in the extracted driver folder) and Click on Open Button.
- Click on the Finish button to complete the installation.
Follow Complete Guidelines
Readme Once:
[*] Driver Signature Error: If you are facing Driver Signature Error while installing the USB Driver, then head over to How to Fix Driver Signature Error page.
[*] Driver Easy: We recommend you to use Driver Easy application to update all the computer drivers in a Single Click.
[*] Highscreen Boost 3 Stock Firmware: If you are looking for the Highscreen Boost 3 Stock Firmware, then head over to the Stock Firmware page.
Highscreen Boost 3 USB Driver for Windows Computer
Highscreen Boost 3 USB Driver helps you to connect your Highscreen Device to the Windows Computer and transfer data between the device and the computer. It also allows you to Flash Highscreen Boost 3 Stock Firmware on your Highscreen Device using the preloader drivers. Here on this page, we have managed to share the official Highscreen Boost 3 USB Driver.
It is very necessary to have Highscreen Boost 3 USB drivers whenever you have to connect Highscreen Boost 3 to the Pc for the purpose of transferring data or important files. Also, when it comes to updating your Highscreen Boost 3 manually, it’s necessary to have them on your PC. While you are installing or flashing Fastboot firmware on the device, then Highscreen USB Drivers are required. Check out the download links given in this post to simply keep up the pace in this matter.

Highscreen Boost 3 Mediatek Driver for Windows (11,10,8,7,XP)
Driver Package Name : Mediatek Driver for windows
Package File Name: Mediatek_Driver_Auto_Installer_v1.1352_(USB-Driver.NET).zip
Driver File Size: 9.56 MB
Download Driver File Now
How to install Highscreen Boost 3 Mediatek Driver official on Windows
Highscreen Boost 3 Mediatek Driver is compatible with the SP Flash Tool, MTK Flash Tool, SP MDT Tool, and the SN Write Tool and can be useful if you are trying to install firmware (ROM) on the Highscreen Boost 3.
Step 1 : Download and extract Highscreen Boost 3 Mediatek Driver Auto Installer package on the Computer. If in case, you have already downloaded and extracted the driver package, then SKIP this step.

Step 2 : Once you have extracted the driver package, you will be able to see the following files:
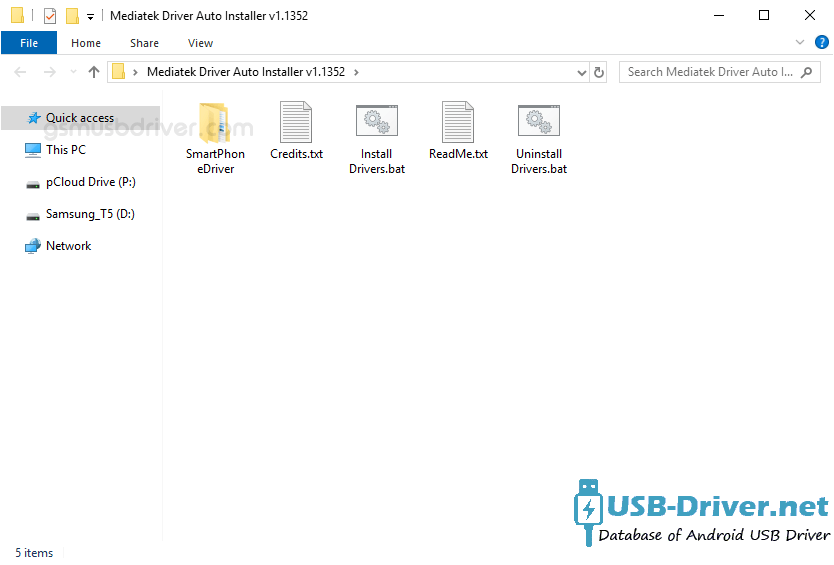
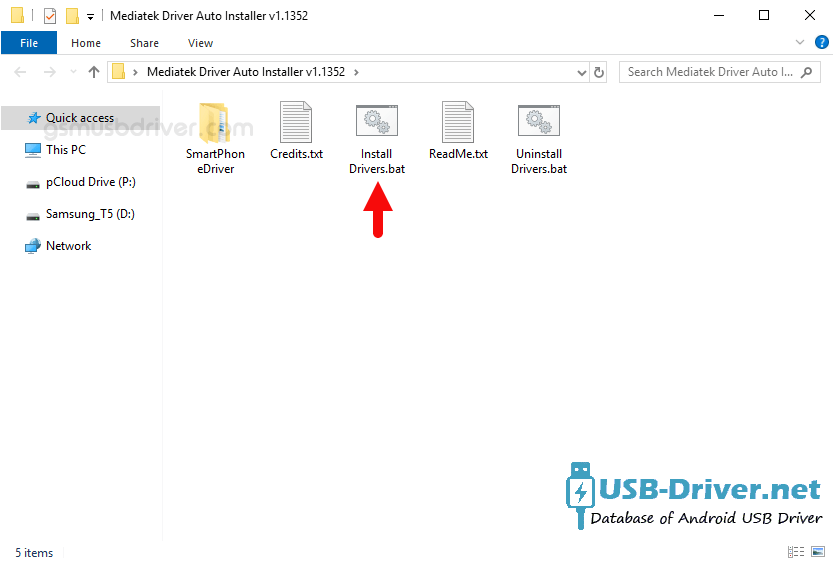
Step 3 : Open Install Drivers.bat to Launch the Setup Dialog Box:
Step 4 : Once the Driver Setup Dialog Box is Launched, you will be able to see the following window:
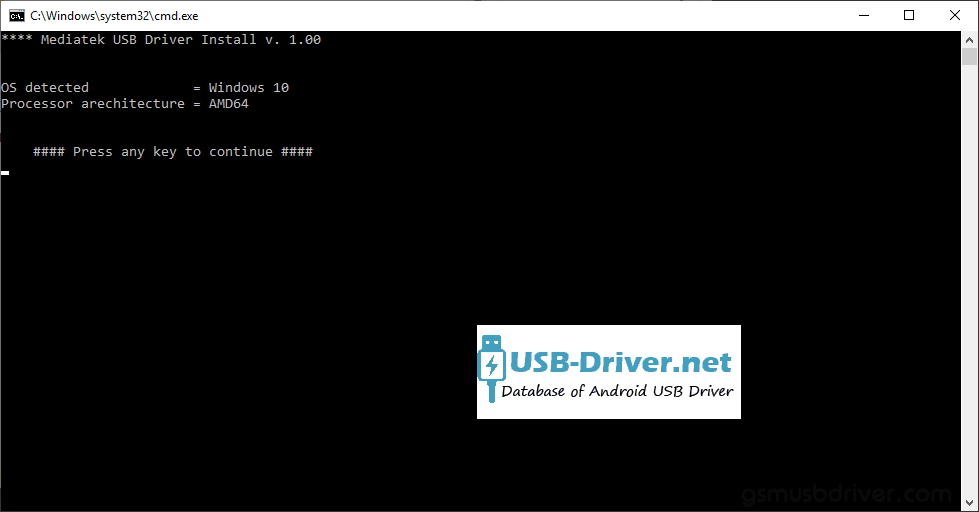
Step 5 : Now, Press any Key (from keyboard) to begin the installation process.
Step 6 : Once the installation process is completed, you will be able to see the Driver installation Completed Message:
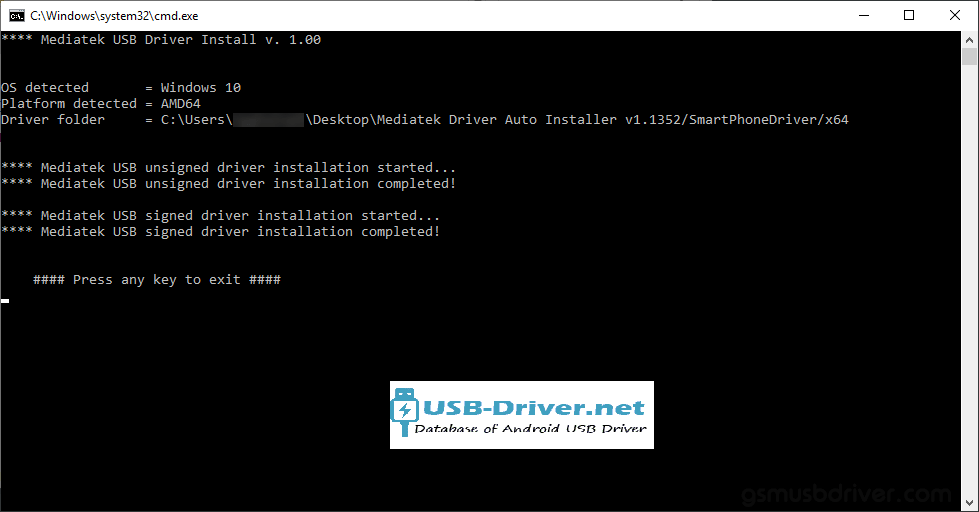
Step 7 : Now, Press any Key (from keyboard) to exit the Setup Window.
Step 8 : Restart your Computer:
Step 9 : Once the Computer is restarted, you can easily connect your Highscreen Boost 3 MediaTek the computer without facing any issue.
Highscreen Boost 3 ADB Driver for Windows (11,10,8,7,XP)
Driver Package Name : Android ADB Driver for windows
Package File Name: usb_driver_r13-windows_(USB-Driver.NET).zip
Driver File Size: 8.27 MB
Download Driver File Now
[•] Download Highscreen Boost 3 Stock Firmware: If you are looking for the Highscreen Boost 3 Stock Firmware, then head over to the Stock Firmware page.
How4 to install Highscreen Boost 3 USB drivers
The Highscreen Boost 3 USB driver makes almost every task that needs to be performed by connecting the device to PC easier. All the files can be transferred in no time without worrying about anything. Also, there are certain benefits to having it. Before you proceed to download, it is suggested to you to remove the previously installed Highscreen Boost 3 from your PC in case you have installed it. Once you are done, click the below link to download Highscreen USB Drivers on your PC.
How to install Highscreen Boost 3 ADB Driver on Windows
Highscreen ADB Driver can be used to connect the Highscreen to the computer and transfer data between the mobile and the computer.
Step 1 : Download and extract Highscreen Boost 3 ADB Driver (.inf based) (The link is above) on the Computer. If in case, you have already downloaded and extracted the driver, then SKIP this step.
Step 2 : Open Device Manager on the Computer. Press Win + R key from the keyboard and type devmgmt.msc and Click on OK Button:
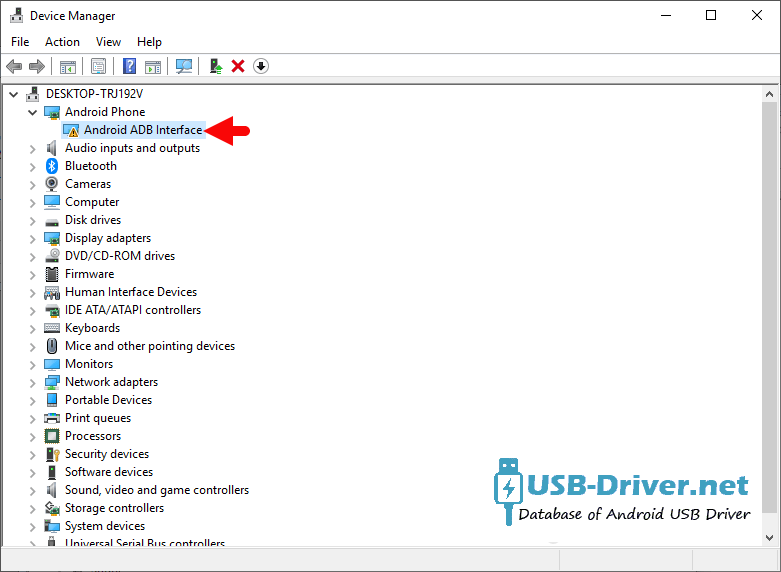
Step 3 : Once the Device Manager is Launched, Click on the Computer Name (name can vary from the image below):

Step 4 : Click on the Action Menu and Select Add Legacy Hardware option:
Step 5 : Under Add hardware Dialog Box, Click on the Next Button:
Step 6 : Tick on the Install the hardware that I manually select from a list checkbox and Click on the Next Button:
Step 7 : Click on the Next Button:
Step 8 : Then Click on the Have Disk Button:
Step 9 : Click on the Browse Button:
Step 10 : Locate the .inf file from the computer (this file can be found in the extracted driver folder).
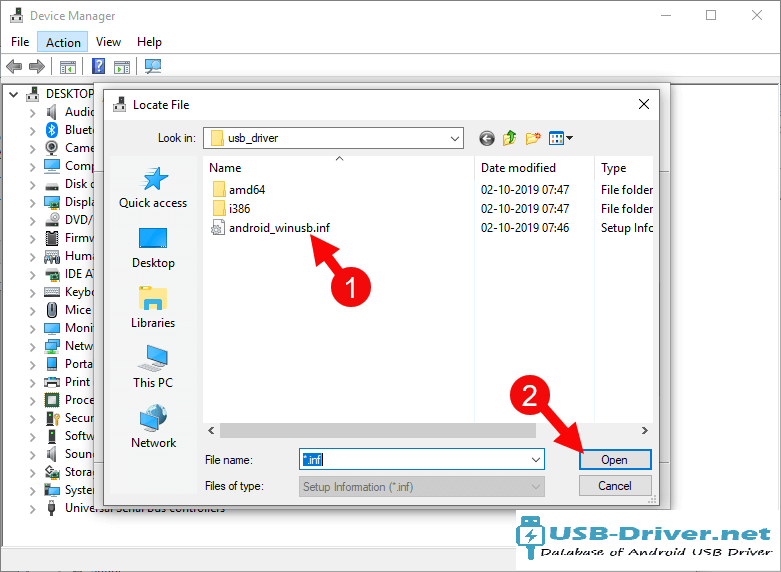
Step 11 : Click on the OK Button:
Step 12 : Click on the Next button:
Step 13 : Again Click on the Next button:
Step 14 : Click on the Finish button to complete the installation process (ignore Code 10; it will be gone post restarting the computer).
Step 15 : Your Highscreen Boost 3 driver is listed in the Device Manager.
Step 16 : Now, Restart the Computer. Once the computer is restarted, you can easily connect your Highscreen Boost 3 device to the computer.
[•] Driver Signature Error: If you got Driver Signature Error While installing the Highscreen Boost 3 Driver then See this Video to fix this problem.
[•] Request Highscreen Driver: If you are looking for any specific Highscreen drivers that is not listed above, then you can request it through the comment box below (do not request driver from the contact page, or else it will be ignored).
Download and Install Android USB Driver
In this article, you will find out the Highscreen USB Drivers? Don’t worry about it, we are here to give you the latest officially released drivers for your Highscreen Boost 3 Pro smartphone or tablet and check for the USB driver for your device? If yes are you checking out an easy way to connect your device to a PC or Laptop? You’ve come to the right place! Here we’ve provided free download Highscreen Boost 3 Pro USB drivers for all models supported their model numbers, just check below.
Additionally, Highscreen Mobile doesn’t offer computer suite application, connecting your device to a PC while not downloading and installing the USB driver given here is a not possible task. Therefore, download Highscreen USB drivers from here, install it on your PC and connect Highscreen smartphone/tablet to PC or Laptop with successfully.
Here, we have provided 2 USB drivers for your Highscreen Boost 3 Pro Android device on this page.
| USB Driver Type | ADB Driver |
| USB Driver Purpose | Secure your device to a computer |
| File Size | 8.3 MB |
| USB Driver link | Click here to Download |
Download Highscreen Boost 3 Pro Qualcomm Driver
| USB Driver Type | Qualcomm Driver |
| USB Driver Purpose | Flashing stock firmware on your device |
| File Size | 11.00 MB |
| Qualcomm Driver link | Click here to Download |
Watch video tutorial about ADB USB Drivers
If you don’t like this video tutorial or if you would like to get more command, then continue reading.
How to Install Android USB Drivers for Windows?
- Let’s get started, download the USB driver and extract it on your desktop.
- Currently, open Device Manager > Action > Add legacy hardware.

- Click “Next” in the Add legacy hardware wizard.

- NOW, select“Install the hardware that I manually select from the list (Proceed)” and click “Next“.

- When done choose “Show all devices“, click “Next” and select the extracted file manually from your PC.

- Now to start installing your new hardware, click “Next” once again.

- Click “Install” in the Windows security prompt window.

- Click “Finish” to complete the installation.

You May Also Like:
Samsung USB Drivers
Huawei USB Drivers
Nokia USB Drivers
Motorola USB Drivers
LG USB Drivers
Oppo USB Drivers
Meizu USB Drivers
Xiaomi USB Drivers
Lenovo USB Drivers
Vivo USB Drivers
ZTE USB Drivers
Supported Operating Systems 32-bit / 64-bit
Need USB driver to download for Windows 10, Windows 8.1, Windows 7? Just in case you are having problems at the part of your USB is not operating, see the article below to settle your USB problems.
How to Install Android USB Drivers on Windows 10
Installation the Android USB driver on Windows 10 for the first time, some awesome steps guide below:
- Connect your Android device to your computer’s USB port.
- From Windows Explorer, open “Computer Management”.
- In the “Computer Management” left pane, select Device Manager.
- In the “Device Manager” right pane, locate and expand Portable Devices > Other Devices, depending on which one you see.
- Right-click the name of the device you connected, and then select “Update Driver Software”.
- In the “Hardware Update Wizard“, select Browse my computer for driver software and click “Next”.
- Click Browse and then locate the USB driver folder. For example, the Google USB Driver is located in.
android_sdkextrasgoogleusb_driver - Click “Next” to install the driver.
How to Install Android USB Drivers on Windows 8.1
Installation the Android USB driver on Windows 8.1 for the first time, some awesome steps guide below:
- Connect your Android device to your computer’s USB port.
- Access search, as follows: Touch screen: On your computer, swipe in from the right edge of the screen and tap “Search”.Using a mouse: Point to the lower-right corner of the screen, move the mouse pointer up, and then click “Search”.
- In the search box, type into and then click “Device Manager”.
- Double-click the device category, and then double-click the device you want.
- Click the “Driver” tab, click Update Driver, and follow the instructions.
How to Install Android USB Drivers on Windows 7
Installation the Android USB driver on Windows 7 for the first time, some awesome steps guide below:
- Connect your Android device to your computer’s USB port.
- Right-click on “Computer” from your desktop or Windows Explorer, and select “Manage”.
- Select “Devices” in the left pane.
- Locate and expand “Another device” in the right pane.
- Right-click the device name (such as Nexus S) and select “Update Driver Software”. This will launch the Hardware Update Wizard.
- Select Browse my computer for driver software and click “Next”.
- Click “Browse” and locate the USB driver folder. (The Google USB Driver is located in
android_sdkextrasgoogleusb_driver.) - Click “Next” to install the driver.
Or, to upgrade an existing Android USB driver on Windows 7 and higher with the new driver:
- Connect your Android device to your computer’s USB port.
- Right-click on “Computer” from your desktop or Windows Explorer, and select “Manage”.
- Select “Device Manager” in the left pane of the Computer Management window.
- Locate and expand “Android Phone” in the right pane.
- Right-click on “Android Composite ADB Interface” and select “Update Driver”. This will launch the Hardware Update Wizard.
- Select “Install from a list or specific location” and click “Next”.
- Select “Search for the best driver in these locations” uncheck “Search removable media”, and check to Include this location in the search.
- Click “Browse” and locate the USB driver folder. (The Google USB Driver is located in
android_sdkextrasgoogleusb_driver.) - Click “Next” to upgrade the driver.
That’s it. Now you have successfully finished installing Android ADB Driver on your Windows computer. From now on, you will be able to connect your Android smartphone or tablet with the PC successfully.
In the event that you might want to connect with us for many reasons, utilize the contact page.
Do you own a Highscreen smartphone or tablet? If yes, are you searching for the USB driver for your device? If yes is your answer again, then you have landed in the right place. Download Highscreen USB drivers from here (based on your device model number), install it on your computer and connect your device to PC or Laptop successfully.
Since Highscreen Mobile doesn’t offer PC Suite for its customers, you will need to download and install the USB drivers given here for connecting your device to a PC or laptop computer.

| Highscreen Models | Download USB Driver |
|---|---|
| Highscreen Wallet | Download Driver |
| Highscreen Power Ice | Download Driver |
| Highscreen Fest Pro | Download Driver |
| Highscreen Fest | Download Driver |
| Highscreen Easy Power Pro | Download Driver |
| Highscreen Easy Power | Download Driver |
| Highscreen Fest XL Pro | Download Driver |
| Highscreen Fest XL | Download Driver |
| Highscreen Easy XL Pro | Download Driver |
| Highscreen Easy XL | Download Driver |
| Highscreen Power Five Max 2 | Download Driver |
| Highscreen Expanse | Download Driver |
| Highscreen Alpha R | Download Driver |
| Highscreen Alpha GTX | Download Driver |
| Highscreen Zera S | Download Driver |
| Highscreen Zera F | Download Driver |
| Highscreen Thor | Download Driver |
| Highscreen Alpha Tab | Download Driver |
| Highscreen Ice 2 | Download Driver |
| Highscreen Zera S Power | Download Driver |
| Highscreen Spade | Download Driver |
| Highscreen Zera S (rev.S) | Download Driver |
| Highscreen Zera F (rev.S) | Download Driver |
| Highscreen Boost 3 Pro | Download Driver |
| Highscreen Bay | Download Driver |
| Highscreen Power Five Pro | Download Driver |
| Highscreen Spark 2 | Download Driver |
| Highscreen Power Four | Download Driver |
| Highscreen Boost 3 | Download Driver |
| Highscreen Pure J | Download Driver |
| Highscreen Power Five | Download Driver |
| Highscreen Pure F | Download Driver |
| Highscreen Verge | Download Driver |
| Highscreen Hercules | Download Driver |
| Highscreen Zera U | Download Driver |
| Highscreen Omega Prime Mini | Download Driver |
| Highscreen Omega Prime XL | Download Driver |
| Highscreen Boost | Download Driver |
| Highscreen Spider | Download Driver |
| Highscreen Boost 2 SE | Download Driver |
| Highscreen Boost 2 | Download Driver |
| Highscreen Win Joy | Download Driver |
| Highscreen Winwin | Download Driver |
| Highscreen Omega Prime S | Download Driver |
| Highscreen Omega Prime Mini SE | Download Driver |
| Highscreen Alpha Ice | Download Driver |
| Highscreen Razar Pro | Download Driver |
| Highscreen Razar | Download Driver |
| Highscreen Power Ice Max | Download Driver |
| Highscreen Easy L Pro | Download Driver |
| Highscreen Easy L | Download Driver |
| Highscreen Power Five Max | Download Driver |
| Highscreen Power Rage Evo | Download Driver |
| Highscreen Power Ice Evo | Download Driver |
| Highscreen Thunder | Download Driver |
| Highscreen Boost 3 SE | Download Driver |
| Highscreen Easy S Pro | Download Driver |
| Highscreen Easy S | Download Driver |
| Highscreen Pure Power | Download Driver |
| Highscreen Easy F Pro | Download Driver |
| Highscreen Easy F | Download Driver |
| Highscreen Power Five Evo | Download Driver |
| Highscreen Tasty | Download Driver |
| Highscreen Prime L | Download Driver |
| Highscreen Power Rage | Download Driver |
Installation Tutorials
- How To Install CDC Driver On Windows Computer
- How To Install VCOM Driver On Windows Computer
- How To Install ADB Driver On Windows Computer
Points To Remember:
1) Highscreen Mobile officially provides all the USB drivers given here. So, if you encounter any issues while using these USB drivers, contact their support team.
2) The Highscreen USB drivers given here are for Windows-based computers. So, if you are using a Linux or Mac-based computer, these drivers will not work.
3) If the USB driver for your Highscreen device is not available on this page, do let us know by dropping a comment below.
4) If you own another brand’s smartphone or tablet, you can download USB drivers for the same by visiting our USB drivers page.

Boopathy Sundaramoorthy is a tech and Android enthusiast working for RootMyDevice.com from 2018. He specializes in testing new Android rooting methods, and he shares his experiences here. He also provides stock ROM installation tutorials and custom recovery installation tutorials here.
Reader Interactions

Шаги обновления драйвера устройства Highscreen вручную:
Базовые драйверы Highscreen должны быть объединены в %%os%% или загружены через обновление Windows®. Хотя эти драйверы Device в комплекте включают основные функции, они обычно не охватывают все аппаратные функции.
Наши инструкции по обновлению драйверов Highscreen содержат все необходимые шаги.
Порядок выполнения автоматической загрузки и обновления:
Рекомендация: Как правило, большинству пользователь Windows, мы настоятельно рекомендуем выполнять обновление драйверов Highscreen с помощью утилиты для обновления драйверов, такой как DriverDoc [DriverDoc — Продукт от Solvusoft]. DriverDoc — это утилита, которая автоматически скачивает и обновляет драйверы Highscreen, гарантируя установку надлежащей версии драйвера для вашей операционной системы.
Более того, наша база, содержащая более 2 150 000 драйверов (обновляется ежедневно), позволяет обновлять не только драйверы Highscreen , но и остальные драйверы для ПК.
Установить необязательные продукты — DriverDoc (Solvusoft) | Лицензия | Политика защиты личных сведений | Условия | Удаление
![]()
Highscreen Часто задаваемые вопросы относительно обновления
Почему некоторые люди игнорируют обновления драйверов Highscreen?
Многие люди не видят необходимости обновления драйверов устройств Highscreen, поэтому они никогда не обновляются.
Как узнать, когда обновлять драйверы Highscreen?
Как правило, после крупных обновлений Windows следует обновлять драйверы устройств Highscreen.
Каковы риски и преимущества обновлений драйверов Highscreen?
Преимущества обновления драйверов Highscreen включают повышение производительности и расширение возможностей аппаратного обеспечения, а также повышение его общей функциональной совместимости. Потенциальные риски установки неверных драйверов включают нестабильность ПК, снижение производительности и случайные сбои.
Какая ОС совместима с драйверами Highscreen?
Highscreen поддерживается Windows.
Распространенные проблемы обновления драйверов
Highscreen подвержен системным ошибкам, связанным с поврежденными или устаревшими драйверами устройств. Драйверы ПК могут стать проблематичными без какой-либо очевидной причины. Хорошей новостью является то, что драйвер системы Устройство всегда может быть изменен для решения дилеммы ноутбука.
Поиск правильного драйвера Highscreen на веб-сайте Highscreen может быть очень сложным и часто может занять много времени на поиск. Тем не менее, даже если вы хорошо найдете, устанавливаете и обновляете драйверы для Highscreen, вы все равно можете тратить много времени и быть очень разочарованы этим начинанием. Неправильные драйверы оборудования могут привести к более серьезным проблемам, чем просто неисправная установка.
Из-за времени и сложности, связанных с обновлением драйверов, мы настоятельно рекомендуем использовать программное обеспечение для обновления драйверов. Хорошая служба обновления драйверов гарантирует наличие текущих совместимых драйверов и создает резервную копию всех текущих драйверов, прежде чем вносить какие-либо изменения. Поддержание резервной копии драйвера обеспечивает уверенность в том, что вы можете откатить любой драйвер к предыдущей версии (при необходимости).
Поиск по категориям драйверов Highscreen
- Видеокарта
- Клавиатура
- Модем
- Монитор
- Мышь
- Звуковая карта
Всего страниц: 1
Всего элементов: 6
Рейтинг телефона:
(5 — 1 голос)

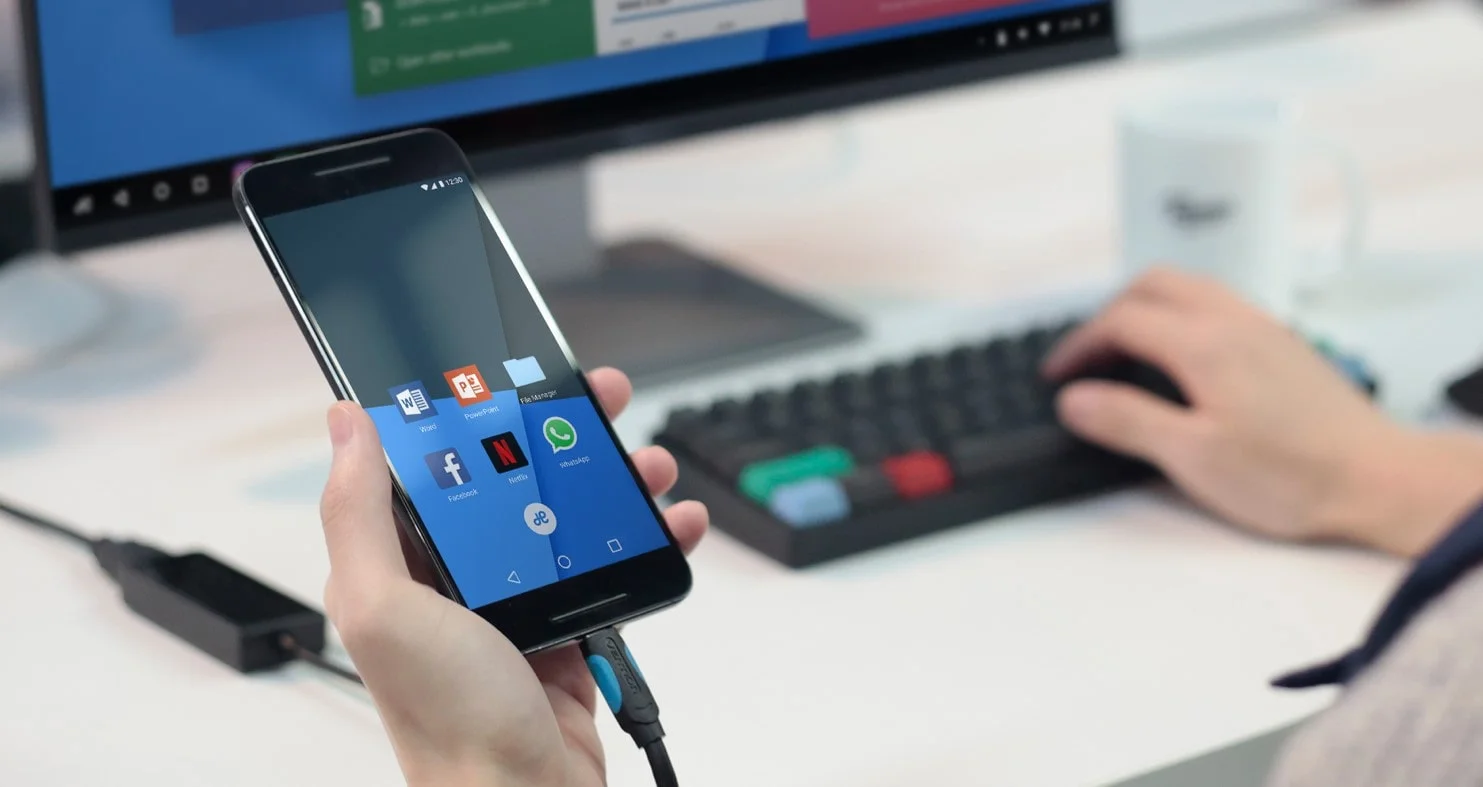
Владельцы смартфонов регулярно подключают мобильный девайс к ПК. Делается это для того, чтобы передать файлы с одного носителя на другой для дальнейшего использования. Но иногда пользователи сталкиваются с проблемой, когда телефон Highscreen Boost 3 не видит компьютер. Почему так происходит, и что нужно делать в такой ситуации?
Почему Highscreen Boost 3 не видит компьютер
Если человек подключает смартфон к ПК через USB-кабель, но компьютер никак не реагирует, значит, пользователь столкнулся с одной из следующих проблем:
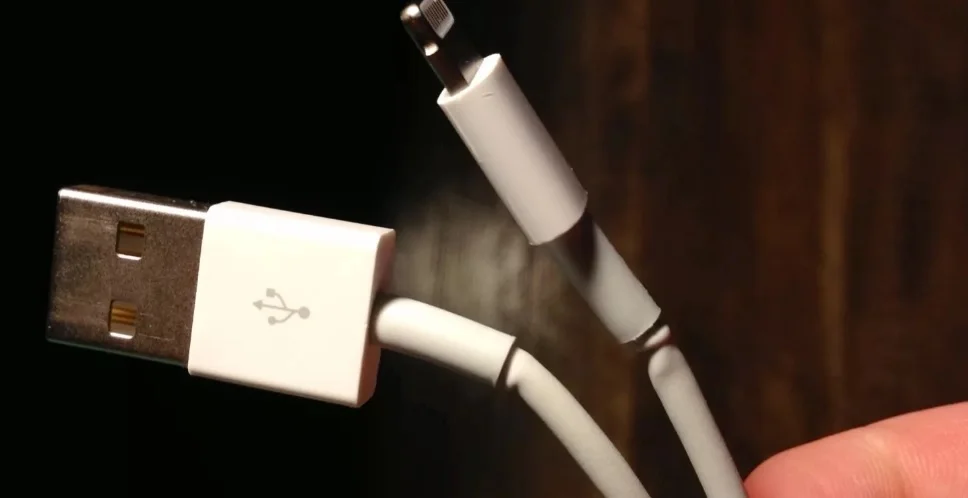
- неисправность кабеля;
- поломка гнезда USB на одном из устройств;
- на компьютере установлены некорректные драйвера для смартфона, или их нет вовсе;
- при подключении выбрана опция «Только зарядка»;
- сбой в работе операционной системы одного из устройств.
Таким образом, все обозначенные проблемы можно поделить на физические и программные. Чтобы определить точную причину того, что телефон Highscreen Boost 3 не видит ПК, нужно выполнить проверку оборудования и настроек обоих устройств.
Как решить проблему
Для начала вы должны убедиться, что для подключения используется исправный кабель. Самый простой способ – поставить телефон на зарядку с тем же шнуром. Если девайс заряжается, значит, проблема точно не в кабеле.
Второй момент, который пользователи часто упускают из вида, – выбран неправильный тип подключения. Когда человек соединяет смартфон с ПК, на экране мобильного устройства появляется уведомление, предлагающее выбрать один из нескольких типов сопряжения:
- только зарядка;
- камеры;
- медиаустройство и так далее.
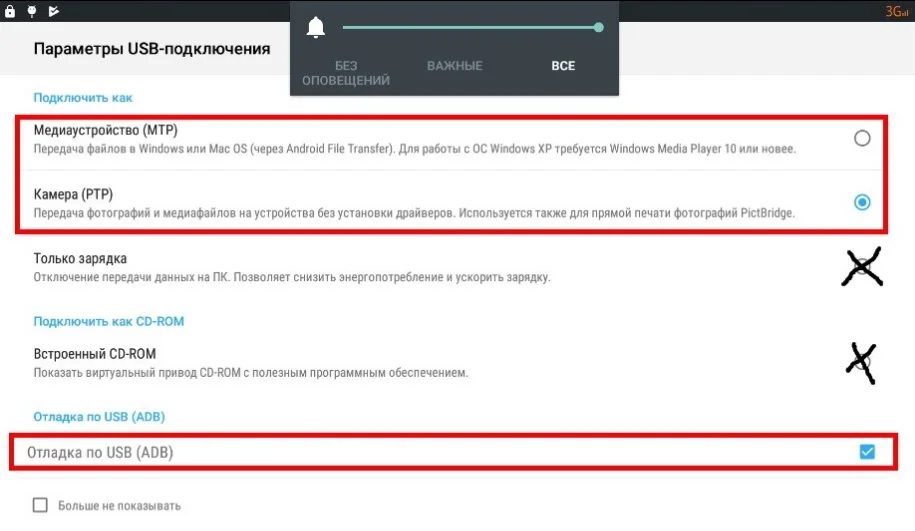
По умолчанию указывается тип «Только зарядка». При таком подключении смартфон на ОС Андроид просто получает энергию от компьютера. Проверьте настройки сопряжения и выберете пункт «Подключить как медиаустройство» или «USB-накопитель». Только в таком случае ПК увидит телефон Highscreen Boost 3, как полноценный носитель информации.
Если же при подключении мобильного девайса к ПК не происходит совсем ничего (гаджет даже не заряжается), нужно проверить работоспособность интерфейса USB на компьютере. Например, можно вставить флешку или подключить мышку.
Проблемы физического характера (поломка кабеля или разъема) решаются только заменой комплектующих. А в ситуации, когда вы выбираете правильный тип подключения (медиаустройство) и пользуетесь исправными аксессуарами, причиной появления ошибки становятся неисправные драйвера.
Как правило, они устанавливаются автоматически при первом сопряжении смартфона и ПК. Загружается ПО только при наличии соединения с интернетом. Если не подключиться к сети, драйвера загружены не будут. Поэтому рекомендуется проверить доступ к интернету.
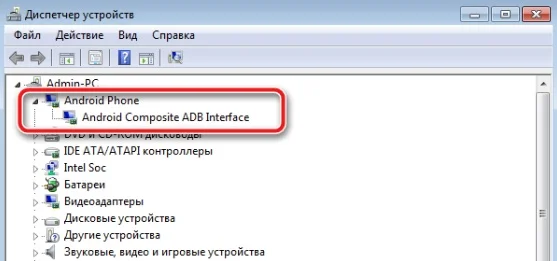
Проверить работоспособность драйверов можно следующим образом:
- Открыть диспетчер устройств (Win+R и затем ввести devmgmt.msc).
- Найти в списке MTP-устройство или название телефона.

- Дважды нажать левой кнопкой мыши.
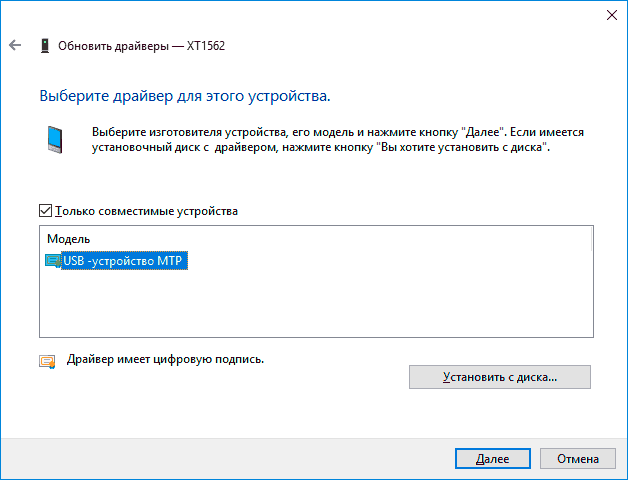
- Кликнуть «Обновить драйвер».
- Выбрать «USB-устройство MTP».
- Нажать «Далее».
- Дождаться окончания переустановки драйверов.
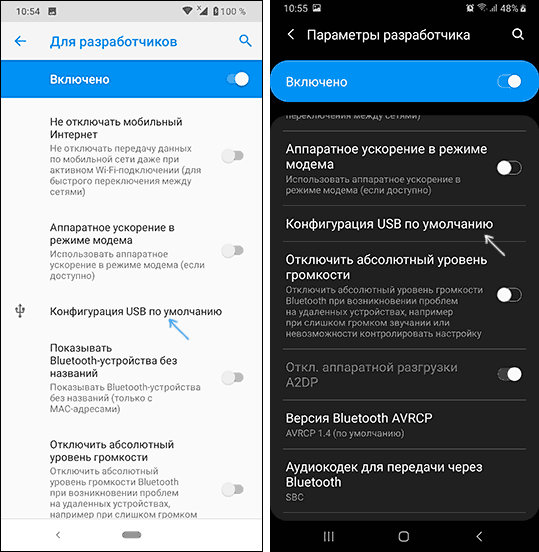
Если же в диспетчере устройств никак не отображается смартфон, есть смысл включить на гаджете Андроид режим разработчика:
- Открыть настройки телефона.
- Перейти в раздел «Для разработчиков».
- Активировать функцию.
- Кликнуть «Конфигурация USB по умолчанию».
- Выбрать значение «Передача файлов».
Когда не помогает ни один из предложенных советов, единственный выход – сбросить настройки смартфона. Эта операция выполняется в том случае, если владелец устройства подозревает, что сопряжение отсутствует из-за наличия вирусов.
Для сброса настроек нужно:
- Открыть настройки.
- Перейти в раздел «Восстановление и сброс».
- Нажать «Сбросить настройки».
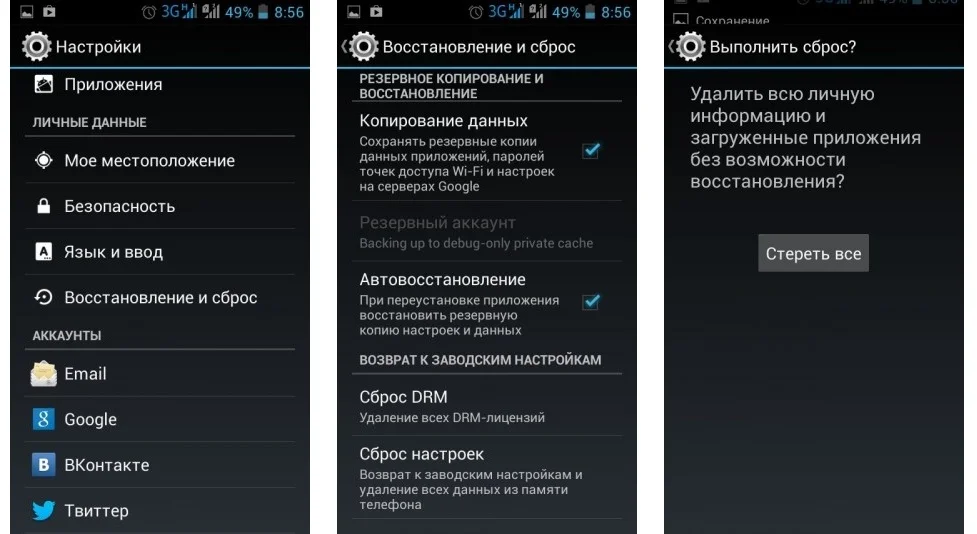
После выполнения операции с мобильного девайса удалятся все файлы. Чтобы не потерять важную информацию, рекомендуется предварительно создать резервную копию.
Альтернативные методы подключения
Если соединить телефон Highscreen Boost 3 с компьютером через USB не получилось, можно попробовать альтернативные методы передачи информации с одного устройства на другое:
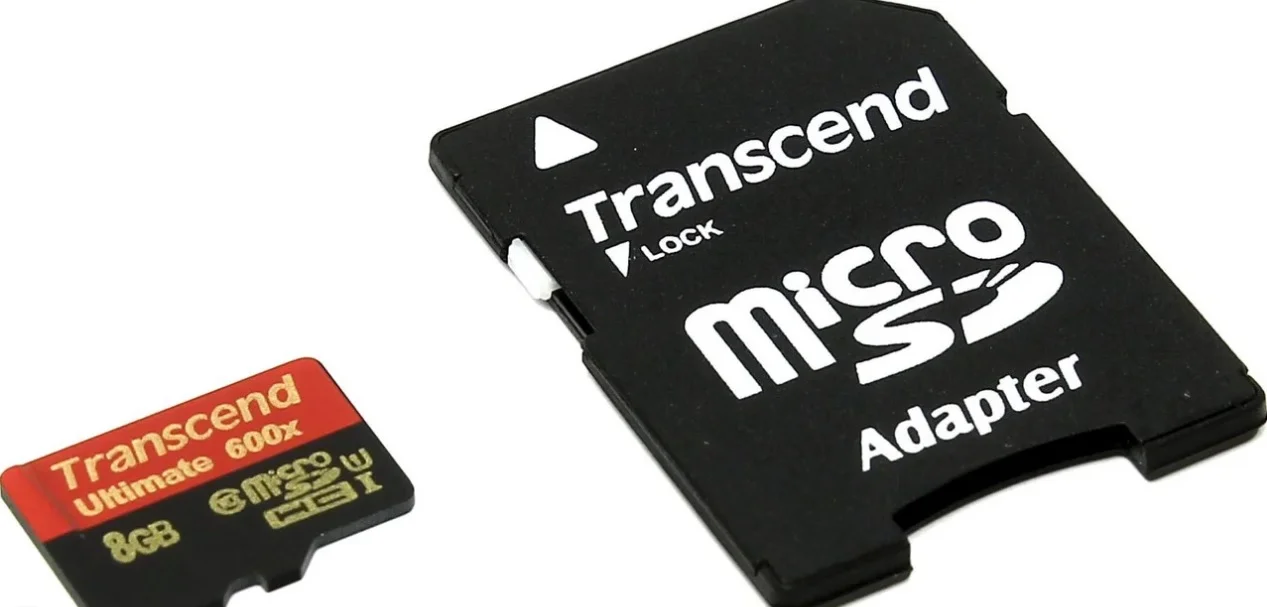
- при помощи MicroSD-карты;
- через Wi-Fi.
Первый вариант не нуждается в подробном описании, так как в таком случае просто требуется вставить карту памяти в адаптер и подключить к ПК через соответствующий разъем. Но подобный вид сопряжения позволит лишь перекинуть файлы на флешку или с нее.
Чтобы получить доступ к памяти смартфона, нужно использовать соединение Wi-Fi. Для этого понадобится дополнительная программа. Например, MyPhoneExplorer. Ее следует загрузить как на ПК (с официального сайта), так и на телефон (через Google Play).
Дальнейшее подключение выполняется следующим образом:
- Подключить оба устройства к одной сети Wi-Fi.
- Открыть приложение MyPhoneExplorer на телефоне.
- Придумать пароль для подключения.
- Открыть программу на ПК.
- Нажать кнопку «Файл» и выбрать пункт «Подключить».
- Подтвердить сопряжение вводом ранее созданного кода.
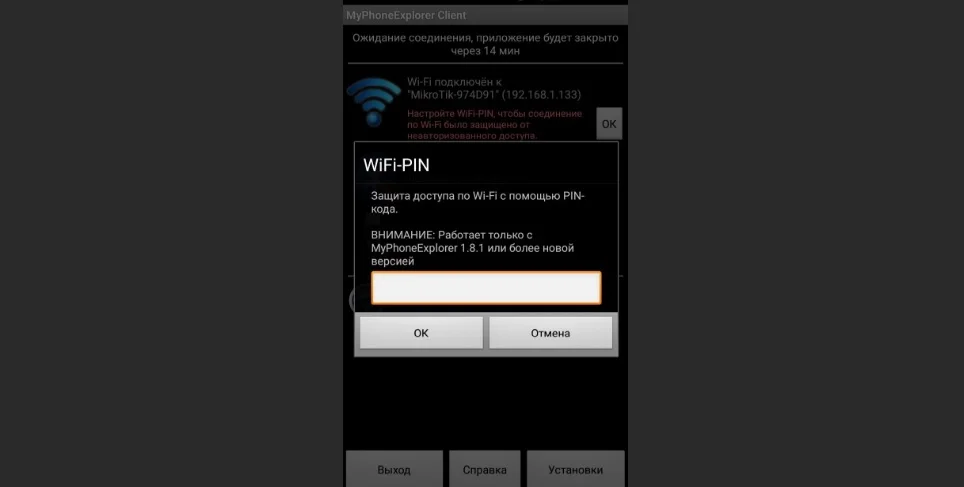
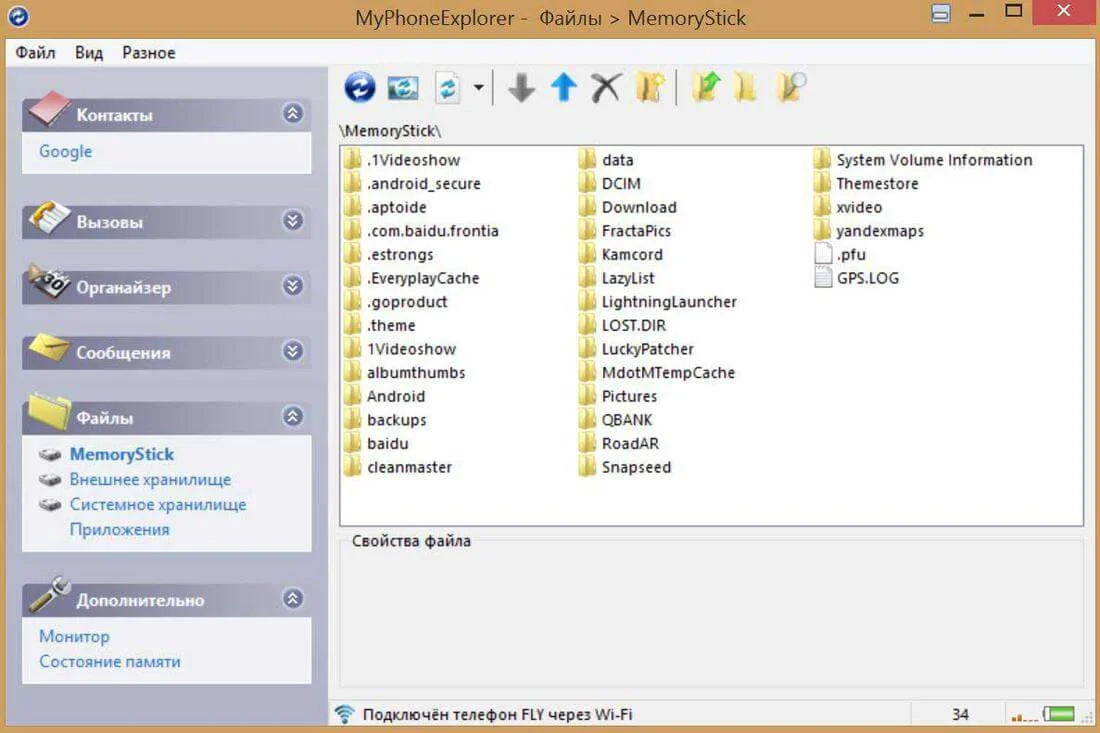
Так смартфон сможет подключиться к ПК без использования USB-кабеля. В MyPhoneExplorer на компьютере отобразится список всех доступных файлов. Можно перекинуть информацию как с телефона, так и на него.
Как не столкнуться с проблемой в будущем
Чтобы впредь ситуация не повторялась, и телефон Highscreen Boost 3 всегда видел компьютер, следуйте нескольким простым советам:
- Используйте для подключения только комплектные аксессуары. Не покупайте дешевые кабели.
- На телефоне выставляйте параметр «Медиаустройство» или «USB-накопитель».
- При первом сопряжении не забудьте установить драйвера и при необходимости обновить их.
Соблюдение всего трех правил раз и навсегда избавит от проблем при подключении телефона к компьютеру.
Поделитесь страницей с друзьями:
Если все вышеперечисленные советы не помогли, то читайте также:
Как прошить Highscreen Boost 3
Как получить root-права для Highscreen Boost 3
Как сделать сброс до заводских настроек (hard reset) для Highscreen Boost 3
Как разблокировать Highscreen Boost 3
Как перезагрузить Highscreen Boost 3
Что делать, если не включается Highscreen Boost 3
Что делать, если не заряжается Highscreen Boost 3
Как сделать скриншот на Highscreen Boost 3
Как сделать сброс FRP на Highscreen Boost 3
Как обновить Highscreen Boost 3
Как записать разговор на Highscreen Boost 3
Как подключить Highscreen Boost 3 к телевизору
Как почистить кэш на Highscreen Boost 3
Как сделать резервную копию Highscreen Boost 3
Как отключить рекламу на Highscreen Boost 3
Как очистить память на Highscreen Boost 3
Как увеличить шрифт на Highscreen Boost 3
Как раздать интернет с телефона Highscreen Boost 3
Как перенести данные на Highscreen Boost 3
Как разблокировать загрузчик на Highscreen Boost 3
Как восстановить фото на Highscreen Boost 3
Как сделать запись экрана на Highscreen Boost 3
Где находится черный список в телефоне Highscreen Boost 3
Как настроить отпечаток пальца на Highscreen Boost 3
Как заблокировать номер на Highscreen Boost 3
Как включить автоповорот экрана на Highscreen Boost 3
Как поставить будильник на Highscreen Boost 3
Как изменить мелодию звонка на Highscreen Boost 3
Как включить процент заряда батареи на Highscreen Boost 3
Как отключить уведомления на Highscreen Boost 3
Как отключить Гугл ассистент на Highscreen Boost 3
Как отключить блокировку экрана на Highscreen Boost 3
Как удалить приложение на Highscreen Boost 3
Как восстановить контакты на Highscreen Boost 3
Где находится корзина в Highscreen Boost 3
Как установить WhatsApp на Highscreen Boost 3
Как установить фото на контакт в Highscreen Boost 3
Как сканировать QR-код на Highscreen Boost 3
Как подключить Highscreen Boost 3 к компьютеру
Как установить SD-карту на Highscreen Boost 3
Как обновить Плей Маркет на Highscreen Boost 3
Как установить Google Camera на Highscreen Boost 3
Как включить отладку по USB на Highscreen Boost 3
Как выключить Highscreen Boost 3
Как правильно заряжать Highscreen Boost 3
Как настроить камеру на Highscreen Boost 3
Как найти потерянный Highscreen Boost 3
Как поставить пароль на Highscreen Boost 3
Как включить 5G на Highscreen Boost 3
Как включить VPN на Highscreen Boost 3
Как установить приложение на Highscreen Boost 3
Как вставить СИМ-карту в Highscreen Boost 3
Как включить и настроить NFC на Highscreen Boost 3
Как установить время на Highscreen Boost 3
Как подключить наушники к Highscreen Boost 3
Как очистить историю браузера на Highscreen Boost 3
Как разобрать Highscreen Boost 3
Как скрыть приложение на Highscreen Boost 3
Как скачать видео c YouTube на Highscreen Boost 3
Как разблокировать контакт на Highscreen Boost 3
Как включить вспышку (фонарик) на Highscreen Boost 3
Как разделить экран на Highscreen Boost 3 на 2 части
Как выключить звук камеры на Highscreen Boost 3
Как обрезать видео на Highscreen Boost 3
Как проверить сколько оперативной памяти в Highscreen Boost 3
Как обойти Гугл-аккаунт на Highscreen Boost 3
Как исправить черный экран на Highscreen Boost 3
Как изменить язык на Highscreen Boost 3
Как открыть инженерное меню на Highscreen Boost 3
Почему компьютер не видит другие модели