When Windows backup is turned on, Windows backs up the settings you choose across all your Windows 11 devices that you’ve signed in to with your Microsoft account.
Turn on Windows backup
To turn on Windows backup and choose your backup settings, select Start > Settings > Accounts > Windows backup.
Open Windows backup settings
The following items can be backed up:
-
OneDrive folder syncing
Turn on OneDrive folder syncing to start backing up your files and folders right from Settings. This setting is not available for work or school accounts.
-
Remember my apps
Windows will remember the apps you have installed and help you restore them from Microsoft Store on your new devices. This setting is not available for work or school accounts, and Windows does not remember your apps for work or school accounts.
-
Remember my preferences
You can back up preferences including accessibility passwords, language, and other Windows settings. If you turn on Other Windows settings, Windows also syncs some device settings (for things like printers and mouse options), File Explorer settings, and notification preferences.
Note: The Remember my preferences settings are available for a work or school account if it’s allowed by your organization. For more info about how Azure Active Directory and Enterprise State Roaming work to synchronize user and app settings to the cloud, see Enterprise State Roaming overview.
How to stop backing up items
To stop backing up your settings and remove them from the cloud, turn off Windows backup settings on all the devices connected to your Microsoft account. After this is done, you’ll need to remove these settings from your account. Here’s how:
-
Go to account.microsoft.com/devices.
-
At the bottom of the page, select Clear stored settings.
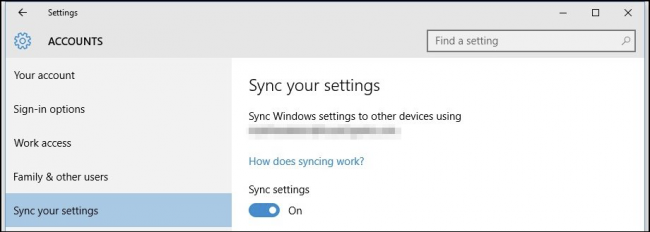
When Sync settings is turned on, Windows syncs the settings you choose across all your Windows 10 devices that you’ve signed in to with your Microsoft account.
Note: You can also sync your settings for a work or school account if it’s allowed by your organization. For more info about how Azure Active Directory and Enterprise State Roaming work to synchronize user and app settings to the cloud, see Enterprise State Roaming overview.
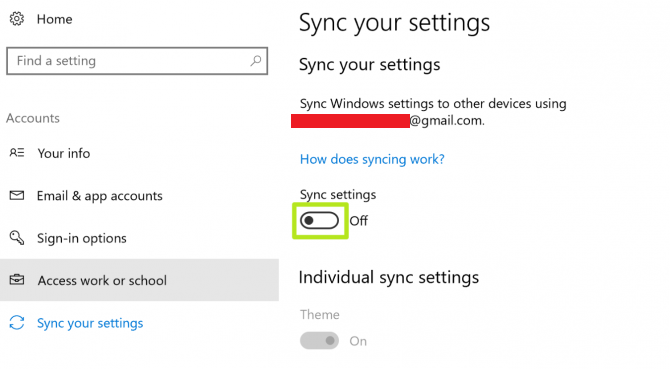
To find Sync settings, select Start , then select Settings > Accounts > Sync your settings .
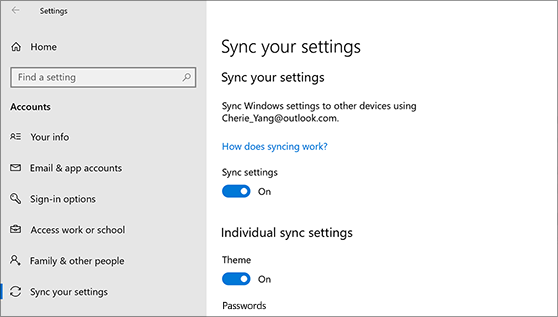
Choose from settings such as language preferences, passwords, and color themes. If you turn on Other Windows settings, Windows also syncs some device settings (for things like printers and mouse options), File Explorer settings, and notification preferences. For a complete list of settings that Windows can sync, see Windows 10 roaming settings reference.
Open Sync settings
To stop syncing your settings and remove them from the cloud, turn off synced settings on all the devices connected to your Microsoft account. After this is done, you’ll need to remove it from your account. Here’s how:
-
Go to https://account.microsoft.com/devices.
-
Scroll down to the bottom of the page and select Clear stored settings.
How to Sync Your Settings in Windows 10
- Click the Start button.
- Click the Settings icon.
- Click Accounts.
- Click Sign in with a Microsoft account and enter your account information. Move to step 5 if you don’t see that option.
- Click Sync your settings.
- Turn on the switch next to Sync Settings.
Contents
- 1 Why can’t I sync my settings on Windows 10?
- 2 Where is the sync button on Windows 10?
- 3 How do I sync my settings account?
- 4 Why can’t I turn on sync settings?
- 5 What is the Sync Center in Windows 10?
- 6 Does Windows 10 have a sync program?
- 7 How do I turn my computer sync on?
- 8 How do I sync all of my computer?
- 9 Where can I find Sync?
- 10 Why is Sync not working?
- 11 How do you use Sync?
- 12 Does Windows 10 have built in file sync?
- 13 How do I start Sync Center?
- 14 How do I create a sync folder in Windows 10?
- 15 Should I turn sync on or off?
- 16 How do I use the Sync Center in Windows 10?
- 17 What is automatic sync Microsoft?
- 18 What is Auto Sync?
- 19 Where do I find my sync pin?
- 20 What does sync error mean?
Why can’t I sync my settings on Windows 10?
The main cause of sync problems for most people are wrong Feedback and diagnostics settings. Once you change Feedback and Diagnostics settings, you should be able to sync your settings normally again. Changing Feedback and Diagnostics settings should solve the sync problem.
Where is the sync button on Windows 10?
Open your Settings by pressing Win+I on your Windows 10 PC. Open the Accounts tab and scroll down to select Sync Your Settings. You can choose to turn Sync on for all settings and apps, or you can decide on your preferences. You can also turn off the entire Sync settings altogether by turning the Sync button off.
Manually sync your account
- Open your phone’s Settings app.
- Tap About phone Google Account. Account sync. If you have more than one account on your phone, tap the one you want to sync.
- Tap More. Sync now.
Why can’t I turn on sync settings?
One of the main causes of sync problems for most people is incorrect Feedback and diagnostics settings. Once you edit the Feedback and Diagnostics settings, you should be able to sync your settings normally again.
What is the Sync Center in Windows 10?
Sync Center is a feature that was introduced in Windows Vista, and it has been supported in many subsequent versions of Windows including Windows 10 Pro. The main purpose of Sync Center is to synchronize your files with a network server so that you always have the most updated copies when you need them.
Does Windows 10 have a sync program?
Windows 10 allows you to sync your Windows settings and data files across multiple computers so that changes made on one computer automatically update all your computers.
How do I turn my computer sync on?
Sign in and turn on sync
- On your computer, open Chrome.
- At the top right, click Profile .
- Sign in to your Google Account.
- If you want to sync your info across all your devices, click Turn on sync. Turn on.
How do I sync all of my computer?
Turn on the Sync feature
- To turn on the Sync feature, start by pressing Win+I to display the Settings window.
- Click Accounts, and then click Sync Your Settings.
- Click the Sync Settings On/Off button if it is turned off to turn it on.
- Click the window Close (X) button to close the Settings window and apply the settings.
Where can I find Sync?
Get the mobile apps for iOS and Android
Get the mobile app on Google Play (for Android devices) or the Apple App Store (for Apple iPhones and iPads), by searching for “sync.com” or following the links above. You can also access Sync from your mobile web browser, without installing the app.
Why is Sync not working?
Open Settings and under Sync, tap on Google. You can now disable and re-enable sync app or service wise, which is cool. Just tap on the service that’s giving the ‘sync is currently experiencing problems’ error, wait a few seconds to let it take effect, and then re-enable sync again.
How do you use Sync?
Next steps:
- Install the Sync desktop app for Windows or Mac on your computer.
- Access the Sync.com web panel.
- Get the Sync mobile apps for iOS and Android.
- Back up and synchronize your files using the Sync folder.
- Archive your files with Sync Vault.
- Share your files securely with links.
Does Windows 10 have built in file sync?
Users must setup sync by a system administrator, which could be so complex for average users. However, Windows 7, Windows 8/8.1, and Windows 10 are built in a tool called Sync Center, which makes things go much easier. That’s because there are no server settings to worry about, and people can sync files by themselves.
How do I start Sync Center?
Open Sync Center
Press Ctr + F or left click on the “Search Control Panel” box located at the top right corner to begin search. Begin typing “Sync Center” until the Sync Center option apears. Left click on Sync Center from the list.
How do I create a sync folder in Windows 10?
Follow the step-by-step guide:
- Step 1: Run SyncToy to Start Sync Folders Windows 10. Double-click on this free file sync tool in Windows 10 to launch it to the main interface.
- Step 2: Choose Two Folders You Want to Sync.
- Step 3: Choose One Method to Sync Two Folders Window 10.
- Step 4: Run Folder Sync Windows 10.
Should I turn sync on or off?
If you are using Enpass on multiple devices, then we recommend enabling sync to keep your database updated across all your devices.Also, you don’t need to worry about the safety of your database as using sync is safe. Your cloud always contains a copy of the same encrypted data as on your device.
How do I use the Sync Center in Windows 10?
How to Use Sync Center Windows 10?
- Open Control Panel.
- Click Sync Center to continue.
- In the pop-up window, click Manage offline files from the left panel to continue.
- Then click Enable offline files to open Windows 10 Sync Center.
What is automatic sync Microsoft?
If you hover over ‘Automatic Sync’ it says When you connect your Microsoft Account to an app or service that manages email, it needs to sign in as you. You can expect to see the same automatic sync activity at regular intervals.
What is Auto Sync?
With auto-sync, you no longer have to transfer data manually, saving you time and making sure that essential data is backed up to another device. The Gmail app syncs data automatically into data clouds so you can access information off of any device at any time.
Where do I find my sync pin?
Your SYNC system will prompt you again: “Search for SYNC on your device and select SYNC once it is found.” From there, go to your mobile device and search for SYNC and then select it. A six-digit number (PIN) will display on both your mobile phone and SYNC screen.
What does sync error mean?
A device synchronization error will appear while sampling when timing issues arise between devices.Most computers feature multiple USB ports, but they are not generally synchronized to each other. The external USB hub is essential to prevent unnecessary timing issues between devices.
Содержание
- Синхронизация настроек в Windows 10
- Способ 1: «Параметры» системы
- Способ 2: «Редактор реестра»
- Вопросы и ответы
Windows 10 – самая популярная операционная система в мире на сегодняшний день. Некоторые используют ее сразу на нескольких устройствах, и чтобы в таких случаях не тратить время на повторную настройку ОС, следует воспользоваться функцией синхронизации параметров. Из данной статьи вы узнаете подробнее о ней и ее активации.
По умолчанию в Windows 10 можно включить синхронизацию сразу нескольких параметров. К таковым относятся настройки визуального оформления, браузеров, языков, специальных возможностей и так далее. Обратите внимание, что сделать это можно лишь при условии, что вы вошли в систему под своей учетной записью Майкрософт. В противном случае вы увидите следующее:
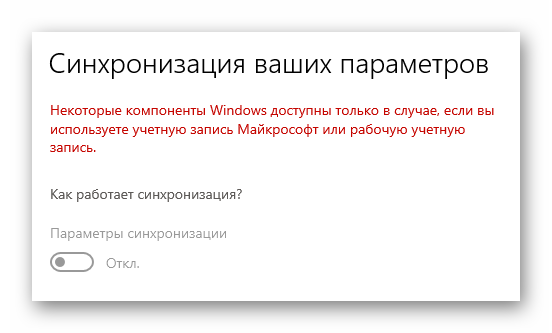
Если у вас еще нет аккаунта Microsoft, рекомендуем его создать. О том, как правильно это сделать, мы рассказывали в отдельном руководстве. После того как вход в систему будет выполнен должным образом, включить нужные параметры синхронизации можно двумя методами.
Подробнее: Регистрируем учетную запись Windows Live
Способ 1: «Параметры» системы
Начнем с самого простого и очевидного метода. Он заключается во включении и отключении нужных настроек в окне общих параметров Windows 10. В данном случае функция синхронизации активируется следующим образом:
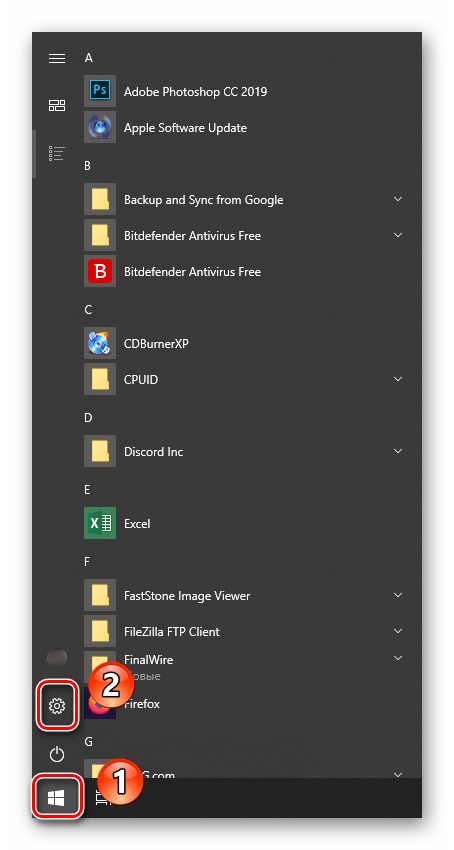
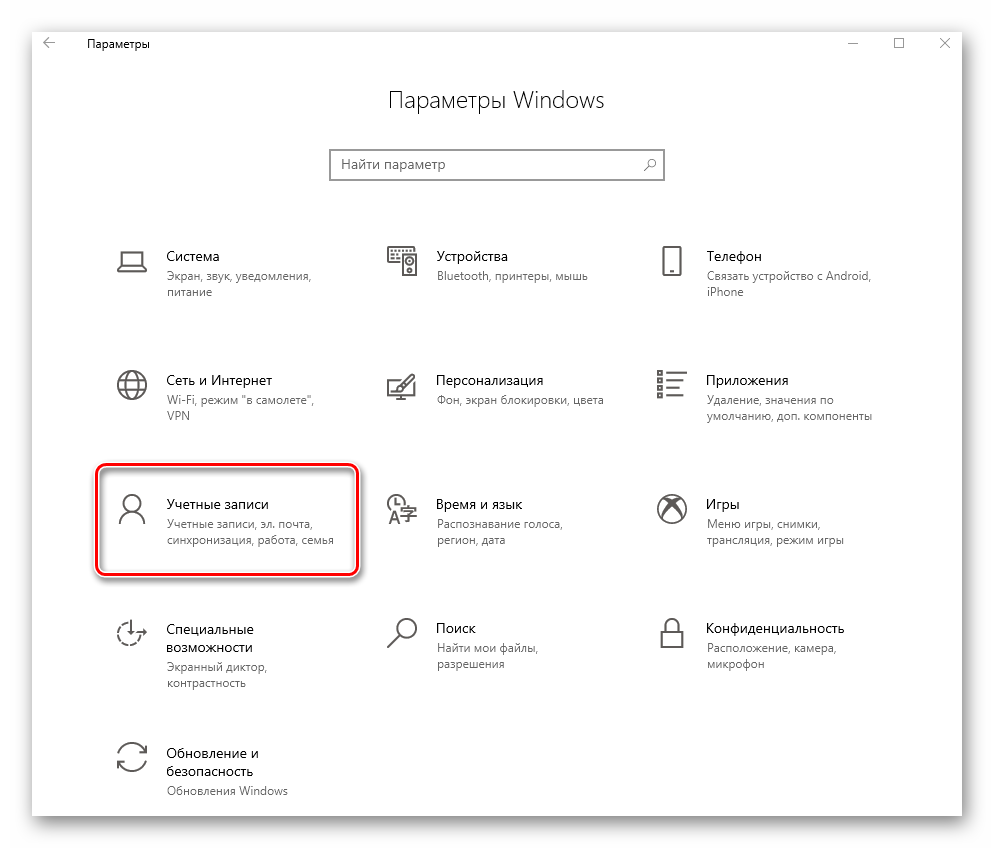
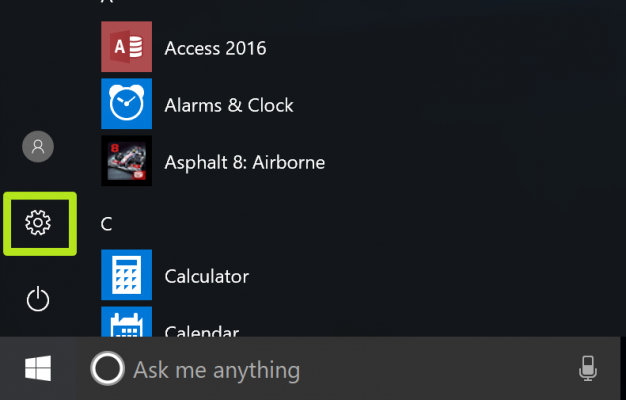
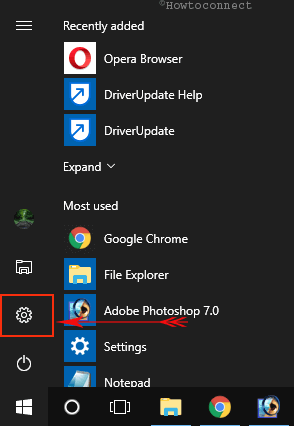
- Нажмите на «Пуск» левой кнопкой мышки. В открывшемся окне выберите пункт «Параметры», который изображен в виде шестеренки.
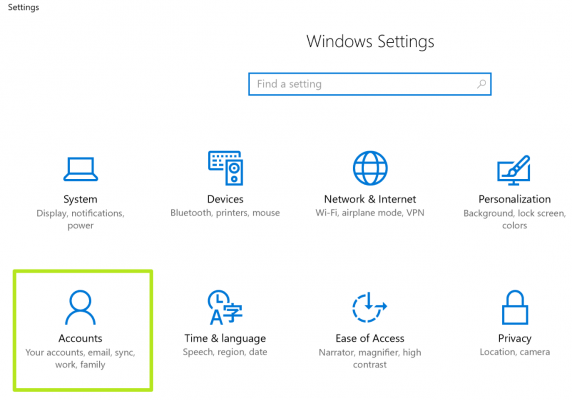
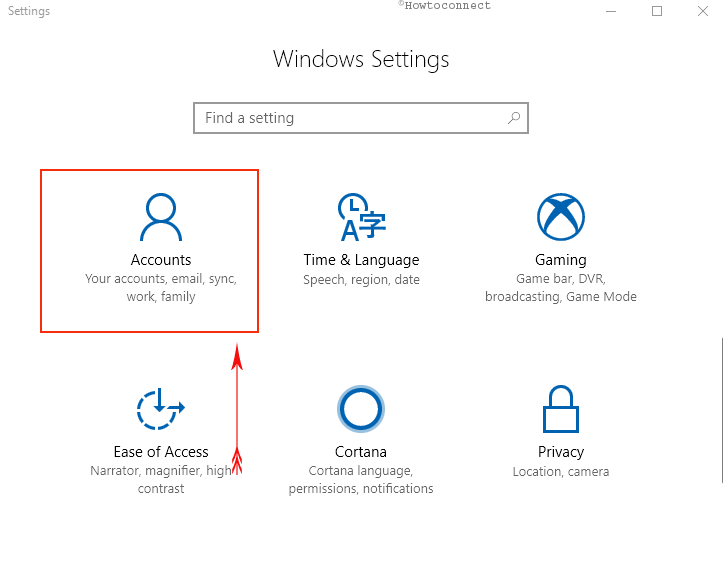
- Далее в появившемся окне кликните ЛКМ по разделу под названием «Учетные записи».
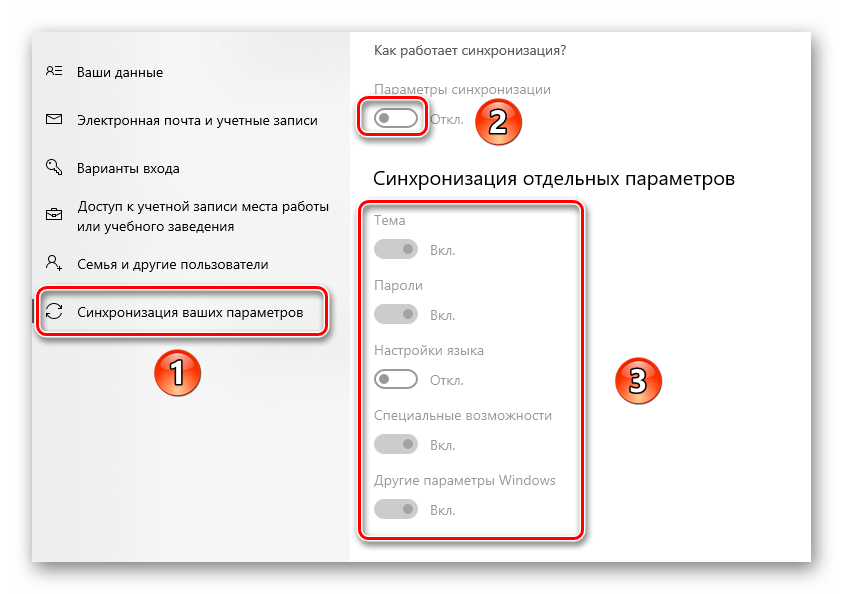
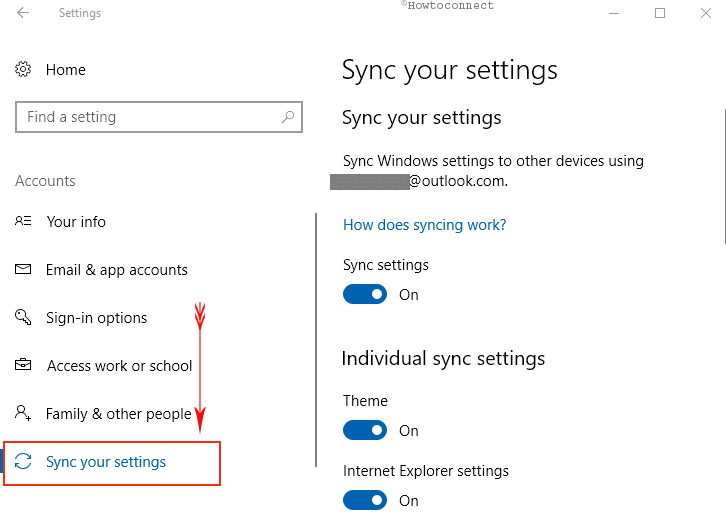
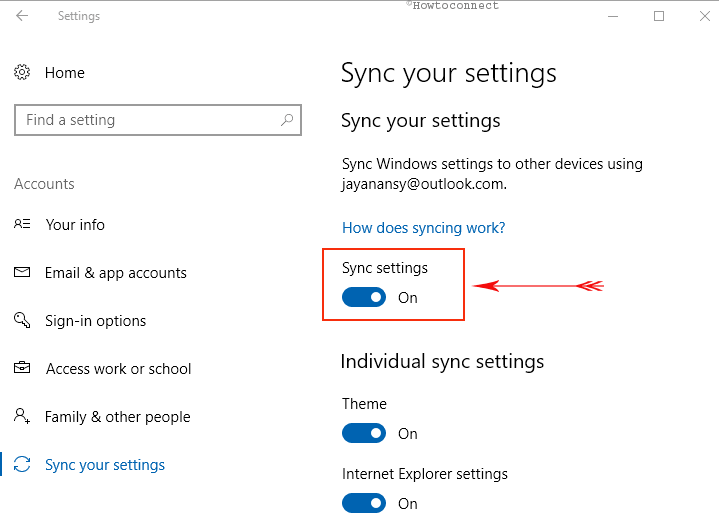
- В левой половине следующего окна нажмите по строке «Синхронизация ваших параметров», затем в правой области вы увидите перечень параметров, которые можно синхронизировать. Для того чтобы появилась возможность включить или отключать функцию синхронизации для конкретной группы настроек, сперва переведите общий регулятор в положение «Вкл» — он находится в самом верху окна.
- Вот и все, теперь можно закрыть все открытые ранее окна. После авторизации на другом компьютере под той же учетной записью все настройки будут загружены из облака Майкрософт автоматически.
Способ 2: «Редактор реестра»
Данный метод практически аналогичен предыдущему, просто выполнять все действия мы будем не в окне с параметрами, а в утилите «Редактор реестра».
Будьте внимательны при выполнении нижеизложенной инструкции! Если вы ошибетесь и внесете изменения не в тот файл, можете навредить системе и ее работоспособности.
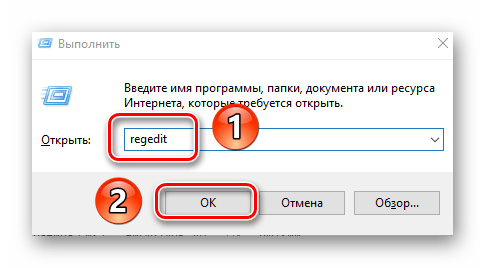
- Нажмите на клавиатуре одновременно «Windows+R». В текстовое поле открывшейся утилиты «Выполнить» введите команду
regedit, а затем нажмите кнопку «OK».

Читайте также: Как открыть Редактор реестра в Windows 10
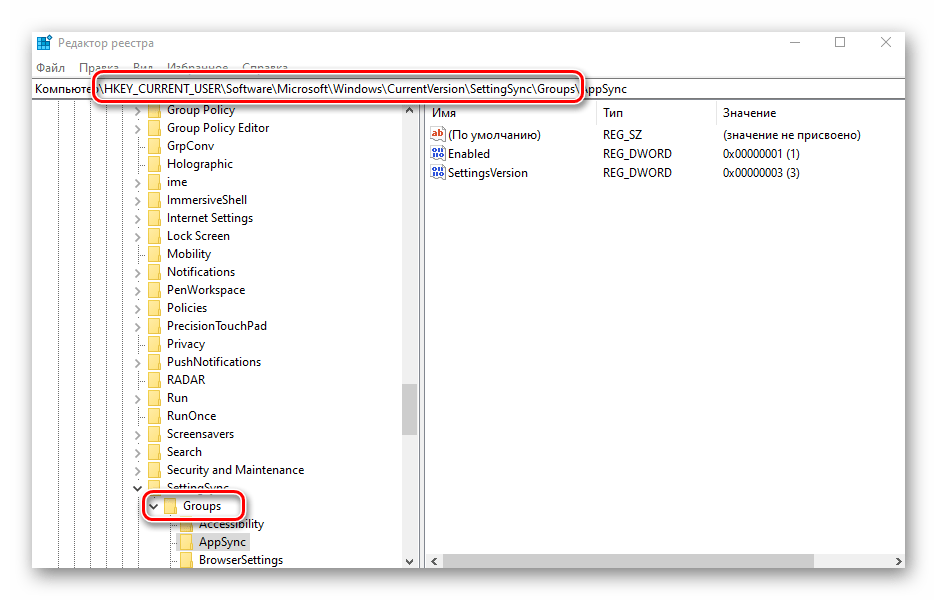
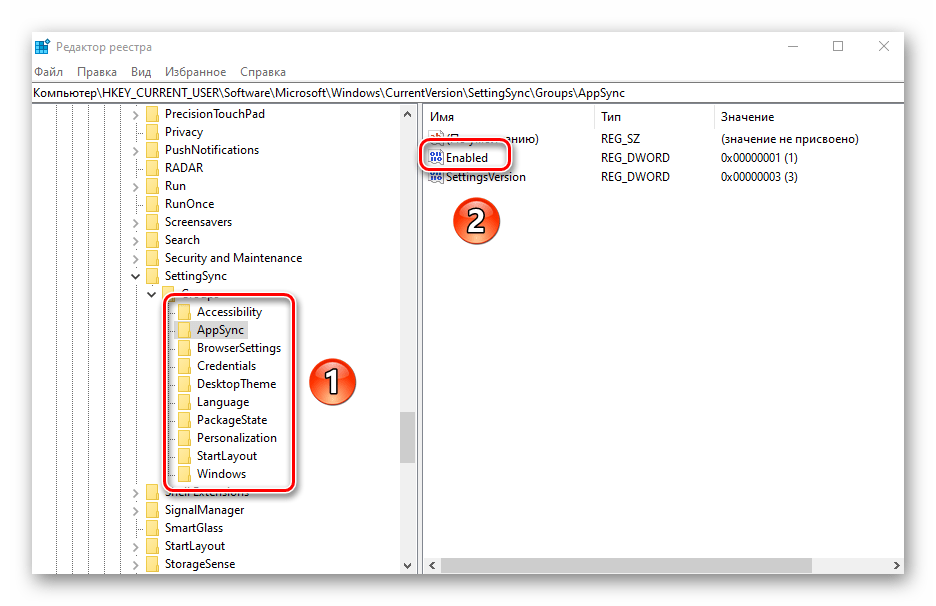
- В результате появится окно оснастки «Редактор реестра». Используя древовидную структуру папок слева, перейдите в следующий каталог:
HKEY_CURRENT_USERSoftwareMicrosoftWindowsCurrentVersionSettingSyncGroups - Внутри папки «Groups» вы увидите другие директории. Это и есть параметры синхронизации, такие как язык, темы, специальные возможности и другие. Для активации любого из них нужно выбрать одиночным кликом ЛКМ из списка папку, а затем открыть файл под названием «Enabled» внутри нее.
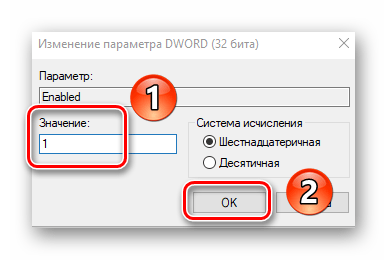
- Появится небольшое окно, в котором в поле «Значение» необходимо прописать цифру «0» для деактивации параметра синхронизации или «1» для его включения. Для подтверждения изменений следует нажать кнопку «OK».
- После выполнения аналогичных манипуляций со всеми настройками синхронизации можно закрыть открытые ранее окна.

Таким образом, вы узнали о методах, которые позволяют без особого труда включить все или некоторые параметры для синхронизации между устройствами, работающими под управлением Windows 10. В качестве заключения мы хотели бы напомнить, что перед всеми важными манипуляциями стоит не полениться и создать точку восстановления — это позволит избежать проблем в случае фатальных ошибок.
Подробнее: Инструкция по созданию точки восстановления Windows 10
Еще статьи по данной теме:
Помогла ли Вам статья?
Windows 10 was a remarkable update to an already glorious operating system.With the newer build to Windows 10, a lot of new and great things became possible. One amazing feature of using Windows 10 is that you can have your personalized settings among all your Windows devices. This ability to sync settings was introduced in Windows 8, but in Windows 10 it is even better! However, people often seek help to sync settings in Windows 10. Therefore in this post, I’m presenting a “guide” to the question that Windows 10 users often have in their minds, “How do I sync settings in Windows 10?” I will tell you how to sync settings in Windows 10 in the simplest manner.

Contents
- 1 What should you know about Windows Sync Settings?
- 1.1 Location of Sync Settings in Windows 10 and 8/8.1
- 1.1.1 7 Options of Sync Settings in Windows 10
- 1.1 Location of Sync Settings in Windows 10 and 8/8.1
- 2 How to Sync Settings in Windows 10
- 3 Tutorial: How to make a Microsoft account in Windows 10?
- 4 Summary
What should you know about Windows Sync Settings?
Windows Sync Settings are a part of the operating system since Windows 8. However, they got a makeover and some important advancements in Windows 10. The sync settings did not become really popular in Windows 8. This was assumed to be due to two factors: (i) A lot of users didn’t upgrade to Windows 8 and, (ii) Sync settings were placed in a rarely visited place. However, Sync settings in Windows 10 have proved to be a success. The reason behind this is that: (i) most of the Windows 7 users finally upgraded their systems, and (ii) Sync settings in Windows 10 are placed in an appropriate place. Let’s begin with a quick comparison between the Sync settings in Windows 10 and 8.
Location of Sync Settings in Windows 10 and 8/8.1
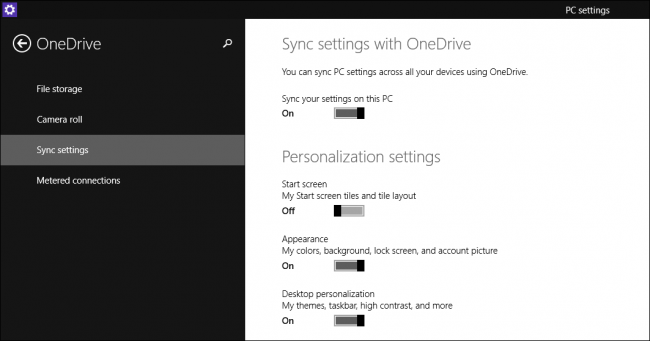
In Windows 8 and 8.1, the sync settings are placed in the OneDrive group. Logically, the decision was right to have the sync settings in OneDrive group, but practically, the decision was a failure. The reason for failure was that majority of the Windows users are just casual users who are not very curious. OneDrive group was an unlikely place for these casual users to visit. A lot of other items were also wrongly placed in Windows 8, but that could a different topic to discuss.
In Windows 10, the sync settings are moved to the Accounts group. Also, they are now renamed as “Sync your settings.” The number of options are also reduced to seven. All these changes made the Sync settings in Windows 10 way more manageable for even the casual users.
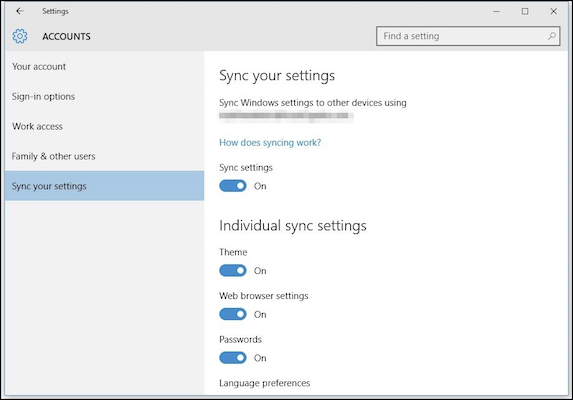
7 Options of Sync Settings in Windows 10
The first option that you find is to turn the Sync Settings in Windows 10 on and off. If you turn off the Sync Settings, your account on that particular computer becomes local, doesn’t matter if it is a Microsoft account. This means that the changes you make to any of the settings on this particular Windows 10 computer will not take place on the other devices you log into with the same account.
Below this, you will find the individual sync settings. These are the settings that will move from one computer to the other that you log into with your particular Microsoft account.
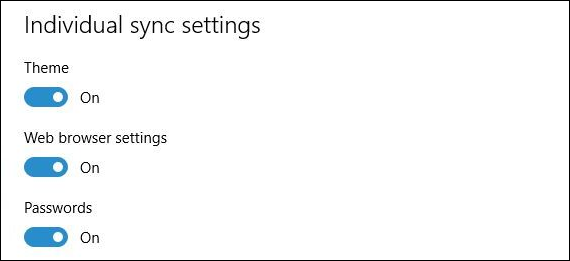
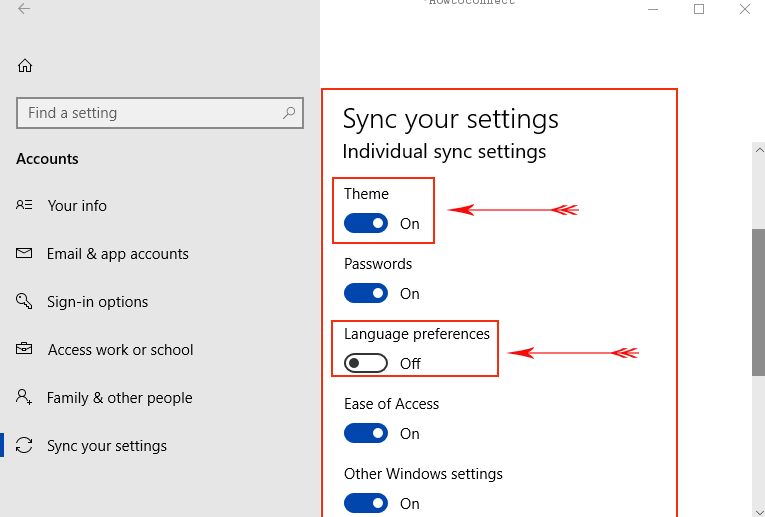
Individual Sync Settings in Windows 10
- The “Theme” setting will sync your color and background selections. This means that if you want different colors and backgrounds on your different computers, you should keep it turned off.
- “Web browser settings” will deal with the new default browser on Windows 10, the Edge browser’s settings. This sync setting will apply to the settings of Edge browser like bookmarks, themes, logins, etc. I suggest you keep it turned On.
- The “Passwords” settings make sure that any passwords you save on one Windows 10 system are synced to the others. This saves you from typing your passwords again and again. You decide whether you need this turned on or off.
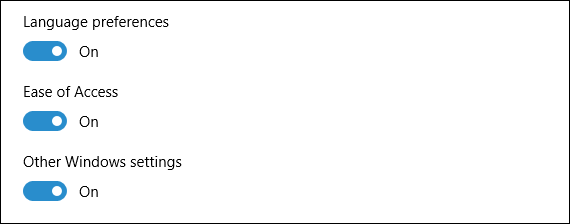
- The “Language preferences” is a setting which is very useful if you use Windows multilingually.
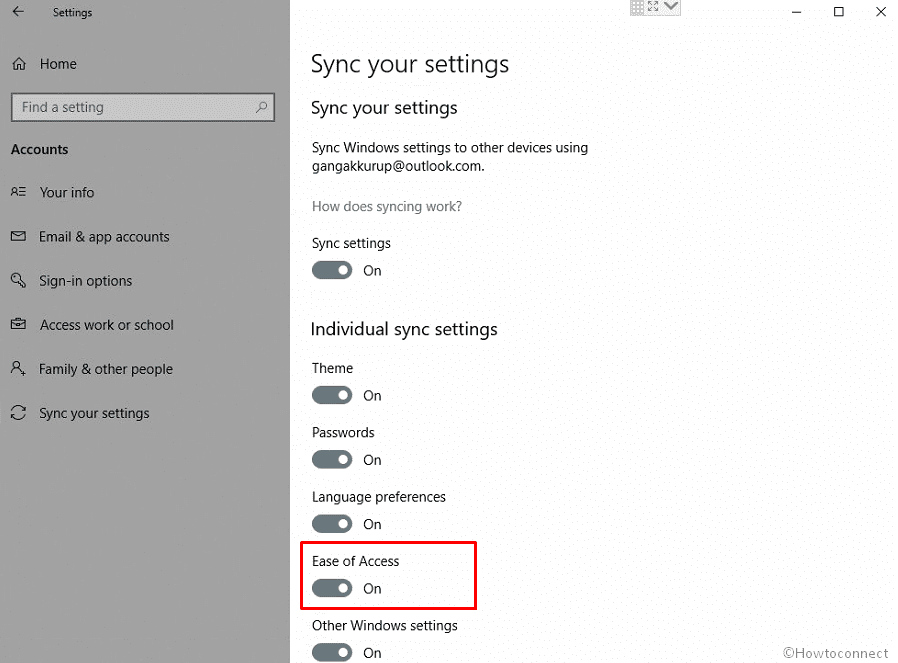
- “Ease of Access” sync setting is to move all the adjustments you make on one system to its accessibility to all your Windows systems.
- Ultimately, the “Other Windows settings” can be used to sync desktop items like window accents, taskbar position, etc.
You must have a Microsoft account in order to use the sync settings in Windows 10. If you don’t have it yet, I strongly recommend you make one. Scroll down, I have made a tutorial for you people too. For those having a Microsoft account, proceed with these steps:
Step-1: Firstly, click on the Start button.
Step-2: Next, click on the Settings icon.
Step-3: In the Settings window, click on Accounts.
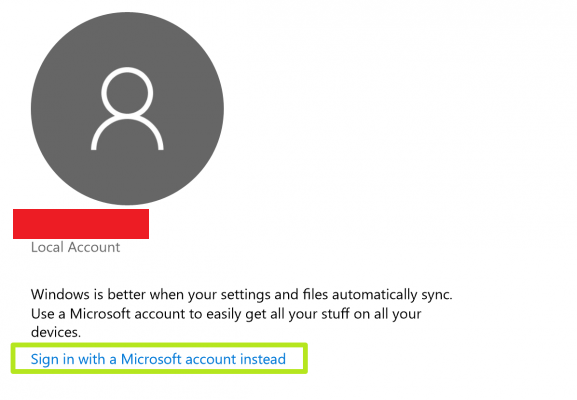
Step-4: If you are not yet signed in to your Microsoft account, click on Sign in with a Microsoft account instead. If you are already signed in, skip to the next step.
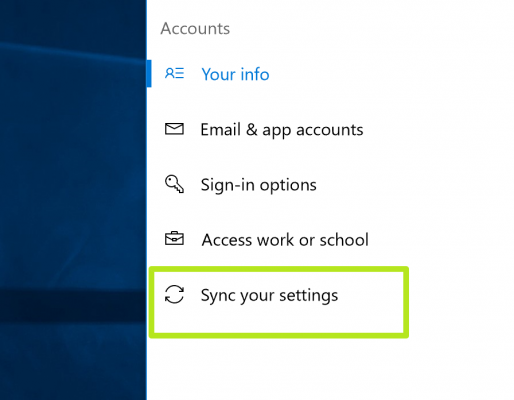
Step-5: Now click on Sync your settings.
Step-6: Turn on the switch present under Sync settings. Do the same from Step-1 to Step-6 on your other Windows systems.
Step-7: Select what settings you need to sync from the Individual settings section.

Done. That’s all.
Tutorial: How to make a Microsoft account in Windows 10?
Step-1: Firstly, Open the Microsoft Windows Account page, and choose “Create a free Microsoft account.”
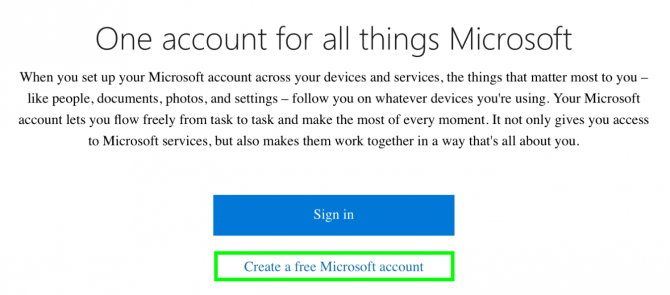
Step-2: Fill your personal information and enter a password. Choose “Get a new email address” if you want your Microsoft account to be separate from your personal account.

Step-3: Now enter the captcha code correctly to verify that you are not a robot.
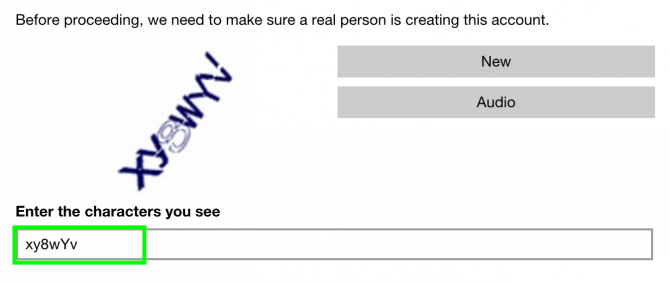
Step-4: Next click on Create account.

Step-5: Finally, open your mailbox, open the mail for verification of email address and verify your Microsoft account.
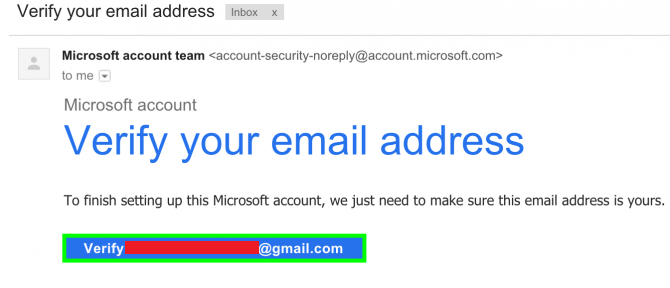
Done. Now you have got your Microsoft account. You can now learn to sync settings in Windows 10 with the help of Guide present above.
Summary
The ability to sync settings among several devices is a great benefit of using Windows OS. You can get your personalized settings on whichever system you log into with your Microsoft account. This is one very useful feature for all kinds of users. You can also choose which settings you need to sync and which you don’t. Also, you can altogether choose to not sync and start syncing again whenever you wish.
For any queries, doubts, or suggestions, do visit the Comments sections present below. Hope I helped you. Have a nice day, Folks!
The one advantage of Windows 10 is its sign-in with Microsoft account. When you log into Windows 10 computer with your Microsoft account credentials, you can sync settings and information so that if you need you are able to access your settings, files, folders, and documents globally. After you sign in, your computer is affixed to Microsoft online server or cloud. Let us see this in a more clear way!
With the sync settings on, you can actually experience the same Start Menu, the selected colors, favorites, your web browser settings, language preferences, ease of access, apps, and passwords of your Windows 10 computer to another Windows 10 computer anywhere. The settings get synced between the computers when you choose to sync settings.
- Press – Winlogo + I.
- Select – Accounts.
- On the left, click – Sync your settings.
- Now the right pane shows you some options. To sync settings, click the toggle switch of Sync settings to turn it On.
Sync Individual Settings
- But if you wish to keep a few things personal and don’t prefer to sync all the settings, you can always choose individual sync settings.
- Under the ‘Individual Sync Settings’ section, you can see many settings listed.
- Switch OFF the settings you don’t prefer to sync and turn ON those which you want to get synced.
Update –
Configure Sync your Settings in Windows 10 Individually
Let’s see how to configure Sync your Settings in Windows 10 individually –
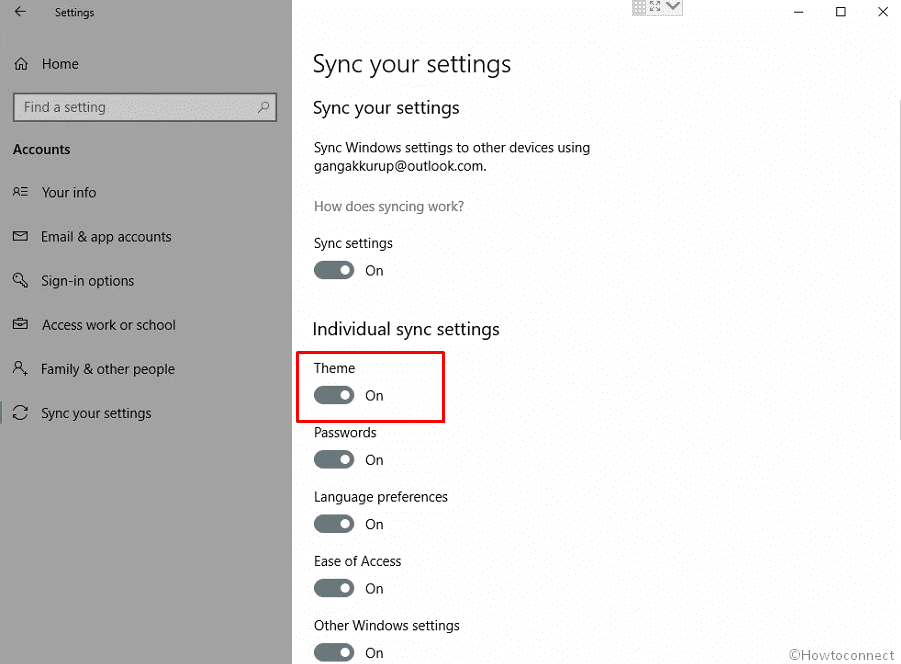
Turn on Sync Theme in Windows 10
Windows 10 allows to sync theme with just a toggle so that you may have the ability to experience the same theme across computers and Mobile devices as well. All you need is to log in using a Microsoft account and you see the universal wallpaper automatically. Follow the steps for how to Sync Theme in Windows 10 –
Step-1: Open Windows Settings (Win+I) and select Accounts.
Step-2: Click on Sync your settings from the left pane.
Step-3: Go to the right and click on the Toggle switch below Theme from Individual Sync Settings section.
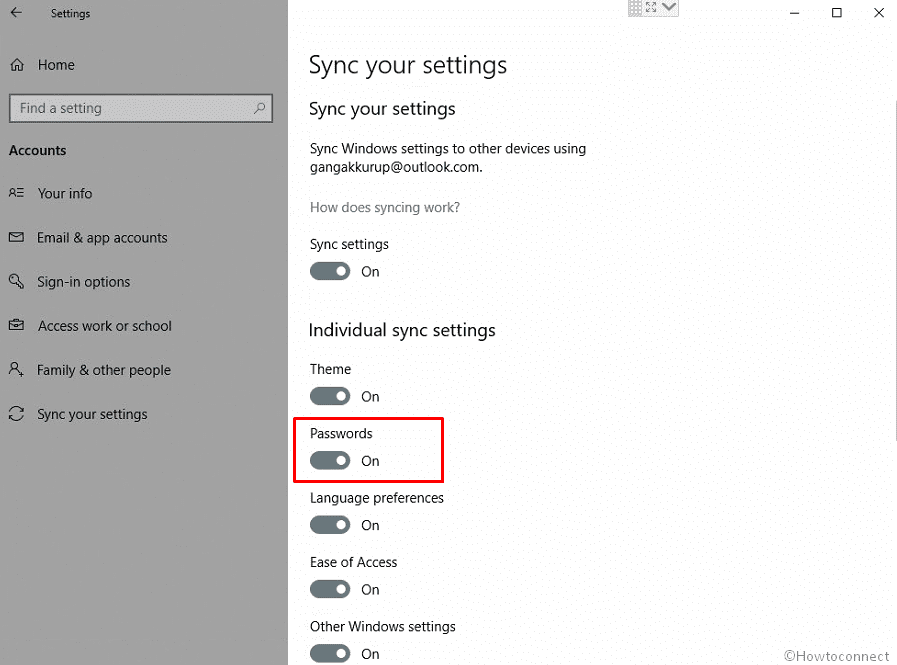
Turn on Password Sync in Windows 10
When you configure Sync your settings in Windows 10, the password is most important. You can carry your saved credentials across multiple Windows 10 devices automatically through this feature. So you don’t need to be bothered to remember and enter them every time after enabling Sync settings for the password. Here is how to turn on Password Sync in Windows 10 –
- Go to Settings => Accounts => Sync your settings as mentioned in the above method.
- Click on the toggle switch for Password in the Individual Sync Settings section.
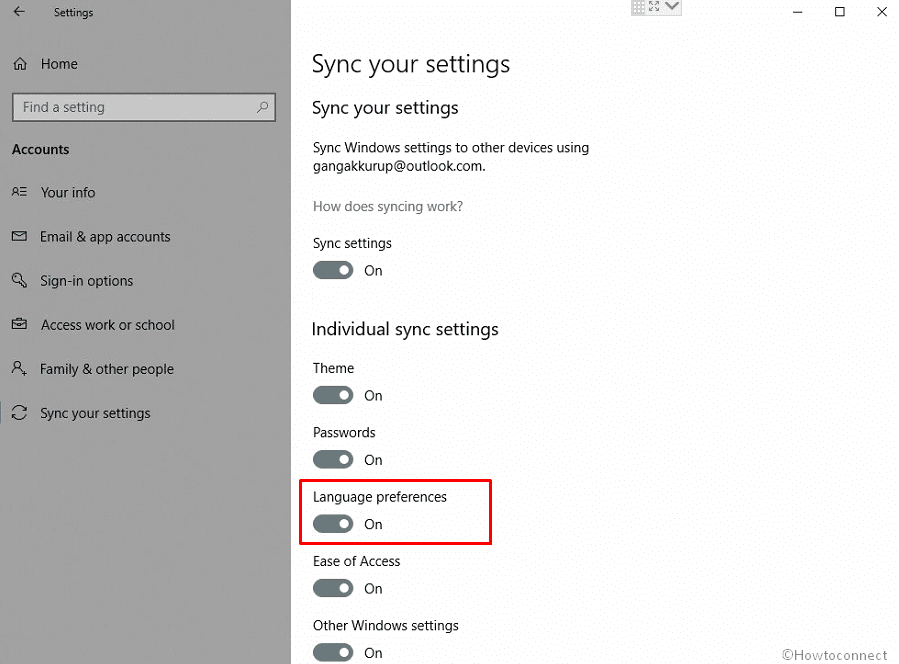
Sync Language preferences
When you enable Sync for Language preferences in Windows 10 you will notice the same lingo between multiple devices. Once you sign in using your Microsoft account whether it is PC or mobile the language sets automatically.
- Access Sync your Settings and click on the Language preferences Toggle button.
Turn on Synchronization for Ease of access
When you enable sync for Ease of access you will find all the settings for the tools like Magnifier, Narrator, Color filter, etc in all the devices. You will have to only log in to your Microsoft account and the remaining work will be handled by Windows 10 itself.
- Open Settings and navigate to ‘Sync your Settings’.
- Click on the button for Ease of access underneath Individual Sync settings.
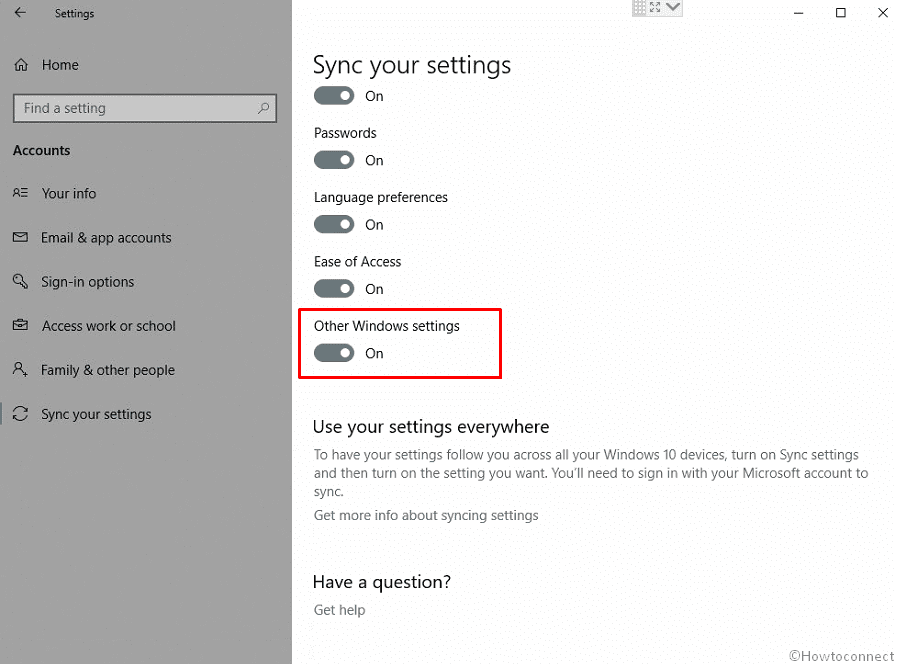
Sync Other Windows settings
This setting is supposed to enable sync for taskbar position, accents and so on. Turn on this setting by clicking on the button underneath.
How to Configure Sync your Settings in Windows 10 using Group Policy editor
Addition to the Settings application, Windows 10 lets you configure Sync your settings from Group Policy Editor (Gpedit). Let’s see how –
- Press Window logo key on the keyboard, type gpedit.msc and then hit Enter.
- Navigate to “Computer configuration => Adminitrative template => Windows component => Sync your settings”.
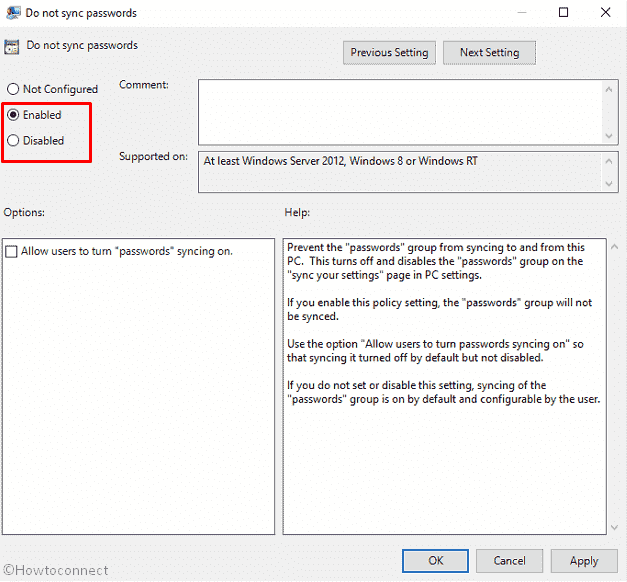
- You will see policies for the Sync options in the right pane. Double click on Do not sync.
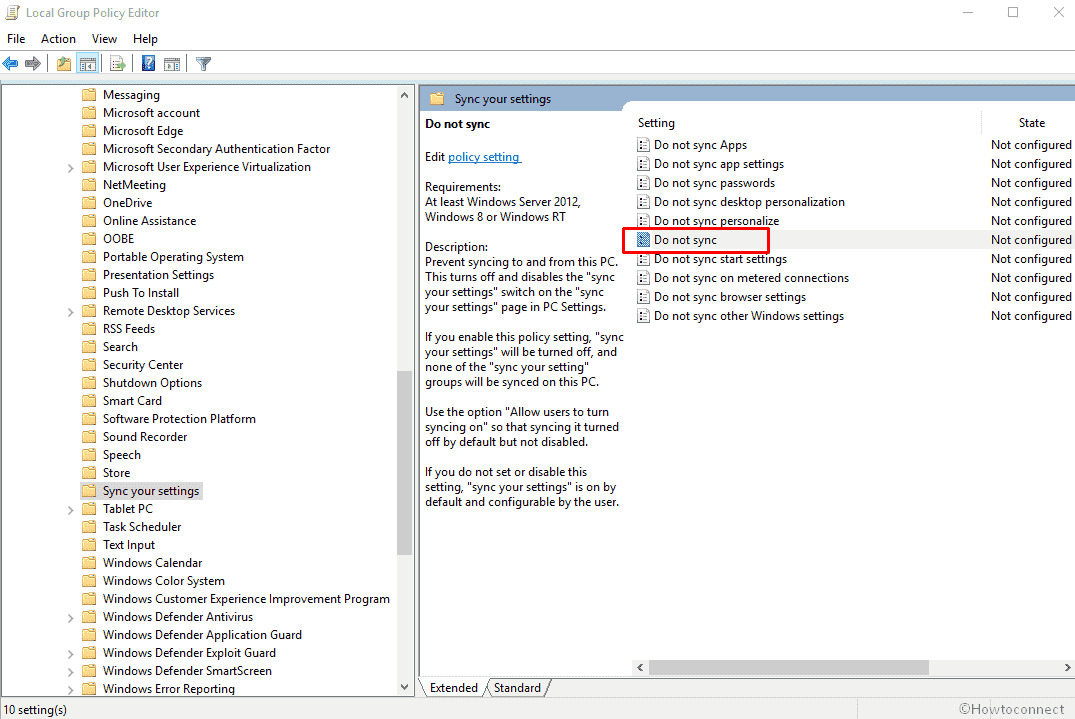
- Select Enabled to stop syncing and Disabled to start.
- Click on Apply then OK.

Configure Sync your Settings in Windows 10 Individually using Group Policy editor
- Double click on the policy for which you want to turn on./off Sync your settings. For example, if you want to change the Synchronization for Passwords then double click on Do not sync passwords.
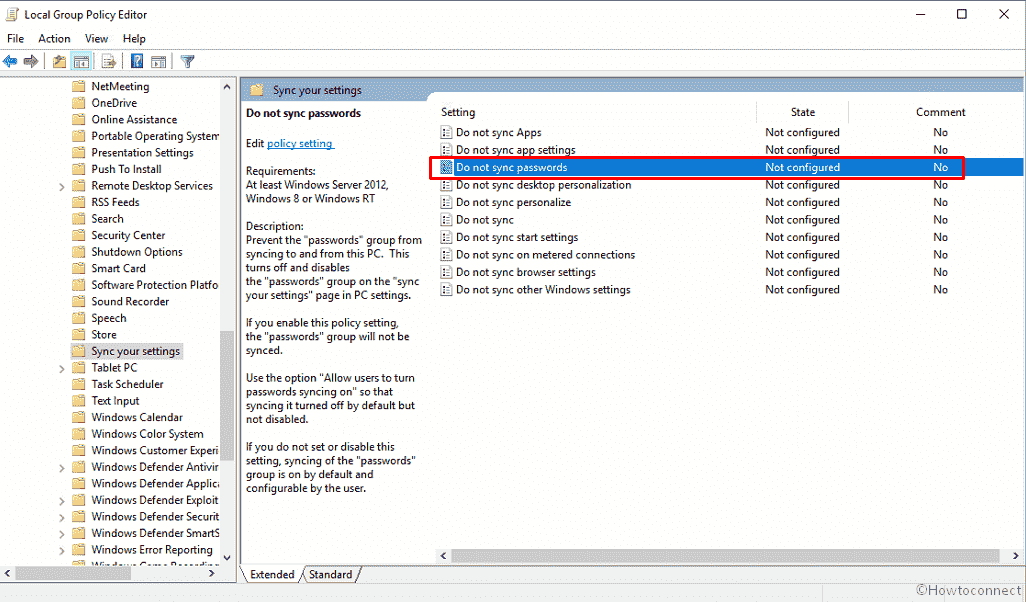
- Check the radio box Enabled to stop synching and Disabled to start.
- Finally, click on Apply followed with OK to save the modifications.
Configure Sync your Settings in Windows 10 using Registry Editor (Regedit.exe)
Windows 10 Sync settings may also change through some modifications in entries in Registry Editor (regedit).
- Access Registry editor. You can click on Start, type regedit.exe, and press Enter to do the same.
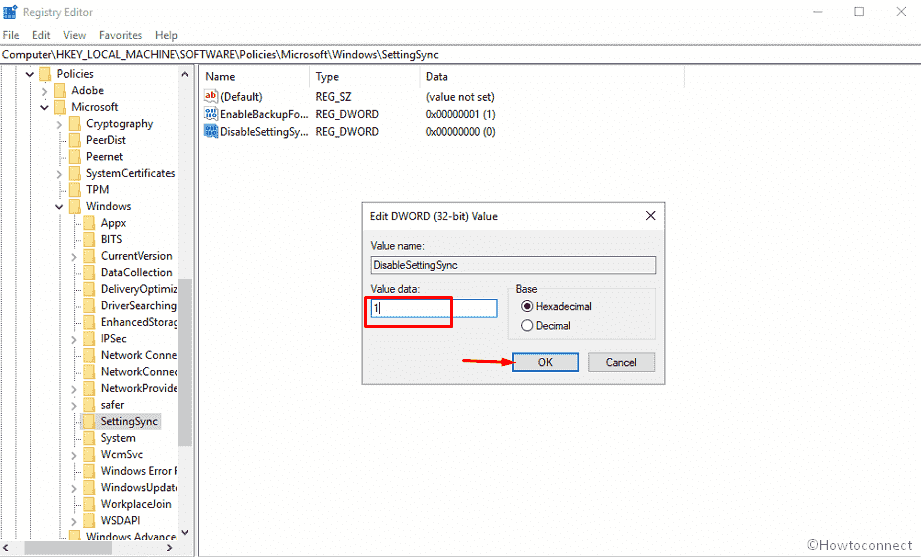
- Copy the below-given path, paste into the address bar of Registry editor, and then hit on Enter –
HKEY_LOCAL_MACHINESOFTWAREPoliciesMicrosoftWindowsSettingSync
- Go to the right pane, right click anywhere in an empty space and select New => DWORD (32-Bit) Value.
- Name the value DisableSettingSync.
- Double click on the just created value enter 1 in the Value data file and select OK to turn off the sync settings. Change it to zero to enable again.
That’s all!!!
1) How to Sync Ease of Access in Windows 10
2) How to Sign in and Sync Sticky Notes 3.0 in Windows 10
3) How to Enable Save Clipboard Data, Clear and Sync in Windows 10
4) How to Sync the Narrator cursor and system focus in Windows 10
5) How to Pause Syncing in OneDrive for 2, 8 and 24 Hours

Days to Sync means the period for which emails are stored on your device for offline usage.
We show a period of emails equal to the Days to Sync settings.
If you’re signed in with your Microsoft account, and you have the sync options enable, the theme you set on your computer will sync across devices.
Changing themes
- Open Settings.
- Click on Personalization.
- Click on Themes.
- Under “Apply a theme,” click the one you want to apply to your desktop.
What does sync your settings mean?
Sync is the word use to indicate that there is a synchronization between your device and the server of the mail you have been using. It is simply the exchange(upload and download) of data between the server and your device. 220 views.
How do I turn off sync in Windows 10?
To turn on or off Sync Settings in Windows 10, do the following.
- Open Settings.
- Go to the Accounts > Sync your settings page.
- On the right, go to the section Individual sync settings.
- There, turn off each option you want to exclude from sync.
How do I turn off Sync Center in Windows 10?
To do that you need to disable the Offline Files feature. In Windows 10 the easiest way to do that is hit the Windows Key on your keyboard and type: offline files and select the result from the top or hit Enter. Or, in previous versions of Windows, you can open Control Panel > Network and Internet > Offline files.
How to Sync Your Settings in Windows 10
- Click the Start button.
- Click the Settings icon.
- Click Accounts.
- Click Sign in with a Microsoft account and enter your account information. Move to step 5 if you don’t see that option.
- Click Sync your settings.
- Turn on the switch next to Sync Settings. Apply steps 1-6 on your other Windows 10 machines.
How do I sync all my devices?
Which apps sync
- Open your device’s Settings app .
- Tap Accounts. If you don’t see “Accounts,” tap Users & accounts.
- If you have more than one account on your device, tap the one you want.
- Tap Account sync.
- See a list of your Google apps and when they last synced.
Where is Auto Sync?
How to turn off Google Sync on an Android device
- On the main Android home screen find and tap Settings.
- Select “Accounts”, “Accounts & Sync”, “Data Synchronization”, or “Cloud and Accounts”
- Tap Accounts or select the Google account if it appears directly.
- Uncheck Sync Contacts and Sync Calendar.
What does Days of mail to sync mean?
By default your iPad/iPhone is set up to sync 3 days of mail. This means you can only see mail you received in the last 3 days in your inbox or any of your e-mail folders. You will want to change this setting.
How do I find my synced devices?
Now, you need to make sure open tabs are synced. Click the menu button (three vertical dots) and select “Settings” from the drop-down menu. On the “Settings” tab, click “Advanced sync settings“. Make sure the “Open tabs” box is checked and click “OK“.
Photo in the article by “Flickr” https://www.flickr.com/photos/jeffreyww/7847026330
Configuring the settings and apps on all your devices is really time-taking and tiresome, this is where the Windows Sync feature comes as a savior. You can sync all your settings and apps across all your Windows devices so that if you ever re-install the operating system, you don’t have to configure them again. The sync settings feature was launched with Windows 8.1 operating system and has always been appreciated by the users. This post will explain how to sync settings in Windows 11/10.
When you turn on Sync Settings on your Windows PC, your operating system takes care of all your settings and sets the same for all your Windows 11/10 devices. You can choose which settings you want to sync across your devices, such as passwords, browser settings, color themes and more.
To enable the sync settings, you first need to login into your Windows 10 with the same Microsoft Account on all your devices.

Sync settings are available under the Accounts setting in Windows 10. Open your Settings by pressing Win+I on your Windows 10 PC. Open the Accounts tab and scroll down to select Sync Your Settings.
You can turn Sync on for all settings and apps, or you can decide on your preferences. You can also turn off the Sync settings altogether by turning the Sync button off. Under the Individual Sync Settings tab, you can see different settings options.
Read: How to configure Windows Sync Settings using Registry Editor.
Syncing the Theme setting will synchronize your PC’s background color, theme, etc across all your Windows devices and syncing the Internet Explorer settings will synchronize your bookmarks, log in details, browsing history, etc. However, the default web browser now in Windows 10 is Microsoft Edge and these settings will imply the same.
Next, comes the Passwords. To synchronize your passwords across your Windows devices, you first need to verify your identity. You can get the verification code via your registered phone number or email address. 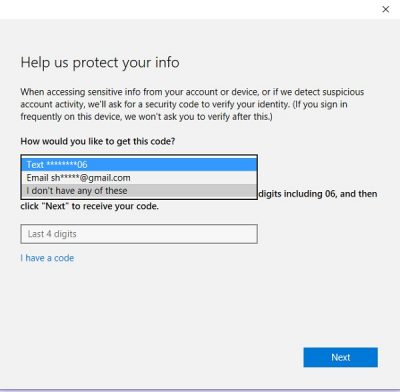
The other sync settings let you synchronize the language preferences, ease of access, and other Windows settings which basically include your desktop settings.
Windows 11 is a significant improvement over Windows 10. Many settings were changed, and the focus was on making the approach towards usability much easier. The same happened with the Sync Settings options, which were a part of Windows backup. Both the type of options and the way they are presented have changed.
How to Sync Settings across devices in Windows 11
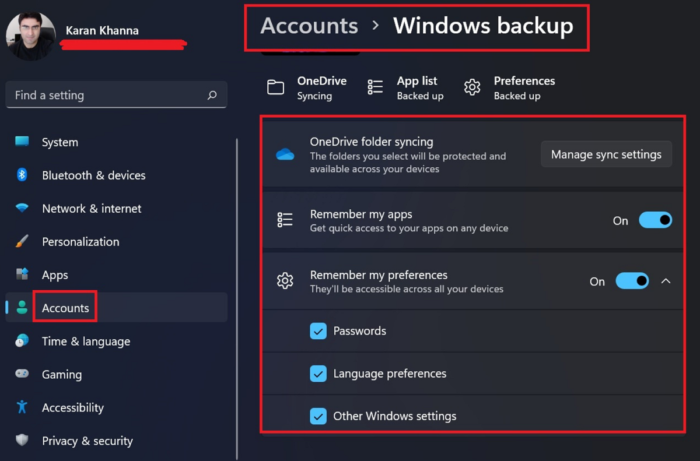
You can access the Sync settings in Windows 11 as follows:
- Right-click on the Start button and select Settings from the menu.
- Go to the Accounts tab on the list on the left-hand side.
- In the right pane, select Windows backup.
- The option to Sync settings will be on the Windows backup page itself and will work through Microsoft single sign-on.
The settings are as follows:
- OneDrive folder syncing
- Remember my apps
- Remember my preferences
1] OneDrive folder syncing
OneDrive syncs 3 folders by default. These 3 folders are Documents, Pictures, and Desktop. You can use the mentioned options to stop the syncing process for either of these 3 folders. When the options are activated, you will be able to access the contents of these folders on any system where you are logged in with the same Microsoft account.
2] Remember my apps
The Remember my apps option is an excellent way to remember your applications installed on one system to another system where you have logged in with the same account. If the apps are available on the Microsoft Store, then you can reinstall them from the same. It is not available for work and school accounts.
3] Remember my preferences
You can also allow or disallow Windows to remember your passwords, language, and other preferences across systems. This is crucial since passwords entered on one application on one system can be remembered on the same app installed on other devices managed through the same account.
Once turned on, the Sync settings for every app will carry over to all your Windows 11/10 devices where you are logged in with the same Microsoft account.
Sync settings grayed out or not working
Remember that Sync settings are available only if you are logged in with your Microsoft Account. So make sure you are signed in to your PC with your Microsoft account. If it is still not working, try using another Microsoft account. The other things you could try are running System File Checker and DISM.
Should I turn Sync ON or OFF?
Turning Sync ON or OFF is a personal choice, but I usually keep it OFF for crucial data like passwords. However, keeping Sync ON for apps makes it easier to remember the same across systems and install them at the click of a button.
What is the storage size for Sync files?
The storage size for sync files is the same as the size of your OneDrive minus the space you have already used. By default, OneDrive comes with a free space of 5GB. You can increase it to 1TB by purchasing their plan. Unless you have lots of large pictures, this space should be sufficient.