I cannot access PostgreSQL through the command line in Windows. Although I am able to create and update the databases, access them through PGAdminIII, and push to Heroku, I am unable to access them directly through my command line using the psql command.
When I try to create a database by using the command
$ createdb mydb
as explained in the PG documentation, I get the message
createdb: command not found
The documentation suggests that in this case, «PostgreSQL was not installed properly. Try calling the command with an absolute path instead.» Sure enough, I am able to create a database by entering the direct path to the file:
$ c:/postgreSQL/9.1/bin/createdb mydb
Does this mean that the path can be reconfigured to connect correctly? Or do I need to reinstall? I’ve reinstalled several times, and have not been able to set the correct path. I currently have both the /bin and /lib paths addedto my system and user(:Umezo) paths, but still no access from the command line.
User variables for umezo
variable name: Path
variable value: C:PostgreSQL9.1bin; C:PostgreSQL9.1lib

System variables
variable name: Path
variable value: C:PostgreSQL9.1bin; C:PostgreSQL9.1lib
Any information or feedback regarding how I can fix my installment would be appreciated.
My info is as below:
I mostly followed these sources here and here. I installed a 32 bit version of 9.1 because some sources suggested issues with 64 bit.
PG download version: Installer Version 9.1 Win x86-32
Operating System: Windows 7 (64 bit)
pg_hba.conf
#TYPE     DATABASE     USER     CIER-ADDRESS     METHOD
# IPv4 local connections:
host      all          all      127.0.0.1/32     md5
# IPv6 local connections:
host      all          all      ::1/128          md5
postgresql.conf
# - Connection Settings -
listen_addresses = '*'
port = 5432
max_connections = 100
pg_ident.conf
# *Everything is commented out*
Login Role Umezo #from properties window in PGAdminIII
Properties/Role name: Umezo
Properties/Can login: "check"
Role privileges: all categories "check"
If, after installing PostgreSQL, you face “psql not recognized as an internal or external command” error when you try to run psql from the command prompt, then most probably all you need to do to solve this problem is to add Postgres’s bin directory to the PATH system variable (the PATH is a system variable which allows Windows with the help of the Command prompt or the Terminal window find executables).
In this blog post, we’ll share seven simple steps that describe how to add the folder to the Windows 10 PATH variable.
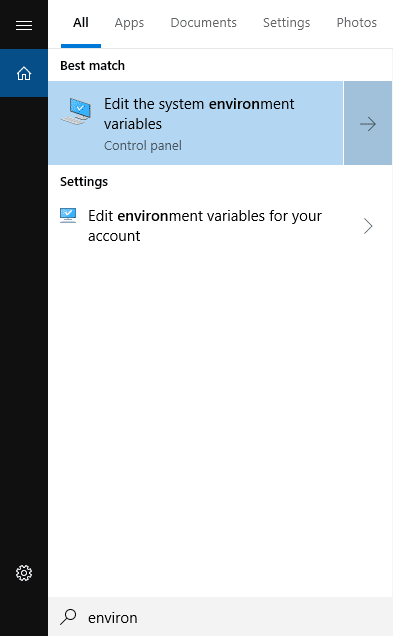
Step 1. Run Windows Search on your Windows 10 machine by pressing WIN+S. You will see the Search Textbox.
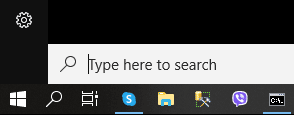
Step 2. Start typing “environ…” in the Windows Search Textbox and choose “Edit the system environment variables” option at the “Best match” list.
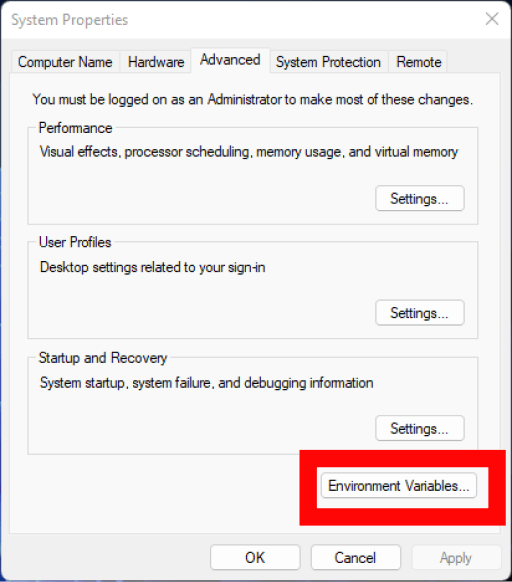
Step 3. The “System Properties” window will be opened where the tabs like “Computer Name,” “Hardware,” and other advanced properties can be founded.

Go to the “Advanced” tab and click on the “Environment Variables” button at the bottom. The “Performance,” “User Profiles,” and “Startup and Recovery” options can also be set in this tab.
Step 4. The “Environment Variables” window will be opened. This is divided into two boxes with User variables and System variables – where all variables and their values are displayed.

Find the “Path” variables in the System variables box, as shown in the screenshot above.
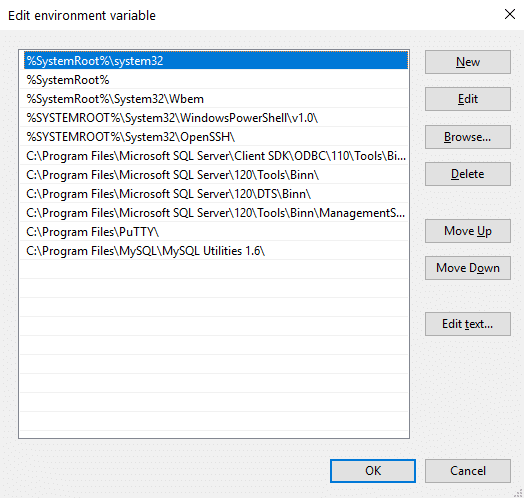
Step 5. Double click on the “Path” variable.
The list with all Path variables will be opened, where the Path variables can be edited, added, and deleted.
Step 6. Click on the “New” button and type a new path, like C:Program FilesPostgreSQL11bin into a new editable row.
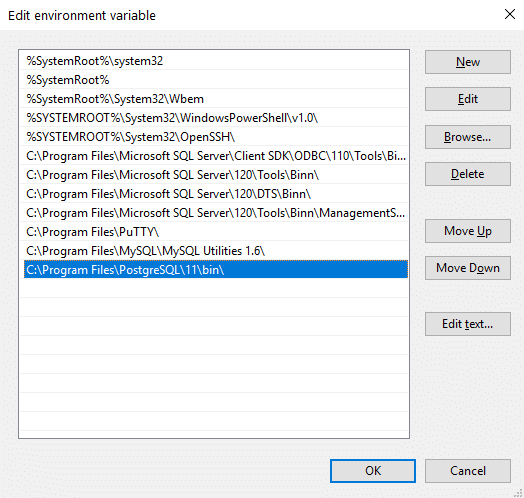
Step 7. Click “OK” to save the new PATH variable. But in order to these changes has an effect on your Command Prompt window you need to reopen it.
| Введение | |
| Для чего используется | |
| Пример | |
| Добавить директорию в PATH | |
| Изучить содержимое PATH | |
| Ошибки | |
| Postgesql | |
| Похожие статьи |
Введение
Если Вам нужно настроить PATH в Linux — перейдите
сюда
Для чего используется
Когда Вы выполняете какую-либо команду в консоли, система ищет соответствие
между названием этой команды и программой, которую можно выполнить.
Искать по всему жёсткому диску было бы слишком долго, поэтому поиск
осуществляется только по некоторым директориям.
Список этих особых директорий хранится в системной переменной PATH.
Пример
Предположим, что возникла необходимость запускать какую-то программу, например
Firefox
, непосредственно из командной строки.
Без предварительной подготовки ввод Firefox в консоль выдаст ошибку.
C:Usersa>firefox
‘firefox’ is not recognized as an internal or external command, operable program or batch file.
Чтобы решить эту проблему нужно добавить директорию с испоняемым файлом firefox в PATH
Добавить директорию в PATH
Быстрый способ перейти к редактированию PATH — нажать клавишу Win и ввести в поиск env

Пошаговый способ:
Правый клик на Этот Компьютер (This PC) → Свойства (Properties)

Дополнительные параметры системы (Advanced system settings)

Дополнительно (Advanced) → Переменные среды (Environment Variables)

Если хотите менять для всей системы, то в окошке «Переменные среды»
(System Variables)
найдите строку PATH в блоке
«Системные переменные» (System variables)
выделите кликом и нажмите кнопку «Изменить…» (Edit…)
Если хотите менять только для своего пользователя, то делайте это в блоке
«Переменные среды пользователя %USERNAME%» (User variables for %USERNAME%)

Создайте новый путь (New)

Введите адрес директории в которой лежит нужная программа. В нашем случае это
C:Program Files (x86)Mozilla Firefox

Перезапустите консоль или открываем новую и пишем там firefox.
C:Usersa>firefox
Браузер должен запуститься.
Изучить содержимое PATH
В
PowerShell
достаточно выполнить
echo $Env:Path
C:Windowssystem32;C:Windows;C:WindowsSystem32Wbem;C:WindowsSystem32WindowsPowerShellv1.0;
Или
Get-ChildItem Env:Path
Name Value
—- ——
Path C:Windowssystem32;C:Windows;C:WindowsSystem32Wbem;C:WindowsSystem32WindowsPo…
В cmd.exe посмотреть список переменных
окружения можно выполнив команду
set
без параметров.
set
Выдача содержит системные переменные и переменные пользователя
а также дополнительную информацию. Содержимое PATH выделено зелёным.

Ошибки
-bash: syntax error near unexpected token `(‘
Скорее всего Вы пытаетесь добавить в unix PATH адрес из Windows, c пробелами, скобками и так далее.
Например:
andrey@olegovich-10:/usr/share$ export PATH=/mnt/c/Program Files (x86)/Common Files/Oracle/Java/javapath_target_1128437:$PATH
-bash: syntax error near unexpected token `(‘
Для решения этой проблемы Вам нужно экранировать пробелы и скобки. Если импортируется много путей и ввод очень длинный —
немного проще записать PATH=$PATH:/путь , если Вам подходит запись в конец.
Также нужно помнить, что все лишние пробелы сломают импорт — для проверки можно сделать весь скрипт в одну строку
в текстовом редакторе.
Также стоит помнить, что если Вы работаете в
bash под Windows
,
то переменные окружения нужно задавать через Windows.
andrey@olegovich-10:/usr/share$ export PATH=$PATH:/mnt/c/Program Files (x86)/Common Files/Oracle/Java/javapath_target_1128437
Postgesql
Приведу пример для использования psql из
bash под Windows
— это может пригодиться если Вы хотите временно добавить
путь к psql в PATH чтобы запустить
Postrgres
скрипт.
В моём случае
psql.exe
находится в папке C:Program FilesPostgreSQL12bin
PATH=$PATH:/mnt/c/Program Files/PostgreSQL/12/bin
| Windows | |
| Loudness Equalization | |
| PowerShell | |
| Посмотреть конец файла в PowerShell (аналог tail) | |
| Создать новый файл в PowerShell (аналог touch) | |
| Проверить контрольную сумму файла в PowerShell (аналог md5sum) | |
| Windows Firewall | |
| Remote Desktop Protocol | |
| Драйверы в Windows | |
| Режим разработчика в Windows 10 | |
| BASH в Windows 10 | |
| Telnet в Windows 10 | |
| Системная переменная PATH | |
| Установка Windows на gpt диск | |
| batch file | |
| pstools | |
| Удалённый рабочий стол | |
| Горячие клавиши |
After you install PostgreSQL 14 on Windows, there are a few steps to create a sandbox database. This post shows you those steps, including a couple Windows OS tasks you’ll need to complete. You should note that these instructions are for the PostgreSQL psql Command Line Interface (CLI).
Open a Command Prompt with Administrator privileges. It should give you a command prompt like the following:
Microsoft Windows [Version 10.0.19042.1466]
(c) Microsoft Corporation. All rights reserved.

C:Usersusername>
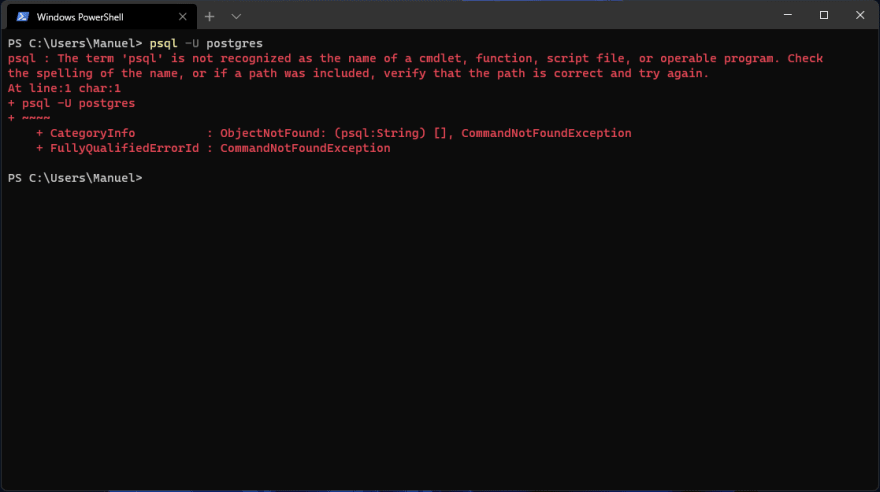
Type psql to launch the PostgreSQL CLI and then the return or enter key:
Most likely, you’ll get the following error message. It means that your System Path environment variable doesn’t include the directory where the psql executable is found, and that’s why the command is not recognized.
'psql' is not recognized as an internal or external command, operable program or batch file.
You can set it temporarily in your current Windows CLI with the following command:
set PATH=%PATH%;C:Program FilesPostgreSQL14bin;
For those familiar with Windows CLI navigation in prior releases, the convention is to append a semicolon at the end of the item added to the %PATH% environment variable. If you were to put the semicolon between the %PATH% and new directory path there would be two semicolons together. While it won’t do any harm, it’s best to follow the new convention or style.
CRITICAL NOTE: The rest of the post assumes you have set the correct %PATH% environment variable or added it to your System’s Path environment variable and restarted the Windows CLI after adding it through the GUI tool. The reason you need to restart the Windows CLI is that the %PATH% environment variable is inherited at startup and doesn’t change in an open Windows CLI shell.
Another common mistake some users make, at least those who have used an older version of the psql utility on a Linux distribution (or “distro”), is to type psql without any arguments to become the superuser. This error doesn’t occur in Linux because you most likely connected as the postgres user before trying to connect to the PostgreSQL database. A quick demonstration should illustrate the error and support explaining why it occurs on the Windows OS.
Attempting to connect to the PostgreSQL database as a non-postgres user:
You should get the following error:
psql: error: connection to server at "localhost" (::1), port 5432 failed: fe_sendauth: no password supplied
This error occurs because you’re not the postgres user, and all other users must designate that they’re connecting to the superuser account. The correct syntax is:
C:Usersusername>psql -U postgres
Then, you’ll be prompted for the password that you set when you installed PostreSQL database. Enter that password from the installation at the prompt.
Password for user postgres:
psql (14.1)
WARNING: Console code page (437) differs from Windows code page (1252)
         8-bit characters might not work correctly. See psql reference
         page "Notes for Windows users" for details.
Type "help" for help.

postgres=#
The warning message is telling you that the character set collation differs between your Windows OS and the PostgreSQL database. We’ll discuss this more later but for the sake of almost all your work, it won’t matter. If the warning message bothers you, you can run the chcp command before launching PostgreSQL when you open your Windows CLI:
The chcp command changes your terminal character set to align with the Latin 1 character set, which enables you to use things like non-English accent characters (the umlaut over an o, or ö). After running the You will see this when you connect after running that command:
psql (14.2)
Type "help" for help.

postgres#
INFO: The chcp command is used to supplement the international keyboard and character set information, allowing MS-DOS to be used in other countries and with different languages. Before the chcp command can be used, the nlsfunc must be loaded, and the country.sys must be loaded into the OS configuration.
If you are an experienced Windows OS user, you may want to edit your Windows Registry to change this behavior automatically for each Windows CLI session. You can do that by opening the Windows Registry with the regedit command as an Administrator. In regedit, add an Autorun element with a value of chcp 1252 to this part of the registry:
ComputerHKEY_LOCAL_MACHINESOFTWAREMicrosoftCommand Processor
This value automatically sets your Windows CLI to a Latin 1 character set everytime you launch a terminal shell with the cmd.exe utility. You should only do this if you understand it completely.
Now that you’re connected as the superuser, let’s examine the steps to configure your playground or videodb database. There are five steps to configure your database and one step to connect and use the videodb database as the student user
- Create Physical Directory
The directory for the data dictionary changes with PostgreSQL installations. You can find it with the following psql CLI command:
postgres=# show data_directory;
This will return the following:
           data_directory
-------------------------------------
 C:/Program Files/PostgreSQL/14/data
(1 row)
While it is possible to store your subdirectory in the data dictionary, it will raise a warning message. It’s actually a better practice to install your local databases in another location on your file system.
Open a new Windows OS CLI to create a subdirectory (or in Windows parlance folder) where you will store your videoDB database. Each new Windows OS CLI opens in your home directory. You need to create a physical video_db subdirectory in your home directory.
HINT: The name of the database inside PostgreSQL should map to the tablespace name and differ from the physical directory. Otherwise there is a chance you might get confused and make an error in the future.
In a new command line shell, you can use the following syntax to create videoDB subdirectory:
- Create Tablespace
Returning to the original Windows CLI shell where you are connected as the postgres superuser, you can create a video_db tablespace with the following syntax:
CREATE TABLESPACE video_db
  OWNER postgres
  LOCATION 'C:Usersusernamevideo_db';
This will return the following:
You can query whether you successfully create the video_db tablespace with the following:
SELECT * FROM pg_tablespace;
It should return the following:
  oid  |  spcname   | spcowner | spcacl | spcoptions
-------+------------+----------+--------+------------
  1663 | pg_default |       10 |        |
  1664 | pg_global  |       10 |        |
 16395 | video_db   |       10 |        |
(3 rows)
- Create a Database
You need to know the PostgreSQL default collation before you create a new database. You can write the following query to determine the default correlation:
postgres=# SELECT datname, datcollate FROM pg_database WHERE datname = 'postgres';
It should return something like this:
  datname  |         datcollate
-----------+----------------------------
 postgres  | English_United States.1252
(1 row)
The datcollate value of the postgres database needs to the same value for the LC_COLLATE and LC_CTYPE parameters when you create a database. You can create a videodb database with the following syntax provided you’ve made appropriate substitutions for the LC_COLLATE and LC_CTYPE values below:
CREATE DATABASE videodb
  WITH OWNER = postgres
       ENCODING = 'UTF8'
       TABLESPACE = video_db
       LC_COLLATE = 'English_United States.1252'
       LC_CTYPE = 'English_United States.1252'
       CONNECTION LIMIT = -1;
You can verify the creation of the videodb with the following command:
It should show you a display like the following:
                                                 List of databases
   Name    |  Owner   | Encoding |          Collate           |           Ctype            |   Access privileges
-----------+----------+----------+----------------------------+----------------------------+-----------------------
 postgres  | postgres | UTF8     | English_United States.1252 | English_United States.1252 |
 template0 | postgres | UTF8     | English_United States.1252 | English_United States.1252 | =c/postgres          +
           |          |          |                            |                            | postgres=CTc/postgres
 template1 | postgres | UTF8     | English_United States.1252 | English_United States.1252 | =c/postgres          +
           |          |          |                            |                            | postgres=CTc/postgres
 videodb   | postgres | UTF8     | English_United States.1252 | English_United States.1252 |
(4 rows)
Then, you can assign comment to the database with the following syntax:
COMMENT ON DATABASE videodb IS 'Video Store Database';
- Create a Role, Grant, and User
In this section you create a dba role, grant privileges on a videodb database to a role, and create a user with the role that you created previously with the following three statements. There are three steps in this sections.
- The first step creates a dba role:
CREATE ROLE dba WITH SUPERUSER;
- The second step grants all privileges on the videodb database to both the postgres superuser and the dba role:
GRANT ALL PRIVILEGES ON DATABASE videodb TO postgres;
GRANT ALL PRIVILEGES ON DATABASE videodb TO dba;
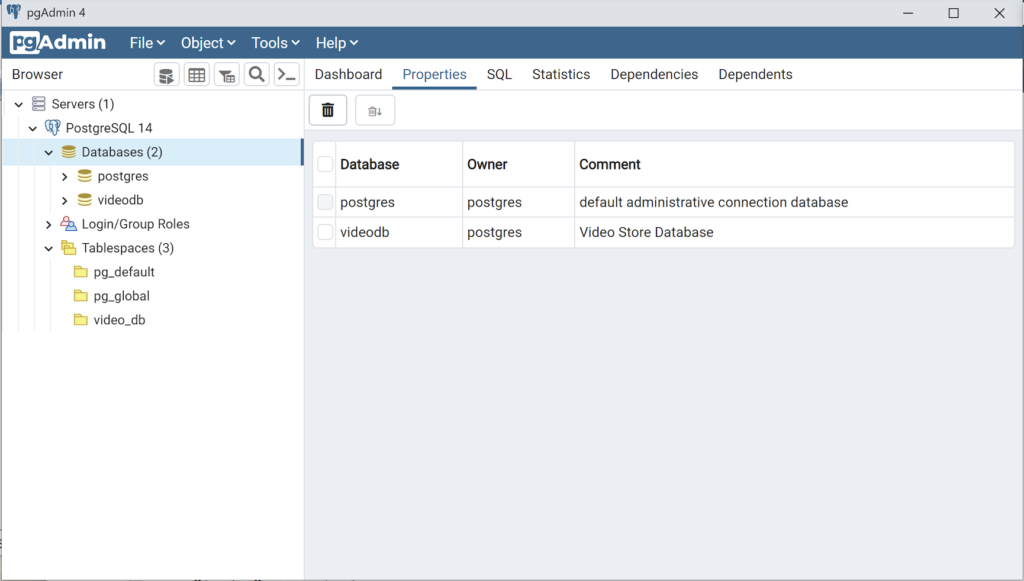
Any work in pgAdmin4 requires a grant on the videodb database to the postgres superuser. The grant enables visibility of the videodb database in the pgAdmin4 console as shown in the following image.

- The third step creates a student user with the dba role:
CREATE USER student
  WITH ROLE dba
       ENCRYPTED PASSWORD 'student';
After this step, you need to disconnect as the postgres superuser with the following command:
- It is possible that you may (and should if this is a new instance you are building) encounter an error when you try to connect as a sandboxed user. The syntax to connect as the student user is:
psql -d videodb -U student -W
All the options, which are preceded with a single dash (–) are case sensitive. The -d option sets the database for the connection. The -U option set user for the connection and the -W option instructs the psql CLI to prompt for the password.
While you shouldn’t encounter the following error during a Windows OS installation,
psql: FATAL: Peer authentication failed for user "student"
You can fix this in PostgreSQL 14 by changing the user access parameters in the pg_hba.conf configuration file. The file is found in the C:Program FilesPostgreSQL14data directory. These are the correct out of the box settings you should see.
# TYPE  DATABASE        USER            ADDRESS                 METHOD

# "local" is for Unix domain socket connections only
local   all             all                                     scram-sha-256
# IPv4 local connections:
host    all             all             127.0.0.1/32            scram-sha-256
# IPv6 local connections:
host    all             all             ::1/128                 scram-sha-256
# Allow replication connections from localhost, by a user with the
# replication privilege.
local   replication     all                                     scram-sha-256
host    replication     all             127.0.0.1/32            scram-sha-256
host    replication     all             ::1/128                 scram-sha-256
If you find something that’s broken, fix it. The values above should ensure you make the changes successfully. You will need to restart the postgres service if you make changes.
If you plan on using the copy command to read external CSV (Comma Separated Value) files, you need to grant as the postgres superuser another privilege to the student user. This grants the pg_read_server_files role to the student user.
GRANT pg_read_server_files TO student;
- Create a Schema
The PostgreSQL database supports multiple schemas inside databases. The default schema for any database is the public schema. You must create separate schemas and refer to them explicitly when accessing them unless you alter the default search path. This section demonstrates how to:
- Create an app schema.
- Create a revision_history table in the app schema.
- Modify the standard search path to include other schemas
The process of creating a schema requires you grant the CREATE ON DATABASE privilege to the user as the postgres user. The initial grant of the create privilege requires the postgres superuser’s privileges. That means you must connect as the postgres user, like:
Then, as the postgres superuser, you use the following syntax to grant the create privilege to the student user on the videodb database:
GRANT CREATE ON DATABASE videodb TO student;
After granting the create privilege, you should exit the postgres superuser’s account, like
Now, you should connect as the student user to the videodb database (syntax introduced earlier but provided again below).
As the student user, create the app schema with the following syntax:
Then, you can query the result as follows:
SELECT   *
FROM     pg_catalog.pg_namespace
ORDER BY nspname;
You should see the following:
  oid  |      nspname       | nspowner |               nspacl
-------+--------------------+----------+-------------------------------------
 16399 | app                |    16398 |
 13388 | information_schema |       10 | {postgres=UC/postgres,=U/postgres}
    11 | pg_catalog         |       10 | {postgres=UC/postgres,=U/postgres}
    99 | pg_toast           |       10 |
  2200 | public             |       10 | {postgres=UC/postgres,=UC/postgres}
(5 rows)
If you create a table without a schema name, it is automatically placed in the public schema. That means any attempt to describe the table with the d command line option returns without prepending the schema name returns an error, however, this is only true when you are using the default search parameter.
Let’s create a revision_history table in the app schema with a script file. A script file is a set of related SQL commands, like the following example that suppresses notices, drops any pre-existing revision_history table, and create the revision_history table.
-- Set client messages to warning or error, which means any
-- notice associated with the if exists clause is suppressed.
SET client_min_messages TO warning;

-- Conditionally drop an existing revision_history table in
-- the app schema.
DROP TABLE IF EXISTS revision_history;

-- Create a revision_history table.
CREATE TABLE app.revision_history
( revision_history_id serial
, session_id          VARCHAR
, table_name          VARCHAR
, revision_id         INTEGER );
You can run a script file by using a relative or absolute file name. An absolute file name includes a full path from a Windows logical driver letter, like C: or a Linux mount point. A relative file name is simply the file name.
If you want to use a relative file name, you must first navigate to the directory where you have saved the file first. This directory becomes your local drive and allows you call any file in it from the psql command prompt by using only its file name.
You should connect as the student user to the videodb database. The i command lets you run a file, assuming you put the preceding script file into a revision_history file in your local directory.
If you try to describe the revision_history table with the d command line option, like
It will show the following:
Did not find any relation named "revision_history".
That’s because there is no revision_history table in the public schema and the default search path only includes the public schema.
You can show the search path with the following:
It should return the following, which is a schema that shares the user’s name and public.
   search_path
-----------------
 "$user", public
(1 row)
You reset the search path as follows:
SET search_path TO app, "$user", public;
After you set the search_path, an attempt to describe the table will work because it searches for the table in the app and public schema. That means the following command:
Shows:
                                                  Table "app.revision_history"
       Column        |       Type        | Collation | Nullable |                            Default
---------------------+-------------------+-----------+----------+---------------------------------------------------------------
 revision_history_id | integer           |           | not null | nextval('revision_history_revision_history_id_seq'::regclass)
 session_id          | character varying |           |          |
 table_name          | character varying |           |          |
 revision_id         | integer           |           |          |
- Connect as student to videodb:
As shown in Step #4 above, you can now connect and use to the videodb as the student user with the following syntax:
psql -d videodb -U student -W
If you did everything correctly, you should see the following after correctly providing the student password for the student user:
Password:
psql (14.1)
WARNING: Console code page (437) differs from Windows code page (1252)
         8-bit characters might not work correctly. See psql reference
         page "Notes for Windows users" for details.
Type "help" for help.

videodb=>
After connecting to the videodb database, you can query the current database, like
SELECT current_database();
It should return the following:
 current_database
------------------
 videodb
(1 row)
This has shown you how to create a videodb tablespace, a videodb database, a dba role, a student user, an app schema, and connect to your new videodb database as the student user. As always, I hope it lets you get a lot down with little effort and avoiding pages and pages of documentation.
Install only the necessary tools for a lean, mean PostgreSQL client machine
Why install all of PostgreSQL when your database server is up in the cloud, managed as an IBM Cloud Database for PostgreSQL?
Most instructions for installing the PostgreSQL tools assume you want the database installed too. It’s a reasonable assumption if you’re dealing with users who don’t have access to PostgreSQL in the cloud or on a remote server.
In this PostgreSQL Tip, we’ll look at how you can install just psql on Windows, Linux, and macOS, allowing you to quickly get up and running and connected to your IBM Cloud Databases (ICD) for PostgreSQL service. We’ll cover the following:
-
macOS with Homebrew
-
Ubuntu 16.04 and 18.04
-
Red Hat Enterprise Linux 7 (and others)
-
Fedora 27 and 28
-
Windows 10
Let’s dive in.
macOS with Homebrew
We recommend Homebrew as a package manager for macOS. With Homebrew in place, you’ll be able to install numerous applications, usually with the programs available in /usr/local/bin. Homebrew’s package for the PostgreSQL client tools is the libpq package. Brew makes it easy to install:
brew install libpq
There’s a small catch though—libpq won’t install itself in the /usr/local/bin directory. To make that happen, you need to run:
brew link --force libpq
This will symlink all the tools (not just libpq) into the /usr/local/bin directory. You’re now ready to run psql and start connecting.
Ubuntu 16.04 and 18.04
Linux systems (unlike macOS) have a package manager built in. For Ubuntu (and Debian-based distributions) thats’s the apt command. The PostgreSQL client is distributed in the appositely named postgresql-client, so all you need to do is run the following:
sudo apt-get install postgresql-client
This will install the PostgreSQL 10 client, which can easily connect to earlier versions of PostgreSQL.
Red Hat Enterprise Linux 7 (and others)
For Red Hat Enterprise Linux (RHEL), there’s a little more set up to do than with Ubuntu. For RHEL, the package manager is yum. First, you need to point yum at the PostgreSQL repository like this:
sudo yum install https://download.postgresql.org/pub/repos/yum/10/redhat/rhel-7-x86_64/pgdg-redhat10-10-2.noarch.rpm
Yum goes to that URL and configures itself to use that package repository. With that done, you can add packages from it by name:
sudo yum install postgresql10
This installs just the client packages. If you are wondering where to find that repository URL, head to Linux Downloads (Red Hat Family). You’ll find a form which will let you select the PostgreSQL version, platform, and architecture, and it’ll give you the appropriate instructions for that Red Hat variant—that includes CentOS, Scientific Linux, and Oracle Enterprise Linux. It also includes Fedora.
Fedora 27 and 28
Fedora’s default repositories already have a PostgreSQL client available from them. So, for Fedora 27, 28, and later, install the PostgreSQL client from the terminal with:
sudo dnf install postgresql.x86_64
And that’s all you need to do!
Windows 10
On Windows 10, there’s a bit more work to be done. We currently recommend using the PostgreSQL installer from Enterprise DB. It’s a full installation package for PostgreSQL on Windows but you can set it to only install the command line tools like psql. Click on that link and select PostgreSQL 9.6 or 10 and Windows 10 as the platform. Once the executable file is downloaded, run it and you’ll see the following options:

Select only the Command Line Tools because we don’t need the server installed. After it installs, you’ll need to set up your Windows environment variables so that you can use the psql client in the command prompt.
Go to the Control Panel > System and Security > System and select Advanced system settings.

From there, you’ll see a box called System Properties. Select Environment Variables. A window will appear with the two sets of environment variables. In the top set (marked User variables for…), select the PATH entry and then click the Edit button. An edit window will appear. Click New and add the path to the psql client. Your path will depend on where PostgreSQL installed, but typically that would be:
C:Program FilesPostgreSQL10bin

After that, click OK a couple of times to go back to the desktop. Start a new Command Prompt, and you should be able to run psql. With no server set and no server running locally, you’ll see the following, which means that it’s working:

Summing up
Now that we’ve covered getting set up with the psql client for PostgreSQL, you can start connecting to IBM Cloud Databases for PostgreSQL without having to install PostgreSQL itself on your local machine. In future PostgreSQL Tips, we’ll cover some of the basic features and functions of the database using your new psql client.
Learn more about IBM Cloud Databases for PostgreSQL
Add Answer
|
View In TPC Matrix
Technical Problem Cluster First Answered On
March 22, 2021
Popularity
10/10
Helpfulness
3/10
Contributions From The Grepper Developer Community
Contents
Code Examples
Related Problems
TPC Matrix View Full Screen
psql command not found windows
Comment
0
Popularity
10/10 Helpfulness
3/10
Language
sql
Source: Grepper
Tags: command
psql
sql
windows

Contributed on Mar 22 2021
Santino
790 Answers Avg Quality 6/10
Published Oct 3, 2018
Today’s tip is how to have a lean mean PostgreSQL client machine by only installing the needed tools. Why install all of PostgreSQL when your database server is up in the cloud, managed like a Compose PostgreSQL.
Most instructions for installing the PostgreSQL tools assume you want the database installed too. It’s a reasonable assumption if you’re dealing with users who don’t have access to PostgreSQL in the cloud or on a remote server.
So, in this PostgreSQL Tip, we’ll look at how you can install just psql on Windows, Linux and macOS, allowing you to quickly get up and running and connected to your Compose PostgreSQL service. We’ll cover:
- macOS with Homebrew
- Ubuntu 16.04 and 18.04
- Red Hat Enterprise Linux 7 (and others)
- Fedora 27 and 28
- Windows 10
Let’s dive in.
macOS with Homebrew
We recommend Homebrew as a package manager for macOS. With Homebrew in place you’ll be able to install numerous applications, usually with the programs available in /usr/local/bin. Homebrew’s package for the PostgreSQL client tools is the libpq package. Brew makes it easy to install:
brew install libpq
There’s a small catch though: libpq won’t install itself in the /usr/local/bin directory. To make that happen, you need to run:
brew link --force libpq
Which will symlink all the tools, not just libpq, into the /usr/local/bin directory. You’re ready to run psql and start connecting now.
Ubuntu 16.04 and 18.04
Linux systems, unlike macOS, have a package manager built in. For Ubuntu (and Debian-based distributions) thats’s the apt command. The PostgreSQL client is distributed in the appositely named postgresql-client so all you need to do is run:
sudo apt-get install postgresql-client
This will install the PostgreSQL 10 client, which can happily connect to earlier versions of PostgreSQL.
Red Hat Enterprise Linux 7 (and others)
For Red Hat Enterprise Linux (or RHEL as it’s usually written), there’s a little more set up to do than Ubuntu. For RHEL, the package manager is yum. First, you need to point yum at the PostgreSQL repository like this:
sudo yum install https://download.postgresql.org/pub/repos/yum/10/redhat/rhel-7-x86_64/pgdg-redhat10-10-2.noarch.rpm
Yum goes to that URL and configures itself to use that package repository. With that done, you can add packages from it by name:
sudo yum install postgresql10
This installs just the client packages. If you are wondering where to find that repository URL, head to Linux Downloads (Red Hat Family) where you’ll find a form which will let you select the PostgreSQL version, platform and architecture and it’ll give you the appropriate instructions for that Red Hat variant — that includes CentOS, Scientific Linux, and Oracle Enterprise Linux. It also includes Fedora but read on…
Fedora 27 and 28
Fedora’s default repositories already have a PostgreSQL client available from them. So For Fedora 27 and 28 and later, install the PostgreSQL client from the terminal with:
sudo dnf install postgresql.x86_64
and that’s all you need to do.
Windows 10
On Windows 10, there’s a bit more work to be done. We currently recommend using the PostgreSQL installer from Enterprise DB. It’s a full installation package for PostgreSQL on Windows but you can set it to only install the command line tools like psql. Click on that link and select PostgreSQL 9.6 or 10 and Windows 10 as the platform. Once the executable file is downloaded, run it and you’ll see the following options:

Select only the «Command Line Tools» because we don’t need the server installed. After it installs, you’ll need to set up your Windows environment variables so that you can use the psql client in the command prompt.
Go to the Control Panel > System and Security > System and select Advanced system settings.

From there you’ll see a box called System Properties. Select Environment Variables. A window will appear with the two sets of environment variables. In the top set, marked «User variables for…» select the PATH entry and then click the Edit button. An edit window will appear. Click New and add the path to the psql client. Your path will depend on where PostgreSQL installed, but typically that would be:
C:Program FilesPostgreSQL10bin

After that, click OK a couple of times to go back to the desktop. Start a new Command Prompt and you should be able to run psql. With no server set and no server running locally, you’ll see the following which means that it’s working.

Start Connecting …
We’ve covered setting up the PostgreSQL client for multiple platforms so start connecting. If you have suggestions on what you’d like to see covered in our next PostgreSQL Tips, drop us a line to articles@compose.com and we’ll see how we can tip you too.
attribution Jan Kahánek via Unsplash

![]()
If you are getting the error below after installing PostgreSQL don’t panic, just follow along with this tutorial and it’s gonna be solved.
This tutorial is simplified to help everyone to know how to add PostgreSQL to user or system variable(path) which can be accessed globally with minimum stress.
Let’s begin!
Normally, you will have to navigate to your PostgreSQL bin directory to copy the path which takes a while. Instead, I will provide the path for you to make everything quick and easy.
Path to postgresql bin directory —
C:Program FilesPostgreSQL14bin
Enter fullscreen mode
Exit fullscreen mode
NB: Change 14 to the version of Postgres you have installed
Step 1
Copy the path to your Postgres bin directory provided above.
Step 2
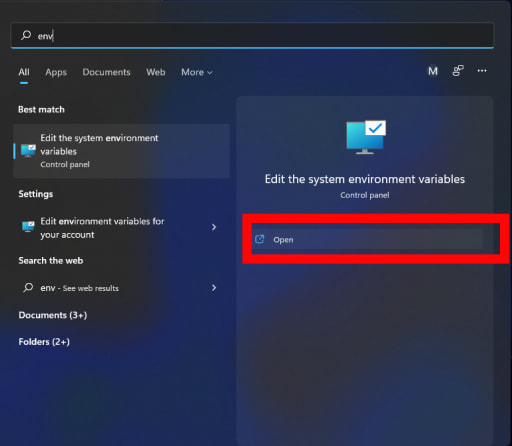
Press the windows start button and search for env then click open
Step 3
Click on Environment Variables
Step 4
Double click on Path

Step 5
Click on New

Step 6
Paste the [PostgreSQL bin](C:Program FilesPostgreSQL14bin) path you copied. Then click ok recursively to close all windows

Step 7
Close all instances of your terminal then reopen it.
NB: If you are using terminals in VS Code Editor, you will have to restart VS Code Editor for the changes to take effect

Step 8
You are done
And now you can log in to Postgres without using the default psql shell.
Hope this solves your issue about using Postgres globally.
Thank You