While the default Windows icons get the job done, they aren’t particularly exciting. If you want to put a personal spin on your computer, changing Windows 10 icons is a great way to do this.
We’ll show you how to change icons on Windows 10, including program and folder icons. With a bit of work, you’ll have an all-new interface with a unique look! While we focus on Windows 10 here, these tips largely work the same on Windows 11.
Where to Find Custom Icons for Windows 10
Before you start changing your current Windows 10 icons, you need some new icons to replace them with. The OS has a few additional icons built-in, but they’re not that great.
Flaticon is a great resource for all your Windows icon needs. The site contains millions of high-quality icons arranged in thousands of convenient packs. You can grab everything in a pack at once, or download single icons.
![]()
The site offers downloads in several formats. We recommend downloading them in PNG for easy conversion to the ICO format. Keep all the raw downloads in a folder called PNG Icons or similar.
If you don’t find what you’re looking for here, try Findicons, IconArchive, or GraphicBurger. We’ve also looked at some great Windows icon packs in the past.
Converting PNG Images to ICO Icons
Windows uses ICO files for its icons. Thus, you’ll need to convert images from PNG (or other image formats) before you use them as icons.
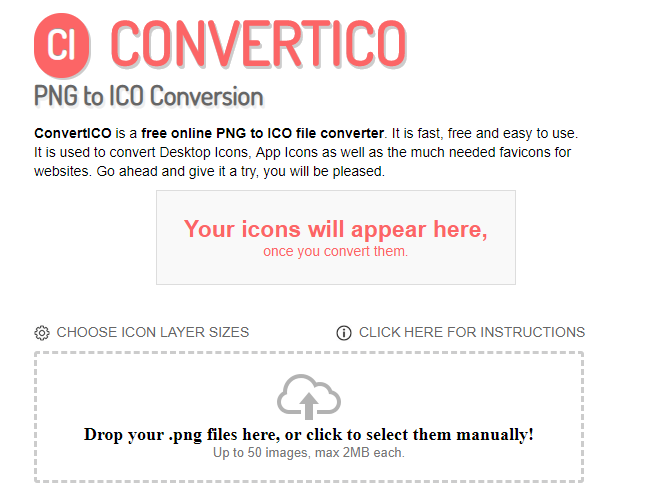
ConvertICO offers an easy way to do this. You can upload up to 50 PNG images at once to convert them into the ICO format. If you prefer, you can also enter the URL of an image you want to convert, cutting out the middle step of downloading the PNG.
Keep all your ICO files in their own folder. Make sure you put this somewhere permanent, as moving icon files after you have assigned them will break the link, requiring you to set them up again.
How to Change Program Icons in Windows 10
Windows 10 makes it easy to change the program icon for a shortcut, but not the main executable. Thus, you should make a desktop shortcut for the app icon you want to change, if you don’t have one already.
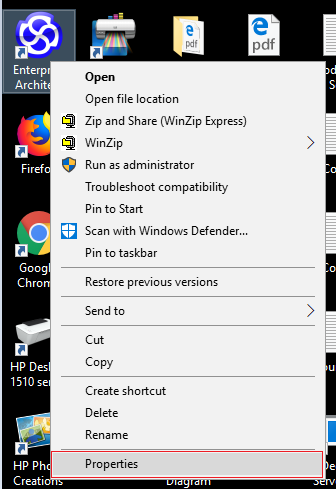
To do this, search for an app in the Start menu, then right-click its name and choose Open file location. In the resulting folder, right-click the program name and choose Send to > Desktop (create shortcut).
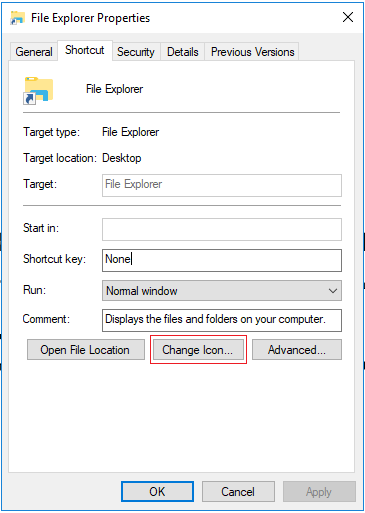
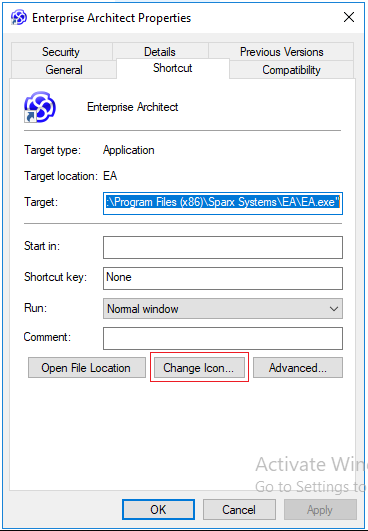
Now you can modify the new shortcut on your desktop. Right-click it and choose Properties to open a new window. Here, switch to the Shortcut tab and click the Change Icon button at the bottom.
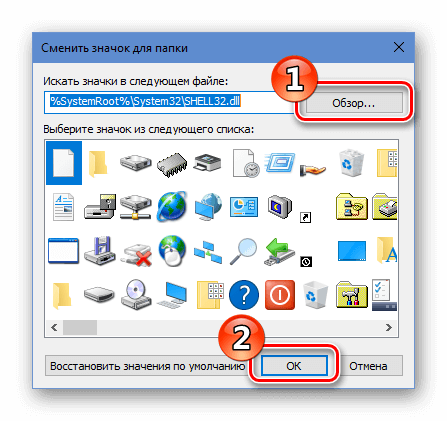
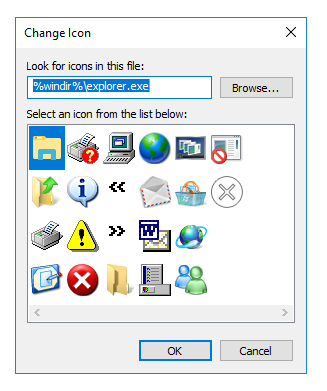
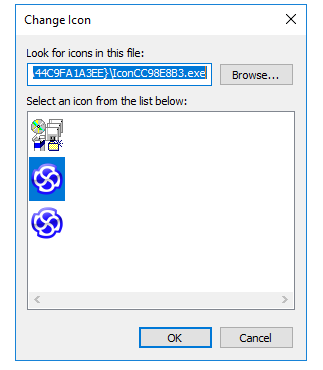
You’ll see a list of alternative icons included in the app, if there are any. To set your own icon, click Browse and navigate to the place where you saved your ICO files.
![]()
Double-click one to select it, then choose OK on both open dialog boxes. That’s all you have to do to change a program icon in Windows 10.
Pinning Custom Icons to the Taskbar
Want to customize the icons on your Taskbar too? The easiest way to do this is to follow the steps above to create custom desktop icons. After that, simply right-click a shortcut and choose Pin to Taskbar.
If you’d rather, you can customize an icon already pinned to your Taskbar. While holding Shift, right-click the app icon and choose Properties. From here, you can follow the same steps as above to set a new icon.
![]()
You may need to wait a few moments for changes you make in this way to take effect.
How to Change Individual Folder Icons in Windows 10
Changing a folder icon is similar to the above process: to begin, right-click the folder you’d like to change and choose Properties.
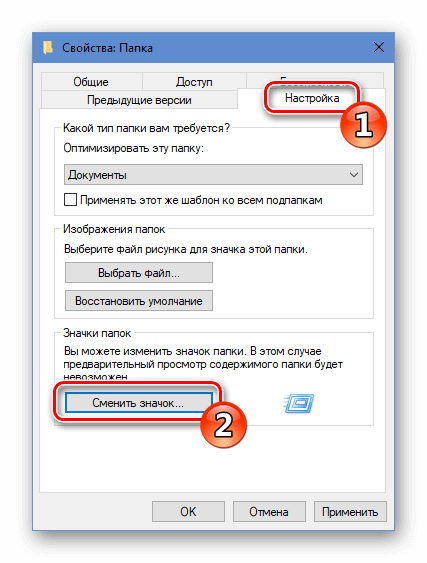
On the resulting window, switch to the Customize tab. Select the Change Icon button at the bottom to select a new icon from your computer. Windows includes many default icons for this, but most of them are old-school and ugly. Hit Browse to locate your custom icons instead.
![]()
If you ever change your mind, just open this window and choose Restore Defaults to get the original folder icon back.
How to Change All Windows Folder Icons at Once
Want to change all the standard folder icons on your computer with one action? You’ll have to dig into the Registry to do so.
Remember that it’s possible to damage your system by modifying the Registry, so take care not to touch any other values while inside.
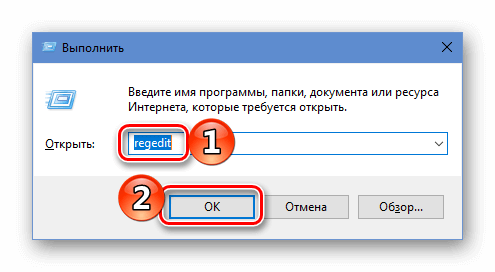
First, type regedit into the Start menu to open the utility. You’ll need to provide administrator permissions to continue. Navigate to the following location:
HKEY_LOCAL_MACHINESOFTWAREMicrosoftWindowsCurrentVersionExplorer
Now, right-click on the Explorer folder in the left navigation tree and select New > Key. Name the new key Shell Icons, then select it in the left panel. In the blank space on the right, right-click and choose New > Expandable String Value. Set its name as 3. Repeat this to create another string called 4.
Now, double-click the 3 string you just made. In the Value data field, enter the location of your folder icon in quotes. An easy way to do this is by holding Shift while right-clicking your ICO file, then selecting the Copy as path option. It should look something like this:
"C:UsersUserDocumentsICO Iconsfolder.ico"
Repeat this for the 4 string, then click OK and exit the Registry Editor.
If you don’t see the change take effect upon opening a new File Explorer window, you’ll need to restart File Explorer for your changes to take effect. To do this, press Ctrl + Shift + Esc to open the Task Manager. Click More details to expand it if needed. On the Processes tab, find Windows Explorer. Right-click this and choose Restart.
This should apply your new icon to all folders. To remove this in the future, simply delete the Shell Icons Registry key you created.
We tested this method as working in Windows 10 version 20H2, but other users have reported that it has no effect. Your mileage may thus vary depending on your version of Windows 10.
How to Change File Icons by Type
Normally, for each file type, Windows shows an icon of the default program. If you’d like to change this, you can use a free utility called FileTypesMan to change the icon for any file type.
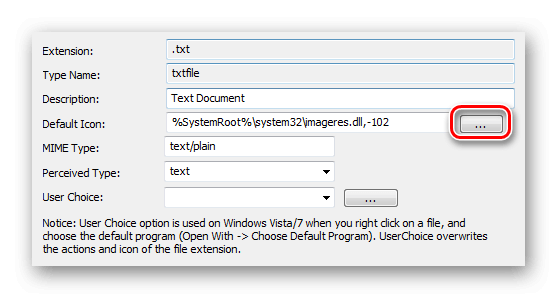
After downloading and running it, press Ctrl + F to locate the file type you want to change. Double-click it in the list to open a new window with many more options. Next to the Default Icon field, you’ll see a … (ellipsis) button.
Click this and you’ll open the familiar Windows dialog box that lets you change the icon.
Using this, you can set up separate icons to distinguish file types, even if they open in the same program. You might want to make it easier to highlight JPG and PNG files at a glance, or spot old DOC Word files not using the newer DOCX format, for instance.
How to Change Drive Icons in Windows
Want to change the icons that you see in This PC for your various computer drives? A free utility called Drive Icon Changer makes this easy.
It’s similar to FileTypesMan mentioned above, but much more basic. Simply select a drive and the desired icon, and it will apply them for you after a restart. That’s all it takes.
How to Create Blank Taskbar Icons
Usually, all of your Taskbar icons appear alongside each other. If you’d like to add some space—perhaps to separate icons by type—you can achieve this with a workaround.
Creating Dummy Batch Files
To start, create a new folder somewhere you can keep permanently. Name it Spaces or something similar. Inside this folder, right-click again and choose New > Text document. Double-click the file to open it.
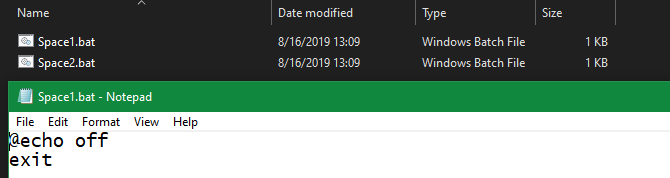
Inside the text file, enter the following. This will create a batch file that’s a dummy; it immediately opens and closes a Command Prompt window if you click on it.
 @echo off
exit
After this, go to File > Save As. In the saving dialog box, give the file a name ending in .BAT. If you want to create multiple spaces, you should then copy, paste, and rename the file so you have several named Space1.bat, Space2.bat, and so on.
Set Up a Blank Icon
Windows has blank icons built-in. But in our testing, these can appear as black squares on your Taskbar instead of transparent boxes, which is no good. This means you’ll need to quickly make your own «blank» icon.
Open an image editor (we used Paint.NET) and hit Ctrl + Shift + R to change the canvas size. Create one that’s perfectly square; 256×256 will work. Press Ctrl + A to select the entire image, then press Del to erase it. This will create a transparent square when saved as a PNG.
However, if you leave it like this, you’ll run into the same black block problem. Thus, you need to take the Pencil tool, zoom in, and use it to draw a single pixel in a corner of the image. This will effectively be invisible when it sits on your Taskbar.
Save the file as a PNG, then use an online converter as mentioned above to convert this into an ICO file.
Creating and Pinning Shortcuts
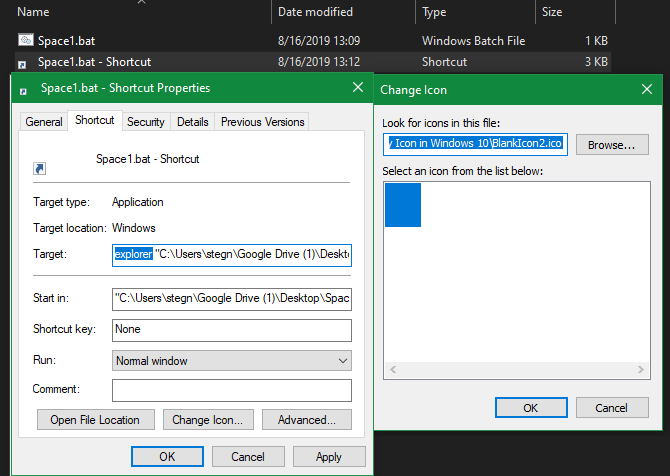
Now, right-click each Space file you made and choose Create shortcut, as you’ll need a shortcut, not the main BAT file, in order to change the icon. Then right-click each shortcut file, select Properties, and use the Change Icon button to select your new blank icon.
Once this is done, you’ll need to add one more element in order to add these shortcuts to your Taskbar. In the Shortcut tab of each BAT file, enter explorer in front of everything in the Target box. Make sure there’s a space before the opening quotes.
Now you can right-click all your Space files and choose Pin to taskbar. They’ll appear as blank icons, allowing you to drag them wherever you like and group your other icons.
How to Change the Desktop Icon Size on Windows 10
Just want to adjust the size of Windows 10 icons on your desktop? That’s an easy fix. On the desktop, you can right-click any empty space and choose View to select Small icons, Medium icons, or Large icons.
If you don’t like one of those presets, hold the Ctrl key and scroll your mouse wheel. This gives you more granular control over icon size.
In a File Explorer window, you’ll find more size options under the View menu. The method of scrolling your mouse wheel while holding Ctrl works, too.
Windows 10 Desktop Icons Missing?
If you don’t see any icons on your desktop, chances are that you’ve hidden them all. Getting them back takes just a few clicks. Right-click anywhere on your desktop, then select View > Show desktop icons if it’s not already checked. With this enabled, you should see your desktop icons with no problem.
If this didn’t fix your problem, your computer may be in tablet mode, which prevents your desktop icons from showing. To disable tablet mode, visit Settings > System > Tablet.
Finally, if you’re missing the default Windows 10 system icons, you’ll need to restore them in another menu. Go to Settings > Personalization > Themes and on the right side of the window, select Desktop icon settings.
This will launch a new window where you can toggle the icons for This PC, your user folder, Network, Control Panel, and the Recycle Bin. While here, you can also change the icons for these shortcuts if you want.
Customize Every Icon in Windows
Now you know how to change nearly every icon on your Windows system. Whether you want to completely overhaul everything or just want to change a few shortcut icons, you have the tools to personalize your computer in a fun way.
If you love personalization, it thankfully doesn’t end here. There are many other ways to customize the look and feel of your Windows environment.
Содержание
- Вариант 1: Иконки системных приложений
- Вариант 2: Иконки пользовательских программ
- Вопросы и ответы
Вариант 1: Иконки системных приложений
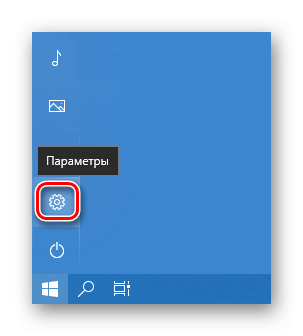
Основные иконки – это системные значки «Этот компьютер», полная или пустая «Корзина», «Сеть». Изменить их можно через «Параметры» Windows 10:
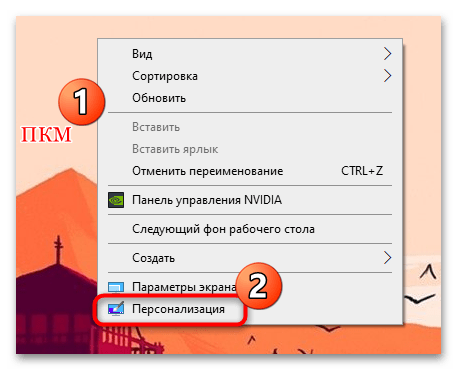
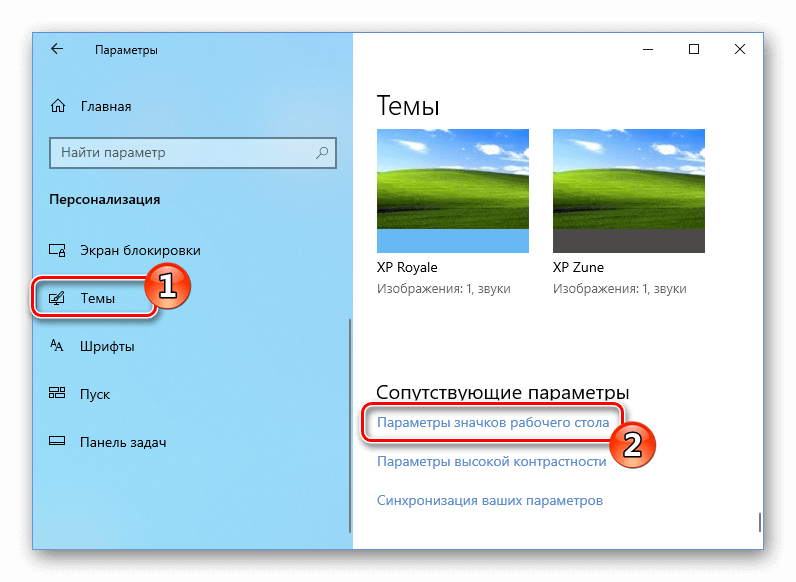
- Щелкните правой кнопкой мыши по свободной области на рабочем столе и из контекстного меню выберите пункт «Персонализация».
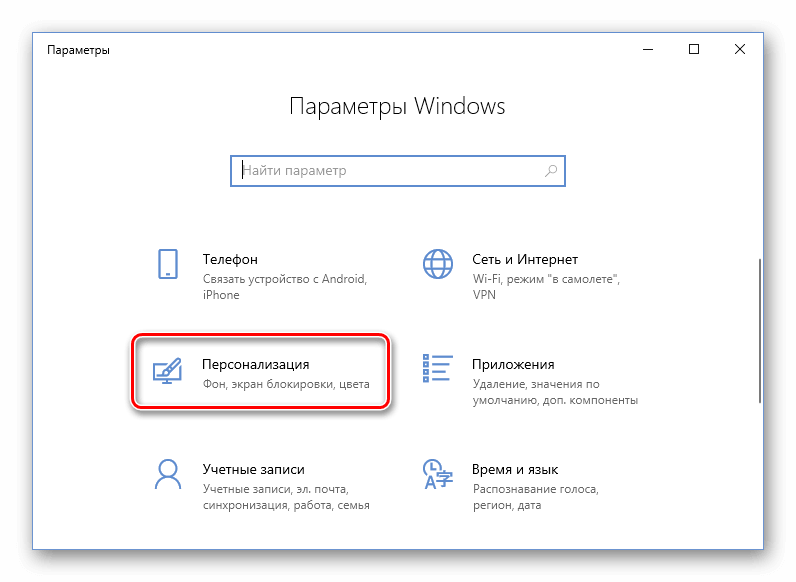
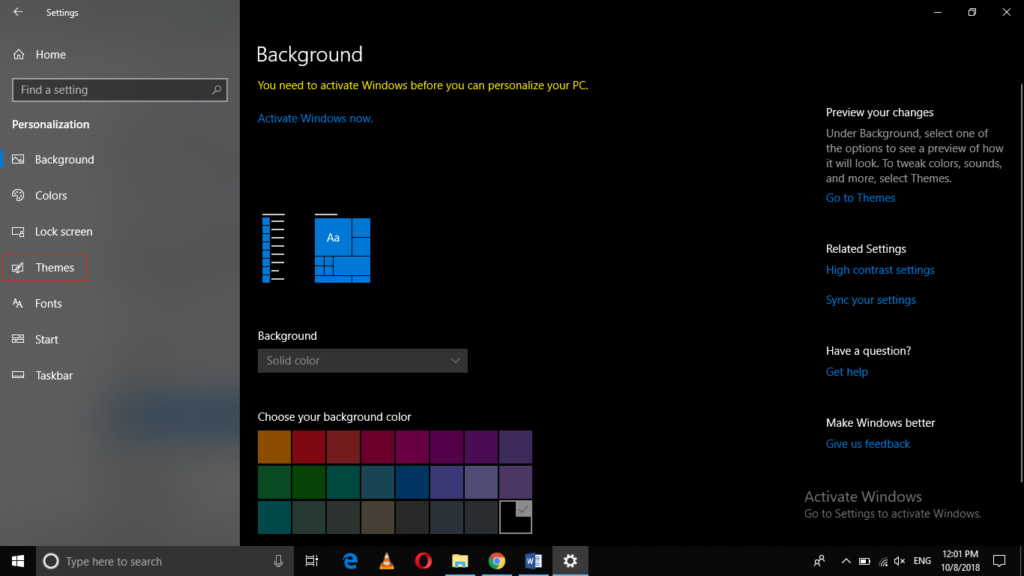
- В окне «Параметров» перейдите на вкладку «Темы», затем щелкните по строке «Параметры значков рабочего стола».
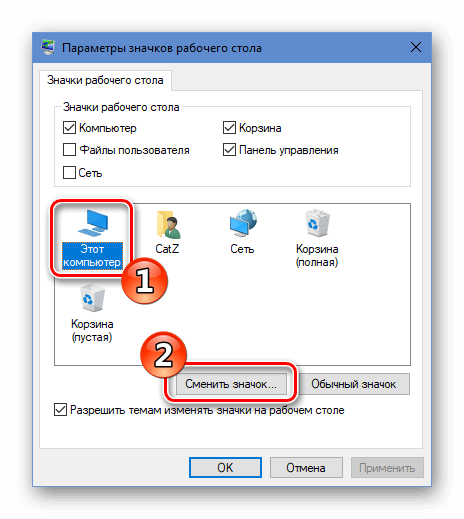
- В новом окошке выделите ту иконку, которую нужно сменить, затем нажмите на соответствующую кнопку ниже.
- Подберите понравившийся значок, затем подтвердите действие, нажав на кнопку «ОК».


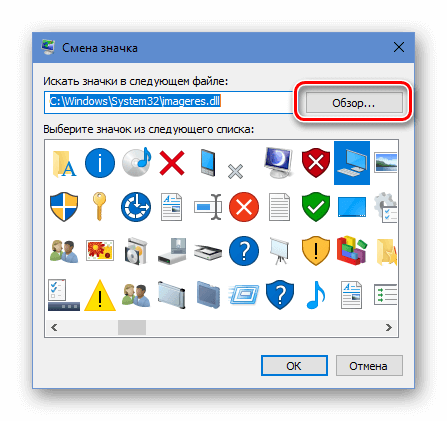
Также можно найти любые другие значки через «Проводник», если нажать на кнопку «Обзор» и указать путь к файлам. Значки должны быть в формате ICO.

Вариант 2: Иконки пользовательских программ
Обычно на рабочем столе используются ярлыки приложений, поскольку исполняемый файл всегда находится в корневой папке программы и изменять его не следует. Поставить другую иконку для ярлыка можно с помощью штатных средств и сторонних решений. Сперва расскажем о первом методе:
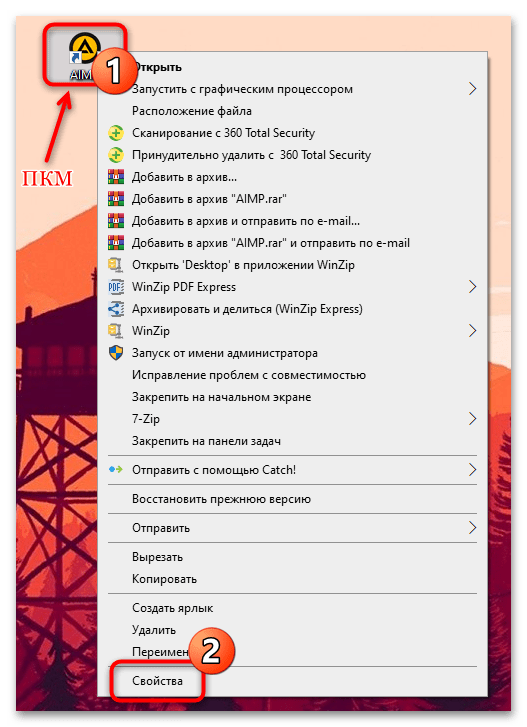
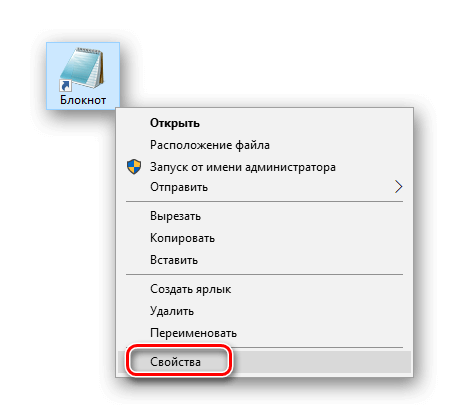
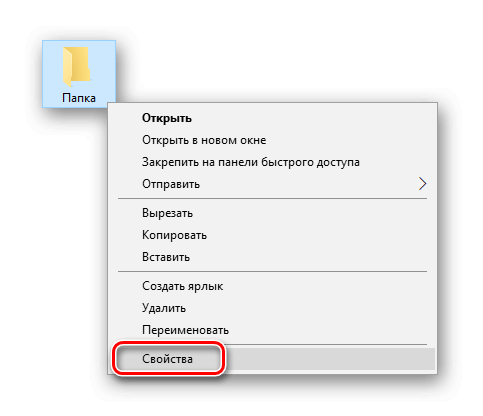
- Щелкните правой кнопкой мыши по ярлыку приложения и из контекстного меню выберите пункт «Свойства».
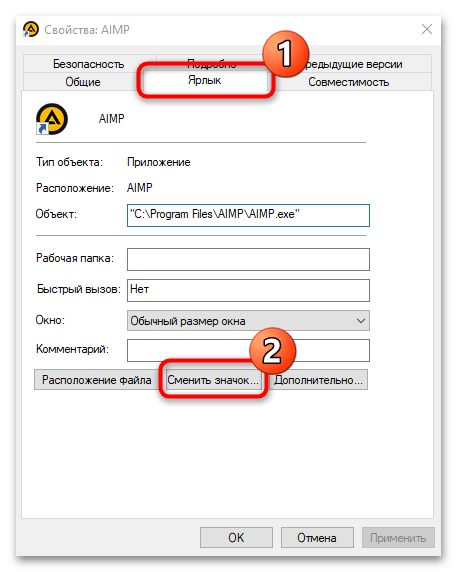
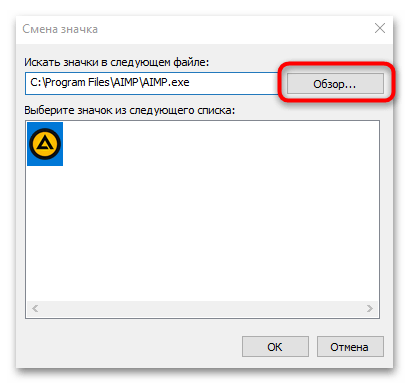
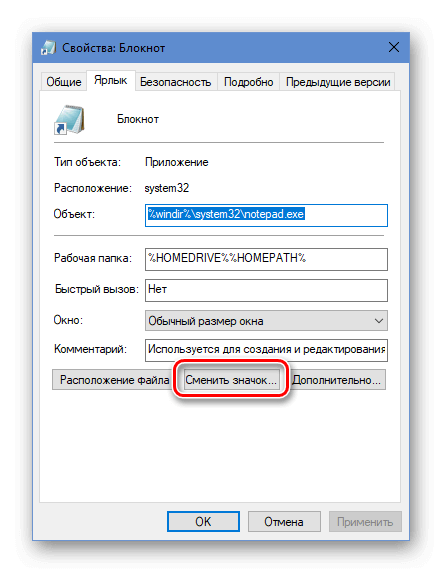
- Перейдите на вкладку «Ярлык» и нажмите на кнопку «Сменить значок».
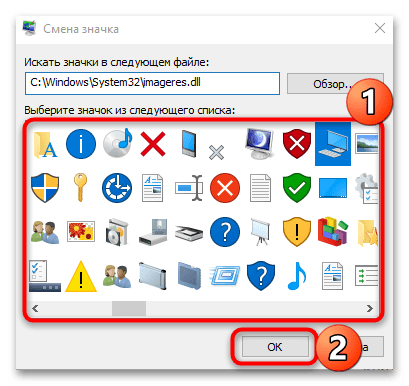
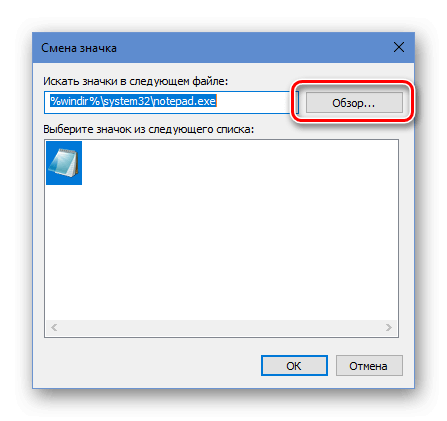
- Если приложение подразумевает другие иконки (эта возможность есть далеко не у каждой программы), которые можно применить, то в окне отобразятся варианты. В другом случае нажмите на кнопку «Обзор». Укажите через «Проводник» путь к изображению и выберите его.
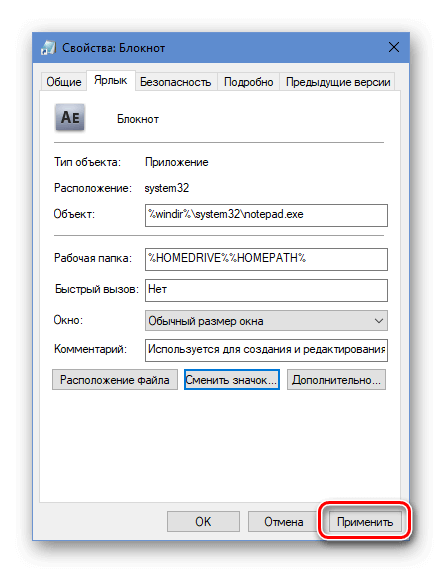
- Нажмите на кнопку «ОК», чтобы изменения вступили в силу.
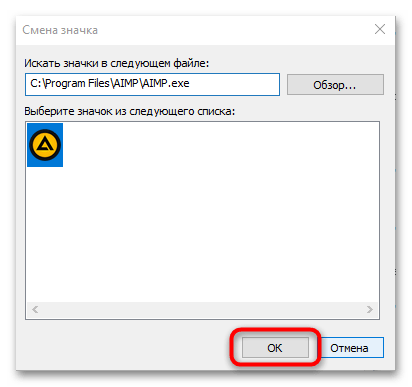
После этого на рабочем столе или в папке ярлык приложения будет тот, который выбрал пользователь через его свойства.
Читайте также: Изменение значков папки на ПК с Windows 10
Если штатное средство не подходят, можно воспользоваться специальными программами, предназначенными для кастомизации ОС, а именно — для установки новых иконок. В нашем отдельном материале есть более подробное описание таких приложений, инструкции по их использованию, а также ссылки на скачивание.
Подробнее: Устанавливаем новые иконки в Windows 10

Еще статьи по данной теме:
Помогла ли Вам статья?
The reason why Windows 10 is so popular amongst developers and users alike is the level of customization that is possible with it. Apart from allowing for external service-level changes, Windows 10 also leaves enough room for developers to craft some refreshing visual packs to change the look and feel of Windows 10.
If you want to make your personal computer truly yours, there’s nothing better than trying out a few icon packs as these are the little things on our PCs that we interact with the most. Here’s how you can change the different icons on Windows 10.
Related: How to Remove Microsoft Account From Windows 10
Download icons for Windows 10
There are a few additional icon sets that come in-built in Windows 10. But there is an ever-expanding list of icons and icon packs that you can get online so it doesn’t make sense to use the ones that come with Windows 10. Some of the platforms where you can download icons for free include the likes of Iconfinder, DeviantArt, Flaticon, GraphicBurger, and IconArchive. You can also pay for some premium icon packages if they catch your fancy.
Once you find a pack that appeals to you, download it and save it in a permanent location. If they are in a .zip file, extract them so that they are all inside one folder.
Before we being, make sure that you keep all these icon images in one place and not move them once they’re applied. If things go wrong, you would want them to be all in one place so that they can be reapplied with ease. So, to reiterate, save the icons in one place and don’t move them.
Related: How To Mute an App on Windows 10
Change PNG images to ICO icons
Though most sites will provide the icon files in the ICO format (which is the format Windows uses for its icons), you may find that some sites will offer icon files in PNG format. But don’t worry, you can easily convert these PNG images to ICO files and use them as icons.
There are a bunch of PNG to ICO converters out there that you can use to get your ICO files, such as Cloudconvert, IcoConvert, and ConvertIco. Simply visit any of these or just do a simple Google search, visit any of the sites and get your PNG files converted.
Once you have your ICO files, save them all in one folder.
Related: How to Reset Taskbar in Windows 10
Change Desktop icons
Now, first up, let’s change the desktop icons. These icons include My Computer, Recycle Bin, Network, and the like, and are a cinch to change. Here’s how you can do so:
Right-click anywhere on your desktop and click on Personalize.
![]()
In the left panel, click on Themes.
![]()
Then, on the right, click on Desktop icon settings.
![]()
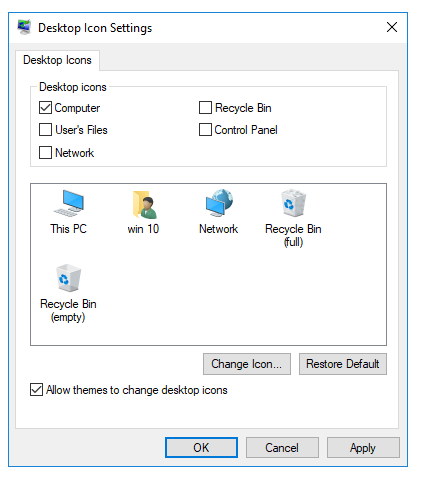
Now, select the icon that you want to change and then click on Change icon.
![]()
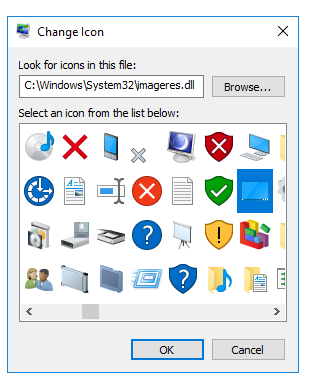
In the next window, you can select from amongst the extra built-in icons. But since you’ve already downloaded (and converted) icon packs, it’s better that you use those. For that, click on Browse.
![]()
Look for the folder where you saved your ICO files. Then select the one that you want to use for a particular icon and click Open. In our example, we’re changing the icon for the This PC.
![]()
Click OK on all open windows.
![]()
Once the changes are made, the new icon will appear in File Explorer, as well as the Desktop and the Taskbar when it is open.
![]()
Didn’t like your new icon? Simply go back to the “Desktop Icon Settings”, select the icon, and click on Restore Default.
![]()
Related: How To Right-Click With Keyboard Windows 10
Change Program icons
Changing program icons is ridiculously easy on Windows 10. But you can only change the shortcut icon, not the main .exe file icon. So, in order to change a program icon, you will have to create its desktop shortcut first (if you haven’t done so already). Here’s how you can do so:
Click on the Start menu and search for an app. In our example, we’re choosing Google Chrome. Right-click on the app and click on Open file location.
![]()
In the folder, right-click on the program and click on Send to and then Desktop (create shortcut).
![]()
The app shortcut will now appear on the desktop. Right-click on it and select Properties.
![]()
In the resulting window, under the “Shortcut” tab, click on Change Icon.
![]()
You will see a few icon options. You can either choose from among these options or click on Browse and go to the folder where you saved the downloaded ICO files.
![]()
Choose the icon that you want for the app, then click Open.
![]()
Click OK on all open windows.
![]()
Your new icon will now be applied to the program.
![]()
Change Folder icons individually
You can change folder icons individually in the same manner. Doing so will make a folder stand out distinctly from other folders, making it easier to find. Here’s how you can do so:
Find a folder whose icon you want to change, right-click on it and choose Properties.
![]()
Click on the Customize tab and then select Change icon.
![]()
Here too you will find a bunch of icons provided by Windows, but most of them have an outdated appearance. Instead of picking one of these, click on Browse.
![]()
Then find the icon you want to apply to this folder from your icon pack. Click on Open.
![]()
Then click OK on all open dialog boxes.
![]()
Your folder icon change will now be applied.
![]()
Related: How to Stop Discord From Opening on Startup on Windows 10
Change Folder icons all at once
If you want to change your folder icons throughout your system, it is unfeasible, to say the least, to do it one at a time. Instead, you have to get into the registry and make the changes there. Here’s how you can change folder icons all at once.
Press Start, type “Registry editor” and click on Run as administrator.
![]()
Once the registry editor opens, navigate to the following location:
HKEY_LOCAL_MACHINESOFTWAREMicrosoftWindowsCurrentVersionExplorer
Or you can simply copy the above location, paste it into the registry, and hit Enter.
![]()
Now, in the left panel, right-click the Explorer folder and click on New, then Key.
![]()
Name this folder as Shell Icons and select it. On the right, right-click in the blank space and select New, then Expandable String Value.
![]()
Name this string 3.
![]()
Repeat the process and create a string 4.
![]()
Now, double-click the 3 string. You will be required to enter the location of the folder icon under “Value data”. To simplify the task, right-click the folder ICO file while holding the right Shift, and select Copy as path.
![]()
Then paste it inside the “Value data” field if string 3 and click OK.
![]()
Do the same for string 4 as well, and click OK.
![]()
You should see the changes take effect once you exit the registry. If that doesn’t happen, you may have to restart Windows Explorer. To do so, right-click on the taskbar and select Task Manager.
![]()
Then, under the Processes tab, right-click Windows Explorer and select Restart.
![]()
The icons for all your folders in your system will now change.
![]()
If you want to revert the process and get back the default folder icons, simply go to the same registry address and delete the Shell Icons key.
So this is how you can change your Windows 10 icons on your personal computer. Windows 10 makes it super convenient to change the appearance of programs shortcuts, folders, and desktop icons so your PC looks and feels truly yours.
Given the amazing icon developer community that we have, you are really spoilt for choices when it comes to selecting an icon pack. So, find icon packs that appeal to you, download them, and apply them as we’ve shown you in this article. Don’t worry if you don’t like them at first; you can easily revert back to default Windows 10 icons from within the same windows.
RELATED
- How to Change User Folder Name in Windows 10
- How To Play a Sound Every Few Minutes on Windows 10
- How To Add Google Meet To Calendar
- How to make WhatsApp calls on Mac or Windows PC app
- How To Select Multiple Files on Windows 10 in 2021 [7 ways]
Сменить иконки на компьютере можно, воспользовавшись значками уже имеющимися в системе, скачав их из интернета или воспользовавшись специальными приложениями, которые содержат в себе предустановленные наборы. В сети есть несколько ресурсов с большим количеством бесплатных значков, например Iconarchive или Findicons. В данной статье будет подробно описано, как сменить значки для различных типов файлов, поменять системные иконки, а также самому создать их с использованием специальных программ и онлайн сервисов.
Изменение вида системных иконок 

Главные значки ОС — это «Корзина», «Этот компьютер», «Сеть», «Панель управления» и некоторые другие. Чтобы их изменить, потребуется выполнить следующие операции:
- Вызываем окно параметров системы из стартового меню или воспользовавшись клавиатурной комбинацией «Win + I».

- Далее открываем раздел «Персонализация».

- Открываем пункт «Темы».
- После этого кликаем по ссылке «Параметры значков рабочего стола».
- Выбираем нужную нам иконку для изменения и нажимаем «Сменить значок».

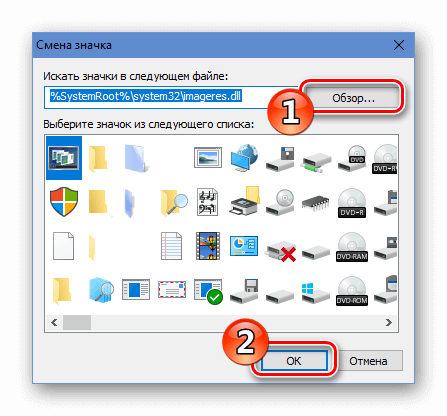
- Появится стандартный набор иконок Windows, где можно будет выбрать новый значок или загрузить собственный при помощи кнопки «Обзор». Извлечь иконку таким способом можно из библиотек dll, файлов приложений или обычного формата значков ico.

- Выбрав нужную картинку, нажимаем по кнопке «Применить».
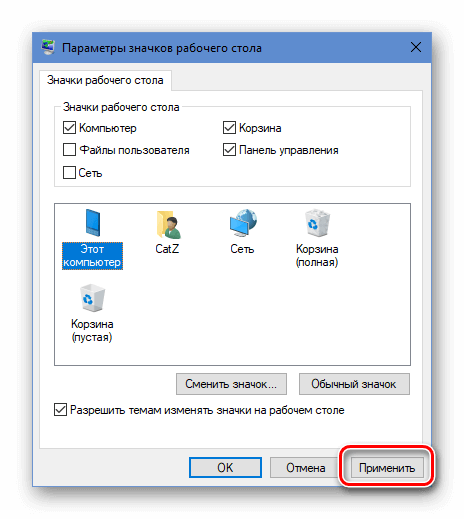
После проделанных операций иконка сразу же поменяется. Если этого не произойдет, то нужно перезагрузить компьютер.
Смена значков ярлыка

Чтобы заменить родной значок программы, потребуется использовать специальные приложения, однако можно создать для него ярлык и изменить его вид. Для этого мы проделаем следующие операции:
- Кликаем по пункту «Свойства» из меню ярлыка.

- После этого нажимаем по кнопке «Сменить значок».

- Далее воспользовавшись кнопкой «Обзор», загружаем файл, в котором имеется подходящий нам значок.
- Выбираем его и жмем «Применить».
- На данном этапе система может запросить административный доступ. Предоставляем его, кликнув «Продолжить».
- После этого нажимаем «ОК», и иконка изменится на выбранную.
Смена значка определённой папки

Чтобы осуществить данную операцию в десятке, нам понадобится проделать следующие шаги:
- Кликаем по пункту «Свойства» из контекстного меню нужной папки.

- Открываем вкладку «Настройка».
- Далее нажимаем «Сменить значок».

- Появится окно для выбора файла, где, воспользовавшись кнопкой «Обзор», загружаем нужную нам иконку.
- Сохраняем применённую установку, нажав «ОК».
Изменение значка всех папок

Чтобы изменить иконку всех директорий ОС, потребуется отредактировать несколько параметров в реестре Windows. Нам нужно будет выполнить следующие операции:
- Вызываем окно «Выполнить», использовав клавиатурную комбинацию «Win + R».
- Вводим команду regedit и нажимаем «ОК» или «Enter».

- Далее нажимаем «Да», чтобы предоставить приложению возможность изменять настройки.
- Открываем ветку реестра HKEY_LOCAL_MACHINE и далее переходим по адресу: Software—Microsoft—Windows—CurrentVersion—Explorer—Shell Icons.
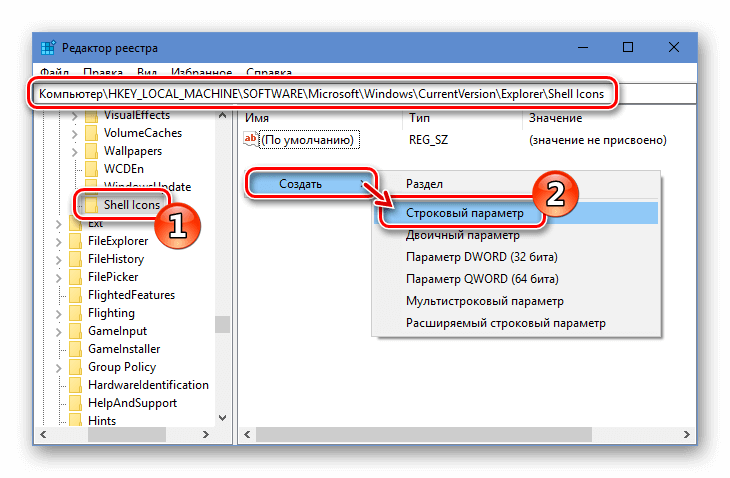
Примечание: Если директории Shell Icons нет, то нужно будет её создать самому, выбрав вариант «Создать» — «Раздел» в меню каталога Explorer.
- В разделе справа вызываем меню при помощи ПКМ. Далее воспользуемся вариантом «Создать» — «Строковый параметр».

- В поле для названия вписываем цифру 3.
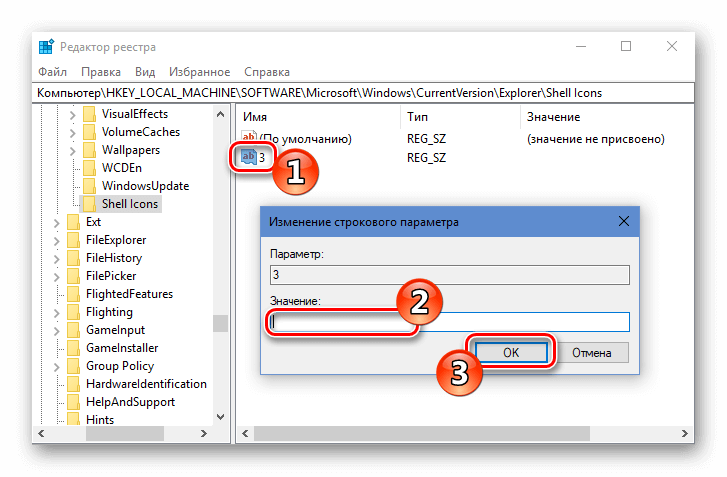
- Дважды нажимаем по новому ключу и в графе значения прописываем адрес расположения иконки с расширением ico.
- Нажимаем «ОК».

Закрываем приложение и перезагружаем компьютер. После перезапуска системы новый значок будет отображаться на всех папках.
Изменяем иконки для типов файлов

Чтобы сменить иконку у всех файлов с одинаковым расширением, потребуется прибегнуть к использованию сторонних приложений. В Windows XP можно было менять эти значки системными средствами, но в последующих версиях ОС такая функция была удалена.
Мы будем использовать для этой цели маленькую, но удобную программу FileTypesMan, которая распространяется бесплатно, но не имеет родной поддержки русского языка. При надобности в интернете можно найти для неё русификатор.
Загрузить приложение с оф. сайта
Перейдя на страницу загрузки, для запуска скачивания файла пролистайте её вниз и нажмите по нужной ссылке в соответствии с разрядностью вашей ОС.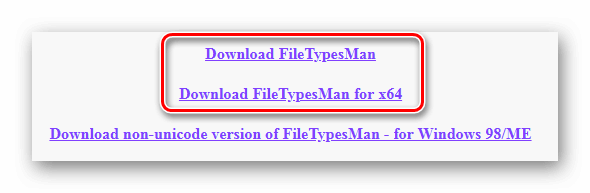
Программу инсталлировать не потребуется, нужно только разархивировать скачанный архив.
- Запускаем приложение FileTypesMan.exe из папки, куда были извлечены файлы.
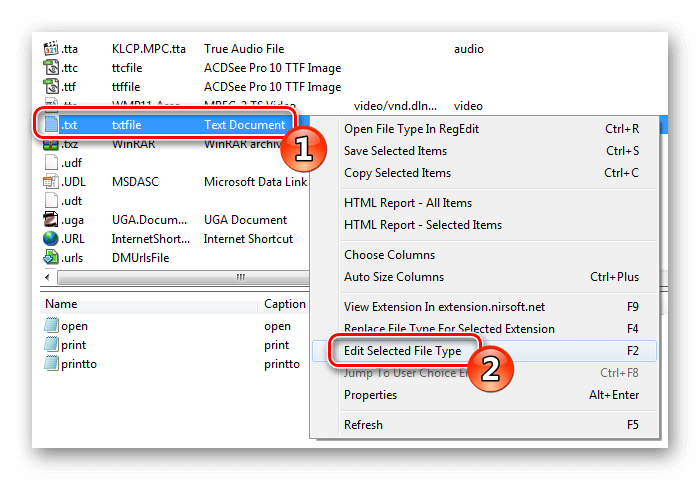
- Далее выбираем тип файла, которому нужно поменять значок.
- Из его контекстного меню выбираем вариант «Edit Selected File Type».

- Нажимаем на кнопку с тремя точками в строке «Default icon».
- Далее воспользовавшись кнопкой «Обзор», загружаем в приложение файл с новым значком.

- Кликаем «ОК».

Иконка для выбранного типа файлов изменится на указанный значок сразу же; перезагружать систему не потребуется.
Специальные приложения для смены значка

Существует несколько программ, которые умеют изменять иконки в Windows 10. Иногда они также содержат в себе и встроенные наборы значков. Рассмотрим в подробностях четыре самых популярных приложения.
IconPackager

IconPackager — это программа, разработанная фирмой Stardock, которая специализируется на изменении интерфейса Windows. В ней уже есть на выбор несколько наборов иконок. Также тут имеется возможность скачивать дополнительные пакеты значков и изменять их на собственное усмотрение. Приложение платное, но его можно использовать в течение 30 дней без регистрации на английском языке.
Скачать программу с официального сайта
После скачивания и установки приложения, при первом запуске нажимаем «Start 30 Day Trial».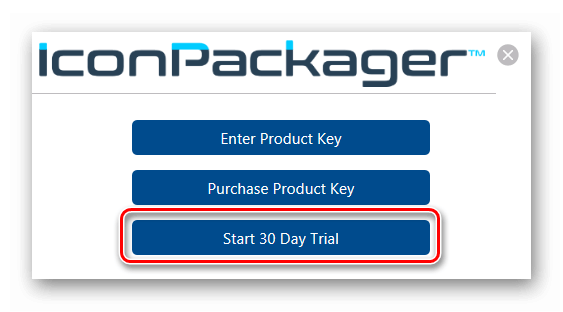
Далее вводим адрес своей электронной почты и жмем «Continue».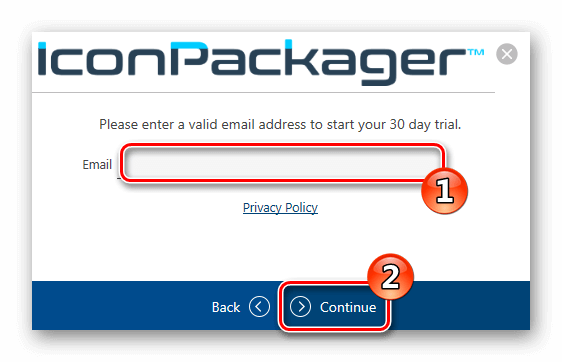
Примечание: после этого может понадобиться подтверждение указанного почтового ящика. Потребуется открыть письмо, которое придет на почту, и пройти по ссылке для активации программы.
Далее можно будет воспользоваться встроенными пакетами значков или загрузить собственные из интернета. Потребуется сделать следующее:
- Открываем вкладку «Look & Feel».
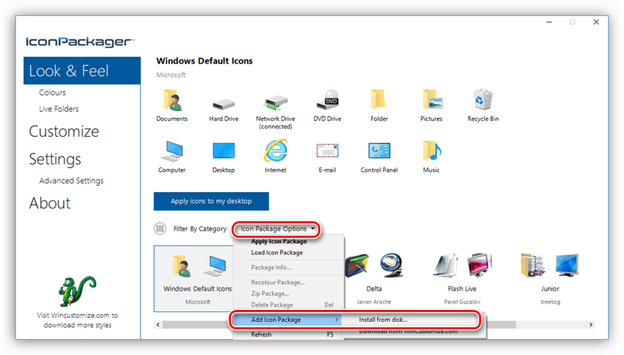
- Кликаем по ссылке «Icon Package Options».
- Из меню выбираем «Add Icon Package», и далее — «Install from disk».

- Выбираем файл с набором значков с диска компьютера. Таким образом, он появится в перечне тем приложения и его можно будет применить.
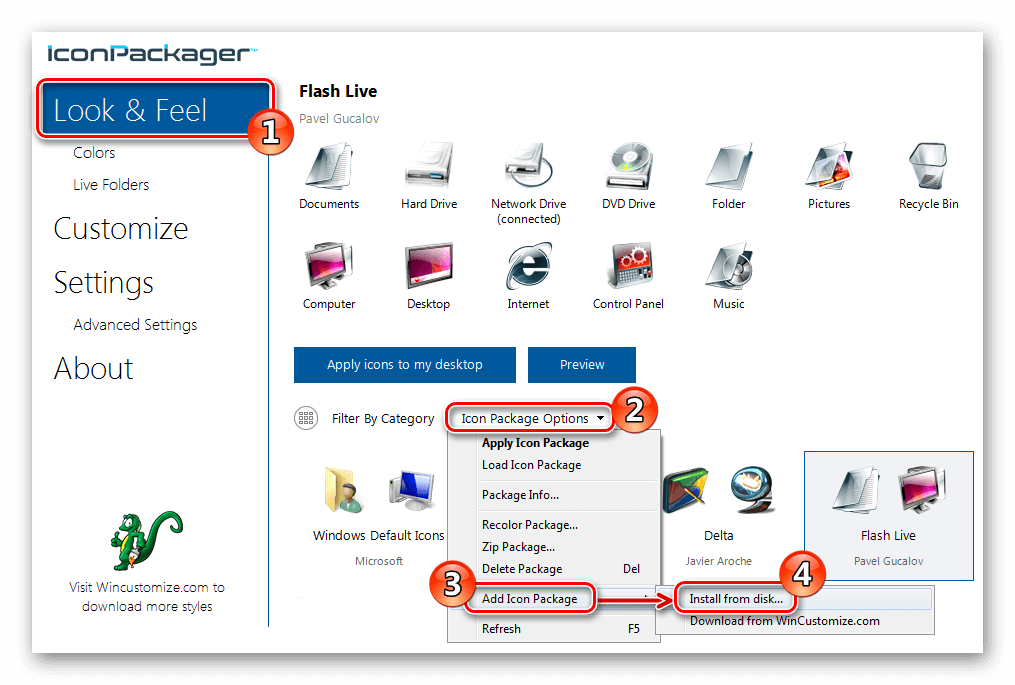
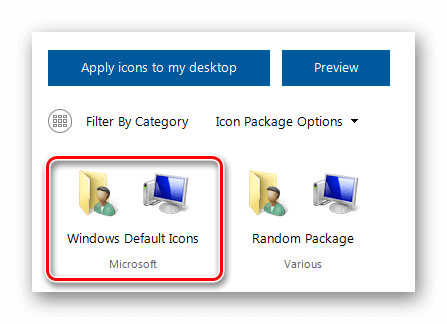
Примечание: для возвращения стандартных иконок системы, потребуется просто установить тему «Windows Default Icons» из списка наборов значков.
В разделе «Customize» имеется возможность создавать собственные пакеты. Открыв его, можно заменить любой значок, кликнув «Change Icon» из контекстного меню выбранной иконки. 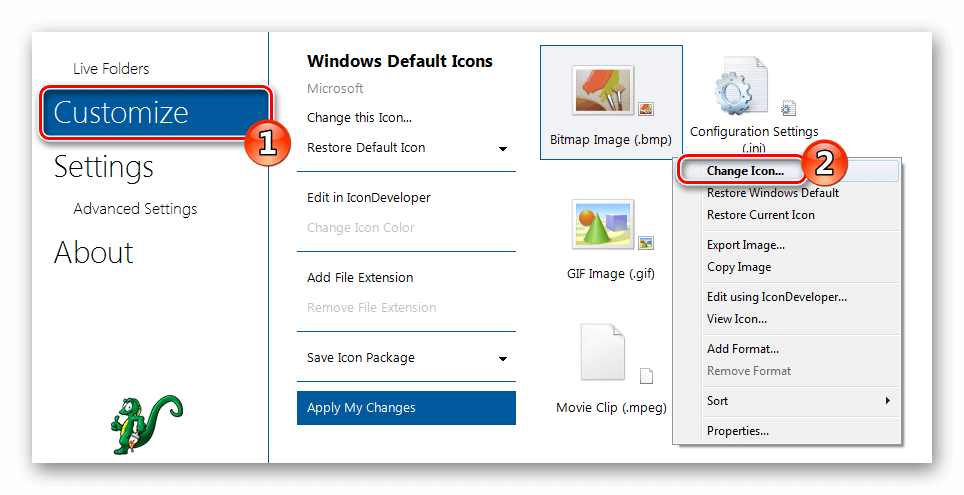
Появится окно для добавления нового значка в набор. После окончания редактирования нажимаем «Save Icon Package» для сохранения изменений.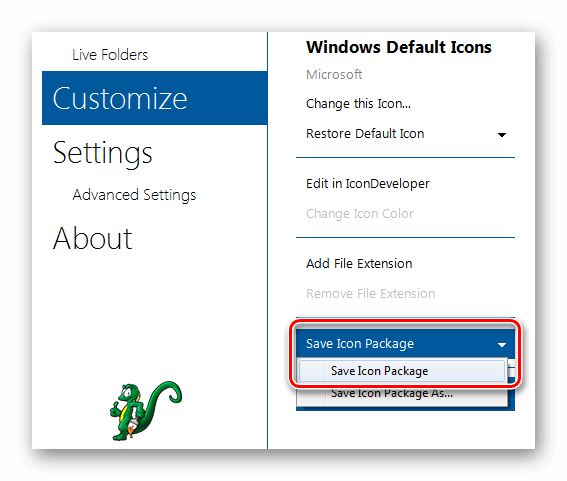
Se7en TSP

Эта программа умеет изменять стандартные, а также некоторые системные значки. Изначально она разрабатывалась для семерки, но сейчас работает и на десятой версии ОС. Приложение распространяется бесплатно.
Загрузить установочный пакет с сайта 7themes
Se7en TSP не нужно инсталлировать на компьютер – потребуется только извлечь файлы из архива и запустить приложение. На сайте программы имеется обширный выбор разнообразных пакетов значков. Чтобы добавить их в программу, потребуется проделать следующее:
- Скачиваем подходящий пакет иконок.
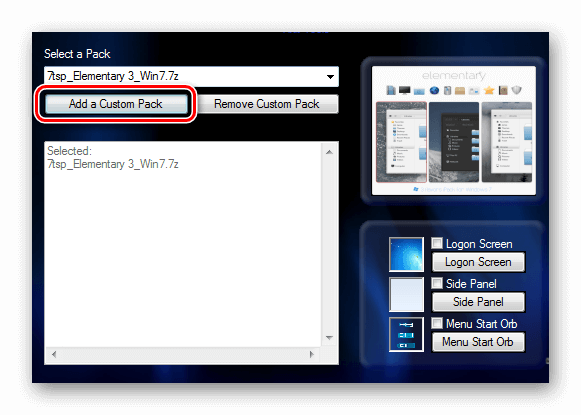
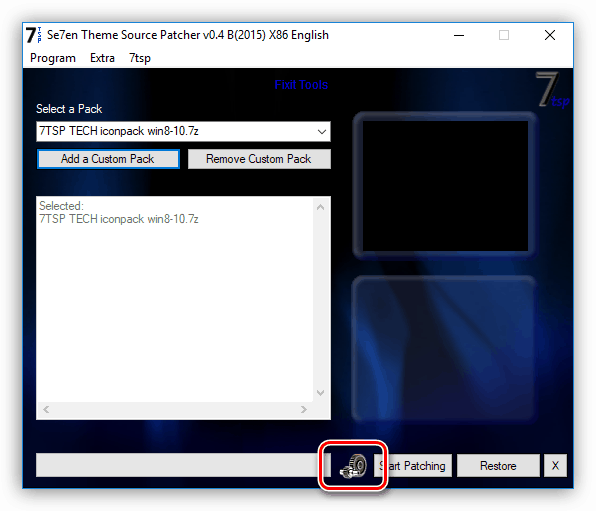
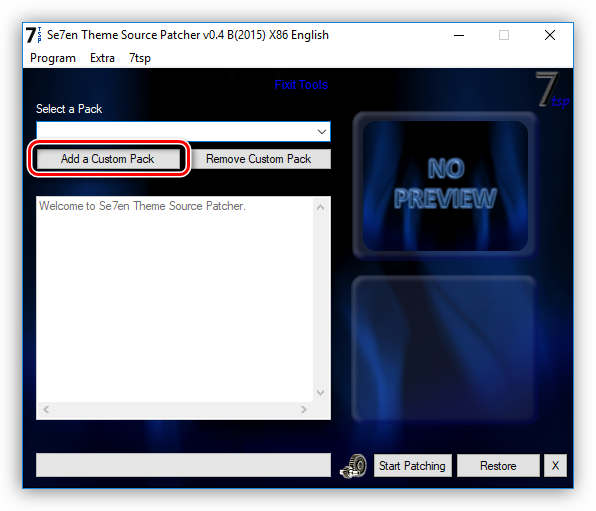
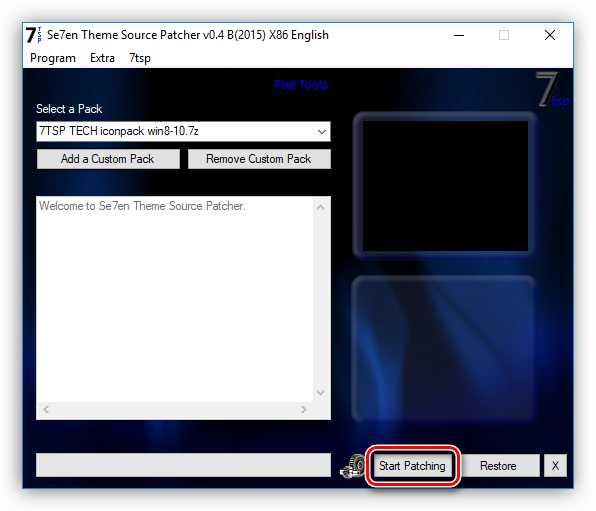
- Далее запускаем приложение и нажимаем «Add a Custom Pack».

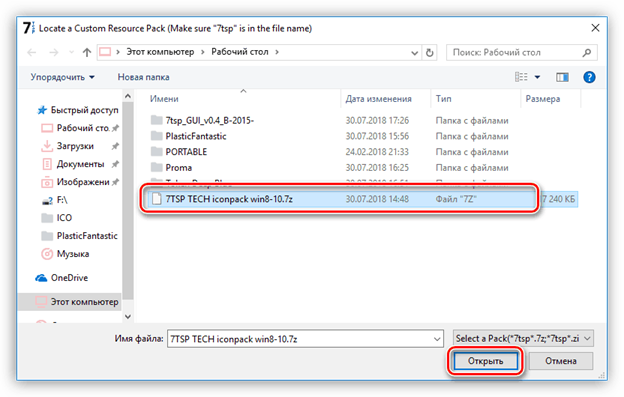
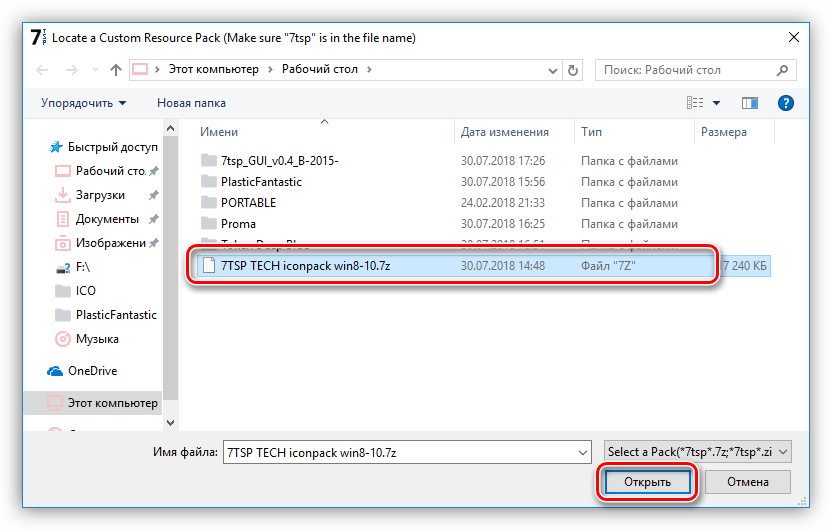
- В проводнике выбираем скачанный файл набора и нажимаем «Открыть».
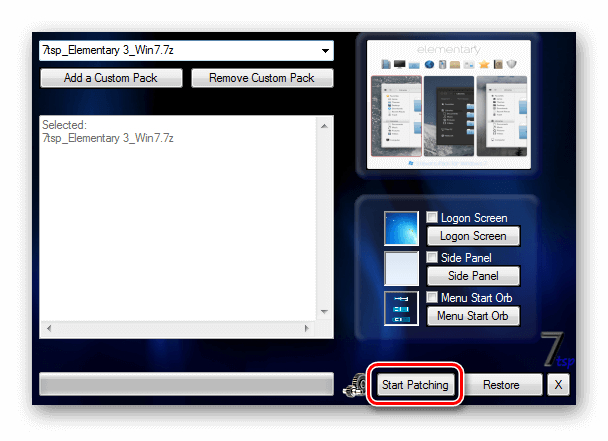
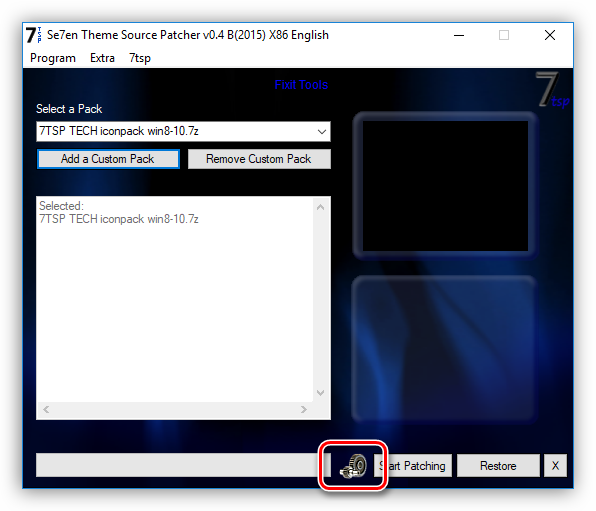
- Пакет значков откроется в программе. Чтобы его применить, воспользуемся функцией «Start Patching».

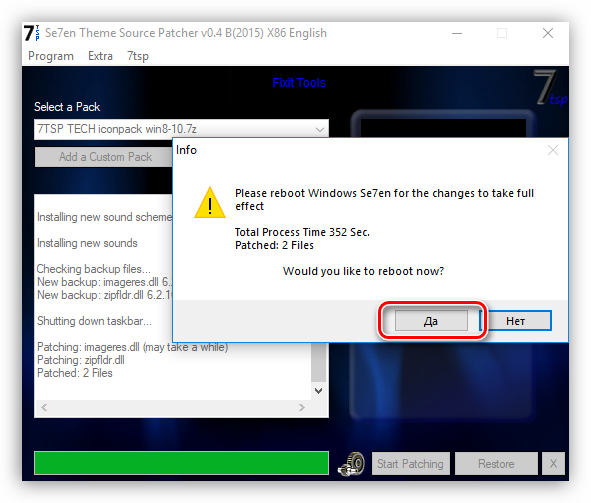
- После этого приложение запросит создание точки восстановления Windows – выберите вариант на свое усмотрение.
- Далее, для того чтобы иконки изменились, потребуется перезагрузка системы.
- Иногда пакеты значков для данного приложения имеют дополнительные настройки элементов ОС, например, в них можно изменить системный шрифт или анимацию диалоговых окон. Настроить эти опции можно, выбрав пункт «Extra» в меню и отметив нужные варианты.

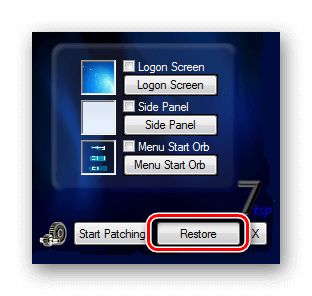
Примечание: инсталлировать пакеты значков при помощи Se7en TSP нужно на родные иконки системы. Поэтому, если у вас установлены сторонние значки, перед применением нужно обязательно вернуть стандартные настройки, нажав по кнопке «Restore».
IconTo

IconTo — это бесплатная программа для изменения системных значков и иконок каталогов. Она имеет большое количество встроенных вариантов, к которым можно добавить собственные. Также программа способна создать иконку из графических файлов или извлечь её из библиотек dll или программ. Интерфейс приложения имеет поддержку русского языка.
Загрузить программу с оф. сайта
Чтобы при помощи IconTo сменить значок у файла или системных элементов, потребуется проделать следующее:
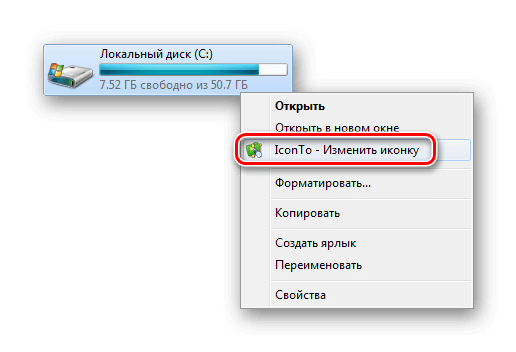
- Из меню диска системы или файла, которому мы будем изменять значок, выбираем вариант «IconTo — Изменить иконку».

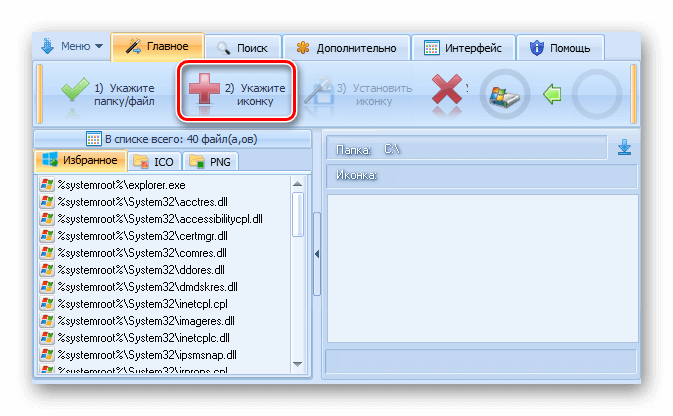
- Откроется окно приложения, где для начала нажимаем «Укажите иконку».

- Далее выбираем файл со значком и загружаем его.
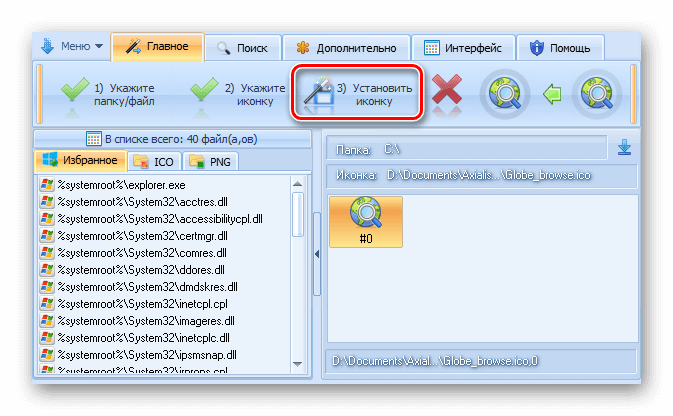
- Нажимаем по нему в окне IconTo, чтобы обозначить свой выбор.
- Кликаем по кнопке «Установить иконку».
- После проделанных операций стандартный значок будет изменен на выбранный.
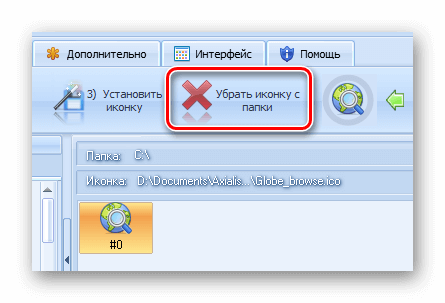
Примечание: вернуть обычную иконку для измененного файла или системного элемента можно воспользовавшись кнопкой «Убрать иконку с папки».
Resource Hacker

Данная программа используется для изменения системных файлов ОС, а также ресурсов любых других приложений. С её помощью можно поменять как системные иконки, так и изменить значок стороннего приложения. Resource Hacker бесплатная утилита без поддержки русского языка, однако при надобности в сети можно найти к ней русификатор.
Скачать программу с сайта разработчика
После установки можно приступать к изменению иконок. Большинство системных значков содержатся в файле imageres.dll, который находится по адресу C:WindowsSystem32 . Редактировать эту библиотеку нужно, обязательно предварительно сохранив копию оригинального файла, а также получив к нему полный доступ в его свойствах.
Важно: неопытным пользователям не рекомендуется изменять системные файлы, так как в процессе модификации могут возникнуть серьезные проблемы.
Итак, чтобы поменять значки при помощи Resource Hacker нам понадобится сделать следующее:
- Запускаем приложение и открываем в нем файл imageres.dll.
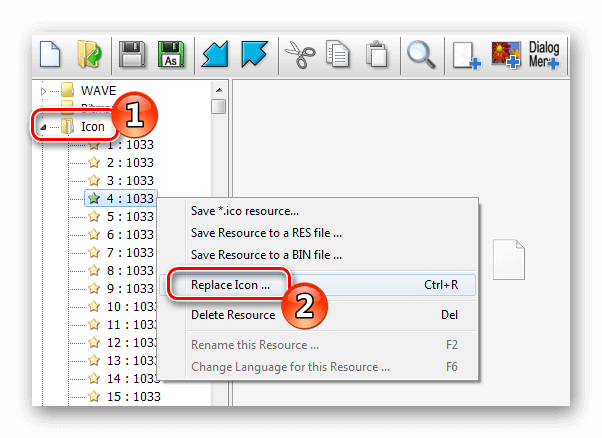
- Открываем раздел «Icon».
- Выбираем значок для замены, и из его контекстного меню нажимаем «Replace Icon».

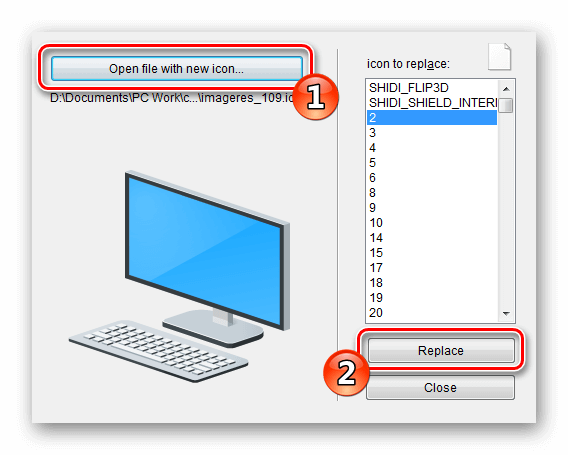
- Далее нажимаем «Open file with new icon».
- Выбираем нужный файл на диске и нажимаем «Replace».

- Сохраняем внесённые изменения, воспользовавшись кнопкой с иконкой дискеты.

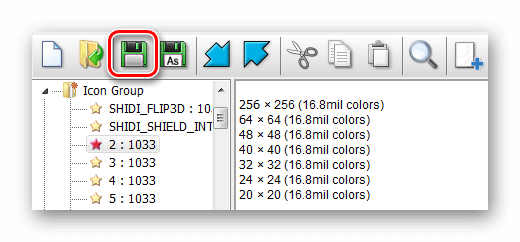
Значки поменяются после перезагрузки системы.
Как сделать свою иконку

Если требуется создать собственную иконку, нарисовать её или конвертировать из простого изображения, то для этого можно использовать вспомогательные программы или преобразовать изображение в значок при помощи онлайн-сервисов. Рассмотрим несколько приложений для создания значков и онлайн сервисов для конвертации обычной картинки в иконку.
Сервис Online-converting

Данный ресурс представляет собой простой конвертер изображения в файл с иконкой.
Открыть страницу сервиса
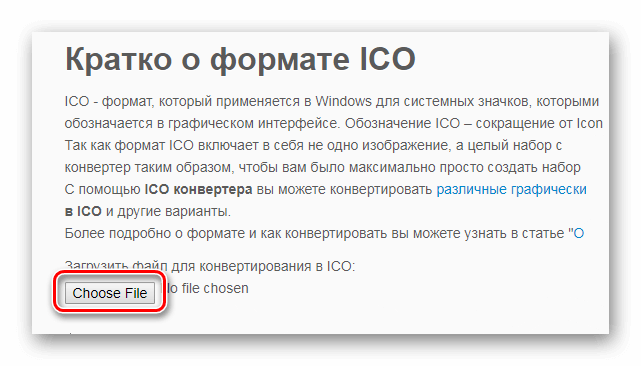
- Перейдя на сайт, нажимаем по кнопке «Choose file», чтобы загрузить изображение.

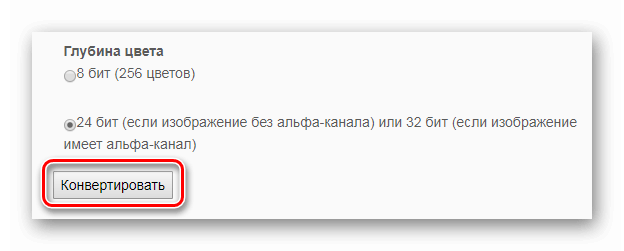
- Далее нажимаем на кнопку «Конвертировать».

- После обработки картинки начнется автоматическое скачивание файла со значком.
Сервис Online-convert

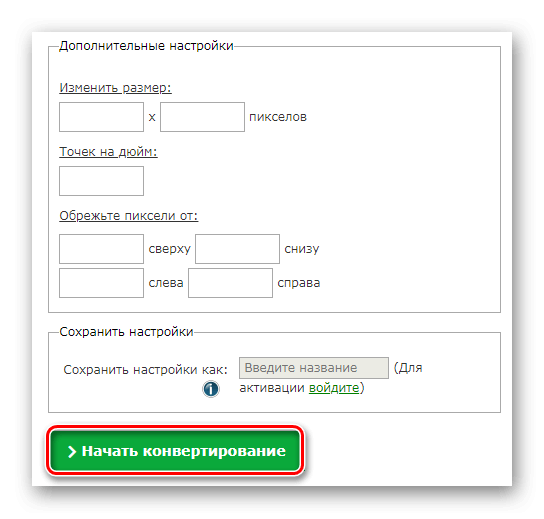
Этот ресурс в отличие от предыдущего, имеет несколько дополнительных настроек, при помощи которых можно изменить разрешение и размер картинки, а также при надобности обрезать её края.
Перейти на сайт сервиса
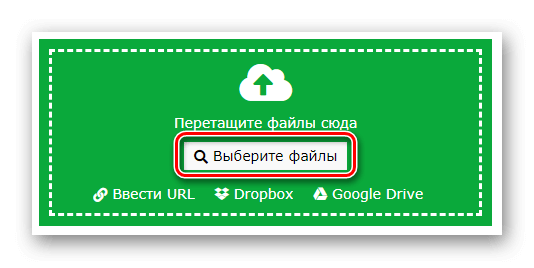
- Открыв страницу для загрузки, нажимаем по кнопке «Выберите файлы».

- Далее при желании выставляем настройки преобразования.
- Нажимаем на кнопку «Начать конвертирование».

После завершения операции начнется автоматическое скачивание готового файла на компьютер.
IcoFX

IcoFX – это продвинутый редактор иконок с обширным функционалом. Приложение платное, но его можно использовать в течение 30 дней без регистрации. Интерфейс программы имеет поддержку русского языка и интуитивно понятен.
Загрузить программу с официального сайта
После установки редактора для создания собственной иконки нам потребуется проделать следующие шаги:
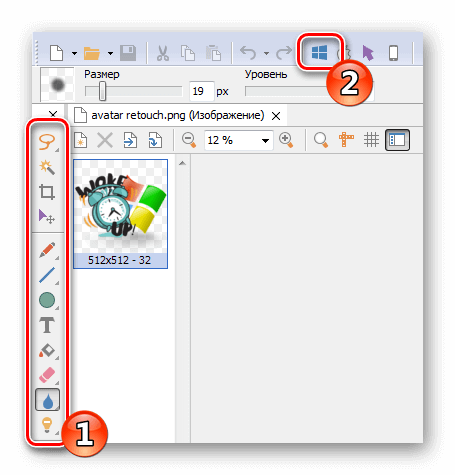
- Запускаем IcoFX и открываем в нем файл картинки, из которой нужно создать иконку.
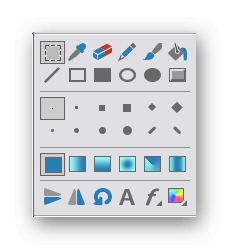
- При надобности редактируем изображение при помощи инструментов программы.
- После этого нажимаем по кнопке с картинкой логотипа Windows.

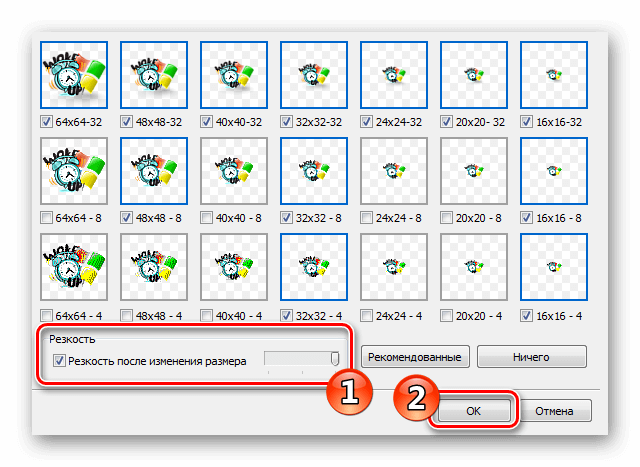
- Далее отмечаем галочкой вариант «Резкость после изменения размера» и выставляем уровень настройки. Так как после уменьшения изображения зачастую иконка выглядит размытой, рекомендуется использовать самые маленькие картинки, чтобы минимизировать искажение.
- Нажимаем «OK».

Иконка готова, и её можно сохранить, воспользовавшись одноименным пунктом в меню «Файл».
Axialis IconWorkshop

Эта программа работает по схожему принципу с предыдущей. У неё меньше возможностей для редактирования изображений, но для создания собственной иконки имеются все нужные функции. К сожалению, приложение не имеет русскоязычного интерфейса.
Скачать IconWorkshop с официального сайта
- После установки запускаем программу и нажимаем «Use Trial Version».

- Открываем в ней файл изображения, из которого будем создавать иконку.
- При надобности редактируем картинку при помощи инструментов программы.

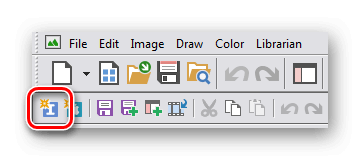
- После этого нажимаем по кнопке с изображением буквы «I».

- Далее нажимаем кнопку «OK».


Иконка готова, и её можно сохранить в памяти компьютера.
Подытожив нашу инструкцию по смене значков в Windows 10, можно сказать, что самым легким вариантом изменения является использование программы IconPackager, однако она зачастую излишне нагружает систему.
Самым профессиональным вариантом смены иконок будет редактирование файла imageres.dll – такой способ займет большее количество времени и потребует дополнительные навыки от пользователя, но замена иконки в данном случае происходит на системном уровне и не требует в дальнейшем использования сторонних приложений для отображения результата.
Post Views: 17 258
Как поменять иконки
Что такое иконки? Это значки, которыми обозначаются те или иные программы, кнопки и остальные части интерфейса. Для примера возьмем кнопку «Пуск», которая обладает своей иконкой. Небольшой значок в левом нижнем углу – это лишь один из примеров подобных элементов интерфейса. Такие иконки могут быть файлами с самыми разными форматами, такими как пакеты для 7tsp GUI, пакеты iPack, файлы-изображения PNG или ICO, а также специальные файлы, которые нужно открывать в приложении IconPackager. Начнем с первого варианта для замены иконок.
7tsp GUI
Для того, чтобы установить свои иконки, используя этот метод, вам нужно заранее скачать приложение, которое также и называется. Для большей безопасности перед любыми системными изменениями создает точку восстановления, которая позволит безболезненно устранить любые последствия неправильной установки. Запускаем наше приложение и видим две кнопки. Нас же интересует добавление новых иконок, поэтому нажимаем Add a Custom Pack.

Далее просто выбираем наш файл с расширением 7z. Это архив, в котором хранятся данные, нужные этому приложению и открываем его.
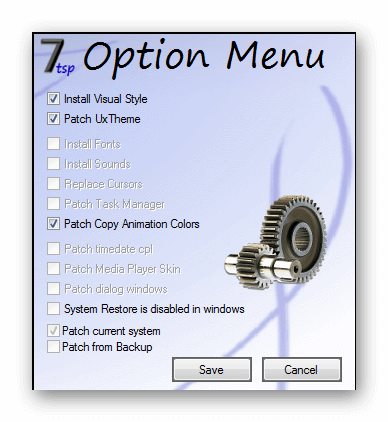
Далее заходим в опции самой программы.
Если вы еще не установили точку восстановления или не знаете, как это сделать, 7tsp GUI сможет сделать это за вас, но для этого вам нужно будет поставить галочку напротив пункта Create New Restore Point When Patching. Далее нажимаем Save.

После этого нажимаем на Start Patching и ждем, пока приложение сделает всю работу.

Перезагружаем устройство и наслаждаемся обновленным внешним видом системы. Если сами иконки интерфейса вас не устраивают, вы можете просто вернуть исходное состояние системы, которое мы сделали, создав точку доступа.

Ссылка на загрузку: https://novice-user.org/wp-content/uploads/2018/09/7tsp_gui_v0.3_b3003.zip
IconPackager
Также простой и доступный метод установки своих элементов интерфейса в Windows 10. От вас требуется установка этого приложения заранее, ведь именно в нем мы и будем менять внешний облик системы. Опять-таки, рекомендуем создать точку доступа для восстановления системы, чтобы с легкостью откатить изменения.
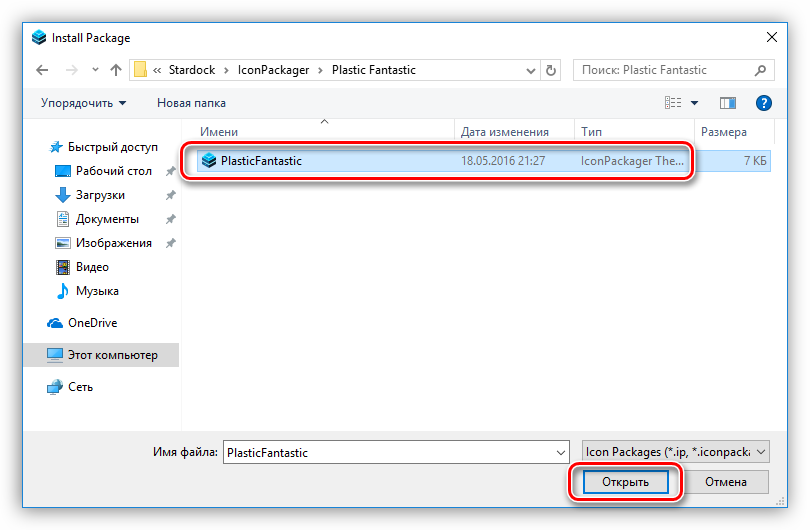
В окошке приложения находим Icon Package Options. Там выбираем список Add Icon Package и Install From Disk. Находим файл, который мы скачали и открываем его.
Выбрали.
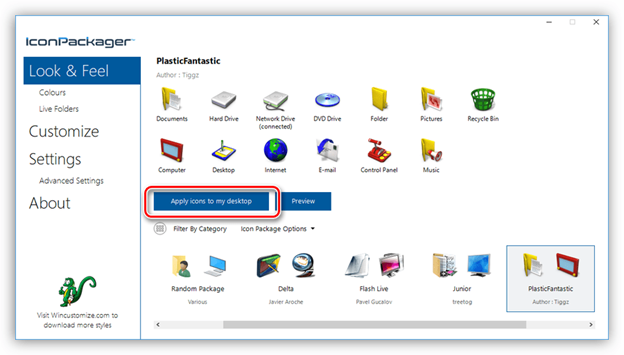
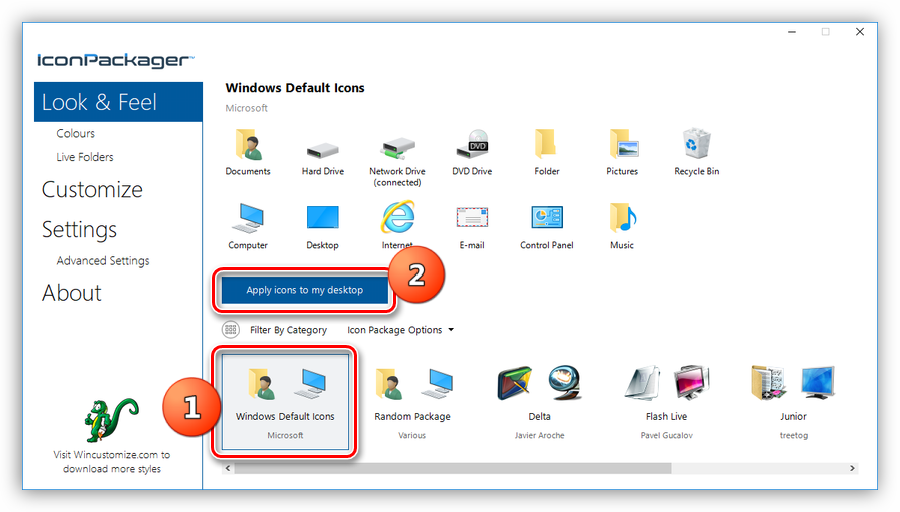
Теперь применяем наши изменения, нажимая Apply icons to my desktop.
На определенное время ваш рабочий стол будет заблокирован от изменений и нажатий, поэтому нужно подождать. После этого устройство будет готово для работы, а вам не обязательно будет перезагружать ПК. Если нужно восстановить предыдущие иконки, нажимаем Windows Default Icons.
Ссылка на загрузку: https://download.cnet.com/IconPackager/3000-2195_4-10031210.html
iPack
Самый простой метод, который мы разберем – это метод с использованием всего одного файла, в котором и содержаться все нужные для компьютера данные. Простой exe-шник, который вам нужно запустить и следовать инструкциям. Недостаток этого метода в том, что количество тем и иконок через iPack, крайне мал. Куда больше разнообразных кнопок и подобных утилит хранятся в формате IconPackage и ему подобных.
Запускаем наш файл.

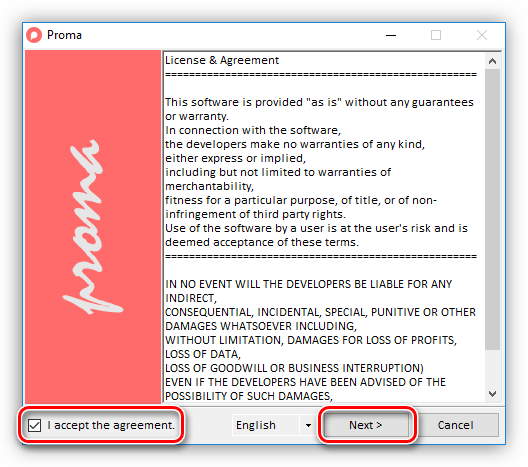
Соглашаемся с условиями лицензии и идем дальше.

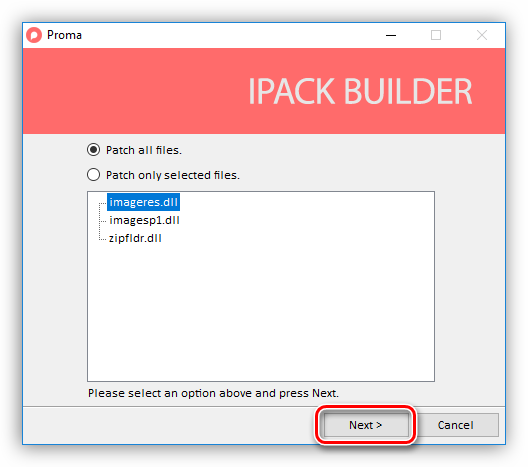
Выбираем Patch All Files.

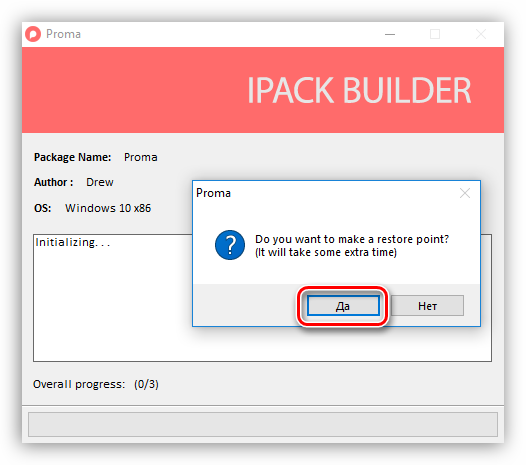
Далее создаем точку восстановления, соглашаясь с установщиком.

После этого перезагружаем устройство и пользуемся обновленным внешним видом нашей программы.
Ссылка на загрузку: https://novice-user.org/wp-content/uploads/2018/09/ipack-builder-v2.2.zip
ICO, PNG и подобные файлы
Таких иконок на просторах интернета, наверное, больше всего. Более того, вы сами можете делать их, если имеется желание. Но устанавливать файлы такого типа сложнее всего, поэтому будьте готовы внимательно следовать инструкции. Традиционно, создаем точку доступа, чтобы ничего в ОС не сломать или же откатить изменения, если это нужно.
Скачиваем программу IconPhile, которая позволит нам установить иконки в качестве основных.
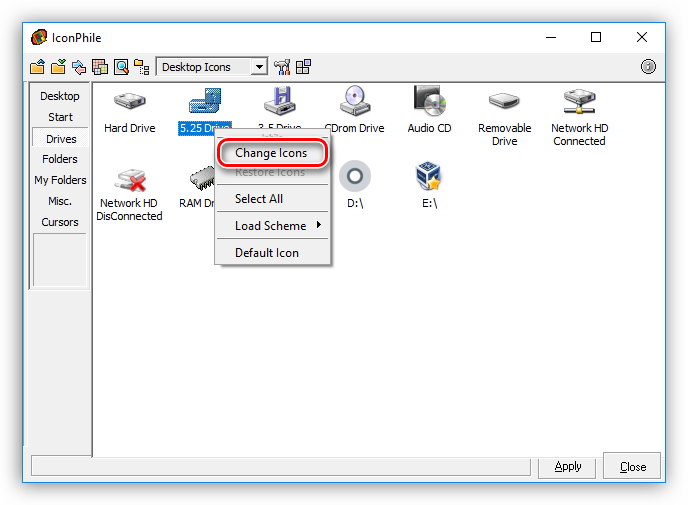
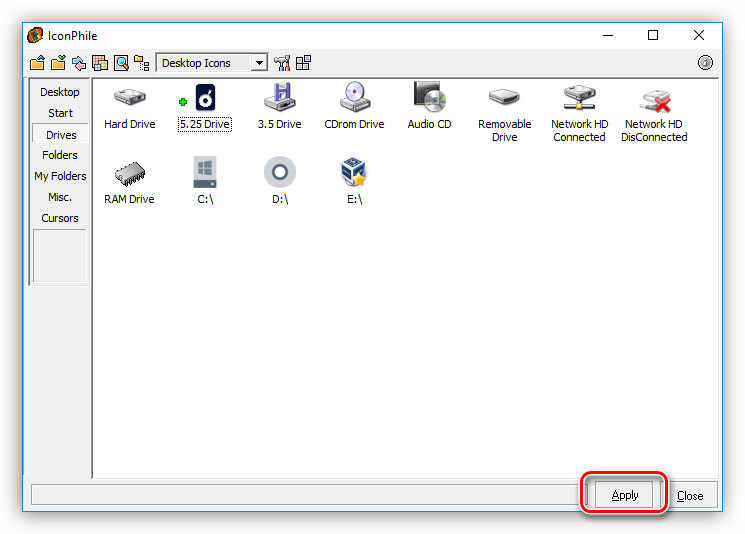
Итак, запускаем программу и выпадающий список сверху. Выбираем там то, что хотим изменить, например, Desktop Icons, а после Drives. Конкретно в этом примере будет менять внешний вид иконок дисков. Видим несколько иконок, которые на данный момент являются основными для вашей системы. Правой кнопкой мыши по ним и тыкаем в Change Icons.
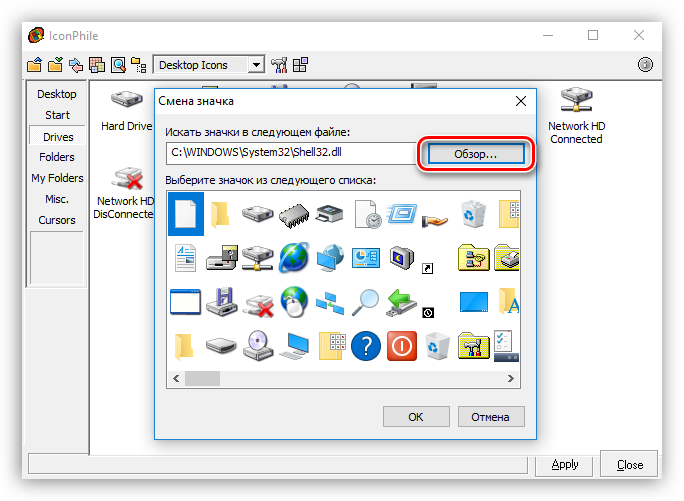
Далее попадаем в менюшку «Смена значка» и нажимаем там на кнопку «Обзор».
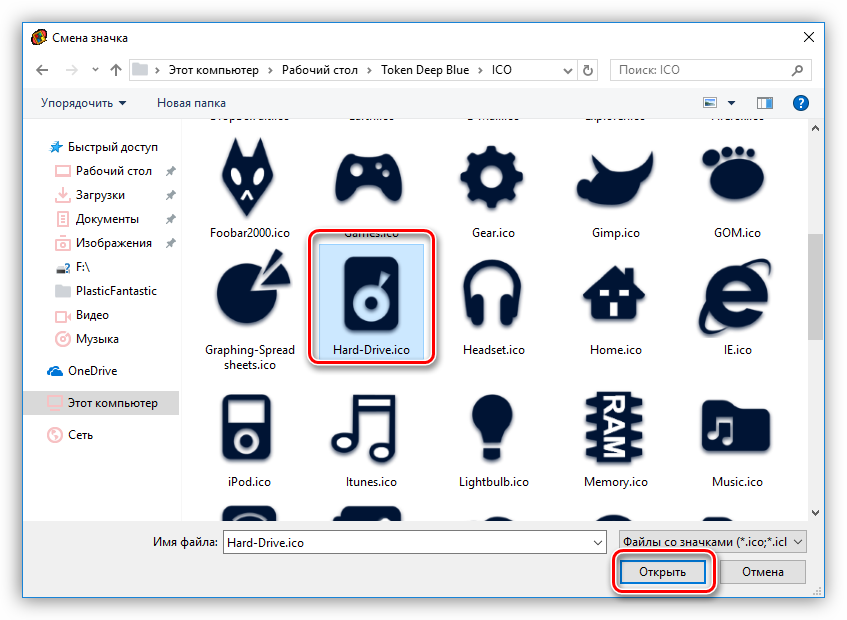
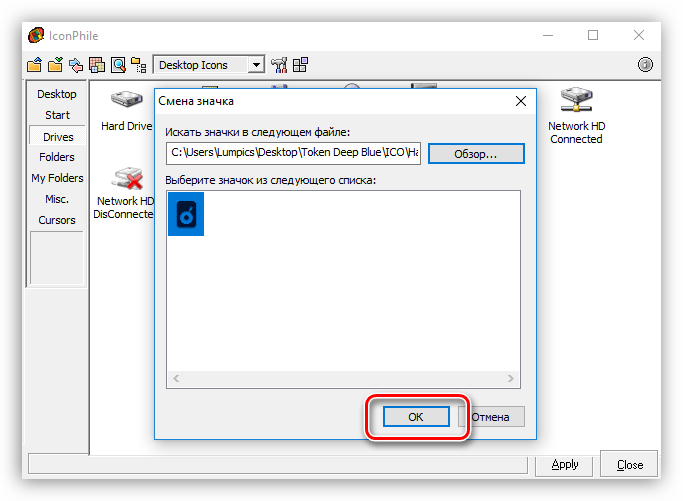
Здесь уже выбираем ту иконку, которая есть у нас, в формате ICO, естественно. Сохраняем изменения, нажимая ОК. И точно также делаем и со всеми другими иконками, которые нужно поменять.
В конце всех наших изменений нажимаем на Apply.
Несмотря на то, что у многих неопытных пользователей с этим вариантом возникают различные сложности, действуя исключительно по инструкции, вы сможете заменить любую иконку, какая вас не устраивает или даже все. Создавайте свои, меняйте их местами – всё это можно сделать с помощью IconPhile. Освоив это приложение, перед вами не будет преград в том, чтобы сделать вашу операционную систему именно такой, какой вы её себе представляете.
Ссылка на загрузку: https://novice-user.org/wp-content/uploads/2018/09/iphile.zip
Итог
При любых неполадках в работе системы в дальнейшем, вы всегда можете воспользоваться откатом до точки доступа, так что всегда создавайте Restore Point перед изменениями системных файлов. Тем не менее, используя любой из методов правильно, вы сможете лишить себя любых проблем с неправильной работой системы.
Многие пользователи после установки операционной системы остаются недовольны внешним видом интерфейса. Специально для таких целей, Windows предоставляет возможность смены темы. Но что, если необходимо не только, чтобы изменился стиль окна, но и установить новые элементы, в частности иконки. В этой статье мы объясним, как это сделать.
Содержание
- Изменение иконок в Windows 10
- Вариант 1: GTS 7tsp
- Вариант 2: IconPackager
- Вариант 3: iPack
- Вариант 4: ICO и PNG файлы
- Заключение
Изменение иконок в Windows 10
В контексте сегодняшней статьи иконки, которые визуально показывают различные элементы интерфейса Windows. Они включают в себя папки, файлы различных форматов, жесткие диски и т.п. Значки, подходящие для решения нашей проблемы, распространяются в нескольких форматах.
- Пакеты для GTS 7tsp;
- Файлы для использования в IconPackager;
- Самостоятельные iPacks;
- Отдельные ICO и / или PNG файлы.
Для каждого из вышеперечисленных форматов есть отдельные инструкции по установке. После этого мы подробно обсудим четыре варианта. Пожалуйста, обратите внимание, что все операции должны проводиться в профиле с правами администратора. Программы также должны быть запущены от имени администратора, так как планируем редактировать системные файлы.
Вариант 1: GTS 7tsp
Чтобы установить эти пакеты иконок, вам необходимо скачать и установить GTS 7tsp программы на ваш компьютер.
Первое, что вы должны сделать — защитить и создать точку восстановления системы.
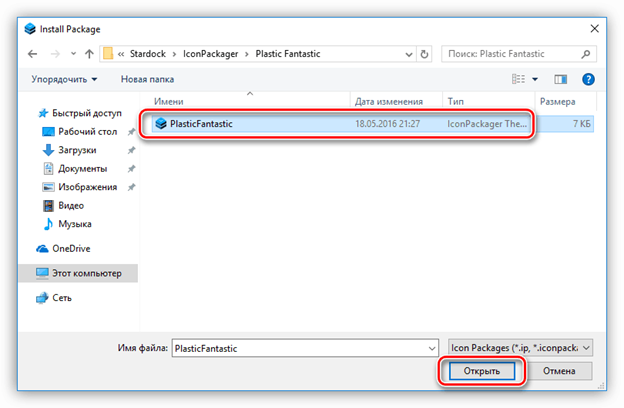
- Ищем пакет иконок из 7 кассет, скачаны из интернета, и нажмите кнопку «Открыть». Имейте в виду, что необходимые файлы для работы могут быть упакованы в ZIP или 7z архив. В этом случае вам не нужно ничего распаковывать — просто установить архив, как пакет.
- Перейти на ваши варианты.Здесь ставим флаг в указанном на фото месте. Это заставит программное обеспечение создавать дополнительные точки восстановления. Не игнорируйте этот параметр: в процессе могут возникнуть различные ошибки, в том числе системные.
- Нажмите кнопку «Загрузка обновлений» и подождите, пока установка не завершится.
- На последнем этапе программа потребует перезагрузки. Нажмите кнопку «Да».
- После перезагрузки мы увидим новые иконки.
Чтобы вернуть систему в первоначальное состояние, достаточно выполнить восстановление из созданной ранее точки. Программа имеет свой собственный инструмент для работы с изменениями, но не всегда работает правильно.
Вариант 2: IconPackager
Эта опция включает использование специальной программы — IconPackager, при помощи которой можно установить иконки из пакетов с IP-расширением. программа оплачивается на 30-дневный испытательный период.
Прежде чем начать, не забудьте создать точку восстановления.
- Запустите IconPackager и нажмите на ссылку «Icon Package Options». Затем, удерживая курсор мыши на пункт «Добавить пакет значков» и нажмите кнопку «Установить с диска» .
- Найдите заранее распакованный файл с пакетом иконок и нажмите кнопку «Открыть».
- Нажмите кнопку «Применить значки на рабочем столе».
- программа временно блокирует рабочий стол, после чего значки будут изменены. Перезагрузка компьютера не требуется.
Для того, чтобы вернуться к старым значкам, выберите «Иконки по умолчанию для Windows» и нажмите на кнопку «Применить значки рабочего стола» еще раз.
Вариант 3: iPack
Такие пакеты идут в комплекте с установочным файлом и всеми необходимыми файлами. Для того, чтобы их использовать, не требуются дополнительные программы, кроме того программа установки автоматически создает точку восстановления и хранит системные файлы, которые должны быть изменены.
- Для установки нужно просто запустить файл с расширением .exe. Если вы скачали архив, сначала надо его распаковать.
- Ставим флажком, как показано на картинке и нажмаем кнопку «Вперед» .
- В следующем окне оставьте все как есть и нажать «Далее» снова.
- программа установки предложит вам создать точку восстановления. Нажимаем «Да».
- Ожидаем завершение процесса.
Восстановление происходит с помощью созданной точки восстановления.
Вариант 4: ICO и PNG файлы
Если у нас есть только отдельные файлы в формате ICO или PNG, то вам придется менять их установки в системе. Чтобы это сделать, нужна программа IconPhile и если фотографии в формате PNG, они все равно должны быть преобразованы.
Перед установкой значков, создайте точку восстановления.
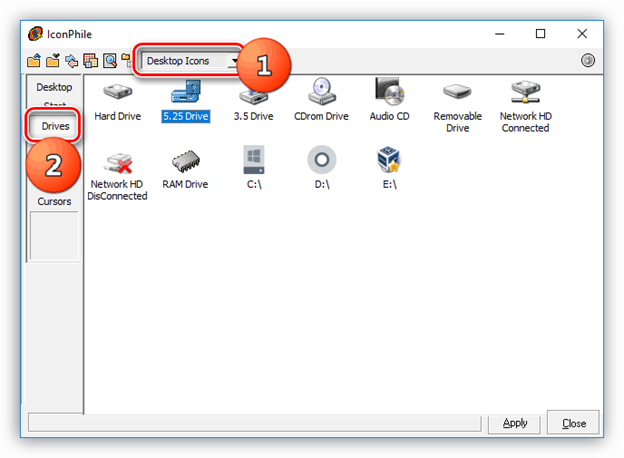
- Запустите программу IconPhile, выберите группу из выпадающего списка и нажмите на один из пунктов в правой части интерфейса. Создайте группу «Иконки на рабочем столе» и выберите пункт «Диски» — диски и устройства.
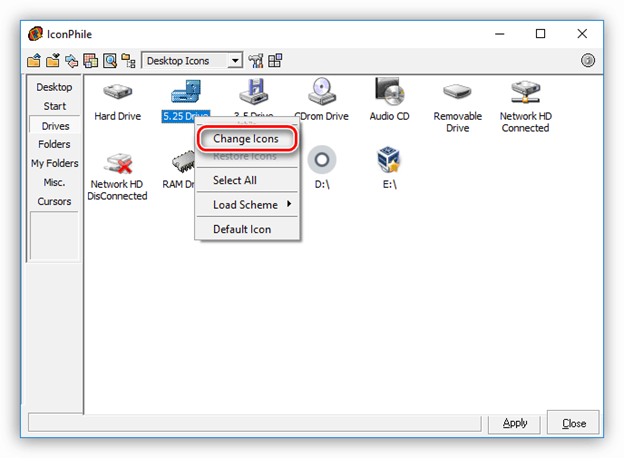
- После этого нажмите на PCM одного из элементов и активируйте пункт «Изменение значков».
- В окне «Изменение значка» нажмите кнопку «Обзор» .
- Находим нашу папку с иконками, выбираем нужную и нажимаем кнопку «Открыть» .Нажмите на кнопку ОК.
- Примените изменения с помощью кнопки «Применить» .
- Возврат оригинальных иконок осуществляется путем восстановления системы из точки.
Этот вариант, хотя и включает в себя ручную замену иконок, но есть одно неоспоримое преимущество: с помощью этой программы вы можете установить независимые значки.
Заключение
Изменение внешнего вида Windows — это увлекательный процесс, но не следует забывать, что это также заменяет или редактирует системные файлы. После таких действий могут возникнуть проблемы с нормальной работы операционной системы. Если вы решились на эту процедуру, не забывайте создавать точки восстановления чтобы можно было вернуться к исходной точке в случае неприятностей.
 Многие пользователи после установки операционной системы остаются недовольными внешним видом интерфейса. Специально для таких целей в Windows предусмотрена возможность изменения тем оформления. Но как быть, если требуется не только сменить стиль окон, но и установить новые элементы, в частности, иконки. В этой статье мы расскажем, как это сделать.
Меняем иконки в Windows 10
В контексте сегодняшней статьи иконки – это значки, которыми визуально обозначаются различные элементы интерфейса Виндовс. К ним относятся папки, файлы разных форматов, жесткие диски и так далее. Иконки, подходящие для решения нашей задачи, распространяются в нескольких видах.
- Пакеты для 7tsp GUI;
- Файлы для использования в программе IconPackager;
- Автономные пакеты iPack;
- Отдельные файлы формата ICO и (или) PNG.
Для каждого приведенного выше вида есть отдельные инструкции по установке. Далее мы подробно разберем четыре варианта действий. Обратите внимание, что все операции необходимо выполнять в учетной записи с администраторскими правами. Программы также нужно запускать от имени администратора, так как мы планируем редактировать системные файлы.
Вариант 1: 7tsp GUI
Для установки данных пакетов иконок необходимо скачать и инсталлировать на свой ПК программу 7tsp GUI.
Скачать 7tsp GUI
Первым делом необходимо подстраховаться и создать точку восстановления системы.
Подробнее: Как создать точку восстановления в Windows 10
- Запускаем программу и нажимаем кнопку «Add a Custom Pack».

- Ищем на диске пакет иконок 7tsp, скачанный из интернета, и жмем «Открыть». Имейте в виду, что необходимые для работы файлы могут быть упакованы в архив ZIP или 7z. В данном случае ничего распаковывать не нужно – просто указываем архив в качестве пакета.

- Переходим к опциям.
Здесь ставим флажок в чекбоксе, указанном на скриншоте. Это заставит софт создать дополнительную точку восстановления. Не стоит пренебрегать этой настройкой: в процессе могут возникнуть различные ошибки, в том числе и системные.

- Нажимаем «Start Patching» и ждем завершения операции установки.
- На завершающем этапе программа потребует выполнить перезагрузку. Нажимаем «Да».

- После перезагрузки мы увидим новые иконки.

Для того чтобы вернуть систему в исходное состояние, достаточно выполнить восстановление из созданной ранее точки. В программе имеется свой инструмент для отката изменений, но он не всегда работает корректно.
Подробнее: Как восстановить систему Windows 10
Вариант 2: IconPackager
Этот вариант также подразумевает использование специальной программы – IconPackager, которая способна устанавливать иконки из пакетов с расширением IP. Программа является платной с 30-дневным пробным периодом.
Скачать IconPackager
Перед тем как начать, не забудьте cоздать точку восстановления.
- Запускаем IconPackager и нажимаем на ссылку «Icon Package Options». Далее наводим курсор на пункт «Add Icon Package» и кликаем по «Install From Disk».

- Находим заранее распакованный файл с пакетом иконок и жмем «Открыть».

- Нажимаем кнопку «Apply icons to my desktop».
- Программа на время заблокирует рабочий стол, после чего иконки будут изменены. Перезагрузка не требуется.


Для отката к старым значкам нужно выбрать «Windows Default Icons» и снова нажать кнопку «Apply icons to my desktop».
Вариант 3: iPack
Такие пакеты представляют собой упакованный установщик со всеми необходимыми файлами. Для их использования дополнительный программы не требуются, кроме того, инсталлятор автоматически создает точку восстановления и резервирует системные файлы, подлежащие изменению.
- Для установки необходимо просто запустить файл с расширением EXE. Если вы скачали архив, то его нужно будет предварительно распаковать.

- Ставим галку, показанную на скриншоте, и жмем «Next».

- В следующем окне оставляем все как есть и снова нажимаем «Next».
- Установщик предложит создать точку восстановления. Согласимся, нажав «Да».

- Ждем завершения процесса.
Откат выполняется с помощью точки восстановления.
Вариант 4: Файлы ICO и PNG
Если у нас имеются только отдельные файлы в формате ICO или PNG, то придется немного повозиться с их установкой в систему. Для работы нам понадобится программа IconPhile, а если наши картинки имеют формат PNG, то их еще будет необходимо конвертировать.
Подробнее: Как конвертировать PNG в ICO
Скачать IconPhile
Перед началом установки иконок создайте точку восстановления.
- Запускаем IconPhile, выбираем группу в выпадающем списке и кликаем по одному из пунктов в правой части интерфейса. Пусть это будет группа «Desktop Icons», а пункт выберем «Drives» — диски и приводы.

- Далее жмем ПКМ по одному из элементов и активируем пункт «Change Icons».
- В окне «Смена значка» нажимаем «Обзор».

- Находим нашу папку с иконками, выбираем нужную и нажимаем «Открыть».

Нажимаем ОК.

- Применяем изменения кнопкой «Apply».

Возврат исходных значков осуществляется при помощи восстановления системы из точки.Данный вариант хоть и подразумевает ручную замену значков, но имеет один неоспоримый плюс: используя эту программу, можно установить любые самостоятельно созданные иконки.

Заключение
Изменение внешнего вида Windows – процесс увлекательный, но не стоит забывать, что при этом происходит замена или редактирование системных файлов. После подобных действий могут начаться проблемы с нормальным функционированием ОС. Если решились на эту процедуру, то не забывайте создавать точки восстановления для того, чтобы можно было откатить систему в случае неприятностей. ![]() Мы рады, что смогли помочь Вам в решении проблемы.
Мы рады, что смогли помочь Вам в решении проблемы.![]() Опишите, что у вас не получилось. Наши специалисты постараются ответить максимально быстро.
Опишите, что у вас не получилось. Наши специалисты постараются ответить максимально быстро.
Помогла ли вам эта статья?
Используемые источники:
- https://novice-user.org/kak-ustanovit-obnovlennye-ikonki-v-windows-10
- https://windowsphoner.ru/14656
- https://lumpics.ru/how-to-install-icons-on-windows-10/
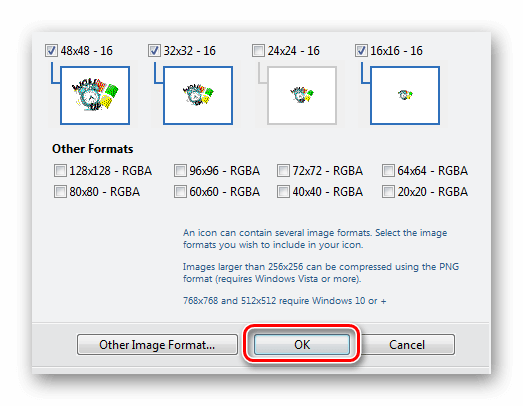
![]()
For instance, changing the icon of New Folder 1 will not change the default icon of New Folder 2.
- Step 1: Navigate to the folder that you want to customize by changing its default icon.
- Step 2: Right-click on the folder and then click Properties to open the Properties dialog.
- Step 3: Switch to the Customize tab.
Once you have the icon that you want to use, right click or press and hold the shortcut whose icon you want to change. Then, select Properties. In the Shortcut tab, click or tap the “Change Icon” button. The Change Icon window opens.For instance, changing the icon of New Folder 1 will not change the default icon of New Folder 2.
- Step 1: Navigate to the folder that you want to customize by changing its default icon.
- Step 2: Right-click on the folder and then click Properties to open the Properties dialog.
- Step 3: Switch to the Customize tab.
Click on the “Shortcut” tab in the pop-up window if it is not already shown by default. Click the “Change Icon” button at the bottom of the window. Click the “Browse” button in top of the “Change Icon” window and navigate to the ICO (icon) file you want to use as your custom icon.Steps to Change the Default Recycle Bin Icon in Windows 10
- Open Start Menu and go to Settings.
- Go to Personalization.
- Tap on Themes.
- In the right panel, you will find Related Settings. Under that click on Desktop Icon Settings.
- Select Recycle Bin. Click on Change Icon. Choose an icon and click OK.
This will convert your batch file to an executable, then you can set the icon for the converted file. You can just create a shortcut and then right click on it -> properties -> change icon, and just browse for your desired icon. Hope this help. You can set this to any icon you like.
How do I download icons for Windows 10?
Downloading icons for Windows 10, Windows 8
- Visit any website that hosts icons.
- In the search bar enter the desired term.
- Now you’ll see the list of icons that meet your search criteria. Select the desired icon.
- You should be presented with several download options. Select to download your icon in .ico format.
How do I lock my icons on my desktop Windows 10?
Method 1:
- In your desktop, right click on an open area.
- Select Personalise, click Themes on the left menu.
- Remove the checkmark on Allow themes to change desktop icons, then click Apply.
- Arrange your icons where you want them to be.
How do I change the PDF icon in Windows 10?
Here’s how you can set/change your default application for PDF files. Navigate to any PDF file on your system and right click on it to open properties. On properties window, You’ll see a change button (as highlighted in screen clips below). Use it to set adobe acrobat reader as your default app.
How do I change the Explorer icon in Windows 10?
How to Change the Target Folder in Windows 10 File Explorer
- Right click the File Explorer icon in the taskbar and select Unpin from taskbar.
- Search for explorer.exe in the Cortana / Search box.
- Right click the explorer.exe icon in results and select Open file location.
- Right click on the explorer.exe file in the window and select Create shortcut.
How do I change icons on Windows 10?
How to Change Taskbar Icons for Programs in Windows 10
- Pin the program to your Taskbar.
- Right-click the new icon in your Taskbar.
- You’ll see the properties window.
- Click the Browse button and browse to the new icon file on your PC.
- Click OK twice to save the new icon.
Customizing Icons in Windows 10
- Click on the Personalization tab as highlighted in the image shown above.
- Click on the Desktop icon settings option as highlighted in the following image:
- As soon as you will click on it, the Desktop Icon Settings window will appear which is shown in the image below:
How do I keep my desktop icons from moving in Windows 10?
Stop Windows 10 Desktop Icons from Changing Location After a Screen Refresh
- Press Windows key + R to bring up the Run dialog and type: %userprofile% and hit Enter.
- Your User folder will open.
- Next, open the AppData folder and then open the Local folder.
- Select the IconCache file then click Delete.
- That’s it!
Why does Windows 10 rearrange my desktop icons?
If Windows does not let you rearrange the icons as you want, then most probably the Auto-arrange icons option is turned on. To see or change this option, right-click on an empty space of your desktop, and move the mouse pointer to highlight the View item on the shortcut menu.
Can I lock icons on my desktop?
Click “Auto arrange icons” so there is a checkmark next to it. This will reorder your desktop icons and keep them in a certain order so they can’t be moved to other areas. Click “Align icons to grid” so there is a checkmark next to it. This will keep your icons neatly spaced and lock them to a grid layout.
How do I change a PDF icon?
Step 2: Click on the File Types tab and you’ll see a listing of all the registered file types on your computer along with the extensions and the icon. Step 3: Scroll down to the file extension you want to change the icon for and then select it in the list.
How do I change Adobe PDF icon?
You should be able to change the icon associated with the PDF file type; on Windows Explorer use ‘Tools’ ‘Folder Options’, then tab ‘File Types’. Select the ‘PDF’ extension, then click ‘Advanced’. Here you can use the ‘Change Icon’ button.
How do I change the icon of a PDF in Preview?
Open Acrobat or Acrobat Reader. On the Edit menu, choose Preferences. In the Preferences dialog box, choose General in the Categories list, and then select the Enable PDF thumbnail previews in Windows Explorer check box.
How do I change my default folder in Windows 10?
HOW TO CHANGE THE LOCATION OF USER FOLDERS IN WINDOWS 10
- Open File Explorer.
- Click Quick Access if it isn’t open.
- Click the user folder that you want to change to select it.
- Click the Home tab on the Ribbon.
- In the Open section, click Properties.
- In the Folder Properties window, click the Location tab.
- Click Move.
- Browse to the new location you want to use for this folder.
How do I change the target shortcut in Windows 10?
Right-click the File Explorer shortcut and click on the Properties menu item. When you get to the Properties screen, click on the Shortcut tab. Now, just like you did in Windows XP, you will change the Target box on this screen (Figure C) to include the switches and the location of your desired folder.
How do I add quick launch to Explorer in Windows 10?
If you are using Windows 10 or Windows 8.1 and the Task Manager opens up in its compact mode, click or tap on “More details.” Then, in all Windows versions, open the File menu and click or tap on “Run new task.” In the “Create new task” window, type explorer and press Enter or OK.
How do I change the icon size in Windows 10?
How to Change the Size of Desktop Icons in Windows 10
- Right-click on an empty space on the desktop.
- Select View from the contextual menu.
- Select either Large icons, Medium icons, or Small icons.
- Right-click on an empty space on the desktop.
- Select Display settings from the contextual menu.
How do I change drive icons in Windows 10?
Specific Drive Icon – Change in Windows 10
- Open Registry Editor.
- Go to the following key: HKEY_LOCAL_MACHINESOFTWAREMicrosoftWindowsCurrentVersionExplorerDriveIcons.
- Under the DriveIcons subkey, create a new subkey and use the drive letter (ex: D ) that you want to change the icon for.
Can I change an app icon?
Change icons with an app. If you’d rather not use a whole new launcher just to change your icons, you can try Icon Changer Free from the Play Store instead. Open the app and tap the screen. Choose the app, shortcut or bookmark whose icon you wish to change.
How do I change the icon picture on my desktop?
Step 1: Press Windows+I to open Settings panel, and click Personalization to access Personalization settings. Step 2: Tap Change desktop icons on the top left in the Personalization window. Step 3: In the Desktop Icon Settings window, select the icon of This PC and click Change Icon.
Where are Windows 10 icons located?
Step 1.Right-click on the folder you want to customize and select “Properties”. Step 2.Under the “customize” tab, go to the “Folder icon” section, click on “Change icon” button. Step 3.Select one of the many icons shown in the list and click “OK”. These icons are located in the C:Windowssystem32SHELL32.dll location.
How do I change the picture on Windows 10?
Change Default Folder Picture Windows 10 File Explorer. First, open File Explorer and right-click on the folder you want to change the default picture and choose Properties from the context menu. Then click the Customize tab and click the “Choose File” button.
How do I arrange my desktop icons alphabetically in Windows 10?
To arrange icons by name, type, date, or size, right-click a blank area on the desktop, and then click Arrange Icons. Click the command that indicates how you want to arrange the icons (by Name, by Type, and so on). If you want the icons to be automatically arranged, click Auto Arrange.
How do I clean my desktop icons in Windows 10?
Delete any shortcuts, screenshots or files you no longer use. Gather all the files and folders you want to keep on the desktop and instead place them in a single folder on the desktop. Hide all the icons on the desktop by clicking on the desktop and deselecting Show desktop icons in the context menu.
How do I save my desktop icon layout?
By Windows system icon, this means you can right-click on My Computer, My Documents, or the Recycle Bin to access the new menu options. Once you have arranged the icons on your desktop in the desired way, go ahead and right-click on My Computer and left-click on Save Desktop Icon Layout.
How do I put icons on my desktop in Windows 10?
How to restore the old Windows desktop icons
- Open Settings.
- Click on Personalization.
- Click on Themes.
- Click the Desktop icons settings link.
- Check each icon you want to see on the desktop, including Computer (This PC), User’s Files, Network, Recycle Bin, and Control Panel.
- Click Apply.
- Click OK.
How do I lock my desktop?
4 ways to lock your Windows 10 PC
- Windows-L. Hit the Windows key and the L key on your keyboard. Keyboard shortcut for the lock!
- Ctrl-Alt-Del. Press Ctrl-Alt-Delete.
- Start button. Tap or click the Start button in the bottom-left corner.
- Auto lock via screen saver. You can set your PC to lock automatically when the screen saver pops up.
How do I move my desktop icons to the right side in Windows 10?
Move Desktop Icons from Left Side to Right Side. The method of move desktop icons from the left side to the right side is very easy. Press Ctrl + A buttons to choose all the desktop icons, and then use the mouse drag these icons to the screen right side.
Photo in the article by “Wikimedia Commons” https://commons.wikimedia.org/wiki/File:Inform7_Main_Window.png
Windows 10 provides you with the flexibility to change the appearance of different icons. You can modify and customize how these icons look according to your own taste. This customization can be done for various purposes. Some of them are listed below:
- To make your environment look catchy and trendy
- To make your environment look user-friendly
- To highlight the importance of a particular icon by making it look different from the rest of the icons
- To locate an important icon immediately from a huge set of icons
The different icons that you can modify are as follows:
- Desktop Icons
- Taskbar Icons
- Folder Icon
- Shortcut Icon
Out of all the types of icons listed above, the folder icons are the most important. The customization of the folder icons can help you a lot in performing your daily routine activities. For example, you are a software engineer and your hard disk is overstuffed with folders. You work on a folder named Software Engineering on daily basis and access the rest of the folders occasionally. Therefore, you can customize the icon of the Software Engineering folder according to your choice so that you can easily distinguish it whenever you turn on your PC. In this article, we will explain to you the method through which you can customize the icons in Windows 10.
We will look at the methods of customization of different types of icons in Windows 10 one by one.
Customize Desktop Icons in Windows 10
In order to customize the Desktop icons in Windows 10, you will need to perform the following steps:
Type settings in the search section of your taskbar and click on the search result to launch a new settings window. The newly opened Settings window is shown in the following image:
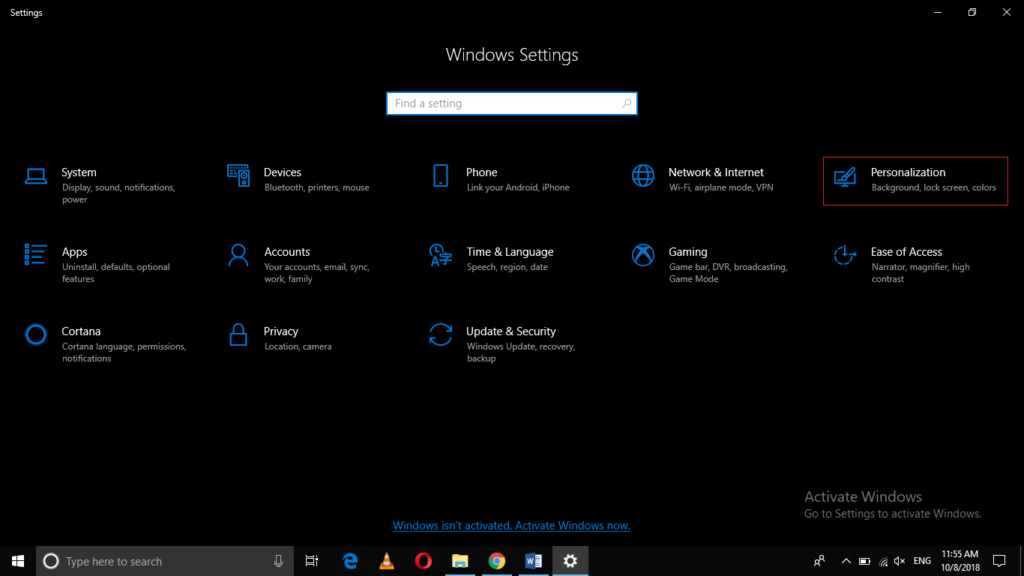
Click on the Personalization tab as highlighted in the image shown above.
Now click on the Themes tab as shown in the image below:
Click on the Desktop icon settings option as highlighted in the following image:
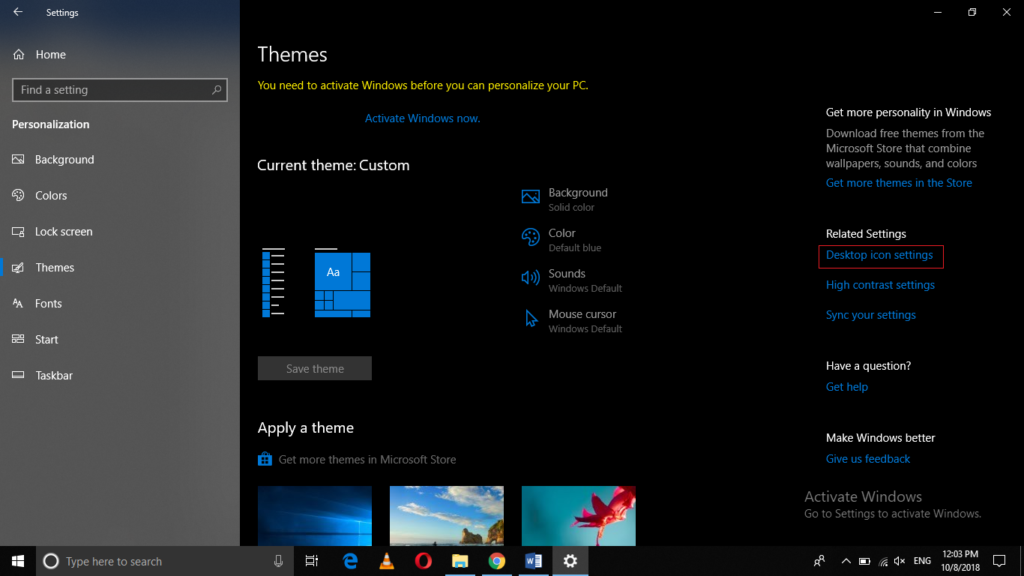
As soon as you will click on it, the Desktop Icon Settings window will appear which is shown in the image below:
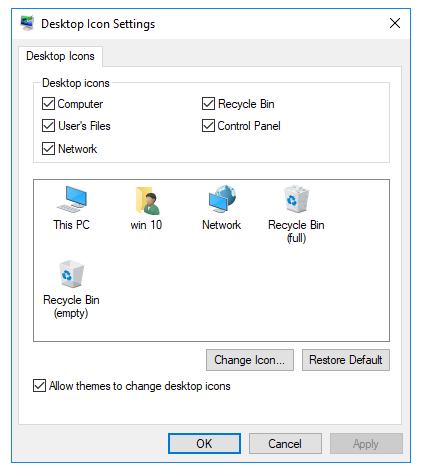
From the Desktop Icons section, check the checkbox corresponding to that particular item whose icon you want to change and then click on the Change Icon button as shown in the image above.
In this example, I want to change the icon of This PC so I will select Computer from the Desktop Icons section and then click on the Change Icon button as shown in the following image:
As soon as I will click on the Change Icon button, a list of different icons will appear on the screen. Just choose any desired icon from this list and then click on the OK button as shown in the image below:
Finally, click on the Apply button and then click on the OK button in order to save your settings as shown in the following image:
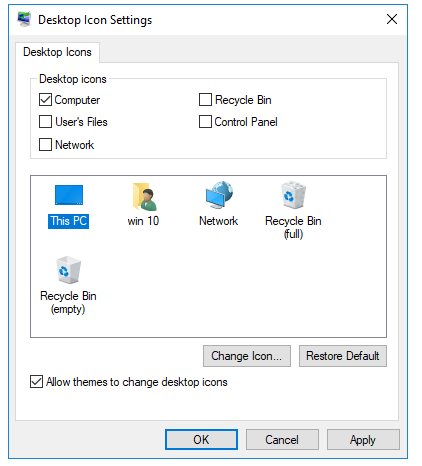
Now your This PC icon will look something like this:

Customizing Taskbar Icons in Windows 10
In order to customize the icons of the items pinned to the taskbar in Windows 10, you will need to perform the following steps:
Press the Shift key and while holding it, right click on any item that is pinned to the taskbar to launch a menu as shown in the image below:
Click on the Properties option from this menu as highlighted in the image shown above.
Now click on the Change Icon button. As soon as you will click on it, a list of different icons will appear on the screen as shown in the following image:
Select any icon of your choice from this list and then click on the OK button.
Finally, click on the Apply button and then click on the OK button in order to save your settings.
Customizing the Folder Icon in Windows 10
In order to customize the Folder icon in Windows 10, you will need to perform the following steps:
Right-click on that particular folder whose icon you want to change to launch a cascading menu as shown in the image below:
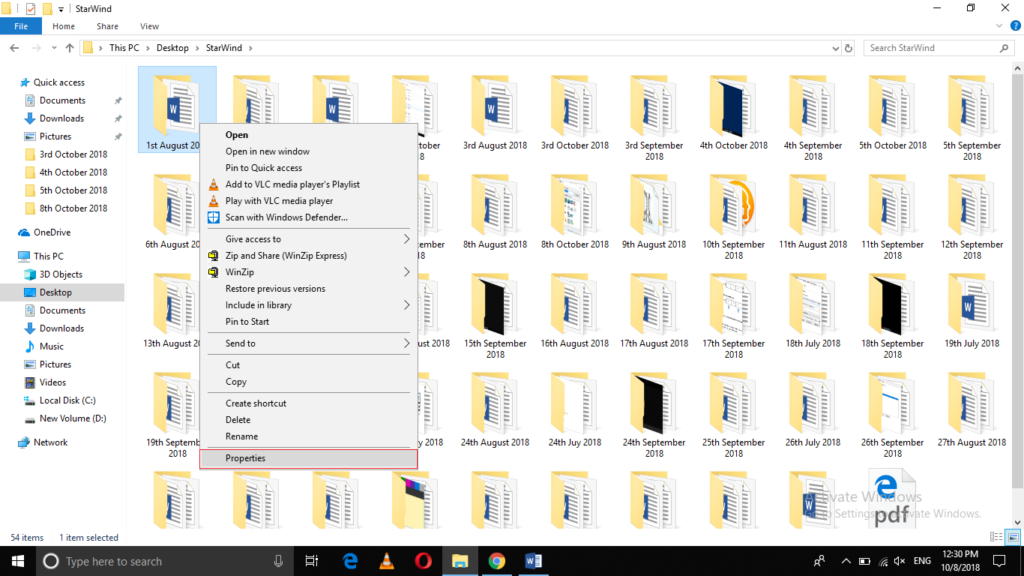
Click on the Properties option from this menu as highlighted in the image shown above.
The Folder Properties window will appear which is shown in the following image:
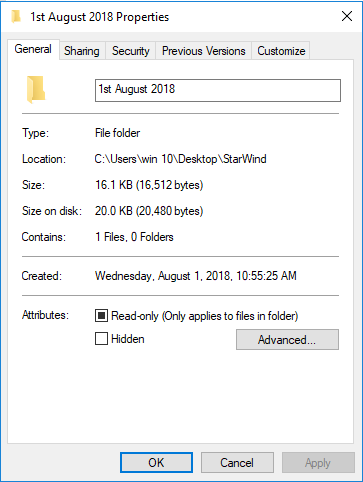
Now click on the Customize tab from this window.
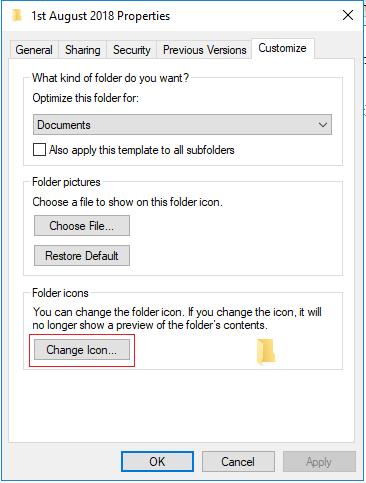
Click on the Change Icon button as highlighted in the image shown above.
As soon as you will click on it, a list of different icons will appear on the screen as shown in the image below:
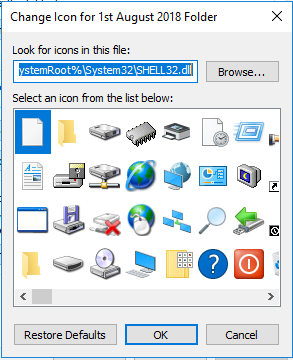
Select any icon of your choice from this list and click on the OK button.
Finally, click on the Apply button and then click on the OK button in order to save your settings.
Customizing the Shortcut Icon in Windows 10
In order to customize the shortcut icon in Windows 10, you will need to perform the following steps:
Right-click on any particular shortcut whose icon you want to change to launch a cascading menu as shown in the following image:
Click on the Properties option from this menu as highlighted in the image shown above.
Now click on the Change Icon button.
As soon as you will click on it, a list of different icons will appear on the screen as shown in the image below:
Select any icon of your choice from this list and click on the OK button.
Finally, click on the Apply button and then click on the OK button to save your settings.
Conclusion
In this way, you can customize various types of icons in Windows 10 using a very easy and simple method. If you want to revert the changes that you have made, you will only need to locate the Restore Defaults button in the corresponding Properties window and click on it. As soon as you will click on this button, your previous icons will be restored.