- You can change the mouse cursor on Windows 10 to customize your PC experience.
- If you don’t like the available pointers in the Cursors folder, you can download others online.
- You can also customize your mouse cursor’s color, size, and speed.
With the increased popularity of touchscreen devices and tablets it may seem like cursors have become less essential. However, if you still use a desktop computer chances are that you still need a cursor to perform a majority of functions.
Microsoft allows users to fully customize the OS on their device to their liking, which even includes changing the overall appearance of their mouse cursor.
Whether you want to change the color of the cursor or even the size of the cursor, Microsoft provides robust customization features for you to experiment with.
How to change the mouse cursor on Windows 10
Follow the steps below to change your default mouse cursor to something more interesting.
Change schemes
When you change schemes, you give all your pointers a new look.
1. Boot up your Windows 10 computer.
2. Press the Windows button on your keyboard, or click on the Search Bar on your Windows 10 Taskbar.
3. Type in «Mouse» and wait for suggestions to appear, then select Change your mouse settings, and Windows will open the Mouse settings page.
Stefan Ionescu
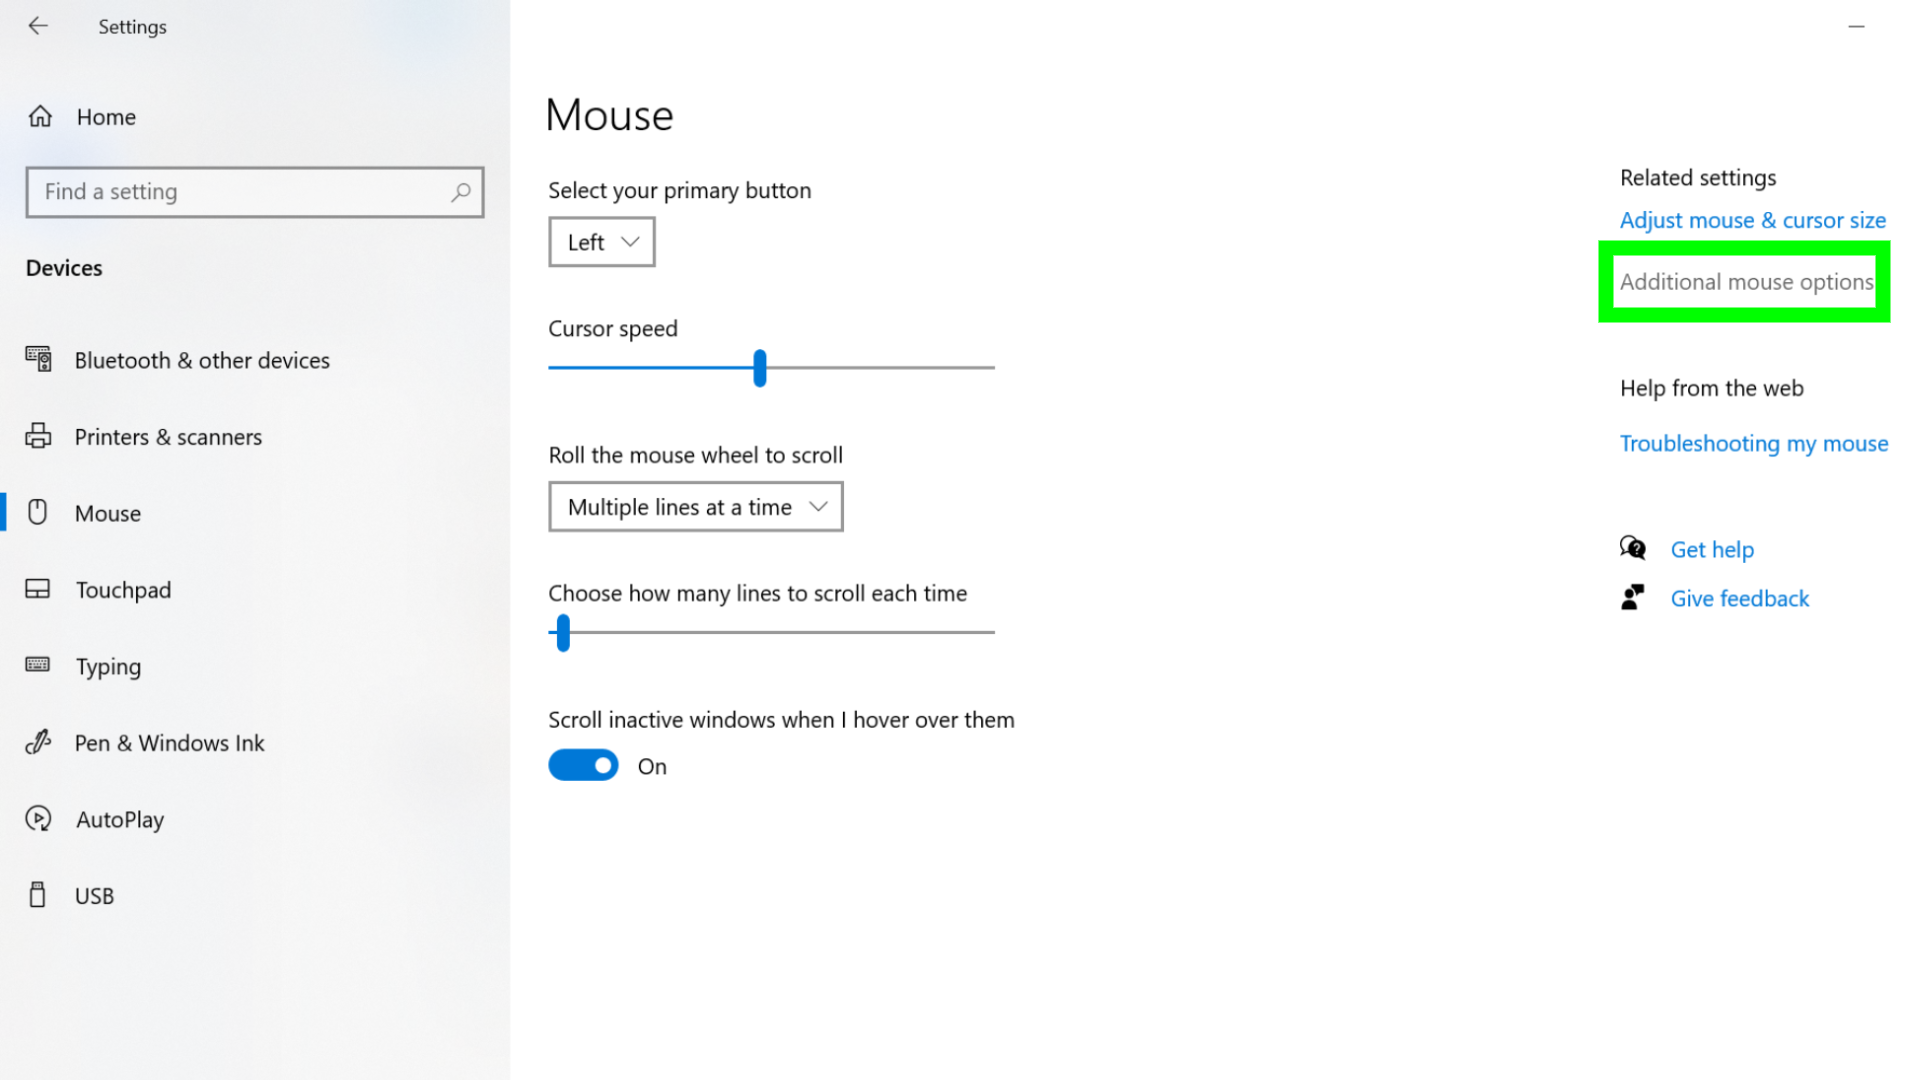
4. In Change your mouse settings, click Additional mouse options to bring up the Mouse Properties pop up
Stefan Ionescu
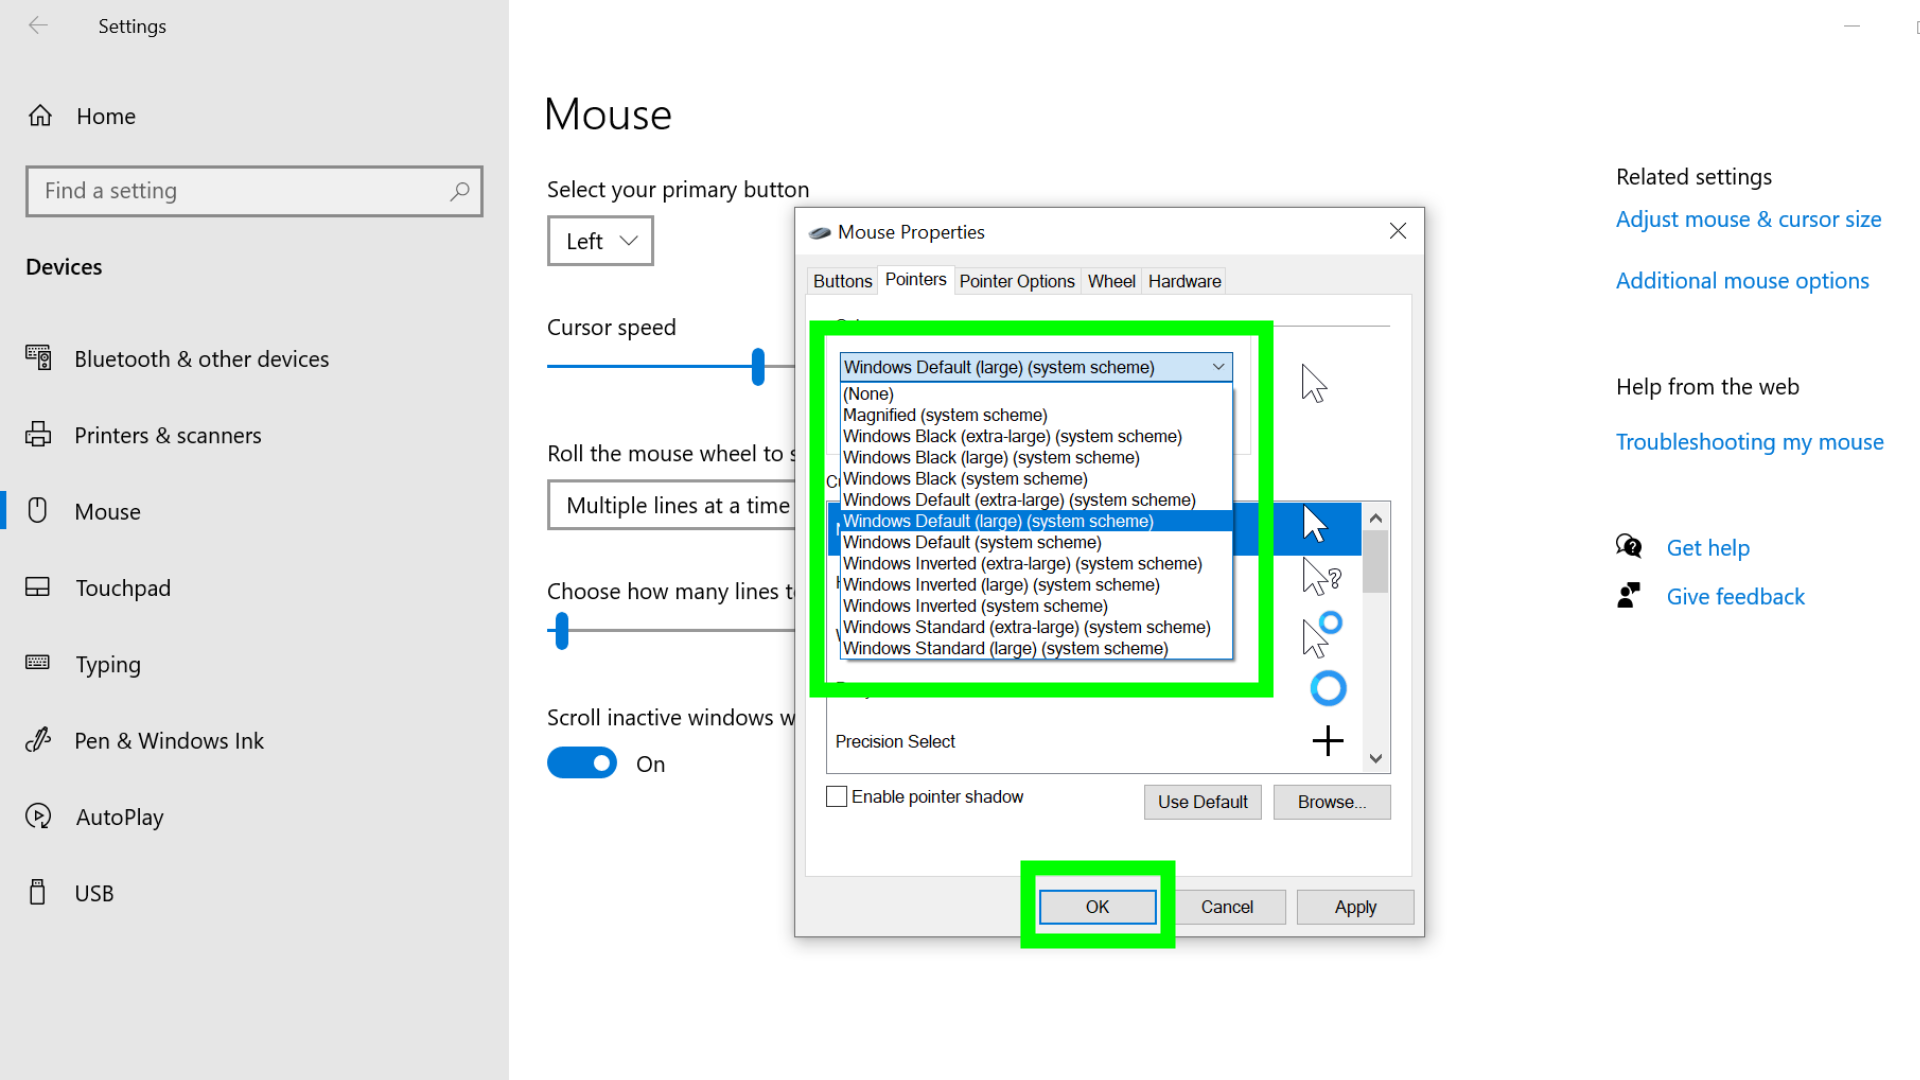
5. Select the Pointers tab and then click the dropdown under Scheme to see the available schemes.
Stefan Ionescu
6. Pick a scheme and then click on Apply.
Change individual cursor
You can also customize a particular cursor of the scheme you’ve applied.
1. In the Pointers tab of the Mouse Properties pop up, select on the cursor you want to change under Customize and then click on «Browse» on the bottom-right hand corner of the screen.
2. You will now see a slew of cursor options for you to choose from. Select the cursor that you want and Click Open.
3. Then press Apply to confirm your new cursor.
How to customize cursors on Windows 10
You can further customize the cursor to make it more to your liking. Keep in mind the making changes here will override any previous customizations to the cursor.
Change cursor color
1. Open the Mouse pointer settings page, and click on Adjust mouse & cursor size.
2. Under Change pointer color, click on any of the options below to pick a new color for the cursor.
Stefan Ionescu
Change cursor size
1. Open the Mouse settings page, and click on Adjust mouse & cursor size.
2. Under Change point size, drag the slider to the size of your liking. Sliding it to the right will increase the cursor’s size, while sliding it to the left will decrease it.
Stefan Ionescu
Change cursor speed
1. To change the pointer speed, open the Mouse settings and locate Cursor speed on the page.
2. Then, adjust the slider left or right to decrease or increase the cursor speed, respectively.
Stefan Ionescu
Download custom cursors
1. Open the Open Cursor Library on your favorite web browser, and click on the cursor you want.
2. Click on the next page, click on the big Download button, and the cursor will be downloaded onto your PC.
Taylor Lyles is a freelance writer for Business Insider.
Read more
Read less
Switch to a different look by going into your mouse settings
Updated on November 5, 2021
What to Know
- Select a cursor scheme from Mouse Settings > Additional mouse options > Mouse Properties > Pointers tab.
- Manually pick another cursor from Mouse Properties > Customize > Browse.
- Go to Mouse Settings > Adust mouse and cursor size and change the relative size of pointers and cursors.
This article shows you how to change the cursor on Windows 10 and customize it to your liking.
How to Change Your Mouse Color
How to Change the Mouse Cursor on Windows 10
You don’t have to stay with the default cursor. You can always make it more interesting or more visible. Windows allows you to choose among several native themes and customize the cosmetics with third-party cursor packs. Let’s change the default cursor first.
-
Go to Windows Search on your Windows 10 taskbar.
-
Type «Mouse» to display search results related to the mouse. Select the top result that says Mouse Settings or «Change your mouse settings» to launch the Settings screen.
-
On the Mouse settings screen, select Additional mouse options under Related settings on the right.
-
On the Mouse Properties dialog, select the Pointers tab. Change the appearance of the cursor with the options here.
-
Select a Scheme from the dropdown. The list includes all default Windows mouse themes and every installed cursor packs.
-
Select a pointer scheme to preview its icons in the Customize box.
-
Choose Apply to use the scheme. Select the OK button to exit the dialog if you like the scheme.
How to Get a Custom Cursor in Windows 10
Windows allows you to install third-party cursor packs and pick individual pointers and cursors to your liking. In short, you can mix and match them to create a color scheme.
Downloaded cursor packs can have both CUR and ANI files. Files with CUR extensions are static cursors, while ANI file formats are animated cursor files.
-
Highlight and select the pointer or cursor you want to change.
-
Select Browse on the bottom right-hand corner of the Mouse Properties screen. It will open the Windows Cursors folders (C:WindowsCursors). Select a cursor that matches the function you want it to perform.
-
Select Open. Then press Apply to finalize your new cursor.
-
Save this custom scheme by selecting Save As > give the scheme a new name, and press Ok.
-
Select OK to exit the Mouse Properties dialog box.
Change Cursor Size and Color
Two sliders help change the size of the pointer and cursor for those with vision problems (or larger screens).
-
Go to Mouse Settings > Adust mouse and cursor size.
-
On the Mouse pointer screen, move the slider under Change pointer size and color to increase or decrease the pointer size. Select a thumbnail to change the color.
-
Move to Make visual feedback for touch points darker and larger. Drag the slider to the right to change the cursor’s thickness.
Reasons to Change Mouse Pointers in Windows 10
Apart from aesthetics alone, there can be several reasons to change your cursor.
- Make your cursor easier to see against a dark or light background.
- High contrast cursors (like the Inverted schemes) are an accessibility need for someone with poor eyesight.
- Larger cursors are suitable for screens with higher resolutions and sizes.
Note:
You can easily install third-party cursor packs that have an INF file. Just right-click on the INF file and choose Install. The installed set will appear under the Scheme dropdown. If the cursor pack lacks an INF file, then manually select and apply the individual pointers and cursors as described above.
How to Lock a Mouse to One Monitor
Thanks for letting us know!
Get the Latest Tech News Delivered Every Day
Subscribe
Современная ОС Windows 10 позволяет настроить практически любой графический элемент: начиная от «Панели задач» и окон «Проводника Windows» и заканчивая иконками и курсором мыши. Сегодня рассмотрим настройку последнего: как его поменять до неузнаваемости с помощью различных средств (как встроенных, так и сторонних).
Порой нам хочется чего-то нового в компьютере: изменить интерфейс или использовать новый фон на «Рабочем столе». Дополнением к этим полезным для глаз изменениям может быть настройка указателя компьютерной мыши, с помощью которой мы выполняем подавляющее большинство действий на ПК. Внести изменения во внешний вид устройства можно как средствами Windows, так и через сторонние утилиты.
С помощью системных средств
За счёт встроенных средств каждый клиент Windows 10 может изменить внешний вид своего указателя мыши. Как известно, он может менять свою форму в процессе работы за компьютером в зависимости от ситуации. Например, появляется голубой кружок или значок в виде песочных часов, когда система ожидает загрузки какого-либо окна. В специальном окне вы можете настроить не только основной указатель, но и значки для всех его состояний по отдельности.
Итак, как открыть это специальное окно? Как в нём настроить указатель под себя? Возьмите на вооружение следующую подробную инструкцию:
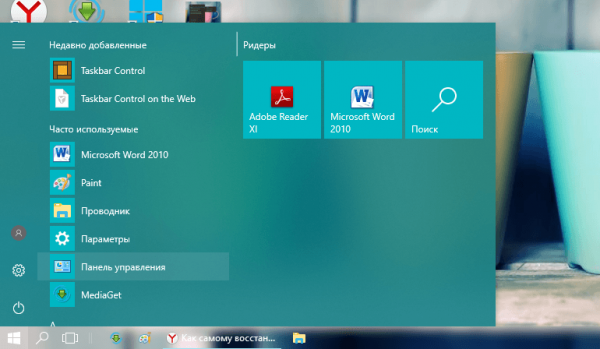
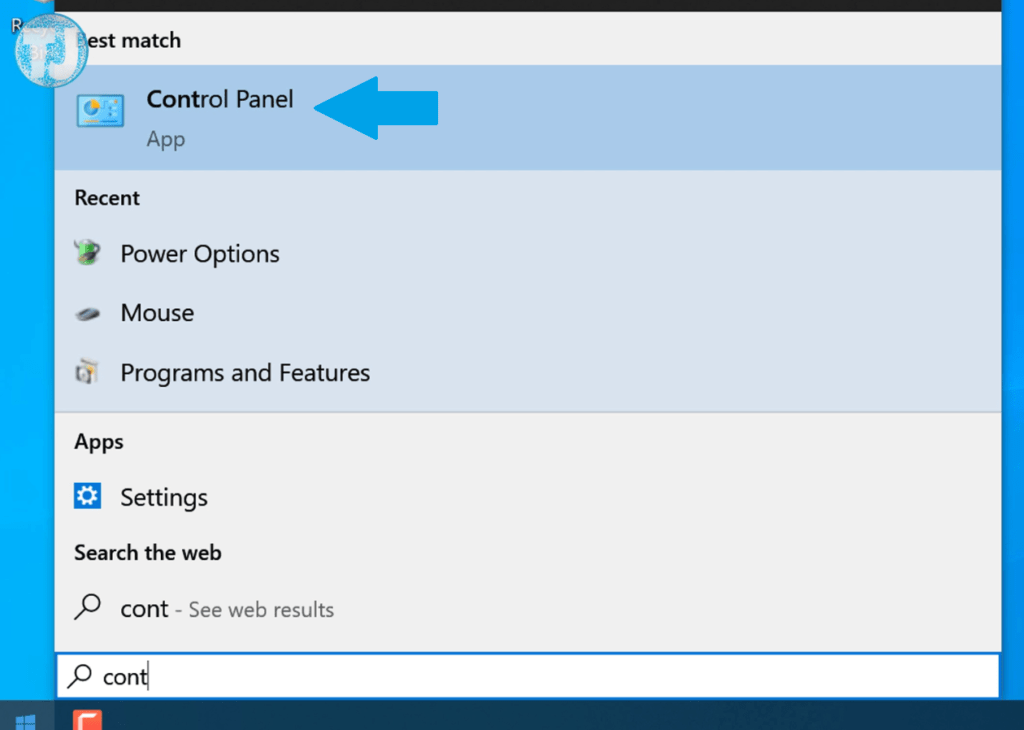
- Используя меню «Пуск», запустите системный раздел для пользовательских настроек под названием «Панель управления». Он будет в списке под буквой «П» либо в блоке «Часто используемые», если вы нередко открывали его.

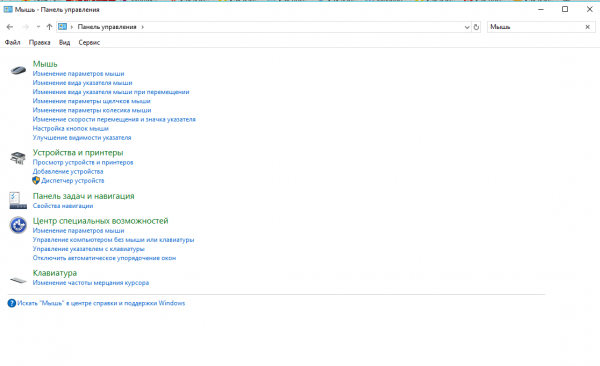
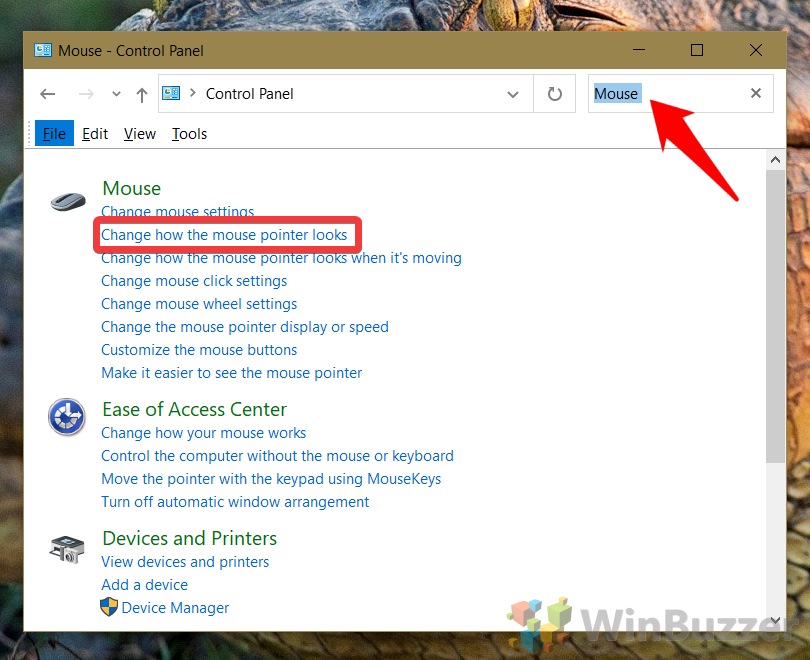
Найдите в меню «Пуск» раздел «Панель управления» - Когда откроется окно с панелью, вы увидите в правом верхнему углу поле для ввода поисковых запросов. Напечатайте там запрос «Мышь», а в тут же появившихся результатах поиска выберите ссылку «Изменение вида указателя мыши».

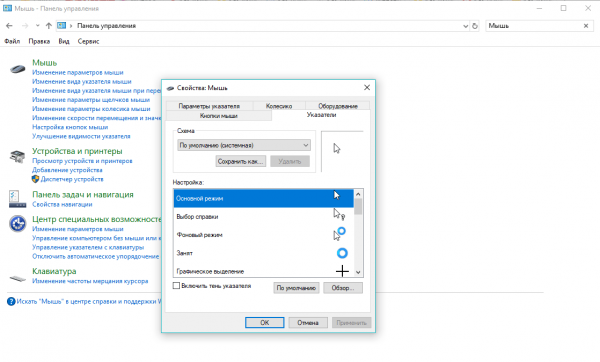
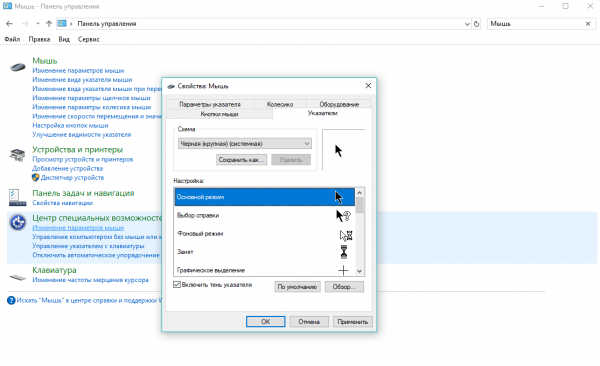
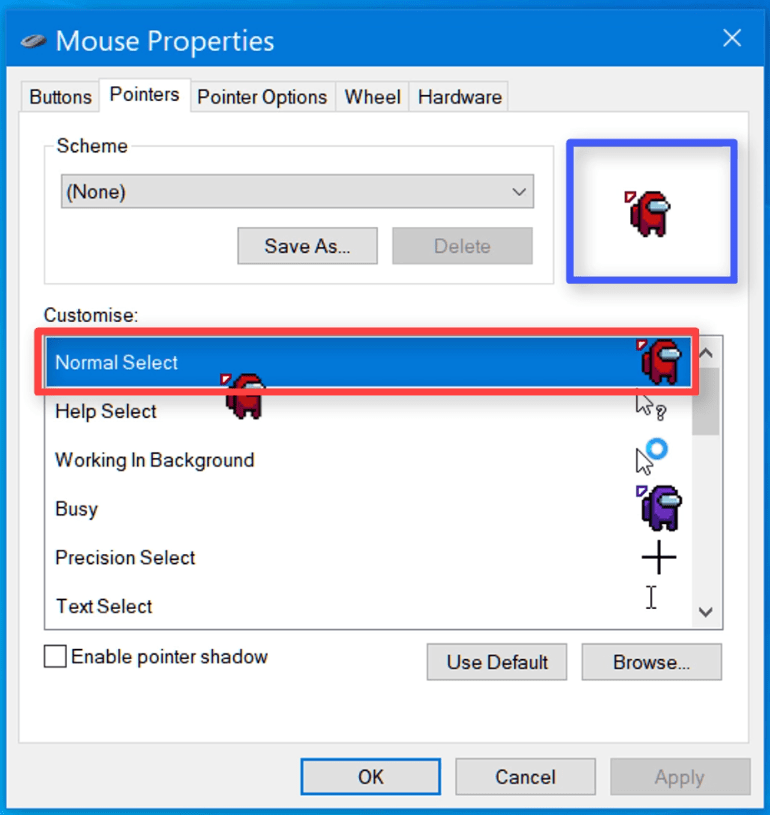
В разделе «Мышь» кликните по ссылке «Изменение вида указателя мыши» - Запустится ещё одно окно, но уже меньшего размера. Оно будет называться «Свойства: Мышь».

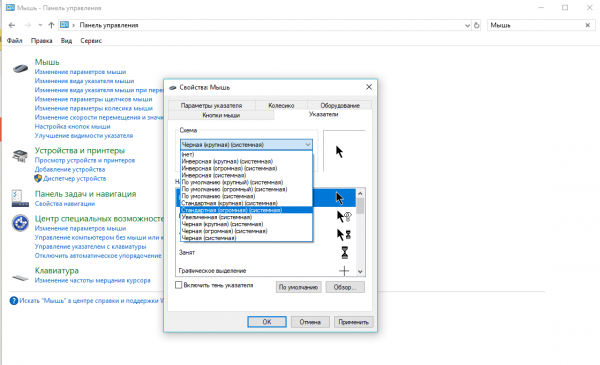
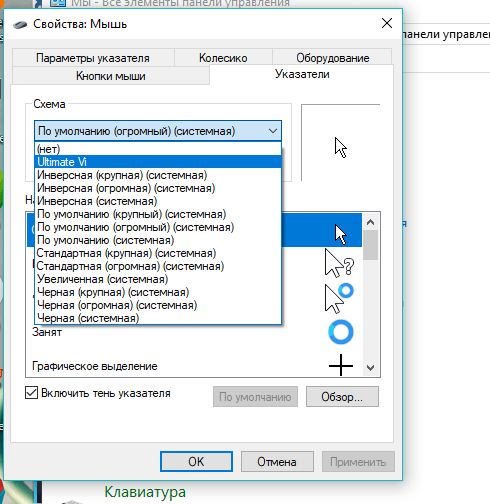
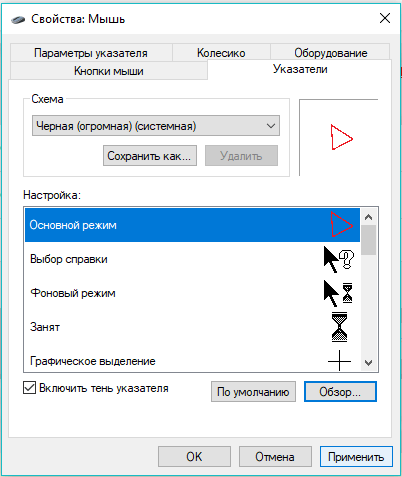
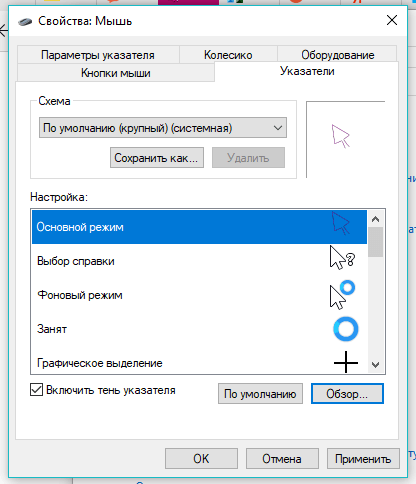
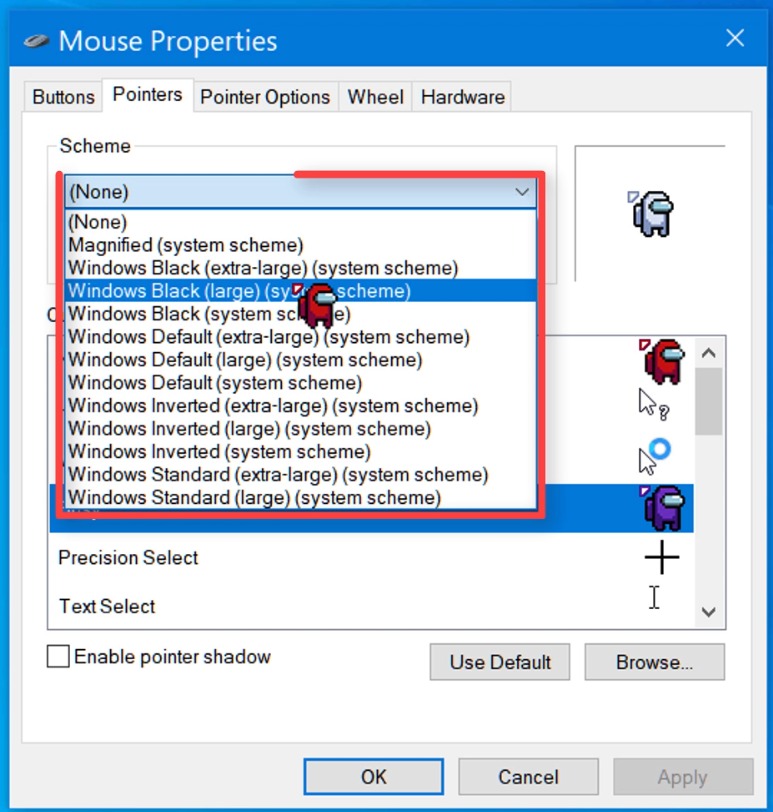
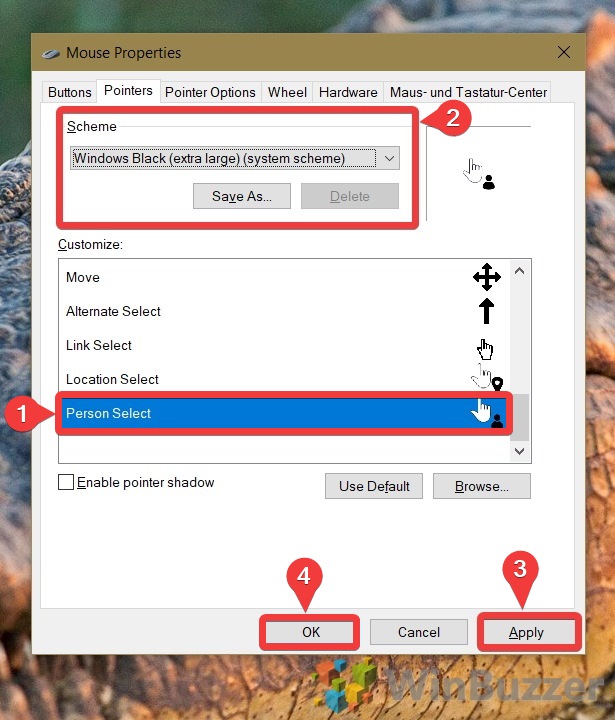
После нажатия на ссылку «Изменение вида указателя мыши» появится окно «Свойства: Мышь» - Щёлкните левой кнопкой по выпадающему меню «Схема», чтобы увидеть перечень тем, доступных в данный момент.

Выберите в меню «Схема» понравившуяся тему для курсора мыши - Определитесь, какое оформление вам нравится больше всего, например, отдадим предпочтение схеме под названием «Чёрная (крупная) (системная)».
Схема «Чёрная (крупная) (системная)» установит большой курсор тёмного цвета - В названии курсора будет сразу указан его размер и цвет. Если вы хотите большой курсор, выбирайте пункты со словами «огромная» или «крупная». Чтобы выбрать указатель, который вас устроит, советуем просмотреть все доступные схемы. Таким образом, вы ничего не упустите.
- При желании вы можете включить эффект тени на курсоре. Для этого поставьте галочку рядом с соответствующим пунктом под списком.
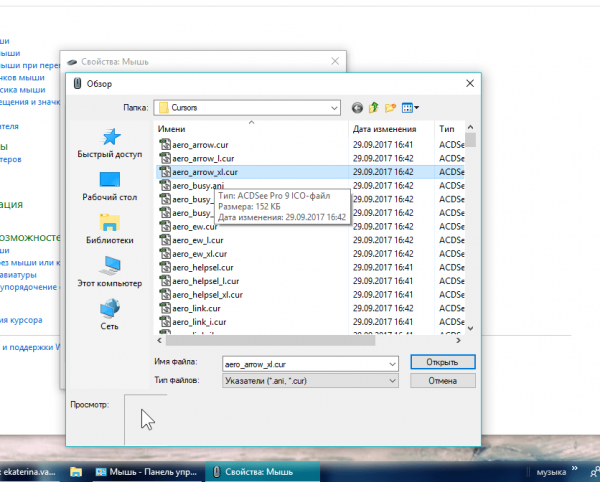
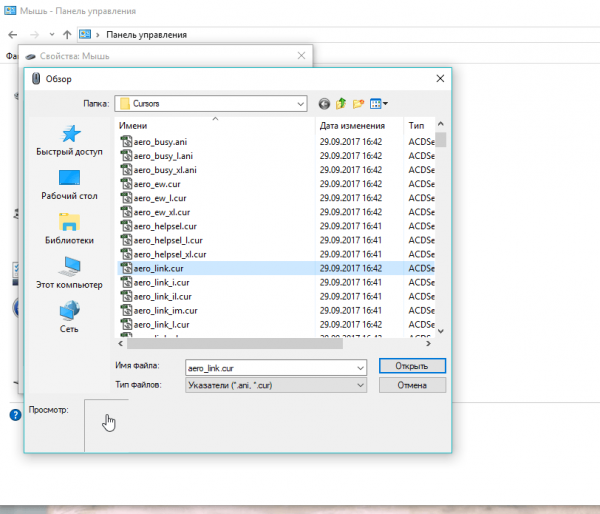
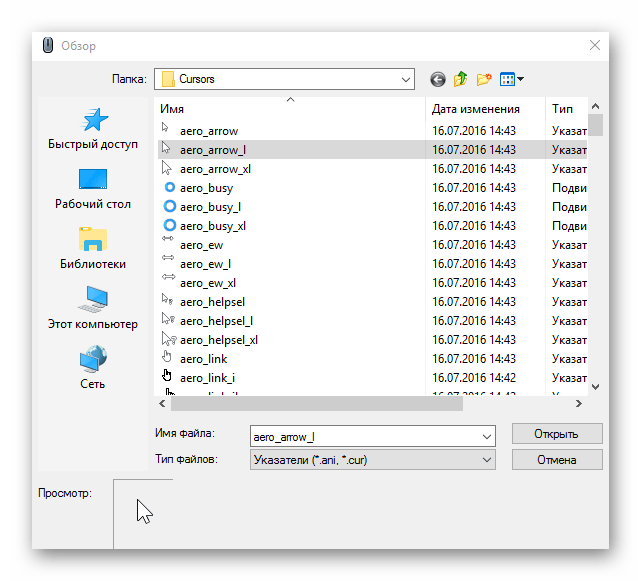
- Курсор можно выбрать и с помощью кнопки «Обзор». Щёлкните по ней левой кнопкой. В открытом «Проводнике Windows» выберите любой понравившийся. Предварительно посмотреть на него вы можете в левом нижнем углу проводника.

Выберите в окне «Обзор» понравивишийся вам тип курсора - Например, выбираем aero_link.cur. Он будет в виде ладошки. Нажимаем на «Открыть».

Выберите, например, курсор aero_link.cur. в виде ладони - Если вам не понравился выбранный значок, вы можете вернуть прежний стандартный с помощью кнопки «По умолчанию», которая находится рядом с клавишей «Обзор».
- В окне «Свойства» теперь кликаем сначала по «Применить», а потом по соседней кнопке ОК, чтобы закрыть окно.
Видео: как заменить курсор средствами Windows
С помощью специальных программ
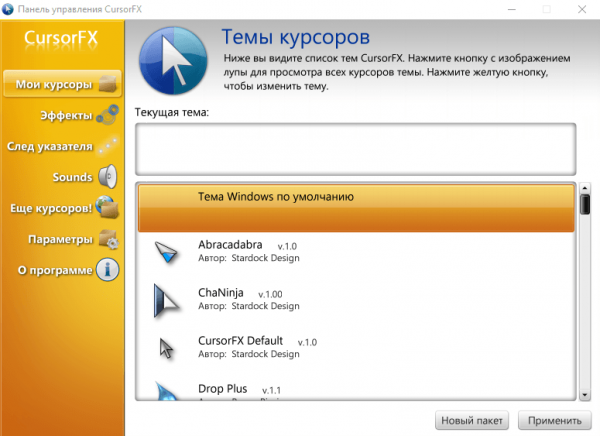
Для людей, которые хотят быстро установить красивый новый курсор мыши разработаны специальные утилиты. Всего в пару кликов они ставят различные курсоры, доступные в их базе. Например, для таких целей была создана программа CursorFX. Сегодня рассмотрим установку указателя на её примере.
Преимущество этого софта в том, что у него интерфейс на русском языке. В нём легко разберётся даже новичок. Кроме этого, у него большая база оригинальных указателей и различных эффектов к ним, в том числе и звуковых. Откуда загрузить утилиту и как ей пользоваться?
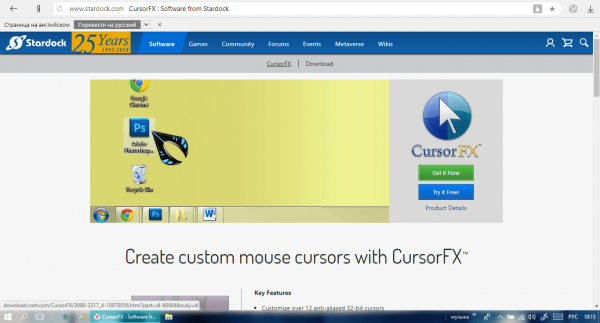
- В любом обозревателе перейдите на официальный сайт разработчика утилиты Stardock.

Кликните по кнопке Try it Free - Нажимаем на синюю кнопку Try it Free, чтобы загрузить только бесплатный вариант программы.
- Вводим адрес действующей электронной почты, от которой вы знаете пароль. На неё придёт письмо со ссылкой на скачивание. Нажимаем теперь на зелёную кнопку Download и переходим по ссылке, которая пришла на указанный ящик.
- Скачиваем инсталлятор и открываем его. Устанавливаем программу. Процедура не займёт много времени.
- Запускаем софт и попадаем в главное окно CursorFX «Панель управления». Здесь доступно несколько вкладок.

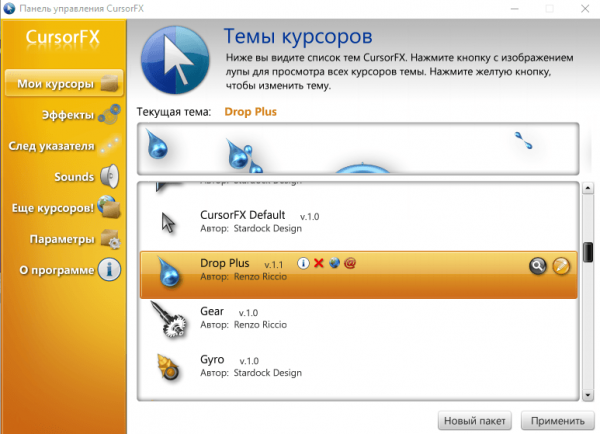
Окно CursorFX разделено на несколько удобных вкладок - В первом блоке «Мои курсоры» вы выбираете тему для указателя. Здесь их довольно много. К тому же они очень необычные. Например, сделаем выбор в пользу Drop Plus — значку в виде большой капли воды. Кликаем сразу по кнопке «Применить», которая располагается в правом нижнем углу окна.

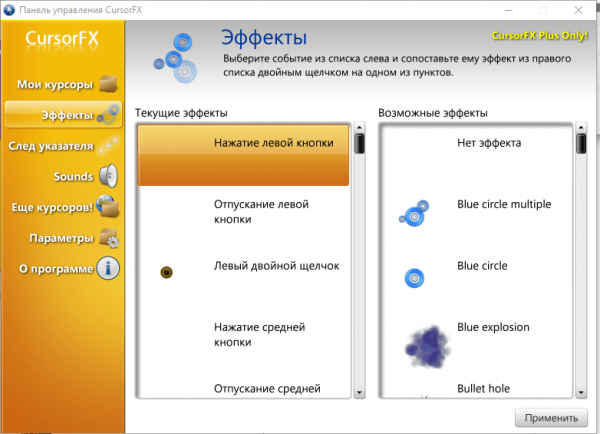
В первой вкладке «Мои курсоры» выберите сам значок указателя - Во втором блоке «Эффекты» добавьте визуальные эффекты для определённых действий, выполняемых мышью: нажатие и отпускание кнопок, двойной клик и т. д. Например, щёлкните по «Левый двойной щелчок» в левой колонке и выберите любой эффект в правой колонке. После всех действий нажмите на «Применить».
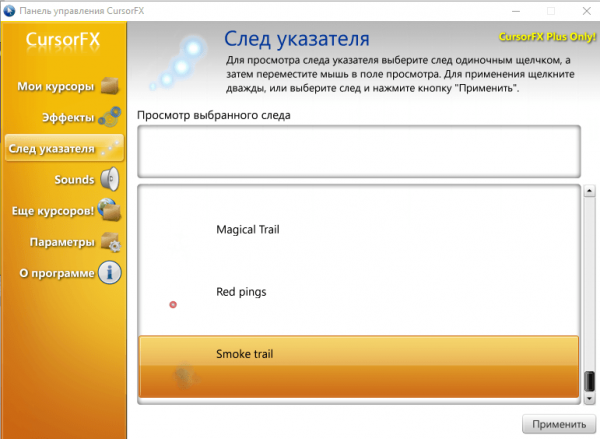
Примените визуальные эффекты к каждому действию мышкой - В блоке «След» определитесь с типом следа, который будет оставлять после себя курсор. Например, поставим Smoke Trail. Для применения кликните по нему дважды.

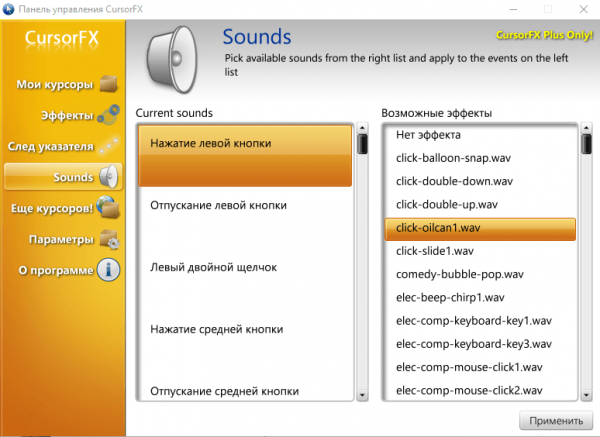
В третьем разделе по желанию установите любой понравивишийся след, который будет оставляться курсором - Блок Sounds раскрывает другие возможности курсора: звуковые. Опять же для каждого действия вы можете выбрать определённый звук. Процедура выбора такая же, как и во вкладке «Эффекты».

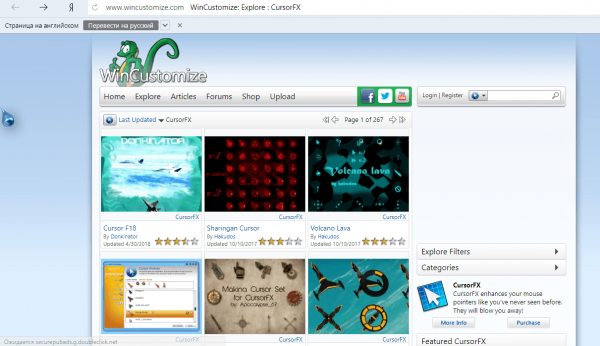
Во вкладке Sounds примените отдельные доступные звуки к каждому действию мышкой - В разделе «Ещё курсоров» вы можете перейти на страницу в интернете, где в свободном доступе есть масса других тем для указателя.

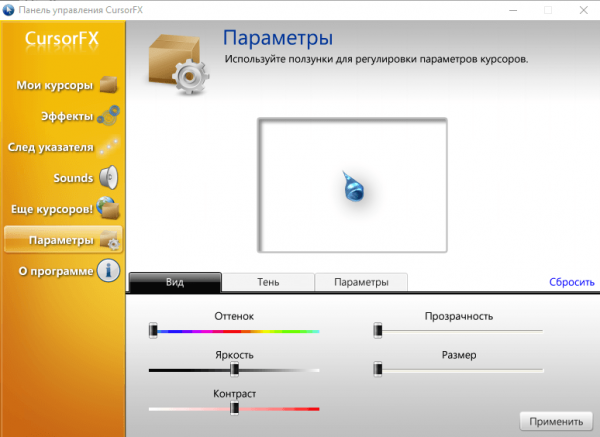
С помощью вкладки «Ещё курсоров» вы можете открыть базу дополнительных тем для указателя - В разделе «Параметры» клиент Windows может настроить параметры яркости, прозрачности, контраста, размера и т. д.
Во вкладке «Параметры» вы можете изменить множество параметров, включая яркость, контраст, прозрачность, размер указателя и другое
Видео: как использовать программу CursorFX
Как изменить размер и цвет курсора на Windows 10
При желании вы можете увеличить или уменьшить размер вашего курсора и другим способом: в окне «Параметры Windows». Там же есть возможность выбрать другой цвет курсора. Однако здесь будет только три варианта: чёрный, белый или чёрно-белый. Windows, к сожалению, не предлагает цветные и яркие версии указателей. Каким образом открыть нужное окно для настройки?
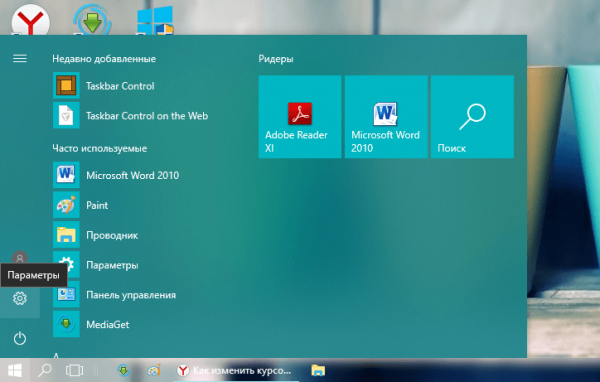
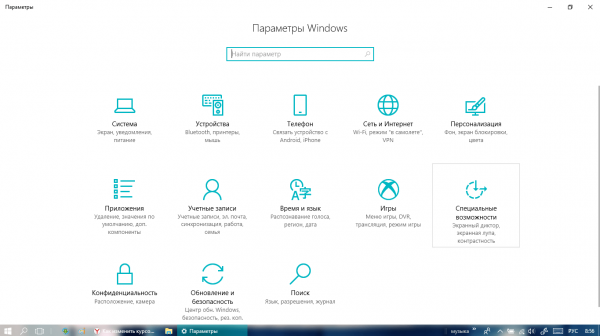
- Кликаем сначала по кнопке «Пуск», чтобы открыть одноимённое меню. В Windows 10 окно «Параметры Windows» вызывается очень просто: для этого над кнопкой выключения устройства была размещена иконка в виде шестерёнки. Если вы наведёте на неё курсор мыши, появится названием раздела «Параметры». Щёлкаем по этой иконке всего один раз.

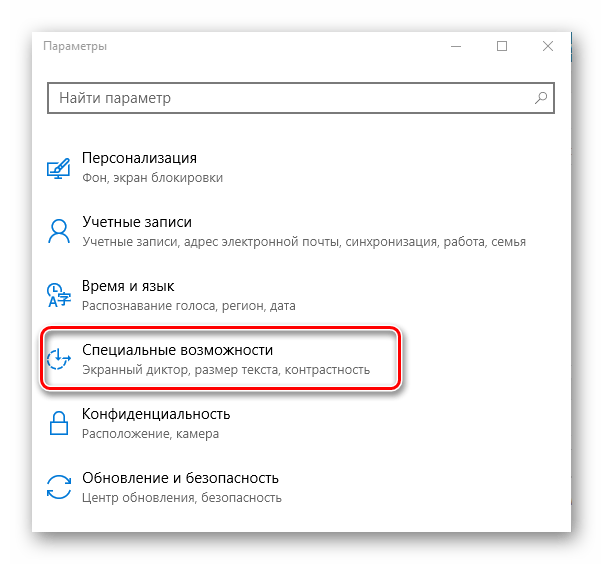
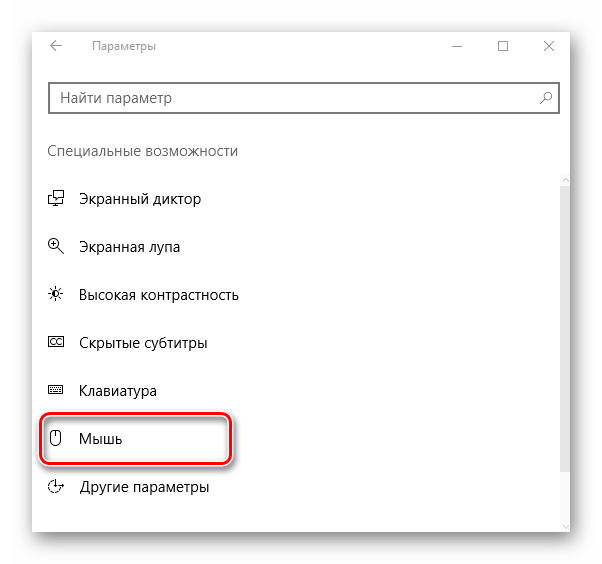
Кликните на значку в виде шестерёнки, чтобы открыть «Параметры Windows» - В запустившемся большом окне со списком нескольких разделов, расположенных в виде ячеек, выбираем блок «Специальные возможности».

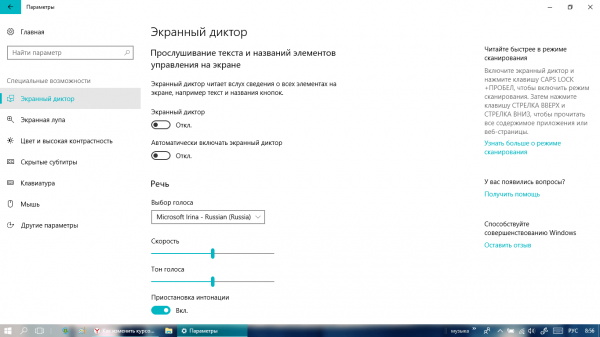
Выберите «Специальные возможности» в окне «Параметры Windows» - Вы попадёте сразу в первую вкладку «Экранный диктор».

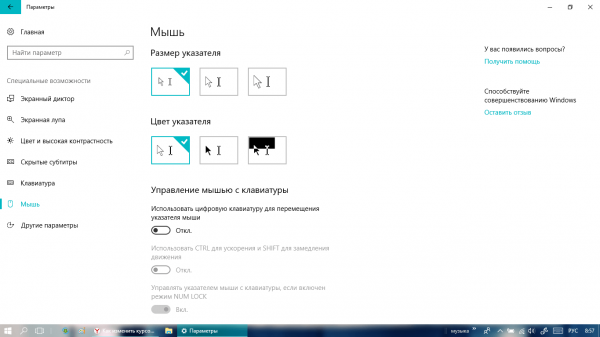
После открытия раздела «Специальные возможности» запускается вкладка «Экранный диктор» - Сразу переходим на предпоследний блок под названием «Мышь».
Установите нужные вам значения для параметров цвета и размера - Здесь вы увидите два параметра, которые хотите поменять: цвет и размер. Отметьте нужные вам плитки. Вы заметите, что изменения сразу вступили в силу без каких-либо сохранений. Теперь можете закрывать окно.
Как создать собственный курсор
Если ваша фантазия уходит далеко за пределы стандартных значков Windows и вы хотите получить действительно оригинальный курсор мыши, с которым приятно будет работать, создайте собственный указатель. Здесь вы можете как загрузить уже созданные до вас значки, так и нарисовать свой с помощью редакторов. Рассмотрим все два варианта развития событий.
Скачиваем новый значок из интернета
Перед тем как скачивать тот или иной файл в интернете, нужно узнать его формат. Для статичных картинок используется файл с расширением cur. Если вы будете загружать целый набор значков, чтобы установить его в качестве схемы (смотри раздел «С помощью системных средств» этой статьи), то есть ставить для каждой ситуации (например, ожидания загрузки) значок, схожий по тематике с основным указателем, то значки будут загружаться в формате inf.
- Скачайте понравившийся вам архив с иконками в интернете. Чтобы быстро найти сайт для закачки, используйте поисковик «Яндекс» или Google. Будьте при этом внимательны: не загружайте файлы с подозрительных ресурсов.
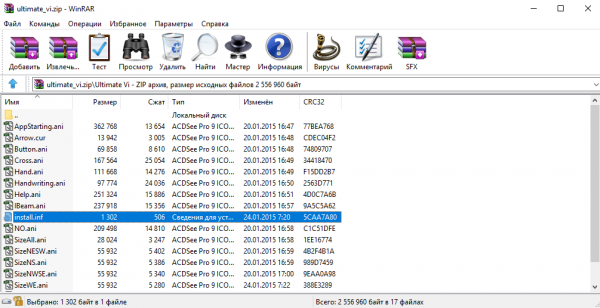
- Откройте загруженный вами архив. Мы, например, скачали набор курсоров под названием UltimateVi. В нём есть список файлов, каждый из которых отвечает за какой-то отдельный курсор. Теперь рассмотрим, как установить скачанный курсор.

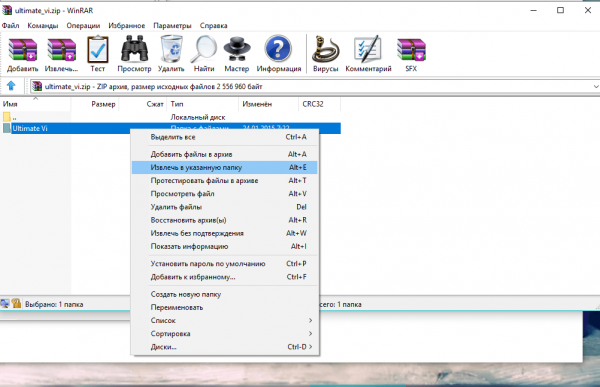
В архиве UltimateVi будут файлы для каждого значка курсора - Извлеките папку с новыми указателями. Для этого кликните по ней правой кнопкой мыши и в большом контекстном меню выберите «Извлечь без подтверждения». Папка появится в том же разделе для загрузок, который был установлен в браузере.

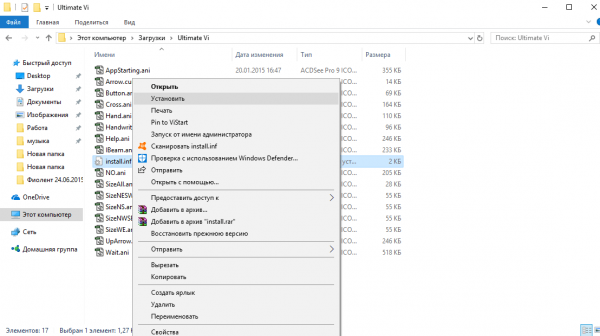
Выберите «Извлечь без подтверждения» в контексном меню - Теперь нам нужно запустить папку в «Проводнике Windows», в которую вы извлекли архив. Здесь будет один отличный от других файл под названием install.inf. Именно он поможет нам включить тему UltimateVi в список схем. Кликаем по нему правой кнопкой и в большом перечне опций выбираем второй пункт «Установить».
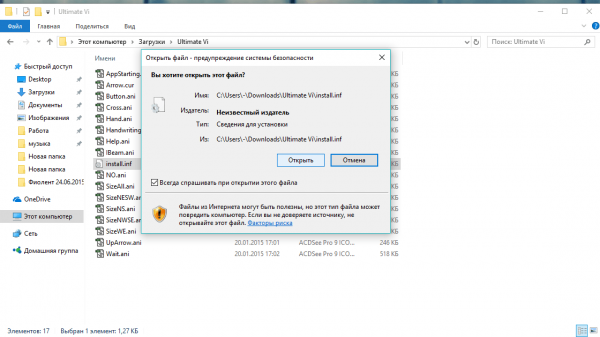
Выберите «Установить» в контексном меню файла install.inf - Щёлкаем по «Открыть» в небольшом окошке с предупреждением системы безопасности.
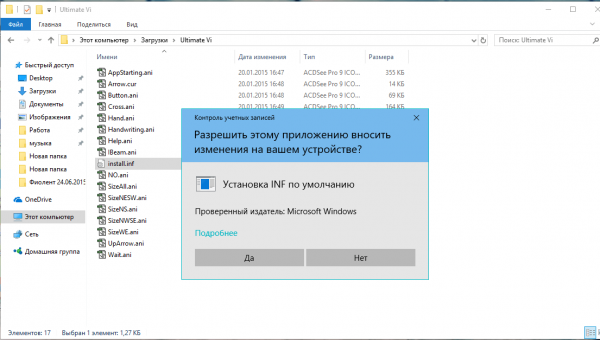
Нажмите на «Открыть», чтобы принудительно запустить файл - Теперь нажимаем на «Да», разрешая, таким образом, файлу вносить изменения на устройстве.

Кликните по «Да», чтобы разрешить файлу вносить изменения на устройстве - Подождите, пока система установит тему.
- Вызовите снова окно «Свойства: Мышь», используя инструкцию из раздела «С помощью системных средств» этой статьи.

Выберите пункт Ultimate Vi в выпадающем меню «Схема» - Щёлкаем по выпадающему меню «Схема». В этом списке практически на первом месте будет тема Ultimate Vi. Кликаем по ней.
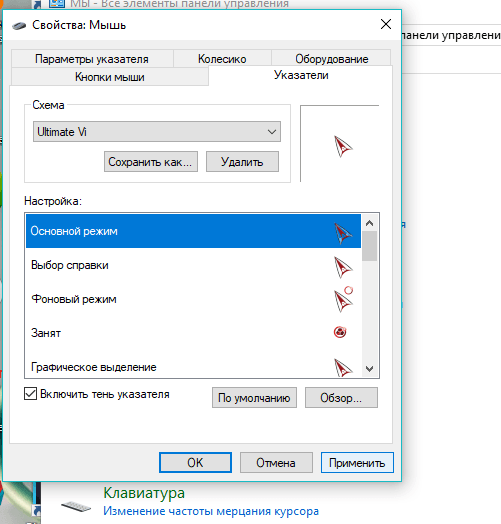
- Остаётся только щёлкнуть по «Применить», а потом по ОК, чтобы закрыть окно. Теперь вы можете наслаждаться новым дизайном своего указателя.

Примените тему Ultimate Vi с помощью соответствующей кнопки
Видео: как скачать из интернета новый указатель и установить его
Создаём свой значок в Paint
Необязательно быть художником, чтобы нарисовать свой курсор мыши в этом встроенном редакторе изображений Windows. Его инструменты позволяют сделать ровные линии и использовать любые цвета. Этот способ подойдёт вам, если вы не любите чёрный и белый цвета классического курсора мыши, или если просто считаете их скучными.
Способ не из лёгких, так как состоит из нескольких этапов, однако поможет вам создать оригинальный значок, без предварительной установки программ на компьютере (для редакции изображения будем использовать сервисы, которые работают в режиме онлайн, то есть у вас должен быть подключён интернет).
- С помощью меню «Пуск», запустите графический редактор Paint. Он будет в списке под латинской буквой P или в разделе «Часто используемые», если вы часто его вызывали.

Найдите Paint в меню «Пуск» - Установите размер фона 128 x 128 пикселей. Для уменьшения используйте стрелки по краям страницы. Если вы хотите большой красивый курсор, сделайте формат больше указанного: здесь ограничений по размеру нет. Однако не забывайте, что если вы сделаете рисунок на весь лист, стрелка будет на весь экран. Нарисуйте на белом листе курсор, которым в дальнейшем хотите пользоваться, например, ровную красную стрелку без закрашенного пространства внутри.

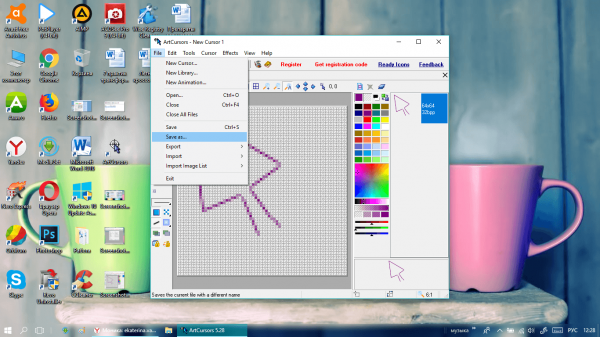
Уменьшите размер листа и нарисуйте будущий курсор, используя любой инструмент Paint - Щёлкните по «Файл» и в меню наведите курсор на четвёртый пункт «Сохранить как». Теперь делаем выбор в пользу первого варианта с расширением png.

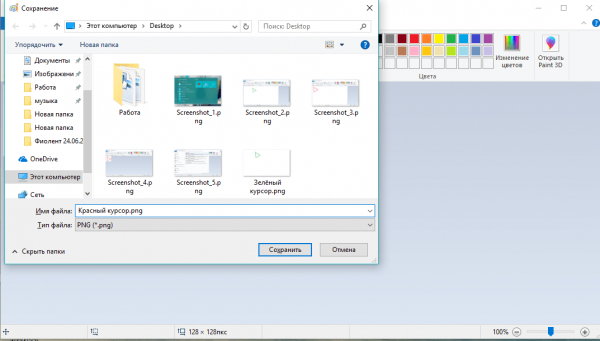
Выберите для сохранения формат png - Печатаем нужное имя курсора, чтобы не потерять файл среди других изображений на ПК. Сохраняем его в папку, к которой у вас есть быстрый доступ. Можно поместить прямо на «Рабочий стол».

Назовите файл и выберите папку для сохранения - Теперь нужно решить проблему с белым фоном. Если вы его не удалите, курсор мыши будет в виде стрелки на белом квадрате. Естественно, это не может вас устроить, поэтому делаем прозрачный фон, но уже с помощью другого сервиса, так как в Paint нет подобной функции. Переходим на сайт редактора изображений. В нём очень легко и удобно работать и, кроме этого, у него широкий функционал.
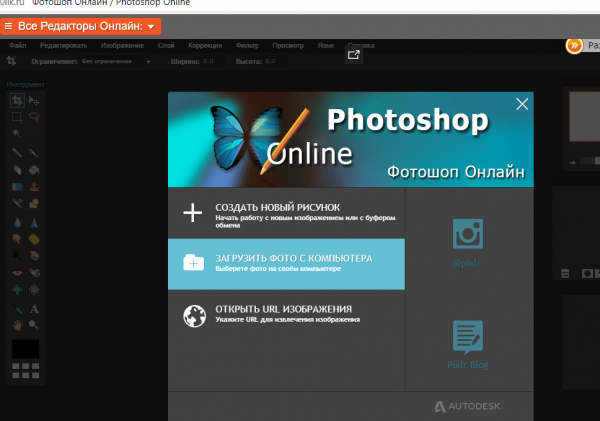
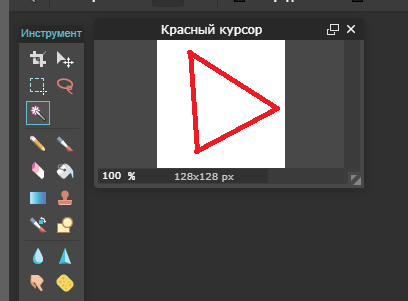
- Щёлкаем по «Загрузить фото с компьютера». Выбираем в «Проводнике Windows» файл, который мы создали только что с помощью Paint.

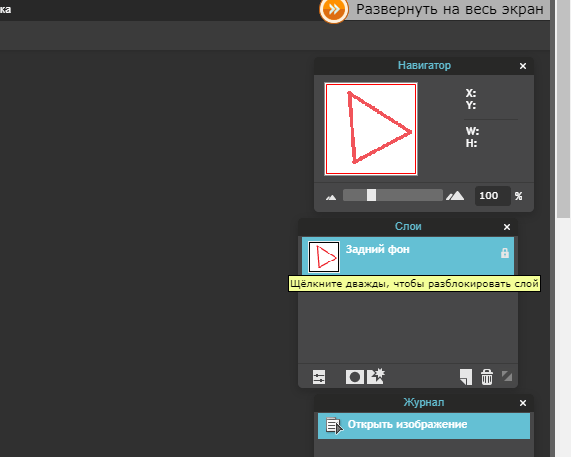
Кликните по «Загрузить фото с компьютера» - На плитке «Слои», расположенной в правой части экрана, будет находиться один пункт «Задний фон». В его правом углу будет значок в виде замка. Кликните по нему быстро два раза, чтобы убрать блокировку.

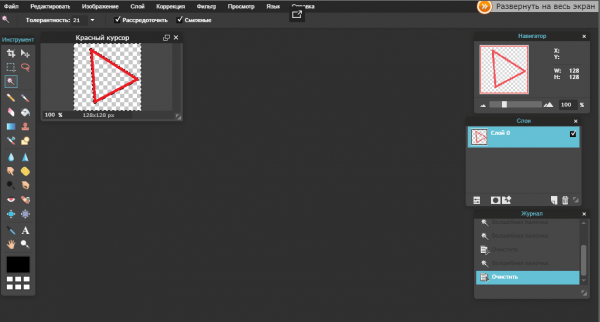
Кликните двойным щелчком по значку в виде замка - На панели «Инструмент» выбираем «Волшебную палочку». Кликаем мышкой по белому фону на изображении и нажимаем на клавиатуре на кнопку Delete. Повторите процедуру для белого фона внутри стрелки.

Выберите в качестве инструмента «Волшебная палочка» - В результате вместо белого фона появится фон с рисунком шахматной доски. Это будет означать, что он прозрачный.

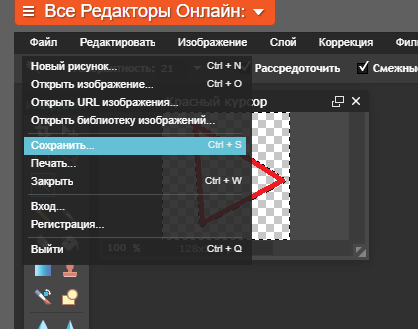
Шахматная доска на фоне означает, что он прозрачный - Щёлкните по «Файл», а затем по пятой опции «Сохранить».

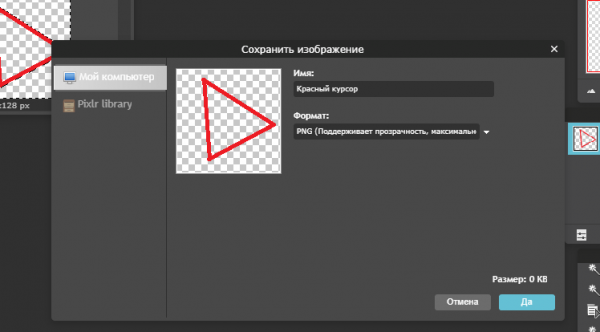
Кликните по «Сохранить» в меню «Файл» - В параметре «Формат» будет уже стоять нужное нам расширение png. Кликаем по «Да». Файл сохранится в папке «Загрузки» на ПК.

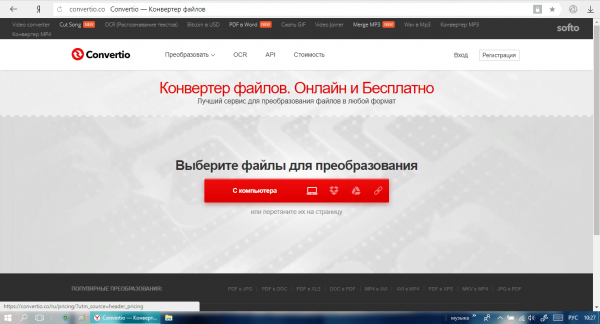
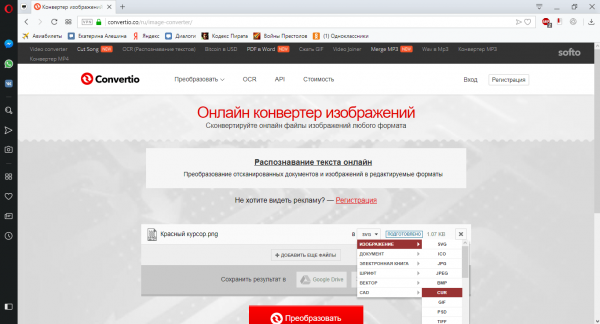
Нажмите на «Сохранить», чтобы сохранить рисунок курсора на прозрачном фоне - Следующим шагом будет конвертация файла. Нам нужно установить другое расширение для него, чтобы установить его в результате в качестве курсора. Как это сделать? Необходимо воспользоваться любым онлайн-сервисом для конвертации. Для примера возьмём этот сайт под названием Convertio. Он надёжный и быстро конвертирует практически все виды файлов. Нажимаем на красную кнопку «С компьютера».

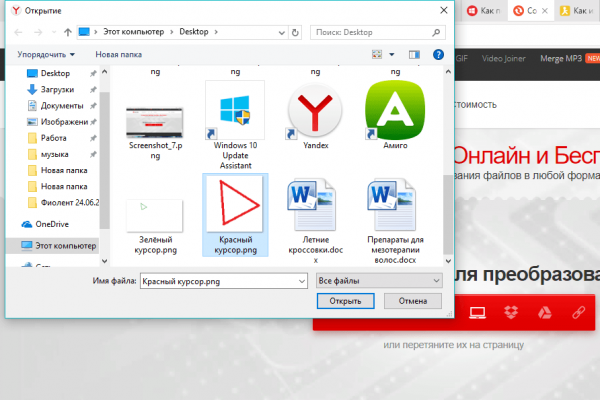
Нажмите на красную кнопку «С компьютера» на главной странице Convertio - В «Проводнике Windows» выбираем только что отредактированное изображение. Щёлкаем по кнопке «Открыть».

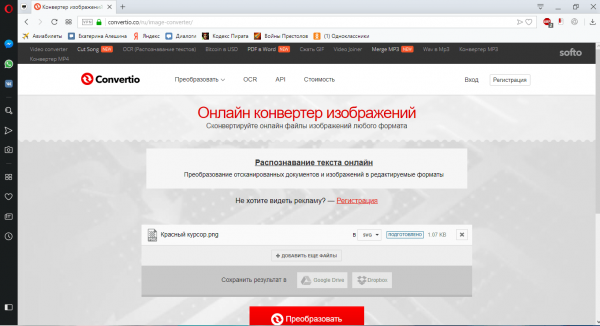
Выберите отредактированный ранее рисунок в окне «Проводника Windows» - Кликаем по выпадающему меню «В».

Откройте выпадающее меню «В» - Сначала наводим мышку на пункт «Изображение», а затем на тип файла cur.
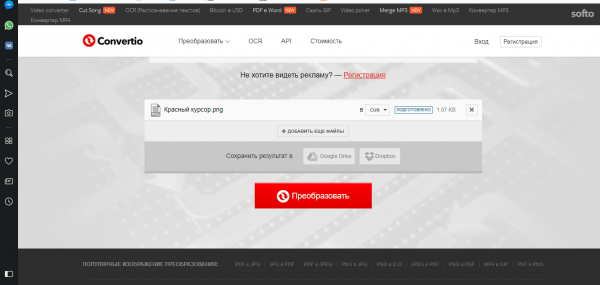
Выберите раздел «Изображение», а затем cur в списке - Теперь нажимаем на кнопку «Преобразовать». Подождите, пока завершится обработка загруженного вами файла.

Нажмите на кнопку «Преобразовать», чтобы начался процесс конвертации - После окончания процедуры в строке появится зелёная кнопка «Скачать». Щёлкаем по ней.

Кликните по кнопке «Скачать», чтобы загрузить файл с нужным расширением - Файл с форматом cur уже у вас на компьютере. Большая часть процедуры проведена. Остаётся дело за малым: установить курсор с помощью окна «Свойства: Мышь». Инструкция по запуску этого маленького блока для настройки курсора есть в разделе «С помощью системных средств» этой статьи.
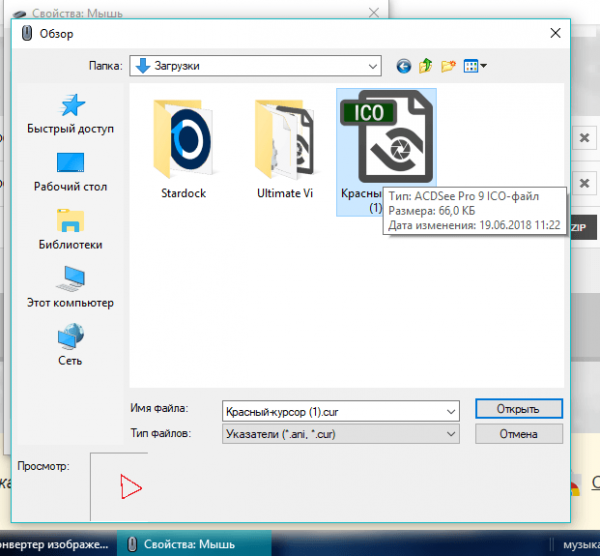
- Щёлкаем по уже знакомой кнопке «Обзор». Переключаемся на папку, в которую был загружен конвертированный файл. Ищем его в списке.

Откройте файл «Красный курсор» с помощью кнопки обзор в окне «Свойства: Мышь» - Завершающее действие — кнопка «Применить». Вы увидите, что курсор поменял вид: теперь вместо обычного стоит ваш собственный рисунок.

Нажмите на кнопку «Применить», чтобы вместо обычного курсора появился нарисованный вами указатель


Создаём курсор с помощью ArtCursors
Нарисовать свой указатель мыши можно не только с помощью Paint, но и за счёт сторонних утилит от различных разработчиков. Преимущество использования специальных программ в том, что вам не нужно будет отдельно конвертировать файл изображения png. Утилита создаст рисунок уже в нужном формате cur.
Для примера возьмём ArtCursors. Несмотря на то что её интерфейс на английском языке, в ней легко разобраться. Её минус в том, что она платная. Однако в начале пользования предлагается пробный период на месяц. Итак, как и где её скачать, а затем работать в ней?
- Загружаем инсталлятор этого редактора курсора только из официального источника. Щёлкаем по зелёной кнопке Download.

Нажмите на кнопку Download, чтобы загрузить инсталлятор - Открываем скачанный только что архив и запускаем в нём двойным щелчком последний файл setup.exe.

Откройте двойным щелчком файл setup.exe - Следуем простым пошаговым инструкциям по установке программы в специальном окне. Сама процедура не займёт много времени.
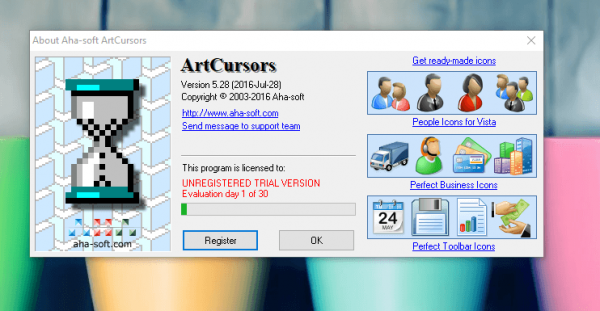
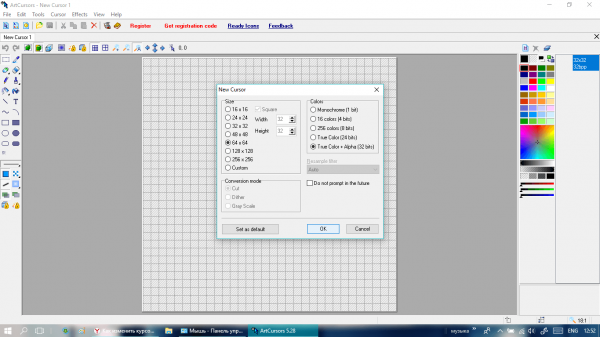
- В результате у вас откроется само окно редактора. Сначала вам дадут два варианта на выбор: пользоваться программой бесплатно в течение месяца либо зарегистрироваться и оплатить стоимость платной версии. Нажимаем на ОК, чтобы выбрать первый вариант.

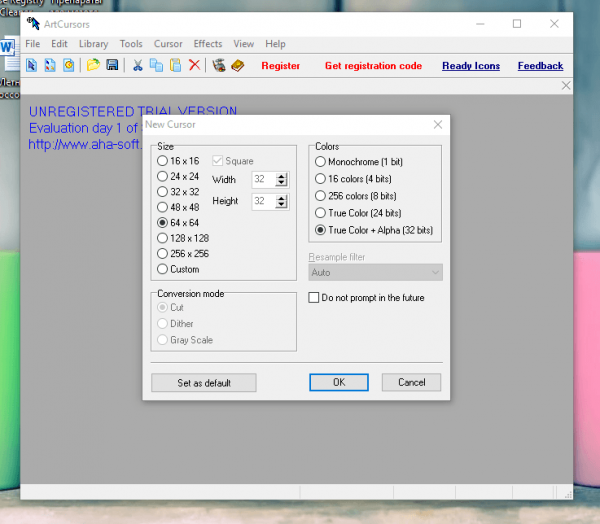
Нажмите на ОК, чтобы начать пользоваться программой в течение пробного периода - В следующем окне определитесь с размером значка и щёлкните левой кнопкой по ОК.

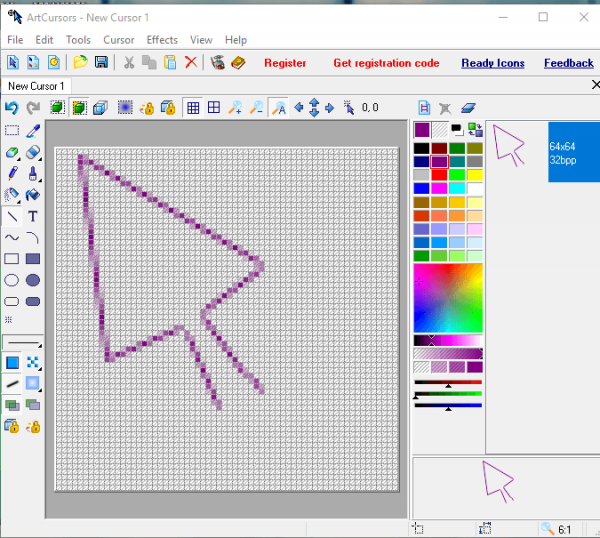
Выберите необходимый размер курсора среди доступных вариантов - Нарисуйте в редакторе необходимый курсор, например, фиолетовую стрелку. Мы использовали в данном случае инструмент «Линия», чтобы рисунок был ровным. При этом у нас был включён режим прозрачного фона (иконка в виде зелёного куба).

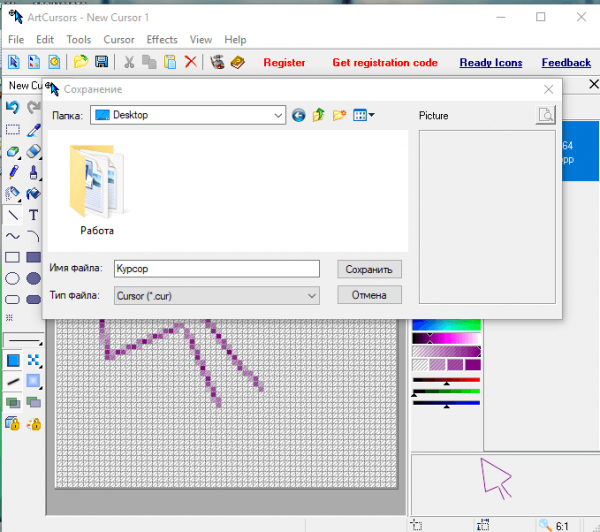
Нарисуйте в окне редактора свой будущий курсор - Когда рисунок завершён, щёлкаем по разделу на верхней панели «Файл», а затем кликаем по Save as.
В меню File выберите пункт Save as - Даём имя изображению и нажимаем на кнопку «Сохранить». Для хранения файла можете использовать любую папку на ПК. Мы сохранили на «Рабочий стол».

Выберите имя и расположения для рисунка - Теперь установите курсор в окне «Свойства: Мышь», используя инструкцию из раздела «Скачиваем значок из интернета» этой статьи.

Примените внесенные изменения

Видео: как сделать свой курсор в программе ArtCursors
Создание анимированного курсора
Что подразумевается под «анимированным курсором»? Это значок указателя мыши, который постоянно ежесекундно меняет свой внешний вид, то есть одна картинка тут же сменяется другой и так по кругу. Анимация может быть как короткой, так и длинной в зависимости от количества изображений в ней. Анимированный указатель мыши можно легко создать самому. Для этих целей подойдёт программа, которую мы использовали в предыдущем разделе статьи для создания обычного статичного курсора. Рассмотрим подробно шаги по созданию оригинальной анимации:
- Запустите утилиту ArtCursors, используя его иконку на «Рабочем столе». Щёлкните по ОК, чтобы продолжить пользоваться бесплатной пробной версией.
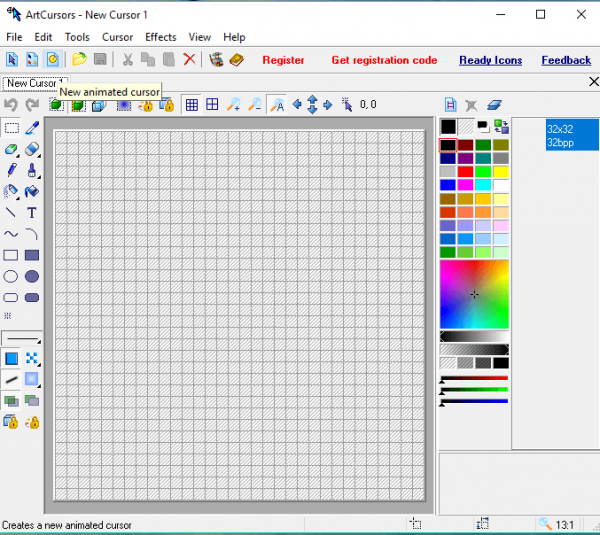
- В окне программы нажмите на иконку в виде голубого листа бумаги с нарисованным внутри жёлтым кругом. Он будет называться New animated cursor.

Кликните по иконке в виде листа бумаги с нарисованным жёлтым кругом - Выберите нужный вам размер курсора. Если хотите крупный указатель, отметьте 128 x 128 или больше. Щёлкните по ОК.
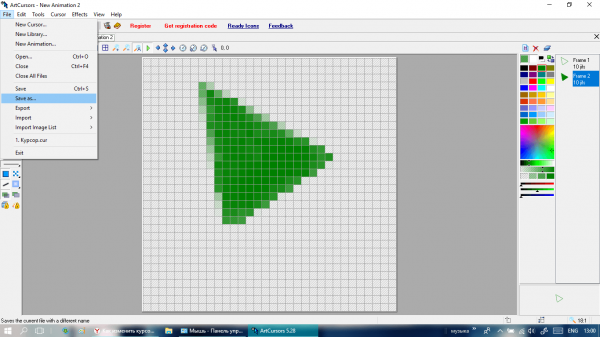
Выберите нужный размер для будущего анимированного указателя мыши - Нарисуйте необходимый вам курсор, в частности, его первую картинку в анимации. Например, мы сделали зелёную рамку в виде стрелки и не заполнили внутреннюю часть.
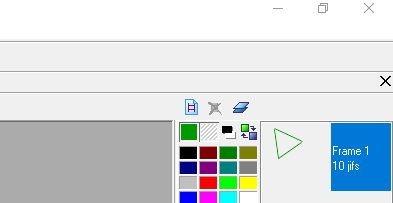
Нарисуйте первой изображение для анимации - Теперь в верхнем правом углу отыщите значок в виде листа бумаги с изображением розовой видеопленки. Нажмите на неё, чтобы создать следующее изображение для будущей анимации.

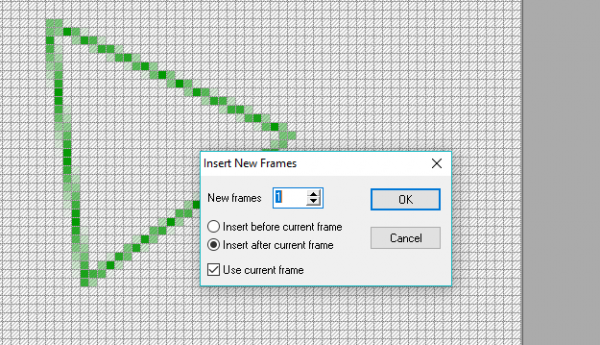
Чтобы созать второй рисунок, кликните по иконке с розовой видеоплёнкой - В небольшом окошке мы указываем, что создаём только одну рамку (Frame) и выбираем значение Insert after current frame. Это будет означать, что следующее изображение, которое мы создадим, будет идти в анимации после первого, а не перед ним. Если вы хотите использовать первый рисунок как основу для второго, оставьте галочку рядом с параметром Use current frame. Мы её оставили, так как это было необходимо для осуществления нашей задумки.
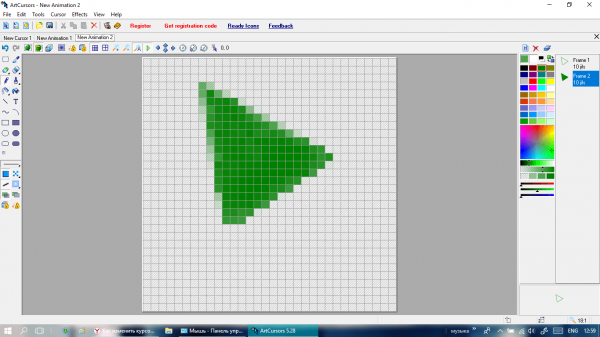
Выберите Insert after current frame и нажмите на ОК - Наша идея анимации состояла в том, чтобы сначала в анимированном курсоре была внутри пустота, а затем появлялся фон того же цвета. Мы заполнили внутреннюю часть стрелки зелёной краской. Посмотреть анимацию можно прямо в процессе создания. Для этого просто кликните по кнопке с зелёной стрелкой (по типу кнопки Play в обычном проигрывателе), расположенной на панели инструментов сверху. Анимация будет показываться в правом нижнем углу окна.
Сделайте второй рисунок для анимации - Если вы закончили работать с анимацией, кликните по опции File, а затем по Save as.
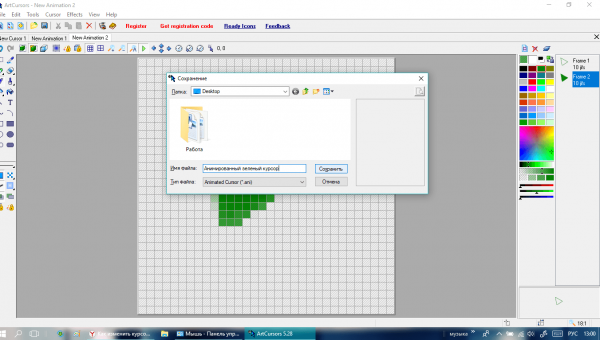
Кликните по Save as, чтобы сохранить анимацию на ПК - Назовите вашу анимацию. В меню «Тип файла» уже будет стоять нужное разрешение. Выбираем место для хранения, например, «Рабочий стол» и кликаем по «Сохранить».
Выберите место для хранения файла и нажмите на «Сохранить» - В окне «Свойства: Мышь» с помощью кнопки «Обзор» устанавливаем анимированный указатель, который только что создали.

Выберите только что сохраненный файл в окне «Свойства: Мышь» с помощью кнопки «Обзор»


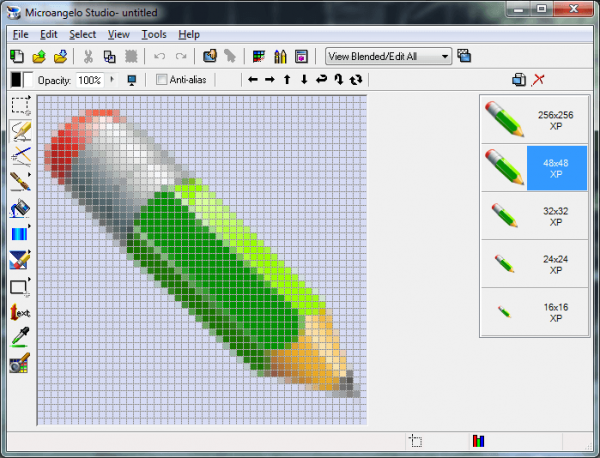
Miсroangelo: создание иконок Windows и анимированных курсоров мыши
Нарисовать анимированный указатель мышь можно не только в ArtCursors, но и в других приложениях, например, Mircoangelo от одноимённого разработчика. В нём можно делать не только новые курсоры, но и различные типы иконок для операционной системы Windows. В распоряжении у пользователя этого софта есть несколько режимов. С помощью Animator, например, создаются анимированные значки, в том числе и для указателя мыши.
Какие возможности есть у этой программы?
- изменяет рисунки по каждому параметру: цвет, размер, оттенок, эффекты и т. д.;
- предлагает для редактирования специальные шаблоны;
- позволяет вращать изображения, а также загружать сторонние картинки.
Приложение доступно для скачивания на официальном ресурсе разработчика.
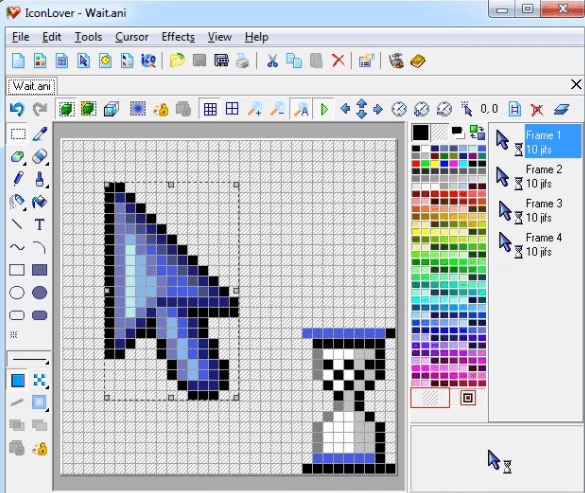
IconLover: превращение готовых картинок в анимированный курсор
Утилита IconLover подходит для создания иконок (каталогов, программ и т. д.) и курсоров, в том числе анимированных. Преимущество её в том, что она может превращать уже готовые картинки в иконку и указатель.
На что ещё способная эта утилита?
- импортировать и экспортировать файлы различных форматов, включая gif, png, bmp и многое другие;
- делать шахматные и градиентные заливки в слоях анимации;
- создавать значки маленьких и больших размеров;
- рисовать полупрозрачные значки для иконок и курсоров;
- использовать различные эффекты: тонировка, тень, сглаживание, прозрачность и другое;
- вращать, сдвигать и отражать рисунок.
Загрузить эту полезную утилиту для творческих людей можно с официального сайта.
Real World Cursor Editor: упрощённый редактор с множеством функций и языков
Утилита представляет собой бесплатное приложение для создания статичных и анимированных указателей мыши. Кроме большого количества инструментов для создания рисунков, утилита может похвастаться следующими возможностями:
- упрощённая функция применения различных эффектов на отдельные слои анимации (размытие, тень и т. д.);
- опция импорта и экспорта созданных движущихся курсоров в виде файлов с расширениями gif и png, например, для публикации в интернете;
- загрузка нескольких изображений для создания анимации;
- оптимизация анимированного курсора с повторяющимися слоями;
- дополнительные языки (при желании можно загрузить, чтобы было удобнее и быстрее работать в редакторе);
- создание указателей в формате 3D.
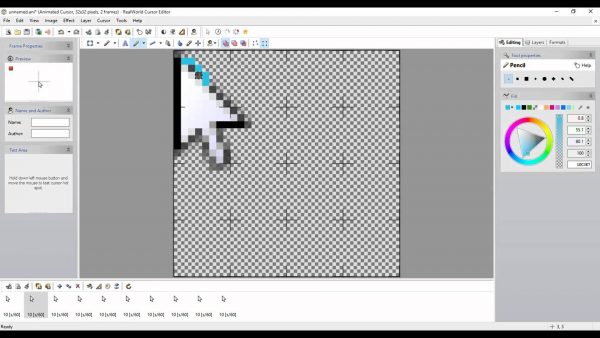
Программа доступна для скачивания на официальной странице разработчика RealWorld Graphics.
Возможности Windows позволяют внести что-то новое в интерфейс, например, сделать новый курсор, непохожий на стандартный. Вы имеет право воспользоваться сторонними утилитами для создания собственного оригинального указателя, например, приложением ArtCursors, или же просто для установки готовых тем, например, CursorFX.
- Распечатать
Оцените статью:
- 5
- 4
- 3
- 2
- 1
(4 голоса, среднее: 3 из 5)
Поделитесь с друзьями!
You can learn how to change your mouse cursor in Windows in a few different ways. So, if you are looking for different cursor colors and sizes, whether for better visibility or simply based on cosmetic preference, you can follow our simple guide on how to change your mouse cursor in Windows.
Contents
- Change your mouse cursor natively in Windows 10
- Change your mouse cursor scheme
- Customizing cursors
- Change your cursor size and color
- Change your mouse settings in Windows 11
Changing the cursor to a variety of built-in Windows “schemes” — which function as collections of cursors for normal operation, text selection, hyperlinks, etc. — is fairly easy, but users can also customize individual images or install themed packs.
Also, note that changing the mouse cursor on Windows 11 is just the same as on Windows 10. It’s only the navigation and finding the settings that are different.

Change your mouse cursor natively in Windows 10
The next few sections will cover how to change your mouse cursor away from the default in Windows 10.
Step 1: Click on the Search box located in the taskbar.
Step 2: Type in «mouse.»
Step 3: Select Change your mouse settings from the resulting list of options to open the primary mouse settings menu.
Step 4: Select Additional mouse options.
Step 5: You’ll then be able to look through cursor schemes. These are collections of static and animated images that completely replace the default “arrow” cursor and its associated tools. Most of them are boring but functional, and they take on the regular Windows look.
Step 6: In the Mouse properties window that appears, select the Pointers tab. The first option there is Scheme, and it’s all that most users will need.
Step 7: Click the Scheme drop-down menu, and you’ll see roughly a dozen different cursor schemes.

Change your mouse cursor scheme
Once you found a scheme following the steps above, you can change it. Here’s how.
Step 1: Click on any of the schemes to see a preview of the applicable cursors. You can move back and forth between them to compare the color and size. The inverted schemes are especially useful for those who have a hard time seeing the standard white cursor.
Step 2: When you’ve found one that looks good to you, click Apply.
Step 3: Click OK to implement the changes.
Step 4: Return to the Mouse properties menu for any additional changes in the future.
Step 5: The Enable pointer shadow option adds a cosmetic shadow to the cursor — it’s interesting, but not all that useful.

Customizing cursors
You can also browse a full list of extra cursors for more choices if you really want to customize your options.
Step 1: Navigate to the Mouse properties window as we did earlier.
Step 2: Select the Pointers tab.
Step 3: To select a custom cursor for the highlighted individual icon, click Browse.
Step 4: That will open the default cursors folder, where hundreds of different cursor options are available.
Step 5: Click one that matches the function (not the scheme) of the current cursor.
Step 6: Click Open to apply it to the current scheme.
Step 7: You can repeat step 2 as many times as it takes to get the desired result or click Use default to return to the standard cursor for the scheme in question. (Just be aware that “default” may not always mean the original cursor for that scheme, and it may be better to just hit Cancel instead if what you want is to return to the original cursor for a given scheme.)
Step 8: Repeat the process with any other individual cursors you’d like to change.
Step 9: Click Apply.
Step 10: Click OK to activate them.
Change your cursor size and color
If you are more interested in changing your cursor for accessibility reasons, you can quickly adjust the size or color without needing to mess around with different schemes or designs.
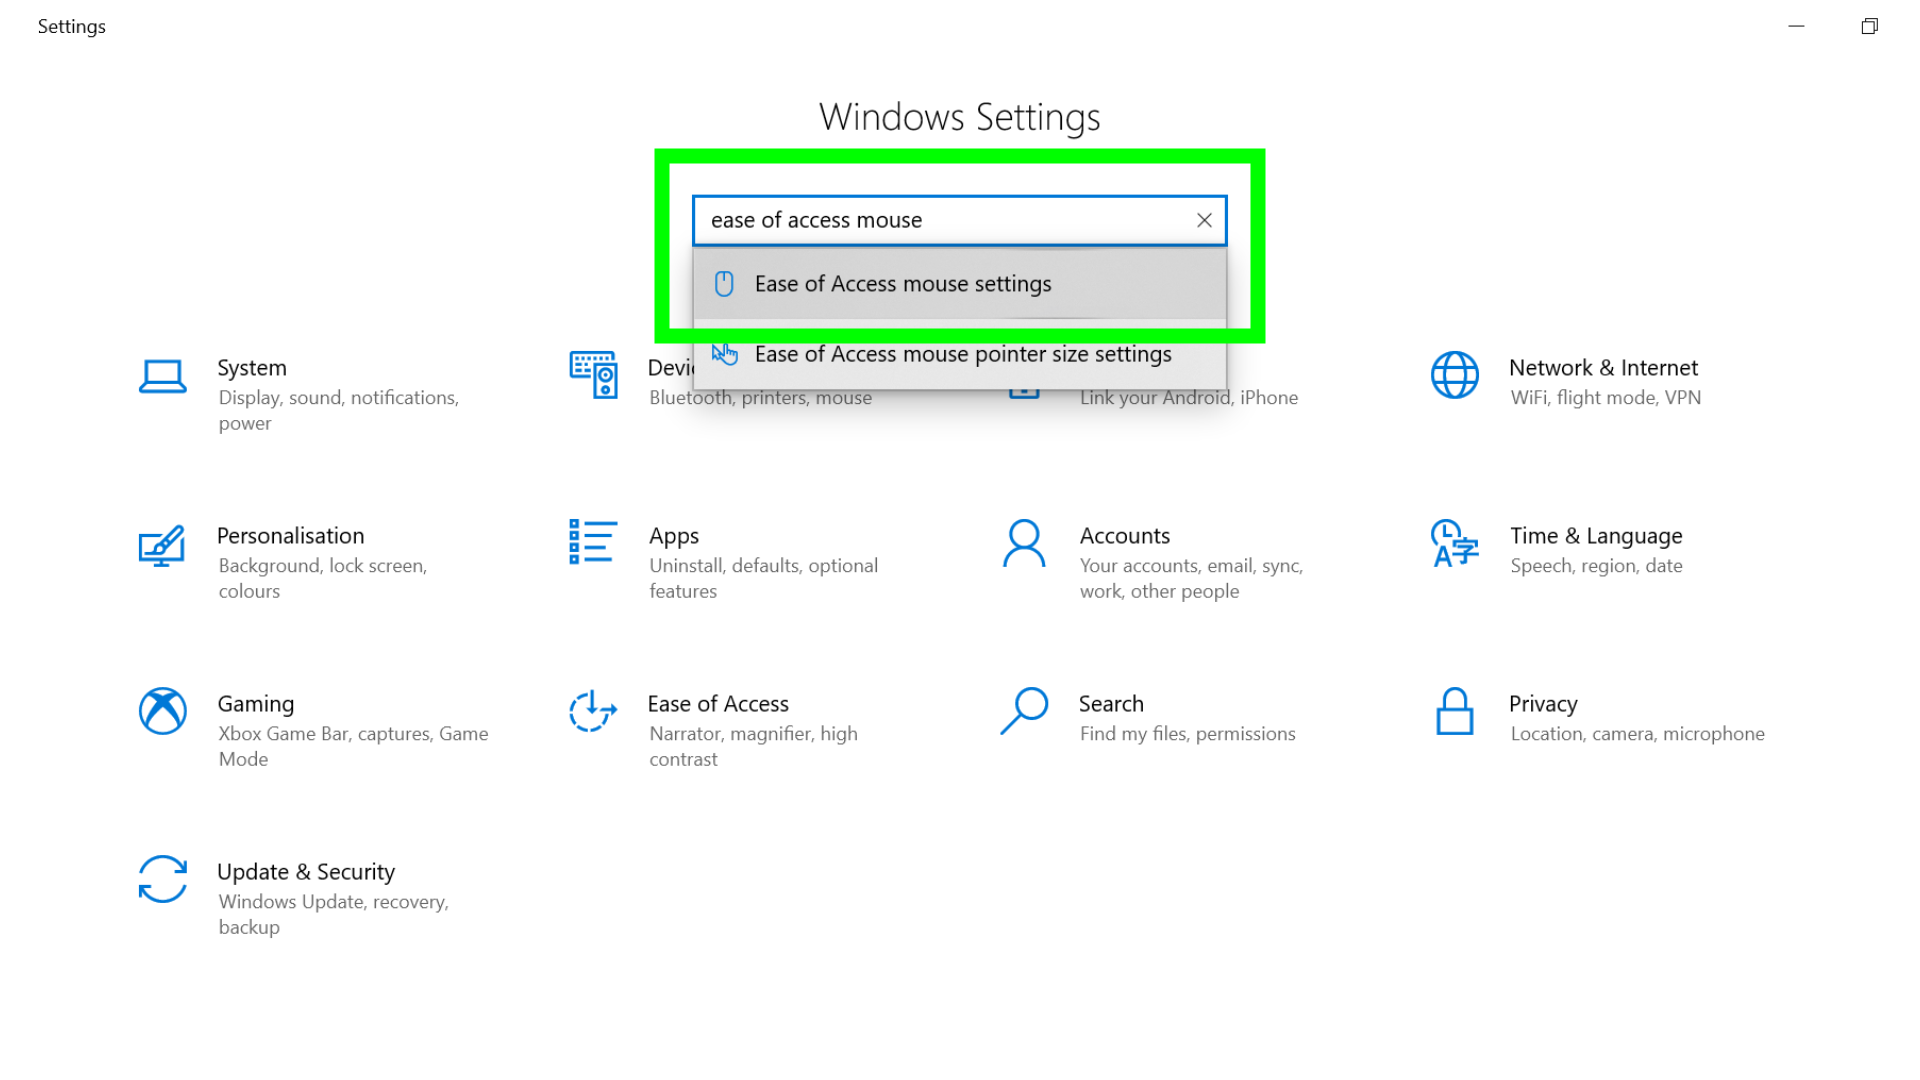
Step 1: In the Windows search box, search for «ease of access» and select Ease of access mouse settings from the resulting list.
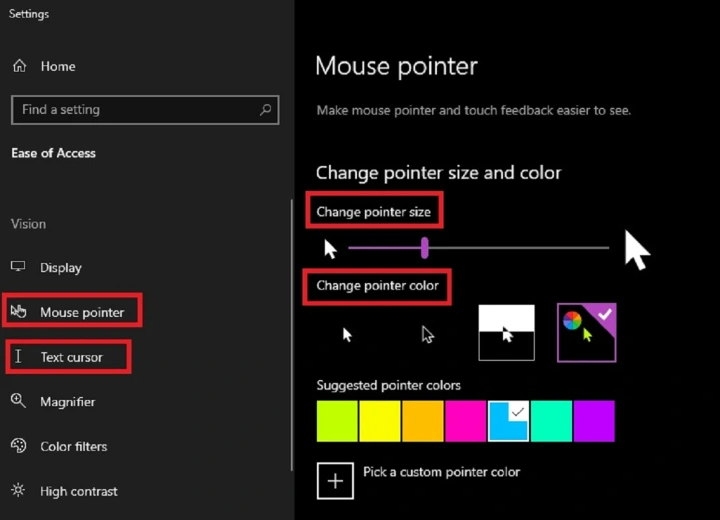
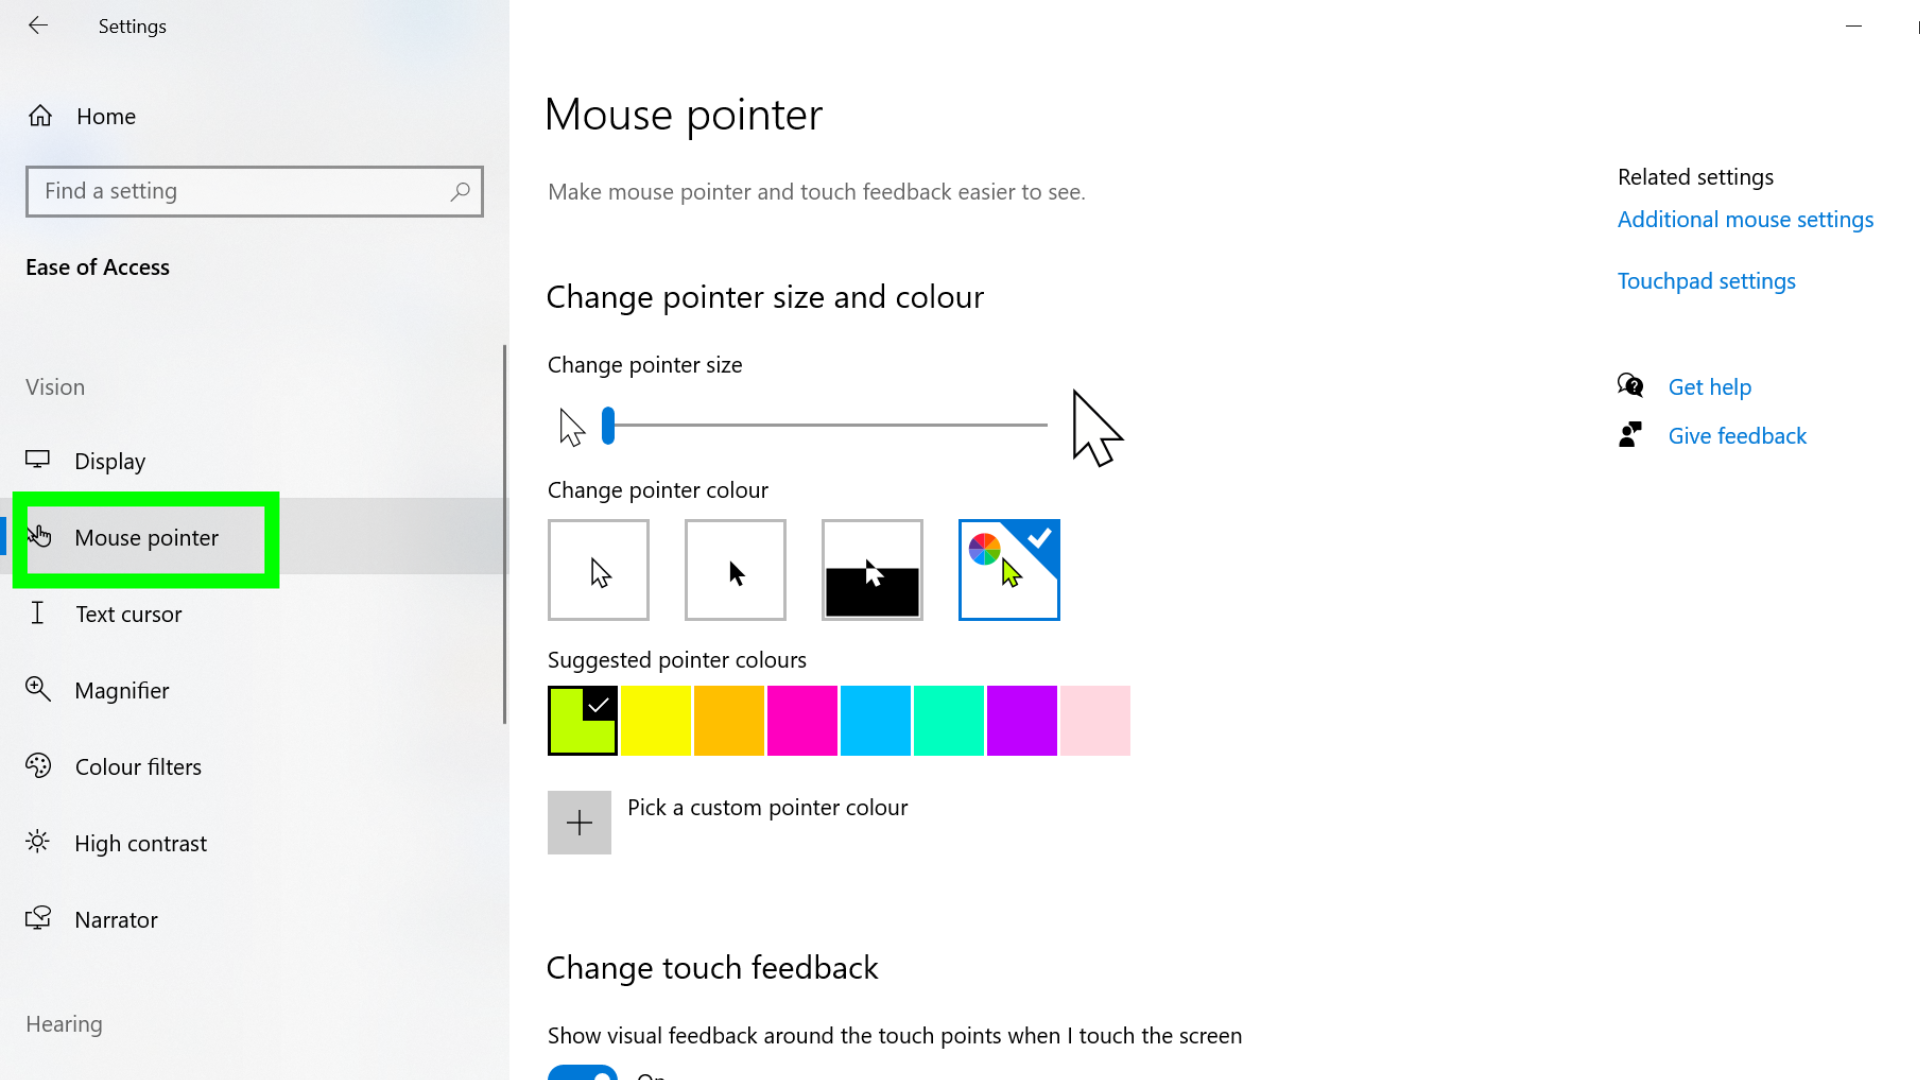
Step 2: In the left-side menu, select Mouse pointer.
Step 3: Under Change pointer size, you can adjust the bar to a size that works best for you. Under Change pointer color, you can select from several basic color options to make the cursor more visible: White, black, inverted, or custom. With custom, you can choose from either a set of seven suggested colors or pick a custom color of your own.
Step 4: You can also adjust the appearance of your text cursor. Select Text cursor from the left side of the Ease of access section of the Settings app.
Step 5: Here, you can change the color of your text cursor and even the thickness of it.

Change your mouse settings in Windows 11
If you’re on the newer version of Windows, which is Windows 11, then we have some good news. Microsoft hasn’t changed the way of tweaking your mouse cursor. It is exactly the same as it is in Windows 10. You just need to follow these steps to get to the settings for it.
Step 1: Open the Start menu and type «mouse.»
Step 2: Click Mouse settings.
Step 3: Scroll down in the settings app and click on Additional mouse settings.
Step 4: Visit the Pointers Pointer options, Browser, and Scheme settings as we described above, and tweak as you see fit. You also can get to the mouse pointer options by clicking Mouse pointer.
Customizing the Windows interface has recently declined in popularity. However, if you’re tech-savvy or prefer more advanced features, many programs can download supplementary cursor schemes or customized cursors to the menu. These alternative options include Stardock’s CursorFX and websites like the Open Cursor Library, which have specialized features for personalized cursors. To pick your cursor from one of these programs, follow the same steps detailed above.
If you find a couple (or several, if you’re feeling fun) cursors you wish to install, you simply need to copy and paste the image files into the corresponding Cursors folder. For Windows 7, 8, or 10 users, look for the Cursors folder in the default Windows installation folder (C: > Windows > Cursors). The Browse option can transfer to any folder of your choice on your computer. That said, we think it’s best to keep the majority of your customized cursor files in the default Cursors folder or at least in one designated folder. It helps keep your information organized.
Finally, ransomware and other malware attacks are always a potential threat to your computer. Be sure to keep an eye out for these attacks whenever you transfer a cursor file (or any other software, for that matter). To try and prevent these damaging viruses, be sure to check that a website is trustworthy before downloading anything. We recommend only using credible sites or checking files with a virus scanner immediately after downloading them and before opening them on your computer.
![]()
Today’s tech news, curated and condensed for your inbox
Check your inbox!
Please provide a valid email address to continue.
This email address is currently on file. If you are not receiving newsletters, please check your spam folder.
Sorry, an error occurred during subscription. Please try again later.
Editors’ Recommendations
-
ChatGPT: how to use the viral AI text generator that’s taken the world by storm
-
How to sync your Outlook calendar with an iPhone
-
Best VPN services 2023: today’s top picks
-
Best microSD cards in 2023: top picks for your computer, camera, or drone
-
Wi-Fi not working? Here’s how to fix the most common problems
Содержание
- Изменение указателя в Windows 10
- Способ 1: CursorFX
- Способ 2: RealWorld Cursor Editor
- Способ 3: Daanav Mouse Cursor Changer
- Способ 4: «Панель управления»
- Способ 5: Параметры
- Вопросы и ответы

Каждый пользователь ПК имеет свои персональные предпочтения относительно элементов операционной системы, в том числе и указателя мыши. Для кого-то он слишком маленький, кому-то не нравится его стандартное оформление. Поэтому довольно часто юзеры задаются вопросом, можно ли изменить дефолтные настройки курсора в Windows 10 на другие, которые будут более удобными в использовании.
Рассмотрим, как можно изменить цвет и размер указателя мыши в Виндовс 10 несколькими простыми способами.
Способ 1: CursorFX
CursorFX — русскоязычная программа, с помощью которой можно легко установить интересные, нестандартные формы для указателя. Она проста в использовании даже для начинающих пользователей, имеет интуитивно понятный интерфейс, но имеет платную лицензию (с возможностью использовать триальную версию продукта после регистрации).
Скачать приложение CursorFX
- Загрузите программу с официального сайта и установите ее на свой ПК, запустите ее.
- В главном меню нажмите раздел «Мои курсоры» и выберите желаемую форму для указателя.
- Нажмите кнопку «Применить».

Способ 2: RealWorld Cursor Editor
В отличии от CursorFX, RealWorld Cursor Editor позволяет не только устанавливать курсоры, но и создавать собственные. Это отличное приложение для тех, кто любит создавать что-то уникальное. Для изменения указателя мыши этим методом необходимо выполнить такие действия.
- Загрузите RealWorld Cursor Editor с официального сайта.
- Запустите приложение.
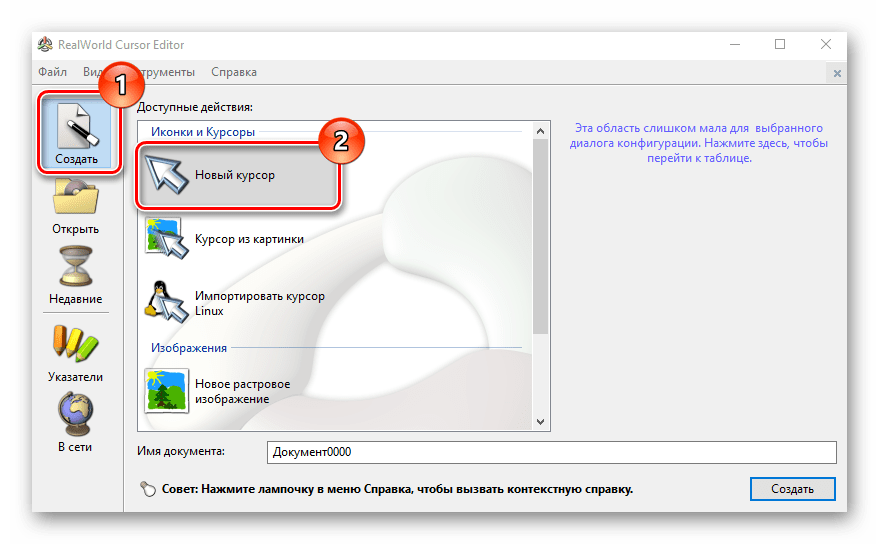
- В окне, которое откроется, нажмите на элемент «Создать», а потом «Новый курсор».
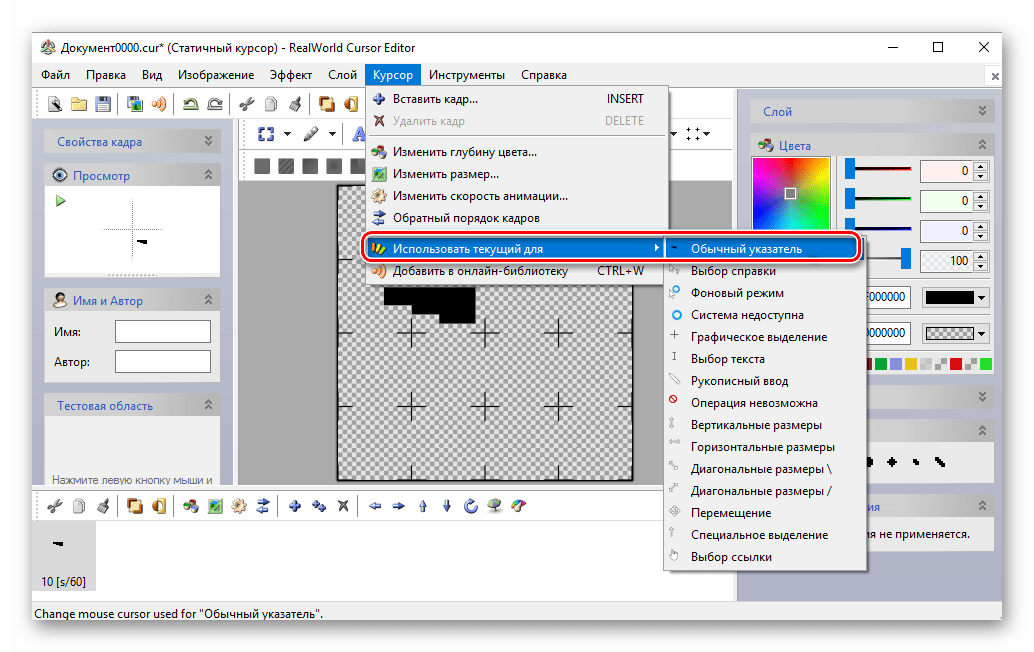
- Создайте собственный графический примитив в редакторе и в разделе «Курсор» кликните по пункту «Использовать текущий для -> Обычный указатель».
Способ 3: Daanav Mouse Cursor Changer
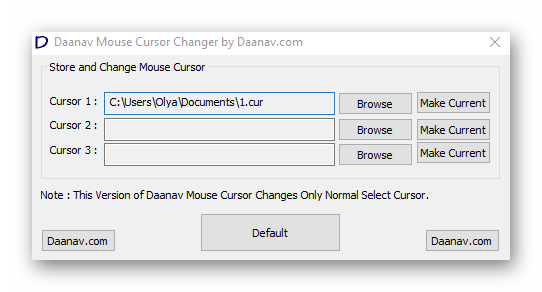
Это небольшая и компактная программа, которую можно загрузить с официального сайта разработчика. В отличии от ранее описанных программ, она предназначена для изменения курсора на основе ранее загруженных файлов из Интернета или собственных файлов.
Скачать программу Daanav Mouse Cursor Changer
- Скачайте программу.
- В окне Daanav Mouse Cursor Changer нажмите кнопку «Browse» и выберите файл с расширением .cur (скачанный из интернета или сделанный вами в программе для создания курсоров), в котором хранится вид нового указателя.
- Кликните по кнопке «Make Current», чтобы установить выбранный курсор новым указателем, который используется в системе по умолчанию.
Способ 4: «Панель управления»
- Откройте «Панель управления». Это можно сделать, нажав правой кнопкой мыши по элементу «Пуск» или, использовав комбинацию клавиш «Win+X».
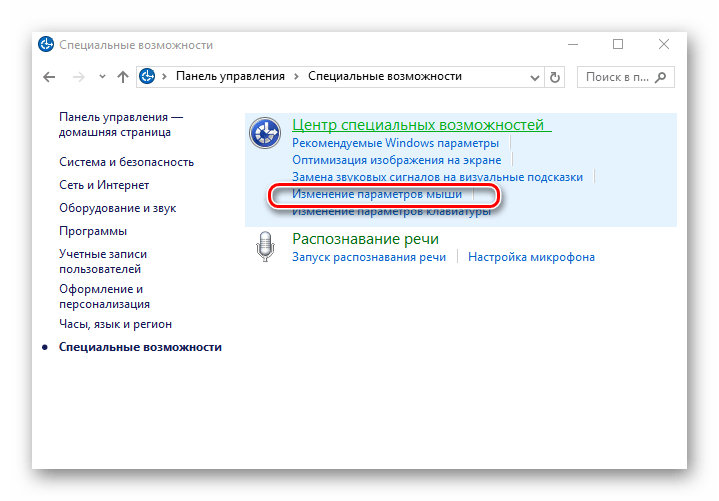
- Выберите раздел «Специальные возможности».
- Кликните на пункте «Изменение параметров мыши».
- Выберите размер и цвет курсора из стандартного набора и щелкните по кнопке «Применить».


Для изменения формы курсора необходимо выполнить такие действия:

- В «Панели управления» выберите режим просмотра «Крупные значки».
- Далее откройте элемент «Мышь».
- Перейдите на вкладку «Указатели».
- Щелкните мышкой по графе «Основной режим» в группе «Настройка» и нажмите кнопку «Обзор». Это позволит Вам настроить вид указателя, когда он находится в основном режиме.
- Из стандартного набора курсоров, выберите тот, который Вам больше всего нравится, кликните кнопку «Открыть».


Способ 5: Параметры
Для замены размера и цвета указателя также можно использовать «Параметры».
- Щелкните по меню «Пуск» и выберите пункт «Параметры» (или просто нажмите «Win+I»).
- Выберите пункт «Специальные возможности».
- Далее «Мышь».
- Установите размер и цвет курсора на свой вкус.

Такими способами можно всего за несколько минут придать указателю мыши желанную форму, размер и цвет. Экспериментируйте с разными наборами и Ваш персональный компьютер приобретет долгожданный вид!
Еще статьи по данной теме:
Помогла ли Вам статья?

Hello friends, many people want to change the cursor or mouse pointer on their pc or laptop. But they do not know how they should properly change the mouse cursor without affecting the other important settings in the control panel. So today, in this post, I will tell you how to change your mouse cursor in Windows 10.
Contents
- 1 how to change cursor windows 10
- 1.1 Watch Video:
- 1.2 how to change cursor back to normal windows 10
- 1.2.1 how do I change my mouse cursor icon
It is very easy to change the custom cursors on your laptop or pc. Just follow the steps given below and you are golden.
Watch Video:
To change your mouse cursor:
Step 1. Open Mouse settings. To do that, click on the start menu and search the control panel. You will see it in the results; click on it to open.
Step 2. Now you will see all the control panel settings but in a collapsed view. To get a better view of all the settings, click on the category button on the top right side of this window and select large icons as shown below.
Also Read: How To Delete Facebook Account Permanently
Now you will be able to all settings options clearly and one of the options is Mouse, double click to open it.
Step 3. Now a mouse properties window will pop up. In this window, you have to select the pointers tab as shown in the image below.
As you can see that I am using an Among us game custom cursor on my laptop.
how to change cursor back to normal windows 10
If you want to change your new custom cursor to the default windows 10 cursor. Then follow these steps:
- Click on the drop-down menu under the scheme tab.
- Now Choose any windows default cursor.
- After selection, click on apply then an ok button.
Also Read: How To Update and Download AMD Drivers
Now starts the fun part. Now, friends, I will tell you about a website from where you can download 1000’s of custom cursors.
Step 4. Now open up the chrome browser and go to cursors-4u.com.
There are unlimited cursors that you can use on your windows 10 pc or laptop.
On the top of this website, you will find the treading cursors. On the left side of this website, you will see many categories such as newest, most viewed, games, animated, and much more.
Advertisement
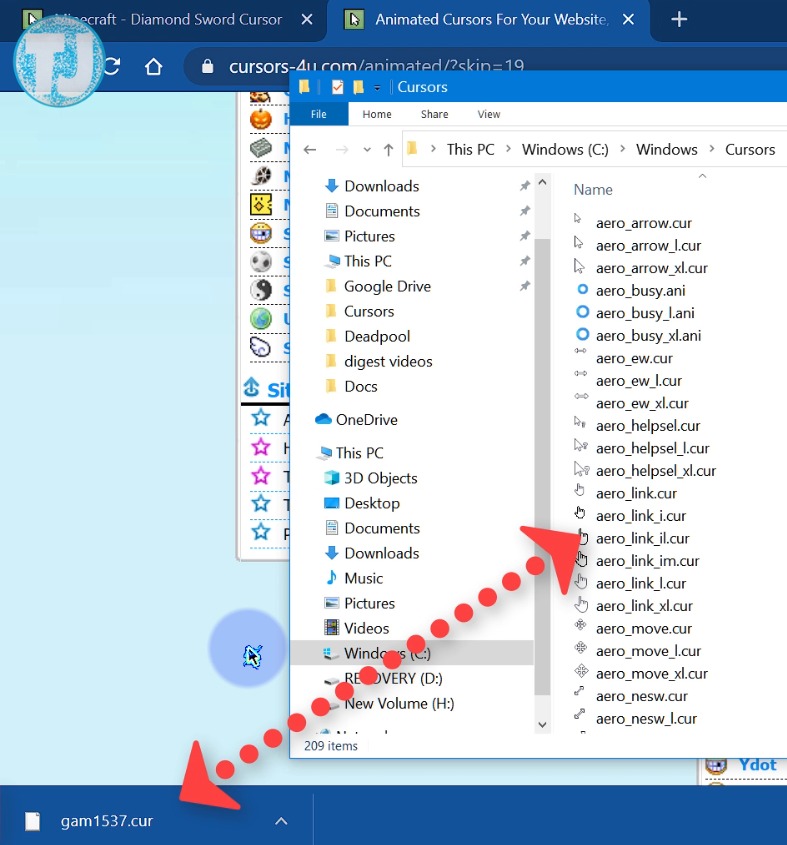
Step 5. Now choose the cursor that you want to download. For example, I am going to download this Minecraft sword custom cursor. After clicking on the desired cursor, you will see a new page.
On this page your mouse cursor will automatically change to your selected cursor.

Step 6. To download the selected cursor you have to click on the download button as shown in the above image. Then this file will be saved in your downloads folder
how do I change my mouse cursor icon
After downloading the file, now we have to move this file to the cursors folder in C drive.
- Open my computer or this pc.
- Click on Local Disk Drive C.
- Select Windows folder.
- Select and open the Cursors Folder.
- Now simply drag and drop the cursor file into the cursors folder.
Step 7. Now open Mouse properties again.
Also Read: Windows 10 Brightness Slider Missing
Step 8. Click on the Browse button and go to the fonts folder in C Drive and select the new cursor that you want to use.
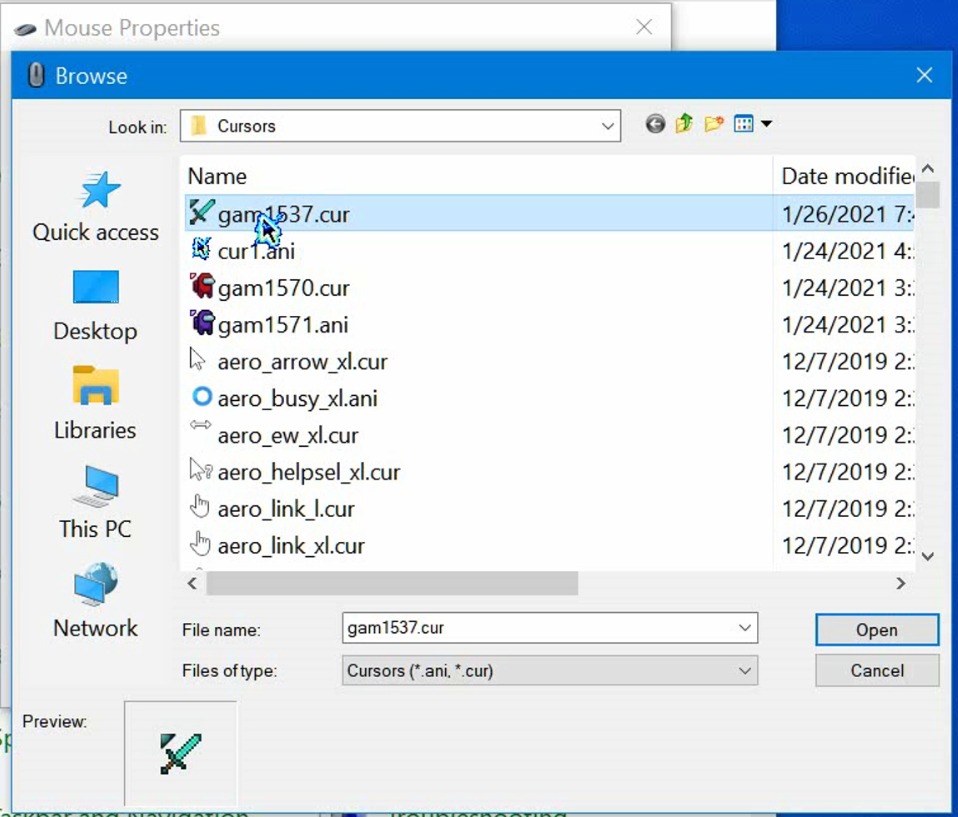
Now click on the open button. After that click on apply and ok button.
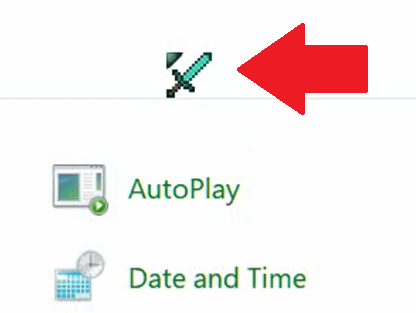
Now you have successfully changed your cursor to a new custom one as you can see in the image below.
Note: If you want to switch back to the default cursor, follow the guide given above.
Also Read: How To Hide Number on Whatsapp
Guys, if you have any questions feel free to ask me in the comments. Thanks for reading.
Summary
Article Name
How to Change your Mouse Cursor
Description
Simple steps about How to Change your Mouse Cursor in Windows 10 or 7. Change your cursor to Minecraft cursor, anime cursor, cursor style
Author
Publisher Name
Jaspreet Singh
Publisher Logo

A mouse pointer, also known as the cursor is a graphical icon which represents your pointing device’s movements on your display. It allows the user to manipulate objects on the screen with a mouse, a touchpad or any other pointing device. In this article, we will see how to change the appearance of the mouse pointer in Windows 10.
In Windows 10, mouse cursors support themes, so you can change the appearance of all your cursors with one click. Windows comes with a few themes bundled. Some third-party themes come with a set of cursors. The user can change individual cursors manually using Settings, the classic Mouse Properties window, and also the Registry.
Change Mouse Pointer in Windows 10 using Settings
To change mouse pointers in windows 10, do the following.
- Open Settings.

- Go to Ease of Access — Mouse.

- On the right, select the size of the cursor — standard, large, extra large — using thumbnail buttons under Mouse pointers.
- Under the Pointer color, you can choose between the white and black mouse pointer color.


The Settings app has limited abilities to change the mouse pointers as of this writing, so most of the settings are still located in the classic Control Panel applet called «Mouse Properties».
Change Mouse Pointers in Windows 10 using Mouse Properties
To change the mouse pointer appearance using the classic Control Panel, do the following.
- Open Control Panel.
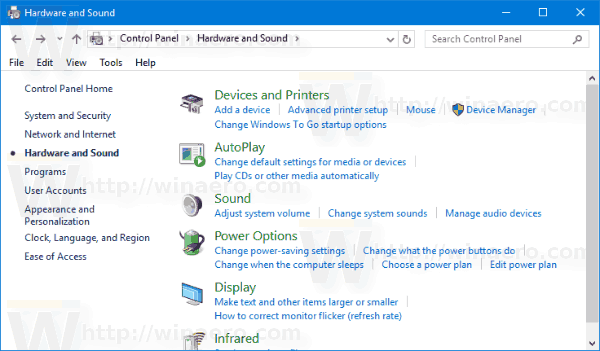
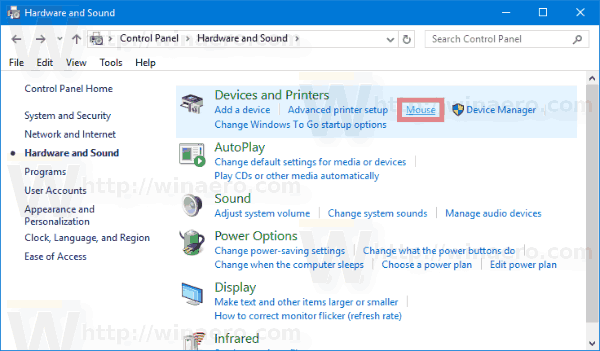
- Go to Control PanelHardware and Sound.

- Under Devices and Printers, click the Mouse link.
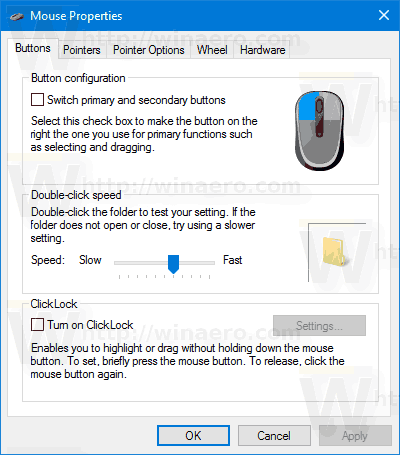
The following window will open:
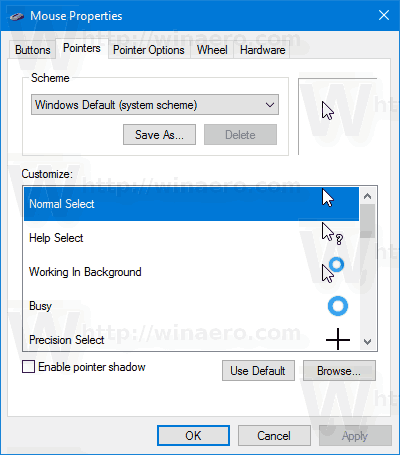
- There, switch to the Pointers tab. Here is how it looks.
- Under Scheme, you can pick one of the installed cursor themes. See the screenshot below.
- Under Customize, you can change individual cursors for the selected scheme. Select the desired cursor in the list, and click the Browse… button to pick an alternative cursor file. You can choose a static cursor image (*.cur file) or an animated cursor (*.ani file).
- Tip: Once you have finished customizing your cursors, you can click the button Save As under Scheme to save your changes as a new pointer scheme.

- To reset the customized cursor and use the default one from the current theme, click the button Use Default.
 You can choose a static cursor image (*.cur file) or an animated cursor (*.ani file).
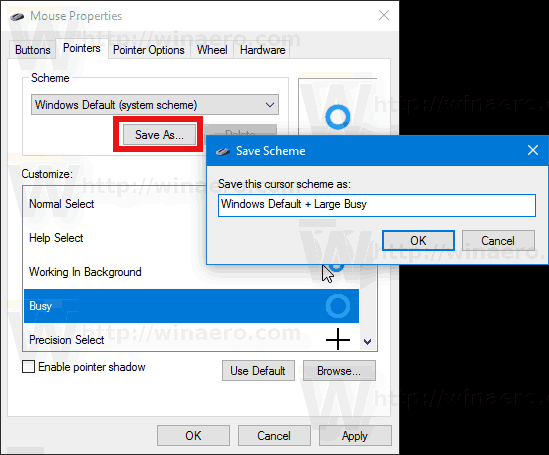
Change Mouse Pointers in Registry
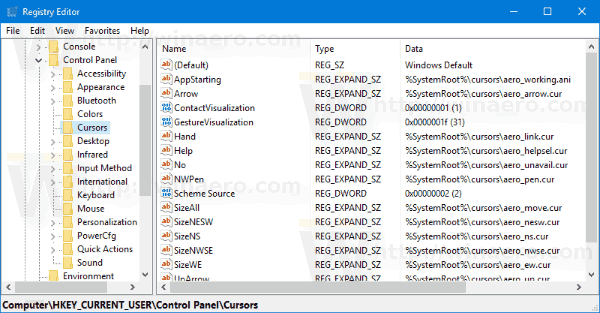
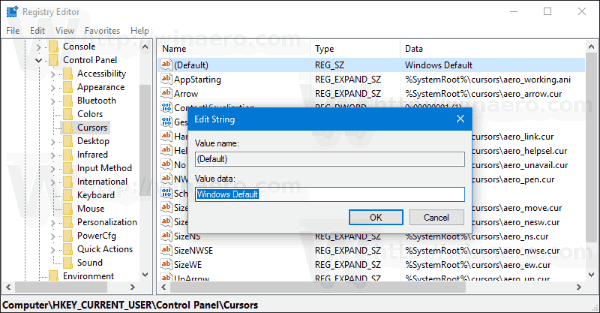
Using the built-in Registry Editor app, you can customize the cursors. Windows stores the path to each cursor file under the following Registry key:
HKEY_CURRENT_USERControl PanelCursors
Here is how you can edit them.
- Open Registry Editor.
- Navigate to the following Registry key:
HKEY_CURRENT_USERControl PanelCursors
Tip: You can access the desired Registry key with one click.

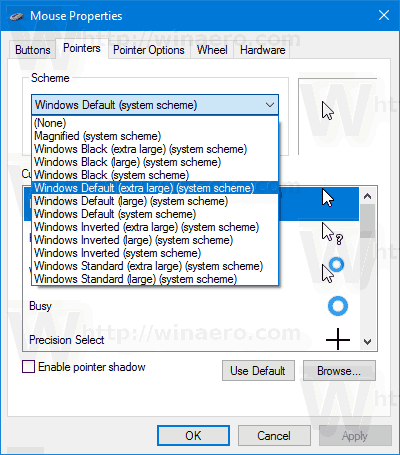
- On the right, modify the (Default) string value and set it to one of the following values to apply any of the default cursor schemes:
blank — this will set the default scheme named «None».
Magnified
Windows Black (extra large)
Windows Black (large)
Windows Black
Windows Default (extra large)
Windows Default (large)
Windows Default
Windows Inverted (extra large)
Windows Inverted (large)
Windows Inverted
Windows Standard (extra large)
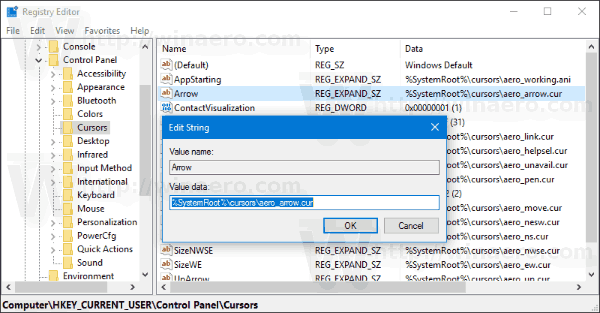
Windows Standard (large) - To customize individual pointers, modify the following string values:
Arrow — the pointer for «Normal Select».
Help — the pointer for «Help Select».
AppStarting — the pointer for «Working in Background».
Wait — the pointer for «Busy».
Crosshair — the pointer for «Precision Select».
IBeam — the pointer for «Text Select».
NWPen — the pointer for «Handwriting».
No — the pointer for «Unavailable».
SizeNS — the pointer for «Vertical Resize».
SizeWE — the pointer for «Horizontal Resize».
SizeNWSE — the pointer for «Diagonal Resize 1».
SizeNESW — the pointer for «Diagonal Resize 2».
SizeAll — the pointer for «Move».
UpArrow — the pointer for «Alternate Select».
Hand — the pointer for «Link Select».
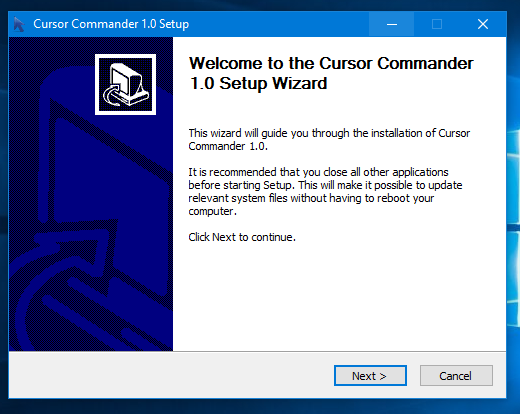
Get new cursor schemes with Cursor Commander
Some time ago, I released a freeware app, Cursor Commander, which can help you manage cursors in Windows 10. The main idea of the Cursor Commander app is that you can install and apply multiple new cursors with a single click. It uses a special file extension, .CursorPack. It is actually a ZIP archive which contains a set of cursors and a special text file with instructions for the app to apply them.
- Download Cursor Commander from HERE. You can also read a detailed description of the app HERE.
- Unpack the file named Cursor Commander-1.0-Win8.exe. It works in Windows 10 without issues.
- Run the installer and follow the setup instructions.

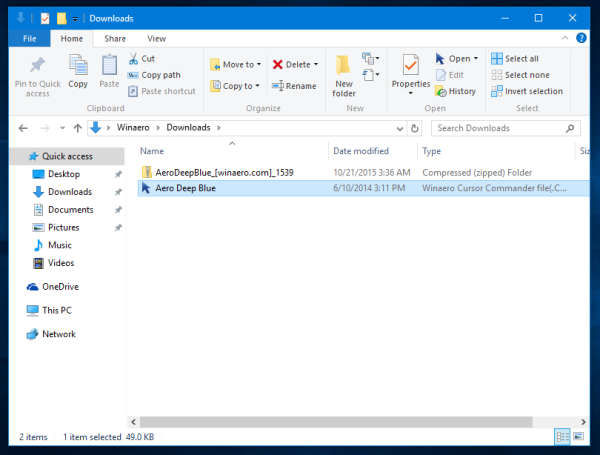
- Now, pick a set of cursors you like from HERE. I will use the one named «Aero Deep Blue», which goes well with the default theme in Windows 10:

- Double click the CursorPack file you downloaded:
 It will be installed and appear in Cursor Commander’s themes. From there, you can apply it with one click:
- You can switch between cursor themes easily. When you get bored with the current theme, you can pick another one and click the button «Use these cursors«. It is much faster than applying them manually with the Mouse Control Panel.

 It will be installed and appear in Cursor Commander’s themes. From there, you can apply it with one click:
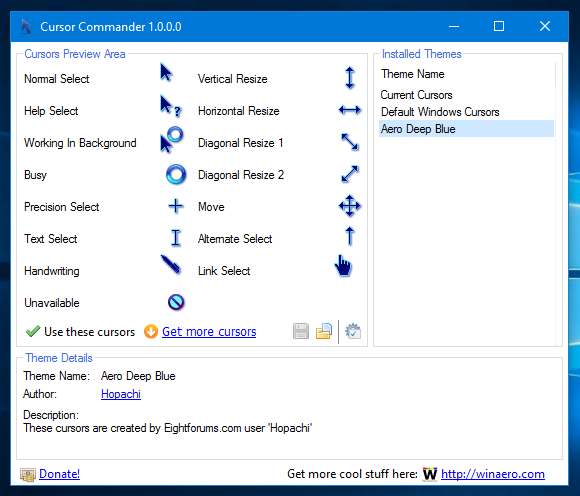
Cursor Commander is a freeware desktop app which works in Windows 10, Windows 7 and Windows 8.x. I have not tested it, but it should work fine in earlier versions of Windows too, like Windows Vista or XP with .NET 3.0 or .NET 4.x installed.
Actually there is a bug in Windows 7 and all later versions where custom cursors/mouse pointers get reset at startup when applied using Mouse Control Panel. The best fix for this is to use Winaero’s Cursor Commander to apply them. Then they won’t get reset to default and will scale correctly for higher DPI as well.
That’s it.
Support us
Winaero greatly relies on your support. You can help the site keep bringing you interesting and useful content and software by using these options:
If you like this article, please share it using the buttons below. It won’t take a lot from you, but it will help us grow. Thanks for your support!
Knowing how to change mouse cursor in Windows 10 is a pretty useful skill to have. After all, your mouse cursor is a really important part of using your computer, and you use it constantly to select, highlight, drag, and perform many other everyday tasks.
Unless you’re an expert who can do everything using keyboard shortcuts, you should make sure your mouse cursor is customized to be perfect for you.
- The best mouse you can buy today
- How to test a webcam in Windows 10
- How to rotate the screen in Windows 10
- How to remove the Windows 10 news and weather widget
If you’re struggling to see your mouse cursor, then changing the size, color, and contrast will make it much easier to use. If you just want to change it for aesthetic reasons, then that’s fine too.
Fortunately, it’s easy to change mouse cursor in Windows 10. We’ll show you how in a few simple steps.
How to change mouse cursor in Windows 10: Change the style
1. Open Settings in Windows 10 by clicking the Start menu button in the bottom left corner of your screen and clicking the gear icon.
2. Select “Devices,” “Mouse,” and then “Additional mouse options.” Alternatively, you can type “mouse” into the search box to find the right options.
3. A window named “Mouse Properties” will open. To change the look of your mouse cursor, go to “Pointers,” click «Browse» and scroll through the different cursor styles that are available in Windows 10.
Select the one you like best, then click «OK» to confirm. Your mouse cursor should change right away.
How to change mouse cursor in Windows 10: Change the size and color
Most of the default mouse cursor options are black or white. For more customization options, follow these steps to change the cursor color and size:
1. In Settings, search for “ease of access mouse” and select «Ease of access mouse settings.»
2. Select “Mouse pointer” in the side menu. Use the «Change pointer size» slider to change the size of the mouse cursor.
Choose one of the «Change the pointer color» options to change the color of your mouse cursor.
And that’s it. If you want more Windows tips, we’ve got you covered. For instance, here are our tips on how to speed up Windows 10 so you can get things done faster.
We’ll also show you how to uninstall a Windows 10 update if updates are giving you trouble. Plus, we have advice on freeing up space in Windows 10 and the best VPN to use on Windows 10.
- More: How to install Windows 10: Everything you need to know
- How to reinstall Windows 10 without losing your files
- How to hide desktop icons in Windows
- How to share a printer in Windows 10
- How to disable the Windows key in Windows 10
- How to batch rename multiple files in Windows 10
Get instant access to breaking news, the hottest reviews, great deals and helpful tips.
Millie is a Deals writer at Tom’s Guide specializing in deals content. She also covers the latest tech news and and creates how-to articles about everything from phones, streaming devices, and headphones to apps and video games. In her spare time, she enjoys reading, gaming on her Nintendo Switch and creating digital art.

Contents
- 1 How to Change Cursor Size and Colour in Settings
- 2 How to Change the Mouse Pointer Look in Control Panel
- 3 How to Get a Custom Cursor in Windows 10 via a Cursor Library
The Windows 10 cursor is more or less iconic at this point, but it’s not without its flaws. Quite often, it can be too small on high-resolution displays or fit poorly with your system theme. In such instances, you can change your cursor to a custom one or simply change your cursor size in Windows 10 settings.
This is important because while it often fades into the background, the cursor is a fundamental part of how we interact with most PCs. A cursor that’s too small will seriously hamper your productivity, and turning your resolution down isn’t a good solution either. While you can change the DPI scaling level of your entire PC, the ability to make your cursor bigger in Windows 10 is often all you need if you’re sitting in front of a monitor.
Today we’re going to start by showing you how to change your cursor size in Windows 10, then move onto the world of cursor customization so you can get it looking exactly as you wish. Let’s get started:
How to Change Cursor Size and Colour in Settings
Where possible, we like to start with the options in Microsoft’s modern settings app, and this is no different. The Windows 10 May 2019 Update (version 1903) added several new cursor customization options to Settings that allow you to quickly change cursor size and color.
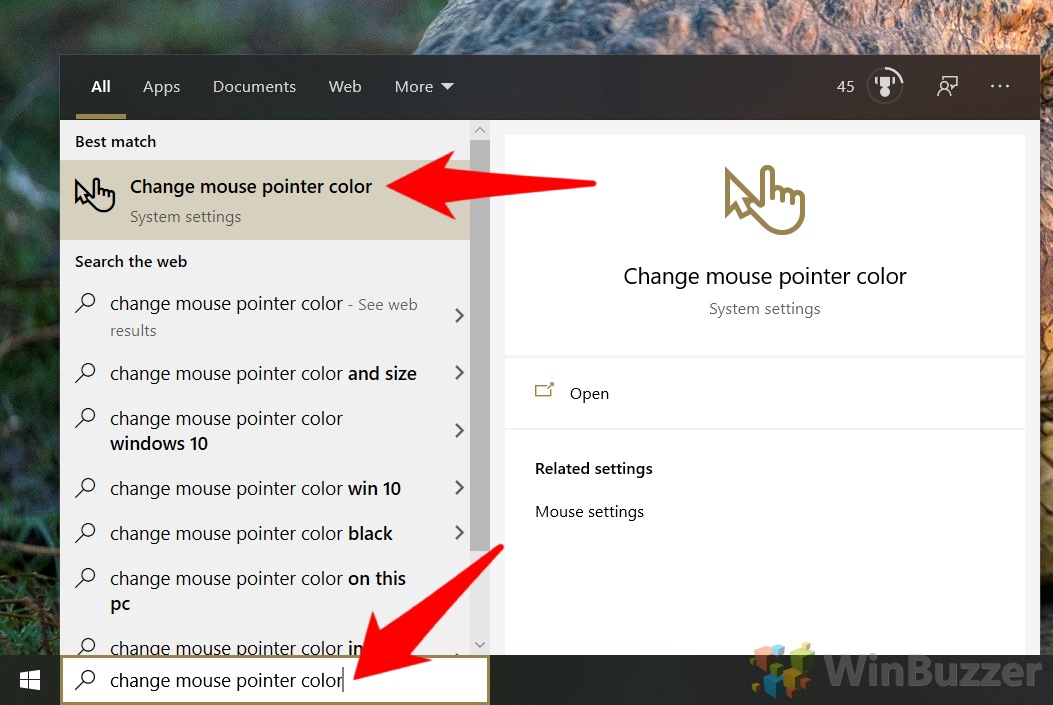
- Open cursor settings
Press the Start button and type “Change mouse pointer color“. Click the first result,=.

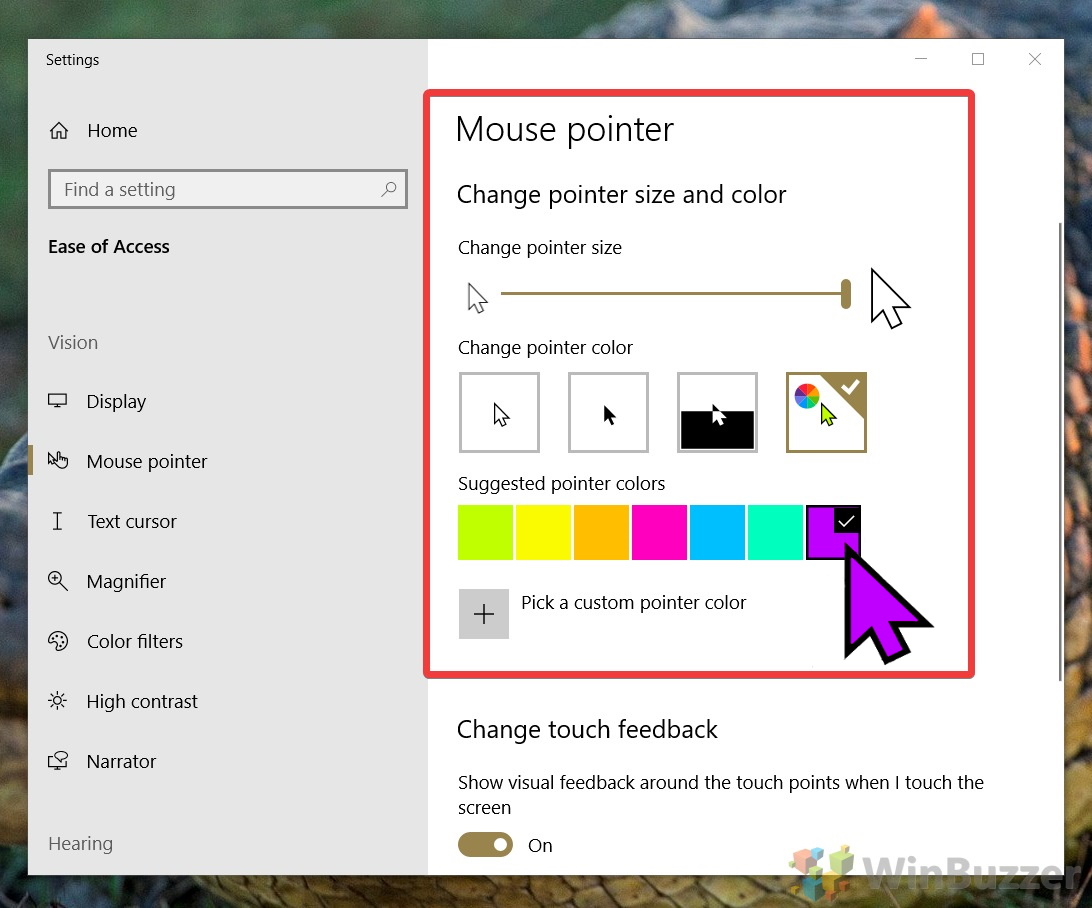
- Change your Windows 10 cursor settings
Use the slider to make your cursor bigger via Windows 10 settings, or smaller if you’ve already increased it.
To change mouse pointer color, press the icon on the far-left under “Change pointer color” – the one with a color wheel. Then, select one of the suggested pointer colors or press the “+” icon next to “Pick a custom pointer color” to set your own.

How to Change the Mouse Pointer Look in Control Panel
While the Windows Settings interface is intuitive, the Control Panel holds more in-depth options for your mouse pointer. With it, you can set a custom mouse cursor for different functions, such as when you’re selecting text or clicking a link.
- Open Control Panel
Press the Start or Search button and type “Control Panel”. Click the top result under “Best match”.

- Open mouse cursor settings
In your Control Panel, click the search bar in the top-right corner and search for “Mouse”. Under the Mouse heading in the main pane, click “Change how the mouse pointer looks“.

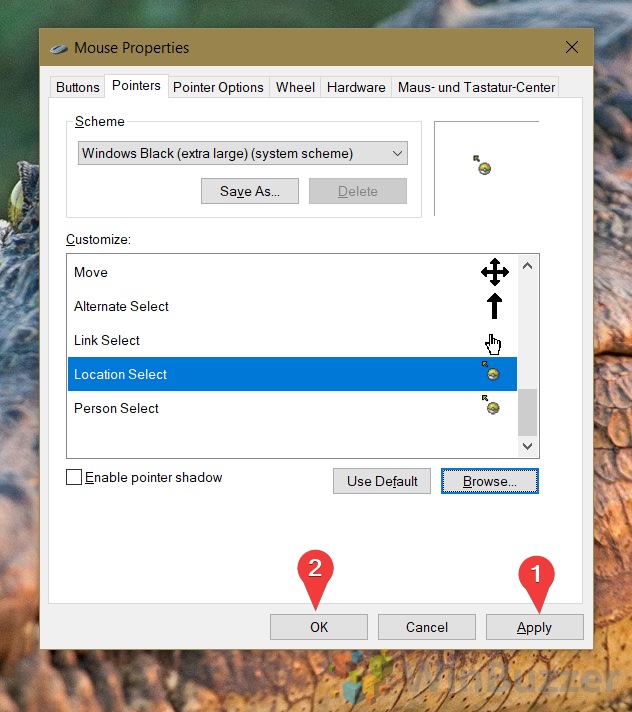
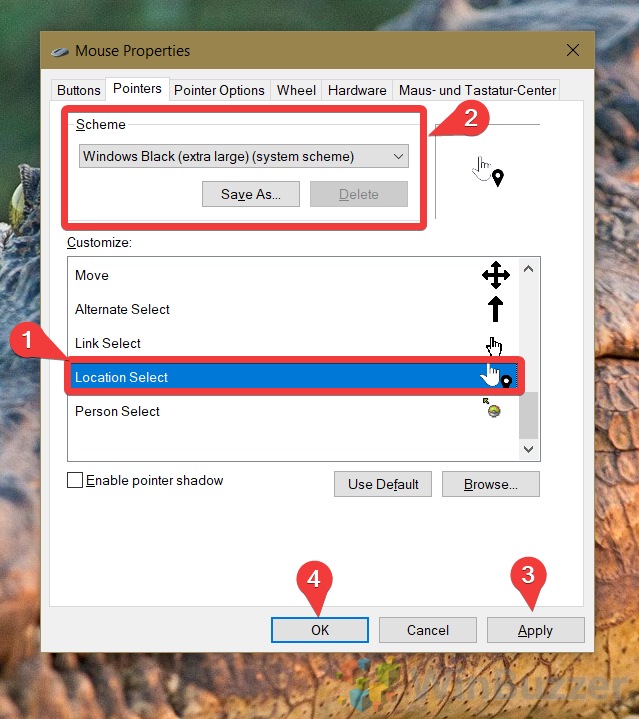
- Perform your cursor change
In the pane under “Customize”, click the mouse pointer icon you want to modify and use the cursor style changer under “Scheme” to change its theme. Once you’ve finished customizing, press “Apply” and “OK“.


If you want to set an entirely custom cursor in Windows 10, your best bet is a cursor library. For the sake of this tutorial, we’ll be using a collection from rw-designer called the Open Cursor Library. We’ll then show you how to apply these cursor skins to your system. Each Windows 10 cursor download there is completely free of charge.
- Go to the Open Cursor Library
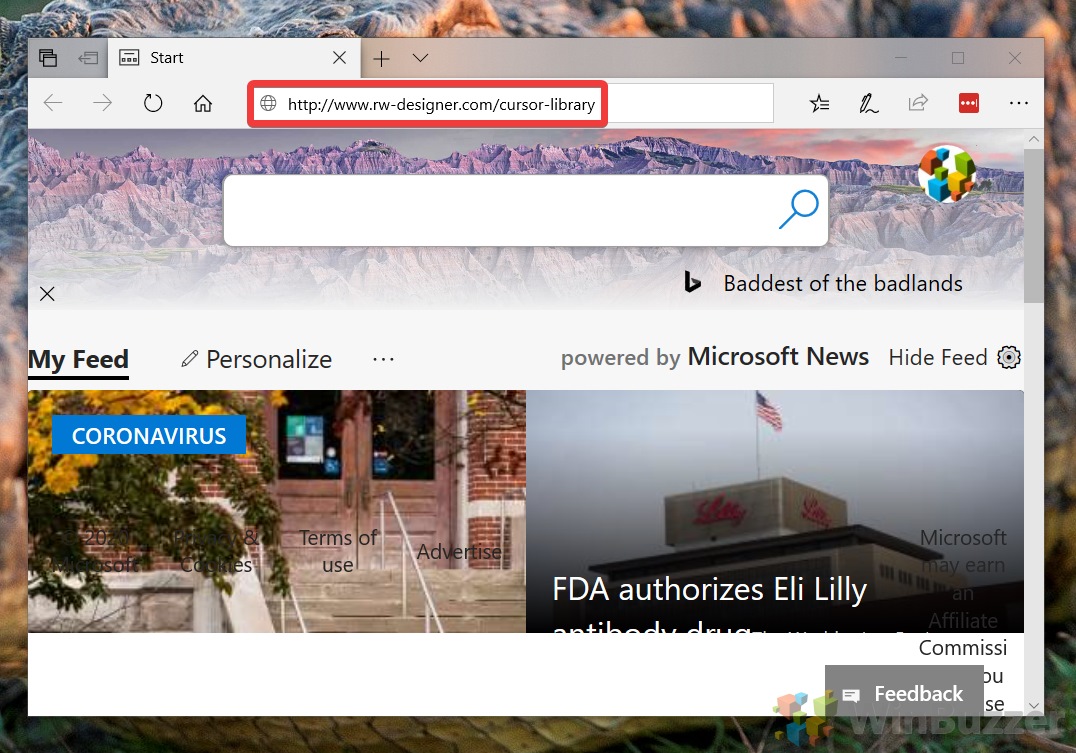
In your browser, visit the Open Cursor Library by clicking this link.

- Choose your desired cursor
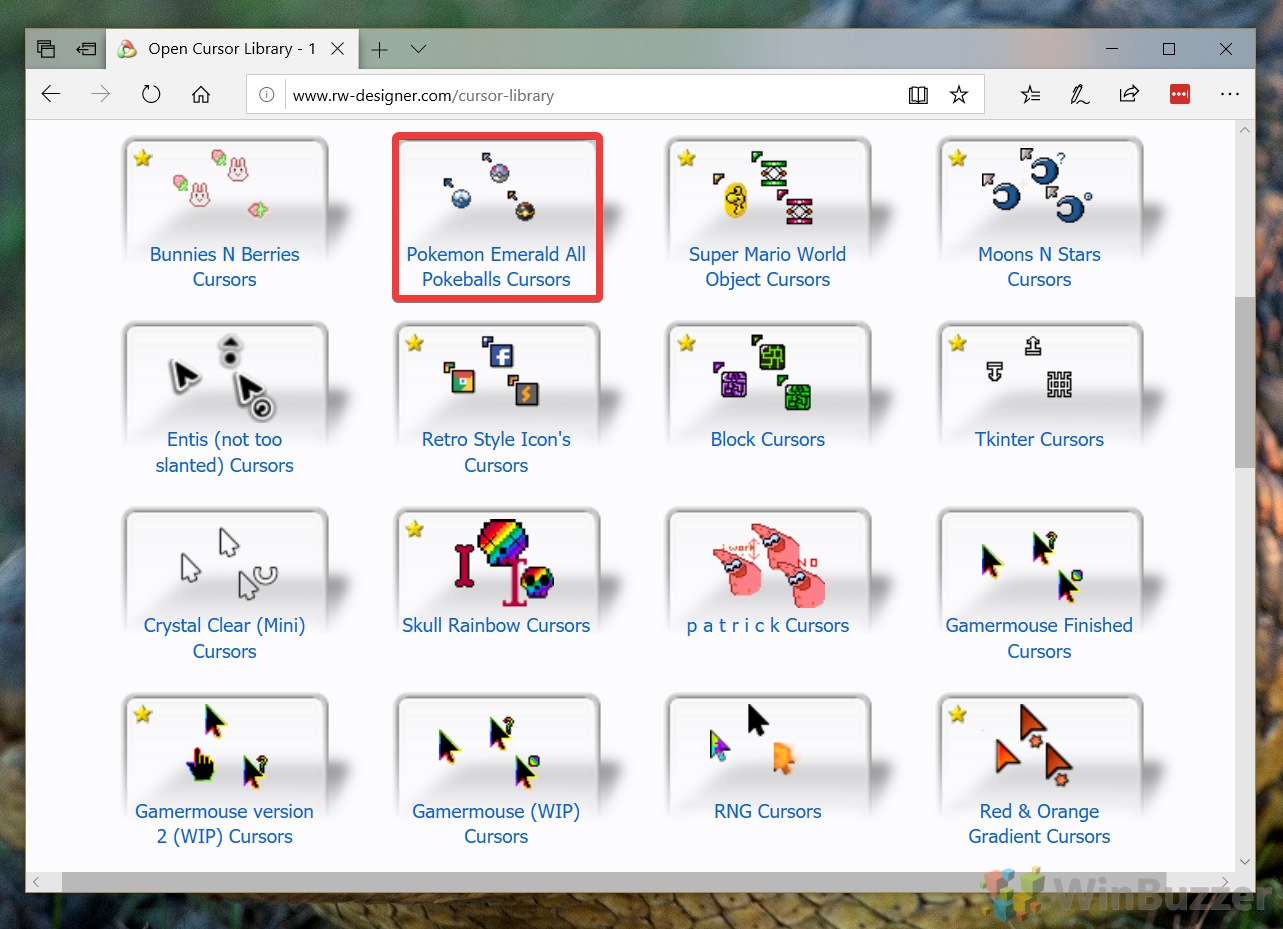
Scroll through the collection of cursors for Windows 10 until you find one that suits you. We’re big fans of Pokémon here at Winbuzzer, so the Emerald cursors are a natural pick for us.
Click the cursor to open its download page.

- Press the big blue ‘Download’ button
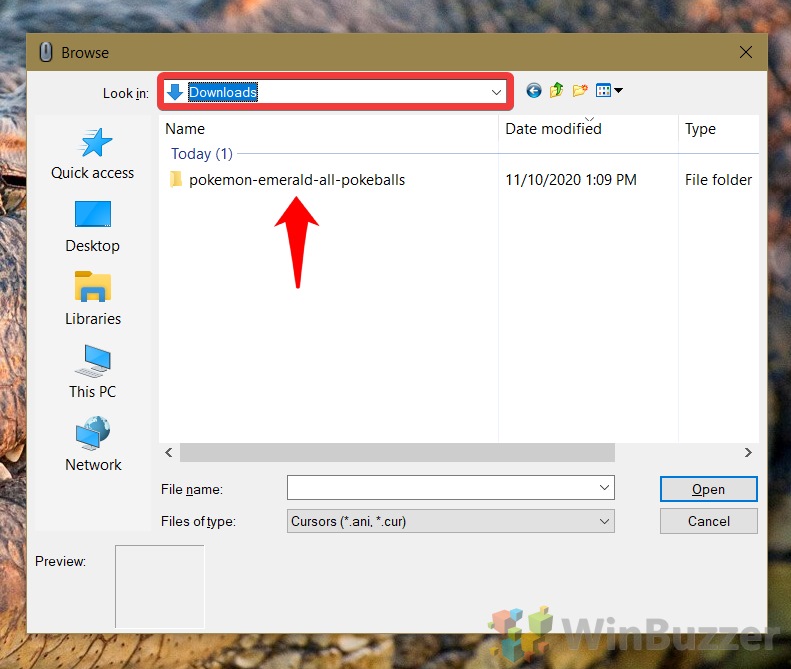
Save the resulting .zip file to your PC and extract it into its own folder for use in the next step.

- Press ‘Browse’ in your mouse properties window

- Navigate to your custom mouse cursor images
The cursors will likely be in your downloads folder, rather than the “cursor” folder that Windows will start you in.

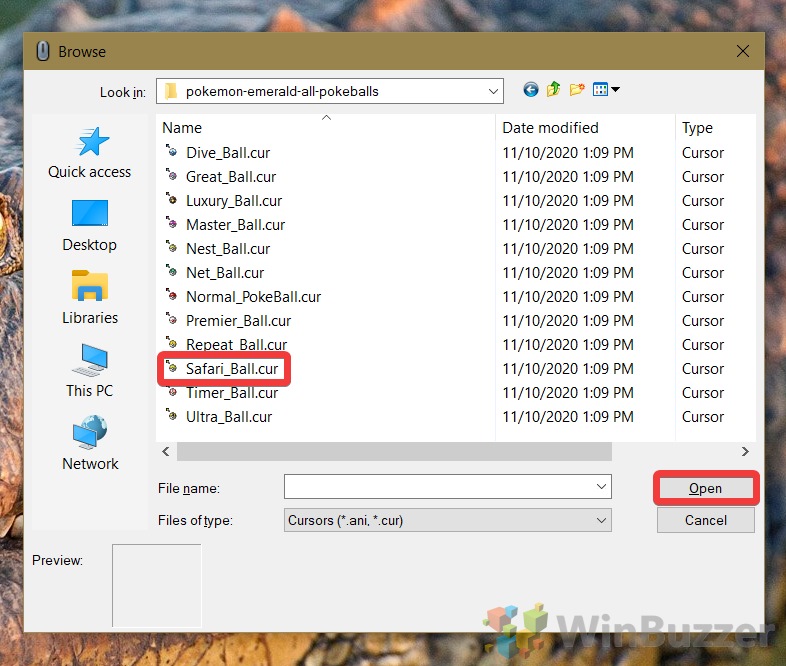
- Select the cursor style you like and press “Open”.

- Apply your custom mouse cursor change
Repeat the process for each cursor icon you’d like to change, then click “Apply”, followed by “OK”.

- How to change your cursor back
Select the icon you’d like to reset, then change the scheme back to one of your choice. Once you’re done, press “Apply“, followed by “OK”.


If you enjoyed this tutorial, you may want to look into other Windows 10 customizations, including how to set a screensaver or change the lock screen background.
-
MiniTool
-
MiniTool News Center
- How to Change Mouse Cursor on Windows 10? Here Are the Methods!
By Daisy | Follow |
Last Updated February 25, 2020
![]()
What should you do when finding the default size of the mouse pointer a little smaller than you would like it to be in Windows 10? Then you may want to know how to change mouse cursor. Read this post from MiniTool to help you to do that.
With the increasing popularity of touch screen devices and tablets, cursors seem to have become less important, however, you may still need a cursor to perform most functions if you are still using a desktop computer.
You are allowed to fully customize the operating system on your device based on your needs, including even changing the overall appearance of the mouse cursor. Microsoft provides powerful customization features for you to try whether you want to change the color of the cursor or the size of the cursor. Then, I will introduce how to change mouse cursor Windows 10.
Tip: Sometimes, you may find that your mouse cursor is disappearing, this post — How to Fix Mouse Cursor Disappears on Windows/Surface/Chrome can help you fix the issue.
Method 1: Change Mouse Cursor in the Settings Application
You can change cursor Windows 10 in the Settings application. You can follow the instructions below:
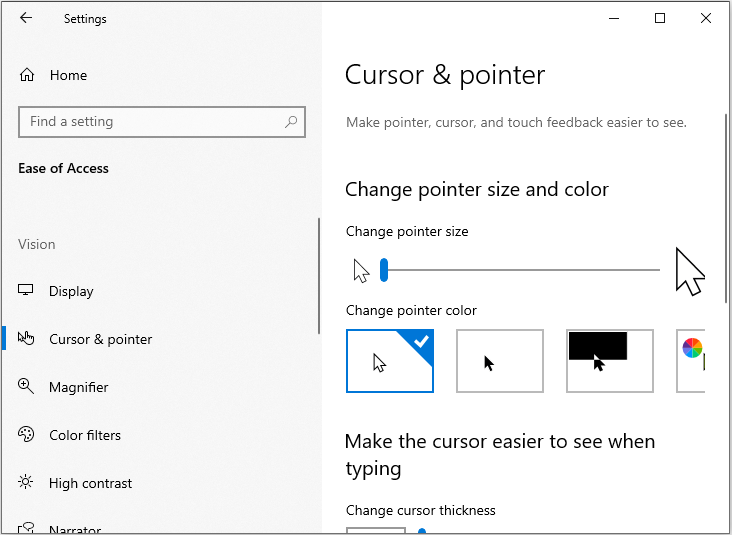
Step 1: Type Settings in the Search box to open it, then click Mouse and Adjust mouse & cursor size.
Step 2: In the Cursor & pointer part, you can change the pointer size and color.
Method 2: Change Mouse Cursor in Mouse Properties
You can also try changing mouse cursor in Mouse properties. The steps are as follows:
Step 1: Type mouse in the Search box, then select Change your mouse settings.
Step 2: In the Mouse part, click Additional mouse options.
Step 3: Navigate to the Pointers tab and click it, then click down arrow and choose a scheme from the list and click OK.

Method 3: Change Mouse Cursor in Control Panel
The last method for you to change the mouse cursor is via the Control Panel application. Here is how to do that:
Step 1: Open the Control Panel application. If you don’t know how to do that, this post — 7 Ways to Fix Control Panel Not Opening in Windows 10.
Step 2: Then click the Ease of Access Center part.

Step 3: Then click Make the mouse easier to use. Choose a new mouse pointer in the options provided, and click OK.
Also see: How to Make the Mouse Cursor Easier to See
Final Words
This post introduces how to change mouse cursor on Windows 10. If you have such a demand, you can try the 3methods mentioned above. In addition, if you have any different opinions about changing it on Windows 10, you can share it in the comment zone.
About The Author

Position: Columnist
She was graduated from the major in English. She has been the MiniTool editor since she was graduated from university. She specializes in writing articles about backing up data & systems, cloning disks, and syncing files, etc. She is also good at writing articles about computer knowledge and computer issues. In daily life, she likes running and going to the amusement park with friends to play some exciting items.