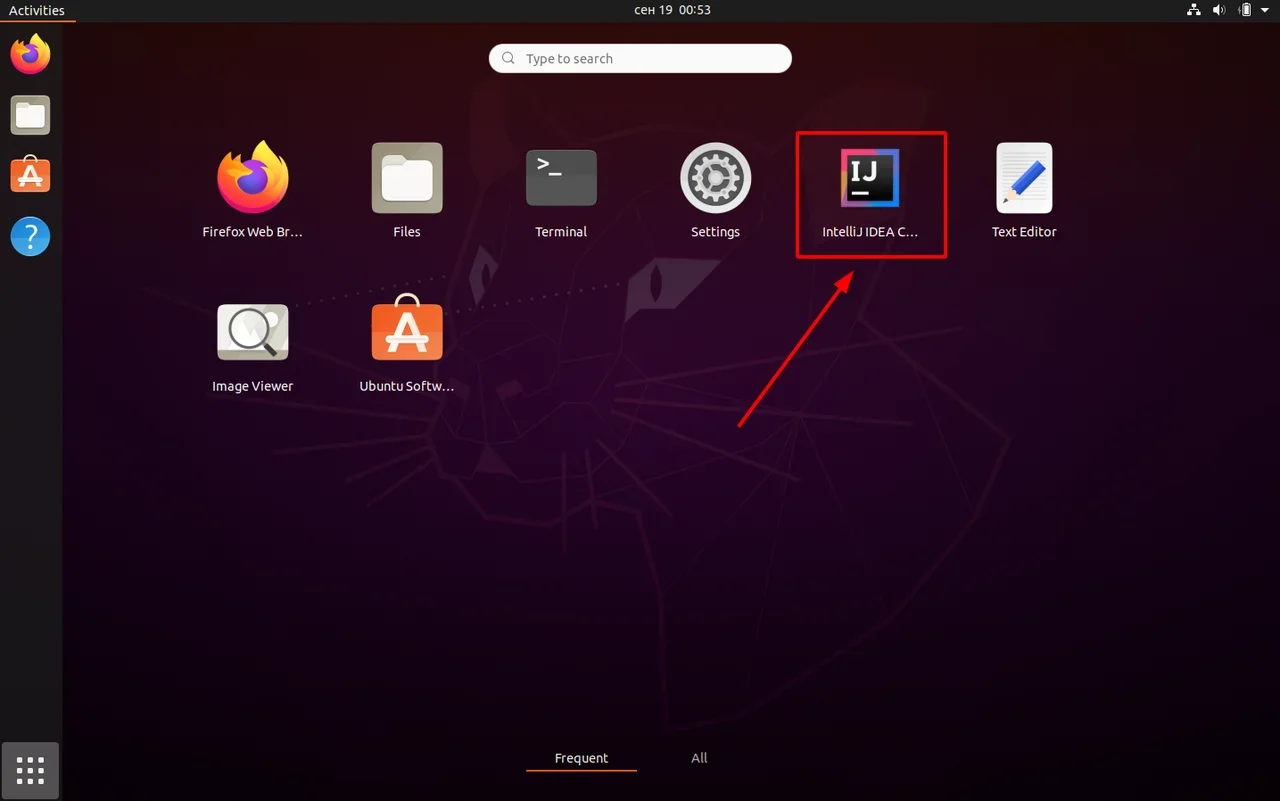
IntelliJ IDEA
Download
IntelliJ IDEA Community Edition 
These instructions will help you build IntelliJ IDEA Community Edition from source code, which is the basis for IntelliJ Platform development.
The following conventions will be used to refer to directories on your machine:
<USER_HOME>is your home directory.<IDEA_HOME>is the root directory for the IntelliJ source code.
Getting IntelliJ IDEA Community Edition Source Code
IntelliJ IDEA Community Edition source code is available from github.com/JetBrains/intellij-community by either cloning or
downloading a zip file (based on a branch) into <IDEA_HOME>. The default is the master branch.
The master branch contains the source code which will be used to create the next major version of IntelliJ IDEA. The branch names
and build numbers for older releases of IntelliJ IDEA can be found on the page of
Build Number Ranges.
These Git operations can also be done through the IntelliJ IDEA user interface.
Speed Tip: If the complete repository history isn’t needed then using a shallow clone (git clone --depth 1) will save significant time.
On Windows: Two git options are required to check out sources on Windows. Since it’s a common source of Git issues on Windows anyway, those options could be set globally (execute those commands before cloning any of intellij-community/android repositories):
git config --global core.longpaths truegit config --global core.autocrlf input
IntelliJ IDEA Community Edition requires additional Android modules from separate Git repositories. To clone these repositories,
run one of the getPlugins scripts located in the <IDEA_HOME> directory. These scripts clone their respective master branches. Make sure you are inside the <IDEA_HOME> directory when running those scripts, so the modules get cloned inside the <IDEA_HOME> directory.
getPlugins.shfor Linux or macOS.getPlugins.batfor Windows.
Note: Always git checkout the intellij-community and android Git repositories to the same branches/tags.
Building IntelliJ Community Edition
Version 2022.1 or newer of IntelliJ IDEA Community Edition or IntelliJ IDEA Ultimate Edition is required to build and develop
for the IntelliJ Platform.
Opening the IntelliJ Source Code for Build
Using IntelliJ IDEA File | Open, select the <IDEA_HOME> directory.
- If IntelliJ IDEA displays an error about a missing or out of date required plugin (e.g. Kotlin),
enable, upgrade, or install that plugin and restart IntelliJ IDEA.
IntelliJ Build Configuration
- It’s recommended to use JetBrains Runtime 17 to compile the project.
When you invoke Build Project for the first time, IntelliJ IDEA should suggest downloading it automatically. - If the Maven plugin is disabled, add the path variable
«MAVEN_REPOSITORY» pointing to<USER_HOME>/.m2/repositorydirectory. - Make sure you have at least 8GB of RAM on your computer. With the bare minimum of RAM, disable «Compile independent modules in parallel»
option in the compiler settings. With notably more memory
available, increase «User-local build process heap size» to 3000 — that will greatly reduce compilation time.
Building the IntelliJ Application Source Code
To build IntelliJ IDEA Community Edition from source, choose Build | Build Project from the main menu.
To build installation packages, run the installers.cmd command in <IDEA_HOME> directory. installers.cmd will work on both Windows and Unix systems.
Options to build installers are passed as system properties to installers.cmd command.
You may find the list of available properties in BuildOptions.kt
Examples (./ should be added only for Linux/macOS):
- Build installers only for current operating system:
./installers.cmd -Dintellij.build.target.os=current - Build source code incrementally (do not build what was already built before):
./installers.cmd -Dintellij.build.incremental.compilation=true
installers.cmd is used just to run OpenSourceCommunityInstallersBuildTarget from the command line.
You may call it directly from IDEA, see run configuration Build IDEA Community Installers (current OS) for an example.
Dockerized Build Environment
To build installation packages inside a Docker container with preinstalled dependencies and tools, run the following command in <IDEA_HOME> directory (on Windows, use PowerShell):
docker run --rm -it -v ${PWD}:/community $(docker build -q . --target build_env)
Running IntelliJ IDEA
To run the IntelliJ IDEA built from source, choose Run | Run from the main menu. This will use the preconfigured run configuration «IDEA«.
To run tests on the build, apply these setting to the Run | Edit Configurations… | Templates | JUnit configuration tab:
- Working dir:
<IDEA_HOME>/bin - VM options:
-ea
You can find other helpful information at https://www.jetbrains.com/opensource/idea.
The «Contribute Code» section of that site describes how you can contribute to IntelliJ IDEA.
Running IntelliJ IDEA on CI/CD environment
To run tests outside of IntelliJ IDEA, run the tests.cmd command in <IDEA_HOME> directory. tests.cmd will work on both Windows and Unix systems.
Options to run tests are passed as system properties to tests.cmd command.
You may find the list of available properties in TestingOptions.kt
Examples (./ should be added only for Linux/macOS):
- Build source code incrementally (do not build what was already built before):
./tests.cmd -Dintellij.build.incremental.compilation=true - Run a specific test:
./tests.cmd -Dintellij.build.test.patterns=com.intellij.util.ArrayUtilTest
tests.cmd is used just to run CommunityRunTestsBuildTarget from the command line.
You may call it directly from IDEA, see run configuration tests in community for an example.
- Details
- Written by
- Last Updated on 16 February 2020 | Print Email
Like Eclipse and NetBeans, it’s pretty easy to download, install, and get IntelliJ IDEA up and running to start coding. Note that your computer should have at least 4GB of RAM to run the IDE smoothly. In this lesson, I will guide you how to download and install IntelliJ IDEA on Windows operating system.
Although IntelliJ IDEA is bundled with JRE 8, you still need to have JDK 8 or higher installed on your computer first. That means the IDE is running on its own JRE and requires a separate JDK for Java development.
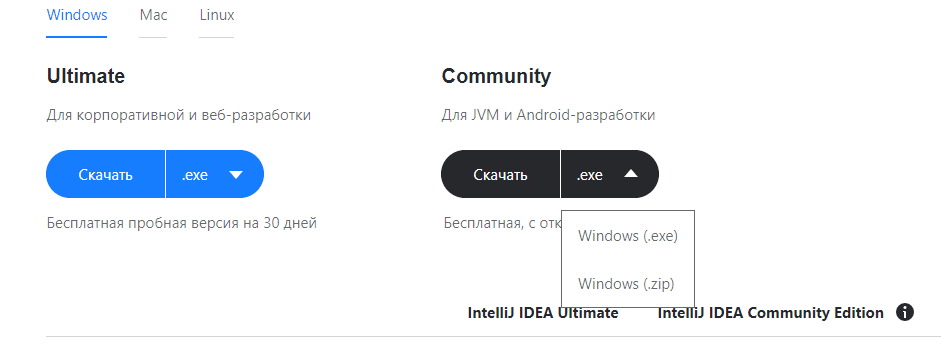
Click this URL to open the download page:
https://www.jetbrains.com/idea/download/
You will see the following screen:
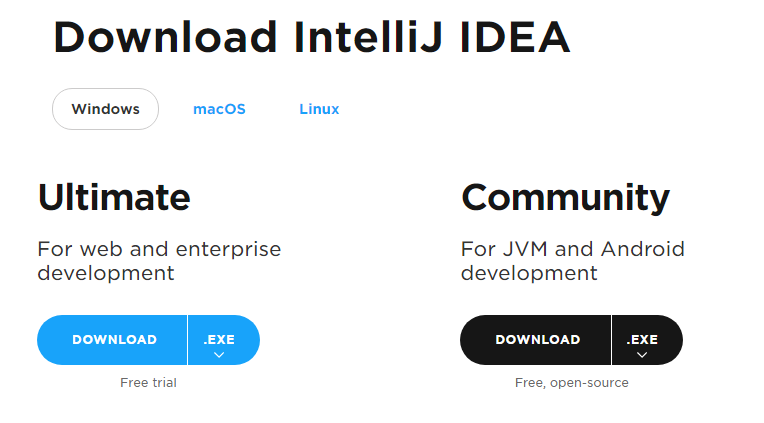
Here, you can download the Ultimate edition or Community edition for Windows, Mac or Linux. On Windows, you can download either an installer (EXE) or a Zip package.
I recommend you to try the Ultimate edition to experience the full features of IntelliJ IDEA in 30 days.
1. Install IntelliJ IDEA using Installer
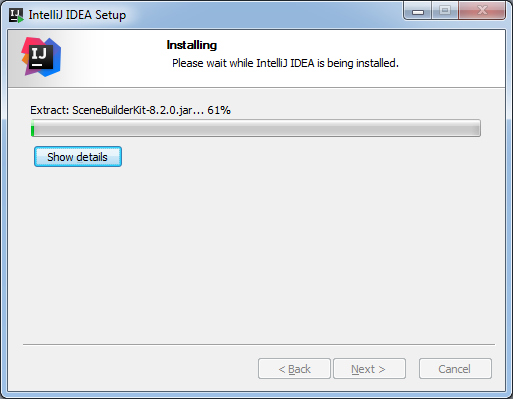
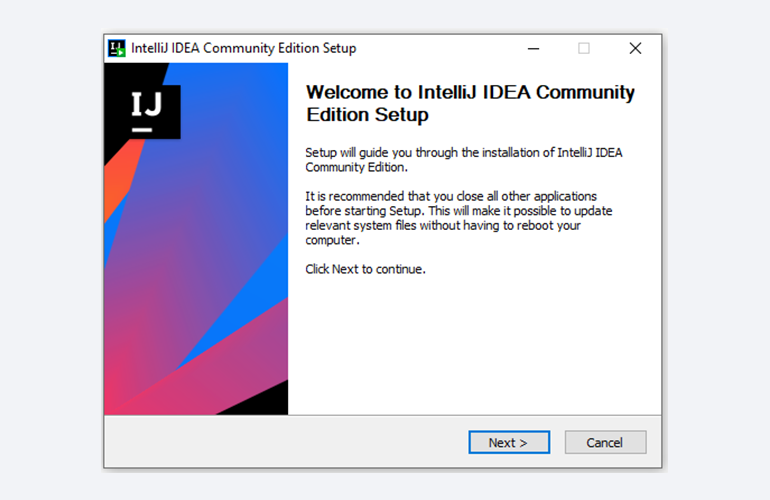
Click Download .EXE to start downloading the installer program. Once download completed, run the installer program and the following screen appears:
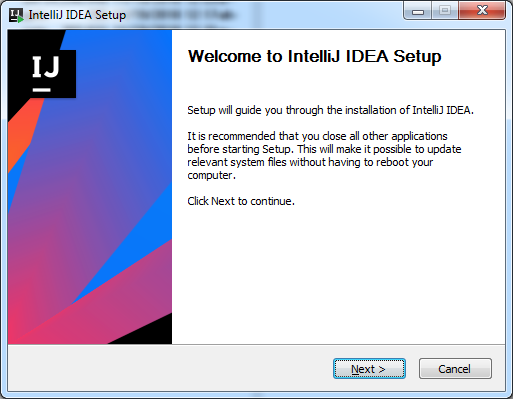
Click Next. Let it uses the suggested installation directory, or click Browse to choose a different location on your computer:
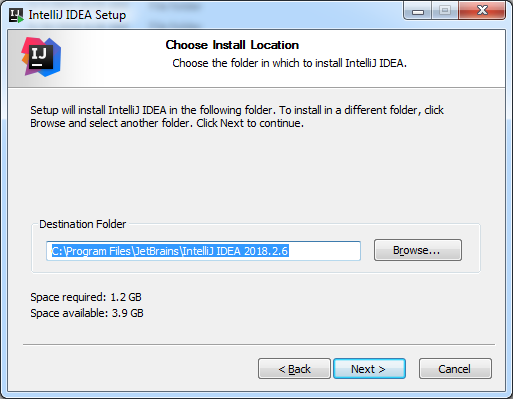
Click Next. You can choose to create desktop shortcut and file associations:
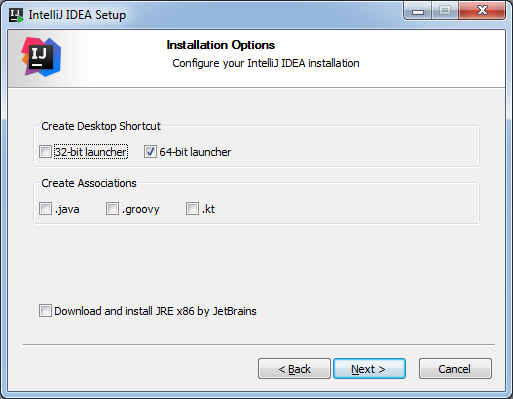
And click Next to start installing the IDE:
2. Install IntelliJ IDEA using ZIP package
In the download page, click the down arrow to the right of the Download button, and select Windows (.zip):

Once download completed, extract the Zip file to a destination directory on your computer.
3. Run IntelliJ IDEA for the first time
If you install IntelliJ IDEA from an EXE installer, launch the IDE by clicking its shortcut on desktop or in Programs menu. In case you extract from a zip file, go to the bin directory and run the idea.exe (32-bit) or idea64.exe (64-bit) file.
The Ultimate edition asks you to activate license:
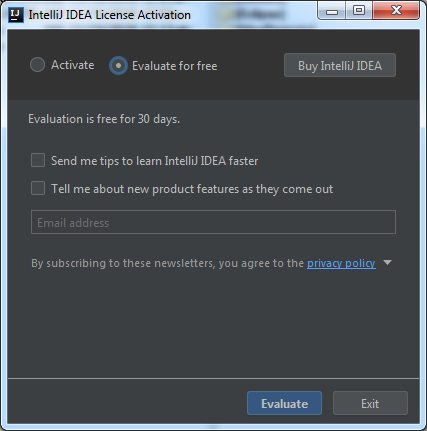
Choose the option Evaluate for free to use the Ultimate edition for free in 30 days. The Community edition doesn’t ask you to activate license. Click Evaluate.
Then you are asked to choose a favorite theme:
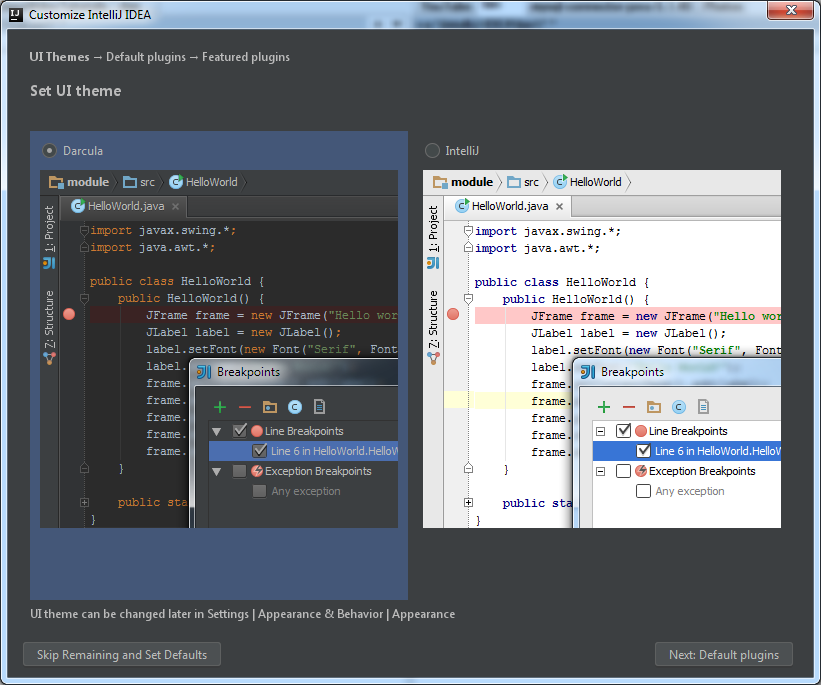
You can choose theme Darcula (black) or IntelliJ (white). Click Next: Default Plugins:
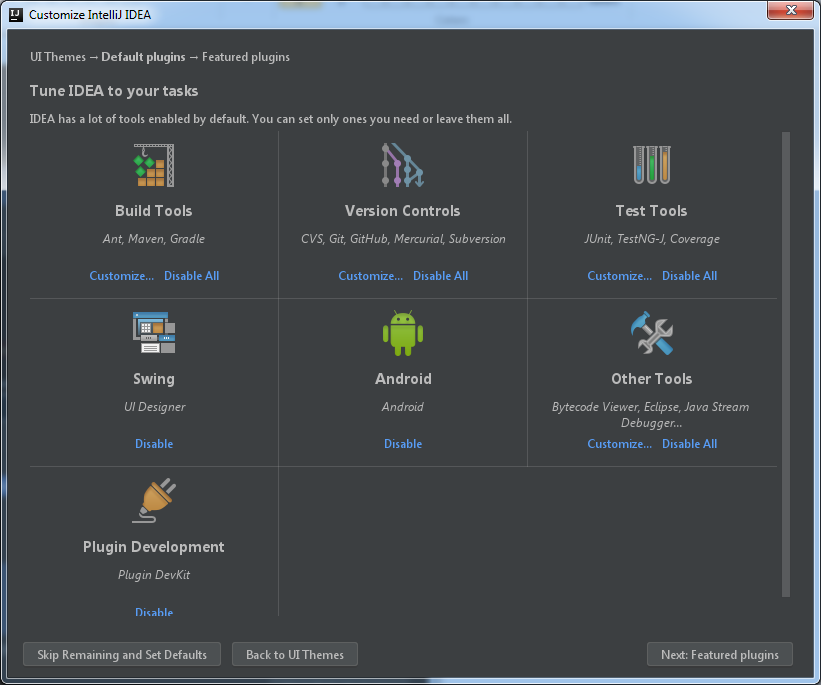
Here, you can customize various plugins. The default is good enough, so click Skip Remaining and Set Defaults.
Then it is all set, the splash screen appears:

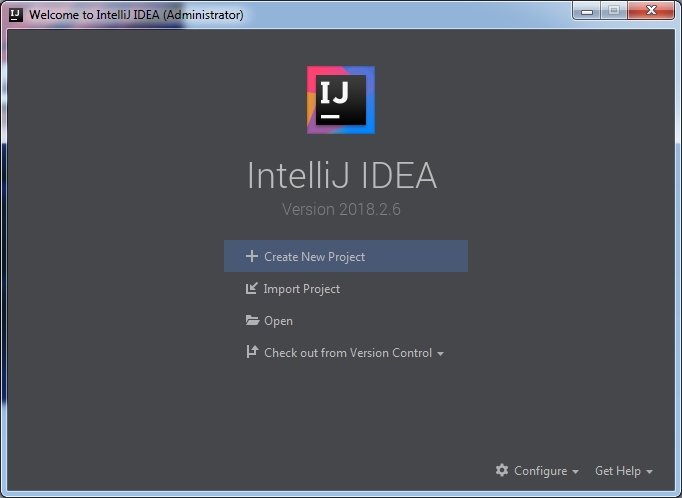
Then comes the Welcome dialog, which lets you to create a new or open an existing project:
That’s it! Now you can experience one of the best Java IDEs ever.
About the Author:
 Nam Ha Minh is certified Java programmer (SCJP and SCWCD). He started programming with Java in the time of Java 1.4 and has been falling in love with Java since then. Make friend with him on Facebook and watch his Java videos you YouTube.
Add comment
#База знаний
- 18 фев 2021
-
14
Начинаем разрабатывать на Java: где взять, как установить и настроить всё, что нужно.
vlada_maestro / shutterstock

Пишет на Java. Верит в Agile. Пьёт много кофе и не любит грязный код.
Чтобы начать программировать на Java, нужно установить комплект разработчика приложений (SDK). Он позволит запускать, отлаживать и исполнять наши первые программы. Также нам понадобится среда разработки (IDE), где мы и будем писать код.
Пройдём через это вместе. Установим JDK в Windows, Ubuntu и macOS, и IntelliJ IDEA тоже в Windows, Ubuntu и macOS. Поехали!
Java Development Kit (JDK) — это комплект ПО для разработчиков приложений на Java. Стандартная установка включает в себя интерпретатор, облегчённый интерпретатор JRE, компилятор, библиотеку Java-классов, отладчик, средства архивации и сжатия jar и другое.
Чтобы установить JDK в Windows, нужно:
- загрузить актуальную версию пакета,
- установить его,
- настроить переменные окружения.
Нам нужна бесплатная версия — AdoptOpenJDK (она есть под Windows, macOS, Ubuntu и другие платформы).
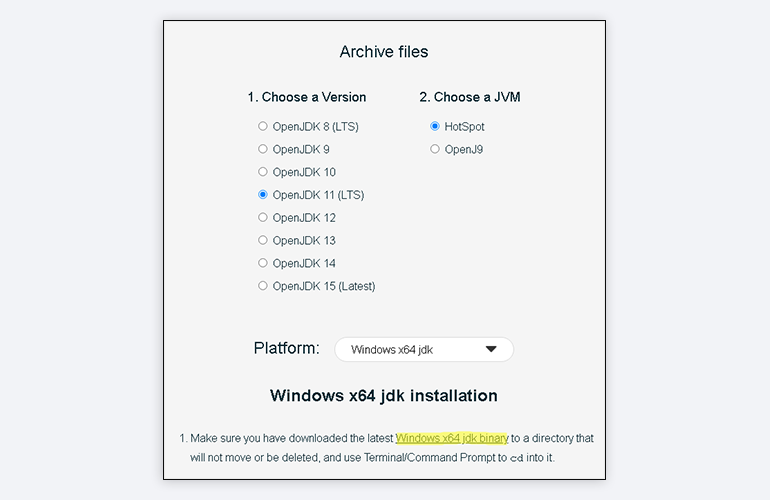
Идём сюда и выбираем версию JDK (актуальны версии 8+), виртуальную Java-машину (JVM) и свою платформу.
Я выбрал OpenJDK 11 (LTS), HotSpot и Windows x64 jdk соответственно:
Скачиваем файл по появившейся ссылке (я выделил её жёлтым на скрине выше).
Извлекаем скачанный архив в папку C:Program FilesJava
При этом будет создана подпапка jdk-*номер версии*, а внутри неё появится папка bin.
В результате полный путь до папки bin у меня выглядит так:
C:Program FilesJavajdk-11.0.2bin
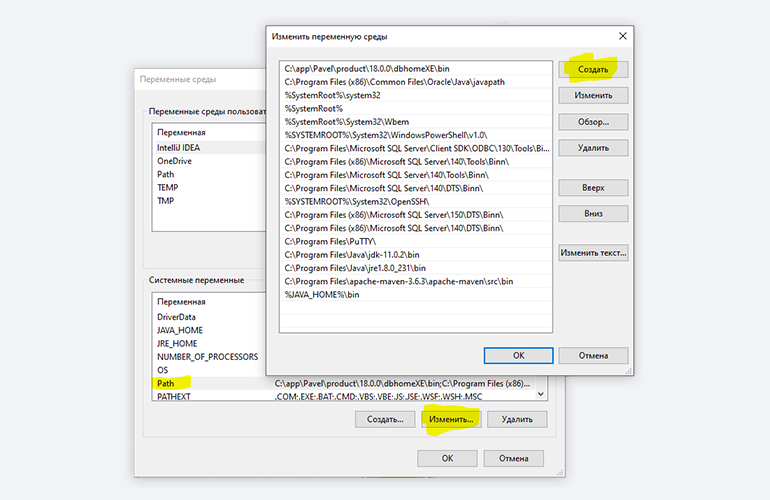
Нам нужно создать системную переменную JAVA_HOME, которая будет хранить путь до нашей версии JDK. Это понадобится программам для работы с проектами Java.
Заходим в Панель управления → Система → Дополнительные параметры системы → Дополнительно
А можно и прямо в Панели управления вбить в поиск слово «переменных» (без кавычек). ОС предложит варианты, из которых выбирайте «Изменение системных переменных среды».
У вас откроется окно:
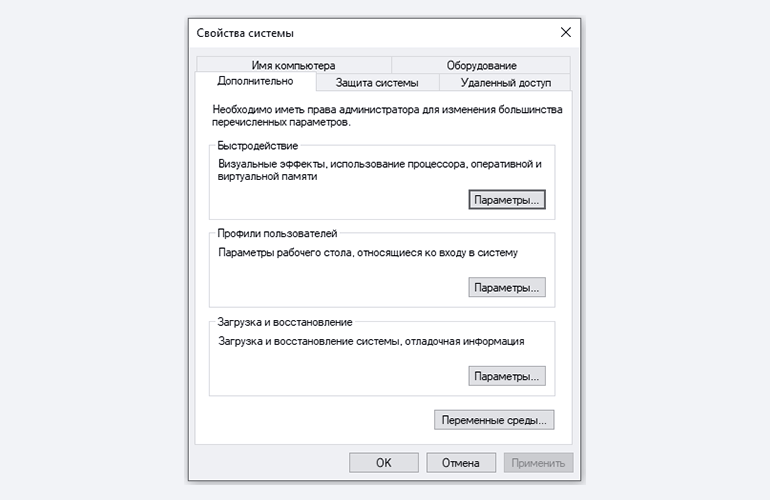
Здесь жмём на кнопку «Переменные среды».
В новом окне для раздела «Системные переменные» кликаем «Создать». В «Имя переменной» вводим JAVA_HOME (именно так, латиницей в верхнем регистре), а в поле «Значение переменной» подставляем наш путь C:Program FilesJavajdk-*номер версии*:
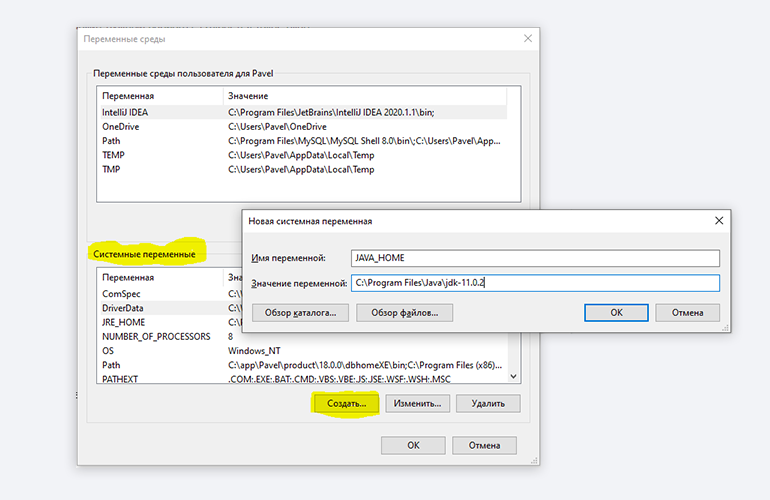
Далее в разделе «Переменные среды…» редактируем системную переменную Path. Нужно добавить в неё путь к папке с исполняемыми файлами Java, а именно: %JAVA_HOME%bin (соблюдайте регистр символов):
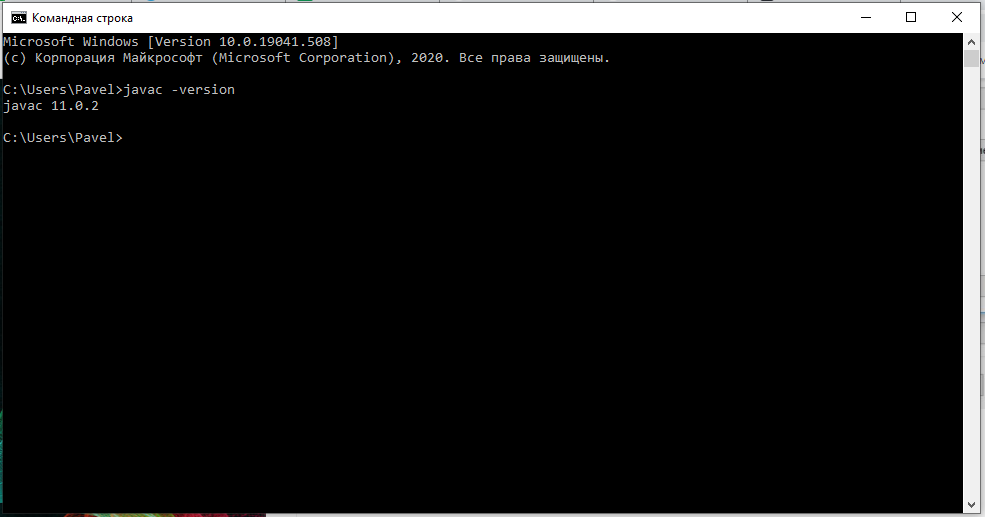
Перезагружаем Windows.
Запускаем Командную строку Windows. Для этого нажимаем Win + R, а в появившемся окне вводим cmd.exe и жмём на Enter.
В открывшейся консоли набираем javac -version и жмём ввод.
Если установка прошла успешно, то ответ покажет версию вашего компилятора:
Рассмотрим установку JDK на одном из самых популярных дистрибутивов Linux — Ubuntu 20.04 (LTS).
Проще всего установить версию, которая входит в пакет Ubuntu. По умолчанию в Ubuntu 20.04 входит версия Open JDK 11.
Открываем терминал сочетанием клавиш Ctrl + Alt + T и обновляем базу данных пакетов с помощью APT:
Проверяем ранее установленные версии командой:
Если установка уже выполнялась, то мы увидим что-то такое:

Для запуска любых приложений Java нужна JRE (Java Runtime Environment — среда выполнения для языка Java). Но для компиляции и разработки программ требуется JDK (Java Development Kit).
Чтобы установить JRE, вводим в консоль:
$ sudo apt install default-jre
Для установки JDK — команду:
$ sudo apt install default-jdk
Вводим команду:
Ответ должен выглядеть примерно так:
Этот способ установки использует HomeBrew (менеджер недостающих пакетов для macOS).
Прежде всего нужно добавить репозиторий в HomeBrew. Для этого открываем терминал (Cmd + N) и вводим:
$ brew tap AdoptOpenJDK/openjdk
Устанавливаем OpenJDK 11 командой:
$ brew cask install adoptopenjdk11
Вводим:
Ответ должен выглядеть примерно так:
openjdk version "11.0.2" 2019-01-15
OpenJDK Runtime Environment AdoptOpenJDK (build 11.0.2+9)
OpenJDK 64-Bit Server VM AdoptOpenJDK (build 11.0.2+9, mixed mode)
IntelliJ IDEA — это интегрированная среда разработки (IDE), то есть система программных средств для создания проектов на разных языках программирования.
Сегодня это самая популярная IDE для языка Java. А ещё есть Eclipse, NetBeans и немало других, но мы рекомендуем именно IDEA, потому что даже её бесплатная версия обладает широкой функциональностью, подходит для профессиональной разработки и вообще делает Java проще в использовании.
В IDE обязательно входят:
- текстовый редактор для написания кода (он знает синтаксис нужных языков);
- компилятор;
- отладчик.
IntelliJ IDEA доступна в бесплатной (Community) и платной (Ultimate) версиях. Чем они различаются, видно на скрине ниже:

Пока что нам хватит возможностей бесплатной версии.
На заметку: IntelliJ предлагает студентам и преподавателям свободный доступ к своим продуктам.
Заходим сюда и качаем версию для Windows.
Запускаем скачанный файл .exe:
Жмём Next (Далее) и выбираем путь для установки:
Снова Next, и настраиваем параметры установки:
В общем случае это:
- 64-bit launcher — для запуска 64-разрядной версии приложения (будет создан ярлык на рабочем столе);
- Add ”Open Folder as Project“» — позволяет открывать папки с исходниками как проекты прямо через контекстное меню;
- .java — файлы такого типа (с таким расширением) будет открывать IDEA (по умолчанию и через контекстное меню).
Кликаем Next (Далее) и выбираем папку для ярлыков IDEA (оставляем по умолчанию):
Нажимаем Install (Установить), после чего стартует установка:

Дожидаемся её окончания и жмём Finish (Завершить):
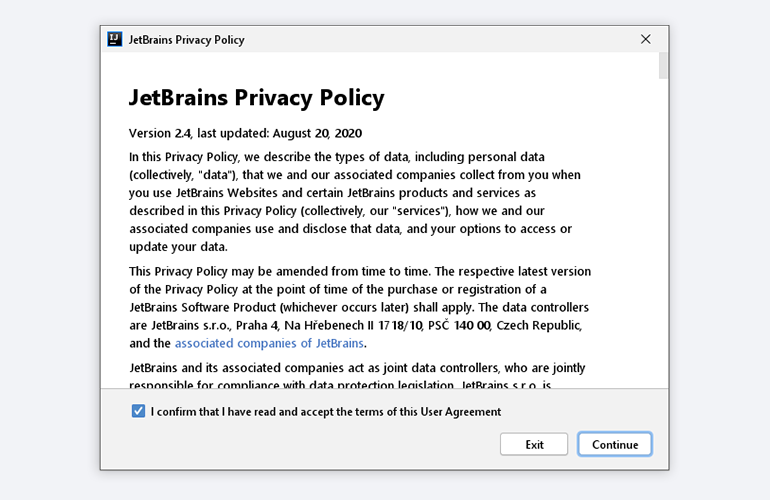
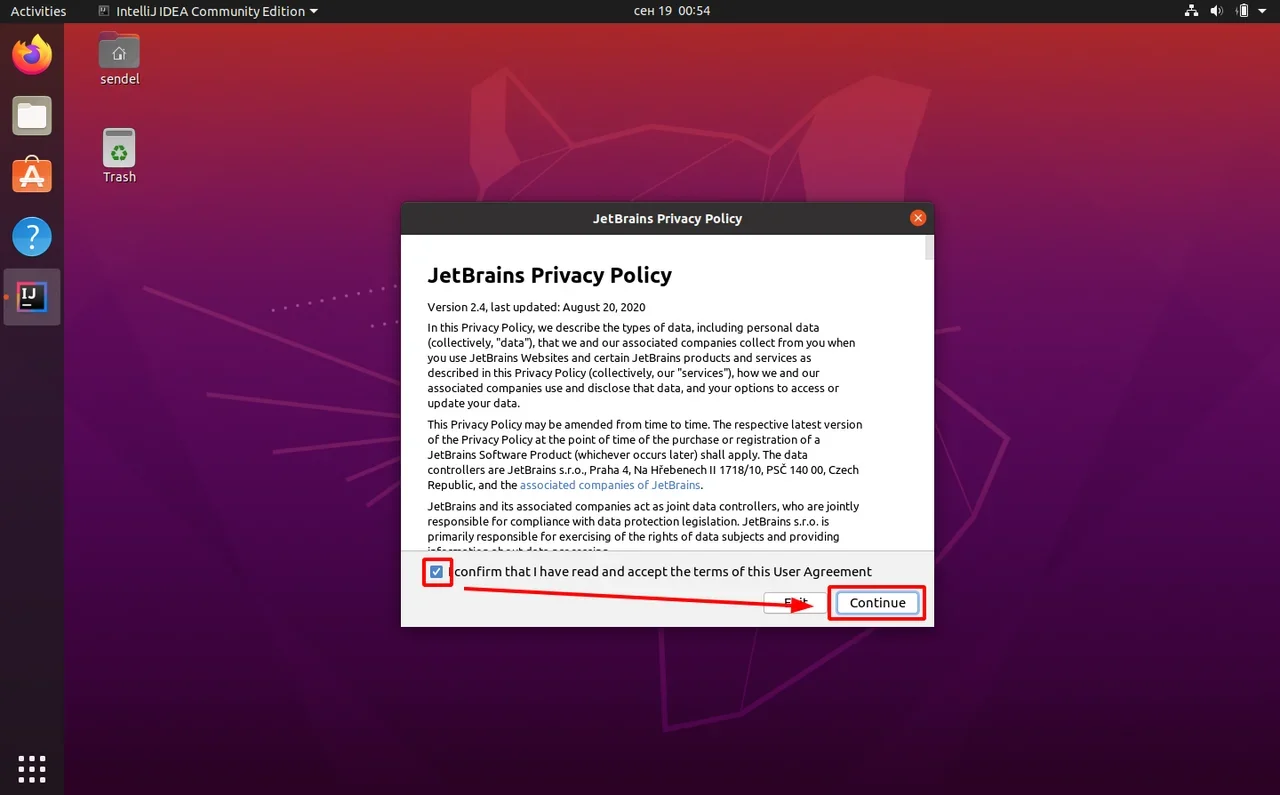
При первом запуске принимаем пользовательское соглашение и нажимаем Continue (Продолжить):
Далее выбираем тему оформления (доступны тёмная и светлая):
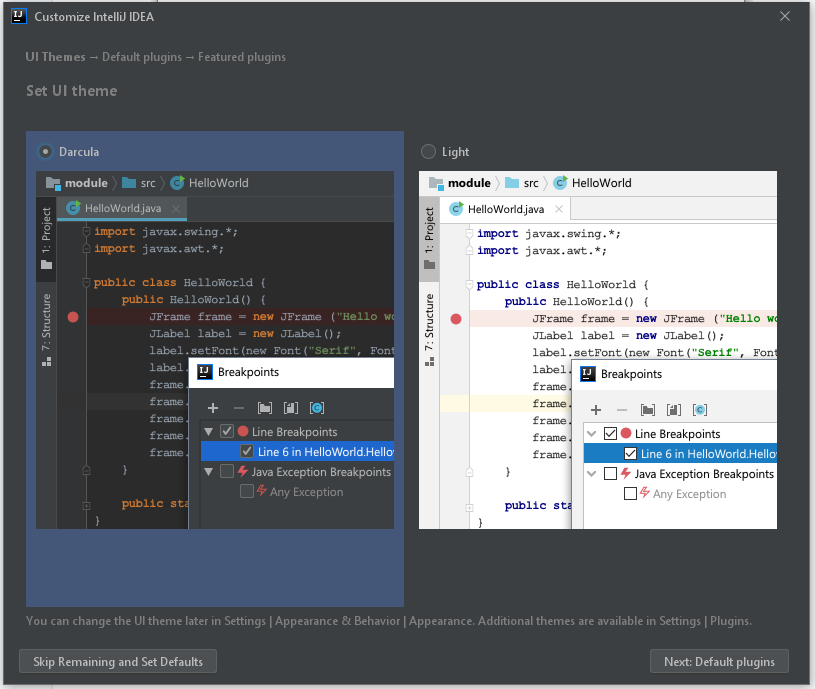
Жмём Next: Default plugins и переходим к выбору устанавливаемых плагинов:
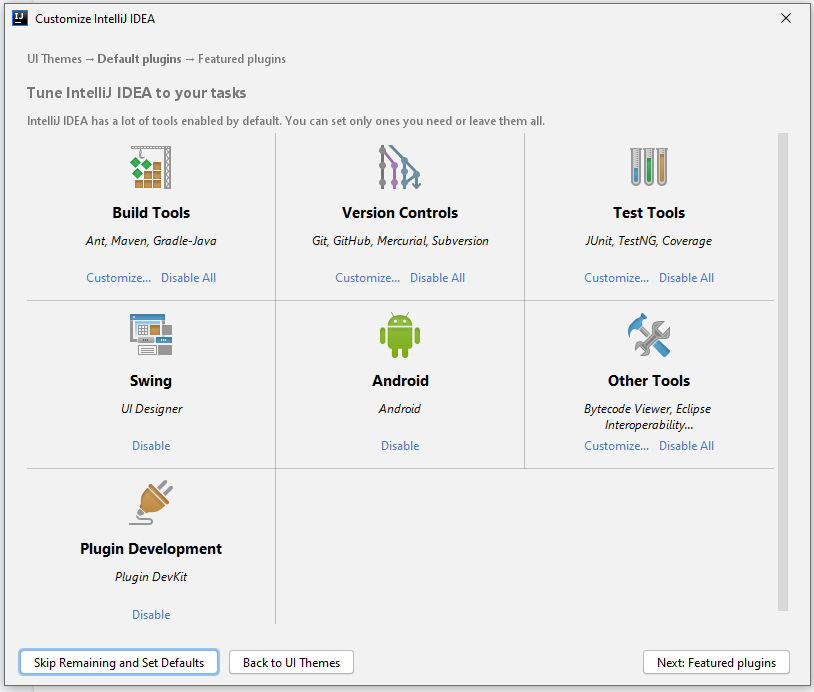
Если не знаете, что вам точно пригодится, — оставляйте всё как есть. А если, например, с Андроидом вам не работать — выключите соответствующий пункт.
Не волнуйтесь, если надобавляете лишнего или о чём-то забудете. Всё можно будет переиграть — в настройках среды.
После чего нажмите на кнопку Next: featured plugins и выберите другие нужные плагины (или оставляйте всё по умолчанию):
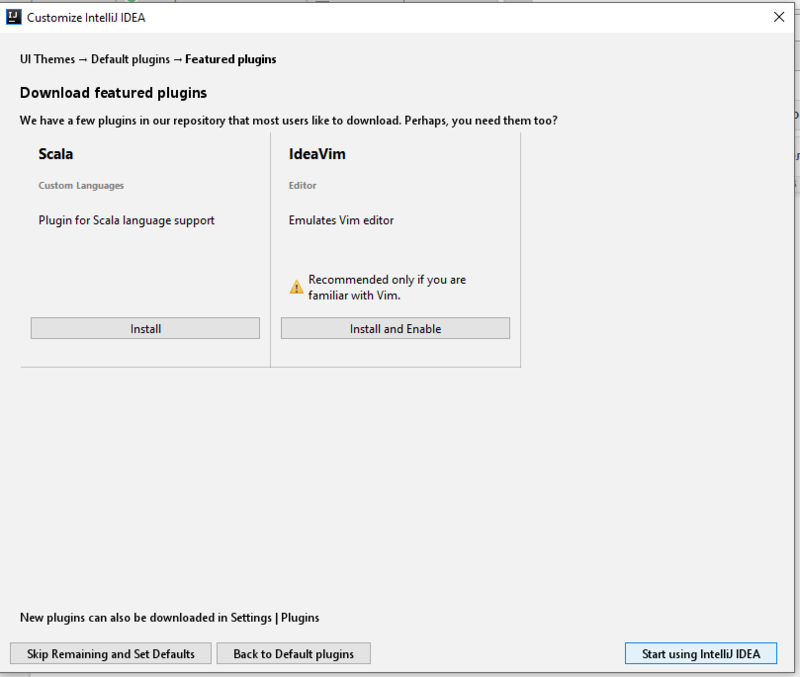
И наконец, нажимаем Start using IntelliJ IDEA.
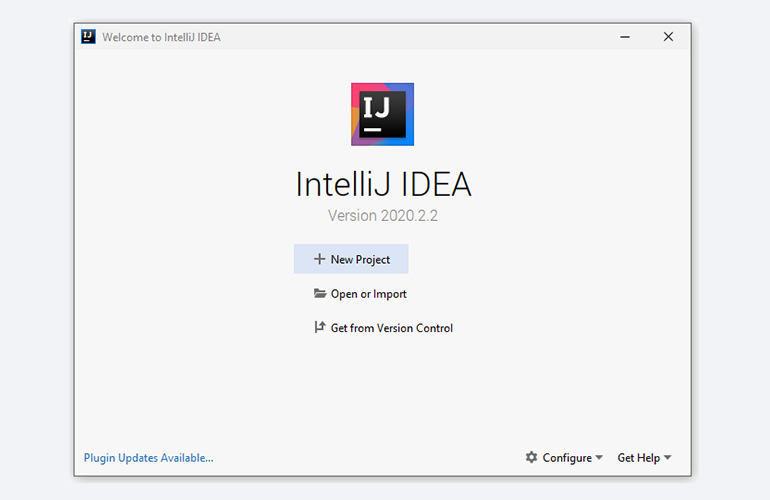
Вас встретит начальный экран среды разработки (Welcome screen). Здесь можно создать новый проект, открыть или импортировать существующий, а также скачать проект из системы контроля версий:
Если вы видите такой же экран — поздравляю, установка и настройка прошли успешно! Приятного обучения!
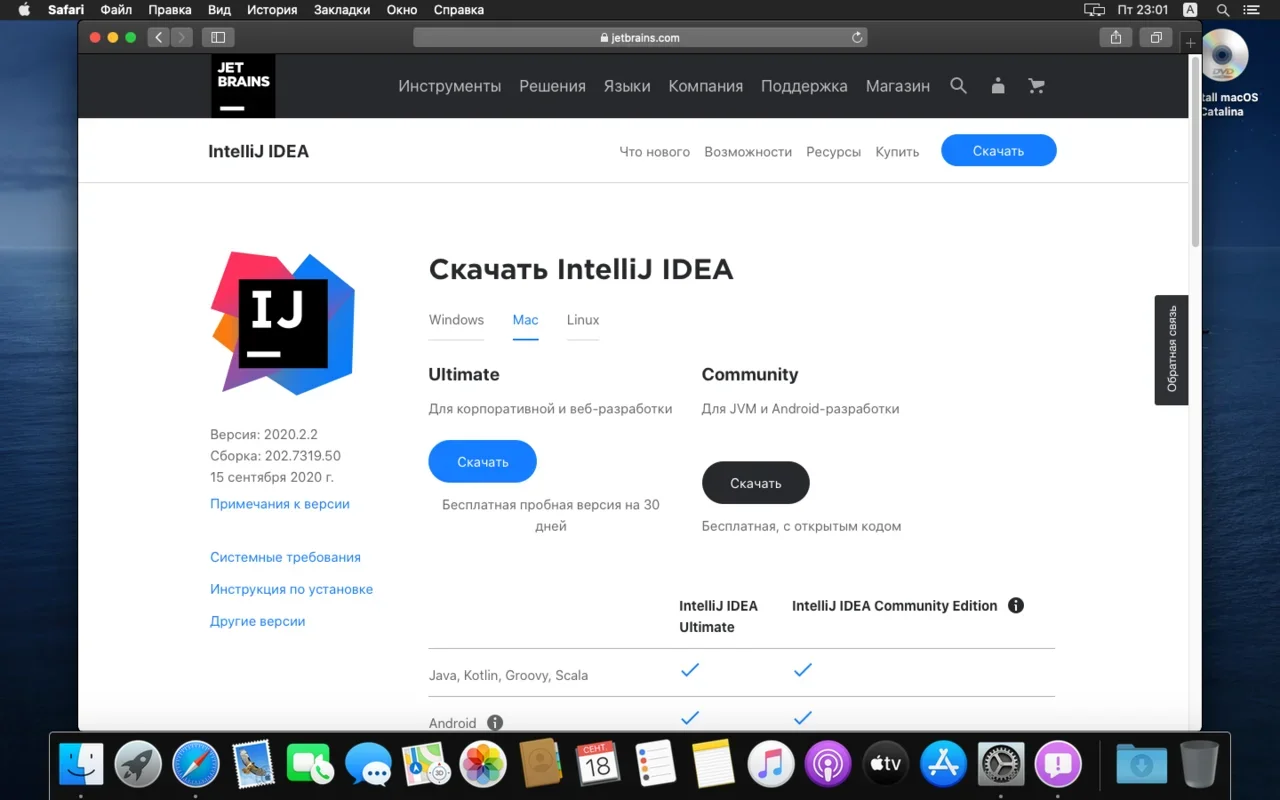
Здесь всё даже легче, чем в Windows. Для начала качаем версию для macOS отсюда (о различии между редакциями Community и Ultimate читайте выше — в пункте про установку на Windows):
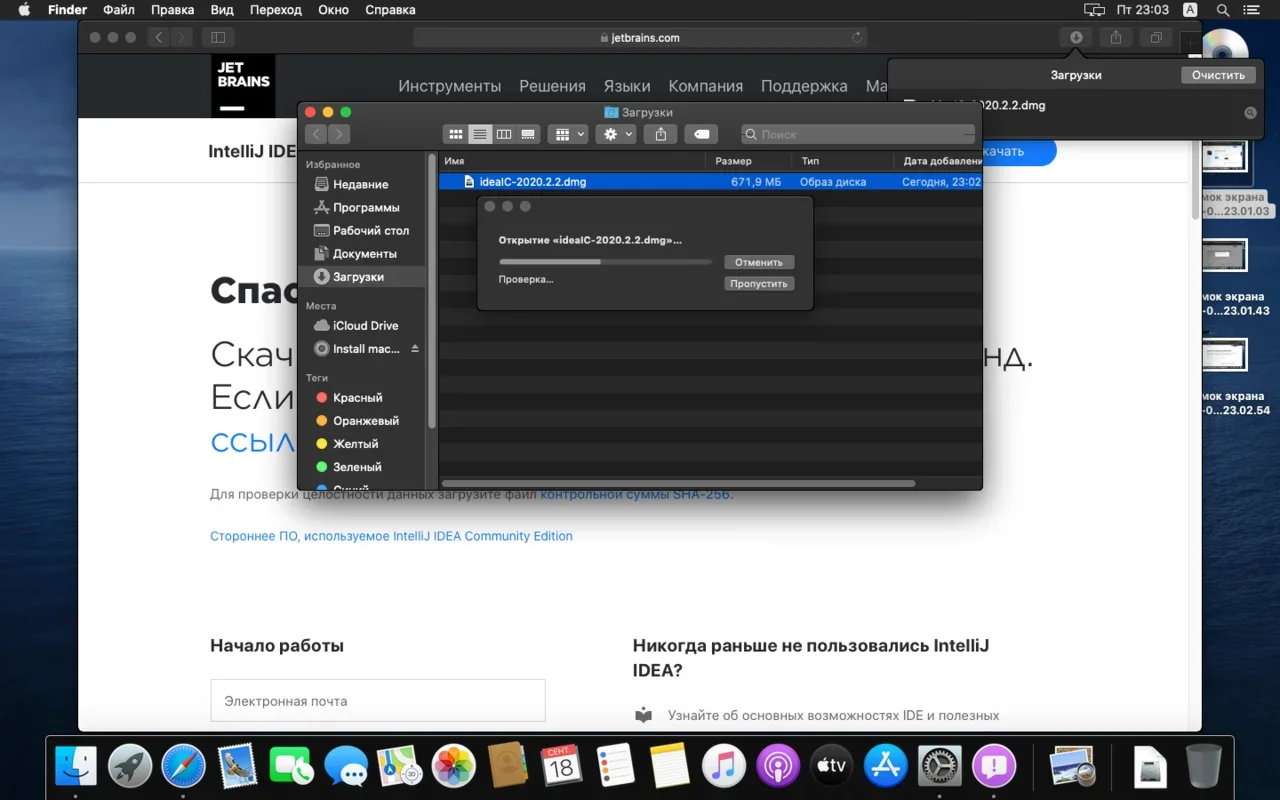
Открываем скачанный файл .dmg:
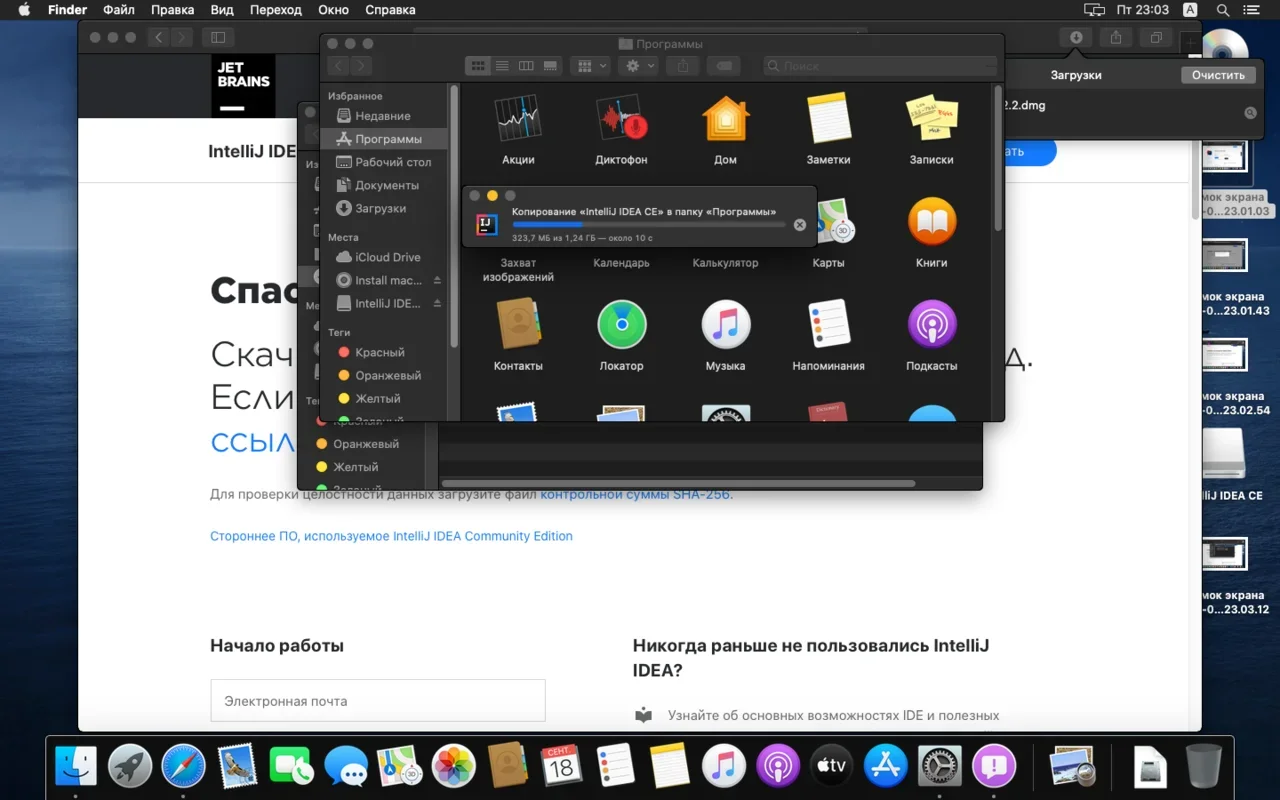
Копируем файл в «Программы»:
Читаем предупреждение ОС и жмём «Открыть»:
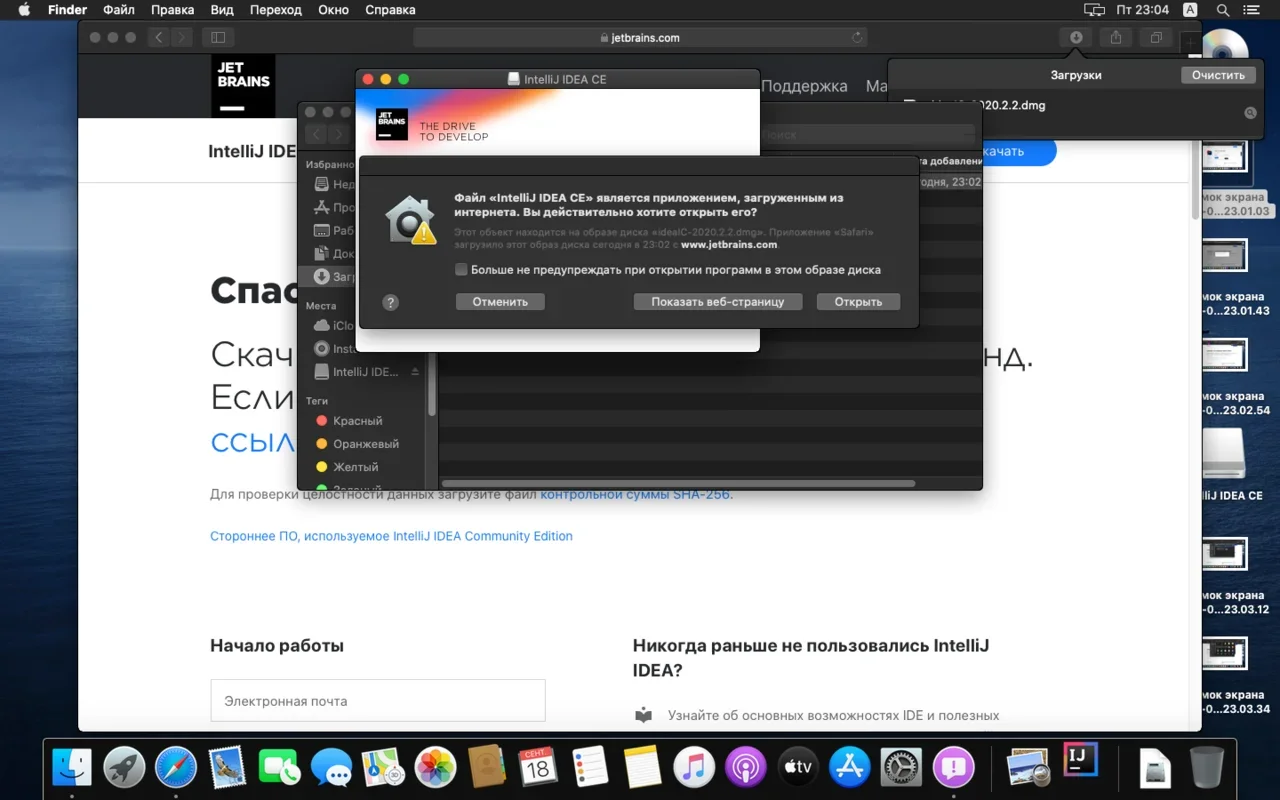
Принимаем пользовательское соглашение и жмём кнопку Continue (Продолжить):

Теперь приложением можно пользоваться. Приятного обучения!
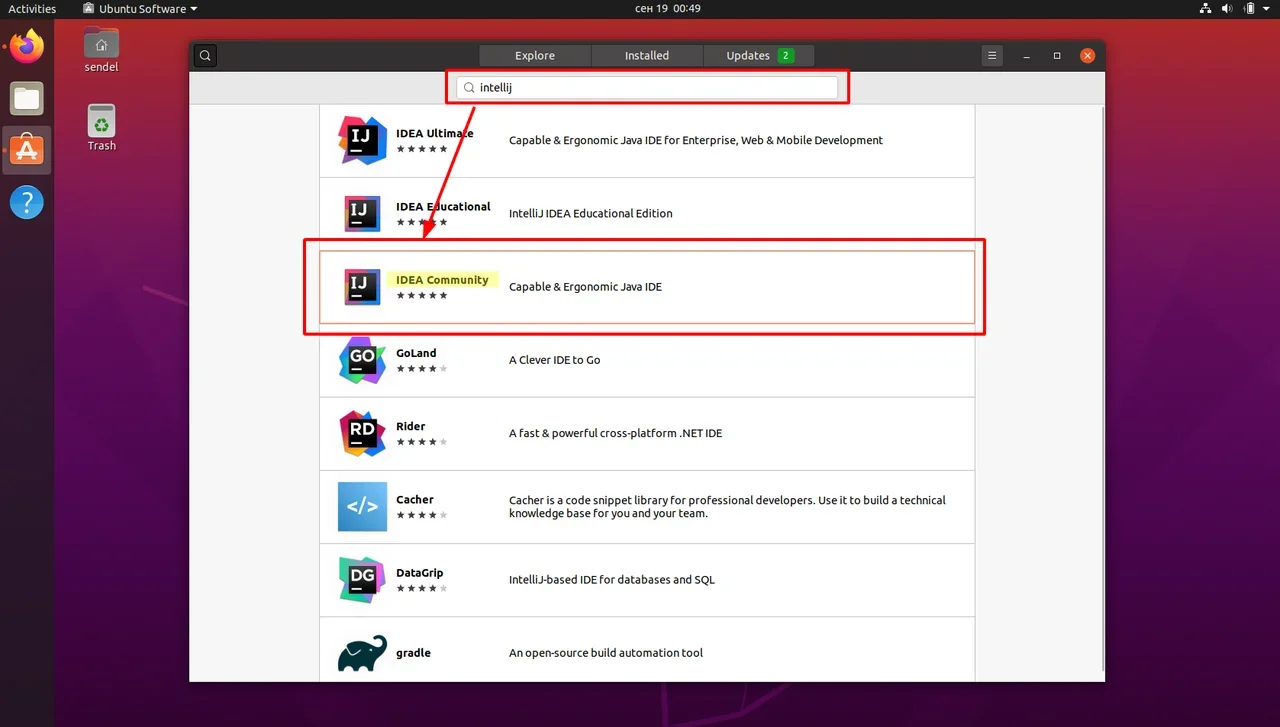
Для установки IntelliJ IDEA открываем Центр приложений Ubuntu:
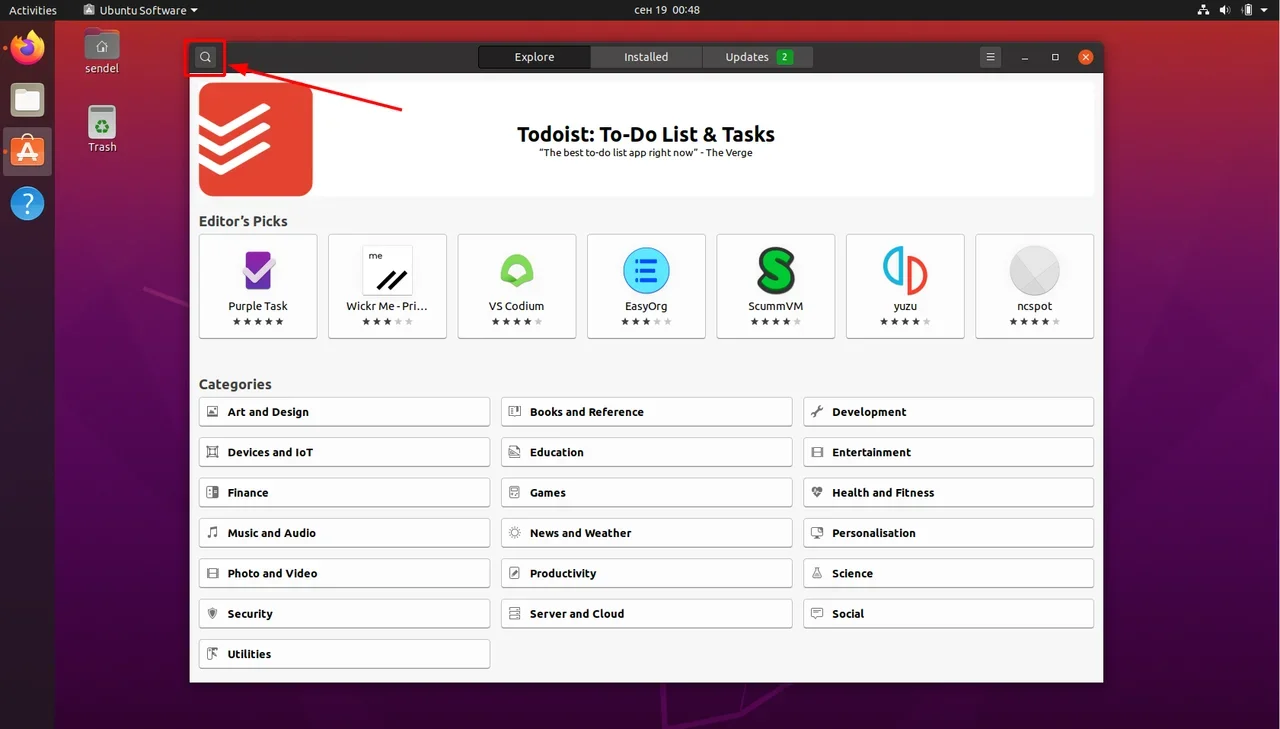
Вводим в поиск слово «Intellij» (без кавычек). Нам нужна IDEA Community (о различии между редакциями Community и Ultimate читайте выше — в пункте про установку на Windows):
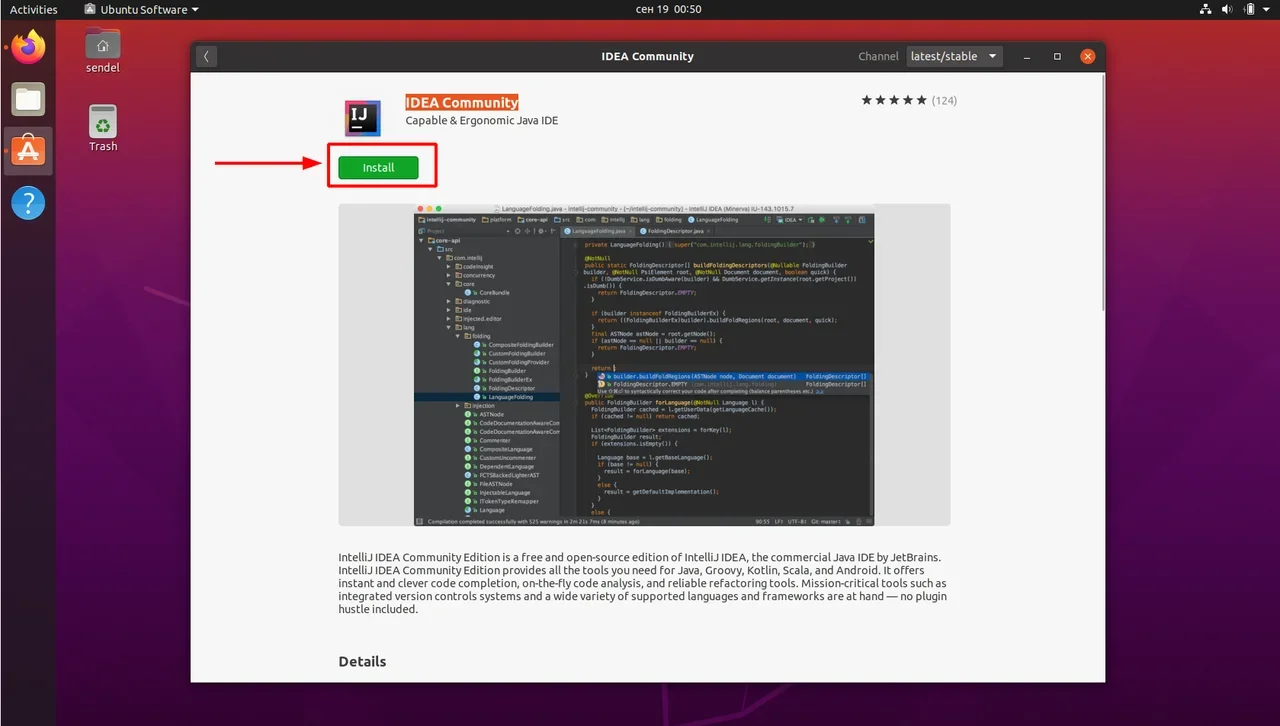
Выбираем версию и нажимаем кнопку Install (Установить):
После установки видим IDEA в меню программ:
Запускаем, принимаем пользовательское соглашение и нажимаем кнопку Continue (Продолжить):
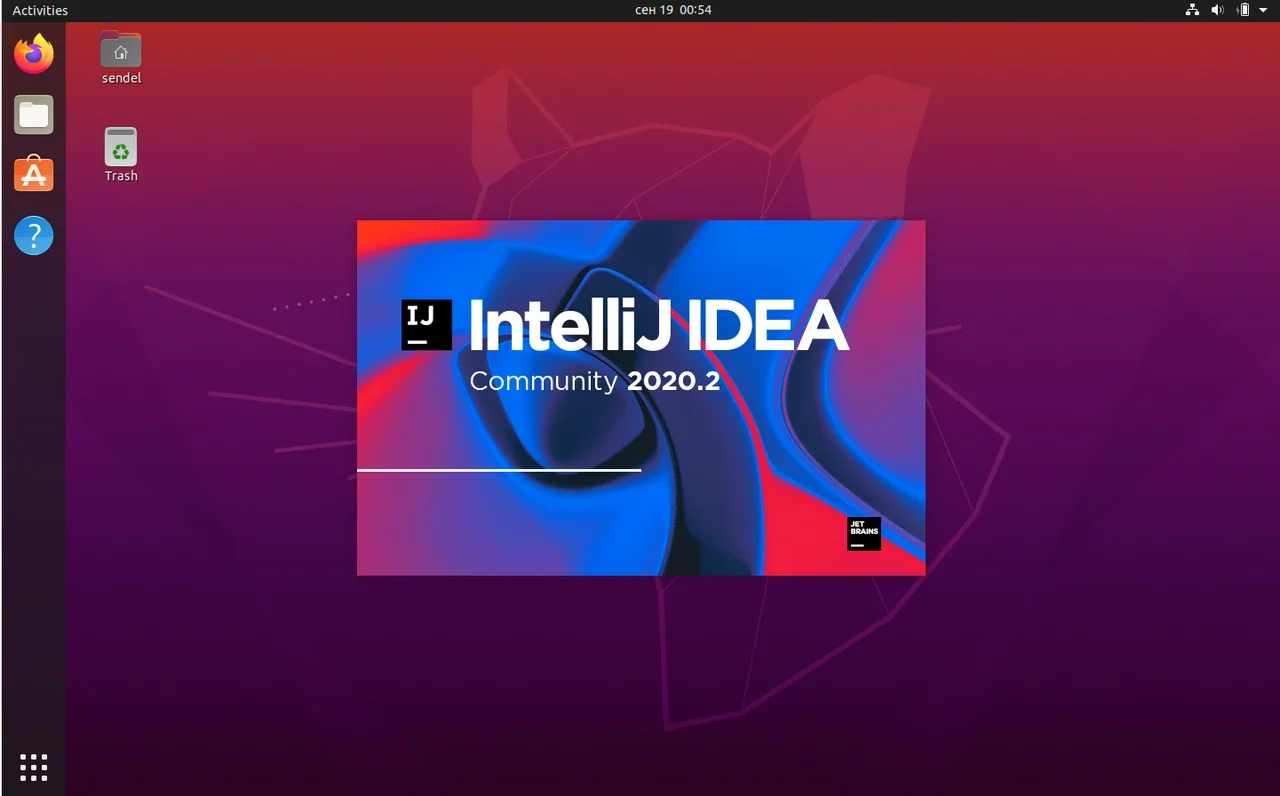
Вы увидите экран загрузки:
Далее вас встретит начальный экран (Welcome screen). Здесь можно создать новый проект, открыть или импортировать существующий, а также скачать проект из системы контроля версий.
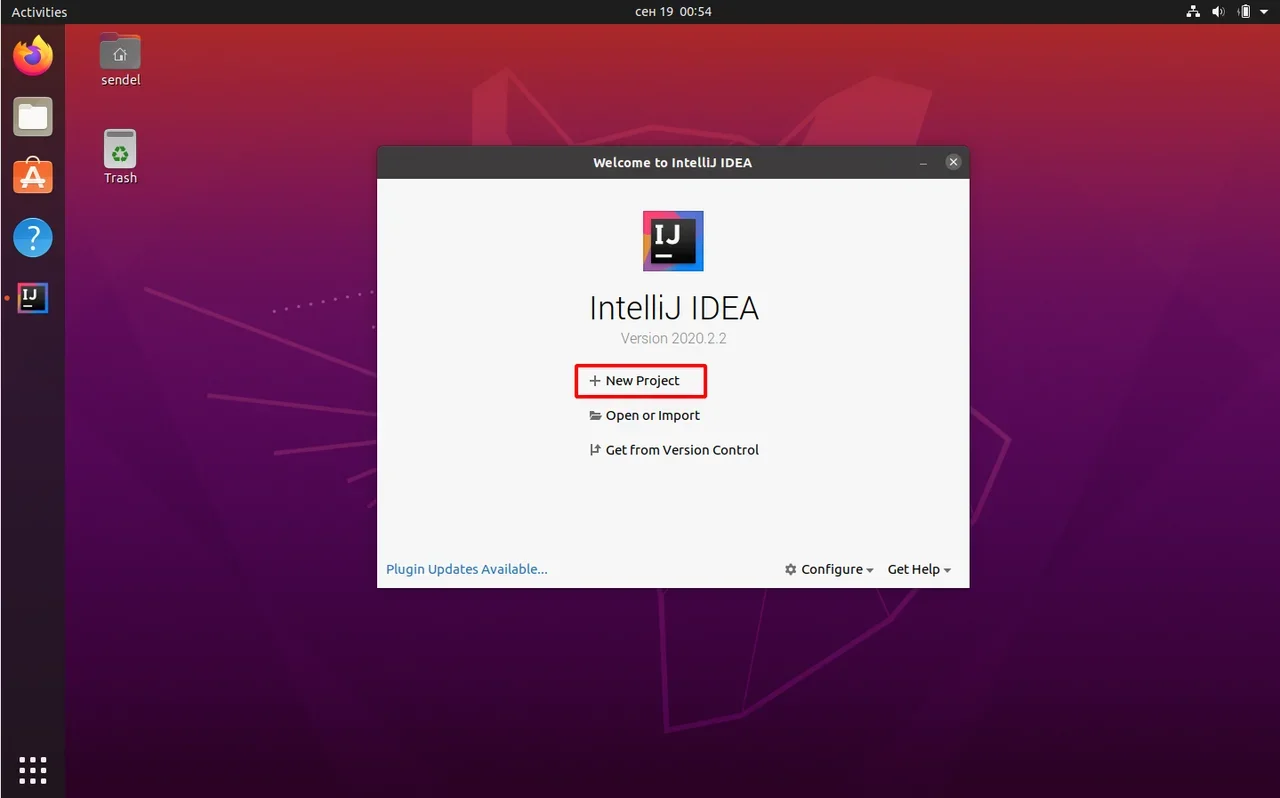
Если вы видите такой же экран — поздравляю, установка и настройка прошли успешно! Приятного обучения!

Учись бесплатно:
вебинары по программированию, маркетингу и дизайну.
Участвовать

Школа дронов для всех
Учим программировать беспилотники и управлять ими.
Узнать больше
IntelliJ IDEA – это продукт от корпорации JetBrains, который представляет собой интегрированную среду разработки для программирования на разных языках. Программа помогает оптимизировать производительность и сократить время за счёт того, что автоматизирует повторяющиеся задачи разработки. Перейдите по ссылке на этой странице, чтобы установить IntelliJ IDEA для Windows официальную версию бесплатно.
Среда разработки выходит в двух версиях
- Под лицензией Apache 2.0, подходит для безвозмездных и некоммерческих проектов.
- Версия IntelliJ IDEA Community Edition — создана для использования в коммерческих целях.
IntelliJ IDEA поддерживает следующие языки программирования: Java, JavaScript, CoffeScript, html, css, xml, yaml, Python, Haxe и другие. При использовании сторонних плагинов появляется возможность работать с языками OCaml, Erlang, Lua, Perl5 и другими.
Подходит для установки на платформу Windows XP, Vista, 7, 8, 10, 11. Разрядность 32 и 64-bit.
Опции и характеристики IntelliJ IDEA для Windows
- анализирует коды и рефакторинги;
- автоматическое дополнение кода;
- подходит для работы с популярными языками;
- автоматизирует повторяющиеся задачи;
- два варианта для разного использования.
Как установить программу IntelliJ IDEA для Windows
Для того, чтобы установить утилиту IntelliJ IDEA, скачайте файл, который находится на этой странице. Затем откройте его и дождитесь полной установки среды программирования. После того как программа установится, откройте её и начните работу.
Заключение
В обновлённой версии (на данный момент выпущена только бета-версия) предложена поддержка удалённой разработки и новый способ диагностики и устранения проблем в работе IDE. Это значит, что пользователь сможет установить связь с удалённым сервером, на котором запущена IntelliJ IDEA из любой точки планеты.
IntelliJ IDEA is the smartest IDE for Java development. It’s also the base of the official Android IDE i.e. Android Studio used for Android mobile application development. This tutorial provides all the steps required to install IntelliJ Idea on Windows 10 for Java development. The same installation can be used for Android application development using either Java or Kotlin. The steps should be the same for other versions of Windows systems.
It assumes that Java is already installed on the system. You may also be interested in How To Install OpenJDK 12 On Windows and How To Install Java 11 On Windows.
Download IntelliJ IDEA
Click here to navigate to the IntelliJ IDEA’s download page. It will open the download page as shown below.

Fig 1
The IntelliJ IDEA provides two different installers i.e. Ultimate and Community. The Ultimate edition is commercial version whereas the Community edition can be used for free. This tutorial shows the steps required to install the Community edition. The differences between both the editions are shown in Fig 2.

Fig 2
The Community Edition provides essential features required to develop Java applications. It supports Java, Kotlin, Groovy, Scala, Android, Maven, Gradle, SBT, Git, Svn, and Mercurial out of the box. The Ultimate edition also provides more advanced features including Perforce, JavaScript, TypeScript, Database Tools, Duplicates Detection, and supports frameworks including Spring, Play, Grails, etc.
Install IntelliJ IDEA
To start the installation, execute the Community Edition downloaded in the previous section. The steps remain the same for the Ultimate Edition. It will ask for system permission before starting the download. Allow permission to continue with the installation. It will show the welcome screen as shown in Fig 3.

Fig 3
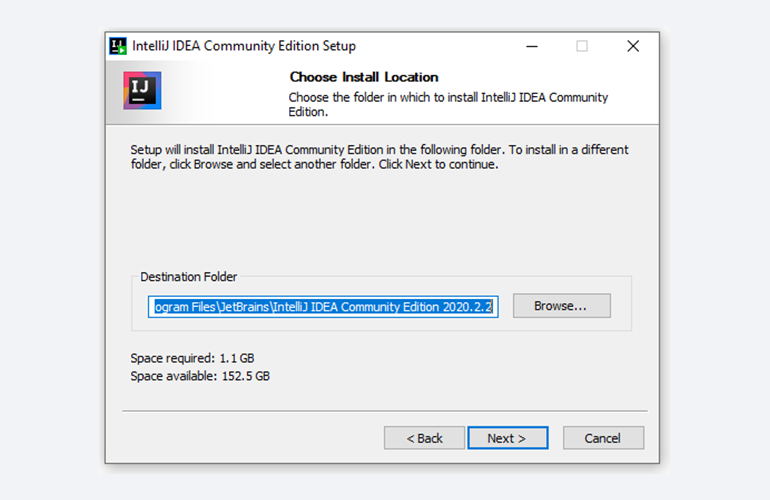
Click on the Next Button to continue with the installation. It will provide options to choose the installation location as shown in Fig 4. Make sure that you have sufficient space available on the selected drive since it will consume around 1 GB storage.

Fig 4
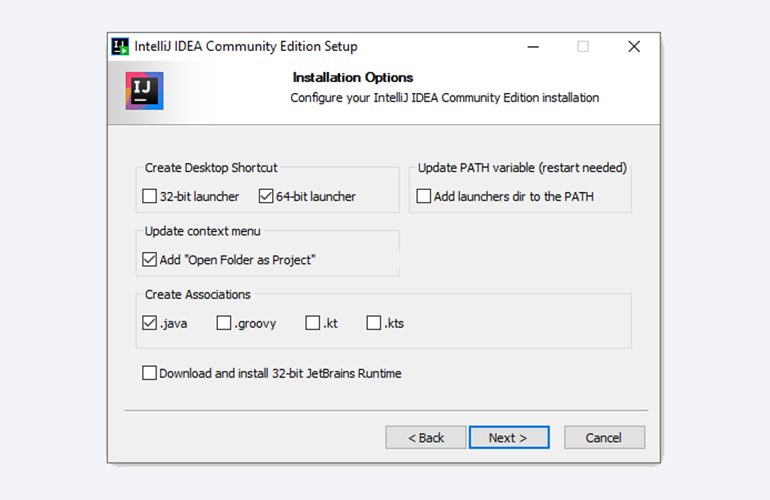
Click on the Next Button after choosing the appropriate installation path. It will show installation options as shown in Fig 5.

Fig 5
The installation options screen provides options to configure system path, create 64-bit desktop launcher icon, Open Folder as Project, and file association for Java, Groovy, and Kotlin files. I have selected the option to create a desktop launcher icon. You may choose the options based on your requirements.
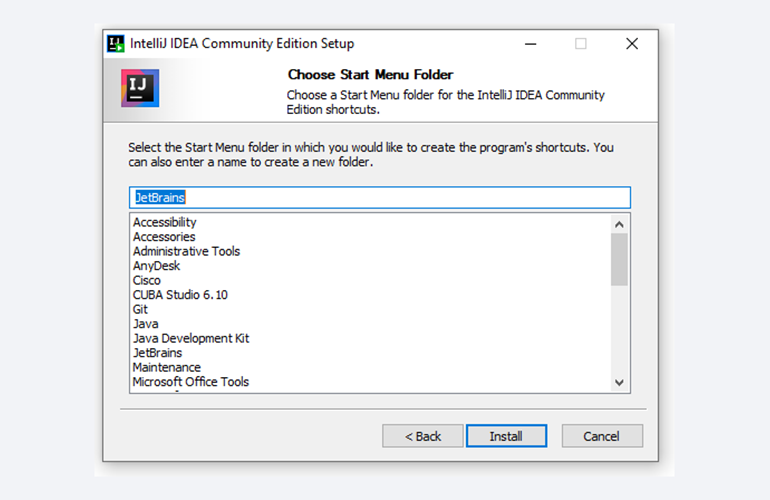
Now click on the Next Button to continue with the installation. The next screen shows options to configure the Start Menu Folder as shown in Fig 6.

Fig 6
Click on the Install Button after selecting the Start Menu Folder option. It will show the installation progress as shown in Fig 7.

Fig 7
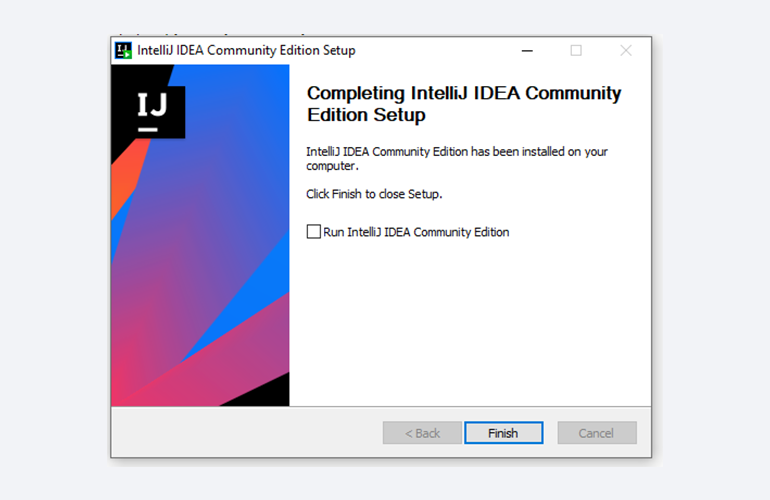
It will show the final screen after successfully installing IntelliJ IDEA as shown in Fig 8.

Fig 8
Click on the Finish Button to close the installer. Now execute IntelliJ IDEA using the desktop shortcut icon. It might ask to import settings from the previous installation as shown in Fig 9.

Fig 9
Choose the location to import setting or simply skip it as shown in Fig 9. Click on OK button to launch the IDE. It will show the options to configure the IDE on the first launch. The very first option is to choose a theme as shown in Fig 10. I have skipped the rest of the options with default settings.

Fig 10
Click on the Skip Remaining and Set Defaults Button to start the IDE. You may further configure by clicking on the button at button right corner. It will also ask to create a new project or Import Project for the first time as shown in Fig 11.

Fig 11
We will create the first project i.e. Hello World. Click on the Create New Project option to start creating the project. It will show the screen to configure the project as shown in Fig 12.

Fig 12
I have kept the default options as shown in Fig 12. Now click on the Next Button to continue with project setup. The next screen provides options to choose Project Template as shown in Fig 13.

Fig 13
Click on the Next Button to configure project name and location as shown in Fig 14. I have provided the project name as Hello World and select an appropriate location to store project files.

Fig 14
Now click on the Finish Button to create the project. It will also ask to create the directory as shown in Fig 15.

Fig 15
Click on the OK Button to grant permission. It will launch the IDE showing Tip of the Day as shown in Fig 16.

Fig 16
The IDE will show the Hello World project set up on the left panel with all the default options.
Hello World
In the previous sections, we have downloaded and installed IntelliJ IDEA for Java development and also create the Hello World project as part of the process to launch the IDE. In this section, we will write our first Java program and execute it to print Hello Java on the console.
Expand the Project Hello Word and right-click on the src folder, hover on New Option and click on Java Class Option as shown in Fig 17.

Fig 17

Fig 18
It will show the New Java Class Dialog as shown in Fig 19. I have provided the Java Filename with the package as shown in Fig 18. Now press Enter Key to create the packages and Java file. It will open the Java file as shown in Fig 19.

Fig 19
I have updated the HelloJava class to print Hello Java !! on the console as shown in Fig 20.

Fig 20
Now right click on the HelloJava class file and choose Run HelloJava.main() Option or press Ctrl + Shift + F10 to compile and execute the program as shown in Fig 21. It will also build the project.

Fig 21
The final output of the program will be displayed on the console as shown in Fig 22.

Fig 22
This is how we can install IntelliJ IDEA on Windows 10 and create the Hello World project to execute our first program in Java.
Операционная система: Windows
Лицензия: Условно бесплатно, бесплатно
Описание
IntelliJ IDEA – среда разработки программного обеспечения, ориентированная на производительность и концентрацию разработчика на важных задачах. IntelliJ IDEA способна анализировать написанный код, что позволяет подбирать наиболее подходящие варианты для автозаполнения и разные методы решения проблемы в случае допущенной ошибки. Программа содержит встроенные редакторы для большинства языков программирования. IntelliJ IDEA поддерживает самые распространенные каркасы, как Java EE, Spring, Grails, Play, Android, GWT, Vaadin и тому подобные. Программа работает с развернутыми базами данных пользователя и совместима с другими системами управления версиями. Также IntelliJ IDEA содержит инструменты для разработки графического интерфейса пользователя.
Основные особенности:
- Мощный редактор кода
- Поддержка распространенных каркасов и языков программирования
- Интеграция с серверами приложений
- Контроль версий
- Разработка графического интерфейса пользователя
- Работа с базами данных