![]()
Download Article
![]()
Download Article
This wikiHow teaches you how to run macOS High Sierra on your Windows computer. To do this, you will need to download Niresh Catalina. You will also need Transmac or a Mac along with a supported Windows computer and a blank hard drive.
-

1
Check your computer’s specifications. Your Windows computer must have an Intel Core i3, i5, i7 or i9 processor in order to run macOS Catalina, as well as a minimum of four gigabytes of RAM. To check these specs:
- Open Start
.
- Type in system information.
- Click System Information at the top of the menu.
- Look at the name of the processor to the right of the «Processor» heading.
- Scroll down and look at the number to the right of the «Installed Physical Memory» heading.
- Open Start
-
2
Check your computer’s BIOS type. Next to the «BIOS Mode» heading in the System Information menu, check to see whether it says «UEFI» or «BIOS». Keep this information in mind for later.
- You can exit System Information after this point.
Advertisement
-
3
Determine your computer’s bit type. There are two types of computer: 32-bit, and 64-bit. Your computer must be able to support 64-bit operation in order to install macOS.
-
4
Make sure you have access to a recent model of Mac. The Mac in question must be able to download macOS Catalina.
- If your Mac can’t run macOS Catalina, try finding another one.
-
5
Gather the required equipment. In order to install macOS High Sierra on your Windows computer, you will need the following hardware:[1]
- USB drive — Find a flash drive that can hold at least 16 gigabytes.
- Blank hard drive — Find a USB external hard drive that holds at least 100 gigabytes (this is where you’ll install your macOS stuff, so the bigger, the better).
- USB-C adapter — If you’re working with a Mac that doesn’t have traditional USB ports, you’ll need a USB-C-to-USB-3.0 adapter.


Advertisement
-
1
Go to the Hackintosh Zone download site. Go to https://www.hackintoshzone.com/. Make sure you sign in with you account by clicking.
-
2
Click Log in or Register. It’s in the upper-right side of the page. A menu will appear at the top of the page.
-
3
Enter your email address. Do so in the «Email address» field. Make sure this is an email address that you can easily access—you’ll need to log in and verify the email address later.
-
4
Check the «No, create an account now» box. It’s near the bottom of the menu.
-
5
Click Sign up. Doing so takes you to the Create an Account page.
-
6
Enter the required information. Fill out the following fields:
- Name — Enter the name you want to use for your account.
- Password — Enter a password you’d like to use for the login.
- Confirm Password — Repeat the password you entered above.
- Date of Birth — Select the month, day, and year of your birth.
- Location — Type in your country’s name.
-
7
Check the «I agree to the terms and rules» box. It’s near the bottom of the page.
-
8
Click Sign up. This button is at the bottom of the page. Doing so creates your account and sends a confirmation email to your provided email address.
-
9
Go to your email inbox. Go to the email address that you selected for your account. You may have to log in with your email address and the email account’s password to open the inbox.
-
10
Open the confirmation email. Click the email from «tonymacx86.com» to open it.
-
11
Click the confirmation link. Click the link below the «Confirm Account» text in the middle of the email. This will take you back to the Unibeast download site.
-
12
Double-click the Downloads tab. It’s on the right side of the row of tabs that’s near the top of the page. The Downloads page should open.
- If you just see a drop-down menu appear, click the Downloads tab once more.
-
13
Click Hackintosh then download Hackintosh Catalina.
- For example, the current release of
-
14
Click Download Now. It’s in the top-right corner of the page. Doing so will download Unibeast onto your Mac.
-
15
Download Multibeast. This program, which is hosted on the same site as Unibeast, will allow you to install drivers so that you can use things like your PC’s speakers, the Internet, and so on:
- Double-click the Downloads tab again.
- Click Multibeast — High Sierra 10.2.0
- Click Download Now in the upper-right corner of the page.


Advertisement
-
1
Open your Mac’s
App Store. Click the App Store app icon, which is blue with a white «A» on it, in your Mac’s Dock.
-
2
Click the search bar. It’s in the upper-right side of the App Store window.
-
3
Search for High Sierra. Type high sierra into the search bar, then press ⏎ Return.
-
4
Click Download. It’s to the right of the High Sierra icon. Doing so will prompt the installer to begin downloading onto your Mac.
-
5
Wait for the installer window to open. Once it does, you’ll need to close it immediately.[2]
-
6
Press ⌘ Command+Q when the window opens. This will close the installer window.
-
7
Open
Finder. Click the blue face-like icon in your Mac’s Dock.
-
8
Click the Applications folder. It’s on the left side of the Finder window.
-
9
Make sure that the installer is there. The installer will be called «Install macOS High Sierra» or something similar and will have an image of a ridge of mountains on it. As long as the installer is present in the Applications folder, you can proceed.
- If the installer isn’t there, try downloading High Sierra again.


Advertisement
-
1
Plug your USB drive into your Mac. This is the 16-gigabyte minimum flash drive that you’ll use to install macOS High Sierra on your computer.
- If your Mac doesn’t have traditional USB ports on it, attach your USB-C to USB-3.0 adapter first.
-
2
Open Spotlight
. Click the magnifying glass icon in the top-right corner of the screen. A search bar will open.
-
3
Type disk utility into Spotlight. This will search your Mac for the Disk Utility app.
-
4
Click Disk Utility. It’s below the Spotlight search bar. Doing so will open Disk Utility.
-
5
Select your USB drive. Click the USB drive’s name in the upper-left side of the window.
-
6
Click the Erase tab. It’s near the top of the window. A pop-up box will appear.
-
7
Click the «Format» drop-down box. You’ll find this in the middle of the pop-up box. Clicking it prompts a drop-down menu.
-
8
Click OS X Extended (Journaled). This will set your USB drive’s file system to that of your Mac.
-
9
Click the «Scheme» drop-down box. It’s below the «Format» drop-down box.
-
10
Click GUID Partition Map. This option is in the «Format» drop-down menu.
-
11
Click Erase. Doing so will reformat your USB drive to your Mac’s file system.
-
12
Click Done when prompted. You can now proceed with creating your installation drive.


Advertisement
-
1
Open the Unibeast folder. Double-click the Unibeast folder to unzip and open it.
-
2
Open Unibeast. Double-click the Unibeast PKG file to open it.
-
3
Click Open when prompted. Doing so will open the Unibeast setup window.
- If your Mac is currently running macOS Sierra or higher, you’ll have to verify the Unibeast installation before continuing.
-
4
Click Continue four times. It’s in the bottom-right corner of the first four pages of the Unibeast setup window.
-
5
Click Agree when prompted. It’s at the top of the window.
-
6
Select your USB drive, then click Continue. Click the USB drive’s name to select it.
-
7
Select High Sierra, then click Continue. You should see High Sierra in the middle of the page.
-
8
Select a motherboard type. Depending on whether your Windows computer has a UEFI- or a BIOS-type motherboard, your choice will vary:
- UEFI — Click UEFI Boot Mode, then click Continue.
- BIOS — Click Legacy Boot Mode, then click Continue.
-
9
Select a graphics card option if necessary, then click Continue. Check the box next to Inject [card name] for your preferred graphics card settings.
- If your graphics card supports macOS High Sierra by default, skip this step.
-
10
Click Continue. It’s in the bottom-right corner of the page. Doing so will prompt you to enter your Mac’s password.
-
11
Enter your Mac’s password. Type in the password you use to log into your Mac.
-
12
Click OK. This will prompt Unibeast to begin installing to the USB drive. Once the installation process is complete, your USB drive will be ready to install macOS High Sierra on your PC. While the Unibeast installation finishes up, you should change your Windows computer’s boot order.


Advertisement
-
1
Unplug any USB items from your Windows computer. Make sure that you don’t have any USB drives, in particular.
-
2
Enter your computer’s BIOS or UEFI settings page. This process varies from computer to computer, but you will typically restart your computer and then repeatedly press a key (e.g., Del) immediately as the computer begins to start up.
-
3
Locate the «Boot Order» section. This section is normally on the main page of the BIOS, though you may need to use the arrow keys to navigate over to the «Boot» or «Advanced» tab.
- The «Boot Order» section varies from BIOS to BIOS. If you can’t find your BIOS’ «Boot Order» page, consult your motherboard’s manual or look up your computer model online to find direct instruction for your specific BIOS page.
-
4
Select Removable Devices. Use the arrow keys to move the blinking bar down to Removable Devices.
- On some pages, this section may instead be called USB Devices or something similar (e.g., Peripherals).
-
5
Move your selected location to the top of the list. Typically, you’ll press the + key with the boot location you want to use selected until it’s at the top of the «Boot Order» list.
- You can double-check the key that you’re supposed to use in the legend that’s usually on the right side or the bottom of the BIOS page.
-
6
Save your settings and exit the BIOS. Look for the key you’re supposed to press to save and exit in the legend on the right side of the page, then press it. Doing so will shift your Windows computer’s boot priority so that installation USB drive will be selected as the boot point once you plug it in.
- You may have to press another key to confirm this choice.


Advertisement
-
1
Place Multibeast on the USB drive. Open the USB drive’s folder, then drag the Multibeast file into the folder. You’ll need to use Multibeast later, so having it on the flash drive will make using it when necessary as simple as possible.
-
2
Eject the Unibeast USB drive from the Mac. Open the Finder, then click the ⏏ Eject icon to the right of the USB drive’s name in the upper-left corner of the Finder window. After doing so, you can remove your USB drive.
- You should make sure that the Unibeast installation is complete before doing this.
-
3
Shut down your Windows computer. Press and hold the Power button on your Windows computer until your computer shuts down completely. This will usually occur one or two seconds after the computer’s display turns off.
-
4
Plug both the Unibeast USB drive and the blank hard drive into your computer. These should both fit into USB ports on your computer.
-
5
Start your Windows computer. Press the Power button to start the computer. Once the computer has a chance to begin booting, it should select your plugged-in USB drive as a place from which to boot.
-
6
Select your USB drive when prompted, then press ↵ Enter. This will begin the macOS installation process.
-
7
Select a language, then click →. Doing so takes you to the next page of the installer.
-
8
Click Continue twice. It’s in the bottom-right corner of the pages.
-
9
Click Agree when prompted. You’ll see this at the top of the screen.
-
10
Click the Utilities menu item. This menu item is in the top-left side of the screen. A drop-down menu will appear.[3]
-
11
Click Disk Utility. It’s in the drop-down menu.
-
12
Select the blank hard drive. Click the blank hard drive’s name on the left side of the page.
-
13
Click the Erase tab. It’s near the top of the page.
-
14
Format the blank hard drive. Change the following fields:
- Format — Click the drop-down box, then click Mac OS X Extended (Journaled)
- Scheme — Click the drop-down box, then click GUID Partition Map
-
15
Click Erase. Doing so will reformat your blank hard drive for macOS’ file system.
-
16
Click Done when prompted, then close the Disk Utility window. You can now proceed with installing macOS High Sierra on the hard drive.
-
17
Click the blank hard drive’s name, then click Continue. This will both select the hard drive as the installation point and begin installing macOS High Sierra.
-
18
Wait for macOS High Sierra to finish installing. This process should take around 15 minutes.
-
19
Follow the on-screen prompts. You’ll be prompted to enter specific information, such as your name, a password, your preferred language, your location, and so on. Once you complete this setup process, macOS’ software will be completely set up on your Windows computer.


Advertisement
-
1
Open your flash drive. Open
Finder, then click the name of the flash drive from which you installed macOS High Sierra. This will open the flash drive’s window in Finder.
-
2
Double-click the Multibeast file. Doing so will open the Multibeast window.
-
3
Click the Bootloaders tab. It’s at the top of the window.
-
4
Select the proper bootloader. Check the «Clover UEFI Boot Mode» box if you selected the UEFI boot mode for your motherboard during the Unibeast tool creation, or check the «Clover Legacy Boot Mode» box if you used legacy boot mode.
-
5
Click the Drivers tab. You’ll find this option at the top of the window.
-
6
Click Audio. It’s on the left side of the window.
-
7
Select audio drivers. Click the current audio item’s heading in the middle of the window to expand it, then check the box next to your computer’s audio provider’s name.
-
8
Click Misc. This option is on the left side of the window.
-
9
Check the «FakeSMC» box. You’ll find it near the top of the window.
-
10
Click Network. It’s on the left side of the window.
-
11
Select an Internet driver. Click the name of your Internet card, then check the box next to the driver’s name.
-
12
Click the Customize tab. It’s at the top of the window.
-
13
Select the proper graphics options. Check the box next to your computer’s graphics card name, then check the «Fixup» box for your graphics card’s manufacturer.
- For example, to install drivers for a NVIDIA card, you would check both the «NVIDIA Web Drivers Boot Flag» box and the «NVIDIA Graphics Fixup» box.
- Leave the «Inject» options blank.
-
14
Click System Definitions. It’s on the left side of the window.
-
15
Select a Mac which most closely resembles your computer. Click the heading of the type of Mac (e.g., iMac) which resembles your computer, then check the box next to the type of Mac which uses your computer’s graphics card settings.
-
16
Click the Build tab. It’s at the top of the window.
-
17
Select a drive. Click the «Select Install Drive» box on the right side of the window, then click your macOS drive’s name in the resulting drop-down menu.
-
18
Install the drivers. Once you complete this process, you should be able to use your macOS PC with minimal trouble:
- Click Install in the bottom-right corner.
- Click Agree when prompted.
- Enter your Mac’s password when prompted.
- Click Install Helper


Advertisement
Add New Question
-
Question
Will this work on AMD systems?

No, it won’t, unfortunately.
-
Question
Why do high system requirement applications like Android Studio, After Effects, Photoshop, etc., run so smoothly on a Mac but are quite slow in Windows?
This is very much dependent on the hardware you are using. It may be that the Windows PC you are using has lower specs or has other software which is slowing it down.
-
Question
Can I use other virtual programs like VirtualBox or VMWare to use Mac OS?
You can; VMware will be the best for using it because it provides for functions and runs smoothly on Windows. You should allocate 4 GB RAM for Mac OS.
See more answers
Ask a Question
200 characters left
Include your email address to get a message when this question is answered.
Submit
Advertisement
-
If you enjoy macOS on your Windows computer, consider purchasing a Mac to stay Apple-compliant.
-
Windows computers with macOS installed on them are called «Hackintoshes».
-
macOS doesn’t have the proper drivers to run utilities like Wi-Fi or sound on your Windows computer, which is why you’ll need to use Multibeast.
Show More Tips
Thanks for submitting a tip for review!
Advertisement
-
Only do this if your computer has sufficient amount of RAM installed.
-
Installing macOS on a Windows computer violates the Apple End User License Agreement.
Advertisement
References
About This Article
Article SummaryX
Installing macOS on a Windows computer is tricky, but not impossible. You’ll need to download the macOS High Sierra installation file on a Mac and then transfer the installer over to Windows by using a macOS-formatted USB drive running a program called Unibeast; after this point, you can use the USB drive to install macOS over onto a blank hard drive that you’ve also formatted for macOS. Once you’ve installed macOS, it’s a good idea to run Multibeast from the flash drive in order to install drivers needed for things like sound, Internet, and graphics cards.
Did this summary help you?
Thanks to all authors for creating a page that has been read 1,780,508 times.
Is this article up to date?
ПРОЧТИ МЕНЯ ПОЖАЛУСТО
Если вы НЕ МОЖЕТЕ распаковать файлы на флешку, пожалуйста, отойдите от кливиатуры и срочно прочитайте книгу «Компьютер для чайников: подробное пособие как пользоваться ПК»!!!
1. Все файлы залиты на МЕГУ. Кто испытывает с ней проблемы — в комментариях перезалили на торрент.
2. Пожалуйста, не спрашивайте меня про установку Мака на ноутбуки. Прошу вас. Пожалуйста. Это очень геморройный процесс. Поставьте себе убунту и подключите тему Мака. Тот же экспириенс получите
3. Я на хабре редко отвечаю, пишите в вк по всем вопросам.
Данный мануал/гайд/etc написан для тех, кому лень собирать по кускам ту или иную информацию об установке «мака» на PC, все понятно и по полочкам.
Для начала, перед, собственно, установкой самой системы на ПК, нужно определиться, нужна ли она нам или нет, так как сама система очень специфична в плане установки и настройки, если у вас, конечно, не яблочный девайс. Нет смысла объяснять, что разворачивание системы, которая изначально не планировалась для настольных ПК — дело сложное и на это все можно убить от 2-ух до N часов, в зависимости от совместимости железа.
Теперь, разберемся в том, что же такое Хакинтош (Hackintosh): слово «хакинтош» образовалось от слияния двух слов «Macintosh» и «Hack», что по сути означает «взломанный макинтош», хотя ничего общего со «взломом» тут нет.
В данном гайде рассмотрим создание установочной флешки из-под Windows (так как это наиболее популярная система среди «начинающих хакинтошников»), установку системы на чистый диск, расширения ядра под ваше железо и, собственно, установку и настройку загрузчика (именно на этом моменте и многих и возникают проблемы)
Машина автора:
CPU: Intel Core i5 4460 3,2 GHz (Haswell)
Memory: 16 GB Crucial Ballistix Sport
Graphics: MSI GeForce GTX 760 2048MB
Motherboard: Gigabyte GA-H81-S2V (UEFI Bios)
ACHTUNG
Автор НЕ ГАРАНТИРУЕТ работоспособность системы на таком же уровне, как и у него. Система работает на разных машинах по-разному и не нужно корить автора за «кривую инструкцию»
Также хочу обратить внимание, что в этой статье работа идет с видеокартами NVidia и UEFI BIOS’ом.
Что ж, поехали.
Шаг 1. Оценка и анализ железа
Да, несмотря на то, что Хакинтош так или иначе запускается на почти любых конфигурациях, делает он это всегда по-разному. Поэтому сразу стоит проанализировать наше железо.
Процессоры
Итак, начнем с того, что на машинах на процессорах AMD система работать НЕ БУДЕТ (то предсмертное состояние агонии, в котором она будет прибывать, «работой» назвать очень сложно). Да, по сути, можно поставить кастомное ядро, перепрошить его и так далее, но смысл изобретать велосипед из палок, если так или иначе он все равно сломается. Система встает без проблем на процессоры Intel, начиная с Core i3 (мы говорим конкретно про macOS Sierra 10.12, предыдущие выпуски могут встать также и на процессорах Core 2 Duo и Pentium). В моем случае выпал камень i5 4460 (4 ядра, 4 потока, турбобуст до 3,4 ГГц).
ACHTUNG 2
Наблюдаются проблемы на процессорах сокета 2011-3, в частности на чипсете X99. Обычно проявляется из-за слишком больших наворотов материнской платы.
Видеокарты
Далее, определяемся с графикой. Если вы пользуетесь встроенной графикой Intel (в моем случае это HD4600), то скорее всего понадобится отдельный «завод» графики (хотя могут завестись нативно).
Список поддерживающихся графоядер Intel
Intel HD 3000
Intel HD 4000
Intel HD 4600 (лэптопы)
Intel HD 5000
Радеоны (AMD) заводятся, но опять же с треском. Например, новые карточки (RX-4**), а также всем известная R9 380 или R9 380x могут просто вывести загрузку в черный экран.
Список точно поддерживающихся карт AMD
Radeon HD 4000 series
Radeon HD 5000 series
Radeon HD 6000 series (Желательно 6600 и 6800)
Radeon HD 7000 series (Желательно 7700, 7800, и 7900)
Radeon R9 200 series (R9 290 не заводится)
Radeon R9 300 series (С R9 380 могут быть проблемы. Лично не проверял, но судя по отзывам на Реддите с этими карточками есть проблемы)
В этом мануале рассматривать завод графики AMD не будем, так как все это сводится к патчам фрэймбуффера и подменам Device ID в загрузчике (что для каждого индивидуально). Подробнее о картах AMD тут: тык (English).
Совсем другое дело обстоит с карточками от NVidia. Заводятся почти все, за исключением некоторых особо-одаренных.
Проблемы наблюдаются на 10-ой серии, но, скорее всего, их не скоро будет
Уже все норм. На картах GTX графика заводится с полпинка, карты выпуска GT тоже не отстают, хотя там и есть некоторые исключения.
Список рабочих карт NVidia
Geforce 7000 series
Geforce 8000 series
Geforce 9000 series
Geforce 200 series
Geforce 400 series
Geforce 500 series
Geforce 600 series
Geforce 700 series
Geforce 900 series
UPD 14.05 Geforce GTX 1000 Series
Более чем уверен, что вы найдете в списке свою карту.
Сетевой контроллер
Думаю, не нужно разжевывать, как можно определить свою сетевую карту…
Ньюби гайд
Открываем Диспетчер задач → вкладка «производительность» → Ethernet (Windows 10), там большими черными буквами будет сетевуха.
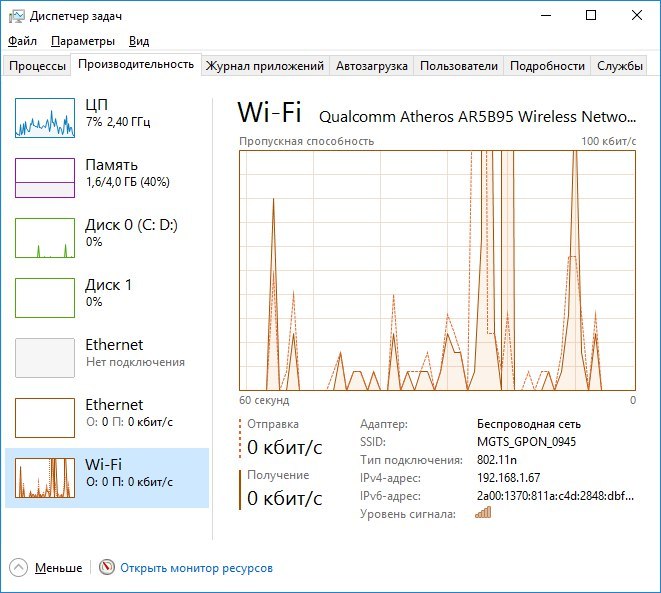
К слову, еще можно в BIOS’e посмотреть
Так или иначе, на этом подробно останавливаться не будем. Сетевую карту в любом случае придется заводить, так что просто предоставлю список поддерживаемых сетевых карт.
Сетевые карты
Intel Gigabit
5 Series – 82578LM/82578LC/82578DM/82578DC
6 and 7 Series – 82579LM/82579V
8 and 9 Series – I217LM/I217V/I218LM/I218V/I218LM2/I218V2/I218LM3
Realtek
RTL8111, 8168, 8101E, 8102E, 8131E, 8169, 8110SC, 8169SC
RTL8111/8168 B/C/D/E/F/G
RTL8101E/8102E/8102E/8103E/8103E/8103E/8401E/8105E/8402/8106E/8106EUS
RTL8105/8111E/8111F/8136/8168E/8168F
Atheros
AR8121, 8113, 8114, 8131, 8151, 8161, 8171, 8132,8151, 8152, 8162, 8172
AR816x, AR817x поддерживаются
Broadcom
BCM5722, 5752, 5754, 5754M, 5755, 5755M, 5761, 5761e, 57780, 57781, 57785,5784M, 5787, 5787M, 5906, 5906M, 57788, 5784M
Marvell
88E8035, 88E8036, 88E8038, 88E8039, 88E8056, 88E8001
Killer
E2200
Память
Ограничений нет. Система запускается на двух гигабайтах. Рекомендовано 4. Автор рекомендует 8.
С железом, собственно, разобрались. Если на этом этапе вы не передумали, идем дальше.
Шаг 2. Делаем загрузочную флешку и развертываем на нее установщик
Итак, вот мы и подошли к практике. Напомню, что делаем мы все это из-под Windows. Сразу говорю, что мы не будем использовать образы с рутрекера, которые так яро советуют
люди, у которых все работает
хакинтошники «до 18». Для начала нам потребуется утилита BDU (BootDiskUtiliy).
Потребуется флешка >8 ГБ. Любая.
Качаем: тык
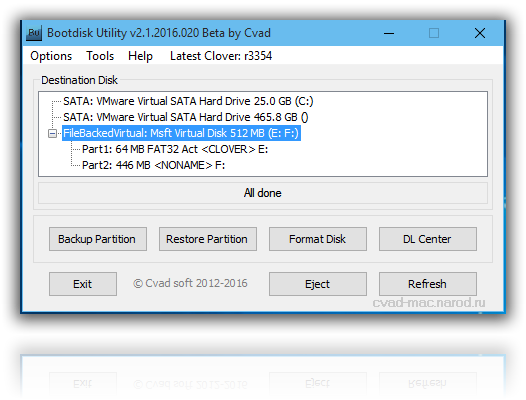
1. Запускаем утилиту
2. Destination disk → выбираем нашу флешку
3. Format disk
Теперь ждем. Флешка отформатируется в Apple HFS и разобьется на два раздела, на один из которых будет установлен загрузчик (CLOVER), а второй останется чистым для того, чтобы туда можно было развернуть установщик.
После выполненных манипуляций получаем примерно следующую картину:
Далее необходимо развернуть установщик на второй раздел. Делаем мы это также через утилиту BDU. Однако, тут стоит вопрос, откуда взять образ. Варианта два: взять готовый, уже распакованный, либо же самолично достать его из Install Mac OS Sierra.app из AppStore. Так как второй способ требует достаточно много времени, да и искать сам этот .app очень долго, воспользуемся первым. Народные умельцы уже приготовили для этой утилиты готовые HFS файлы, извлекли их из .app за нас. Все, что нам нужно, так это скачать его (образ весит почти 5 гигов, так что можно просто поставить на закачку). Собственно, качаем macOS 10.12 Sierra отсюда.
Скачали.
1. Достаем из архива HFS Partition File (HFS+), файл с расширением .hfs.
2. В окне утилиты BDU «Destination disk» выбираем Part 2 нашей разбитой флешки.
3. Открываем «Restore partiton».
4. Ищем и выбираем наш *.hfs-файл. Обратите внимание, что он должен быть не больше PART 2 раздела.
5. Ждем его распаковки.
Все, установщик на флешке распакован и готов к работе.
Теперь нам потребуются некоторые файлы для вашей системы. Все необходимое я собрал в этом архиве. Позже объясню, что и для чего.
→ Скачать
Также потребуется еще этот кекст, его тоже скачиваем: тык. Распаковываем папку из архива в корень раздела с Clover’ом, а кекст в папку, которую мы распаковали. Все, готово. Флешка сделана. Идем дальше.
Шаг 3. Установка macOS Sierra на Intel-PC
Проверяем, что флешка вставлена в 2.0 порт. Перезагружаемся, заходим в BIOS. Напомню, что BIOS у нас — UEFI. Отключаем виртуализацию (Intel Virtualization). В приоритет загрузки (BOOT) указываем нашу флешку. Убедитесь, что она будет грузится именно в режиме UEFI. Сохраняем и применяем настройки, перезагружаемся. Попадаем в меню Clover’а.
Clover («Клевер») — загрузчик хакинтоша, а также его установщика.
Нажимаем стрелочку вниз до того момента, пока не попадем на меню Options. Нажимаем Enter. Все, что нам нужно здесь — это вот эта строка:
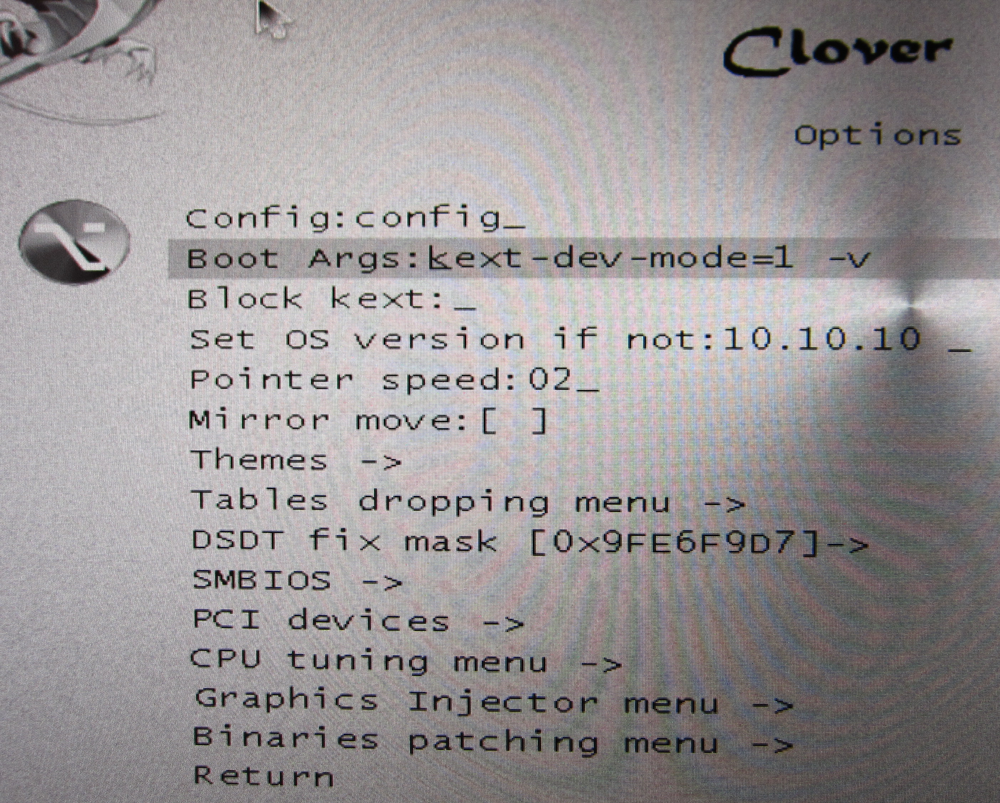
Прописываем в нее следующее:
kext-dev-mode=1 rootless=0 -v npci=0x2000 nv_disable=1Объясню, что делает каждый из этих аргументов:
kext-dev-mode=1— необходимый арг, без которого не запустится хак. Позволяет загружать в систему кексты (Изначально, FakeSMC.kext).
rootless=0— отключает SIP (System Integrity Protection). Необходимый арг.
-v— «Verbose mode». Вместо красивого яблочка мы увидем «консольную» загрузку, чтобы можно было опознать ошибку, если таковая появится.
npci=0x2000(или 0x3000, в зависимости от версии PCI-e) — по желанию. Предупреждаем остановку загрузки на этапе сканирования PCI. Можно не прописывать.
nv_disable=1— по желанию. Чтобы избежать артефактов при загрузке и прочего мусора, отключаем графическую оболочку. Грузимся в нативном режиме графики в православном 144p разрешении. Можно не прописывать.
Применяем аргументы, нажимая Enter. Выбираем Boot Mac OS Sierra from OS X Base System. И вот, пошла родимая загрузка. Сразу разберем некоторые ошибки: still waiting for root device — не успевает подключиться IDE-контроллер.
Фикс
Переподключаем флешку в другой 2.0 порт, грузимся с такими аргументами:
kext-dev-mode=1 rootless=0 cpus=1 npci=0x2000 -v UseKernelCache=No
Missing Bluetooth controller transport — не включилась видеокарта, либо не подрубился FakeSMC.kext. Проверьте, что в папке kexts/other есть FakeSMC.kext. Синезуб тут не при чем.
Фикс
Грузимся так:
kext-dev-mode=1 rootless=0 -v npci=0x2000
Или так:
kext-dev-mode=1 rootless=0 -v -x npci=0x2000
Если такие ошибки все же остались, то пробуем грузится так:
kext-dev-mode=1 rootless=0 -v npci=0x3000 darkwake=0 nv_disable=1 cpus=1В иных случаях помогут только гуглы, хотя эти фиксы должны решать эти проблемы.
Ждем. На некоторых моментах может подвисать. Если зависает больше чем на минуту — ребут. Должно помочь в некоторых случаях.
И вот мы, собственно, в установщике. Выбираем язык и кликаем на стрелочку. Пойдет подгрузка языкового пакета (может подвиснуть на минуту). Теперь открываем Утилиты>Дисковая утилита, нам нужно форматировать диск под macOS. Выбираем нужный диск, нажимаем «Стереть». Для удобства называем новый диск «Macintosh HD». Форматируем, закрываем дисковую утилиту. Далее выбираем диск, на который будем устанавливать систему (в нашем случае, Macintosh HD), устанавливаем.
Установка занимает от 15 до 30 минут, все зависит от скорости записи на диск. После установки система предложит нам настроить интернет подключение — пропускаем, это сделаем позже. Делаем пользователя. Готово, мы в системе. Вернее, в ее обрубке. Пока у нас еще ничего не работает. Если вы перезагрузите машину, то попасть в систему будет невозможно (ввиду отсутствия загрузчика).
Фикс
Если же комп все же перезагрузился или вырубился, то можно выбрать загрузку с флешки, затем в меню кловера выбрать «Boot macOS Sierra from Macintosh HD», не забывая при этом прописать boot arguments в меню options.
Идем дальше…
Шаг 4. Базовая настройка системы и установка кекстов
Итак, вот мы в системе. Пока она умеет мало, в интернет мы не выйдем, графика не работает, да и вообще все выглядит как-то ну очень плохо. Это нужно исправлять.
Разберемся, что такое кексты.
Kext (Kernel Extension) — расширения ядра, запускающие то или иное несовместимое с оригинальным маком оборудование (Например, откуда в аймаке мы найдем сетевую карту от Realtek или звуковую карту?). Вот они нам сейчас и понадобятся.
Для начала нам потребуется папка PostInstall, которую вы распаковали в раздел CLOVER на загрузочную флешку. Оттуда нам нужна, в первую очередь, утилита Kext Utility, которая позволяет устанавливать кексты в систему. Запускаем ее, вводим пароль от пользователя, ждем, пока увидем надпись «All done».

Устанавливаем кекст на сетевую карту (Папка Network, там по папкам рассортировал под каждую сетевую карту), просто перетаскиваем его в окно программы. Ждем, пока появится надпись «All done». Далее, заходим в раздел CLOVER нашей флешки, далее в kexts, далее в Other. Копируем оттуда FakeSMC.kext в любое место (Лучше в ту же PostInstall), далее тем же путем, что и кекст на сетевую карту, устанавливаем его. Также потребуется кекст на USB 3.0. Он был в архиве Legacy_13.2_EHC1.kext.zip, который вы распаковали в PostInstall. Устанавливаем его.
Готово, мы завели интернет, USB и позволили системе вообще загружаться (FakeSMC.kext имитирует чип System Management Control, который присутствует только на материнских платах Apple. Без этого кекста система просто не стартанет).
Теперь установим загрузчик. Заходим в папку PostInstall → Clover_v2.3k_r3949. Там есть *.pkg файл, открываем его.
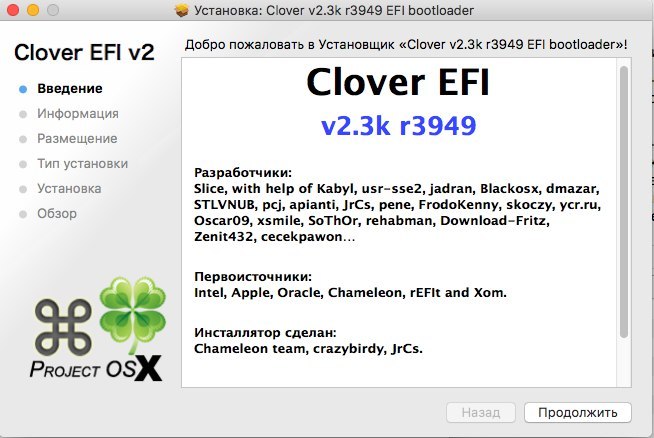
Кликаем продолжить, читаем инфу о загрузчике (вру, тоже нажимайте продолжить). Далее, в левом нижнем углу нажимаем «Настроить».
Для UEFI-загрузки выставляем следующие настройки:
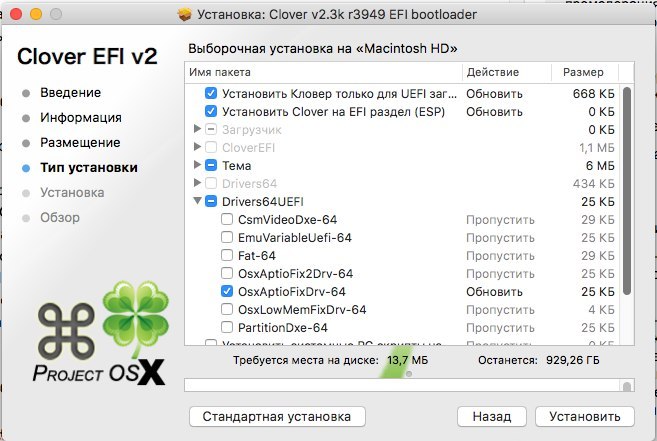
О легаси-загрузке поговорим позже, так как там все немного сложнее и придется патчить DSDT.
Нажимаем «Установить». Пойдем процесс установки загрузчика.
Готово, загрузчик установлен.
Шаг 5. Настройка загрузчика
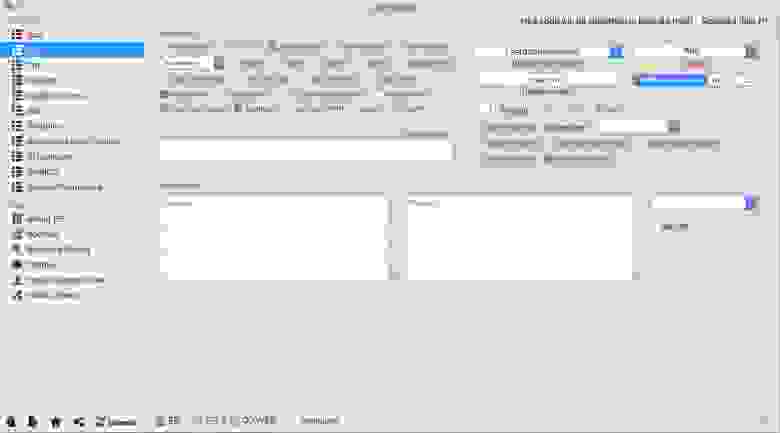
После установки мы получим чистый, ненастроенный загрузчик Clover, который необходимо немного подконфигурировать. Открываем Clover Configurator (в будущем не советую пользоваться данной программой для точечного редактирования конфига загрузчика).
Для начала нам необходимо попасть на EFI раздел с загрузчиком. В левом меню нажимаем Mount EFI. Далее нажимаем Check partition, появится таблица всех разделов. Нужный нам раздел должен находится на том же разделе, что и Apple_HFS , он отображается как EFI EFI. Нажимаем Mount partition. В списке выбираем нужный нам диск (Например, disk0s1). Обратите внимание, что есть баг, когда не видно всех разделов. Покрутите колесиком мышки, так вы сможете листать между разделами и выбрать нужный.
Далее нажимаем Open Partition. Откроет «папка» с нужным разделом. Переходим EFI>CLOVER. Копируем plist.config в папку PostInstall, для удобства. Также на всякий случай копируем его еще куда-нибудь, так как тот, который мы только что скопировали, будем редактировать. А еще один для бэкапа. Копируем, открываем plist.config.
Видим примерно следующее:

ACPI — Фиксы не трогаем, дропаем (DropOEM) нашу видеокарту (DropOEM_DSM работает, когда встречаются два DSDT патча. Поэтому оставляем оригинальный метод автопатча загрузчиком, а наш, если таковой появится, отключаем).
Переходим в секцию BOOT.
Итак, вот тут нам следует покопаться. Аргументы выставляем сами, в зависимости от системы.
-v (verbose)— уже знакомый «текстовый» режим загрузки. Лучше не включать, а прописывать вручную при необходимости.
arch— архитектура. В моем случае x86_64
npci— уже известный нам ключ. Выставляем при необходимости. Рекомендую первую загрузку делать без него, но в Verbose mode.
darkwake— отвечает за режим сна и гибернацию. Имеет 7 режимов. Если сон не заведется изменением hibernatemode в терминале, то рекомендую методом проб и ошибок найти нужный режим дарквэйка.
cpus=1— запуск с использованием только одного ядра. Не рекомендую выбирать.
nvda_drv=1— активация вебдрайвера НВидии, который мы поставим чуть позже. Выбираем, если у вас nVidia.
nv_disable=1— отключение графики невидии и запуск на нативном драйвере мака. Лучше не выбирать, но при необхожимости вручную прописывать.
kext-dev-mode=1иrootless=0уже объяснялись ранее.
Переходим в правую подсекцию.
Default Boot Volume— раздел, с которого по-умолчанию будет начинаться выбор диска для загрузки. По-умолчанию LastBootedVolume (последний выбранный раздел).
Legacy— Legacy Boot для старых версий Windows и Linux. Очень сильно зависит от аппаратной части и построения БИОСа, поэтому были разработаны несколько алгоритмов:
LegacyBiosDefault— для тех BIOS UEFI, где есть протокол LegacyBios.
PBRTest, PBR— варианты PBR Boot, тут просто перебором. В моем случае работает PBR.
XMPDetection=YES— важный параметр. Фиксирует количество оперативной памяти, слотов, плашек, частоту и количество каналов.
DefaultLoader— если на разделе несколько загрузчиков, выбираем дефолтный. Не должен быть пустым!
Timeout— время до автоматического бута.
Fast— параметр, пропускающий выбор раздела и сразу переход к загрузке.
-1 (Timeout -1)— отключение автобута.
Секцию CPU пропускаем, загрузчик сам подцепит нужные значения. Devices также лучше пропустить, если вам нечего «фэйкать». Disable Drivers — отключение ненужных драйверов при загрузке. GUI — настройка внешнего вида загрузчика. Думаю, пояснять тут ничего не нужно, особых параметров тут нет. Разрешение экрана, язык и тема меню. Все просто. Graphics — настройка и инжекты графики.
Параметр Inject NVidia не трогать! На запуске будут артефакты. Он предназначен для запуска старых карт линейки GT
Kernel and Kext Patches — патчи и кастомизация ядра. По-умолчанию выбран Apple RTC. Лучше не трогать. SMBIOS — самый сок, кастомизация и подделка «мака».
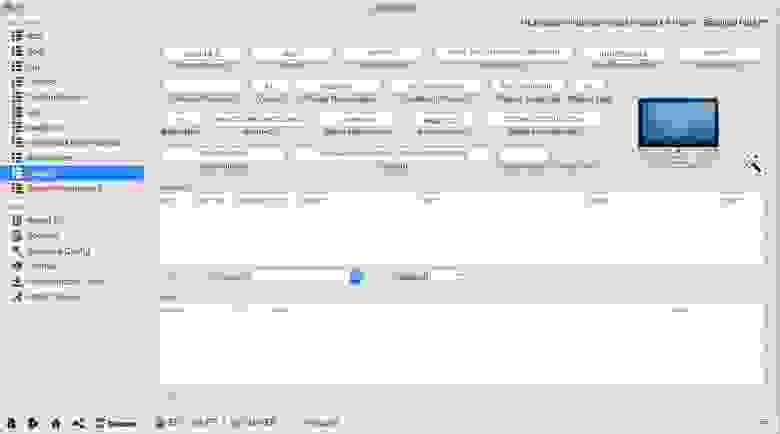
Для настройки заводской информации нажимаем на иконку волшебной палочки. Далее выбираем iMac (Если ПК) или MacBook (если ноут).
ACHTUNG 3
Можно посмотреть также среди более старых конфигов, типа MacMini, либо Mac Pro. Ваша задача подобрать наиболее схожий с вашим железом мак.
Не добавляйте ничего в Memory и Slots. Это чисто косметические параметры, которые кловер подцепляет на этапе загрузке. Неправильно выставленные параметры могут вызвать конфликты.
WARNING: Видеокарты Nvidia без правок полиси-кекста работают только на мак-моделях iMac13,1 и iMac14,2.
В AppleGraphicsControl.kext/Contents/PlugIns/AppleGraphicsDevicePolicy.kext/Contents/info.plist исправляем Config1 на none вот тут:
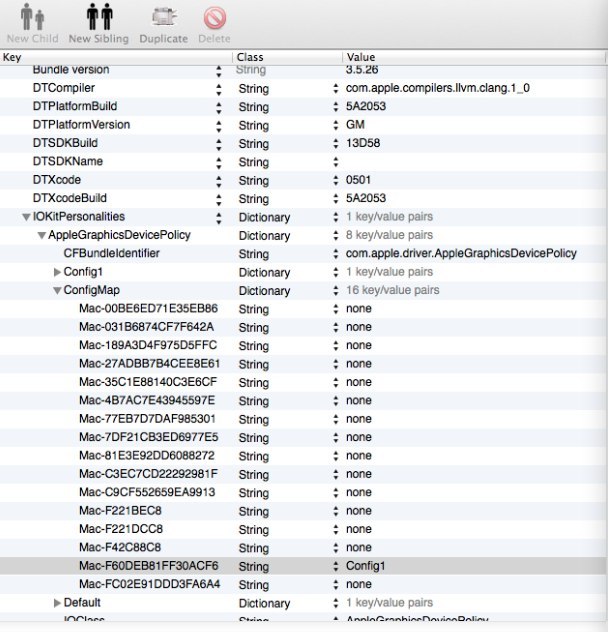
Теперь должно работать.
Готово. Больше не трогаем ничего, базовые настройки мы сделали. Сохраняем наш файл. Теперь копируем его в папку CLOVER раздела EFI, авторизируемся, заменяем. Напомню, что перед этим вы должны были сделать бэкап.
Шаг 6. Установка графического драйвера и первая перезагрузка
Вот мы почти у цели. Теперь осталось только завести видеокарту. В папке PostInstall лежит пакет WebDriver*.pkg. Открываем его, устанавливаем. Далее он предлагает нам перезагрузится. Перезагружаемся.
Теперь удостоверимся, что мы загружаемся не с флешки, а с жесткого диска в режиме UEFI. Выбираем Boot macOS Sierra from Macintosh HD. Запускаемся.
Примечание
Я рекомендую использовать ключ -v для первого запуска, чтобы если что-то пошло не так, то можно было сразу идентифицировать ошибку. Если загрузчик поломался и вы не можете попасть в систему, то загружайтесь с флешки, прописывайте в опциях нужные ключи и загружайте систему в Verbose mode.
Готово, вот мы и в системе. На картинке я примерно показал, как будет выглядеть ось после всех настроек. Обратите внимание на то, как система поняла ваш «мак», а также на частоту процессора.

Верным признаком работы драйвера нвидии будет ее логотип на панели задач. Я его отключил, к слову, так как он мешается, но получить доступ к панели управления невидией можно через «Системные настройки…». Интернет можем проверить через Сафари. USB 3.0 банально воткнув флешку в 3.0 порт.
Дополнительно
— Звук
Касаемо звука дело обстоит иначе. Если у вас внешняя звуковая карта, то просто скачайте драйвера для нее с сайта производителя (аналоговые устройства, типа микшерных пультов, не требуют драйверов и заводятся сразу). Для встроенной звуковой карты используйте один из этих кекстов:
VoodoHDA. Народные умельцы запилили инструкцию по его настройке. Не буду ее копипастить, а просто дам ссылку на архив.
P.S. Автор рекомендует перемещать кекст руками, однако, это все можно сделать через Kext Utility.
AppleHDA
Касаемо AppleHDA
Необходимо выполнить следующие условия, чтобы он заработал:
- Наличие ванильного (чистого) кекста AppleHDA.kext в системе.
- Наличие секции HDEF в вашем DSDT (либо фикс кловера FixHDA_8000->True)
- Указать layout в DSDT (либо в config.plist кловера Devices->Audio->Inject->1,2,28…etc. Выбрать из тех, которые прописаны для вашего кодека выше)
- Убрать ВСЕ патчи для звука (если были в вашем config.plist) из раздела KextsToPatch
- Убрать DummyHDA.kext (если пользовались)
- Если пользовались VoodooHDA.kext — удалить. Также удалить AppleHDADisabler.kext и пересобрать кеш.
- Для Intel HDMI 4000/4600 требуется фикс кловера UseIntelHDMI->True
Собственно, это все. После мы получаем готовую к работе macOS Sierra.
UPD от 14.05.2017
— В комментариях добрые люди перезалили файл с меги на торрент. Связано это с тем, что у многих возникает проблема при скачивании файла с меги. Признаюсь честно, я не знал, что у Меги есть ограничение по скорости закачки (пользуюсь премиум аккаунтом). Так же все вопросы просьба писать мне в ВК, но сначала проверьте комментарии. Есть шанс, что вашу проблему там уже решили. Опять же, я не отвечаю за любой риск, который может быть нанесён вашему компьютеру. Так же, хочу оговорить один момент о том, что статья представлена исключительно в образовательных целях. Сам факт установки хакинтоша на пк является грубым нарушением политики Apple в отношении их системы, что карается законом. Автор не призывает использовать MacOS на не-Apple компьютерах и не поощряет изменение исходного кода системы.
— The end

Part 7 Installing macOS on Your PC
- Place Multibeast on the USB drive.
- Eject the Unibeast USB drive from the Mac.
- Shut down your Windows computer.
- Plug both the Unibeast USB drive and the blank hard drive into your computer.
- Start your Windows computer.
- Select your USB drive when prompted, then press ↵ Enter .
Is it legal to install Mac OS on a PC?
If you install macOS or any operating system in the OS X family on non-official Apple hardware, you violate Apple’s EULA for the software. According to the company, Hackintosh computers are illegal, due to the Digital Millennium Copyright Act (DMCA).
Is it possible to install Mac OS on Windows laptop?
Never. You can never hackintosh a laptop and have it work just as well as a real Mac. No other PC laptop is going to run Mac OS X as well, regardless of how compatible the hardware is. That said, some laptops (and netbooks) are easily hackintoshable and you can put together a very cheap, non-Apple alternative.
How do I install Sierra on my PC?
Install macOS Sierra on PC
- Step #1. Create Bootable USB Installer For macOS Sierra.
- Step #2. Setup Parts of Your Motherboard’s BIOS or UEFI.
- Step #3. Boot into Bootable USB Installer of macOS Sierra 10.12.
- Step #4. Choose Your Language for macOS Sierra.
- Step #5. Create Partition For macOS Sierra with Disk Utility.
- Step #6.
- Step #7.
- Step #8.
Can you run iOS on a PC?
The Mac, App Store, iOS and even iTunes are all closed systems. A Hackintosh is a PC that runs macOS. Just like you can install macOS in a virtual machine, or in the cloud, you can install macOS as the bootable operating system on your PC. Switch it on, and macOS loads.
Is hackintosh illegal?
The question being answered in this article is whether or not it is illegal (unlawful) to build a Hackintosh using Apple’s software on non-Apple branded hardware. With that question in mind, the simple answer is yes. It is, but only if you own both the hardware and software. In this case, you don’t.
You can install Hackintosh, a virtual machine and a pirated version of Macintosh. Using the virtual players you can use it on your Windows PC. If you want to install Mac OS on your Windows PC, then you have to make sure that your system supports Intel Virtualization Technology.
Is my computer Hackintosh compatible?
Having compatible hardware in a Hackintosh (a PC running Mac OS X) makes the difference between success and failure. If you’re interested in installing Mac OS X on your PC, it’s important to know what hardware is compatible and what isn’t. This article will help you determine whether your current PC can run Mac OS X.
Can I install Mac OS on my HP laptop?
The answer is YES, it is possible to install Mac OS X on virtually any machine that is powerful enough and compatible enough. There are two methods: The easy and questionably legal way: This method involves running OS X in a virtual environment rather than installing the OS directly onto the machine.
Can you install Windows on a Mac?
There are two easy ways to install Windows on a Mac. You can use a virtualization program, which runs Windows 10 like an app right on top of OS X, or you can use Apple’s built-in Boot Camp program to partition your hard drive to dual-boot Windows 10 right next to OS X.
Is there a way to install Mac OS on PC?
One of the most popular installer creation tools is Unibeast. It’s a free Mac app that creates an installer for macOS on a USB stick which is capable of being installed on an Intel PC. You’ll need to register on tonymacx86.com to download it, but once you’ve done that you’re ready to go.
How do I install Mac High Sierra on my PC?
tonymacx86
- Step 1: Download macOS High Sierra.
- Step 2: Create a Bootable USB with UniBeast.
- Step 3: Recommended BIOS Settings.
- Step 4: Install macOS High Sierra.
- Step 5: Post Installation with MultiBeast.
- STEP 1: Download macOS High Sierra.
- STEP 2: Create a Bootable USB Drive with UniBeast.
- STEP 3: Recommended BIOS Settings.
How do you install a new operating system on a Mac?
How to install a fresh copy of OS X on your Mac
- Shut down your Mac.
- Press the Power button (the button marked with a O with a 1 through it)
- Immediately press the command (cloverleaf) key and R together.
- Make sure you’re connected to the internet through Wi-Fi.
- Select Install Mac OS X, then click Continue.
- Wait.
Can I run Mac on Windows?
Maybe you’d like to test drive OS X before switching to a Mac or building a Hackintosh, or maybe you just want to run that one killer OS X app on your Windows machine. Whatever your reason, you can actually install and run OS X on any Intel-based Windows PC with a program called VirtualBox.
How do I install Apple on Windows?
How to install Windows 10 with Boot Camp
- Launch Boot Camp Assistant from the Utilities folder in Applications.
- Click Continue.
- Click and drag the slider in the partition section.
- Click Install.
- Type your password.
- Click OK.
- Choose your language.
- Click Install Now.
Is hackintosh safe?
So, build your Hackintosh out of the correct, most compatible parts and you will have a safe, affordable, reliable machine that will last you years – possibly having a longer lifespan that a real Mac because you can upgrade it! That said, there are ways to build a Hackintosh that are not recommended.
Is it illegal to sell Hackintosh?
Short answer: yes, selling Hackintosh computers is illegal. Longer answer: The EULA for OS X is very clear on how it can be used: The grants set forth in this License do not permit you to, and you agree not to, install, use or run the Apple Software on any non-Apple-branded computer, or to enable others to do so.
Is creating a Hackintosh legal according to the EULA?
The EULA provides, first, that you don’t “buy” the software—you only “license” it. And that the license terms do not permit you to install the software on non-Apple hardware. Thus, if you install OS X on a non-Apple machine—making a “Hackintosh”—you are in breach of contract and also copyright law.
Is hackintosh a piracy?
Pirated software is certainly illegal, but for the sake of discussion we’ll assume that your friend owns a legal license for OS X that isn’t currently being used on another computer. As mentioned in other answers, making a hackintosh is definitely against Apple’s EULA.
Can I install Mac OS on my Windows PC?
You need to have a Mac. You need to install Boot Camp, and then Windows. Lastly, when running windows, you need to use VMware Workstation to install macOS (OS X) as a guest operating system within Windows. Legally, you can only virtualise macOS on Apple hardware.
How do I get Mac OS on Windows Sierra?
Steps to Install macOS Sierra on VMware on Windows
- Step 1: Download Image and Extract file with Winrar or 7zip. Download Winrar then install it.
- Step 2: Patch the VMware.
- Step 3: Create New Virtual Machine.
- Step 4: Edit Your Virtual Machine.
- Step 5: Edit VMX File.
- Step 6: Play Your macOS Sierra and Install VMware Tool.
How do I make my computer look like a Mac?
Fed up with Windows monotony? Add a little Apple magic!
- Move your taskbar to the top of your screen. Simple, but an easy one to miss.
- Install a dock. The OSX dock is a simple way to launch regularly used programs.
- Get Expose.
- Throw in Widgets.
- Completely reskin Windows.
- Get some Spaces.
- That’s the look.
Is Windows free for Mac?
Windows 8.1, the current version of Microsoft’s operating system, will run you about $120 for a plain-jane version. You can run the next-gen OS from Microsoft (Windows 10) on your Mac using virtualization for free, however.
Is it good to install Windows on Mac?
Of course it can. Users have been able to install Windows on a Mac for years, and Microsoft’s latest operating system is no exception. Apple doesn’t officially support Windows 10 on a Mac, so there’s a good chance you may run into driver issues.
How do I switch from Windows to Mac on startup?
Switch between Windows and macOS with Boot Camp
- Restart your Mac, then immediately hold down the Option key.
- Release the Option key when you see the Startup Manager window.
- Select your macOS or Windows startup disk, then click the arrow or press Return.
How do I make a bootable Mac High Sierra USB Windows?
To create a bootable USB drive with the latest version of macOS, do the following:
- Download and install TransMac on your Windows PC.
- Connect the USB flash drive you want to use to fix your Mac.
- Right-click TransMac, and select Run as administrator.
- If you’re using the trial version, wait 15 seconds, and click Run.
Can Mac OS run on VMware?
The Mac OS X server runs fine on VMWare Fusion but is not officially supported on other VMWare products yet. It would be possible to install it on VMWare Workstation, but I’m not sure how stable it is. See the official guest OS compatibility guide. Mac OS X client cannot be legally run on any VMWare product.
How install macOS Sierra final on VirtualBox windows?
Steps to Use macOS 10.12 Sierra on VirtualBox on Windows
- Step 1: Extract Image File with Winrar or 7zip. Install Winrar, Select Image file, Right click then select “Extract Here”
- Step 2: Install VirtualBox. This tutorial working with VirtualBox 5.0.
- Step 3: Create New Virtual Machine.
- Step 4: Edit Your Virtual Machine.
How do I personalize my computer?
How to Personalize Your PC
- Personalize Your PC. To get started, right-click on your desktop background and select Personalize.
- Menu Options. A Control Panel window will appear, giving you the ability to change your settings.
- Change the Background.
- Use Your Own Photos.
- Change the Colors.
- Customize Sounds.
- Change the Screen Saver.
- Use Your Own Photos.
How can I make Windows 10 better?
- Change your power settings.
- Disable programs that run on startup.
- Shut Off Windows Tips and Tricks.
- Stop OneDrive from Synching.
- Turn off search indexing.
- Clean out your Registry.
- Disable shadows, animations and visual effects.
- Launch the Windows troubleshooter.
Photo in the article by “Pexels” https://www.pexels.com/photo/fatih-mosque-istanbul-mosque-turkey-2388046/
Windows 10 is a great operating system. It has its quirks and annoyances, but which operating system doesn’t? Even if you’re beholden to Microsoft and Windows 10, you can still shop around.
What better way to do that than from the safe confines of your existing operating system with a virtual machine? This way, you can run macOS on Windows, which is perfect for using Mac-only apps on Windows.
So, here’s how you install macOS in a virtual machine on Windows, making a virtual Hackintosh that lets you run Apple apps from your Windows machine.
What Files Do You Need to Create a macOS Virtual Machine on Windows 10?
Before delving into the «how-to,» you need to download and install the essential tools. The tutorial details how to create macOS virtual machines using both Oracle VirtualBox Manager (VirtualBox) and VMware Workstation Player (VMware Player).
- Download the latest version of VirtualBox
- Download the latest version of VMware Player
You need a copy of macOS, too. Monterey is the latest stable macOS version at the time of writing, although macOS Ventura is just around the corner, You can find the download links for macOS Monterey in the next section.
This tutorial will focus on installing macOS Monterey in a virtual machine running on Intel and AMD hardware, using either VirtualBox or VMware Player.
The code snippets that an AMD system requires to boot a macOS Monterey using VMware on AMD hardware differs from the Intel code, but you can find the tutorial and the code snippet in the sections below.
One more thing to note before you get stuck into the macOS virtual machine tutorials. I found it much easier to log in to my iCloud account on the VMware Player virtual machine compared to the VirtualBox virtual machine. Your mileage is highly likely to vary, and unfortunately, although this is a working version of macOS on Windows, not all of the features you’re installing macOS for will work.
Download macOS Monterey Virtual Image
Use the download links below to download the macOS Monterey image for both VirtualBox and VMware.
Download: macOS Monterey Virtual Machine Image
Download: VMware Player Patch Tool
Once your download finishes, right-click the file, and select «Extract to macOS Monterey» using an archive tool like WinZip or 7-Zip.
How to Create a macOS Monterey Virtual Machine With VirtualBox
Before creating the macOS virtual machine, you need to install the VirtualBox Extension Pack. It includes fixes for USB 3.0 support, mouse and keyboard support, and other useful VirtualBox patches.
Download: VirtualBox Extension Pack for Windows (Free)
Scroll down, select All supported platforms to download, then double-click to install.
1. Create the macOS Monterey Virtual Machine
These instructions detail how to install a macOS Monterey virtual machine in VirtualBox on an Intel-based machine.

- Open VirtualBox. Select New. Type macOS. VirtualBox will detect the OS as you type and will default to Mac OS X. You can leave this as is.
- Regarding the virtual machine name, make it something memorable yet easy to type. You’ll need to input this name in a series of commands, and it is frustrating to type a complicated name multiple times!
- Next, set the amount of RAM the macOS virtual machine can use. I would suggest a minimum of 4GB, but the more you can give from the host system, the better your experience.
- Remember, you cannot assign more RAM than your system has available, and you need to leave some memory available for the host operating system.
- Now, select Create a hard disk now and select Create. On the next screen, select Virtual Hard Disk, then set the disk size to a minimum of 50GB, but ideally more if you can spare the space. macOS Monterey requires at least 35GB of storage.
2. Edit the macOS Monterey Virtual Machine Settings
Don’t try and start your macOS Monterey virtual machine yet. Before firing the virtual machine up, you need to make a few tweaks to the settings. Right-click your macOS virtual machine and select Settings.
- Under System, remove Floppy from the boot order. Ensure the Chipset is set to ICH9.
- Select the Processor tab. Assign two processors. If you have a CPU with power to spare (such as an Intel Core i7 or i9 with multiple extra cores), consider assigning more. However, this isn’t vital.
- Make sure the Enable PAE/NX box is checked.
- Under Display, set Video Memory to 128MB.
- Now, under Storage, select the blank disc under Storage Devices. Next, select the disk icon alongside Optical Drives. Browse to and select your macOS Monterey disk image.
- Finally, head to the USB tab and select USB 3.0, then press OK.
3. Use the Command Prompt to Add Custom Code to VirtualBox
It still isn’t quite time to fire up your macOS Monterey virtual machine. In its current configuration, VirtualBox doesn’t work with your macOS disk image.
To get it up and running, you have to essentially patch VirtualBox before the macOS virtual machine will function. To do this, you need to enter some code using the Command Prompt. All the details are below.
Start by closing VirtualBox. The commands will not execute properly if VirtualBox or any of its associated processes are running. Once closed, press the Windows key + X, then select Command Prompt (Admin) from the menu.
If your menu only shows the PowerShell (or Windows Terminal option on Windows 11), type command into your Start menu search bar. Then right-click the Best Match, and select Run as Administrator.
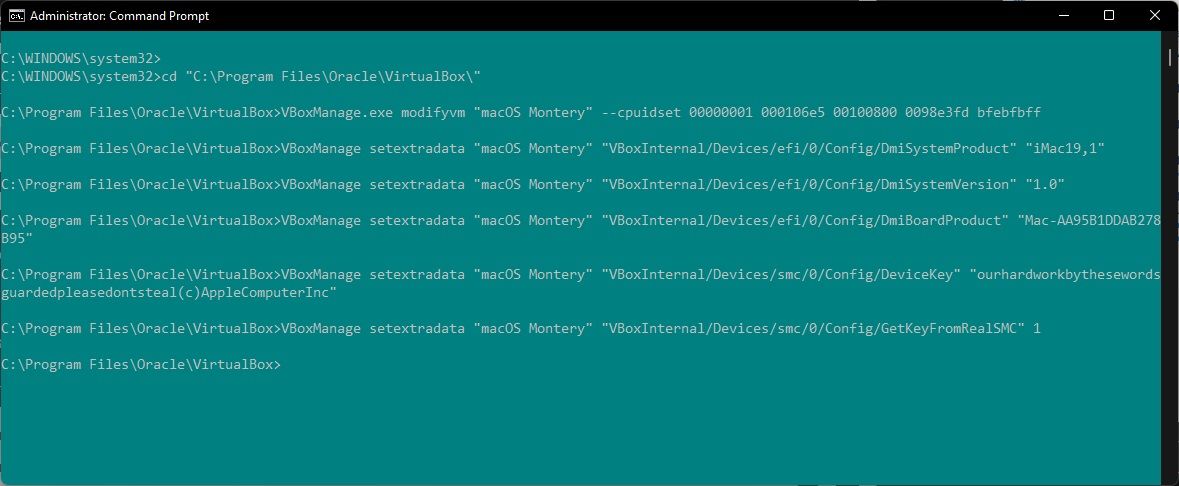
Use the following command to locate the Oracle VirtualBox directory:
cd "C:Program FilesOracleVirtualBox"
Now, enter the following commands, one by one. Adjust the command to match the name of your virtual machine. For instance, my virtual machine name is macOS Monterey. Here are the commands:
 VBoxManage.exe modifyvm "macOS Monterey" --cpuidset 00000001 000106e5 00100800 0098e3fd bfebfbff
VBoxManage setextradata "macOS Monterey" "VBoxInternal/Devices/efi/0/Config/DmiSystemProduct" "iMac19,1"
VBoxManage setextradata "macOS Monterey" "VBoxInternal/Devices/efi/0/Config/DmiSystemVersion" "1.0"
VBoxManage setextradata "macOS Monterey" "VBoxInternal/Devices/efi/0/Config/DmiBoardProduct" "Mac-AA95B1DDAB278B95"
VBoxManage setextradata "macOS Monterey" "VBoxInternal/Devices/smc/0/Config/DeviceKey" "ourhardworkbythesewordsguardedpleasedontsteal(c)AppleComputerInc"
VBoxManage setextradata "macOS Monterey" "VBoxInternal/Devices/smc/0/Config/GetKeyFromRealSMC" 1
After the completion of the commands and presuming you encountered no errors, close the Command Prompt.
4. Boot Your macOS Monterey Virtual Machine
Reopen VirtualBox. Double-click your macOS virtual machine to start it. You will see a long stream of text, followed by the Apple logo. On the next screen, select your language of choice, then Continue.
- Next, select Disk Utility. You create a clean drive for macOS Monterey to install to.
- In the Disk Utility, select VBOX HARDDISK MEDIA from the Internal drive column.
- After selecting the drive, head to the Erase option found at the top of the utility.
- Give your drive a name, set the Format to Mac OS Extended (Journaled), and the Scheme to GUID Partition Map.
- Select Erase.
- Once complete, you can exit the Disk Utility back to the Monterey recovery screen. From here, you should select Install macOS Monterey.
- Select the drive you created in the Disk Utility, followed by Continue.
At this point, the installation says it’ll take a few minutes. However, in my experience, this isn’t correct. The initial installation phase took around 15 minutes, but then you land on a second installation screen after the macOS Monterey virtual machine restarts.
The initial installation time on that screen begins at around 29 minutes. However, once it reaches Less than a minute remaining and you get your hopes up—don’t.
It took another two hours for the installation to complete from this point, but I’ve also read reports of people waiting for upwards of three or four hours. Worse, there is no way to tell if the installation is ongoing or if you’re just wasting your time.
If you can afford the time, leave it for several hours, and hopefully, when you come back, you’ll be staring at the macOS Monterey Welcome page.
5. Take a macOS Monterey Virtual Machine Snapshot
Once you complete the macOS setup, take a snapshot within VirtualBox. Head to Machine > Take Snapshot, give your snapshot a name, and wait for it to process. If anything breaks or the Monterey virtual machine corrupts, you can head back to the snapshot to restore your previously good installation.
But the virtual machine snapshot is just a backup precaution. You can close your macOS virtual machine as you would with your regular computer, as the macOS virtual machine is installed on its own storage device.
How to Create a macOS Monterey Virtual Machine Using VMware Workstation Player
Prefer VMware over VirtualBox? You can create a macOS Monterey virtual machine using VMware that works exactly the same as VirtualBox. And, just as with VirtualBox, VMware also requires patching before the macOS Monterey virtual machine will work.
This part of the tutorial works for Intel and AMD systems. AMD users must use the second code snippet when editing the virtual machine VMX file. Read through the tutorial to see what this means exactly.
1. Patch VMware Workstation Player
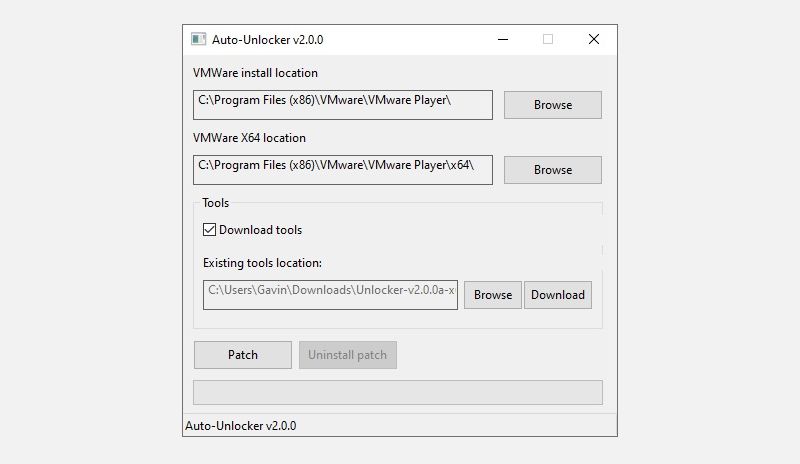
In the «Download macOS Monterey Virtual Image» section is the VMware Player Patch Tool. Before commencing any further, download the latest version of the patch tool.
- Browse to the location you downloaded the patch tool to. Extract the contents of the archive. This process works best when the folders are on the same drive (e.g., the VMware root folder and extracted archive are both found on the C: drive).
- Make sure VMware is completely closed. In the Unlocker folder, right-click the win-install command script and select Run as Administrator. The script will open a Command Prompt window, and the patch script will run.
Do pay attention. The script whizzes by, and you need to keep watch for any «File not Found» messages.
The most common reason for a «file not found» or a «system cannot find the file specified» message is installing VMware Workstation Player in a different location to the default folder and executing the patch from a different directory.
Once the patch completes, you can open VMware.
2. Create the macOS Monterey Virtual Machine with VMware
- Select Create a New Virtual Machine. Choose I will install the operating system later.
- Now, select Apple Mac OS X, and change the Version to macOS 12. If you don’t see the macOS options, it is because the patch didn’t install correctly.
- Next, you need to choose a name for your macOS Monterey virtual machine. Choose something easy to remember, then copy the file path to somewhere handy—you’re going to need it to make some edits in a moment.
- On the next screen, set a disk size of 50GB or larger and select Store virtual disk as a single file. Complete the virtual disk creation wizard, but do not start the virtual machine just yet.
3. Edit the macOS Monterey Virtual Machine Settings
Before you can boot the virtual machine, you must edit the hardware specification.
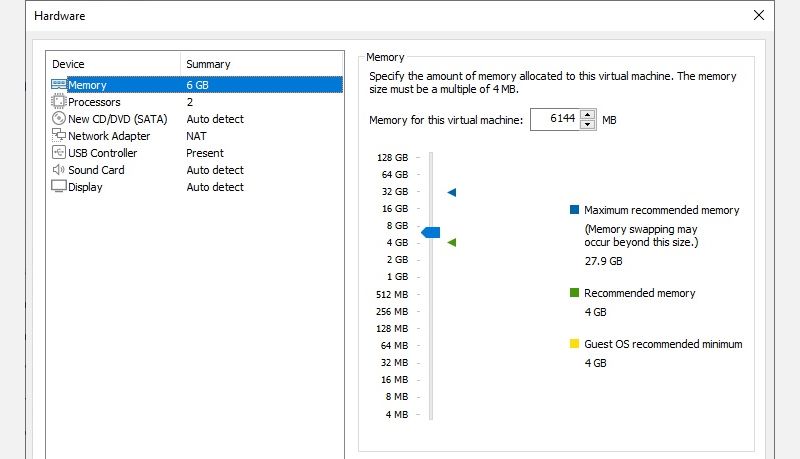
- From the main VMware screen, select your macOS Monterey virtual machine, then right-click and select Settings.
- Bump the virtual machine memory up to at least 4GB. You can allocate more if you have RAM to spare.
- Under Processors, edit the number of available cores to 2 (or more if available).
- Now, select New CD/DVD (SATA) > Use ISO image file. Browse to the macOS Monterey ISO file and select it.
- Close the Hardware window, and select Finish.
However, don’t start the VMware Workstation Player macOS Monterey virtual machine just yet. There are still some edits to make to configuration files.
4. Edit the macOS Monterey VMX File for Intel Hardware
This section is for Intel users. It involves the final set of edits you need to make before switching your VMware macOS Monterey virtual machine on!
Close VMware. Head to the location you stored the macOS virtual machine. The default location is:
C:UsersYOURNAMEDocumentsVirtual MachinesYOUR MAC OS X FOLDER
Browse to macOS Monterey.vmx, right-click, and select Open with > Notepad (or your preferred text editor). Scroll to the bottom of the configuration file and add the following line:
 smbios.reflectHost = "TRUE"
hw.model = "MacBookPro14,3"
board-id = "Mac-551B86E5744E2388"
smc.version = "0"
Save, then Exit.
You can now open VMware, select your macOS Monterey virtual machine, and fire it up!
5. Edit the macOS Monterey VMX File for AMD Hardware
This section is for AMD users. Like the above section, AMD users must also edit the VMX file before proceeding. The AMD edit involves a few more lines than the Intel version, but you can copy and paste the data into the file.
Close VMware. Head to the location you stored the macOS virtual machine. The default location is:
C:UsersYOURNAMEDocumentsVirtual MachinesYOUR MAC OS X FOLDER
Browse to macOS Monterey.vmx, right-click, and select Open with > Notepad (or your preferred text editor). Scroll to the bottom of the configuration file and add the following lines:
 cpuid.0.eax = “0000:0000:0000:0000:0000:0000:0000:1011”
cpuid.0.ebx = “0111:0101:0110:1110:0110:0101:0100:0111”
cpuid.0.ecx = “0110:1100:0110:0101:0111:0100:0110:1110”
cpuid.0.edx = “0100:1001:0110:0101:0110:1110:0110:1001”
cpuid.1.eax = “0000:0000:0000:0001:0000:0110:0111:0001”
cpuid.1.ebx = “0000:0010:0000:0001:0000:1000:0000:0000”
cpuid.1.ecx = “1000:0010:1001:1000:0010:0010:0000:0011”
cpuid.1.edx = “0000:0111:1000:1011:1111:1011:1111:1111”
Save, then Exit.
You can now open VMware, select your macOS Monterey virtual machine, and fire it up!
6. Configure and Install the macOS Monterey Virtual Machine
After launching the macOS Monterey virtual machine, you’ll have to configure the storage drive before installation.
- Next, select Disk Utility. You create a clean drive for macOS Monterey to install to.
- In the Disk Utility, select VMware Virtual SATA Hard Drive Media from the Internal drive column.
- After selecting the drive, head to the Erase option found at the top of the utility.
- Give your drive a name, set the Format to APFS, and the Scheme to GUID Partition Map.
- Select Erase.
- Once complete, you can exit the Disk Utility back to the Monterey recovery screen. From here, you should select Install macOS Monterey.
- Select the drive you created in the Disk Utility, followed by Continue.
The installation process takes a while, but it is faster than VirtualBox. Once macOS Monterey loads, you can configure the operating system as you see fit.
7. Install VMware Tools to Your macOS Monterey Virtual Machine
You now need to install VMware Tools, which is a set of utilities and extensions that improve mouse handling, video performance, and other useful things.
With the macOS virtual machine running, head to Player > Manage > Install VMware Tools.
The installation disc will appear on the macOS desktop. When the option appears, select Install VMware Tools, then allow it access to the removable volume. Follow the guided installer, which will require a restart on completion.
Troubleshooting
A couple of things can go wrong during the macOS virtual machine installation in VMware Player Workstation.
- If you cannot see «Apple Mac OS X» during the virtual machine creation wizard, then you need to revisit the patch process. Ensure every process associated with VMware Player is off.
- If you receive the message «Mac OS X is not supported with binary translation» when starting the virtual machine, there is a strong chance you need to activate virtualization in your BIOS/UEFI configuration.
- If you receive the message «VMware Player unrecoverable error: (vcpu-0)» when starting the virtual machine, you need to head back to the macOS Monterey.vmx configuration file to ensure you added the extra line and saved the edit.
- If you’re running AMD hardware and get stuck at the Apple logo, first power off the virtual machine. Now, head to Settings > Options > General. Change the Guest operating system to Microsoft Windows and the Version to Windows 10 x64. Press OK, then attempt to power up the virtual machine again. Once the Apple logo passes, power down the virtual machine, then set the Guest operating system option back to Apple Mac OS X, selecting the correct version.
macOS Virtual Machines for AMD Hardware
For a long time, Apple used Intel hardware to power its desktops and laptops. Configuring a macOS virtual machine using Intel hardware is easier because the hardware specifications are very similar. With AMD, the opposite is true. Because Apple does not develop macOS on AMD hardware, creating a macOS virtual machine on an AMD system is trickier.
In the future, macOS virtual machines running on AMD or Intel machines may become even more difficult. Apple’s M1 and M2 chips use different instructions sets from AMD and Intel, using an ARM-based architecture to deliver much better performance, power, and battery life. Ironically, it’s much easier to install Windows 11 on an M1 Mac than macOS on Windows 10 or Windows 11.
macOS Monterey Virtual Machine Installation Complete
You have two options to choose from for your macOS Monterey virtual machine. Both options are great if you want to give macOS a try before making the switch from Windows and enjoy some of the best Apple apps on offer.
It’s been a while that macOS Catalina 10.15 is released and this is the latest Apple Mac Operating system up to now. In this article, I’m going to show you step by step to install macOS Catalina on VirtualBox on Windows PC. Indeed, installing macOS on VirtualBox on a Windows PC is not technically legal according to Apple terms of use, but here we only use it for testing and educational purposes. If anyone misuses it, that’s not our responsibility.
Tip: before reading the rest of the article, it’s recommended to navigate to the Required File section of this post and download macOS Catalina 10.15 then you’ve time to read the item until the downloading gets complete.
Steps to Install macOS Catalina on VirtualBox on Windows
- Download macOS Catalina ISO
- Install VirtualBox on Windows PC
- Install & Update VirtualBox Extension
- Create a New Virtual Machine & Customize it
- Run VirtualBox Code via Command Prompt
- Start the Virtual Machine
- Create macOS Catalina Bootable Disk
- Perform a Clean Installation of macOS Catalina
- Summary
Important Note
Before we get started, make sure your system can support Virtualization Technology (VT), and it is enabled from BIOS so that you should be able to run Virtualization software like Virtualbox or VMware. Also, you should have a 64-bit Windows operating system with at least 2 GB RAM and 20 GB of free storage. We recommend you 4 GB of RAM or higher and more room so you can store more files and install more apps on macOS Catalina disk.
Furthermore, if you have an SSD, it’s highly recommended to use it as storage because SSD is much faster then mechanical hard drive (HDD) and macOS run on SSD very smooth. Anyway, it is not 100% compulsory but if you have don’t hesitate to use it.
Download the Prerequisites
All the necessary files are linked in the article below, and you should be able to download them without any issues.
- Download macOS Catalina ISO
- VirtualBox Code
- Virtualbox 6.1.10 Setup (Direct Link)
- Download Virtualbox 6.x Setup
- Download Virtualbox Extension
Step 1: Download macOS Catalina ISO
You’ve to download macOS Catalina ISO from the link provided. If you’ve not downloaded, you should download the macOS Catalina ISO image. We’ll be using the ISO image of macOS Catalina in this guide. Please read the guide step by step. If you miss any step, then the installation might not work. So read all the steps because all of them are important.
Recommendation: It’s highly recommended to create a new drive on your Windows PC and install macOS Catalina on a separate drive.
Step 2: Install VirtualBox on Windows PC
From the “Required File” section of this post, you should have downloaded VirtualBox and if you didn’t, download VirtualBox latest version and install it on your Windows system. If you’ve already installed VirtualBox, then you can skip this step. Other than that, follow the steps below.
- On the welcome Wizard page, click Next.
- Keep the default setting on the Custom Setup page and click Next.
- Again Click Next to accept the default options unless you want to change something.
- On the warning Network interface page, just click Yes to process with Virtualbox installation.
- Click the Install button to install VBox. Again click Yes if required.
- While installing VBox, you might a security warning about “Oracle Corporation”. You need to click Install on this page to process with the installation. If you click Don’t install, the installation process will be terminate here and you can’t go ahead. If you see the security warning again click the Install button.
- Finally, click Finish.
Step 3: Install & Update VirtualBox Extension
This step is not 100% necessary but it’s highly recommended to do this step because macOS Catalina might not be compatible with VirtualBox and for this reason, it might cause problems during the installation. Go to the Virtualbox download page. Under VirtualBox 6.1.10 Oracle VM VirtualBox Extension Pack section, click All supported platforms to download the latest version of Virtualbox Extension Pack.

Download Virtualbox Extensions
Once you’ve downloaded the Extension pack. Now, Follow the steps below to update the Virtualbox extension pack.
- Open up VirtualBox, navigate to Tools>Pereferences>Extensions.
- Click on Plus (+) icon and select VirtualBox extension which you’ve downloaded at the beginning of this section. Click Install or Upgrade and then Agree to the terms and conditions. Click the OK button.
Finally, you should see something like the screenshot below.
Step 4: Create a New Virtual Machine & Customize it
Creating a virtual machine for macOS Catalina is kind of the same as you create a virtual machine for the Windows Operating system or Linux but with some minor changes. In this post, I’ll show those changes. Follow the steps below to create a new virtual machine for macOS Catalina using ISO file.
- Open up your VirtualBox application and click New.

New VM
- Click Expert Mode and select the following options then click Create.
- Type a suitable Virtual Machine Name.
- Virtual Machine Location (a separate drive is recommended).
- Type (Mac OS X).
- Version (Mac OS X 64-bit).
- Memory 4 GB (recommended 8 GB or higher).
- Hard Disk: Select Create a virtual disk now.
- On the create virtual hard disk window, choose the following options.
- Disk Location: The default location should be fine unless you want to change to a new location.
- File Size: You can specify the disk size here.
- Hard disk file type: Select VHD (Virtual Hard Disk) format.
- Storage on physical hard disk: Select the Dynamically allocated option. However, if you want to have a better performance disk then choose a fixed disk. Fixed disk, will allocate the specified size from your host machine immediately. Read more about the dynamic vs fixed-size disk.
- It’s time to edit the virtual machine to make it works. Select macOS Catalina VM and click on Settings. Now, bring the following changes to macOS Catalina VM.
- Under System>Motherboard, increase the Base Memory to 12281MB. However, you can use a bit lower memory if your system doesn’t have this much RAM.
- Uncheck Floppy from the Boot Order section.
- Under the Processor tab, increase the processors to 4 or higher.
- On the Display window, increase the Video Memory to 128MB.

Increase Video Memory
- From the Storage section, click on the Empty>DVD icon. Click on Choose a disk file. You should select macOS Catalina ISO which you’ve downloaded from the “Required Files” section of this post. Finally, click OK to close the macOS Catalina Settings window.


Step 5: Run VirtualBox Code Via Command Prompt
Once you’ve created and customized your virtual machine, it’s time to run some codes in order to install macOS Catalina on VirtualBox.
First, you should notice your virtual machine name because later on, we will use it. Open the VirtualBox code which you should have downloaded from the Required File section of this post. If you’ve not downloaded doesn’t matter. Just use the following code.
Note: Before, you execute the code by command prompt. You should read the following steps.
cd "C:Program FilesOracleVirtualBox"
VBoxManage.exe modifyvm "VM Name" --cpuidset 00000001 000106e5 00100800 0098e3fd bfebfbff
VBoxManage setextradata "VM Name" "VBoxInternal/Devices/efi/0/Config/DmiSystemProduct" "iMac19,1"
VBoxManage setextradata "VM Name" "VBoxInternal/Devices/efi/0/Config/DmiSystemVersion" "1.0"
VBoxManage setextradata "VM Name" "VBoxInternal/Devices/efi/0/Config/DmiBoardProduct" "Mac-AA95B1DDAB278B95"
VBoxManage setextradata "VM Name" "VBoxInternal/Devices/smc/0/Config/DeviceKey" "ourhardworkbythesewordsguardedpleasedontsteal(c)AppleComputerInc"
VBoxManage setextradata "VM Name" "VBoxInternal/Devices/smc/0/Config/GetKeyFromRealSMC" 1- When you opened VirtualBox code via notepad or any other text editor, use the replace function of the program to Replace the “VM Name” with your virtual machine name. See the picture below to get an idea of how to do it.

Replace VM Name
- Now, you’ve two choices. First, if you want to fix your macOS Catalina screen resolution in the first place. You should also execute the following code. You have to change “VM Name” with your virtual machine name and HxV with a screen resolution such as “1280×720“. For more supported screen resolution on VirtualBox and detailed guide, visit fix macOS Catalina screen resolution on VirtualBox.
VBoxManage setextradata "VM Name" VBoxInternal2/EfiGraphicsResolution HxVImportant Note: We highly recommend to quit the VirtualBox program before executing the code. If you don’t do it, your virtual machine might not proceed to the installation step.
Exit VirtualBox
- Once you replaced the “VM Name” with your virtual machine name, then run the code one by one via command prompt (CMD). You can open the command prompt by pressing the Windows+X key in Windows 10 and select Command Prompt from the list. Or simply press Windows key and type CMD. Click Run As Administrator and click Yes.

Execute VirtualBox Code by CMD


Step 6: Start the Virtual Machine
Starting macOS Catalina with the older version of the Mac Operating system was a bit different, but with new macOS Catalina still, it’s easy to set it up.
#1. Open the VirtualBox app then click the Start button. A black screen with a few yellow & white text will appear on the screen.

Start macOS Catalina VM
#2. Once you’ve started your virtual machine, you might have to choose which ISO to select. If you’ve attached only one ISO image. You probably not see the window below. Just make sure, you’re using the right macOS Catalina ISO.

Select Start-up Disk
Step 7: Create macOS Catalina Bootable Disk
- Once you start your VM, a whole bunch of code will run on the screen, but you should not be worried about it. Wait for a few minutes, and you should see the macOS Catalina Language window. Select your Language and click Continue arrow.
- Now, you’ll see macOS Utilities Window. From the list, select Disk Utility and click Continue.
- Select your main VHD Disk and click the Erase button. Choose the following options and again click Erase.
- Name: Catalina Disk (You can type any name you want)
- Format: APFS (If you get an error, select Mac OS X Extended Journaled)
- Scheme: GUID Partition MAP
- Now, close the Disk Utility window.
- From macOS Utilities, select Install macOS and click Continue.
- Click Continue on Install macOS Catalina screen.
- Agree to the macOS Catalina License agreement.
- Select macOS Catalina Disk and click Install.
- Now, wait for 3 minutes and your VM will restart. macOS Catalina will be installed on your Disk. Next, you should not do anything. You’ll see another 29 minutes installation window.
Step 8: Perform a Clean Installation of macOS Catalina
- Once you’ve passed the step #9. You’ll see the macOS Catalina Welcome window. Select the following options. You can change most of the settings later on, so don’t worry about it for now.
-
- Select your Country and click Continue.
- Choose a Keyboard Layout and click Continue. If you’re not happy with default settings, you can customize the Settings.
- On the “Data & Privacy” window, click Continue.
- Select Don’t transfer any information now.
- Click on Set Up Later then Don’t Sign In. Click Skip. You can add your Apple ID later.
- Click Agree to the Terms and Conditions and click Continue.
- Fill out the Full name, Account name, Password, and Hint then click Continue.
- If you want to customize Express Set Up, you can click on Customize Settings otherwise click on Continue.
- On the Analytics window, click Continue.
- On-Screen Time, click Set up Later.
- Do not set up Siri for now. Just skip it.
- Select an appearance theme and click Continue. You can choose between dark mode or light and Auto mode.

Choose Catalina Theme
- Wait a few seconds that your macOS should be set up.
- Close Feedback Assistant for now and close mouse & keyboard window.
-
- Well done 👌 you’ve successfully installed macOS Catalina on VirtualBox using the ISO image.

Related: If you want to install macOS Catalina using VMDK file then visit “how to install macOS Catalina on VirtualBox on Windows using VMDK”.

Installed macOS Catalina on VirtualBox

Catalina Display
Fix Common Errors
The issue regarding “[EB|#LOG:EXITBS:START] (AND CURRENT DATE/TIME)”. Use the command below.
VBoxManage modifyvm “VM Name” --cpu-profile “Intel Xeon X5482 3.20GHz”Please comment your problem and solution if you’ve then we will add in this section for other visitors.
Summary
Basically, in this article, I’ve shown you the step by step pictorial guide on how to install macOS Catalina on VirtualBox on a Windows computer. After reading and following this guide, you should have done the following;
- Download macOS Catalina ISO
- Install VirtualBox on Windows
- Installed & upgraded VirtualBox extension
- Created a new virtual machine for macOS Catalina
- Customized macOS Catalina VM
- Executed the VirtualBox code via CMD
- Start the Virtual Machine
- Create macOS Catalina Bootable Disk
- And finally performed a clean installation of macOS Catalina.
We are ready to keep receiving your feedback about this article, and other posts on wikigain. Your suggestions and feedbacks are highly appreciated.
On the morning of 3rd June, Apple kicked off its 2019 annual developer conference with all the new stuff Apple has been working on for the last year will be front and center. The keynote was significantly exciting mostly for software but a little for hardware lovers. While WWDC is one of the most important and significant events with the biggest update to Mac, iPhone, iPad, Mac Pro, Apple Watch and Apple TV. In this post, we’ll install macOS Catalina on VirtualBox on Windows PC.
With all those things updated, the biggest update to macOS is the more exciting new version of macOS which is popular by macOS Catalina. With the new version of macOS – Catalina arriving on Mac’s, it’s fine to some Windows users wanting it within their computer. While Catalina works perfectly on Mac, but when it comes to installing it on Windows, it’s not the case. If you’re would like to install Catalina on a Mac, all you do is enroll in the developer program and download it. Once you’ve the installer file, you will straightly boot into and install Catalina in your Mac.
Instead, if you’re willing to install macOS Catalina on VirtualBox on Windows PC, first of all, you’ll need to download macOS Catalina VirtualBox image, (not from App Store or Apple’s developer program, they don’t work with virtual machines) which is pretty difficult to figure out. Getting a copy of the Catalina VirtualBox installer is even very tricky. If you Google, you’ll find some broken or corrupt files or download links that are completely rubbish. Even searching deep and more and more won’t help you out.
In terms of installing Catalina on Windows, there is no such question. Even Catalina is now risky to install but you have the perfect option which is a virtual machine. The virtual machines solve almost all questions and make riskiness faraway. It will completely work separate from your actual operating system without harming a single thing. If there’s some problem at some point, you’ve two solid options whether to delete the virtual machine or use the snapshot that is pretty easy. That’s the best option to try everything up without taking a risk.
Excited about Catalina, but don’t want to wait until fall? The public beta is now available to try on your Windows PC; here’s how to install macOS Catalina on VirtualBox. If you want to install macOS Catalina on VirtualBox worth of new features to play with, the Public Beta of Catalina VirtualBox image gives you access right now.
Whether you would like to install macOS Mojave on VirtualBox or would like to install macOS Catalina on VirtualBox, we are with you. In this tutorial, we’ll walk you through how to install macOS Catalina on VirtualBox on your Windows PC.
- Related: Install macOS Catalina on VirtualBox on Windows PC [New Method]
What You’ll Need
This process requires some necessary tools that are very easy to get at this point. We’ve prepared the things for you that you won’t have to dig around. These images are straightforward to obtain. They are securely created, compressed, uploaded to two powerful servers. All you’ve to do is click on the images and acquire those.
- VirtualBox — This virtual machine app makes the process quite easy. With VirtualBox, it’s pretty easy to understand everything, and not only that but is easy to install and use it. There’s nothing more you’d need that VirtualBox needs to run with. All of its components are integrated into it. The nice thing is, it supports installing macOS no matter which version, unlike VMware. But still, there’s a simple trick which we need to do.
Join us on Patreon and support us for making better content.
https://bit.ly/39ZB1FR
macOS Catalina Final Version (19A602) 15 Oct 2019 (Recently Uploaded)
Download Now link 1
Download Now link 2
Download Now link 3
Finally, when you’re done, you’ll need to extract the files into a single folder.
Before we get to the important part, one last thing before we jump in: make sure the Intel VT-x is turned on for Intel users. If you’re an AMD user, you could definitely ignore this.
Done downloading things? Good. Now it turns to Install macOS Catalina on VirtualBox on Windows PC which is pretty simple.
- Related: Install macOS Catalina on VirtualBox on Windows PC [New Method]
Step One: Install VirtualBox on Windows
The first thing you need to do is start the VirtualBox installation with the setup.exe from the VirtualBox setup files.
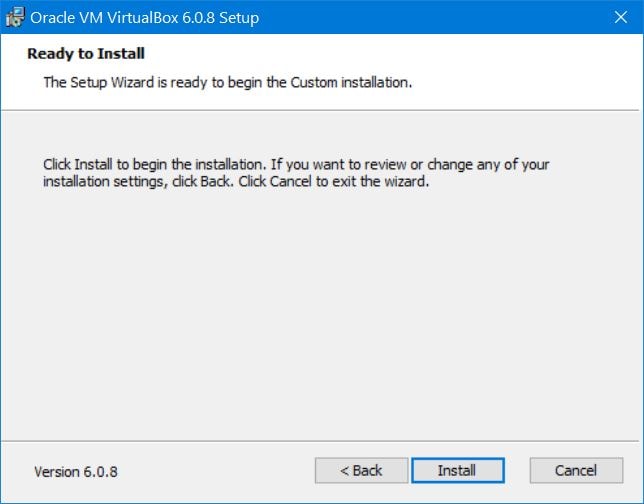
The installation part is simple, with a few clicks you’ll end up installing it.
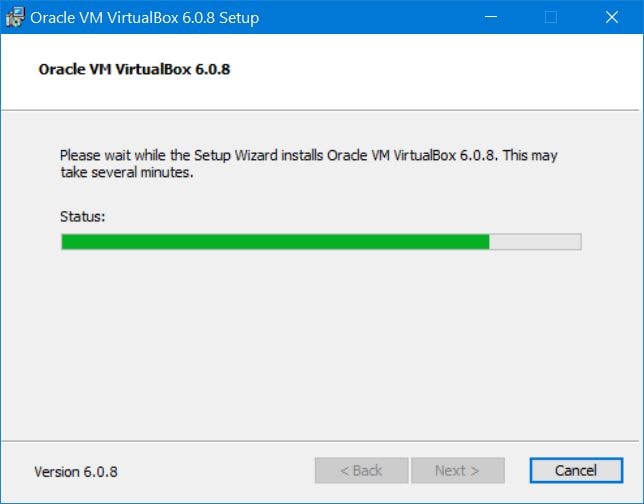
At the end, start the VirtualBox from the installation and click Finish.
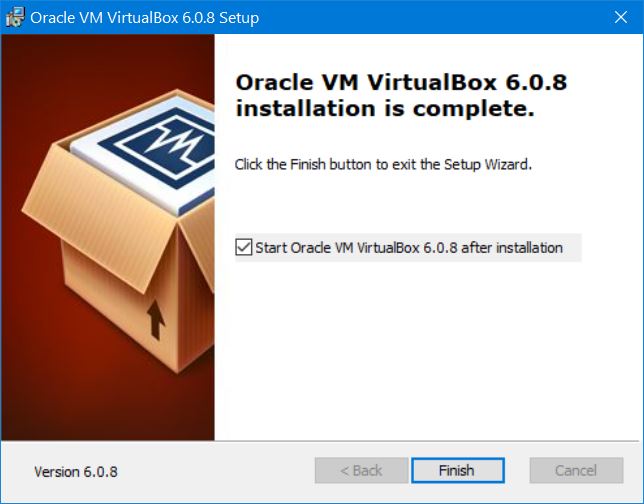
Step Two: Set Up A New Virtual Machine
Speaking of installing Catalina, you’ll need to set up a new virtual machine in order to install macOS Catalina.
From the VirtualBox, click on New.
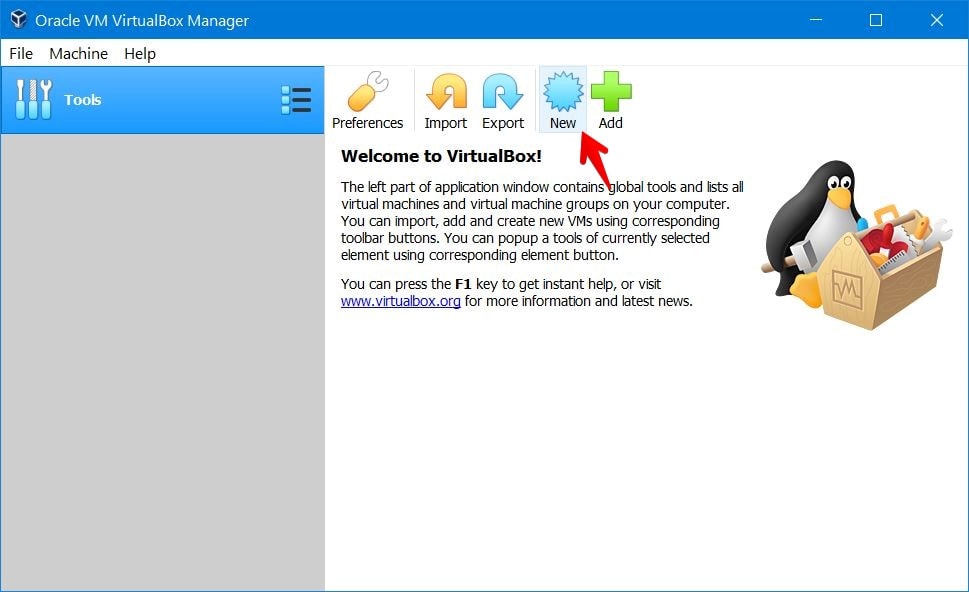
Now choose Expert Mode from the bottom.
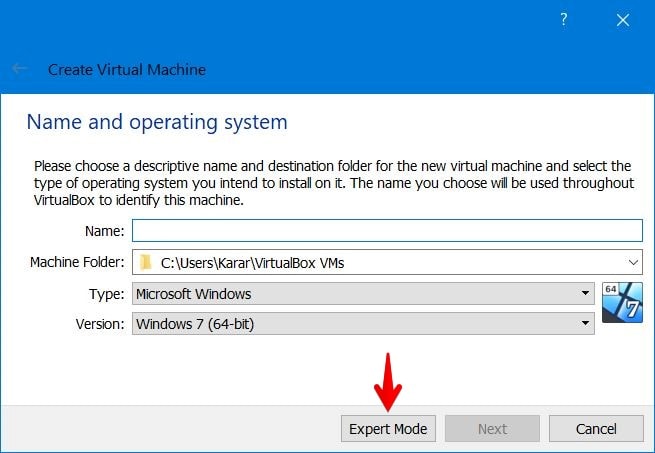
For the Name & operating system, write down the name of the virtual machine. In my case, I will write down “macOS Catalina”. Select “Mac OS X” for the Type and Mac OS X (64-bit) for the version.
For Memory, I recommend you to go with the 50-50 rule which is to assign 50 to 60% of your computer’s memory for the virtual machine. For Hard Disk, select Use an existing virtual hard disk file and choose the macOS Catalina’s extracted VirtualBox image which is Catalina’s VMDK file. In the end, click Create. Here’s the preview of how it looks like.
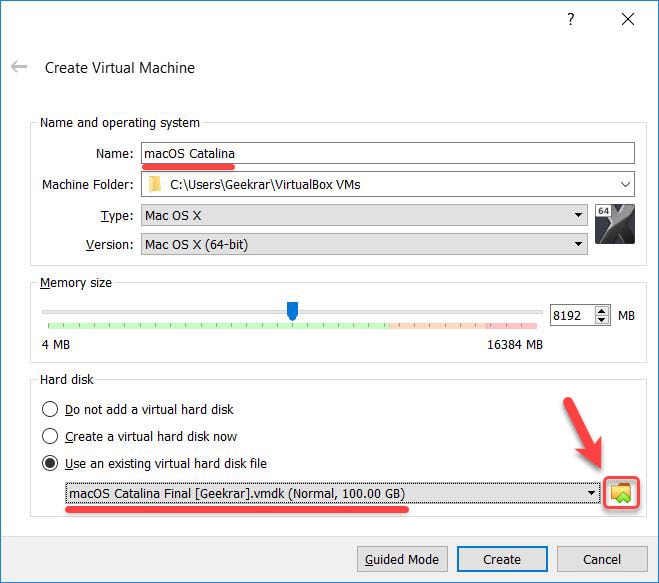
With the virtual machine created, simply close the VirtualBox (Important!). If you didn’t, you would likely end up with EFI Internal Shell. Here’s how to fix EFI Internal Shell on VirtualBox.
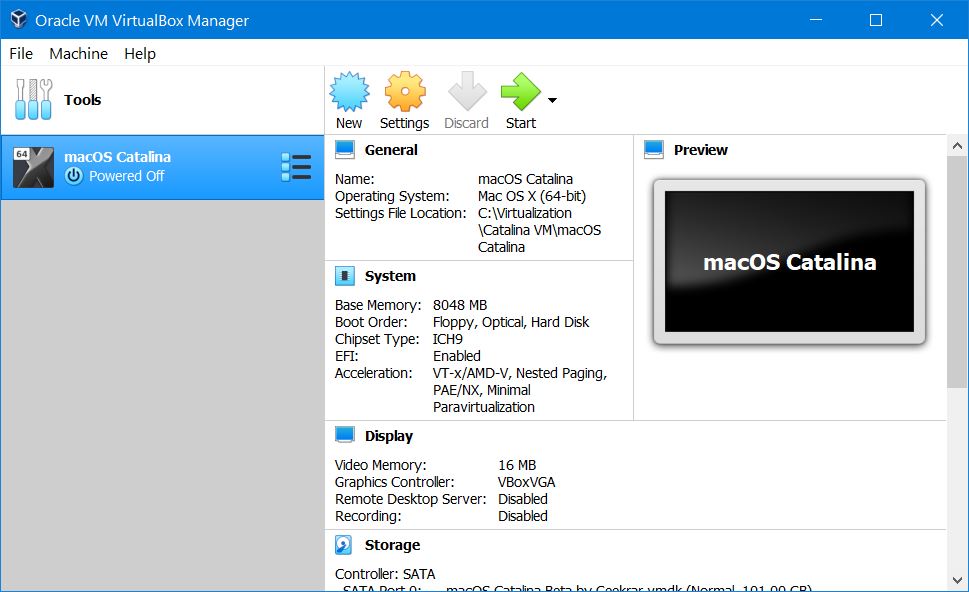
Done all that? Alright, here’s what else you need to do.
Step Three: Configure macOS Catalina Virtual Machine
Install macOS Catalina on VirtualBox on Windows PC will essentially work straightforward similar to a Mac, and devotes most of your Windows power and its graphics card to running Catalina. How much ever you allocate, it will get more thirsty of power. The more you allocate, the better the performance. That is what makes the experience better and better. So note this!
The virtual machine won’t work without configuring. We need to do some quick configuration from the virtual machine settings. From the top of the window, click on Settings.

Now select the System tab and click on Processor. Increase the processor to 2 at least or more (Seriously, otherwise, the virtual machine won’t boot).
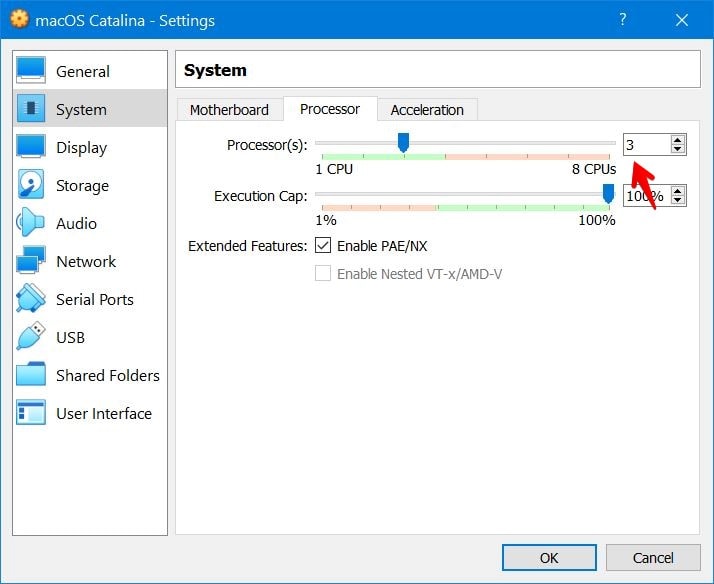
Under it, click the Display tab. Increase the video memory to the highest which is 128 MB. When you’re done, click OK.
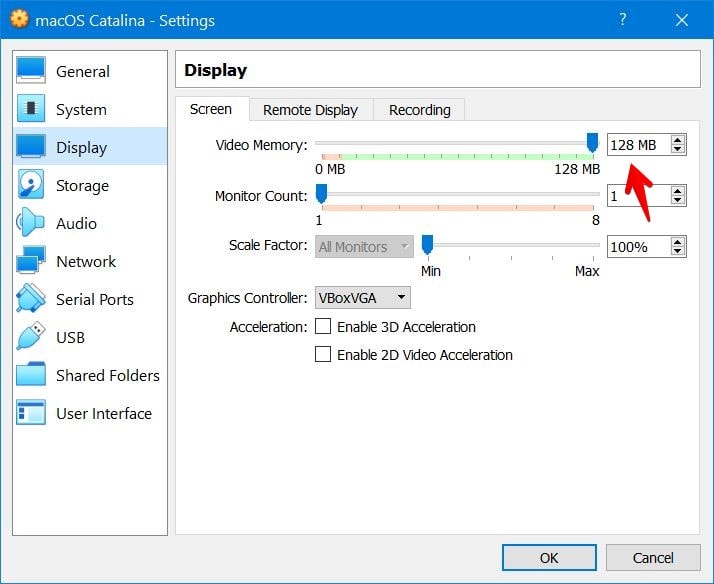
Next head to the storage tab and click on the hard disk plus icon at then choose existing disk on the pop up that appears.
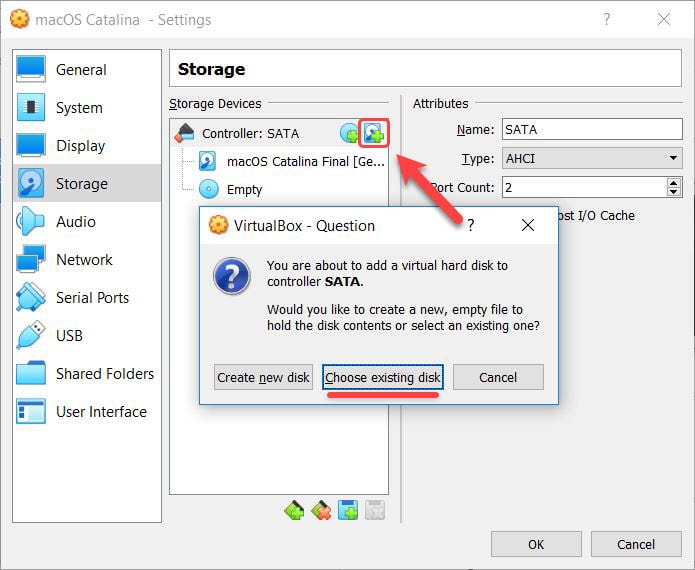
Now first click on Add button and choose VirtualBox Boot Image by Geekrar.
If the top one didn’t work, here’s another one.
- Download macOS Catalina VirtualBox Boot Image
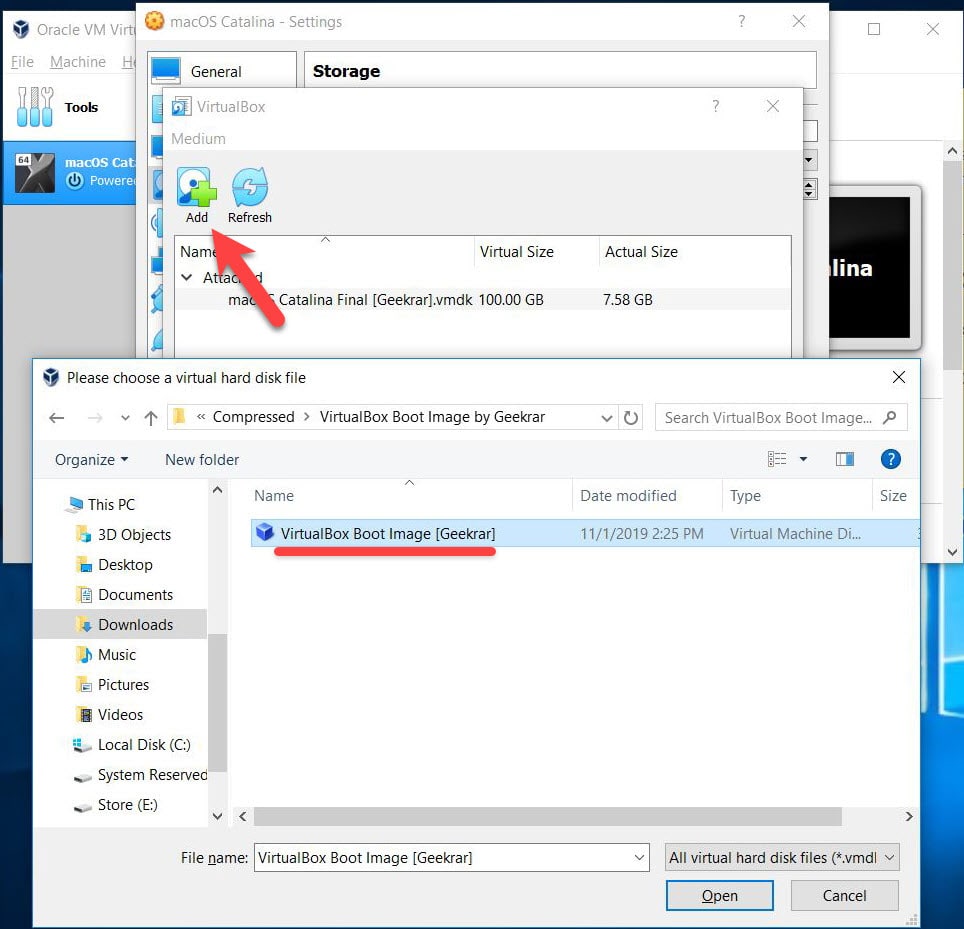
When that’s added, click choose.
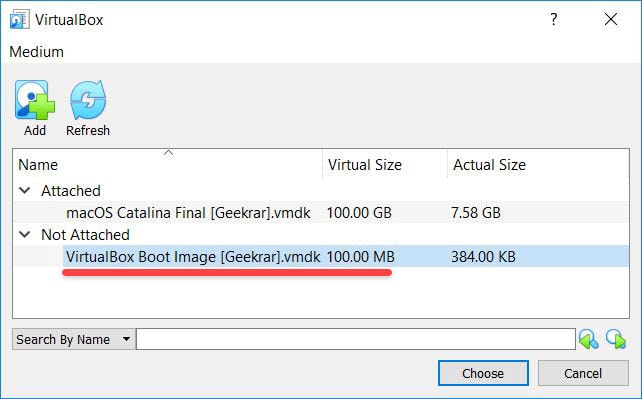
When done, click OK on the virtual machine settings.
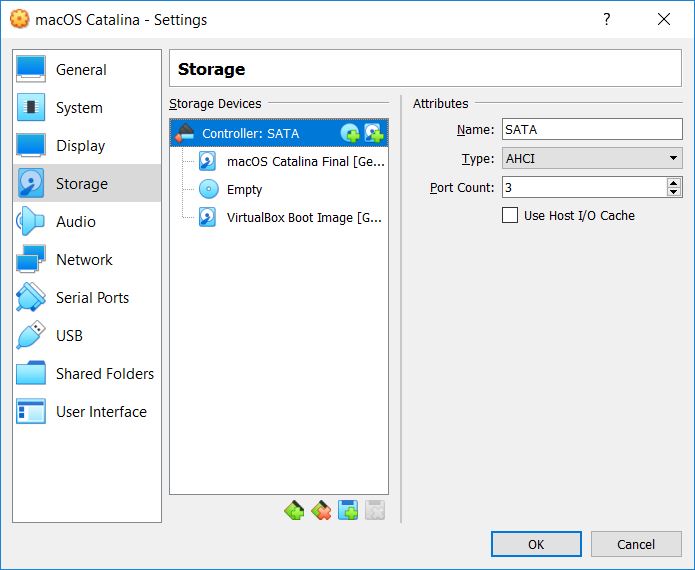
Step Four: Install VirtualBox Extension Pack
The virtual machine is nearly finished configuration. In order to work mouse and keyboard, you’ll need to install the VirtualBox extension pack. Here’s how to do it.
- Related: How to Install VirtualBox Extension Pack
Go to the VirtualBox downloads page and scroll down for the VirtualBox extension pack. Click on the All supported forms to download it.
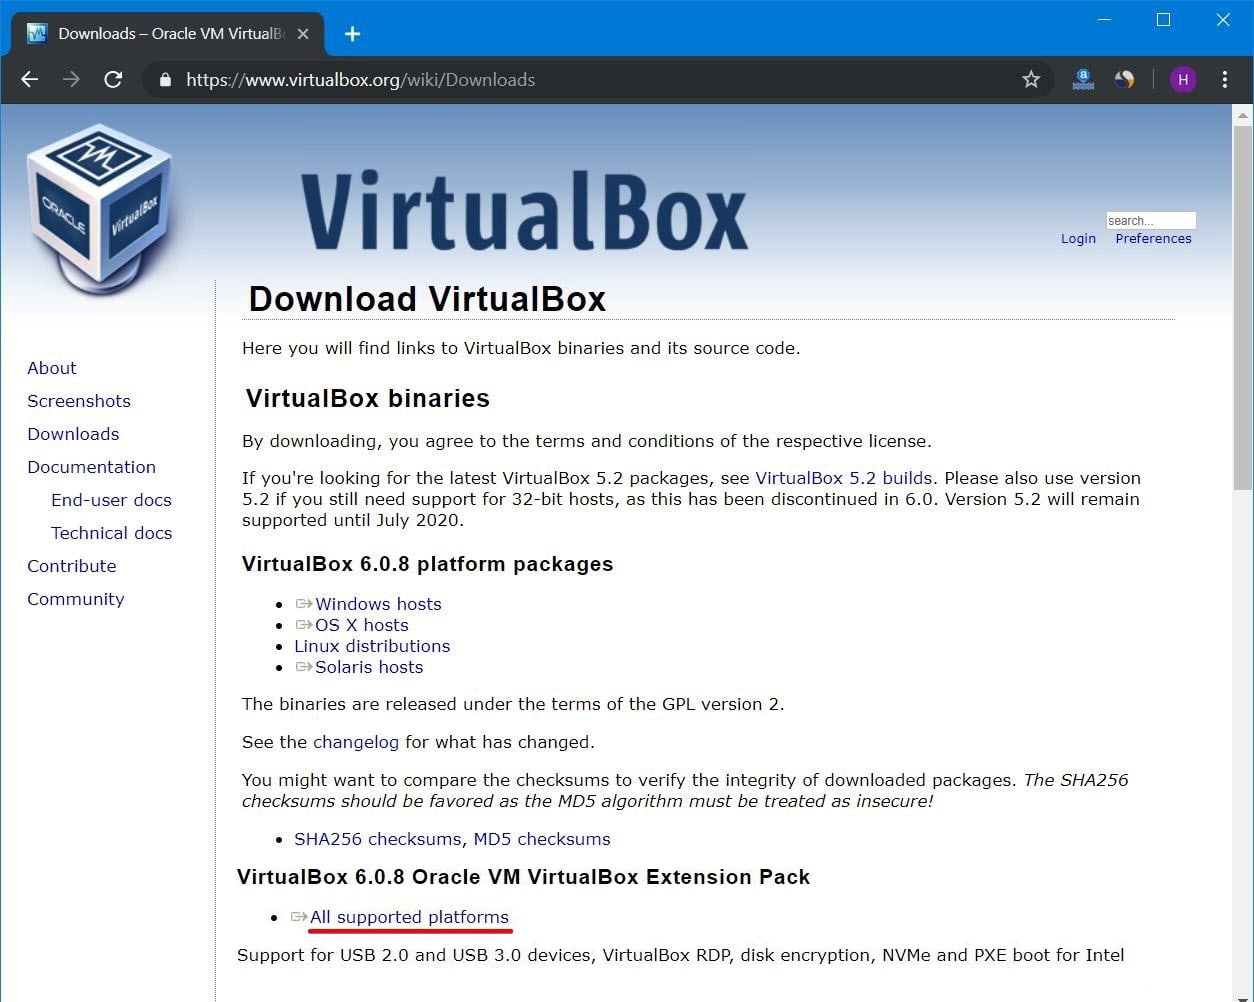
When it’s finished, open it. It will pop up the extension installing a window, click on Install. It will immediately upgrade the VirtualBox extension. If you haven’t installed yet, you need to Install VirtualBox Extension Pack.
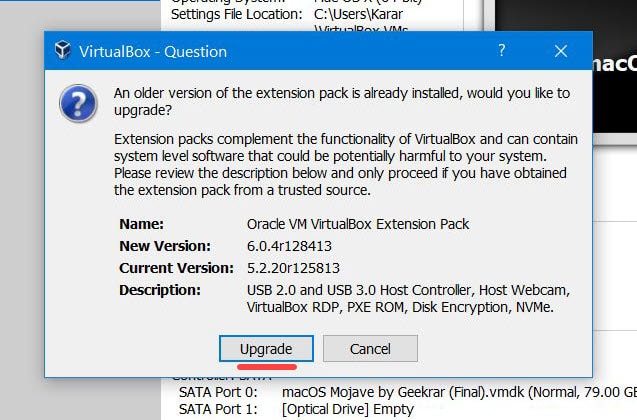
Step Five: Apply Commands on VirtualBox
Once you’ve accomplished those, there are some commands which you need to apply in order to run macOS Catalina.
Open the commands and press Ctrl + H. When the window popped up, write “macOS Catalina” (your machine name) in front of Find What and write “Your Virtual Machine Name” in front of Replace with.
Note: If you’ve an AMD Ryzen or AMD Radeon, you need a different command. This won’t work for you. Here’s how to install macOS Catalina on VirtualBox on AMD system.
cd "C:Program FilesOracleVirtualBox"
VBoxManage.exe modifyvm "Your Virtual Machine Name" --cpuidset 00000001 000106e5 00100800 0098e3fd bfebfbff
VBoxManage setextradata "Your Virtual Machine Name" "VBoxInternal/Devices/efi/0/Config/DmiSystemProduct" "iMac11,3"
VBoxManage setextradata "Your Virtual Machine Name" "VBoxInternal/Devices/efi/0/Config/DmiSystemVersion" "1.0"
VBoxManage setextradata "Your Virtual Machine Name" "VBoxInternal/Devices/efi/0/Config/DmiBoardProduct" "Iloveapple"
VBoxManage setextradata "Your Virtual Machine Name" "VBoxInternal/Devices/smc/0/Config/DeviceKey" "ourhardworkbythesewordsguardedpleasedontsteal(c)AppleComputerInc"
VBoxManage setextradata "Your Virtual Machine Name" "VBoxInternal/Devices/smc/0/Config/GetKeyFromRealSMC" 1
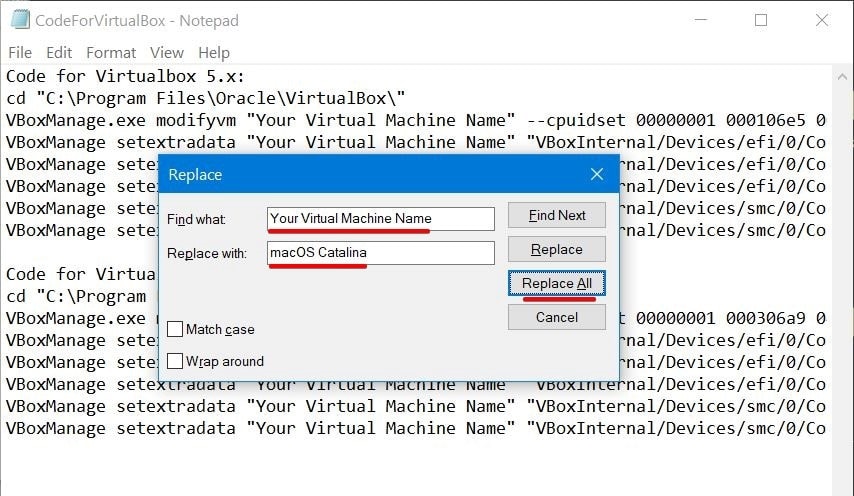
Now open up Command Prompt (CMD) without administrator privileges.
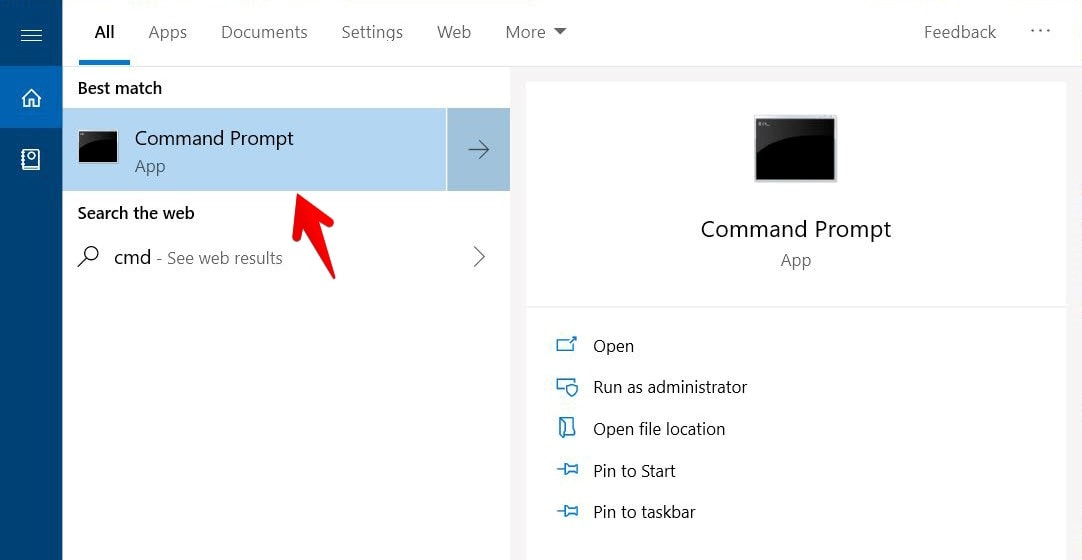
First, copy and paste the first line of the commands.
cd "C:Program FilesOracleVirtualBox"
VBoxManage.exe modifyvm "Your Virtual Machine Name" --cpuidset 00000001 000106e5 00100800 0098e3fd bfebfbff
VBoxManage setextradata "Your Virtual Machine Name" "VBoxInternal/Devices/efi/0/Config/DmiSystemProduct" "iMac11,3"
VBoxManage setextradata "Your Virtual Machine Name" "VBoxInternal/Devices/efi/0/Config/DmiSystemVersion" "1.0"
VBoxManage setextradata "Your Virtual Machine Name" "VBoxInternal/Devices/efi/0/Config/DmiBoardProduct" "Iloveapple"
VBoxManage setextradata "Your Virtual Machine Name" "VBoxInternal/Devices/smc/0/Config/DeviceKey" "ourhardworkbythesewordsguardedpleasedontsteal(c)AppleComputerInc"
VBoxManage setextradata "Your Virtual Machine Name" "VBoxInternal/Devices/smc/0/Config/GetKeyFromRealSMC" 1
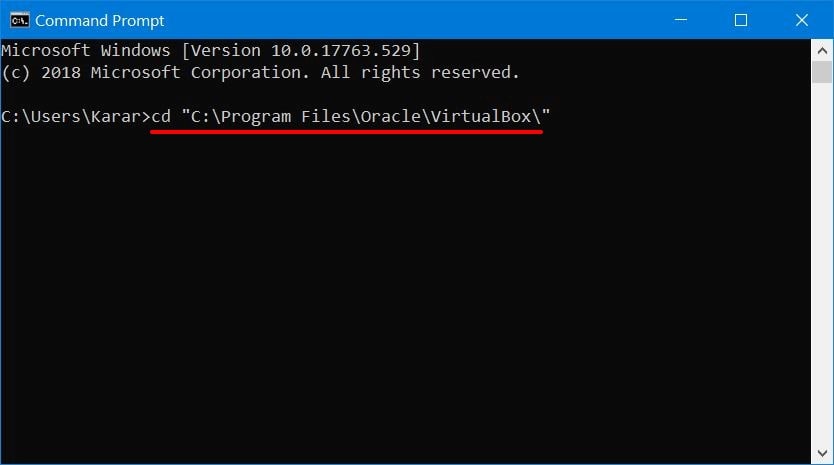
Then, copy and paste all the remaining part of the commands.
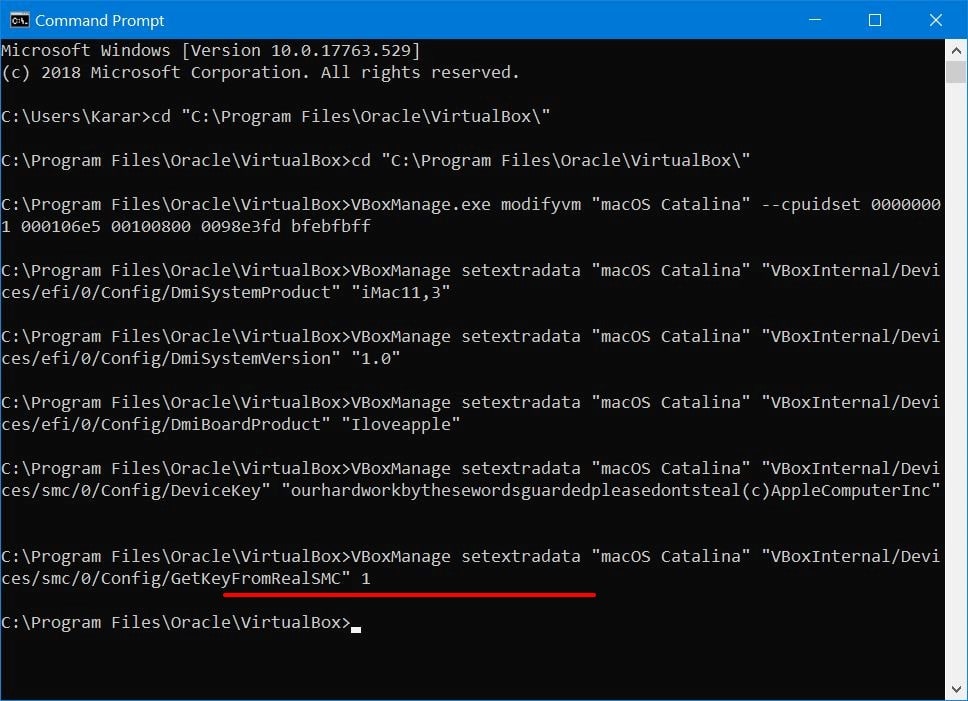
Step Six: Install macOS Catalina on VirtualBox on Windows PC
The time has come to succeed with the installation war. Start Install macOS Catalina on VirtualBox on Windows PC. Now fire up VirtualBox and click Start.
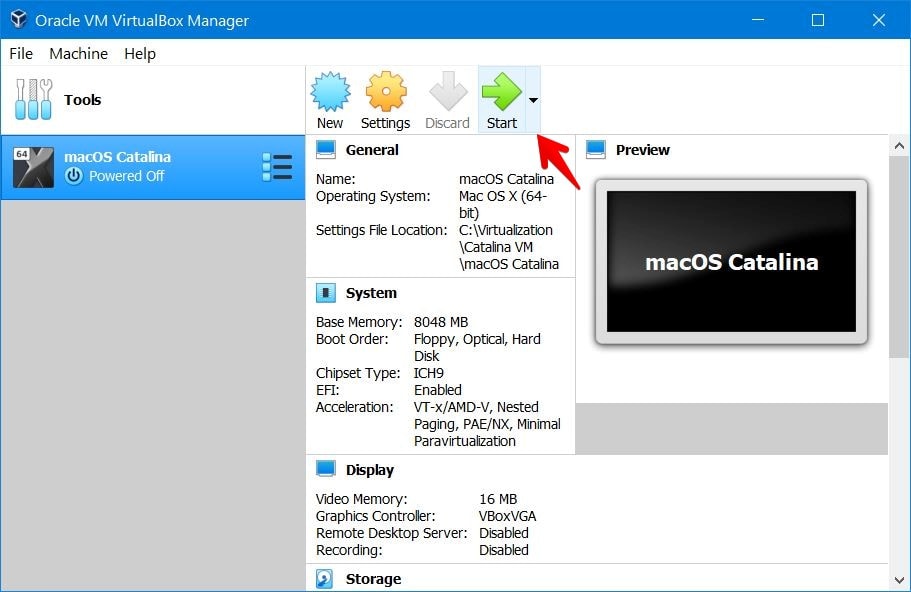
Once the booting finished, press ESC to skip startup.nsh. Now type “install.nsh” and hit Enter. This will definitely take a while.
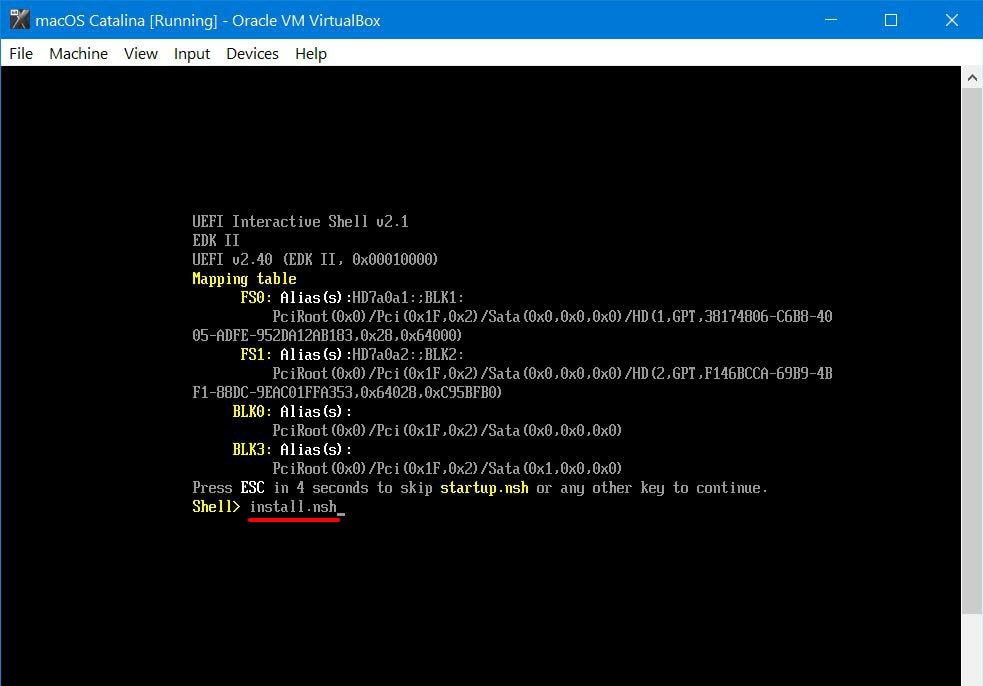
The installation will begin in a moment that will look like this.
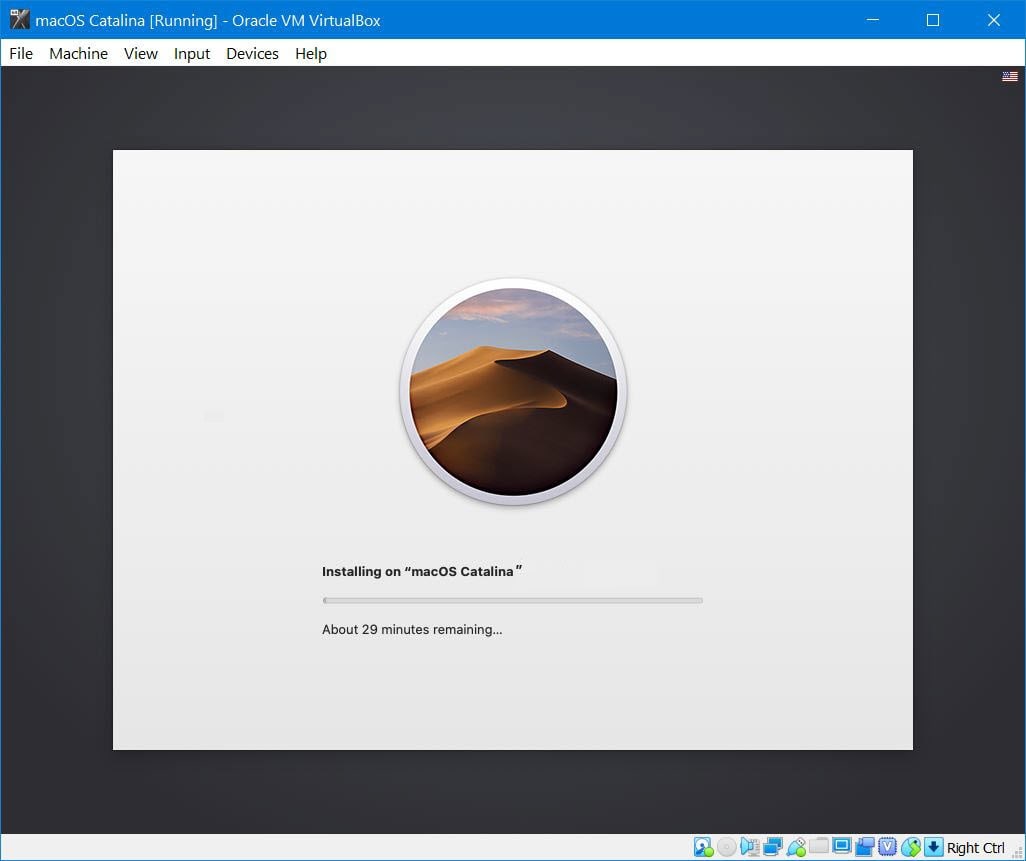
After this, it will restart with hundreds of lines of codes appearing. Don’t worry, that’s fine. When the machine boots up, you’ll figure out the Welcome screen. There you go! Choose where you are located and click Continue.
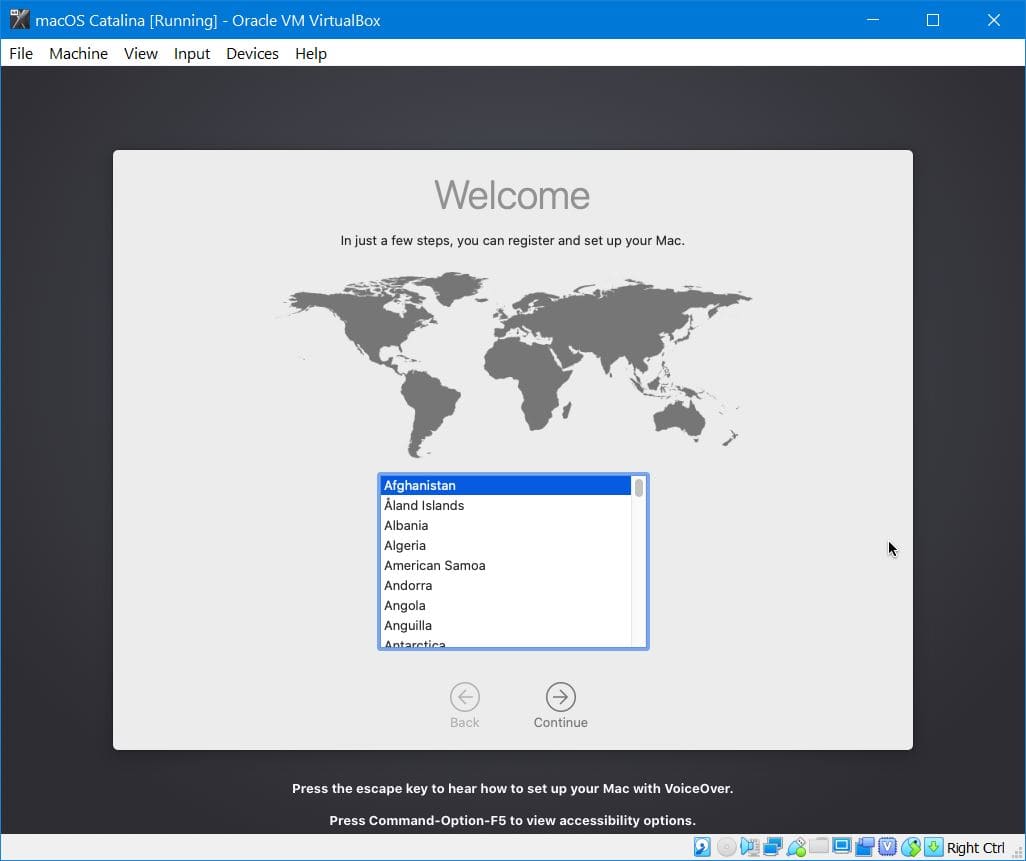
Great! From now, whenever you use an Apple feature, Apple might collect some information of you, simply Continue. There’s no risk in it.
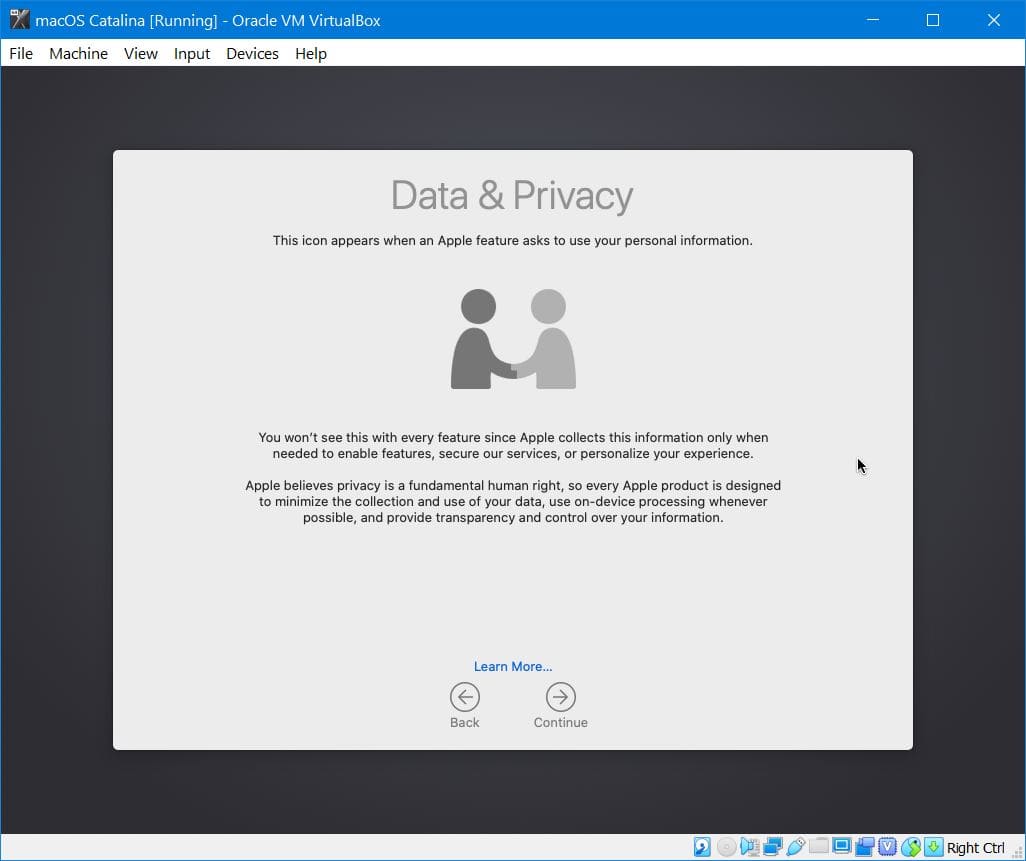
Next, if you would like to make your information here, you’re free to go. In my case, I’ll use the Don’t transfer any information now.
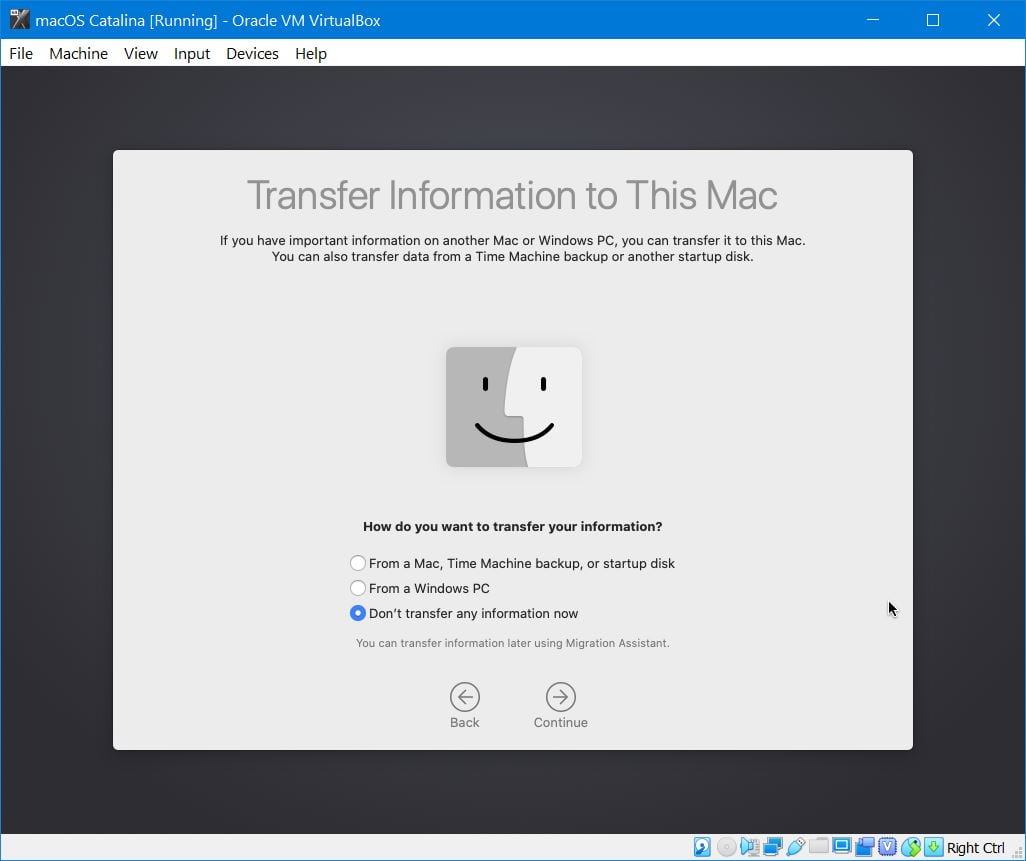
The sign in option is there. If you have an Apple ID, use it to sign in there. Next, you’ll be asked for your credential, type it and click Continue.
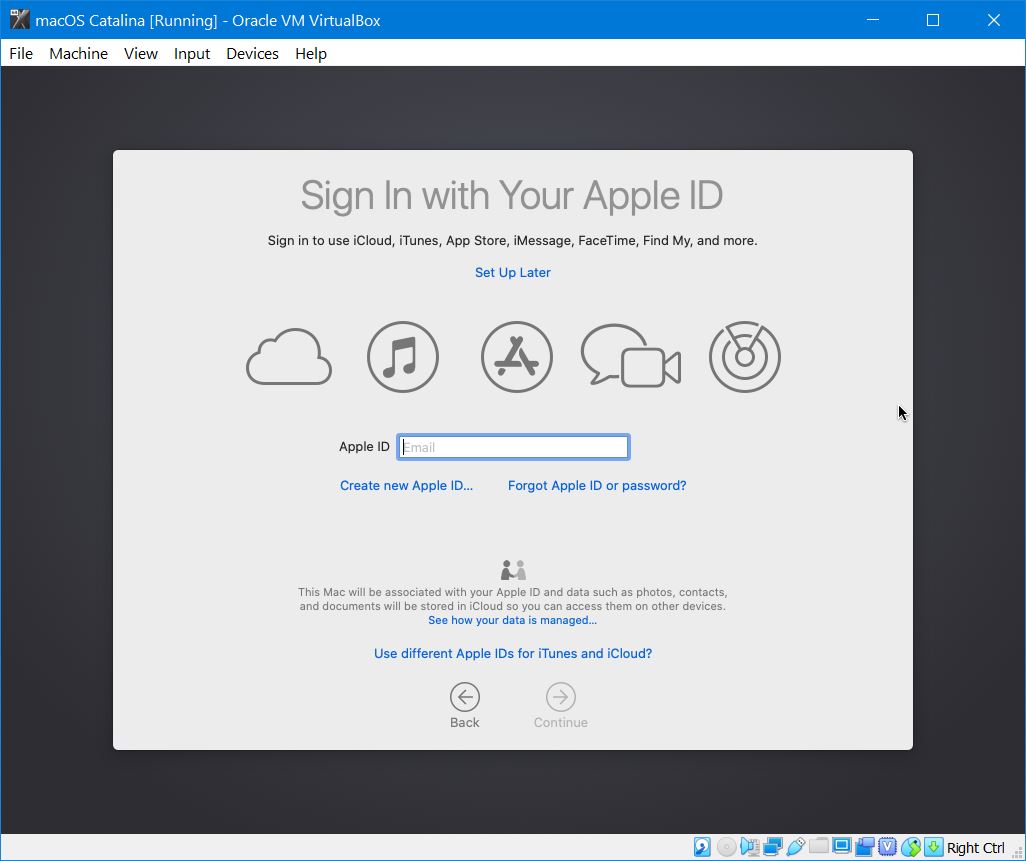
Since I’ve signed in with my Apple ID, Apple recommends using two-factor authentication.

The use of the macOS Catalina points to the terms and conditions. Click Agree and continue with the installation.
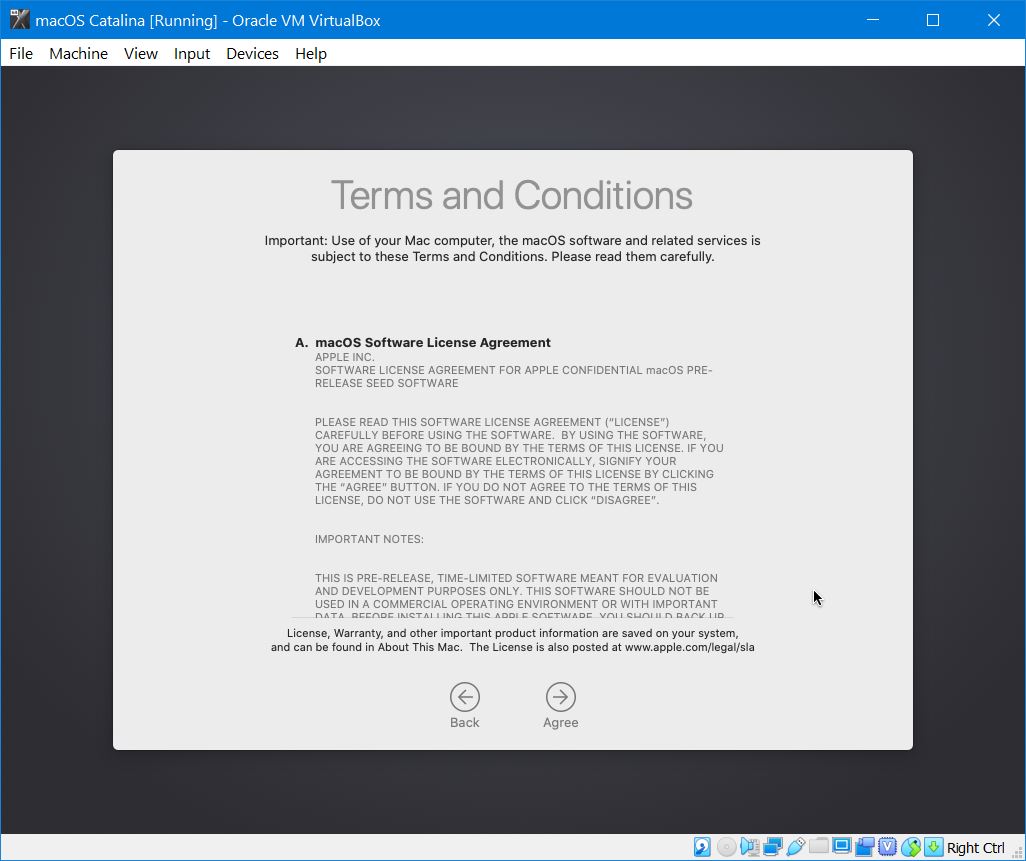
Create your account with the following details and Continue.
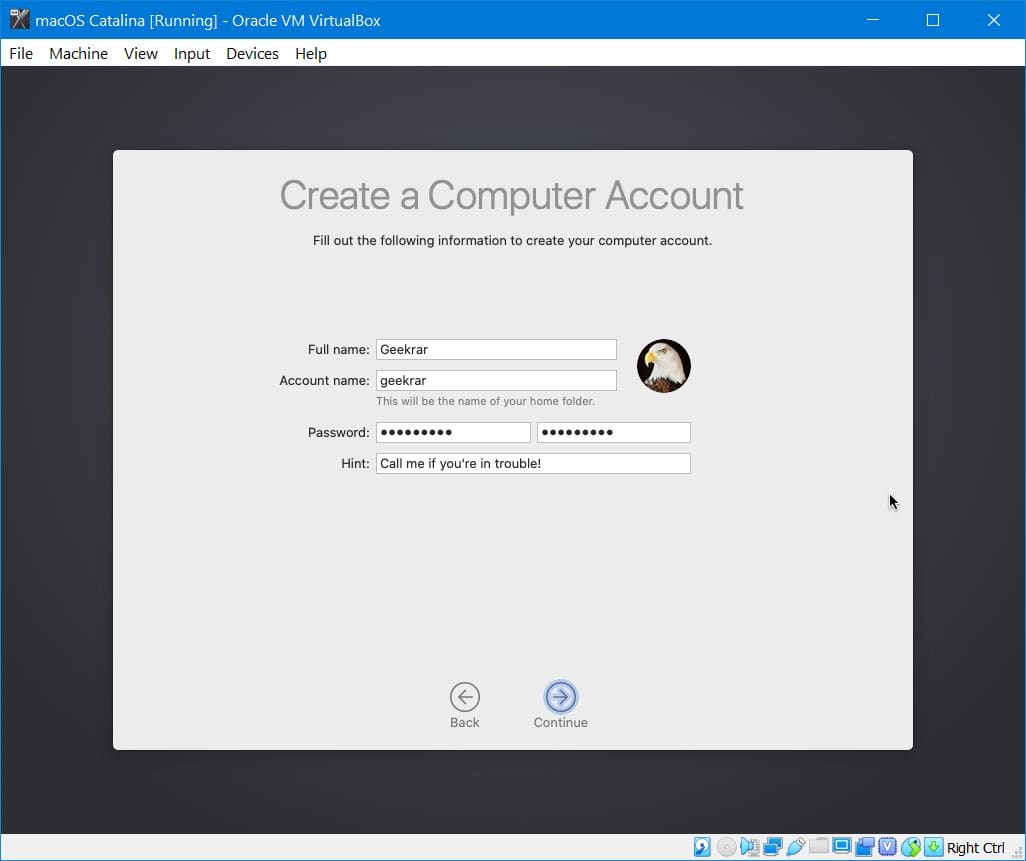
There are some useful features which will be set up for you, Continue with it.
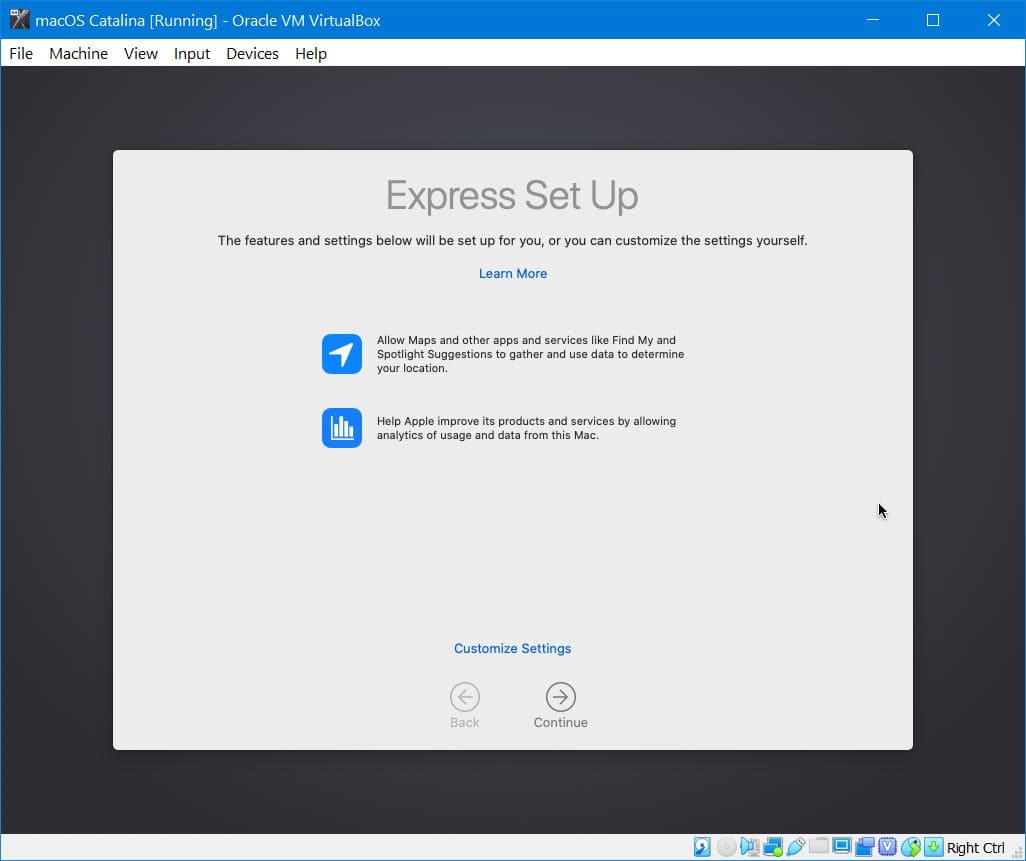
Apple might receive some information about the software, Continue with it. This can be changed from the System Preferences later.
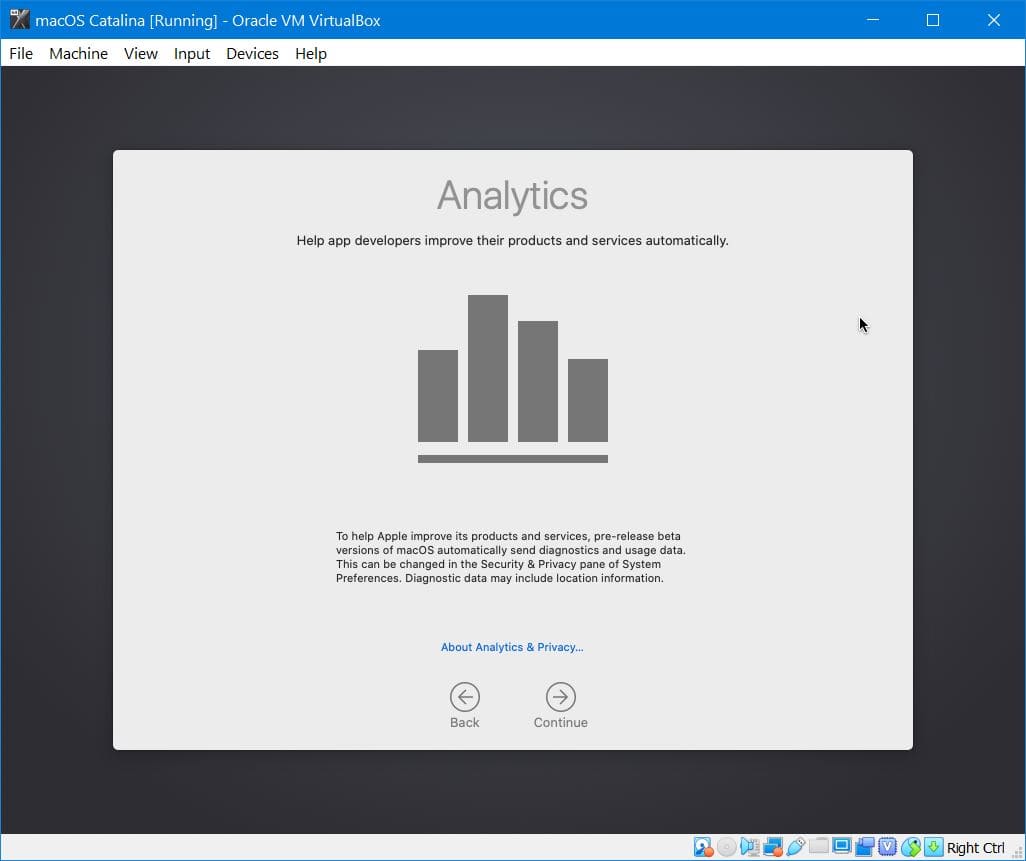
Wonderful! The new screen time feature is under your hands, Continue with it.
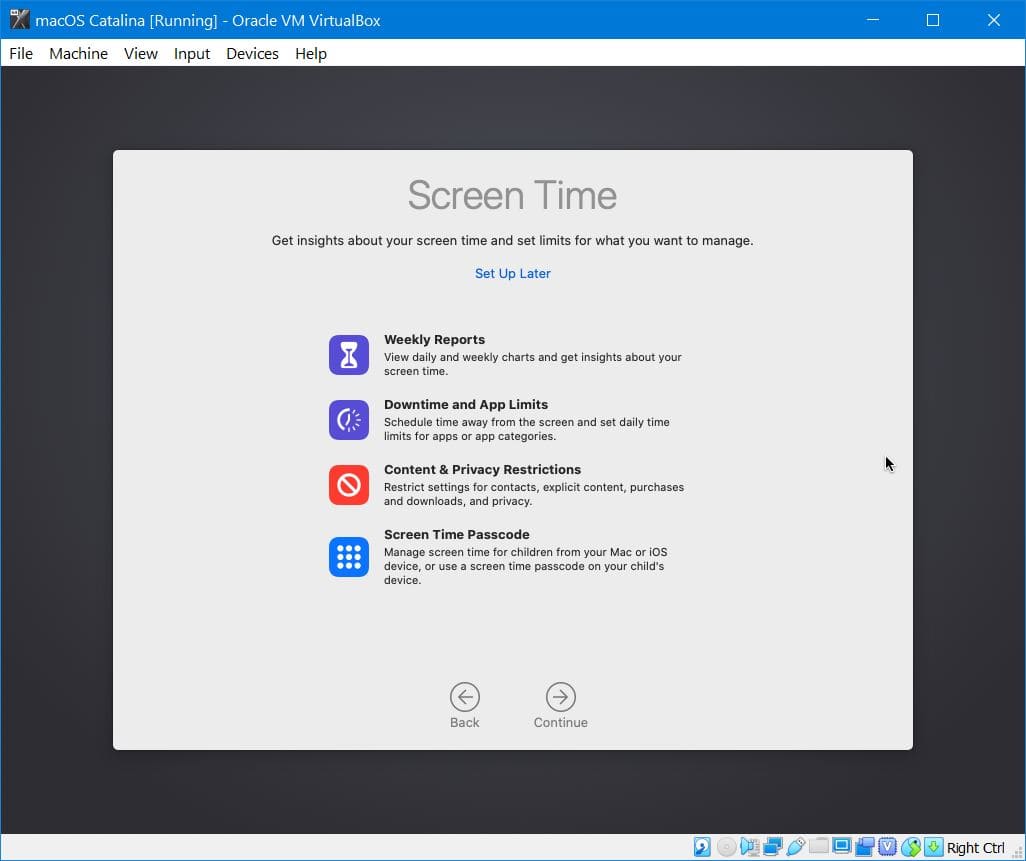
Select your desired interface which looks the best to you and click Continue.
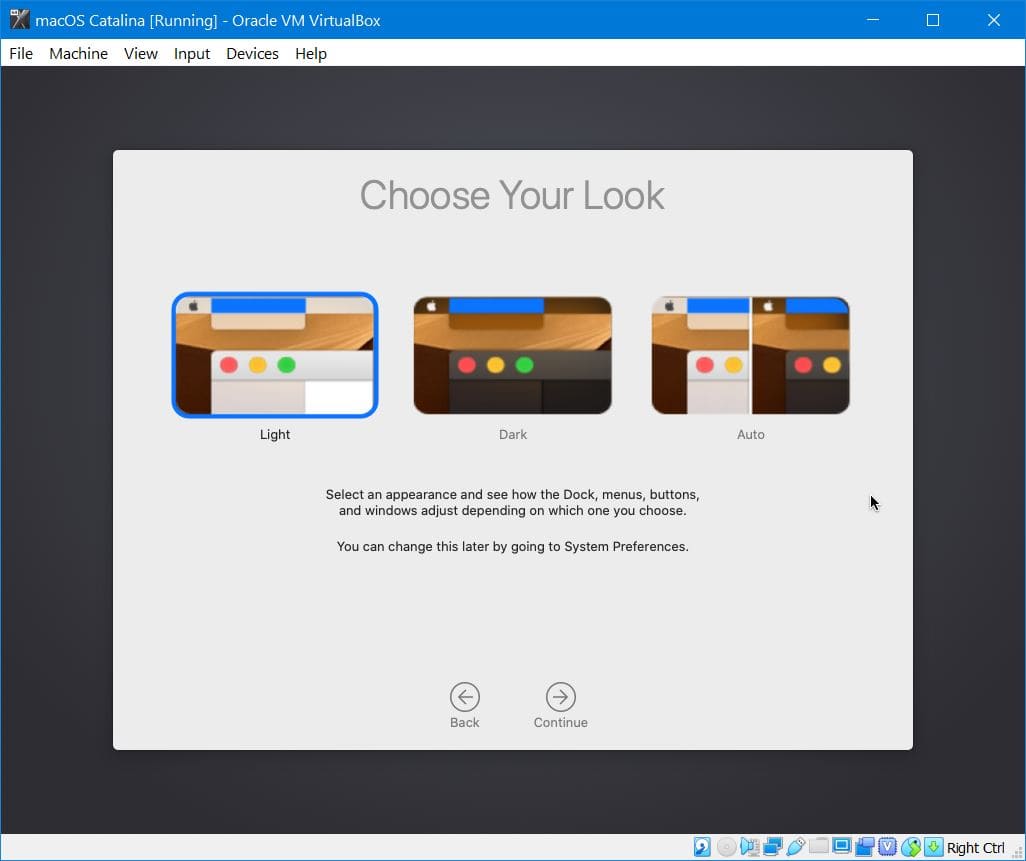
Once you’ve done the settings, your Mac will begin setting up.
When it’s finished, you’ll see the newest version of macOS which is macOS Catalina. The dark mode of Catalina is super stunning. Here’s a quick look at what we expect to see.
Optional Step: Fix macOS Catalina Small Screen Resolution
With all the things done, you will likely notice a small resolution when you turn into a full screen. Here’s how to fix macOS Catalina screen resolution.
- Fix macOS Catalina Screen Resolution on VirtualBox
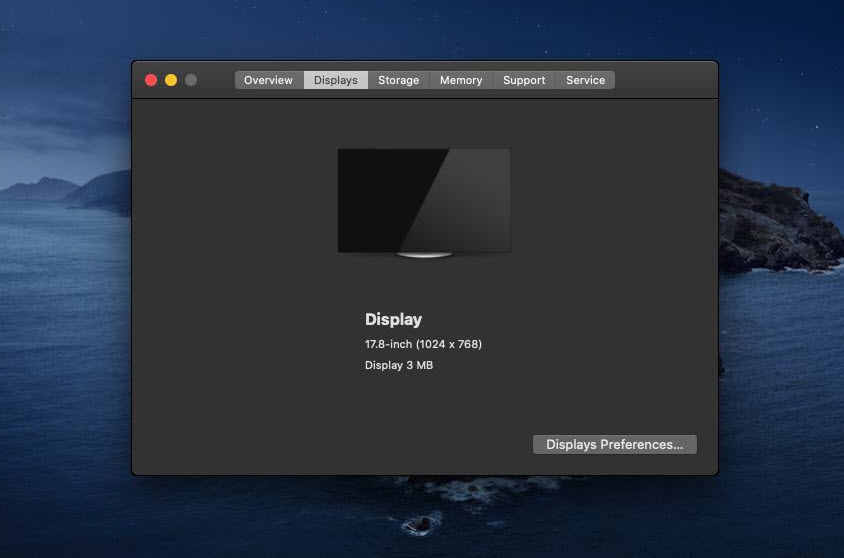
With the assigned resources, you should now do speed experience a speed surf of Catalina. Here’s how to speed up macOS Catalina or Mojave on Virtual Machine.
One More Step: Take A Snapshot
We recommend taking a backup of your virtual machine and when something goes wrong, you may simply switch to backup. This is really easy on VirtualBox.
- How to Take and Use Snapshots on VirtualBox

From now, you can surf, try new apps and features, develop apps on XCode and even install Windows on Catalina. Including these, there’s plenty of things you could do. While running macOS on VirtualBox mightn’t be the best, but however, it’s the most convenient and cheapest way to try and even work. It’s worth giving a try! Now that you’ve done all these, there’s nothing more you’ve to do. This isn’t probably perfect experience for trying out Catalina on an actual computer, but with virtual machine, you’ll experience nearly the most similar experience. That way, whenever a new version is dropped, you don’t need to wait for us to upload an image, instead, you can directly update your macOS to the latest version.
However, if there were some issues with slow performance, you can always speed up slow running macOS Catalina.
That’s the end line of Install macOS Catalina on VirtualBox on Windows PC. If you’ve some questions, suggestions or ideas for improvement, we are here to know.
VIDEO: Install macOS Catalina on VirtualBox on Windows PC
68
68 people found this article helpful
Build your own Hackintosh
Updated on August 22, 2022
What to Know
- You need a fresh copy of macOS, a USB drive, free tools called UniBeast and MultiBeast, and compatible PC hardware.
- The steps below outline installing a macOS Catalina 10.15.6 on a PC and were tested using an Intel NUC DC3217IYE.
- You might need to change some configuration settings depending on the PC components you use.
This article covers what you need to build a Hackintosh and why you would build one, how to create a bootable Hackintosh installation USB drive, and how to install it on a PC.
How to Create a Bootable Hackintosh Installation USB Drive
The first step in installing macOS on a PC and creating your own Hackintosh is to create a bootable USB with macOS on it. This requires a working Mac that has access to the Mac App Store, a USB thumb drive, and some time. It isn’t difficult, but it is a little time consuming, and it’s important to make sure that you get each step exactly right.
Scroll to the bottom to see a full list of what you need to build a Hackintosh.
Before you proceed, consider backing up your Mac just in case you run into any problems during the initial creation of the installation media.
If you have your Mac and a USB thumb drive ready, then you can follow these instructions to make a bootable macOS USB:
-
Using a Mac, open the Mac App Store.
-
Log in using your Apple ID if prompted.
-
Search for and download the latest version of macOS.
-
Restart your Mac, holding down Command + R as it starts back up. This will allow you to load into recovery mode.
-
Release Command + R when you see the Apple icon and progress bar appear.
-
Wait for macOS Recovery to load.
-
Click Utilities > Terminal.
-
With the terminal open, type csrutil disable and then press enter.
-
Wait for the terminal to display a message that SIP has been disabled.
-
Click the Apple menu > Restart.
-
Once your Mac has booted up, connect your USB drive.
-
Open Disk Utility.
-
Select your USB drive in the left column, then click Erase.
-
In the pop up menu, enter a name for your USB drive, select Mac OS Extended (Journaled), and click Erase.
-
Click Done.
-
Run the UniBeast app.
-
Click Continue.
-
Click Continue.
-
Click Continue.
-
Click Continue.
-
Click Agree.
-
Click the USB drive that you set up earlier, and then click Continue.
-
Select Catalina, then click Continue.
-
Select UEFI Boot Mode or Legacy Boot Mode, then click Continue.
UEFI Boot Mode is recommended for all systems that are capable of using UEFI. Only select Legacy Boot Mode if you have older hardware that can only use BIOS.
-
If you are using an NVIDIA or ATI graphics card, make the appropriate selection and click Continue.
-
Take a look at your selections, and click Continue if you didn’t make any mistakes.
-
Enter your password if prompted, and then click OK.
-
UniBeast will now create your installation media. This process can take a while, so just leave it alone until it’s done.
How to Install macOS on a PC Using the Installation USB
After you have successfully created your macOS installation USB, you will need to remove it from your Mac and plug it into the PC that you want to turn into a Hackintosh. This is a fairly long process that involves formatting the drive in your PC and performing a clean installation of macOS. If you don’t want to format or erase your drive, you’ll have to remove it and install a different one before you proceed.
For this tutorial, an Intel NUC DC3217IYE was used as the PC base to create a Hackintosh, and the settings seen in screenshots pertain specifically to that hardware configuration. Make sure to select settings that are compatible with your hardware.
Here’s how to install macOS on your PC:
-
From the Clover boot screen, select Boot macOS Install from Install macOS Catalina.
If your PC is set to boot from USBs, you’ll see this screen without needing to do anything. If it isn’t, you’ll have to press F8, F11, F12, or the appropriate key for your motherboard to choose your USB drive as the boot device.
-
Select your desired Language, and click the forward arrow.
-
Select Disk Utility from the macOS Utilities menu.
-
Click your PC hard drive in the left column.
-
Click Erase.
-
Enter a new name for the drive, select APFS for the format, and click Erase.
-
Click Done.
-
Return to the main macOS Utilities menu, select Install macOS, and click Continue.
-
Click Continue to proceed with the installation of macOS on your PC.
-
When you complete the installation process, your PC will reboot. You may need to manually select macOS Catalina from the bootloader if it macOS doesn’t load automatically.
Finish Setting Up Your Hackintosh
Your PC has macOS installed at this point, and it will probably work to one degree or another depending on the specific hardware that you used. You may find that some peripherals don’t work quite right, the graphics aren’t displayed correctly, or that there are other issues.
Even if your new Hackintosh seems to work, the final step of installing macOS on a PC is to run the free MultiBeast tool from Tonymacx86. This app configures your macOS installation to work seamlessly with your PC hardware, so skipping this step is not advisable.
-
Run the Multibeast app. From the Quick Start menu, select UEFI Boot Mode if your PC supports UEFI, or Legacy Boot Mode if it only supports BIOS.
If you didn’t already download it earlier, download the latest version of MultiBeast from the Tonymacx86 tools download section. This is a different app from UniBeast, but you can find it in the same location.
-
Click Drivers, and select the audio drivers that are necessary for your hardware.
-
Click Misc, and select any necessary drivers.
You may need to also select disk, network, or USB drivers depending on your hardware.
-
Click Bootloaders, and select your desired bootloader.
-
Click Build, verify your settings, and click Save to save your Multibeast settings. If you have problems with these settings, you can load and alter them later to fine tune things.
-
Click Install.
-
Click Agree.
-
Enter your password if prompted, and click Install Helper.
-
When you see this screen, you can restart your Hackintosh. If it runs as expected, you’re done. Otherwise you’ll need to run MultiBeast again and make sure you have selected all the right drivers and settings for your individual PC hardware.
What You Need to Build a Hackintosh
Building a Hackintosh is a multi-step process that isn’t exceptionally difficult, but it is time-consuming, and it’s also very precise. While you can technically build a Hackintosh without any specialized knowledge or experience, having a background in PC building and some knowledge of macOS helps.
This is the hardware and software you need before you can build a Hackintosh:
- macOS compatible hardware: Obtain and assemble computer hardware that’s compatible with macOS. If you aren’t sure if your hardware will work, check sources like Tonymacx86.com, the OSx86 Project, Hacktintosh.com, and the Hackintosh subreddit.
- A working macOS computer: You need a working modern macOS computer with the App Store to download a fresh copy of macOS.
- A USB drive: A 16GB or 32GB drive is preferred.
- UniBeast and MultiBeast: These are free tools available from Tonymacx86.
Why Make a Hackintosh?
There are a lot of reasons to make a Hackintosh instead of just buying a Mac, but the primary factor is cost. You can build a Hackintosh with more powerful specifications than any Mac for less money. If you prefer macOS over other operating systems, but you want to save some money by putting together your own system, then building a Hackintosh is an attractive option.
The downside is that Apple doesn’t support this procedure, and they have even actively discouraged it. You won’t be able to get tech support for macOS on your PC, and Apple may block services like Facetime and iMessage on your custom Hackintosh as well. If you’re willing to risk it, then you stand to save some money and have a much greater level of control over your hardware choices than you would with an off the rack Mac.
FAQ
-
How do you update Mac OS?
To update Macs running macOS Mojave (10.14) or later, select System Preferences > Software Update. You can update Macs running macOS High Sierra (10.13) or earlier through the App Store.
-
How can you run the Windows operating system on a Mac computer?
To run Windows on a Mac, the best-known option is Boot Camp. This utility is included free with your Mac and allows you to install Windows directly on your Mac’s hardware.
Thanks for letting us know!
Get the Latest Tech News Delivered Every Day
Subscribe
I bet you’ve heard about the new OS, known as macOS Monterey, for Mac. I’m pretty sure you are here because you want to try it on your Windows 10 computer. Then you are in the right place. In this article, I will show you the best and step-by-step instructions to install macOS Monterey on VirtualBox on Windows 10 PC or laptop. I need you to read this post to the end and provide your thoughts regarding our guidance.
Related: How to Install macOS Monterey on VMware on Windows 10 PC
Apple has announced the next version of macOS at its WWDC keynote, after showing off iOS, iPadOS, and watchOS. It’s being called Monterey, in keeping the California location-based theme it’s had since 2013.
macOS Monterey (macOS 12) is replacing macOS Big Sur in Apple products on the market. There aren’t many changes in macOS 12, but some major updates and changes have already arrived. Its development team added some new features such as general control, Airplay on Mac, shortcuts, 3D map layout, some note updates, etc.
Apple offers a new look and background for macOS Monterey (macOS 12). The new design includes edge curves and adds a new box to settings that require administrator privileges. With the addition of general-purpose controls to macOS Monterey (macOS 12), you can use one mouse for your iPad, iMac, and MacBook. You can use not only a mouse but also a keyboard and other devices.
On June 9, 2021, the first beta of macOS Monterey (macOS 12) was available to developers. Soon after, they will release a beta that you can test without a developer account. Also, don’t forget about the final version of macOS Monterey (macOS 12), which will be available this fall, and also remember that you can download and install macOS Monterey on Windows 10 using VirtualBox, which I’ll show you step-by-step below.
Compatible devices with macOS Monterey
According to Apple, not all Apple computers can support macOS Monterey (macOS 12). Here is a list of Macs that are compatible with macOS Monterey:
- 2015 and later MacBook
- Early 2015 and later MacBook Air
- Early 2015 and later MacBook Pro
- Late 2014 and later Mac mini
- Late 2015 and later iMac
- 2017 and later iMac Pro
- Late 2013 and later Mac Pro
How to Install macOS Monterey on VirtualBox on Windows 10 PC & Laptop
Below, I’ll show you how you can install macOS Monterey on your Windows 10 or 11 computer in five easy steps. The steps are as follows:
- Enable virtualization on your Windows 10/11 PC.
- Install VirtualBox and the VirtualBox Extension Pack on Windows 10/11.
- Create a New Virtual Machine for macOS 12.
- Customize macOS Monterey’s Virtual Machine.
- Running VirtualBox Codes on CMD.
- Perform a macOS Monterey clean installation.
Before starting the process, you need to download the below files:
- Download and install VirtualBox.
- Download the VirtualBox codes.
- Download macOS Monterey (macOS 12) ISO Image.
Recommended: I recommend using an SSD on your computer, especially for speed, as most users are saying that their system is slow while using virtual machines. Also, increasing the amount of RAM on your physical computer will not cause any speed issues.
1. Enable Virtualization on your Windows 10/11 PC
Modern CPUs include hardware virtualization features that help in the acceleration of virtual machines built by VirtualBox. To use this functionality, however, you must first enable it. Please keep in mind that virtualization must be enabled on your system. Otherwise, you will see the error message “Can’t open a session on the virtual machine.” Click on the link below to learn more about it and how to install it.
-> Enable virtualization on your Windows PC
2. Install VirtualBox and the VirtualBox Extension Pack on your Windows 10/11 Computer
Installing macOS Monterey on your Windows 10 or 11 computer requires installing VirtualBox first, so you need to install VirtualBox first on your PC or laptop. If you don’t want to face any errors while installing macOS Monterey, you need to install the extension pack too. If you don’t know how to install them, we have a step-by-step guide for you. Click on the link below.
-> Install VirtualBox and its extension pack on your Windows system
3. Create a New Virtual Machine for macOS 12 Monterey on Windows 10
After installing VirtualBox on your PC and laptop, the second step to installing macOS Monterey on your Windows 10 computer is to create a virtual machine from which the macOS Monterey will boot. For that, follow the steps below:
- Go the VirtualBox and tap on new.
- Next, Tap on the expert mode, enter a name, starting with macOS.
- Once the macOS is typed the macOS version and type will be automatically selected by the VB.
- Now, you need to choose the amount of RAM for the VirtualBox, I will go with 4 GB.
- Next, select create a Virtual Hard disk Now and tap on Create to generate the VM.
- Specify the file location to save the Virtual Hard Disk, you can choose the default one or change it. Select the storage capacity of the virtual machine, and finally select the type of Virtual Hard Disk. You can choose the default Hard Disk type called VDI. Finally, remember to choose a dynamically allocated physical drive.
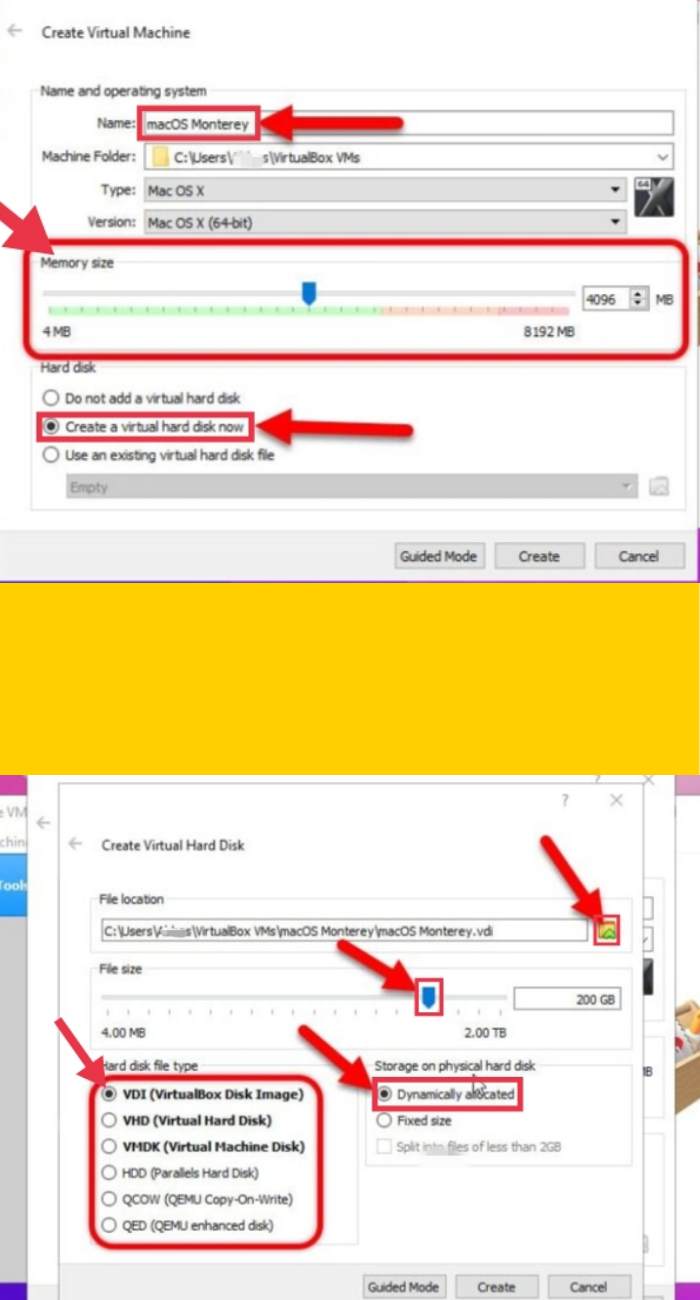
4. Customize Virtual Machine of macOS Monterey
Creating a virtual machine is not a big deal, but configuring and customizing it is important, so you better follow the steps below closely.
- After creating the virtual machine, you will return to the main VirtualBox page and click on macOS Monterey settings.
- Open the System tab, uncheck the floppy disk since we are not using it, also make sure that you ticked the extended features. There you see other settings like the chipset and pointing device, don’t touch them.
- For the virtual machine display settings, increase the video memory to 128MB and leave the rest unchanged. I think it would be better if you look at the screenshot below.
- In this step, we must attach the macOS Monterey ISO image to the virtual machine. Go to the Storage tab, click empty, next to attributes, click the CD icon and find the macOS 12 ISO image.
- The final setup is very simple because you need to enable USB 3.0 to solve the mouse and keyboard freezing issue. When we install the VirtualBox expansion pack, USB 3.0 is enabled, otherwise, it is disabled.
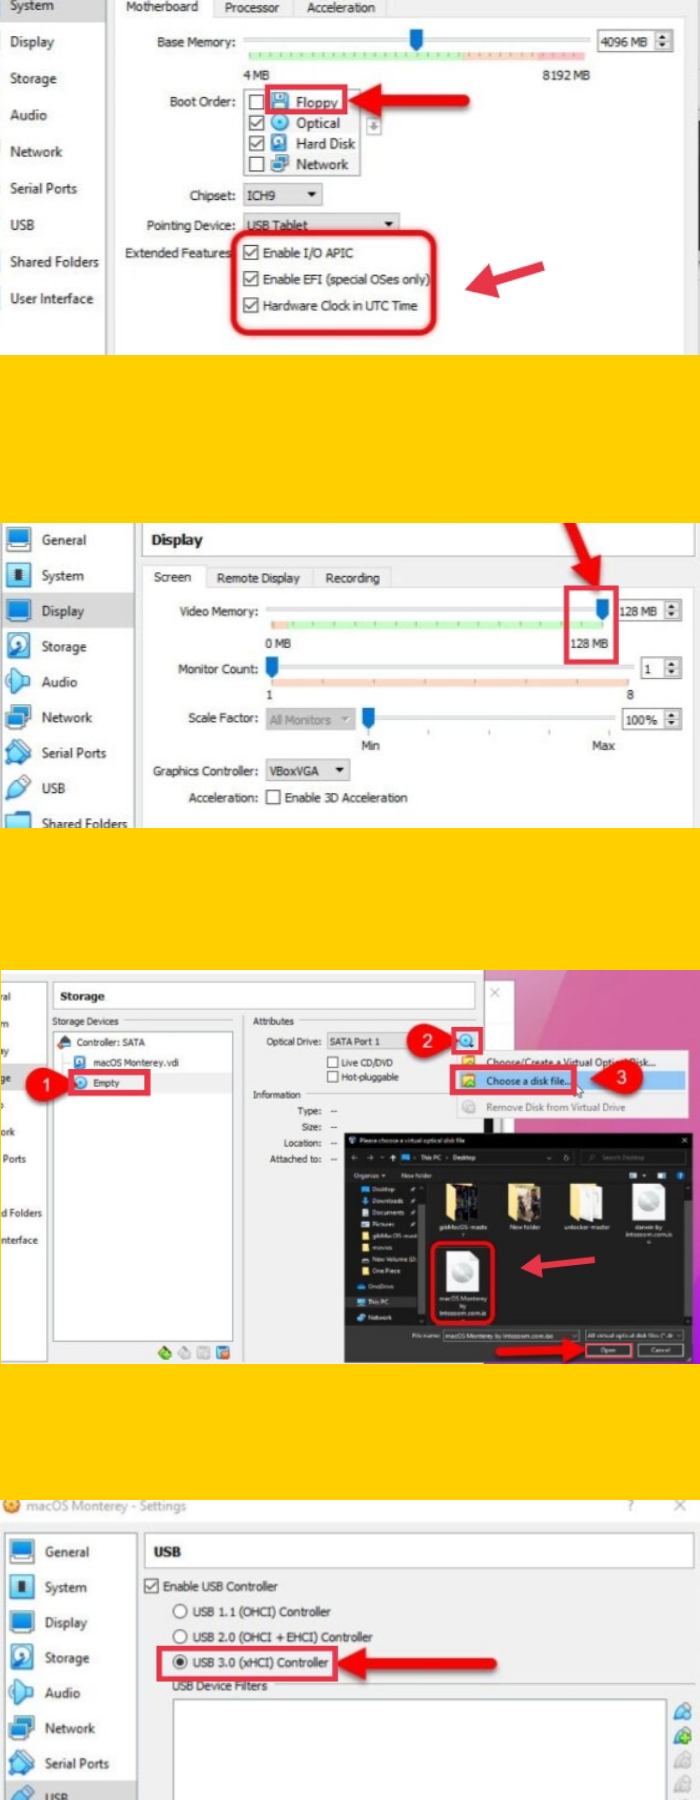
5. Run VirtualBox codes on CMD
To install and use macOS Monterey in VirtualBox on Windows 10/11, the VirtualBox code is an important factor. Since VirtualBox does not directly set macOS settings on Windows, this is where the code comes in. If the code is not applied or it is applied incorrectly, the virtual machine containing macOS will be in a loop. They must be applied carefully.
Note: Before you take another step, make sure to know the name of the VM, and then go to the File menu and choose exit.
- Open the downloaded codes, then go to the edit menu
- Next tap on Replace, replace the VM Name with the Virtual Machine you created a moment ago.
- Now open CMD and run it as administrator and copy the code and paste into CMD, then press Enter. Remember that if the code is entered incorrectly you will see an error, try to paste it correctly.
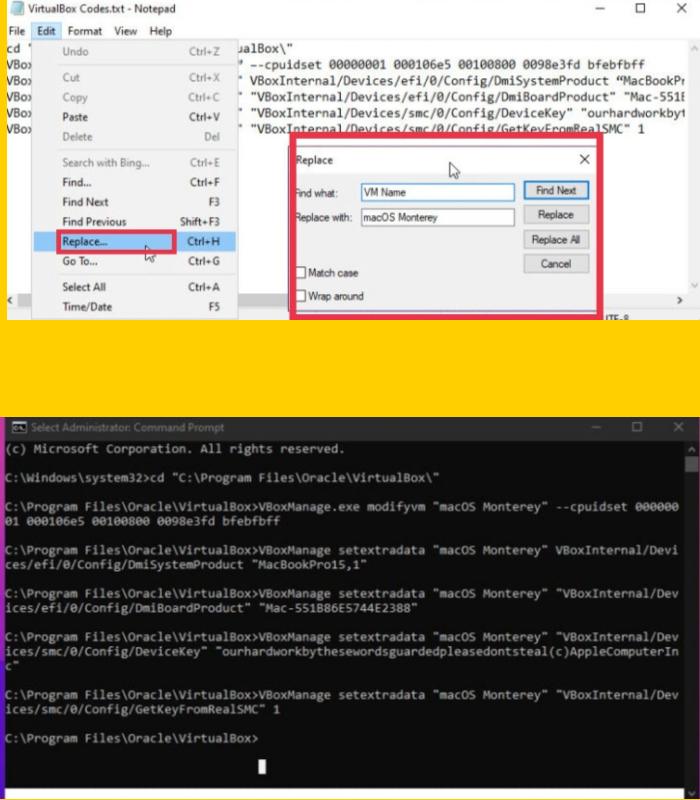
6. Performing macOS Monterey clean installation
This is the final step to install macOS Monterey on VirtualBox on Windows 10 PC & laptop after completing all the four steps above. Now it is time to do a clean install of macOS Monterey on VirtualBox on your Windows 10 computer. So let’s start the installation process. Follow the below steps:
- Open the VirtualBox and start the Virtual machine of macOS Monterey. After that, a bunch of codes will appear on the screen and finally, you will be on the Apple logo.
- Next, you need to choose your language.
- Before installing the macOS Monterey (macOS 12) on the VM, you need to partition the Storage. For that, you need to go to the Disk Utility and click continue.
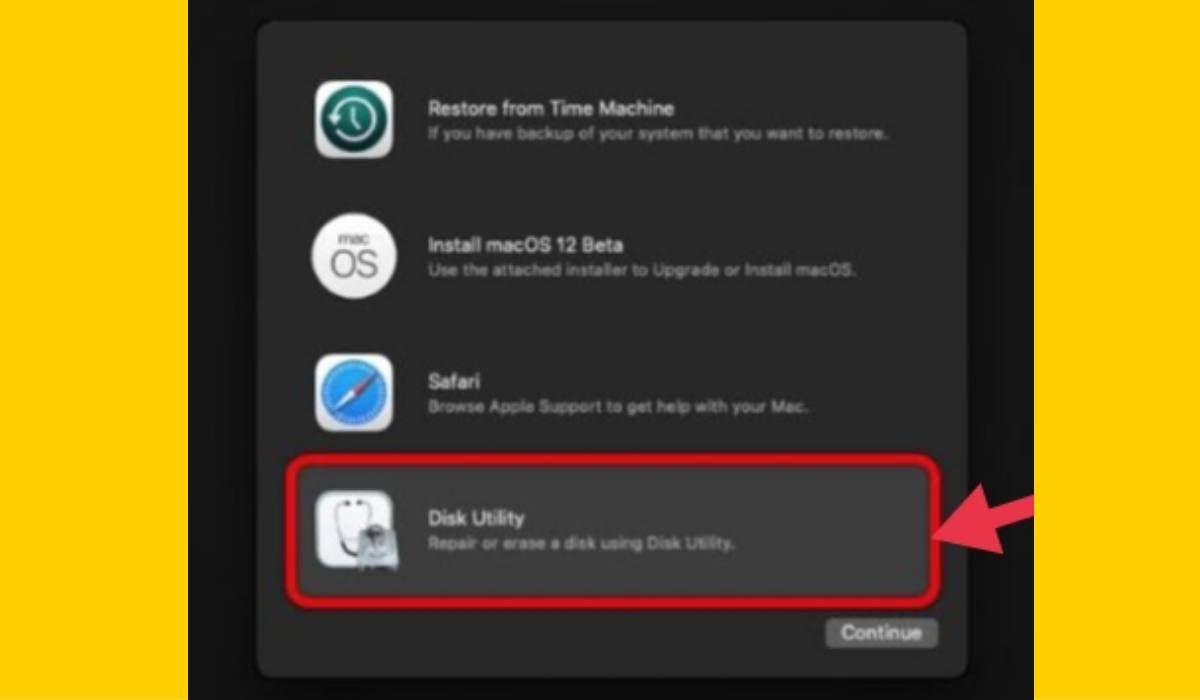
- Now, you need to choose the storage when you created the Virtual machine. then click erase and partition it so that the macOS Monterey should be installed in it.
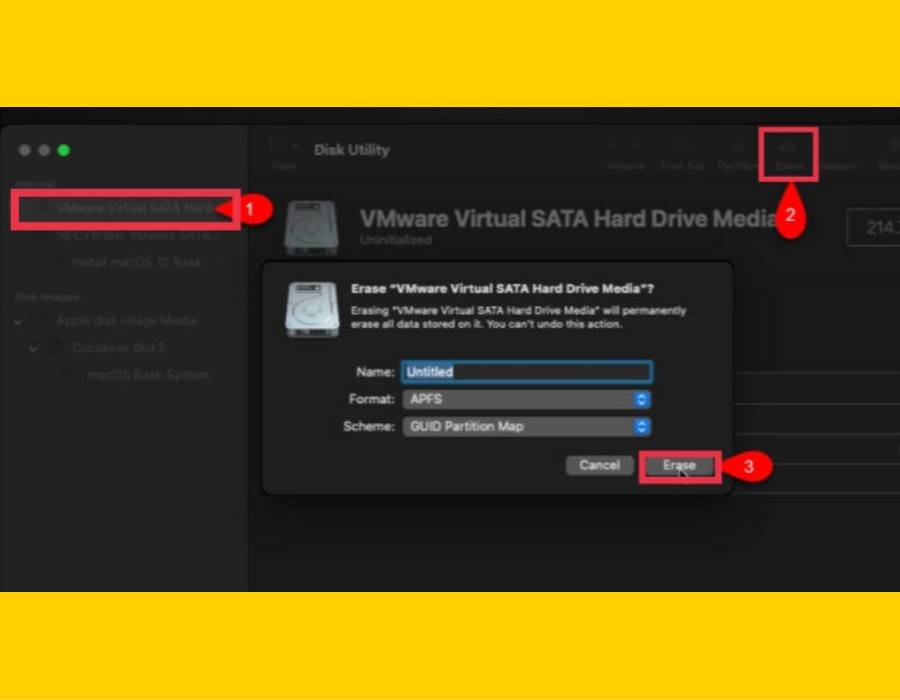
- Next, Quit the Disk Utility, and in the main menu select the Install macOS 12 Beta and tap on continue.
- Now, you need to agree to the terms and conditions and select the disk so the macOS Monterey can be installed.
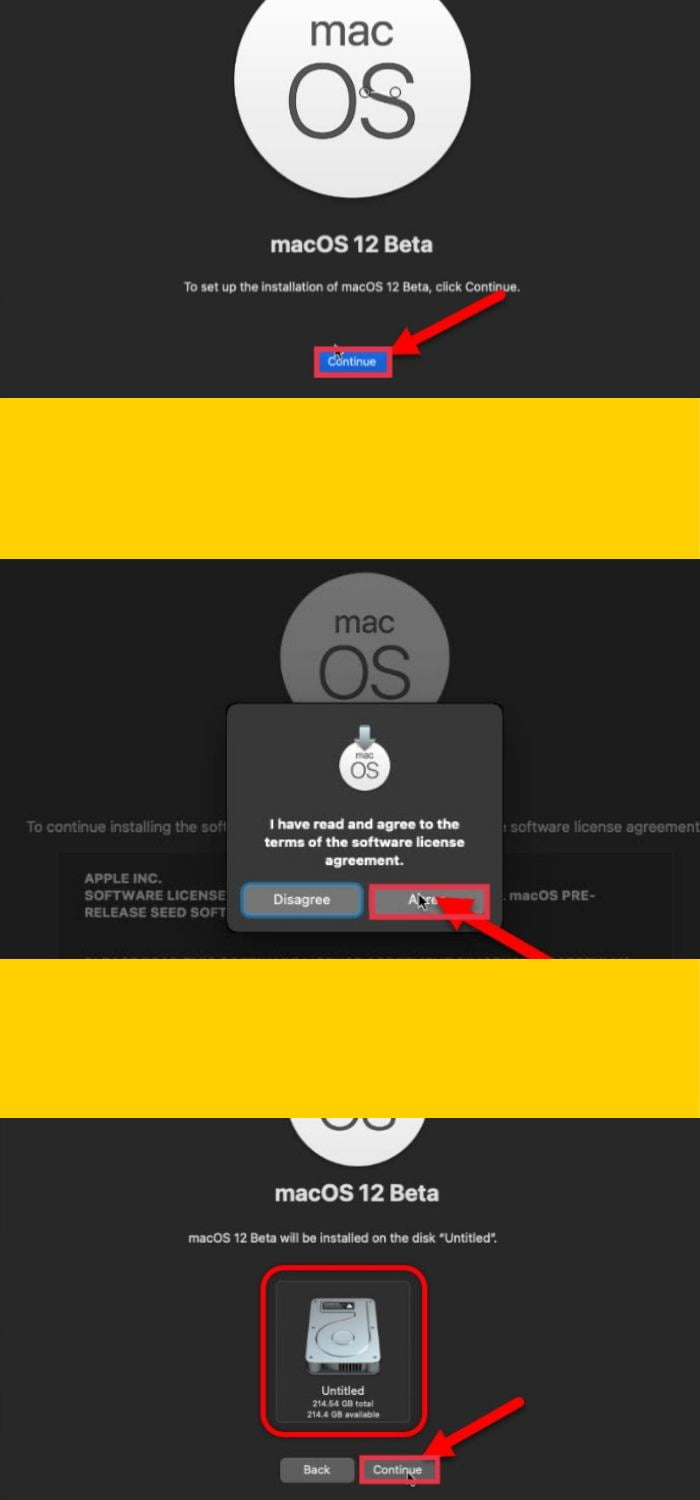
- Based on the Country you are living, choose it so the country input keyboard should be added by default. I have chosen the United States of America, and the OS has inserted the U.S input sources. Tap on ‘Continue‘ twice.
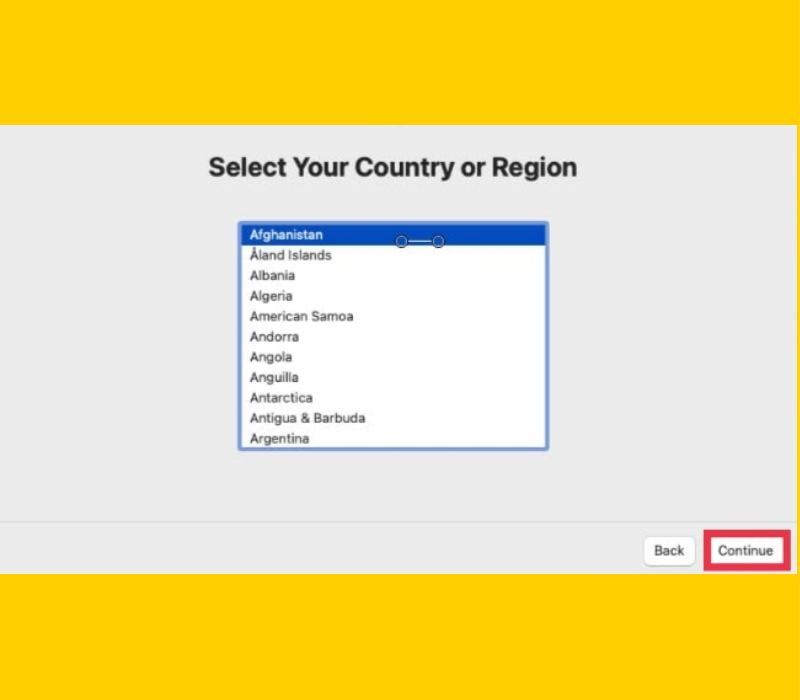
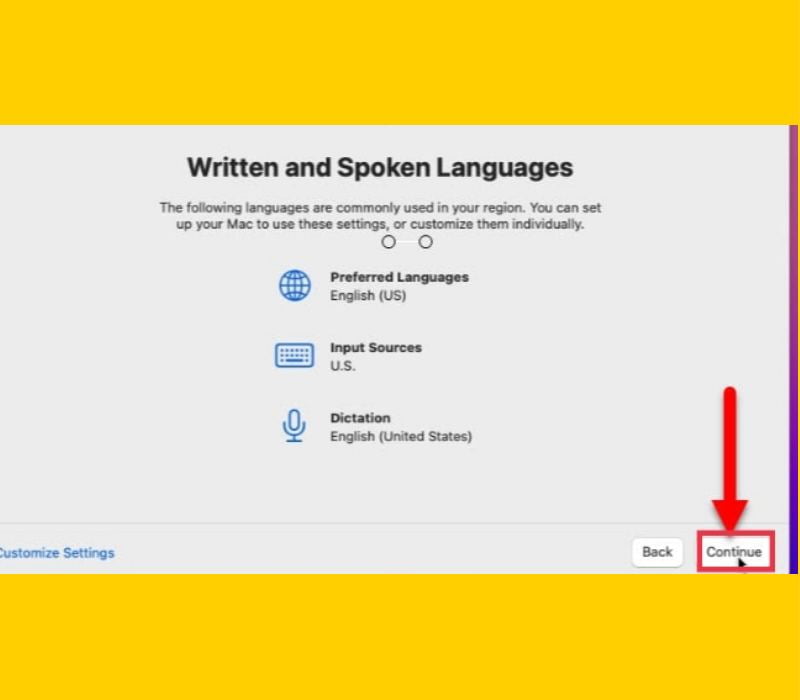
- I will not go for Accessibility, So, I will pass this step by clicking Not Now.
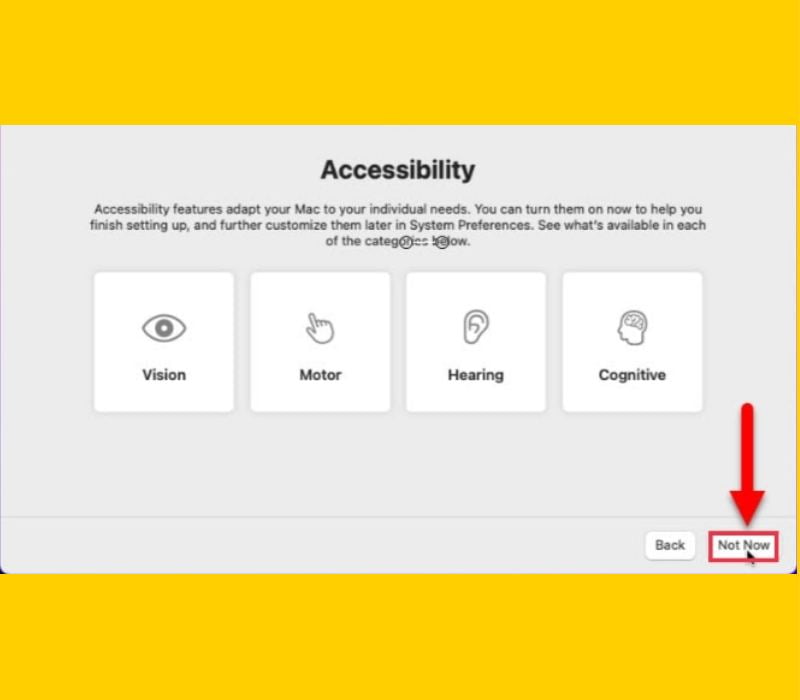
- Select ‘My computer doesn’t connect to the internet‘. Since it is a Virtual Machine Wifi does not work, ethernet is not working either because of the Virtual machine. Don’t worry, the internet is working on this type of mac. Tap on ‘Continue‘ to proceed.
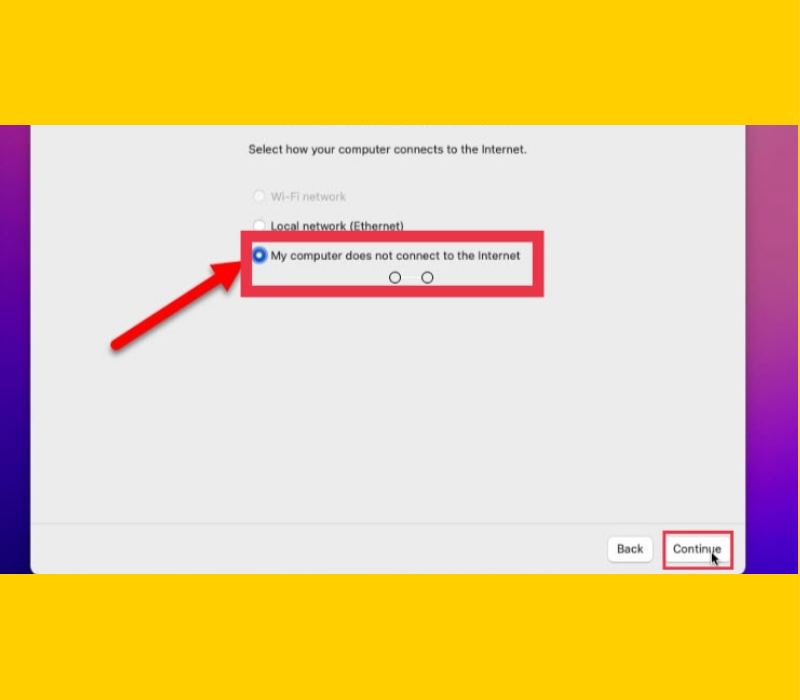
- Ignore the alert and continue.
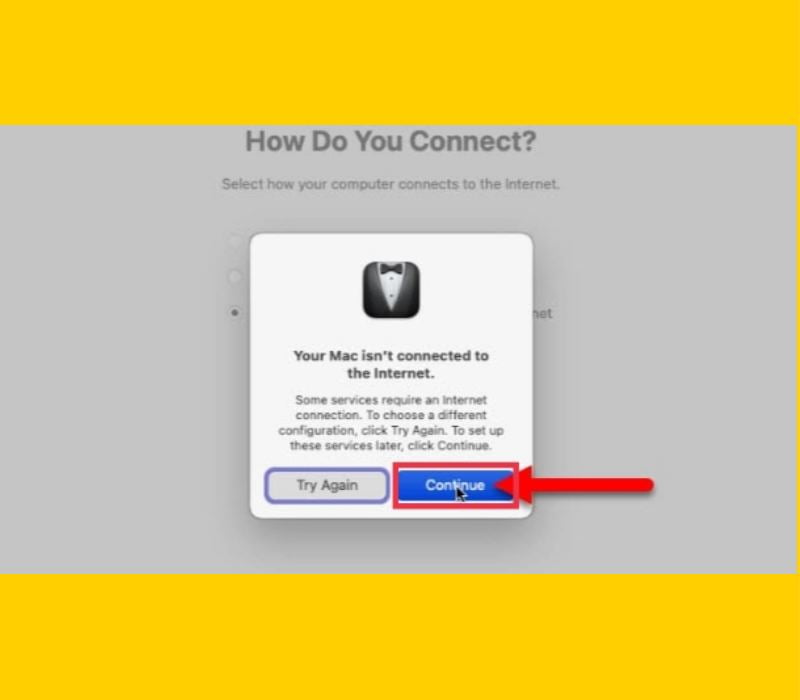
- Tap on ‘Continue‘ with data and privacy.
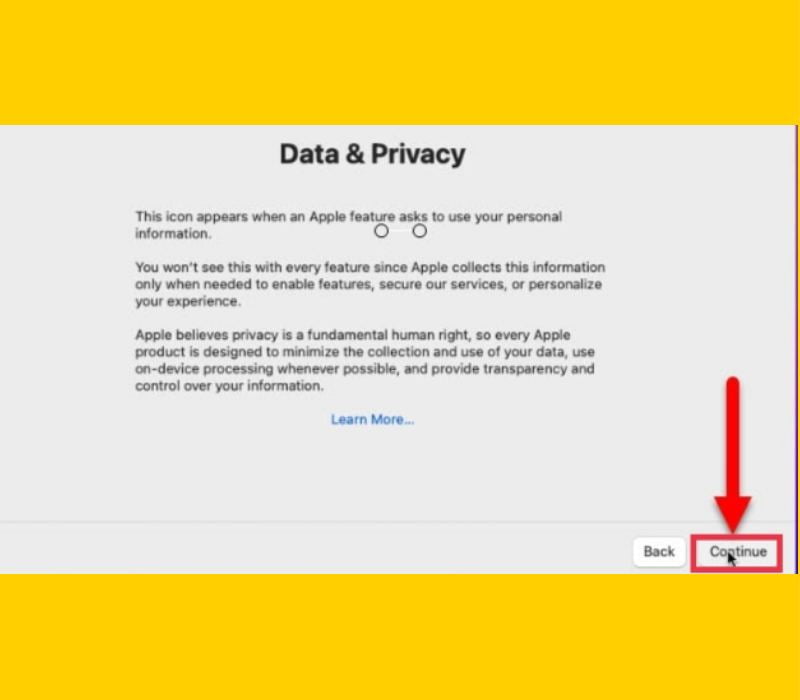
- Apple has provided the Migration Assistant for users who are migrating from another Mac, Windows PC. In simple words, you can transfer your files here. Since we are performing a clean installation, there is no need to configure it, So click on ‘Not Now‘.

- You have to read and agree to the macOS Monterey’s Terms and regarding the license.
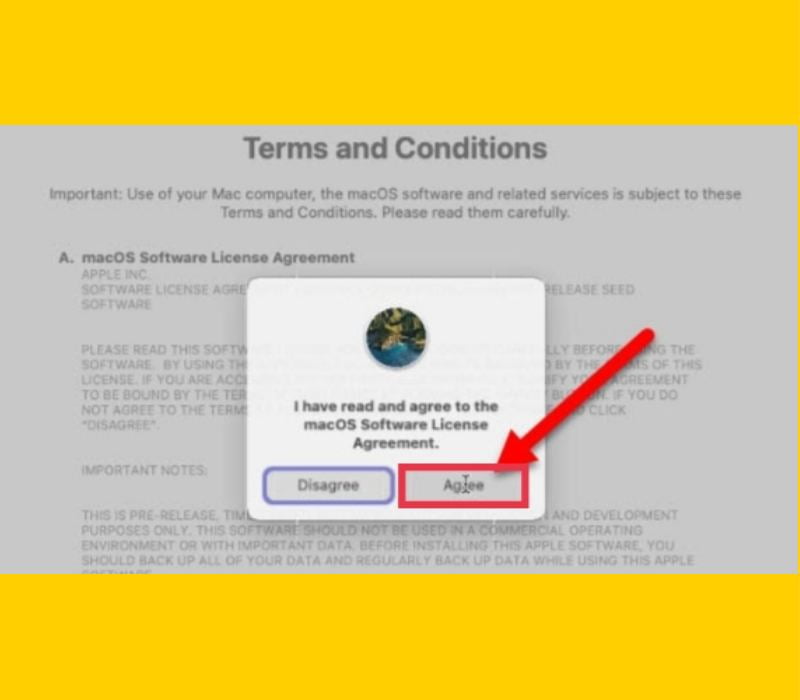
- You need to create an account for your Virtual machine computer, and tap on ‘Continue‘.
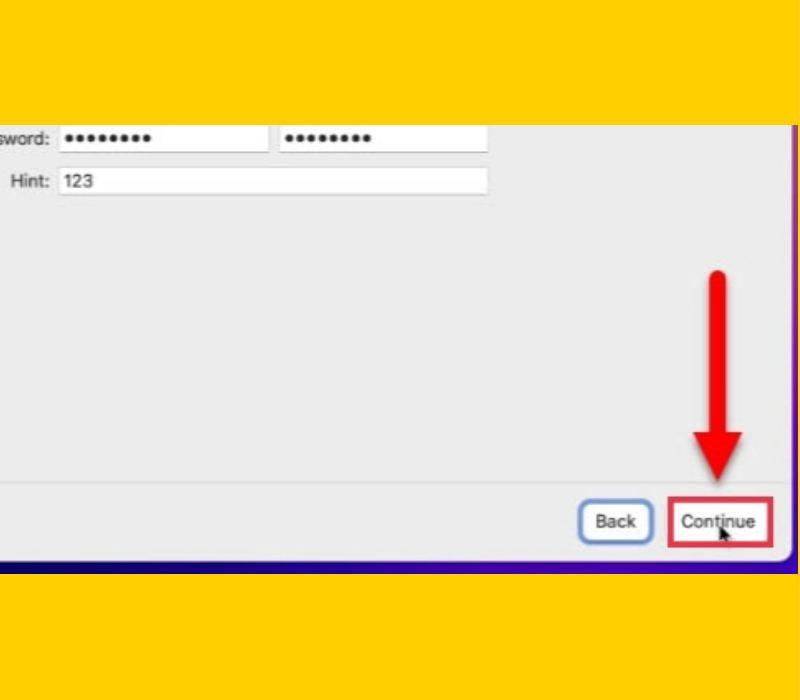
- Apple is showing you that they have already enabled the location services, along with the device analytics. You can turn them off if you are concerned about security and privacy. Click on ‘Continue‘
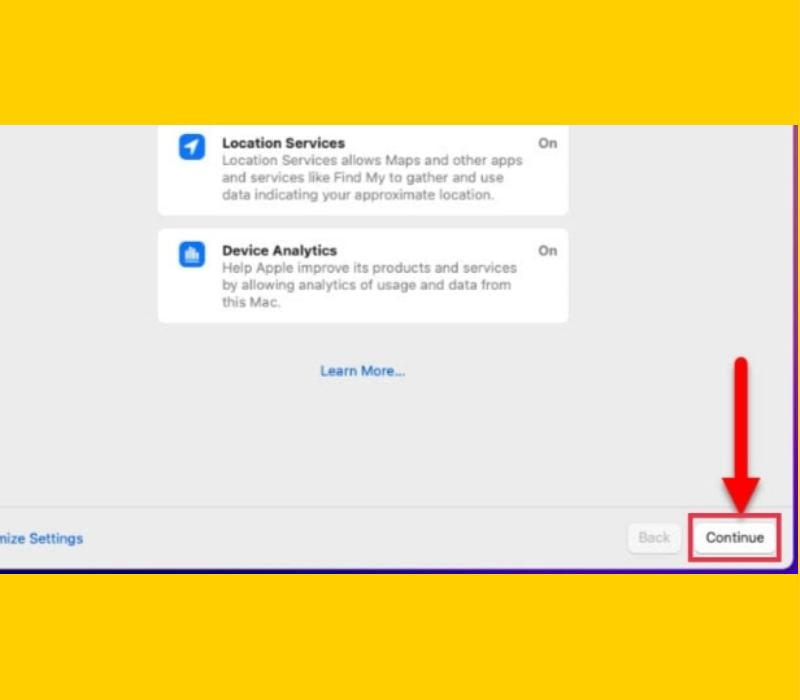
- If you want to monitor you weekly, downtime, content, and privacy restriction, you can enable the Screen Time. Screen Time is actually is good if you are looking to monitor your work.
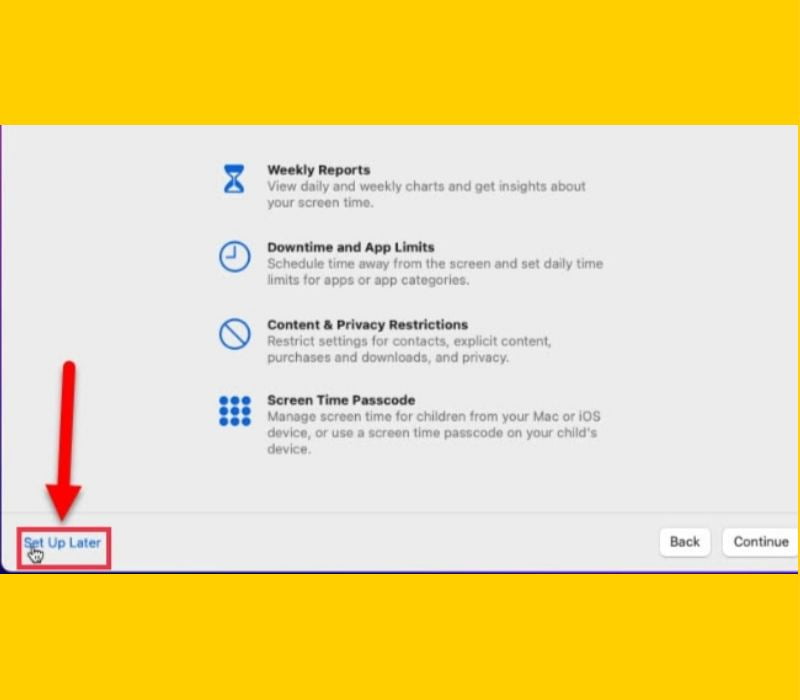
- The voice assistant is another feature for you to decide to enable it or not. Since these days many users are using the voice assistant, you should give Siri a try too. Tap on ‘Continue‘ to add Siri.
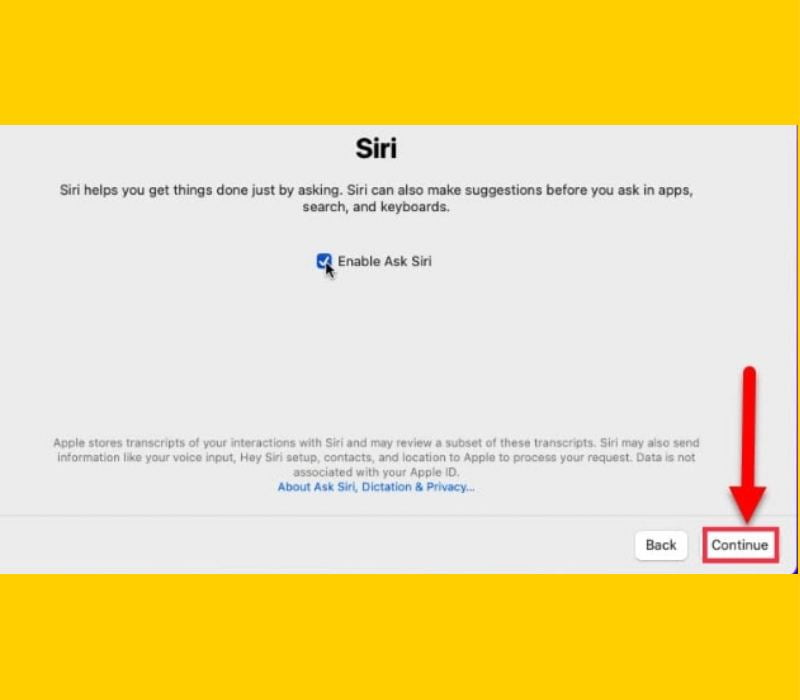
- Finally, Choose Your desired Look at the macOS Monterey (macOS 12) and tap on ‘Continue’.
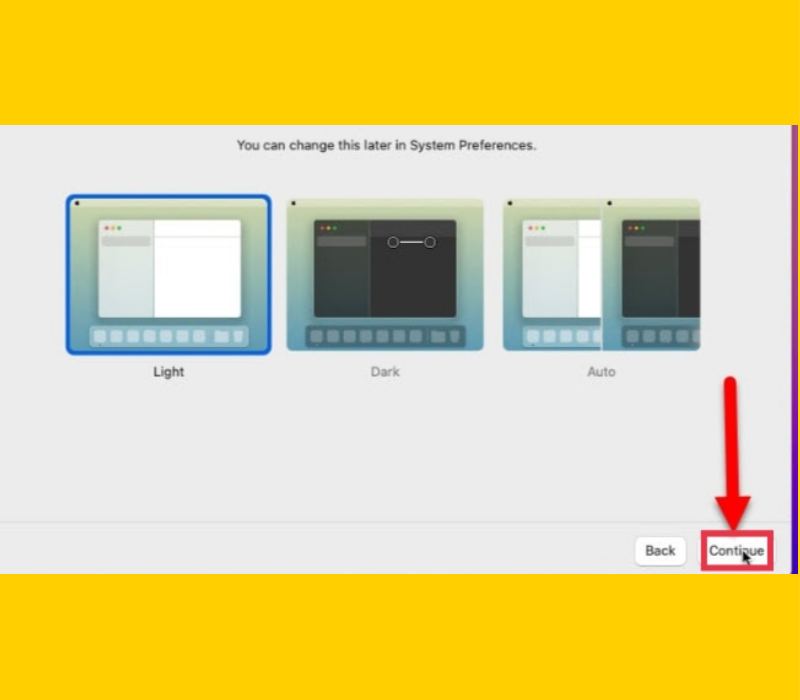
Final Words
That’s is how you can Install macOS Monterey on VirtualBox on Windows 10 PC and laptop easily and with step-by-step instructions. If you have any kind of questions or encounter any kind of problem, please let me know in the comment section. Good Luck!
Read also:
How to Hide the Desktop Icons on macOS Big Sur
How to Create a Bootable USB Installer for macOS Catalina on Windows 10