Android Studio is the official IDE (Integrated Development Environment) for Android app development and it is based on JetBrains’ IntelliJ IDEA software. Android Studio provides many excellent features that enhance productivity when building Android apps, such as:
- A blended environment where one can develop for all Android devices
- Apply Changes to push code and resource changes to the running app without restarting the app
- A flexible Gradle-based build system
- A fast and feature-rich emulator
- GitHub and Code template integration to assist you to develop common app features and import sample code
- Extensive testing tools and frameworks
- C++ and NDK support
- Built-in support for Google Cloud Platform, making it easy to integrate Google Cloud Messaging and App Engine, and many more.
- Provides GUI tools that simplify the less interesting parts of app development.
- Easy integration with real time database ‘firebase’.
System Requirements
- Microsoft Windows 7/8/10 (32-bit or 64-bit)
- 4 GB RAM minimum, 8 GB RAM recommended (plus 1 GB for the Android Emulator)
- 2 GB of available disk space minimum, 4 GB recommended (500 MB for IDE plus 1.5 GB for Android SDK and emulator system image)
- 1280 x 800 minimum screen resolution
Installation Guide
Step 1: Head over to this link to get the Android Studio executable or zip file.
Step 2: Click on the Download Android Studio Button.
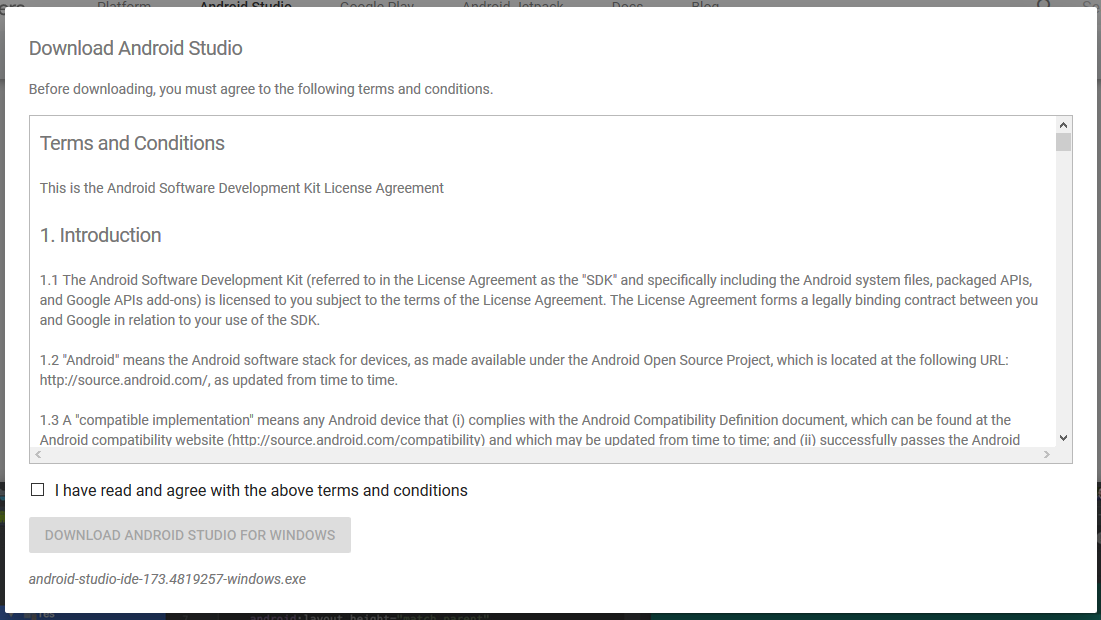
Click on the “I have read and agree with the above terms and conditions” checkbox followed by the download button.
Click on the Save file button in the appeared prompt box and the file will start downloading.
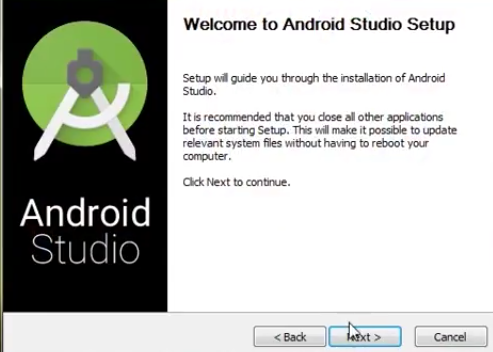
Step 3: After the downloading has finished, open the file from downloads and run it. It will prompt the following dialog box.
Click on next. In the next prompt, it’ll ask for a path for installation. Choose a path and hit next.
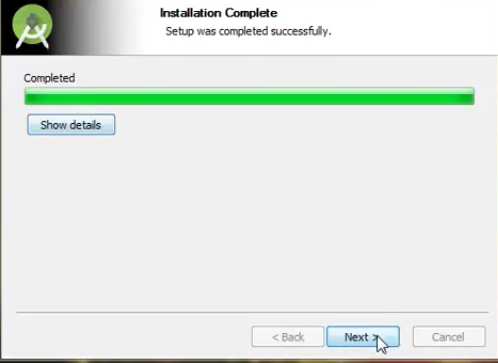
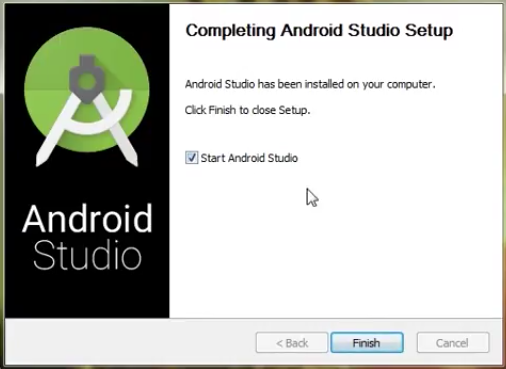
Step 4: It will start the installation, and once it is completed, it will be like the image shown below.
Click on next.
Step 5: Once “Finish” is clicked, it will ask whether the previous settings need to be imported [if the android studio had been installed earlier], or not. It is better to choose the ‘Don’t import Settings option’.
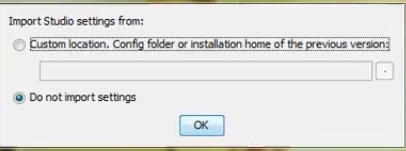
Click the OK button.
Step 6: This will start the Android Studio.
Meanwhile, it will be finding the available SDK components.

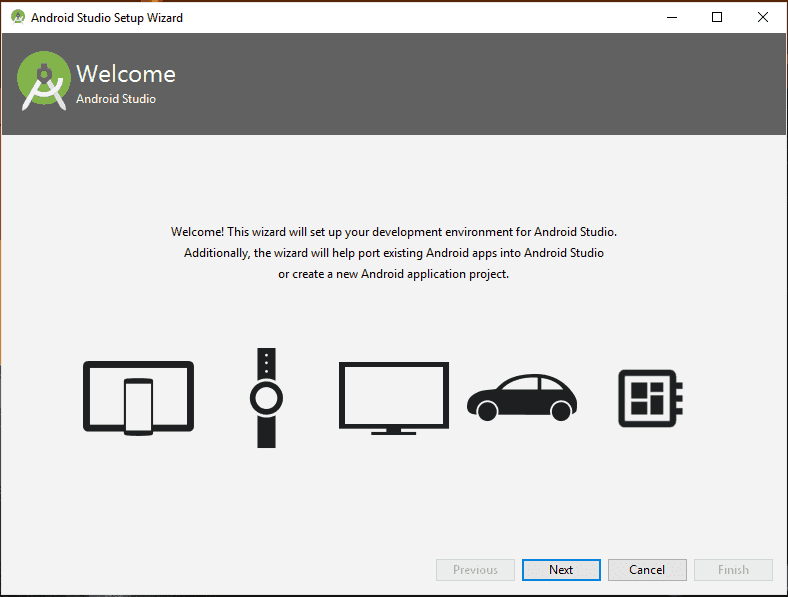
Step 7: After it has found the SDK components, it will redirect to the Welcome dialog box.
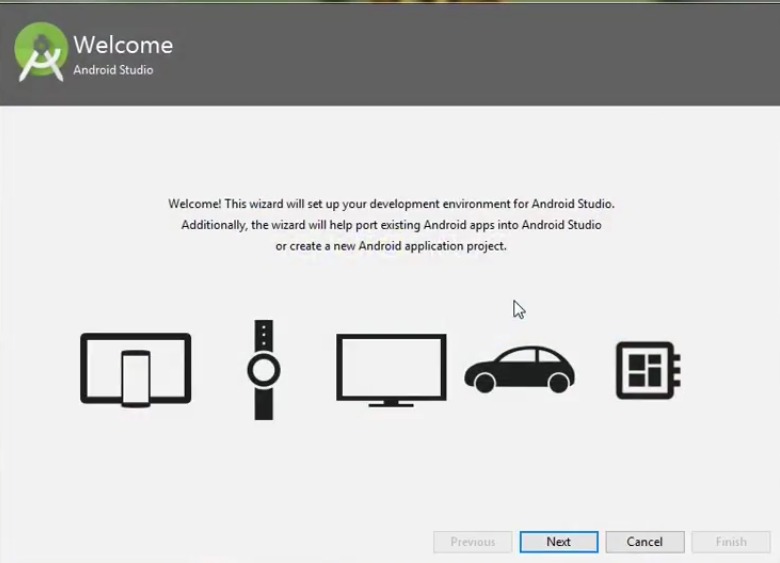
Click on Next.
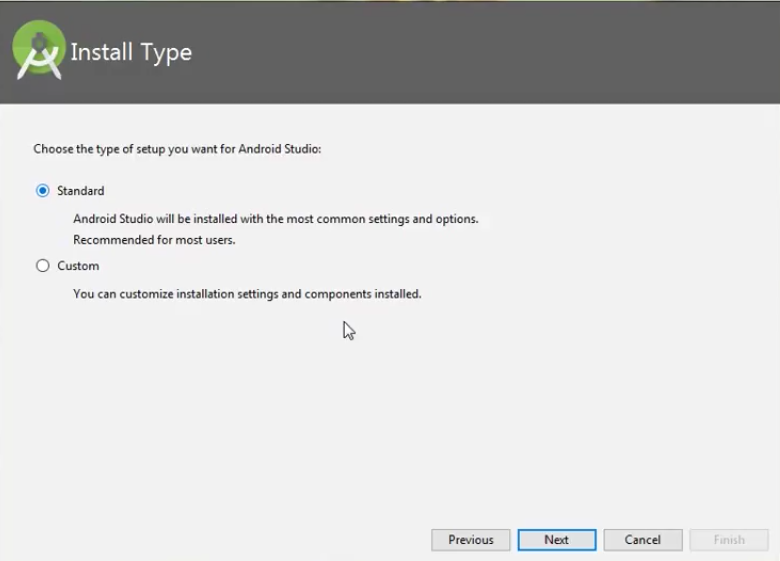
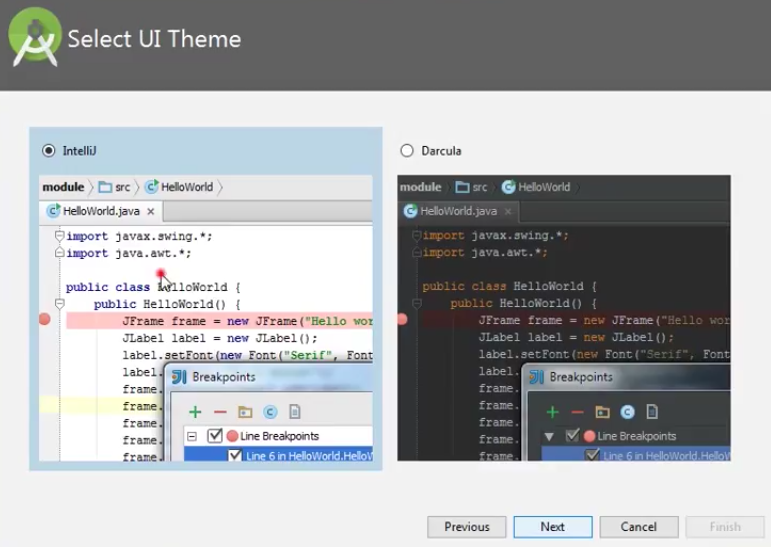
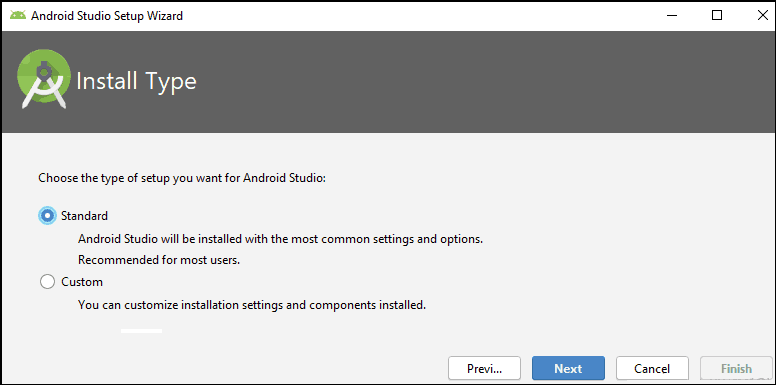
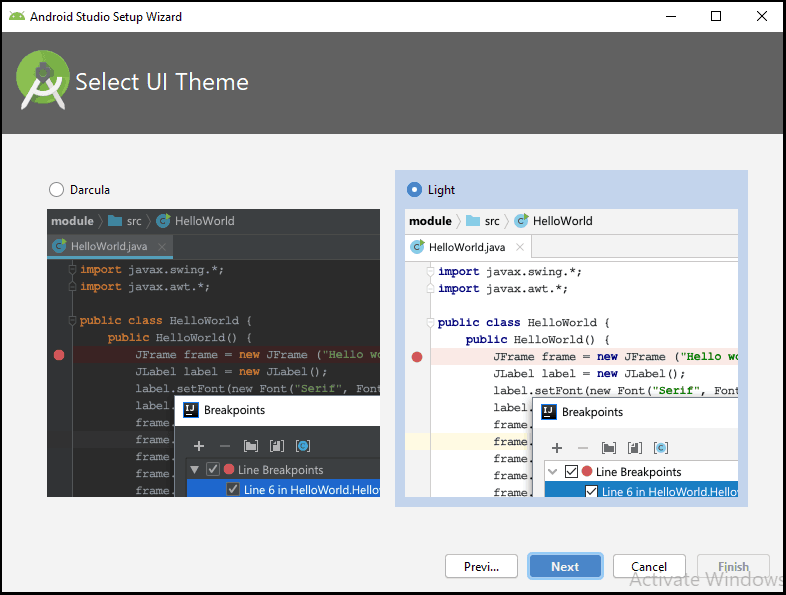
Choose Standard and click on Next. Now choose the theme, whether the Light theme or the Dark one. The light one is called the IntelliJ theme whereas the dark theme is called Dracula. Choose as required.
Click on the Next button.
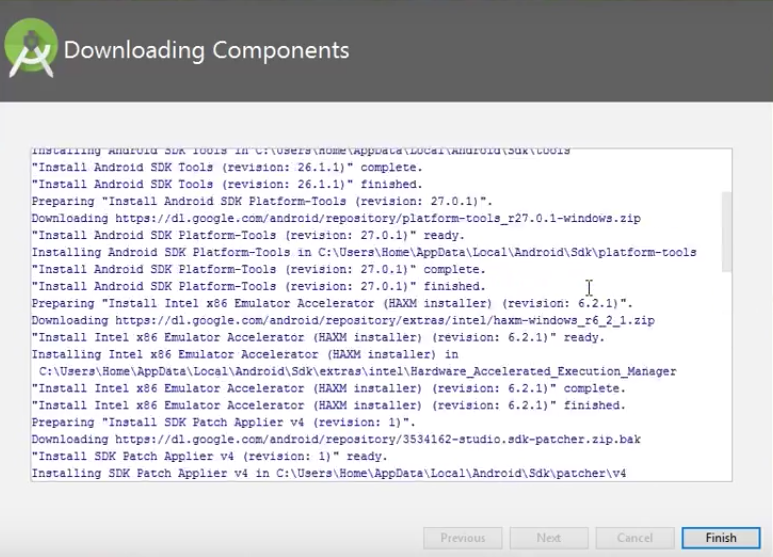
Step 8: Now it is time to download the SDK components.

Click on Finish. Components begin to download let it complete.
The Android Studio has been successfully configured. Now it’s time to launch and build apps. Click on the Finish button to launch it.
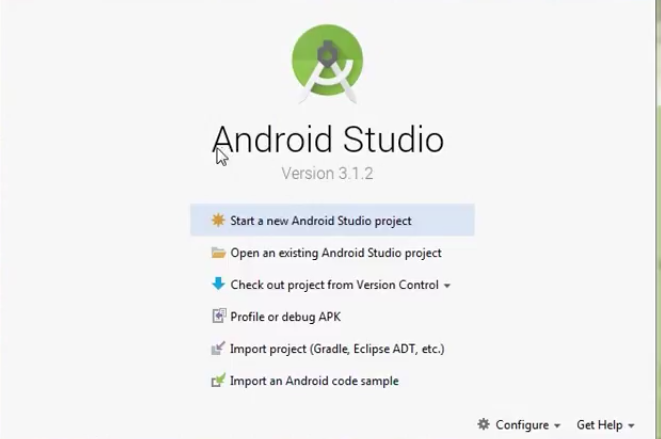
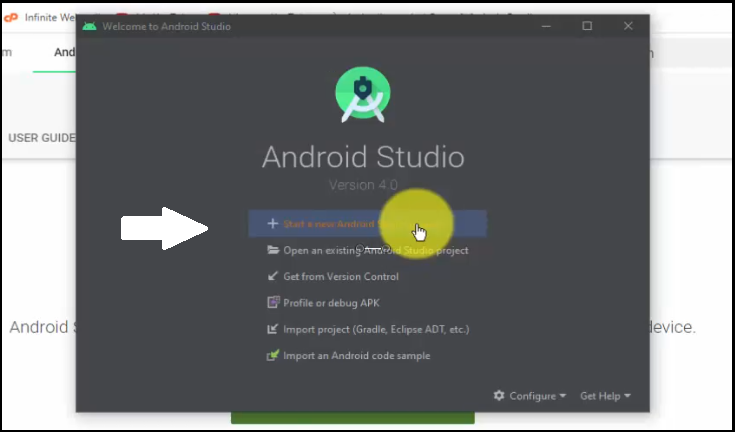
Step 9: Click on Start a new Android Studio project to build a new app.
To run your first android app in Android Studio you may refer to Running your first Android app.
| date | categories | tags | related-id | update | ||||||
|---|---|---|---|---|---|---|---|---|---|---|
|
2019-07-16 |
|
|
start-java |
2021-08-09 |
Установка Android Studio в Windows
В статье рассказывается, как установить Android Studio в Windows 10.
Предварительные напутствия
Настоятельно рекомендую устанавливать Android Studio на 64-битную Windows. На сайте Android Studio даже нет полноценного установщика на 32-битную версию. Раньше можно было архив скачать на 32-битную, но теперь и это не найти.
В идеале лучше использовать Windows 10 x64, но на Windows 8.1, 8, 7 тоже должно пойти.
Помните, что для Android Studio нужно минимум 8 Гб оперативной памяти (раньше было 2 Гб, а потом 4 Гб) и выше. Программа очень прожорливая. А на жестком диске нужно приличное количество места: после установки с эмулятором всё будет занимать от 15 Гб, а потом в процессе работы после установки библиотек и остального занимаемое место будет быстро расти.
Желательно иметь процессор от Intel, так как на процессорах AMD будут проблемы с эмуляторами Android. Но они решаемы.
И желательно, чтобы процессор имел поддержку виртуализации: сильно ускорит работу эмуляторов.
Если есть возможность и если пользователь на вашем компьютере называется по-русски, то поменяйте его на английское написание. Проблем с русскими именами будет много, причем не только в Android Studio. Очень много программ зарубежного производства рассчитаны на работу с файлами, в пути которых только латиница. Но если возможности нет для смены имени, то в статье будут описаны решения некоторых ваших проблем.
JDK
Если раньше нужно было самостоятельно устанавливать JDK, то теперь он устанавливается самостоятельно при установке Android Studio:

Но если всё таки что-то пошло не так, то подробно об установке JDK можно узнать в статьях: Установка JDK в Windows или Установка OpenJDK в Windows.
Скачивание Android Studio
Переходим по ссылке: https://developer.android.com/studio/.
Нажимаем на кнопку скачивания:

Соглашаемся с лицензией, прокручивая её, и скачиваем:

Установка 64-битной Android Studio
Запускаем скаченный файл:


Раньше рекомендовал менять пути установки Android Studio, но теперь же, наоборот, рекомендую устанавливать всё туда, куда хочет Android Studio, так как на большинстве машин теперь всё работает по умолчанию хорошо. И в следующем окне установщика можем оставить всё, как есть:

Далее по умолчанию, или выберете, где в меню Пуск будет находиться Android Studio:

И пошел процесс установки, в конце которой вы увидите окно окончания установки:


Установка предварительной сборки
Если хотите получить самую последнюю версию Android Studio с самыми последними нововведениями, то можно установить предварительную версию.
На сайте https://developer.android.com/studio/preview/ скачиваем превью версию программы:


Скачается не установщик, а архив, который мы распаковываем. И в папке bin находится файл studio64.exe, который и запускаем:

Первоначальная настройка Android Studio
При первом запуске Android Studio нас попросят выставить некоторые настройки. Сперва появится это окно:

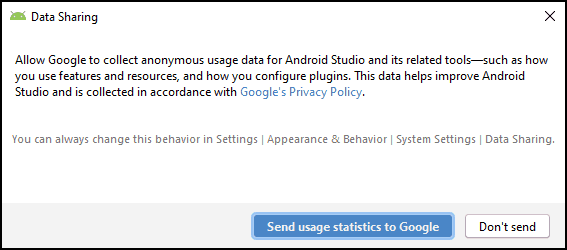
Спросят об отправке статистики в Google (я обычно соглашаюсь):


Выбираем стандартную настройку параметров:

Выбор светлой или темной темы:

Если Android Studio не смог найти сам JDK, то нужно ему помочь его найти:


Список того, что будет установлено:

Сама установка:

Хорошо, если в окне окончания установки не будет красного текста, который свидетельствует о том, что что-то не установилось. Например, обладатели AMD процессоров, возможно, увидят сообщение, что не установился HAXM. Это будет означать, что стандартный эмулятор вы скорее всего нормально не запустите, но Android Studio будет работать полноценно. Если у вас появились другие сообщения об ошибках, то это плохо (гуглите).
Окончание установки:

Создание нового приложения
Теперь создадим новое приложение:

Выбираем болванку нашего приложения Empty Activity:

Выберем настройки проекта:

Внимание! В пути к проекту, как и в его названии, не должно быть русских букв и пробелов! По умолчанию Android Studio сохраняет проекты в папке пользователя компьютера. И если у вас пользователь написан русскими буквами, то ничего не запустится!
Поэтому рекомендую создать какую-нибудь папку, где будете располагать свои проекты. Например, у меня это папка C:UserssergiOneDriveProjectsAndroid.
Когда выберите папку для ваших проектов (у меня C:UserssergiOneDriveProjectsAndroid), то придется вручную дописать название проекта в пути проекта, убирая пробелы из названия. Саму папку создавать не нужно: Android Studio создаст её сам. По итогу у меня получился путь C:UserssergiOneDriveProjectsAndroidMyApplication. В последующие разы Android Studio будет создавать проекты по нормальному.
Также в этом окне выбираем язык Java как основной язык проекта (по умолчанию будет выбран Kotlin), минимальную версию Android, на котором будет запускаться приложение (версия 5.1 вполне сойдет).
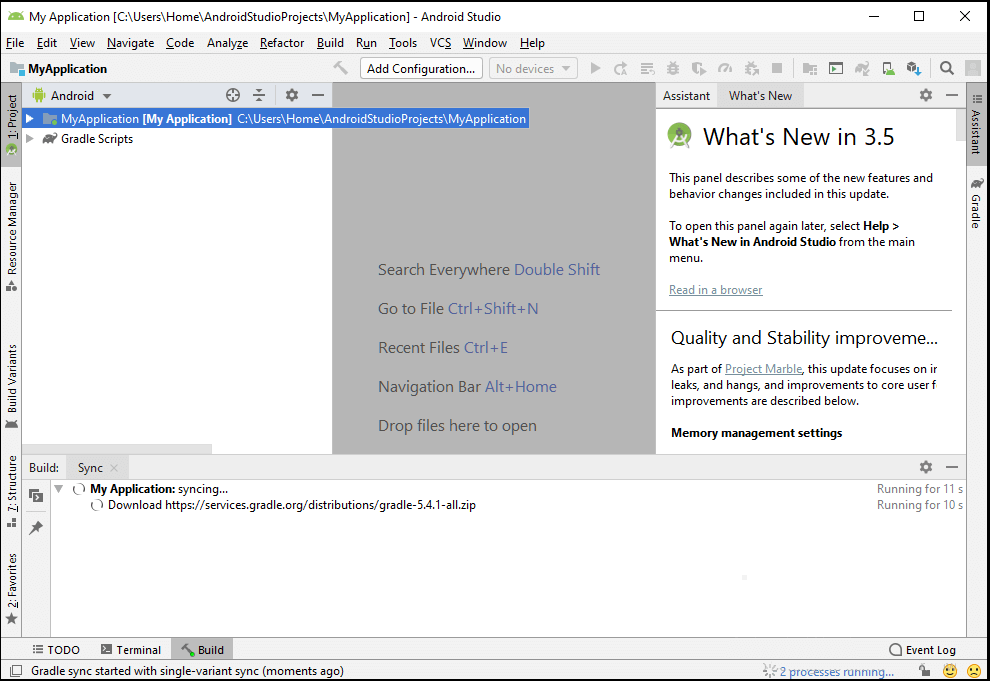
И после кнопки Finish должно наконец-то появиться окно редактора Android Studio:

Если надо, то закройте окно с подсказками:

В этот момент начнет работать Gradle, чтобы синхронизировать нужные библиотеки. И пока внизу не прекратиться крутиться кружок, то проект не готов к работе. Если у вас компьютер слабый, то крутиться кружок будет долго:

Внизу пропала полоса загрузки, а кнопка запуска приложения стала зеленой. Это означает, что всё прогрузилось:

Возможно (не обязательно) внизу появится сообщение об ошибке Install Tools ... and sync project:

Эту ошибку вы будете встречать часто, когда будете открывать чьи-то проекты программ на Android Studio, сделанных не на вашем компьютере. Бояться её не нужно: просто щелкните по этой синей надписи Install Tools ... and sync project: Android Studio просто говорит, что ему нужны библиотеки SDK, которых нет у вас, и предлагает их скачать.
Для тех, у кого пользователь назван русскими буквами
Если у вас пользователь назван русскими буквами, то в предыдущем разделе столкнетесь с тем, что Gradle не синхронизирует проект, и вообще он на всё ругается. Дело в том, что по умолчанию Gradle в новых версиях Android Studio ставит в отдельную папку, которая находится в папке пользователя, который у вас написан по-русски.
Вам нужно поменять папку на другую. Создадите, например, папку C:Androidgradle. Потом идите в настройки Android Studio:

Там находим настройки Gradle. Видим, что Gradle сейчас находится в папке пользователя:

Меняем его на путь к папке, которую мы создали, например, это C:Androidgradle:

Но после нажатия OK ничего не произойдет (иногда слетает светлая тема оформления). Нужно Gradle синхронизировать принудительно. Для этого наверху есть кнопка Sync Project with Gradle Files:

И начнется небыстрый процесс скачивания и установки gradle в новую папку с последующей синхронизацией проекта:

Чтобы убедиться, что всё прошло хорошо, то можно посмотреть папку C:Androidgradle, где должны появиться следующие папки:

Если слетит тема оформления, то нужно её вернуть (File → Settings...):

Настройка SDK
Надеялись, что всё установили? Нет, теперь нужно настроить SDK. Для этого из Android Studio нужно перейти в SDK Manager. Это можно сделать так:

В разделе SDK Platforms вы выбираете те версии Android, которые вам потребуются. Можно, например, выбрать последнюю и минимальную версию, под которой всё должно работать, как показано на скриншоте ниже:

В SDK tools выберете Google USB Driver (чтобы можно было подключать планшеты и смартфоны), Google Web Driver:

Нажимаете на OK и начинается процесс установки:


Создание виртуального устройства
Если у вас нет физического Android устройства, или же вы хотите своё приложение протестировать на конкретных устройствах с конкретной версией Android, то вам нужно будет виртуальное устройство.
Идем в AVD Manager:

Создаем новое виртуальное устройство:

Выбираем, какое устройство будем создавать. Допустим, мы хотим создать эмулятор Pixel 2:

Внимание! Важный шаг. Для эмулятора нужен образ версии Android, который будет устанавливаться на эмулятор. И вам нужно будет его скачать, нажав на Download. Например, нам нужен Android 10.0:

Рекомендую выбирать версию Android от 6 и выше. Например, выбирал однажды версию более низкой версии, но при попытке запуска приложений на эмуляторе возникала ошибка такого вида:

Обычно такая ошибка решается отключением Instant Run в настройках, но в тот раз не помогало. Так что еще раз рекомендую выбирать версию Android от 6 и выше (с ними у меня проблемы не возникли).
Если вы обладатель AMD процессора, то вполне вероятно, что образ Android x86 не заработает у вас, поэтому нужно выбирать (после неудачной попытки с образом x86) образ Android из другой вкладки под armeabi-v7a. Но сразу предупреждаю: если у вас эмулятор под armeabi заведется всё-таки, то работать он будет медленно, и было на практике много случаев, когда эмулятор потом так и не запускался:

После нажатия на кнопку Download начнется скачивание образа:

Возможно, что перед этим вас попросят согласиться с лицензией:

После этого образ Android будет доступен для выбора и можно продолжить создание виртуального устройства:

Здесь всё можно оставить по умолчанию:

Попробуем запустить эмулятор:

Если через какое-то время у вас в эмуляторе запустился полноценный Android, то всё замечательно:

Можно пока его не закрывать, так как будем его использовать для запуска нашего приложения. Но для будущего есть рекомендация: закрывать эмулятор лучше через крестик, а не через кнопку питания, которая находится чуть ниже: практика показывает, что при отключении питания потом эмулятор может не запуститься:

Другие эмуляторы
Если родной эмулятор от Android Studio не запускается или тормозит так, что работать нельзя, то можно попробовать сторонние эмуляторы, благо их много.
BlueStacks — известный эмулятор, предназначенный в первую очередь для запуска игр Android на ПК, но его можно использовать и для Android Studio.
Genymotion — по работе похож на родной эмулятор Android Studio. Можно устанавливать образы разных версий Android.
Nox — еще один популярный эмулятор от китайцев, которым лично много пользовался.
Запуск приложения
Теперь у нас Android установлен и настроен. В процессе мы создали приложение до этого. Давайте его запустим. Для этого щелкаем по зеленому треугольнику в панели инструментов:

Или из главного меню вызвать такую же команду:

Обратите внимание на то, что раньше в Android Studio после нажатия на кнопку запуска предлагалось выбрать устройство, на котором будет происходить запуск, то сейчас вначале нужно выбрать устройство в выпадающем меню слева от кнопки запуска:

Если вы выключили эмулятор, то можно либо его запустить через AVD Manager, либо тут выбрать эмулятор и по нему щелкнуть. Но если у вас устройство медленное, и эмулятор запускается долго, то лучше его запустить заранее.
Вас могут попросить что-нибудь дополнительно установить (привыкайте к этому):


Ждем, когда Gradle соберет проект, сформирует APK файл и загрузит его на устройство:

Ошибки при запуске
В реальности при установке Android Studio, при запуске приложений вас может ожидать букет ошибок. Причем они постоянно разные от версии к версии Android Studio. Могут быть проблемы в совместимости JDK и Android Studio, проблемы с операционной системой, учетными записями и так далее.
Всегда лучше загуглить текст ошибки, чтобы почитать, что говорят об этом люди.
На июль 2021 года, например, при создании пустого приложения и его запуске появляется ошибка:

Для исправления этой ошибки, нужно внести изменения в файл build.gradle (обратите внимание, что таких файлов два: вам нужен второй). Нужно в трех местах число 31 поменять на 30:

А потом синхронизировать Gradle:

Скорее всего, когда вы читаете эту статью, то именно этой ошибки не будет.
Как запустить на реальном физическом устройстве
Вначале включим режим Для разработчиков на телефоне.
Зайдите в настройки телефона и в разделе О телефоне найдите пункт Номер сборки. Щелкните по нему 7 раз. На скриншоте ниже мне пишут: «Не нужно, вы уже разработчик», — так как я уже нажимал 7 раз на этот пункт в прошлом:

Теперь в настройках телефона уровнем выше должен появиться пункт Для разработчиков:

В нем нужно включить пункт Отладка по USB:

Теперь, если вы включите свой смартфон через кабель к компьютеру, то устройство должно увидеться в списке устройств:

Но оно не получится запустить приложение на нем, так как устройство имеет подпись Unknown Device. Это возникает по причине того, что на самом устройстве мы не разрешили компьютеру подключение. Разрешите:

Если вы пропустили это окно, то вытащите кабель и вставьте его обратно.
После разрешения доступа устройство должно появиться полноценно:

Теперь его можно выбирать при запуске приложения на телефоне:

Сейчас я описал алгоритм подключения устройства в общем случае на примере Windows 10 и OnePlus 3t с Android 8.0. У вас подключение может отличаться. Лучше загуглить подключение вашего устройства к Android Studio. Пример запроса: Galaxy A6 connect Android Studio Windows 7.
Например, на Windows 7 нужно устанавливать драйвера телефона. Где взять для некоторых марок телефонов можно найти тут: https://developer.android.com/studio/run/oem-usb.
Для Samsung телефонов на Windows 7 драйвера автоматически ставятся при установке приложений Samsung (устройства с версией Android до 4.2 включительно) и Samsung Smart Switch (устройства с версией Android выше 4.2).
Windows 10 обычно все драйвера находит автоматически.
Дополнительные настройки
Настройки, описанные в данном разделе, опциональны, и можно их вообще не трогать.
Переходим в настройки приложения:


В разделе General я ставлю возможность увеличения шрифта колесиком мыши при нажатом Ctrl, а также устанавливаю правило, что при сохранении файла все лишние пробелы справа у всех строк будут удаляться.
Пример приложения
В статье Сложение двух чисел в Android Studio на Java (Android приложение) написано как вы можете написать простое приложение по сложению двух чисел.
Introduction
The official Integrated Development Environment (IDE) for developing Android Apps is Android Studio, which Google supports. Java was replaced by kotlin on May 7, 2019, as a preferred language for developing Android Apps. But still, Java is being used for developing Android Apps. Android Studio 3.6.1 has the following features.
- Gradle-based build support.
- UI components can be created by drag and drop features in the layout editor.
- Common Android designs and components can be created by Template-based wizards.
- Built-in support for Google Cloud Platform enabling integration with Firebase Cloud Messaging (Earlier ‘Google Cloud Messaging’) and Google App Engine.
- Lint tools to catch performance, usefulness, version compatibility, and other problems.
This tutorial will show you the system requirements and various steps on how to download and install Android Studio in Windows 10.
System Requirements
Before downloading and installing Android Studio, the following requirements are essential.
- Operating System Version — Microsoft Windows 7/8/10 (32-bit or 64-bit).
- Random Access Memory (RAM) — Minimum 4 GB RAM and 8 GB RAM recommended.
- Free Disk Space — Minimum 2 GB and 4 GB recommended.
- Minimum Required JDK Version — Java Development Kit (JDK) 8.
- Minimum Screen Resolution — 1280 * 800.resolution
Download and Install Android Studio
Step 1
To download the Android Studio, visit the official Android Studio website in your web browser.
Step 2
Click on the «Download Android Studio» option.
Step 3
Double click on the downloaded «Android Studio-ide.exe» file.
Step 4
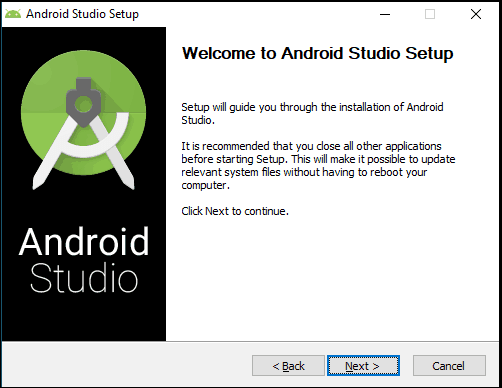
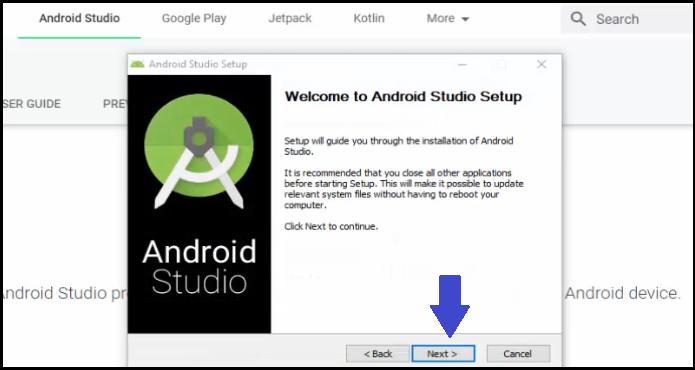
«Android Studio Setup» will appear on the screen and click «Next» to proceed.
Step 5
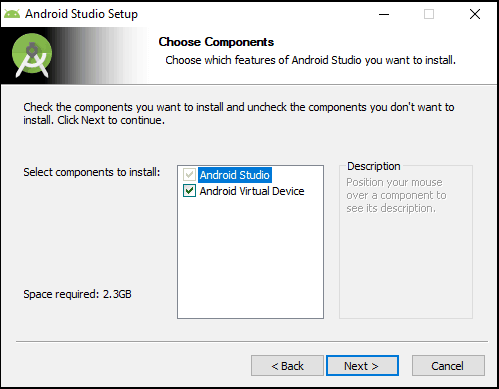
Select the components that you want to install and click on the «Next» button.
Step 6
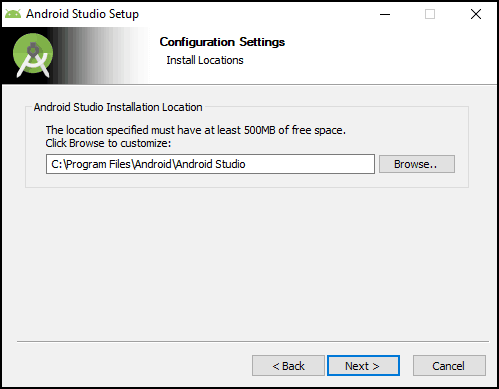
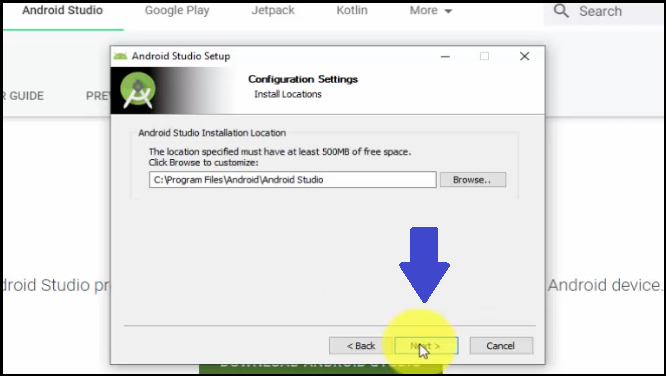
Now, browse the location where you want to install the Android Studio and click «Next» to proceed.
Step 7
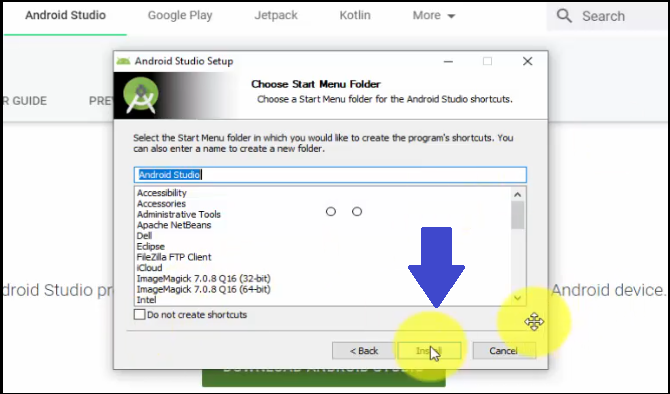
Choose a start menu folder for the «Android Studio» shortcut and click the «Install» button to proceed.
Step 8
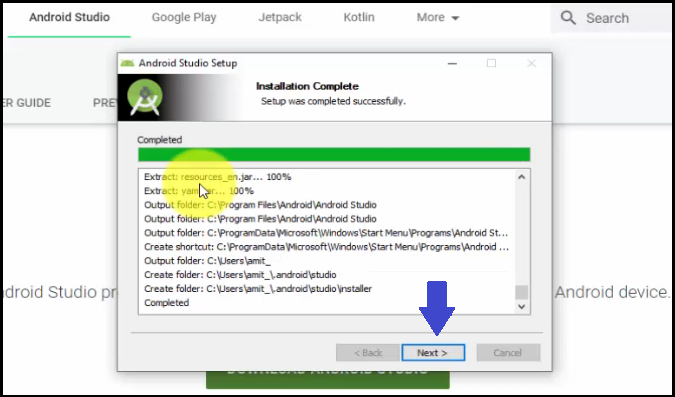
After the successful completion of the installation, click on the «Next» button.
Step 9
Click on the «Finish» button to proceed.
Now, your Android studio welcome screen will appear on the screen.
Android Studio Setup Configuration
Step 10
«Android Studio Setup Wizard» will appear on the screen with the welcome wizard. Click on the «Next» button.
Step 11
Select (check) the «Standard» option if you are a beginner and do not have any idea about Android Studio. It will install the most common settings and options for you. Click «Next» to proceed.
Step 12
Now, select the user interface theme as you want. (I prefer Dark theme (Dracula) that is most liked by the coders). Then, click on the «Next» button.
Step 13
Now, click on the «Finish» button to download all the SDK components.
And, the downloading and installation process of components gets started.
Step 14
After downloading all the necessary components, click on the «Finish» button.
Congrats, your Android Studio has been successfully installed in your system and you can start a new Android studio project.
Conclusion
By following the above steps, you can download and install Android Studio in Windows 10.
I hope you enjoyed this article. Follow C# Corner to learn more new and amazing things about Windows 10.
Thanks for reading this article.
Reference
https://en.wikipedia.org/wiki/Android_Studio
In this How to install Android Studio on Windows guide, we will show you how to download, install & setup Android Studio. This tutorial is installing the Android Studio Version 3.5.1 on the Windows 10 OS, but steps should work equally well with other flavors of windows like Windows 7 & Windows 8. First, we will check the Prerequisites required to install Android Studio. Next, we download the Android Studio. Finally, we will show you how to install Android Studio
Table of Contents
- What is Android Studio
- How to install Android Studio on Windows
- Prerequisites
- OS & Hardware
- JDK
- Downloading Android Studio
- Installing Android Studio
- Setup Android Studio
- Starting Android Studio
- Prerequisites
- Summary
What is Android Studio
Android Studio is an integrated development environment to build, develop, test and distribute Android-based applications. The IDE is developed & maintained by google. It is built on top of JetBrains IntelliJ IDEA software.
We can develop apps for android in many ways. For Example, you can use Ionic, React Native, NativeScript, Java, Kotlin and now the latest flutter. Each employs different techniques to build the App. Frameworks like Ionic uses the Hybrid model, where you can build apps using HTML & Javascript and runs inside a native app shell in the device. The Apps using Java or Kotlin can runs natively in the device. The frameworks like React Native & NativeScript, which allows us to write in Javascript but converts them to the native code.
The Android Studio is preferred IDE when you choose Java or Kotlin as the language. But, even if you choose any other tool like Nativescript or React Native, you still need to install & Manage Android SDK and Android Emulator. These tools are part of the Android Studio and are installed along with it. Hence It is necessary to install the Android Studio.
Prerequisites
OS & Hardware
- Microsoft® Windows® 7/8/10 (32- or 64-bit)The Android Emulator only supports 64-bit Windows (learn more).
- 4 GB RAM minimum, 8 GB RAM recommended
- 2 GB of available disk space minimum
- 4 GB Recommended (500 MB for IDE + 1.5 GB for Android SDK and emulator system image)
- 1280 x 800 minimum screen resolution
JDK
Android Studio since version 2.2 is comes bundled with OpenJDK 8. Hence there is no need to install the JDK separately. It is recommended to use the OpenJDK.
If you have an old Android project’s, which uses the JDK you can convert them to use the OpenJDK from the Android Studio menu, File > Project Structure -> SDK Location -> JDK location and check the Use embedded JDK
Downloading Android Studio
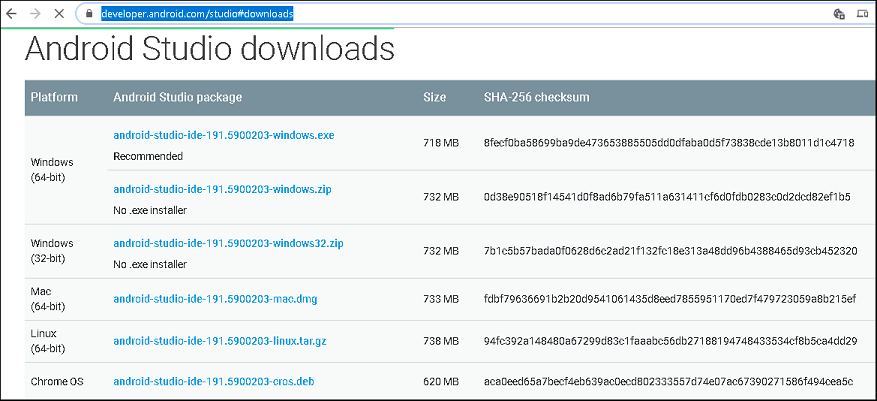
You can download it from the link https://developer.android.com/studio#downloads
Under downloads for windows, you can either download 64 bit or 32-bit versions. The 32-bit version can only be downloaded as a zip file, while 64 bit is available as exe installer.
The current version as of this writing this article is Android Studio 3.5.1
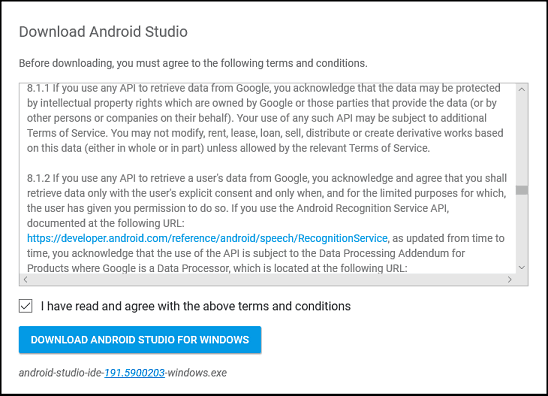
Next, accept the license agreement and click on “Download Android Studio for Windows” to begin download.
For 32 Bit Windows
1. Go to C:Program Files.
2. Create a folder named Android.
3. Unzip the downloaded Zip file
4. Copy the folder Android-Studio from the unzipped file to the folder C:Program filesAndroid.
5. Rename the folder from Android-Studio to Android Studio
6. Locate the Studio.exe and create a shortcut on the desktop
Installing Android Studio
Double click on the downloaded installer to begin the Installation Process.
Click Next on Welcome to Android Studio Setup screen
After the welcome screen, you will be presented with the option to choose the components. Select both the option and click on Next.
Next, choose the installation location. Accept the defaults and click on Next to continue.
The next window is about selecting the start menu folder. Accept the defaults and click on Install to begin the installation.

Completing the Android Studio setup screen appears once the installation completes.
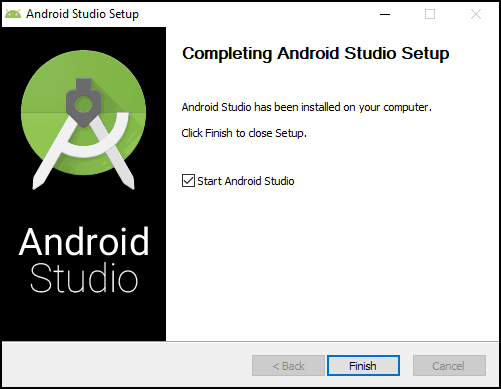
Select the Start Android Studio and Click on Finish. The Android Studio starts for the first time
Setup Android Studio
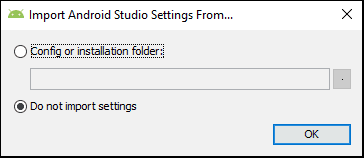
When you start Android Studio for the first time, it will ask you to Import the Studio settings. Since this is a fresh installation choose not to import settings and click on OK.
You may be asked to send the usage statistics to Google. choose accordingly.
The Android Studio will download a few components and then displays the Android Studio Setup Wizard dialogue box as shown below. Click Next to continue.
The second dialogue box asks for the install type. Select the default i.e. Standard and click on next to continue to next window.
The next up is the select UI Theme screen with two options Light & Darcula. Let us keep the default Light theme.
Finally, the Verify Settings dialogue appears, where you can verify the settings here. Click on Previous if you want to change any of the settings else click on finish to complete the installation.
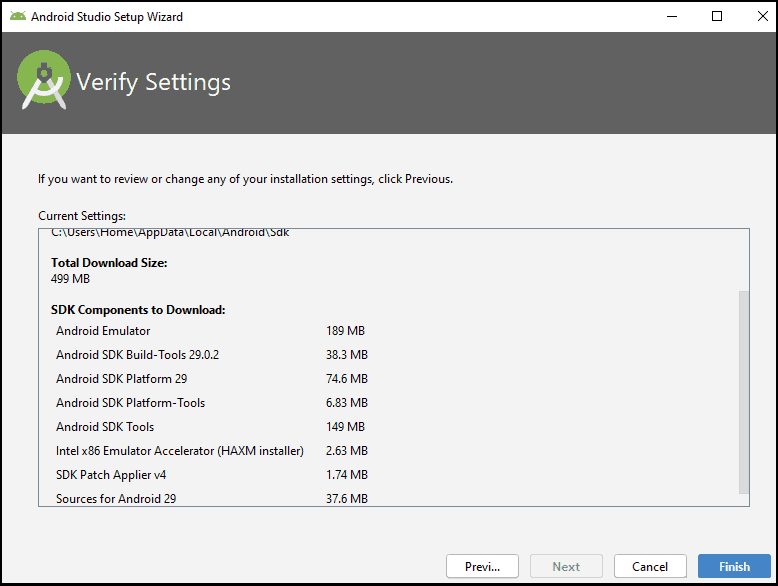
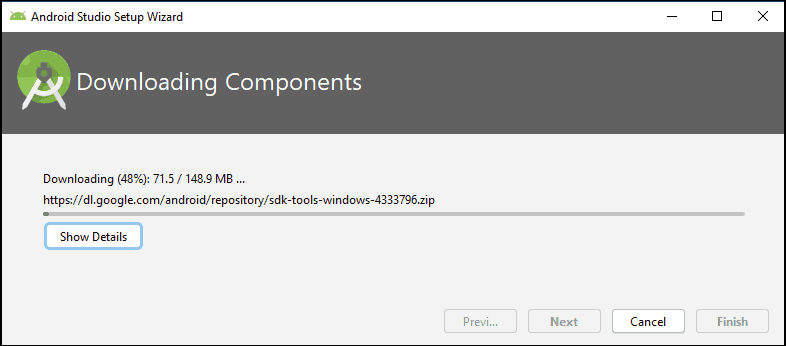
Now, the Android Studio setup wizard starts to download the various components and installs them in the system. This will take time depending on your internet connection.
You may see HAXM Installation Failed error here. It will happen under the following circumstances
- If the processor is non-intel based.
- If you have not disabled the Hyper-V Manager
Ignore them for now and continue.
If you are on intel based CPU, then HAXM is very important. without which Android Virtual Device (AVD) runs very very slowly.
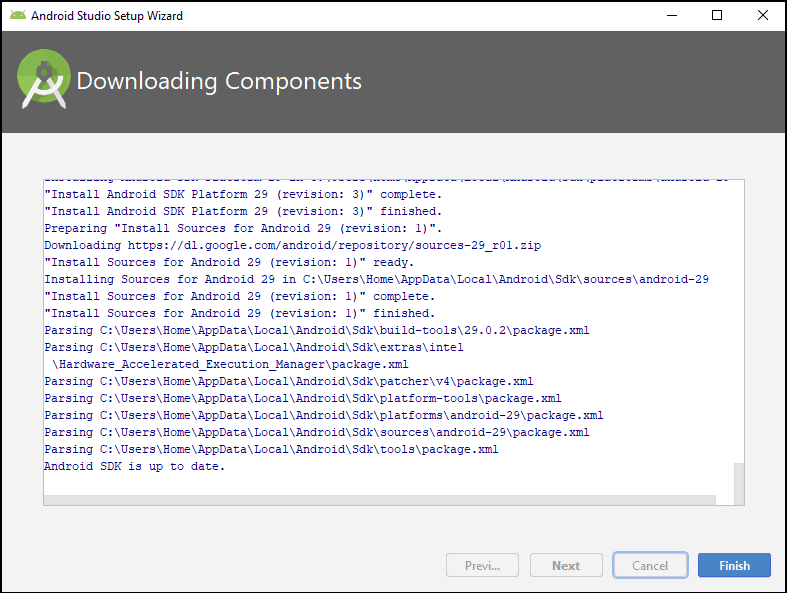
The following screen appears once all the essential components are downloaded and installed. At this point the Android Studio installation is complete.
Starting Android Studio
Once the installation and initial setup is complete, the Android Studio starts. Since it is the first time you are starting the Android Studio, it will be present you with the Welcome to Android Studio screen as shown below
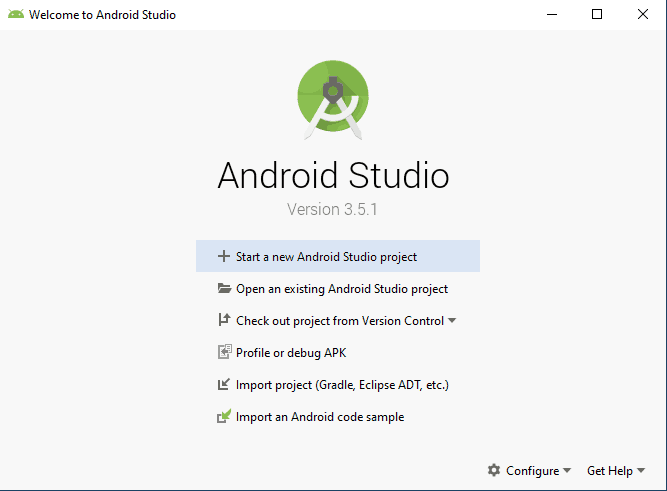
Usually, Android Studio automatically opens the last Opened Project. But since it is a new Android Studio installation it will not open until you create a new project or open an existing one. Hence we will create a new project. Click on Start a new Android Studio Project.
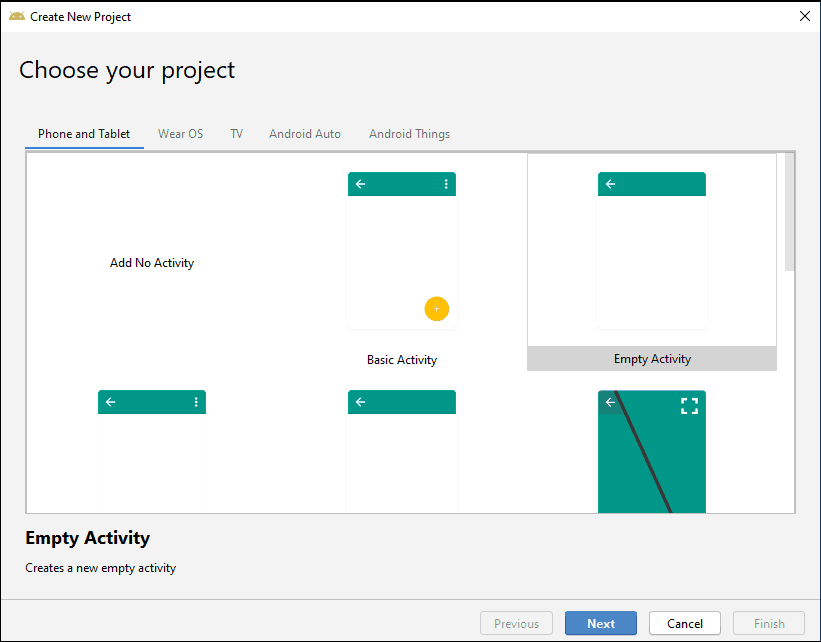
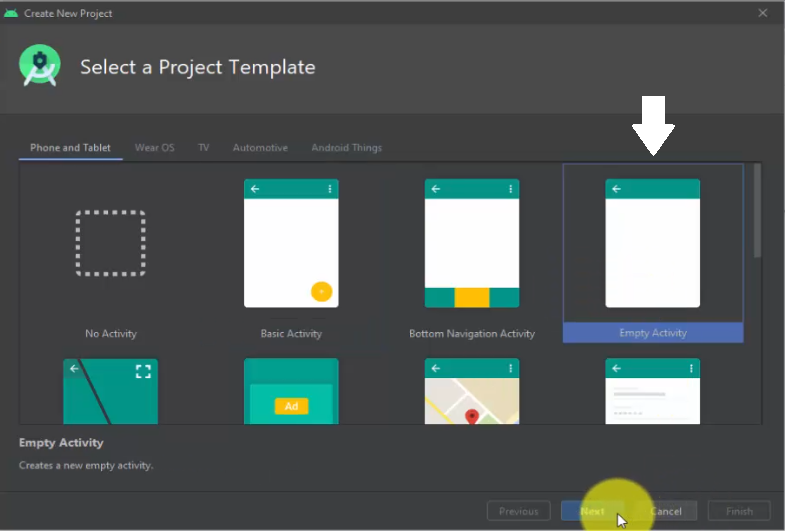
The Create New Project appears. The first option is to select the type of activity. Choose Empty, which is the default and click Next.
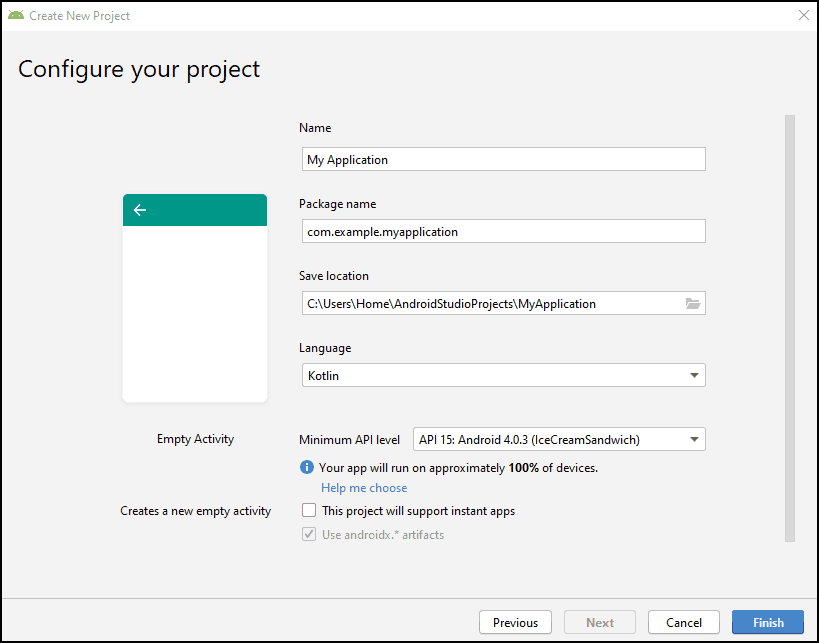
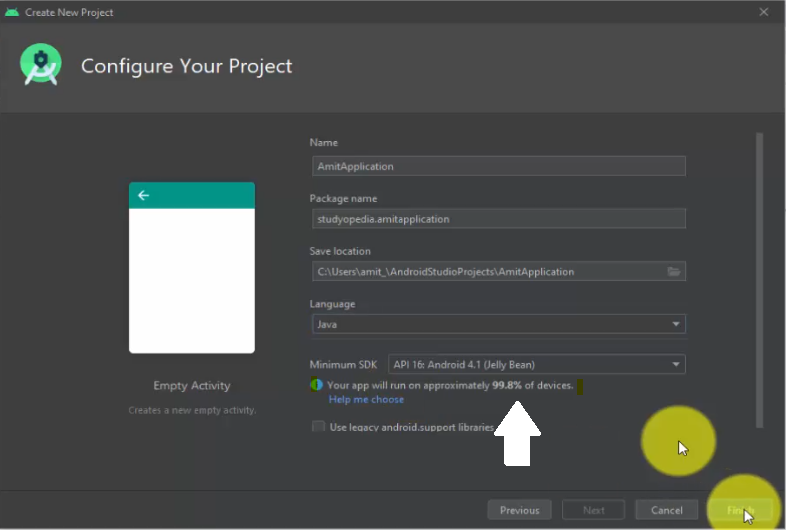
Configure your project is the next screen. It will ask for the name of the Application, Package Name, Project path, language, and API Level. Keep the defaults and click on Finish.
Android Studio may start a few more downloads. Wait for it to finish. Once everything is downloaded and installed, the new project is created and you are taken to the Android workspace.
Now, you have completed all the installation steps and Android Studio is now ready to use
But before starting to build the Android Apps, there a few more things to be taken care of like Installing & Setting SDK & Android Emulator. We have covered them in the following Tutorials.
Android SDK Tutorial
Summary
We learned how to download, install and setup Android Studio in a Windows OS. We used the Windows 10 OS, But it will work any other flavors of windows like Windows 7 or Windows 8.
In the world majority of the smartphone users use the Android operating system on their devices. However, in addition to that developers are also focused to bring their applications for Android users first. So large user community helps in getting proper feedback, reviews, new features, etc. All in all, becoming an Android developer has many advantages. But to become an Android developer first you’ll need Android studio installed on your computer. In this article, we’ll tell you How to Install Android Studio on Windows 10.
If you’re finding it difficult installing Android studio on windows 10 then you can refer to the below video for a complete guide.
Download Android Studio
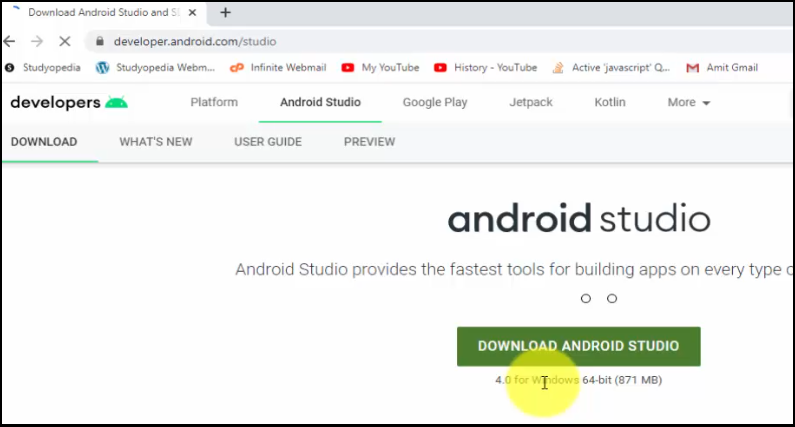
1) Firstly we will download the latest version of Android studio available on the internet. Follow the below-provided link to download Android Studio for window 10. There simply click on the green Download Android Studio button.
Download Android Studio Here: https://developer.android.com/studio

2) After that a licence agreement will show up. Simply tick the agreement checkbox and click on the Download Android Studio For Windows button. within few seconds Android studio will start getting downloaded.

Install Android Studio on Windows 10
1) Open up the folder where the downloaded .exe file is available, double click on the file to start the installation wizard.

2) In the welcome screen simply click on the Next button to continue the installation process of Android studio.

3) In the select components window tick the checkboxes of both Android Studio & Android Virtual Device and click on the Next button.

4) After that you’ll be asked to choose the installation folder for Android studio, here we will go with the default installation folder so click on Next.

5) Now, simply click on the Install button and your Android studio will start getting installed.

6) after the installation gets complete click on the Next button and again after that click on the Finish button.

Congrats you’ve successfully installed Android Studio on your Windows 10 machine. For creating your first Android app check out the video tutorial for a complete guide.
Also Read: How to Run SFML in Visual Studio Code on Windows 10
Skip to content
How to install Android Studio on Windows 10
In this tutorials, we will see how to install Android Studio on Windows 10 Operating system.
Download Android Studio:
Download the latest version of Android studio from official website.
Install Android Studio :
To install Android Studio, in prior we should have JDK on our machine and set up JAVA_HOME. If you do not have JDK setup yet, follow our previous articles how to install Java8 on windows 10 and how to set JAVA_HOME on Windows 10.
After downloading the android-studio-ide-171.4443003-windows.exe file, follow the below steps to install.
Step – 1 : Right click on downloaded .exe file and Run as Administrator.
Step – 2 : You will see the below Setup wizard.

Click in Next >
Step – 3 :

Select Android Virtual Device and click on Next >
Step – 4 :
It will show the installation path, default it could be in C:Program FilesAndroid, If you want to change the installation directory, you can freely use the Browse button and give the location and click on Next.

Step -5 :

Click on Install.
Step -6 :
Actual installation in progress..

After completing installation process click on Next >
Step – 6 :

Tick on Start Android Studio and Click on Finish.
This is how, we can install Android Studio on windows 10, as we tick on Start Android Studio option, the Android Studio will launch automatically as soon as we click on Finish button.
Now Lets move on to Android Studio Setup.
Step – 7:
Here is the Welcome Screen.

Click on Next.
Step – 8 :
It will ask for the Android Studio installation type. Mostly we can go with Standard setup, if you have any specific configuration setup then you can select the Custom option to manual setup. Now I am choosing Standard Setup.

Click on Next
Step -9 :
It will ask for the UI Theme, by default it would be IntelliJ, then directly you can click on Next.

Step -10 :
It will ask for the confirmation for installation setting wizard.

click on Next
Step -11 :
It will download all necessary components to launch the Android Studio and setting up the environment.

After download and installation click on Finish.
We have successfully installed the Android Studio and ready to kick off the First Basic Hello World Android Project.
Happy Learning 🙂
Share a word.

Related Posts
Page load link
Posted at 14:25h
in Android
1 Comment
To create, run, and test Android Application on your Windows 10, Mac and Linux Operating System, you need to install Android Studio IDE. Android Studio is an open source IDE, developed by Google and JetBrains to run Android applications. It introduced by Google in 2013 and the current version is 4.1.
In this lesson, we will see how to setup and install Android Studio. At first, we will install Java JDK, since Android Studio setup requires the JDK setup. After that, we will also see how to create a new project/ Android application in Android Studio and run it. We will also create Android Virtual Device (AVD) to run and test our apps. Listing the steps:
- Step 1: Download and Install Java
- Step 2: Download and Install Android Studio
- Step 3: Android Studio Setup initiates
- Step 4: Create a new project/ Android application
- Step 5: Create AVD (Android Virtual Device)
- Step 6: Run first project/ Android application
Let’s begin with installation of Android 4 on Windows 10:
Download and Install Java
For Android Studio IDE installation, you need to Install Java. Refer, our tutorial on how to setup Java on Windows 10. Set the JAVA JDK and remember the path. Our Java JDK path is:
|
C:Program FilesJavajdk—13 |
Note: The JAVA JDK path will be used in the next section, wherein we will install Android Studio. We need to fill the path while installing.
Download and Install Android Studio
To download and install Android Studio on 64-bit Windows 10 OS, at first, visit the Android Developer’s official website. Here, click Download Android Studio as in the below screenshot:
After clicking, you will be shown the terms and conditions, read it and Accept. On clicking, a new button Download Android Studio for Windows, is visible:
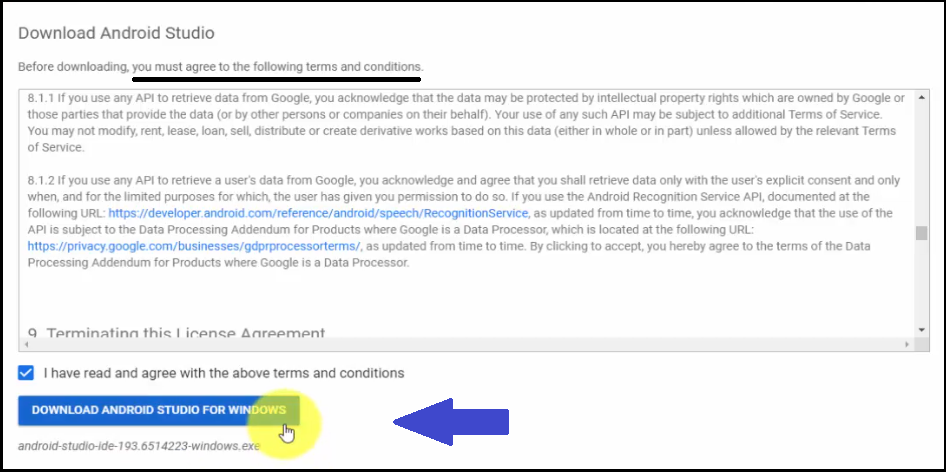
Click on it and the exe file for Android Studio android-studio-ide-193.6514223-windows.exe will generate and begin downloading:
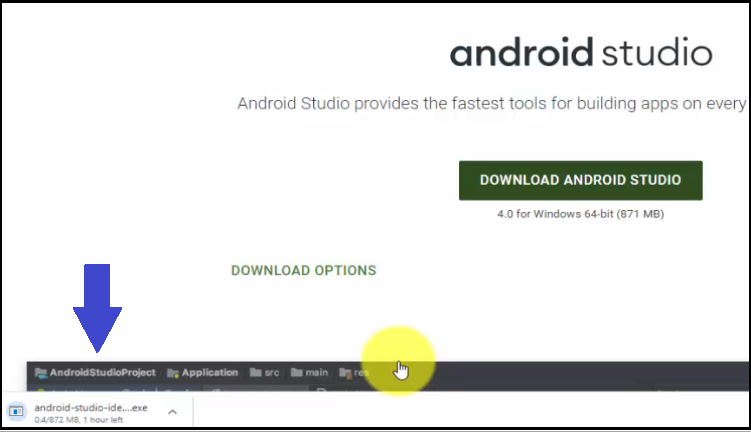
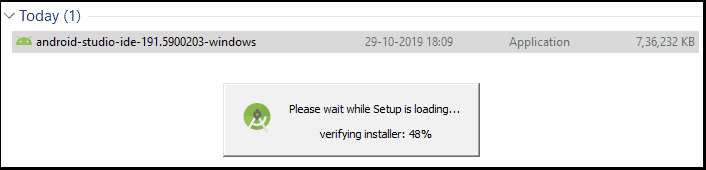
After completing the download, double-click on the exe file and the installation begins as in the below screenshot:
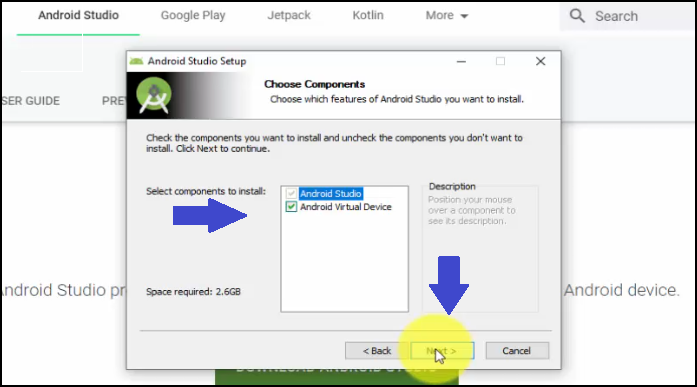
Click Next, and now Choose Components. Keep as it is i.e. Android Studio and Android Virtual Device and click Next:
Now, set the Install Location i.e. where the Android Studio will get installed. Keep as it “C:Program FilesAndroidAndroid Studio” and click Next:
Now, a Start Menu settings dialog box will be visible. This is for Android Studio’s shortcut. Keep the default and click Install as in the below screenshot:
After clicking Install above, the installation begins. It will take some seconds/minutes based on the Internet speed. The Installation complete as shown in the below screenshot. Click Next:
Android Studio installation completes. Click Finish. Since the Start Android Studio checkbox is by default checked, it will open immediately after clicking Finish:
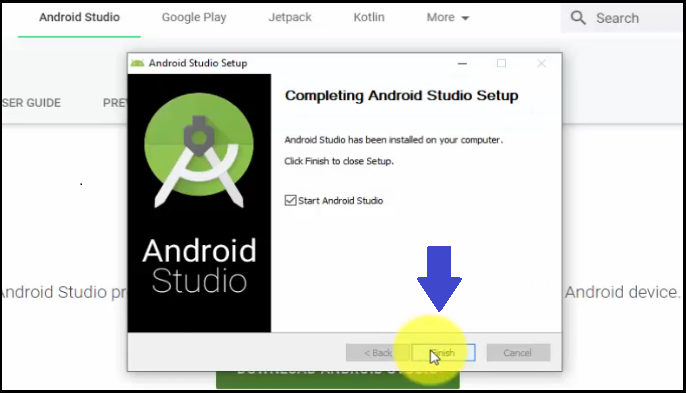
Now, a new dialog box Import Android Studio Settings From… would be visible. Select “Do Not Import Settings”, since we do not have any previous installation of Android Studio on our system. Click OK:

Android Studio Setup Initiates
After completing installation of Android Studio, now we need to work through the setup wizard.
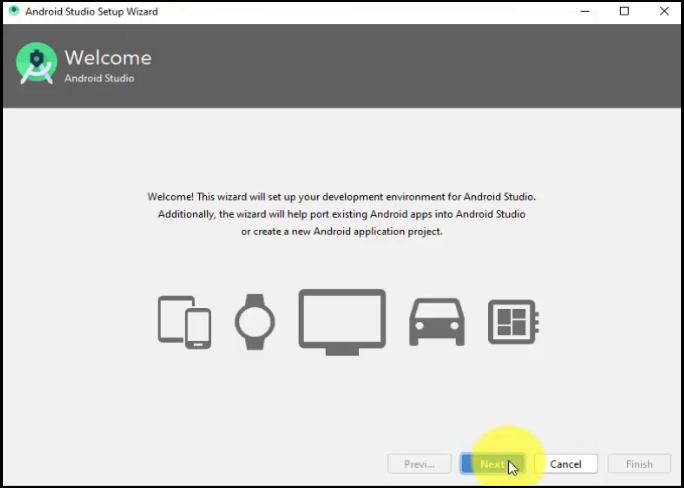
Now, after clicking OK above, the Android Studio Setup Wizard would be visible. This will set up your Development Environment for Android Studio.
Click Next:
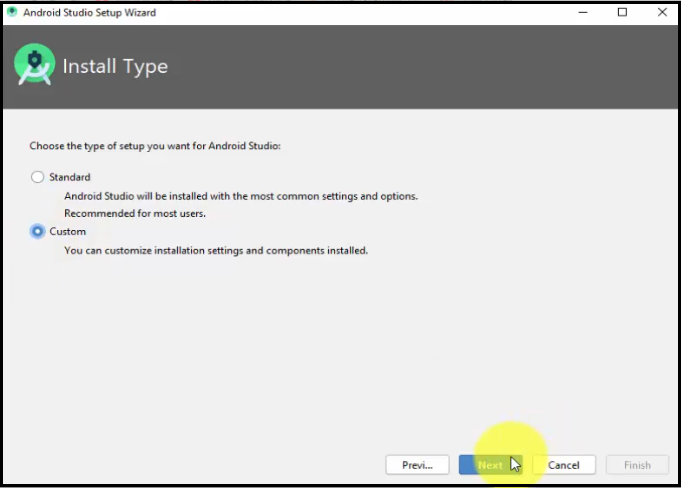
Now, choose the Install Type. We will select Custom and click Next:
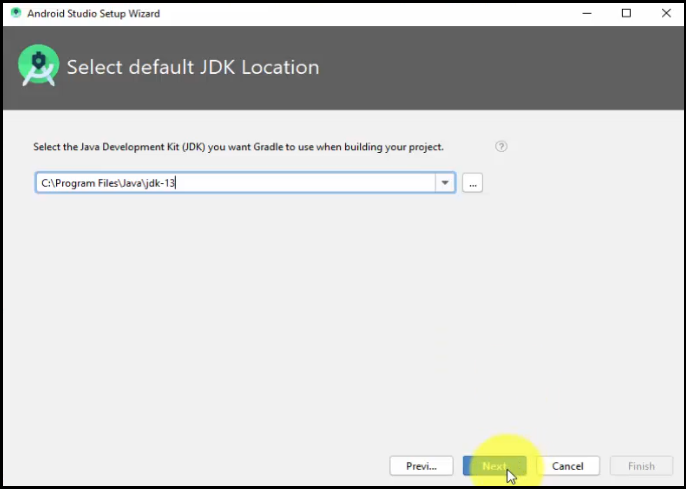
Select the default JDK location. Above, we saw where we installed JAVA JDK. We have to insert the same path here i.e.
|
C:Program FilesJavajdk—13 |
By clicking the … i.e. three dots, we have set the same Java JDK path:
Next, select the theme. We selected the Dracula dark them. Click Next.
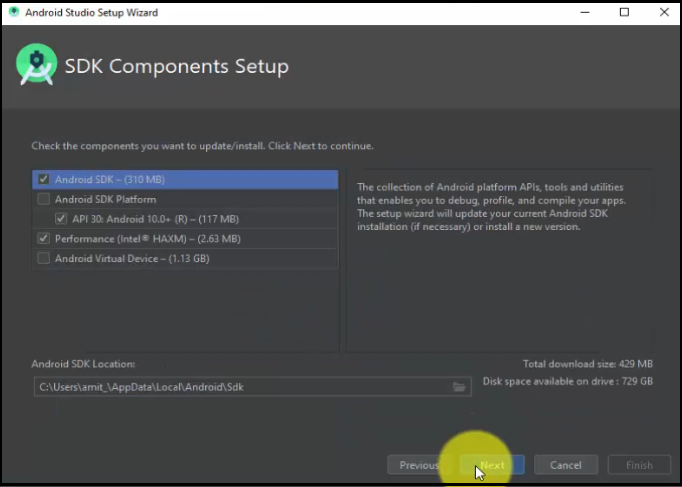
Now, select the SDK components. Keep the default i.e. Android SDK, AP30, Intel HAXM and click Next:
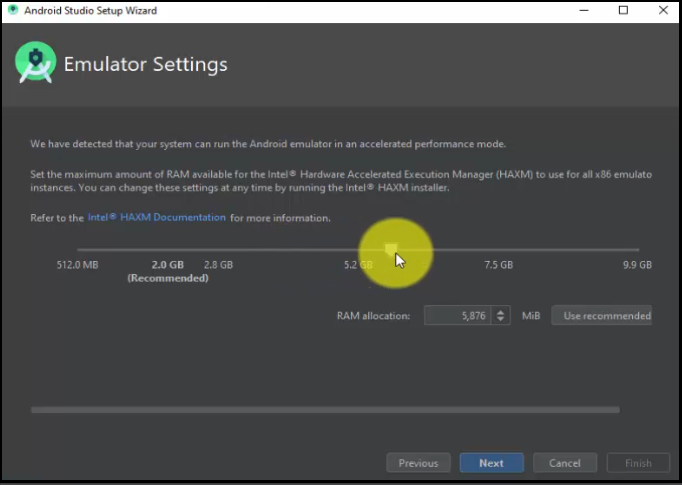
Set the RAM for Emulator. An emulator is a fast and powerful virtual device through which you can easily test your devices on different screen sizes. Without using a hardware device, you can deploy and test your app. The emulator works like your hardware device i.e. after installation of the app on emulator, you can uninstall it from there itself.
Click Next:
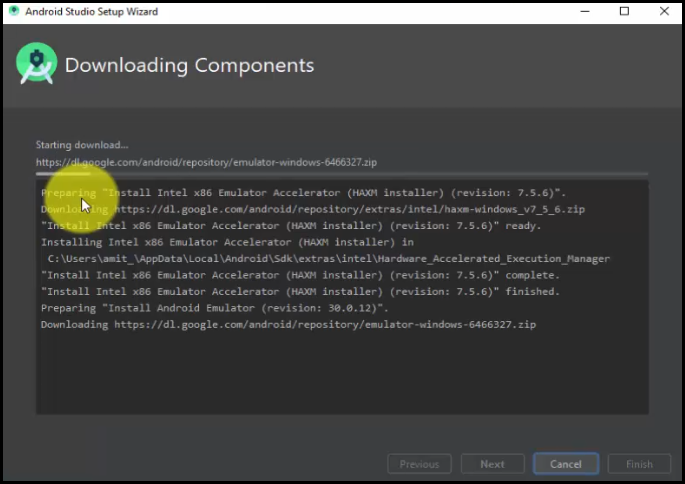
Now, the installation of the SDK components will begin:
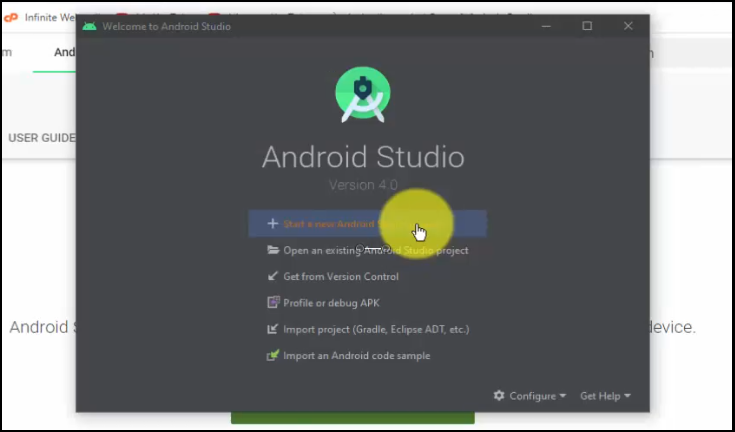
Congrats! We have successfully installed Android Studio. Following Welcome to Android Studio window will be visible:
Now, let us create a new project.
Create a new project/ Android application
To create a new project, as you can see, we reached the dialog box displaying installation completed successfully. Let’s continue from here and click Start a new Android Studio Project:
From here, you will reach the Select a Project Template section. Select Phones and Tablets tab, since we will be creating a Demo app. Under that, select Empty Activity and click Next:
Now, configure your Android project. Set the project name, Package Name, Language, and set the Minimum SDK. We have set the following
- Name: AmitApplication
- Package Name: studyopedia.amitapplication
- Language: Java
- Minimum SDK: API 16: Android 4.1 (Jelly Bean)
Note: Minimum SDK is set by default, based on user’s convenience. You can change it from dropdown, but since the same API 16 will current run on 99.8% of devices, therefore, it is sensible to keep the Minimum SDK as it is as shown below:
Now, click Finish:
The AmitApplication project opens successfully. Now, to run the demo project, we need an AVD. Let’s create an Android Virtual Device (AVD).
Create AVD (Android Virtual Device)
Android Virtual Device (AVD) allows you to easily define the characteristics of multiple devices such as Android phone, Android Wear, tablet, and Android TV device. These are the devices which simulate in the Android Emulator.
An emulator is a fast and powerful virtual device through which you can easily test your devices on different screen sizes. Without using a hardware device, you can deploy and test your app. The emulator works like your hardware device i.e. after installation of the app on emulator, you can uninstall it from there itself.
Let’s see how we can reach the AVD and create a new one, to run our first Android application, AmitApplication.
Go to Tool > SDK Manager:

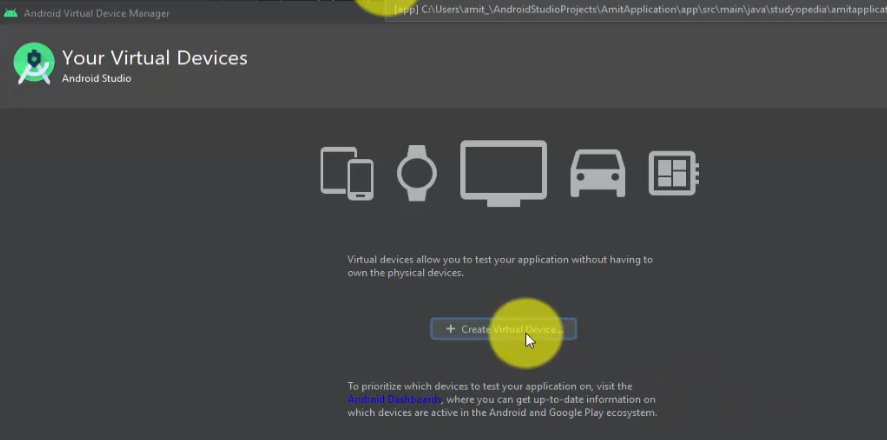
Now, under Android Virtual Device Manager, click Create Virtual Device to create a new Virtual Device:
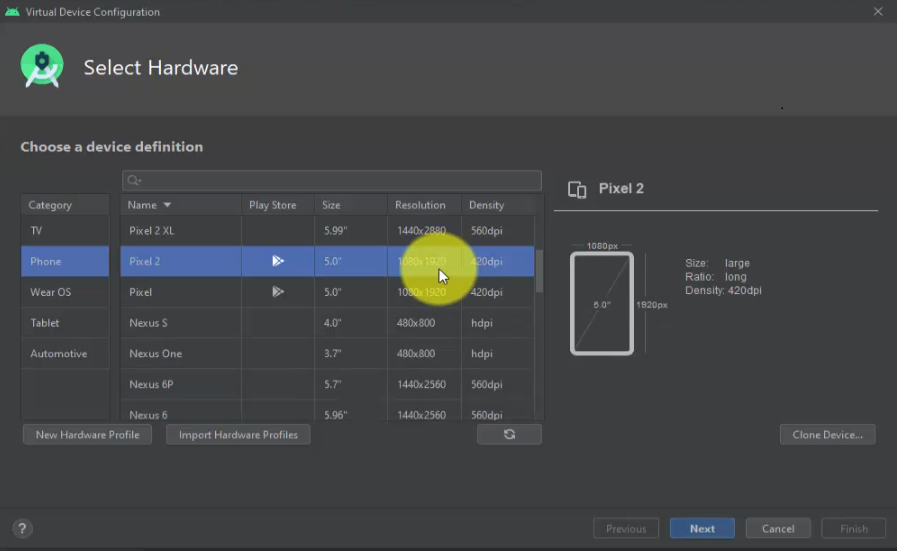
Select Hardware by Choosing a Device Definition.
From the Phone tab on the left, select any device for creating a Virtual Device, running and testing the app. We selected Pixel 2. Click Next:
We have reached the System Image section. Under Recommended, select any image. We will select the Q Download with API Level 29.
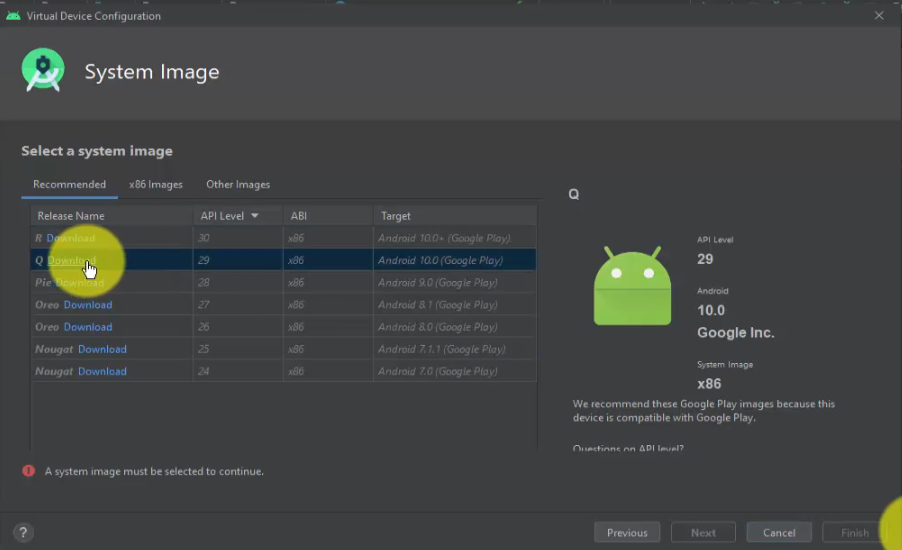
On clicking, the installation of System Image for Q begins. After downloading, click Finish:

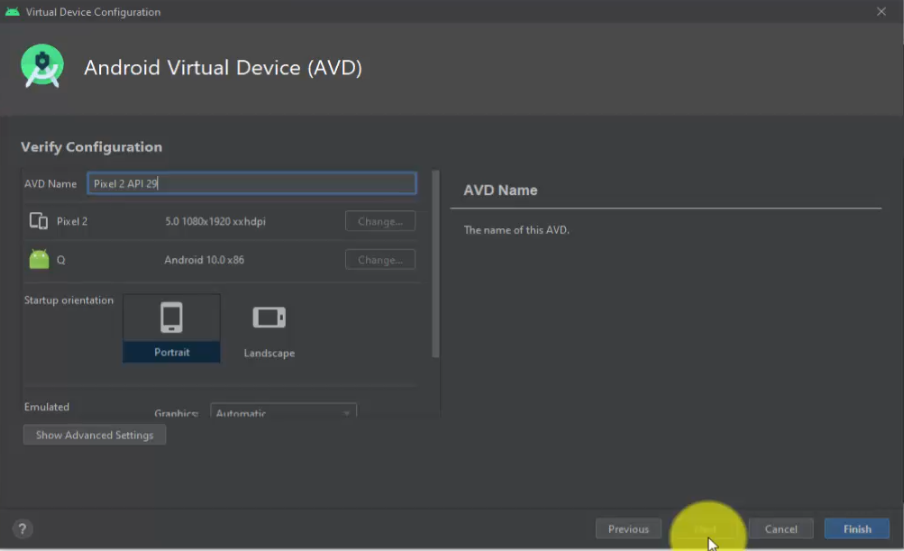
Now, you will reach the Verify Configuration section for Android Virtual Device for Pixel 2, we set above. Check the configuration and click Finish:
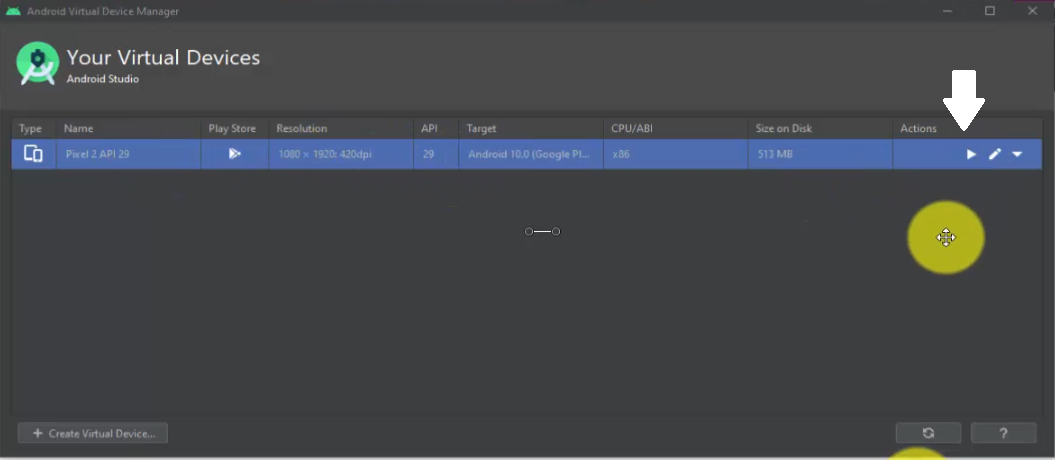
Android Virtual Device (AVD) created successfully, Pixel 2 API 29.
Click on the play button to Launch:
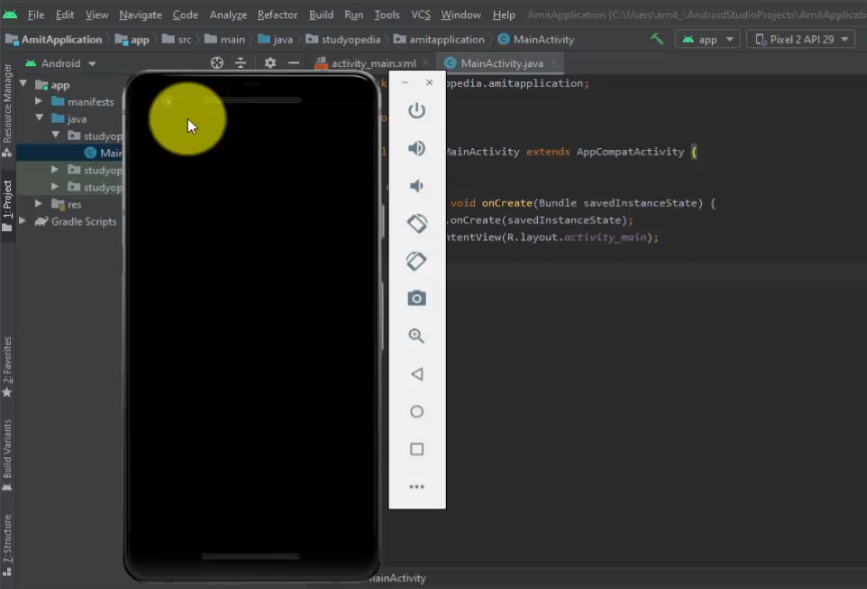
On clicking the play button, our Pixel 2 AVD launched successfully:
Run first project/ Android application
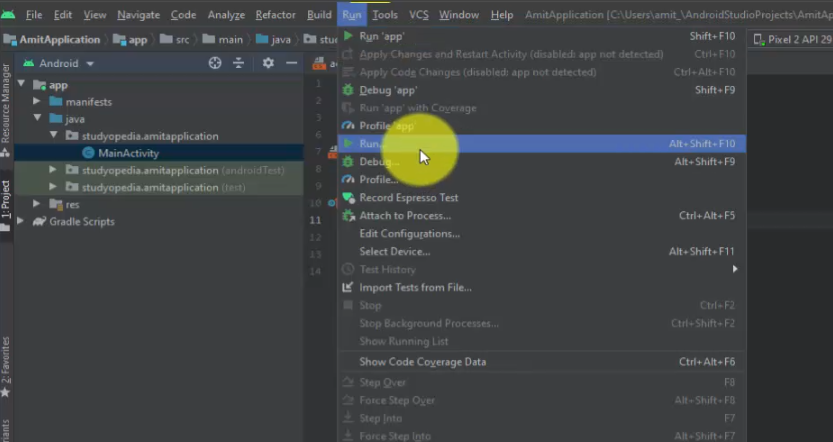
Go to Run menu and click Run to run the AmitApplication:
On clicking RUN, the GRADLE runs successfully. The AmitApplicaion project ran successfully and the output of the app is visible. The title AmitApplication is also visible, with the demo text Hello World.
Here’s the YouTube video for the steps we saw above to install Android Studio on Windows 10:
If you liked the tutorial, spread the word and share the link and our website Studyopedia with others.
Support us: DONATE
Read More:
- Install WordPress on localhost in Windows 10
- Install Drupal on localhost in Windows 10
- Install Joomla on localhost in Windows 10
- Install Python on Windows 10
- Install jQuery on localhost in Windows 10
- Install Eclipse in Windows 10
- Install Java 13 on Windows 10