Ansible is an agentless automation tool that you install on a single host (referred to as the control node). From the control node, Ansible can manage an entire fleet of machines and other devices (referred to as managed nodes) remotely with SSH, Powershell remoting, and numerous other transports, all from a simple command-line interface with no databases or daemons required.
-
Control node requirements
-
Managed node requirements
-
Node requirement summary
-
Selecting an Ansible package and version to install
-
Installing and upgrading Ansible
-
Locating Python
-
Ensuring
pipis available -
Installing Ansible
-
Upgrading Ansible
-
Confirming your installation
-
-
Installing for development
-
Installing
develfrom GitHub withpip -
Running the
develbranch from a clone
-
-
Adding Ansible command shell completion
-
Installing
argcomplete -
Configuring
argcomplete-
Global configuration
-
Per command configuration
-
Using
argcompletewith zsh or tcsh
-
-
Control node requirements
For your control node (the machine that runs Ansible), you can use nearly any UNIX-like machine with Python 3.9 or newer installed. This includes Red Hat, Debian, Ubuntu, macOS, BSDs, and Windows under a Windows Subsystem for Linux (WSL) distribution. Windows without WSL is not natively supported as a control node; see Matt Davis’ blog post for more information.
Managed node requirements
The managed node (the machine that Ansible is managing) does not require Ansible to be installed, but requires Python 2.7, or Python 3.5 — 3.11 to run Ansible library code.
The managed node also needs a user account that can SSH to the node with an interactive POSIX shell.
Note
Network modules are an exception and do not require Python on the managed device. See Network modules.
Node requirement summary
The table below lists the current and historical versions of Python
required on control and managed nodes.
|
ansible-core Version |
Control node Python |
Managed node Python |
|---|---|---|
|
2.11 |
Python 2.7, Python 3.5 — 3.9 [†] |
Python 2.6 — 2.7, Python 3.5 — 3.9 |
|
2.12 |
Python 3.8 — 3.10 |
Python 2.6 — 2.7, Python 3.5 — 3.10 |
|
2.13 |
Python 3.8 — 3.10 |
Python 2.7, Python 3.5 — 3.10 |
|
2.14 |
Python 3.9 — 3.11 |
Python 2.7, Python 3.5 — 3.11 |
[†]: Has a soft requirement of Python 3.8 as not packaged for older versions
Selecting an Ansible package and version to install
Ansible’s community packages are distributed in two ways: a minimalist language and runtime package called ansible-core, and a much larger “batteries included” package called ansible, which adds a community-curated selection of Ansible Collections for automating a wide variety of devices. Choose the package that fits your needs; The following instructions use ansible, but you can substitute ansible-core if you prefer to start with a more minimal package and separately install only the Ansible Collections you require. The ansible or ansible-core packages may be available in your operating systems package manager, and you are free to install these packages with your preferred method. These installation instructions only cover the officially supported means of installing the python package with pip.
Installing and upgrading Ansible
Locating Python
Locate and remember the path to the Python interpreter you wish to use to run Ansible. The following instructions refer to this Python as python3. For example, if you’ve determined that you want the Python at /usr/bin/python3.9 to be the one that you’ll install Ansible under, specify that instead of python3.
Ensuring pip is available
To verify whether pip is already installed for your preferred Python:
If all is well, you should see something like the following:
$ python3 -m pip -V
pip 21.0.1 from /usr/lib/python3.9/site-packages/pip (python 3.9)
If so, pip is available, and you can move on to the next step.
If you see an error like No module named pip, you’ll need to install pip under your chosen Python interpreter before proceeding. This may mean installing an additional OS package (for example, python3-pip), or installing the latest pip directly from the Python Packaging Authority by running the following:
$ curl https://bootstrap.pypa.io/get-pip.py -o get-pip.py
$ python3 get-pip.py --user
You may need to perform some additional configuration before you are able to run Ansible. See the Python documentation on installing to the user site for more information.
Installing Ansible
Use pip in your selected Python environment to install the Ansible package of your choice for the current user:
$ python3 -m pip install --user ansible
Alternately, you can install a specific version of ansible-core in this Python environment:
$ python3 -m pip install --user ansible-core==2.12.3
Upgrading Ansible
To upgrade an existing Ansible installation in this Python environment to the latest released version, simply add --upgrade to the command above:
$ python3 -m pip install --upgrade --user ansible
Confirming your installation
You can test that Ansible is installed correctly by checking the version:
The version displayed by this command is for the associated ansible-core package that has been installed.
To check the version of the ansible package that has been installed:
$ python3 -m pip show ansible
Installing for development
If you are testing new features, fixing bugs, or otherwise working with the development team on changes to the core code, you can install and run the source from GitHub.
Note
You should only install and run the devel branch if you are modifying ansible-core or trying out features under development. This is a rapidly changing source of code and can become unstable at any point.
For more information on getting involved in the Ansible project, see the Ansible Community Guide. For more information on creating Ansible modules and Collections, see the Developer Guide.
Installing devel from GitHub with pip
You can install the devel branch of ansible-core directly from GitHub with pip:
$ python3 -m pip install --user https://github.com/ansible/ansible/archive/devel.tar.gz
You can replace devel in the URL mentioned above, with any other branch or tag on GitHub to install older versions of Ansible, tagged alpha or beta versions, and release candidates.
Running the devel branch from a clone
ansible-core is easy to run from source. You do not need root permissions to use it and there is no software to actually install. No daemons or database setup are required.
-
Clone the
ansible-corerepository$ git clone https://github.com/ansible/ansible.git $ cd ./ansible
-
Setup the Ansible environment
-
Using Bash
$ source ./hacking/env-setup
-
Using Fish
$ source ./hacking/env-setup.fish
-
To suppress spurious warnings/errors, use
-q$ source ./hacking/env-setup -q
-
-
Install Python dependencies
$ python3 -m pip install --user -r ./requirements.txt
-
Update the
develbranch ofansible-coreon your local machineUse pull-with-rebase so any local changes are replayed.
Adding Ansible command shell completion
You can add shell completion of the Ansible command line utilities by installing an optional dependency called argcomplete. argcomplete supports bash, and has limited support for zsh and tcsh.
For more information about installation and configuration, see the argcomplete documentation.
Installing argcomplete
$ python3 -m pip install --user argcomplete
Configuring argcomplete
There are 2 ways to configure argcomplete to allow shell completion of the Ansible command line utilities: globally or per command.
Global configuration
Global completion requires bash 4.2.
$ activate-global-python-argcomplete --user
This will write a bash completion file to a user location. Use --dest to change the location or sudo to set up the completion globally.
Per command configuration
If you do not have bash 4.2, you must register each script independently.
$ eval $(register-python-argcomplete ansible)
$ eval $(register-python-argcomplete ansible-config)
$ eval $(register-python-argcomplete ansible-console)
$ eval $(register-python-argcomplete ansible-doc)
$ eval $(register-python-argcomplete ansible-galaxy)
$ eval $(register-python-argcomplete ansible-inventory)
$ eval $(register-python-argcomplete ansible-playbook)
$ eval $(register-python-argcomplete ansible-pull)
$ eval $(register-python-argcomplete ansible-vault)
You should place the above commands into your shells profile file such as ~/.profile or ~/.bash_profile.
Using argcomplete with zsh or tcsh
See the argcomplete documentation.
Introduction
Ansible is an Infrastructure as Code tool used for managing and monitoring remote servers.
Ansible requires a Linux-based system to run. This can be a problem if you want to use its features on a Windows 10 system. However, there are ways to install Ansible on Windows.
This tutorial will cover different ways you can install Ansible on Windows 10.

Prerequisites
- A system running Windows 10
- A user account with administrator privileges
There are three ways to run Ansible on Windows 10:
- Cygwin
- Linux Virtual Machine
- Enabling Ubuntu on Windows 10
We shall explain all three methods of installing Ansible on Windows.
Method 1: Using Cygwin
Cygwin is a POSIX-compatible environment that lets you run tools and code designed for Unix-like operating systems on Microsoft Windows.
Even though the default Cygwin installation contains hundreds of tools for Unix-based systems, Ansible is not one of them. You must manually add Ansible during the installation process.
To install Ansible on Windows using Cygwin, follow these steps:
1. Download the Cygwin installation file. This file is compatible with both the 32-bit and 64-bit versions of Windows 10. It automatically installs the right version for your system.
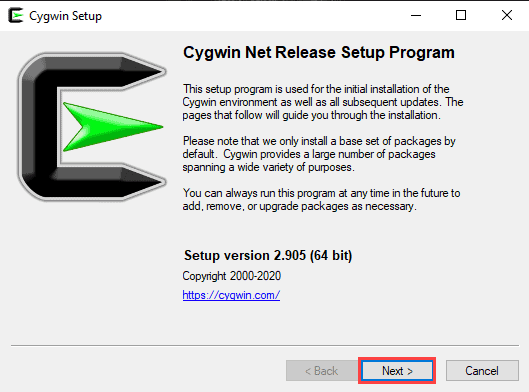
2. Run the Cygwin installation file. On the starting screen of the installation wizard, click Next to continue.
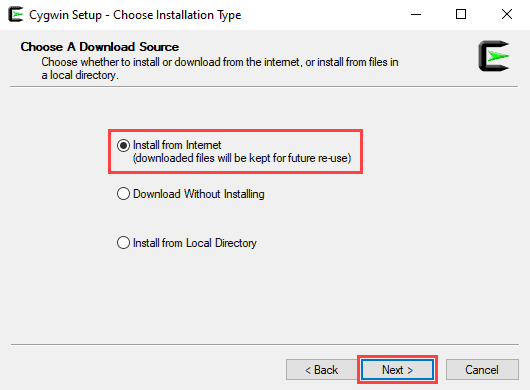
3. Select Install from Internet as the download source and click Next.
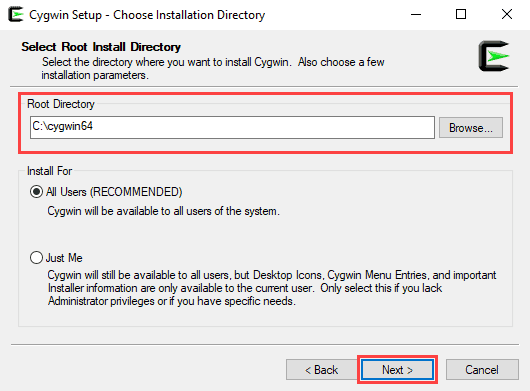
4. In the Root Directory field, specify where you want the application installed, then click Next.
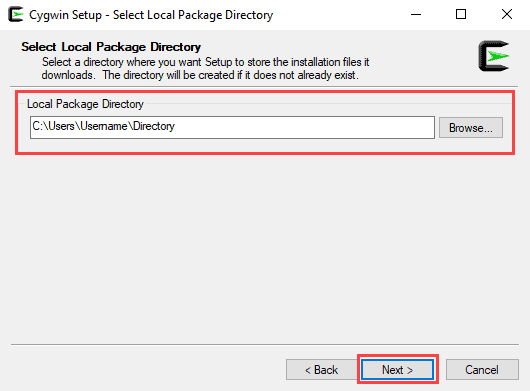
5. In the Local Package Directory field, select where you want to install your Cygwin packages, then click Next.
6. Choose the appropriate Internet connection option.
If you aren’t using a proxy, select Direct Connection.
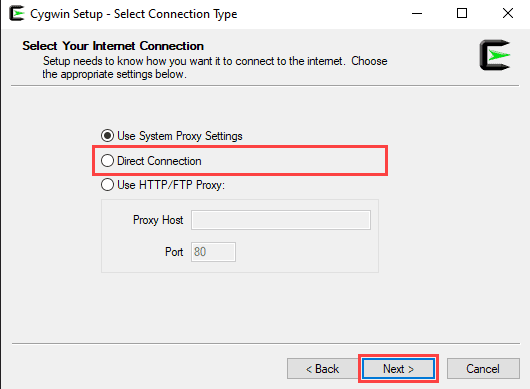
If you are using a proxy, select Use System Proxy Settings or enter the proxy settings manually with the Use HTTP/FTP Proxy.
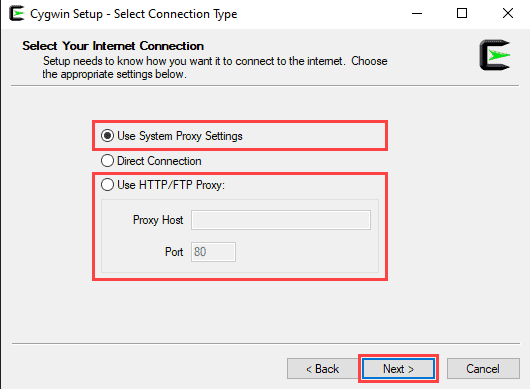
Click Next to continue.
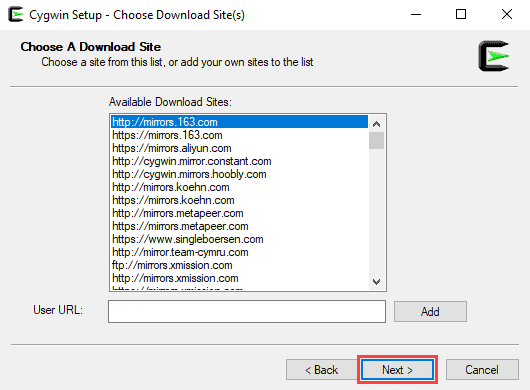
7. Choose one of the available mirrors to download the installation files, then click Next.
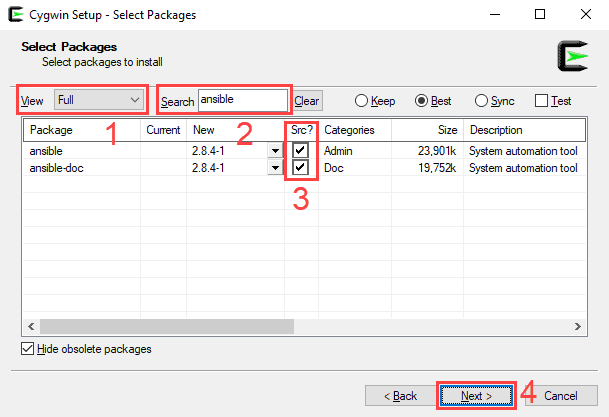
8. On the Select Packages screen, change the View option to Full and type ‘ansible’ in the search bar.
Select both Ansible and Ansible Doc by checking the boxes under Src? and click Next to continue.
9. This screen lets you review the installation settings. To confirm and begin the install process, click on Next.

10. The install wizard will download and install all the selected packages, including Ansible.
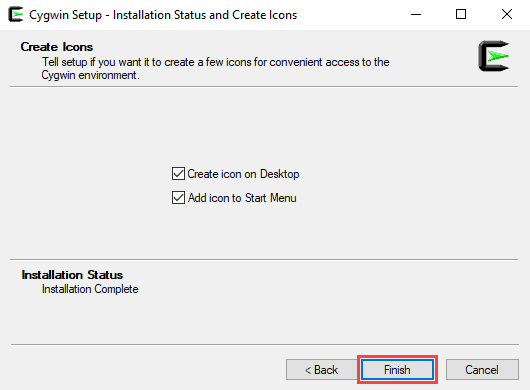
11. Once the installation is complete, select whether you want to add a Cygwin desktop and Start Menu icon, then click on Finish to close the wizard.
Method 2: Using a Linux Virtual Machine
Another way to install Ansible on Windows 10 is to use a virtualization tool and a Linux virtual box.
In this example, we will use Oracle VM VirtualBox to set up an Ubuntu virtual machine and install Ansible.
Step 1: Setting Up VirtualBox
1. Download the VirtualBox installation file.
2. Run the VirtualBox installation file.
On the starting screen of the installation wizard, click Next to continue.

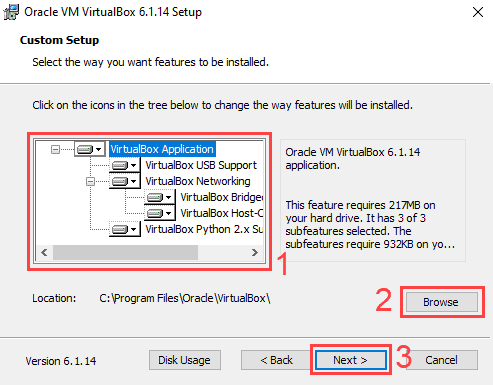
3. Use this screen to select which features of VirtualBox you want to install. This is also where you can set the install location. Click Next to continue.
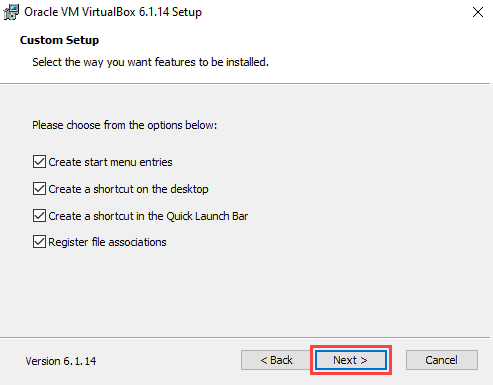
4. Choose whether you want to add Desktop, Start Menu, and Quick Launch Bar shortcuts and add file associations. Click Next to continue.
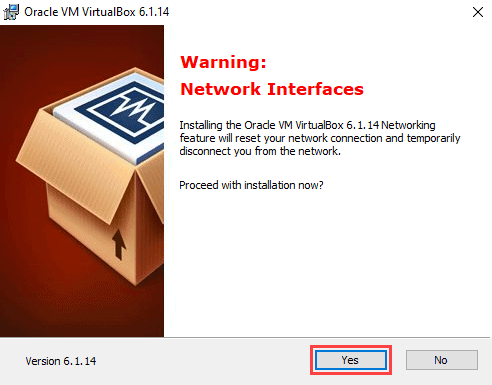
5. A new screen will warn you that the install wizard needs to reset your network connection. Click Yes to continue.
6. On the next screen, click Install to begin the installation process.

7. The install wizard might prompt you to add a VirtualBox USB device. Click Yes to continue.
8. Click Finish to complete the installation.
Step 2: Creating an Ubuntu 20.04 Virtual Box
1. Download the Ubuntu 20.04 desktop image.
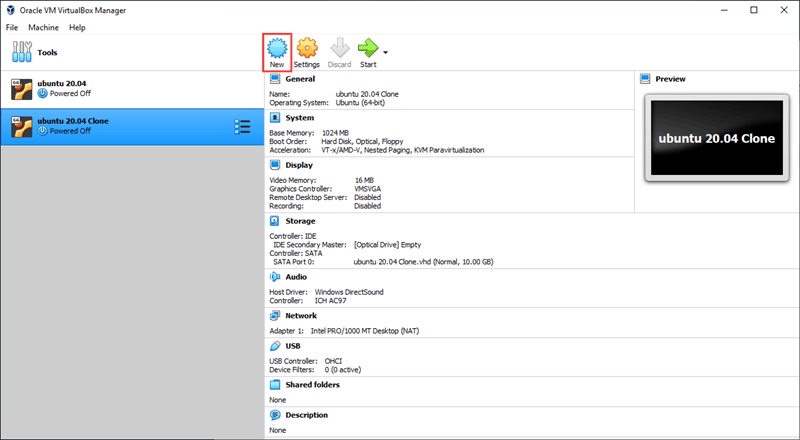
2. On the VirtualBox starting screen, click New.
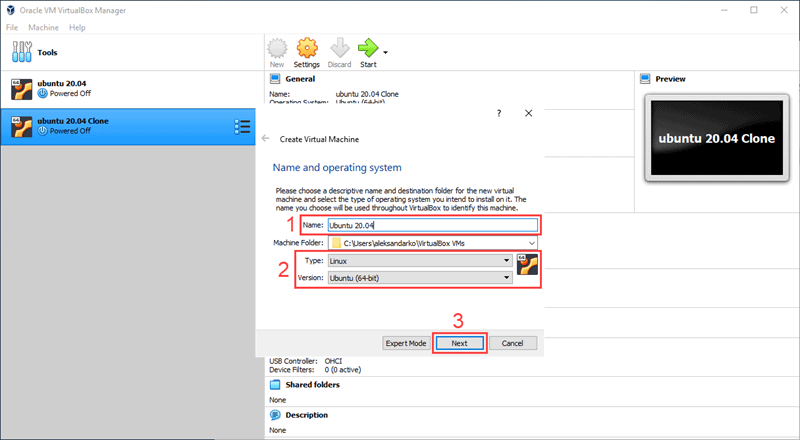
3. Type in the name of your virtual machine. If the name contains the word ‘Ubuntu’, the operating system dropdown menu will automatically update to Ubuntu (64-bit). If not, you can select the operating system manually using the dropdown menu. Click Next to continue.
4. Set the amount of RAM you want the virtual machine to have.
Click Next to continue.
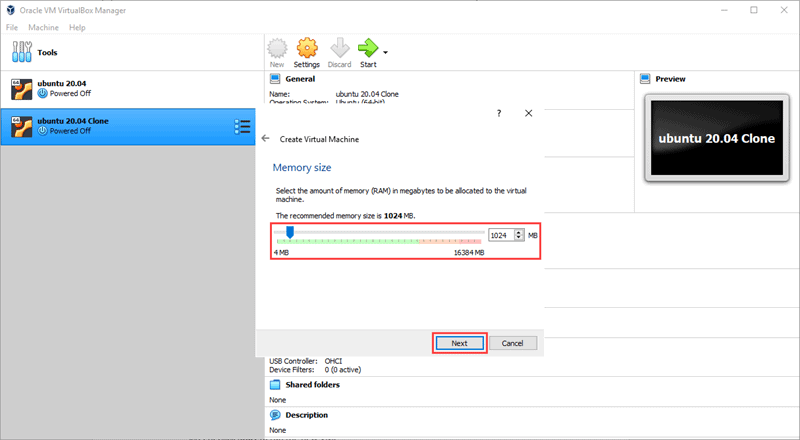
Note: By default, Oracle VM VirtualBox assigns 1024MB of RAM to every virtual box. Make sure you assign enough RAM to your new virtual box, or it will not work properly.
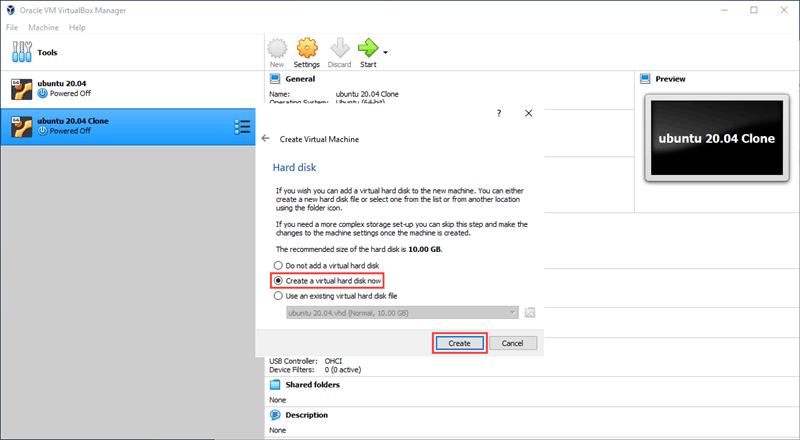
5. Select a hard disk option for your virtual machine.
Choose Create a virtual hard disk now if you are creating a brand new VM. Click Create to continue.
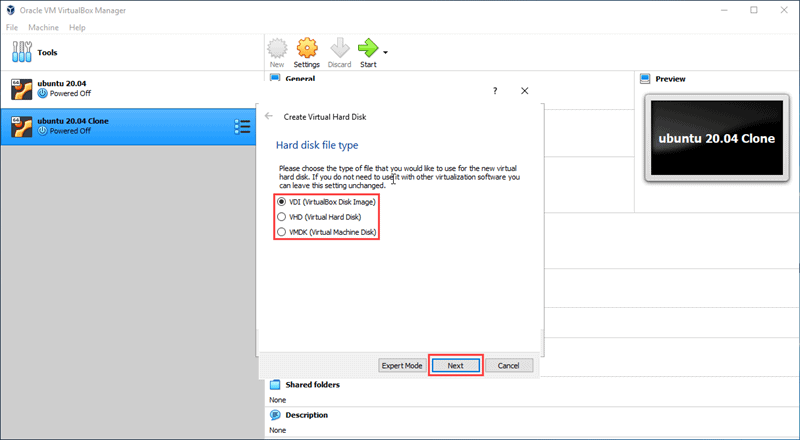
6. Choose the type of virtual hard disk you want to create. Click Next.
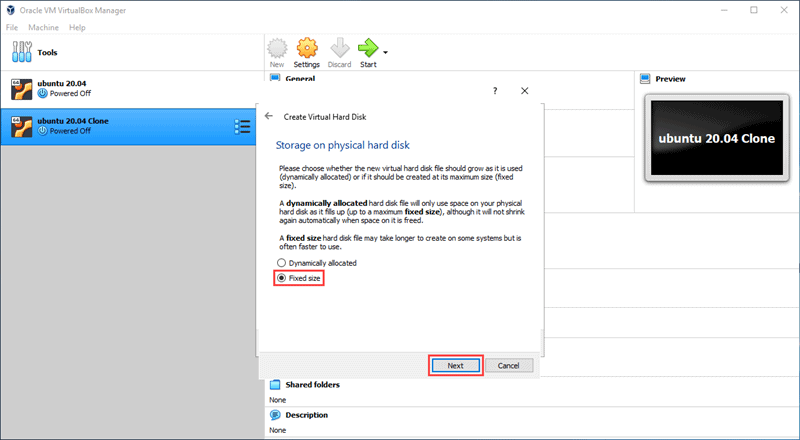
7. Choose if the new virtual hard disk has a fixed amount of space or if you want it to allocate space dynamically. Select Fixed size and click Next.
8. Select the location of the virtual hard disk on your computer and enter the size limit.
For this example, we will set the size limit to 10GB. Click Create to continue.
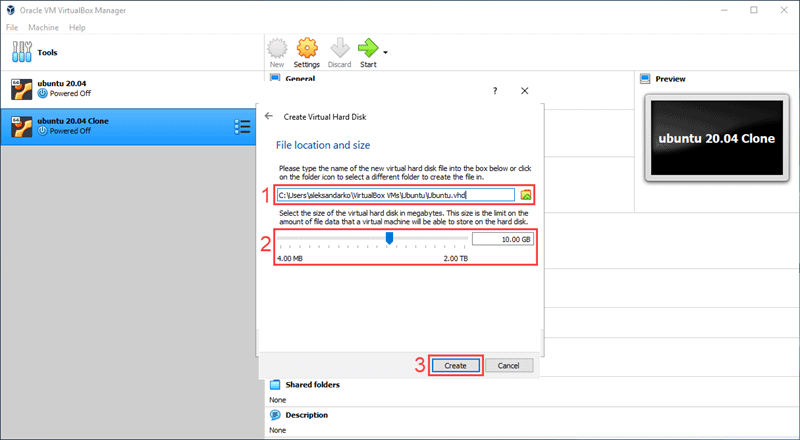
Note: Just like with RAM, you need to make sure you assign enough hard disk space to your virtual machine. VirtualBox sets the fixed-size hard disk at 10GB by default.
9. Select the new virtual machine you just created on the left-hand side of the VirtualBox starting screen. Click Start to run the new VM.
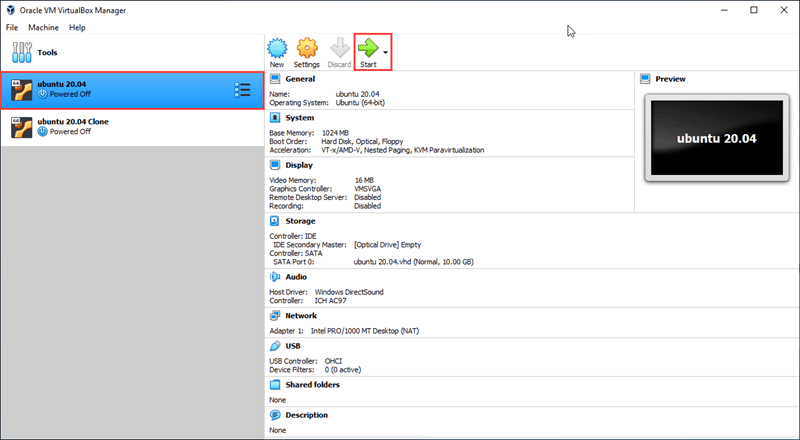
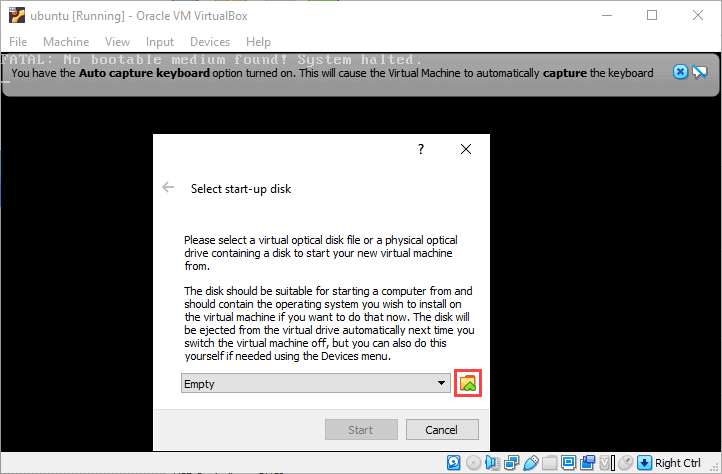
10. VirtualBox will prompt you to select a start-up disk. Click on the button next to the drop-down menu to open the optical Disk Selector.
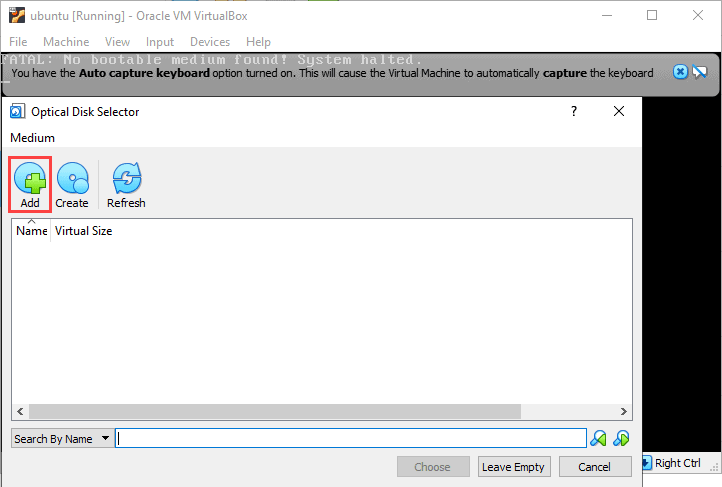
11. In the Optical Disk Selector, click Add.
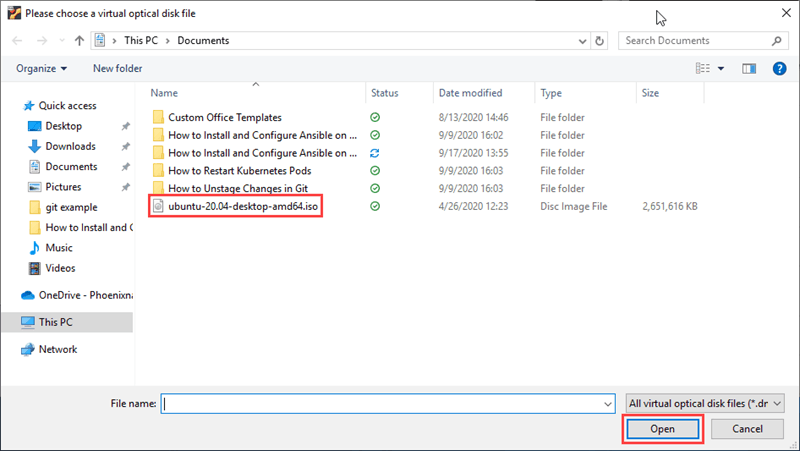
12. Find the Ubuntu 20.04 desktop image you downloaded in a previous step. Select the image and click Open.
13. In the Optical Disk Selector, highlight the image you just added and click Choose.
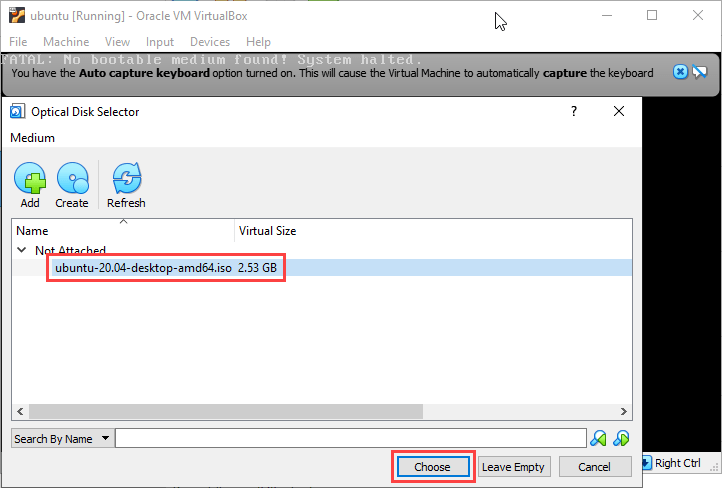
14. Click Start to begin the install process for Ubuntu 20.04.
Step 3: Installing Ansible
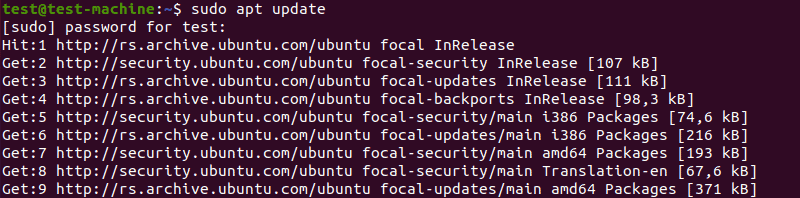
1. Once you are done installing Ubuntu 20.04, open the command terminal.
2. In the command terminal, enter the following command:
$ sudo apt updateThis command refreshes the system’s package index and allows you to Install Ansible.
3. To install Ansible, use the command:
$ sudo apt install ansible -y
The rest of the install process is automated.
After you install it on you virtual machine, you can configure Ansible by setting up the hosts inventory file and checking the connections.
Method 3: Enabling Ubuntu on Windows 10
The third option is to use the Windows Subsystem for Linux to start up the Ubuntu terminal without setting up a virtual machine:
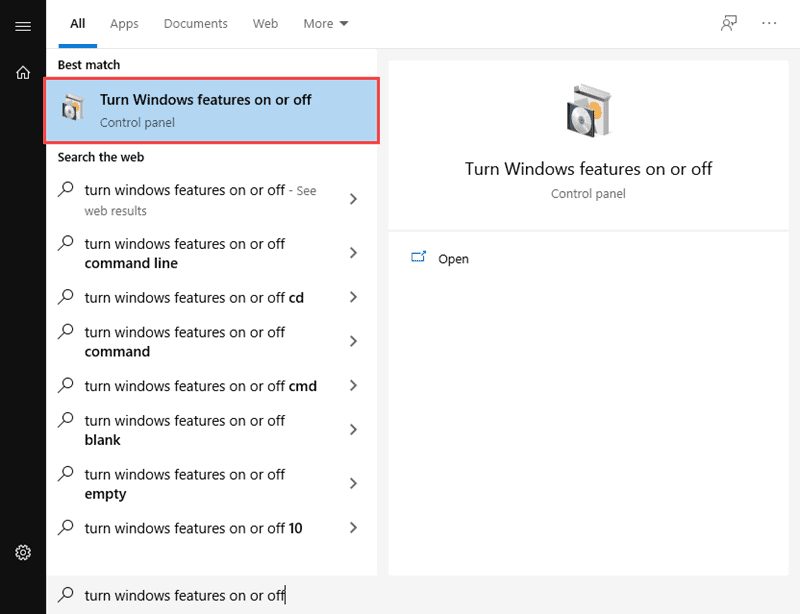
1. Open the Start menu and search for Turn Windows features on or off. Click on the shortcut when it appears.
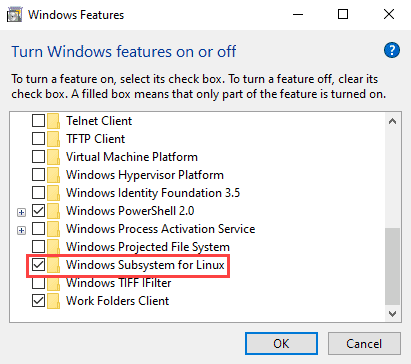
2. Scroll down through the list of features until you see Windows Subsystem for Linux. Click on the checkbox, and then click OK to enable the feature.
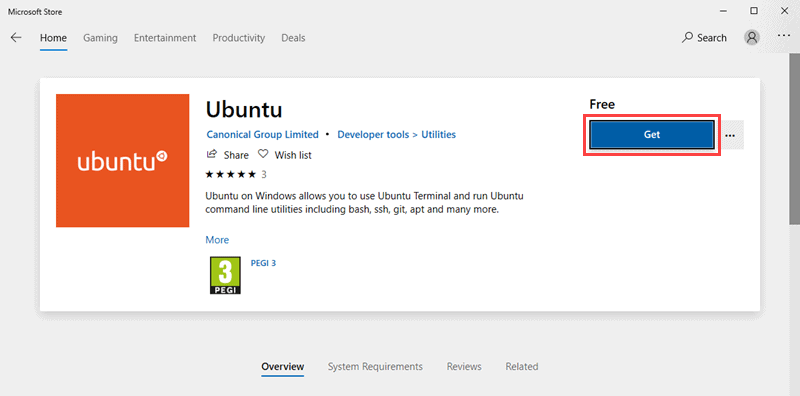
3. Open the Microsoft Store. Search for Ubuntu and click on Get to install the latest version.
4. Once the installation is complete, click on Launch to start up the Ubuntu command terminal.
5. To install Ansible, enter the following set of commands:
$ sudo apt-get update
$ sudo apt-get install software-properties-common
$ sudo apt-add-repository ppa:ansible/ansible
$ sudo apt-get update
$ sudo apt-get install ansible -y
Conclusion
If you followed the steps in this guide, you now have a copy of Ansible installed on your Windows 10 system.
Now you can use Ansible to manage and configure remote servers, and plan your CI/CD process.
How to install and maintain Ansible inside Windows 10 using the Windows Subsystem for Linux and Ubuntu 20.04 LTS.

October 25, 2021

How to install Ansible in Windows 10.
Today we’re going to talk about the easier way to install and maintain Ansible inside Windows 10 using the Windows Subsystem for Linux.
I’m Luca Berton and welcome to today’s episode of Ansible Pilot.
How to install Ansible in Windows 10
Today we’re talking about How to install Ansible in Windows 10.
Officially Windows is not a supported operating system for the control node even if RedHat is working really hard to eliminate barriers to native Windows controllers.
The reason behind this is that there are a lot of UNIX-isms deeply baked into most of Ansible that prevents it from working on native Windows, basically, Windows doesn’t have the fork() syscall implementation. Ansible controller worker model as of 2.10 makes heavy use of the POSIX fork() syscall.
-
Cygwin
Some people used Cygwin POSIX-compatibility projects but sometimes it just breaks so it’s not a reliable solution. -
Windows Subsystem for Linux
The best alternative is to use Windows Subsystem for Linux, also known as WSL. Run WSL version 2 if Windows 10 later than build 2004 or Windows 11.
Ansible works great on WSL and WSL2.
Links
More technical information:
- https://docs.microsoft.com/en-us/windows/wsl/compare-versions
- https://docs.ansible.com/ansible/latest/user_guide/windows_faq.html
The Best Resources For Ansible
Video Course
- Learn Ansible Automation in 250+examples & practical lessons: Learn Ansible with some real-life examples of how to use the most common modules and Ansible Playbook
Printed Book
- Ansible For VMware by Examples: A Step-by-Step Guide to Automating Your VMware Infrastructure
eBooks
- Ansible by Examples: 200+ Automation Examples For Linux and Windows System Administrator and DevOps
- Ansible For Windows By Examples: 50+ Automation Examples For Windows System Administrator And DevOps
- Ansible For Linux by Examples: 100+ Automation Examples For Linux System Administrator and DevOps
- Ansible Linux Filesystem By Examples: 40+ Automation Examples on Linux File and Directory Operation for Modern IT Infrastructure
- Ansible For Containers and Kubernetes By Examples: 20+ Automation Examples To Automate Containers, Kubernetes and OpenShift
- Ansible For Security by Examples: 100+ Automation Examples to Automate Security and Verify Compliance for IT Modern Infrastructure
- Ansible Tips and Tricks: 10+ Ansible Examples to Save Time and Automate More Tasks
- Ansible Linux Users & Groups By Examples: 20+ Automation Examples on Linux Users and Groups Operation for Modern IT Infrastructure
- Ansible For PostgreSQL by Examples: 10+ Examples To Automate Your PostgreSQL database
- Ansible For Amazon Web Services AWS By Examples: 10+ Examples To Automate Your AWS Modern Infrastructure
demo
Let’s jump in a quick live demo of how to install the latest and a specific version of Ansible in Windows using Windows Subsystem for Linux.
You must be running Windows 10 version 2004 and higher (Build 19041 and higher) or Windows 11.
code
- install_wsl.ps1
wsl --help
wsl --list -o
wsl --install
execution
output
- install WSL
Windows PowerShell
Copyright (C) Microsoft Corporation. All rights reserved.
Try the new cross-platform PowerShell https://aka.ms/pscore6
PS C:Usersuser> wsl --install
Installing: Virtual Machine Platform
Virtual Machine Platform has been installed.
Installing: Windows Subsystem for Linux
Windows Subsystem for Linux has been installed.
Downloading: WSL Kernel
Installing: WSL Kernel
WSL Kernel has been installed.
Downloading: Ubuntu
The requested operation is successful. Changes will not be effective until the system is rebooted.
PS C:Usersuser>
- setup Ubuntu 20.04 LTS WSL and install ansible
Installing, this may take a few minutes...
Please create a default UNIX user account. The username does not need to match your Windows username.
For more information visit: https://aka.ms/wslusers
Enter new UNIX username: ansiblepilot
New password:
Retype new password:
passwd: password updated successfully
Installation successful!
To run a command as administrator (user "root"), use "sudo <command>".
See "man sudo_root" for details.
Welcome to Ubuntu 20.04 LTS (GNU/Linux 4.4.0-19041-Microsoft x86_64)
* Documentation:  https://help.ubuntu.com
 * Management:     https://landscape.canonical.com
 * Support:        https://ubuntu.com/advantage
System information as of Tue Oct 26 08:11:05 UTC 2021
System load:    0.52      Users logged in:       0
  Usage of /home: unknown   IPv4 address for eth0: 10.0.2.15
  Memory usage:   58%       IPv4 address for eth1: 169.254.106.26
  Swap usage:     0%        IPv4 address for eth1: 192.168.0.202
  Processes:      7
0 updates can be installed immediately.
0 of these updates are security updates.
The list of available updates is more than a week old.
To check for new updates run: sudo apt update
This message is shown once once a day. To disable it please create the
/home/ansiblepilot/.hushlogin file.
ansiblepilot@demo:~$ sudo apt update
Get:1 http://archive.ubuntu.com/ubuntu focal InRelease [265 kB]
Get:2 http://archive.ubuntu.com/ubuntu focal-updates InRelease [114 kB]
Get:3 http://archive.ubuntu.com/ubuntu focal-backports InRelease [101 kB]
Get:4 http://security.ubuntu.com/ubuntu focal-security InRelease [114 kB]
Get:5 http://archive.ubuntu.com/ubuntu focal/main amd64 Packages [970 kB]
Get:6 http://archive.ubuntu.com/ubuntu focal/main Translation-en [506 kB]
Get:7 http://archive.ubuntu.com/ubuntu focal/main amd64 c-n-f Metadata [29.5 kB]
Get:8 http://archive.ubuntu.com/ubuntu focal/universe amd64 Packages [8628 kB]
Get:9 http://archive.ubuntu.com/ubuntu focal/universe Translation-en [5124 kB]
Get:10 http://archive.ubuntu.com/ubuntu focal/universe amd64 c-n-f Metadata [265 kB]
Get:11 http://archive.ubuntu.com/ubuntu focal/multiverse amd64 Packages [144 kB]
Get:12 http://archive.ubuntu.com/ubuntu focal/multiverse Translation-en [104 kB]
Get:13 http://archive.ubuntu.com/ubuntu focal/multiverse amd64 c-n-f Metadata [9136 B]
Get:14 http://archive.ubuntu.com/ubuntu focal-updates/main amd64 Packages [1298 kB]
Get:15 http://archive.ubuntu.com/ubuntu focal-updates/main Translation-en [269 kB]
Get:16 http://archive.ubuntu.com/ubuntu focal-updates/main amd64 c-n-f Metadata [14.4 kB]
Get:17 http://archive.ubuntu.com/ubuntu focal-updates/restricted amd64 Packages [523 kB]
Get:18 http://archive.ubuntu.com/ubuntu focal-updates/restricted Translation-en [75.0 kB]
Get:19 http://archive.ubuntu.com/ubuntu focal-updates/restricted amd64 c-n-f Metadata [504 B]
Get:20 http://archive.ubuntu.com/ubuntu focal-updates/universe amd64 Packages [866 kB]
Get:21 http://archive.ubuntu.com/ubuntu focal-updates/universe Translation-en [186 kB]
Get:22 http://archive.ubuntu.com/ubuntu focal-updates/universe amd64 c-n-f Metadata [19.3 kB]
Get:23 http://archive.ubuntu.com/ubuntu focal-updates/multiverse amd64 Packages [24.6 kB]
Get:24 http://archive.ubuntu.com/ubuntu focal-updates/multiverse Translation-en [6856 B]
Get:25 http://archive.ubuntu.com/ubuntu focal-updates/multiverse amd64 c-n-f Metadata [620 B]
Get:26 http://archive.ubuntu.com/ubuntu focal-backports/main amd64 Packages [2568 B]
Get:27 http://archive.ubuntu.com/ubuntu focal-backports/main Translation-en [1120 B]
Get:28 http://archive.ubuntu.com/ubuntu focal-backports/main amd64 c-n-f Metadata [400 B]
Get:29 http://archive.ubuntu.com/ubuntu focal-backports/restricted amd64 c-n-f Metadata [116 B]
Get:30 http://archive.ubuntu.com/ubuntu focal-backports/universe amd64 Packages [5800 B]
Get:31 http://archive.ubuntu.com/ubuntu focal-backports/universe Translation-en [2068 B]
Get:32 http://archive.ubuntu.com/ubuntu focal-backports/universe amd64 c-n-f Metadata [276 B]
Get:33 http://archive.ubuntu.com/ubuntu focal-backports/multiverse amd64 c-n-f Metadata [116 B]
Get:34 http://security.ubuntu.com/ubuntu focal-security/main amd64 Packages [945 kB]
Get:35 http://security.ubuntu.com/ubuntu focal-security/main Translation-en [178 kB]
Get:36 http://security.ubuntu.com/ubuntu focal-security/main amd64 c-n-f Metadata [8844 B]
Get:37 http://security.ubuntu.com/ubuntu focal-security/restricted amd64 Packages [482 kB]
Get:38 http://security.ubuntu.com/ubuntu focal-security/restricted Translation-en [69.2 kB]
Get:39 http://security.ubuntu.com/ubuntu focal-security/restricted amd64 c-n-f Metadata [508 B]
Get:40 http://security.ubuntu.com/ubuntu focal-security/universe amd64 Packages [647 kB]
Get:41 http://security.ubuntu.com/ubuntu focal-security/universe Translation-en [106 kB]
Get:42 http://security.ubuntu.com/ubuntu focal-security/universe amd64 c-n-f Metadata [12.7 kB]
Get:43 http://security.ubuntu.com/ubuntu focal-security/multiverse amd64 Packages [21.9 kB]
Get:44 http://security.ubuntu.com/ubuntu focal-security/multiverse Translation-en [4948 B]
Get:45 http://security.ubuntu.com/ubuntu focal-security/multiverse amd64 c-n-f Metadata [540 B]
Fetched 22.1 MB in 8s (2745 kB/s)
Reading package lists... Done
Building dependency tree
Reading state information... Done
243 packages can be upgraded. Run 'apt list --upgradable' to see them.
ansiblepilot@demo:~$ sudo apt install ansible
Reading package lists... Done
Building dependency tree
Reading state information... Done
The following additional packages will be installed:
  ieee-data python3-argcomplete python3-crypto python3-dnspython python3-jmespath
  python3-kerberos python3-libcloud python3-lockfile python3-netaddr python3-ntlm-auth
  python3-requests-kerberos python3-requests-ntlm python3-selinux python3-winrm
  python3-xmltodict
Suggested packages:
  cowsay sshpass python-lockfile-doc ipython3 python-netaddr-docs
The following NEW packages will be installed:
  ansible ieee-data python3-argcomplete python3-crypto python3-dnspython python3-jmespath
  python3-kerberos python3-libcloud python3-lockfile python3-netaddr python3-ntlm-auth
  python3-requests-kerberos python3-requests-ntlm python3-selinux python3-winrm
  python3-xmltodict
0 upgraded, 16 newly installed, 0 to remove and 243 not upgraded.
Need to get 9643 kB of archives.
After this operation, 90.2 MB of additional disk space will be used.
Do you want to continue? [Y/n] y
Get:1 http://archive.ubuntu.com/ubuntu focal/main amd64 python3-crypto amd64 2.6.1-13ubuntu2 [237 kB]
Get:2 http://archive.ubuntu.com/ubuntu focal/main amd64 python3-dnspython all 1.16.0-1build1 [89.1 kB]
Get:3 http://archive.ubuntu.com/ubuntu focal/main amd64 ieee-data all 20180805.1 [1589 kB]
Get:4 http://archive.ubuntu.com/ubuntu focal/main amd64 python3-netaddr all 0.7.19-3 [235 kB]
Get:5 http://archive.ubuntu.com/ubuntu focal/universe amd64 ansible all 2.9.6+dfsg-1 [5794 kB]
Get:6 http://archive.ubuntu.com/ubuntu focal/universe amd64 python3-argcomplete all 1.8.1-1.3ubuntu1 [27.2 kB]
Get:7 http://archive.ubuntu.com/ubuntu focal/main amd64 python3-jmespath all 0.9.4-2 [21.3 kB]
Get:8 http://archive.ubuntu.com/ubuntu focal/universe amd64 python3-kerberos amd64 1.1.14-3.1build1 [22.6 kB]
Get:9 http://archive.ubuntu.com/ubuntu focal/main amd64 python3-lockfile all 1:0.12.2-2ubuntu2 [14.6 kB]
Get:10 http://archive.ubuntu.com/ubuntu focal/universe amd64 python3-libcloud all 2.8.0-1 [1403 kB]
Get:11 http://archive.ubuntu.com/ubuntu focal/universe amd64 python3-ntlm-auth all 1.1.0-1 [19.6 kB]
Get:12 http://archive.ubuntu.com/ubuntu focal/universe amd64 python3-requests-kerberos all 0.12.0-2 [11.9 kB]
Get:13 http://archive.ubuntu.com/ubuntu focal/universe amd64 python3-requests-ntlm all 1.1.0-1 [6004 B]
Get:14 http://archive.ubuntu.com/ubuntu focal/universe amd64 python3-selinux amd64 3.0-1build2 [139 kB]
Get:15 http://archive.ubuntu.com/ubuntu focal/universe amd64 python3-xmltodict all 0.12.0-1 [12.6 kB]
Get:16 http://archive.ubuntu.com/ubuntu focal/universe amd64 python3-winrm all 0.3.0-2 [21.7 kB]
Fetched 9643 kB in 2s (4937 kB/s)
Selecting previously unselected package python3-crypto.
(Reading database ... 31836 files and directories currently installed.)
Preparing to unpack .../00-python3-crypto_2.6.1-13ubuntu2_amd64.deb ...
Unpacking python3-crypto (2.6.1-13ubuntu2) ...
Selecting previously unselected package python3-dnspython.
Preparing to unpack .../01-python3-dnspython_1.16.0-1build1_all.deb ...
Unpacking python3-dnspython (1.16.0-1build1) ...
Selecting previously unselected package ieee-data.
Preparing to unpack .../02-ieee-data_20180805.1_all.deb ...
Unpacking ieee-data (20180805.1) ...
Selecting previously unselected package python3-netaddr.
Preparing to unpack .../03-python3-netaddr_0.7.19-3_all.deb ...
Unpacking python3-netaddr (0.7.19-3) ...
Selecting previously unselected package ansible.
Preparing to unpack .../04-ansible_2.9.6+dfsg-1_all.deb ...
Unpacking ansible (2.9.6+dfsg-1) ...
Selecting previously unselected package python3-argcomplete.
Preparing to unpack .../05-python3-argcomplete_1.8.1-1.3ubuntu1_all.deb ...
Unpacking python3-argcomplete (1.8.1-1.3ubuntu1) ...
Selecting previously unselected package python3-jmespath.
Preparing to unpack .../06-python3-jmespath_0.9.4-2_all.deb ...
Unpacking python3-jmespath (0.9.4-2) ...
Selecting previously unselected package python3-kerberos.
Preparing to unpack .../07-python3-kerberos_1.1.14-3.1build1_amd64.deb ...
Unpacking python3-kerberos (1.1.14-3.1build1) ...
Selecting previously unselected package python3-lockfile.
Preparing to unpack .../08-python3-lockfile_1%3a0.12.2-2ubuntu2_all.deb ...
Unpacking python3-lockfile (1:0.12.2-2ubuntu2) ...
Selecting previously unselected package python3-libcloud.
Preparing to unpack .../09-python3-libcloud_2.8.0-1_all.deb ...
Unpacking python3-libcloud (2.8.0-1) ...
Selecting previously unselected package python3-ntlm-auth.
Preparing to unpack .../10-python3-ntlm-auth_1.1.0-1_all.deb ...
Unpacking python3-ntlm-auth (1.1.0-1) ...
Selecting previously unselected package python3-requests-kerberos.
Preparing to unpack .../11-python3-requests-kerberos_0.12.0-2_all.deb ...
Unpacking python3-requests-kerberos (0.12.0-2) ...
Selecting previously unselected package python3-requests-ntlm.
Preparing to unpack .../12-python3-requests-ntlm_1.1.0-1_all.deb ...
Unpacking python3-requests-ntlm (1.1.0-1) ...
Selecting previously unselected package python3-selinux.
Preparing to unpack .../13-python3-selinux_3.0-1build2_amd64.deb ...
Unpacking python3-selinux (3.0-1build2) ...
Selecting previously unselected package python3-xmltodict.
Preparing to unpack .../14-python3-xmltodict_0.12.0-1_all.deb ...
Unpacking python3-xmltodict (0.12.0-1) ...
Selecting previously unselected package python3-winrm.
Preparing to unpack .../15-python3-winrm_0.3.0-2_all.deb ...
Unpacking python3-winrm (0.3.0-2) ...
Setting up python3-lockfile (1:0.12.2-2ubuntu2) ...
Setting up python3-ntlm-auth (1.1.0-1) ...
Setting up python3-kerberos (1.1.14-3.1build1) ...
Setting up python3-xmltodict (0.12.0-1) ...
Setting up python3-jmespath (0.9.4-2) ...
/usr/lib/python3/dist-packages/jmespath/visitor.py:32: SyntaxWarning: "is" with a literal. Did you mean "=="?
  if x is 0 or x is 1:
/usr/lib/python3/dist-packages/jmespath/visitor.py:32: SyntaxWarning: "is" with a literal. Did you mean "=="?
  if x is 0 or x is 1:
/usr/lib/python3/dist-packages/jmespath/visitor.py:34: SyntaxWarning: "is" with a literal. Did you mean "=="?
  elif y is 0 or y is 1:
/usr/lib/python3/dist-packages/jmespath/visitor.py:34: SyntaxWarning: "is" with a literal. Did you mean "=="?
  elif y is 0 or y is 1:
/usr/lib/python3/dist-packages/jmespath/visitor.py:260: SyntaxWarning: "is" with a literal. Did you mean "=="?
  if original_result is 0:
Setting up python3-requests-kerberos (0.12.0-2) ...
Setting up ieee-data (20180805.1) ...
Setting up python3-dnspython (1.16.0-1build1) ...
Setting up python3-selinux (3.0-1build2) ...
Setting up python3-crypto (2.6.1-13ubuntu2) ...
Setting up python3-argcomplete (1.8.1-1.3ubuntu1) ...
Setting up python3-requests-ntlm (1.1.0-1) ...
Setting up python3-libcloud (2.8.0-1) ...
Setting up python3-netaddr (0.7.19-3) ...
/usr/lib/python3/dist-packages/netaddr/strategy/__init__.py:189: SyntaxWarning: "is not" with a literal. Did you mean "!="?
  if word_sep is not '':
Setting up python3-winrm (0.3.0-2) ...
Setting up ansible (2.9.6+dfsg-1) ...
Processing triggers for man-db (2.9.1-1) ...
ansiblepilot@demo:~$ ansible --version
ansible 2.9.6
  config file = /etc/ansible/ansible.cfg
  configured module search path = ['/home/ansiblepilot/.ansible/plugins/modules', '/usr/share/ansible/plugins/modules']
  ansible python module location = /usr/lib/python3/dist-packages/ansible
  executable location = /usr/bin/ansible
  python version = 3.8.2 (default, Mar 13 2020, 10:14:16) [GCC 9.3.0]
code with ❤️ in GitHub
Recap
Now you know how to install the latest version of Ansible in Windows 10 using the Windows Subsystem for Linux.
Subscribe to the YouTube channel, Medium, Website, Twitter, and Substack to not miss the next episode of the Ansible Pilot.
Academy
Learn the Ansible automation technology with some real-life examples in my
My book Ansible By Examples: 200+ Automation Examples For Linux and Windows System Administrator and DevOps

Donate
Want to keep this project going? Please donate
Love Ansible, but wondering how to get it running on Windows?
Ansible is one of the most popular configuration administration and infrastructure automation tools. It helps to automate infrastructure configuration/provisioning, software deployments, and general infrastructure management.
Ansible was initially available on Linux. However, with Microsoft’s new viewpoint on open source, their community improvements, and their acceptance of a more agile, DevOps-minded software development method, Windows support is gradually catching up with the pace.
Although Windows support requires a slight bit more configuration, it’s not very bad once the initial setup is done. There are two possible ways to get it installed.
Using Cygwin
Have you heard of Cygwin?
It is a POSIX-compatible environment to run on Windows. This means – you can run many things on Windows, which you usually do on UNIX-based OS.
If its the first time you heard about Cygwin then I would refer to their official website to get more understanding.
The default Cygwin installation doesn’t cover Ansible. Hence, you got to select them during installation, as explained below manually.
- Download Cygwin (Chose 32 bit or 64 bit Cygwin package as per your system)

- Run the Cygwin installation file which you downloaded above and follow the screen.

- Select download source as “Install from Internet.”

- Set a root directory where you would like your application installed

- Select a directory where you would like to install your Cygwin packages

- Select Direct connection if you’re not using a proxy.

- Select a mirror to download your packages. You can choose any from the list.

- Packages available for installation will be shown; this is where we have to select ansible – select view as Full explicitly and then search for “ansible” and then select the latest version as shown below.
- Ansible-doc is optional, click next

- Review and confirm changes by clicking next

- It will download and install the necessary packages.

- Once done, you will get a success message, click Finish

Congratulation! You have installed Cygwin with Ansible on Windows. Let’s verify it.
- Double click on Cygwin Terminal icon from the desktop and type
ansible --version

And, as you can see, it has successfully installed.
Go ahead and play around with it. If you are interested in learning Ansible, then check out this Udemy course.
Using Ubuntu on Windows 10
Thanks to Microsoft. Now it is possible to install Ubuntu on Windows 10.
Let’s get it started.
- Search for Windows features in the search box. And when the “Turn Windows features on or off ” appears, click on that.

- A window will open with a bunch of features. Scroll down and check the box of Windows Subsystem for the Linux option. And after that, click on the OK button.

- Open the Microsoft Store and search for Ubuntu to install the latest version.

- After the installation, you will see a launch button, use that to open the Ubuntu bash.
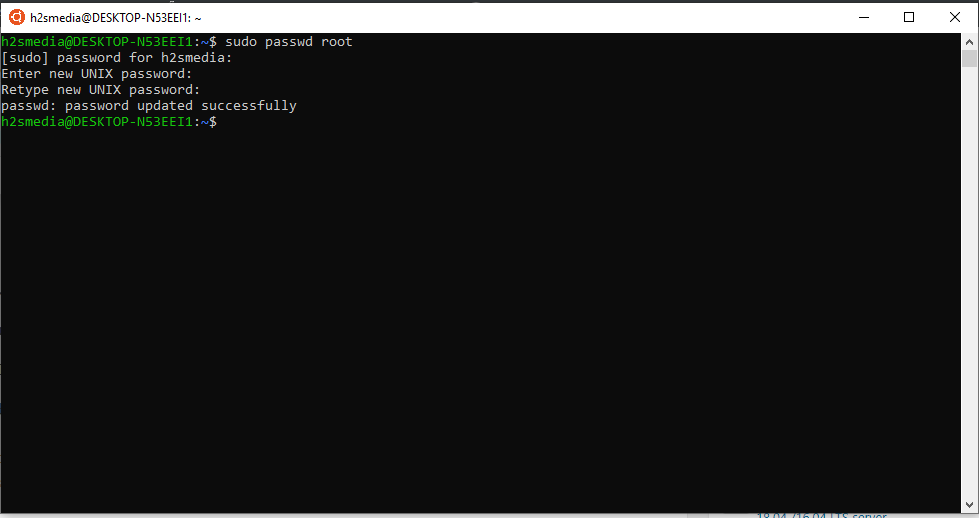
- On Ubuntu bash, it will ask you to set the username and password for the default user. You can also set the root account password from here by typing
sudo passwd root

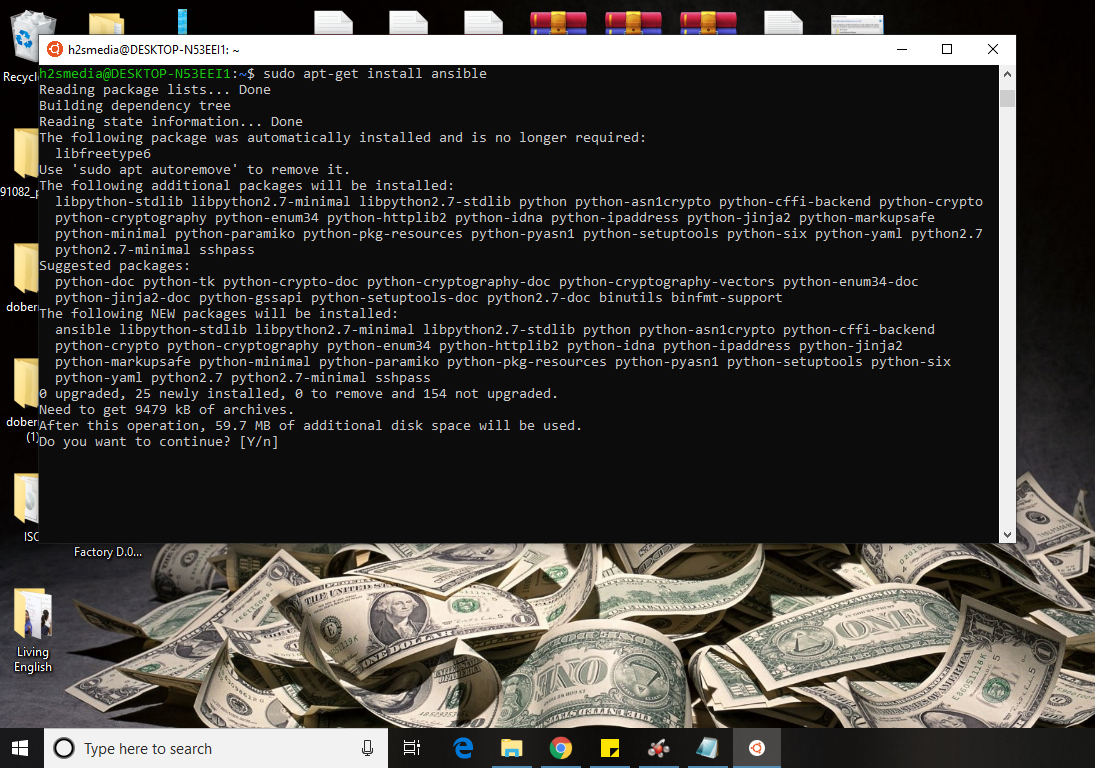
- Its time to get the Ansible installed with the following commands.
sudo apt-get update
sudo apt-get install software-properties-common
sudo apt-add-repository ppa:ansible/ansible
sudo apt-get update
sudo apt-get install ansible- Press Y when it asks for…

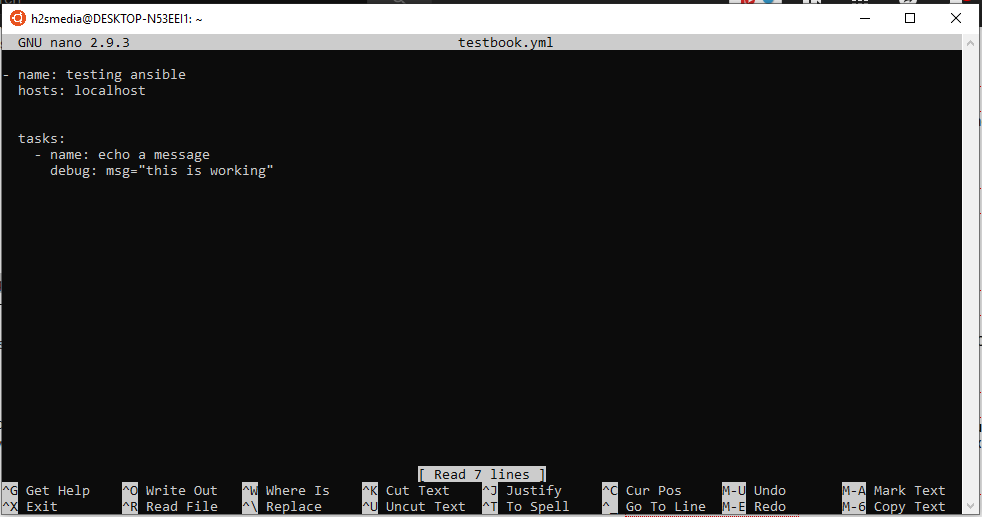
After the installation, let’s test whether by creating and running a demo playbook.
- Create a file called testbook.yml
nano testbook.yml- Add the following lines and save the file
- name: testing ansible
hosts: localhost
tasks:
- name: echo a message
debug: msg=”this is working"
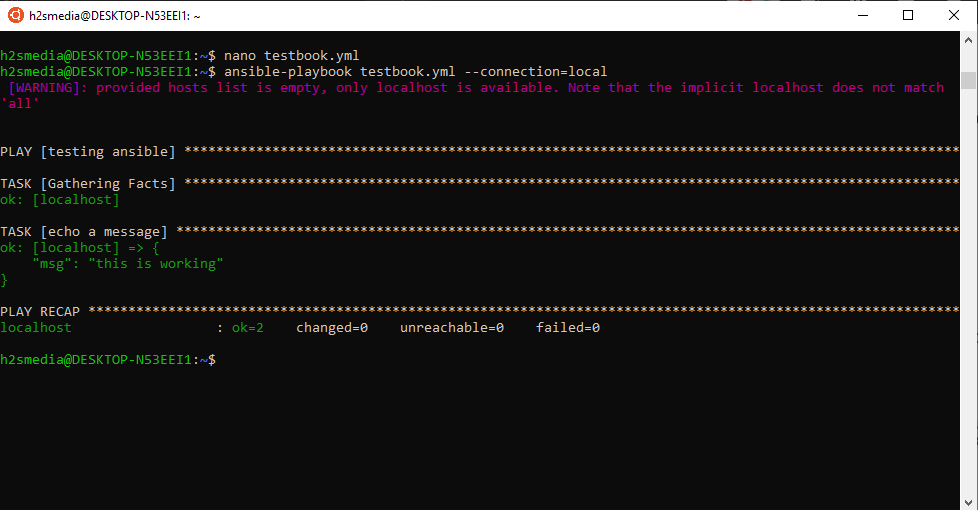
And, finally, run the playbook.
ansible playbook testbook.yml --connection=localConclusion
I hope this helps you to install Ansible on Windows. Check out this blog post to learn about the playbook to automate the tasks.
Even though Ansible is known for managing Linux nodes using SSH, did you know that Ansible on Windows works just as well? Using Windows Remote Management (WinRM), Ansible on Windows can effectively manage all of your Windows nodes too!
Not a reader? Watch this related video tutorial!
Not seeing the video? Make sure your ad blocker is disabled.
With Ansible on Windows, you can perform tasks like deploying patches, managing Windows servers, execute PowerShell scripts, and more.
In this tutorial, you’re going to learn how to set up your first Windows node to be managed with Ansible and see how to run commands and playbooks against it.
Prerequisites
If you’d like to follow along with the tutorial, please be sure you have the following before starting:
- An Ansible controller host – This tutorial will be using Ansible v2.9.18 on an Ubuntu 18.04.5 LTS machine with an IP address of 10.111.4.53. Note that Windows is not supported as a control node, only a managed node.
- Python installed on your Ansible controller host – This tutorial will be using Python v2, but v3 should work just as well.
- The pip package installed on the Ansible controller.
- A Windows 2012 R2 or greater computer for Ansible to manage – This tutorial will use two Windows Server 2012 R2 Standard machines as remote nodes with IP addresses of 52.242.251.213 and 10.111.4.106.
- A Windows workstation – This tutorial will perform some basic pre-configuration to the node that Windows will manage with Ansible and will require you to sitting at a Windows workstation.
- The Windows server to manage has PowerShell Remoting enabled
- A user account in the local Administrators group on the Windows computer. This tutorial will use an account called adminuser.
Setting up the WinRM listener on Windows
Before Ansible can communicate with a remote Windows node, it must be able to make a connection to it. It does this through the Microsoft protocol WinRM. WinRM is the same protocol that PowerShell Remoting uses to run remote commands from within PowerShell.
As of this writing, Ansible does support SSH as a management protocol, but it’s an experimental feature at this time.
For Ansible to use WinRM to communicate with the Windows node, you must configure WinRM. To do this, Ansible provides a PowerShell script that sets various WinRm options.
Although the PowerShell script that Red Hat provides to configure WinRM has been tested and is safe, you should read through it and understand, at a high level, what it’s doing.
Your first task will be to download the configuration script and run Ansible on the Windows node. To do that, assuming you already have PowerShell Remoting enabled on your target Windows computer and you’re at a Windows workstation:
Download the ConfigureRemotingForAnsible.ps1 PowerShell script to your local Windows computer. This tutorial will assume it’s saved in ~Downloads.
Run the configuration script on the Windows node Ansible will manage using the Invoke-Command command. The command below will run the command on the tutorial’s two demo machines and prompt you for the password for the local adminuser account on the Windows nodes.
Invoke-Command -ComputerName 52.242.251.213, 10.111.4.106 -FilePath '~DownloadsConfigureRemotingForAnsible.ps1' -Credential (Get-Credential -UserName adminuser)By default, the configuration script will configure WinRM for basic HTTP authentication. If you’d like Ansible to use a more secure connection, learn How to Configure WinRM over HTTPS for Ansible.
Configuring the Controller of Ansible on Windows
Now that the Windows node is ready for Ansible, let’s now configure the Ansible controller to show Ansible how to communicate with it.
1. Connect to your Ansible controller host via SSH using your favorite SSH client.
2. Install the pywinrm Python module. The pywinrm Python module is required for Ansible on Windows to communicate to hosts via the WinRM protocol.
3. Define the remote Windows nodes in an Ansible inventory file. An Ansible inventory is a collection of remote hosts defined in a file either by their hostname or IP address. Once defined, you can then target Ansible inventories with commands and playbooks, as you’ll soon see.
The default Ansible inventory file is located in the /etc/ansible/hosts directory.
The sample inventory file below is created a windows host group that contains each Windows node. The tutorial is using a host group here to make it easier to target all Windows nodes (if you have more than one) at once later.
[windows]
 54.242.251.213
 10.111.4.106
4. Next, define a few required variables Ansible will use when connecting to the Windows hosts in the inventory file as a windows:vars group.
[windows:vars]
ansible_user=localadmin ## the windows username for ansible to communicate
ansible_password=s3crect ## the windows password for ansible to communicate
ansible_connection=winrm ## The kind of connection which ansible will make with remote windows node
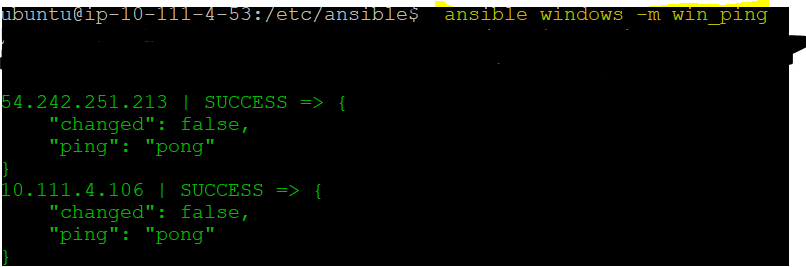
ansible_winrm_server_cert_validation=ignore ## ignore certificate validation because we'll just be using a self-signed certificate that comes with Ansible5. Now, use the Ansible win_ping module to execute a simple connection test to the hosts inside of the windows host group defined in step #3.
# windows is the host group
# -m tells Ansible to use the win_ping module
 ansible windows -m win_ping
Once executed, you can see below that Ansible returns green text with a SUCCESS message indicating the successful ping attempt.

The output confirms that the Ansible controller host can communicate with the Windows remote host successfully over WinRM.
At this point, you’re all set for Ansible to begin controlling your Windows nodes. Let’s now test this out by running an ad-hoc command on the Windows nodes to change them. Ad-hoc commands are great when you need to run a simple command on nodes without first creating a playbook.
Let’s demonstrate ad-hoc commands by installing a Windows feature on the Windows nodes defined in the windows host group in the inventory file. To do that, assuming you’re still SSHed into your Ansible controller node:
1. Instead of the win_ping module this time, call the win_feature module (-m), passing it two arguments (-a) of name and state indicating the name of the Windows feature and the state you desire it to be in.
# windows here is a group of hosts
# win_feature is the name of the module
# state=present means to install the package or service
 ansible windows -m win_feature -a "name=Telnet-Client state=present"
When you run the above command, if all goes well, Ansible should connect to all of the nodes in the windows host group and run the win_feature command on each checking for, and if not present, installing the Telnet-Client Windows feature.
2. Ansible shows success, but to be sure, connect to the Windows nodes manually with PowerShell and verify the Telnet Client Windows feature is now installed. On your local Windows workstation, run Invoke-Command to run the Get-WindowsFeature PowerShell command on each Windows computer.
Invoke-Command -ComputerName 52.242.251.213, 10.111.4.106 -ScriptBlock { Get-WindowsFeature -Name 'Telnet-Service' } -Credential (Get-Credential -UserName adminuser)At this point, you can run any Windows module you like as ad-hoc commands!
Creating and Running Ansible on Windows Playbooks
Once you’ve mastered the art of running ad-hoc commands on Windows managed nodes, your next task is to create and run playbooks.. An Ansible playbook combines commands into a single place and allows you to write complex logic to perform complex automation scenarios.
Running Remote Windows Commands with the win_command Module
Assuming you’re still connected to your Ansible controller host:
1. Create a folder under your home directory called ansible-windows-demo and change to it. This folder will hold your playbook.
mkdir ~/ansible-windows-demo
cd ~/ansible-windows-demo
2. Open your favorite text editor and create and save a file called ansible-windows.yml in the ~/ansible-windows-demo directory.
Ansible playbooks are written in YAML
3. Now, copy the below playbook into the ansible-windows.yml file to create a single task. This playbook will execute the netstat Windows command using the win_command Windows Ansible module on all hosts inside the windows host group.
The win_command module executes commands on windows remote host. It doesn’t allow commands which include variables such as special characters, line breaker, greater than symbol, etc.
---
- name: Ansible win_command module example
hosts: windows # host group to run the module on
tasks:
- name: run an executable command on a remote Windows system
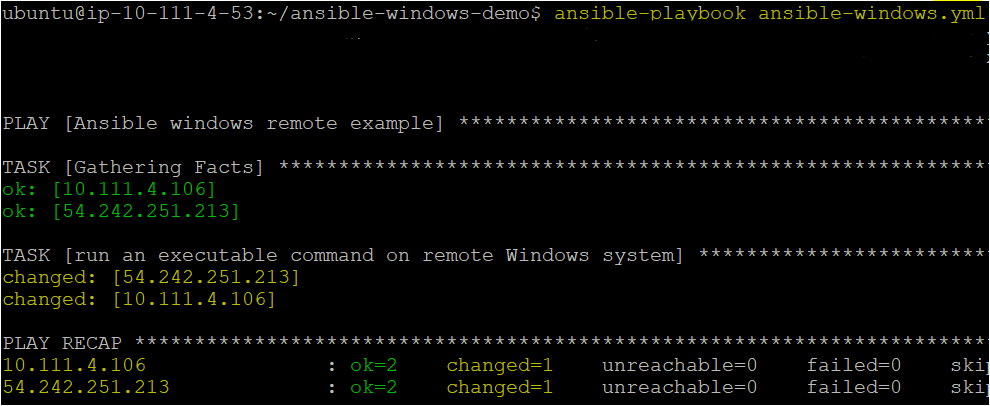
win_command: netstat -e # win_command is a Windows module. 4. Invoke the ansible-windows.yml playbook, which executes the task on the remote host by running the following command.
ansible-playbook ansible-windows.ymlIf all went well, you should see output like below.
Running Remote PowerShell Commands with the win_shell Module
You created a playbook to run a remote cmd.exe command (netstat) on Windows managed nodes in the previous example. Let’s now up the ante a bit and run PowerShell commands using the win_shell module.
By default win_shell module runs on PowerShell on windows host
On your local Windows workstation:
1. First, open your favorite text editor on your local Windows workstation and create a sample PowerShell script and copy the following code into it, saving it as one.ps1. This tutorial will save the script to ~one.ps1.
The below code creates a blank text file called test2.txt in the C:temp directory.
Set-Content -Path C:temptest2.txt -Value ''2. Copy the one.ps1 PowerShell script to your Windows managed nodes using your preferred method. This tutorial will assume you’ve copied the one.ps1 script to the C:Temp folder on each Windows node.
3. Once the sample PowerShell script is one the Windows node(s), connect to your Ansible controller host and open your favorite text editor again. This time, create and save another playbook called ansible-windows-shell.yml in the same ~/ansible-windows-demo directory.
4. Copy and paste the following playbook into the ansible-windows-shell.yml file. This playbook will run two tasks to demonstrate the win_shell module. It invokes the PowerShell script just copied from step #2 and inserts the PowerShell code directly into the playbook to demonstrate the script isn’t needed at all.
To pass multiple lines of PowerShell code to the win_shell module, use the
|pipe character.
---
 - name: Ansible win_shell module example
   remote_user: localadmin # local Windows user to connect with
   hosts: windows # remote host group
   tasks:
    - name: Single line PowerShell # Running single command using win_shell module
      win_shell: C:tempone.ps1
    - name: Run multi-lined shell commands
      win_shell: |
        $text = ' Iam Author of ATA'
       Set-Content -Path C:temptest3.txt -Value $text
5. Now, invoke the second playbook ansible-windows-shell.yml, which executes on the remote host but with PowerShell.
ansible-playbook ansible-windows-shell.yml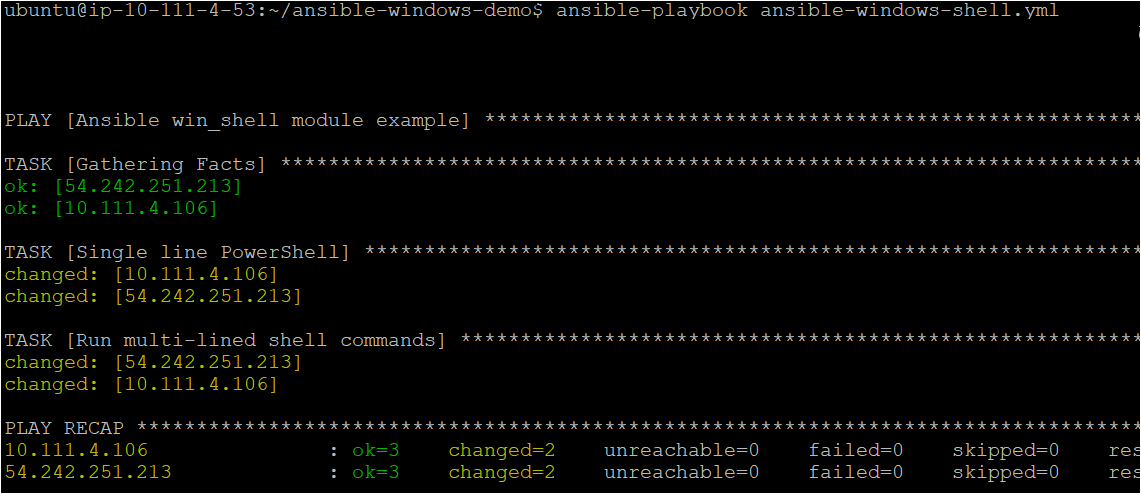
6. If necessary, on your local Windows workstation, verify the playbook executed the existing script and the PowerShell code in the playbook.
Invoke-Command -ComputerName 52.242.251.213, 10.111.4.106 -ScriptBlock { Test-Path -Path 'C:Temptest3.txt','C:Temptest2.txt' } -Credential (Get-Credential -UserName adminuser)If the Ansible playbook ran successfully, PowerShell should return two True statements indicating that the files now exist.
Conclusion
In this tutorial, you’ve learned how to set up your first Windows managed node in Ansible. Even though Ansible has traditionally been known as a Linux tool, it can easily be used for Windows also!
What playbooks and Windows modules will you start using to manage Windows with Ansible?
Know simple way to configure Ansible on Windows 10 using Windows subsystems for Linux such as Debian, Open Suse or Ubuntu.
Ansible is an open source software available for Linux Based systems such as Debian, Redhat, Ubuntu, Centos and more… Besides the free product, it also comes in an enterprise version called Ansible Tower. It was acquired by RedHat (2015) and written in Python. It is basically powerful and simple to setup tool that uses for making the automation process. It can help in configuration management, application deployment, and task automation.
This tool is capable of handling complex operations without the need of some agent on the remote machine. It can connect remotely via SSH or Powershell.
Ansible is very much able to handle multiple tasks simultaneously. For example, the user can upgrade some remote server while simultaneously detaching that from any cluster. Means many complex tasks can be done from a single point on the screen. It also has an extensible architecture which allows users to use Ansible modules to add extra functionality into it. They are mostly standalone and written in language like Python, Perl, Ruby, Bash, etcetera. So, now let’s see how to install the Ansible on Windows 10 without any virtual machine or virtualization software like VirtualBox.
- Open the Window’s Turn Windows features on or off section.
- Select the Windows Subsystem for Linux to activate it.
- Go to the Microsoft app store.
- Search for Linux.
- Multiple Linux system will appear like Debian, Ubuntu, OpenSuse
- Select the Ubuntu or any other Linux you want to install the Ansible. Here we are using Ubuntu 18.04
- Once the Ubuntu installed on Windows 10, it will ask you to create the user.
- Now add the Ansible PPA repo on Windows 10’s Ubuntu app.
- Use installation commands to install the Ansible on Windows 10 Linux subsystem.
- Now you can run Ansible on Windows to perform different management and automation tasks.
Tutorial in Detail with screenshots:
Step 1: Turn Windows features on or off
Basically, this features already on the Windows 10 and we just need to turn it on from the features option. For that just search for Windows features in the Search box. And when the “Turn Windows features on or off ” appears click on that.
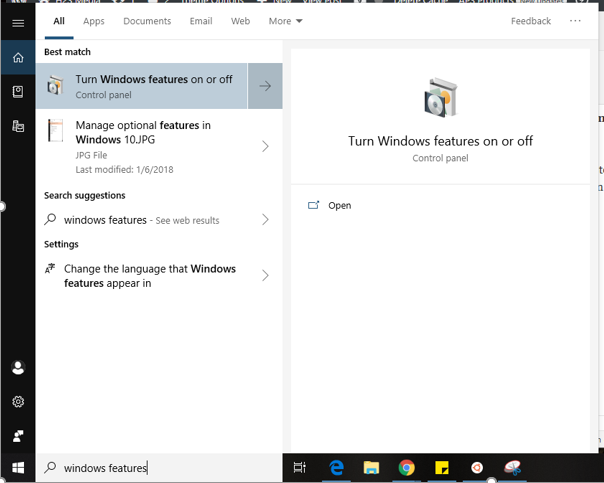
Step 2: Install the Windows SubSystem for Linux
Now a window will open with a bunch of features. Scroll down and check the box of Windows Subsystem for Linux option. And after that click on the OK button.

Step 3: Open the Microsoft Store
To open the App store of Microsoft for Windows click on the search box and type Microsoft store. The moment it will appear, click on that.

Step 4: Install Ubuntu 18.04 on Windows 10
Now search for the Ubuntu and install the latest version which is 18.04. As soon as it appears, you will see GET button, click on that and install it on your Windows 10. After the installation, you will see a launch button, use that to open the Ubuntu Bash. You can install any other Linux system such as Debian, Kali Linux, and OpenSuSE to install the Ansible.

Step 5: Set the credentials
When the Ubuntu Bash opens, it will ask you to set the username and password for default user of your Ubuntu on Windows. We can also set the root account password from here. Just type sudo passwd root
Step 6: Install Ansible on Windows
For installing and running Ansible on Windows just use the below-given commands:
sudo apt-get update
sudo apt-get install software-properties-common
sudo apt-add-repository ppa:ansible/ansible
sudo apt-get update
sudo apt-get install ansible
Note: For older Ubuntu versions such as Ubuntu 14.04, 15.04, and 16.04, we need to add the repo of Ansible but the latest version such as Ubuntu 18.04 can get the Ansible installation files directly from via its package management.
Press Y when it asks for…
Step 7: Test Ansible on Windows
After the installation of Ansible, we will test it whether it is working or not. So, we create a demo playbook file for it.
Create a file called testbook.yml
nano testbook.yml
Now add the following lines into it and then exit and save the file.
- name: testing ansible
hosts: localhost


tasks:
- name: echo a message
debug: msg="this is working"
Step 8: Now run the ansible command to check whether it is working or not.
The command is:
ansible playbook testbook.yml --connection=local
Note: We are pointing the ansible to localhost because we want to test the file present on localhost.
It will prompt a message the mentioned host file is empty. So, in the next, we will also give it some demo inventory file.
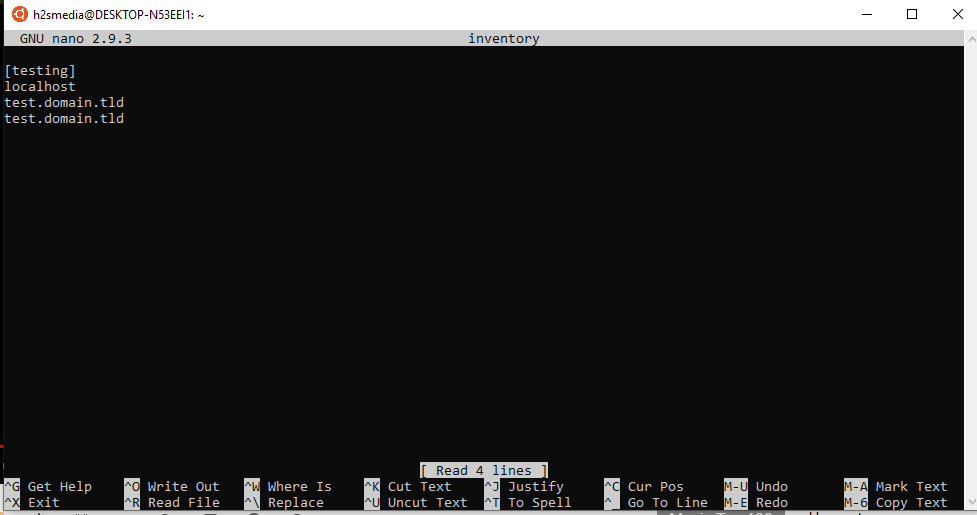
Step 9: Create a demo inventory for Ansible
Create a file with any name you want, we are using ‘inventory’. So, the command is:
nano inventory
Now add the following lines into it… Here we are adding some random non-existing demo domains in a group of localhost in the file for testing purpose.
[testing]
localhost
test.domain.tld
test.domain.tld
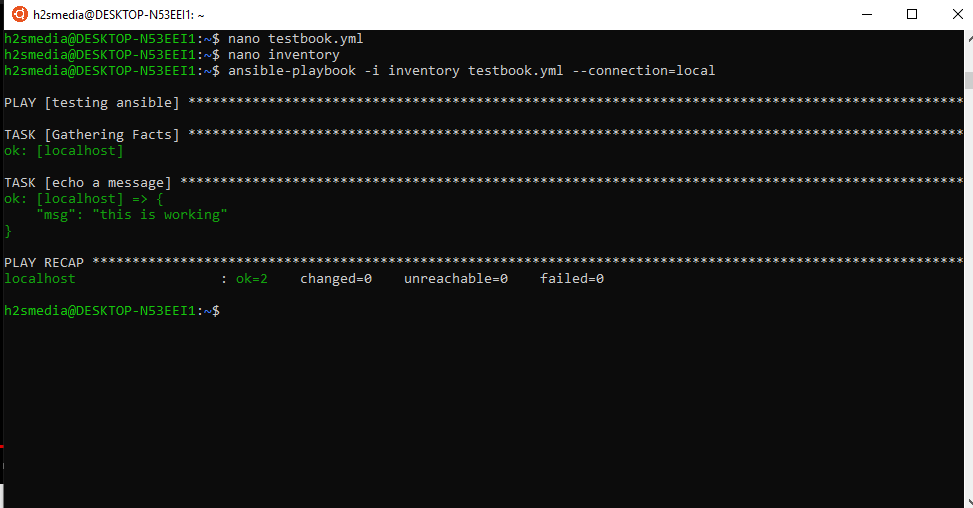
Step 10: Run the Ansible command with inventory
This time again we run the same command above but with inventory file available
ansible playbook -i inventory testbook.yml --connection=local
This time you will see that it will not be going to show any error.
So, in this way, we can install the Ansible on Windows 10 for testing and other purposes.
Other Useful Resources:
- How to Install MySQL Workbench on Fedora and RedHat (REHL)
- Download and install VLC media player on RHEL/Centos/Fedora…
- How to get out of safe mode in Windows 10/ 7/ 8 via command prompt
- Tutorial to download and install Blender in Ubuntu
- How to install Webmin on Ubuntu 18.04 /16.04 LTS server
Ever since I heard about the new ‘Beta’ Windows Subsystem for Linux, which basically installs an Ubuntu LTS release inside of Windows 10 (currently 14.04), I’ve been meaning to give it a spin, and see if it can be a worthy replacement for Cygwin, Git shell, Cmder, etc. And what I was most interested in was whether I could finally point people to a more stable and friendly way of using Ansible on a Windows workstation.
In the past, there was the option of running Ansible inside Cygwin (and this is still the best way to try getting Ansible working in an older Windows environment), but this always felt kludgy to me, and I hated having to recommend either that or forcing Windows users to do a full Linux VM installation just to run Ansible commands. I finally updated my PC laptop to the latest Windows 10 Anniversary Update, and installed the Windows Subsystem for Linux, and lo and behold, Ansible works!
In this blog post, I’ll show you how to install and use Ansible on Windows 10.
Installing Bash on Windows 10
For reference, here are the official instructions from Microsoft: Bash on Ubuntu on Windows — Installation Guide.
Before installing the Linux Subsystem, you have to have:
- Windows 10 (Anniversary update or later version)
- 64-bit installation (can’t run on 32-bit systems)
Once you verify your system is 64-bit and up to date, you have to do a few manual steps to enable the ‘Windows Subsystem for Linux’:
- Open ‘Settings’ (the cog in the start menu)
- Click ‘Update & Security’, then click the ‘For developers’ option on the left.
- Toggle the ‘Developer mode’ option, and accept any warnings Windows pops up.
Wait a minute for Windows to install a few things in the background (it will eventually let you know a restart may be required for changes to take effect—ignore that for now). Next, to install the actual Linux Subsystem, you have to jump over to ‘Control Panel’ (why is this separate from ‘Settings’?), and do the following:
- Click on ‘Programs’
- Click on ‘Turn Windows features on or off’
- Scroll down and check ‘Windows Subsystem for Linux (Beta)’, and then click OK.
The subsystem will be installed, then Windows will require a reboot. Reboot, then open up the start menu and enter ‘bash’ (to open up ‘Bash’ installation in a new command prompt). Fill out all the questions (it will have you create a separate user account for the Linux subsystem), and once that’s all done (it takes a few minutes to install), you will finally have Ubuntu running on your Windows laptop, somewhat integrated with Windows.
Installing Ansible
To install Ansible, since we’re basically in an Ubuntu environment, it’s as simple as installing pip, then installing Ansible:
- Open a bash prompt (from start menu, type ‘bash’ and hit enter).
- Install Pip:
sudo apt-get -y install python-pip python-dev libffi-dev libssl-dev - Install Ansible:
pip install ansible --user(--userinstalls packages local to the user account instead of globally to avoid permissions issues with Pip and the Linux Subsystem) - Since the
ansible*commands are installed under~/.local/bin, we need to add that to the $PATH, so run the command:echo 'PATH=$HOME/.local/bin:$PATH' >> ~/.bashrc - Either exit out of the bash prompt and start it again from the Windows menu, or run
source .bashrcto update your$PATHto include Ansible.
Note the use of
--userfor thepip installcommand; due to some peculiarities of the way the Linux subsystem works, Pip can’t easily install packages globally, so we install packages just for the user account we set up for bash.
Using Ansible
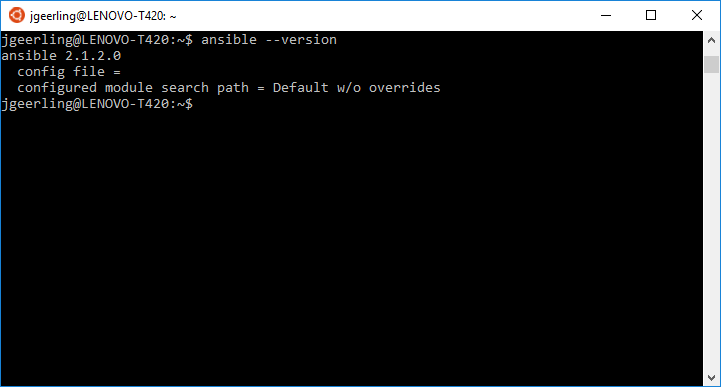
At this point, which ansible should show the path to Ansible, ansible --version should show you Ansible’s version, and you should be able to use ansible and the rest of the command-line tools (e.g. ansible-playbook, ansible-galaxy, etc.) as you would on any common environment.
If you get the error message
ImportError: No module named markupsafe, try installing markupsafe manually withpip install markupsafe --user. See this GitHub issue for more detail.
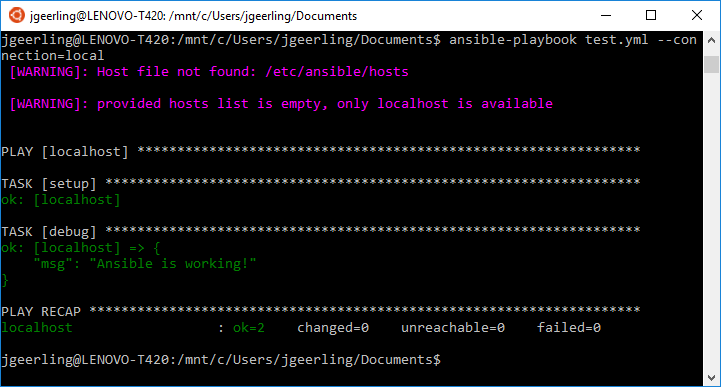
If you want to run a playbook that’s stored in your Windows user account’s Documents folder (e.g. C:UsersjgeerlingDocuments), you can do so by navigating to /mnt/c/Users/jgeerling/Documents (where jgeerling is your username). Windows drives are mounted in the Subsystem inside the /mnt directory. Let’s create a test playbook and see if it works!
- Open a bash prompt, and
cdinto your Windows user’s Documents directory:cd /mnt/c/Users/jgeerling/Documents. - Create a new test playbook:
touch test.yml -
User nano or some other editor to add the following contents:
--- - hosts: localhost tasks: - debug: msg="Ansible is working!" - Run the playbook with the command
ansible-playbook test.yml --connection=local
Ansible should run the command and print out the debug message. Ansible might warn about no inventory file being present, but since you’re using --connection=local, the localhost host should automatically work.
Going further
Now that you have Ansible installed, you can start automating everything (even including the rest of the bash environment)! If you need to, you can generate an SSH key for use connecting to servers, use ssh to directly connect to servers, etc. It’s basically a full Ubuntu LTS install running inside Windows!
![]()
Ansible is a configuration management, provisioning and deployment tool which is quickly gaining popularity in the DevOps areas. Managing and working on various platforms including Microsoft Windows.
What makes Ansible stand out of other configuration management tools is that it’s agentless. Which means no software is required on the target host. Ansible uses SSH for communication with Unix based hosts and WinRM for Windows hosts.
Recent announcement from Microsoft’s team is an upcoming fork of OpenSSH for Windows, which would make things ever smoother for DevOps teams managing Windows infrastructure.
In this post we will get started with Ansible by:
- Setup of the control machine
- Configure Windows server in order to receive commands from Ansible
- Install Chocolatey and SQL Server
Ansible requires PowerShell version 3.0 and .NET Framework 4.0 or newer to function on older operating systems like Server 2008 and Windows 7.
If you covered the requirements, let’s get started with the first step.
Setup Ansible control machine
As previously mentioned Ansible is agentless, but we need control machine — machine which talks to all of our hosts.
Ansible can’t run on Windows but there’s a trick
Currently Ansible can only be installed on Unix based machines, but if you are using Windows as your primary OS, you can install Ubuntu subsystem. Read this for further installation details. If you are non Windows user please continue reading.
Install Ansible
After the installation of Ubuntu subsystem on Windows (if you had so), lets proceed with the installation of Ansible by opening terminal.
Install Ubuntu repository management:
$ sudo apt-get install software-properties-common
Lets update our system:
$ sudo apt-get update
Add Ansible repository:
$ sudo apt-add-repository ppa:ansible/ansible
Then install Ansible:
$ apt-get install ansible
Add Python package manager:
$ apt install python-pip
Add Python WinRM client:
$ pip install pywinrm
Install XML parser:
$ pip install xmltodict
If every thing went OK you should be able to get the current version:
$ ansible --version
So far, so good. Lets continue with configuration of the tool.
Configure Ansible
Inventory — list of the hosts
Inventory.yml is the main configuration file of your hosts addresses separated in groups with descriptive names.
Let’s create that file and set the example below:
$ vim inventory.yml
Enter the IP/DNS addresses for your group:
[dbservers]
mydbserver1.dns.example 80.69.0.160

[webservers]
mywebserver1.dns.example 80.69.0.162
Enter fullscreen mode
Exit fullscreen mode
Configure the connection
We are a few steps away from establish connection to the remote servers. Let’s configure the connection itself — credentials, ports, type of connection. The convention is to name the config file based on your group of hosts.
If you want all of your inventory to use that same configuration file you can name it all.yml. We will use all.yml as all servers will have same credentials and connection type.
Let’s begin by creating folder:
$ mkdir group_vars
Create the file and edit it:
$ vim group_vars/all.yml
Add the configuration details:
ansible_user: ansible_user
ansible_password: your_password_here
ansible_port: 5985
ansible_connection: winrm
ansible_winrm_transport: basic
ansible_winrm_operation_timeout_sec: 60
ansible_winrm_read_timeout_sec: 70
Enter fullscreen mode
Exit fullscreen mode
This credentials will be used to access the remote hosts with connection set to WinRM basic authentication. We will create them in the next section.
We use basic authentication but for your production environment you probably want to use more secure schema. See this article for more info.
Configure Windows hosts
Our Windows hosts need to be configured before execute any commands on it. The following PowerShell script will do:
- Create the Ansible user we defined in all.yml
- Add the user to the Administrators group
- Set WinRM authentication to basic and allow unencrypted connections
- Add Firewall rule for WinRM with your control machine IP address
Open PowerShell on the host and execute the script:
NET USER ansible_user "your_password_here" /ADD
NET LOCALGROUP "Administrators" "ansible_user" /ADD
Set-Item -Path WSMan:localhostServiceAuthBasic -Value $true
Set-Item -Path WSMan:localhostServiceAllowUnencrypted -Value $true
netsh advfirewall firewall add rule name="WinRM" dir=in action=allow protocol=TCP localport=5985 remoteip=10.10.1.2
Enter fullscreen mode
Exit fullscreen mode
After the execution is completed we can try to ping our host from the control machine to check that connection is OK. We ping only the DB servers:
$ ansible dbservers -i inventory.yml -m win_ping
Write our first playbook
Getting back to our Ansible control machine to add a playbook — set of tasks or plays which together form the playbook.
The target is to install Chocolatey which is the community driven package manager for Windows. After that we will install SQL Server and reboot the server.
Ansible come with many modules for Windows with a lot of functionalities out of the box. They are prefixed with “win_” like for example win_feature. You can check more here for your specific needs.
Let’s continue with the creation of the playbook file:
$ vim configure-win-server-playbook.yml
In the file describe the playbook as follows:
--------
- hosts: dbservers
  tasks:
   - name: Install Chocolatey
     raw: Set-ExecutionPolicy Bypass -Scope Process -Force; iex ((New-Object System.Net.WebClient).DownloadString('https://chocolatey.org/install.ps1'))

   - name: Install SQL Server
     win_chocolatey:
     name: sql-server-2017
     state: present

   - name: Reboot to apply changes
     win_reboot:
      reboot_timeout: 3600
Enter fullscreen mode
Exit fullscreen mode
Execute the playbook by typing:
$ ansible-playbook dbservers -i inventory.yml configure-win-server-playbook.yml
You will see each task running and returning status of execution and after reboot we are all ready!
Conclusion
Ansible is really powerful tool. Microsoft and the community is doing really fantastic work for porting Ansible modules to Windows which are written in PowerShell. Yet the plan to have SSH feature on Windows is great too. No matter if your inventory is of physical or virtual servers, you should definitely try out Ansible on your infrastructure for saving time, money and of course avoid human mistakes by manually configure, deploy or provision those environments.