Learn how to get your favorites apps on Windows 11
by Loredana Harsana
Loredana is a passionate writer with a keen interest in PC software and technology. She started off writing about mobile phones back when Samsung Galaxy S II was… read more
Updated on January 19, 2023
Reviewed by
Vlad Turiceanu

Passionate about technology, Windows, and everything that has a power button, he spent most of his time developing new skills and learning more about the tech world. Coming… read more
- Android apps are delivered to users through the Google Play Store and other app stores.
- When one has an application in APK format but no Android device to install it on, one can use a third-party app.
- Windows 11, through the Windows Subsystem for Android, now allows you to open and install such files on your PC.
XINSTALL BY CLICKING THE DOWNLOAD FILE
- Download Restoro PC Repair Tool that comes with Patented Technologies (patent available here).
- Click Start Scan to find Windows 11 issues that could be causing PC problems.
- Click Repair All to fix issues affecting your computer’s security and performance
- Restoro has been downloaded by 0 readers this month.
Have you ever downloaded a file that ends with the letters APK? This normally happens to apps meant for phones and loaded onto your computer.
Most of these files end with the letters APK. It’s likely that you’ve been trying to open these files but haven’t been able to figure out where they are stored or how to install them because of their unusual extensions.
If you’re looking for a way to open or install such files on Windows 11, and have googled your way out of your hair, worry not! It’s actually much easier than this.
In fact, doing so is free, and you don’t even have to install anything. Well, you will have to download an APK file opener for your operating system – but that’s only if you don’t already have one installed. For more advanced features and a higher probability of opening an APK file, we recommend File Viewer Plus which has more than 400 extensions available.
Windows 11 is a significant upgrade over the previous versions of Windows. The reason behind this is that Microsoft keeps on updating its products with considerable changes for the sole purpose of providing users with a more convenient and improved experience.
If you have been using Windows for years and trying to install or run an Android APK file, you might have found yourself at a loss when it came to it. Lucky for you, we will break down numerous ways you can continue enjoying your treasured applications.
- Is my PC APK ready?
- What do I need to install APK files on Windows 11?
- How can I install APK files on Windows 11?
- 1. Download and install Windows Subsystem for Android
- 2. Download and install the Amazon Appstore
- 3. Sideload APKs using an APK file
- Are there implications of running APKs from third-party sites?
Is my PC APK ready?
Plenty of people download Android apps without having the right software or even knowing what file types they can expect.
There are two ways to install APK files on Windows: use an Android emulator or unpack them with a special application.
In order to install APKs on Windows 11, you need to have Hyper-V and Virtual Machine Platform enabled.
To enable the two features:
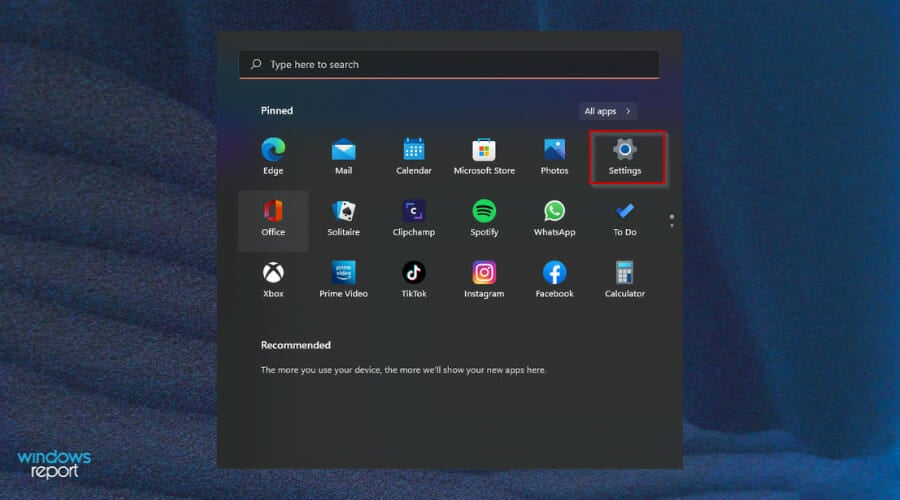
1. Hit the Windows + I keys simultaneously to open the Start Menu then select the Settings app.
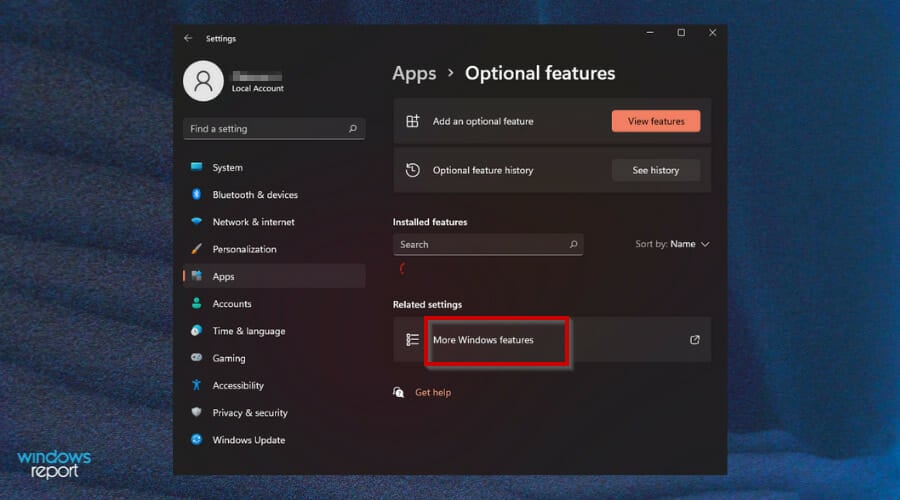
2. Navigate to Apps and select Optional features.

3. Select More Windows Features.
Some PC issues are hard to tackle, especially when it comes to corrupted repositories or missing Windows files. If you are having troubles fixing an error, your system may be partially broken.
We recommend installing Restoro, a tool that will scan your machine and identify what the fault is.
Click here to download and start repairing.
4. Locate Hyper-V and click on the checkbox then press OK.
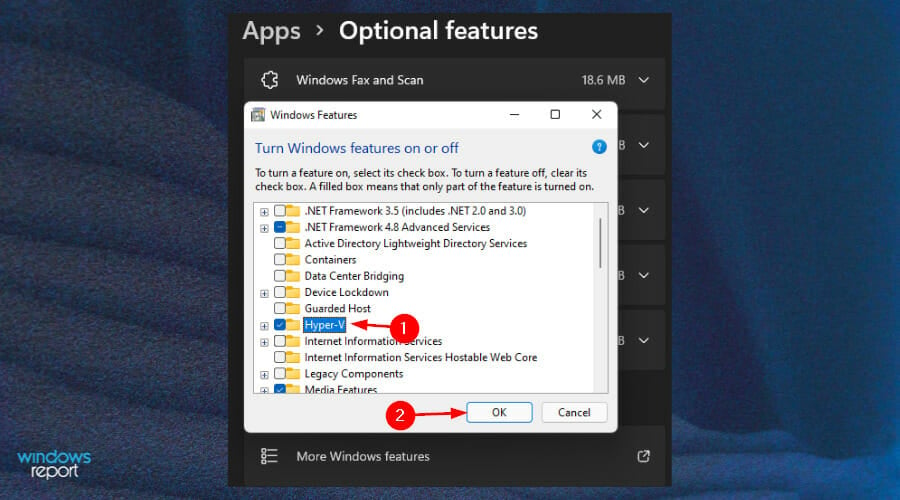
5. Also find Virtual Machine Platform, click on the checkbox and press OK.

6. Wait for the installation to complete.
What do I need to install APK files on Windows 11?
The majority of Android apps are written for phones, and won’t run on the larger screens of PCs. There are ways to get around this, but they vary in effectiveness and riskiness.
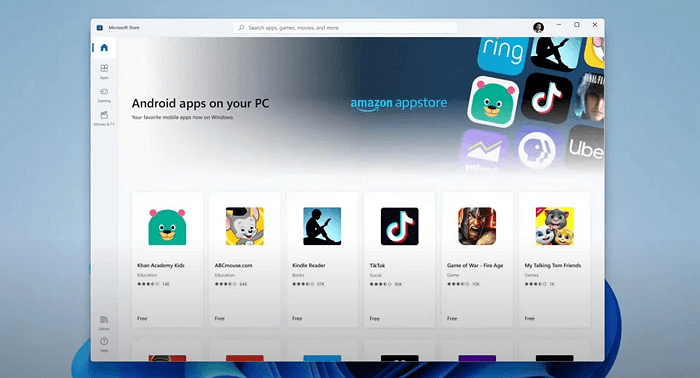
You will probably want to download a Google Play Store alternative for your Windows 11 PC. The most common app stores are the Amazon Appstore and the Microsoft Store.
The only limitation is that the stores offer a limited number of applications so if you need one that is unavailable, you will have to sideload it. In addition, your PC must meet the minimum system requirements before you can run any APKs.
Sideloading means installing apps from sources other than the official stores. There are quite a few reasons why one might want to do this: free apps, avoiding data usage when downloading games and videos, and so on.
Don’t hesitate to visit our guide on how to sideload Android apps on Windows 11 if you choose to install them from third-party sites.
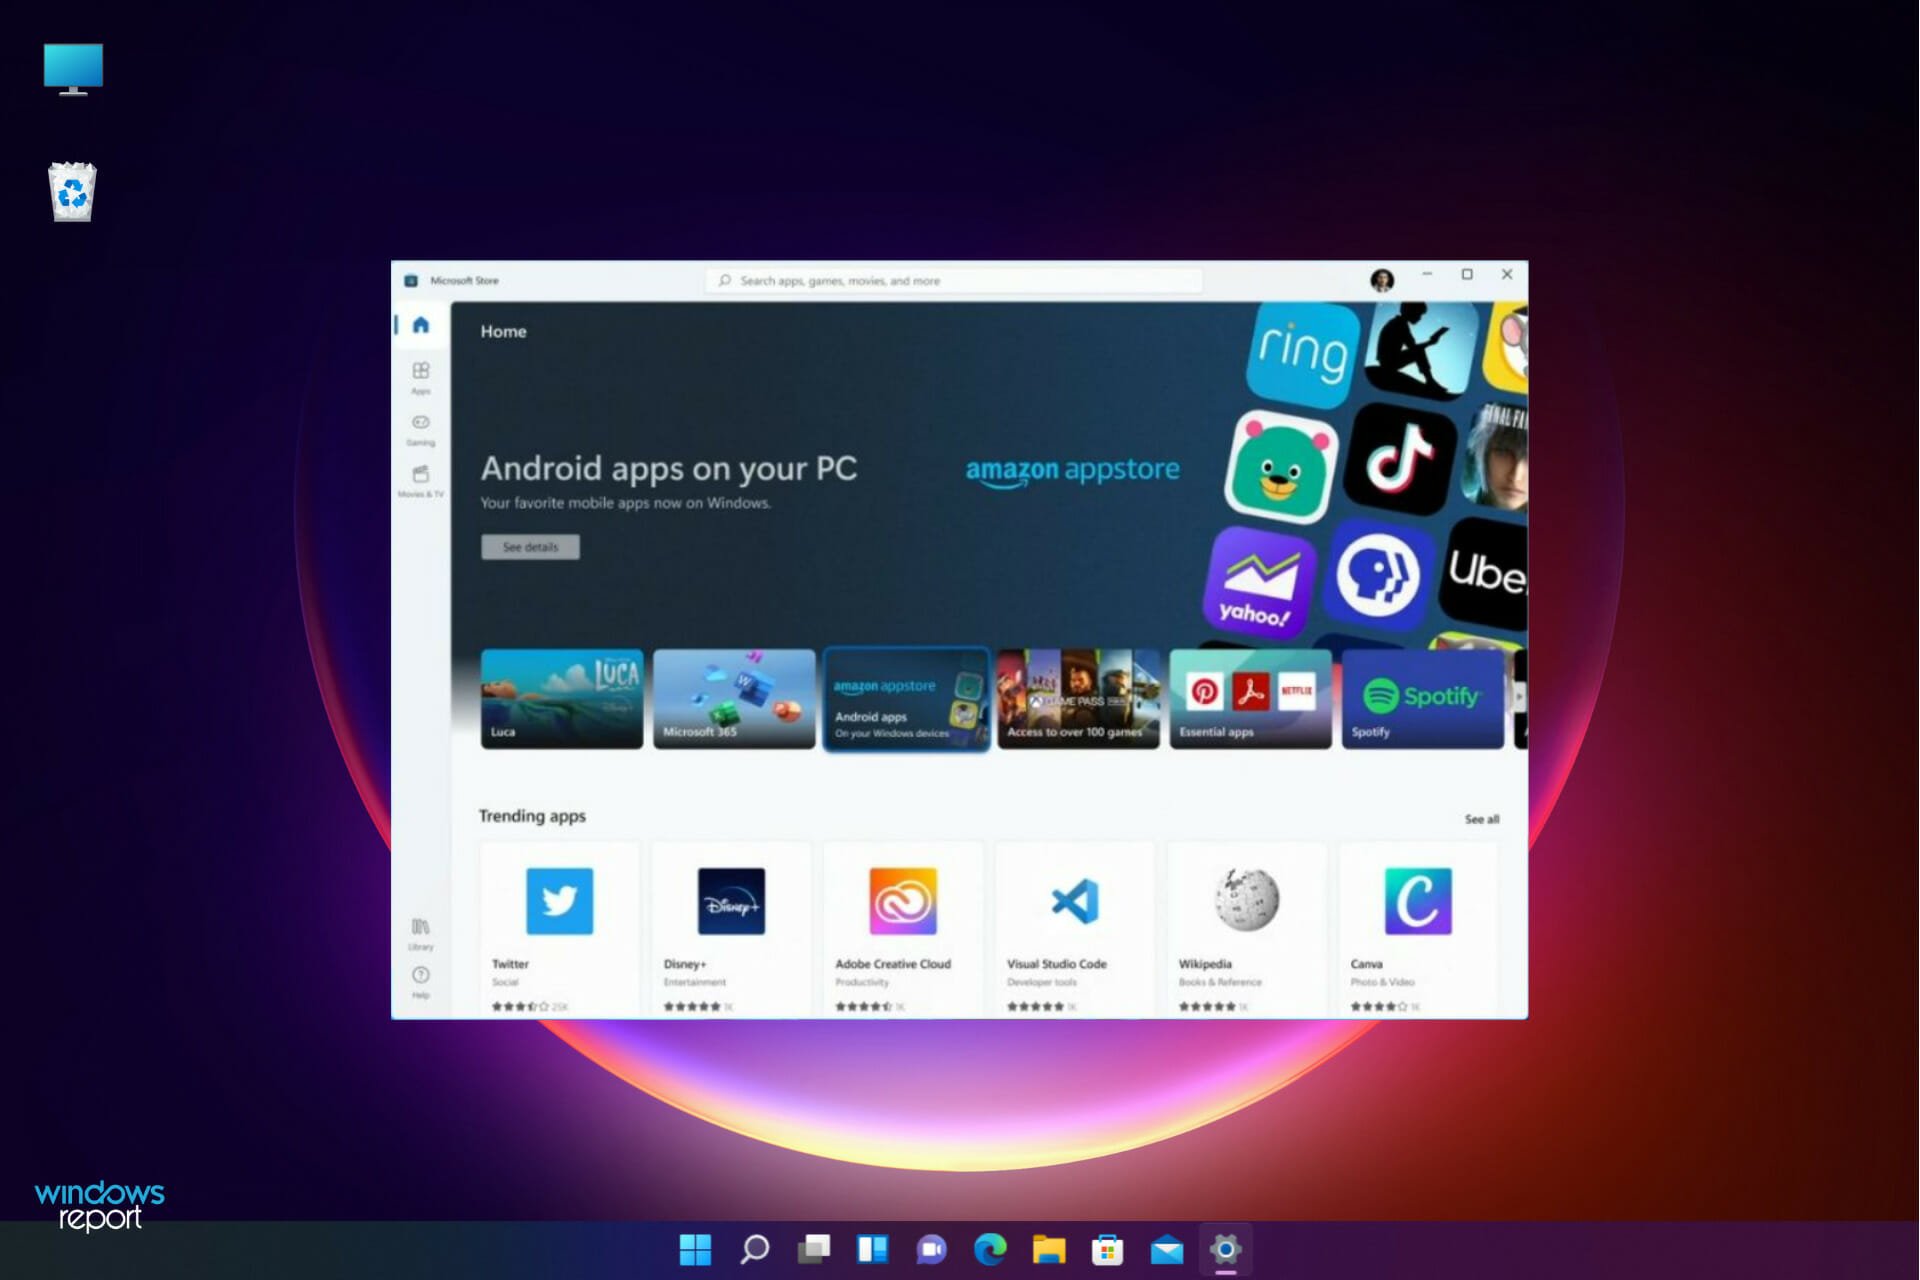
For Windows 11 users, Microsoft’s Windows Subsystem for Android is a great new addition to the operating system. It allows you to run Android apps on your PC or laptop.
How can I install APK files on Windows 11?
1. Download and install Windows Subsystem for Android
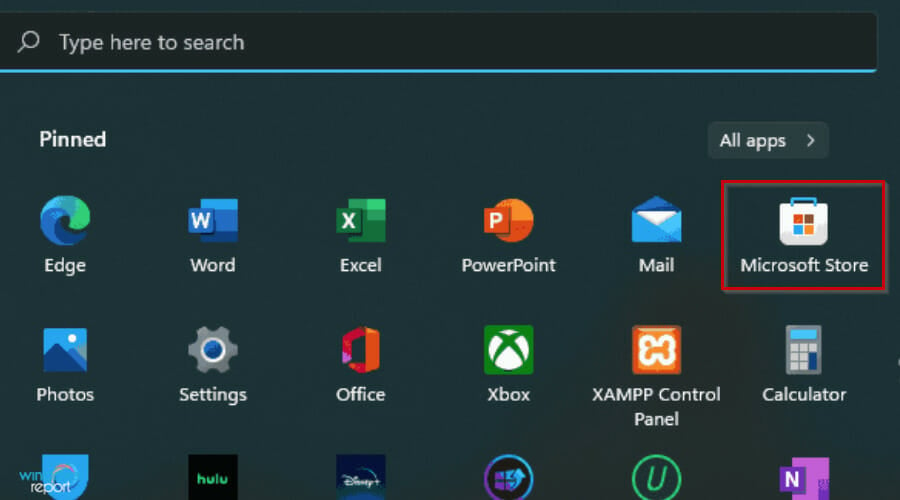
- Press the Windows + I keys to open the Start Menu.
- Select Microsoft Store to launch.

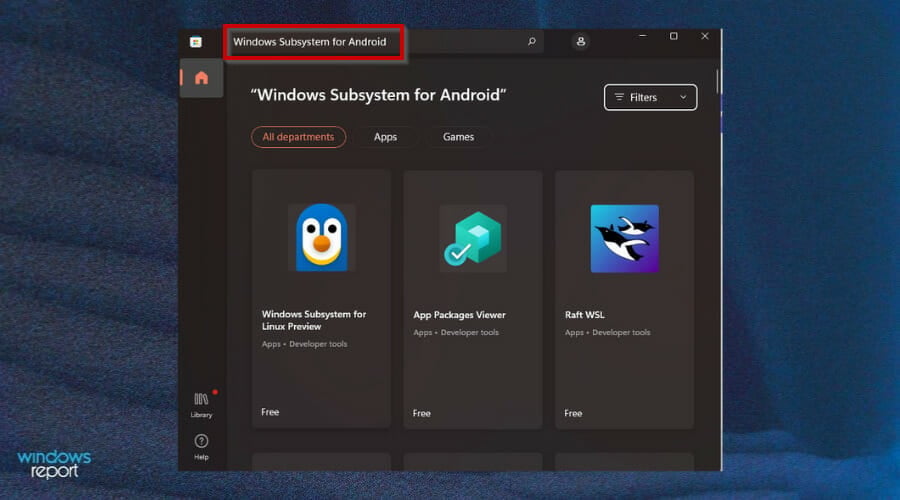
- Type Windows Subsystem for Android on the Microsoft Store search window and press Enter.
- Click Open Microsoft Store to be redirected to the Microsoft Store.
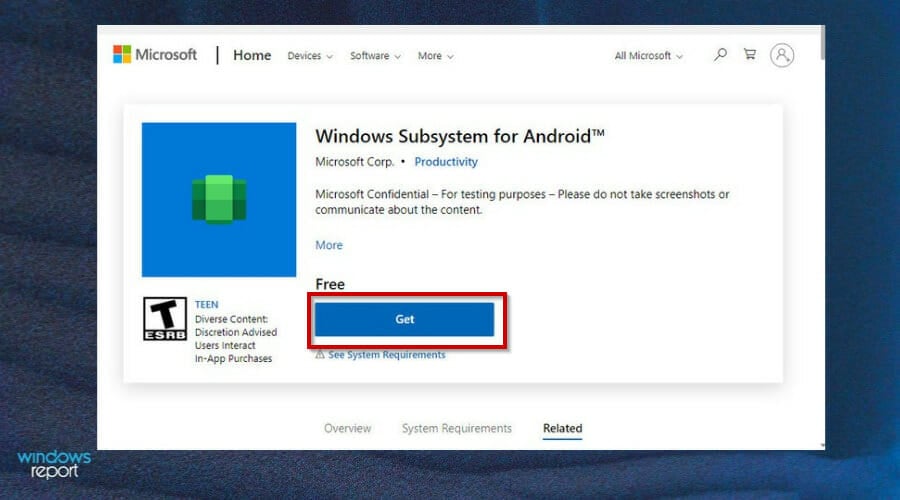
- Hit the Get button to start installation.
- Once installed, you can now download and open APKs.

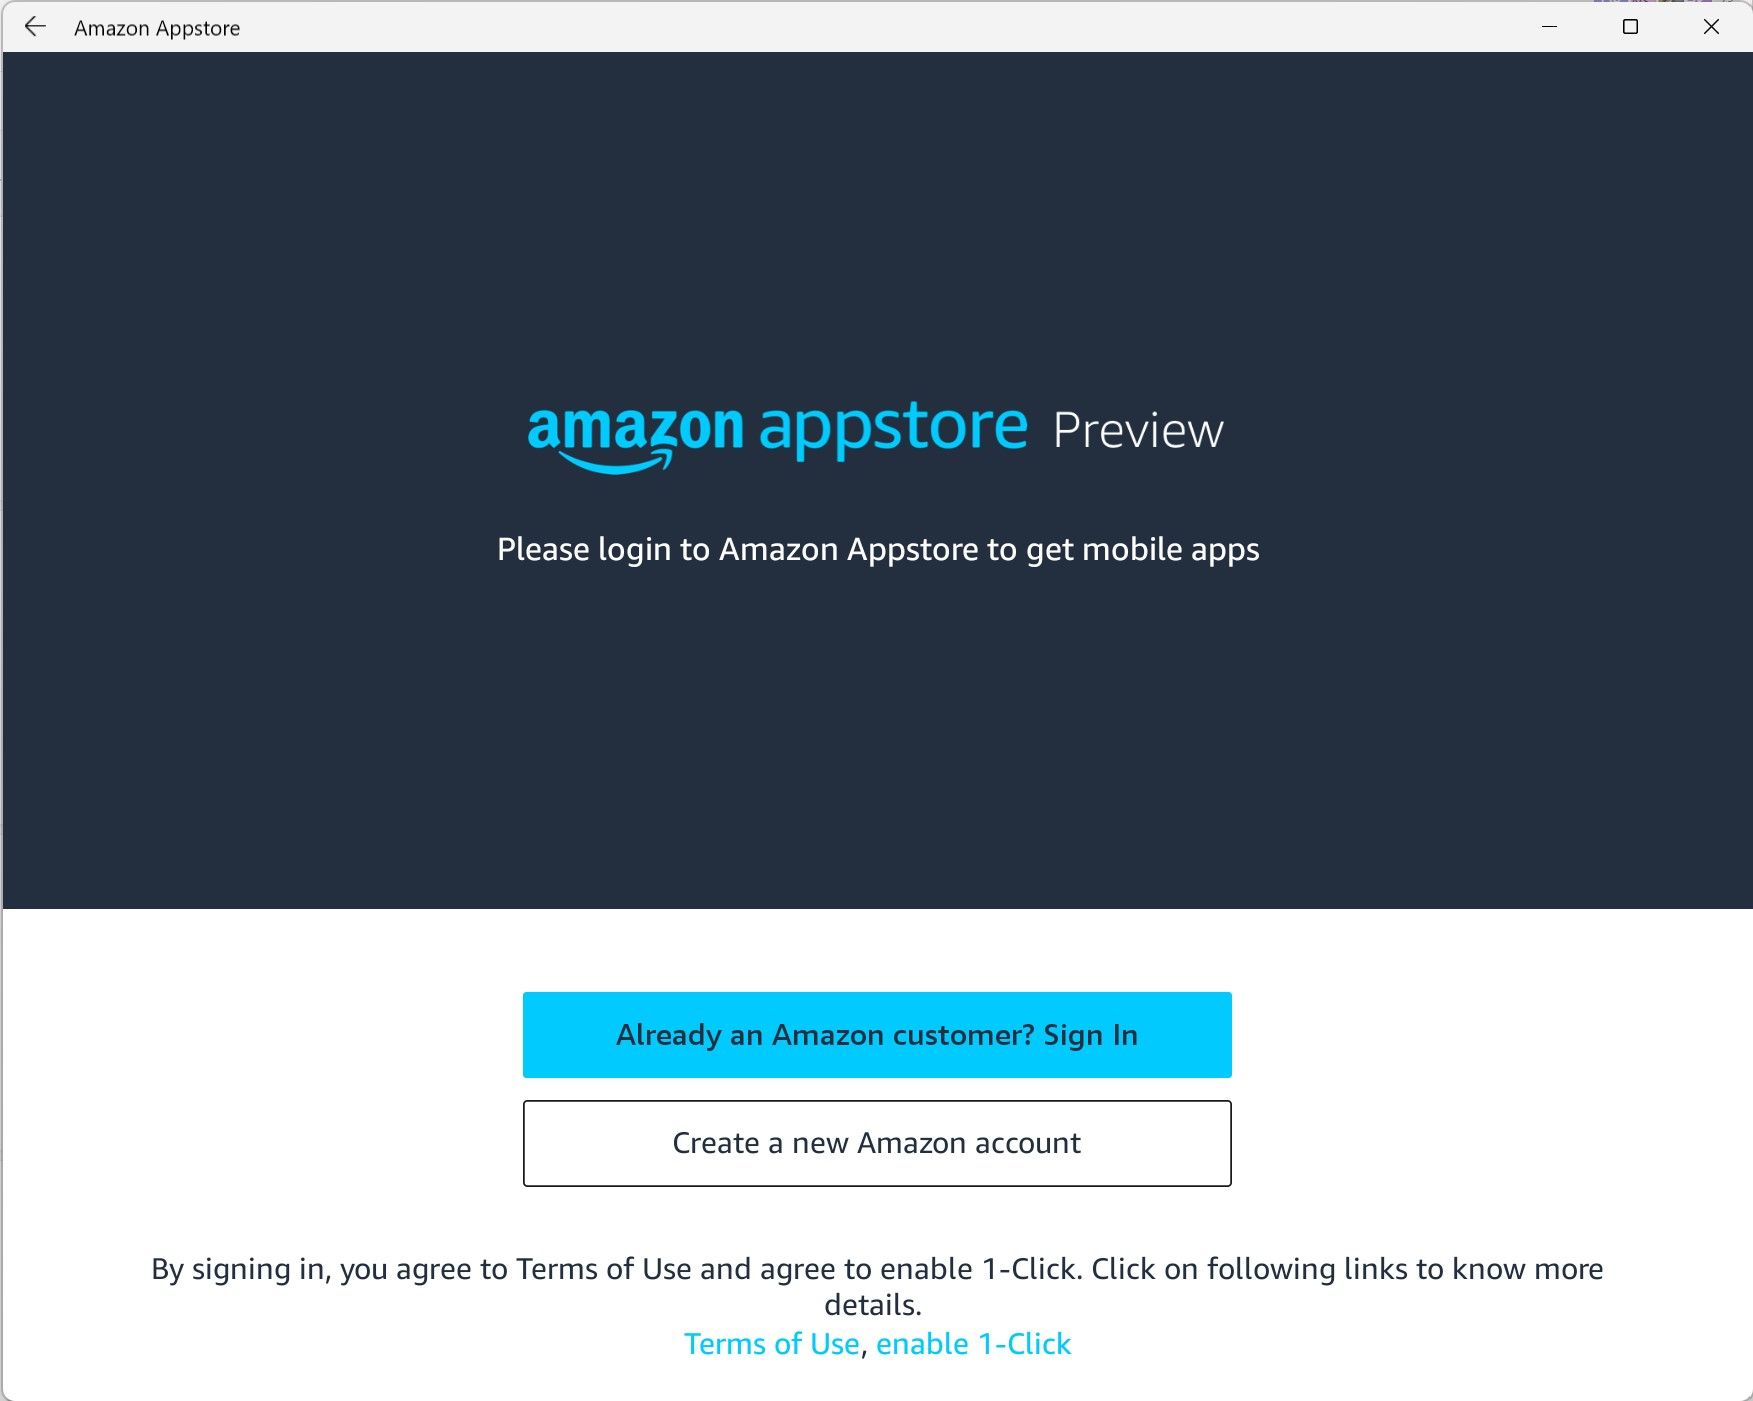
2. Download and install the Amazon Appstore
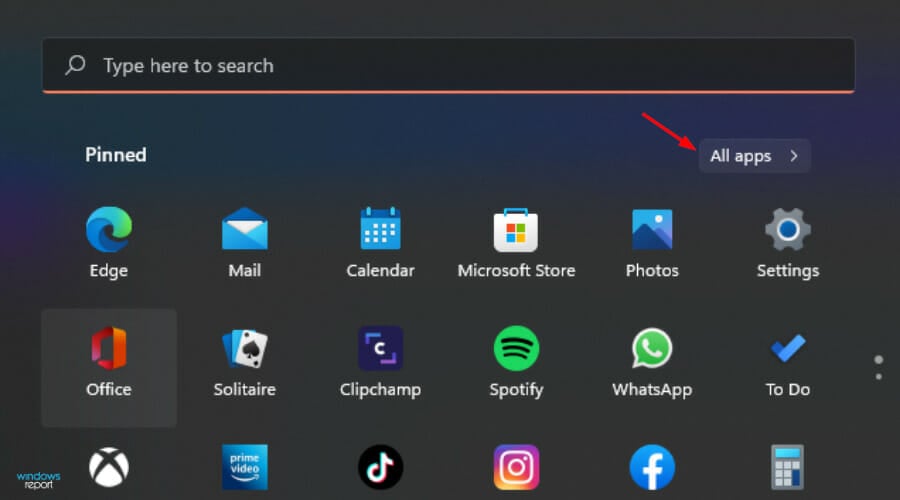
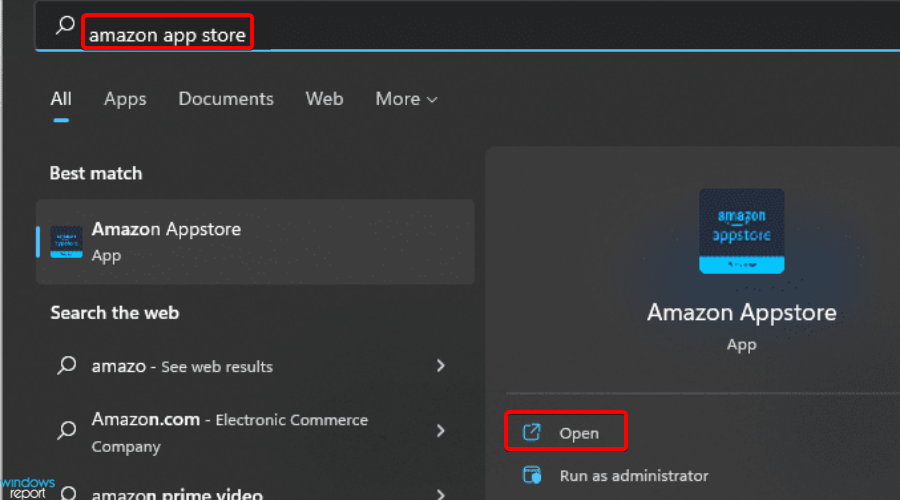
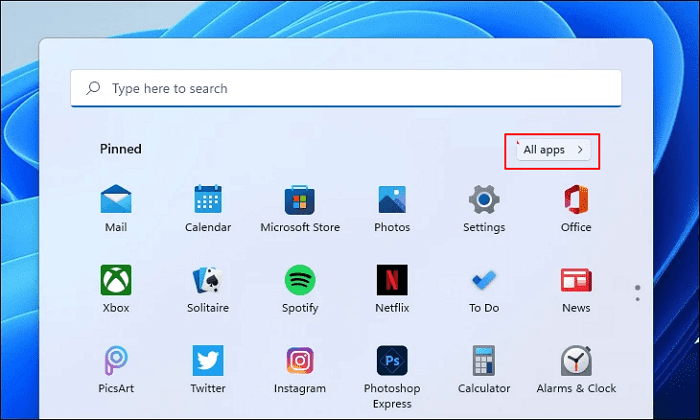
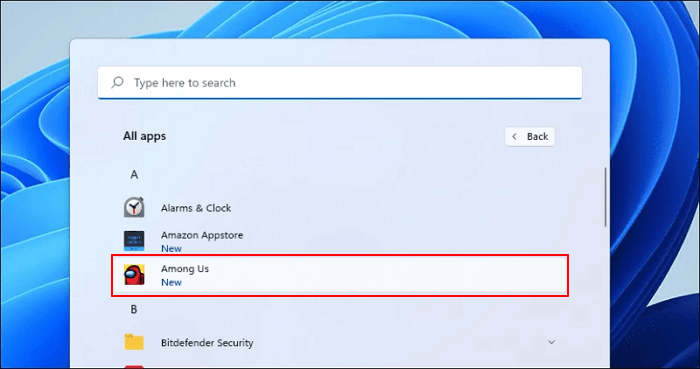
- Press the Windows + I key to open the Start Menu and click on All apps.
- Locate the Amazon Appstore and click on it to launch.
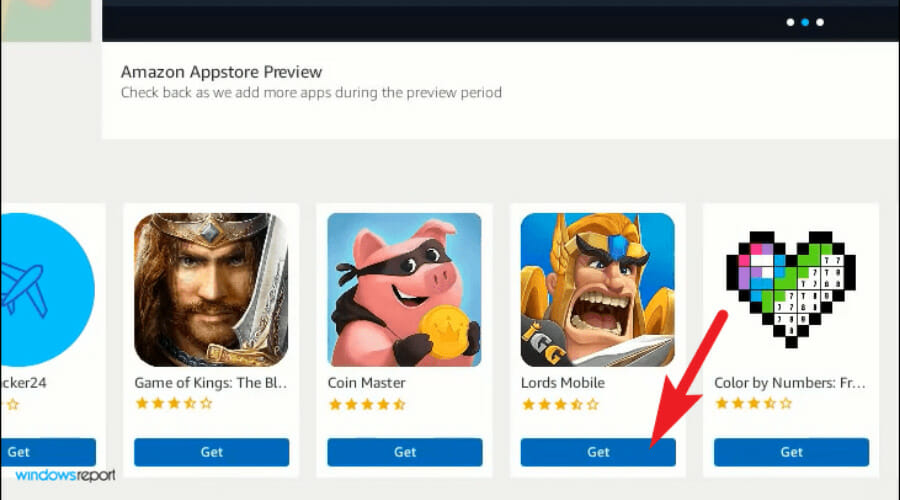
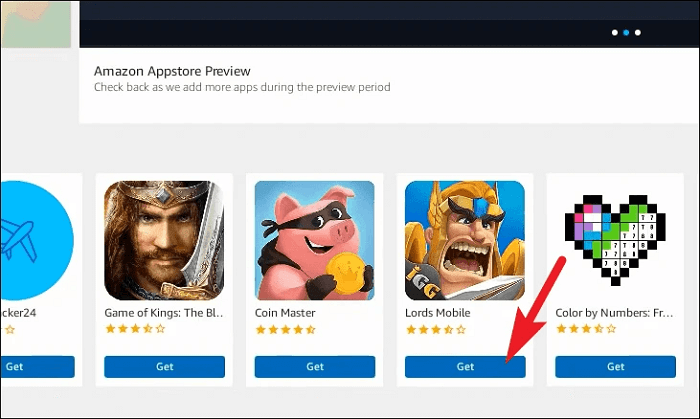
- Find the application of your choice and click on the Get button.
3. Sideload APKs using an APK file
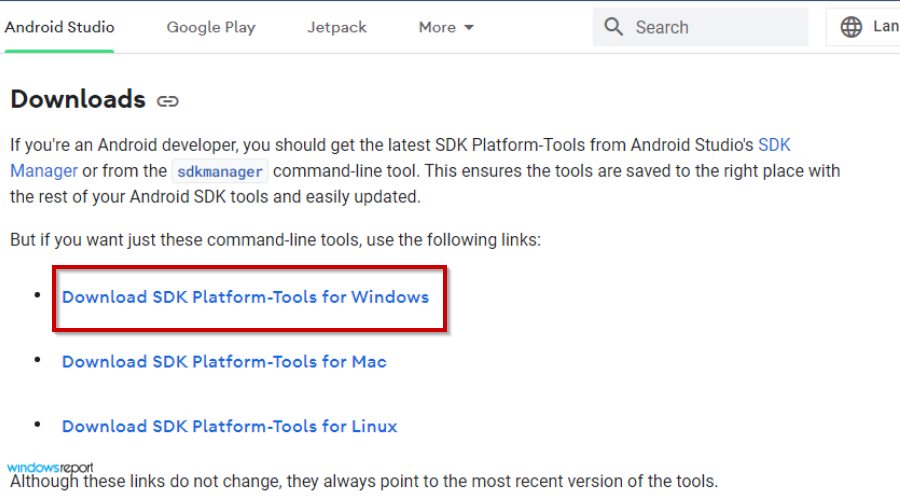
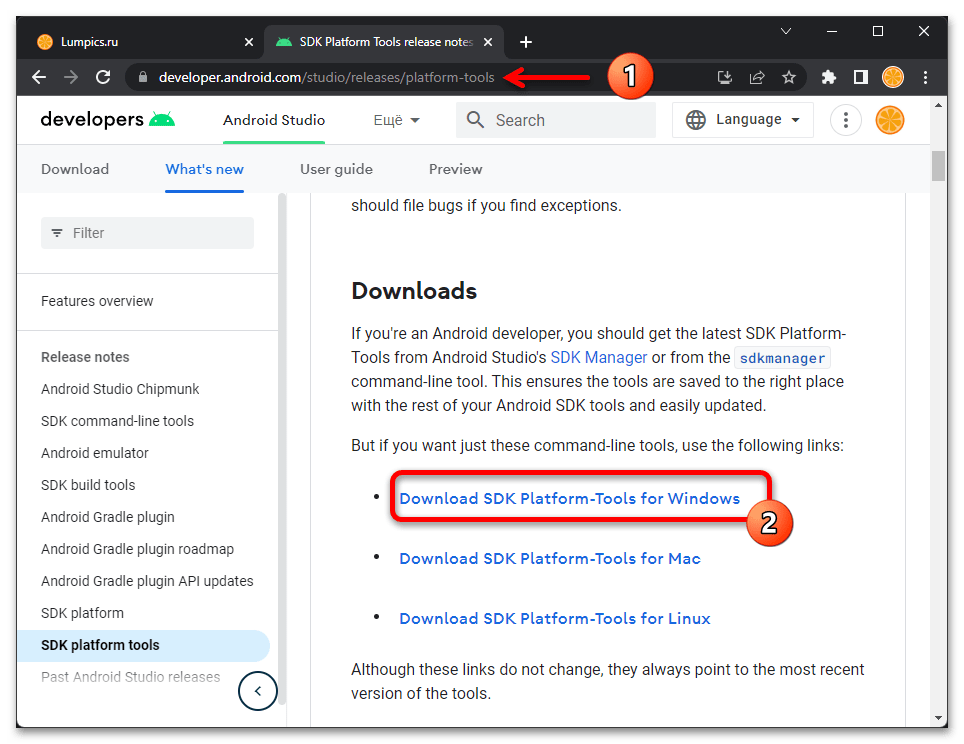
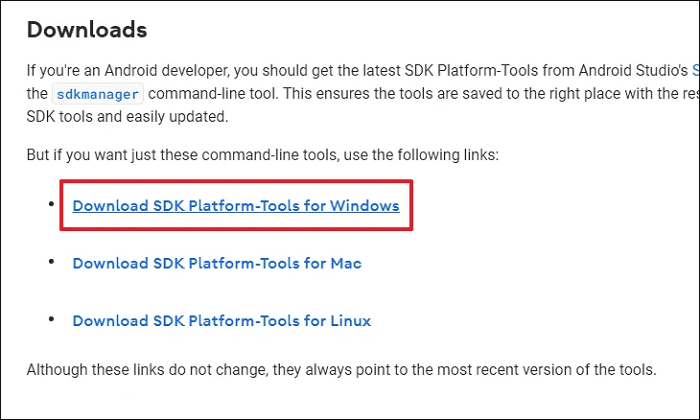
- Open your browser and click to Download SDK Platform-Tools for Windows.
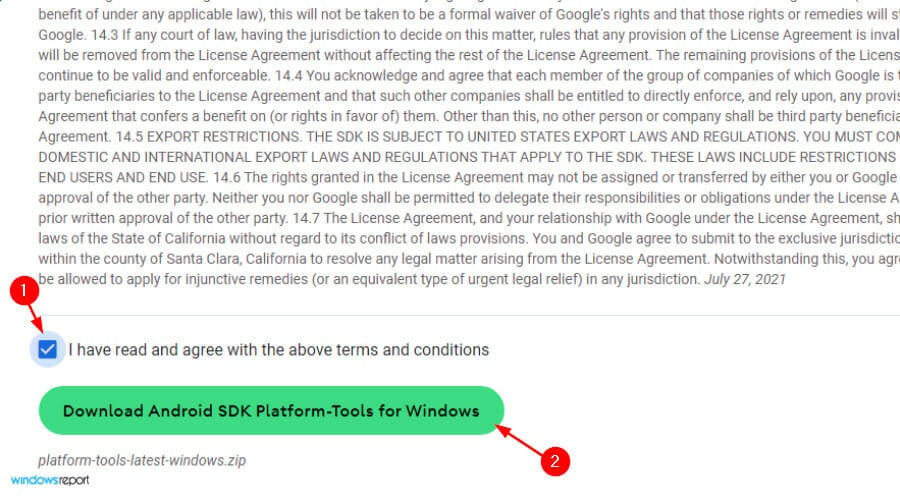
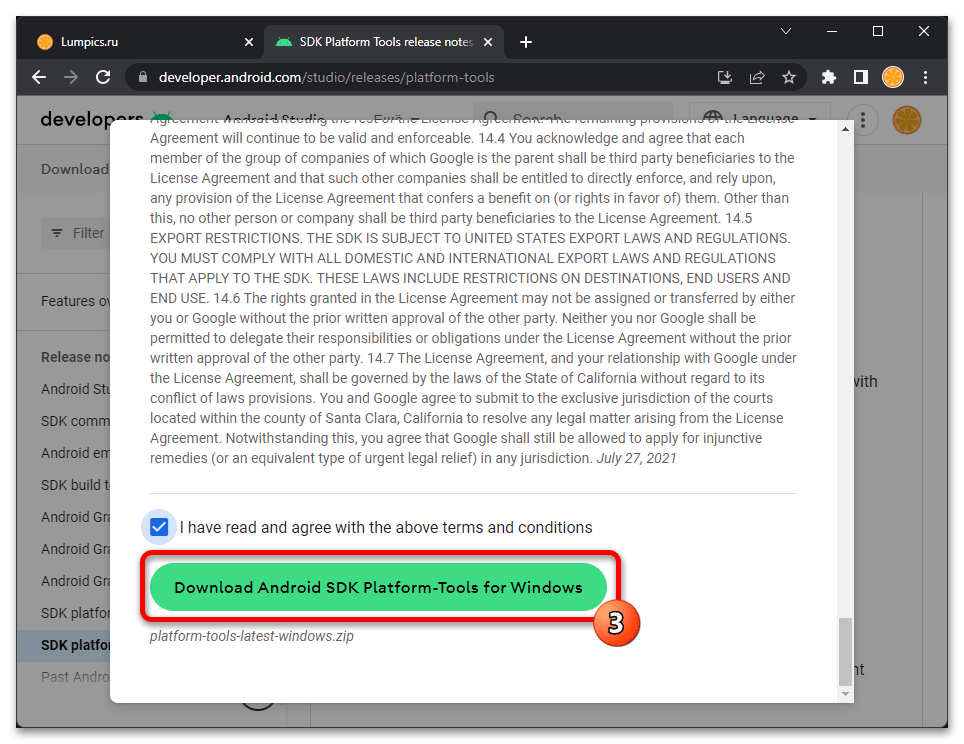
- Click the checkbox I have read and agree with the above terms and conditions to start downloading.
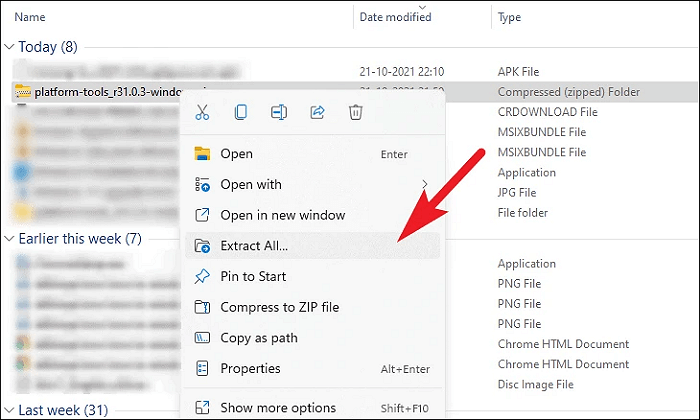
- Open the zip folder to extract all files.
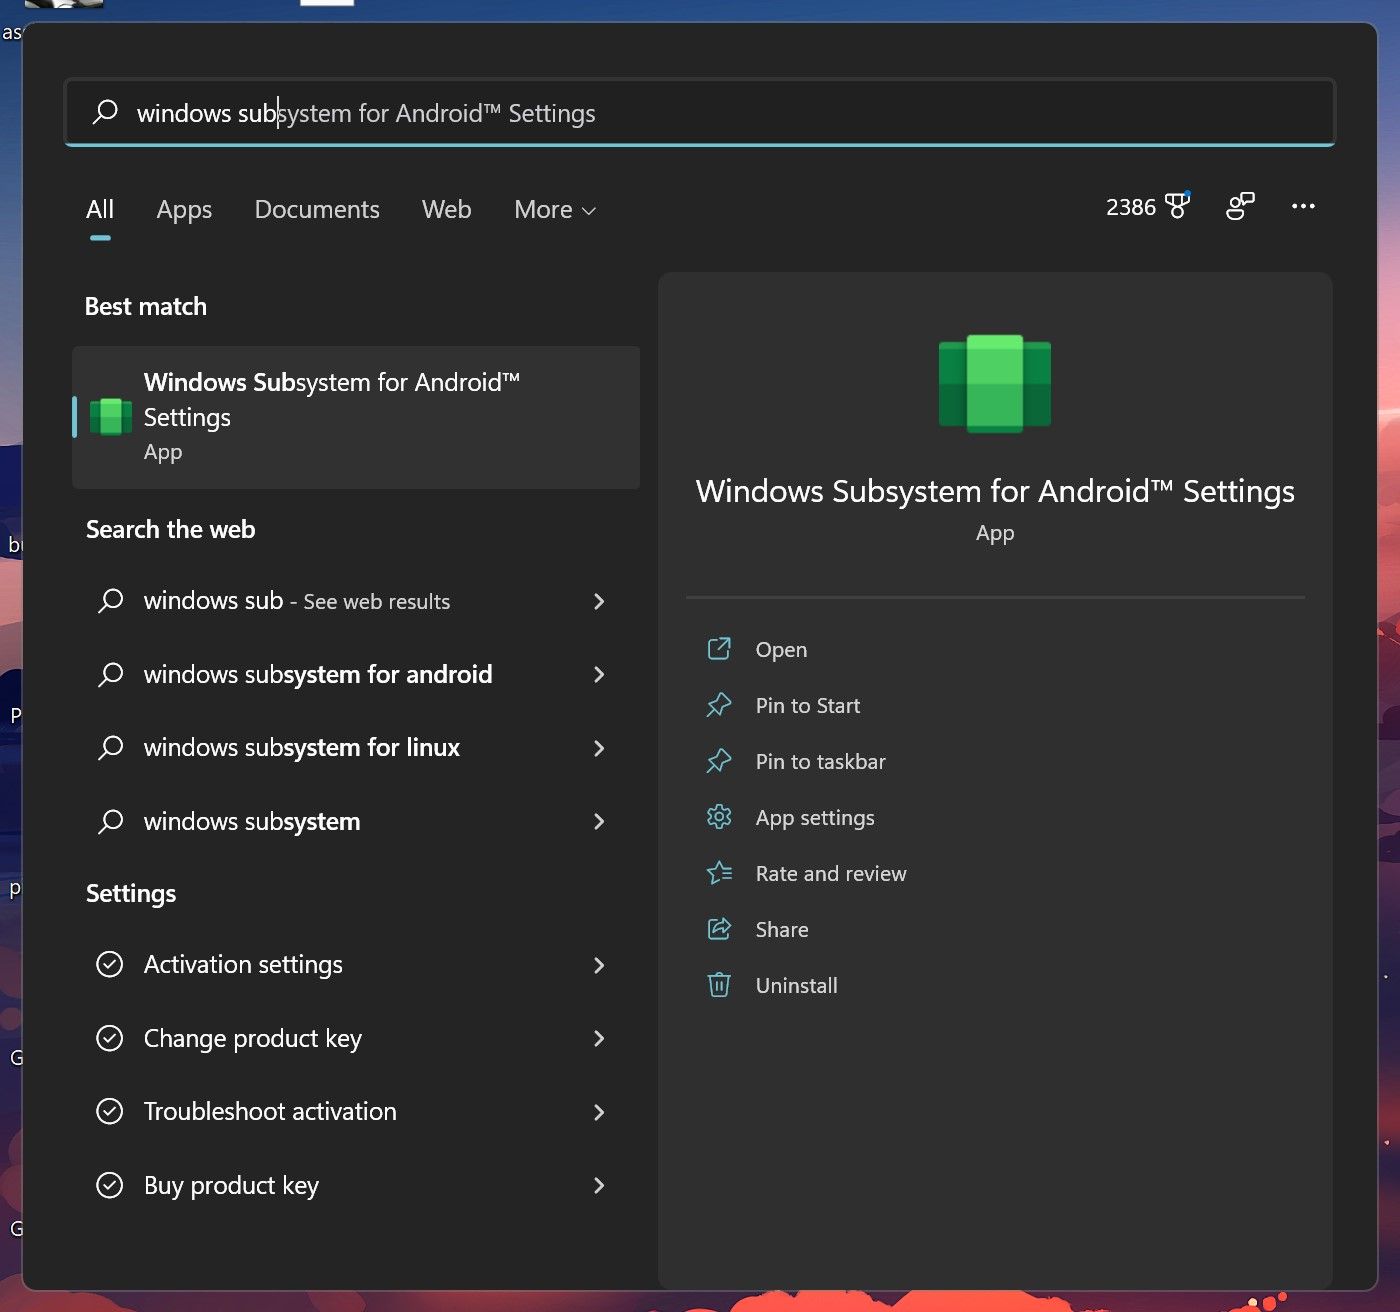
- Open the Start Menu and select All apps.
- Locate Windows Subsystem for Android and launch it.
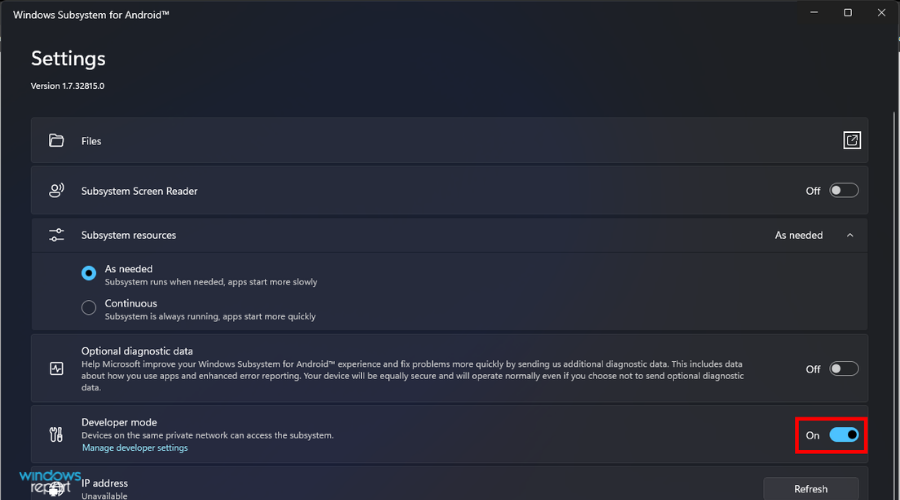
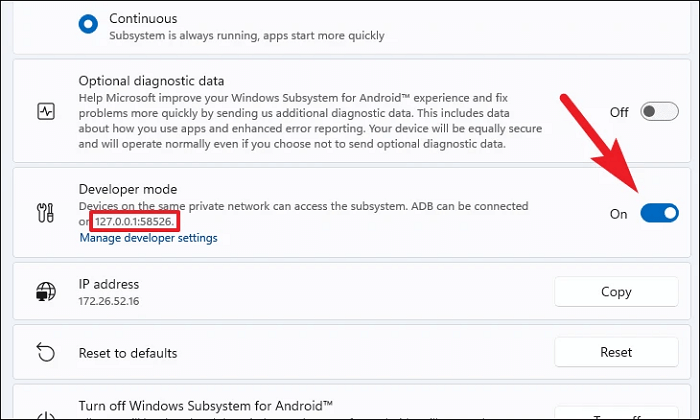
- Select Developer mode and toggle it on.
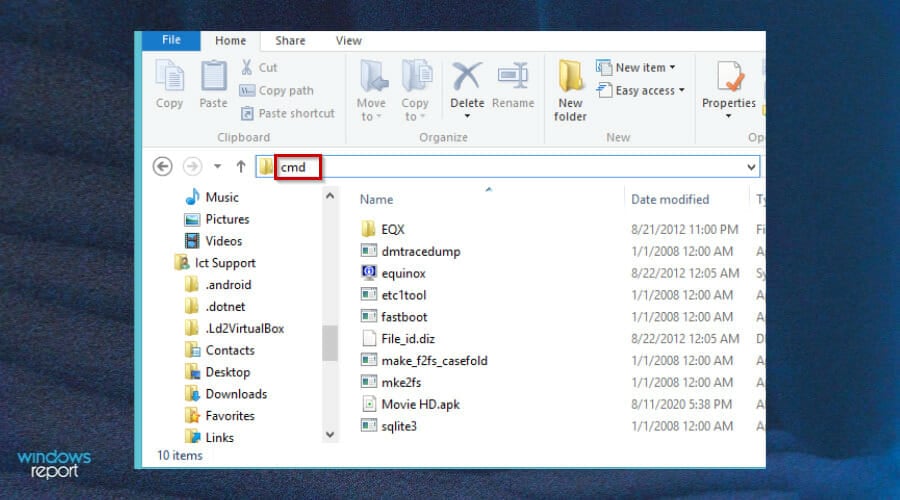
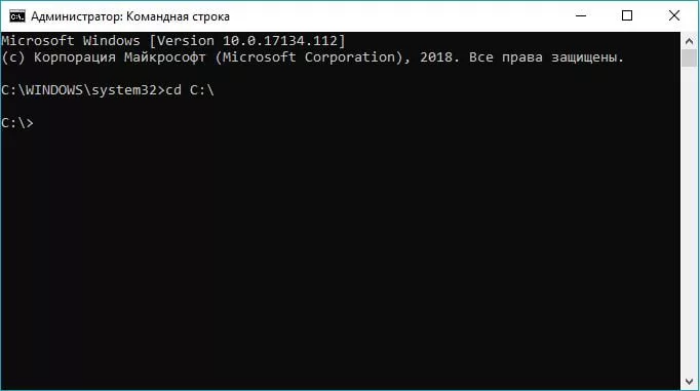
- Go back to the extract folder and type cmd on the address bar.
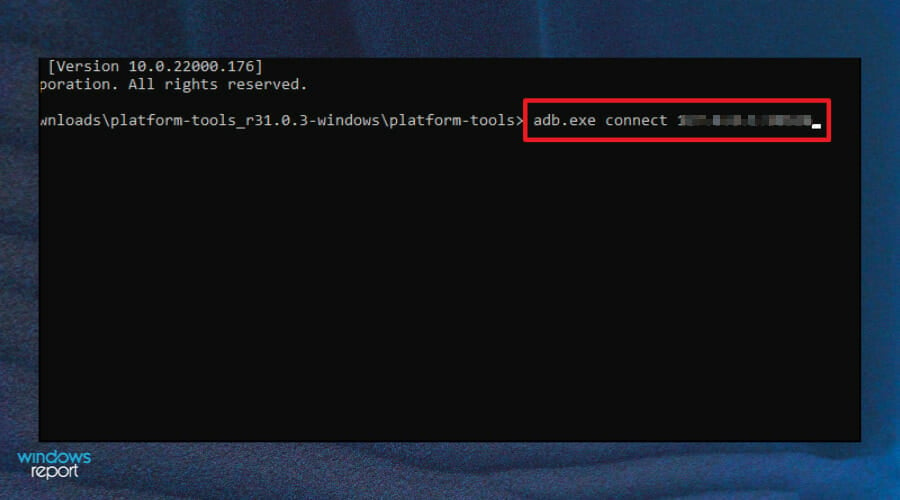
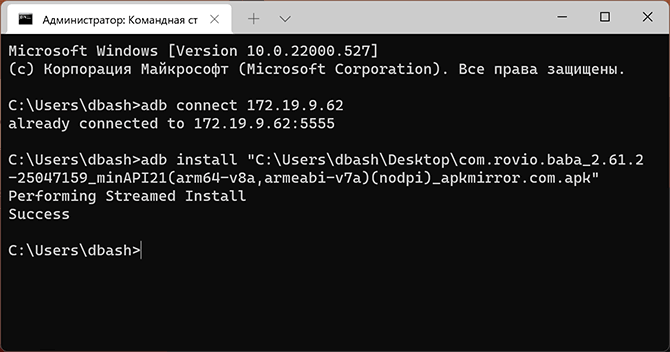
- Type in the following commands and press Enter after each one:
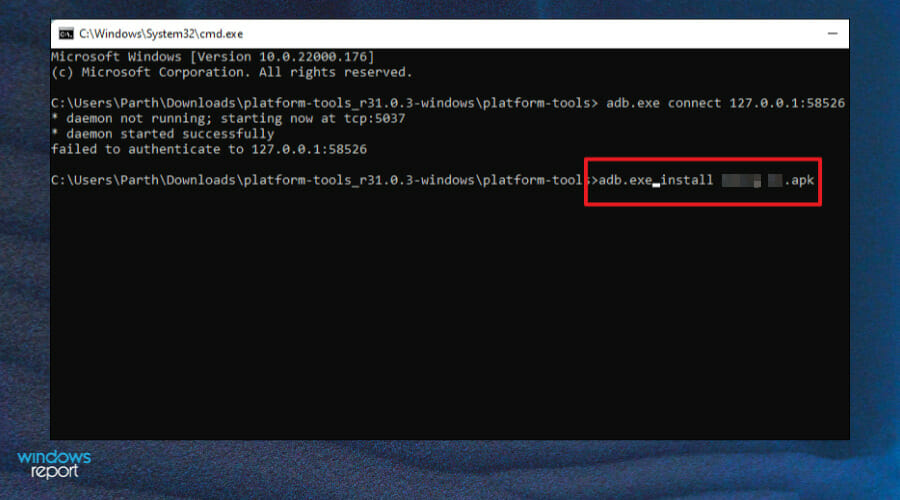
adb.exe connect <IP address>adb.exe install <file name>.apk - Once your app is installed successfully, the following message will be displayed:
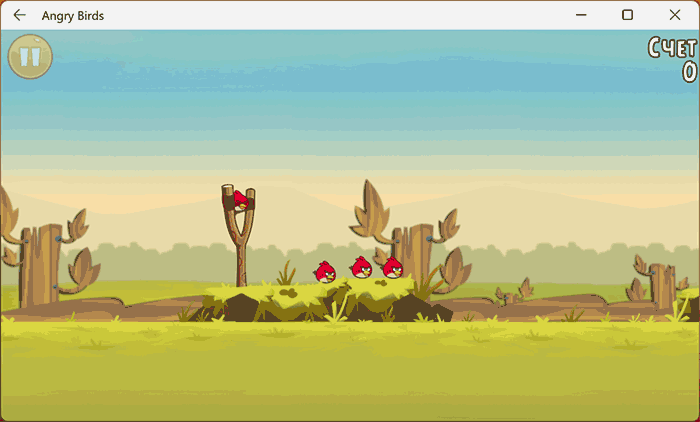
- Go back to the Start Menu and launch your APK to open.


Are there implications of running APKs from third-party sites?
The safety of this approach is often questioned. Are you really installing what you think you are? Probably not from a random site you found on the Web.
But when you have a choice between an app installed from a site you know and one that is not, there are other considerations. It’s worth reviewing those to make sure your risk profile is as low as it can be.
When installing APKs from third-party sites, Windows users need to be aware of the risks. Malware attacks are a growing threat. You need to make sure that your device is completely safe and secure. We have outlined some of the top antiviruses for your PC to keep you safe while browsing.
First, you should never download applications from untrusted websites. You can never know what malware they might contain. If you want to install an application on your PC and don’t find it in the official store, head to the official site to see if the app is available there.
The goal here is not just to avoid downloading malicious software like viruses and spyware but also software that will take control of your device for other purposes, such as sending spam emails or stealing data from your online accounts.
Another thing to watch out for when installing APKs is phishing scams. A hacker can use this method to trick you into giving away sensitive information like credit card details or even login credentials for your online accounts.
If you are not careful, clicking on a malicious link can lead you to a phishing website that will try and steal important information from you. Remember to always check the address bar in your browser before entering any sensitive information.
Also, if you choose to use other Android emulators to run APKs and encounter installation problems, refer to our guide on how to resolve the issue.
We hope you found a way to open and install APKs from one or more of the methods we listed above. If you encounter any problems while running APKs, leave us a comment down below.
![]()
Newsletter
Содержание
- Способ 1: Подсистема Windows для Android
- Шаг 1: Подготовка системы
- Шаг 2: Установка Android-приложений
- Вариант 1: WSATools
- Вариант 2: APK Installer
- Вариант 3: Консольная утилита ADB
- Способ 2: Эмуляторы ОС Android для Windows
- Вопросы и ответы
Способ 1: Подсистема Windows для Android
Одним из существенных нововведений в Windows 11 стало внедрение специальной подсистемы, призванной реализовать беспроблемное функционирования созданных для Android приложений на десктопе без привлечения сторонних средств эмуляции — Windows Subsystem for Android (WSA). Рассмотрим, как получить этот инструментарий на своём ПК, а также способы установки практически любого мобильного софта с его помощью.
Шаг 1: Подготовка системы
Установка и запуск предназначенных для ОС Android приложений на ПК под управлением Windows 11 через Windows Subsystem for Android возможны только после проведения довольно обширной подготовки с целью выполнения нескольких условий: активированная аппаратная виртуализация; загруженный и включённый компонент «Платформа для виртуальной машины», а также наличие и работоспособность самой подсистемы WSA.
Включение аппаратной виртуализации
Аппаратной виртуализация (Intel Virtualization Technology (Intel VT) или AMD virtualization (AMD-V)) часто активированы в BIOS материнских плат ПК и ноутбуков по умолчанию, поэтому вполне вероятно, что специальным образом ничего включать не потребуется, а достаточно будет проверить факт работоспособности технологии, но сделать это следует обязательно.
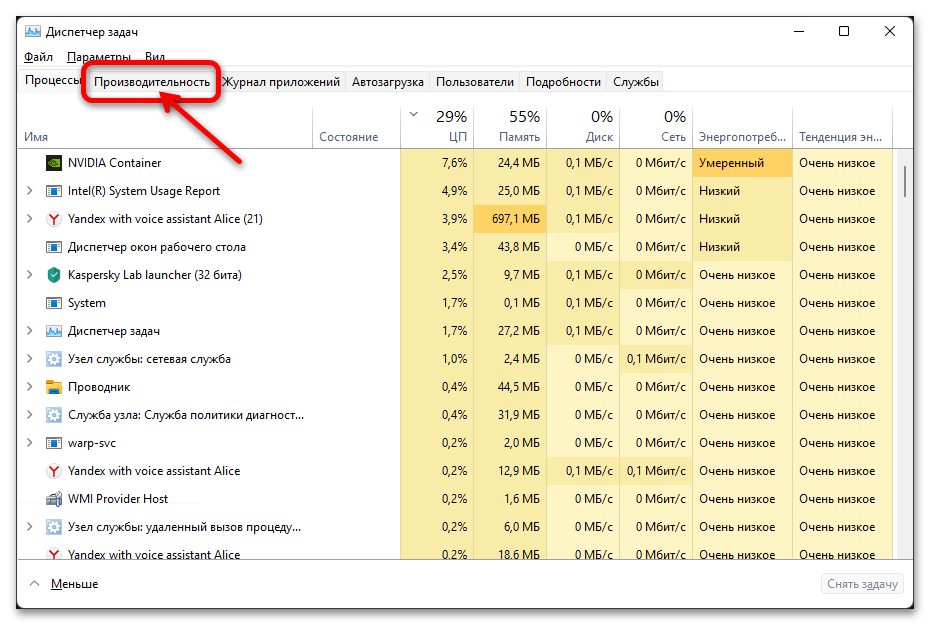
- Проверить, что аппаратная виртуализация включена из среды Windows 11 проще всего через Диспетчер задач (ДУ), запускаем данную оснастку, воспользовавшись контекстным меню кнопки «Пуск», панели задач или клавишами «Ctrl+Shift+Esc».
Подробнее: Вызов «Диспетчера задач» в Windows 11
- Переходим на вкладку «Производительность» открывшегося окна.
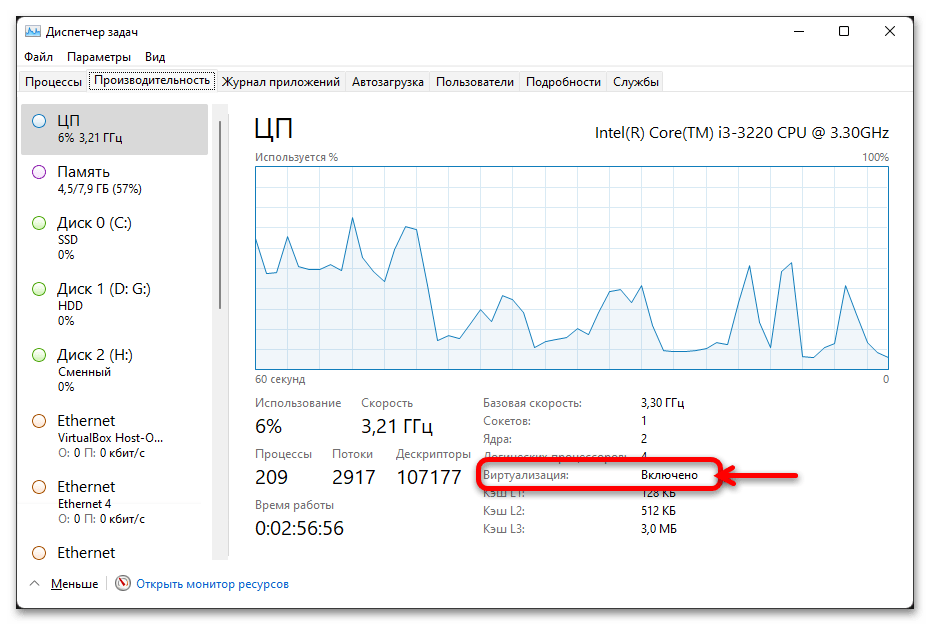
- В списке под графиком «Активность ЦП» есть параметр «Виртуализация». Если в данной строчке указано «Включено», закрываем Диспетчер задач и переходим к следующему этапу подготовки компьютера к установке Android-приложений.

- Если констатируется, что значение параметра «Виртуализация» в ДУ — «Выключено», перезагружаемся в BIOS компьютера, активируем технологию, а затем повторяем процедуру проверки доступности технологии.
Подробнее: Включаем виртуализацию в BIOS
Включение «Платформы для виртуальной машины»
С целью обеспечить поддержку платформы для виртуальных машин в Windows 11 можно пойти различными путями, а самый короткий будет следующим:
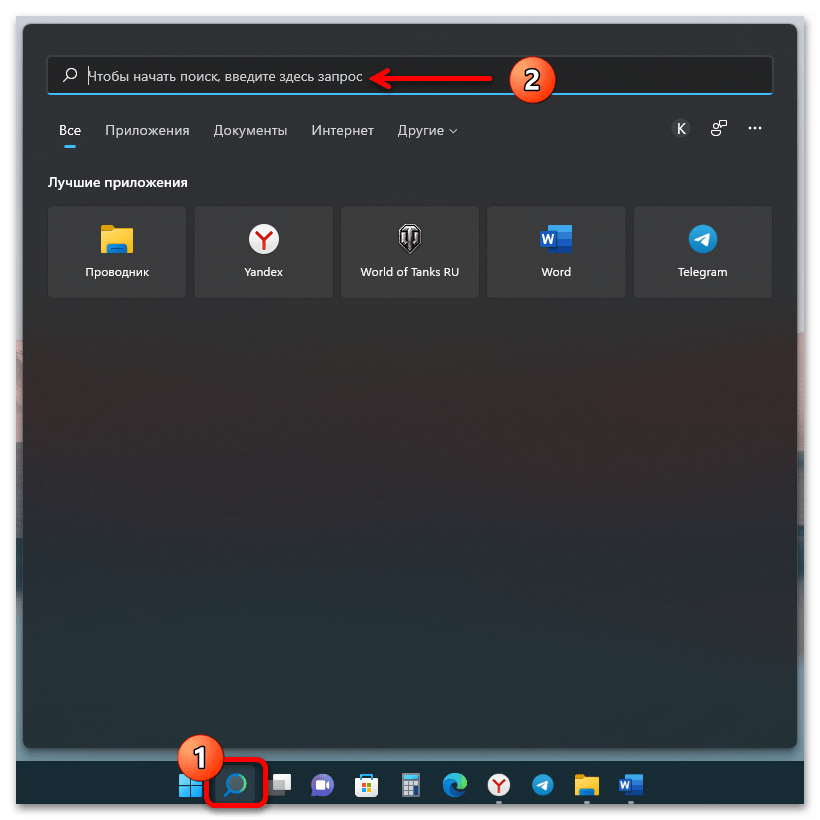
- Вызываем системный «Поиск». В поле вводим запрос «Включение или отключение компонентов Windows».
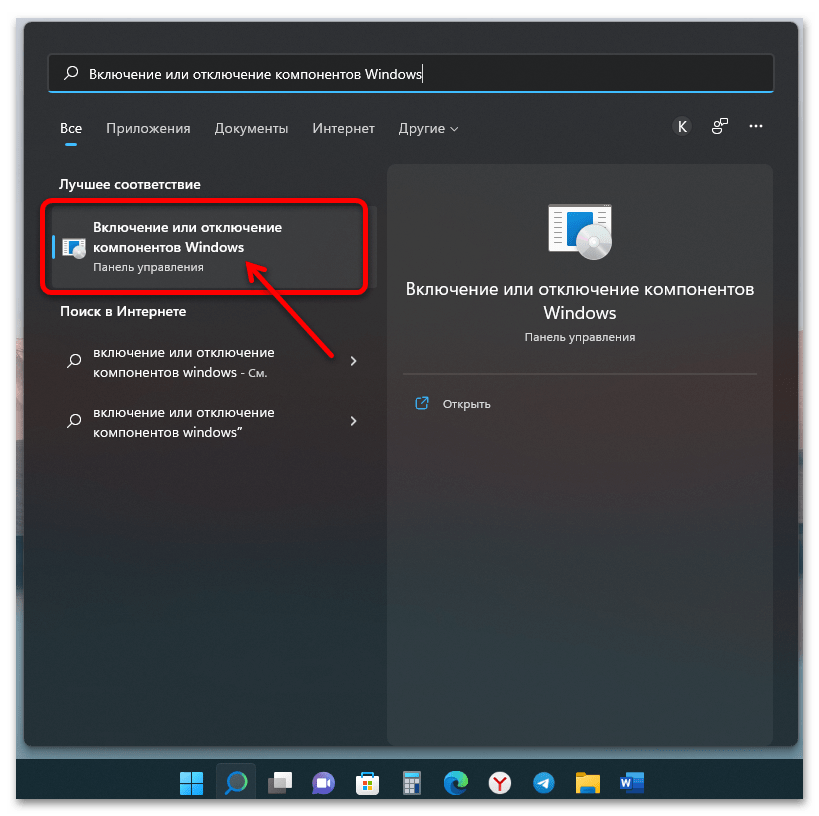
- Переходим по выданный системой ссылке на одноименный запросу раздел «Панели управления» Windows 11.
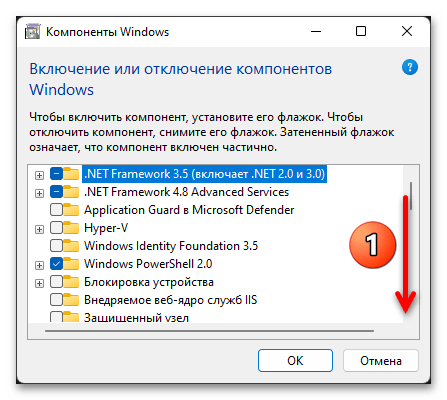
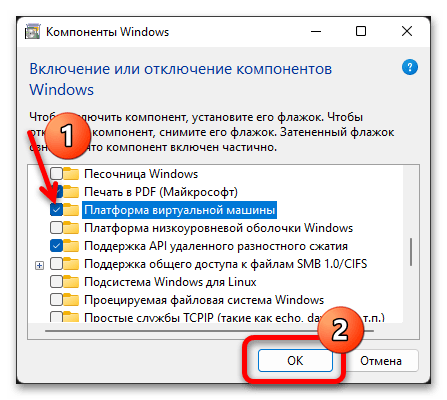
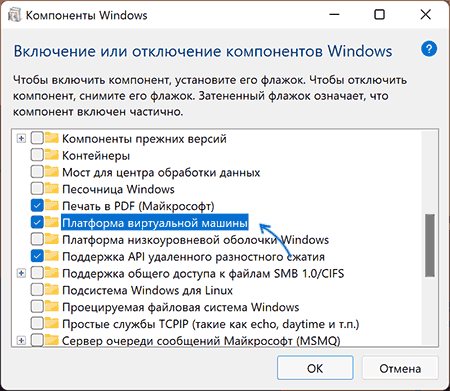
- Пролистываем список опций в открывшемся окне «Компоненты Windows»

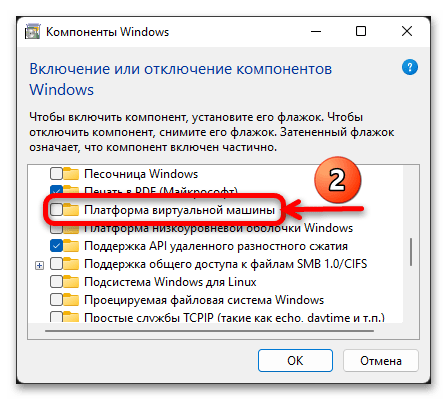
и находим пункт «Платформа для виртуальной машины».
- Устанавливаем галочку в чекбоксе слева от наименования указанного компонента, кликаем «OK».
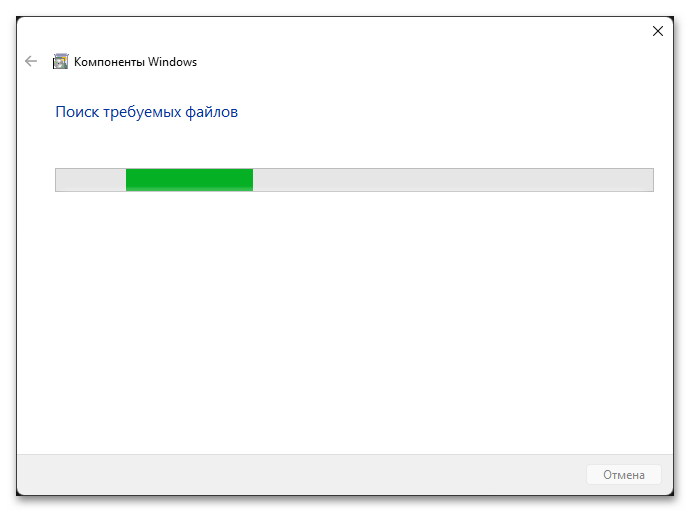
- Ожидаем, пока ОС автоматически найдёт в сети и скачает необходимые файлы, а затем установит компонент «Платформа для виртуальной машины».
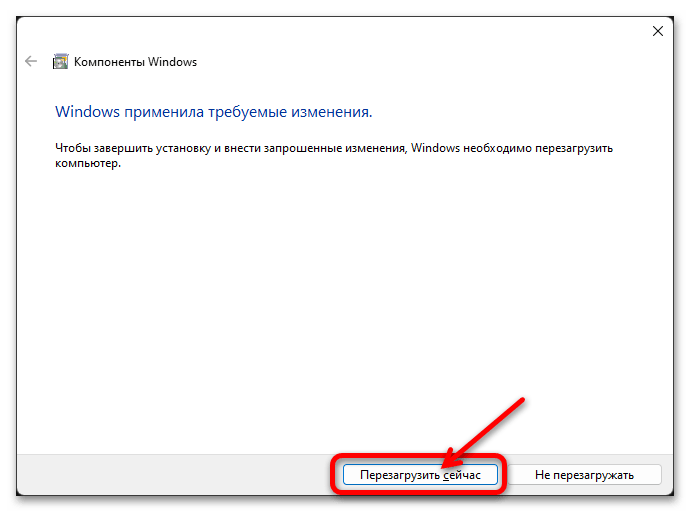
- Кликаем «Перезагрузить сейчас» в окне «Windows применила требуемые изменения». Далее останется подождать, пока сопровождаемый настройкой и включением новых возможностей ОС перезапуск компьютера будет завершён.

Загрузка и установка «Windows Subsystem for Аndroid»
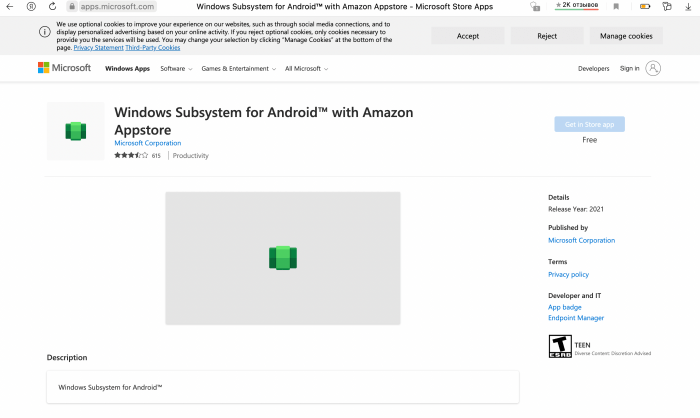
Предоставляющая возможность запуска мобильного софта подсистема официально представлена в виде программы Windows subsystem for Аndroid with Amazon Appstorе в Магазине приложений Microsoft и по замыслу создателей должна инсталлироваться именно из этого источника.
Скачать Amazon Appstorе из Microsoft Store
Не секрет, что из-за региональных и иных устанавливаемых Майкрософт ограничений установка Подсистемы Виндовс для Андроид из Магазина компании практически всегда оказывается неосуществимой, а значит, придётся действовать «обходными путями» и один из них описан далее.
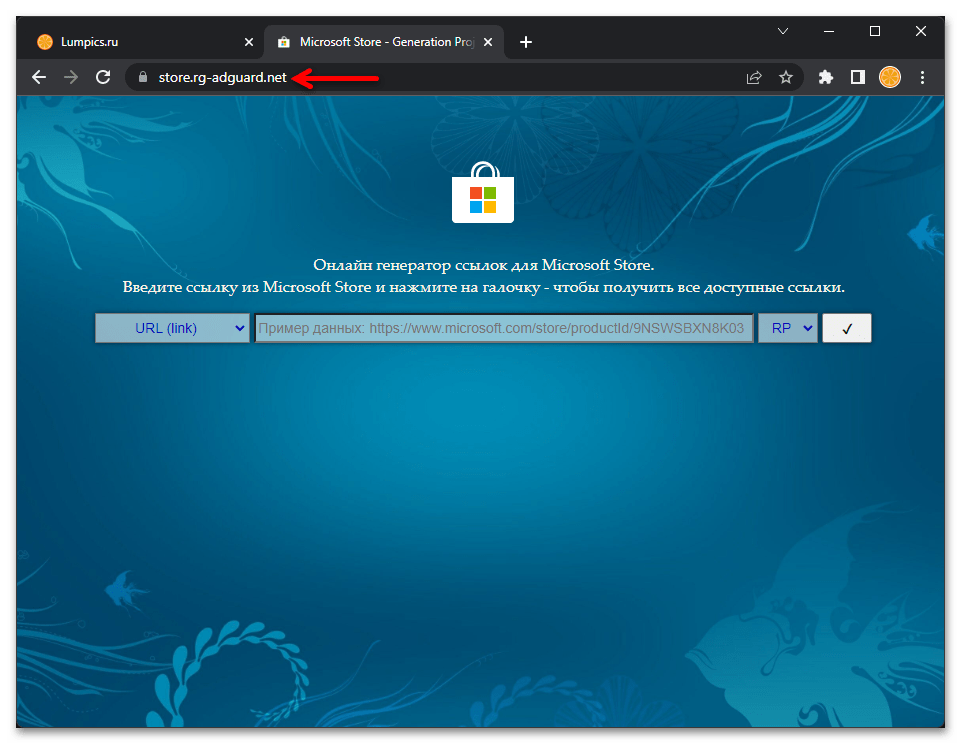
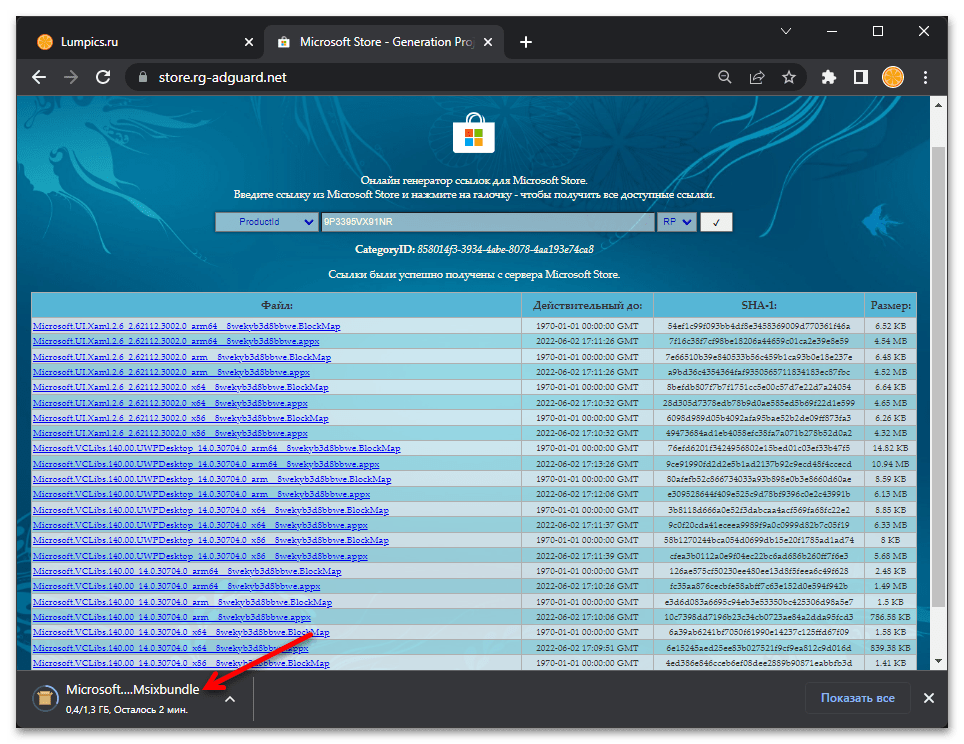
Перейти к онлайн-сервису Генератор ссылок для Microsoft Store
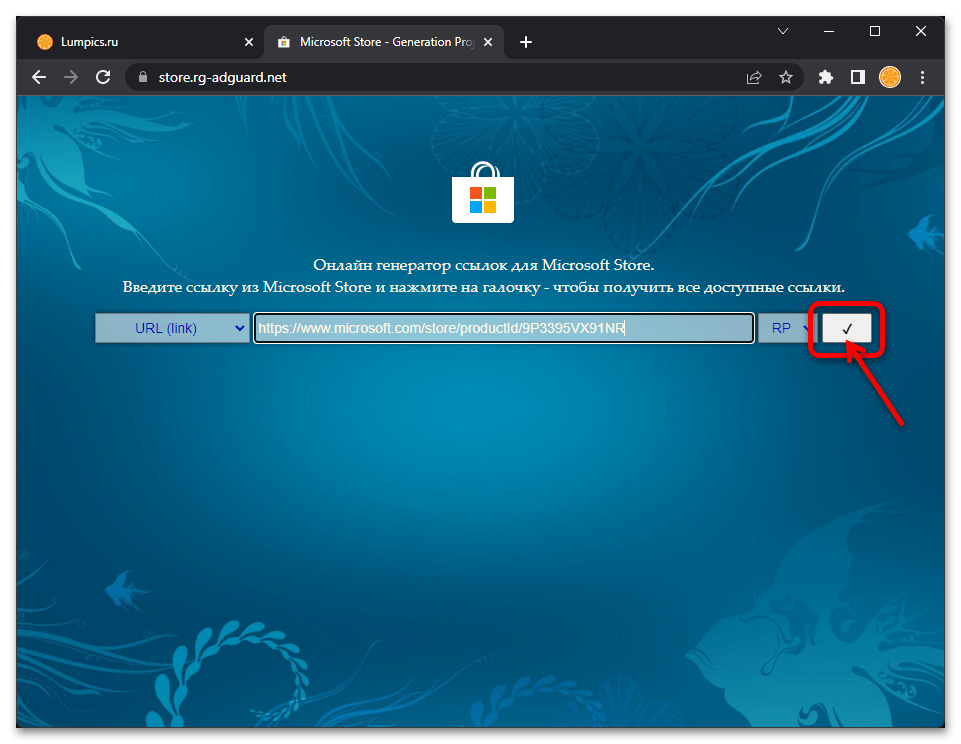
- В любом веб-обозревателе переходим по ссылке выше и таким образом открываем онлайн-сервис генерации ссылок для скачивания файлов из Microsoft Store.
- В поле для исходных сведений («Пример данных…») на открывшейся веб-странице вводим (проще всего скопировать из этой статьи в буфер обмена Windows 11, а затем вставить в браузер) следующую ссылку:
https://www.microsoft.com/store/productId/9P3395VX91NR - Кликаем по кнопке с галочкой – «Сгенерировать временные ссылки» справа от поля ввода, немного ожидаем, пока сервис выполнит свою работу.
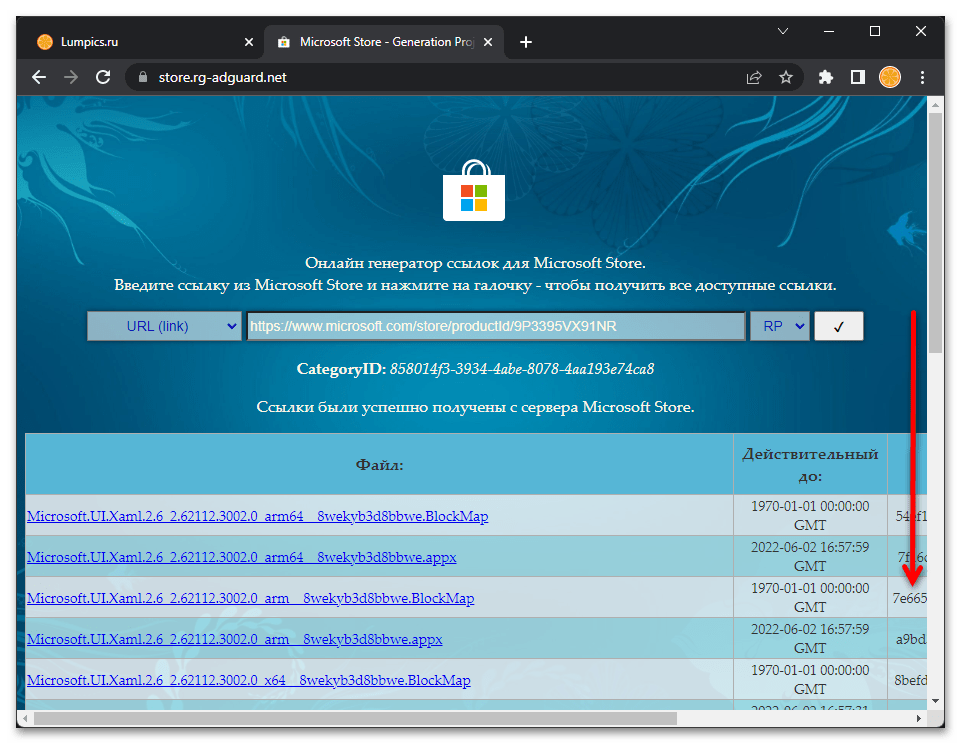
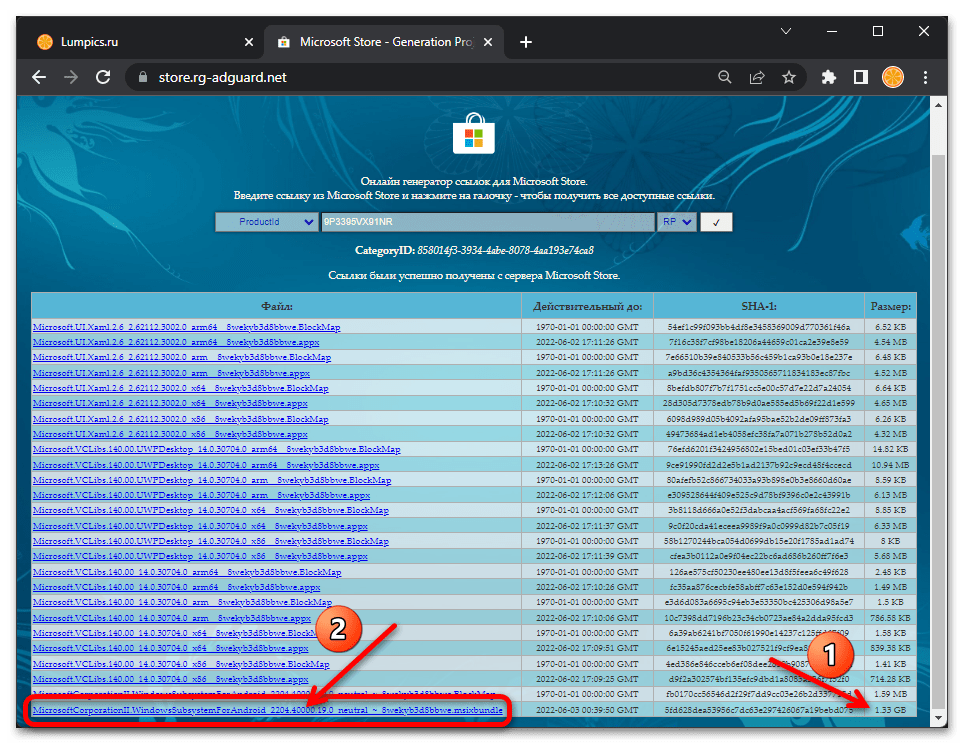
- Пролистываем представленный на странице список ссылок до конца, нас интересует последний по счёту его пункт:
MicrosoftCorporationII.WindowsSubsystemForAndroid_НОМЕР_СБОРКИ_neutral_~_8wekyb3d8bbwe.msixbundle.
- Убеждаемся, что в столбце «Размер» для указанного адреса демонстрируется превышающее 1 Гб значение. Далее щёлкаем по ссылке, чтобы инициировать скачивание расположенного по ней файла.
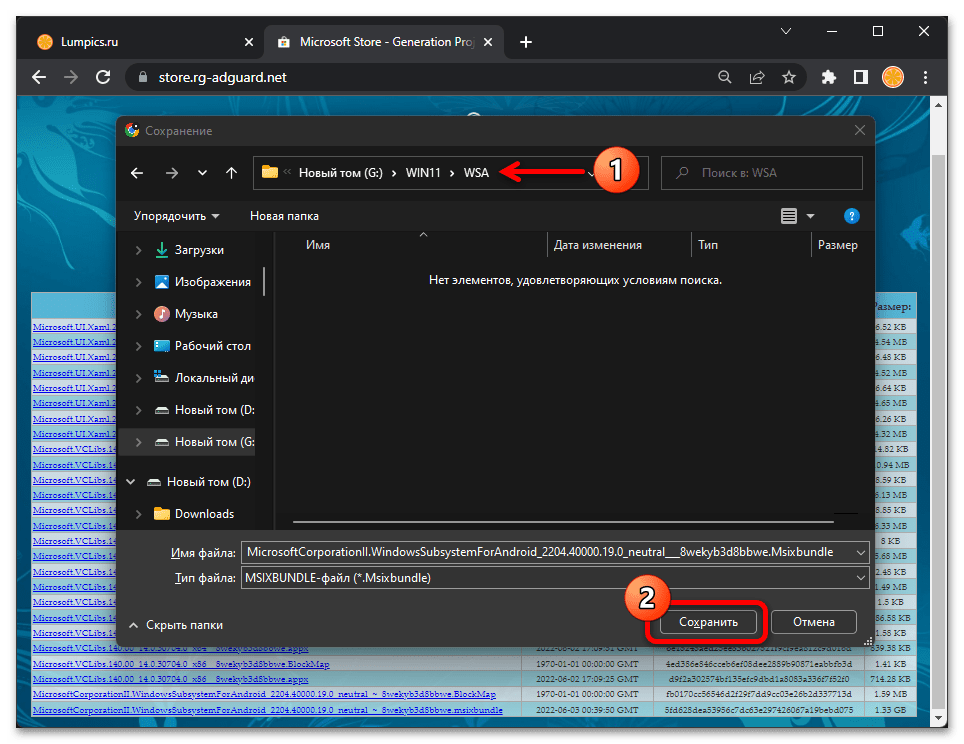
- Определяем папку на диске ПК, в которую будет помещен дистрибутив WSA, кликаем по кнопке «Сохранить».

- Дожидаемся завершения загрузки файла.
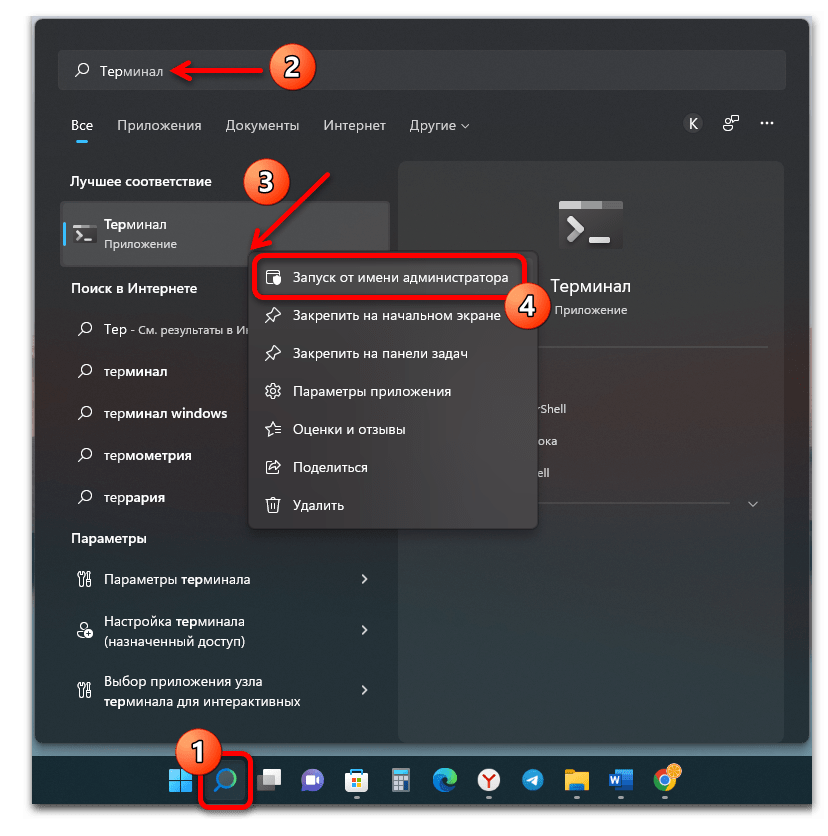
- С целью инсталляции WSA путём развёртывания полученного по результату выполнения вышеперечисленных манипуляций файла в Windows 11 следует задействовать системное приложение «Терминал» (PowerShell):
- Запускаем Терминал от имени Администратора. Для этого, например, открываем системный «Поиск», пишем
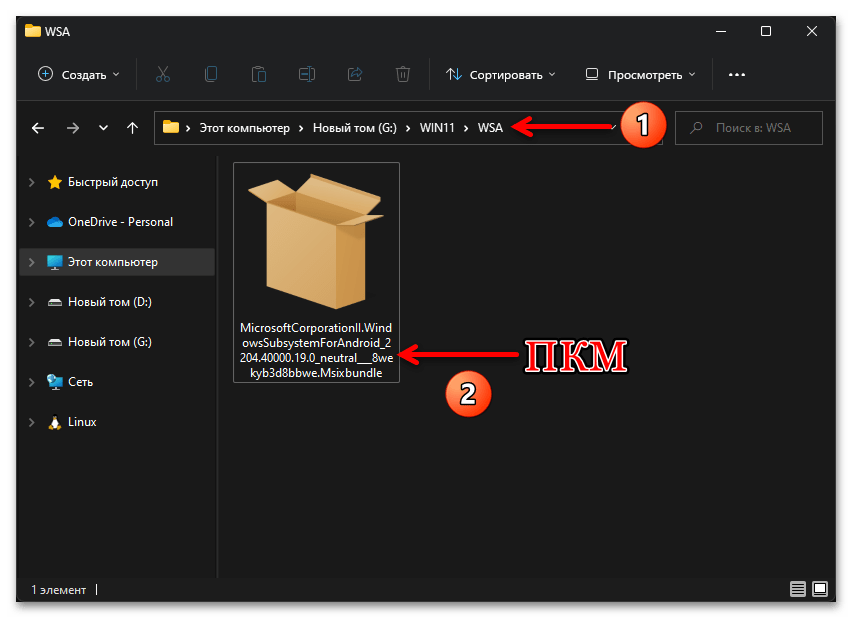
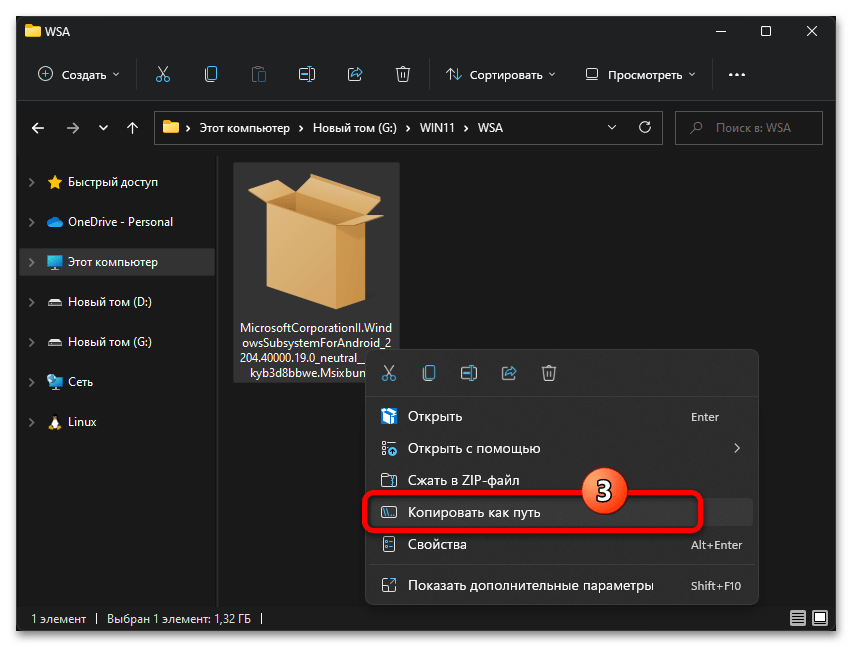
Терминалв поле ввода запросов, после отображения результатов кликаем правой кнопкой мыши по ссылке на программу слева в области средства поиска и выбираем «Запуск от имени администратора» в появившемся меню. - Открываем каталог с установочным файлом WSA в Проводнике операционки, кликаем по имени первого правой кнопкой мыши

и выбираем «Копировать как путь» в отобразившемся контекстном меню.
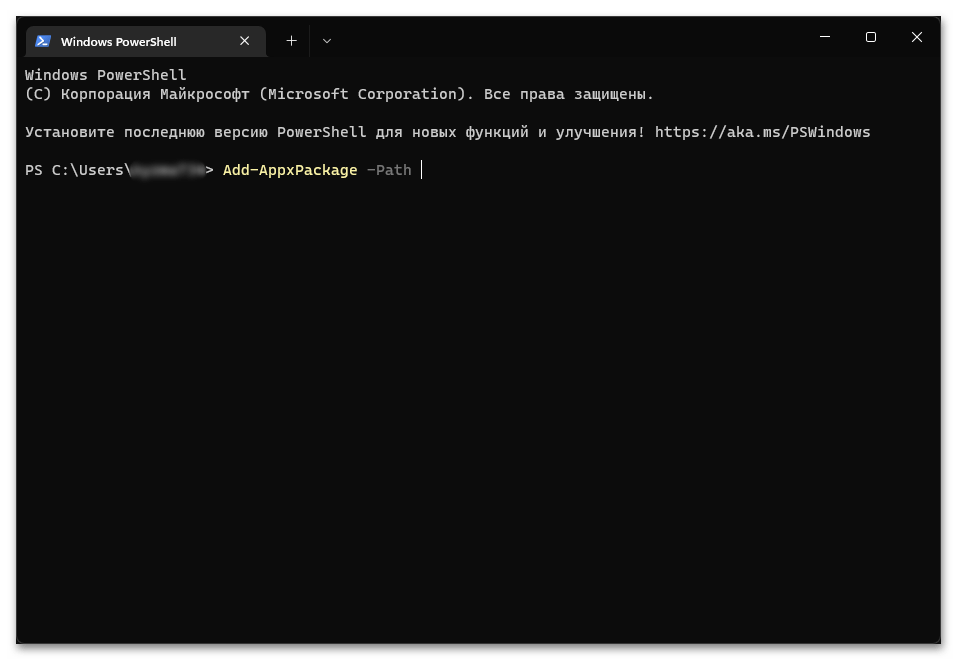
- Перемещаемся в окно Терминала и пишем первую часть команды установки пакета:
Add-AppxPackage -PathВведя указанное, ставим пробел.
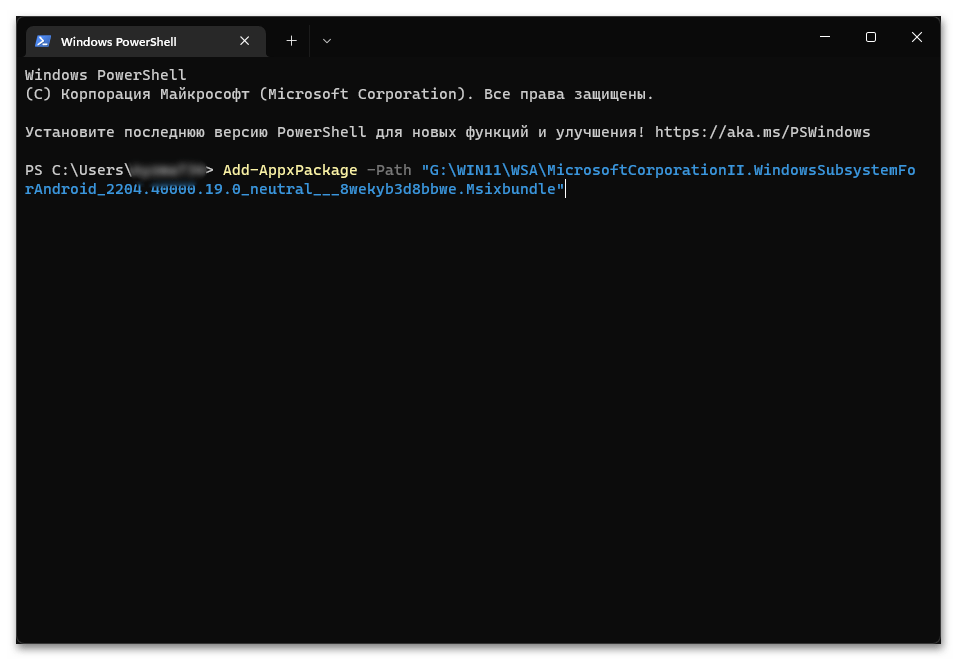
- Далее кликаем в рабочей области окна Терминала правой кнопкой мыши – это приведёт к вставке пути (в кавычках) устанавливаемого пакета. Убедившись, что полученная команда аналогична запечатлённой на следующем скриншоте (путь расположения файла и цифровое обозначение номера сборки WSA в его имени, скорее всего, будут отличаться), нажимаем «Enter» на клавиатуре.
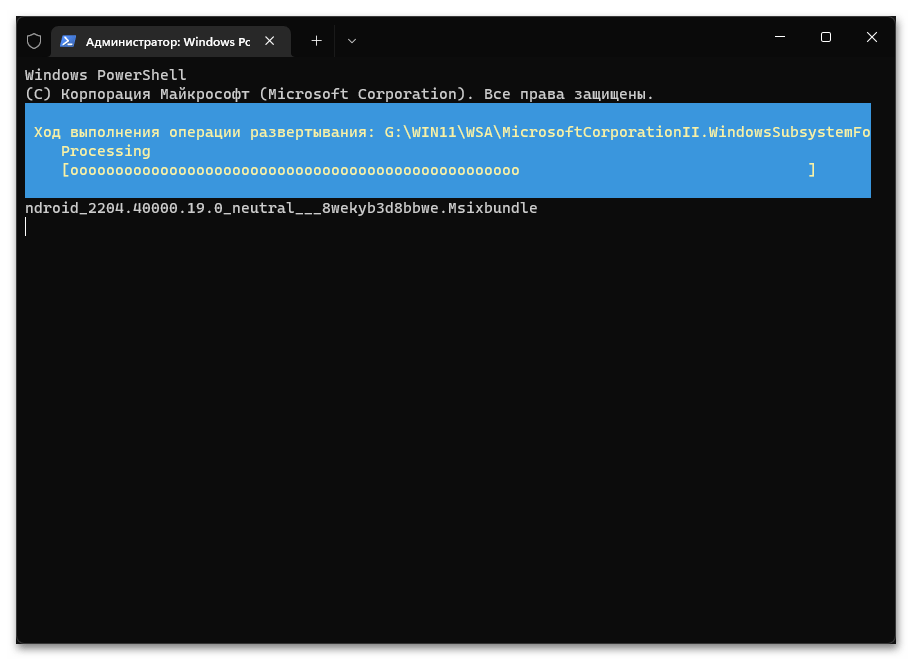
- Ожидаем завершения операции развёртывания Подсистемы Windows для Android.
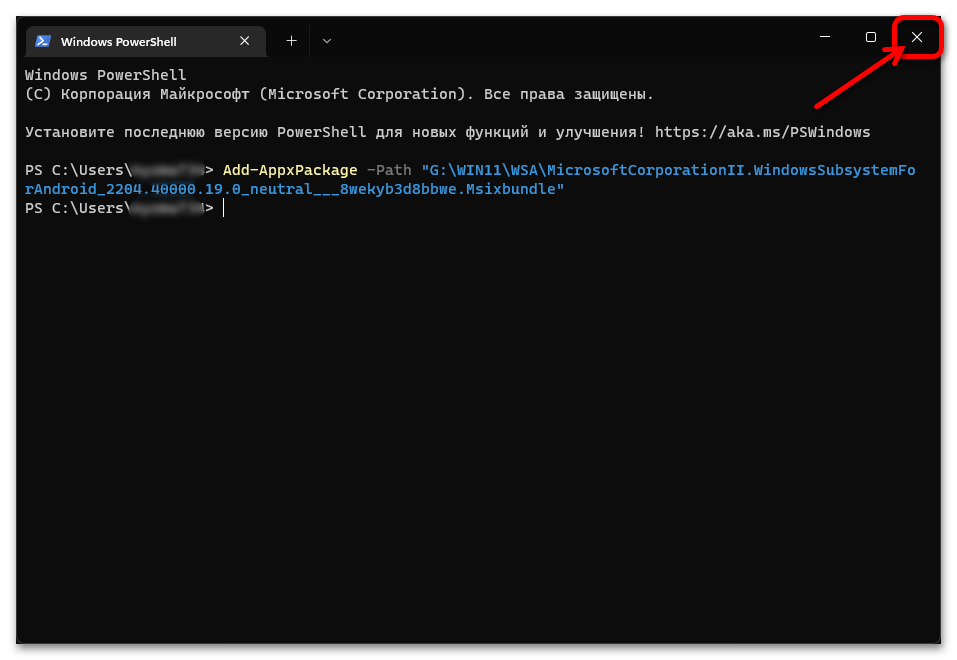
- После заполнения и исчезновения индикатора выполнения и убедившись в отсутствии констатации системой каких-либо ошибок закрываем окно Терминала.


- Запускаем Терминал от имени Администратора. Для этого, например, открываем системный «Поиск», пишем
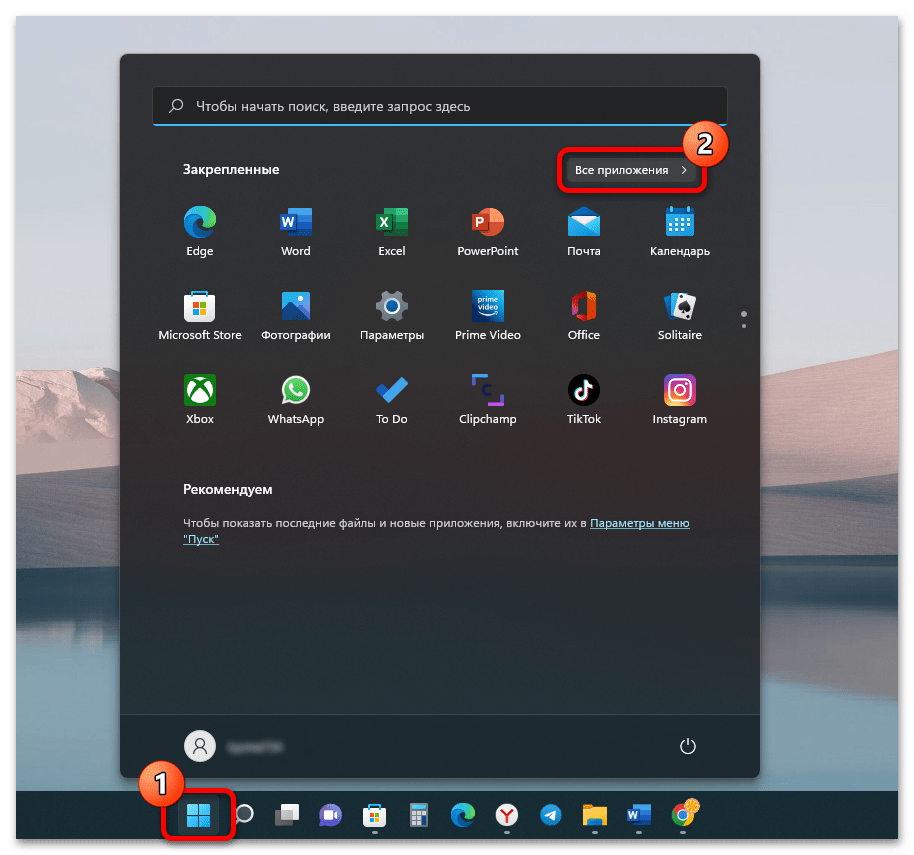
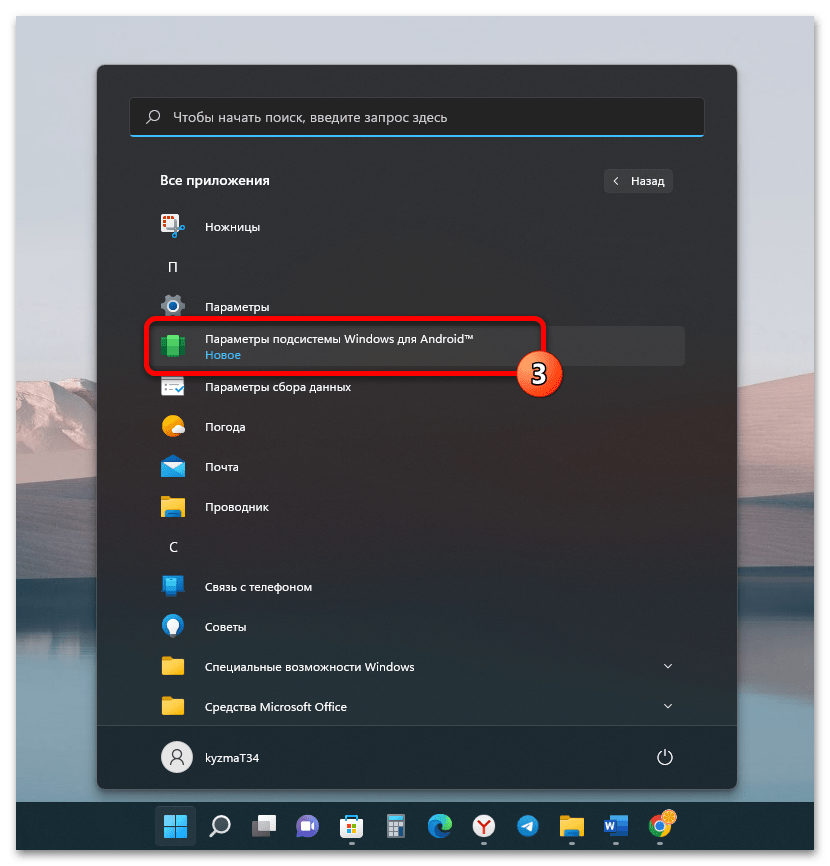
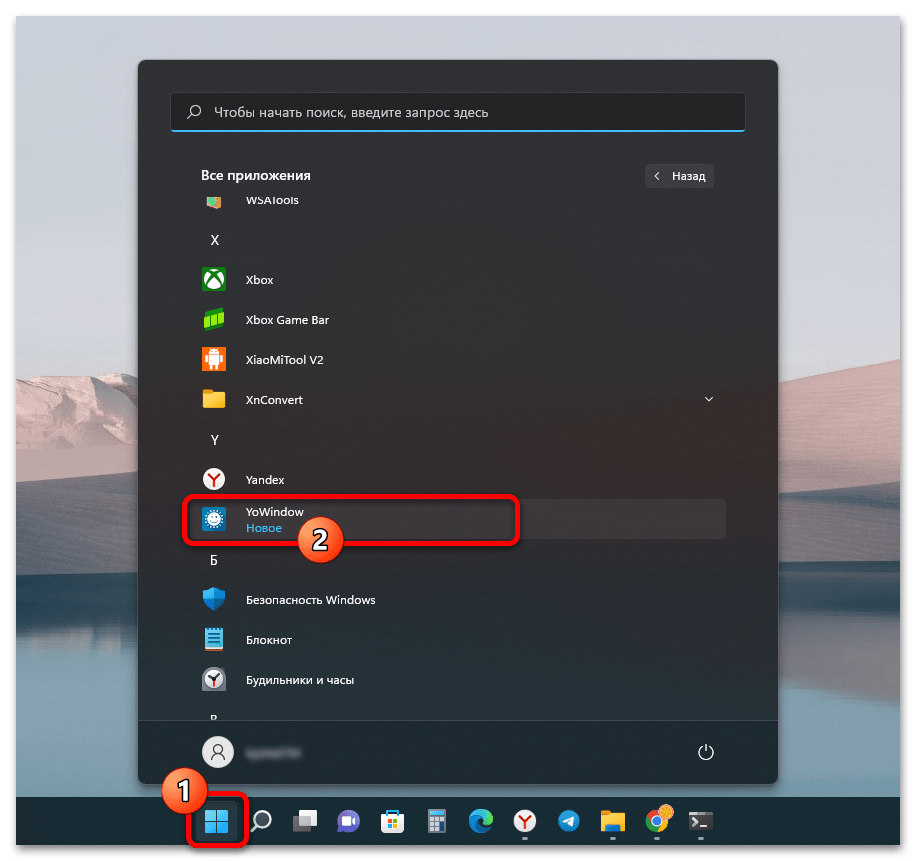
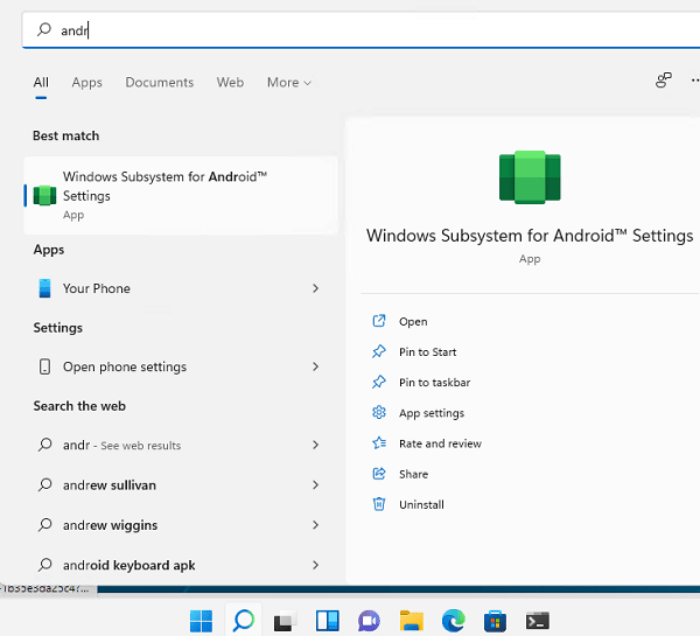
- Вызываем Главное меню Windows 11, щёлкаем «Все приложения»,

находим в отобразившемся списке и затем открываем «Параметры подсистемы Windows для Android» — появление этой программы в системе уже, по сути, означает, что вышеописанные операции

выполнены результативно.
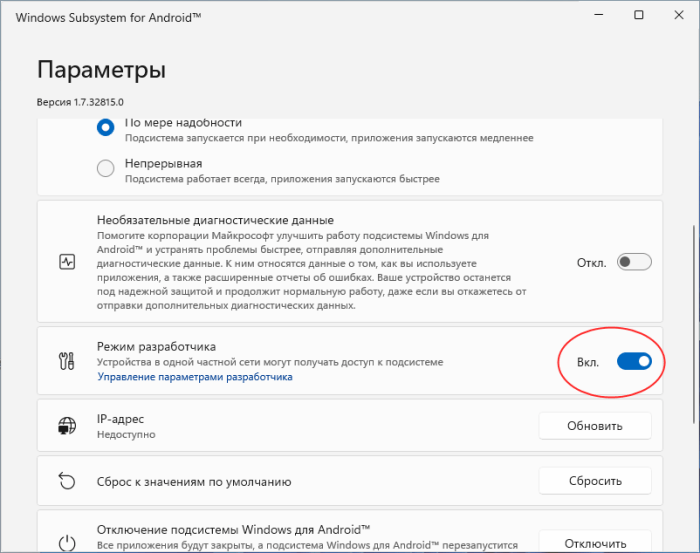
- На этом практически всё, но чтобы в дальнейшем не пришлось столкнуться с ошибками в процессе развёртывания Android-приложений, важно активировать в WSA «Режим разработчика»:

Шаг 2: Установка Android-приложений
Официально предлагаемый Microsoft канал распространения мобильного софта для установки и запуска в среде ОС Windows 11 – Amazon Appstore — для большинства читателей этой статьи недоступен ввиду региональных и иных ограничений, поэтому рассматривть его мы не будем, а уделим внимание несколько более сложным, но зато универсальным методам.
Скачивание APK-файлов
Все три предложенные далее в этом материале способа непосредственной установки Android-приложений в среде Windows 11 подразумевают развёртывание на компьютере их специализированных пакетов формата APK (Android Package). Таким образом, прежде чем применять любую из следующих инструкций, необходимо получить и сохранить на компьютере указанные своеобразные «дистрибутивы» предполагаемых к инсталляции мобильных приложений.
APK практически любого программного продукта можно без проблем найти в интернете, но во избежание связанных с кибербезопасностью рисков скачивать их следует с осторожностью и исключительно с проверенных ресурсов (например, официальных сайтов разработчиков)!
Продемонстрируем один из самых надёжных и безопасных вариантов получения APK любого приложения – его загрузку из Google Play Маркета через один из специализирующихся на решении таких задач онлайн-сервис.
Перейти к онлайн-сервису для скачивания APK из Google Play Маркета
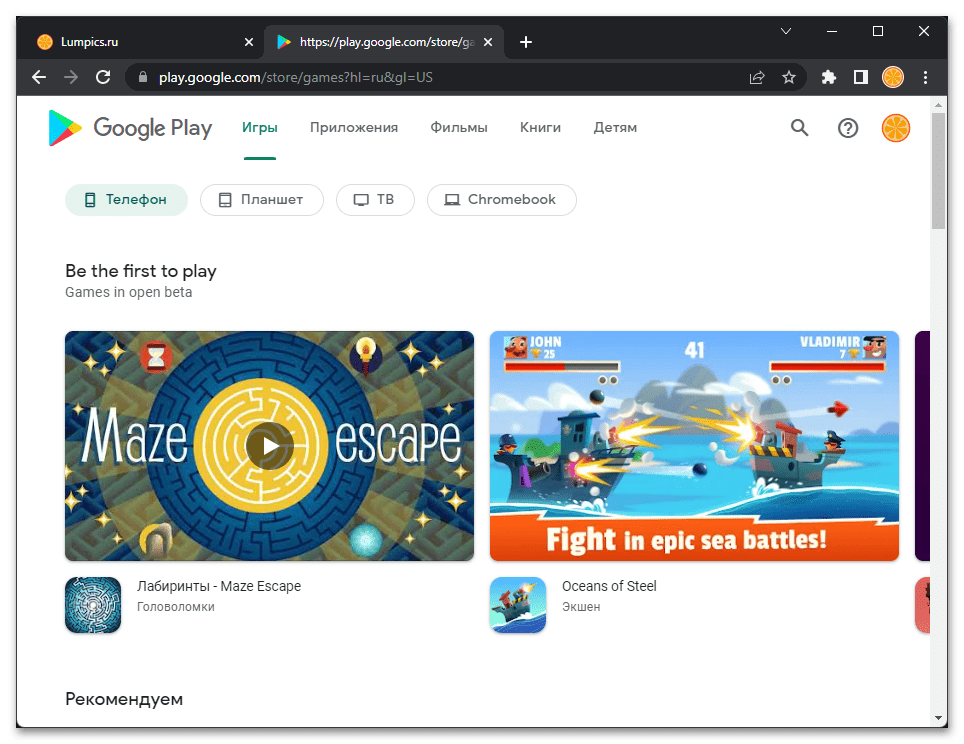
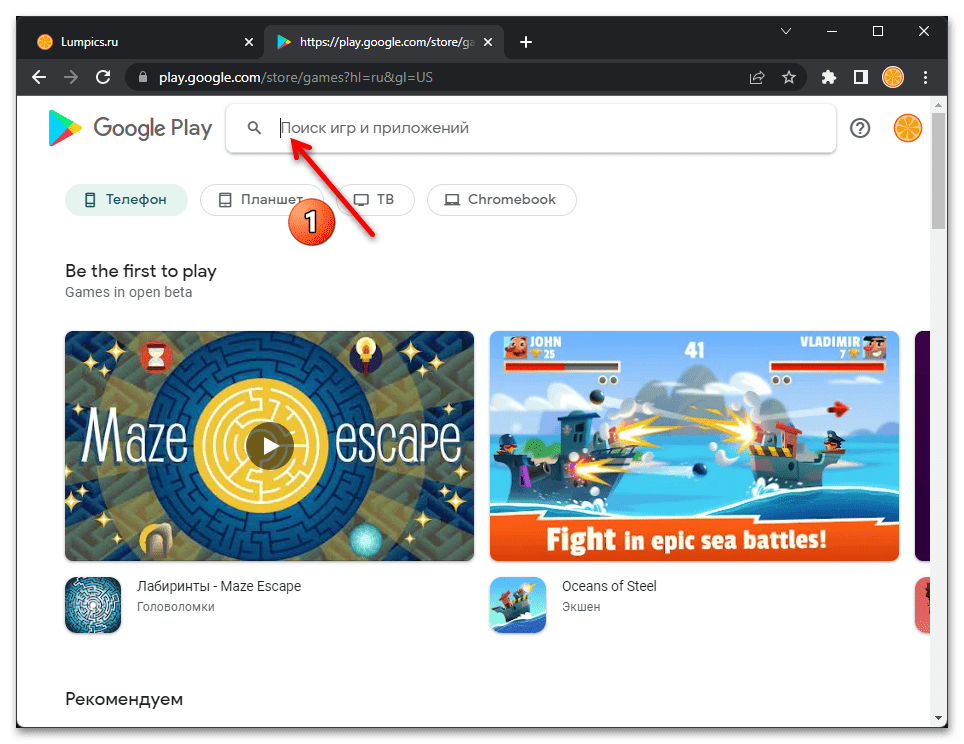
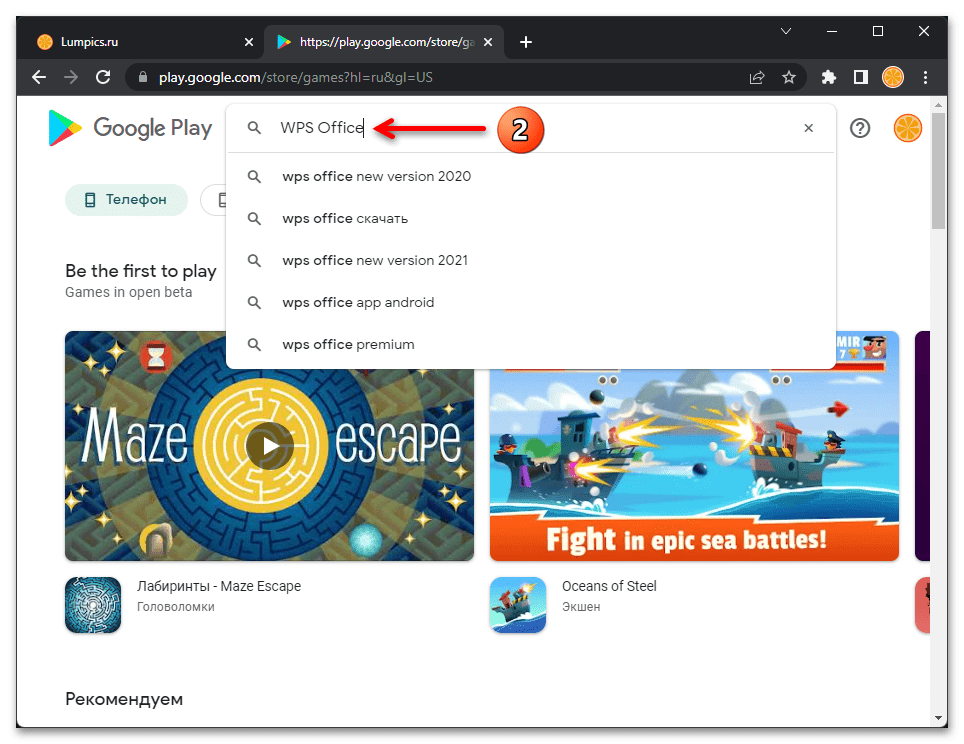
- В любом браузере на компьютере открываем веб-версию Гугл Плей Маркета (play.google.com).
- Кликаем по значку «Поиск» вверху справа, вводим название требуемого Android-приложения в отобразившееся поле
и нажимаем «Enter» на клавиатуре.
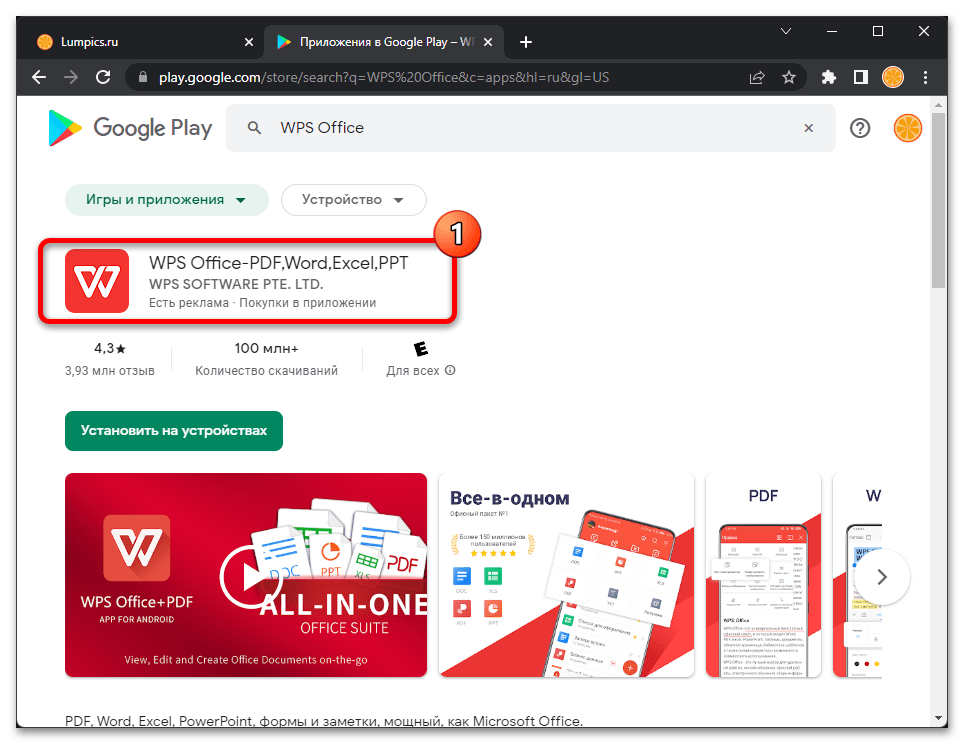
- Находим в поисковой выдаче и, кликнув по наименованию,
переходим на страницу нужного мобильного софта в Магазине.
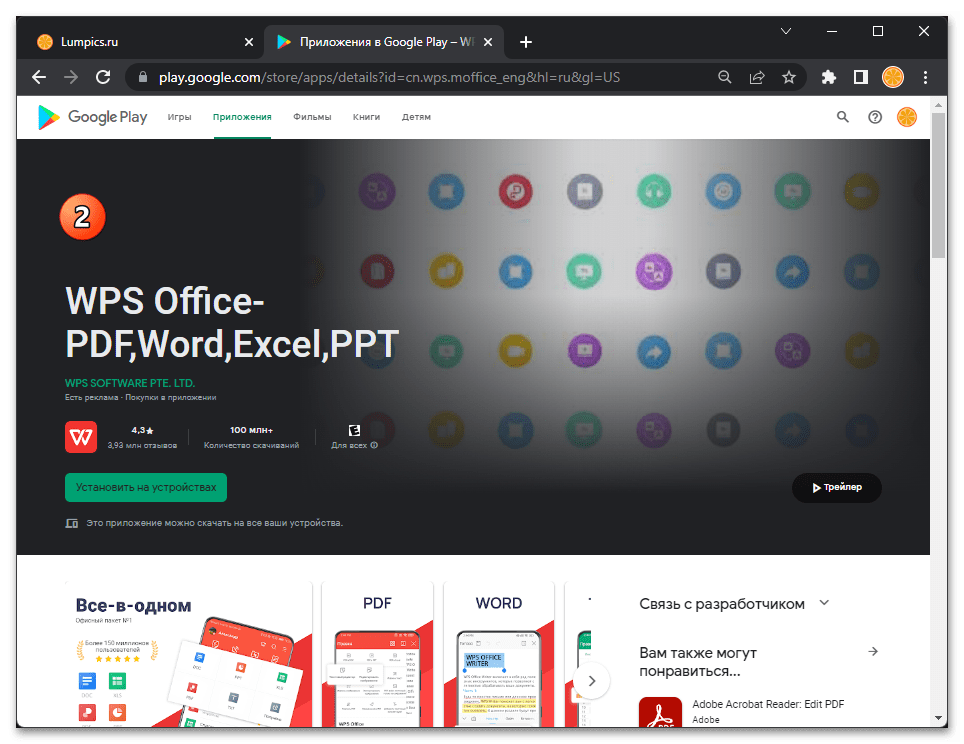
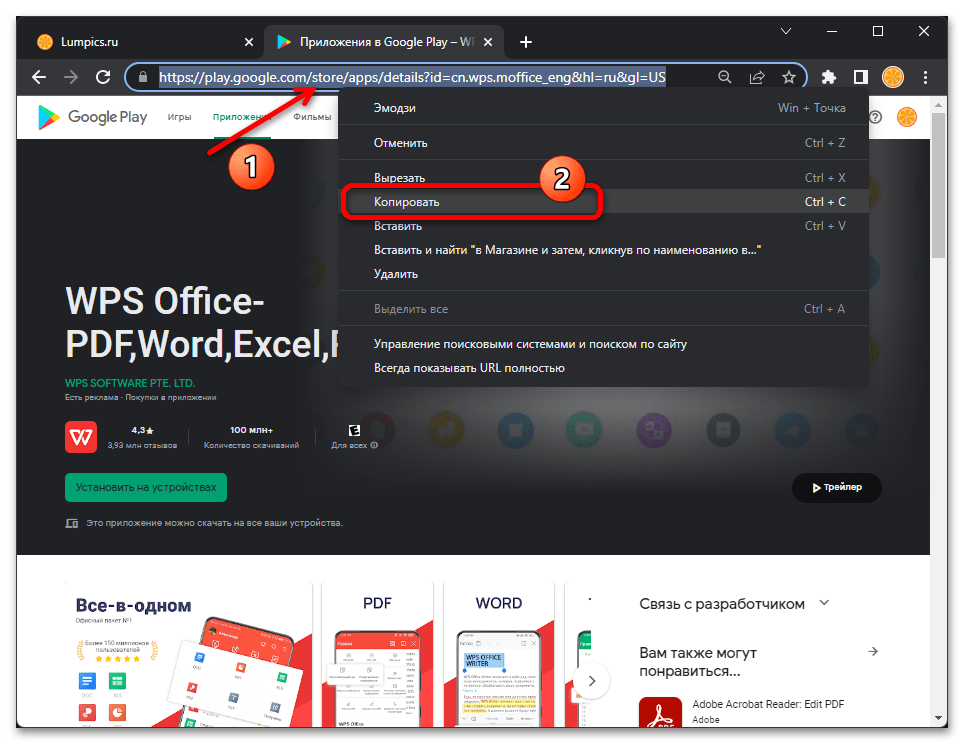
- Копируем адрес веб-страницы приложения в каталоге в буфер обмена Windows.
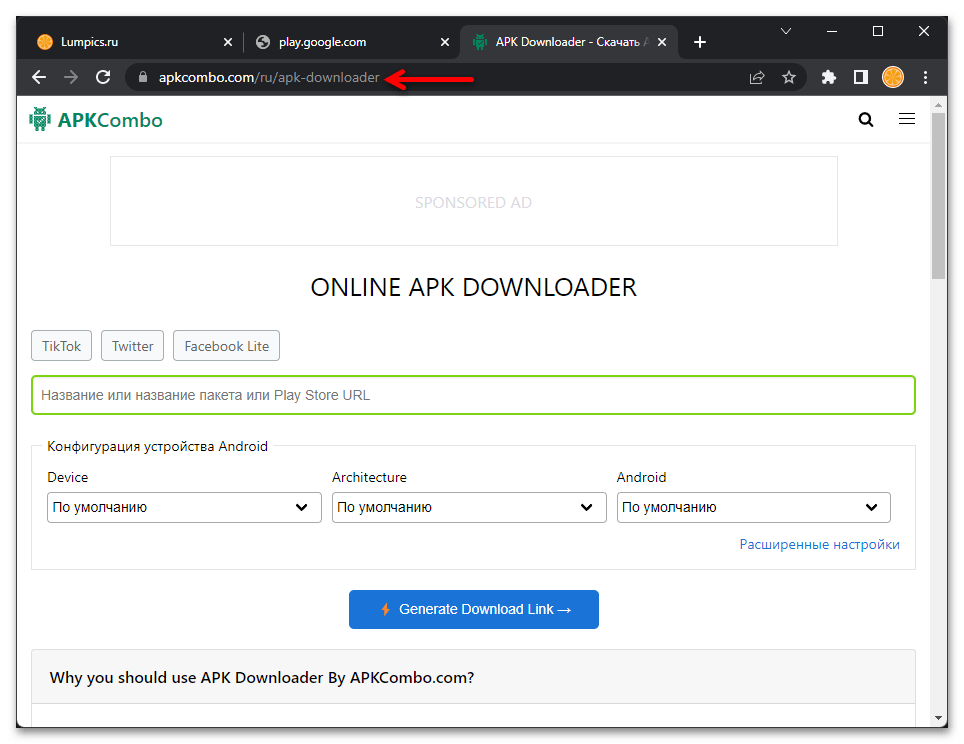
- По ссылке перед этой инструкцией открываем сайт сервиса для загрузки APK (в нашем примере — apkcombo.com, но стоит отметить, что существуют и другие сайты, функционирующие аналогично).
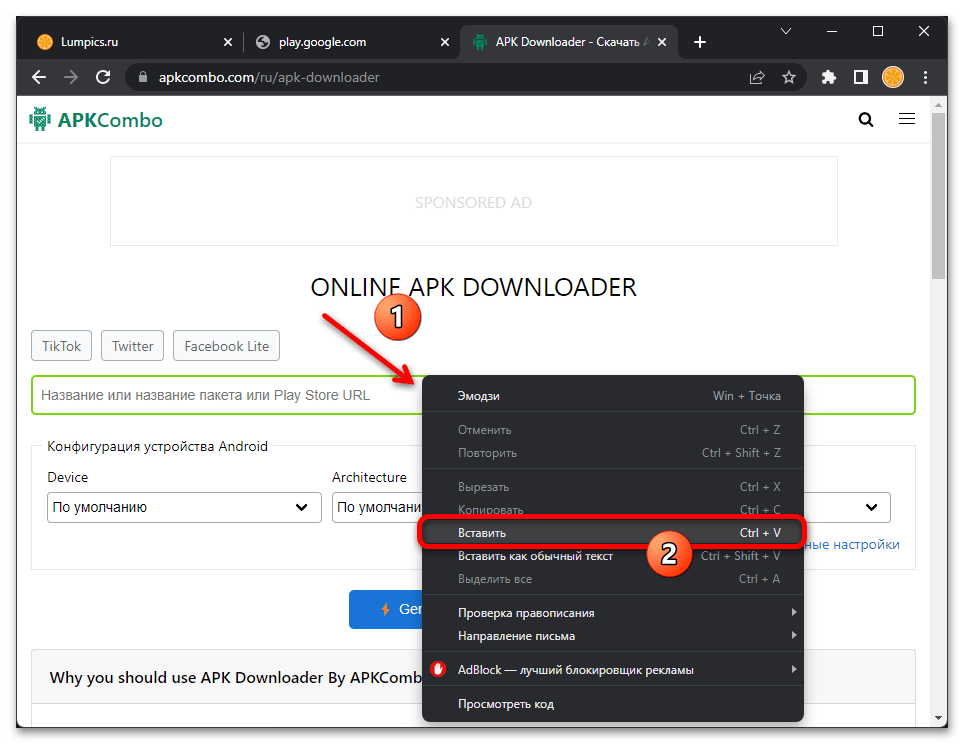
- Вставляем ссылку на страницу приложения в каталоге Google Play Маркета в поле «Название приложения или пакета или Play Store URL».
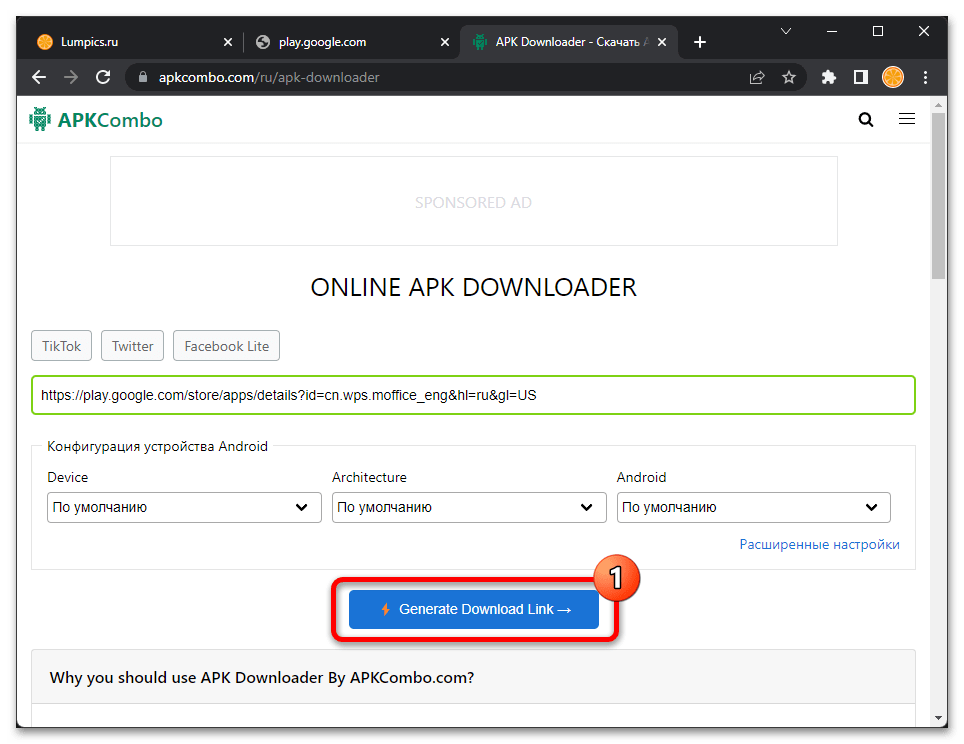
- Кликаем «Generate Download Link» и
недолго ожидаем, пока сервис представит список доступных к получению APK.
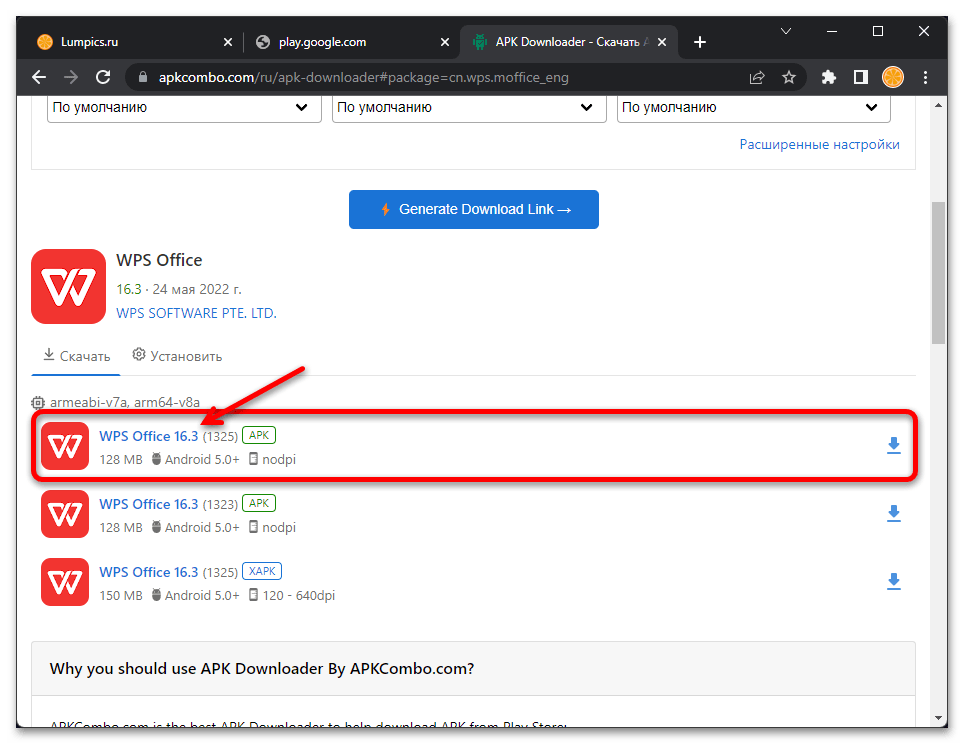
- Щёлкаем по наименованию (чаще всего подойдёт первый из списка выданных сервисом) APK-пакета – это инициирует его скачивание на диск компьютера.
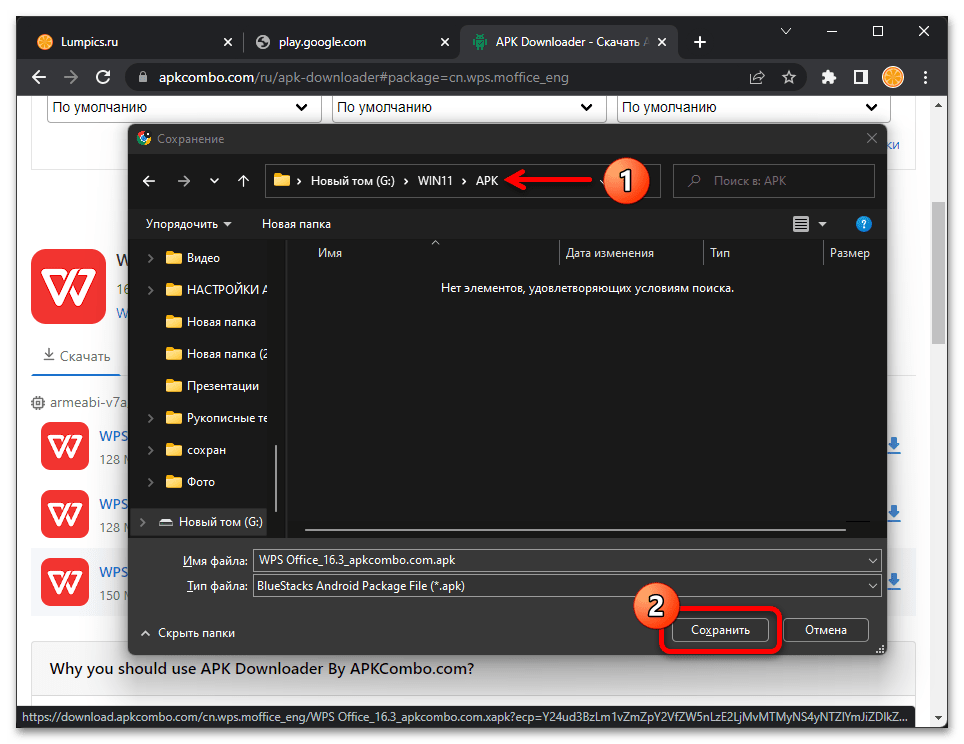
- Определяем в какой папке будет сохранён APK-файл, кликаем «Сохранить»
и дожидаемся завершения загрузки.


Вариант 1: WSATools
WSATools – это первый из появившихся и ставших широко известными, а потому самый распространённый инструмент для непосредственной установки Android-приложений в Windows 11. При условии полноценно выполненных установки и настройки WSA и наличия заранее подготовленного APK-файла инсталлируемого софта потребует для решения нашей задачи всего нескольких кликов мышью.
Скачать WSATools из Microsoft Store
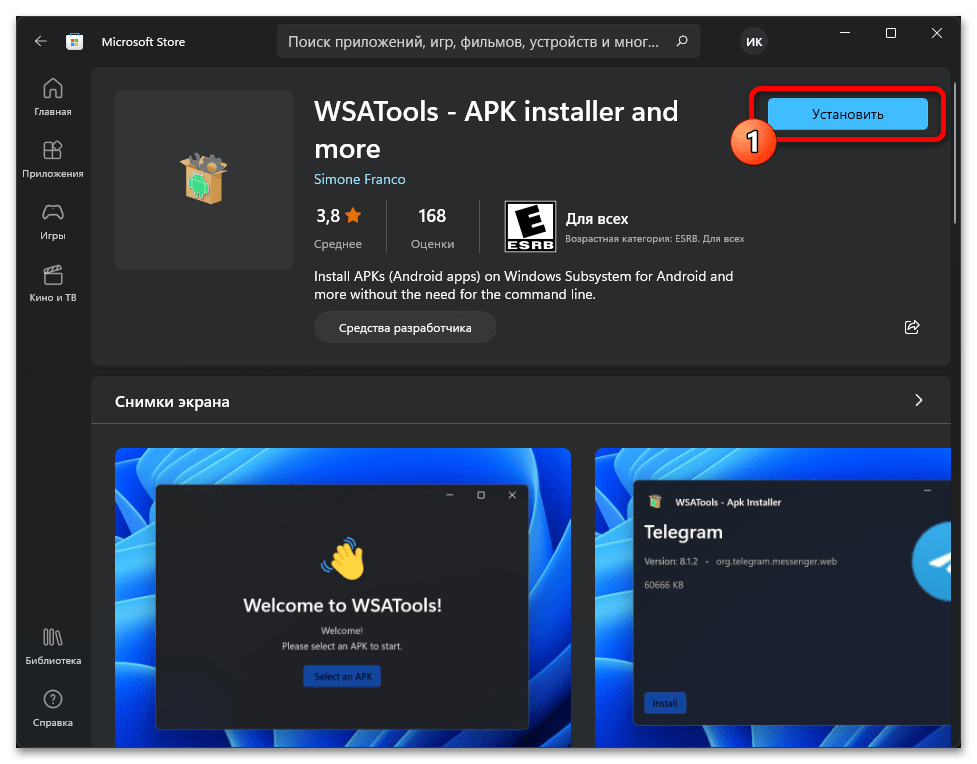
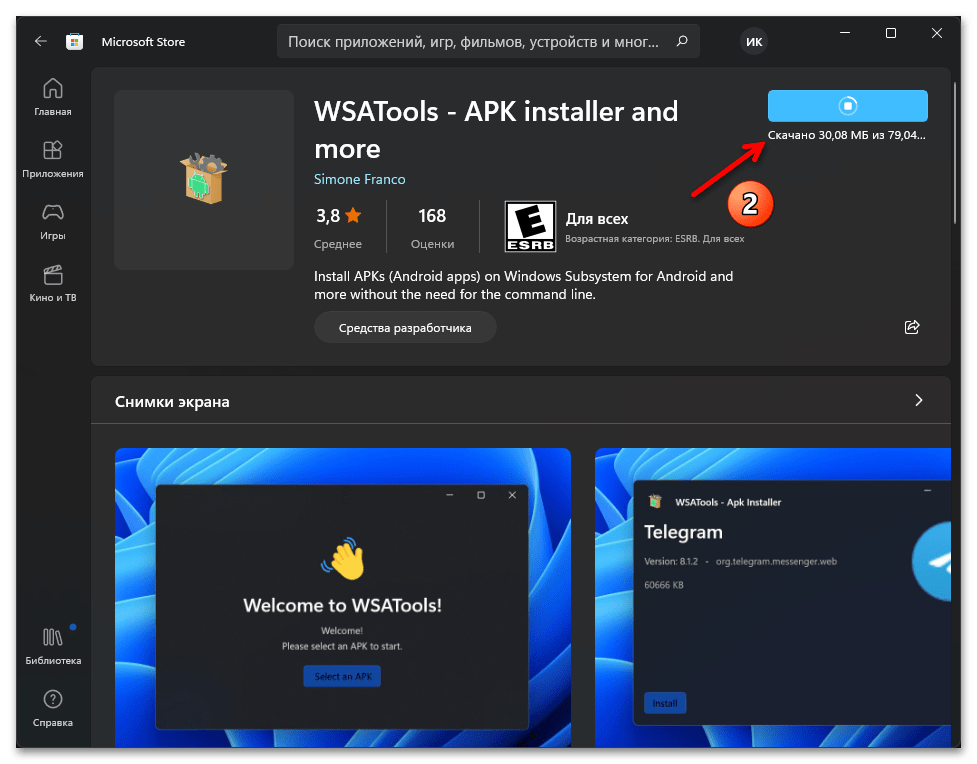
- Перейдя по ссылке выше, открываем страницу WSATools в Магазине Microsoft, скачиваем

и устанавливаем программу.
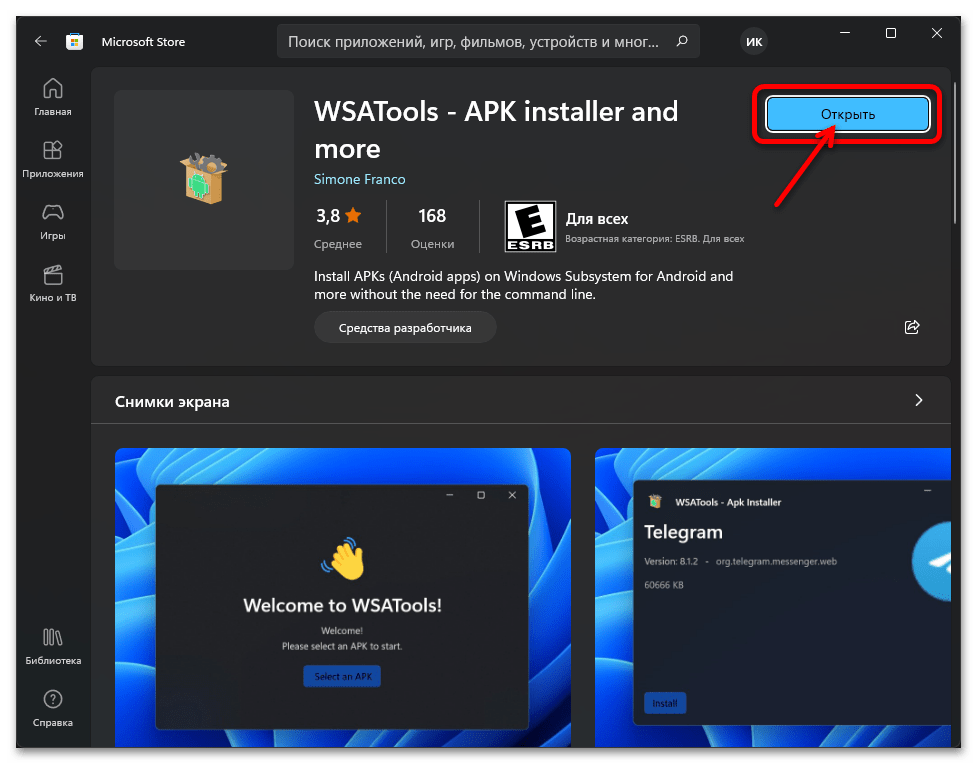
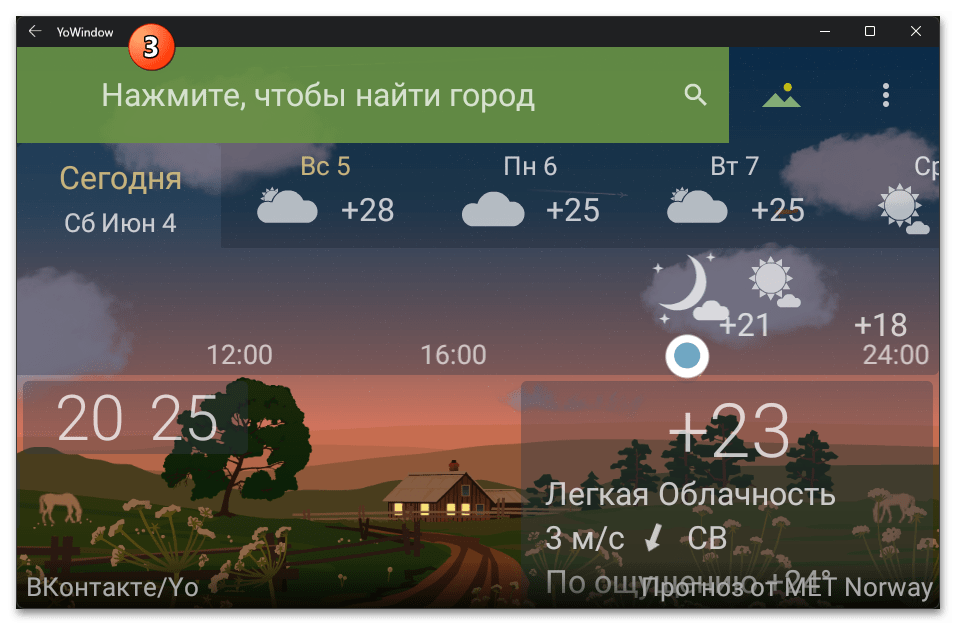
- По завершении инсталляции запускаем WSATools – либо щёлкнув по кнопке «Открыть» на странице средства в Microsoft Store, либо из Главного меню Windows 11.
- Нажимаем на единственную в первом окне WSATools кнопку-функцию «Install an APK».
- При первом использовании программа сообщит об отсутствии в системе необходимой для её функционирования консольной утилиты ADB. С целью устранения этой «ошибки» следует единоразово выполнить:
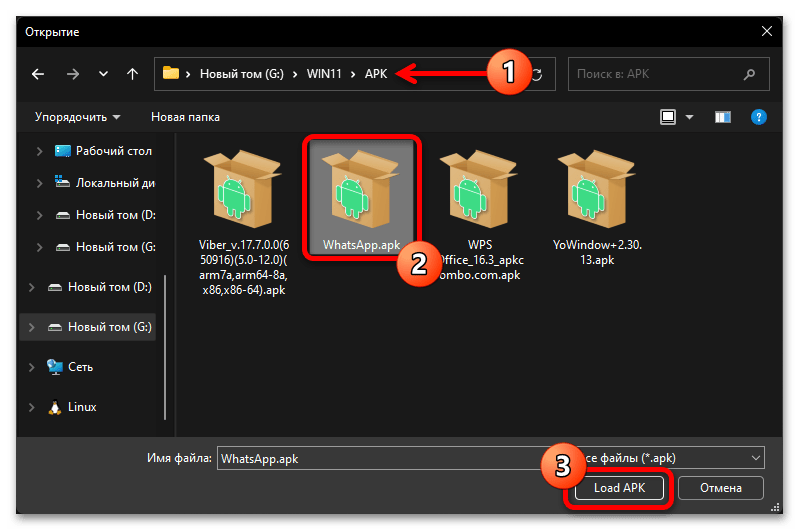
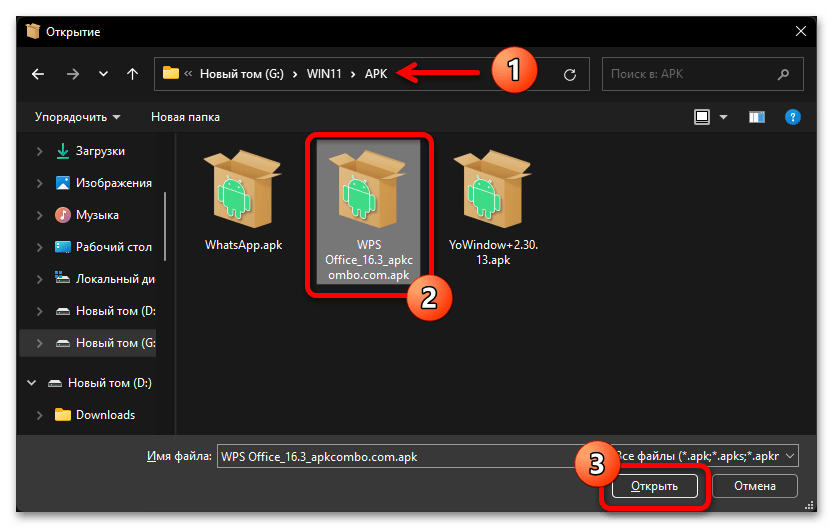
- Через окно «Открытие» переходим в каталог, где хранится APK устанавливаемого в текущий момент Android-приложения. Выделяем файл, затем щёлкаем по кнопке «Load APK» (либо просто дважды кликаем по наименованию или значку пакета).
- Немного ожидаем завершения анализа файла в WSATools.
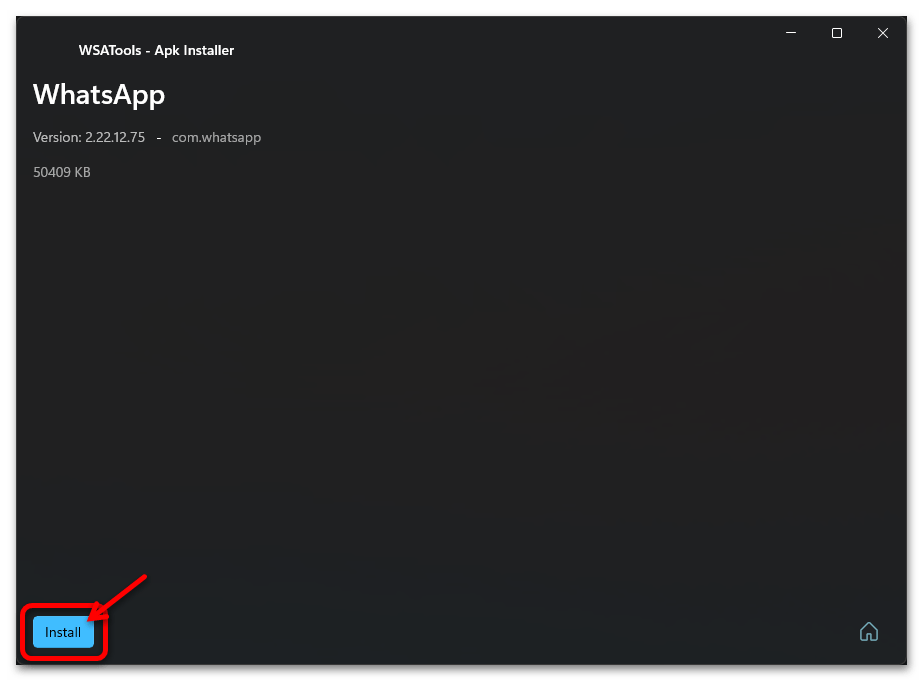
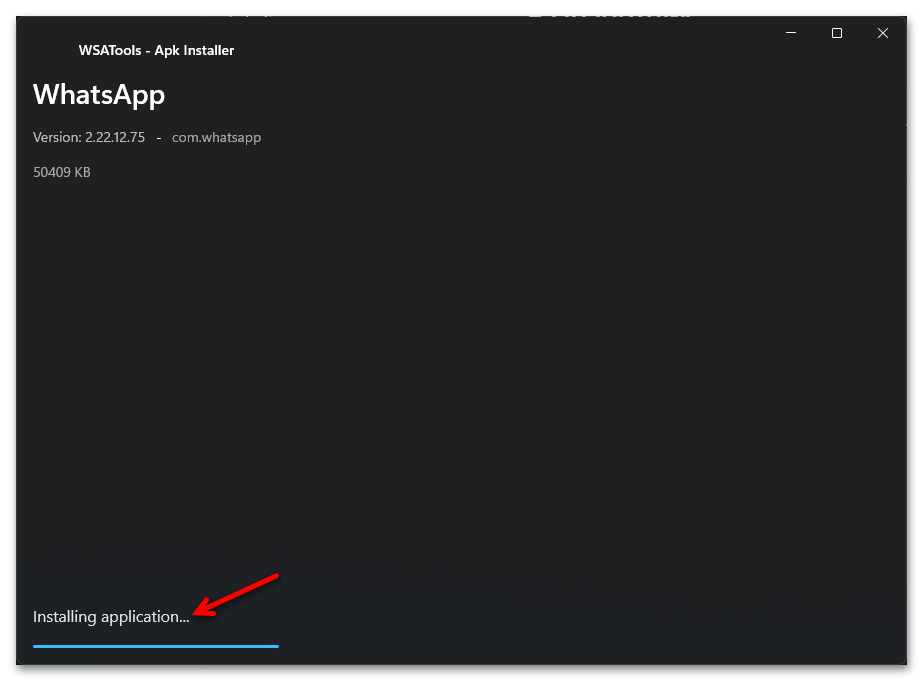
- Щёлкаем «Install» в левом нижнем углу окна с указанием имени и версии Android-приложения.
- Ожидаем, пока выбранный Android софт будет развёрнут в Windows 11 – обычно это происходит очень быстро.
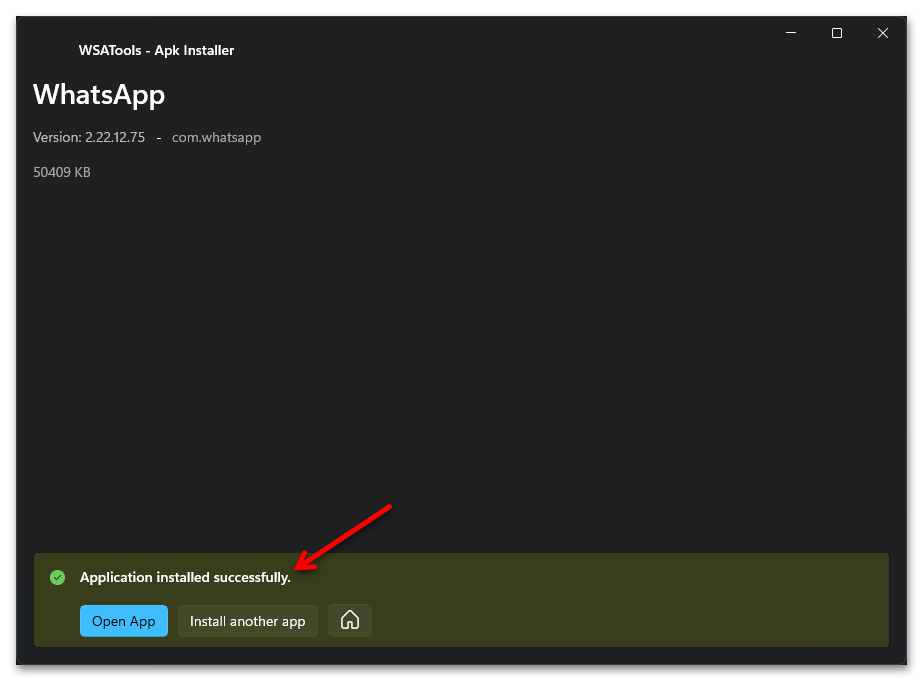
- По окончании процесса установки, в окне WSATools появится уведомление «Application installed successfully». Далее можно запустить инсталлированное приложение (кнопка «Open»), перейти к развертыванию другого Android-софта («Install another apps») или закрыть программу.
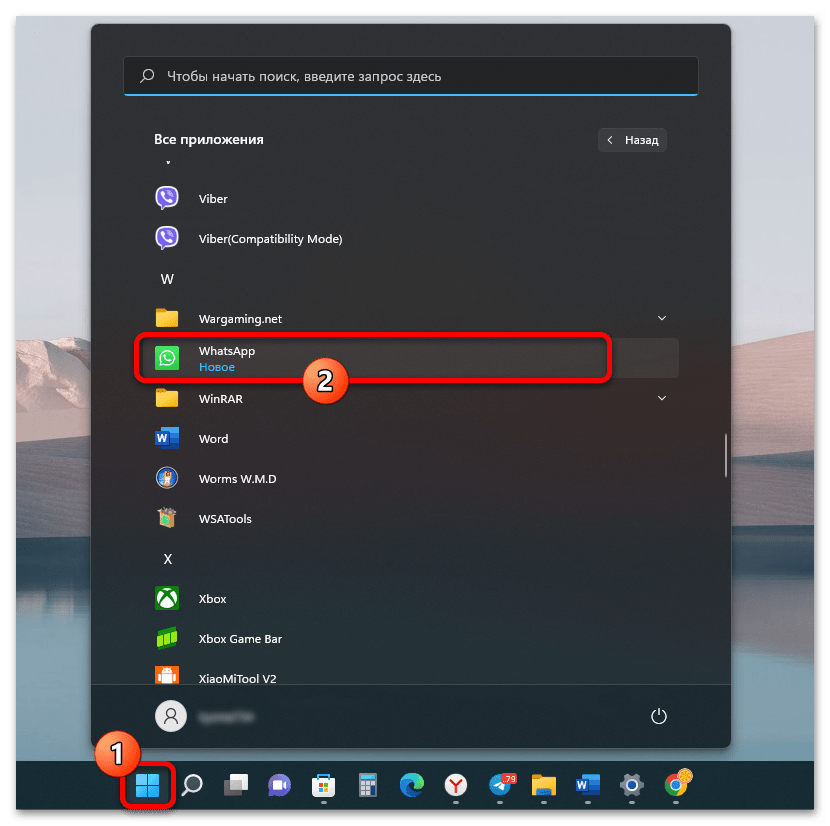
- Все установленные через WSATools Android-приложения появляются в Главном меню ОС Windows 11,

откуда их и следует

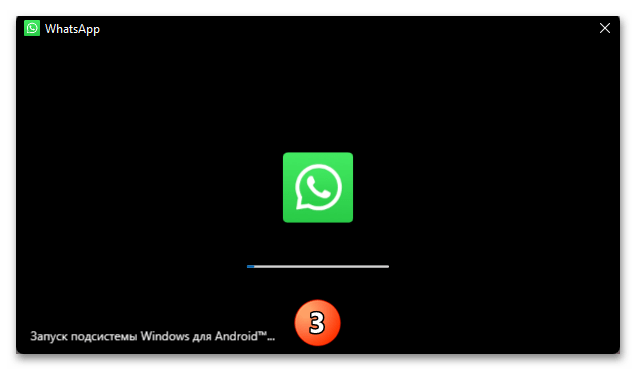
запускать.

Вариант 2: APK Installer
Ещё один представленный в Microsoft Store установщик Android-приложений в среде оснащённой WSA ОС Windows 11. APK Installer менее востребован, нежели вышеописанный WSA Tools, но функционирует по тому же принципу и так же эффективно, а в некоторых моментах кажется даже более удобным и простым.
Скачать APK Installer из Microsoft Store
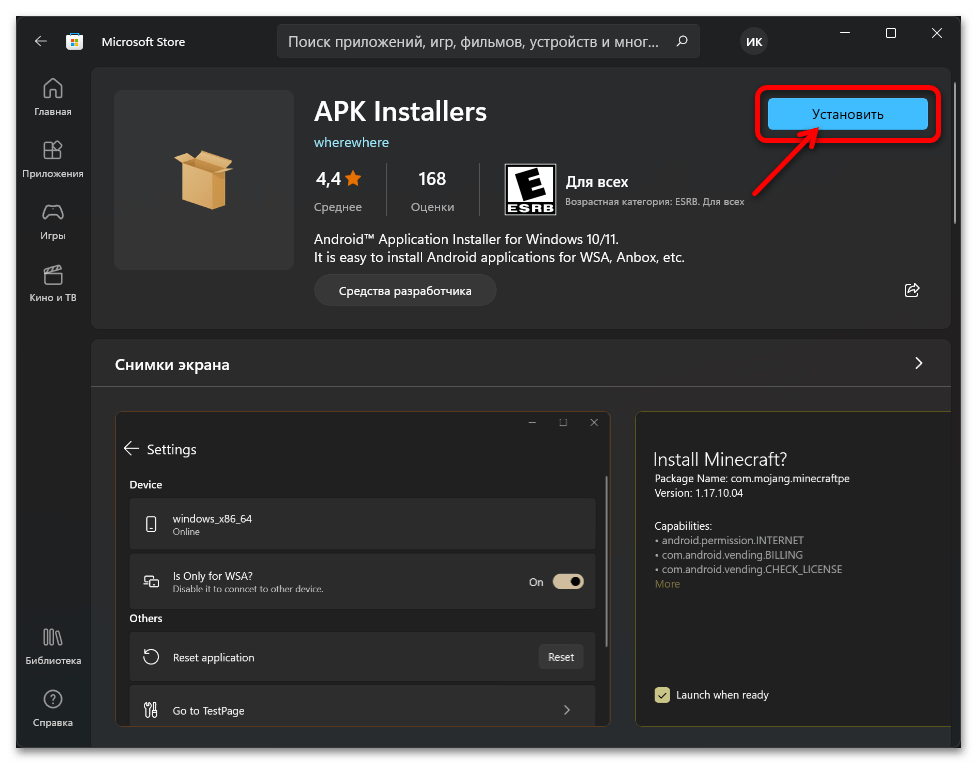
- Устанавливаем APK Installer из Microsoft Store – ссылка на страницу средства в магазине представлена выше.
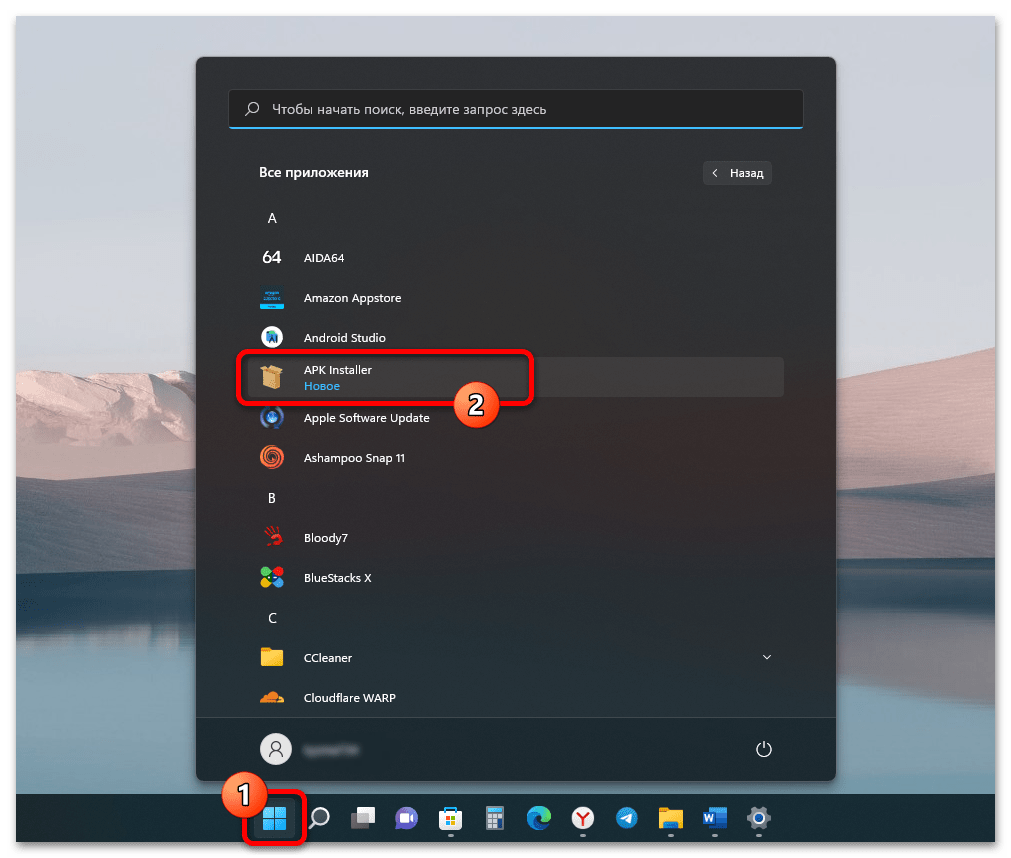
- Запускаем установщик АПК-файлов со страницы в каталоге софта Майкрософт либо из Главного меню Виндовс 11.
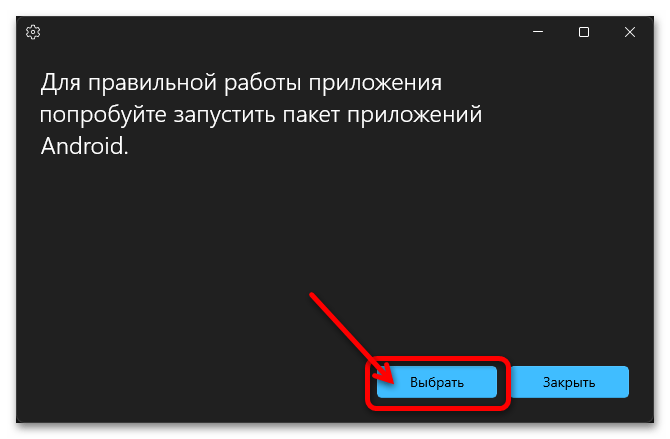
- Нажимаем «Выбрать» в окне АПК Инсталлера.
- Перемещаемся по пути расположения APK-файла инсталлируемого Android-приложения, выделяем его и щёлкаем «Открыть».
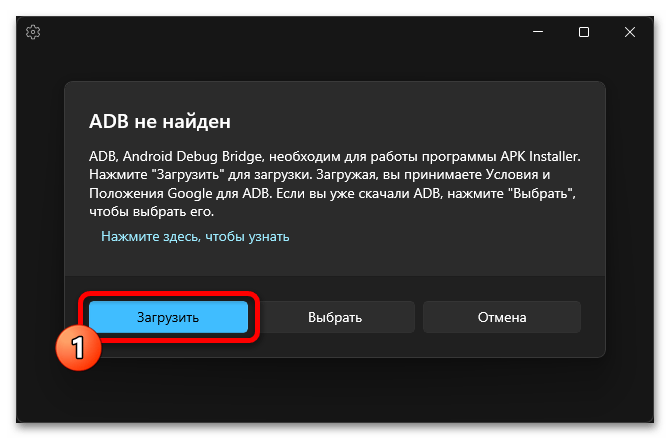
- При первом использовании рассматриваемого инструмента началу установки APK-файла будет предшествовать требование скачать и установить компоненты Android Debug Bridge – кликаем под ним «Загрузить».

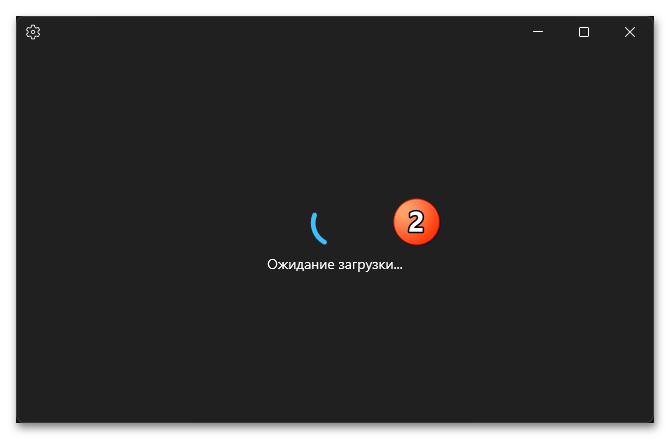
Немного ожидаем, пока необходимые файлы будут скачаны из сети помещены в специальную папку APK Installer,
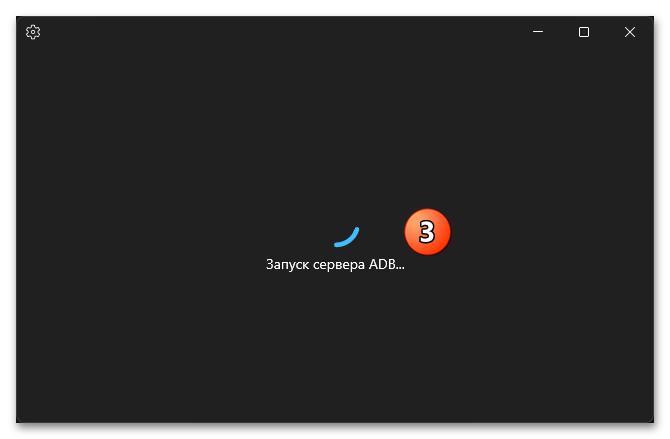
а затем завершения запуска сервера ADB.
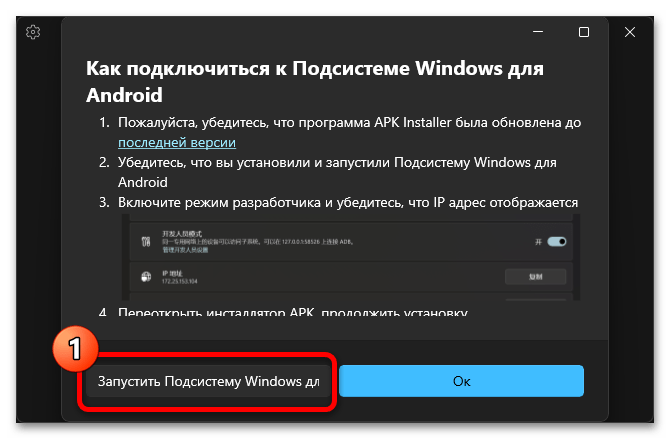
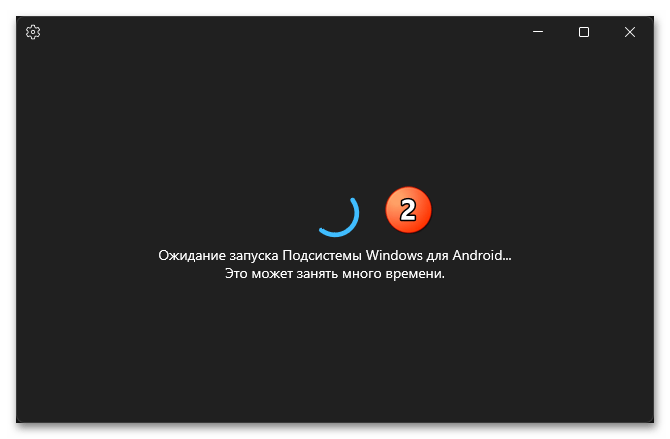
- В окне (если появится) «Как подключится к Подсистеме Windows для Android» щёлкаем «Запустить Подсистему»,
после чего вновь придётся немного подождать.
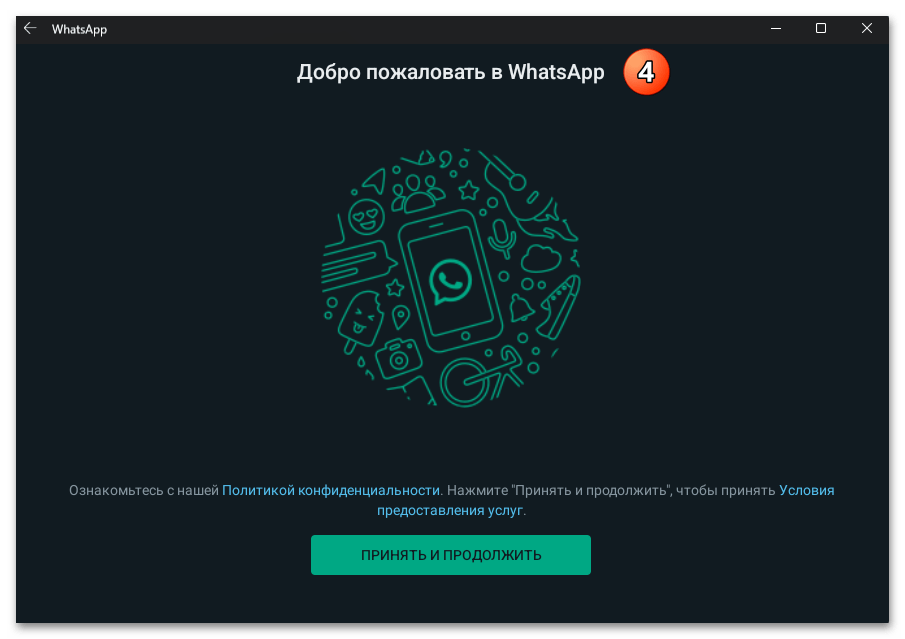
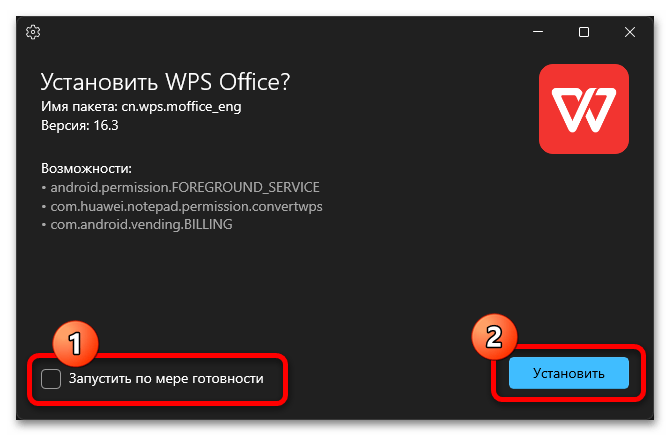
- В следующем окне APK Installer с описанием Android-приложения, по желанию отключив или оставив активированной опцию «Запустить по мере готовности», нажимаем «Установить».
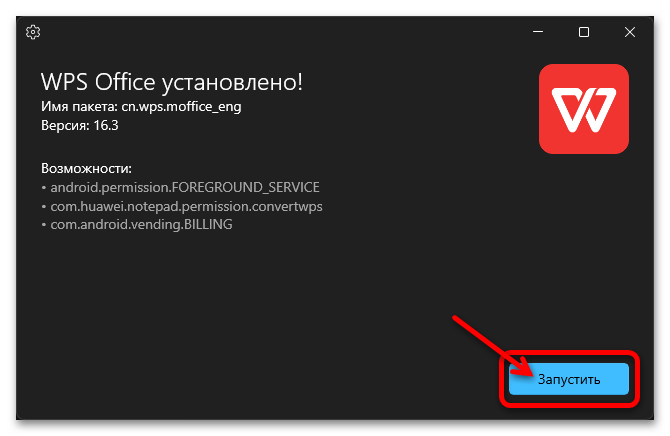
- Через некоторое время, длительность которого зависит от размера развёртываемого приложения, средство сообщит о том, что первое установлено. На этом всё – можно «Запустить» инсталлированное Android-ПО (впоследствии открываем его из Главного меню Windows 11) или просто закрыть APK Installer.
Вариант 3: Консольная утилита ADB
Инсталлировать APK-файлы в Подсистеме Windows для Android возможно и без использования софта от сторонних разработчиков – задействовав возможности Android Debug Bridge через консоль десктопной ОС. Данный метод не такой удобный как вышеописанные, однако его следует считать самым надёжным – по опыту через ADB удаётся успешно развернуть пакеты, с которыми по разным причинам не справляются установщики APK из Microsoft Store.
Скачать Android SDK Platform Tools c официального сайта
- Если с консольной утилитой ADB ранее дела иметь не приходилось, переходим по ссылке выше на сайт Android Developers и скачиваем с него
набор компонентов SDK Platform Tools.
- Распаковываем загруженный архив и помещаем получившуюся папку в корень системного диска компьютера.
- Открываем папку с ADB в Терминале Windows. Проще всего это сделать таким образом:
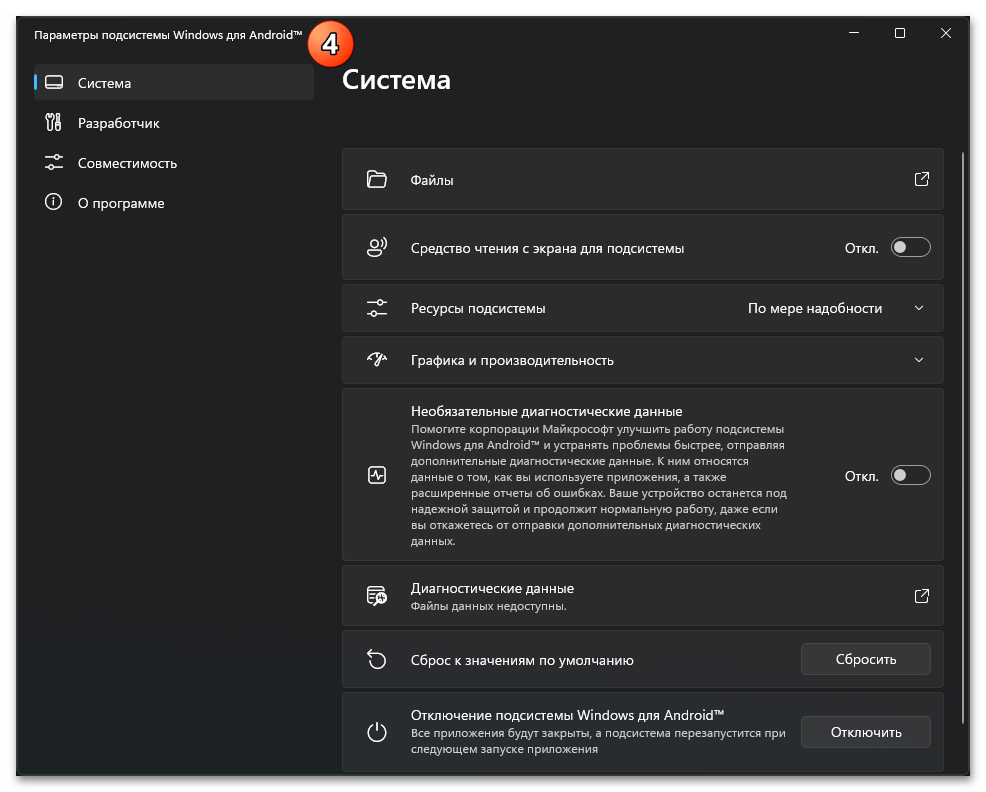
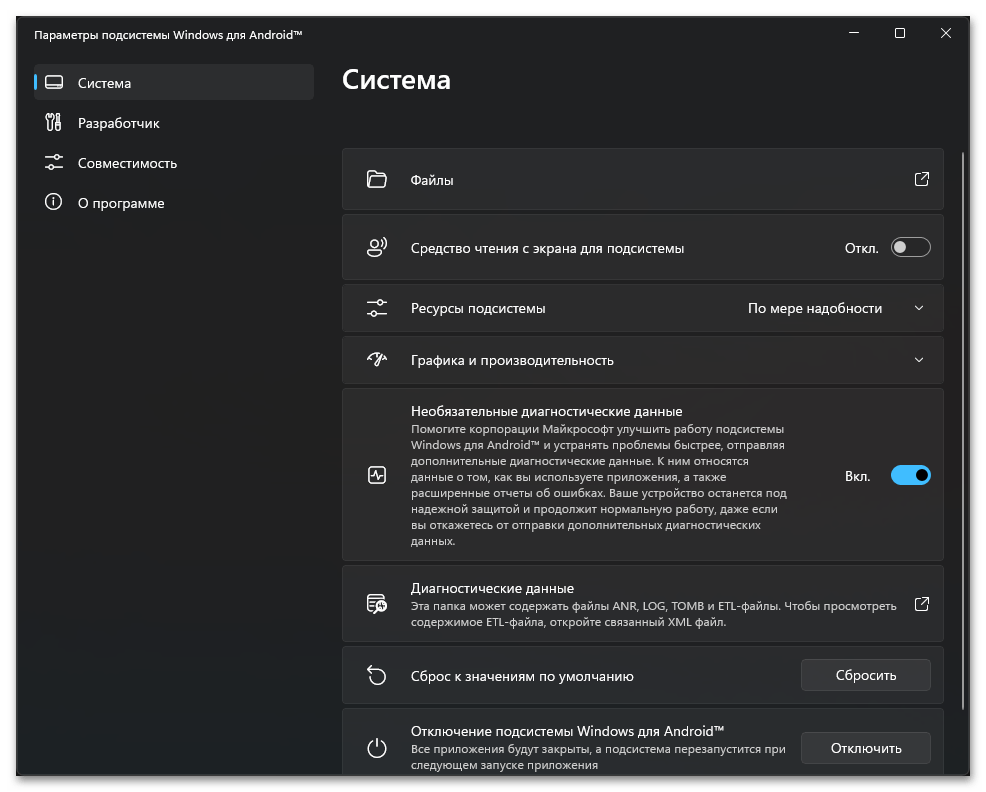
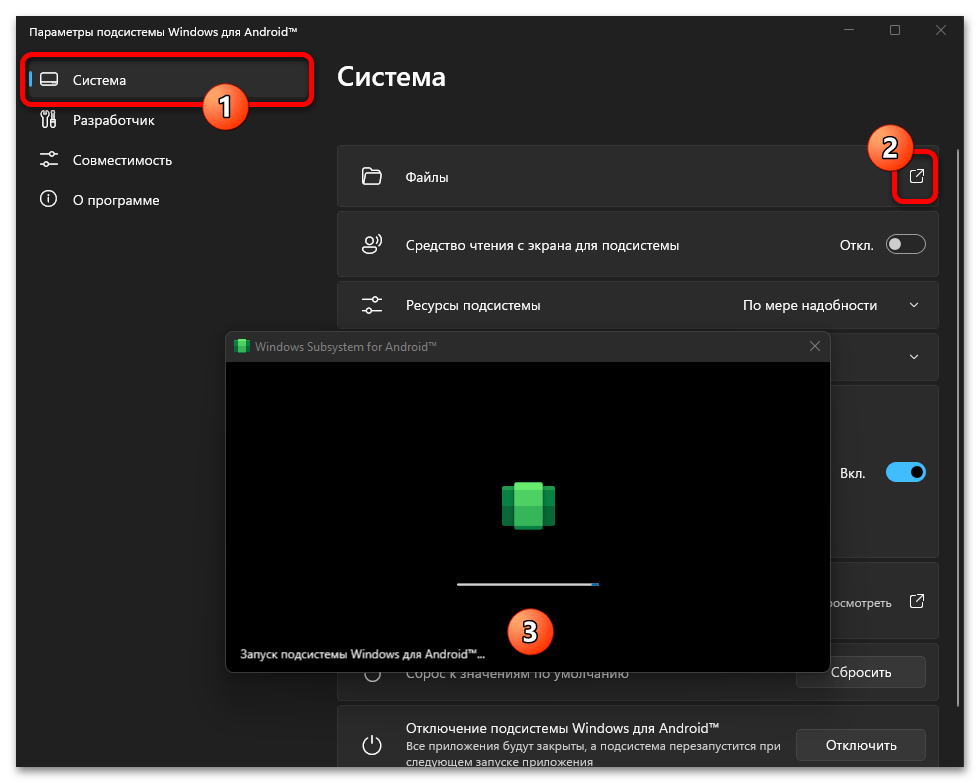
- Открываем «Параметры подсистемы Windows для Android» из Главного меню ОС.
- Включаем WSA – для этого можно кликнуть по элементу запуска средства «Файлы» — представлено первым по списку на вкладке «Система» настроек подсистемы.

Не закрываем открывшееся приложение до завершения всех манипуляций по установке APK!
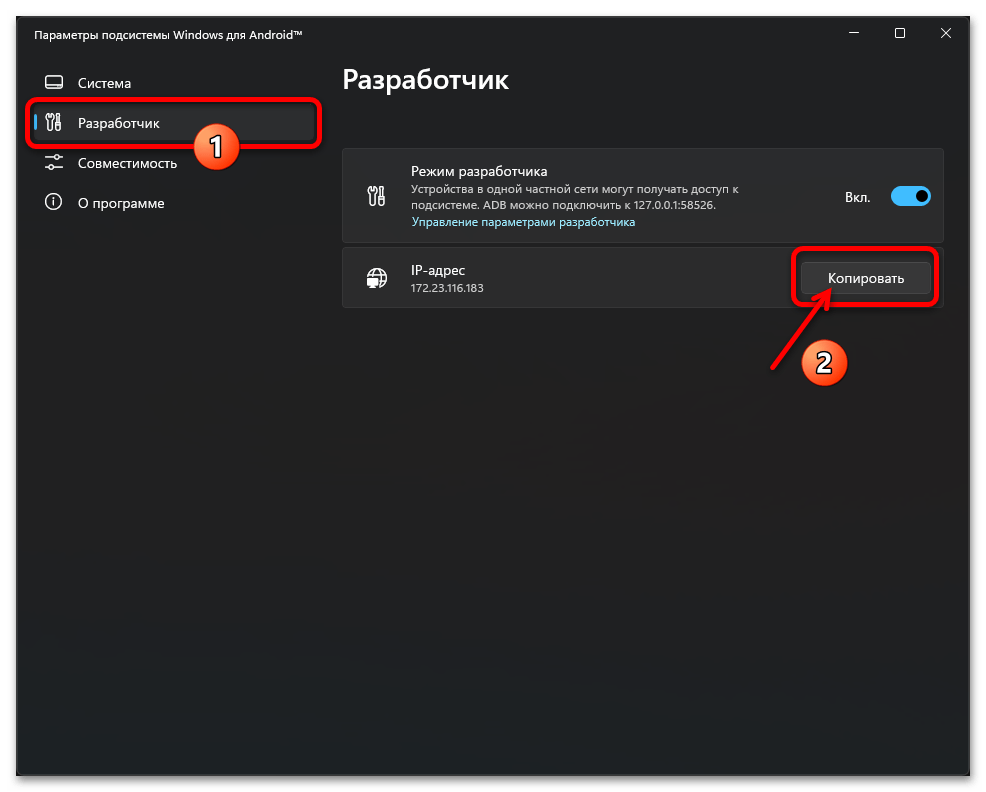
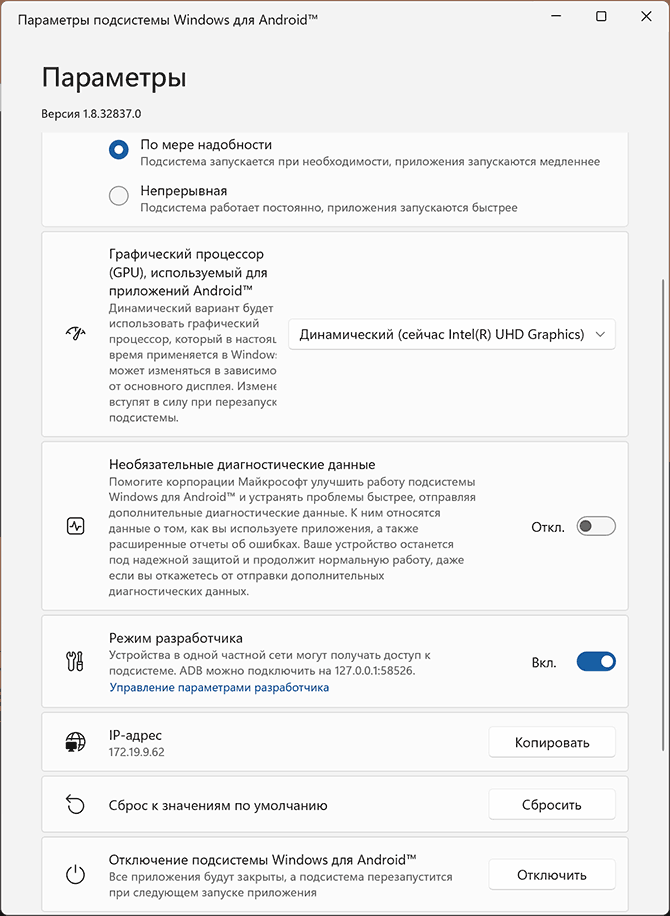
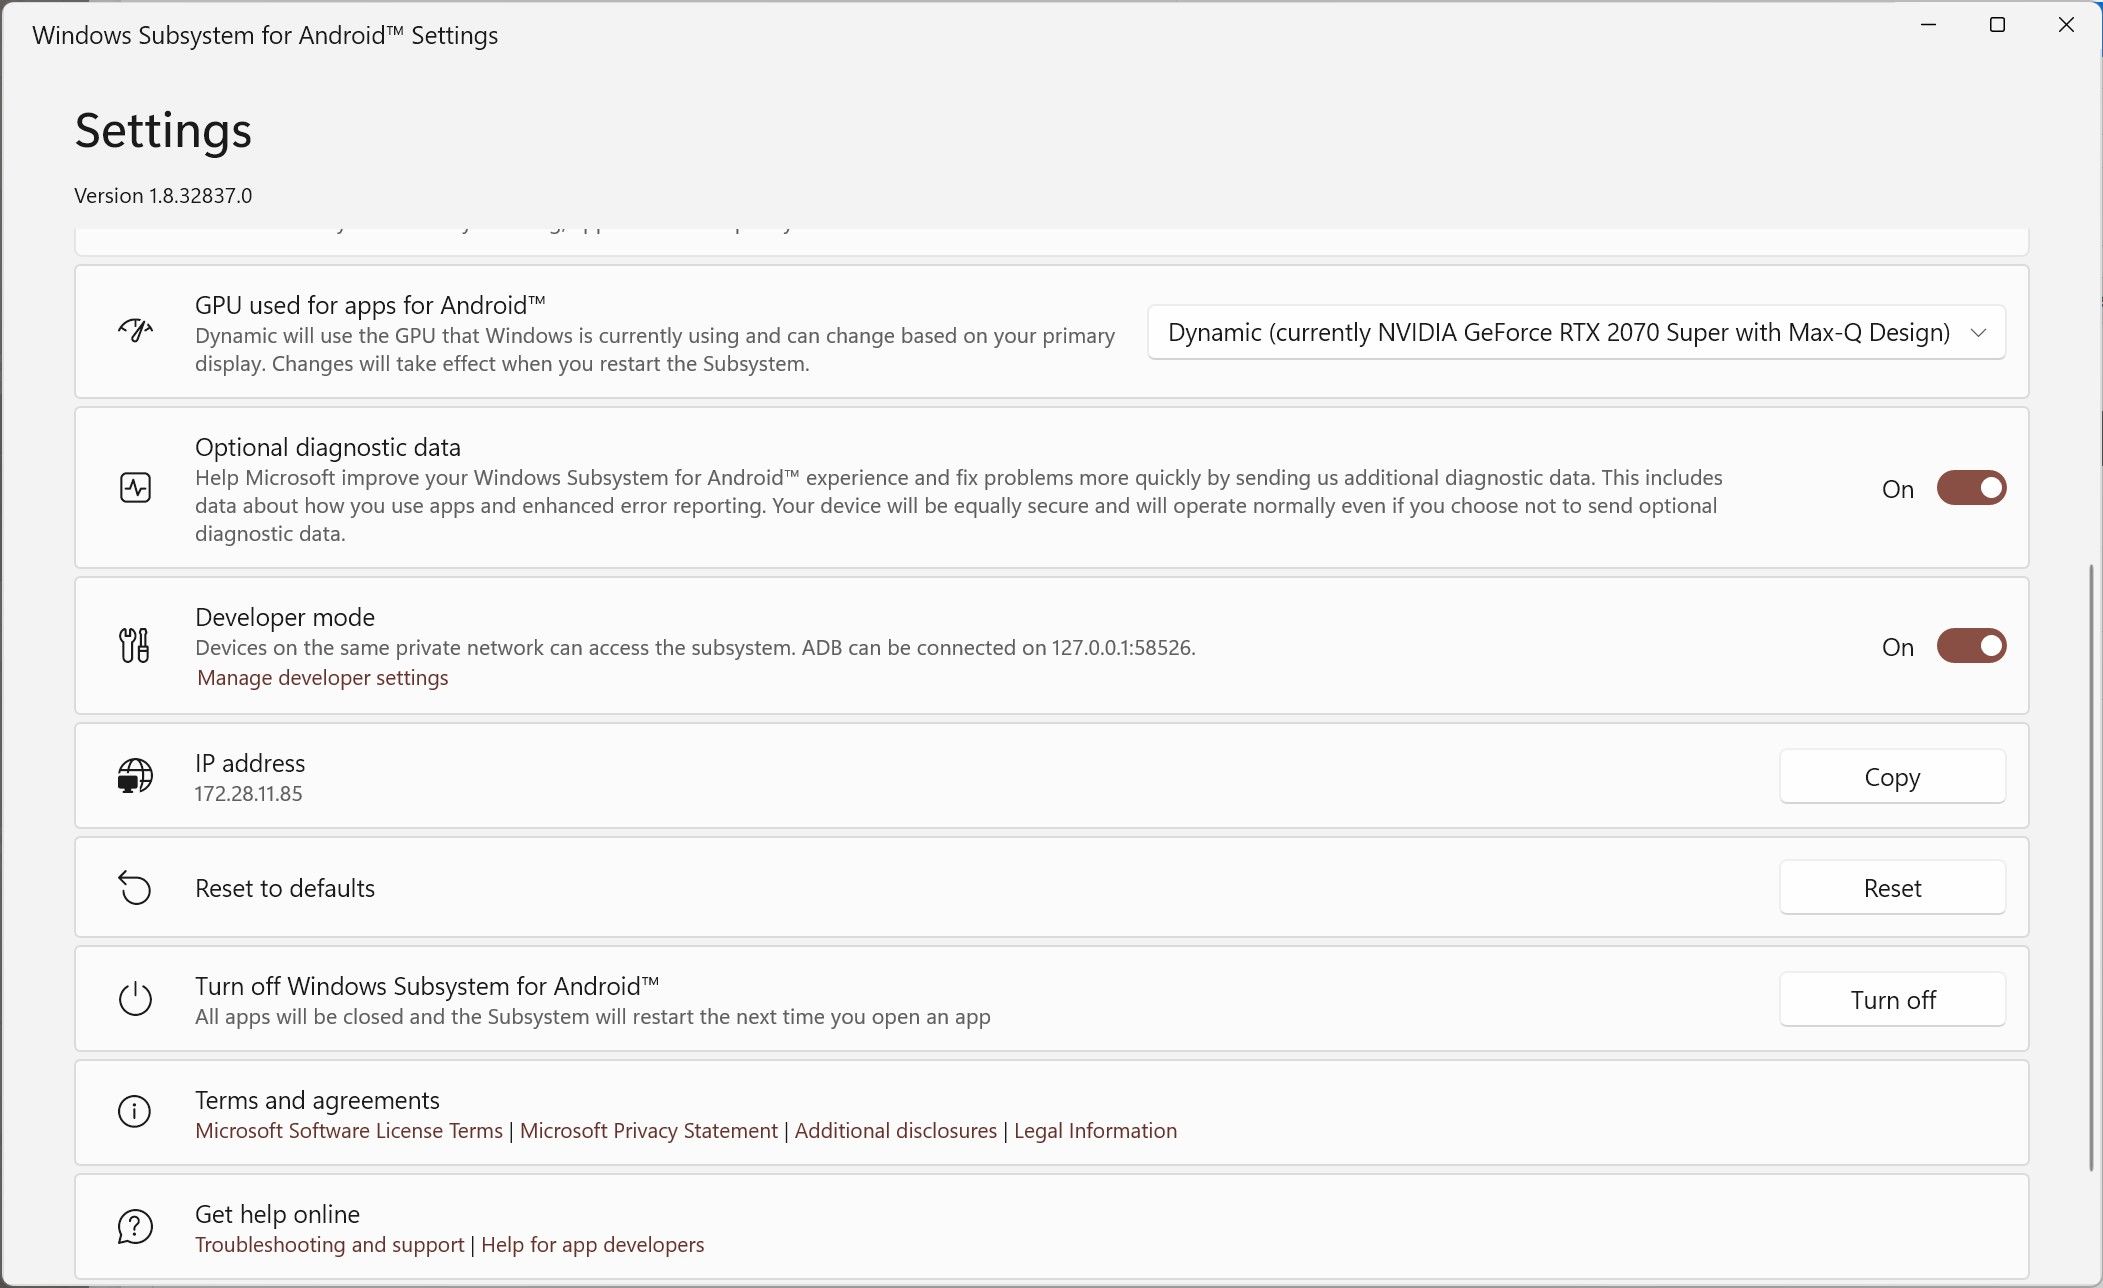
- Далее перемещаемся в раздел «Разработчик» параметров WSA, кликаем «Копировать» в области «IP-адрес» (если цифровое значение идентификатора не отображается, сначала щёлкаем «Обновить»).
- Подключаем ADB к WSA:
- Теперь всё готово к непосредственной установке приложения из APK-файла. Для этого в Терминале используется команда:
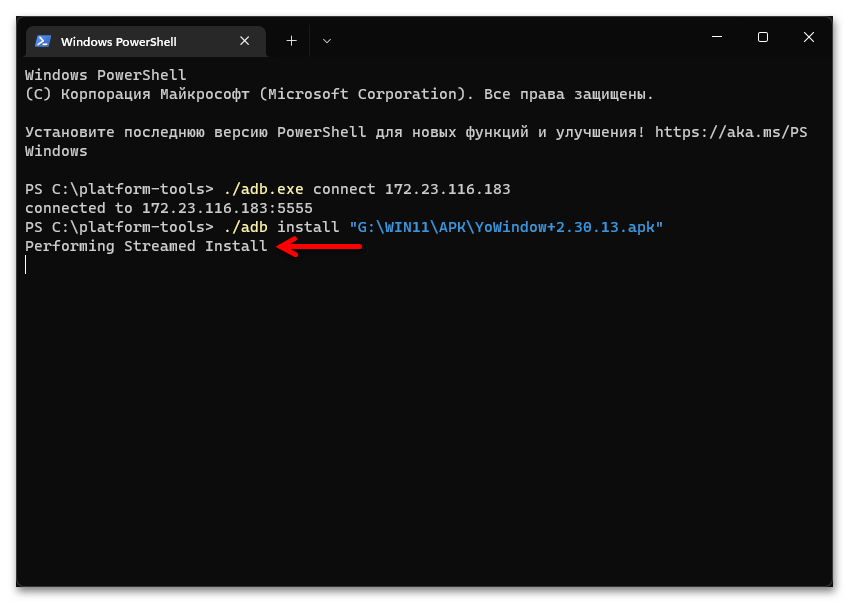
./adb install "ПУТЬ_К_ФАЙЛУ_APK"Чтобы не запоминать и не вводить вручную часто длинные путь и имя пакета Android-приложения, действуем следующим образом:
- Далее нажимаем «Enter» на клавиатуре и ожидаем завершения процесса «Performing Streamed Install» –

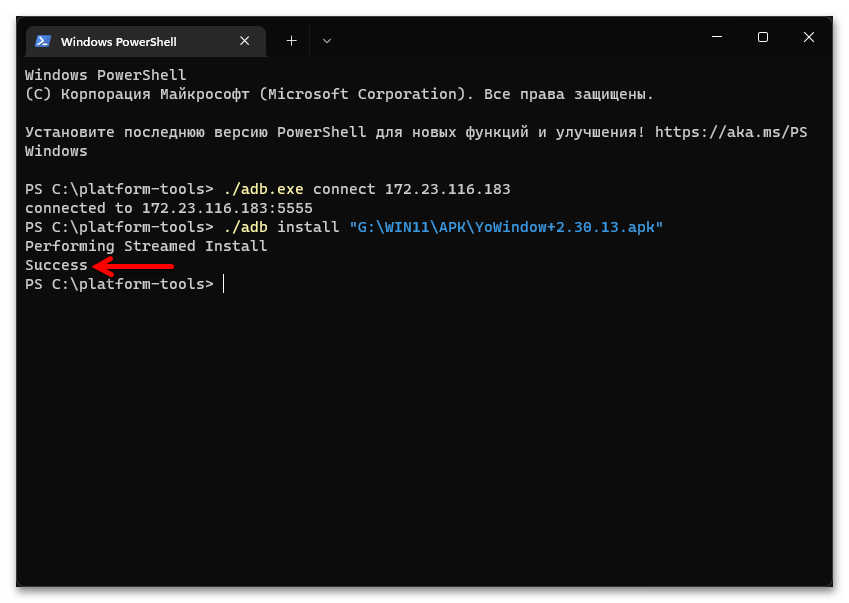
при успехе появится уведомление «Success». После этого Терминал можно закрывать или же повторить выполнение этого и предыдущего пунктов инструкции с целью установки других Android-приложений.
- Открываем меню «Пуск» Windows 11, перемещаемся в перечень «Все приложения», находим и запускаем

инсталлированный софт.
Способ 2: Эмуляторы ОС Android для Windows
Несмотря на появление собственной подсистемы для запуска Android-приложений, в Windows 11 осталось возможным использовать давно известный способ работы с мобильным софтом на десктопах – через программы-эмуляторы от сторонних разработчиков. Получение, настройка и эксплуатация Android-эмуляторов в одиннадцатой версии операционки от Microsoft ничем не отличается от таковых в предыдущих вариантах ОС.
Читайте также: Способы запуска игр для Android на компьютере
Далее подробно описаны методы получения и инсталляции мобильных приложений в наиболее популярном Android-эмуляторе для Windows под названием BlueStacks, но, стоит учитывать, что ввиду схожести принципов работы и интерфейсов большинства эмуляторов, используя отличные от предложенной для примера платформы, чаще всего можно действовать по аналогии.
Читайте также: Выбираем аналог BlueStacks
Скачать Android-эмулятор BlueStacks для Windows с официального сайта
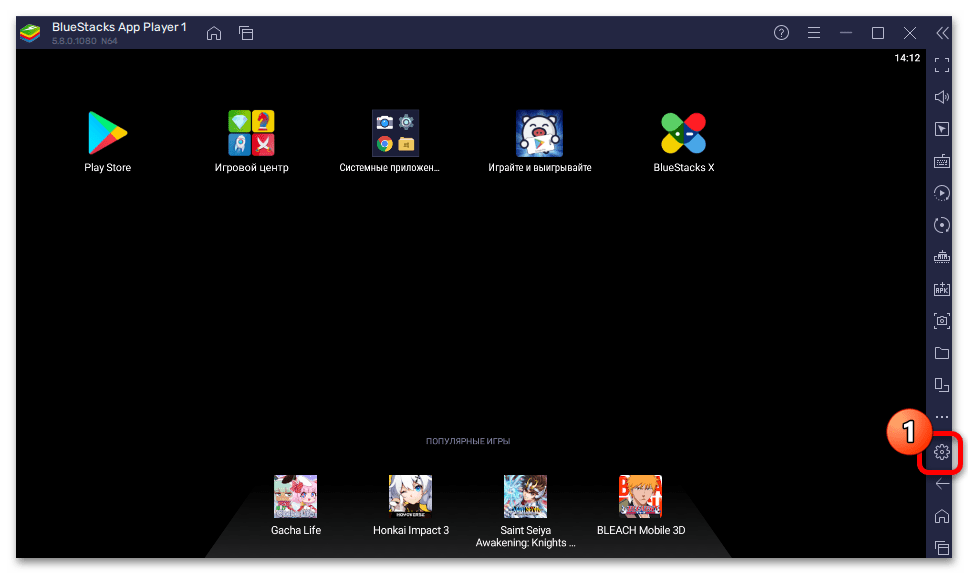
- Первая, можно сказать, подготовительная к получению возможности запуска Android-приложений в Windows операция — это скачивание и установка эмулятора BlueStacks на компьютер:
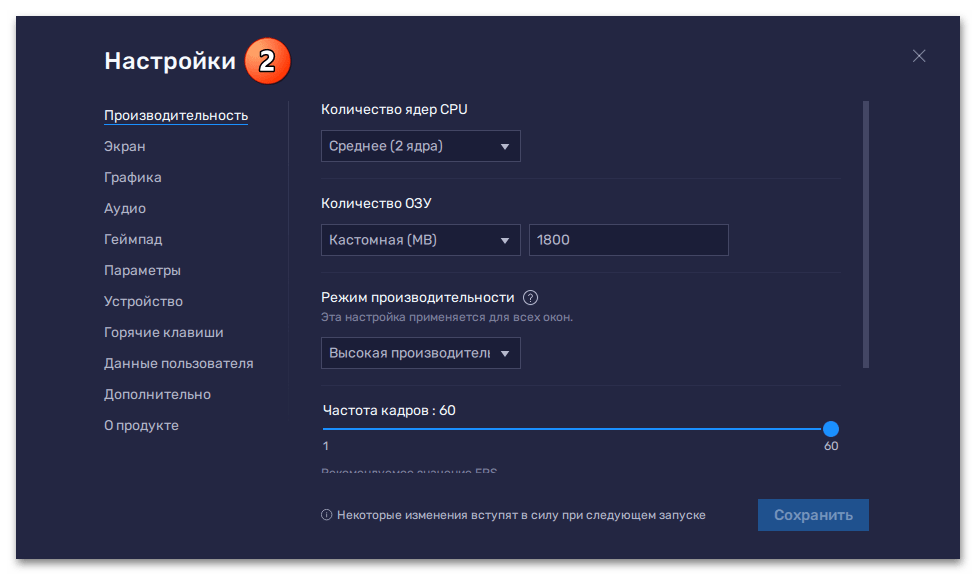
- После первой загрузки виртуального Android BlueStacks считается готовым к установке мобильных приложений и эксплуатации в целом, но при желании можно из панели инструментов слева окна перейти в «Настройки» и

сконфигурировать программу под собственные потребности.
- В BlueStacks предусмотрено два основных пути получения и инсталляции Android-софта, первый и наиболее простой — из Google Play Маркета:
- Второй вариант установки Android-приложений в BlueStacks подразумевает развёртывание в эмуляторе их APK/XAPK-файлов, которые сохранённы на диске компьютера:
- Complex Level: Medium
- Applies to: Install APK on Windows 11 for both Public and Preview Insider users.
Timeline for Windows 11 Supporting Android Apps:
- 1. On October 21st, 2021, Microsoft introduced Android apps on Windows 11 to Windows Insiders.
- 2. On February 15th, 2022, Windows Subsystem for Android was available for public preview.
On February 16th, 2022, Windows Subsystem for Android allows Windows 11 devices to run Android apps in Amazon Appstore. Currently, the newest Windows Subsystem for Android is only available in the United States.
At The Beginning:
This page covers everything that you need to know about Windows System for Android that enables Windows 11 devices to install APK and run Android applications available in Amazon Appstore. Both Windows 11 Public and Preview Insider users can all get a full guide here to obtain the latest Windows 11 system and sideload Android apps successfully on their computers.
If you are one of them, follow the respective guide here to install and run Android apps on your computers with respective solutions.
In this article, you’ll learn:
- #1. Check If Your Windows 11 PC Meets the System Requirements for Android Apps
- #2. Prepare Windows 11 PC Ready for Installing APK
- #3. How to Install APK on Windows 11 Insider OS
Can I Install APK on Windows 11 and Run Android App
Sure! Since Microsoft announced on October 5th, 2021, it’s already a known truth that Windows 11 will support running Android apps soon with an Android Subsystem. However, since then, Windows users have continued asking when and how to install APK on Windows 11.
So for the question of «Can I run Android Apps on Windows 11», the answer is Yes! Here in the following, you’ll get everything you need to know about Windows Subsystem for Android App and how to install APK on your Windows 11 computers. So let’s get started now.
Which OS Can Install Android APK and Run Android Apps
After the release of the Windows 11 KB5010414 update on February 15th, 2022, it’s now a real thing for sideloading and running Android apps as a partnership of Amazon Appstore. Then, it’s now a reality that Windows 11 Public users in the U.S. area could get the new update and configure the computer to install APK in Windows 11.
So what about the Windows users outside the United States? The good news is that any Windows 11 Preview Insiders can also download the Windows Subsystem for Android App on their computers.
In a word, regardless you are a Windows 11 Public user in the United States or a Preview Insider around the world, you can all install Windows 11 for Android Apps now.
How to do so? Here is a full guide for you:
- #1. Check If Windows 11 On Your PC Meets The System Requirements for Android Apps
- #2. Prepare Windows 11 PC Ready for Installing APK
- #3. How to Install APK on Windows 11 Insider/Window 11 Public
#1. Check If Your Windows 11 PC Meets the System Requirements for Android Apps
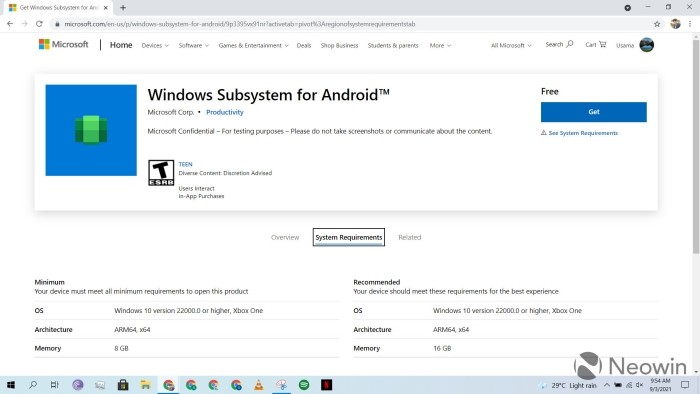
Note that not all computers installed with Windows 11 can get the newest Windows Subsystem for Android App. This new system has some basic requirements on computer hardware, let’s see the details.
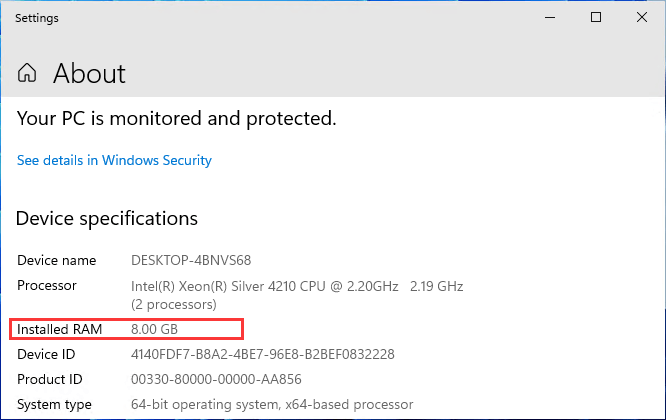
- RAM: 8 GB or 16 GB (recommended)
- Storage Type: Solid State Drive (SSD)
- Processor: Intel Core i3 8th or above; AMD Ryzen 3000 or above; Qualcomm Snapdragon 8c or above.
- Processor architecture: x64 or ARM64
- Virtual Machine Platform: Virtualization must be enabled on Windows 11
So how do you know if your computer reaches the system requirement specification? Here are two methods that you can pick either one to follow.
Method 1. Check If Your PC Support Windows 11 with Automated Software
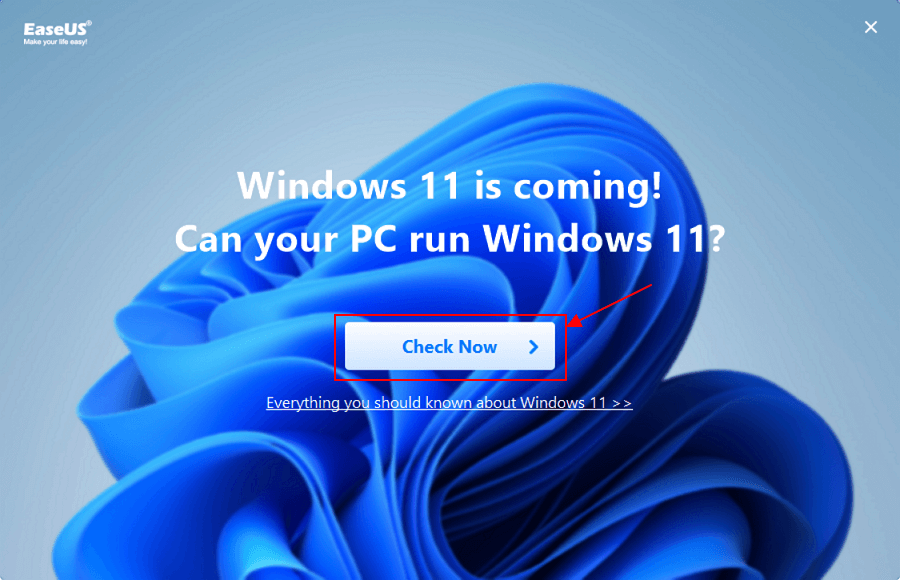
EaseUS Partition Master offers you a powerful feature called Win11 Checker that you can directly check if your PC supports Windows 11 or not here.
Step 1. Launch EaseUS Partition Master and click «Toolkit».
Step 2. Click «Win11 Checker» to open this feature. Then click the Check Now button to start.
Step 3. The Windows 11 compatibility result window will soon appear. All the incompatible and compatible configuration items will be listed.
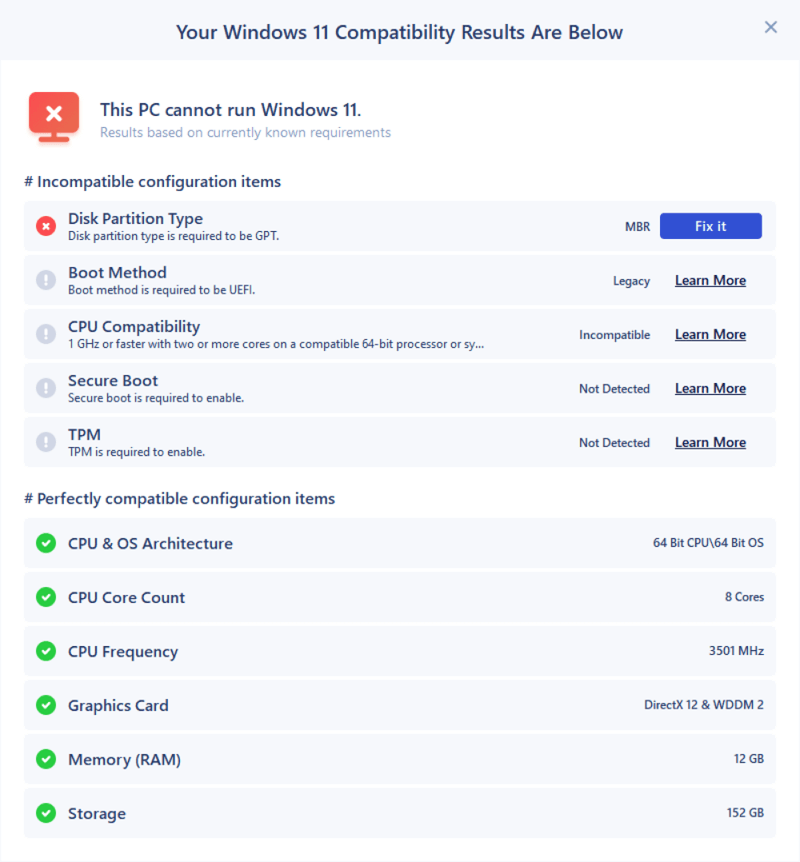
If you see Incompatible configuration items on the result screen, it means that your computer is not compatible with Windows 11. If you see no items, it means that your computer is perfectly comp
Method 2. Check if your Windows 11 PC Meets the System Requirements to Install APK:
Step 1. Press Windows + I keys to open Settings.
Step 2. Click on «Systems» and click «About» on the system settings window.
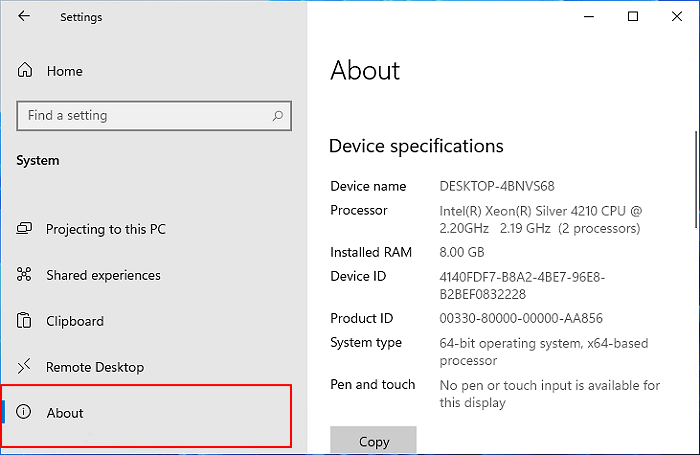
Step 3. Check and confirm if your computer meets the system requirements for installing APK on Windows 11:
- Under the Device specifications section, confirm the RAM and CPU requirements.
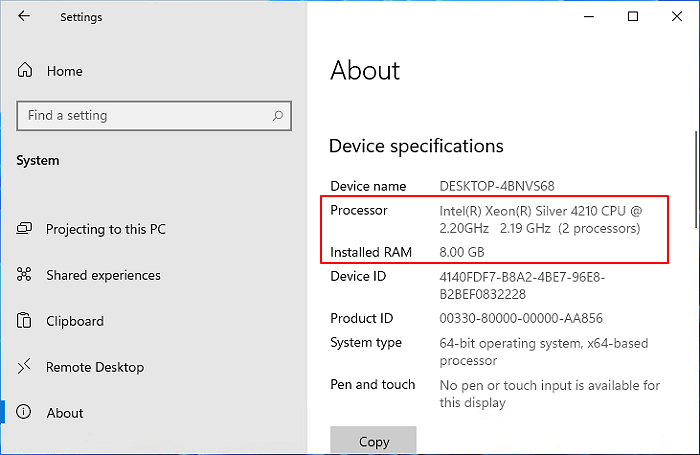
- Under the Windows specifications section, confirm if your Windows 11 is equal to or higher than 22000.257.
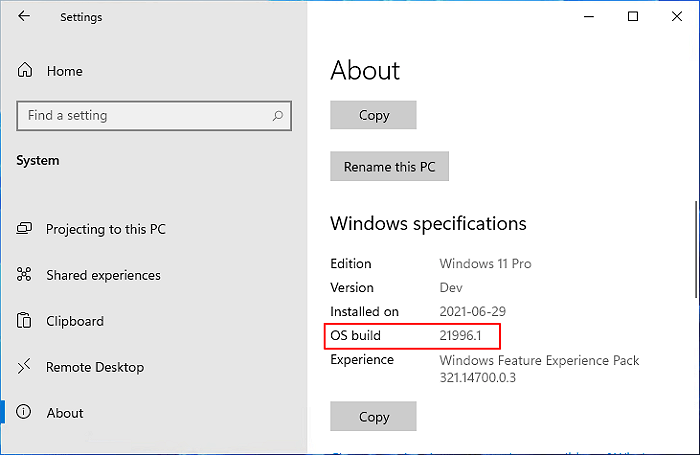
For example, my current OS is an older version and I’ll need to update my computer to the newest Windows 11 first.
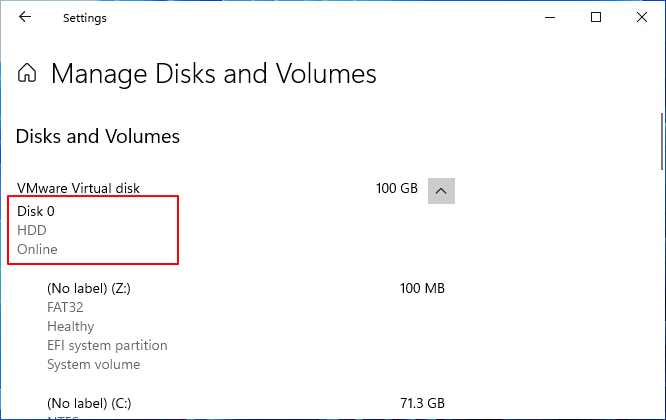
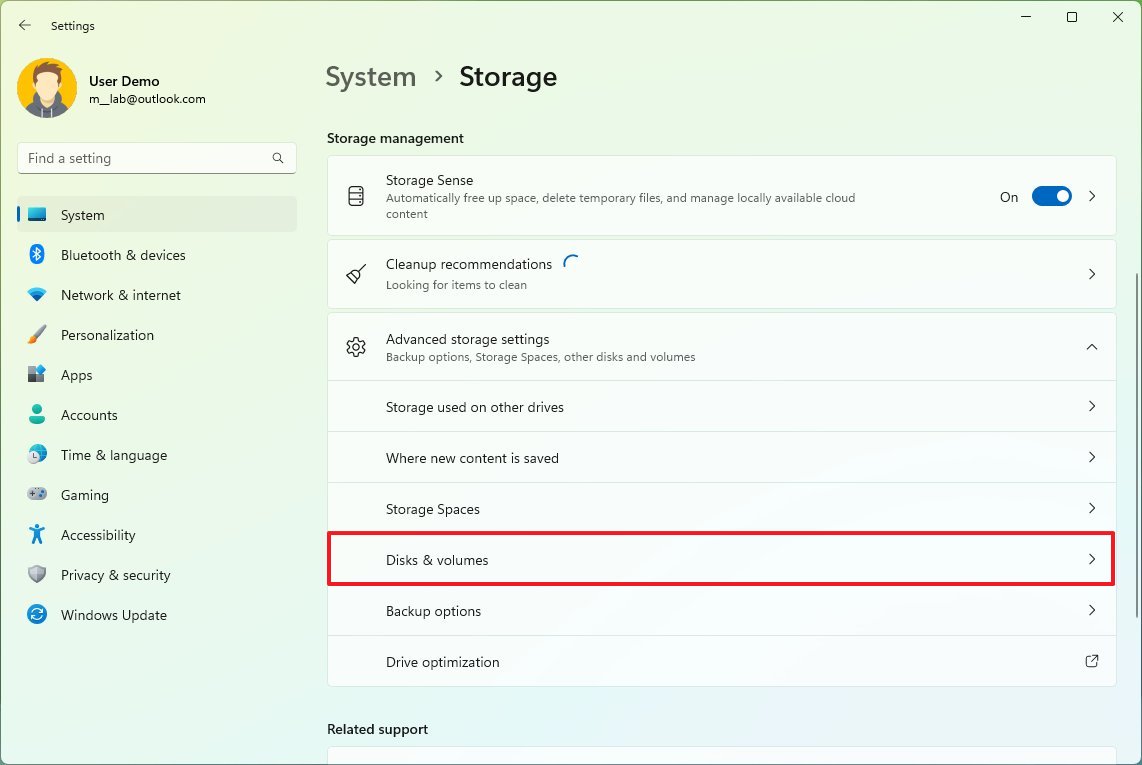
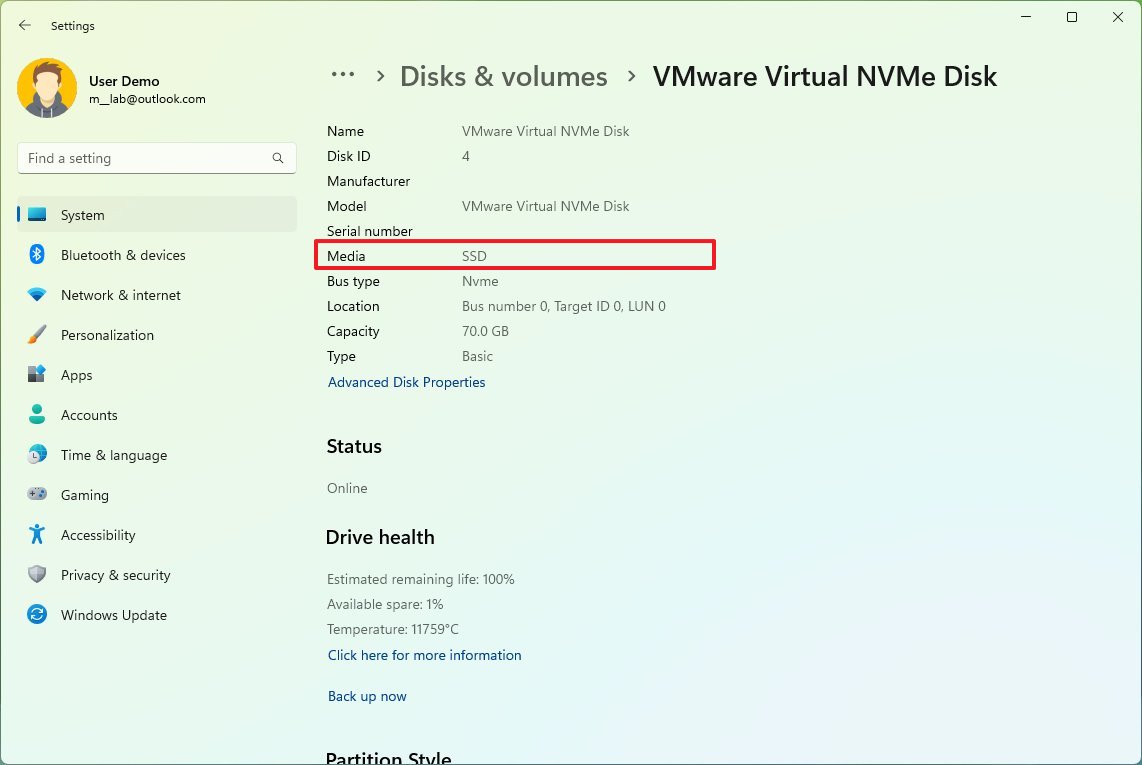
- Click «System» > «Storage», under the storage management section, click «Advanced storage settings» > «Disks & volumes» settings to see if the media type of main drive is SSD.
If it’s HDD, you can’t install APK on Windows 11.
If your computer meets all the requirements, you can directly skip the 2nd part of «Prepare Windows 11 PC Ready» and move to the 3rd or 4th part to install APK on Windows 11.
If your computer doesn’t meet all the requirements, follow the 2nd part to configure and get the computer ready for installing and running Android apps.
#2. Prepare Windows 11 PC Ready for Installing APK
Here we’ll guide you through configuring and getting Windows 11 PC ready for installing APK Android apps from the following 4 parts: RAM, Storage Type, Processor/Processor architecture, and Virtual Machine.
Let’s go.
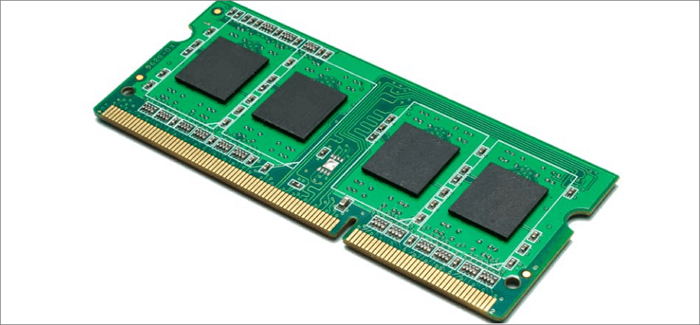
1. Increase RAM If It’s Less Than 8GB
If the RAM on your computer is less than 8GB, you can purchase a new RAM card to extend it to 8GB or 6GB.
Here is how to do so:
Step 1. Check the RAM storage on your PC:
Right-click on «This PC» > Click «Properties», and next to the «Installed RAM» section, you can view the RAM storage on your PC.
Step 2. Purchase a RAM card for your PC.
Note that the RAM card needs to be the same storage capacity as the original card installed on your PC.
For example: 4GB — 4GB; 8GB — 8GB; 16GB — 16GB; 32GB — 32GB.
If you purchased a 32GB RAM card, but the original card is 16GB, the new memory card performance will be configured to run the same speed as the old card.
Step 3. Install the new RAM card to your PC:
Shut down your PC and open the computer case > Find the RAM card slot, insert and fasten the new RAM card > Close the computer cause and restart the computer.

After this, you need to wait for the computer to boot up, and the system will automatically detect and display the added RAM storage.
2. Migrate Windows 11 from HDD to SSD
When your Windows 11 operating system is installed on a mechanical hard disk drive, the new Subsystem won’t install on your PC. This is because the system requires an SSD for installing APK on Windows 11.
To do so, you can transfer and migrate Windows 11 from HDD to a new SSD with the help of reliable partition manager software — EaseUS Partition Master.
Here is how to migrate Windows 11 system from HDD to SSD without reinstallation:
1st. Purchase and Install a New SSD to Windows 11
Two tips for selecting and adding a new SSD for Windows 11 OS migration:
- The new SSD must be equal to or better than the used space of the Windows 11 system partition.
- New SSD must be installed or added as an internal disk on your PC.
Here is how to do so:
Step 1. Purchase a new SSD that contains equal or bigger storage capacity than the system drive, for example, 120GB SSD = 120GB C drive, or 256GB, 512GB SSD.
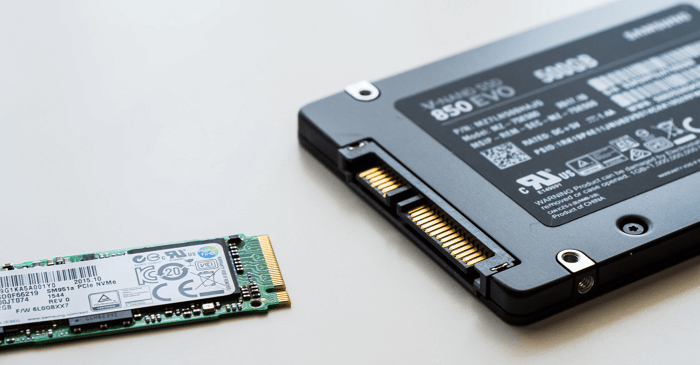
Step 2. Check the new SSD type: a SATA SSD or an M.2/NVMe SSD.
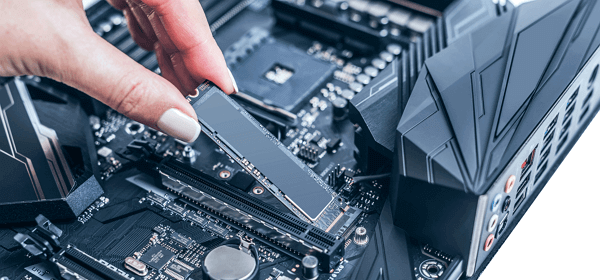
Step 3. Shutdown the computer, open the computer case, install the new SSD:
- If it’s a SATA SSD, connect the SSD to the computer via a SATA cable and a power cable.
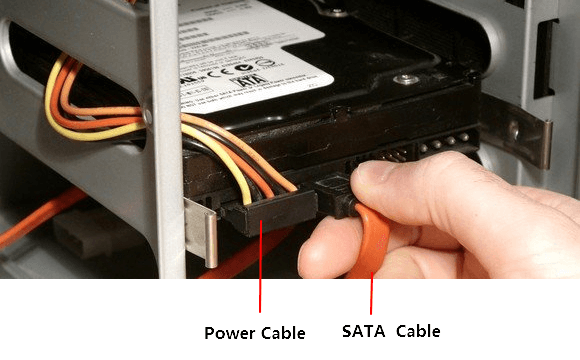
- If it’s an M.2 or NVMe SSD, find the SSD slot, slide in the SSD disk, and fasten it.
Step 3. Once done, reboot your computer.
2nd. Initialize New SSD on Windows 11
To make the new SSD readable on Windows 11, you need first to initialize this disk to share the same disk type as your current OS drive. Here is how to do so:
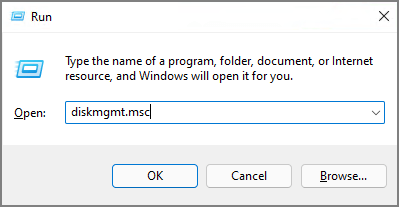
Step 1. Press Windows + R keys, type diskmgmt.msc in the opened Run dialog and click «OK» to open disk management.
Step 2. Right-click the OS disk, select «Properties», go to the Volumes tab, and check the partition style.
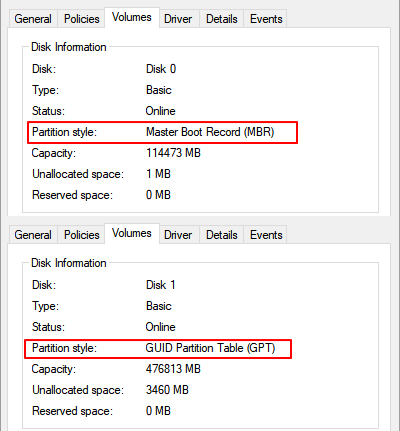
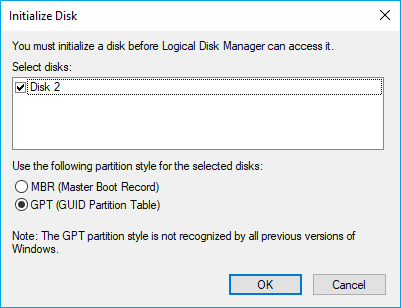
Step 3. Right-click on the SSD and select «Initialize Disk», then select «GPT» as the type.
(Windows 11 requires GPT as boot disk type as it needs UEFI and Secure Boot modes.)
3rd. Migrate Windows 11 to SSD Without Reinstallation
Once you set up the SSD, you are now good to transfer Windows 11 to SSD with the help of OS migration software like EaseUS Partition Master.
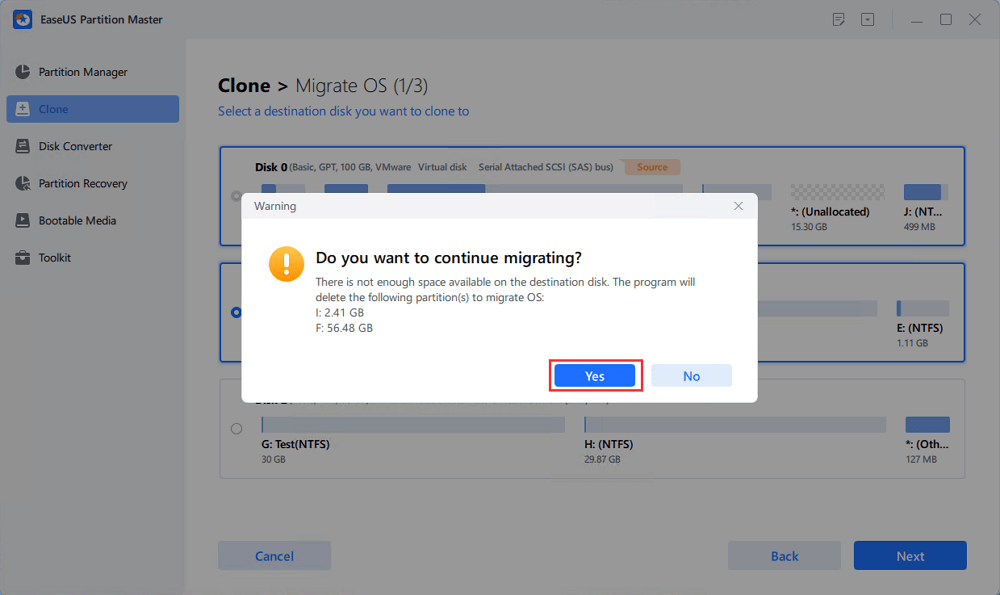
Note: The operation of migrating OS to SSD or HDD will delete and remove existing partitions and data on your target disk when there is not enough unallocated space on the target disk. If you saved important data there, back up them to an external hard drive in advance.
Step 1. Select «Clone» from the left menu. Select the «Migrate OS» and click «Next» to continue..
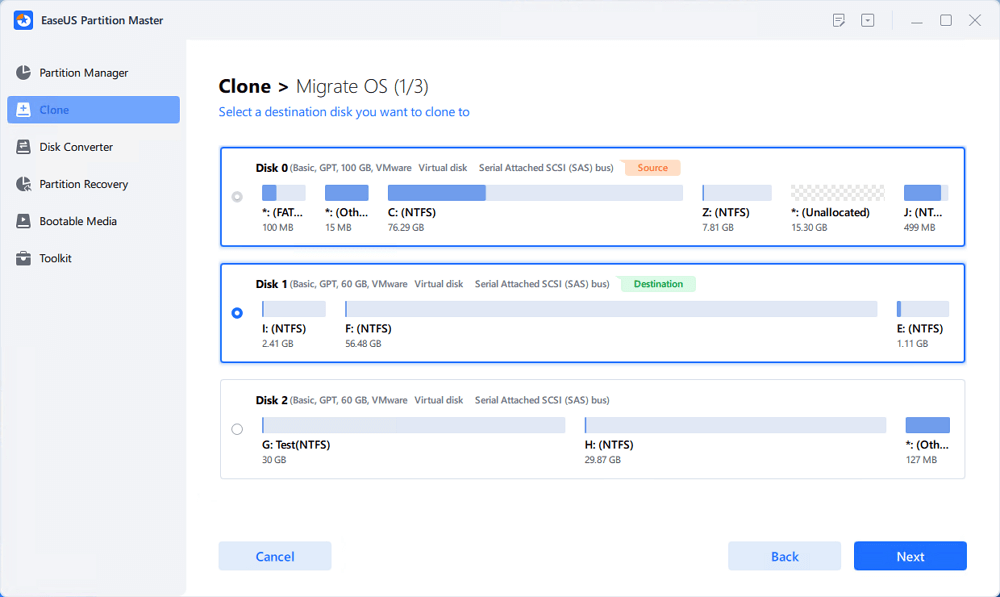
Step 2. Select the target disk you want to clone. Click «Next».
Step 3. Click «Yes» after checking the warning message. The data and partitions on the target disk will be deleted. Make sure that you’ve backed up important data in advance. If not, do it now.
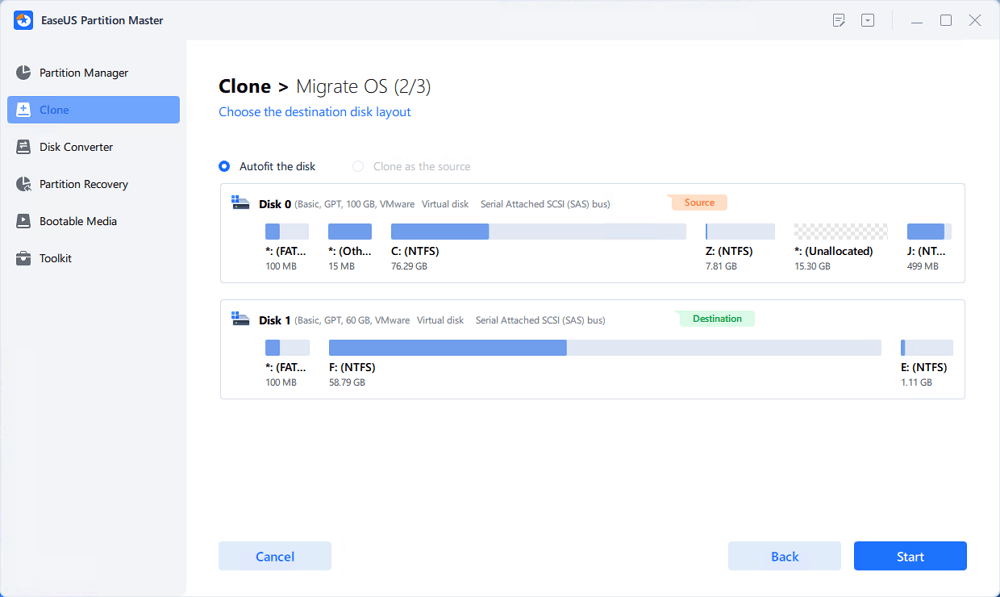
Step 4. Preview the layout of your target disk. You can also click the disk layout options to customize the layout of your target disk as you want. Then click «Start» to start migrating your OS to a new disk
3. Upgrade Processor/Processor Architecture
Note that if your computer processor or processor architecture is older Intel Core i3 8th, AMD Ryzen 3000, Qualcomm Snapdragon 8c, etc., you have two ways to go:
- Option 1. Manually replace and upgrade the CPU processor on your own.
Here is a checklist of Windows 11 supported Processors: https://docs.microsoft.com/en-us/windows-hardware/design/minimum/supported/windows-11-supported-intel-processors
See details for upgrading CPU.
- Option 2. Replace your old computer with a newer one.
For nun-geek users, we don’t recommend you try to replace the CPU processor as it’s easy to get your computer broken. However, if you have no technical skills, replacing the Old PC with a new computer is much easier.
Also, if your computer is 32bit, you’ll need to replace the computer with a 64bit for installing APK files on Windows 11.
4. Enable Virtualization on Windows 11
To emulate the Subsystem for Andriod on Windows 11, you’ll need to enable virtualization on your PC to access a larger library of apps like APK apps to use and install.
Here is how to do so:
First. Enger BIOS Settings
- Press Windows + S, type settings in the search box, and open Settings.
- Click «Windows Update» on the left pane, then select «Advanced options».
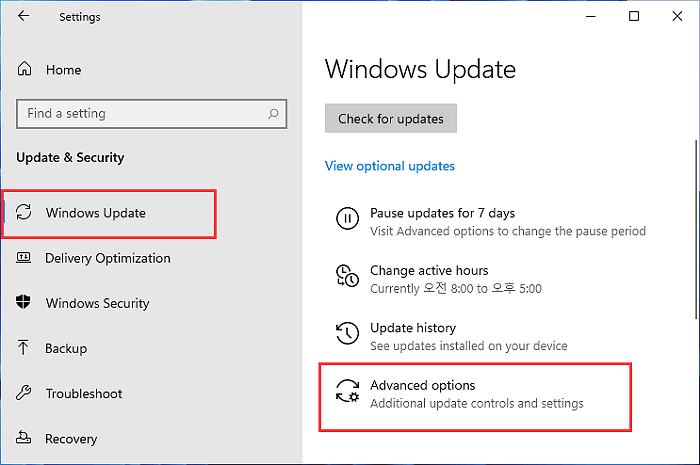
- Click «Recovery» > Select «Restart now» next to the Advanced startup section.
- Click «Troubleshoot» > «Advanced Options» > «UEFI Firmware Settings».
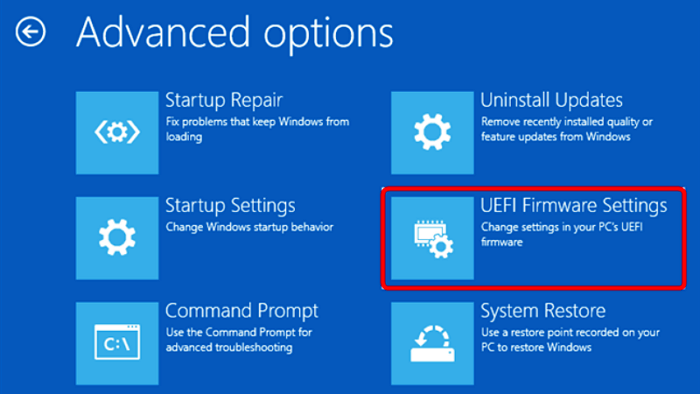
- Click «Restart» on the UEFI Fireware Settings window so to enter BIOS settings.

Second. Enable Virtualization in BIOS
Here we’ll show you how to enable Virtualization in Intel and AMD CPUs. Let’s see the details:
Enable Virtulization for Intel CPU:
- On BIOS settings, press F7 or click «Advanced Mode».
- Click «Advanced» > Select «CPU configuration».
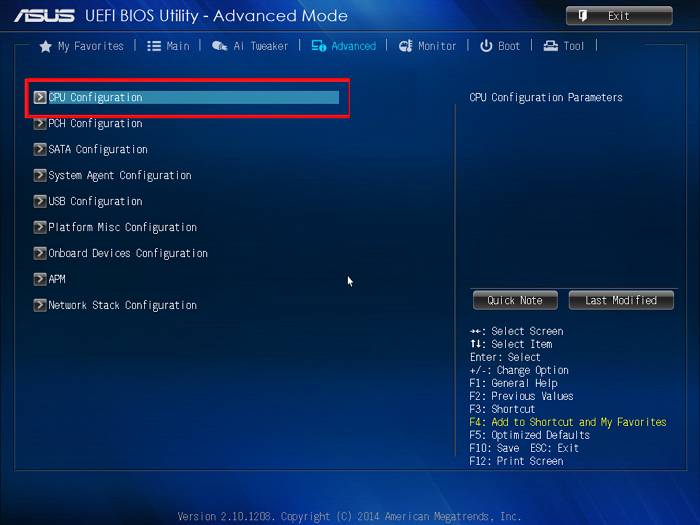
- Click «Intel Virtualization Technology», select «Enabled».
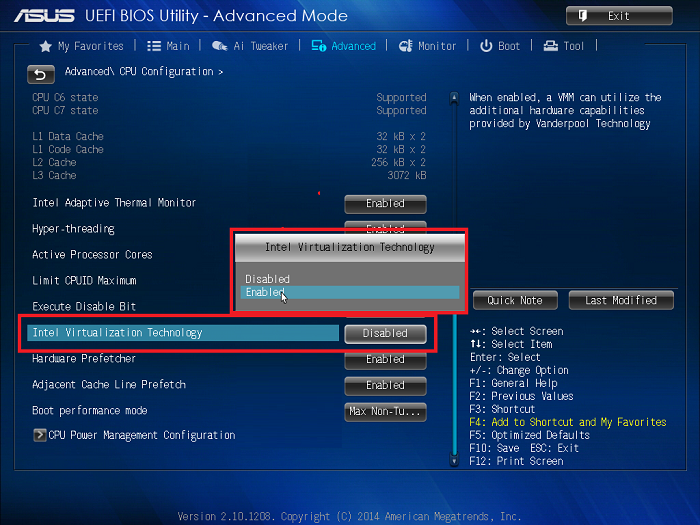
- Press F10 to save and exit, or click «Exit» and save changes.
Enable Virtualization for AMD CPU:
- On BIOS settings, press F7 or click «Advanced Mode».
- Click «Advanced» > «CPU Configuration».
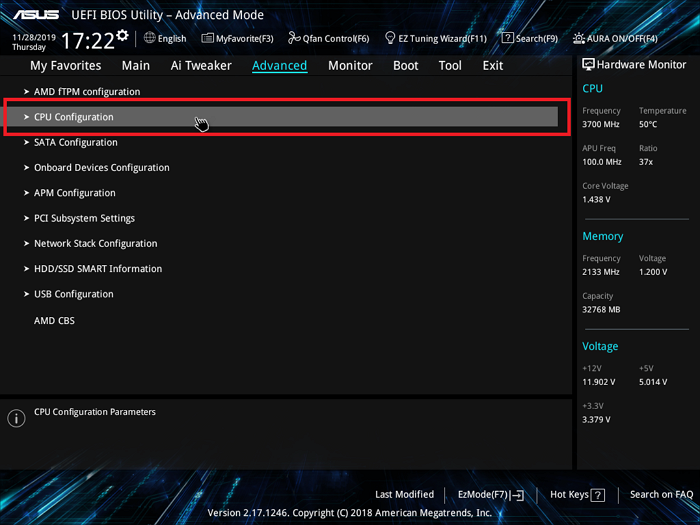
- Select «SVM Mode» and click «Enabled».

- Click «Exit» and click «OK» to save the changes and restart the computer.
After this, you can now move to the next part to install Android APK on Windows 11. As the ways to install APK on Windows 11 are different, we suggest you first confirm your current running version of Windows 11 and then follow the right guide to get the desired APK application installed on your PC.
#3. How to Install APK on Windows 11 Insider OS
For Windows Insiders, you need first make sure that you’ve updated Windows 11 to the latest version with the following steps:
Open Settings > Click on «Windows Update» > Click on «Check for updates».
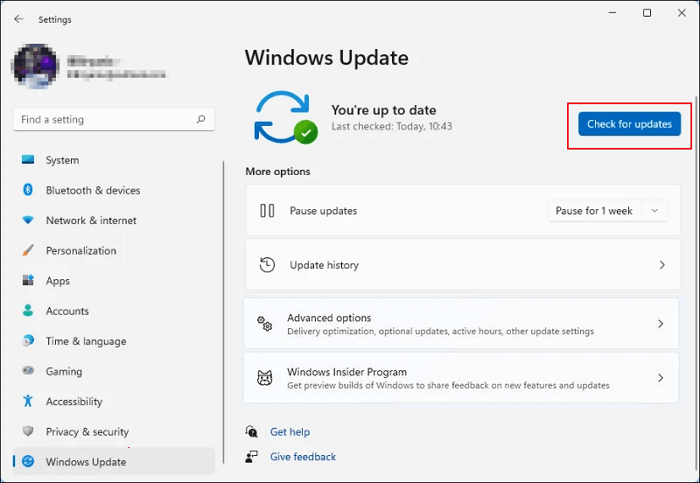
Wait for the process to complete and then restart the computer to install the new updates.
First. Check for Microsoft Store Update
It’s also important that both Insider and Public users update the Microsoft Store so as to install APK apps on Windows 11. Here is how to do so:
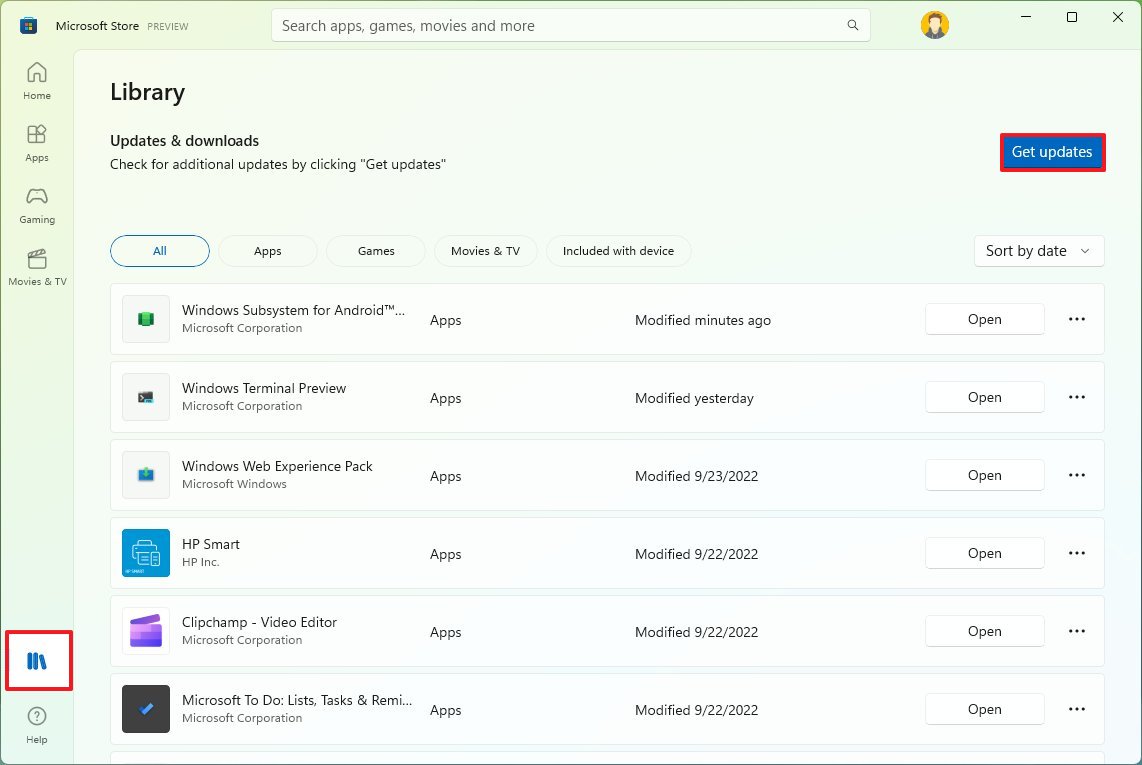
Step 1. Open Microsoft Store, click «Library,» and click «Get updates».
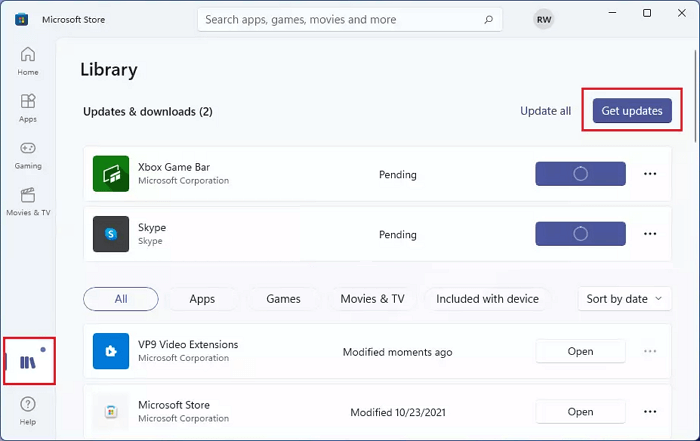
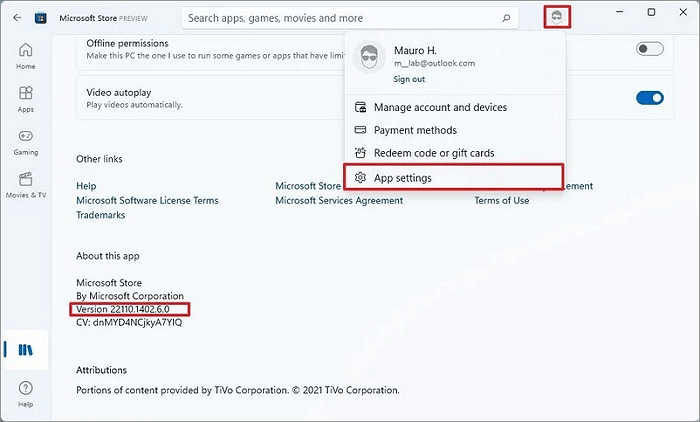
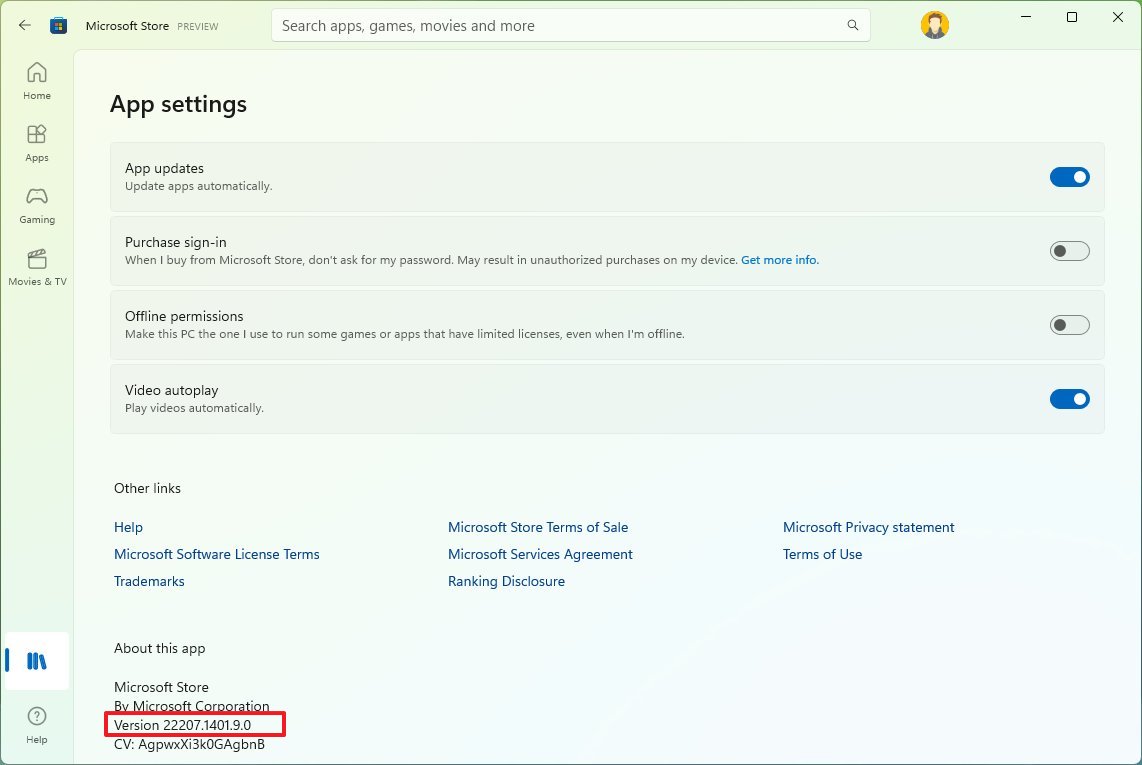
Step 2. Click the Profile menu, select «App settings», then confirm if Microsoft Store is with 22110.1402.6.0 or even higher version.
If not, upgrade the Microsoft Store app to the new version.
Second. Install Windows Subsystem for Android with Amazon App Store on Windows 11
Step 1. Open Microsoft Store app, search «Windows Subsystem for Android,» and click «Get».
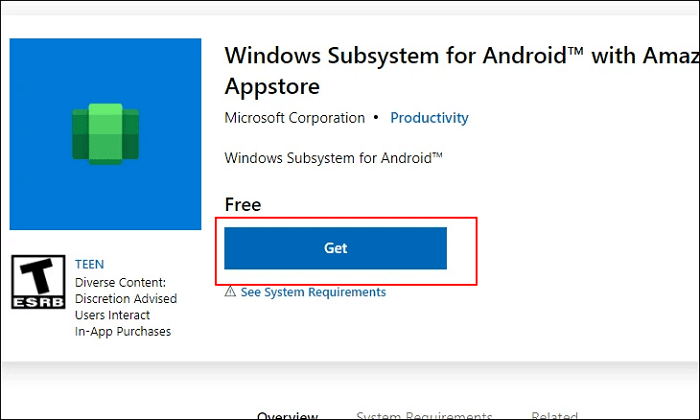
Step 2. Click «Get» or «Install» on the Microsoft Store app.
Wait for the process to complete.
Step 3. Search to open Amazon Appstore in Microsoft Store, click «Install».
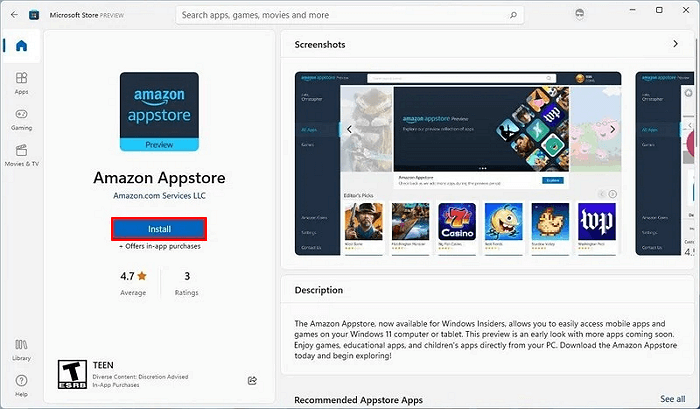
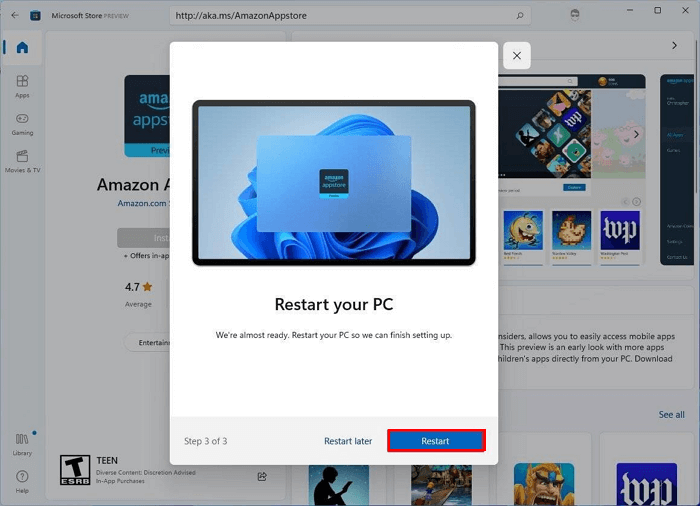
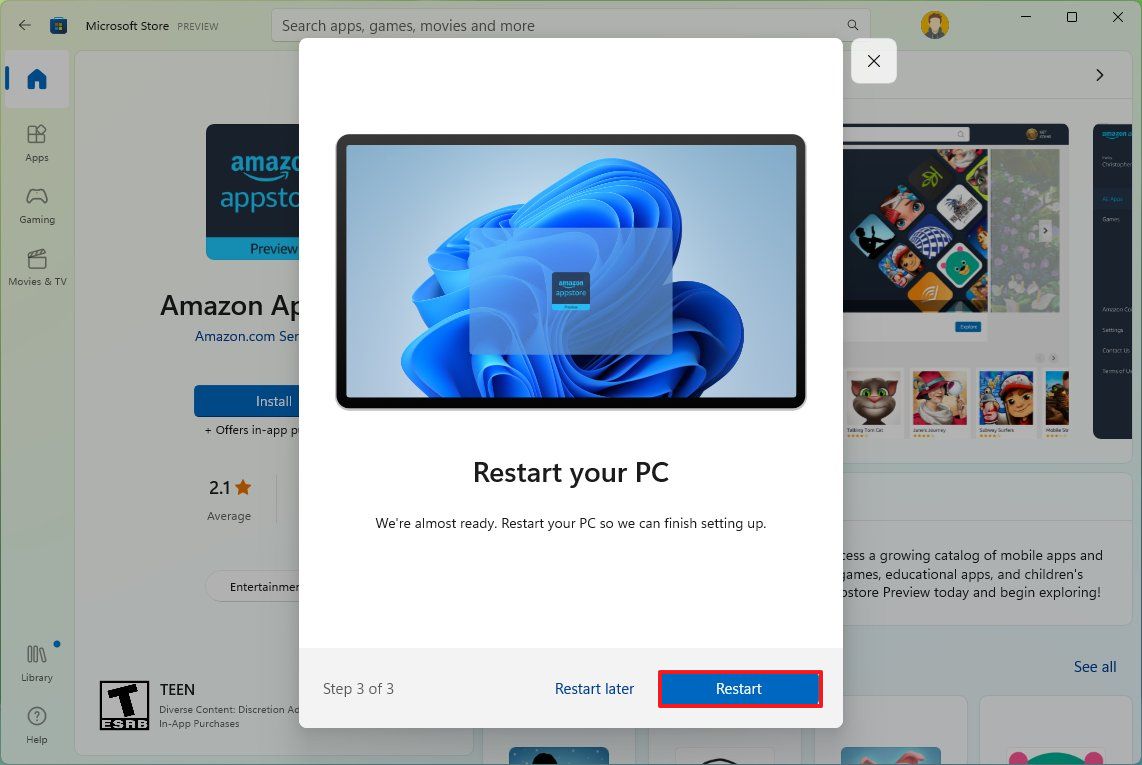
Step 4. Click «Set up» and click «Download» > «Next» > «Restart».
After this, you are now good to go and install Android APK applications on your Windows 11 computers.
Last. Install Android Apps on Windows 11 from Amazon Appstore
Step 1. Open the start menu on Windows 11, and click «All apps».
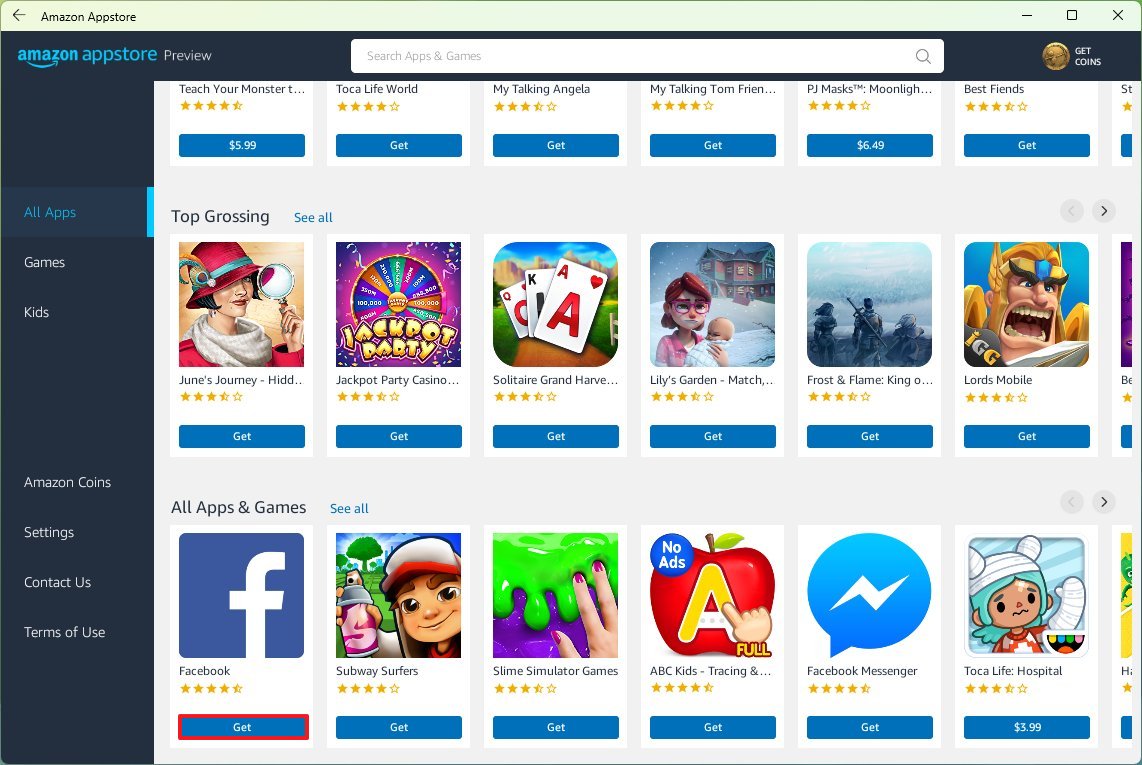
Step 2. Sign in with your Amazon account, and then you are good to select and install Android applications by clicking «Get».
Bonus Tip: How to Install APK on Windows 11 to Sideload Android Apps
Alongside Amazon Appstore, you can also sideload apps on Windows 11 via the APK files. Here is how to do so:
Step 1. Go to Android developer website: https://developer.android.com/studio/releases/platform-tools
Step 2. Go to the Downloads section and click «Download SDK Platform-Tools for Windows».
Step 3. Check «I have read and agree with the above terms and conditions», and click «Download Android ADK Platform-Tools for Windows».
Step 4. Once done, go to the download directory, right-click the zipped folder, and select «Extract All».
Step 5. Once the zipped folder opens, download and copy to save the APK file for a desired app to the folder.
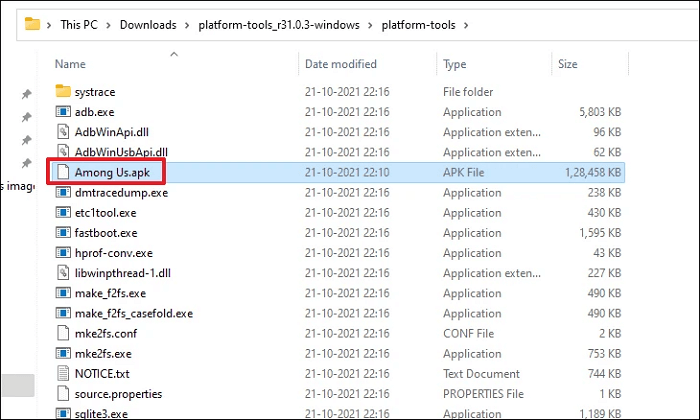
Step 6. Open Windows Subsystem for Android on Windows 11 from the menu bar, enable the Developer mode on WSA window: switch to On size.
Step 7. Open Command Prompt, type the following command lines, and hit Enter each time:
- adb.exe connect ip address
- adb.exe install file name.apk
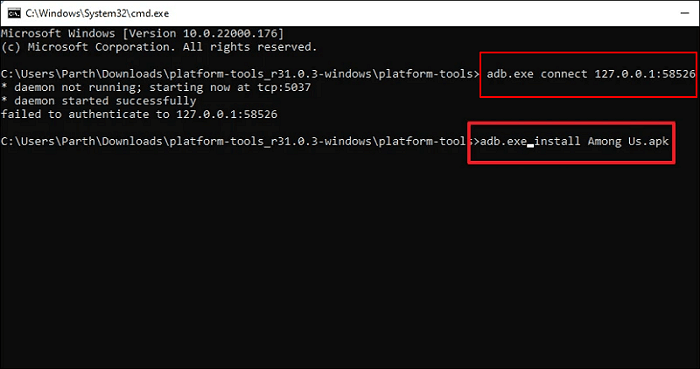
Wait for the process to complete. This will help to install the APK file on Windows 11.
Once done, you can now go to the App section on the start menu to view and use the sideloaded Android apps on Windows 11.
Conclusion
On this page, we introduced some key points to make sure you can install Android APK or apps on Windows 11 successfully. To make it simple, check and confirm that you follow the guidelines one by one:
- You are the latest new Windows 11 Public or Insider user of 22000.527 or higher.
- Your computer meets Windows 11 requirements for installing Android apps: 8GB or more RAM, SSD OS disk, enable virtualization, processor, and update processor architecture.
If you are unsure if your computer meets the requirements, take EaseUS Partition Master to test the compatibility.
If you don’t know how to get the latest Windows 11, relax, and you can revert to the #2 part to get Windows 11 ready for this.
For the complete process of installing Android apps on Windows 11, go to the #3 part and get a complete guide. I hope this page indeed works for you.
FAQs About How to Install APK on Windows 11
If you have more questions about installing APK on Windows 11, follow the questions here and find answers below:
1. How do I open a APK file in Windows 11?
- Install Windows Subsystem for Android (WSA) on your PC.
- Create a virtual Android machine on computer with WSA.
- Sideload APK files of your favored apps and games.
- Install and then open the Android apps.
2. How do I manually install Android apps on Windows 11?
- Go to the Migcorosft Store.
- Go to the Amazon Appstore.
- Click on ‘Install’.
- Sign in with your Microsoft Account.
- Follow the instructions and sign in with your account.
- Download the Android apps you want.
3. Can you run Android apps on Windows 11?
Yes, sure. Microsoft has officially supported users to run Android apps on Windows 11 with its Windows Subsystems for Android. If you are interested in, follow the tutorial guide on this page to download and run Android apps and games on Windows 11.
Вам для этого не требуется использование программы Windows Insider. С помощью этого гайда вы сможете скачать систему Windows Subsystem for Android и устанавливать приложения Android.
Естественно, это все стоит делать на свой страх и риск, так как Microsoft еще занимается тестированием этой технологии.
Включение виртуализации
1. Включение соответствующего параметра в UEFI. Эту информацию найдете отдельно для вашей материнской платы.
2. Запускаете через Пуск Включение или отключение компонентов Windows.
3. Ставите галки напротив этих двух параметров и перезагружаете систему.
Установка Windows Subsystem for Android
1. Идем на сайт, который позволяет генерировать ссылки для скачивания приложений из магазина Microsoft в обход самого магазина.
3. Скачиваем самый тяжелый пакет с расширением .msixbundle. На момент написания статьи его SHA-1 хэш: 0c4b3430bcd37be562f54322c79fb14f11ce1348.
4. Запускаем Powershell от имени администратора (можно запустить новый Windows Terminal и в нем открыть Powershell вкладку).
5. Используем команду Add-AppxPackage -Path <path_to_msixbundle_file>, где последний параметр это путь к скачанному файлу.
6. Если установка прошла успешно, то вы сможете запустить Windows Subsystem for Android.
Установка ADB
1. Идем на сайт Google и качаем версию для вашей системы.
2. Распаковываете в какое-нибудь удобное для вас место и прописываете путь к этой папке в PATH.
Установка сторонних приложений Android
1. Включите режим разработчика в настройках Windows Subsystem for Android.
2. Для первичной настройки запустите управление параметрами Android
3. Запустите командную строку и подключитесь к adb с помощью команды adb connect <IP>, где в качестве параметра IP следует использовать указанный в настройках разработчика.
4. Скачайте с известных вам сайтов нужный вам APK.
5. Используйте команду adb install <PATH>, где последний параметр это путь к скачанному APK.
6. Запускайте приложение.
 При анонсе Windows 11 Майкрософт пообещала возможность запуска Android приложений в новой операционной системе. На момент релиза функция была недоступна, затем появилась в предварительных версиях системы, теперь же доступна всем пользователям.
В этой инструкции пошагово о том, как включить Windows Subsystem for Android в Windows 11, установить Android приложения и дополнительная информация, которая может оказаться полезной в контексте рассматриваемой темы. Также может быть полезным: Лучшие эмуляторы Android для Windows.
Установка Windows Subsystem for Android (WSA, Подсистема Windows для Android)
Все описанные действия по установке Подсистемы Windows для Android актуальны на момент написания статьи: вероятнее всего в скором времени процесс будет проще.
Необходимые шаги для установки Windows Subsystem for Android или WSA в Windows 11:
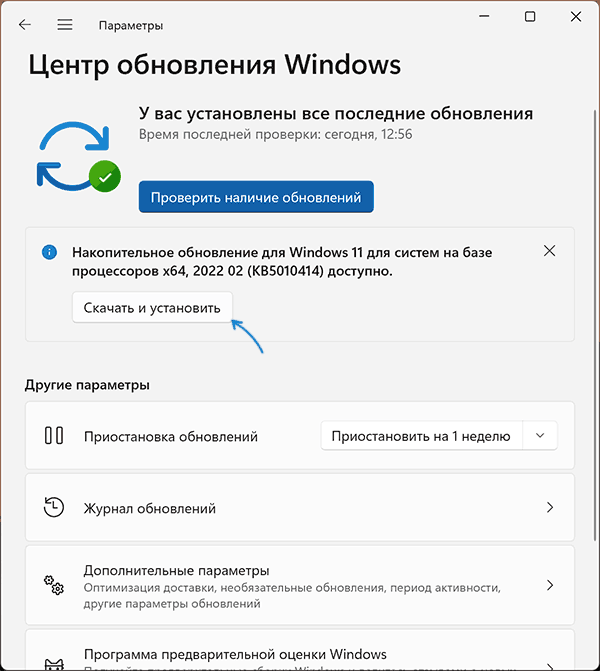
- Установите накопительное обновление KB5010414 через Центр обновления Windows, если вы этого еще не сделали.

- Для того, чтобы WSA могла работать, необходимо, чтобы на компьютере была включена виртуализация. Среди прочих требований — наличие SSD. Мне неизвестно, насколько критичен последний пункт при ручной установке Windows Subsystem for Android, к которой мы прибегнем далее.
- Зайдите в Панель управления (для её открытия можно использовать поиск в панели задач) — Программы и компоненты, откройте пункт «Включение или отключение компонентов Windows», включите компонент «Платформа виртуальной машины», установите его и перезагрузите компьютер. Подробнее: Как установить дополнительные компоненты Windows 11 и Windows 10.

- Следующий шаг — установка приложения Windows Subsystem for Android, которое устанавливается при установке Amazon Appstore из магазина Microsoft Store. Сейчас приложение доступно лишь пользователям из США (но проверьте, возможно, к моменту, когда вы читаете этот материал, это уже не так), поэтому придется использовать обходной путь: зайдите на сайт https://store.rg-adguard.net/
- В пункте слева выберите «ProductId», в поле ввода данных введите 9p3395vx91nr и нажмите кнопку с изображением «галочки» справа. Внизу отобразится список доступных файлов для загрузки, требуется скачать файл размером более одного гигабайта в конце списка с именем
MicrosoftCorporationII.WindowsSubsystemForAndroid_НОМЕР_ВЕРСИИ_neutral_~_8wekyb3d8bbwe.msixbundle

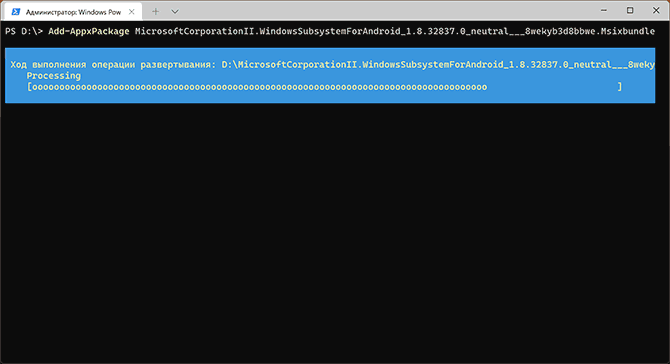
- Загруженный файл не получится установить просто запустив его. Для установки откройте Терминал Windows от имени администратора (правый клик по кнопке Пуск и выбрать нужный пункт в контекстном меню), а затем используйте команду
Add-AppxPackage полный_путь_к_скачанному_файлу
Путь можно скопировать, нажав правой кнопкой по файлу и выбрав соответствующий пункт в контекстном меню. Если путь содержит пробелы, возьмите его в кавычки.


В результате выполнения указанных действий WSA или Подсистема Windows для Android будет установлена на компьютере, а в списке доступных приложений появится приложение «Параметры подсистемы Windows для Android».
После запуска подсистемы Windows для Android (первый раз можно быстро запустить, открыв пункт «Файлы» в параметрах подсистемы Windows для Android), на компьютере также будет установлено приложение Amazon AppStore — стандартный метод установки Android-приложений в Windows 11.
Установка Android приложений в Windows 11
Стандартный метод установки Android приложений в Windows 11 — Amazon AppStore, однако на текущий момент (если ситуация изменится, и вы заметите это раньше меня, пожалуйста, напишите в комментариях), после входа в приложение вы увидите уведомление о том, что оно недоступно в нашей стране:
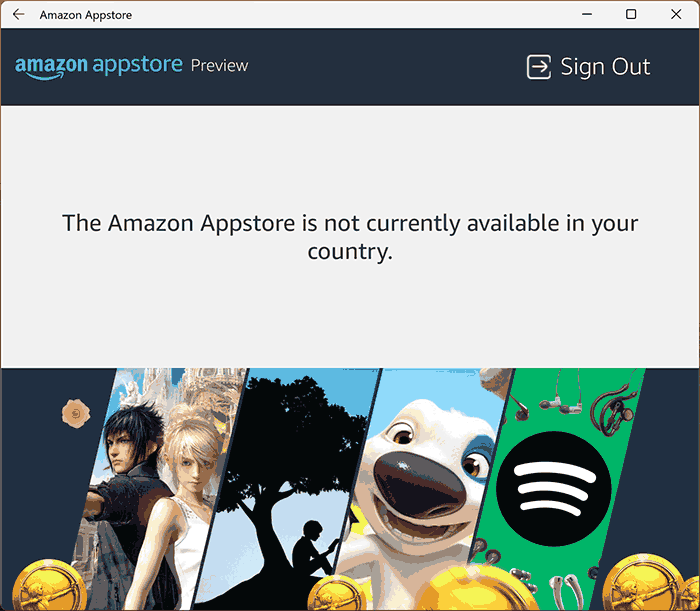
Поэтому придется использовать один из следующих методов.
Ручная установка Android-приложений в WSA с помощью adb.exe
Первый метод — использовать команды adb.exe для установки приложений из файлов APK вручную. Порядок действий:
- Скачайте инструменты командной строки platform-tools, включая adb.exe и распакуйте в удобную папку на вашем компьютере, рекомендую брать отсюда: https://adbinstaller.com/ — в этом варианте будет загружено только самое необходимое.
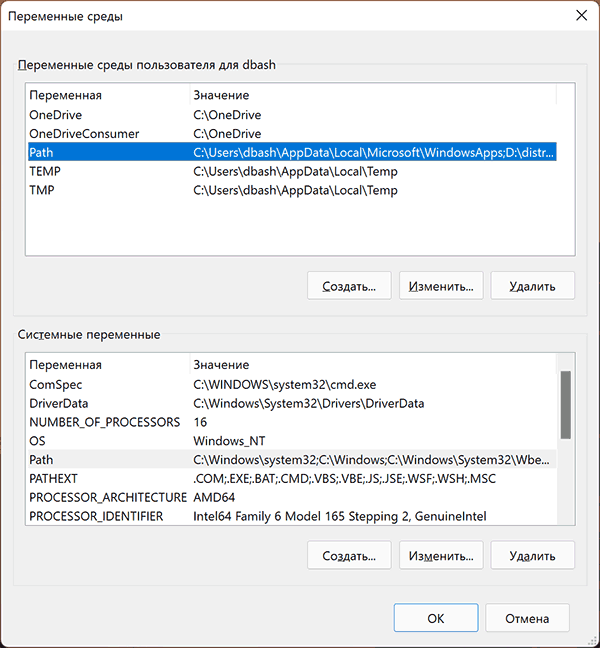
- Шаги 2-4 можно не выполнять, если вы готовы указывать полный путь к adb.exe в командной строке. Нажмите клавиши Win+R на клавиатуре, введите sysdm.cpl и нажмите Enter. Перейдите на вкладку «Дополнительно» и нажмите кнопку «Переменные среды».
- Выберите переменную Path (для пользователя, если требуется использование только текущим пользователем или в разделе «Системные переменные» для всей системы» и нажмите «Изменить».

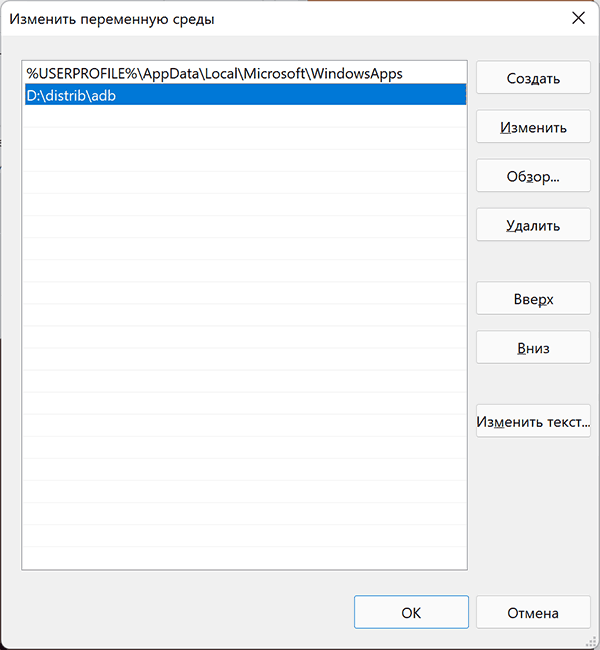
- Нажмите «Создать» и добавьте путь к папке с файлом adb.exe в системную переменную Path.

- Откройте приложение «Параметры подсистемы Windows для Android», включите пункт «Режим разработчика». Если сама WSA не запущена, запустите её (например, откройте пункт «Файлы» вверху окна, после открытия можно закрыть). Обратите внимание на пункт «IP-адрес» в параметрах, скопируйте его (если адрес не отображается, нажмите кнопку «Обновить» после запуска подсистемы Windows для Android).
- Скачайте нужные вам приложения Android в виде файлов APK, например вот так: Как скачать APK приложений Android.
- Запустите командную строку от имени Администратора (как запустить командную строку от администратора в Windows 11).
- Введите команду adb connect IP-адрес (где IP-адрес — адрес WSA из 5-го шага).
- Используйте команды adb install путь_к_файлу_apk для установки приложений Android. Успешно установленные приложения будут добавляться в меню Пуск Windows 11.

Не все приложения исправно работают: некоторые будут сообщать об ошибках или необходимости установки из Google Play (по всей видимости, из-за отсутствия Google Play Services). Но некоторые работают очень хорошо:
Даже работающие приложения не всегда делают это вполне исправно, среди замеченных проблем — неправильная отрисовка текстового контента в браузерах.
WSATools
В магазине Microsoft Store вы можете найти приложение WSATools, которое призвано облегчить установку приложений Android в Windows 11. Всё что требуется — указать файл APK устанавливаемого Android приложения, а всё остальное программа должна выполнить автоматически, в том числе — скачать и установить adb.exe при необходимости.

Однако в моем тесте установка в актуальной не Preview версии Windows 11 не удалась: экземпляр adb.exe, скачиваемый WSATools отказывается запускаться, а при ручной установке adb.exe, приложение либо зависает, либо «не видит» установленного adb.
Видео
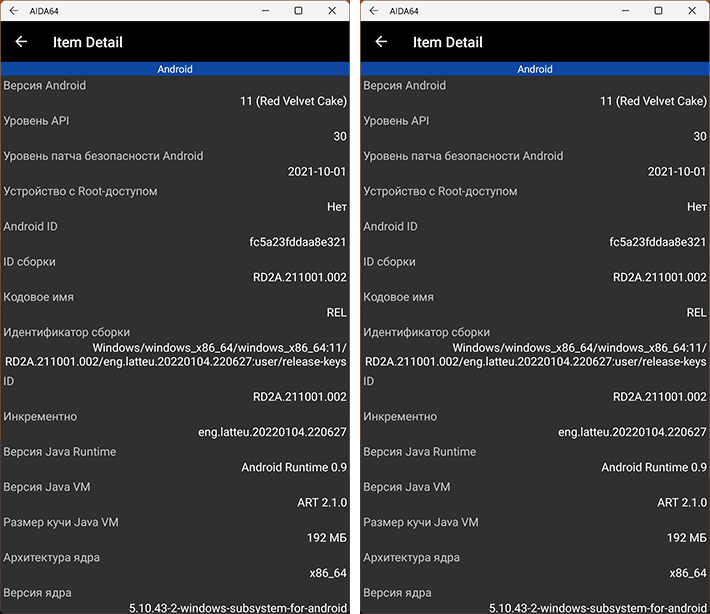
Если кому-то интересны характеристики виртуального устройства, запущенного в рамках Подсистемы Windows для Android, ниже — скриншоты с этой информацией.
Также, думаю, может заинтересовать проект MagiskOnWSA https://github.com/LSPosed/MagiskOnWSA для установки OpenGApps и получения Root в Windows Subsystem for Android.
The web is great and all, but depending on your workflow, keeping specific windows for dedicated tasks is the way to go. With Windows 11, Microsoft made it possible to bring all of your favorite apps to your PC — as long as they’re on the Amazon Appstore, that is. With such a limited selection to choose from, many Windows users might write off the feature altogether. Thankfully, we’re talking about Android apps here, so sideloading is absolutely an option.
While you can absolutely use ADB on Windows 11 to install any APK file, it’s not exactly the most intuitive process for many users. If you’re looking to try out some of your favorite mobile apps on desktop, you don’t need to rely on command lines or Amazon’s lineup of software. Instead, all you need is a simple GUI known as WSA PacMan — short for Package Manager — to turn any APK into a double-click install. Here’s how it works.
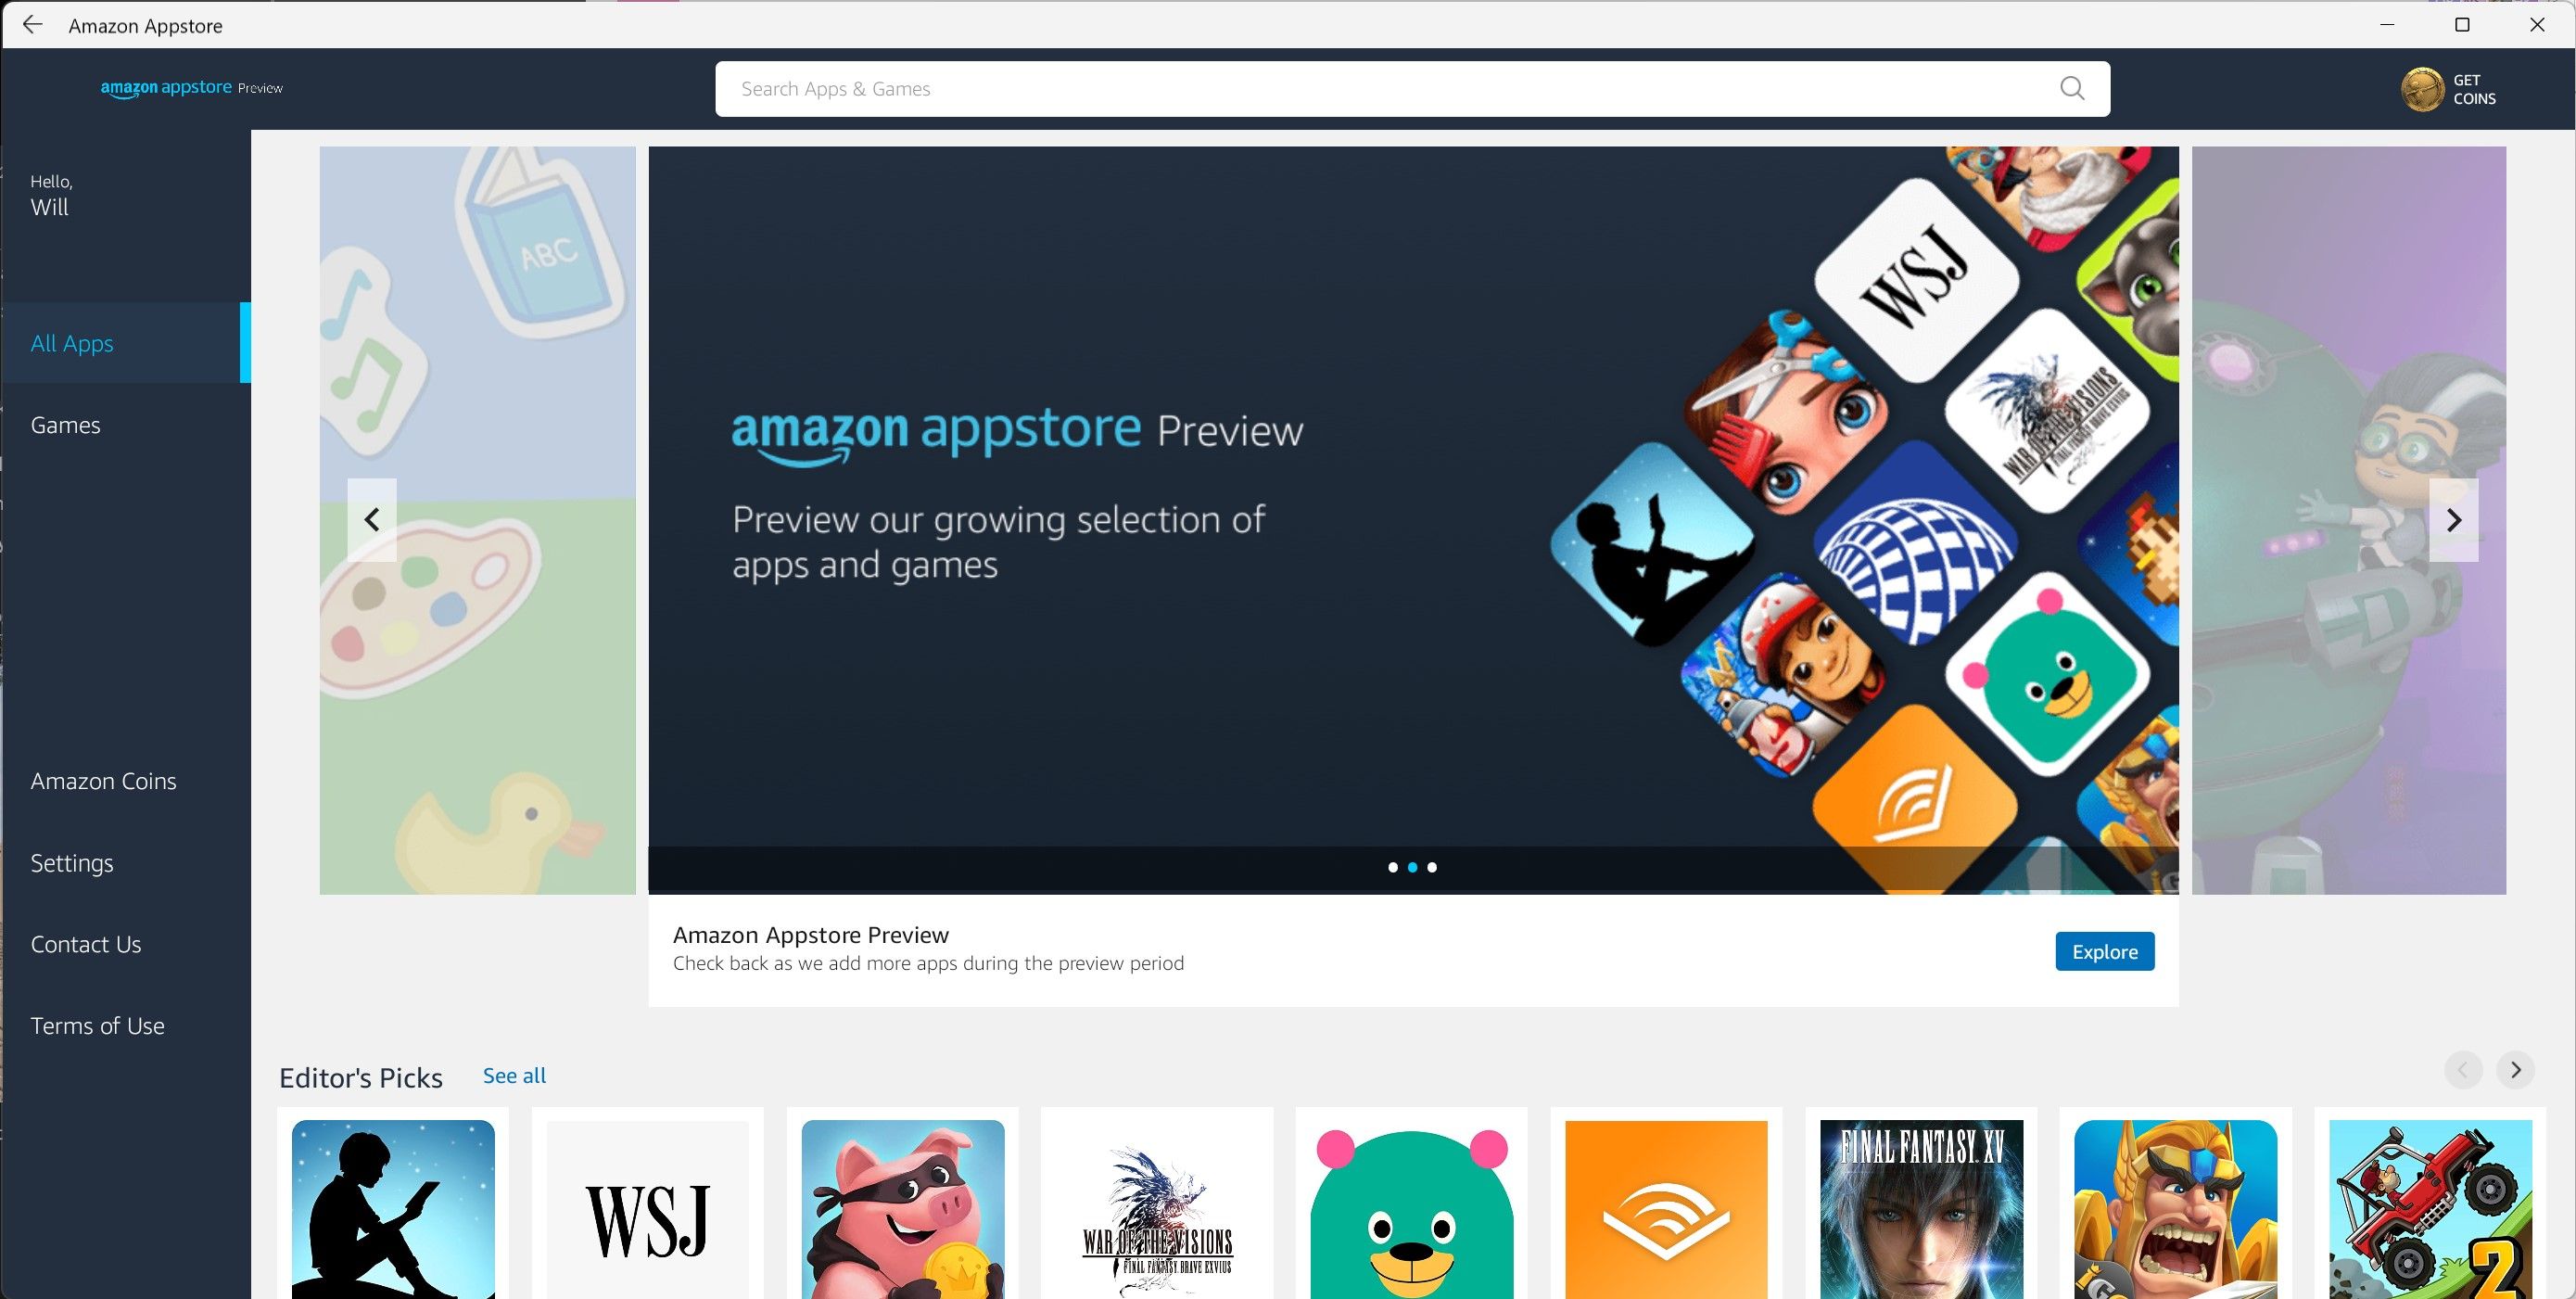
Grab the Amazon Appstore
Because WSA PacMan is just an interface designed to streamline sideloading, you’ll still need to get the bones of Android support up and running on Windows 11. You’ll have to start by installing the Amazon Appstore if you don’t already have it, since it includes Windows Subsystem for Android.
- Open the Microsoft Store on your computer.
- Search for «Amazon Appstore» using the search bar at the top of the page.
- Click the «Get» option to install the app on your computer.
You don’t need to log into the Amazon Appstore — installing it is enough to add WSA to your device.
Unfortunately, the Appstore is only available in the US right now, so non-US readers will have to jump through a couple of hoops to get WSA up and running. It’s a complicated process, but we’ve created a Windows 11 WSA installation guide — no Amazon Appstore required.
Get WSA PacMan up and running
Okay, with Windows Subsystem for Android ready to go on your PC, we’re one step closer to sideloading paradise. Here’s what you’ll need to do next.
- Using the Start menu, locate and open Windows Subsystem for Android.

- Make sure Developer mode is enabled. Since all sideloading is done through ADB commands — even if you’re running a third-party GUI — this is a necessary step.

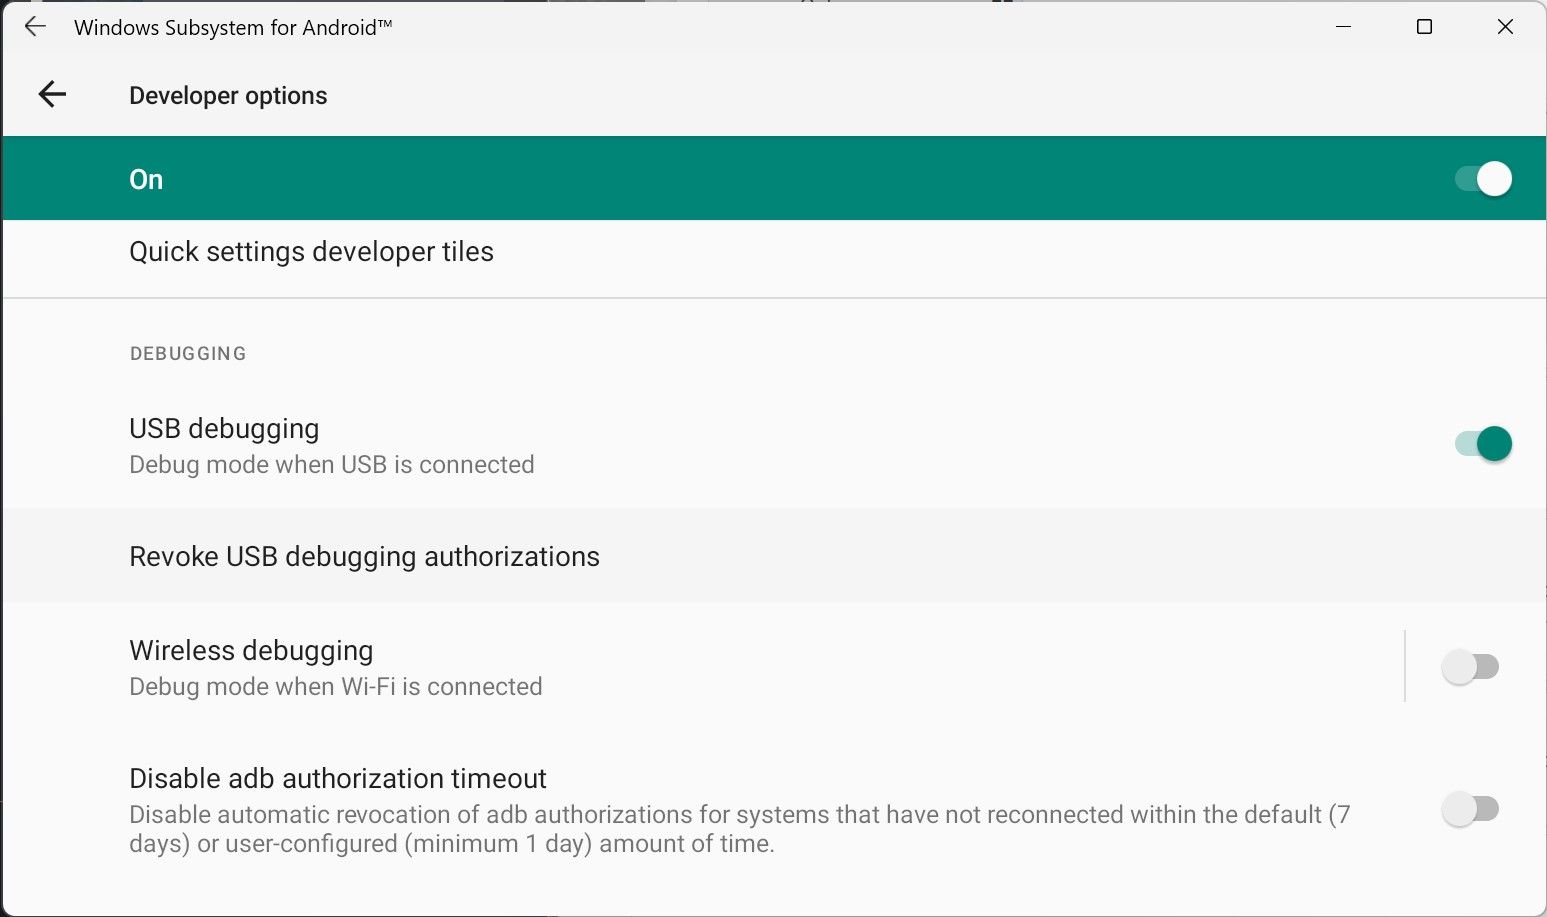
- Click «Manage developer settings,» then look for USB debugging and toggle it on. This screen should look familiar to Android users — it’s the same menu you’ll find in any AOSP build.

- Meanwhile, if you haven’t already, download WSA PacMan from GitHub by selecting the latest version under «Releases.» There’s also a portable version if you’d rather not use a .exe file.
- Follow through with the installation process to get WSA PacMan running on your computer, then open the app from the Start menu.
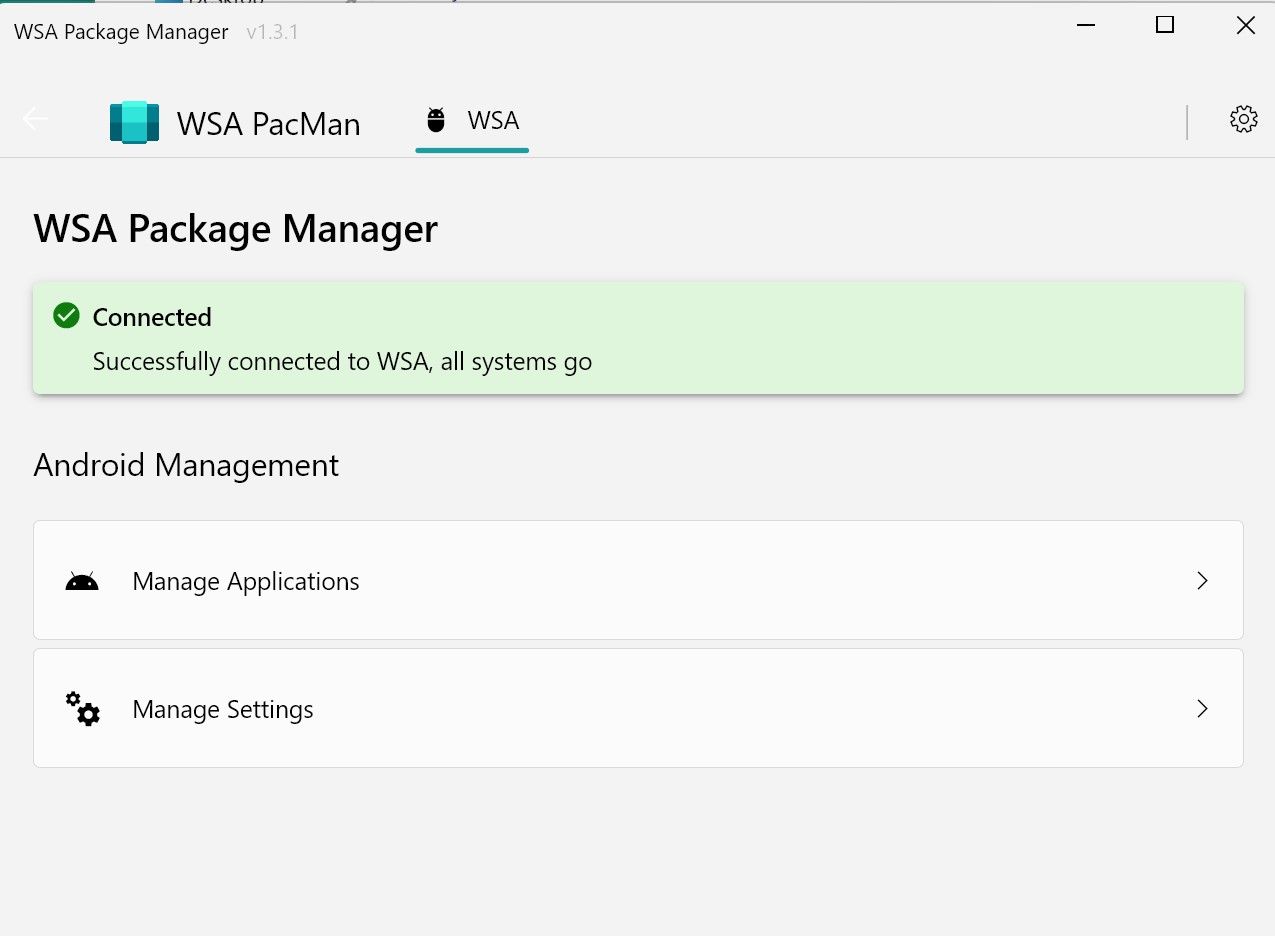
If everything is ready to go, you’ll see a «Connected» notification at the top of the app.
Installing APKs on Windows 11 with WSA PacMan
From here, you can close out of Windows Subsystem for Android and WSA PacMan, as they don’t need to be open to install APKs on your computer. After all, you’ve done the hard work — now all you need is an app to install.
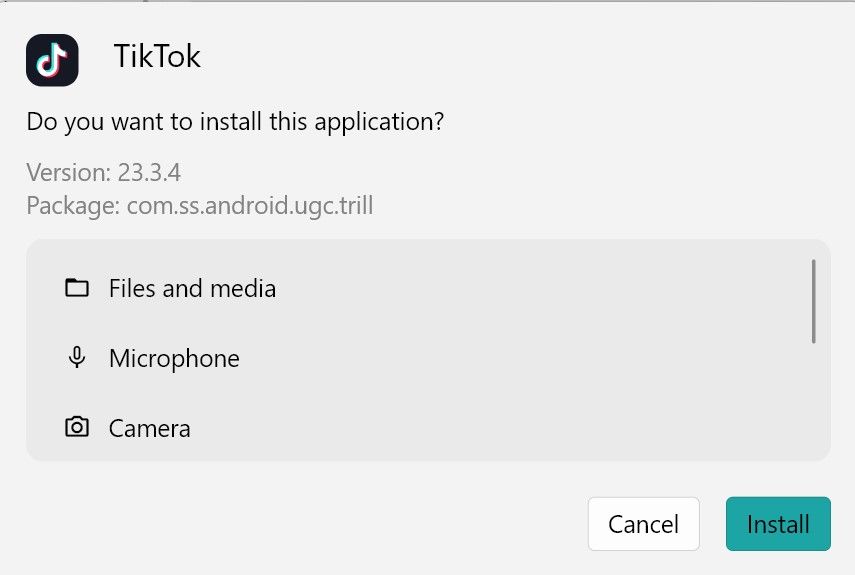
Locate the APK file on your device, or grab one from a site like APK Mirror, and double-click on it like any other .exe file on Windows. WSA PacMan takes care of the rest, prompting a message similar to what you would see on Android. You’ll also get the option to create a desktop shortcut for your app once installed.
From here, the app will function just like any other software on your computer. It’s accessible from the Start menu, can be pinned to your taskbar, and even uninstalled with a simple right-click. Just keep in mind that not every app is guaranteed to work here. Streaming apps like Netflix, for example, will likely run into DRM-related issues, as Windows 11 lacks Winevine support at the moment.
Whether Android apps on Windows 11 catch on is still an open question, but the option not to rely on the Amazon Appstore certainly makes its future a little brighter. Thankfully, once WSA PacMan is set up, installing nearly any of our favorite mobile apps and games is a breeze.

(Image credit: Future)
On Windows 11, the Windows Subsystem for Android is a platform that lets you run Android apps on your laptop or desktop alongside Windows apps. Officially, you can only install apps from Amazon Appstore, but it’s also possible to sideload Android apps using the Android Debugging Bridge (ADB) tools.
The platform is currently available as a preview for devices running the most up-to-date version of Windows 11 and the Microsoft Store app. Initially, the platform was limited to the United States and Japan, but it’s now expanding to 31 additional markets, including Australia, Canada, France, Germany, Italy, Spain, and the United Kingdom.
This guide will walk you through the steps you need to know to get started getting and using Android apps on Windows 11.
How to install Windows Subsystem for Android on Windows 11
You first need to check whether your computer meets all the requirements.
System requirements
These are the requirements to install Android apps on Windows 11:
- Memory: 8GB (16GB recommended).
- Processor: Intel Core i3 8th Gen, AMD Ryzen 3000, Qualcomm Snapdragon 8c, or better.
- Storage: Solid-state drive (SSD).
- Microsoft Store app: Version 22110.1402.6.0 or higher.
- Windows 11: Build 22000.526 or higher.
Check system requirements
To check the system requirements, use these steps:
- Open Settings.
- Click on System.
- Click the About page on the right side.
- Under the «Device specifications» section, confirm the RAM and CPU requirements.

- Under the «Windows specifications» section, confirm the build number is equal to or higher than 22000.526.
- Click on System.
- Click the Storage page on the right side.
- Under the «Storage management» section, select the «Advanced storage settings» option.
- Click the Disks & volumes setting.
- Select the main drive and click the Properties button.
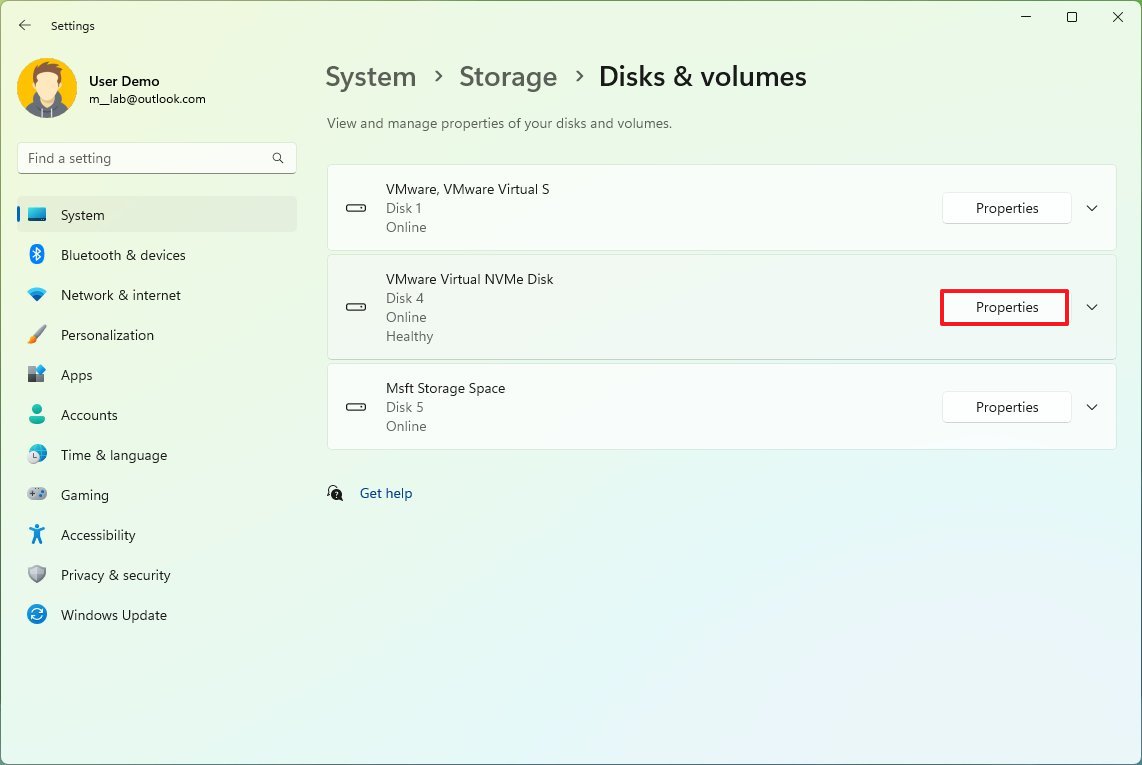
- Confirm the media type is SSD. (If it’s «HDD,» you won’t be able to install WSA.)
Once you complete the steps, you want to check for updates to ensure that the system has the latest patches and the most up-to-date version of the Microsoft Store.
Check for Windows 11 updates
To download and install updates on Windows 11, use these steps:
- Open Settings.
- Click on Windows Update.
- Click the Check for updates button.
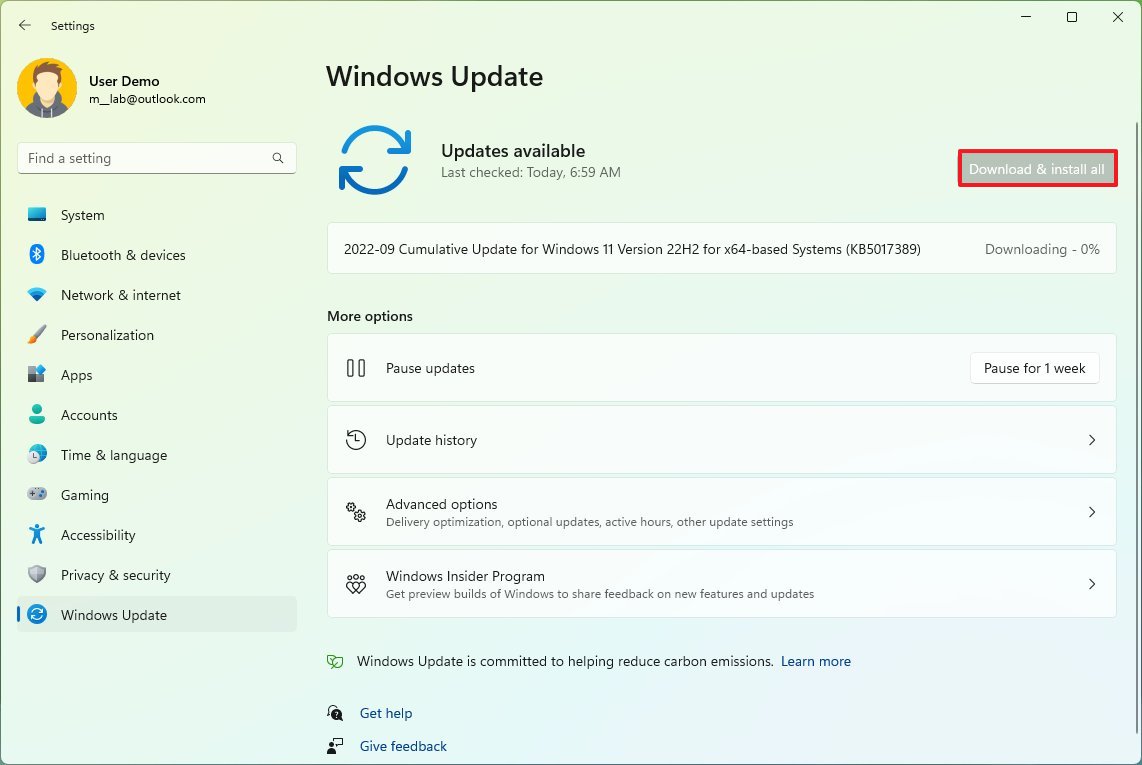
After you complete the steps, restart the computer to finish applying the system updates.
Check for Microsoft Store update
The computer must also have the latest version of the Microsoft Store app to download the Amazon Appstore app.
To check the Microsoft Store version and check for updates, use these steps:
- Open Microsoft Store app.
- Click on Library.
- Click the Get updates button.
- Click the Profile menu and select the App settings option.
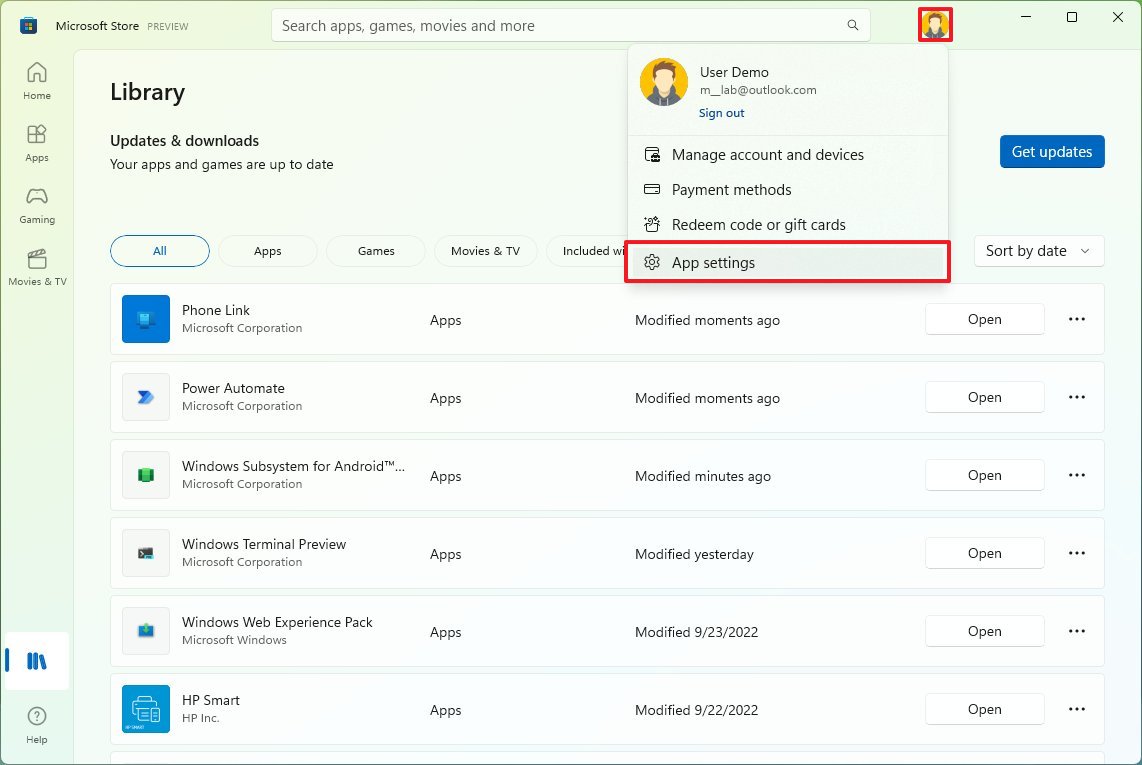
- Confirm the version is equal to or higher than 22110.1402.6.0.
After you complete the steps, you can enable the virtualization features on the UEFI firmware and Windows 11.
Enable virtualization
The Windows Subsystem for Android also requires virtualization to be enabled at the hardware and software level to run the virtual machine that makes everything happen. Since these steps are different per device, you may want to check your manufacturer support website for specific details depending on the computer. If you have a computer with modern hardware, this feature may already be enabled. Once virtualization has been enabled, you can turn on the «Virtual Machine Platform» feature on Windows 11.
To enable the Virtual Machine Platform feature on Windows 11, use these steps:
- Open Start.
- Search for Turn Windows features on or off and click the top result to open the experience.
- Check the «Virtual Machine Platform» option.
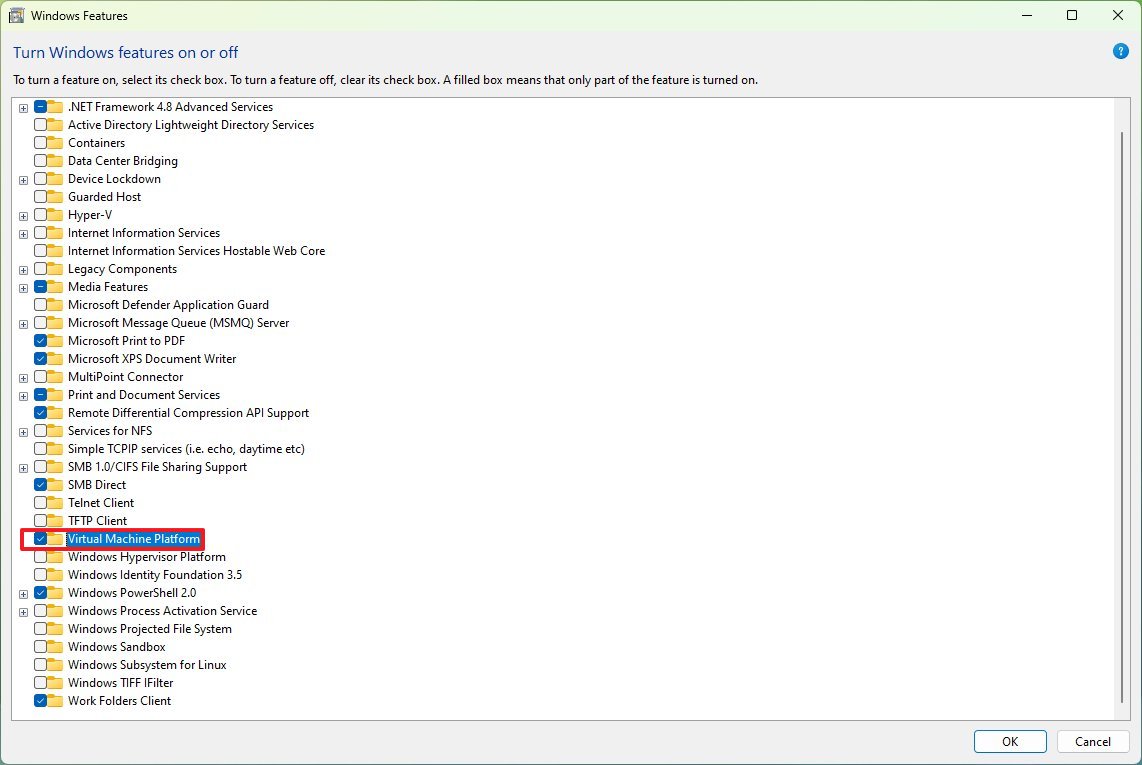
- Click the OK button.
- Click the Restart button.
Once you complete the steps, you can install the Windows Subsystem for Android and the Amazon Appstore.
Install Windows Subsystem for Android
To install the Windows Subsystem for Android alongside the Amazon Appstore, use these steps:
- Open the Amazon Appstore page (opens in new tab).
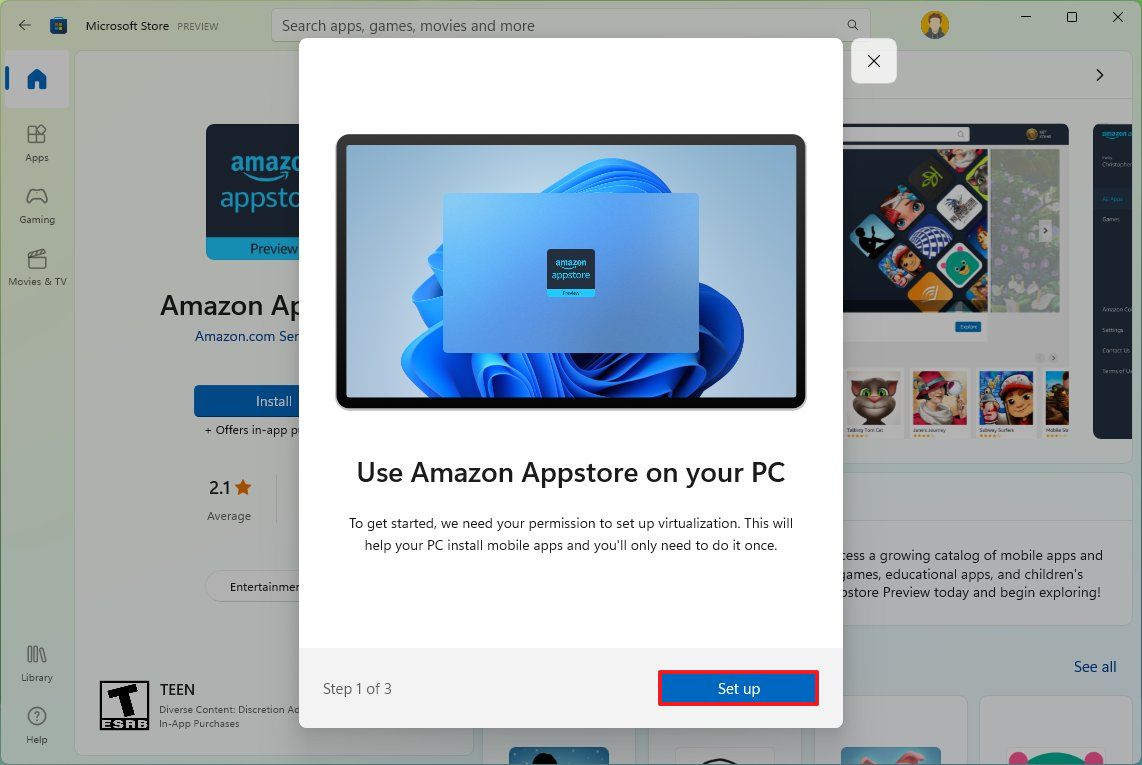
- Click the Install button.

- Click the Set up button.
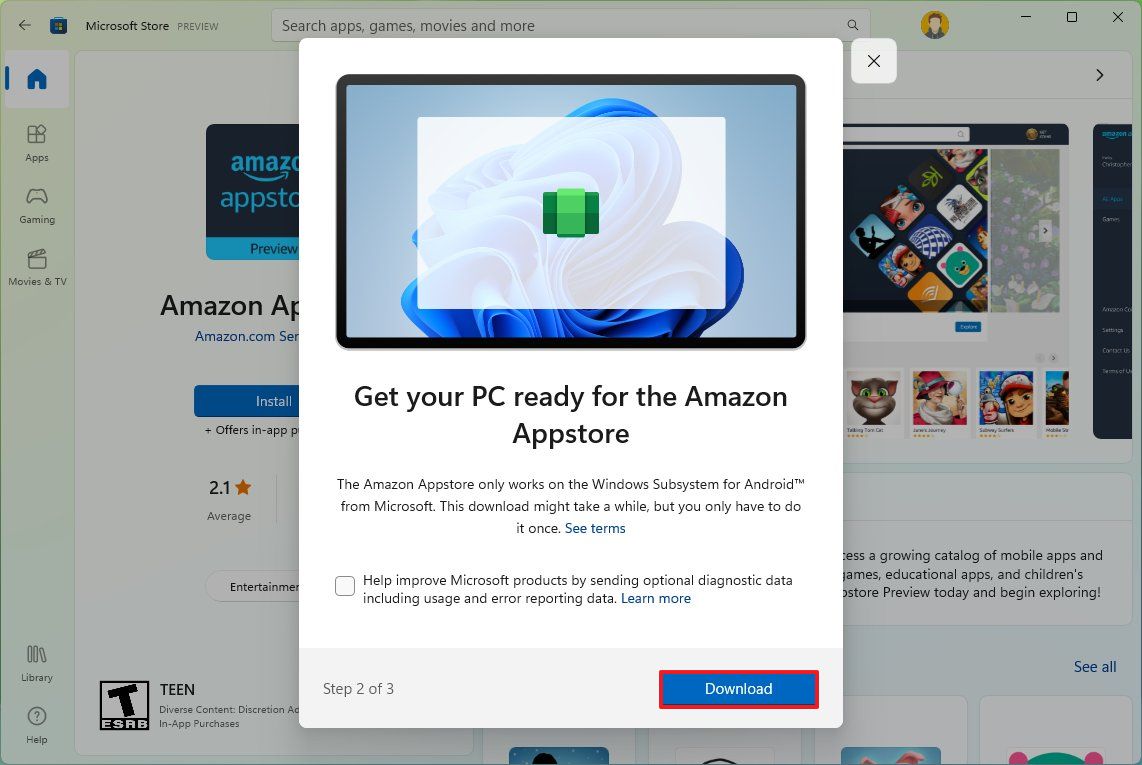
- Click the Download button.
- Click the Next button.
- Click the Restart button.
After you complete the steps, you can finally install Android apps on Windows 11.
How to install Android apps on Windows 11
To install Android apps on your computer, use these steps:
- Open Start.
- Search for Amazon Appstore and click the top result to open the app.
- Click the Sign in button.
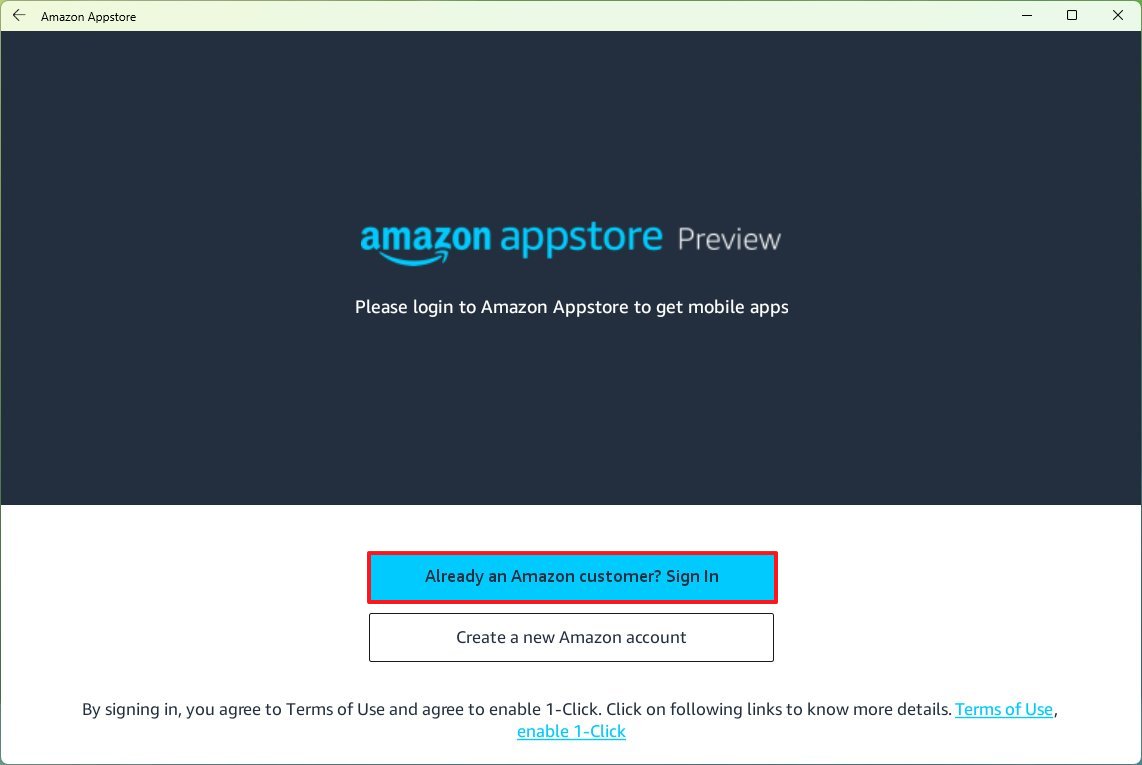
- Sign in with your Amazon account.
- Select the application.
- Click the Get button.
- Click the Download button.
- Click the Download button again.
Once you complete the steps, you can open the app from the Amazon Appstore, or it’ll also be listed in the Start menu. If you can’t find it, the app will probably be listed in the «All apps» section.
Launching an Android app will behave like a regular Microsoft Store app. You can maximize, minimize, and resize windows, and you can also use the mouse and keyboard for input. You can terminate the application by clicking the Close button like any other app, but it might take a little time.
How to uninstall Android apps on Windows 11
On Windows 11, you can uninstall Android apps like any other Microsoft Store app from the Start menu or Settings app.
Remove apps from Start menu
To remove Android apps from the Windows 11 Start menu, use these steps:
- Open Start.
- Search for the app.
- Right-click the Android apps and select the Uninstall button.

Remove apps from Settings
To uninstall Android apps from the Settings app, use these steps:
- Open Settings.
- Click on Apps.
- Click the Installed apps page from the right side.
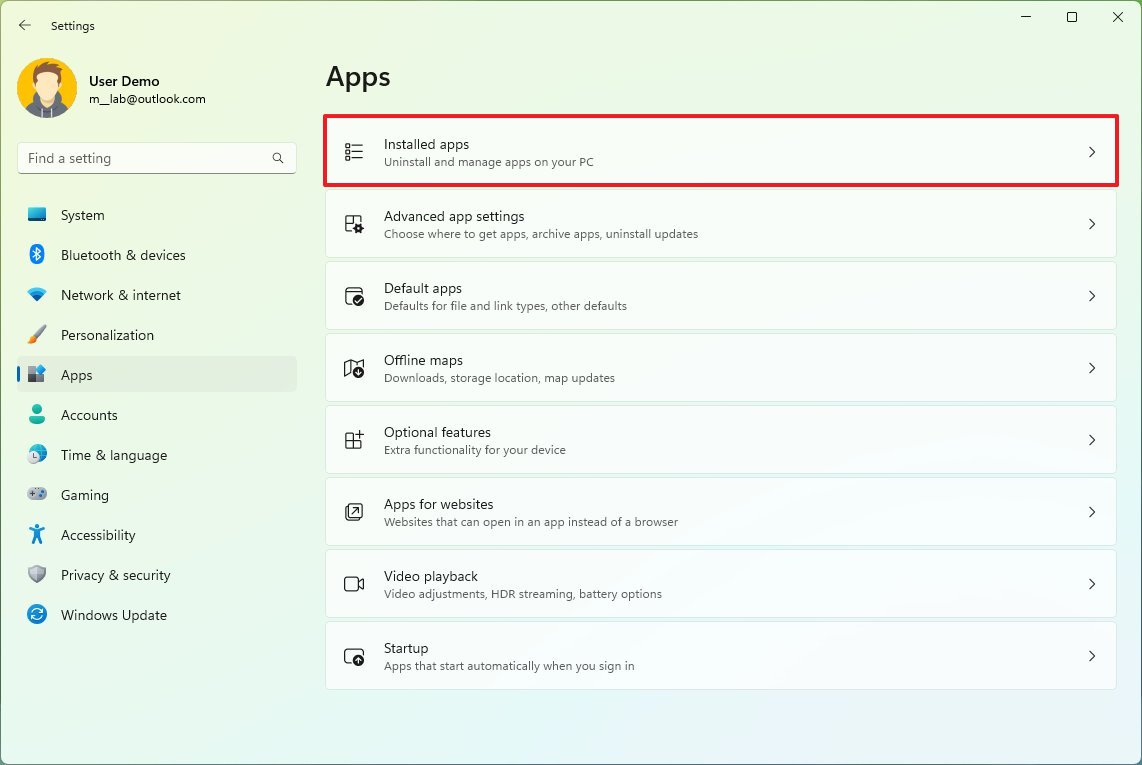
- Select the Android app.
- Click the menu (three-dotted) button and select the Uninstall option.
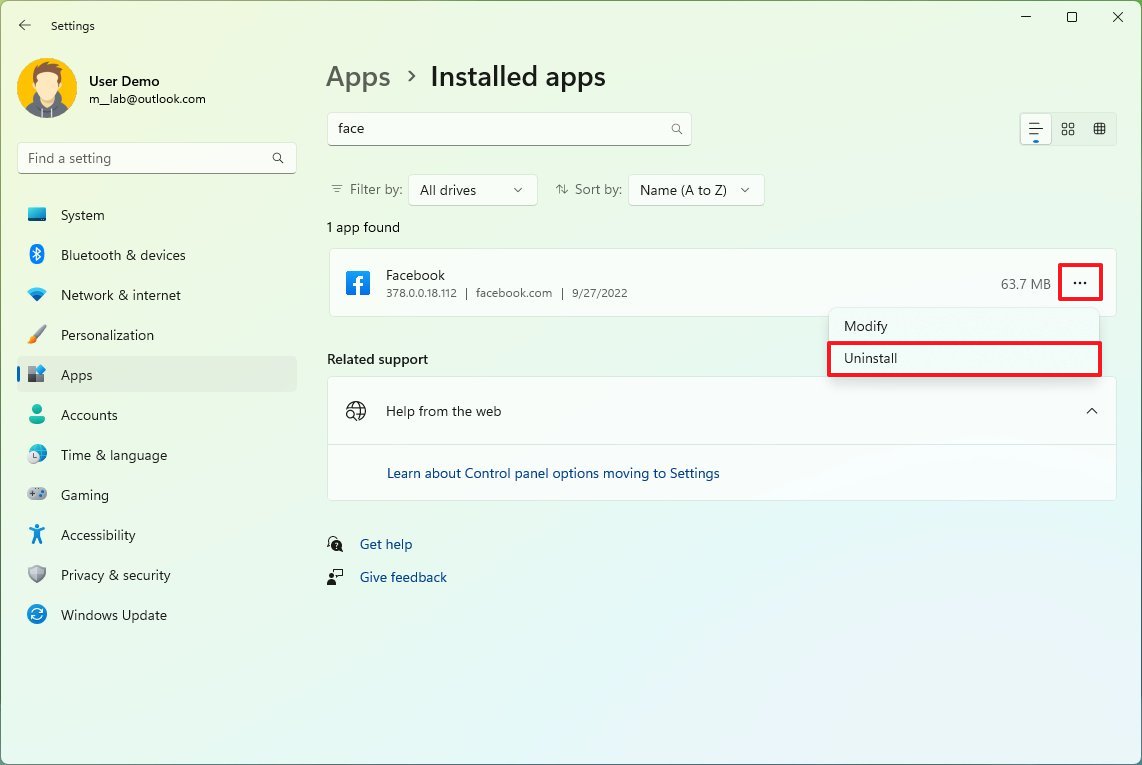
- Click the Uninstall button again.
After you complete the steps, the app will no longer be available on the device.
These instructions work for removing apps from the Amazon Appstore or apps you sideloaded using the Android Debugging Bridge (ADB) tools.
How to uninstall Windows Subsystem for Android on Windows 11
To uninstall the Windows Subsystem for Android, Amazon Appstore, and installed apps, use these steps:
- Open Settings.
- Click on Apps.
- Click the Apps & features page from the right side.
- Select the «Windows Subsystem for Android» app.
- Click the menu (three-dotted) button and select the Uninstall option.
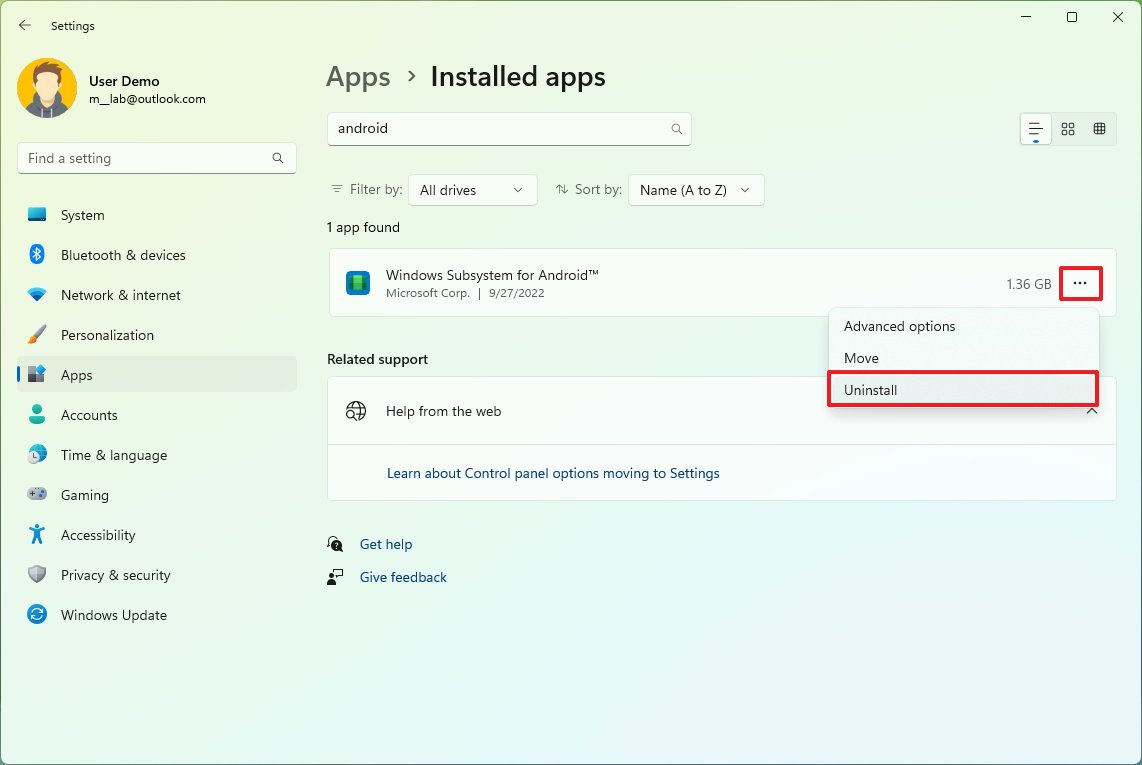
- Click the Uninstall button again.
- Restart the computer.
- Quick note: Restarting isn’t required, but the system may need a refresh to remove any remaining files and configuration. Also, if you don’t restart, if you are reinstalling the platform, you may get an error downloading the components from the Microsoft Store.
Once you complete the steps, the Windows Subsystem for Android, Amazon Appstore, and Android apps will be removed from the device.
Other details
Although the platform works out of the box, the Windows Subsystem for Android also comes with various settings you can change, which you can open from the Start menu.
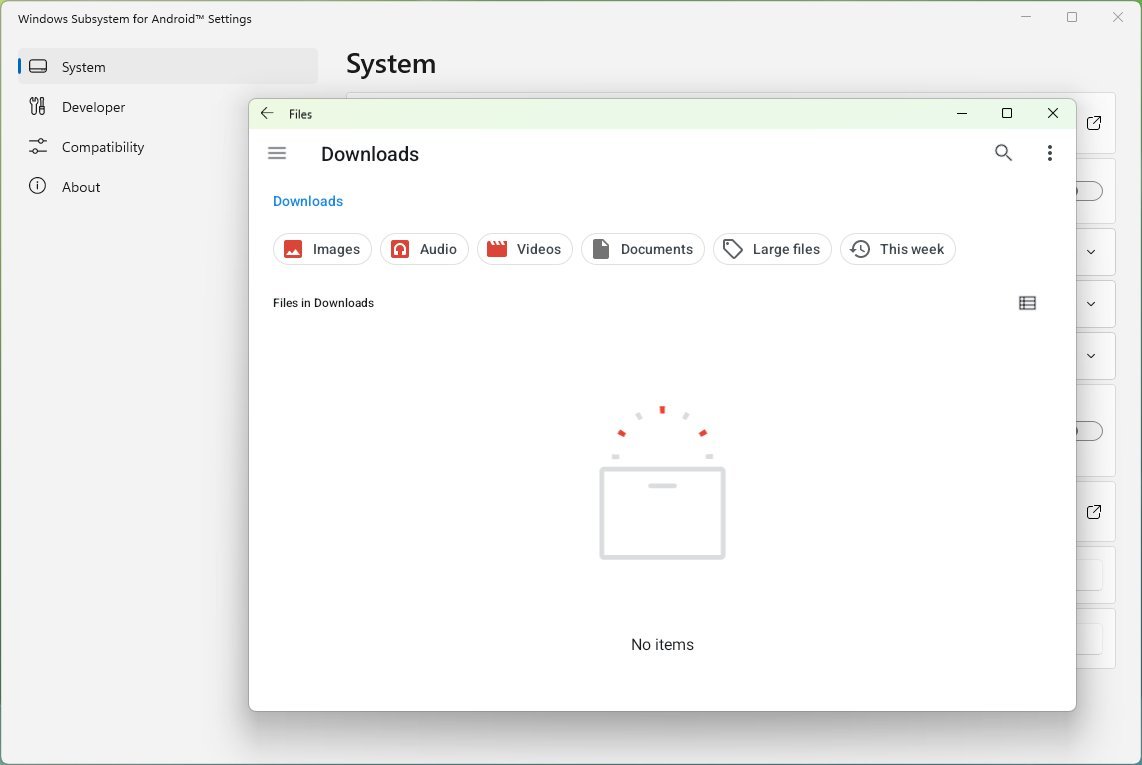
The settings page includes an option to access files you created and downloaded using the platform, including images, audio, videos, documents, and more.
By default, WSA will remain dormant until you launch an application. However, the settings page also includes a «Subsystem resources» feature that allows you to choose to run the virtual machine continuously.
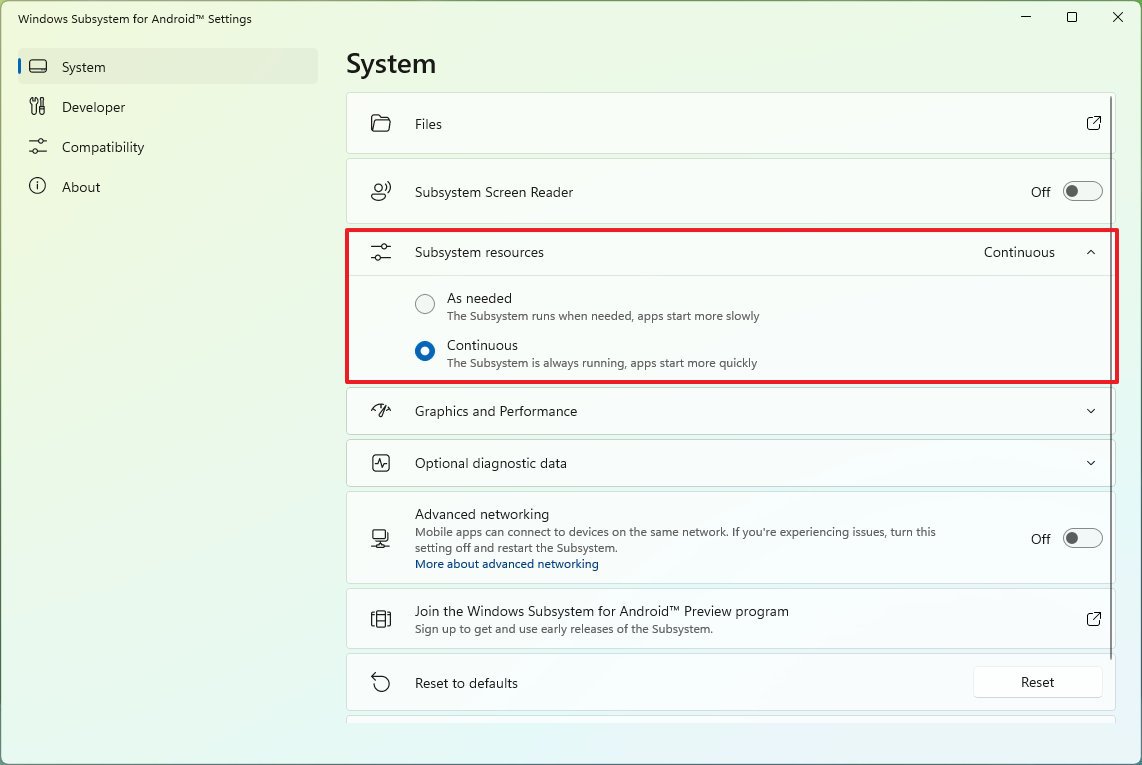
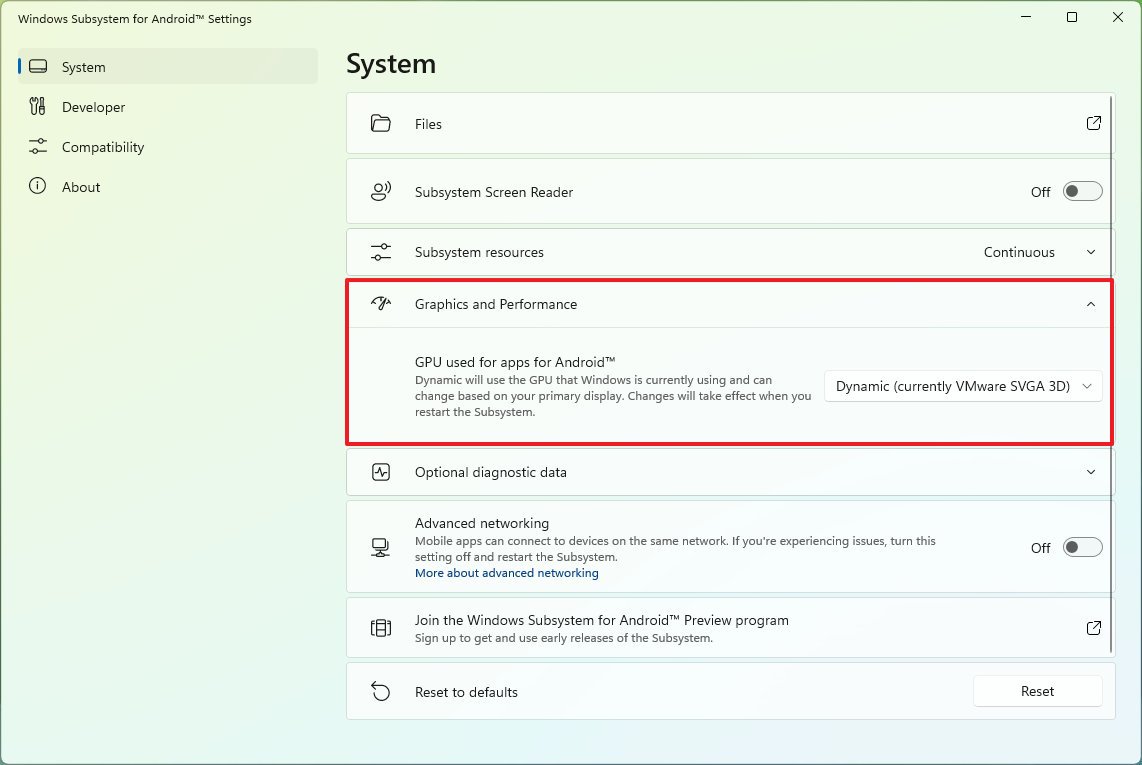
You can also assign the graphic card the platform should use when running applications using the «Graphics and Performance» setting.
In the «Developer» section, you can enable «Developer mode» for testing and debugging.

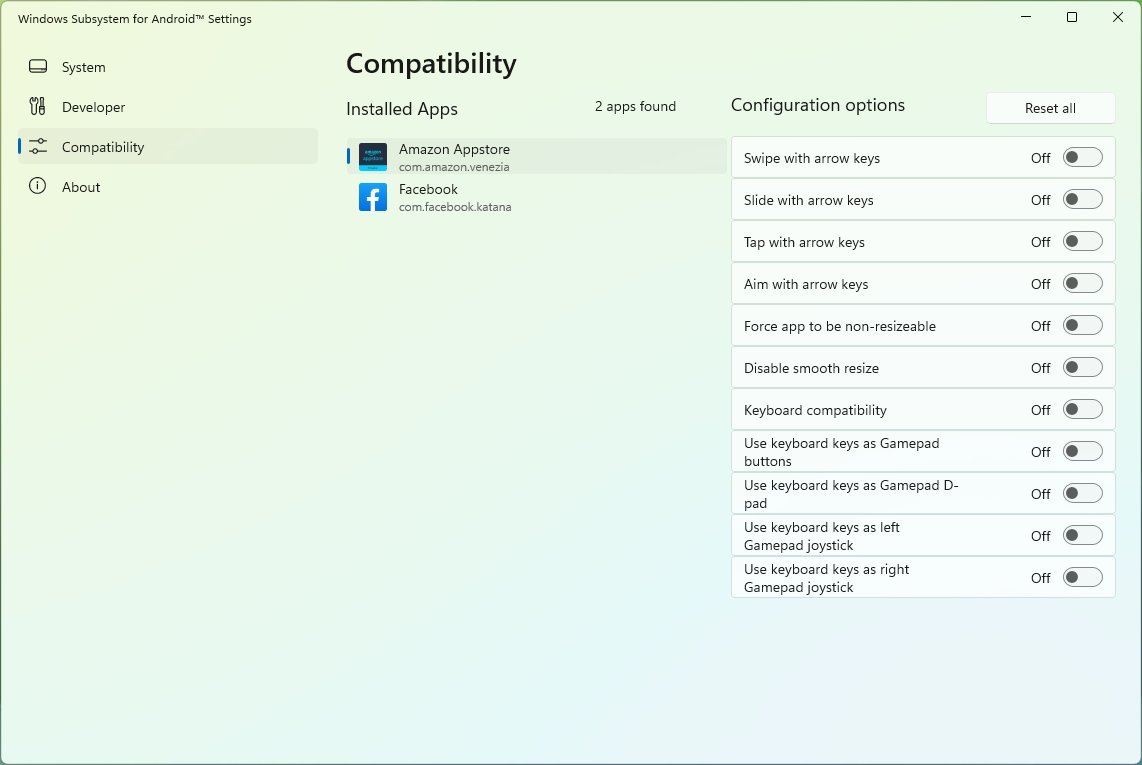
The «Compatibility» section includes a number of shims you can enable per application to make Android apps more compatible with the platform on Windows 11.
Although bringing Android apps support is a welcome addition to Windows 11, you cannot run any app you want. For instance, the Amazon Appstore only includes around 20,000 apps. While it may seem like a lot, it’s not, and most of them are games. Also, if you sideload apps, you may be able to install virtually any app, but those that require Google Play Services like Gmail, Google Maps, and others won’t work.
You can check which apps are compatible with Windows 11 using this community list on GitHub.
This guide showed you the steps to install WSA by installing the Amazon Appstore; however, you can also install the Windows Subsystem for Android app (opens in new tab), which will also install the Amazon Appstore.
The platform is only available in a handful of regions. However, if you are located in a country still not supported, you can get around this by changing the region settings. You can do this on Settings > Time & language > Language & region and change the «Country or region» setting to the United States.
If you are a developer, Microsoft has published various resources (opens in new tab) to optimize your Android apps to run with the Windows Subsystem for Android. The documentation explains the steps to set up the development environment and configure the platform settings. Also, you will find information to add support for keyboard and mouse, resizing windows, and more details on the virtual machine, security, and Amazon Appstore.
More resources
For more helpful articles, coverage, and answers to common questions about Windows 10 and Windows 11, visit the following resources:
- Windows 11 on Windows Central — All you need to know
- Windows 10 on Windows Central — All you need to know
Get the best of Windows Central in in your inbox, every day!
Mauro Huculak is technical writer for WindowsCentral.com. His primary focus is to write comprehensive how-tos to help users get the most out of Windows 10 and its many related technologies. He has an IT background with professional certifications from Microsoft, Cisco, and CompTIA, and he’s a recognized member of the Microsoft MVP community.

Когда появились первые анонсы Windows 11, то пользователи сразу поняли – Microsoft пытается превратить свой продукт в мобильную ОС. Об этом свидетельствовали многие изменения в интерфейсе и функционале. Например, только в Windows 11 появились свайпы с помощью тачпадов. Благодаря новым функциям свежая ОС стала поддерживать приложения с расширением APK, которые раньше использовались только на Андроид. О том, как установить apk на ОС Windows 11, и пойдет речь.
Через Microsoft Store
Начнем с хорошей новости. Разработчики ПО для Андроида, а также специалисты из Microsoft, уже позаботились о возможности устанавливать мобильные приложения на компьютер с Windows 11. Для этого они значительно улучшили официальный магазин приложений Micosoft Store (он использовался еще в Windows 10, но так и не обрел популярность), а также адаптировали популярные мобильные программы под Windows.
Майкрософт Стор по умолчанию устанавливается с Виндовс. Чтобы пользоваться им, достаточно выполнить действия ниже:
- Нажмите на кнопку пуска в нижней части экрана.
- Введите фразу «Microsoft Store», она автоматически будет вводиться в строку поиска.

- Откройте первое найденное приложение.
- Войдите в свой аккаунт Microsoft или создайте его.

- Введите в поиске нужную программу.
- Нажмите на кнопку «Получить» для начала установки.

Этот способ работает только с теми программами, которые разработчики сами добавили в Microsoft Store. Магазин приложений может не работать на пиратских версиях Windows.
Windows Subsystem for Android
Этот способ гораздо сложнее предыдущего, а потому пойдет только для опытных пользователей. Однако, благодаря понятным инструкциям, справиться с задачей смогут и новички, но на это уйдет гораздо больше времени. Утилита из подзаголовка была разработана самой Microsoft. Однако по умолчанию она удален или настроен только с сервисом Amazon AppStore. Чтобы настроить инструмент для работы со всеми apk-приложениями, выполните действия из инструкций ниже.
Установка программы на ПК
Для начала необходимо установить нужные программы на компьютер. Пошаговая инструкция:
- Откройте этот сайт, который позволяет скачивать приложения из Microsoft Store в обход самого магазина.

- В единственную на странице строку ввода введите этот адрес – https://www.microsoft.com/en-us/p/windows-subsystem-for-android/9p3395vx91nr.
- Появится список найденных файлов. Найдите в нем файл, который оканчивается на «msixbundle». Обычно он находится в самом конце списка. Кликните по этому файлу для загрузки.
- Дождитесь завершения загрузки.
- Откройте терминал в режиме Powershell. В Виндовс 11 этот режим открывается по умолчанию. Для этого зажмите сочетание клавиш Win + X, а после выберите пункт «Терминал (Администратор)». Должна появиться консоль, в которой перед строкой ввода будет отображаться метка «PS». Если этой метки нет, то введите команду «powershell».
- Введите команду «Add-AppxPackage -Path «путь_до_файла»», но при этом текст в кавычках замените на реальный путь до установленного в позапрошлом шаге файла. После ввода команды не забудьте нажать на Enter.
На этом загрузка одного инструмента завершена. Однако для взаимодействия с ним понадобится еще одна утилита, которая называется ADB. Установить утилиту можно по этой ссылке.
Главное не забудьте, в какую папку она будет разархивирована. В будущем это понадобится для установки APK.
Загрузка APK
После загрузки перечисленных выше программ на компьютере появится поддержка мобильных приложений.
- Откройте меню пуск и нажмите на появившееся приложение «Windows Subsystems for Android».
- Не закрывайте приложение.
- Найдите в интернете нужный apk-файл. Обязательно проверьте его на наличие вирусов, например, через сервис VirusTotal.

- Запустите Windows Subsystem for Android и перейдите в «Параметры».
- Включите режим разработчика (поставьте галочку напротив одноименного пункта).
- Скопируйте полученный IP-адрес или нажмите «Обновить», если адрес не отобразился.
На этом завершается второй этап настройки подсистемы Андроид для Windows. Теперь осталось загрузить само приложение.
Установка приложения
Хорошая новость – для завершения процедуры осталось ввести пару команд. Алгоритм действий:
- Откройте командную строку и перейдите в папку с adb. Для этого введите команду «cd *путь_до_папки*».
- Введите команду «adb connect *IP-адрес, полученный в предыдущей инструкции*.

- После подключения введите команду «adb install *путь до установленного apk-файла*».
Готово. После проделанных махинаций в списке приложений должна появиться установленная программа. Для того, чтобы запустить установленное приложение, достаточно один раз кликнуть по нему. В случае отсутствия программы проверьте выполнение перечисленных выше инструкций. Возможно, на каком-то этапе на экране появилась ошибка, на которую пользователь не обратил внимание.
Использование эмуляторов
А на очереди у нас еще один способ, с помощью которого можно установить абсолютно любые APK-файлы. Речь идет об эмуляторах Android. Небольшая справка: эмуляторы ОС – это такие программы, которые могут имитировать одну среду запуска в другой. Проще говоря, эмуляторы позволяют запустить одну ОС в другой, например, Android в Windows. На сегодняшний день существует три популярных эмулятора:
- BlueStacks;
- Nox;

Есть и другие программы, но автор лично не пользовался ими. Каждый из перечисленных выше эмуляторов позволяет запускать APK. Единственное различие между ними – это изобилие функций. Например, LDPlayer был рассчитан на игры, в то время как BlueStacks разрабатывался для более универсальных целей. Все три программы можно использовать, следуя инструкциям ниже:
- Скачайте эмулятор с официального сайта.
- Запустите его.

- Выберите характеристики устройства и настройки управления и доступа. В некоторых программах для этого достаточно просто выбрать модель, в остальных же приходится вручную указывать все характеристики.
- Откройте в запущенном эмуляторе Play Market или браузер (да, не удивляйтесь, эти программы полностью эмулируют работу телефона).
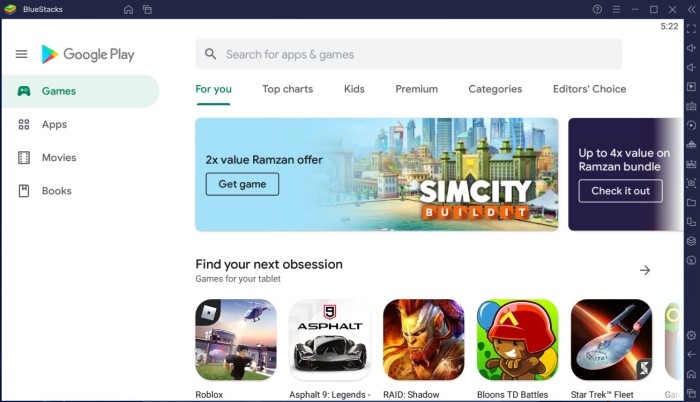
- Скачайте нужный APK.

- Запустите установщик.
Готово. После этого приложение появится на главном экране эмулятора. Самое приятное в этом способе то, что устанавливаемая на Андроид программа даже не догадывается о том, что она существует внутри эмулятора. Это значит, что все приложения, которые работали на Андроид, будут работать и на компьютере.
У эмуляторов есть и один значительный недостаток – они потребляют приличное количество ресурсов компьютера. Только при запуске BlueStacks или Nox система начинает потреблять около 512 мегабайт оперативной памяти. Когда в эмуляторе происходят какие-то манипуляции, то размер занимаемой ОЗУ возрастает в несколько раз. В общем, не стоит ставить эмуляторы на слабые компьютеры и ноутбуки.
Возможные проблемы
Почти все перечисленные выше способы требовали от пользователей некоторые продвинутых навыков работы с компьютером. Те читатели, у которых этих навыков не было, могли столкнуться с различными трудностями в виде непредвиденных ошибок и сбоев.
Мы собрали частые ошибки, с которыми сталкиваются пользователи, а также предложили свои способы решения:
- Эмулятор приводит к жутким зависаниям компьютера. В настройках попробуйте уменьшить характеристики эмулируемого девайса. В частности, измените значение ОЗУ, оно не должно превышать 75 % от оперативной памяти компьютера.
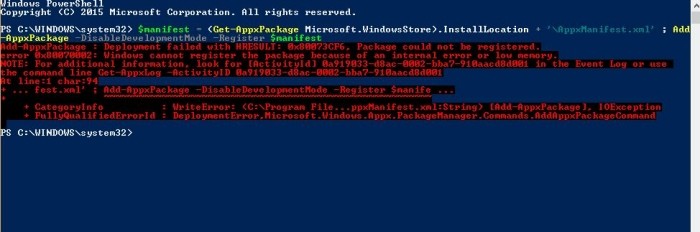
- Microsoft Store не работает или его нет вообще. Попробуйте открыть Powershell и ввести команду «Get-AppxPackage *windowsstore* -AllUsers | Foreach {Add-AppxPackage -DisableDevelopmentMode -Register «$($_.InstallLocation)AppxManifest.xml»}». При копировании может возникнуть ошибка синтаксиса. В таком случае удалите кавычки из команды и снова вручную введите их. Если это не поможет, то значит, на компьютере стоит корпоративная версия Windows. Ее необходимо переустановить, выбрав другую версию.
- Не удается получить IP-адрес во втором способе. Это значит, что на компьютере выключен компонент виртуальной машины. Чтобы исправить это, откройте «Панель управления», перейдите в раздел «Программы и компоненты», а после в подраздел «Включение и выключение компонентов Windows». В открывшемся меню необходимо поставить галочку напротив пункта «Платформа виртуальной машины».