Можно использовать установочный носитель (USB-накопитель или DVD-диск), чтобы установить новую копию Windows, выполнить чистую установку или переустановить Windows.
Чтобы создать установочный носитель, перейдите на веб-сайт скачивания ПО, где вы найдете пошаговые инструкции. На этом веб-сайте вы можете выбрать версию Windows и создать собственный установочный носитель с помощью USB-устройства флэш-памяти или DVD-диска. Чтобы перейти непосредственно к одной из версий, выберите одну из следующих ссылок:
-
Windows 7
-
Windows 8.1
-
Windows 10 (Затем выберите Скачать средство сейчас.)
-
Windows 11 (затем выберите Скачать средство сейчас.)
Важно: Создайте резервную копию файлов перед установкой и переустановкой Windows на компьютере. Узнайте, как это сделать.
Чтобы создать установочный носитель, необходимо следующее:
-
Компьютер с надежным подключением к Интернету. Время скачивания зависит от скорости подключения к Интернету.
-
USB-устройство флэш-памяти, внешний жесткий диск или DVD-диск. Пустое USB-устройство флэш-памяти или внешний жесткий диск объемом не менее 8 ГБ либо пустой DVD-диск (и устройство для записи на DVD-диски). Рекомендуем использовать чистый носитель, поскольку все его содержимое будет удалено. Если при записи DVD-диска из ISO-файла отображается сообщение о том, что файл образа диска слишком большой, необходимо использовать DVD-носитель с двумя слоями (DL).
-
Ключ продукта. 25-значный ключ продукта (не требуется для цифровых лицензий). Если вам требуется помощь, см. раздел Как найти ключ продукта Windows.
После создания установочного носителя вы можете сбросить или переустановить Windows. Дополнительные сведения см. в статье Параметры восстановления в Windows.
Нужна дополнительная помощь?
You are here:
Home » Windows 10 » How To Clean Install Windows 10 From ISO File (Without USB/DVD)
Windows operating system’s performance deteriorates with time. The best possible fix to make Windows fast again is to reinstall or perform a clean install of Windows 10 by deleting files, settings, and installed programs.
Traditionally, when it comes to installing or reinstalling Windows, users prepare a bootable media and then use it to install/reinstall Windows operating system.
To clean install or reinstall Windows 10, you don’t need to prepare a bootable USB of Windows 10. All you need is Windows 10 ISO, which you can get from Microsoft with the help of the official Media Creation Tool.
Well, it’s possible to clean install or reinstall Windows 10 from an ISO file. Clean installing Windows 10 from ISO is not vastly different from clean installing Windows 10 from USB or DVD. The only difference is that we are not going to create bootable media while installing Windows 10 directly from the ISO file.
What about the product key?
Note that you won’t need a product key if you have legally upgraded your current PC from Windows 7/8.1 to Windows 10 and successfully activated it, before clean installing Windows 10 on the same PC. Likewise, if you got Windows 10 preloaded on your PC and activate your copy of Windows 10, you have nothing to worry about.
When you are prompted to enter a product key during the product installation, click the Skip button. Your PC will be automatically activated after installing Windows 10 as long as you have installed the same edition of Windows 10 was activated on your current PC by using the free upgrade offer.
However, when you clean install Windows 10 on a different PC or newly built PC, you will have to enter a valid product key.
If at all, Windows 10 is not activated after the clean install or reinstall, use the built-in activation troubleshooter to fix the issue.
Perform a clean install of Windows 10 from ISO image
Here is how to clean install Windows 10 from the ISO image file without having to create a bootable USB or DVD.
Step 1: If you haven’t downloaded your Windows 10 ISO yet, please follow the instructions in our download Windows 10 ISO from Microsoft guide to download the ISO image file.
Step 2: On your Windows 10 PC, where you want to perform a clean install of Windows 10, back up all data as we are going to clean install Windows 10 by removing installed programs and personal files. So it’s a good idea to backup everything using the right backup solution.
Step 3: Right-click on the Windows 10 ISO image file, and then click Mount option to mount the ISO image.
Step 4: Open up This PC, and then open up the newly mounted drive (containing Windows 10 installation files) by right-clicking on the drive and then clicking Open in new window option.
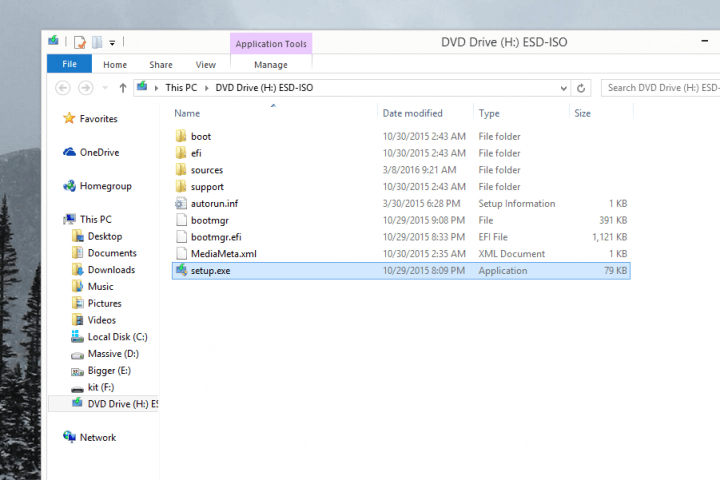
Step 5: Perform a double-click on the Setup.exe file to launch the Windows 10 Setup.
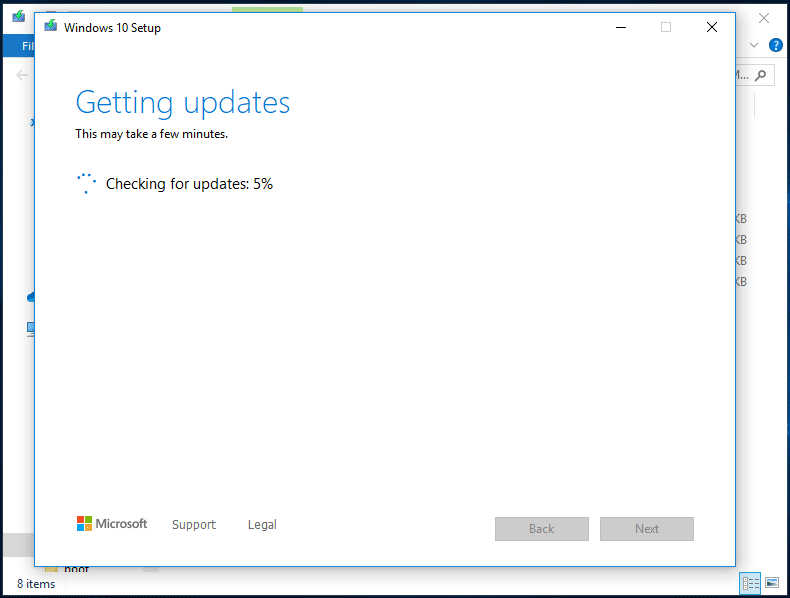
Step 6: When you see the following screen, select the first option labeled Download and install updates (recommended), or you can also choose the option titled Not right now, as we can always download and install updates after clean installing Windows 10.
If you have selected Download and install updates option, the setup will check for available updates and download them if available.
Step 7: Next is the user agreement screen where you need to click the Accept button to accept the license terms to install and use Windows 10.
Step 8: Once again, the setup might start looking for updates and download them.
Step 9: Once everything is ready, you will see Ready to install screen.
Step 10: Here, select Keep nothing if you want to perform a clean install of Windows 10 by removing all installed programs and data. We have chosen Keep personal files and apps as we don’t want to lose installed apps and important data.
And if you want to keep your data, please select Keep personal files option by clicking Change what to keep link.
Step 11: Finally, click the Install button to begin installing Windows 10.
Note that although the installation screen shows an “Upgrading” message, it’s actually clean installing. From here on, follow the straight-forward on-screen directions to complete installing or reinstalling Windows 10.
Windows 11 might be the latest version of Windows, but if you still use Windows 10 and need to «clean install» the operating system, or install or upgrade to it for the first time on an older PC, you’ll need an ISO File.
There are also plenty of other uses for a Windows 10 ISO file. For example, you may want to install Windows 10 on your Mac or set up Windows 10 in a virtual machine application.
Contents
- Downloading the ISO from Microsoft
- Installing or updating to Windows 10 with the ISO file
- Create a bootable USB drive for install on another PC
- Burn the Windows 10 ISO to a DVD
- FAQs about ISO files
In either case, the ISO file is the preferred tool for installing Windows 10. Yet there may be some confusing steps to get and use it. But don’t worry. In this guide, we’ll cover how you can download a Windows 10 ISO and use it to create installation media.
Downloading the ISO from Microsoft
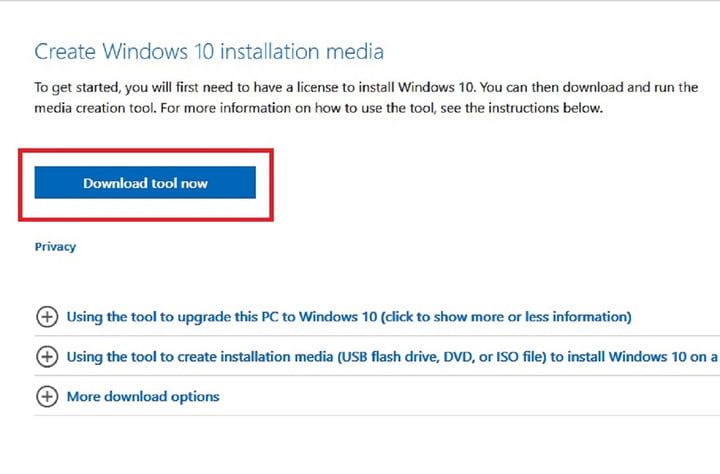
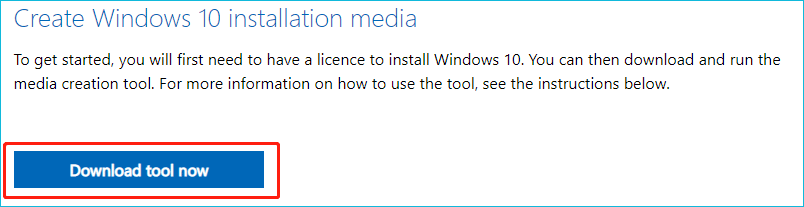
The best way to get a Windows 10 ISO file is from Microsoft. To get started, head to the Windows 10 download page. Under the header that says Create Windows 10 installation media, select the Download tool now button.
Step 1: Next, a dialogue box will ask you if you want to save a program called «MediaCreationTool21H2.exe.» Click Save file. This will download the file to your computer.
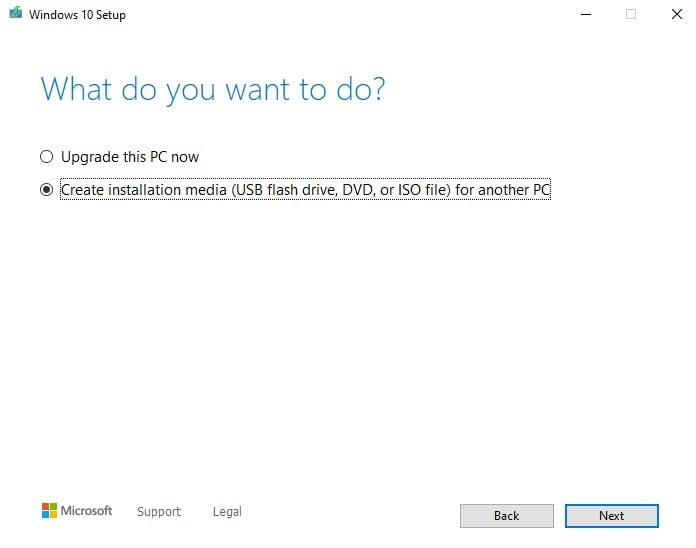
Step 2: Now, create your ISO file. Once downloaded, this ISO download tool makes it easy to turn any USB key into a bootable Windows 10 installer and allows you to download the Windows 10 ISO file for future use. When the tool downloads, run it. A terms-of-use screen will pop up, and you’ll need to then click Accept. You must then confirm whether you want to upgrade your current PC or create installation media for another PC.
Step 3: Select Create installation media (USB flash drive, DVD, or ISO file) for another PC and then click Next. Select the language, architecture, and edition of Windows you prefer. It’s usually best to check the box for Use the recommended options for this PC. Click *Next *when you’re ready.
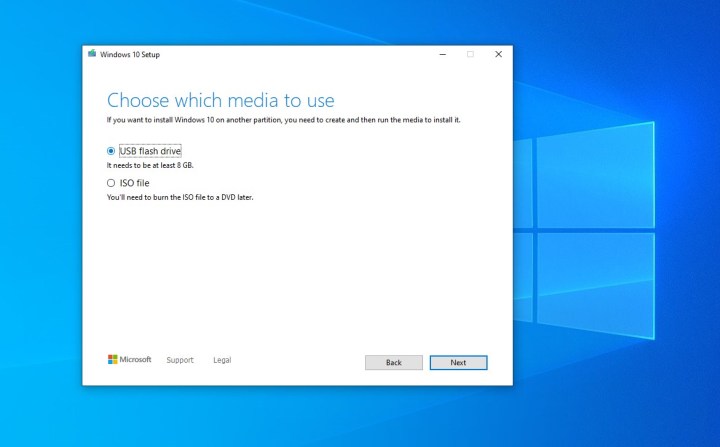
Step 4: On the next screen, if you’re looking to install Windows on your PC, select the ISO file option. Doing so will save a file that you can click later to upgrade your PC to Windows 10. For most people, the ISO file is the safest method. After selecting ISO File, click Next and select where to save the ISO file. Once the download is complete, you will have the ISO file on your computer’s hard drive.
Installing or updating to Windows 10 with the ISO file
If you’re running Windows 8 or newer, you can upgrade your PC or laptop to Windows 10 by mounting the ISO file you just downloaded — just double-click it. Windows will display the ISO as though it is a DVD drive.
Step 1: From here, you can install Windows 10. Just open Setup.exe, and the installer will open. Then choose to install Windows 10 in place, leaving your files and programs. All necessary data will transfer from the ISO to your computer, which will eventually restart to complete the installation.
Step 2: If you’re running Windows 7 or earlier, you can’t mount ISOs — instead, you can download Virtual Clone Drive and use that to install ISO files. Once you’ve got the drive mounted, the Windows 10 installer will open. Note that you also can try the Windows 10 Upgrade Assistant to upgrade from older versions of Windows 10. We have a guide for that.
Create a bootable USB drive for install on another PC
We covered how you can update an existing PC to Windows 10, but what if you want to update another PC using an ISO file? Well, you can use the Windows 10 Media Creation tool to do so.
Step 1: Head to the Windows 10 download page. Under the header that says Create Windows 10 installation media, select the Download tool now button.
Step 2: A dialogue box will ask you if you want to save a program called «MediaCreationTool21H2.exe.» Click Save file. This will download the file to your computer.
Step 3: When the tool downloads, run it. A terms-of-use screen will pop up, and you’ll need to then click Accept.
Step 4: Select Create installation media (USB flash drive, DVD, or ISO file) for another PC and then click Next. From here, choose the Use the recommended options for this PC. You can also customize it and choose a different language or architecture to match the PC you plan to install Windows 10 on.
Step 5: Choose the USB flash drive option and click Next. Pick your USB drive from the list and click Next. The installer will download Windows 10 and write it to your USB drive. You’ll see a message that Your USB flash drive is ready — select Finish.
Step 6: When complete, close the Windows 10 Setup and turn off your PC. If installing on a different system, plug the USB drive in that system. Boot it up and hold down the F12 or Delete key on your keyboard. You’ll need to head to UEFI or BIOS to boot from your USB installer that you created. If you’re unsure how to do this, consult your PC maker for help. Once booted into the USB drive, follow the steps on your screen, and Windows 10 will install.

Burn the Windows 10 ISO to a DVD
If your computer has a DVD burner and you’ve got a writable DVD on hand, you can burn the Windows 10 ISO to a DVD and install Windows 10 by booting from it.
Step 1: Right-click the previously downloaded Windows ISO file, and navigate to Properties (under the General), then select Change > Windows Explorer >* Apply*.
Step 2: Right-click on the Windows ISO file again and click Burn disc image. The Windows Disc Image Burner will open, asking you which drive you’d like to use.
Step 3: When ready, click Burn to start the process. When it’s complete, you’ll have a bootable DVD that you can use to install Microsoft Windows. You can use other software to burn your ISO, but the built-in software is simple enough to use.
Step 4: Once the burn to a CD is finished, you’ll have to boot your PC (or another PC) from the CD. To do so, hold down the F12 or Delete key on your keyboard. You’ll have to boot and select the CD as the temporary boot device. You might need to head to UEFI or BIOS to boot. If you’re unsure how to do this, consult your PC maker for help.
Step 5: Once booted into the Windows 10 installer, follow the steps on your screen.
Note that the Windows Media Creation tool only works on computers running Windows 7, 8, or 10. If you’re not running one of those operating systems, you can still download the Windows 10 ISO from Microsoft. Just head to the Windows 10 download page on Microsoft’s website, and it will detect that you’re not running a compatible OS.
From this page, you can pick which Windows 10 version to download — either 32-bit or 64-bit ISO — in your language of choice. You can then copy the ISO file to a USB stick and bring it over to a Windows laptop or desktop to proceed with the Windows installation.
If you need to upgrade to Windows 11 (or are planning to soon), don’t forget to check out our guide on how to install Windows 11.
FAQs about ISO files
Can you download the Windows 10 ISO for free?
Yes. Microsoft offers ISO files for free on its website. You can legally download these for free, but you’ll still need to buy a Windows 10 license once you create installation media to activate the operating system.
What’s the fastest way to download the Windows 10 ISO?
You can grab the Windows 10 ISO file from Microsoft’s Windows 10 Media Creation tool.
Is the Windows 10 ISO the latest version of Windows 10?
The latest version of Windows 10 is the Windows 10 November 2021 Update. It’s code-named Windows 10 21H2. Any ISO files you download from Microsoft will always be the latest version of Windows.
![]()
Today’s tech news, curated and condensed for your inbox
Check your inbox!
Please provide a valid email address to continue.
This email address is currently on file. If you are not receiving newsletters, please check your spam folder.
Sorry, an error occurred during subscription. Please try again later.
Editors’ Recommendations
-
Best Gaming PC Deals: Save on RTX 3070, 3080, 3090 PCs
-
Best Chromebook deals: Get a new laptop from $114
-
How to sync your Outlook calendar with an iPhone
-
How to download YouTube videos
-
If you think PCs are dying, you haven’t been paying attention
-
MiniTool
-
MiniTool News Center
- [Illustrated Guide] How to Install Windows 10 21H2 Using ISO?
By Stella | Follow |
Last Updated November 17, 2022
![]()
Do you want to install Windows 10 21H2 using the ISO file? If yes, do you know how to do this? In this MiniTool post, we will show you a full guide on how to install 10 21H2 using ISO. You can also use this guide to upgrade to Windows 10 21H2 or install other Windows versions.
Tip: You might delete some important files by mistake when using your PC. If you want to rescue these deleted files, you can try MiniTool Power Data Recovery, a free file recovery tool.
Free Download
You Can Install Windows 21H2 Using ISO
There are many ways to install Windows 10 21H2 on your computer. You can go to Settings > Update & security > Windows Update to update to this latest version of Windows 10. You can also download the Windows 10 Media Creation Tool and use it to perform a Windows 10 in-place upgrade. Additionally, if you have a Windows 10 21H2 ISO file at hand, you can install Windows 10 21H2 using ISO. Of course, you can use the same steps to upgrade to Windows 10 21H2 with ISO.
How to Install Windows 10 21H2 Using the ISO File on Your Computer?
In this part, we will show you a graphic guide on how to install Windows 10 21H2 using the ISO file. You can also follow this guide to upgrade your system to Windows 10 21H2. Of course, this instruction applies to all versions of Windows.
Step 1: Download a Windows 10 21H2 ISO File
If you want to install Windows 10 21H2 from the ISO file, the first thing you need to do is to get a Windows 10 21H2 ISO file. Where to find and download such an ISO file? Here are two reliable ways.
1. Use Windows 10 21H2 Media Creation Tool to create a Windows 10 21H2 ISO file.
2. Join the Windows Insider Program and go to the Windows Insider Preview Downloads page to download a Windows 10 21H2 Insider preview ISO file.

Now, Windows 10 21H2 ISO file is prepared.
Step 2: Install Windows 10 21H2 Using the ISO File
1. Double-click the downloaded Windows 10 21H2 ISO file to mount it. You can right-click the ISO file and select mount to mount it.
2. Select the setup.exe file to open it.

3. The tool will start the installation-preparing process. Then, you will enter the following Windows 10 Setup interface. By default, Windows 10 setup will get updates, drivers, and optional features. If you don’t want to do this, you can click the Change how Windows Setup downloads updates link to select Not right now.


4. The next page is the Applicable notices and license terms. Click Accept to continue.

5. Windows 10 setup begins checking for updates. When the process ends, click Next to continue.
6. Now, the tool is ready to install Windows 10 21H2. By default, it is set to keep personal files and apps. If you keep personal files only or remove everything, you can click the Change what to keep link and select the option you want to use.

If you choose the keep nothing, you should back up your Windows data in advance to keep them safe.

7. Click Next.
8. The Windows 10 installing process starts. During the process, your computer might restart several times. The whole process will last for a while. You should wait patiently.

9. If you choose to get the updates, you will see the following screen after Windows 10 21H2 installation.

10. Before entering the desktop, you still need to choose privacy settings for your device. Then, click Accept. After that, you can see the desktop.

You see it is simple to install Windows 10 21H2 using ISO. You just need to follow the on-screen wizards and select the installation options you want to use. Try this way if you want to install Windows 10 using ISO. Should you have other issues or suggestions, you can let us know in the comments.
About The Author

Position: Columnist
Stella has been working in MiniTool Software as an English Editor for more than 4 years. Her articles mainly cover the fields of data recovery including storage media data recovery and phone data recovery, YouTube videos download, partition management, and video conversions.
Installing Windows OS is not a complicated task. You can easily install Windows 10 from ISO image file using a DVD or USB drive. The Windows upgrade option is also an excellent choice to install Windows 10. But you can not directly install Windows from ISO file on a computer. Here we just explain the method you must know to install Windows 10 from an ISO file.
You must know that you can’t install Windows 10 from ISO image file directly. It’s not impossible, but you can do it with Windows deployment services. The Windows Deployment Services (WDS) enables you to deploy Windows operating systems over the network, which means that you do not have to install each operating system directly from a CD, DVD or USB.
Benefits of Windows Deployment Services
- Allows network-based installation of Windows operating systems, reducing the complexity and cost compared to manual installations.
- Supports deploying images for mixed environments including Windows 7 and Windows Server 2008 R2 through Windows 10 and Windows Server 2016.
- Uses standard Windows Setup technologies including Windows Preinstallation Environment (Windows PE), .wim files, and image-based setup.
- Transmits data and images by using multicast functionality.
- Allows you to create images of a reference computer using the Image Capture Wizard, which is an alternative to the ImageX tool.
- Allows you to add driver packages to the server and configure them to be deployed to client computers along with the install image.
The below articles are about Windows deployment services, which explain the WDS usage on Windows servers. With these step by step articles, you can learn the best way to deploy Windows 10 images in the network environment.
- Install Windows deployment services on Windows Server.
- Configuring Windows Deployment Services.
- Install and Configure WDS on Windows Server 2016.
- Deploying Windows 10 with Windows deployment services.
- How to Capture Windows 10 Reference Image using WDS?
On the final note, installing or deploying Windows operating systems with WDS is a perfect option for the network environment. For installing Windows on a single machine, you must use a DVD or a Windows Bootable USB. The following article helps you make a Windows 10 bootable USB with Diskaprt utility and Windows PowerShell.
- How to Create a Bootable USB Using Diskpart Utility?
Tools for Managing Windows Deployment Services
The following are tools that you can use to manage your server:
- Windows Deployment Services MMC snap-in – Provides an easy way to manage images, computers, and common server settings. You can perform almost all tasks from the MMC snap-in (for example, you cannot prestage client computers). Note that the snap-in is not available when you install only the Transport Server role service.
- WDSUTIL command-line tool – enables you to manage the full functionality of the server. WDSUTIL also enables you to script common tasks.
- Windows PowerShell cmdlets for WDS – enables you to manage and monitor the WDS server using Windows PowerShell scripts.
How to Install Windows 10 ISO from USB?
To install Windows 10 ISO from USB, create a Windows 10 bootable USB with Diskpart or PowerShell. When you have created a bootable USB drive, then boot your computer with USB and follow the Windows 10 installation process. It works the same as installing Windows 10 from Windows 10 DVD.
- Make Windows 10 Bootable USB with PowerShell.
And anymore question you have about installing Windows operating systems, feel free to ask as from comment box under the post.