Installation
phpMyAdmin does not apply any special security methods to the MySQL
database server. It is still the system administrator’s job to grant
permissions on the MySQL databases properly. phpMyAdmin’s :guilabel:`Users`
page can be used for this.
Linux distributions
phpMyAdmin is included in most Linux distributions. It is recommended to use
distribution packages when possible — they usually provide integration to your
distribution and you will automatically get security updates from your distribution.
Debian and Ubuntu
Most Debian and Ubuntu versions include a phpMyAdmin package, but be aware that
the configuration file is maintained in /etc/phpmyadmin and may differ in
some ways from the official phpMyAdmin documentation. Specifically, it does:
- Configuration of a web server (works for Apache and lighttpd).
- Creating of :ref:`linked-tables` using dbconfig-common.
- Securing setup script, see :ref:`debian-setup`.
More specific details about installing Debian or Ubuntu packages are available
in our wiki.
.. seealso::

    More information can be found in `README.Debian <https://salsa.debian.org/phpmyadmin-team/phpmyadmin/blob/debian/latest/debian/README.Debian>`_
    (it is installed as :file:`/usr/share/doc/phpmyadmin/README.Debian` with the package).
OpenSUSE
OpenSUSE already comes with phpMyAdmin package, just install packages from
the openSUSE Build Service.
Gentoo
Gentoo ships the phpMyAdmin package, both in a near-stock configuration as well
as in a webapp-config configuration. Use emerge dev-db/phpmyadmin to
install.
Mandriva
Mandriva ships the phpMyAdmin package in their contrib branch and can be
installed via the usual Control Center.
Fedora
Fedora ships the phpMyAdmin package, but be aware that the configuration file
is maintained in /etc/phpMyAdmin/ and may differ in some ways from the
official phpMyAdmin documentation.
Red Hat Enterprise Linux
Red Hat Enterprise Linux itself and thus derivatives like CentOS don’t
ship phpMyAdmin, but the Fedora-driven repository
Extra Packages for Enterprise Linux (EPEL)
is doing so, if it’s
enabled.
But be aware that the configuration file is maintained in
/etc/phpMyAdmin/ and may differ in some ways from the
official phpMyAdmin documentation.
Installing on Windows
The easiest way to get phpMyAdmin on Windows is using third party products
which include phpMyAdmin together with a database and web server such as
XAMPP.
You can find more of such options at Wikipedia.
Installing from Git
In order to install from Git, you’ll need a few supporting applications:
- Git to download the source, or you can download the most recent source directly from Github
- Composer
- Node.js (version 10 or higher)
- Yarn
You can clone current phpMyAdmin source from
https://github.com/phpmyadmin/phpmyadmin.git:
git clone https://github.com/phpmyadmin/phpmyadmin.git
Additionally you need to install dependencies using Composer:
If you do not intend to develop, you can skip the installation of developer tools
by invoking:
Finally, you’ll need to use Yarn to install some JavaScript dependencies:
yarn install --production
Installing using Composer
You can install phpMyAdmin using the Composer tool, since 4.7.0 the releases
are automatically mirrored to the default Packagist repository.
Note
The content of the Composer repository is automatically generated
separately from the releases, so the content doesn’t have to be
100% same as when you download the tarball. There should be no
functional differences though.
To install phpMyAdmin simply run:
composer create-project phpmyadmin/phpmyadmin
Alternatively you can use our own composer repository, which contains
the release tarballs and is available at
<https://www.phpmyadmin.net/packages.json>:
composer create-project phpmyadmin/phpmyadmin --repository-url=https://www.phpmyadmin.net/packages.json --no-dev
Installing using Docker
phpMyAdmin comes with a Docker official image, which you can easily deploy. You can
download it using:
The phpMyAdmin server will listen on port 80. It supports several ways of
configuring the link to the database server, either by Docker’s link feature
by linking your database container to db for phpMyAdmin (by specifying
--link your_db_host:db) or by environment variables (in this case it’s up
to you to set up networking in Docker to allow the phpMyAdmin container to access
the database container over the network).
Docker environment variables
You can configure several phpMyAdmin features using environment variables:
.. envvar:: PMA_ARBITRARY

    Allows you to enter a database server hostname on login form.

    .. seealso:: :config:option:`$cfg['AllowArbitraryServer']`
.. envvar:: PMA_HOST

    Hostname or IP address of the database server to use.

    .. seealso:: :config:option:`$cfg['Servers'][$i]['host']`
.. envvar:: PMA_HOSTS

    Comma-separated hostnames or IP addresses of the database servers to use.

    .. note:: Used only if :envvar:`PMA_HOST` is empty.
.. envvar:: PMA_VERBOSE

    Verbose name of the database server.

    .. seealso:: :config:option:`$cfg['Servers'][$i]['verbose']`
.. envvar:: PMA_VERBOSES

    Comma-separated verbose name of the database servers.

    .. note:: Used only if :envvar:`PMA_VERBOSE` is empty.
.. envvar:: PMA_USER

    User name to use for :ref:`auth_config`.
.. envvar:: PMA_PASSWORD

    Password to use for :ref:`auth_config`.
.. envvar:: PMA_PORT

    Port of the database server to use.
.. envvar:: PMA_PORTS

    Comma-separated ports of the database server to use.

    .. note:: Used only if :envvar:`PMA_PORT` is empty.
.. envvar:: PMA_ABSOLUTE_URI

    The fully-qualified path (``https://pma.example.net/``) where the reverse
    proxy makes phpMyAdmin available.

    .. seealso:: :config:option:`$cfg['PmaAbsoluteUri']`
.. envvar:: PMA_QUERYHISTORYDB

    When set to `true`, enables storing SQL history to :config:option:`$cfg['Servers'][$i]['pmadb']`.
    When `false`, history is stored in the browser and is cleared when logging out.

    .. seealso:: :config:option:`$cfg['Servers'][$i]['history']`
    .. seealso:: :config:option:`$cfg['QueryHistoryDB']`
.. envvar:: PMA_QUERYHISTORYMAX

    When set to an integer, controls the number of history items.

    .. seealso:: :config:option:`$cfg['QueryHistoryMax']`
.. envvar:: PMA_CONTROLHOST

    When set, this points to an alternate database host used for storing the ":ref:`linked-tables`" database.

    .. seealso:: :config:option:`$cfg['Servers'][$i]['controlhost']`
.. envvar:: PMA_CONTROLUSER

    Defines the username for phpMyAdmin to use for the ":ref:`linked-tables`" database.

    .. seealso:: :config:option:`$cfg['Servers'][$i]['controluser']`
.. envvar:: PMA_CONTROLPASS

    Defines the password for phpMyAdmin to use for the ":ref:`linked-tables`" database.

    .. seealso:: :config:option:`$cfg['Servers'][$i]['controlpass']`
.. envvar:: PMA_CONTROLPORT

    When set, will override the default port (`3306`) for connecting to the control host.

    .. seealso:: :config:option:`$cfg['Servers'][$i]['controlport']`
.. envvar:: PMA_PMADB

    When set, define the name of the database to be used for the ":ref:`linked-tables`" database.
    When not set, the advanced features are not enabled by default: they can still potentially be enabled by the user when logging in with the :ref:`zeroconf` feature.

    .. note:: Suggested values: `phpmyadmin` or `pmadb`

    .. seealso:: :config:option:`$cfg['Servers'][$i]['pmadb']`
.. envvar:: HIDE_PHP_VERSION

    If defined, this option will hide the PHP version (`expose_php = Off`).
    Set to any value (such as `HIDE_PHP_VERSION=true`).
.. envvar:: UPLOAD_LIMIT

    If set, this option will override the default value for apache and php-fpm (this will change ``upload_max_filesize`` and ``post_max_size`` values).

    .. note:: Format as `[0-9+](K,M,G)` default value is `2048K`
.. envvar:: MEMORY_LIMIT

    If set, this option will override the phpMyAdmin memory limit :config:option:`$cfg['MemoryLimit']` and PHP's `memory_limit`.

    .. note:: Format as `[0-9+](K,M,G)` where `K` is for Kilobytes, `M` for Megabytes, `G` for Gigabytes and `1K` = 1024 bytes. Default value is `512M`.
.. envvar:: MAX_EXECUTION_TIME

    If set, this option will override the maximum execution time in seconds for phpMyAdmin :config:option:`$cfg['ExecTimeLimit']` and PHP's `max_execution_time`.

    .. note:: Format as `[0-9+]`. Default value is `600`.
.. envvar:: PMA_CONFIG_BASE64

    If set, this option will override the default `config.inc.php` with the base64 decoded contents of the variable.
.. envvar:: PMA_USER_CONFIG_BASE64

    If set, this option will override the default `config.user.inc.php` with the base64 decoded contents of the variable.
.. envvar:: PMA_UPLOADDIR

    If set, this option will set the path where files can be saved to be available to import (:config:option:`$cfg['UploadDir']`)
.. envvar:: PMA_SAVEDIR

    If set, this option will set the path where exported files can be saved (:config:option:`$cfg['SaveDir']`)
.. envvar:: APACHE_PORT

    If set, this option will change the default Apache port from `80` in case you want it to run on a different port like an unprivileged port. Set to any port value (such as `APACHE_PORT=8090`).
By default, :ref:`cookie` is used, but if :envvar:`PMA_USER` and
:envvar:`PMA_PASSWORD` are set, it is switched to :ref:`auth_config`.
Note
The credentials you need to log in are stored in the MySQL server, in case
of Docker image, there are various ways to set it (for example
:samp:`MYSQL_ROOT_PASSWORD` when starting the MySQL container). Please check
documentation for MariaDB container
or MySQL container.
Customizing configuration
Additionally configuration can be tweaked by :file:`/etc/phpmyadmin/config.user.inc.php`. If
this file exists, it will be loaded after configuration is generated from above
environment variables, so you can override any configuration variable. This
configuration can be added as a volume when invoking docker using
-v /some/local/directory/config.user.inc.php:/etc/phpmyadmin/config.user.inc.php parameters.
Note that the supplied configuration file is applied after :ref:`docker-vars`,
but you can override any of the values.
For example to change the default behavior of CSV export you can use the following
configuration file:
<?php
$cfg['Export']['csv_columns'] = true;
You can also use it to define server configuration instead of using the
environment variables listed in :ref:`docker-vars`:
<?php
/* Override Servers array */
$cfg['Servers'] = [
    1 => [
        'auth_type' => 'cookie',
        'host' => 'mydb1',
        'port' => 3306,
        'verbose' => 'Verbose name 1',
    ],
    2 => [
        'auth_type' => 'cookie',
        'host' => 'mydb2',
        'port' => 3306,
        'verbose' => 'Verbose name 2',
    ],
];
.. seealso::

    See :ref:`config` for detailed description of configuration options.
Docker Volumes
You can use the following volumes to customize image behavior:
:file:`/etc/phpmyadmin/config.user.inc.php`
Can be used for additional settings, see the previous chapter for more details.
:file:`/sessions/`
Directory where PHP sessions are stored. You might want to share this
for example when using :ref:`auth_signon`.
:file:`/www/themes/`
Directory where phpMyAdmin looks for themes. By default only those shipped
with phpMyAdmin are included, but you can include additional phpMyAdmin
themes (see :ref:`themes`) by using Docker volumes.
Docker Examples
To connect phpMyAdmin to a given server use:
docker run --name phpmyadmin -d -e PMA_HOST=dbhost -p 8080:80 phpmyadmin:latest
To connect phpMyAdmin to more servers use:
docker run --name phpmyadmin -d -e PMA_HOSTS=dbhost1,dbhost2,dbhost3 -p 8080:80 phpmyadmin:latest
To use arbitrary server option:
docker run --name phpmyadmin -d --link mysql_db_server:db -p 8080:80 -e PMA_ARBITRARY=1 phpmyadmin:latest
You can also link the database container using Docker:
docker run --name phpmyadmin -d --link mysql_db_server:db -p 8080:80 phpmyadmin:latest
Running with additional configuration:
docker run --name phpmyadmin -d --link mysql_db_server:db -p 8080:80 -v /some/local/directory/config.user.inc.php:/etc/phpmyadmin/config.user.inc.php phpmyadmin:latest
Running with additional themes:
docker run --name phpmyadmin -d --link mysql_db_server:db -p 8080:80 -v /some/local/directory/custom/phpmyadmin/themeName/:/var/www/html/themes/themeName/ phpmyadmin:latest
Using docker-compose
Alternatively, you can also use docker-compose with the docker-compose.yml from
<https://github.com/phpmyadmin/docker>. This will run phpMyAdmin with an
arbitrary server — allowing you to specify MySQL/MariaDB server on the login page.
Customizing configuration file using docker-compose
You can use an external file to customize phpMyAdmin configuration and pass it
using the volumes directive:
phpmyadmin:
    image: phpmyadmin:latest
    container_name: phpmyadmin
    environment:
     - PMA_ARBITRARY=1
    restart: always
    ports:
     - 8080:80
    volumes:
     - /sessions
     - ~/docker/phpmyadmin/config.user.inc.php:/etc/phpmyadmin/config.user.inc.php
     - /custom/phpmyadmin/theme/:/www/themes/theme/
.. seealso:: :ref:`docker-custom`
Running behind haproxy in a subdirectory
When you want to expose phpMyAdmin running in a Docker container in a
subdirectory, you need to rewrite the request path in the server proxying the
requests.
For example, using haproxy it can be done as:
frontend http
    bind *:80
    option forwardfor
    option http-server-close

    ### NETWORK restriction
    acl LOCALNET  src 10.0.0.0/8 192.168.0.0/16 172.16.0.0/12

    # /phpmyadmin
    acl phpmyadmin  path_dir /phpmyadmin
    use_backend phpmyadmin if phpmyadmin LOCALNET

backend phpmyadmin
    mode http

    reqirep  ^(GET|POST|HEAD) /phpmyadmin/(.*)     1 /2

    # phpMyAdmin container IP
    server localhost     172.30.21.21:80
When using traefik, something like following should work:
defaultEntryPoints = ["http"]
[entryPoints]
  [entryPoints.http]
  address = ":80"
    [entryPoints.http.redirect]
      regex = "(http:\/\/[^\/]+\/([^\?\.]+)[^\/])$"
      replacement = "$1/"

[backends]
  [backends.myadmin]
    [backends.myadmin.servers.myadmin]
    url="http://internal.address.to.pma"

[frontends]
   [frontends.myadmin]
   backend = "myadmin"
   passHostHeader = true
     [frontends.myadmin.routes.default]
     rule="PathPrefixStrip:/phpmyadmin/;AddPrefix:/"
You then should specify :envvar:`PMA_ABSOLUTE_URI` in the docker-compose
configuration:
version: '2'

services:
  phpmyadmin:
    restart: always
    image: phpmyadmin:latest
    container_name: phpmyadmin
    hostname: phpmyadmin
    domainname: example.com
    ports:
      - 8000:80
    environment:
      - PMA_HOSTS=172.26.36.7,172.26.36.8,172.26.36.9,172.26.36.10
      - PMA_VERBOSES=production-db1,production-db2,dev-db1,dev-db2
      - PMA_USER=root
      - PMA_PASSWORD=
      - PMA_ABSOLUTE_URI=http://example.com/phpmyadmin/
IBM Cloud
One of our users has created a helpful guide for installing phpMyAdmin on the
IBM Cloud platform.
Quick Install
- Choose an appropriate distribution kit from the phpmyadmin.net
Downloads page. Some kits contain only the English messages, others
contain all languages. We’ll assume you chose a kit whose name
looks likephpMyAdmin-x.x.x -all-languages.tar.gz. - Ensure you have downloaded a genuine archive, see :ref:`verify`.
- Untar or unzip the distribution (be sure to unzip the subdirectories):
tar -xzvf phpMyAdmin_x.x.x-all-languages.tar.gzin your
webserver’s document root. If you don’t have direct access to your
document root, put the files in a directory on your local machine,
and, after step 4, transfer the directory on your web server using,
for example, FTP. - Ensure that all the scripts have the appropriate owner (if PHP is
running in safe mode, having some scripts with an owner different from
the owner of other scripts will be a problem). See :ref:`faq4_2` and
:ref:`faq1_26` for suggestions. - Now you must configure your installation. There are two methods that
can be used. Traditionally, users have hand-edited a copy of
:file:`config.inc.php`, but now a wizard-style setup script is provided
for those who prefer a graphical installation. Creating a
:file:`config.inc.php` is still a quick way to get started and needed for
some advanced features.
Manually creating the file
To manually create the file, simply use your text editor to create the
file :file:`config.inc.php` (you can copy :file:`config.sample.inc.php` to get
a minimal configuration file) in the main (top-level) phpMyAdmin
directory (the one that contains :file:`index.php`). phpMyAdmin first
loads the default configuration values and then overrides those values
with anything found in :file:`config.inc.php`. If the default value is
okay for a particular setting, there is no need to include it in
:file:`config.inc.php`. You’ll probably need only a few directives to get going; a
simple configuration may look like this:
<?php
// The string is a hexadecimal representation of a 32-bytes long string of random bytes.
$cfg['blowfish_secret'] = sodium_hex2bin('f16ce59f45714194371b48fe362072dc3b019da7861558cd4ad29e4d6fb13851');

$i=0;
$i++;
$cfg['Servers'][$i]['auth_type']     = 'cookie';
// if you insist on "root" having no password:
// $cfg['Servers'][$i]['AllowNoPassword'] = true;
Or, if you prefer to not be prompted every time you log in:
<?php

$i=0;
$i++;
$cfg['Servers'][$i]['user']          = 'root';
$cfg['Servers'][$i]['password']      = 'changeme'; // use here your password
$cfg['Servers'][$i]['auth_type']     = 'config';
Warning
Storing passwords in the configuration is insecure as anybody can then
manipulate your database.
For a full explanation of possible configuration values, see the
:ref:`config` of this document.
.. index:: Setup script
Using the Setup script
Instead of manually editing :file:`config.inc.php`, you can use phpMyAdmin’s
setup feature. The file can be generated using the setup and you can download it
for upload to the server.
Next, open your browser and visit the location where you installed phpMyAdmin,
with the /setup suffix. The changes are not saved to the server, you need to
use the :guilabel:`Download` button to save them to your computer and then upload
to the server.
Now the file is ready to be used. You can choose to review or edit the
file with your favorite editor, if you prefer to set some advanced
options that the setup script does not provide.
- If you are using the
auth_type«config», it is suggested that you
protect the phpMyAdmin installation directory because using config
does not require a user to enter a password to access the phpMyAdmin
installation. Use of an alternate authentication method is
recommended, for example with HTTP–AUTH in a :term:`.htaccess` file or switch to using
auth_typecookie or http. See the :ref:`faqmultiuser`
for additional information, especially :ref:`faq4_4`. - Open the main phpMyAdmin directory in your browser.
phpMyAdmin should now display a welcome screen and your databases, or
a login dialog if using :term:`HTTP` or
cookie authentication mode.
Setup script on Debian, Ubuntu and derivatives
Debian and Ubuntu have changed the way in which the setup script is enabled and disabled, in a way
that single command has to be executed for either of these.
To allow editing configuration invoke:
To block editing configuration invoke:
Setup script on openSUSE
Some openSUSE releases do not include setup script in the package. In case you
want to generate configuration on these you can either download original
package from <https://www.phpmyadmin.net/> or use setup script on our demo
server: <https://demo.phpmyadmin.net/master/setup/>.
Verifying phpMyAdmin releases
Since July 2015 all phpMyAdmin releases are cryptographically signed by the
releasing developer, who through January 2016 was Marc Delisle. His key id is
0xFEFC65D181AF644A, his PGP fingerprint is:
436F F188 4B1A 0C3F DCBF 0D79 FEFC 65D1 81AF 644A
and you can get more identification information from <https://keybase.io/lem9>.
Beginning in January 2016, the release manager is Isaac Bennetch. His key id is
0xCE752F178259BD92, and his PGP fingerprint is:
3D06 A59E CE73 0EB7 1B51 1C17 CE75 2F17 8259 BD92
and you can get more identification information from <https://keybase.io/ibennetch>.
Some additional downloads (for example themes) might be signed by Michal Čihař. His key id is
0x9C27B31342B7511D, and his PGP fingerprint is:
63CB 1DF1 EF12 CF2A C0EE 5A32 9C27 B313 42B7 511D
and you can get more identification information from <https://keybase.io/nijel>.
You should verify that the signature matches the archive you have downloaded.
This way you can be sure that you are using the same code that was released.
You should also verify the date of the signature to make sure that you
downloaded the latest version.
Each archive is accompanied by .asc files which contain the PGP signature
for it. Once you have both of them in the same folder, you can verify the signature:
$ gpg --verify phpMyAdmin-4.5.4.1-all-languages.zip.asc
gpg: Signature made Fri 29 Jan 2016 08:59:37 AM EST using RSA key ID 8259BD92
gpg: Can't check signature: public key not found
As you can see gpg complains that it does not know the public key. At this
point, you should do one of the following steps:
- Download the keyring from our download server, then import it with:
$ gpg --import phpmyadmin.keyring
- Download and import the key from one of the key servers:
$ gpg --keyserver hkp://pgp.mit.edu --recv-keys 3D06A59ECE730EB71B511C17CE752F178259BD92
gpg: requesting key 8259BD92 from hkp server pgp.mit.edu
gpg: key 8259BD92: public key "Isaac Bennetch <bennetch@gmail.com>" imported
gpg: no ultimately trusted keys found
gpg: Total number processed: 1
gpg:               imported: 1  (RSA: 1)
This will improve the situation a bit — at this point, you can verify that the
signature from the given key is correct but you still can not trust the name used
in the key:
$ gpg --verify phpMyAdmin-4.5.4.1-all-languages.zip.asc
gpg: Signature made Fri 29 Jan 2016 08:59:37 AM EST using RSA key ID 8259BD92
gpg: Good signature from "Isaac Bennetch <bennetch@gmail.com>"
gpg:                 aka "Isaac Bennetch <isaac@bennetch.org>"
gpg: WARNING: This key is not certified with a trusted signature!
gpg:          There is no indication that the signature belongs to the owner.
Primary key fingerprint: 3D06 A59E CE73 0EB7 1B51  1C17 CE75 2F17 8259 BD92
The problem here is that anybody could issue the key with this name. You need to
ensure that the key is actually owned by the mentioned person. The GNU Privacy
Handbook covers this topic in the chapter Validating other keys on your public
keyring. The most reliable method is to meet the developer in person and
exchange key fingerprints, however, you can also rely on the web of trust. This way
you can trust the key transitively though signatures of others, who have met
the developer in person.
Once the key is trusted, the warning will not occur:
$ gpg --verify phpMyAdmin-4.5.4.1-all-languages.zip.asc
gpg: Signature made Fri 29 Jan 2016 08:59:37 AM EST using RSA key ID 8259BD92
gpg: Good signature from "Isaac Bennetch <bennetch@gmail.com>" [full]
Should the signature be invalid (the archive has been changed), you would get a
clear error regardless of the fact that the key is trusted or not:
$ gpg --verify phpMyAdmin-4.5.4.1-all-languages.zip.asc
gpg: Signature made Fri 29 Jan 2016 08:59:37 AM EST using RSA key ID 8259BD92
gpg: BAD signature from "Isaac Bennetch <bennetch@gmail.com>" [unknown]
.. index::
    single: Configuration storage
    single: phpMyAdmin configuration storage
    single: pmadb
phpMyAdmin configuration storage
.. versionchanged:: 3.4.0

   Prior to phpMyAdmin 3.4.0 this was called Linked Tables Infrastructure, but
   the name was changed due to the extended scope of the storage.
For a whole set of additional features (:ref:`bookmarks`, comments, :term:`SQL`-history,
tracking mechanism, :term:`PDF`-generation, :ref:`transformations`, :ref:`relations`
etc.) you need to create a set of special tables. Those tables can be located
in your own database, or in a central database for a multi-user installation
(this database would then be accessed by the controluser, so no other user
should have rights to it).
Zero configuration
In many cases, this database structure can be automatically created and
configured. This is called “Zero Configuration” mode and can be particularly
useful in shared hosting situations. “Zeroconf” mode is on by default, to
disable set :config:option:`$cfg[‘ZeroConf’]` to false.
The following three scenarios are covered by the Zero Configuration mode:
- When entering a database where the configuration storage tables are not
present, phpMyAdmin offers to create them from the Operations tab. - When entering a database where the tables do already exist, the software
automatically detects this and begins using them. This is the most common
situation; after the tables are initially created automatically they are
continually used without disturbing the user; this is also most useful on
shared hosting where the user is not able to edit :file:`config.inc.php` and
usually the user only has access to one database. - When having access to multiple databases, if the user first enters the
database containing the configuration storage tables then switches to
another database,
phpMyAdmin continues to use the tables from the first database; the user is
not prompted to create more tables in the new database.
Manual configuration
Please look at your ./sql/ directory, where you should find a
file called create_tables.sql. (If you are using a Windows server,
pay special attention to :ref:`faq1_23`).
If you already had this infrastructure and:
- upgraded to MySQL 4.1.2 or newer, please use
:file:`sql/upgrade_tables_mysql_4_1_2+.sql`. - upgraded to phpMyAdmin 4.3.0 or newer from 2.5.0 or newer (<= 4.2.x),
please use :file:`sql/upgrade_column_info_4_3_0+.sql`. - upgraded to phpMyAdmin 4.7.0 or newer from 4.3.0 or newer,
please use :file:`sql/upgrade_tables_4_7_0+.sql`.
and then create new tables by importing :file:`sql/create_tables.sql`.
You can use your phpMyAdmin to create the tables for you. Please be
aware that you may need special (administrator) privileges to create
the database and tables, and that the script may need some tuning,
depending on the database name.
After having imported the :file:`sql/create_tables.sql` file, you
should specify the table names in your :file:`config.inc.php` file. The
directives used for that can be found in the :ref:`config`.
You will also need to have a controluser
(:config:option:`$cfg[‘Servers’][$i][‘controluser’]` and
:config:option:`$cfg[‘Servers’][$i][‘controlpass’]` settings)
with the proper rights to those tables. For example you can create it
using following statement:
And for any MariaDB version:
CREATE USER 'pma'@'localhost' IDENTIFIED VIA mysql_native_password USING 'pmapass';
GRANT SELECT, INSERT, UPDATE, DELETE ON `<pma_db>`.* TO 'pma'@'localhost';
For MySQL 8.0 and newer:
CREATE USER 'pma'@'localhost' IDENTIFIED WITH caching_sha2_password BY 'pmapass';
GRANT SELECT, INSERT, UPDATE, DELETE ON <pma_db>.* TO 'pma'@'localhost';
For MySQL older than 8.0:
CREATE USER 'pma'@'localhost' IDENTIFIED WITH mysql_native_password AS 'pmapass';
GRANT SELECT, INSERT, UPDATE, DELETE ON <pma_db>.* TO 'pma'@'localhost';
Note that MySQL installations with PHP older than 7.4 and MySQL newer than 8.0 may require
using the mysql_native_password authentication as a workaround, see
:ref:`faq1_45` for details.
Upgrading from an older version
Warning
Never extract the new version over an existing installation of
phpMyAdmin, always first remove the old files keeping just the
configuration.
This way, you will not leave any old or outdated files in the directory,
which can have severe security implications or can cause various breakages.
Simply copy :file:`config.inc.php` from your previous installation into
the newly unpacked one. Configuration files from old versions may
require some tweaking as some options have been changed or removed.
For compatibility with PHP 5.3 and later, remove a
set_magic_quotes_runtime(0); statement that you might find near
the end of your configuration file.
The complete upgrade can be performed in a few simple steps:
- Download the latest phpMyAdmin version from <https://www.phpmyadmin.net/downloads/>.
- Rename existing phpMyAdmin folder (for example to
phpmyadmin-old). - Unpack freshly downloaded phpMyAdmin to the desired location (for example
phpmyadmin). - Copy :file:`config.inc.php« from old location (
phpmyadmin-old) to the new one (phpmyadmin). - Test that everything works properly.
- Remove backup of a previous version (
phpmyadmin-old).
If you have upgraded your MySQL server from a version previous to 4.1.2 to
version 5.x or newer and if you use the phpMyAdmin configuration storage, you
should run the :term:`SQL` script found in
:file:`sql/upgrade_tables_mysql_4_1_2+.sql`.
If you have upgraded your phpMyAdmin to 4.3.0 or newer from 2.5.0 or
newer (<= 4.2.x) and if you use the phpMyAdmin configuration storage, you
should run the :term:`SQL` script found in
:file:`sql/upgrade_column_info_4_3_0+.sql`.
Do not forget to clear the browser cache and to empty the old session by
logging out and logging in again.
.. index:: Authentication mode
Using authentication modes
:term:`HTTP` and cookie authentication modes are recommended in a multi-user
environment where you want to give users access to their own database and
don’t want them to play around with others. Nevertheless, be aware that MS
Internet Explorer seems to be really buggy about cookies, at least till version
6. Even in a single-user environment, you might prefer to use :term:`HTTP`
or cookie mode so that your user/password pair are not in clear in the
configuration file.
:term:`HTTP` and cookie authentication
modes are more secure: the MySQL login information does not need to be
set in the phpMyAdmin configuration file (except possibly for the
:config:option:`$cfg[‘Servers’][$i][‘controluser’]`).
However, keep in mind that the password travels in plain text unless
you are using the HTTPS protocol. In cookie mode, the password is
stored, encrypted with the AES algorithm, in a temporary cookie.
Then each of the true users should be granted a set of privileges
on a set of particular databases. Normally you shouldn’t give global
privileges to an ordinary user unless you understand the impact of those
privileges (for example, you are creating a superuser).
For example, to grant the user real_user with all privileges on
the database user_base:
GRANT ALL PRIVILEGES ON user_base.* TO 'real_user'@localhost IDENTIFIED BY 'real_password';
What the user may now do is controlled entirely by the MySQL user management
system. With HTTP or cookie authentication mode, you don’t need to fill the
user/password fields inside the :config:option:`$cfg[‘Servers’]`.
.. seealso::

    :ref:`faq1_32`,
    :ref:`faq1_35`,
    :ref:`faq4_1`,
    :ref:`faq4_2`,
    :ref:`faq4_3`
.. index:: pair: HTTP; Authentication mode
HTTP authentication mode
-
Uses :term:`HTTP` Basic authentication
method and allows you to log in as any valid MySQL user. -
Is supported with most PHP configurations. For :term:`IIS` (:term:`ISAPI`)
support using :term:`CGI` PHP see :ref:`faq1_32`, for using with Apache
:term:`CGI` see :ref:`faq1_35`. -
When PHP is running under Apache’s :term:`mod_proxy_fcgi` (e.g. with PHP-FPM),
Authorizationheaders are not passed to the underlying FCGI application,
such that your credentials will not reach the application. In this case, you can
add the following configuration directive:SetEnvIf Authorization "(.*)" HTTP_AUTHORIZATION=$1
-
See also :ref:`faq4_4` about not using the :term:`.htaccess` mechanism along with
‘:term:`HTTP`‘ authentication mode.
Note
There is no way to do proper logout in HTTP authentication, most browsers
will remember credentials until there is no different successful
authentication. Because of this, this method has a limitation that you can not
login with the same user after logout.
.. index:: pair: Cookie; Authentication mode
Cookie authentication mode
- Username and password are stored in cookies during the session and password
is deleted when it ends. - With this mode, the user can truly log out of phpMyAdmin and log
back in with the same username (this is not possible with :ref:`auth_http`). - If you want to allow users to enter any hostname to connect (rather than only
servers that are configured in :file:`config.inc.php`),
see the :config:option:`$cfg[‘AllowArbitraryServer’]` directive. - As mentioned in the :ref:`require` section, having the
opensslextension
will speed up access considerably, but is not required.
.. index:: pair: Signon; Authentication mode
Signon authentication mode
- This mode is a convenient way of using credentials from another
application to authenticate to phpMyAdmin to implement a single signon
solution. - The other application has to store login information into session
data (see :config:option:`$cfg[‘Servers’][$i][‘SignonSession’]` and
:config:option:`$cfg[‘Servers’][$i][‘SignonCookieParams’]`) or you
need to implement script to return the credentials (see
:config:option:`$cfg[‘Servers’][$i][‘SignonScript’]`). - When no credentials are available, the user is being redirected to
:config:option:`$cfg[‘Servers’][$i][‘SignonURL’]`, where you should handle
the login process.
The very basic example of saving credentials in a session is available as
:file:`examples/signon.php`:
.. literalinclude:: ../examples/signon.php
    :language: php
Alternatively, you can also use this way to integrate with OpenID as shown
in :file:`examples/openid.php`:
.. literalinclude:: ../examples/openid.php
    :language: php
If you intend to pass the credentials using some other means than, you have to
implement wrapper in PHP to get that data and set it to
:config:option:`$cfg[‘Servers’][$i][‘SignonScript’]`. There is a very minimal example
in :file:`examples/signon-script.php`:
.. literalinclude:: ../examples/signon-script.php
    :language: php
.. seealso::
    :config:option:`$cfg['Servers'][$i]['auth_type']`,
    :config:option:`$cfg['Servers'][$i]['SignonSession']`,
    :config:option:`$cfg['Servers'][$i]['SignonCookieParams']`,
    :config:option:`$cfg['Servers'][$i]['SignonScript']`,
    :config:option:`$cfg['Servers'][$i]['SignonURL']`,
    :ref:`example-signon`
.. index:: pair: Config; Authentication mode
Config authentication mode
- This mode is sometimes the less secure one because it requires you to fill the
:config:option:`$cfg[‘Servers’][$i][‘user’]` and
:config:option:`$cfg[‘Servers’][$i][‘password’]`
fields (and as a result, anyone who can read your :file:`config.inc.php`
can discover your username and password). - In the :ref:`faqmultiuser` section, there is an entry explaining how
to protect your configuration file. - For additional security in this mode, you may wish to consider the
Host authentication :config:option:`$cfg[‘Servers’][$i][‘AllowDeny’][‘order’]`
and :config:option:`$cfg[‘Servers’][$i][‘AllowDeny’][‘rules’]` configuration directives. - Unlike cookie and http, does not require a user to log in when first
loading the phpMyAdmin site. This is by design but could allow any
user to access your installation. Use of some restriction method is
suggested, perhaps a :term:`.htaccess` file with the HTTP-AUTH directive or disallowing
incoming HTTP requests at one’s router or firewall will suffice (both
of which are beyond the scope of this manual but easily searchable
with Google).
Securing your phpMyAdmin installation
The phpMyAdmin team tries hard to make the application secure, however there
are always ways to make your installation more secure:
-
Follow our Security announcements and upgrade
phpMyAdmin whenever new vulnerability is published. -
Serve phpMyAdmin on HTTPS only. Preferably, you should use HSTS as well, so that
you’re protected from protocol downgrade attacks. -
Ensure your PHP setup follows recommendations for production sites, for example
display_errors
should be disabled. -
Remove the
testdirectory from phpMyAdmin, unless you are developing and need a test suite. -
Remove the
setupdirectory from phpMyAdmin, you will probably not
use it after the initial setup. -
Properly choose an authentication method — :ref:`cookie`
is probably the best choice for shared hosting. -
Deny access to auxiliary files in :file:`./libraries/` or
:file:`./templates/` subfolders in your webserver configuration.
Such configuration prevents from possible path exposure and cross side
scripting vulnerabilities that might happen to be found in that code. For the
Apache webserver, this is often accomplished with a :term:`.htaccess` file in
those directories. -
Deny access to temporary files, see :config:option:`$cfg[‘TempDir’]` (if that
is placed inside your web root, see also :ref:`web-dirs`. -
It is generally a good idea to protect a public phpMyAdmin installation
against access by robots as they usually can not do anything good there. You
can do this usingrobots.txtfile in the root of your webserver or limit
access by web server configuration, see :ref:`faq1_42`. -
In case you don’t want all MySQL users to be able to access
phpMyAdmin, you can use :config:option:`$cfg[‘Servers’][$i][‘AllowDeny’][‘rules’]` to limit them
or :config:option:`$cfg[‘Servers’][$i][‘AllowRoot’]` to deny root user access. -
Enable :ref:`2fa` for your account.
-
Consider hiding phpMyAdmin behind an authentication proxy, so that
users need to authenticate prior to providing MySQL credentials
to phpMyAdmin. You can achieve this by configuring your web server to request
HTTP authentication. For example in Apache this can be done with:AuthType Basic AuthName "Restricted Access" AuthUserFile /usr/share/phpmyadmin/passwd Require valid-user
Once you have changed the configuration, you need to create a list of users which
can authenticate. This can be done using the :program:`htpasswd` utility:htpasswd -c /usr/share/phpmyadmin/passwd username
-
If you are afraid of automated attacks, enabling Captcha by
:config:option:`$cfg[‘CaptchaLoginPublicKey’]` and
:config:option:`$cfg[‘CaptchaLoginPrivateKey’]` might be an option. -
Failed login attempts are logged to syslog (if available, see
:config:option:`$cfg[‘AuthLog’]`). This can allow using a tool such as
fail2ban to block brute-force attempts. Note that the log file used by syslog
is not the same as the Apache error or access log files. -
In case you’re running phpMyAdmin together with other PHP applications, it is
generally advised to use separate session storage for phpMyAdmin to avoid
possible session-based attacks against it. You can use
:config:option:`$cfg[‘SessionSavePath’]` to achieve this.
Using SSL for connection to database server
It is recommended to use SSL when connecting to remote database server. There
are several configuration options involved in the SSL setup:
- :config:option:`$cfg[‘Servers’][$i][‘ssl’]`
- Defines whether to use SSL at all. If you enable only this, the connection
will be encrypted, but there is not authentication of the connection — you
can not verify that you are talking to the right server. - :config:option:`$cfg[‘Servers’][$i][‘ssl_key’]` and :config:option:`$cfg[‘Servers’][$i][‘ssl_cert’]`
- This is used for authentication of client to the server.
- :config:option:`$cfg[‘Servers’][$i][‘ssl_ca’]` and :config:option:`$cfg[‘Servers’][$i][‘ssl_ca_path’]`
- The certificate authorities you trust for server certificates.
This is used to ensure that you are talking to a trusted server. - :config:option:`$cfg[‘Servers’][$i][‘ssl_verify’]`
- This configuration disables server certificate verification. Use with
caution.
When the database server is using a local connection or private network and SSL can not be configured
you can use :config:option:`$cfg[‘MysqlSslWarningSafeHosts’]` to explicitly list the hostnames that are considered secure.
.. seealso::

    :ref:`example-google-ssl`,
    :ref:`example-aws-ssl`,
    :config:option:`$cfg['Servers'][$i]['ssl']`,
    :config:option:`$cfg['Servers'][$i]['ssl_key']`,
    :config:option:`$cfg['Servers'][$i]['ssl_cert']`,
    :config:option:`$cfg['Servers'][$i]['ssl_ca']`,
    :config:option:`$cfg['Servers'][$i]['ssl_ca_path']`,
    :config:option:`$cfg['Servers'][$i]['ssl_ciphers']`,
    :config:option:`$cfg['Servers'][$i]['ssl_verify']`
Known issues
Users with column-specific privileges are unable to «Browse»
If a user has only column-specific privileges on some (but not all) columns in a table, «Browse»
will fail with an error message.
As a workaround, a bookmarked query with the same name as the table can be created, this will
run when using the «Browse» link instead. Issue 11922.
Trouble logging back in after logging out using ‘http’ authentication
When using the ‘http’ auth_type, it can be impossible to log back in (when the logout comes
manually or after a period of inactivity). Issue 11898.
![]()
Download Article
![]()
Download Article
This wikiHow teaches you how to install the phpMyAdmin program on your Windows computer. You can use phpMyAdmin to control a MySQL server from within a web browser, but to do so you must first have a MySQL server set up on your computer. You can also use a free program called WAMP to automatically install phpMyAdmin on your server.
-

1
Make sure that you’ve installed Apache, PHP, and MySQL. Apache, PHP, and MySQL must all be installed and configured on your computer before you can install phpMyAdmin in this way.
-
2
Advertisement
-
3
Click Download. It’s a green button in the upper-right side of the page. The phpMyAdmin ZIP folder will begin downloading onto your computer.
- You’ll also see the version number next to Download (e.g., for the November 2017 version of phpMyAdmin, you’d click Download 4.7.5).
-
4
Click Close when prompted. This will return you to the phpMyAdmin webpage.
-
5
Open the phpMyAdmin folder. Double-click the downloaded phpMyAdmin ZIP folder to do so.
-
6
Copy the phpMyAdmin folder’s contents. Click the regular phpMyAdmin folder in the ZIP folder’s window, then press Ctrl+C.
-
7
Go to your Apache host folder. This is typically a folder named «htdocs» inside of the «Apache» folder, which should be located in the «C:» folder on your hard drive.
- The Apache host folder usually has a text document named «index.php» or something similar.
- The fastest way to get to this folder is by clicking This PC on the left side of the window, double-clicking the Apache folder, and double-clicking the htdocs (or similar) folder.
-
8
Paste the copied folder into the host folder. Press Ctrl+V to paste the copied phpMyAdmin folder into the Apache host folder.
-
9
Change the copied folder’s name to phpmyadmin. Click the phpMyAdmin folder, click Home, click Rename in the toolbar, type phpmyadmin into the folder’s name field, and press ↵ Enter.
-
10
Open the PHP folder. This folder is located in the «C:» folder along with the «Apache» folder. Once you find the PHP folder, double-click it to open it.
-
11
Find the «php.ini-production» file and rename it. You’ll change this file’s name to php.ini.[1]
-
12
Double-click the «php.ini» file. It will open in your default text editor (e.g., Notepad), though you may first have to select Notepad from a list and click OK.
-
13
Find the «extension=php_mbstring.dll» line of text and remove the semicolon. You’ll see the semicolon to the left of this line of text.
- You can press Ctrl+F to bring up a «Find» window where you can enter this line of text to go to it.
-
14
Find the «extension=php_mysqli.dll» line of text and remove the semicolon. Once you’ve done this, your phpMyAdmin server is good to go.
-
15
Save your changes and exit Notepad. Press Ctrl+S to save, then click the X in the top-right corner of the Notepad window to exit Notepad.
-
16
Run your Apache server. Open Command Prompt in Administrator mode by right-clicking Start
, clicking Command Prompt (Admin), and clicking Yes when prompted, then do the following:
- Type in cd /Apache24/bin and press ↵ Enter (replace «Apache24» with your Apache folder’s name).
- Type in httpd -k restart and press ↵ Enter.
-
17
Test your phpMyAdmin program. Open a web browser, then type http://localhost into the address bar and press ↵ Enter. This should take you to the phpMyAdmin login page.


Advertisement
-
1
Make sure that you have MySQL installed. WAMP allows you to interact with an existing server on your computer, but won’t create a server in and of itself.
-
2
-
3
-
4
Scroll down and click either WAMPSERVER 64 BITS or WAMPSERVER 32 BITS. The number that you choose here will depend on your computer’s bit number. Clicking either option will prompt a pop-up window.
-
5
Click the download directly link. It’s in the upper-right side of the pop-up window. Doing so takes you to a Source Forge page from which you can download your version of WAMP.
-
6
Click Download. This green button is near the top of the page. WAMP will begin downloading onto your computer.
- The download will take several minutes to complete.
-
7
Install WAMP. Double-click the downloaded WAMP setup file, then do the following:
- Click Yes when prompted.
- Select a language and click OK
- Check «I accept the agreement» and click Next
- Click Next three times.
- Click Install
-
8
Wait for WAMP to finish installing. This will take a few minutes.
-
9
Choose a browser when prompted. Click Yes, then go to your preferred browser’s EXE file, click it, and click Open.
- For example: to select Chrome, you would find and click on the Google folder on the left side of File Explorer, then double-click the Chrome folder and select the Chrome icon.
- If you would prefer just to use Internet Explorer, click No instead.
-
10
Select a different text editor if needed. If you don’t want to use Notepad as your server’s text editor, click Yes when prompted, then find the EXE file for the text editor that you want to use, select it, and click Open.
- Click No if you want to keep Notepad as the default text editor.
-
11
Finish the setup. Click Next, then click Finish on the final WAMP window. WAMP is now installed on your computer.
-
12
Open WAMP. Double-click the pink «Wampserver» icon on your desktop, then click Yes when prompted. This will prompt your server to start running.
-
13
Click the WAMP icon in the system tray. On the far-right side of the Windows toolbar, you should see an orange or green WAMP icon. Clicking this will prompt a pop-up menu.
- You may first have to click the upward-facing arrow in the toolbar to see the WAMP icon.
-
14
Click phpMyAdmin. It should be near the top of the pop-up menu. As long as your server is properly installed, doing so will open the phpMyAdmin login page in your preferred browser.


Advertisement
Add New Question
-
Question
What do I do if I type localhost/phpmyadmin/, and it says «localhost refused to connect»?

There is error in the database connection. Try to solve that first. Check your connection code and try again. Also check whether the localhost ID is correct.
-
Question
How can I install and use this?
Go to the phpMyAdmin website and download it from there. You will need a server.
Ask a Question
200 characters left
Include your email address to get a message when this question is answered.
Submit
Advertisement
-
If you’ve set up a web server using a service other than Apache, you might be able to install phpMyAdmin by copying the phpMyAdmin folder into the service’s root folder. The folder used will vary widely from service to service.
Thanks for submitting a tip for review!
Advertisement
-
phpMyAdmin is not set to run directly on a computer that doesn’t have other server-related services (e.g., Apache) installed.
Advertisement
About This Article
Article SummaryX
1. Install Apache, PHP, and MySQL.
2. Download phpMyAdmin from https://www.phpmyadmin.net.
3. Unzip the file.
4. Copy the folder.
5. Paste the folder into your htdocs folder.
6. Rename the folder «phpmyadmin.»
7. Rename «php.ini-production» to «php.ini» and open it.
8. Remove the semicolon to the left of «extension=php_mbstring.dll» and save.
Did this summary help you?
Thanks to all authors for creating a page that has been read 1,121,850 times.
Is this article up to date?
— Advertisement —
Hey, what’s up? Today we’re going to talk about install phpMyAdmin on WIndows 10. This is open-source software, designed to handle the administration and management of MySQL databases through a graphical user interface. Through this application, we can create, modify and delete records. It is also possible to import and export tables from the MySQL database. In addition, we can execute MySQL queries, optimize and repair the database and many more tasks. Well, in this post we are going to see how to install phpMyAdmin in Windows 10.
Prerequisites
To make use of this tool, the webserver must obviously be configured and running correctly. In like manner, here in osradar.com, I show you how to install and configure the following elements:
- Any web server running and configured. In this case, we will use Apache.
- A database manager. For this purpose, we will use MySql.
- PHP.
Download the latest version of phpMyAdmin.
In the first place, go to the official phpMyAdmin website and download the latest version of the tool from there At the time of writing this post, the version is 5.0.

Then unzip the file and rename it to phpMyAdmin. Then drag this folder to the next path: C:Apache24htdocs

Set up some phpMyAdmin files.
To ensure the correct functioning of the tool, it is necessary to make some previous configurations. First, inside the program folder, locate the file config.sample.inc.php. Then, rename it to config.inc.php.

Finally, you have to modify it with your favorite text editor. Please select the next line:
$cfg['blowfish_secret'] = ''; /* YOU MUST FILL IN THIS FOR COOKIE AUTH! */Enter a value of your choice, minimum of 32 characters long:
$cfg['blowfish_secret'] = ''; /* k7b862qwq4ygj8a2hkczmd6spqsnspnkd */
Finally, save the configuration file.
Enable the necessary extensions.
On the other hand, it is necessary to enable the extensions required for the operation of the tool. With this intention, remove the ; at the beginning of the extension, as shown here. With this intention, open the file php.ini located in the php folder.

The extensions to be enabled are the following:
extension=php_mbstring.dll
extension=mysqli
Finally, save the configuration and restart the Apache server. With this in mind, press the Win+R combination and run the services.msc command. Once the list of services is open, locate the Apache HTTP Server, and restart it.

Login to phpMyAdmin
Once you have made your settings, it is time to login to phpMyAdmin. To do so, please open the following address in your web browser: http://localhost/phpmyadmin/ Once there, please enter your MySQL username and password:

After entering the credentials, the tool’s Dashboard will be displayed. Additionally, when you scroll down the page, a warning sign appears.

This warning is shown because the tool needs a database to work. In case you have not created it before, it is possible to import it from the same installation folder. With this in mind, please click on the Import menu. Then navigate to the following path: C:Apache24htdocsphpMyAdminsql. And from there, select create_tables.sql

Consequently, a database will be created under the name phpmyadmin

Once the database is created, you have to exit the tool by clicking on the door with the small green arrow.

Then, modify the values referred to the user who will manipulate the database. In addition, it enables the database and table storage parameters. To do this, it eliminates the double slashes in front of them. Likewise, in the line corresponding to user control, it adds localhost. Also, it modifies the value controluser and controlpass with the user and the password of MySQL. To graph the process I show you the code before editing it and where you should make the changes.

Below is the appearance of the correctly modified phpMyAdmin configuration file.

Save the configuration and go back to phpMyAdmin. The warning message should have disappeared.

Ultimately, we have seen how to install phpMyAdmin on Windows 10. This tool facilitates the management and administration of MySQL. I hope you enjoyed this post. See you soon!
Every website needs to interact with a data management system or the data itself, so it needs to use a database. PHPMyAdmin has become one of the most popular software platforms for managing classified data with MySQL and MariaDB databases around the web. This article will teach you 5 Ways To Install PHPMyAdmin On Windows 10. You can check out the packages offered on the Eldernode website if you intend to buy a Windows VPS server.
What is PHPMyAdmin?
PHPMyAdmin is an open-source, free, and third-party software tool written in PHP that manages the MySQL database on the web. It allows you to manage databases, tables, columns, relationships, lists, users, permissions and etc through the user interface. This software is database control software and supports a wide range of operations in MySQL and MariaDB.
Requirements to Install PHPMyAdmin On Windows 10
1- Install Apache web server on Windows
2- Install MySQL database manager on Windows
3- Install PHP on Windows
Downloading PHPMyAdmin on Windows 10
In this section, you will learn how to download PHPMyAdmin on Windows 10. To do this, follow the steps below.
Navigate to the official PHPMyAdmin website to download the desired version of PHPMyAdmin on your Windows 10 system. Click on Download 5.2.0:
Once the download is completed, go to the downloaded folder and unzip the downloaded file. Then move it to the C:Apache24htdocs path.
In order for the tool to work correctly, you need to set up a few PHPMyAdmin files. Find the config.sample.inc.php file inside the folder of the program and rename it to config.inc.php.
Now edit the file using your desired text editor. To do this choose the following line:
cfg['blowfish_secret'] = ''; /* YOU MUST FILL IN THIS FOR COOKIE AUTH! */Then you should enter your desired value. Note that the value must be at least 32 characters long:
cfg['blowfish_secret'] = ''; /* k7b862qwq4ygj8a2hkczmd6spqsnspnkd */Remember to save the configuration file.
Remove the ; beginning of the extension and open the php.ini file which is located in the PHP folder. You should enable the following extensions that are required for the tool’s operation:
extension=php_mbstring.dll extension=mysqliRemember to save the configuration.
Lastly, restart the Apache server by pressing Win+R and running the command below:
services.mscHow to Log in to PHPMyAdmin on Windows 10
First, open the following URL in your web browser and enter your MySQL username and password:
http://localhost/phpmyadmin/Now you should see the dashboard. If you scroll down the page, the warning sign will appear:
The reason for the warning is that the tool needs a database to work. You can import it from the same installation folder. So click on the Import menu, go to the C:Apache24htdocsphpMyAdminsql path and choose create_tables.sql:
You should see a database named PHPMyAdmin.
After the database is created, click on the shown icon to exit the tool:
In this step, modify the values referred to the user that manipulates the database. It will enable the database and table storage parameters and eliminate the double slashes in front of them. Also, it adds localhost in the line corresponding to the user control and modifies the value controluser and controlpass with the user and the password of MySQL.
Finally, save the configuration and come back to the PHPMyAdmin.
Conclusion
PHPMyAdmin facilitates the management and administration of MySQL. In this article, we taught you 5 ways to install PHPMyAdmin on Windows 10. I hope this tutorial was useful for you and helps you to install PHPMyAdmin on Windows 10. If you have any questions or suggestions, you can contact us in the Comments section.
phpMyAdmin – простое приложение с открытым исходным кодом, позволяющее управлять базами данных MySQL. С его помощью можно администрировать пользователей, создавать и редактировать таблицы, а также проводить экспорт и импорт данных в них. Удобство состоит в том, что все эти операции можно проводить в веб-интерфейсе. Я расскажу, как установить phpMyAdmin на компьютер и на сервер.
Установка phpMyAdmin на компьютер
Прежде чем начать установку phpMyAdmin, убедитесь, что у вас установлены и настроены сервер Apache, PHP и базы данных MySQL. Еще нужно соединение с сервером по защищенному туннелю SSH. Этот способ скорее можно назвать ручным.
Сперва советуем скачать архив приложения с официального русскоязычного сайта. Выбираем любую удобную версию и жмем по ссылке для начала загрузки.

Как только процесс загрузки завершится, распакуем архив. Затем переходим в папку htdocs, расположенную на системном диске в директории «Apache». Сюда вставляем папку из архива, потом переименовываем ее в phpmyadmin.
Теперь открываем папку «PHP» и находим в ней файл «php.ini-production». Переименовываем его в php.ini, а потом открываем с помощью «Блокнота». Находим в тексте строчки «extension=php_mysqli.dll» и «extension=php_mbstring.dll» и удаляем в них символ точки с запятой. Сохраняем изменения, выходим из блокнота.
Если все сделано правильно, то после введения в адресной строке браузера запроса http://localhost будет открываться страница авторизации phpMyAdmin.
Комьюнити теперь в Телеграм
Подпишитесь и будьте в курсе последних IT-новостей
Подписаться
Установка phpMyAdmin на сервер
Процедура установки инструмента phpMyAdmin на сервер отличается для разных операционных систем. Требования примерно те же – соединение по защищенному туннелю SSH, предустановленное программное обеспечение PHP, MySQL, Nginx или Apache.
Ubuntu
Перед установкой phpMyAdmin на сервере с ОС Ubuntu прежде всего необходимо проверить, имеется ли расширение PHP для редактирования текстовых строк в формате юникода. Для этого в командной строке вводим вот такой запрос:
sudo apt install php-mbstring
После завершения обновления можно приступать к установке нужного нам инструмента на сервер.
sudo apt install phpmyadmin
Как только данная команда активируется, откроется установщик. В нем будет предложен выбор веб-сервера для работы с приложением в дальнейшем. С помощью пробела выбираем пункт «apache», потом отмечаем кнопку ОК для применения изменений.

Если на вашем сервере установлен Nginx, на этом моменте просто выберите соответствующий пункт.
Далее будет предложено создание баз данных для данного ПО, в которой будет вся служебная информация. Соглашаемся, нажав на кнопку «Да», и идем дальше.

Следующий этап – создание пароля для собственного профиля. Можно придумать новый или оставить поле пустым, чтобы сервис сгенерировал случайную комбинацию. Потом, если мы все же придумали свой пароль, его следует подтвердить.

Но установка phpMyAdmin на сервер не завершена. Нам необходимо включить расширения PHP mcrypt и mbstring, используя для этого нижеуказанные команды:
sudo phpenmod mcrypt

sudo phpenmod mbstring
Чтобы применить все изменения, перезапускаем сервер Apache с помощью специального запроса:
sudo systemctl restart apache2
Debian
В случае с Debian был заранее предустановлен стек LEMP, включающий NGINX, MySQL и PHP. Но если что-то из всего этого на сервере отсутствует, можно задать в терминале вот такую команду:
apt install nginx php-fpm mysql-server
Ждем завершения скачивания и установки всех пакетов. Еще для защиты аутентификации рекомендуется установить сертификат SSL/TLS для передачи зашифрованного трафика.
Так как в Debian большинство программ в репозиториях отсутствует, необходимо будет вручную добавить пункт с phpMyAdmin. Сперва открываем файл «sources.list» в редакторе вот такой командой:
nano /etc/apt/sources.list
Теперь вносим кое-какие изменения в самом конце файла, добавив следующие строчки:
deb http://deb.debian.org/debian/ stretch main contrib non-free

deb-src http://deb.debian.org/debian/ stretch main contrib non-free
Сохраняем изменения и выходим из редактора. Теперь надо обновить базы данных в терминале с помощью такого запроса:
apt-get update
А вот теперь можно приступать непосредственно к скачиванию нужного нам приложения. Вписываем следующую команду:
apt-get install phpmyadmin
Так как у нас заранее предустановлен Nginx, в момент настройки нам не нужно будет выбирать веб-сервер. Просто пропускаем этот пункт, нажав на кнопку «Tab», а затем кликнув на ОК.

Выйдет новое окно в мастере установки, запрашивающее разрешение на использование «dbconfig-common». Данный параметр позволит настроить базу данных и пользователя с правами администратора для программы phpMyAdmin. Поэтому выбираем пункт «Да» и идем дальше.
Точно так же, как было описано ранее, создаем собственный пароль или оставляем поле пустым для генерации случайного. Теперь ждем, когда все пакеты ПО будут до конца установлены. Для проверки в адресной строке браузера вбиваем адрес http://доменное_имя или IP/phpmyadmin.
CentOS
Здесь тоже заранее инсталлированы модули PHP и Apache. Чтобы установить phpMyAdmin на CentOS, прежде всего понадобится скачать расширенный репозиторий EPEL. Для этого мы задаем вот такую команду:
yum install epel-release
Если указанный репозиторий не скачать, командная строка может дать ошибку типа «пакета с названием phpmyadmin не найдено».
Скачивание пакета завершено, теперь можем приступать к скачиванию самой программы, и даем для этого следующий запрос:
yum install phpmyadmin
Потом устанавливаем модули PHP для нормальной работы панели управления базами данных, и делается это одним запросом:
yum install php-json php-mbstring php-mysqli
Возможно, они уже были установлены ранее, но все же стоит дополнительно выполнить проверку. Потом перезапускаем сервер для принятия всех внесенных изменений.
systemctl restart httpd
Понадобится настроить виртуальный домен, создав для этого специальный конфигурационный файл.
vi /etc/httpd/conf.d/phpMyAdmin.conf
Содержание его при этом должно быть таково:
<VirtualHost *:80>

    Define root_domain phpmyadmin.dmosk.local

    Define root_path /usr/share/phpMyAdmin


    ServerName ${root_domain}

    ServerAlias www.${root_domain}

    DocumentRoot ${root_path}


    <Directory /usr/share/phpMyAdmin>

        AllowOverride All

        Options Indexes ExecCGI FollowSymLinks

        Require all granted

    </Directory>

</VirtualHost>
Сохраняем изменения и закрываем редактор. Затем проверяем корректность настроек вот такой командой:
apachectl configtest
Если ошибки не возникли, перезапускаем сервер. Если же возникли, заново вносим изменения в только что созданный файл.
Дополнительно можно еще создать отдельный каталог для хранения временных файлов с помощью такого запроса:
mkdir /usr/share/phpMyAdmin/tmp
Потом потребуется задать для нее владельца и соответствующие права специальными командами:
chown apache:apache /usr/share/phpMyAdmin/tmp

chmod 755 /usr/share/phpMyAdmin/tmp
Настройка завершена. Теперь можно открыть страницу с виртуальным доменом. В результате мы должны попасть на страницу с формой для ввода имени пользователя и пароля.
Managing a database is a complex but necessary part of running a website. Luckily, software like phpMyAdmin exist to make the process much easier. This popular administration tool may seem challenging to learn, but accessing and modifying your database will be a breeze once you have the hang of it.
The most difficult part is knowing how to install phpMyAdmin and setting it up on your web server. If you’re having trouble, you’re certainly not the only one.
In this article, we’ll show you step by step how to install phpMyAdmin on all major operating systems, plus how to configure it from there.
Let’s get going!
Prefer to watch the video version?
What Is phpMyAdmin?
Behind every website is a database. This database allows you to store data ranging from user account information to the posts you make on your site. While there are many database services, MySQL is the most popular one. And most likely, it’s the one your website is using. MariaDB is a common alternative.
Interacting directly with MySQL can be complicated and confusing, especially if you’re new to website administration. But interacting with your databases is often a necessary part of site maintenance.
phpMyAdmin was created to bring a browser-based visual interface to MySQL and make it easier to work with your database. Due to its popularity, many web hosting services include access to phpMyAdmin, including Kinsta.
Managing a database can be complicated 😅 phpMyAdmin exists to make the process much easier ✅ Learn how to install and configure it right here.Click to Tweet
Why Do You Need phpMyAdmin?
Without a tool like phpMyAdmin, your only option for accessing the database is with the command line. It means you have no visual interface — just a text prompt where you put in commands. Doing it this way can be confusing and may even lead to accidentally breaking your site.
phpMyAdmin is free and open source. A wide range of web hosts supports it, and you can even install it yourself without paying a single cent. And once you’ve installed it, executing database commands from the visual interface is much more intuitive.
Still on the fence? You can try phpMyAdmin yourself to see if it’s a database manager you’d like to use. Once you’ve given it a test drive and decided you’d like it, you can install the tool on your server.
phpMyAdmin Requirements
The requirements to install phpMyAdmin are, luckily, relatively simple. If you have a web server of any kind, you should almost certainly be able to get it running. Here are the detailed requirements:
- A webserver of any kind
- MySQL or MariaDB 5.5 or newer
- A web browser that supports Javascript, cookies, and Bootstrap 4.5 (to access phpMyAdmin)
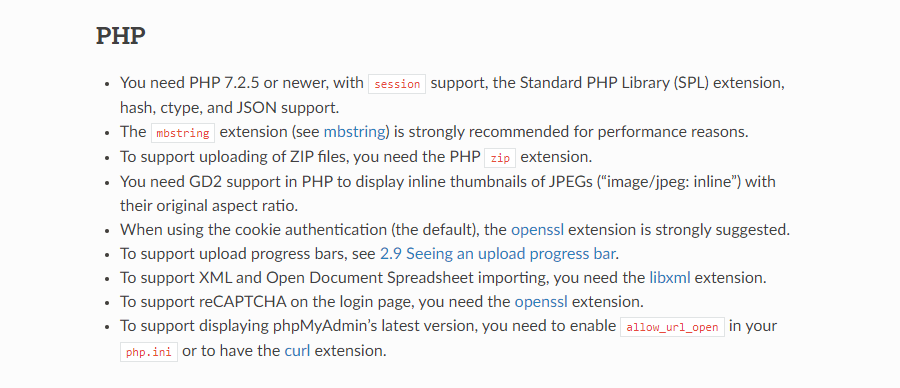
- PHP 7.2.5 or newer
- Additional PHP requirements: The session and SPL extensions, hash, ctype, and JSON support. Other extensions such as mbstring can improve performance or add additional minor functionality (see the requirements page for the complete list).
Before you try to install phpMyAdmin, remember that many web hosts already come with it installed. Kinsta is among them; if you want to access the database manager, log into your Kinsta account, then go to the Info tab and look for Database Access.
Before installing phpMyAdmin, check your web host’s documentation to ensure they’ve not installed it already.
Step By Step: Installing phpMyAdmin
Once you’ve checked to make sure your server supports phpMyAdmin, it’s time to get to work installing it. Web servers come in a wide range of operating systems, so we’ve included all the most popular ones, including Windows, Mac, and multiple distributions of Linux.
With that, here are the step-by-step instructions for installing phpMyAdmin.
How to Install phpMyAdmin on Windows 10
As the requirements state, you’re going to need a web server with PHP and a database to use phpMyAdmin. While you can undoubtedly download Apache, PHP, and MySQL manually, there’s a much simpler option to get a server up and running on a Windows computer.
WAMP (Windows, Apache, MySQL, and PHP) is free software that easily allows you to create a server with all prerequisites. You can also try XAMPP for Windows (Apache, MariaDB, PHP, and Perl) if it suits your needs better.
Once you have one of these downloaded, it’s just a matter of installing it and walking through the setup process.
Suppose you’re using WAMP or XAMPP. Both of these come with phpMyAdmin already! In your browser, navigate to http://localhost/phpMyAdmin, and you should see the login screen, confirming that you’ve installed everything correctly.
How to Install phpMyAdmin on Mac
Getting phpMyAdmin on a Mac is a little different. All the prerequisites are the same. But as macOS ships with both Apache and PHP, you don’t need to download them.
With Mac, you have two options: You can use XAMPP just like with other operating systems or install everything manually.
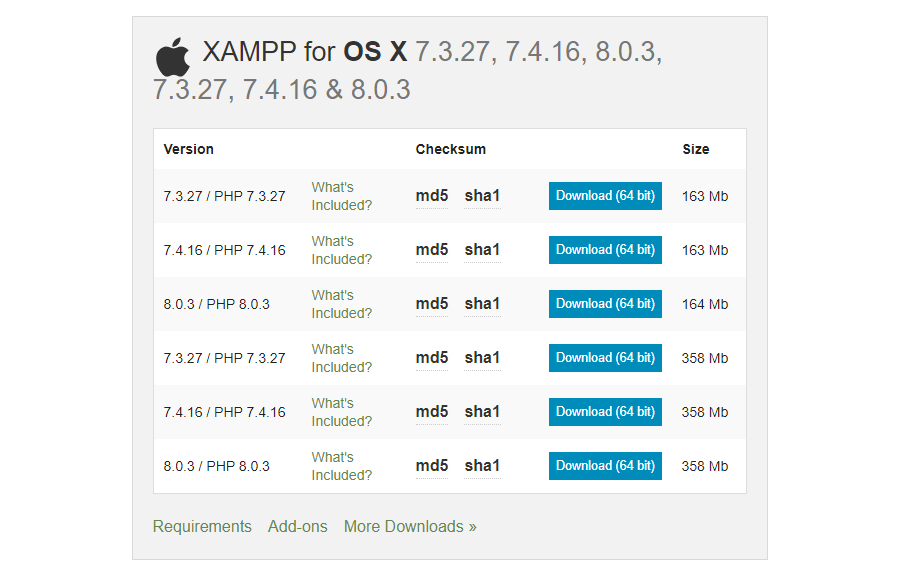
Download XAMPP for OS X, open it, and drop it into your Applications folder.
Open XAMPP Control from /Applications/XAMPP/manager-osx.app to start your Apache and MySQL servers. If you then visit http://localhost, you should find everything working correctly and your phpMyAdmin login under the “Tools” section.
If you’d instead install phpMyAdmin manually, the process is simple. Since you already have Apache and PHP, you only need to download MySQL. Make sure you select macOS from the dropdown. Download and install the file, follow the instructions, and record any usernames and passwords given to you.
You can then open System Preferences and launch MySQL to start a server. You can also start Apache by running this command in the Terminal:
sudo apachectl start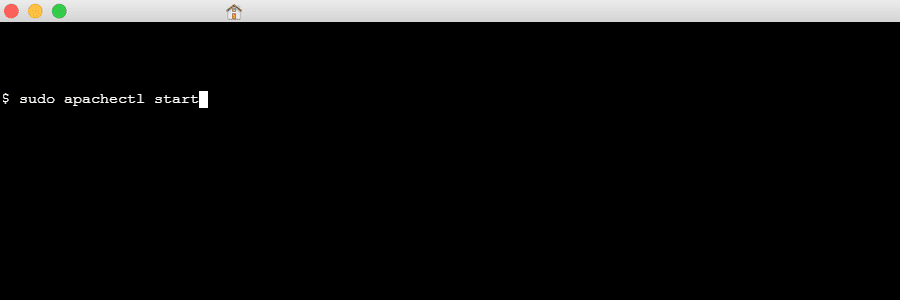
With that, all that’s left is installing phpMyAdmin. Rename the folder to “phpMyAdmin” and move it to /Library/WebServer/Documents/. Check to make sure it’s installed correctly by visiting http://localhost/phpMyAdmin in the browser.
If you have Homebrew installed, another option is to put in the command: brew install phpMyAdmin.
How to Install phpMyAdmin on Ubuntu
As one of the most popular and most accessible to use Linux distributions, Ubuntu is a good choice for your server.
While manual installation of Apache and MySQL is always possible, Linux has its own “stack” of standard server software known as LAMP (Linux, Apache, MySQL, and PHP). Unlike WAMP and XAMPP, this does not come with phpMyAdmin, so you’ll need to install it manually. Luckily, Ubuntu allows you to do all of your installations through the command line.
First, check that tasksel is enabled. Server editions of Ubuntu should come with it installed, but if you have a desktop edition, you can enable it with this command:
sudo apt-get install taskselAfter that, you can use tasksel to install a LAMP server with this command:
sudo tasksel install lamp-server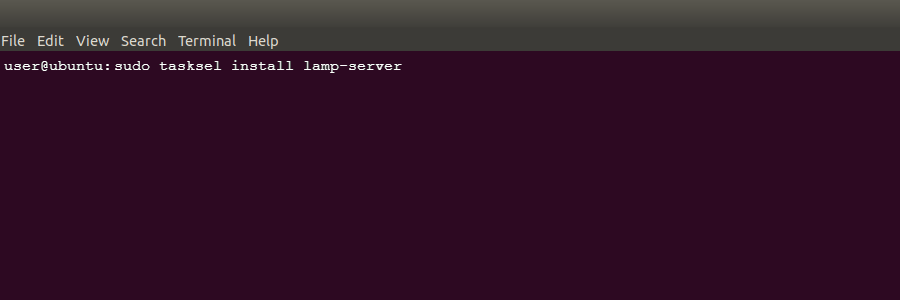
Now, you can install phpMyAdmin:
sudo apt install phpMyAdminWith that, you have all the necessary files to run a server on your computer.
How to Install phpMyAdmin on CentOS 7
Installing phpMyAdmin on CentOS 7 is very similar to other distributions, but the commands are slightly different as this OS uses Yum rather than the typical apt command.
There’s also no simple LAMP stack that installs all the server components you need at once, so you’ll need to download Apache, MySQL, and PHP manually. Thankfully these can be easily obtained through the command line.
First, let’s get a LAMP stack downloaded using the command line, beginning with Apache:
sudo yum install httpd.serviceTo start the Apache server and ensure it runs on boot, use these commands:
sudo systemctl start httpd.service
sudo systemctl enable httpd.service
Now it’s time to install a database. CentOS 7 defaults to installing MariaDB. It is also fully compatible with phpMyAdmin, so it’s safe to use. While it’s possible to download MySQL instead, it’s a much more complicated process. Let’s use MariaDB:
sudo yum install mariadb-server mariadb
Now we can run it and cause it to start at boot:
sudo systemctl start mariadb
sudo systemctl enable mariadb.service
To finish installing MariaDB and ensure it’s secure, run the secure installation setup with the following command.
sudo mysql_secure_installationLast, we can install PHP with the additional MySQL package.
sudo yum install php php-mysqlYou’ll also need to restart the Apache server, so it works properly with PHP.
sudo systemctl restart httpd.serviceWith that, you have the LAMP stack you need and can finally get to downloading phpMyAdmin. As it isn’t in the Yum repository, you’ll need to install the EPEL repository instead with this command:
sudo yum install epel-releaseAnd install phpMyAdmin.
sudo yum install phpMyAdminIt takes a few more steps on CentOS 7, but you should now have a server ready for configuration.
How to Install phpMyAdmin on Debian
Much like CentOS 7, you’ll need to install a LAMP stack using the command line manually. First, let’s get Apache with this command:
sudo apt install apache2Next, we’ll install MariaDB. Like CentOS 7, this Linux distribution works better with MariaDB, and we recommended you use that one instead.
sudo apt install mariadb-serverAnd like with CentOS 7, you should run the secure installation to add a database password and ensure that everything is secure.
sudo mysql_secure_installationFinally, we can install PHP and a few extra packages your server will need to work.
sudo apt install php php-mysql libapache2-mod-phpAnd we can finish off by installing phpMyAdmin.
sudo apt install phpMyAdminHow to Access phpMyAdmin
Once you have phpMyAdmin appropriately installed, accessing it and logging in is the same on any operating system.
You’ll need your web server’s address, then append /phpMyAdmin/ to the end of it. If you just set up a server on your computer, the address is very likely simply “localhost,” so visit this link:
http://localhost/phpMyAdminIt may also be an IP, or even a named address if this is a server you already have running on the web. If you’re not sure, you can likely find the address in your Apache or MySQL config files.
Once you’re on the login screen, you’ll need a username and password. If this is a fresh installation, the username is likely “root,” and you can leave the password blank. If that doesn’t work, the password may be “password.”

If you can’t log in, check the phpMyAdmin or MySQL config files to find your login info. You may have also changed the login info during the installation process.
Linux users should try the following Linux command if they’re having trouble accessing the page or logging in:
sudo dpkg-reconfigure phpMyAdminLastly, you should note that if you’re using a web host such as Kinsta with phpMyAdmin preinstalled, you can usually find login info and links in your hosting dashboard. In this case, you don’t need to install phpMyAdmin on the server manually.
Configuring phpMyAdmin
With the database manager installed and ready to go on your system, you should know how to configure phpMyAdmin. Like with any server software, you’re certainly going to want to do plenty of tinkering with the settings.
An unconfigured phpMyAdmin can also pose a potential security risk. There are a few extra steps you need to take to lock down your system.
If you ever need to restore a backup of your database, you can always use phpMyAdmin to import a new SQL file. Always make frequent backups before doing any significant modifications to the database or its settings, especially if you’re not just working on a test server.
How to Run SQL Queries
Now that you have phpMyAdmin working, you should know how to do what it’s made for: running SQL queries.
You can run queries either on the homepage (this will apply to the entire site), or in a specific database or table. Click the SQL tab at the top of the screen, type in your command, and press Go.

Here’s a list of common SQL queries:
- Select: The most important tag, used at the beginning of almost every query.
- Create Table: Create a new table.
- Alter Table: Add new columns.
- Insert: Add new rows.
- Delete: Remove columns.
- Update: Edit values in a table.
- Sum(): Adds up all the values.
- Avg(): Average the values.
- Count(): Counts the number of filled columns.
- Round(): Rounds the value to the integer you set.
- Max(): Return the largest value.
- Min(): Return the smallest value.
- Between: Select columns within a specific range.
- Group By: Group tables by data.
- Order By: Order results in a certain way.
There are certainly more commands to learn, but those are a few to start with.
How to Change the Default phpMyAdmin URL
Leaving the phpMyAdmin access link on its default setting (http://website.com/phpMyAdmin) can pose a security risk.
If you make this page easy to find, hackers will be able to visit it and attempt to brute force down your username and password. It can be even worse if you’ve left the credentials on the default “root” and “password.”
But by changing the URL to something only you know, you can make it much more difficult for unknown users to access this page and try to guess the password.
Open phpMyAdmin.conf in a text editor, which you can find under C:wampalias on Windows/WAMP, xamppapacheconfextra on XAMPP, /etc/httpd/conf.d on Linux, or /usr/conf/extra on Mac.
You should see this line in there:
Alias /phpMyAdmin /usr/share/phpMyAdminChange the /phpMyAdmin path to the new address of your choice. For instance:
Alias /exampleURL /usr/share/phpMyAdminNow you can access this unique URL for phpMyAdmin by visiting the custom address you set (http://website.com/exampleURL).
How to Set Up an NGINX Authentication Gateway
Another option is to set up a second layer of security with an authentication gateway. After moving the phpMyAdmin login page to a secret location, you can password protect this page to make it even less likely for attackers to get through.
Users of Linux on an NGINX server can run the following commands in the command line to create an authentication gateway (this is also possible on Apache servers).
Start by creating an encrypted password (change “example” to whatever you like) and noting down the result:
openssl passwd exampleCreate a configuration file in NGINX’s folder and give it a name:
sudo nano /etc/nginx/examplenameEnter the username and password into this file like this, being careful to leave in the colon:
exampleusername:examplepasswordNow open the NGINX configuration file.
sudo nano /etc/nginx/sites-available/defaultWithin the “server” block, we’ll add our gateway by pasting the following code (make sure to change the values).
location /example {
  auth_basic "Login";
  auth_basic_user_file /etc/nginx/examplename;
The first /example should be whatever you set your phpMyAdmin URL to, and you can adjust the auth_basic variable name to anything you want, and the final /examplename should be the name of the password file you created earlier.
Now upon login, you should be required to enter the credentials you set before even seeing the phpMyAdmin login.
Adminer: A Simpler Alternative to phpMyAdmin
Adminer is a free, open source database management tool similar to phpMyAdmin. Formerly called phpMinAdmin, Adminer was explicitly designed as a simpler, better alternative to phpMyAdmin.
It’s effortless to deploy on any web server. All it takes is uploading a single, lightweight PHP file.
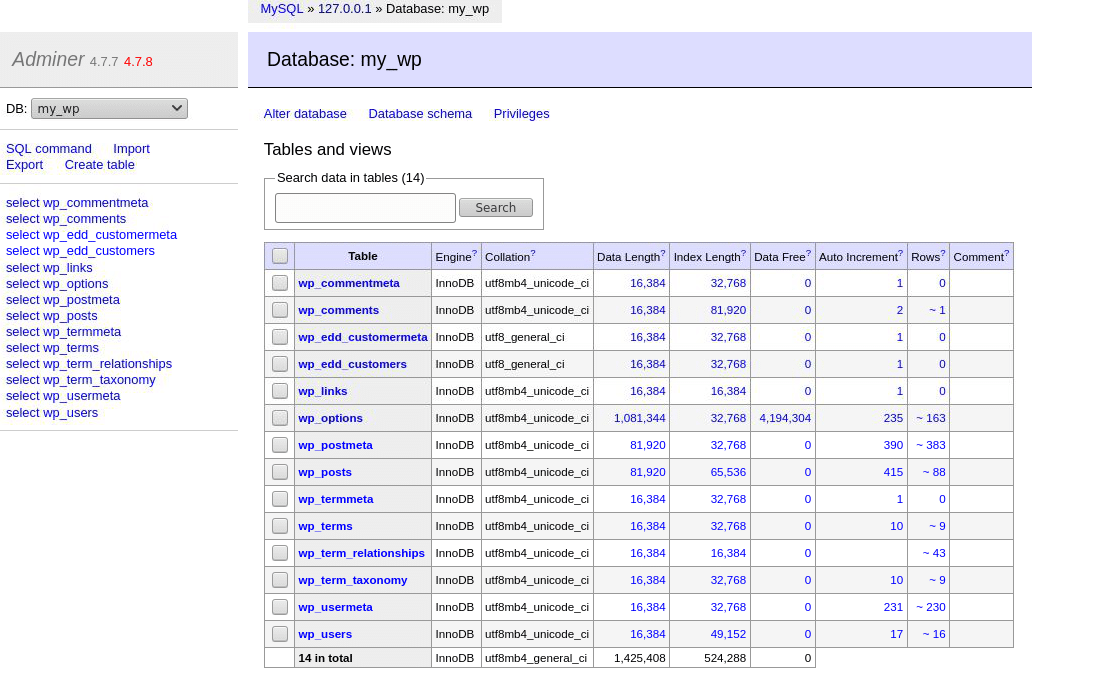
Even DevKinsta, Kinsta’s free suite of local development tools, uses Adminer to run its database manager. It supports many powerful database management features such as easy database switching, viewing and editing tables, manipulating database values, importing and exporting databases, running SQL queries, and much more.
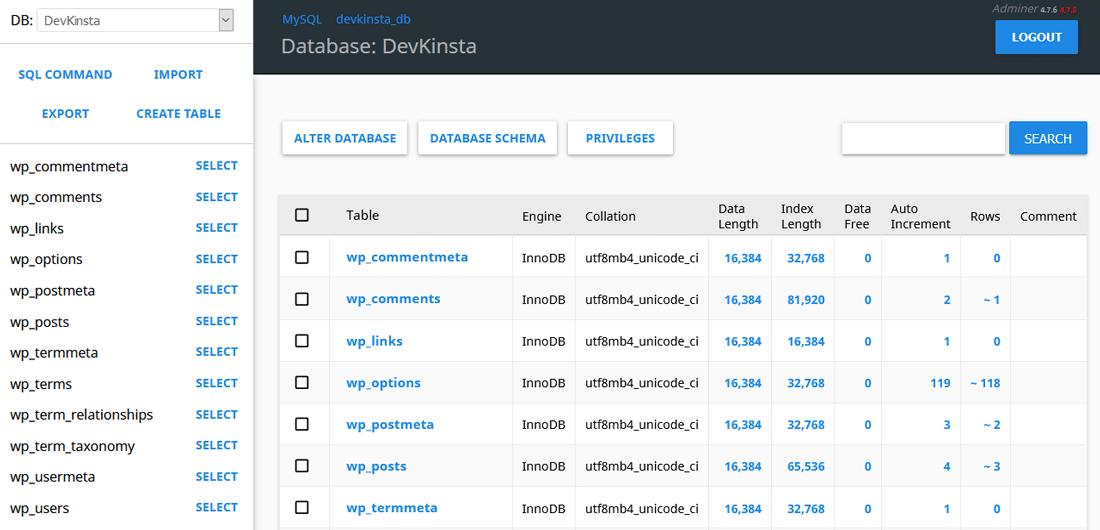
You can learn more about Adminer, its features, and how to use it in our dedicated Adminer article.
Need a little help installing & configuring this popular administration tool? ⬇️ This guide has you covered ✅Click to Tweet
Summary
Your first time using phpMyAdmin can be intimidating. But once you know how to install and configure it, accessing your database will be as easy as logging into WordPress.
Windows, Mac, and Linux users alike can all make use of this invaluable database manager. As long as you have a web server with PHP installed, getting it running should be simple if you follow our instructions. Remember to configure it properly and make sure it’s secure, and you’ll never have trouble modifying your database again.
Get all your applications, databases and WordPress sites online and under one roof. Our feature-packed, high-performance cloud platform includes:
- Easy setup and management in the MyKinsta dashboard
- 24/7 expert support
- The best Google Cloud Platform hardware and network, powered by Kubernetes for maximum scalability
- An enterprise-level Cloudflare integration for speed and security
- Global audience reach with up to 35 data centers and 275+ PoPs worldwide
Test it yourself with $20 off your first month of Application Hosting or Database Hosting. Explore our plans or talk to sales to find your best fit.

In this tutorial you can learn how to install phpMyAdmin on Windows 10. PhpMyAdmin is an open-source software, designed to handle the management of MySQL databases through a graphical user interface.
Prerequisites
To install and use phpMyAdmin a local web server must be configured and running properly. If you don’t have a local web server yet, follow our tutorial: How to setup Apache, PHP and MySQL on Windows 10.
In this tutorial we will use
- Apache 2.4 web server
- MySQL 5.7.1
- PHP 7.4
Installation steps
- Download the latest package from https://www.phpmyadmin.net/downloads/
- Unzip the downloaded file to C:Apache24htdocsphpMyAdmin

- Rename config.sample.inc.php to config.inc.php
- Open the config.inc.php in a text editor and find this line
$cfg['blowfish_secret'] = ''; /* YOU MUST FILL IN THIS FOR COOKIE AUTH! */- Add a value of your choice (min. 32 characters long), for example
$cfg['blowfish_secret'] = 'HUtJc4w3PJH8j2IpIHO391kPhAQrsBgy'; /* YOU MUST FILL IN THIS FOR COOKIE AUTH! */- Save the config.inc.php file
- Make sure you have mbstring and mysqli PHP extensions enabledopen the php.ini file located in your php folder (C:phpxx by default, where xx is the version number, e.g.: C:php74)
- find the ;extension=mbstring line and remove the semicolon (;) from the beginning
extension=mbstring- do the same for the line ;extension=mysqli
- extension=mysqli
- save the php.ini file
- restart Apache service in Services (Windows key + R and type services.msc)

- Open http://localhost/phpmyadmin/ in your browser, log in with your root username and password

- There will be a message at the bottom of the screen which says that the configuration storage is not completely configured. PhpMyAdmin needs a database to work. To configure the storage, click Import at the top of the screen and select the create_tables.sql file from the C:Apache24htdocsphpMyAdminsql directory

- Click Go at the bottom of the screen and the warning message should be gone
Do you have a project for us?
Contact us
Our Services
WEB DESIGN AND DEVELOPMENT
From raw idea to a scalable product
Each website we develop is truly unique, tailor-made for your brand, product or company.
Learn more »
WORDPRESS & WOOCOMMERCE
Custom online-store, theme and plugin development
GoWild Digital leverages the flexibility of the WordPress platform to develop websites that can be easily maintained and upgraded.
Learn more »
TECHNICAL SEO AUDIT
A health check of your website
Our Technical SEO audit identifies technical errors with your website that can be hindering your performance and visibility.
Order now »
WORDPRESS SPEED OPTIMIZATION
Enhance your site’s user experience and rankings
Website speed optimization service that can help your website load at top speeds and generate more conversions.
Order now »
AD-HOC SUPPORT AND MAINTENANCE
For a fixed price
Purchase a block of support minutes to complete any tasks needed. Minutes purchased never expire.
Order now »
WEBSITE MIGRATION
We can help you to migrate your website to your new web hosting
Let us take on the heavy lifting of your next website migration to reduce your stress and to migrate your site efficiently and effectively
Order now »
Update Gone Wrong
An update broke your WordPress site?
Let us help you! Our service provides you with the fix of one error to get your WordPress website back up and running.
Order now »
Repair Hacked Website
Site hacked?
We’ll restore your website fast to help limit the downside. If it gets reinfected in the next 30 days, we fix it for FREE again.
Order now »
Quick Website Repair
Broken WordPress or PHP based website?
Our service provides you with the fix of one error to get your website back up and running.
Order now »
Our Work

Green Guide Budapest

Trilla

Barber Bay

MOST

Hungarian World Music Guide
Contact us
Внимание! phpMyAdmin не предоставляет собственных методов обеспечения безопасности MySQL-сервера. Предоставление привилегий в базе данных MySQL — прерогатива системного администратора. Страница phpMyAdmin’s «Privileges» может быть использована именно для этого.
Предупреждение для пользователей Mac: если у вас установлена версия MacOS до OS X, StuffIt разархивируйте с помощью Mac-архиваторов. Пересохраните с помощью BBEdit в стиле Unix ВСЕ скрипты phpMyAdmin перед копированием их на сервер, т.к. PHP по-видимому не любит Mac-символы переноса строки («r»)
Быстрая установка
1. Распакуйте дистрибутив в корневую директорию вашего веб-сервера (убедитесь, что поддиректории распакованы тоже): tar -xzvf phpMyAdmin_x.x.x.tar.gz. Если Вы не имеете прямого доступа к корню вашего веб-пространства, распакуйте файлы в директорию на локальной машине и, после 3-го шага, скопируйте директорию на веб-сервер, например, через ftp.
2. Убедитесь, что все скрипты имеют соответствующего владельца (если PHP запущен в безопасном режиме, наличие нескольких скриптов, принадлежащих разным владельцам, вызовет проблему в работе). Смотри FAQ 4.2 и FAQ 1.26.
3. Теперь Вы должны создать конфигурационный файл (config.inc.php). Создание конфигурационного файла — необходимое условие прежде всего для запуска phpMyAdmin, а также необходимо для задания некоторых возможностей. Эта задача может быть выполнена двумя разными способами. Традиционно, пользователи могут вручную отредактировать копию файла config.inc.php. Кроме этого, пользователи, предпочитающие графическую инсталляцию, могут воспользоваться мастером установки (скриптом инсталляции).
- Для того, чтобы вручную создать конфигурационный файл, достаточно простейшего текстового редактора, с помощью которого нужно создать файл config.inc.php. Для упрощения задачи, Вы можете скопировать в текстовый редактор содержимое файла config.sample.inc.php — образца рабочей конфигурации, содержащей минимальное количество конфигурационных переменных.
Созданный файл необходимо поместить в главную директорию phpMyAdmin (ту, которая содержит index.php). phpMyAdmin сперва загружает libraries/config.default.php, а затем подменяет значения прописанных в нем переменных теми, что находит в config.inc.php. Если значение по умолчанию (тех переменных, что определены в libraries/config.default.php) Вас устраивает, тогда нет необходимости включать его в config.inc.php. Для запуска phpMyAdmin вам понадобятся как минимум несколько директив, простейшая конфигурация может выглядеть так:
<?php
$cfg[‘blowfish_secret’] = ‘ba17c1ec07d65003’; // use here a value of your choice
$i=0;
$i++;
$cfg[‘Servers’][$i][‘auth_type’] = ‘cookie’;
?>
Или, если вы не хотите вводить каждый раз логин/пароль (данная конфигурация не рекомендуется из соображений безопасности), конфигурационный файл может выглядеть так:
<?php
$i=0;
$i++;
$cfg[‘Servers’][$i][‘user’] = ‘root’;
$cfg[‘Servers’][$i][‘password’] = ‘cbb74bc’; // use here your password
?>
Для более полного ознакомления с функциями и описаниями значений всех конфигурационных переменных читайте раздел документации «Конфигурирование».
- Вместо ручного редактирования файла config.inc.php, Вы можете использовать скрипт установки. Прежде всего, вам необходимо вручную создать в главной директории phpMyAdmin папку ‘config’. Это — мера безопасности. При работе под ОС Linux/Unix Вы можете использовать следующие команды:
cd phpMyAdmin
mkdir config # создает директорию для хранения
chmod o+rw config # дает всем пользователям права на запись в неёДля редактирования уже существующего конфигурационного файла, можно воспользоваться следующими командами:
cp config.inc.php config/ # копирует текущую конфигурацию для редактирования
chmod o+w config/config.inc.php # дает всем пользователям права на запись в неёНа других платформах, просто создайте директорию и убедитесь, что Ваш веб-сервер имеет права на чтение и запись в неё. FAQ 1.26 может помочь в этом случае.
Затем, откройте в браузере scripts/setup.php. Помните, что изменения не будут сохранены на диск до тех пор, пока не будет нажата кнопка «Save» в блоке «Configuration». Если все хорошо, то скрипт сохранит новый config.inc.php в директорию config/, но если веб-сервер не имеет необходимых прав, Вы можете увидеть сообщение об ошибке «Cannot load or save configuration». В таком случае, убедитесь, что директория config/ создана и имеет необходимые права, либо воспользуйтесь ссылкой «Download» для сохранения конфигурационного файла на локальный диск и последующей закачки (например, через FTP) на сервер.
Как только файл был сохранен, необходимо переместить его из директории config/ в главную директорию phpMyAdmin и в целях безопасности сбросить права на него:
mv config/config.inc.php . # перемещает файл в текущую директорию
chmod o-rw config.inc.php # отменяет права на чтение и запись для всех остальных пользователейТеперь файл готов к использованию. Вы можете просмотреть и отредактировать конфигурационный файл в текстовом редакторе, если потребуется установка некоторых расширенных опций, настройка которых не предусмотрена скриптом установки.
4. Если Вы собираетесь использовать «config» аутентификацию (auth_type), необходимо защитить директорию в которую был установлен phpMyAdmin от несанкционированного доступа, потому что данный режим позволяет любому пользователю получить доступ к phpMyAdmin без предварительного ввода логина/пароля. Рекомендуются альтернативные методы аутентификации, например, HTTP-AUTH (с помощью .htaccess файла), либо использованием одного из двух других методов аутентификации: cookie или http. См. подраздел FAQ «Мультипользовательская установка» для дополнительной информации, особенно обратите внимание на FAQ 4.4.
5. Откройте главную директорию phpMyAdmin в вашем браузере. Должно появиться окно приветствия phpMyAdmin и Ваши базы данных, или окно ввода логина, в случае использования режима HTTP- или cookie-аутентификации.
6. Вы должны запретить доступ к субдиректории ./libraries средствами вашего веб-сервера. В случае использования веб-сервера Apache для защиты директории Вы можете использовать файл .htaccess. При использовании других веб-серверов вы должны запретить доступ к директории ./libraries самостоятельно. Подобная конфигурирование — превентивная мера на случай обнаружения уязвимостей: возможного раскрытия пути (path exposure) и межсайтового выполнения сценариев (Cross-site Scripting, XSS).
Linked-tables infrastructure (Инфраструктура связанных таблиц)
Для использования многих опций (закладок, комментариев, SQL-истории, PDF-схем, преобразования содержимого полей, и т.д.) необходимо создать набор специальных таблиц. Эти таблицы могут находиться как в Вашей базе данных, так и в центральной базе при многопользовательской системе (в этом случае данная БД может быть доступна только для пользователя controluser, соответственно, другие пользователи не имеют прав на неё).
Зайдите в директорию scripts/, здесь вы найдете файл create_tables.sql. (Если используете Windows сервер, обратите особое внимание на FAQ 1.24).
Если у Вас установлена версия MySQL сервера 4.1.2 или более позднее, используйте вместо вышеуказанного файла create_tables_mysql_4_1_2+.sql, для новой инсталляции.
Если у вас уже есть готовая инфраструктура и вы обновляете MySQL до версии 4.1.2 или выше, используйте upgrade_tables_mysql_4_1_2+.sql.
Вы можете использовать phpMyAdmin для создания баз данных и таблиц, для этого необходимо обладать администраторскими привилегиями на создание баз данных и таблиц, в связи с чем скрипту может понадобиться небольшая настройка (указание названия базы данных).
После импорта create_tables.sql, Вы должны определить названия таблиц в файле config.inc.php, с помощью директив, описанных в разделе «Конфигурирование». Кроме этого необходимо обладать правами controluser на данные таблицы (см. ниже, раздел «Использование режима аутентификации»).
Обновление старой версии
Просто скопируйте конфигурационный файл ./config.inc.php от предыдущей версии в директорию куда был распакован phpMyAdmin. Конфигурационные файлы из очень старых версий (2.3.0 or older) могут потребовать некоторых настроек, т.к. некоторые опции были изменены или удалены.
Не рекомендуется использовать (копировать) файл libraries/config.default.php вместо config.inc.php, т.к. файл config.default.php является специфичным для каждой версии.
Если Вы обновили свой MySQL-сервер с версии старше, чем 4.1.2 до версии 4.1.2 или новее,и используете инфраструктуру связанных таблиц, тогда необходимо запустить SQL-скрипт, который находится в scripts/upgrade_tables_mysql_4_1_2+.sql.
Использование режимов аутентификации
При использовании ‘HTTP’ и ‘cookie’ режимов phpMyAdmin, рекомендуется завести пользователя (controluser), который должен обладать правами только на выборку (SELECT) из следующих таблиц: mysql.user (все столбцы за исключением «Password»), mysql.db (все столбцы), mysql.host (все столбцы) и mysql.tables_priv (все столбцы за исключением «Grantor» и «Timestamp»).
GRANT USAGE ON mysql.* TO ‘pma’@’localhost’ IDENTIFIED BY ‘pmapass’;
GRANT SELECT (
Host, User, Select_priv, Insert_priv, Update_priv, Delete_priv,
Create_priv, Drop_priv, Reload_priv, Shutdown_priv, Process_priv,
File_priv, Grant_priv, References_priv, Index_priv, Alter_priv,
Show_db_priv, Super_priv, Create_tmp_table_priv, Lock_tables_priv,
Execute_priv, Repl_slave_priv, Repl_client_priv
) ON mysql.user TO ‘pma’@’localhost’;
GRANT SELECT ON mysql.db TO ‘pma’@’localhost’;
GRANT SELECT ON mysql.host TO ‘pma’@’localhost’;
GRANT SELECT (Host, Db, User, Table_name, Table_priv, Column_priv)
ON mysql.tables_priv TO ‘pma’@’localhost’;
Необходимо установить настройки для controluser в файле config.inc.php в следующих секциях: $cfg[‘Servers’][$i][‘controluser’] и $cfg[‘Servers’][$i][‘controlpass’].
В нижеприведенном примере, в обучающих целях используются следующие значения для: ‘controluser’ — ‘pma’, ‘pmapass’ — ‘controlpass’. Но на практике используйте другие значения в своих файлах!
Разумеется, localhost в случае необходимости нужно заменить на реальное имя веб-сервера.
Если вы используете старую версию MySQL (ниже 4.0.2), замените первый запрос GRANT SELECT следующим образом:
GRANT SELECT (
Host, User, Select_priv, Insert_priv, Update_priv, Delete_priv,
Create_priv, Drop_priv, Reload_priv, Shutdown_priv, Process_priv,
File_priv, Grant_priv, References_priv, Index_priv, Alter_priv
) ON mysql.user TO ‘pma’@’localhost’;
… и если Вы хотите использовать возможности закладок и связей:
GRANT SELECT, INSERT, UPDATE, DELETE ON <pma_db>.* TO ‘pma’@’localhost’;
(конечно, подразумевается, что должна быть настроена инфраструктура связанных таблиц).
Разумеется, вышеприведенный запрос работает только в том случае, если рабочая версия MySQL поддерживает команду GRANT (поддерживается начиная с версии 3.22.11).
‘http’ — аутентификация
‘cookie’ — аутентификация
‘config’ — аутентификация