I use python 2.7, 3.5.2 and 3.6. Normally pip3 is installed with python3.x. But …
The code:
where pip3
gives me:
INFO: Could not find files for the given pattern(s).
How can I fix this?
![]()
Edric
23.4k13 gold badges79 silver badges89 bronze badges
asked Jan 6, 2017 at 8:19
![]()
1
On Windows pip3 should be in the Scripts path of your Python installation:
C:pathtopythonScriptspip3
Use:
where python
to find out where your Python executable(s) is/are located. The result should look like this:
C:pathtopythonpython.exe
or:
C:pathtopythonpython3.exe
You can check if pip3 works with this absolute path:
C:pathtopythonScriptspip3
if yes, add C:pathtopythonScripts to your environmental variable PATH .
![]()
Guy Avraham
3,3623 gold badges40 silver badges49 bronze badges
answered Jan 6, 2017 at 8:33
![]()
Mike MüllerMike Müller
80.9k19 gold badges159 silver badges161 bronze badges
7
I Installed pip and pip3 in my windows 10 system easily from the official Microsoft store.
Search python3.9 in Microsoft store. then, click on «Get» to install on you windows platform.
It will install all python install packagers like PIP, PIP3.
Thanks -:)
answered Mar 8, 2021 at 10:11
![]()
Vintage CoderVintage Coder
4211 gold badge6 silver badges9 bronze badges
For python3.5.3, pip3 is also installed when you install python. When you install it you may not select the add to path. Then you can find where the pip3 located and add it to path manually.
answered Mar 25, 2017 at 8:17
![]()
LF00LF00
26.2k27 gold badges148 silver badges280 bronze badges
By default installer from python.org adds this PATH variable:
%USERPROFILE%AppDataLocalMicrosoftWindowsApps
but pip3 installs to %USERPROFILE%AppDataLocalProgramsPythonPython39Scripts.
You should add this path %USERPROFILE%AppDataLocalProgramsPythonPython39Scripts to your PATH variables.
answered Aug 14, 2021 at 11:28
![]()
VladislavVladislav
1,59428 silver badges36 bronze badges
There is another way to install the pip3: just reinstall 3.6.
![]()
double-beep
4,84916 gold badges32 silver badges41 bronze badges
answered May 25, 2020 at 5:41
![]()
Pip3 is the official package manager and pip command for Python 3. It enables the installation and management of third party software packages with features and functionality not found in the Python standard library. Pip3 installs packages from PyPI (Python Package Index), but won’t resolve dependencies or help you solve dependency conflicts.
The ActiveState Platform’s command line interface, the State Tool will automatically resolve dependencies for you to ensure your Python environment won’t be corrupted by installing incompatible dependencies. Get started for free by creating an account on the ActiveState Platform or logging in with your GitHub account.
Install Pip3
pip3 is the official package manager and pip command for Python 3. It enables the installation and management of third party software packages with features and functionality not found in the Python standard library. Pip3 installs packages from PyPI (Python Package Index).
Installation Prerequisites
Check if pip3 is already installed by entering the following command in a terminal or command line:
pip3 -v
Output should be similar to:
Usage:

C:Python38python.exe -m pip <command> [options]

Commands:

  install      Install packages.

  download                    Download packages.

  uninstall                   Uninstall packages.

  freeze                      Output installed packages in requirements format.

  list                        List installed packages.

  show                        Show information about installed packages.

  ...

  ...
You can also check to see which version of pip3 is installed by entering:
pip3 --version
Output should be similar to:
pip 20.0.2 from C:Python38libsite-packagespip (python 3.8)
Confirm which version of Python (if any) is installed on your computer by entering:
python --version
Output should be similar to:
Python 3.8.2
Pip3 Installation
Python 3.4+ in most operating systems includes pip3 by default. If your python version is less than 3.4, then you should upgrade your Python version which will automatically install pip3.
For example, you can install the latest version of Python from ActiveState (Python 3.9), which includes pip3.
Pip3 Upgrade
In operating system environments that already have Python 3 and pip3 installations, you can upgrade pip3, by entering:
python -m pip3 install --upgrade pip
Pip3 Downgrade
You can downgrade to a previous version of pip3, in case a newer version is causing unexpected compatibility errors. For example, to downgrade to pip3 v19.0 run the following command:
python -m pip3 install pip==19.0
Pip3 Virtualenv and Venv
When pip3 is used in a virtual environment, it will generally install packages in a path similar to:
<virtualenv_name>/lib/<python_verion>/site-packages
Pip3 Usage
To install a Python package, enter:
Pip3 install <package_name>
Caution:
Linux and MacOS have system Python, that you should leave alone if possible. System Python is configured to help the operating system work as intended.
Install pip3 Ubuntu and Debian Linux
Ubuntu 18.04 has both Python 2 and Python 3 installed by default, and hence has two pip variants for each Python version. ‘pip’, refers to Python 2. pip3 refers to Python 3.
Ubuntu 20.4 has only Python 3, but still requires a separate python-pip 3 installation.
Procedure for installing pip3 on Ubuntu and Debian Linux:
Enter the following command to update Linux:
sudo apt update
Enter the following command to install pip3:
sudo apt install python3-pip
The above command will also install all pip3 dependencies.
To find the location where pip3 installs packages in Ubuntu Linux, enter:
which pip3
Output should be similar to:
/usr/bin/pip3
Install pip3 Windows
To install or upgrade pip3 in a Windows environment that already has Python 3 installed:
Download the latest version of get-pip.py from
<https://bootstrap.pypa.io/>
You can also use the curl command to download get-pip.py:
curl https://bootstrap.pypa.io/get-pip.py -o get-pip.py
CD into the directory where get-pip.py was downloaded to, and enter the following command to install pip3 and its dependencies:
python3 get-pip.py
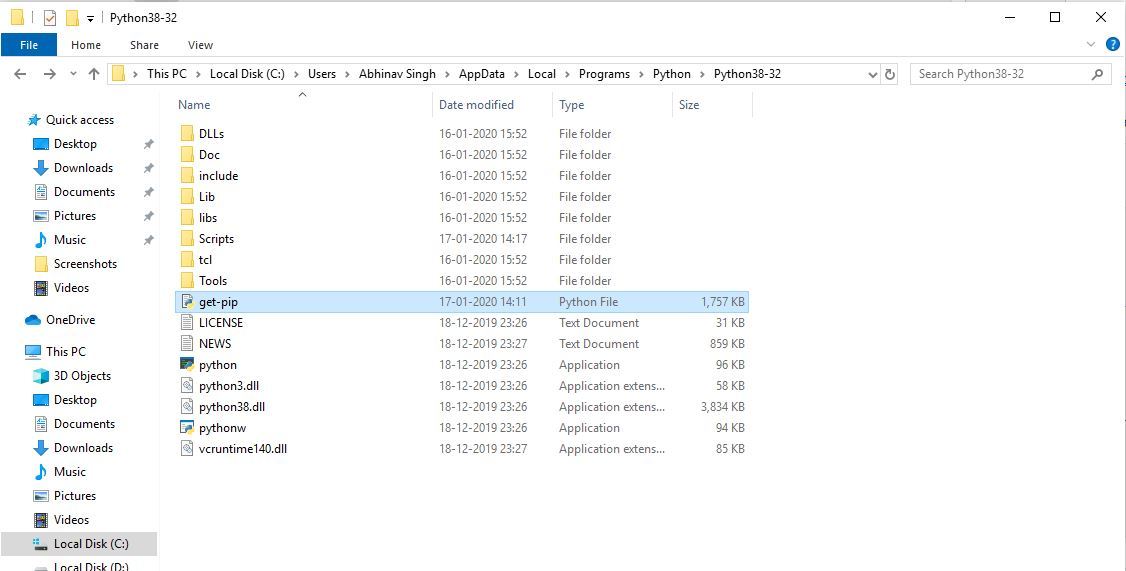
You can verify that pip3 is installed by navigating to the default pip3 installation directory, eg. C:python38scripts, and enter:
pip3 --version
Add Pip3 to Windows Environment Variables
A common problem with running Python tools such as pip3 in Windows, is not having it in the environment path so that you can access it from anywhere. In most cases, you can navigate to the default <python_dir>/scripts directory in which the tool is installed in order to run it.
To run pip3 from any location, you need to add the directory in which it is installed in, as a System PATH environment variable:
- Open the Control Panel and navigate to System.
- Click on Advanced system settings in the upper left panel.
- Click on Environment Variables.
- Under System Variables, scroll down then double-click the PATH variable.
- Click New, and add the directory where pip3 is installed,
e.g.C:Python38Scripts , and select OK.
Figure 1: Environment Variables: Directory where pip3 is installed:

Install Pip3 MacOS
To install pip3 in a MacOS environment that already has Python 3 installed, enter:
sudo apt install python3-pip
To install pip3 using the Homebrew package manager (if it is installed), enter:
brew install pip3
You can also install pip3 using get-pip.py:
- Download the latest version of get-pip.py from https://bootstrap.pypa.io/.
- CD into the download directory, and enter the following command:
sudo python3 get-pip.py
get-pip.py will install pip3 for the python version which runs the script.
Pip3 and Conda
Pip3 has limited use in the Conda environment compared to other operating system environments.
Conda has many of the features found in pip3, but is otherwise a completely separate tool. It installs python modules and packages from the Anaconda Repository. Only after Conda has been used to install as many packages as possible in a project, should pip3 be used to install any remaining software.
It depends on whether you are familiar with pip3 and Conda, and with how package installations interact between the two methods. If you are relatively new to Conda and Python, then only use Conda to install packages in Conda environments. Otherwise pip3 can be used to install packages not found in the Anaconda Repository. Extra care needs to be taken with pip3 dependencies so that they do not conflict with Conda packages and dependencies.
If Python 3 and pip3 are installed outside of the Conda environment, then you can run pip3 from an Anaconda prompt just as you would from a Linux or Windows terminal or command line.
A modern solution to Python package management – Try ActiveState’s Platform
The ActiveState Platform is a cloud-based build tool for Python. It provides build automation and vulnerability remediation for:
- Python language cores, including Python 2.7 and Python 3.5+
- Python packages and their dependencies, including:
- Transitive dependencies (ie., dependencies of dependencies)
- Linked C and Fortran libraries, so you can build data science packages
- Operating system-level dependencies for Windows, Linux, and macOS
- Shared dependencies (ie., OpenSSL)
- Find, fix and automatically rebuild a secure version of Python packages like Django and environments in minutes
Python Package Management In Action
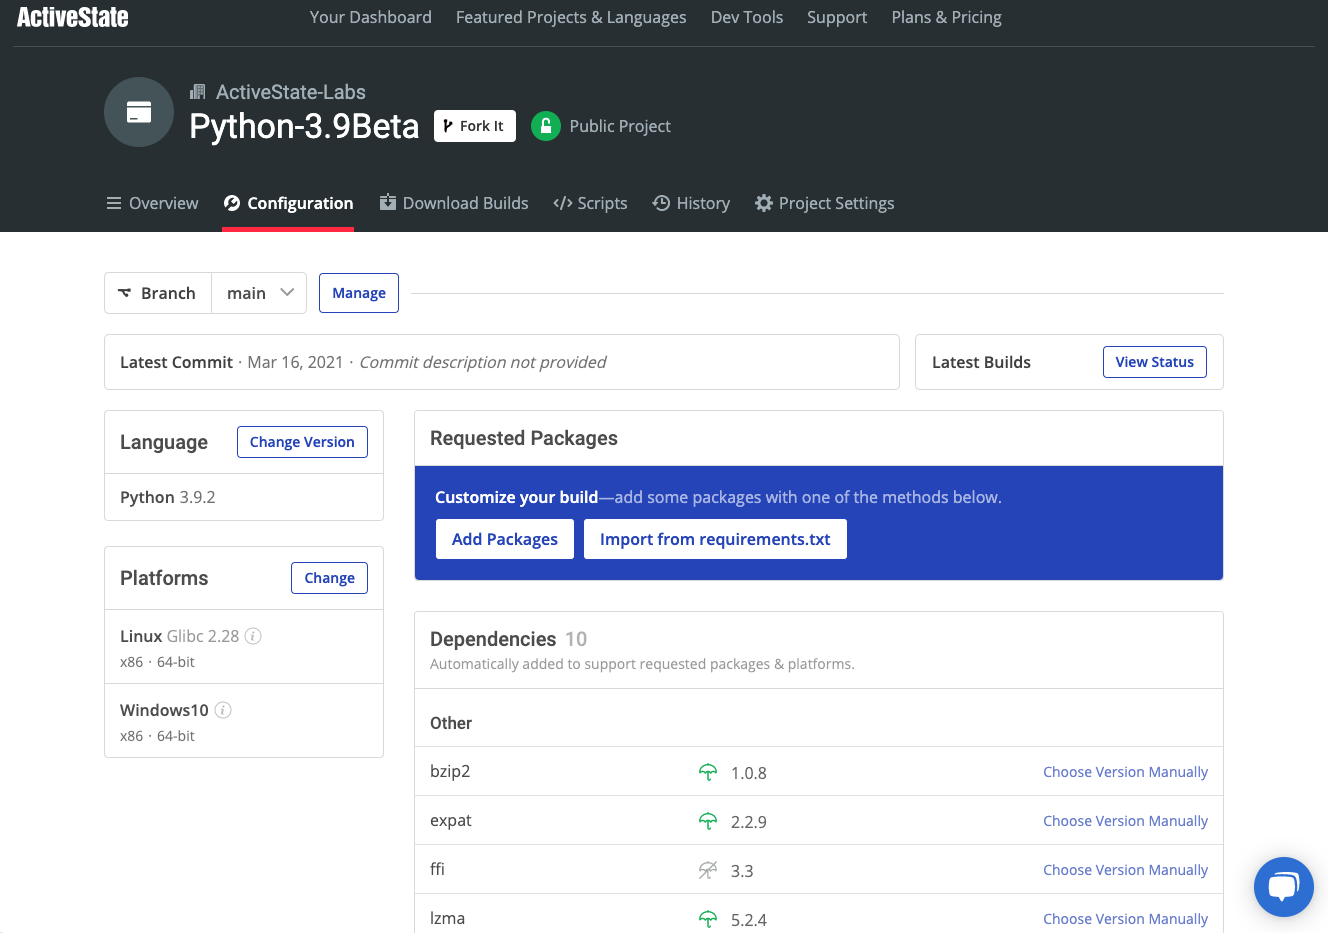
Get a hands-on appreciation for how the ActiveState Platform can help you manage your dependencies for Python environments. Just run the following command to install Python 3.9 and our package manager, the State Tool:
Windows
powershell -Command "& $([scriptblock]::Create((New-Object Net.WebClient).DownloadString('https://platform.activestate.com/dl/cli/install.ps1'))) -activate-default ActiveState-Labs/Python-3.9Beta"
Linux
sh <(curl -q https://platform.activestate.com/dl/cli/install.sh) --activate-default ActiveState-Labs/Python-3.9Beta
Now you can run state install <packagename>. Learn more about how to use the State Tool to manage your Python environment.
Let us know your experience in the ActiveState Community forum.
4 min read
It isn’t easy to find a good programming language. But if you are interested in programming and want to become a developer, you have to command some excellent web hosting to manage all websites. It helps to know more than one language, and Python is the most powerful programming language. It comes with different benefit packages for programming, data science, and many other things. Packages and third-party libraries are essential assets of the Python programming language. The standard Python itself does not have packages and libraries for the developers. You have to download, install, and run them separately. It is why developers depend on pip3 to simplify and error-free the whole process. This blog will tell you how to install pip3 on different operating systems like mac, windows, and Linux flavors.
What is pip3?
Explain pip vs pip3? PIP is a soft (symbolic) link for a specific installer whereas pip3 is an updated version of pip. It is used for Python 3. Pip is a recursive acronym for “Pip Installs Package” or ”preferred installer program”. It is a command line that assists you to manage third-party packages. Using the PIP command, you can install, uninstall and update the packages. When you command pip3, ensure that the module will be installed in Python 3.
Is it difficult to install pip3?
No, it is not difficult to install pip3. Here are some things you should keep in mind before installing pip3.
- You need a powerful operating system like Mac, Linux, etc. It is why VPS hosting plan is best rather than a shared hosting plan when you do programming. You can customize your server to match your desired specifications with VPS hosting plan.
- It takes some time to install pip3; make sure to install it when you have a free schedule.
- After installing pip3, it also takes time to configure it.
How to install pip3?
- Click here https://www.python.org/ftp/python/3.6.5/python-3.6.5.exe to download the 64-bit installer for Python 3.6.5.
- After downloading, you will see a window to click the checkbox and add Python 3.x to Path.
- To verify installation, enter a command: python.
If successfully installed pip3, the program will run, and you will have access to pip3.
How To Configure pip3?
- Put your cursor in a console window and type the following:
pip3 install –user pybin- Press Enter
If your path has been correctly configured, you will get a message to that effect. But if your path has not been correctly configured, you will get a statement that the program is not in PATH. To correctly configure, do this:
- Type the following:
python3 –m pybin put- Press Enter
And you will be correctly configured.
Before Installing PIP: Check if pip is Already Installed
- Launch the command prompt window:
- Press Windows key + X.
- Click Run.
- Type in cmd.exe and press enter.
Alternatively, type cmd in the Windows search bar and click the “Command Prompt” icon.
- Type the pip help at the command prompt.
If PIP responds, then PIP is installed. Otherwise, there will be an error saying the program could not be found.
It is very easy to install pip3 on windows. You need to install a python file and run it using the command prompt. Make sure you have the old version of python to run this file. Here are some steps that how to install pip3 on windows:
- Download the file get-pip.py before installing PIP.
- If it is already not opened, launch a command prompt. Open the search bar in windows, type cmd, and click on the icon.
- Run the following command to download the get-pip.py file.
curl https://bootstrap.pypa.io/get-pip.py -o get-pip.py- To install PIP on windows, type the following command:
python get-pip.pyIf the file is not found, double-check the Path to the folder where you have saved your Python file. You can see the contents of your current directory using the following command:
dirThe dir command returns a complete listing of the contents of a directory.
- You can test whether the command pip help has been successfully installed or not. If installation has been successfully installed, the program runs, and you will see the location of the software package and a list of commands. But if you see an error, then repeat the installation process.
How to install pip3 on MacOS?
Python is installed by default in macOS, but the version provided by Apple is almost outdated, even right after an OS release. Homebrew is a macOS package manager built on ruby and git. Homebrew will assist you in quickly installing and managing a variety of packages and applications. If you’re working with Python and want to install pip3 on Mac, use Homebrew.
/bin/bash -c "$(curl -fsSL https://raw.githubusercontent.com/Homebrew/install/HEAD/install.sh)"Because you have installed the latest version of Python 3, pip is installed. You can verify it with the following command:
$ python3 -m pip –versionAnother option to install pip3 on macOS is to use easy_install. easy_install is the antecedent to pip, and it comes preinstalled on macOS. You can use easy_install to install pip for Python by using this command:
sudo easy_install pipHow to install pip3 on Linux?
There are many different Linux distributions. Each distribution uses other package managers. Installing pip3 on Linux is different compared to Windows and macOS. The OS has various commands for different versions of the Python ecosystem. To install pip3 on Linux, the command you use depends on the distribution or flavor you are using.
On Fedora, RHEL, and CentOS:
$ sudo dnf install python3How to install pip3 on Ubuntu?
Although Python3 comes pre-installed on Ubuntu 18.04, not pip3. We can use the Ubuntu apt (advanced packaging tool) command to install pip3 on the Ubuntu system. But before installing pip3, we make sure that we have sudo rights.
- Update the package
sudo apt update- Install the pip3 for Python 3 by using the apt install command.
sudo apt install python3-pipThe above command will install all tributaries or dependencies and install pip3 on Ubuntu.
- Verify the installation using this command:
pip3 –versionConclusion
Python is one of the most built-in programming languages for beginners, and it comes in different packages. This blog has taught you how to install pip3 on Windows, macOS, and Linux distributions. You have successfully installed pip3, and you are ready to run python packages.
Python is a powerful programming language that has high code readability. It comes with different packages for programming, data science, and many other things. Since Python doesn’t have packages and libraries for developers, you should install them separately. You can do this with Pip3. This article will teach you How to Install Pip3 On Windows With A Few Easy Steps.
Tutorial Install Pip3 On Windows Server
PIP stands for Pip Installs Package or Preferred Installer Program and is a command line to manage PyPI package installations from the command line. In fact, it is a package management system that is used to manage third-party packages written in Python. Pip3 is an updated version of PIP. This utility is used to combine two or more commands. Nevertheless, the output of one command acts as the input of another command. So that the output of the command may also serve as the input of the next command.
Download get-pip.py
First of all, search for cmd in the Windows search bar and open it. Also, If you want, you can buy Windows VPS and then run these commands on it.
Now download the get-pip.py using the command below:
curl https://bootstrap.pypa.io/get-pip.py -o get-pip.pyInstalling Pip3 on the Windows
All you have to do to install Pip3 on Windows is run the following command:
python get-pip.pyIf you can’t find the file, you should check the folder path of the saved file. The following command shows the contents of the current directory:
dirCheck the installation of Pip3 on the Windows
You can check if the Pip3 is installed successfully or not using the command below:
pip helpOnce you have installed Pip3 on your Windows successfully, you will see the location of the software package and a list of commands you can use with Pip3.
Adding Pip3 to Windows Environment Variables
Afterward, follow the steps below to add Pip3 to Windows Environment variables:
Open the Control Panel and Navigate to the System and Security > System path:
Choose Advanced system settings:
Open the Environment Variables and choose the Path in the System Variables section.
Click New and choose the directory where you installed Pip3 to add it to Windows Environment Variables.
Lastly save changes by clicking OK.
Conclusion
Python programming language comes with different packages. You can use Pip3 to manage software packages written in Python. In this article, we introduced you to Pip3 and taught you how to install it on Windows with a few easy steps. If you face any problems or have any questions, you can contact us in the Comments section. I hope this tutorial helps you in installing Pip3 on Windows and you found it useful.
If you don’t have pip3 installed yet, follow the instructions for Installing Pip3 below.
If you think it might already be installed, you can scroll down to Verifying Pip3 to prove it.
If you are sure it’s installed, you can go straight to Configuring Pip3.
Download the 64-bit installer for python 3.6.5 by clicking here or visit the windows releases page for other versions.
The latest python3 installers for Windows install pip3 automatically but make sure that you have clicked the checkbox “Add Python 3.x to PATH” as shown in this screenshot…

Clicking the checkbox adds the folder containing python3 and pip3 to the ‘path’, (a list of folders which is searched by the Windows terminal cmd.exe). This makes it easy to run pip3 commands from the terminal.
Verifying your Pip3 installation
On Windows you should be able to launch a Terminal, which looks like this..
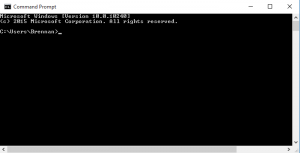
After it has launched, type the following into the Terminal and press Enter
python
If python3 is installed this should launch the python shell, and take you to an interactive python prompt which looks like >>> where you can type 4+4, and press Enter to see 8. Check that the version number starts with “Python 3”.
For example…
Python 3.6.5 (v3.6.5:f59c0932b4, Mar 28 2018, 16:07:46) [MSC v.1900 32 bit (Intel)] on win32
Type “help”, “copyright”, “credits” or “license” for more information.
>>> 4+4
8
If python launched a python3 shell as expected, press CTRL+C to reset the prompt and type…
exit()
…then press Enter to leave the shell. Keep the terminal open, and proceed to configuring your pip3 install.
Troubleshooting
After installing any version of python you must close any existing cmd.exe window and open a new one to run python commands.
Go back to Installing Python3 if you encounter the following;
If python is not installed, the command will not launch a shell. It will instead report…
‘python’ is not recognized as an internal or external command, operable program or batch file.
If python2 is installed instead of python3 you might see instead…
Python 2.7.15 (v2.7.15:ca079a3ea3, Apr 30 2018, 16:30:26) [MSC v.1500 64 bit (AMD64)] on win32
Type “help”, “copyright”, “credits” or “license” for more information.
Our Vanguard tools should run using python2 and can be installed using pip2 . However, Micropython is a dialect of python3 and the makers of python themselves will soon retire python2 so we recommend learners install and use python3 and pip3 following this advice at python.org.
After successfully installing Pip3, keep the terminal open, and proceed to configuring your pip3 install.
User Guide
Running pip
pip is a command line program. When you install pip, a pip command is added
to your system, which can be run from the command prompt as follows:
.. tab:: Unix/macOS

   .. code-block:: shell

      python -m pip <pip arguments>

   ``python -m pip`` executes pip using the Python interpreter you
   specified as python. So ``/usr/bin/python3.7 -m pip`` means
   you are executing pip for your interpreter located at ``/usr/bin/python3.7``.
.. tab:: Windows

   .. code-block:: shell

      py -m pip <pip arguments>

   ``py -m pip`` executes pip using the latest Python interpreter you
   have installed. For more details, read the `Python Windows launcher`_ docs.
Installing Packages
pip supports installing from PyPI, version control, local projects, and
directly from distribution files.
The most common scenario is to install from PyPI using :ref:`Requirement
Specifiers`
.. tab:: Unix/macOS

   .. code-block:: shell

      python -m pip install SomePackage            # latest version
      python -m pip install SomePackage==1.0.4     # specific version
      python -m pip install 'SomePackage>=1.0.4'     # minimum version
.. tab:: Windows

   .. code-block:: shell

      py -m pip install SomePackage            # latest version
      py -m pip install SomePackage==1.0.4     # specific version
      py -m pip install 'SomePackage>=1.0.4'   # minimum version
For more information and examples, see the :ref:`pip install` reference.
Basic Authentication Credentials
This is now covered in :doc:`topics/authentication`.
netrc Support
This is now covered in :doc:`topics/authentication`.
Keyring Support
This is now covered in :doc:`topics/authentication`.
Using a Proxy Server
When installing packages from PyPI, pip requires internet access, which
in many corporate environments requires an outbound HTTP proxy server.
pip can be configured to connect through a proxy server in various ways:
- using the
--proxycommand-line option to specify a proxy in the form
scheme://[user:passwd@]proxy.server:port - using
proxyin a :ref:`config-file` - by setting the standard environment-variables
http_proxy,https_proxy
andno_proxy. - using the environment variable
PIP_USER_AGENT_USER_DATAto include
a JSON-encoded string in the user-agent variable used in pip’s requests.
Requirements Files
«Requirements files» are files containing a list of items to be
installed using :ref:`pip install` like so:
.. tab:: Unix/macOS

   .. code-block:: shell

      python -m pip install -r requirements.txt
.. tab:: Windows

   .. code-block:: shell

      py -m pip install -r requirements.txt
Details on the format of the files are here: :ref:`requirements-file-format`.
Logically, a Requirements file is just a list of :ref:`pip install` arguments
placed in a file. Note that you should not rely on the items in the file being
installed by pip in any particular order.
In practice, there are 4 common uses of Requirements files:
-
Requirements files are used to hold the result from :ref:`pip freeze` for the
purpose of achieving :doc:`topics/repeatable-installs`. In
this case, your requirement file contains a pinned version of everything that
was installed whenpip freezewas run... tab:: Unix/macOS .. code-block:: shell python -m pip freeze > requirements.txt python -m pip install -r requirements.txt.. tab:: Windows .. code-block:: shell py -m pip freeze > requirements.txt py -m pip install -r requirements.txt -
Requirements files are used to force pip to properly resolve dependencies.
pip 20.2 and earlier doesn’t have true dependency resolution, but instead simply uses the first
specification it finds for a project. E.g. ifpkg1requires
pkg3>=1.0andpkg2requirespkg3>=1.0,<=2.0, and ifpkg1is
resolved first, pip will only usepkg3>=1.0, and could easily end up
installing a version ofpkg3that conflicts with the needs ofpkg2.
To solve this problem, you can placepkg3>=1.0,<=2.0(i.e. the correct
specification) into your requirements file directly along with the other top
level requirements. Like so:pkg1 pkg2 pkg3>=1.0,<=2.0
-
Requirements files are used to force pip to install an alternate version of a
sub-dependency. For example, supposeProjectAin your requirements file
requiresProjectB, but the latest version (v1.3) has a bug, you can force
pip to accept earlier versions like so:ProjectA ProjectB<1.3
-
Requirements files are used to override a dependency with a local patch that
lives in version control. For example, suppose a dependency
SomeDependencyfrom PyPI has a bug, and you can’t wait for an upstream
fix.
You could clone/copy the src, make the fix, and place it in VCS with the tag
sometag. You’d reference it in your requirements file with a line like
so:git+https://myvcs.com/some_dependency@sometag#egg=SomeDependency
If
SomeDependencywas previously a top-level requirement in your
requirements file, then replace that line with the new line. If
SomeDependencyis a sub-dependency, then add the new line.
It’s important to be clear that pip determines package dependencies using
install_requires metadata,
not by discovering requirements.txt files embedded in projects.
See also:
- :ref:`requirements-file-format`
- :ref:`pip freeze`
- «setup.py vs requirements.txt» (an article by Donald Stufft)
Constraints Files
Constraints files are requirements files that only control which version of a
requirement is installed, not whether it is installed or not. Their syntax and
contents is a subset of :ref:`Requirements Files`, with several kinds of syntax
not allowed: constraints must have a name, they cannot be editable, and they
cannot specify extras. In terms of semantics, there is one key difference:
Including a package in a constraints file does not trigger installation of the
package.
Use a constraints file like so:
.. tab:: Unix/macOS

   .. code-block:: shell

      python -m pip install -c constraints.txt
.. tab:: Windows

   .. code-block:: shell

      py -m pip install -c constraints.txt
Constraints files are used for exactly the same reason as requirements files
when you don’t know exactly what things you want to install. For instance, say
that the «helloworld» package doesn’t work in your environment, so you have a
local patched version. Some things you install depend on «helloworld», and some
don’t.
One way to ensure that the patched version is used consistently is to
manually audit the dependencies of everything you install, and if «helloworld»
is present, write a requirements file to use when installing that thing.
Constraints files offer a better way: write a single constraints file for your
organisation and use that everywhere. If the thing being installed requires
«helloworld» to be installed, your fixed version specified in your constraints
file will be used.
Constraints file support was added in pip 7.1. In :ref:`Resolver
changes 2020` we did a fairly comprehensive overhaul, removing several
undocumented and unsupported quirks from the previous implementation,
and stripped constraints files down to being purely a way to specify
global (version) limits for packages.
Installing from Wheels
«Wheel» is a built, archive format that can greatly speed installation compared
to building and installing from source archives. For more information, see the
Wheel docs , PEP 427, and PEP 425.
pip prefers Wheels where they are available. To disable this, use the
:ref:`—no-binary <install_—no-binary>` flag for :ref:`pip install`.
If no satisfactory wheels are found, pip will default to finding source
archives.
To install directly from a wheel archive:
.. tab:: Unix/macOS

   .. code-block:: shell

      python -m pip install SomePackage-1.0-py2.py3-none-any.whl
.. tab:: Windows

   .. code-block:: shell

      py -m pip install SomePackage-1.0-py2.py3-none-any.whl
To include optional dependencies provided in the provides_extras
metadata in the wheel, you must add quotes around the install target
name:
.. tab:: Unix/macOS

   .. code-block:: shell

      python -m pip install './somepackage-1.0-py2.py3-none-any.whl[my-extras]'
.. tab:: Windows

   .. code-block:: shell

      py -m pip install './somepackage-1.0-py2.py3-none-any.whl[my-extras]'
Note
In the future, the path[extras] syntax may become deprecated. It is
recommended to use PEP 508 syntax wherever possible.
For the cases where wheels are not available, pip offers :ref:`pip wheel` as a
convenience, to build wheels for all your requirements and dependencies.
:ref:`pip wheel` requires the wheel package to be installed, which provides the
«bdist_wheel» setuptools extension that it uses.
To build wheels for your requirements and all their dependencies to a local
directory:
.. tab:: Unix/macOS

   .. code-block:: shell

      python -m pip install wheel
      python -m pip wheel --wheel-dir=/local/wheels -r requirements.txt
.. tab:: Windows

   .. code-block:: shell

      py -m pip install wheel
      py -m pip wheel --wheel-dir=/local/wheels -r requirements.txt
And then to install those requirements just using your local directory of
wheels (and not from PyPI):
.. tab:: Unix/macOS

   .. code-block:: shell

      python -m pip install --no-index --find-links=/local/wheels -r requirements.txt
.. tab:: Windows

   .. code-block:: shell

      py -m pip install --no-index --find-links=/local/wheels -r requirements.txt
Uninstalling Packages
pip is able to uninstall most packages like so:
.. tab:: Unix/macOS

   .. code-block:: shell

      python -m pip uninstall SomePackage
.. tab:: Windows

   .. code-block:: shell

      py -m pip uninstall SomePackage
pip also performs an automatic uninstall of an old version of a package
before upgrading to a newer version.
For more information and examples, see the :ref:`pip uninstall` reference.
Listing Packages
To list installed packages:
.. tab:: Unix/macOS

   .. code-block:: console

      $ python -m pip list
      docutils (0.9.1)
      Jinja2 (2.6)
      Pygments (1.5)
      Sphinx (1.1.2)
.. tab:: Windows

   .. code-block:: console

      C:> py -m pip list
      docutils (0.9.1)
      Jinja2 (2.6)
      Pygments (1.5)
      Sphinx (1.1.2)
To list outdated packages, and show the latest version available:
.. tab:: Unix/macOS

   .. code-block:: console

      $ python -m pip list --outdated
      docutils (Current: 0.9.1 Latest: 0.10)
      Sphinx (Current: 1.1.2 Latest: 1.1.3)
.. tab:: Windows

   .. code-block:: console

      C:> py -m pip list --outdated
      docutils (Current: 0.9.1 Latest: 0.10)
      Sphinx (Current: 1.1.2 Latest: 1.1.3)
To show details about an installed package:
.. tab:: Unix/macOS

   .. code-block:: console

      $ python -m pip show sphinx
      ---
      Name: Sphinx
      Version: 1.1.3
      Location: /my/env/lib/pythonx.x/site-packages
      Requires: Pygments, Jinja2, docutils
.. tab:: Windows

   .. code-block:: console

      C:> py -m pip show sphinx
      ---
      Name: Sphinx
      Version: 1.1.3
      Location: /my/env/lib/pythonx.x/site-packages
      Requires: Pygments, Jinja2, docutils
For more information and examples, see the :ref:`pip list` and :ref:`pip show`
reference pages.
Searching for Packages
pip can search PyPI for packages using the pip search
command:
.. tab:: Unix/macOS

   .. code-block:: shell

      python -m pip search "query"
.. tab:: Windows

   .. code-block:: shell

      py -m pip search "query"
The query will be used to search the names and summaries of all
packages.
For more information and examples, see the :ref:`pip search` reference.
Configuration
This is now covered in :doc:`topics/configuration`.
Config file
This is now covered in :doc:`topics/configuration`.
Environment Variables
This is now covered in :doc:`topics/configuration`.
Config Precedence
This is now covered in :doc:`topics/configuration`.
Command Completion
pip comes with support for command line completion in bash, zsh and fish.
To setup for bash:
python -m pip completion --bash >> ~/.profile
To setup for zsh:
python -m pip completion --zsh >> ~/.zprofile
To setup for fish:
python -m pip completion --fish > ~/.config/fish/completions/pip.fish
To setup for powershell:
python -m pip completion --powershell | Out-File -Encoding default -Append $PROFILE
Alternatively, you can use the result of the completion command directly
with the eval function of your shell, e.g. by adding the following to your
startup file:
eval "`pip completion --bash`"
Installing from local packages
In some cases, you may want to install from local packages only, with no traffic
to PyPI.
First, download the archives that fulfill your requirements:
.. tab:: Unix/macOS

   .. code-block:: shell

      python -m pip download --destination-directory DIR -r requirements.txt
.. tab:: Windows

   .. code-block:: shell

      py -m pip download --destination-directory DIR -r requirements.txt
Note that pip download will look in your wheel cache first, before
trying to download from PyPI. If you’ve never installed your requirements
before, you won’t have a wheel cache for those items. In that case, if some of
your requirements don’t come as wheels from PyPI, and you want wheels, then run
this instead:
.. tab:: Unix/macOS

   .. code-block:: shell

      python -m pip wheel --wheel-dir DIR -r requirements.txt
.. tab:: Windows

   .. code-block:: shell

      py -m pip wheel --wheel-dir DIR -r requirements.txt
Then, to install from local only, you’ll be using :ref:`—find-links
<install_—find-links>` and :ref:`—no-index <install_—no-index>` like so:
.. tab:: Unix/macOS

   .. code-block:: shell

      python -m pip install --no-index --find-links=DIR -r requirements.txt
.. tab:: Windows

   .. code-block:: shell

      py -m pip install --no-index --find-links=DIR -r requirements.txt
«Only if needed» Recursive Upgrade
pip install --upgrade now has a --upgrade-strategy option which
controls how pip handles upgrading of dependencies. There are 2 upgrade
strategies supported:
eager: upgrades all dependencies regardless of whether they still satisfy
the new parent requirementsonly-if-needed: upgrades a dependency only if it does not satisfy the new
parent requirements
The default strategy is only-if-needed. This was changed in pip 10.0 due to
the breaking nature of eager when upgrading conflicting dependencies.
It is important to note that --upgrade affects direct requirements (e.g.
those specified on the command-line or via a requirements file) while
--upgrade-strategy affects indirect requirements (dependencies of direct
requirements).
As an example, say SomePackage has a dependency, SomeDependency, and
both of them are already installed but are not the latest available versions:
pip install SomePackage: will not upgrade the existingSomePackageor
SomeDependency.pip install --upgrade SomePackage: will upgradeSomePackage, but not
SomeDependency(unless a minimum requirement is not met).pip install --upgrade SomePackage --upgrade-strategy=eager: upgrades both
SomePackageandSomeDependency.
As an historic note, an earlier «fix» for getting the only-if-needed
behaviour was:
.. tab:: Unix/macOS

   .. code-block:: shell

      python -m pip install --upgrade --no-deps SomePackage
      python -m pip install SomePackage
.. tab:: Windows

   .. code-block:: shell

      py -m pip install --upgrade --no-deps SomePackage
      py -m pip install SomePackage
A proposal for an upgrade-all command is being considered as a safer
alternative to the behaviour of eager upgrading.
User Installs
With Python 2.6 came the «user scheme» for installation,
which means that all Python distributions support an alternative install
location that is specific to a user. The default location for each OS is
explained in the python documentation for the site.USER_BASE variable.
This mode of installation can be turned on by specifying the :ref:`—user
<install_—user>` option to pip install.
Moreover, the «user scheme» can be customized by setting the
PYTHONUSERBASE environment variable, which updates the value of
site.USER_BASE.
To install «SomePackage» into an environment with site.USER_BASE customized to
‘/myappenv’, do the following:
.. tab:: Unix/macOS

   .. code-block:: shell

      export PYTHONUSERBASE=/myappenv
      python -m pip install --user SomePackage
.. tab:: Windows

   .. code-block:: shell

      set PYTHONUSERBASE=c:/myappenv
      py -m pip install --user SomePackage
pip install --user follows four rules:
- When globally installed packages are on the python path, and they conflict
with the installation requirements, they are ignored, and not
uninstalled. - When globally installed packages are on the python path, and they satisfy
the installation requirements, pip does nothing, and reports that
requirement is satisfied (similar to how global packages can satisfy
requirements when installing packages in a--system-site-packages
virtualenv). - pip will not perform a
--userinstall in a--no-site-packages
virtualenv (i.e. the default kind of virtualenv), due to the user site not
being on the python path. The installation would be pointless. - In a
--system-site-packagesvirtualenv, pip will not install a package
that conflicts with a package in the virtualenv site-packages. The —user
installation would lack sys.path precedence and be pointless.
To make the rules clearer, here are some examples:
From within a --no-site-packages virtualenv (i.e. the default kind):
.. tab:: Unix/macOS

   .. code-block:: console

      $ python -m pip install --user SomePackage
      Can not perform a '--user' install. User site-packages are not visible in this virtualenv.
.. tab:: Windows

   .. code-block:: console

      C:> py -m pip install --user SomePackage
      Can not perform a '--user' install. User site-packages are not visible in this virtualenv.
From within a --system-site-packages virtualenv where SomePackage==0.3
is already installed in the virtualenv:
.. tab:: Unix/macOS

   .. code-block:: console

      $ python -m pip install --user SomePackage==0.4
      Will not install to the user site because it will lack sys.path precedence
.. tab:: Windows

   .. code-block:: console

      C:> py -m pip install --user SomePackage==0.4
      Will not install to the user site because it will lack sys.path precedence
From within a real python, where SomePackage is not installed globally:
.. tab:: Unix/macOS

   .. code-block:: console

      $ python -m pip install --user SomePackage
      [...]
      Successfully installed SomePackage
.. tab:: Windows

   .. code-block:: console

      C:> py -m pip install --user SomePackage
      [...]
      Successfully installed SomePackage
From within a real python, where SomePackage is installed globally, but
is not the latest version:
.. tab:: Unix/macOS

   .. code-block:: console

      $ python -m pip install --user SomePackage
      [...]
      Requirement already satisfied (use --upgrade to upgrade)
      $ python -m pip install --user --upgrade SomePackage
      [...]
      Successfully installed SomePackage
.. tab:: Windows

   .. code-block:: console

      C:> py -m pip install --user SomePackage
      [...]
      Requirement already satisfied (use --upgrade to upgrade)
      C:> py -m pip install --user --upgrade SomePackage
      [...]
      Successfully installed SomePackage
From within a real python, where SomePackage is installed globally, and
is the latest version:
.. tab:: Unix/macOS

   .. code-block:: console

      $ python -m pip install --user SomePackage
      [...]
      Requirement already satisfied (use --upgrade to upgrade)
      $ python -m pip install --user --upgrade SomePackage
      [...]
      Requirement already up-to-date: SomePackage
      # force the install
      $ python -m pip install --user --ignore-installed SomePackage
      [...]
      Successfully installed SomePackage
.. tab:: Windows

   .. code-block:: console

      C:> py -m pip install --user SomePackage
      [...]
      Requirement already satisfied (use --upgrade to upgrade)
      C:> py -m pip install --user --upgrade SomePackage
      [...]
      Requirement already up-to-date: SomePackage
      # force the install
      C:> py -m pip install --user --ignore-installed SomePackage
      [...]
      Successfully installed SomePackage
Ensuring Repeatability
This is now covered in :doc:`../topics/repeatable-installs`.
Fixing conflicting dependencies
This is now covered in :doc:`../topics/dependency-resolution`.
Using pip from your program
As noted previously, pip is a command line program. While it is implemented in
Python, and so is available from your Python code via import pip, you must
not use pip’s internal APIs in this way. There are a number of reasons for this:
- The pip code assumes that it is in sole control of the global state of the
program.
pip manages things like the logging system configuration, or the values of
the standard IO streams, without considering the possibility that user code
might be affected. - pip’s code is not thread safe. If you were to run pip in a thread, there
is no guarantee that either your code or pip’s would work as you expect. - pip assumes that once it has finished its work, the process will terminate.
It doesn’t need to handle the possibility that other code will continue to
run after that point, so (for example) calling pip twice in the same process
is likely to have issues.
This does not mean that the pip developers are opposed in principle to the idea
that pip could be used as a library — it’s just that this isn’t how it was
written, and it would be a lot of work to redesign the internals for use as a
library, handling all of the above issues, and designing a usable, robust and
stable API that we could guarantee would remain available across multiple
releases of pip. And we simply don’t currently have the resources to even
consider such a task.
What this means in practice is that everything inside of pip is considered an
implementation detail. Even the fact that the import name is pip is subject
to change without notice. While we do try not to break things as much as
possible, all the internal APIs can change at any time, for any reason. It also
means that we generally won’t fix issues that are a result of using pip in an
unsupported way.
It should also be noted that installing packages into sys.path in a running
Python process is something that should only be done with care. The import
system caches certain data, and installing new packages while a program is
running may not always behave as expected. In practice, there is rarely an
issue, but it is something to be aware of.
Having said all of the above, it is worth covering the options available if you
decide that you do want to run pip from within your program. The most reliable
approach, and the one that is fully supported, is to run pip in a subprocess.
This is easily done using the standard subprocess module:
subprocess.check_call([sys.executable, '-m', 'pip', 'install', 'my_package'])
If you want to process the output further, use one of the other APIs in the module.
We are using freeze here which outputs installed packages in requirements format.:
reqs = subprocess.check_output([sys.executable, '-m', 'pip', 'freeze'])
If you don’t want to use pip’s command line functionality, but are rather
trying to implement code that works with Python packages, their metadata, or
PyPI, then you should consider other, supported, packages that offer this type
of ability. Some examples that you could consider include:
packaging— Utilities to work with standard package metadata (versions,
requirements, etc.)setuptools(specificallypkg_resources) — Functions for querying what
packages the user has installed on their system.distlib— Packaging and distribution utilities (including functions for
interacting with PyPI).
Changes to the pip dependency resolver in 20.3 (2020)
pip 20.3 has a new dependency resolver, on by default for Python 3
users. (pip 20.1 and 20.2 included pre-release versions of the new
dependency resolver, hidden behind optional user flags.) Read below
for a migration guide, how to invoke the legacy resolver, and the
deprecation timeline. We also made a two-minute video explanation
you can watch.
We will continue to improve the pip dependency resolver in response to
testers’ feedback. Please give us feedback through the resolver
testing survey.
Watch out for
The big change in this release is to the pip dependency resolver
within pip.
Computers need to know the right order to install pieces of software
(«to install x, you need to install y first»). So, when Python
programmers share software as packages, they have to precisely describe
those installation prerequisites, and pip needs to navigate tricky
situations where it’s getting conflicting instructions. This new
dependency resolver will make pip better at handling that tricky
logic, and make pip easier for you to use and troubleshoot.
The most significant changes to the resolver are:
- It will reduce inconsistency: it will no longer install a
combination of packages that is mutually inconsistent. In older
versions of pip, it is possible for pip to install a package which
does not satisfy the declared requirements of another installed
package. For example, in pip 20.0,pip install "six<1.12"does the wrong thing, “successfully” installing
"virtualenv==20.0.2"
six==1.11, even thoughvirtualenv==20.0.2requires
six>=1.12.0,<2(defined here).
The new resolver, instead, outright rejects installing anything if it
gets that input. - It will be stricter — if you ask pip to install two packages with
incompatible requirements, it will refuse (rather than installing a
broken combination, like it did in previous versions).
So, if you have been using workarounds to force pip to deal with
incompatible or inconsistent requirements combinations, now’s a good
time to fix the underlying problem in the packages, because pip will
be stricter from here on out.
This also means that, when you run a pip install command, pip only
considers the packages you are installing in that command, and may
break already-installed packages. It will not guarantee that your
environment will be consistent all the time. If you pip install x
and then pip install y, it’s possible that the version of y
you get will be different than it would be if you had run pip in a single command. We are considering changing this
install x y
behavior (per :issue:`7744`) and would like your thoughts on what
pip’s behavior should be; please answer our survey on upgrades that
create conflicts.
We are also changing our support for :ref:`Constraints Files`,
editable installs, and related functionality. We did a fairly
comprehensive overhaul and stripped constraints files down to being
purely a way to specify global (version) limits for packages, and so
some combinations that used to be allowed will now cause
errors. Specifically:
- Constraints don’t override the existing requirements; they simply
constrain what versions are visible as input to the resolver (see
:issue:`9020`) - Providing an editable requirement (
-e .) does not cause pip to
ignore version specifiers or constraints (see :issue:`8076`), and if
you have a conflict between a pinned requirement and a local
directory then pip will indicate that it cannot find a version
satisfying both (see :issue:`8307`) - Hash-checking mode requires that all requirements are specified as a
==match on a version and may not work well in combination with
constraints (see :issue:`9020` and :issue:`8792`) - If necessary to satisfy constraints, pip will happily reinstall
packages, upgrading or downgrading, without needing any additional
command-line options (see :issue:`8115` and :doc:`development/architecture/upgrade-options`) - Unnamed requirements are not allowed as constraints (see :issue:`6628` and :issue:`8210`)
- Links are not allowed as constraints (see :issue:`8253`)
- Constraints cannot have extras (see :issue:`6628`)
Per our :ref:`Python 2 Support` policy, pip 20.3 users who are using
Python 2 will use the legacy resolver by default. Python 2 users
should upgrade to Python 3 as soon as possible, since in pip 21.0 in
January 2021, pip dropped support for Python 2 altogether.
How to upgrade and migrate
-
Install pip 20.3 with
python -m pip install --upgrade pip. -
Validate your current environment by running
pip check. This
will report if you have any inconsistencies in your set of installed
packages. Having a clean installation will make it much less likely
that you will hit issues with the new resolver (and may
address hidden problems in your current environment!). If you run
pip checkand run into stuff you can’t figure out, please ask
for help in our issue tracker or chat. -
Test the new version of pip.
While we have tried to make sure that pip’s test suite covers as
many cases as we can, we are very aware that there are people using
pip with many different workflows and build processes, and we will
not be able to cover all of those without your help.- If you use pip to install your software, try out the new resolver
and let us know if it works for you withpip install. Try:- installing several packages simultaneously
- re-creating an environment using a
requirements.txtfile - using
pip install --force-reinstallto check whether
it does what you think it should - using constraints files
- the «Setups to test with special attention» and «Examples to try» below
- If you have a build pipeline that depends on pip installing your
dependencies for you, check that the new resolver does what you
need. - Run your project’s CI (test suite, build process, etc.) using the
new resolver, and let us know of any issues. - If you have encountered resolver issues with pip in the past,
check whether the new resolver fixes them, and read :ref:`Fixing
conflicting dependencies`. Also, let us know if the new resolver
has issues with any workarounds you put in to address the
current resolver’s limitations. We’ll need to ensure that people
can transition off such workarounds smoothly. - If you develop or support a tool that wraps pip or uses it to
deliver part of your functionality, please test your integration
with pip 20.3.
- If you use pip to install your software, try out the new resolver
-
Troubleshoot and try these workarounds if necessary.
- If pip is taking longer to install packages, read :doc:`Dependency
resolution backtracking <topics/dependency-resolution>` for ways to
reduce the time pip spends backtracking due to dependency conflicts. - If you don’t want pip to actually resolve dependencies, use the
--no-depsoption. This is useful when you have a set of package
versions that work together in reality, even though their metadata says
that they conflict. For guidance on a long-term fix, read
:ref:`Fixing conflicting dependencies`. - If you run into resolution errors and need a workaround while you’re
fixing their root causes, you can choose the old resolver behavior using
the flag--use-deprecated=legacy-resolver. This will work until we
release pip 21.0 (see
:ref:`Deprecation timeline for 2020 resolver changes`).
- If pip is taking longer to install packages, read :doc:`Dependency
-
Please report bugs through the resolver testing survey.
Setups to test with special attention
- Requirements files with 100+ packages
- Installation workflows that involve multiple requirements files
- Requirements files that include hashes (:ref:`hash-checking mode`)
or pinned dependencies (perhaps as output frompip-compilewithin
pip-tools) - Using :ref:`Constraints Files`
- Continuous integration/continuous deployment setups
- Installing from any kind of version control systems (i.e., Git, Subversion, Mercurial, or CVS), per :doc:`topics/vcs-support`
- Installing from source code held in local directories
Examples to try
Install:
- tensorflow
hackingpycodestylepandastablibelasticsearchandrequeststogethersixandcherrypytogetherpip install flake8-import-order==0.17.1 flake8==3.5.0 --use-feature=2020-resolverpip install tornado==5.0 sprockets.http==1.5.0 --use-feature=2020-resolver
Try:
pip installpip uninstallpip checkpip cache
Tell us about
Specific things we’d love to get feedback on:
- Cases where the new resolver produces the wrong result,
obviously. We hope there won’t be too many of these, but we’d like
to trap such bugs before we remove the legacy resolver. - Cases where the resolver produced an error when you believe it
should have been able to work out what to do. - Cases where the resolver gives an error because there’s a problem
with your requirements, but you need better information to work out
what’s wrong. - If you have workarounds to address issues with the current resolver,
does the new resolver let you remove those workarounds? Tell us!
Please let us know through the resolver testing survey.
Deprecation timeline
We plan for the resolver changeover to proceed as follows, using
:ref:`Feature Flags` and following our :ref:`Release Cadence`:
- pip 20.1: an alpha version of the new resolver was available,
opt-in, using the optional flag
--unstable-feature=resolver. pip defaulted to legacy
behavior. - pip 20.2: a beta of the new resolver was available, opt-in, using
the flag--use-feature=2020-resolver. pip defaulted to legacy
behavior. Users of pip 20.2 who want pip to default to using the
new resolver can runpip config set global.use-feature(for more on that and the alternate
2020-resolver
PIP_USE_FEATUREenvironment variable option, see issue
8661). - pip 20.3: pip defaults to the new resolver in Python 3 environments,
but a user can opt-out and choose the old resolver behavior,
using the flag--use-deprecated=legacy-resolver. In Python 2
environments, pip defaults to the old resolver, and the new one is
available using the flag--use-feature=2020-resolver. - pip 21.0: pip uses new resolver by default, and the old resolver is
no longer supported. It will be removed after a currently undecided
amount of time, as the removal is dependent on pip’s volunteer
maintainers’ availability. Python 2 support is removed per our
:ref:`Python 2 Support` policy.
Since this work will not change user-visible behavior described in the
pip documentation, this change is not covered by the :ref:`Deprecation
Policy`.
Context and followup
As discussed in our announcement on the PSF blog, the pip team are
in the process of developing a new «dependency resolver» (the part of
pip that works out what to install based on your requirements).
We’re tracking our rollout in :issue:`6536` and you can watch for
announcements on the low-traffic packaging announcements list and
the official Python blog.
Using system trust stores for verifying HTTPS
This is now covered in :doc:`topics/https-certificates`.
Prerequisite: Python Language Introduction
Before we start with how to install pip for Python on Windows, let’s first go through the basic introduction to Python. Python is a widely-used general-purpose, high-level programming language. Python is a programming language that lets you work quickly and integrate systems more efficiently.
PIP is a package management system used to install and manage software packages/libraries written in Python. These files are stored in a large “online repository” termed as Python Package Index (PyPI). pip uses PyPI as the default source for packages and their dependencies. So whenever you type:
pip install package_name
pip will look for that package on PyPI and if found, it will download and install the package on your local system.
Check if Python is installed
Run the following command to test if python is installed or not. If not click here.
python --version
If it is installed, You will see something like this:
Python 3.10.0
Download and Install pip
The PIP can be downloaded and installed using the command line by going through the following steps:
Method 1: Using cURL in Python
Curl is a UNIX command that is used to send the PUT, GET, and POST requests to a URL. This tool is utilized for downloading files, testing REST APIs, etc.
Step 1: Open the cmd terminal
Step 2: In python, a curl is a tool for transferring data requests to and from a server. Use the following command to request:
curl https://bootstrap.pypa.io/get-pip.py -o get-pip.py
python get-pip.py

Method 2: Manually install PIP on Windows
Pip must be manually installed on Windows. You might need to use the correct version of the file from pypa.org if you’re using an earlier version of Python or pip. Get the file and save it to a folder on your PC.
Step 1: Download the get-pip.py (https://bootstrap.pypa.io/get-pip.py) file and store it in the same directory as python is installed.
Step 2: Change the current path of the directory in the command line to the path of the directory where the above file exists.

Step 3: get-pip.py is a bootstrapping script that enables users to install pip in Python environments. Run the command given below:
python get-pip.py
Step 4: Now wait through the installation process. Voila! pip is now installed on your system.

Verification of the installation process
One can easily verify if the pip has been installed correctly by performing a version check on the same. Just go to the command line and execute the following command:
pip -V
or
pip --version

Adding PIP To Windows Environment Variables
If you are facing any path error then you can follow the following steps to add the pip to your PATH. You can follow the following steps to set the Path:
- Go to System and Security > System in the Control Panel once it has been opened.
- On the left side, click the Advanced system settings link.
- Then select Environment Variables.
- Double-click the PATH variable under System Variables.
- Click New, and add the directory where pip is installed, e.g. C:Python33Scripts, and select OK.
Upgrading Pip On Windows
pip can be upgraded using the following command.
python -m pip install -U pip
Downgrading Pip On Windows
It may happen sometimes that your pip current pip version is not supporting your current version of python or machine for that you can downgrade your pip version with the following command.
Note: You can mention the version you want to install
python -m pip install pip==17.0
Python — очень популярный язык программирования. Именно поэтому он поддерживает множество дополнительных фреймворков и библиотек. Сторонние фреймворки устанавливаются, чтобы каждый раз не изобретать велосипед, а пользоваться уже готовыми и проверенными решениями. Но прежде чем установить требуемый пакет на Python, этот программный пакет еще нужно найти. Здесь поможет центральный репозиторий Питона —PyPI, он же Python Package Index, он же каталог Python-пакетов.
Но тут возникает небольшая проблема, так как скачивание, installing и работа с пакетами в ручном режиме — занятие довольно утомительное и небыстрое. Однако этих трудностей можно избежать, если использовать для инсталляции специальный инструмент, который называют PIP. С его помощью процесс упрощается и ускоряется.
Речь идет об утилите командной строки, позволяющей инсталлировать и деинсталлировать программные пакеты PyPI с помощью простейшей команды pip. Еще PIP («пип») называют системой управления программными пакетами, написанными на языке Python. Подразумеваются пакеты, которые находятся в центральном репозитории PyPI.
Чаще всего работа с PIP не вызывает проблем, особенно если у пользователя уже есть опыт работы с терминалом в операционной системе Windows, Linux, Mac.
Также стоит отметить, что для Python серии 3.4 и выше PIP уже установлен (installed), так как он устанавливается (installs) по умолчанию одновременно с Пайтоном. Именно поэтому для начала надо проверить версию Python, которая есть на компьютере. Седлать это несложно: просто запустите в терминале следующую команду:
python --version
Эта команда работает для Windows и Mac. Если у пользователя установлена операционная система Linux, то команда для Python 2 будет аналогичной, а вот для версии 3 будет немного отличаться:
python3 --version
Для тех, кто забыл: для запуска терминала командной строки нужно выполнить простые действия:
- для Windows — комбинация клавиш Win+X;
- для Mac — Command+пробел;
- для Linux — Ctrl+Alt+T (возможны различия в зависимости от установленного дистрибутива).
После выполнения вышеописанных действий пользователь получит информацию о текущей версии Питона, установленной в его операционной системе. Для Виндовс это может выглядеть следующим образом:
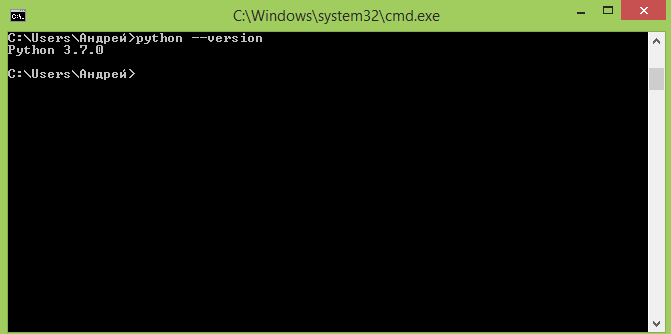
Если вы получили аналогичный результат, Python готов к работе. Если нет, его необходимо сначала установить (когда Пайтон не установлен, выдается сообщение «Python is not defined»).
Особенности PIP install для Python 3 на Windows
Ниже представлен алгоритм установки PIP для Пайтон 3. Этот алгоритм подходит, если на компьютере пользователя установлена ОС Windows 7/8.1/10.
Порядок действий:
- Скачивается инсталляционный скрипт get-pip.py. Для этого надо перейти по ссылке, нажать правой кнопкой мыши на любую часть экрана и выполнить «Сохранить как…». Скрипт можно сохранять в любую папку на усмотрение пользователя. Пусть это будет, к примеру, папка «Загрузки».
- Открывается командная строка и осуществляется переход к каталогу, куда скачан файлом
get-pip.py(в нашем случае это папка «Загрузки», но может быть и любая другая).
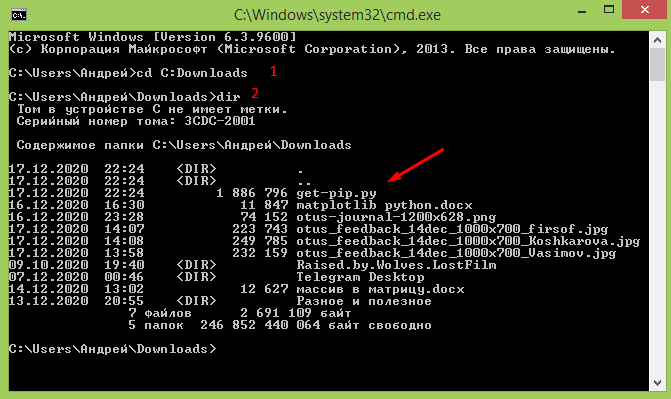
На картинке выше был открыт терминал, потом выполнен переход в папку «Загрузки» (использовалась команда cd). Просмотрев содержимое директории с помощью команды dir, мы удостоверились в том, что скрипт (файл) с именем get-pip и расширением .py в этой папке присутствует.
3. Запускается команда: python get-pip.py
Устанавливаем PIP на Mac
В последних версиях операционной системы Mac как Python, так и PIP уже установлены. Однако команда инсталляции через терминал все же существует:
sudo easy_install pip
Также можно воспользоваться утилитой командной строки Homebrew (она тоже должна быть установлена):
brew install python
Установка на Linux
Если пользователю достался Линукс-дистрибутив с предустановленным языком программирования Python3, получить PIP можно с помощью системного менеджера пакетов — это более практичный и эффективный способ.
Для Python3 и Advanced Package Tool это выглядит следующим образом:
sudo apt-get install python3-pip
Команды для других пакетных менеджеров — в списке ниже:

Обновление PIP для Python
Обновление позволяет всегда иметь свежую версию. Это важно с точки зрения безопасности.
Обновление PIP трудностей не вызывает. Для Windows все просто:
python -m pip install -U pip
Не менее сложен процесс и для операционных систем Mac и Linux:
pip install -U pip
Если разговор идет о текущих версиях Linux, нужна команда pip3.
Как работает PIP?
Когда все выполнено правильно, система готова к работе и позволят устанавливать программные пакеты pip (библиотеки, фреймворки) непосредственно из репозитория PyPI:
pip install package-name
При необходимости можно установить и конкретную версию интересующего пакета (а не последнюю, как это происходит по умолчанию):
pip install package-name==1.0.0
Также можно выполнить поиск определенного пакета:
pip search "your_query"
Или посмотреть детали о пакете, который уже инсталлирован:
pip show package-name
Вдобавок к этому, есть вероятность просмотра всех инсталлированных программных пакетов:
pip list
Удаление тоже не вызывает затруднений:
pip uninstall package-name
Пример
Команды ниже производят установку известнейшей Пайтон-библиотеки с открытым исходным кодом NumPy:
Для Линукс:
sudo pip3 install numpy
Для Виндовс:
pip3 install numpy
Если команда выше не сработает, можно обратиться к утилите напрямую:

Python wheels
Выше была рассмотрена работа с зависимыми Python-пакетами и их установка посредством pip из PyPI. Однако некоторые специалисты утверждают, что этот подход имеет свои минусы:
- Оказывается влияние на производительность — пользователю постоянно нужно скачивать и выполнять сборку пакетов, что тоже не всегда быстро.
- Работа осуществляется онлайн — если с интернетом проблемы, инсталляция не произойдет.
- Стабильность и надежность могут оказаться под вопросом — утверждение справедливо, если:
— возникают проблемы и неполадки на стороне PyPI;
— возникают нарушения зависимостей (некоторые нужные пользователю пакеты удаляются из PyPI);
— возникают неполадки у хостингового провайдера, способные привести к недоступности сетевых ресурсов, того же PyPI.
Избежать всех этих проблем можно путем применения заранее подготовленных пакетов wheel для всех интересующих зависимостей и хранения их в системном репозитории.
Для справки: Wheel — современный формат распространения пакетов в среде Python (wheel пришел на замену eggs). Подробнее об этом можете почитать здесь.
При подготовке статьи использовались следующие источники:
- https://dizballanze.com/ru/python-wheels-dlia-bystroi-ustanovki-zavisimostei/;
- https://pythonworld.ru/osnovy/pip.html;
- https://pythonru.com/baza-znanij/ustanovka-pip-dlja-python-i-bazovye-komandy.