| Workable Solutions | Step-by-step Troubleshooting |
|---|---|
| #1. Install Windows 10 on SSD by OS Migration- Partition Manager | Step 1: Select «Migrate OS» from the top menu. Select the SSD or HDD as the destination disk and click «Next»…Full steps |
| #2. Reinstall Windows 10 on SSD by Windows 10 Installation Media | Step 1: Remove the old HDD and connect the new SSD to your computer; Step 2: Insert the bootable USB flash drive…Full steps |
What’s the Best Procedure to Install Windows 11/10 on SSD?
«I want to install Windows 10 OS on a new SSD from HDD. I plan to use the new SSD as the boot drive while the old WD 1TB hard drive as a storage drive. What is the best or easiest procedure for extracting the old Windows OS from the old hard drive? I am not sure how to identify the OS files.»

Usually, there are two ways for you to install Windows 10 on SSD. One is to clone Windows 11/10 from the source drive to the target drive, and the other one is to reinstall Windows 11/10 on SSD from scratch, namely a clean install or fresh install. Both are approachable and efficient methods to boot Windows 10 from SSD eventually. However, the former one is recommended as the prior choice after comparison. By cloning Windows 10 from HDD to SSD is the most straightforward and less time-consuming.
Nonetheless, if you want to reinstall Windows 10 on SSD, you might spend a little more effort. You know, Windows 10 is only free if you are upgrading from the previous Windows version. If you want a fresh install, you should have a legit product key for Windows 10. Otherwise, your best option would be cloning the system partition to SSD by using several clicks to transfer Windows 10 OS to SSD.
#1. How to Install Windows 10 on SSD by OS Migration
No matter you choose to get the old Windows system installed on the SSD and then upgrade your computer to Windows 10 or migrate the new Windows 10 partition to the new SSD after a successful Windows 10 upgrade, you need a partition manager for help. EaseUS Partition Master is the top recommendation of a magic partition tool that lets you install Windows 10 on SSD from HDD/SSD within several clicks.
Note: The operation of migrating OS to SSD or HDD will delete and remove existing partitions and data on your target disk when there is not enough unallocated space on the target disk. If you saved important data there, back up them to an external hard drive in advance.
Step 1. Select «Clone» from the left menu. Select the «Migrate OS» and click «Next» to continue..
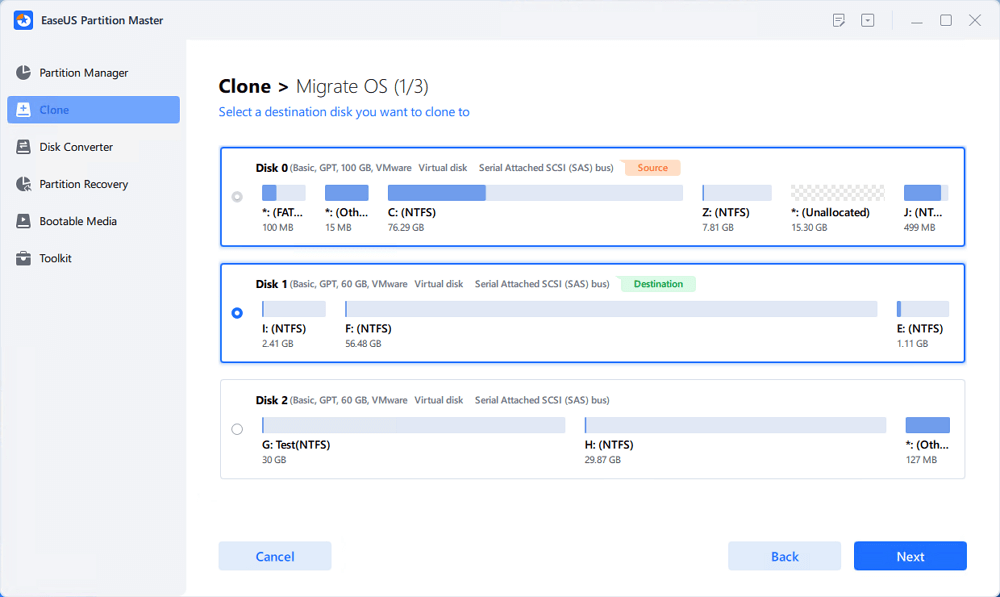
Step 2. Select the target disk you want to clone. Click «Next».
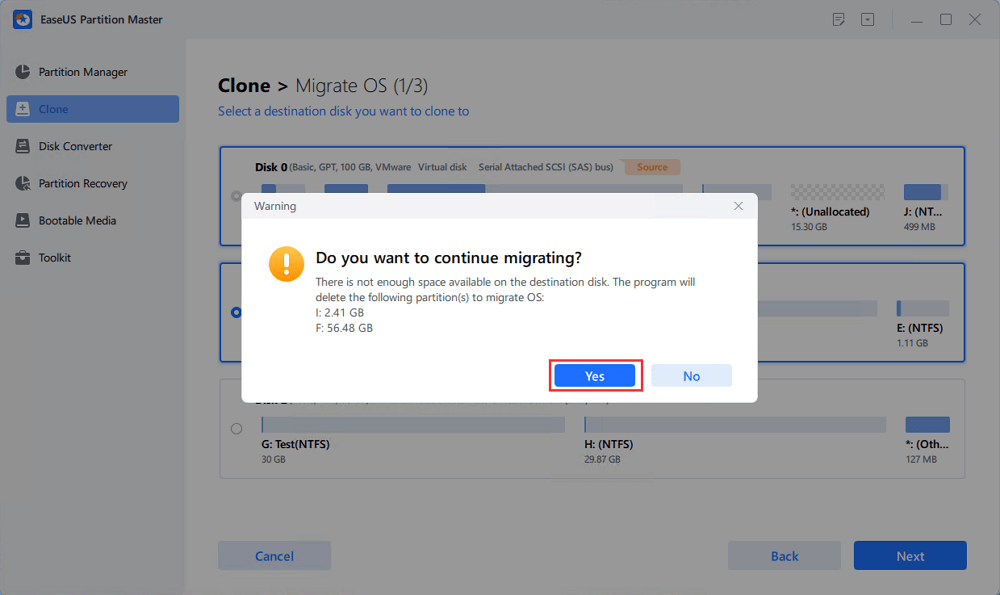
Step 3. Click «Yes» after checking the warning message. The data and partitions on the target disk will be deleted. Make sure that you’ve backed up important data in advance. If not, do it now.
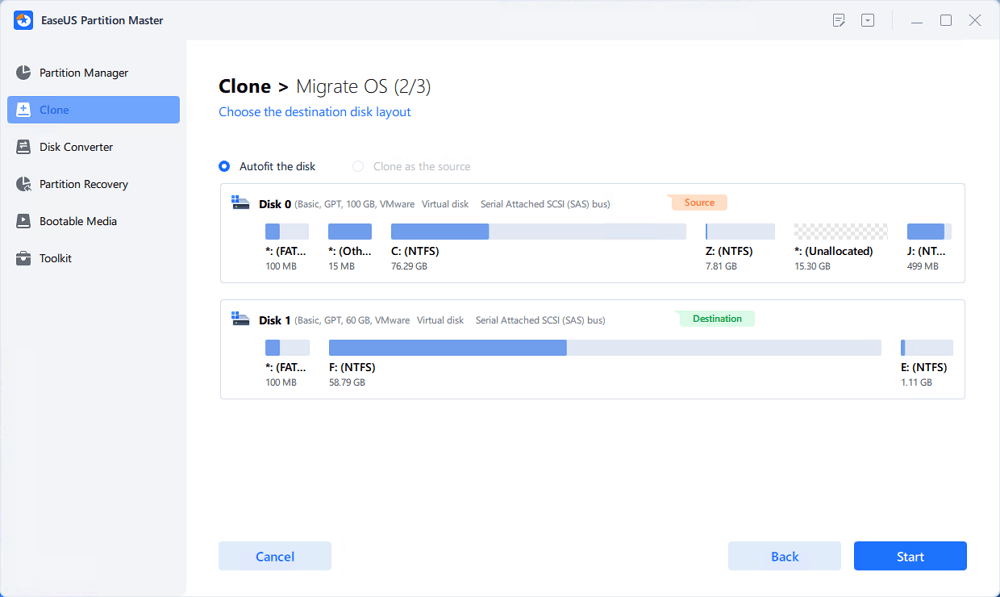
Step 4. Preview the layout of your target disk. You can also click the disk layout options to customize the layout of your target disk as you want. Then click «Start» to start migrating your OS to a new disk
#2. How to Reinstall Windows 10 on SSD by Windows 10 Installation Media
Sometimes you have to start afresh install of Windows 10, mainly when your current OS has been crashing or freezing a lot. As long as you can carefully follow the below guide and prepare all the necessary tools beforehand, you can make it on your own, and finally run a fresh OS on the new SSD.
- Important
- Don’t try to copy the old OS from the HDD. It’s much better to clean install Windows 10 on SSD.
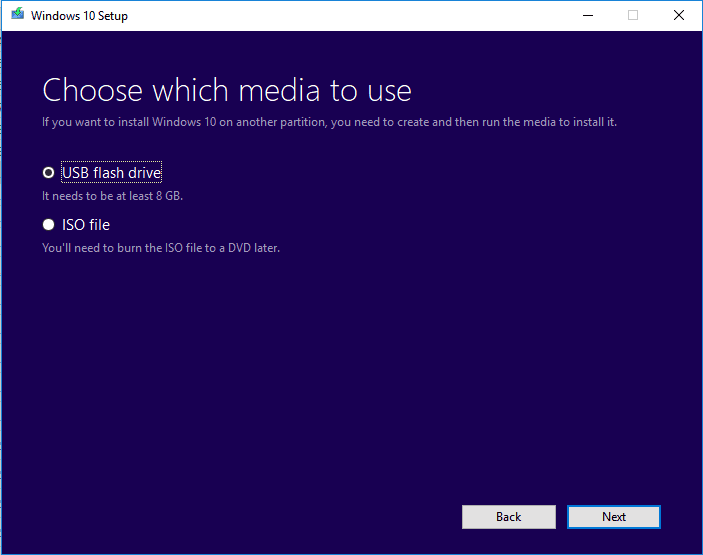
First of all, to reinstall Windows 10 on SSD manually, you need to create a bootable installation media. If you don’t have the bootable media created, click here to download the Media Creation Tool, and next use the tool to create a bootable USB flash drive (min4GB) or create the ISO file and burn it to a CD/DVD disc.
With the bootable installation media at hand, now head to the detailed steps to reinstall Windows 10 on SSD.
Step 1. Remove the old HDD and connect the new SSD to your computer.
Step 2. Insert the bootable USB flash drive, and change your computer boot order to the USB drive in BIOS settings. Make sure that you boot PC from the installation media. The installation should start.
Step 3. During the installation process, skip the steps which ask for a product key and select the option I am Reinstalling Windows 10 on this PC, and activation will not be an issue, your PC will have a digital entitlement stored on the Microsoft Servers.
Step 4. While installing, your system will reboot. At that point, you may need to go into your BIOS settings again and change the boot order so your system boots from your new SSD. Otherwise, the installation may start all over again. Do not remove the installation media at this point.
Step 5. When Windows 10 has finished installing and the desktop appears, you can shut down your system and remove the installation media. The next time you start the computer, you will boot Windows 10 from the new SSD.
What If You Cannot Install Windows 11/10 on SSD?
Chances are that when you choose to use the Windows installation media way to reinstall Windows 10 on SSD, some strange error messages will prevent you from successfully installing the operating system on the selected hard drive.
1. Can’t install Windows 10 on a new SSD
For a new SSD that is not initialized at the beginning, you need to connect it to the computer and initialize the SSD to an MBR or GPT style and then start to install OS on it.
2. Windows cannot be installed on this disk. The selected disk is of the GPT partition style.
Usually, the error message that appears on the screen is Windows cannot be installed onto this disk. This computer’s hardware may not support booting to this disk. Ensure the disk’s controller is enabled in the computer BIOS menu. We fixed this problem in the article on how to fix Windows cannot be installed to this disk.
No matter it’s the problem of SSD not being initialized or the selected disk is of GPT partition style, you can easily fix the trouble with the help of EaseUS Partition Master, and continue installing Windows 10 on SSD without any hassle.
Windows 11 / 10 / 8
Современные операционные системы от Microsoft не имеют проблем с установкой на твердотельные накопители (SSD), поэтому данную процедуру можно выполнить стандартным способом, воспользовавшись загрузочной флешкой или диском. На нашем сайте есть отдельные статьи, в которых детально рассказывается о решении этой задачи.
Подробнее: Как установить Windows 10 / 8 на SSD
Чтобы выполнить инсталляцию одиннадцатой версии операционной системы, можно воспользоваться руководством для Windows 10. Но прежде все равно придется создать загрузочную флешку, поэтому предварительно ознакомьтесь с соответствующим руководством, перейдя по ссылке ниже.
Подробнее: Как создать загрузочную флешку с Windows 11
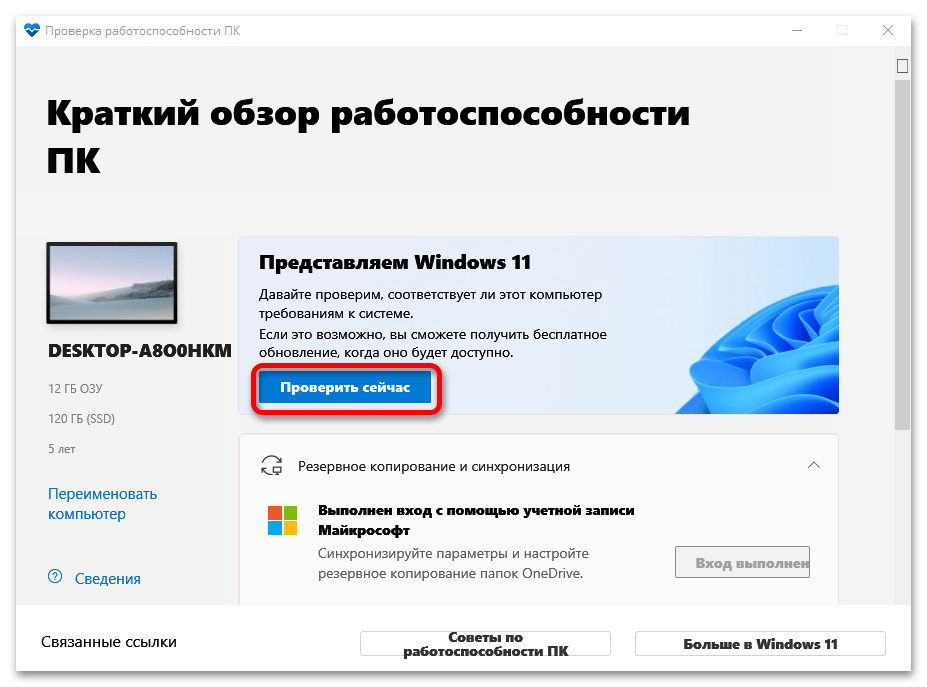
Примечание! Есть вероятность, что последняя на момент написания статьи версия операционной системы не может быть установлена на ваш компьютер по причине высоких требований к железу. В таком случае, чтобы не выяснять это опытным путем, затрачивая время, рекомендуем ознакомиться с другой статьей на нашем сайте, в которой описывается процедура проверки ПК на совместимость с Windows 11.
Подробнее: Как проверить компьютер на совместимость с Windows 11
В некоторых случаях во время инсталляции операционной системы на твердотельный накопитель могут возникать разного рода ошибки и сбои. Выяснить их причину и устранить поможет специальная публикация, написанная другим автором. Для ознакомления с ней перейдите по ссылке ниже.
Подробнее: Причины, по которым Windows 10 не устанавливается на SSD
Обратите внимание! Если выполнить установку необходимо на внешнее устройство, стандартное руководство не поможет в решении этой задачи. Следует обратиться за помощью к другому материалу, опубликованному на нашем сайте. В нем подробно описываются все особенности проведения такой операции.
Подробнее: Установка Windows на внешний накопитель

При установке Windows 7 на SSD нередко возникают проблемы, так как эта версия операционной системы не содержит в инсталляторе специальных драйверов, которые обеспечивают поддержку твердотельных накопителей. Так это потому, что на момент ее выхода носители данного типа только начинали входить в обиход. Но проблему можно легко устранить, создав загрузочную флешку особым способом. Об этом подробно рассказывается в отдельной статье на нашем сайте, с которой и рекомендуем ознакомиться.
Подробнее: Поэтапная установка Windows 7 на SSD

Примечание! Если на компьютере Windows 7 уже инсталлирована на жесткий диск, но есть необходимость переустановить ее на твердотельный накопитель, можно воспользоваться специальными программами, которые помогают в решении этой задачи. Лучшие представители данной категории ПО рассматриваются в отдельном материале на нашем сайте, ссылка на который дана ниже.
Подробнее: Программы для переноса Windows на SSD
Windows XP
Если седьмая версия операционной системы от Microsoft имеет проблемы совместимости с SSD, то в Windows XP их еще больше. Но несмотря на это, выполнить процедуру инсталляции на твердотельный накопитель можно, хотя для этого придется внести изменения в BIOS компьютера и произвести дополнительные манипуляции по оптимизации системы. Все эти процессы подробно описаны в другой публикации на нашем сайте.
Подробнее: Установка Windows XP на SSD

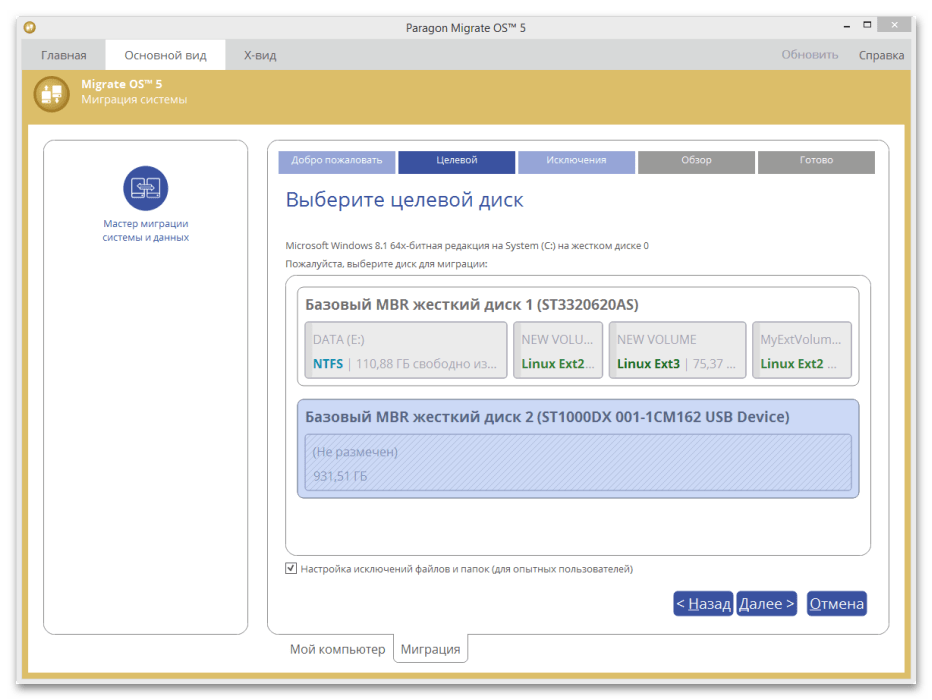
Обратите внимание! Существует возможность перемещения операционной системы с одного SSD на другой без необходимости повторной установки Windows. Это позволяет не только ускорить процесс выполнения операции, но и сохранить все пользовательские данные, что в некоторых случаях очень важно. Если данная тема вас интересует, ознакомьтесь с соответствующей статьей на нашем сайте, перейдя по представленной ниже ссылке.
Подробнее: Перенос системы с одного SSD на другой
Еще статьи по данной теме:
Помогла ли Вам статья?
How do I install Windows 10 on a new SSD?

Save your settings, reboot your computer and you should now be able to install Windows 10.
- Step 1 – Enter your computer’s BIOS.
- Step 2 – Set your computer to boot from DVD or USB.
- Step 3 – Choose the Windows 10 clean install option.
- Step 4 – How to find your Windows 10 license key.
- Step 5 – Select your hard disk or SSD.
How do I install Windows on a new SSD?
Shut down your system. remove the old HDD and install the SSD (there should be only the SSD attached to your system during the installation process) Insert the Bootable Installation Media. Go into your BIOS and if SATA Mode is not set to AHCI, change it.
Should I install Windows on SSD or HDD?
Boiled down, an SSD is (usually) a faster-but-smaller drive, while a mechanical hard drive is a larger-but-slower drive. Your SSD should hold your Windows system files, installed programs, and any games you’re currently playing.
Why can’t I install Windows 10 on my SSD?
5. Set up GPT
- Go to BIOS settings and enable UEFI mode.
- Press Shift+F10 to bring out a command prompt.
- Type Diskpart.
- Type List disk.
- Type Select disk [disk number]
- Type Clean Convert MBR.
- Wait for the process to complete.
- Go back to Windows installation screen, and install Windows 10 on your SSD.
Can I reinstall Windows 10 on a new SSD?
Clean install Windows 10 on SSD. A clean install is an Operating System installation which will remove the current Windows Operating System and user files during the installation process. You can backup Windows 10 to USB drive or another external hard drive in advance.
Can I reinstall Windows 10 for free?
With the end of the free upgrade offer, the Get Windows 10 app is no longer available, and you cannot upgrade from an older Windows version using Windows Update. The good news is that you can still upgrade to Windows 10 on a device that has a license for Windows 7 or Windows 8.1.
How do I move my OS to a new SSD?
If you saved important data there, back up them to an external hard drive in advance.
- Step 1: Run EaseUS Partition Master, select “Migrate OS” from the top menu.
- Step 2: Select the SSD or HDD as the destination disk and click “Next”.
- Step 3: Preview the layout of your target disk.
How do you do clean install of Windows 10?
To start fresh with a clean copy of Windows 10, use these steps:
- Start your device with the USB bootable media.
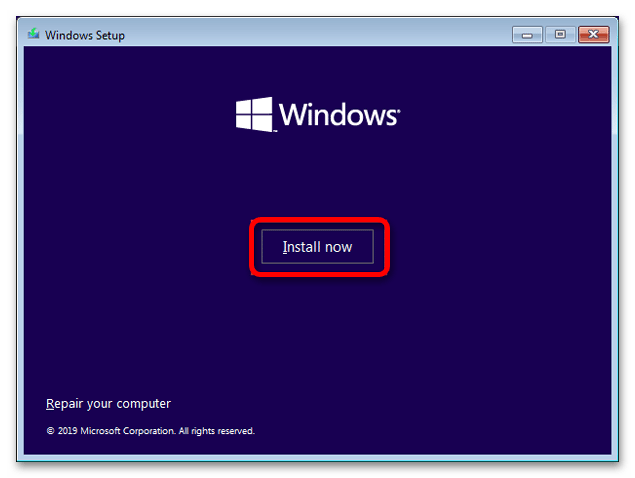
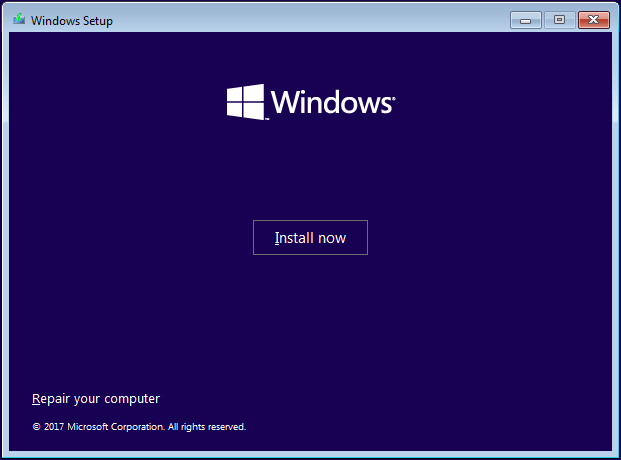
- On “Windows Setup,” click Next to begin the process.
- Click the Install Now button.
- If you’re installing Windows 10 for the first time or upgrading an old version, you must enter a genuine product key.
How do I wipe my SSD and reinstall Windows 10?
Windows 10 has a built-in method for wiping your PC and restoring it to an ‘as new’ state. You can choose to preserve just your personal files or to erase everything, depending on what you need. Go to Start > Settings > Update & security > Recovery, click Get started and select the appropriate option.
Is it better to install games on SSD or HDD?
If you’re having framerate issues, a solid state drive isn’t what you need. The point of installing games on an SSD is the drastic reduction in load times, which occurs because the data transfer speed of SSDs (over 400 MB/s) is significantly higher than that of HDDs, which generally deliver under 170 MB/s.
Is a 120gb SSD enough?
The actual usable space of 120GB/128GB SSD is somewhere between 80GB to 90GB. If you install Windows 10 with Office 2013 and some other basic applications, you’ll end up with almost 60GB.
Does Windows run faster on SSD?
5 Answers. You ask why SSDs don’t necessarily improve the speed of running applications compared to a traditional HDD. The reason is disk access. SSDs do read and write much faster than traditional hard disks.
How do I change my SSD from MBR to GPT?
AOMEI Partition Assistant Help you Convert SSD MBR to GPT
- Before you do:
- Step1: Install and launch it. Select the SSD MBR disk you want to convert and right click it. Then choose Convert to GPT Disk.
- Step2: Click OK.
- Step3: In order to save the change, click the Apply button on the toolbar.
Could not create a new partition or locate an existing one Windows 10?
Step 1: Start Windows 10/8.1/8/7/XP/Vista setup using bootable USB or DVD. Step 2: If you get “We couldn’t create a new partition” error message, close the setup and click the “Repair” button. Step 3: Choose “Advanced tools” and then select “Command Prompt”. Step 4: When Command Prompt opens, enter start diskpart.
How do I change from MBR to GPT?
1. Convert MBR to GPT using Diskpart
- Open command prompt and type in DISKPART and press Enter.
- Then type in list disk (Note down the number of the disk that you want to convert to GPT)
- Then type in select disk number of disk.
- Finally, type in convert gpt.
How do I move Windows 10 to SSD without reinstalling?
Moving Windows 10 to an SSD without Reinstalling
- Open EaseUS Todo backup.
- Choose Clone from the left sidebar.
- Click Disk Clone.
- Choose your current hard drive with Windows 10 installed on as the source, and choose your SSD as the target.
Can I reinstall Windows 10 on a new hard drive?
Reinstall Windows 10 to a new hard drive. If you activated Windows 10 with a Microsoft account, you can install a new hard drive to your PC or laptop and it will remain activated. Shut down your PC, and install the new drive. Insert your USB, turn on your computer to boot into the recovery drive.
Can I still install Windows 10 for free?
While you can no longer use the “Get Windows 10” tool to upgrade from within Windows 7, 8, or 8.1, it is still possible to download Windows 10 installation media from Microsoft and then provide a Windows 7, 8, or 8.1 key when you install it. If it is, Windows 10 will be installed and activated on your PC.
Can I reinstall Windows 10 without losing my programs?
Method 1: Repair Upgrade. If your Windows 10 can boot and you believe all the installed programs are fine, then you can use this method to reinstall Windows 10 without losing files and apps. At the root directory, double-click to run the Setup.exe file.
Do I need to reinstall Windows 10 new motherboard?
If you reinstall Windows 10 after you make a significant hardware change to your PC (such as replacing the motherboard), it may no longer be activated. If you were running Windows 10 (Version 1607) before the hardware change, you can use the Activation troubleshooter to reactivate Windows.
How do I reinstall my free Windows 10 upgrade?
You Can Still Get Windows 10 for Free With a Windows 7, 8, or 8.1
- Microsoft’s free Windows 10 upgrade offer is over–or is it?
- Insert the installation media into the computer you want to upgrade, reboot, and boot from the installation media.
- After you’ve installed Windows 10, head to Settings > Update & Security > Activation and you should see that your PC has a digital license.
Can you wipe an SSD?
Securely Erasing an SSD. Fortunately, it is possible to erase most SSDs, though this is closer to a “reset” than a wipe. The “ATA Secure Erase” command instructs the drive to flush all stored electrons, forcing the drive to “forget” all stored data.
How do I wipe my SSD Windows 10?
Simple steps to wipe or erase SSD drive in Windows 10
- Step 1: Install and launch EaseUS Partition Master. Select the HDD or SSD which you want to wipe.
- Step 2: Set the number of times to wipe data. You can set to 10 at most.
- Step 3: Check the message.
- Step 4: Click “Apply” to apply the changes.
How do I format my SSD Windows 10?
How to format SSD in Windows 7/8/10?
- Before formatting an SSD: Formatting means deleting everything.
- Format SSD with Disk Management.
- Step 1: Press “Win+R” to open “Run” box, and then type “diskmgmt.msc” to open Disk Management.
- Step 2: Right click the SSD partition (here is E drive) you want to format.
Will an SSD make my PC faster?
A PC with a midtier CPU and an SSD (or an SSD cache for a mechanical hard drive) will start up faster and feel significantly faster than a computer that’s hobbled by a slow hard drive, even if it has a higher-end CPU. You can buy an external SSD, too, but those devices are much more expensive.
What will SSD speed up?
It is, and speed is the primary advantage of an SSD over a traditional HDD. This makes an SSD the single best upgrade for your computer if you’re looking for a way to make it operate faster. A new SSD can speed up your computer in several ways: Boot times will be significantly reduced.
What makes SSD faster?
Like a memory stick, there are no moving parts to an SSD. Rather, information is stored in microchips. Conversely, a hard disk drive uses a mechanical arm with a read/write head to move around and read information from the right location on a storage platter. This difference is what makes SSD so much faster.
Photo in the article by “Flickr” https://www.flickr.com/photos/phillipstewart/3504436318
Do you have any idea on how to install Windows 11 on SSD? To get a fast boot speed and better PC performance, installing Windows on an SSD is a good option. It is an easy thing if you follow these two methods given by MiniTool Solution in this post. Let’s see the following full guide now.
Microsoft released Windows 11, a brand new operating system, to the public on June 24, 2021. It brings brand new UI design, features, and improvements. Soon afterward, the first version of the Windows 11 preview build came. Nowadays, multiple build versions are available for Windows Insider users to install.
Tip: What’s new in Windows 11? You can refer to this post to learn more — What’s Next for Windows: What’s New in Windows 11.
Advantages – Install Windows 11 on SSD
With the release of Windows 11, you may want to experience this new OS. But compared to installing Windows on a traditional hard drive, it is a good option to install Windows 11 on a new SSD. The main reasons for this include:
- An SSD has a faster speed. It can greatly improve the system boot speed, shortening the time to seconds from a few minutes.
- Also, an SSD can let the whole system faster by speeding up the system when it is running.
Tip: There are many differences between HDD and SSD. To know more details, read our previous post — SSD VS HDD: What’s Difference? Which One Should You Use in PC.
Well then, do you have an idea of how to install Windows 11 on a new SSD? It is time-consuming and laborious but if you follow these two methods below, things will become easy.
Preparation: Get a New SSD Ready for Windows 11
Since Windows 11 has strict system requirements, to make sure that the PC has a great performance, it is necessary to choose a proper SSD as the system drive. Just get a new SSD ready for Windows 11 by following the tips here.
Note: Make sure your PC is compatible with Windows 11 (Related article: Compatibility Test: How to Check if Your PC Can Run Windows 11?) and then install Windows this new OS on your PC to have a try. Otherwise, Windows 11 on unsupported PCs could result in more BSODs or there are no updates.
Get an Appropriate SSD
There are multiple SSD types, including SATA SSD, PCIe SSD, M.2 SSD, NVME SSD, etc. To know more, refer to this post — Different Types of SSD: Which One Is More Suitable for You.
Related articles:
- Here Are Some Guides for You to Buy Right Solid State Drives
- How to Pick an SSD of the Right Form Factor for Your Device
To install Windows 11 on a new SSD for better performance, you should first buy a proper one. For a fast and endurable computer, an M.2 SSD is ideal for Windows 11. Of course, you can install an SSD in other form factors based on your computer.
Besides, make sure the SSD has a big storage space to store the new system and some files.
Set up SSD
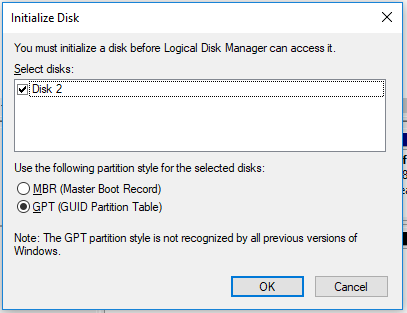
As for Windows 11 system requirements, the new system requires the Secure Boot mode that is only available on a GPT disk. Thus, to make sure of a successful installation of Windows 11 on an SSD, initialize the SSD to GPT.
Just connect your SSD to your computer, then launch Disk Management and right-click on the SSD to choose Initialize Disk. Then, set the partition style to GPT.
After finishing the preparatory work, now it’s time to start Windows 11 installation on an SSD.
How to Install Windows 11 on M.2 SSD or Other SSD?
Method 1: Migrate Windows 11 to SSD
If you haven’t already installed Windows 11, you can upgrade to this new operating system from Windows 10. Currently, Windows 11 is in the test phase.
You can go to Windows Updates and check for updates. Then, download and install Windows 11 on your PC.
After installing Windows 11, now you can transfer the new operating system to your SSD. To achieve this aim, you need the help of professional cloning software. Here, MiniTool ShadowMaker can be your good assistant.
Use MiniTool ShadowMaker to Clone Windows 11 to SSD
At the first sight, you find MiniTool ShadowMaker is a computer backup software since it can back up files, folders, disks, partitions, and systems. It can be a file sync software since it supports file & folder sync. Besides, it can be a powerful disk cloning software. With its Clone Disk feature, you can easily clone a disk to another hard drive.
To install Windows 11 on SSD, you can use it to clone the entire system disk to your SSD and then boot the PC from the target disk. During the cloning process, everything including Windows 11 system files, settings, registries, your files, documents, and other data is transferred to the SSD.
Importantly, this software is free to you. Now, get it to have a try by clicking the following download button. Then, install it on your Windows 11 PC.
Free Download
Step 1: Run MiniTool ShadowMaker in Windows 11.
Step 2: Under the Tools tab, choose Clone Disk to continue.

Step 3: Click the Source section and select the system disk as the source disk from the combo box in the pop-up window. Also, click Destination and choose the SSD as the target disk.
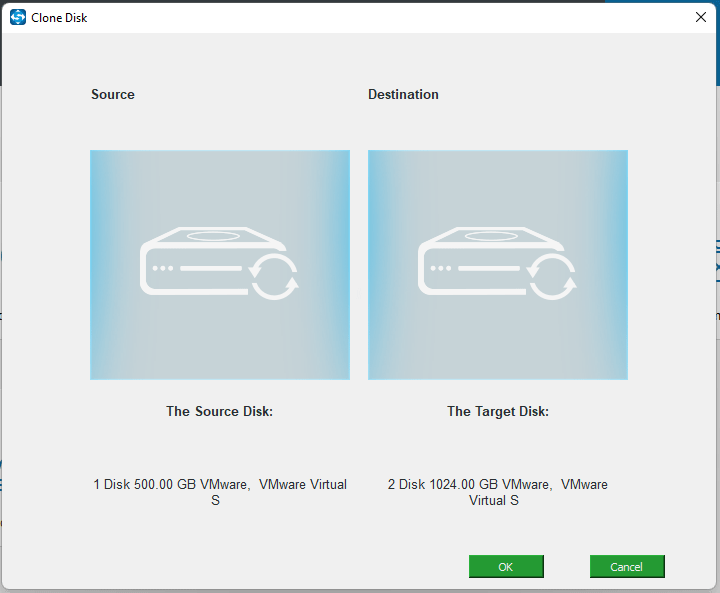
Step 4: Click OK and you will get a message that says the cloning process can destroy the content on the target disk. Click Yes to continue. Then, MiniTool ShadowMaker starts cloning Windows 11 disk to your SSD.
Step 5: After a few minutes, disk cloning finishes.

After finishing the disk cloning, it is better to convert the SSD to GPT with MiniTool Partition Wizard although you have initialized the disk to GPT. This is because GPT turns MBR after the cloning process.
Next, you can remove the original system disk from your computer and then put the SSD in the original place. Then, you can boot Windows 11 from an SSD at a fast speed.
Use MiniTool Partition Wizard to Clone Windows 11 to SSD
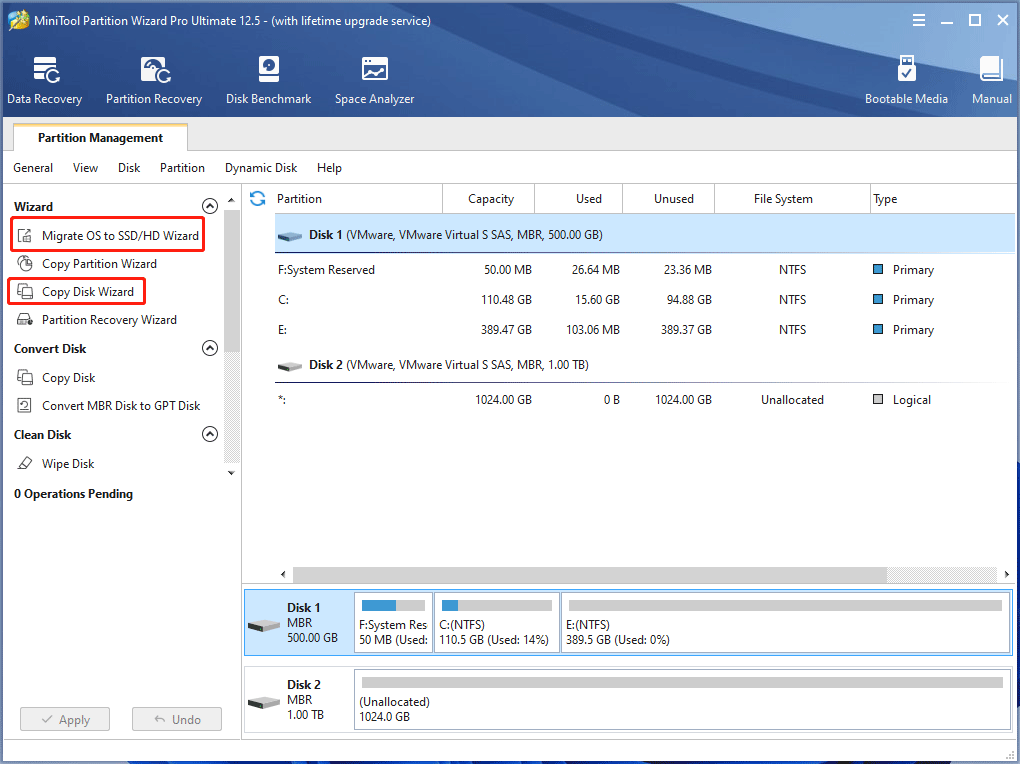
In addition to MiniTool ShadowMaker, you can use another PC cloning software to migrate Windows 11 to SSD. It is MiniTool Partition Wizard. This software offers two options to you
- Migrate OS to SSD/HD: Only transfer Windows 11 to an SSD or clone the entire system disk to an SSD.
- Copy Disk:Clone the entire disk to an SSD
These two features are helpful for you. If you only want to migrate Windows 11 to SSD, use the first feature and select the proper migration mode. To deal with the system disk, a paid edition of MiniTool Partition Wizard is required.
If you initialize the SSD to GPT in advance, after cloning, you won’t need to convert the disk to GPT again. You can also remove the original disk and put the SSD in the original place.
Related article: How to Install an M.2 SSD on Windows PC
If you want to keep both of these two disks on your computer, you need to take measures to make this SSD bootable.
How to Make NVMe/SATA/M.2 SSD Bootable after Windows 11 Installation
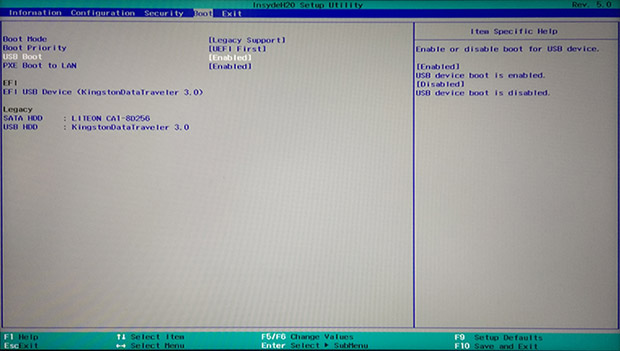
- First, restart your computer, press a specific key to load the PC to BIOS.
- Under the boot menu, set the SSD as the boot drive in BIOS.
- Save the change and reboot the PC again to Windows 11.
Method 2: Install Windows 11 on SSD from USB
This is the direct way to install Windows 11 on an SSD. There are two main situations:
- If you are running Windows on an HDD, you can directly install Windows 11 on a new SSD from a USB drive. After installation, boot the PC from the SSD and keep the original HDD as a data disk.
- Or you have an SSD on your PC and installed Windows on your PC’s SSD, and you want to reinstall Windows 11 due to some reason, this way is also available. Note that you had better back up your important files before the installation with the professional backup software – MiniTool ShadowMaker.
How to install Windows 11 on a new SSD from a USB drive? Follow these steps below.
# 1. Create a Windows 11 Bootable USB Drive
Step 1: Prepare a USB flash drive that has up to 8GB or bigger space.
Step 2: Go to download an ISO file from the Microsoft page.
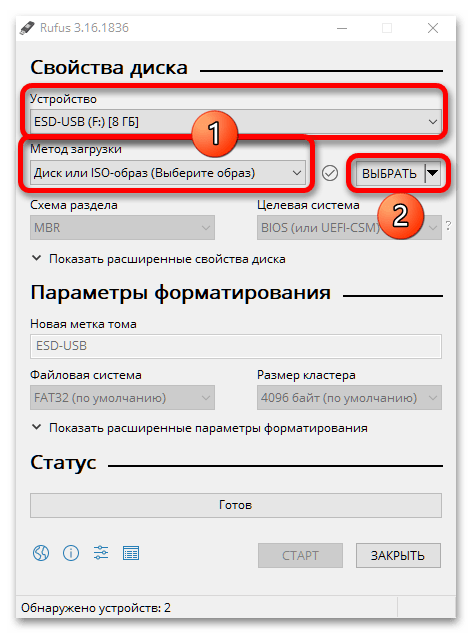
Step 3: Run Rufus to burn the Windows 11 ISO file to your USB flash drive.

#2. Install Windows 11 on SSD
Step 1: Restart your computer and press a specific key (Del, F2, F10, etc.) to enter BIOS.
Step 2: Change the boot sequence in BIOS – set the PC to boot from the USB drive.
Step 3: Configure your keyboard, language, time, and currency format.
Step 4: Click the Install now button to continue.
Step 5: Windows setup will ask you to enter a license key. Just click I don’t have a product key.
Step 6 (Optional): You are asked to choose an edition of Windows 11 and then accept the license terms.
Step 7: Choose Custom: Install Windows only (advanced).
Step 8: Choose a location to install Windows 11 to.
Case 1: To install Windows 11 on a new SSD, you can see Drive 0 Unallocated Space. Click Next to start the installation.
Case 2: To reinstall Windows 11 on your original SSD, you can see Drive 0 Partition 1, Drive 0 Partition 2, etc. Choose the partition where the original system is saved and click Delete. Then, click Next to start the installation process.
This will take some time. After installing Windows 11 on your SSD, set up the new operating system based on your likes.
Bottom Line
On this page, we offer you a full guide to install Windows 11 on SSD – get an SSD ready and install Windows 11 on it. If you want to get a fast boot speed with Windows 11, try one method mentioned above.
Cloning is strongly recommended since everything including all your data, system files, settings, etc. is moved to the SSD, without reinstalling Windows operating system.
If you run into any questions when using MiniTool Software, or have any suggestions on how to install Windows 11 on external hard drive or SSD, leave your idea in the comment below or contact our support team via [email protected].
Содержание статьи
- 1 Что такое SSD?
- 2 Предварительная настройка компьютера
- 3 Сделать загрузочную флешку Windows 10
- 4 Установка Windows 10
- 5 Проверка активации AHCI в диспетчере устройств
- 6 Проверка работы команды TRIM
- 7 Оптимизация SSD диска
- 8 Отключение гибернации Windows
- 9 Утилита SSD Mini Tweaker для автоматической оптимизации накопителя
Разработчики Microsoft традиционны в своем стремлении каждую новую версию операционной системы делать все более ориентированной не на специалиста, а на обычного пользователя ПК с минимальным набором знаний и умений по установке и удалению программ. Не стала исключением и Windows 10, процесс установки которой автоматизирован и нуждается в минимальном участии пользователя.
Однако, в некоторых ситуациях дело обстоит несколько сложнее, и без дополнительных разъяснений разобраться непросто. Например, при установке Windows 10 на SSD. Если вы собираетесь выполнить именно эту операцию, но пока точно не знаете, как сделать все правильно, ознакомьтесь с инструкцией, которую мы для вас подготовили.
SSD – твердотельные накопители, являющиеся немеханическими запоминающими устройствами. Изначально были разработаны в дополнение к привычным жестким дискам HDD, а также для использования в качестве компактных переносных, но вместительных хранилищ данных. Далее рассматривались как альтернатива HDD. Сейчас же все чаще позиционируются как их логичная замена.
Сравнительно с обычными жесткими дисками SSD более надежные, скоростные, не подвержены повреждениям из-за тряски и менее восприимчивы к механическим воздействиям. Ранее их единственным недостатком считалась высокая стоимость. Сейчас на рынке хватает моделей, по емкости конкурирующих с HDD, по стоимости не на много дороже их, а по ключевым характеристикам серьезно их превосходящих.
Именно из-за того, что все больше людей мигрируют с HDD на SSD, стал актуальным вопрос правильной установки на твердотельные накопители ОС Windows 10, поскольку процесс здесь от привычного несколько отличается.
Предварительная настройка компьютера
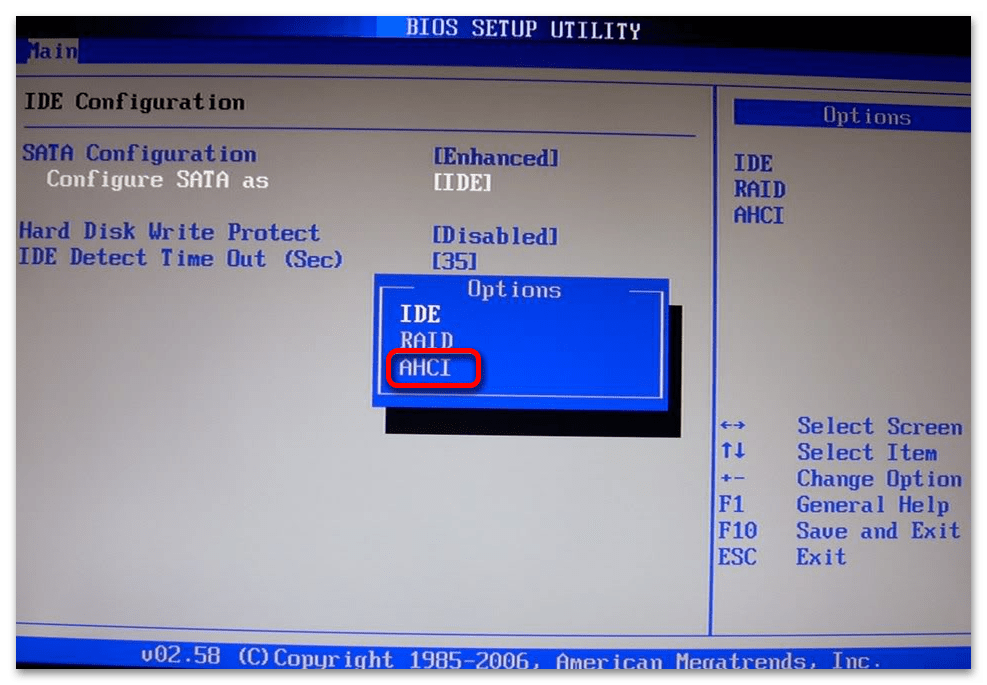
Фактически, предварительная подготовка заключается только в переводе контроллера жестких дисков в режим SATA (AHCI). Это необходимо для того, чтобы обеспечить максимальную производительность SSD и минимизировать скорость износа его ячеек, что позволит продлить срок эксплуатации устройства.
- Войдите в BIOS, нажав при включении ПК, ноутбука клавишу DEL или F1.
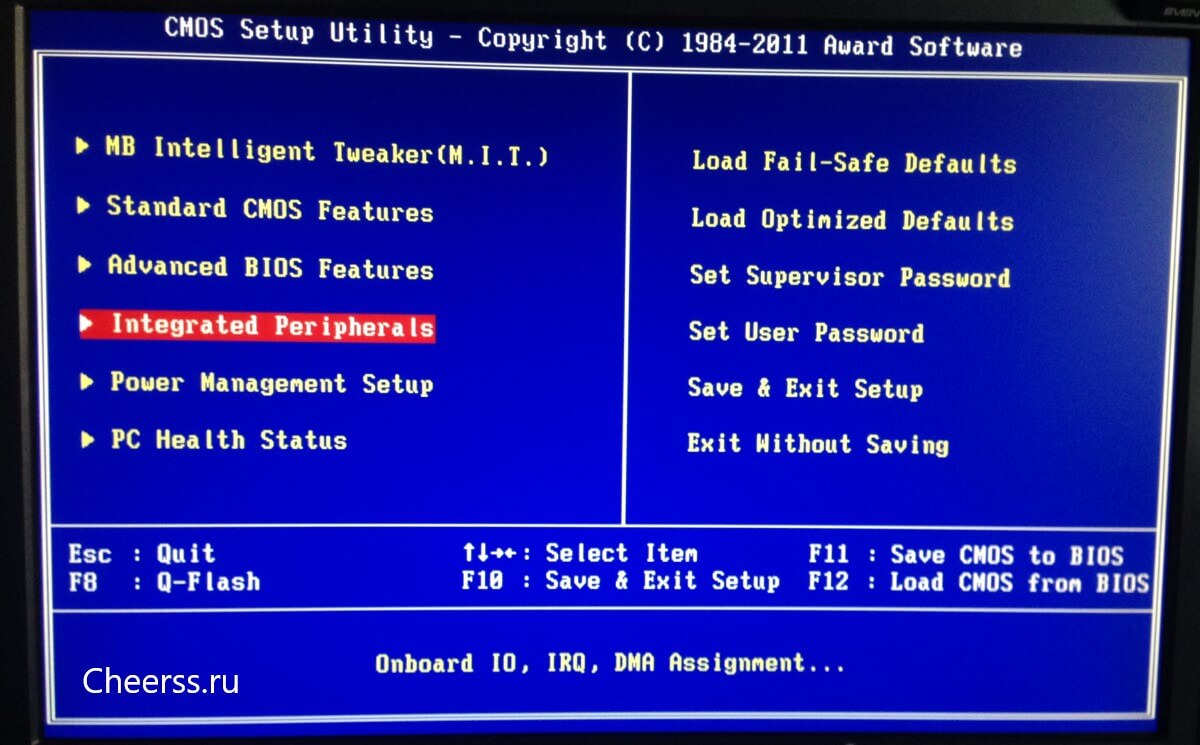
- Найдите раздел «Integrated peripherals» и перейдите в него.
- В появившемся меню ищите строку «SATA Mode или SATA Type», нажимайте на нее. В выпавшем списке установите значение AHCI.
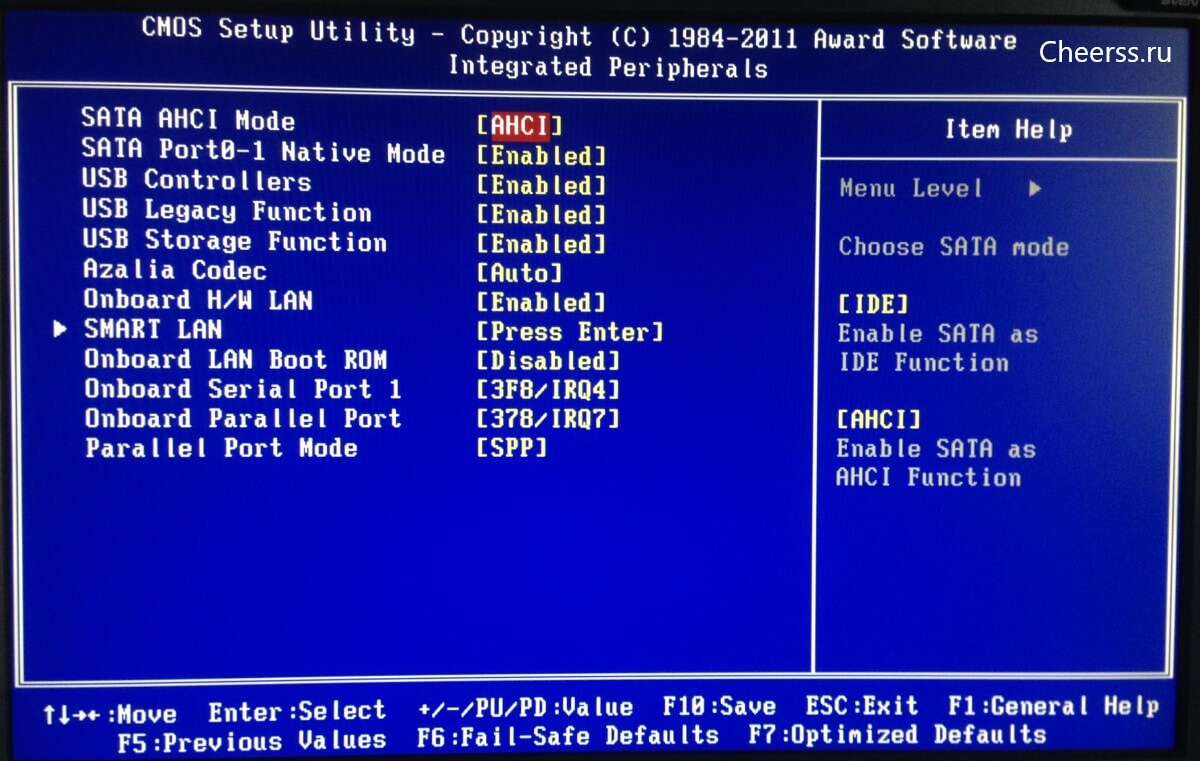
- При выходе не забудьте сохранить изменения, или перед выходом нажмите F10, после чего перезагрузите компьютер.
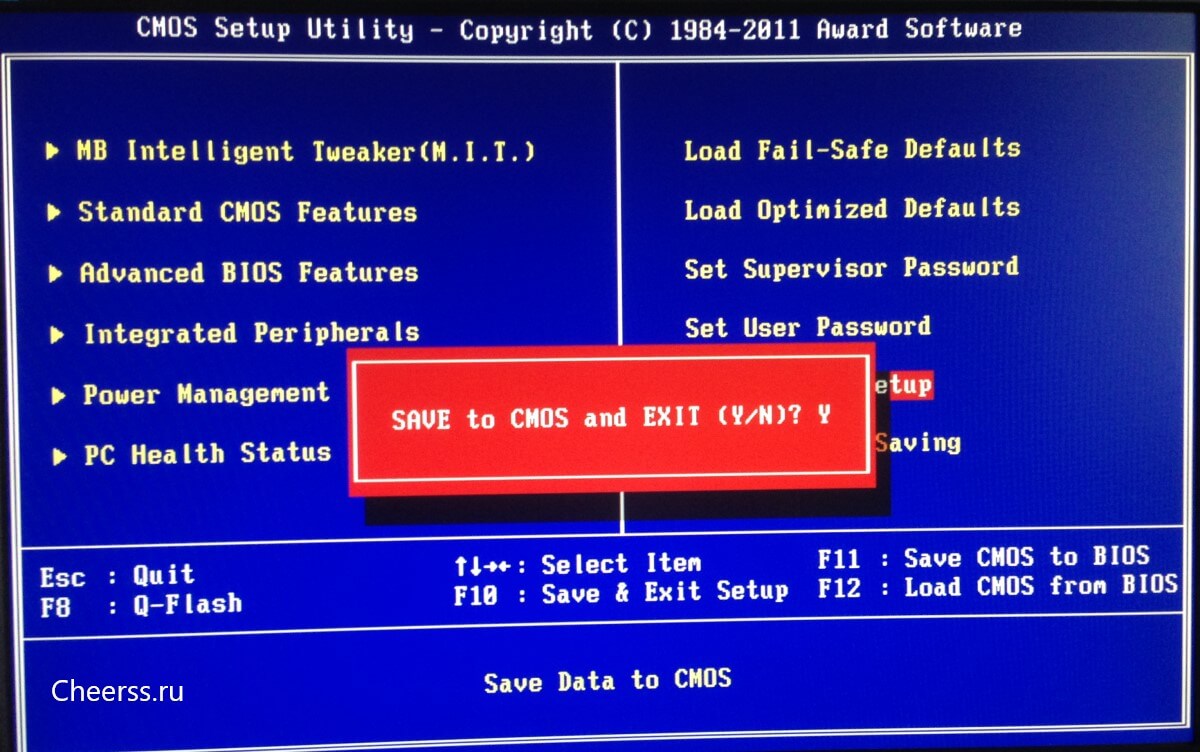
Обратите внимание: выполнять эту операцию важно до начала установки операционной системы. В процессе инсталляции настройки ядра ОС устанавливаются в зависимости от выбранного режима дискового контроллера, и в дальнейшем их изменить будет невозможно. Изменение режима после завершения установки ОС может привести к тому, что компьютер просто не загрузится.
Сделать загрузочную флешку Windows 10
Установить Windows 10 со стандартного DVD-диска невозможно по простейшей причине – размер инсталляционного пакета превышает его емкость. Единственный доступный вариант – загрузить iso — образ ОС на имеющий достаточный объем дискового пространства флеш-накопитель. Сделать это можно, используя одну из популярных специализированных утилит, таких как Windows 7 USB/DVD Download Tool или Rufus. Но наиболее корректным решением будет использование специально разработанной в Microsoft утилиты для обновления ОС – Windows 10 Installation Media Creation Tool. Скачать ее без ограничений можно на официальном сайте разработчика ПО.
- Запускаем утилиту, на приветственном экране нажимаем кнопку «Принять», соглашаясь с условиями разработчика.

- В следующем окне выбираем пункт создания установочного носителя.

- Далее выбираем требуемые параметры ОС.

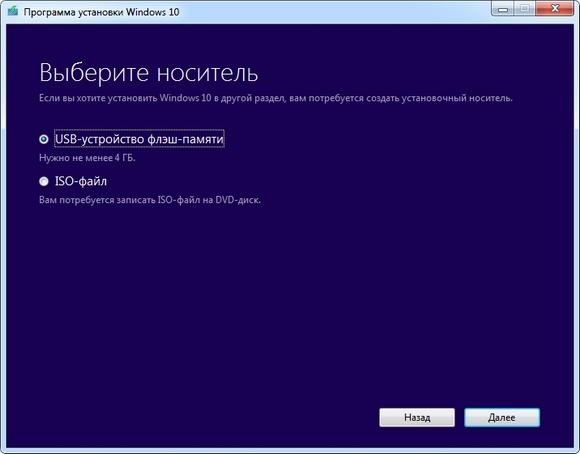
- Выбираем тип устройства, которое будет использовано в качестве загрузочного носителя. В данном случае это USB-флешка.
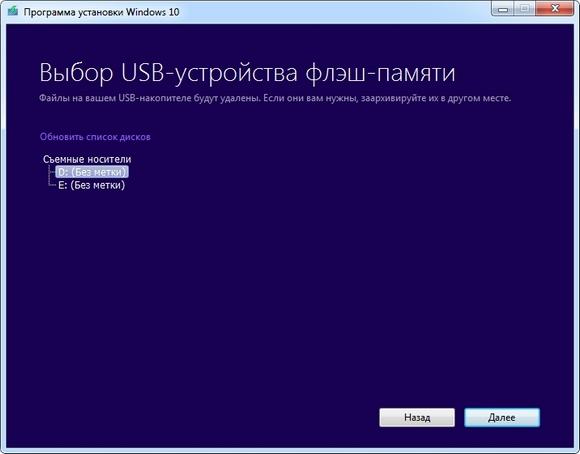
- Выбираем из списка подключенных USB-устройств нужную флешку.
- Ожидаем завершения загрузки образа ОС на флеш-карту. Когда шкала дойдет до 100%, операцию можно считать завершенной, а загрузочное USB-устройство – готовым к применению.
Следует отметить, что процесс создания загрузочного USB-накопителя для Windows 10 с использованием сторонних утилит, хоть и отличается в каждом случае от описанного выше, но несущественно. Все разработчики постарались максимально упростить процесс.
Установка Windows 10
Сам процесс установки Windows 10 на SSD ничем не отличается от аналогичной процедуры с использованием HDD. Система сама распознает USB-устройство, определит оптимальные параметры установки и активирует диалоговое окно с подсказками для дальнейших действий. Отличие только одно – в несколько раз большая скорость выполнения инсталляции благодаря высоким характеристикам твердотельных накопителей.
Проверка активации AHCI в диспетчере устройств
Если вы устанавливали ОС Windows 10 с нуля и в точности придерживались предыдущих пунктов данной инструкции, то режим AHCI у вас и так должен быть активированным, что означает обеспечение максимальной скорости и корректности работы SSD. Если же просто перенесли корневой раздел операционной системы со старого на новый носитель, высока вероятность того, что режим работы контроллера другой – не оптимальный для твердотельного накопителя. В любом случае выполнить эту операцию следует, как минимум для того, чтобы знать, что к чему. Тем более, что сложного в ней ничего нет:
- Нажмите комбинацию клавиш WIN+Pause, чтобы вызвать окно системной информации. В нем перейдите в «Диспетчер устройств» (кнопка его активации расположена в левой части окна).
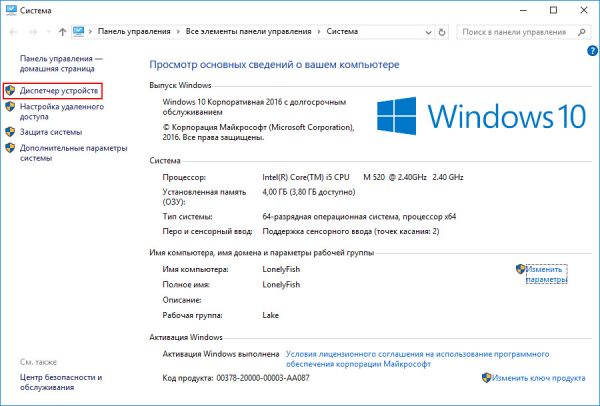
- В открывшемся списке найдите «Контроллеры IDE/ATA», и нажмите на этот пункт.
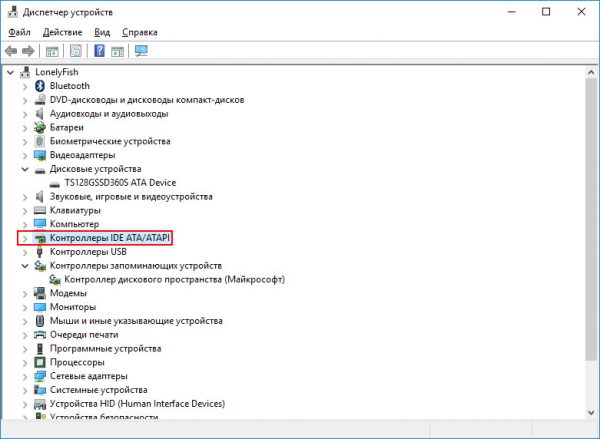
- Подтверждением того, что все настроено правильно, является наличие в списке пункта «AHCI-контроллер». Если его нет, с вероятностью в 100% твердотельный накопитель управляется контроллером, совместимым со старыми версиями жестких дисков.

Обратите внимание: операционная система теоретически предоставляет инструменты для переключения стандарта управления контроллером. Однако, если воспользоваться ими и переключить режим в ОС, после следующего запуска компьютер просто не загрузится. Если вы обнаружили отсутствие AHCI-контроллера, лучше всего переустановить ОС правильно. Либо же смириться со сниженной скоростью работы SSD и его усиленным износом.
Проверка работы команды TRIM
Принцип записи данных в SSD и HDD различается. В твердотельных накопителях ячейка может быть заполнена новой информацией только после стирания предыдущих данных. То есть, при новом копировании последовательно выполняются две функции – стирание и новая запись. Это увеличивает продолжительность операций, снижая общее быстродействие. Но процесс можно оптимизировать, активировав команду TRIM, в результате чего все незанятые ячейки будут очищаться заблаговременно автоматически. Это обеспечит максимальную скорость работы накопителя.
В Windows 10 TRIM предусмотрена в планировщике задач, поэтому ее выполнение происходит без участия пользователя. Однако, если системный раздел был скопирован из старого жесткого диска, эта команда может быть отключена. Чтобы активировать ее вручную, выполните следующую последовательность действий:
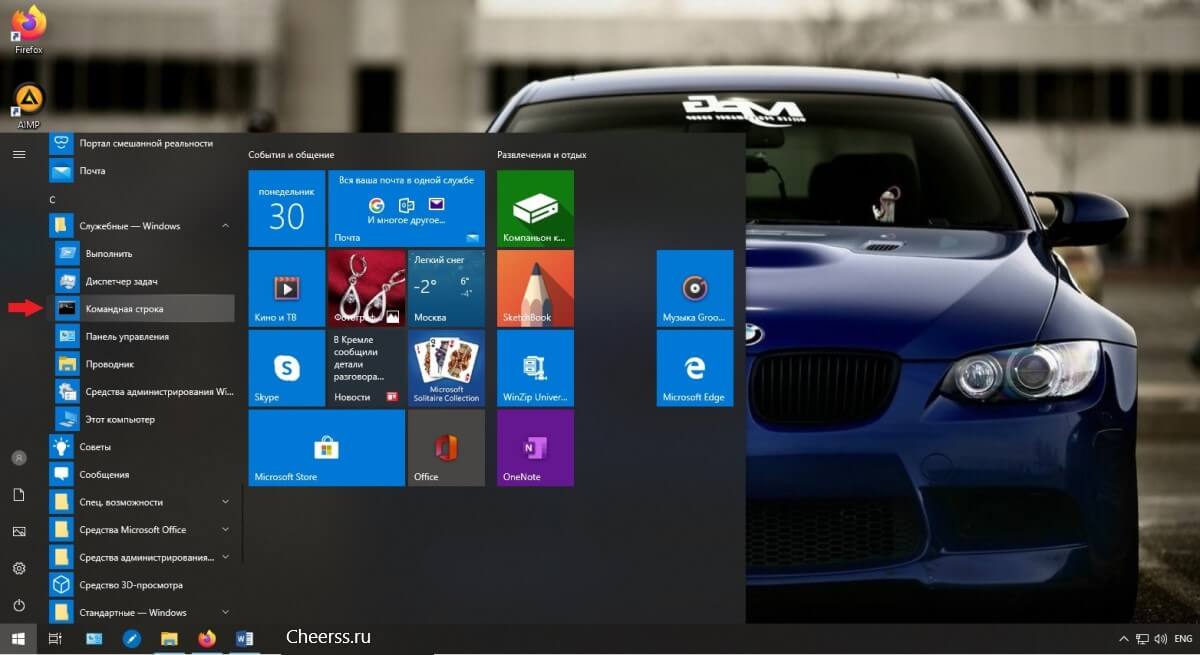
- Найдите в меню пуск: в папке «служебные windows» Командная строка
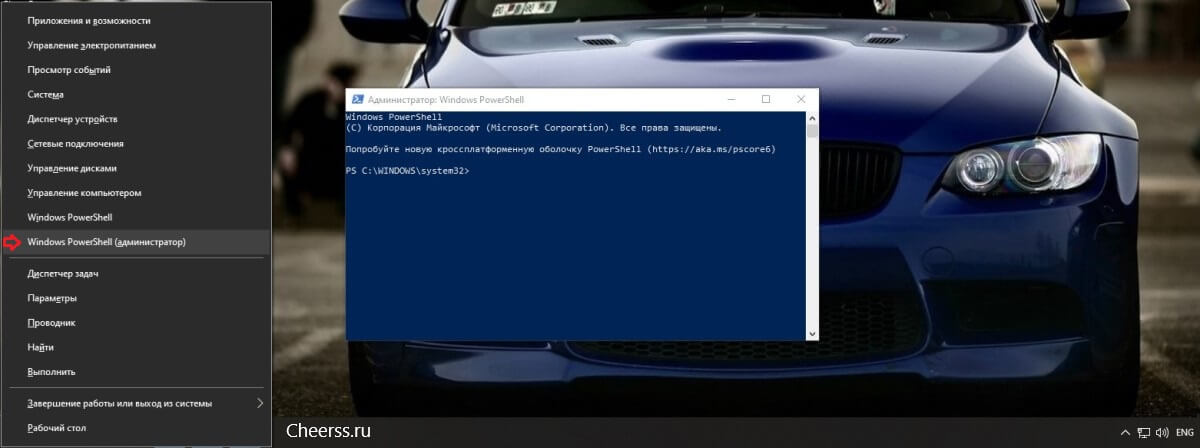
- В более свежих версиях Виндовс, Нажмите комбинацию WIN+X. Здесь вам нужен пункт «Windows PowerShell (администратор)».
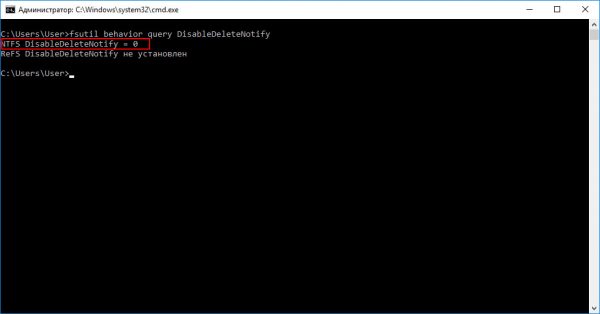
- В открывшемся окне введите команду «fsutil behavior query DisableDeleteNotify». Нажмите Enter, и если у вас отобразится значение «DisableDeleteNotify = 1», это означает, что TRIM неактивен, и его нужно включить.
- Вы сделаете это, введя команду «fsutil behavior set DisableDeleteNotify 0», и снова нажав Enter. Теперь TRIM активирован, что должно быть подтверждено значениями, как на изображении ниже.
Обратите внимание: все производители SSD для своих накопителей выпускают специализированное ПО, призванное автоматизировать настройку и обеспечивать максимальную производительность работы. Фирменная утилита автоматически запустит TRIM, проследит, чтобы контроллер работал в режиме ACHI, а не SATA, выполнит целый ряд других полезных операций без участия пользователя. Установка такой утилиты – одна из первых операций, которые вы должны выполнить, установив ОС Windows 10, как с нуля, так и методом копирования корневого каталога.
Оптимизация SSD диска
Для обеспечения оптимального режима работы SSD важно, чтобы были выполнены следующие условия:
- TRIM – активирован.
- Автоматическая дефрагментация SSD – отключена.
- Гибернация – отключена.
Если первый пункт мы уже в этой инструкции проверили и при необходимости скорректировали. Что касается дефрагментации, то Windows 10 – умная ОС, которая при установке с нуля распознает типы используемых накопителей, автоматически включая корректные параметры для каждого накопителя – TRIM для SSD и дефрагментацию для HDD. И она точно не будет пытаться дефрагментировать твердотельный накопитель автоматически.
Обратите внимание: делать это в ручном режиме тоже не следует: дефрагментация для SSD не просто бесполезная, а крайне вредная процедура!
Отключение гибернации Windows
Гибернация – та же функция «сна», только позволяющая полностью отключить энергопитание. При ее запуске содержимое оперативной памяти копируется на накопитель, и энергопитание прекращается. При включении компьютера осуществляется обратное копирование, возвращая систему в исходное состояние. Учитывая, что копируется все содержимое «оперативки», объем каждый раз получается немаленьким. А это негативно сказывается на скорости износа SSD.
Гибернация ноутбукам не нужна, поскольку там энергопотребление в режиме «сна» и так минимальное. Что касается ПК, то при отсутствии ИБП эта функция может пригодиться. Но придется смириться с усиленным износом накопителя.
Практика показывает, что ее лучше все же отключить. И сделать это можно так:
- Нажмите комбинацию WIN+X. Здесь вам нужен пункт «Командная строка (администратор)».
- Введите команду «powercfg -h off» и жмите «Ввод».
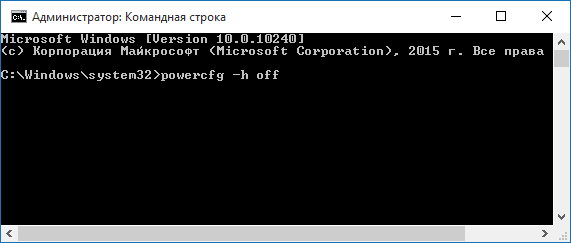
Все, гибернация отключена, а ее файл полностью удален с накопителя.
На этом оптимизацию работы SSD можно считать завершенной.
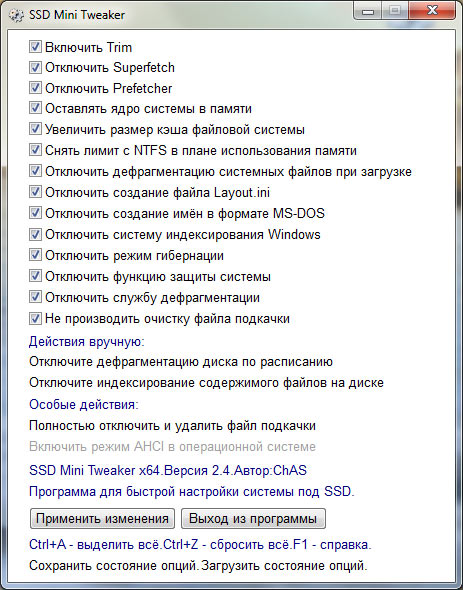
Утилита SSD Mini Tweaker для автоматической оптимизации накопителя
В завершение хотелось бы в двух словах рассказать об одной очень полезной для работы с твердотельными накопителями утилите – SSD Mini Tweaker. Она небольшая, с предельно простым русифицированным интерфейсом, и абсолютно бесплатная. Но при этом позволяет автоматизировать выполнение всех основных операций по оптимизации работы SSD. Все что необходимо – просто поставить «галочки» там, где нужно. Для неопытных пользователей – идеальный вариант!
( 53 оценки, среднее 4.4 из 5 )