Here’s a solution that may delight those who have implemented WSL (Windows Subsystem for Linux). You can just use:
wsl openssl ...whatever_args...
The point is that many who’ve implemented WSL may not realize they can call upon ANY linux command (within their underlying WSL linux vm) right from the DOS or powershell command-line this way. (It’s easy to fall into thinking the point of WSL is to use it to «shell into the vm», which is indeed an option, but the power to just run linux commands from Windows is a real value-add of WSL.)
And to be clear, in doing the command as above, whatever file names or folders you may point to (or create) will be relative to the Windows folder from which you run the command. So doing for example, openssl req to create a self-signed cert, where you may name -keyout selfsigned.key -out selfsigned.crt, those two files will be created in the Windows folder where you ran the command.
That said, there are ways this could fall down for some openssl command examples one may find, such as if they tried to use various bash-specific arguments, in which case «shelling into wsl» to run the command may well be the better choice. You could still direct things to be found or placed on the host, but I don’t mean this answer to become overly-focused on such WSL aspects. I just wanted to propose it as another alternative to installing openssl.
Generating SSL certificates can be a daunting task, one filled with frustration and sorrow. But it doesn’t have to be that way! If you have Windows 10 and OpenSSL along with a little help from this tutorial, you will be well on your way.
Not a reader? Watch this related video tutorial!
Not seeing the video? Make sure your ad blocker is disabled.
In this article, you’re going to learn how to install OpenSSL on Windows 10. Once installed, you’ll then generate SSL certificates, troubleshoot and debug certificates, and convert between formats.
Let’s begin mastering OpenSSL on Windows 10 with PowerShell!
Related: Managing Certs with Windows Certificate Manager and PowerShell
Prerequisites
In this article, you are going to learn using a hands-on approach. While OpenSSL historically is a Linux OS utility, you can use it with Windows OS as well.
- A Windows system with Local Administrator rights – The tutorial will be using Windows 10
- Windows PowerShell 5.1 (comes with Windows) or PowerShell 7
- Chocolatey – A package manager for Windows installed.
- PowerShell ISE, Visual Studio Code or any text editor of your choice
All screenshots in this guide were taken from Windows 10 build 1909 and PowerShell 7.
Installing OpenSSL on Windows 10 with PowerShell and Chocolatey
Assuming you have installed Chocolatey using the installation instructions, your first task is to install OpenSSL on Windows 10. To do this, open up your PowerShell console and run choco install OpenSSL.Lightas shown below.

That’s it! You’ve now installed OpenSSL with PowerShell.
Set up a Working Directory
This tutorial will be creating a few certificates to learn from. To ensure all of the work you do here is confined to a single folder you can clean up later, go ahead and create one.
This tutorial will store all certificates and related files in the C:certs folder. You can create a folder with PowerShell by running the below command.
New-Item -ItemType Directory -Path C:certsNow it’s time to configure OpenSSL.
Configuring OpenSSL
By default, OpenSSL on Windows 10 does not come with a configuration file. This is intentional because there are a lot of configuration options that you can customize. For the purposes of this guide, you are going to use a sample configuration that you can customize later to best suit your security requirements.
Open up PowerShell and run the below command. This command downloads a sample configuration file from MIT and saves it as openssl.cnf in the current working directory.
You can now open up the openssl.cnf file and you should see something that looks like below.
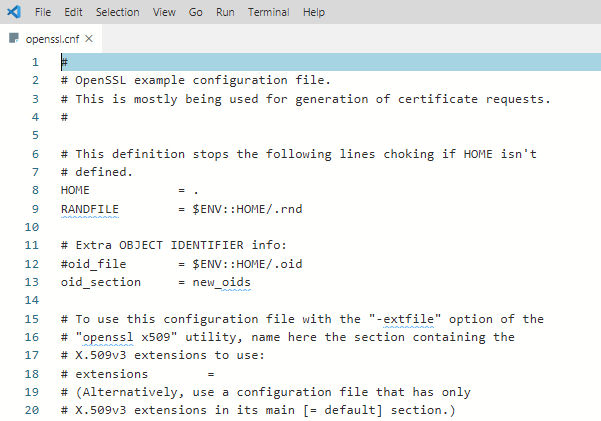
The downloaded configuration will work as-is for now. Do not use the defaults in a production environment!
Update PowerShell Profile Environment Variables
To make things go smoothly, you should modify your PowerShell profile on Windows 10. Setting up some environment variables allows you to easily switch between different versions of OpenSSL that you may have installed.
I suggest adding two environment variables to your PowerShell profile called path and OPENSSL_CONF. You will update the PATH environment variable to ensure you can run the openssl binary in any location while on the command line.
Below you’ll see a way to create a PowerShell profile if you don’t already have one. This command appends the OpenSSL binary path to your PATH and assign the configuration file path to OPENSSL_CONF.
# Add environment variables to PowerShell profile
# Test for a profile, if not found create one!
if (-not (Test-Path $profile) ) {
    New-Item -Path $profile -ItemType File -Force
}

# Edit profile to add these lines
'$env:path = "$env:path;C:Program FilesOpenSSLbin"' | Out-File $profile -Append
'$env:OPENSSL_CONF = "C:certsopenssl.cnf"' | Out-File $profile -Append
To use the environment variables, reload your profile typing . $profile or just close and reopen PowerShell.
Now you can easily invoke the openssl binary wherever you are in PowerShell as shown below.
Using OpenSSL on Windows 10 to Generate a CSR & Private Key
Before you can create an SSL certificate, you must generate a certifiate-signing request (CSR). A CSR is an encoded file that provides you with a way to share your public key with a certificate authority (CA). This file contains identifying information, a signature algorithm, and a digital signature. Let’s create your first CSR and private key.
Related: Your Guide to X509 Certificates for Mortals
To create a CSR, run the below command. OpenSSL will then prompt you to enter some identifying information as you can see in the following demonstration.
openssl req -new -out MyFirst.csr
Once complete, you will have a valid CSR and private key which can be used to issue an SSL certificate to you.
The configuration file defaults can be edited further to streamline this process should you not want to enter data every time you generate a CSR.
You can read more about the available CSR options and view sample configurations in the man pages. OpenSSL also has an active GitHub repository with examples too.
Generating RSA Key Pairs
You can also create RSA key pairs (public/private) with OpenSSL. To do so, first, create a private key using the genrsa sub-command as shown below.
When you run the command below, OpenSSL on Windows 10 will generate a RSA private key with a key length of 2048 bits. This key is generated almost immediately on modern hardware. The resulting key is output in the working directory
# generate a private key using maximum key size of 2048
# key sizes can be 512, 758, 1024, 1536 or 2048.
openssl genrsa -out rsa.private 2048
Next, generate a public key using the private key that you just created using the rsa sub-command. The syntax below will create a public key called rsa.public in the working directory from the rsa.private private key.
# generate a public key using the private key
openssl rsa -in rsa.private -out rsa.public -pubout -outform PEM
Generating a Self-Signed Certificate
On occasion you may need to generate a self-signed certificate. Self-signed certificates are fine to use for lab use but not a secure practice to use in a production environment.
Let’s create a self-signed certificate before moving onto the next task. To do so, enter the command below to create an X509 SSL certificate. This certificate will use SHA256 cryptography that will be valid for 365 days using an RSA key length of 2048 bits. The certificate will be saved to the working directory.
openssl req -x509 -sha256 -nodes -days 365 -newkey rsa:2048 -keyout privateKey.key -out certificate.crtYou are now ready to import the certificate into a browser or server.
Validating CSRs, Certificates, and Keys with OpenSSL
Checking the information in a CSR, private key, certificate, or PKCS#12 can save you time troubleshooting SSL errors. Sometimes a wrong key may have been used to create a certificate, for example. You may have the wrong identifying information in the certificate.
Let’s start by checking a CSR using the req command and some parameters:
openssl req -text -noout -verify -in .MyFirst.csr
Details such as country name, organizational name, and the email address you entered when creating the CSR at the beginning of this guide, should match precisely.
You can also check a certificate using the x509 sub-command with a couple of parameters:
openssl x509 -in .certificate.crt -text -noout | more
Converting Certificates with OpenSSL
There are occasions where an application does not use a particular certificate format. You can run into this issue with an application called HAproxy, for example that requires a PEM certificate when you may have a DER-formatted certificate (.crt .cer .der).
To demonstrate converting a certificate, let’s convert the self-signed certificate created earlier in a DER format (certificate.crt) to PEM. Use the code in the following code snippet to do so.
This command below uses the x509 sub-command with the parameter of -inform which should match the format of the -in file followed by the -out format.
openssl x509 -inform der -in .certificate.crt -out .certificate.pemYou can also reverse the order if you’d like to the DER format from PEM too as shown below.
openssl x509 -outform der -in .certificate.pem -out .certificate.derAnd last but not least, you can convert PKCS#12 to PEM and PEM to PKCS#12. This is a file type that contain private keys and certificates. To convert to PEM format, use the pkcs12 sub-command.
openssl pkcs12 -in .SomeKeyStore.pfx -out .SomeKeyStore.pem -nodesYou can convert a PEM certificate and private key to PKCS#12 format as well using -export with a few additional options. Below you are exporting a PKCS#12 formatted certificate using your private key by using SomeCertificate.crt as the input source. Using the -certfile option value MyCACert.crt allows you to validate SomeCertificate.crt.
openssl pkcs12 -export -out SomeCertificate.pfx -inkey SomePrivateKey.key -in SomeCertificate.crt -certfile MyCACert.crtTroubleshooting & Debugging
Now that you can create & convert CSR’s, certificates, and key pairs, it’s time to learn how to troubleshoot and debug them. OpenSSL comes with commands that make it a breeze to troubleshoot problems.
OpenSSL also allows you to check certificates for file integrity and test for possible data corruption. Using an MD5 checksum, you can use the following code examples to test certificates, keys and CSR’s:
# Certificates
openssl x509 -noout -modulus -in .certificate.crt | openssl md5

# Public / Private Keys
openssl rsa -noout -modulus -in .privateKey.key | openssl md5

# Certificate Server Request
openssl req -noout -modulus -in .MyFirst.csr | openssl md5

# Check an external SSL connection
openssl s_client -connect www.google.com:443
Once you have the original hash, you can then compare that original hash with a current hash to verify the certificate hasn’t been modified or corrupted.
Here’s a sample of what that code looks like when run in PowerShell:

Summary
In this article, you have learned how to install and configure OpenSSL on Windows 10, create a CSR, key pair, and SSL certificate. You have also learned how to convert between different certificate formats and do some basic troubleshooting using built-in sub-commands.
Additional Resources
- OpenSSL config man page
- OpenSSL commands
- Online SSL Checker
- Automating IIS SSL Certificate Installation with PowerShell
- How to Create Self-Signed Certificates with PowerShell
Keeping your computer secure is a balancing act. On one hand, you need to keep your computer safe from viruses and hackers so that confidential information doesn’t get leaked. On the other hand, it’s also important that programs and apps are able to access information from users as needed so they can complete tasks efficiently. Keeping these two factors in mind is essential when installing software on your Windows OS.
Luckily for you, this article will explore how you can install OpenSSL on Windows. You see, OpenSSL helps developers and programmers create applications or software that have encrypted communication over the internet. In this article, you will learn what OpenSSL is and why it’s essential when creating a new app or program with security in mind. Additionally, we explore how to install OpenSSL on Windows using simple steps that even beginners can understand. Let’s get started!
This tutorial will help you to install OpenSSL on Windows operating systems.
Step 1 – Download OpenSSL Binary
You need to download the latest OpenSSL windows installer file. Click the below link to visit the OpenSSL download page:
http://slproweb.com/products/Win32OpenSSL.html
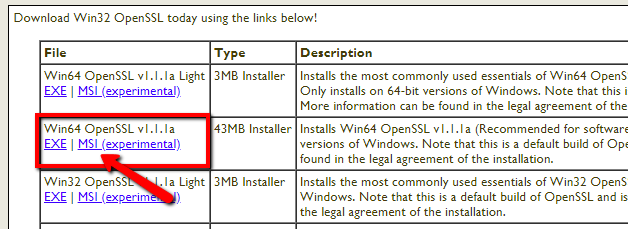
The above screenshot may be outdated but we recommend downloading the most recent version of OpenSSL.
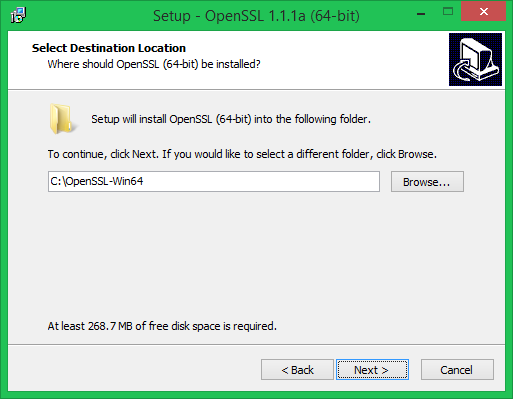
Step 2 – Run OpenSSL Installer
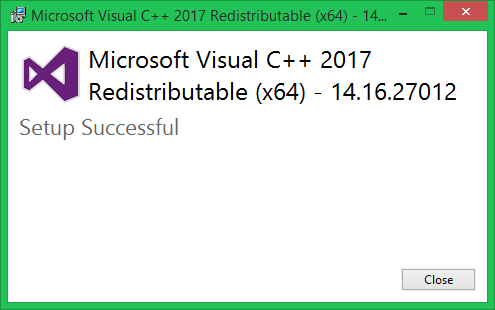
Now run the OpenSSL installer on your system. The OpenSSL required Microsoft Visual C++ to be installed on your system. If your system doesn’t have Microsoft Visual C++ installed, the installer will show your message like:
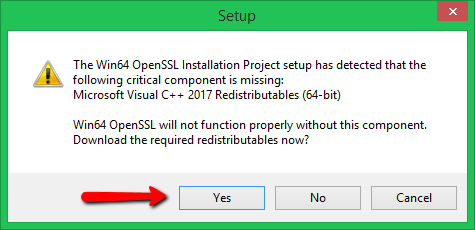
Click Yes to download and install required Microsoft Visual C++ package on your system.
Then again run the OpenSSL installer and follow the wizard.
Step 3 – Setup Environment Variables
Now set the environment variables to function OpenSSL properly on your system. You are required to set OPENSSL_CONF and Path environment variables.
Use the following commands to set the environment for the current session only:
set OPENSSL_CONF=C:OpenSSL-Win64binopenssl.cfgset Path=%Path%;C:OpenSSL-Win64bin
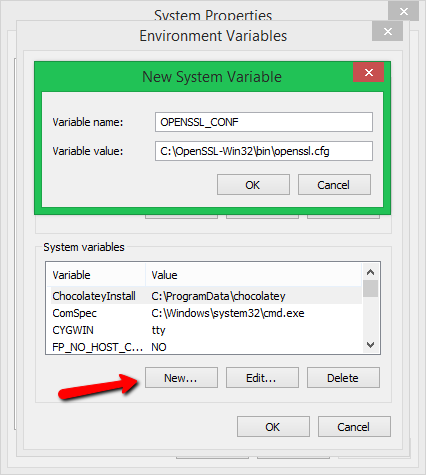
Set Variables Permanently – You can also set the OPENSSL_CONF and Path environment variables in the system permanently. To set the environment variable follow:
Press Windows + R keys together to open run window, Then type “sysdm.cpl” in the Run dialog box and hit Enter. Alternatively, you can open Command Prompt and type the same command to open System Properties
Go to “Advanced” tab and click on “Environment variables“.
Set OPENSSL_CONF Variable:
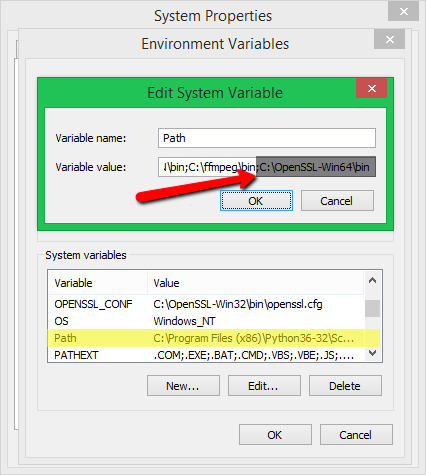
Set Path Variable:
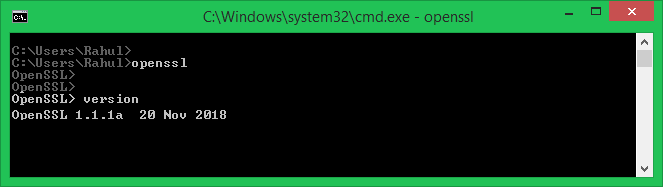
Step 4 – Run OpenSSL Binary
Open a command prompt on your system and type openssl to open OpenSSL prompt. After that type version to get the installed OpenSSL version on your system.
Conclusion
This tutorial helped you for installing OpenSSL on the Windows system. As a best security practice, it is recommended to use the latest OpenSSL version on your system. You can find the latest version details from the www.openssl.org
The following page is a combination of the INSTALL file provided with the OpenSSL library and notes from the field. If you have questions about what you are doing or seeing, then you should consult INSTALL since it contains the commands and specifies the behavior by the development team.
OpenSSL uses a custom build system to configure the library. Configuration will allow the library to set up the recursive makefiles from makefile.org. Once configured, you use make to build the library. You should avoid custom build systems because they often miss details, like each architecture and platform has a unique opensslconf.h and bn.h generated by Configure.
You must use a C compiler to build the OpenSSL library. You cannot use a C++ compiler. Later, once the library is built, it is OK to create user programs with a C++ compiler. But the library proper must be built with a C compiler.
There are two generations of build system. First is the build system used in OpenSSL 1.0.2 and below. The instructions below apply to it. Second is the build system for OpenSSL 1.1.0 and above. The instructions are similar, but not the same. For example, the second generation abandons the monolithic Configure and places individual configurations in the Configurations directory. Also, the second generation is more platform agnostic and uses templates to produce a final, top level build file (Makefile, descrip.mms, what have you).
After you configure and build the library, you should always perform a make test to ensure the library performs as expected under its self tests. If you are building OpenSSL 1.1.0 and above, then you will also need PERL 5.10 or higher (see README.PERL for details).
OpenSSL’s build system does not rely upon autotools or libtool. Also see Why aren’t tools like ‘autoconf’ and ‘libtool’ used? in the OpenSSL FAQ.
Retrieve source code[edit]
The OpenSSL source code can be downloaded from OpenSSL Source Tarballs or any suitable ftp mirror. There are various versions including stable as well as unstable versions.
The source code is managed via Git. It’s referred to as Master. The repository is
- git://git.openssl.org/openssl.git
The source is also available via a GitHub mirror. This repository is updated every 15 minutes.
- Accessing OpenSSL source code via Git
Configuration[edit]
OpenSSL is configured for a particular platform with protocol and behavior options using Configure and config.
You should avoid custom build systems because they often miss details, like each architecture and platform has a unique opensslconf.h and bn.h generated by Configure.
Supported Platforms[edit]
You can run Configure LIST to see a list of available platforms.
$ ./Configure LIST
BC-32
BS2000-OSD
BSD-generic32
BSD-generic64
BSD-ia64
BSD-sparc64
BSD-sparcv8
BSD-x86
BSD-x86-elf
BSD-x86_64
Cygwin
Cygwin-x86_64
DJGPP
...
If your platform is not listed, then use a similar platform and tune the $cflags and $ldflags by making a copy of the configure line and giving it its own name. $cflags and $ldflags correspond to fields 2 and 6 in a configure line. An example of using a similar configure line is presented in Using RPATHs.
Configure & Config[edit]
You use Configure and config to tune the compile and installation process through options and switches. The difference between is Configure properly handles the host-arch-compiler triplet, and config does not. config attempts to guess the triplet, so it’s a lot like autotool’s config.guess.
You can usually use config and it will do the right thing (from Ubuntu 13.04, x64):
$ ./config
Operating system: x86_64-whatever-linux2
Configuring for linux-x86_64
Configuring for linux-x86_64
    no-ec_nistp_64_gcc_128 [default]  OPENSSL_NO_EC_NISTP_64_GCC_128 (skip dir)
    no-gmp          [default]  OPENSSL_NO_GMP (skip dir)
    no-jpake        [experimental] OPENSSL_NO_JPAKE (skip dir)
    no-krb5         [krb5-flavor not specified] OPENSSL_NO_KRB5
    ...
Mac OS X can have issues (it’s often a neglected platform), and you will have to use Configure:
 ./Configure darwin64-x86_64-cc
Configuring for darwin64-x86_64-cc
    no-ec_nistp_64_gcc_128 [default]  OPENSSL_NO_EC_NISTP_64_GCC_128 (skip dir)
    no-gmp          [default]  OPENSSL_NO_GMP (skip dir)
    no-jpake        [experimental] OPENSSL_NO_JPAKE (skip dir)
    no-krb5         [krb5-flavor not specified] OPENSSL_NO_KRB5
    ...
You can also configure on Darwin by exporting KERNEL_BITS:
$ export KERNEL_BITS=64
$ ./config shared no-ssl2 no-ssl3 enable-ec_nistp_64_gcc_128 --openssldir=/usr/local/ssl/macosx-x64/
Operating system: i686-apple-darwinDarwin Kernel Version 12.5.0: Sun Sep 29 13:33:47 PDT 2013; root:xnu-2050.48.12~1/RELEASE_X86_64
Configuring for darwin64-x86_64-cc
Configuring for darwin64-x86_64-cc
    no-gmp          [default]  OPENSSL_NO_GMP (skip dir)
    no-jpake        [experimental] OPENSSL_NO_JPAKE (skip dir)
    no-krb5         [krb5-flavor not specified] OPENSSL_NO_KRB5
    ...
If you provide a option not known to configure or ask for help, then you get a brief help message:
$ ./Configure --help
Usage: Configure [no-<cipher> ...] [enable-<cipher> ...] [experimental-<cipher> ...]
[-Dxxx] [-lxxx] [-Lxxx] [-fxxx] [-Kxxx] [no-hw-xxx|no-hw] [[no-]threads] [[no-]shared]
[[no-]zlib|zlib-dynamic] [no-asm] [no-dso] [no-krb5] [sctp] [386] [--prefix=DIR]
[--openssldir=OPENSSLDIR] [--with-xxx[=vvv]] [--test-sanity] os/compiler[:flags]
And if you supply an unknown triplet:
$ ./Configure darwin64-x86_64-clang
Configuring for darwin64-x86_64-clang
Usage: Configure [no-<cipher> ...] [enable-<cipher> ...] [experimental-<cipher> ...]
[-Dxxx] [-lxxx] [-Lxxx] [-fxxx] [-Kxxx] [no-hw-xxx|no-hw] [[no-]threads] [[no-]shared]
[[no-]zlib|zlib-dynamic] [no-asm] [no-dso] [no-krb5] [sctp] [386] [--prefix=DIR]
[--openssldir=OPENSSLDIR] [--with-xxx[=vvv]] [--test-sanity] os/compiler[:flags]

pick os/compiler from:
BC-32 BS2000-OSD BSD-generic32 BSD-generic64 BSD-ia64 BSD-sparc64 BSD-sparcv8
BSD-x86 BSD-x86-elf BSD-x86_64 Cygwin Cygwin-pre1.3 DJGPP MPE/iX-gcc OS2-EMX
...

NOTE: If in doubt, on Unix-ish systems use './config'.
Dependencies[edit]
If you are prompted to run make depend, then you must do so. For OpenSSL 1.0.2 and below, it’s required to update the standard distribution once configuration options change.
Since you've disabled or enabled at least one algorithm, you need to do
the following before building:

	make depend
OpenSSL 1.1.0 and above performs the dependency step for you, so you should not see the message. However, you should perform a make clean to ensure the list of objects files is accurate after a reconfiguration.
Configure Options[edit]
OpenSSL has been around a long time, and it carries around a lot of cruft. For example, from above, SSLv2 is enabled by default. SSLv2 is completely broken, and you should disable it during configuration. You can disable protocols and provide other options through Configure and config, and the following lists some of them.
Note: if you specify a non-existent option, then the configure scripts will proceed without warning. For example, if you inadvertently specify no-sslv2 rather than no-ssl2 no-ssl3, the script will configure with SSLv2 and without warning for the unknown no-sslv2.
Note: when building a shared object, both the static archive and shared objects are built. You do not need to do anything special to build both when shared is specified.
| Option | Description |
|---|---|
| —prefix=XXX | See PREFIX and OPENSSLDIR in the next section (below). |
| —openssldir=XXX | See PREFIX and OPENSSLDIR in the next section (below). |
| -d | Debug build of the library. Optimizations are disabled (no -O3 or similar) and libefence is used (apt-get install electric-fence or yum install electric-fence). TODO: Any other features? |
| shared | Build a shared object in addition to the static archive. You probably need a RPATH when enabling shared to ensure openssl uses the correct libssl and libcrypto after installation. |
| enable-ec_nistp_64_gcc_128 | Use on little endian platforms when GCC supports __uint128_t. ECDH is about 2 to 4 times faster. Not enabled by default because Configure can’t determine it. Enable it if your compiler defines __SIZEOF_INT128__, the CPU is little endian and it tolerates unaligned data access. |
| enable-capieng | Enables the Microsoft CAPI engine on Windows platforms. Used to access the Windows Certificate Store. Also see Using Windows certificate store through OpenSSL on the OpenSSL developer list. |
| no-ssl2 | Disables SSLv2. OPENSSL_NO_SSL2 will be defined in the OpenSSL headers. |
| no-ssl3 | Disables SSLv3. OPENSSL_NO_SSL3 will be defined in the OpenSSL headers. |
| no-comp | Disables compression independent of zlib. OPENSSL_NO_COMP will be defined in the OpenSSL headers. |
| no-idea | Disables IDEA algorithm. Unlike RC5 and MDC2, IDEA is enabled by default |
| no-asm | Disables assembly language routines (and uses C routines) |
| no-dtls | Disables DTLS in OpenSSL 1.1.0 and above |
| no-dtls1 | Disables DTLS in OpenSSL 1.0.2 and below |
| no-shared | Disables shared objects (only a static library is created) |
| no-hw | Disables hardware support (useful on mobile devices) |
| no-engine | Disables hardware support (useful on mobile devices) |
| no-threads | Disables threading support. |
| no-dso | Disables the OpenSSL DSO API (the library offers a shared object abstraction layer). If you disable DSO, then you must disable Engines also |
| no-err | Removes all error function names and error reason text to reduce footprint |
| no-npn/no-nextprotoneg | Disables Next Protocol Negotiation (NPN). Use no-nextprotoneg for 1.1.0 and above; and no-npn otherwise |
| no-psk | Disables Preshared Key (PSK). PSK provides mutual authentication independent of trusted authorities, but it’s rarely offered or used |
| no-srp | Disables Secure Remote Password (SRP). SRP provides mutual authentication independent of trusted authorities, but it’s rarely offered or used |
| no-ec2m | Used when configuring FIPS Capable Library with a FIPS Object Module that only includes prime curves. That is, use this switch if you use openssl-fips-ecp-2.0.5. |
| no-weak-ssl-ciphers | Disables RC4. Available in OpenSSL 1.1.0 and above. |
| -DXXX | Defines XXX. For example, -DOPENSSL_NO_HEARTBEATS. |
| -DPEDANTIC | Defines PEDANTIC. The library will avoid some undefined behavior, like casting an unaligned byte array to a different pointer type. This define should be used if building OpenSSL with undefined behavior sanitizer (-fsanitize=undefined). |
| -DOPENSSL_USE_IPV6=0 | Disables IPv6. Useful if OpenSSL encounters incorrect or inconsistent platform headers and mistakenly enables IPv6. Must be passed to Configure manually. |
| -DNO_FORK | Defines NO_FORK. Disables calls to fork. Useful for operating systems like AppleTVOS, WatchOS, AppleTVSimulator and WatchSimulator. |
| -Lsomething, -lsomething, -Ksomething, -Wl,something | Linker options, will become part of LDFLAGS. |
| —anythingelse, +anythingelse | Compiler options, will become part of CFLAGS. |
Note: on older OSes, like CentOS 5, BSD 5, and Windows XP or Vista, you will need to configure with no-async when building OpenSSL 1.1.0 and above. The configuration system does not detect lack of the Posix feature on the platforms.
Note: you can verify compiler support for __uint128_t with the following:
# gcc -dM -E - </dev/null | grep __SIZEOF_INT128__
#define __SIZEOF_INT128__ 16
PREFIX and OPENSSLDIR[edit]
—prefix and —openssldir control the configuration of installed components. The behavior and interactions of —prefix and —openssldir are slightly different between OpenSSL 1.0.2 and below, and OpenSSL 1.1.0 and above.
The rule of thumb to use when you want something that «just works» for all recent versions of OpenSSL, including OpenSSL 1.0.2 and 1.1.0, is:
- specify both —prefix and —openssldir
- set —prefix and —openssldir to the same location
One word of caution is avoid —prefix=/usr when OpenSSL versions are not binary compatible. You will replace the distro’s version of OpenSSL with your version of OpenSSL. It will most likely break everything, including the package management system.
OpenSSL 1.0.2 and below
It is usually not necessary to specify —prefix. If —prefix is not specified, then —openssldir is used. However, specifying only —prefix may result in broken builds because the 1.0.2 build system attempts to build in a FIPS configuration.
You can omit If —prefix and use —openssldir. In this case, the paths for —openssldir will be used during configuration. If —openssldir is not specified, the the default /usr/local/ssl is used.
The takeaway is /usr/local/ssl is used by default, and it can be overridden with —openssldir. The rule of thumb applies for path overrides: specify both —prefix and —openssldir.
OpenSSL 1.1.0 and above
OpenSSL 1.1.0 changed the behavior of install rules. You should specify both —prefix and —openssldir to ensure make install works as expected.
The takeaway is /usr/local/ssl is used by default, and it can be overridden with both —prefix and —openssldir. The rule of thumb applies for path overrides: specify both —prefix and —openssldir.
Debug Configuration[edit]
From the list above, it’s possible to quickly configure a «debug» build with ./config -d. However, you can often get into a more amicable state without the Electric Fence dependency by issuing:
$ ./config no-asm -g3 -O0 -fno-omit-frame-pointer -fno-inline-functions
Operating system: x86_64-whatever-linux2
Configuring for linux-x86_64
Configuring OpenSSL version 1.1.0-pre5-dev (0x0x10100005L)
    no-asm          [option]   OPENSSL_NO_ASM
    ...
Configuring for linux-x86_64
IsMK1MF       =no
CC            =gcc
CFLAG         =-Wall -O3 -pthread -m64 -DL_ENDIAN  -g3 -O0 -fno-omit-frame-pointer
...
Don’t be alarmed about both -O3 and -O0. The last setting «sticks», and that’s the -O0.
If you are working in Visual Studio and you can’t step into library calls, then see Step into not working, but can force stepping after some asm steps on Stack Overflow.
Modifying Build Settings[edit]
Sometimes you need to work around OpenSSL’s selections for building the library. For example, you might want to use -Os for a mobile device (rather than -O3), or you might want to use the clang compiler (rather than gcc).
In case like these, its’ often easier to modify Configure and Makefile.org rather than trying to add targets to the configure scripts. Below is a patch that modifies Configure and Makefile.org for use under the iOS 7.0 SDK (which lacks gcc in /Applications/Xcode.app/Contents/Developer/Toolchains/XcodeDefault.xctoolchain/usr/bin/):
- Modifies Configure to use clang
- Modifies Makefile.org to use clang
- Modifies CFLAG to use -Os
- Modifies MAKEDEPPROG to use $(CC) -M
Setting and resetting of LANG is required on Mac OSX to work around a sed bug or limitation.
OLD_LANG=$LANG
unset LANG

sed -i "" 's|"iphoneos-cross","llvm-gcc:-O3|"iphoneos-cross","clang:-Os|g' Configure
sed -i "" 's/CC= cc/CC= clang/g' Makefile.org
sed -i "" 's/CFLAG= -O/CFLAG= -Os/g' Makefile.org
sed -i "" 's/MAKEDEPPROG=makedepend/MAKEDEPPROG=$(CC) -M/g' Makefile.org

export LANG=$OLD_LANG
After modification, be sure to dclean and configure again so the new settings are picked up:
make dclean

./config
make depend
make all
...
Using RPATHs[edit]
RPATH’s are supported by default on the BSD platforms, but not others. If you are working on Linux and compatibles, then you have to manually add an RPATH. One of the easiest ways to add a RPATH is to configure with it as shown below.
./config -Wl,-rpath=/usr/local/ssl/lib
For modern Linux you should also use -Wl,—enable-new-dtags. The linker option sets a RUNPATH as opposed to a RPATH. A RUNPATH allows library path overrides at runtime, while a RPATH does not.
./config -Wl,-rpath=/usr/local/ssl/lib -Wl,--enable-new-dtags
Note well: you should use a RPATH or RUNPATH when building both OpenSSL and your program. If you don’t add a RPATH or RUNPATH to both, then your program could runtime-link to the wrong version of OpenSSL. Linking against random versions of a security library is not a good idea.
You can also add an RPATH or RUNPATH by hard coding the RPATH into a configure line. For example, on Debian x86_64 open the file Configure in an editor, copy linux-x86_64, name it linux-x86_64-rpath, and make the following change to add the -rpath option. Notice the addition of -Wl,-rpath=… in two places.
"linux-x86_64-rpath", "gcc:-m64 -DL_ENDIAN -O3 -Wall -Wl,-rpath=/usr/local/ssl/lib::
  -D_REENTRANT::-Wl,-rpath=/usr/local/ssl/lib -ldl:SIXTY_FOUR_BIT_LONG RC4_CHUNK DES_INT DES_UNROLL:
  ${x86_64_asm}:elf:dlfcn:linux-shared:-fPIC:-m64:.so.$(SHLIB_MAJOR).$(SHLIB_MINOR):::64",
Above, fields 2 and 6 were changed. They correspond to $cflag and $ldflag in OpenSSL’s builds system.
Then, Configure with the new configuration:
$ ./Configure linux-x86_64-rpath shared no-ssl2 no-ssl3 no-comp
    --openssldir=/usr/local/ssl enable-ec_nistp_64_gcc_128
Finally, after make, verify the settings stuck:
$ readelf -d ./libssl.so | grep -i -E 'rpath|runpath'
0x000000000000000f (RPATH)              Library rpath: [/usr/local/ssl/lib]
$ readelf -d ./libcrypto.so | grep -i rpath
0x000000000000000f (RPATH)              Library rpath: [/usr/local/ssl/lib]
$ readelf -d ./apps/openssl | grep -i rpath
0x000000000000000f (RPATH)              Library rpath: [/usr/local/ssl/lib]
Once you perform make install, then ldd will produce expected results:
$ ldd /usr/local/ssl/lib/libssl.so
linux-vdso.so.1 =>  (0x00007ffceff6c000)
 ibcrypto.so.1.0.0 => /usr/local/ssl/lib/libcrypto.so.1.0.0 (0x00007ff5eff96000)
...

$ ldd /usr/local/ssl/bin/openssl
linux-vdso.so.1 =>  (0x00007ffc30d3a000)
libssl.so.1.0.0 => /usr/local/ssl/lib/libssl.so.1.0.0 (0x00007f9e8372e000)
libcrypto.so.1.0.0 => /usr/local/ssl/lib/libcrypto.so.1.0.0 (0x00007f9e832c0000)
...
FIPS Capable Library[edit]
If you want to use FIPS validated cryptography, you download, build and install the FIPS Object Module (openssl-fips-2.0.5.tar.gz) according to the FIPS User Guide 2.0 and FIPS 140-2 Security Policy. You then download, build and install the FIPS Capable Library (openssl-1.0.1e.tar.gz).
When configuring the FIPS Capable Library, you must use fips as an option:
./config fips <other options ...>
If you are configuring the FIPS Capable Library with only prime curves (openssl-fips-ecp-2.0.5.tar.gz), then you must configure with no-ec2m:
./config fips no-ec2m <other options ...>
Compile Time Checking[edit]
If you disable an option during configure, you can check if it’s available through OPENSSL_NO_* defines. OpenSSL writes the configure options to <openssl/opensslconf.h>. For example, if you want to know if SSLv3 is available, then you would perform the following in your code:
#include <openssl/opensslconf.h>
...

#if !defined(OPENSSL_NO_SSL3)
  /* SSLv3 is available */
#endif
Compilation[edit]
After configuring the library, you should run make. If prompted, there’s usually no need to make depend since you are building from a clean download.
Quick[edit]
./config <options ...> --openssldir=/usr/local/ssl
make
make test
sudo make install
Various options can be found examining the Configure file (there is a well commented block at its top). OpenSSL ships with SSLv2, SSLv3 and Compression enabled by default (see my $disabled), so you might want to use no-ssl2 no-ssl3, no-ssl3, and no-comp.
Platfom specific[edit]
Linux[edit]
Intel[edit]
ARM[edit]
X32 (ILP32)[edit]
X32 uses the 32-bit data model (ILP32) on x86_64/amd64. To properly configure for X32 under current OpenSSL distributions, you must use Configure and use the x32 triplet:
# ./Configure LIST | grep x32
linux-x32
...
Then:
# ./Configure linux-x32
Configuring OpenSSL version 1.1.0-pre6-dev (0x0x10100006L)
    no-asan         [default]  OPENSSL_NO_ASAN (skip dir)
    ...
Configuring for linux-x32
CC            =gcc
CFLAG         =-Wall -O3 -pthread -mx32 -DL_ENDIAN
SHARED_CFLAG  =-fPIC
...
If using an amd64-compatible processor and GCC with that supports __uint128_t, then you usually add enable-ec_nistp_64_gcc_128 in addition to your other flags.
Windows[edit]
3noch wrote a VERY good guide in 2012 here (PLEASE NOTE: the guide was written in 2012 and is no longer available at the original location; the link now points to an archived version at the Internet Archive Wayback Machine).
Like he said in his article, make absolutely sure to create separate directories for 32 and 64 bit versions.
W32 / Windows NT — Windows 9x[edit]
type INSTALL.W32
- you need Perl for Win32. Unless you will build on Cygwin, you will need ActiveState Perl, available from http://www.activestate.com/ActivePerl.
- one of the following C compilers:
- Visual C++
- Borland C
- GNU C (Cygwin or MinGW)
- Netwide Assembler, a.k.a. NASM, available from http://nasm.sourceforge.net/ is required if you intend to utilize assembler modules. Note that NASM is now the only supported assembler.
W64[edit]
Read first the INSTALL.W64 documentation note containing some specific 64bits information.
See also INSTALL.W32 that still provides additonnal build information common to both the 64 and 32 bit versions.
You may be surprised: the 64bit artefacts are indeed output in the out32* sub-directories and bear names ending *32.dll. Fact is the 64 bit compile target is so far an incremental change over the legacy 32bit windows target. Numerous compile flags are still labelled «32» although those do apply to both 32 and 64bit targets.
The important pre-requisites are to have PERL available (for essential file processing so as to prepare sources and scripts for the target OS) and of course a C compiler like Microsoft Visual Studio for C/C++. Also note the procedure changed at OpenSSL 1.1.0 and is more streamlined. Also see Why there is no msdo_ms.bat after perl Configure VC-WIN64A on Stack Overflow.
OpenSSL 1.1.0[edit]
For OpenSSL 1.1.0 and above perform these steps:
- Ensure you have perl installed on your machine (e.g. ActiveState or Strawberry), and available on your %PATH%
- Ensure you have NASM installed on your machine, and available on your %PATH%
- Extract the source files to your folder, here
cd c:myPathopenssl - Launch Visual Studio tool x64 Cross Tools Command prompt
- Goto your defined folder
cd c:myPathopenssl - Configure for the target OS with
perl Configure VC-WIN64Aor other configurations to be found in the INSTALL file (e.g. UNIX targets).- For instance:
perl Configure VC-WIN64A.
- For instance:
- (Optional) In case you compiled before on 32 or 64-bits, make sure you run
nmake cleanto prevent trouble across 32 and 64-bits which share output folder. - Now build with:
nmake - Output can be found in the root of your folder as libcrypto-1_1x64.dll and libssl-1_1-x64.dll (with all the build additionals such as .pdb .lik or static .lib). You may check this is true 64bit code using the Visual Studio tool ‘dumpbin’. For instance
dumpbin /headers libcrypto-1_1x64.dll | more, and look at the FILE HEADER section. - Test the code using the ‘test’ make target, by running
nmake test. - Reminder, clean your code to prevent issues the next time you compile for a different target. See step 7.
Windows CE[edit]
Not specified
OpenSSL 1.0.2[edit]
For OpenSSL 1.0.2 and earlier the procedure is as follows.
- Ensure you have perl installed on your machine (e.g. ActiveState or Strawberry), and available on your %PATH%
- Ensure you have NASM installed on your machine, and available on your %PATH%
- launch a Visual Studio tool x64 Cross Tools Command prompt
- change to the directory where you have copied openssl sources
cd c:myPathopenssl - configure for the target OS with the command
perl Configure VC-WIN64A. You may also be interested to set more configuration options as documented in the general INSTALL note (for UNIX targets). For instance:perl Configure VC-WIN64A. - prepare the target environment with the command:
msdo_win64a - ensure you start afresh and notably without linkable products from a previous 32bit compile (as 32 and 64 bits compiling still share common directories) with the command:
nmake -f msntdll.mak cleanfor the DLL target andnmake -f msnt.mak cleanfor static libraries. - build the code with:
nmake -f msntdll.mak(respectivelynmake -f msnt.mak) - the artefacts will be found in sub directories out32dll and out32dll.dbg (respectively out32 and out32.dbg for static libraries). The libcrypto and ssl libraries are still named libeay32.lib and ssleay32.lib, and associated includes in inc32 ! You may check this is true 64bit code using the Visual Studio tool ‘dumpbin’. For instance
dumpbin /headers out32dll/libeay32.lib | more, and look at the FILE HEADER section. - test the code using the various *test.exe programs in out32dll. Use the ‘test’ make target to run all tests as in
nmake -f msntdll.mak test - we recommend that you move/copy needed includes and libraries from the «32» directories under a new explicit directory tree for 64bit applications from where you will import and link your target applications, similar to that explained in INSTALL.W32.
Windows CE[edit]
OS X[edit]
The earlier discussion presented a lot of information (and some of it had OS X information). Here are the TLDR versions to configure, build and install the library.
If configuring for 64-bit OS X, then use a command similar to:
./Configure darwin64-x86_64-cc shared enable-ec_nistp_64_gcc_128 no-ssl2 no-ssl3 no-comp --openssldir=/usr/local/ssl/macos-x86_64
make depend
sudo make install
If configuring for 32-bit OS X, then use a command similar to:
./Configure darwin-i386-cc shared no-ssl2 no-ssl3 no-comp --openssldir=/usr/local/ssl/macosx-i386
make depend
sudo make install
If you want to build a multiarch OpenSSL library, then see this answer on Stack Overflow: Build Multiarch OpenSSL on OS X.
iOS[edit]
The following builds OpenSSL for iOS using the iPhoneOS SDK. The configuration avoids the dynamic library the DSO interface and engines.
If you run make install, then the headers will be installed in /usr/local/openssl-ios/include and libraries will be installed in /usr/local/openssl-ios/lib.
32-bit[edit]
For OpenSSL 1.1.0 and above, a 32-bit iOS cross-compiles uses the ios-cross target, and options similar to —prefix=/usr/local/openssl-ios.
$ export CC=clang;
$ export CROSS_TOP=/Applications/Xcode.app/Contents/Developer/Platforms/iPhoneOS.platform/Developer
$ export CROSS_SDK=iPhoneOS.sdk
$ export PATH="/Applications/Xcode.app/Contents/Developer/Toolchains/XcodeDefault.xctoolchain/usr/bin:$PATH"

$ ./Configure ios-cross no-shared no-dso no-hw no-engine --prefix=/usr/local/openssl-ios

Configuring OpenSSL version 1.1.1-dev (0x10101000L)
    no-afalgeng     [forced]   OPENSSL_NO_AFALGENG
    no-asan         [default]  OPENSSL_NO_ASAN
    no-dso          [option]
    no-dynamic-engine [forced]
    ...
    no-weak-ssl-ciphers [default]  OPENSSL_NO_WEAK_SSL_CIPHERS
    no-zlib         [default]
    no-zlib-dynamic [default]
Configuring for ios-cross

PERL          =perl
PERLVERSION   =5.16.2 for darwin-thread-multi-2level
HASHBANGPERL  =/usr/bin/env perl
CC            =clang
CFLAG         =-O3 -D_REENTRANT -arch armv7 -mios-version-min=6.0.0 -isysroot $(CROSS_TOP)/SDKs/$(CROSS_SDK) -fno-common
CXX           =c++
CXXFLAG       =-O3 -D_REENTRANT -arch armv7 -mios-version-min=6.0.0 -isysroot $(CROSS_TOP)/SDKs/$(CROSS_SDK) -fno-common
DEFINES       =NDEBUG OPENSSL_THREADS OPENSSL_NO_DYNAMIC_ENGINE OPENSSL_PIC OPENSSL_BN_ASM_MONT OPENSSL_BN_ASM_GF2m SHA1_ASM SHA256_ASM SHA512_ASM AES_ASM BSAES_ASM GHASH_ASM ECP_NISTZ256_ASM POLY1305_ASM
...
If you are working with OpenSSL 1.0.2 or below, then use the iphoneos-cross target.
$ export CC=clang;
$ export CROSS_TOP=/Applications/Xcode.app/Contents/Developer/Platforms/iPhoneOS.platform/Developer
$ export CROSS_SDK=iPhoneOS.sdk
$ export PATH="/Applications/Xcode.app/Contents/Developer/Toolchains/XcodeDefault.xctoolchain/usr/bin:$PATH"

$ ./Configure iphoneos-cross no-shared no-dso no-hw no-engine --prefix=/usr/local/openssl-ios
Configuring for iphoneos-cross
    no-dso          [option]
    no-engine       [option]   OPENSSL_NO_ENGINE (skip dir)
    no-gmp          [default]  OPENSSL_NO_GMP (skip dir)
    no-hw           [option]   OPENSSL_NO_HW
    ...
    no-weak-ssl-ciphers [default]  OPENSSL_NO_WEAK_SSL_CIPHERS (skip dir)
    no-zlib         [default]
    no-zlib-dynamic [default]
IsMK1MF=0
CC            =clang
CFLAG         =-DOPENSSL_THREADS -D_REENTRANT -O3 -isysroot $(CROSS_TOP)/SDKs/$(CROSS_SDK) -fomit-frame-pointer -fno-common
...
64-bit[edit]
For OpenSSL 1.1.0 , a 64-bit iOS cross-compiles uses the ios64-cross target, and —prefix=/usr/local/openssl-ios64. ios64-cross. There is no built-in 64-bit iOS support for OpenSSL 1.0.2 or below.
$ export CC=clang;
$ export CROSS_TOP=/Applications/Xcode.app/Contents/Developer/Platforms/iPhoneOS.platform/Developer
$ export CROSS_SDK=iPhoneOS.sdk
$ export PATH="/Applications/Xcode.app/Contents/Developer/Toolchains/XcodeDefault.xctoolchain/usr/bin:$PATH"

$ ./Configure ios64-cross no-shared no-dso no-hw no-engine --prefix=/usr/local/openssl-ios64

Configuring OpenSSL version 1.1.1-dev (0x10101000L)
    no-afalgeng     [forced]   OPENSSL_NO_AFALGENG
    no-asan         [default]  OPENSSL_NO_ASAN
    no-dso          [option]
    no-dynamic-engine [forced]
    ...
    no-weak-ssl-ciphers [default]  OPENSSL_NO_WEAK_SSL_CIPHERS
    no-zlib         [default]
    no-zlib-dynamic [default]
Configuring for ios64-cross

PERL          =perl
PERLVERSION   =5.16.2 for darwin-thread-multi-2level
HASHBANGPERL  =/usr/bin/env perl
CC            =clang
CFLAG         =-O3 -D_REENTRANT -arch arm64 -mios-version-min=7.0.0 -isysroot $(CROSS_TOP)/SDKs/$(CROSS_SDK) -fno-common
CXX           =c++
CXXFLAG       =-O3 -D_REENTRANT -arch arm64 -mios-version-min=7.0.0 -isysroot $(CROSS_TOP)/SDKs/$(CROSS_SDK) -fno-common
DEFINES       =NDEBUG OPENSSL_THREADS OPENSSL_NO_DYNAMIC_ENGINE OPENSSL_PIC OPENSSL_BN_ASM_MONT SHA1_ASM SHA256_ASM SHA512_ASM VPAES_ASM ECP_NISTZ256_ASM POLY1305_ASM
...
Android[edit]
Visit Android and FIPS Library and Android.
More[edit]
VAX/VMS[edit]
I you wonder what are files ending with .com like test/testca.com those are VAX/VMX scripts.
This code is still maintained.
OS/2[edit]
NetWare[edit]
5.x 6.x
HP-UX[edit]
HP-UX Itanium FIPS and OpenSSL build
Autoconf[edit]
OpenSSL uses its own configuration system, and does not use Autoconf. However, a number of popular projects use both OpenSSL and Autoconf, and it would be useful to detect either OPENSSL_init_ssl or SSL_library_init from libssl. To craft a feature test for OpenSSL that recognizes both OPENSSL_init_ssl and SSL_library_init, you can use the following.
if test "$with_openssl" = yes ; then
  dnl Order matters!
  if test "$PORTNAME" != "win32"; then
     AC_CHECK_LIB(crypto, CRYPTO_new_ex_data, [], [AC_MSG_ERROR([library 'crypto' is required for OpenSSL])])
     FOUND_SSL_LIB="no"
     AC_CHECK_LIB(ssl, OPENSSL_init_ssl, [FOUND_SSL_LIB="yes"])
     AC_CHECK_LIB(ssl, SSL_library_init, [FOUND_SSL_LIB="yes"])
     AS_IF([test "x$FOUND_SSL_LIB" = xno], [AC_MSG_ERROR([library 'ssl' is required for OpenSSL])])
  else
     AC_SEARCH_LIBS(CRYPTO_new_ex_data, eay32 crypto, [], [AC_MSG_ERROR([library 'eay32' or 'crypto' is required for OpenSSL])])
     FOUND_SSL_LIB="no"
     AC_SEARCH_LIBS(OPENSSL_init_ssl, ssleay32 ssl, [FOUND_SSL_LIB="yes"])
     AC_SEARCH_LIBS(SSL_library_init, ssleay32 ssl, [FOUND_SSL_LIB="yes"])
     AS_IF([test "x$FOUND_SSL_LIB" = xno], [AC_MSG_ERROR([library 'ssleay32' or 'ssl' is required for OpenSSL])])
  fi
fi
Many thanks to the Postgres folks for donating part of their configure.in. Also see How to tell Autoconf “require symbol A or B” from LIB? on Stack Overflow.
![]()
What Is OpenSSL? How Does OpenSSL Work?
Proper SSL implementation is crucial to a website’s security and success. And, with so many web owners learning about SSL for the first time, it’s essential to equip them with all the necessary tools and utilities. One such tool is OpenSSL. So, what is OpenSSL, and why is it so important?
The following guide covers every aspect of this useful utility, including how to use OpenSSL and the various OpenSSL commands for easy and efficient SSL management.
Table of Contents
- What is OpenSSL?
- How to use the OpenSSL commands on Windows and Linux?
- OpenSSL command line examples
- Conclusion
- Frequently Asked Questions

What is OpenSSL?
OpenSSL is an all-around cryptography library that offers an open-source application of the TLS protocol. It allows users to perform various SSL-related tasks, including CSR (Certificate Signing Request) and private keys generation, and SSL certificate installation.
What is OpenSSL used for?
SSL certificates are in high demand now. The encryption landscape has changed dramatically since Google launched the “HTTPS Everywhere” campaign.
First, they gave an SEO boost as an incentive to install digital certificates, and later, Chrome made HTTPS all but mandatory for everyone. If you don’t use an SSL certificate, popular browsers such as Chrome and Firefox will mark your site as Not Secure.
With OpenSSL, you can apply for your digital certificate (Generate the Certificate Signing Request) and install the SSL files on your server. You can also convert your certificate into various SSL formats, as well as do all kinds of verifications.
Since not all servers provide web user interfaces for SSL management, on some platforms OpenSSL is the only solution to import and configure your certificate. Open SSL commands for Windows are identical to those used on Linux servers.
How to use the OpenSSL commands on Windows and Linux?
OpenSSL is all about its command lines. All you have to do is learn a few common OpenSSL commands and, with each new certificate, the configuration process will become quicker and
easier.
How to check if OpenSSL is installed on Linux?
To check if OpenSSL is installed on your Linux system, use the commands below:
For GNU/Linux distributions that use rpm packages:
rpm -qa | grep -i openssl
For GNU/Linux distributions that use deb packages:
dpkg -l | grep -i openssl
For Arch Linux use:
pacman -Q openssl
How to use OpenSSL on Windows?
The default installation will create a directory for the program on your C: drive. For example C:OpenSSL-Win32
To run the program, go to the C:OpenSSL-Win32bin directory and double-click the file openssl.exe. A text window will open with an OpenSSL> prompt.
Enter the OpenSSL for Windows you need at this prompt. The files you generate will be in this same directory.
How to download OpenSSL for Windows?
First released in 1998, it is available for Linux, Windows, macOS, and BSD systems. Most of the Linux distributions come with OpenSSL pre-compiled, but if you’re on a Windows system, you can download OpenSSL from here.
OpenSSL command line examples
Below we’ve put together a few common OpenSSL commands for regular users. Use them anytime you want to generate or manage your certificates.
How to check the OpenSSL version?
It’s imperative to know what OpenSSL version you have as it determines which cryptographic algorithms and protocols you can use. The latest OpenSSL release is 3.0.0. It supports the TLS 1.3 protocol and restores FIPS 140 support.
You can check your OpenSSL version by running the following command:
openssl version –a
How to use OpenSSL to generate a certificate?
To install an SSL certificate on your website, you must follow a few mandatory steps, which are the same for any server or email client. OpenSSL is especially handy when you don’t have a web control panel or want to streamline the whole process. With just a few OpenSSL commands, you can generate the Certificate Signing Request and the private key, merge files, verify certificate information, and troubleshoot any potential issues.
Learn the commands below, and you’ll know how to manage SSL certs on almost any server, be it mainstream or fully customized.
How to generate a CSR with OpenSSL?
You can use OpenSSL to create your CSR code. CSR is a block of encoded text with data about your website and company. You must submit the CSR to your Certificate Authority for approval. Alternatively, you can create CSR via another external CSR generator tool.
The certificate request requires a private key from which the public key is created. While you can use an existing key, it’s recommended to always generate a new private key whenever you create a CSR.
After you’ve successfully generated the private key, it’s time to create your CSR. It will be in PEM format and include details about your company, as well as the public key derived from your private key.
Run the following command to generate the CSR:
openssl req -new -key yourdomain.key -out yourdomain.csr
–subj Switch – an alternative way to generate the CSR code
You can also submit your information within the command line itself with help of the –subj switch.
This command will disable the question prompts:
openssl req -new -key yourdomain.key -out yourdomain.csr -subj "/C=US/ST=CA/L=San Francisco/O=Your Company, Inc./OU=IT/CN=yourdomain.com"
How to Generate the private key with OpenSSL?
To generate your private key, you need to specify the key algorithm, the key size, and an optional passphrase. The standard key algorithm is RSA, but you can also select ECDSA for specific situations. When choosing a key algorithm, make sure you won’t run into compatibility issues. In this article, we only show how to generate a private key via the RSA algorithm.
For your key size, you should pick 2048 bits when using the RSA key algorithm, and 256 bits when using the ECDSA algorithm. Any key size lower than 2048 is not secure, while a higher value may slow down the performance.
Finally, you should decide whether you need a passphrase for your private key or not. Please note that certain servers will not accept private keys with passphrases.
Once you’re ready to generate your private key (with RSA algorithm), run the commands below:
openssl genrsa -out yourdomain.key 2048
This command will create the yourdomain.key file in your current directory. Your private key will be in the PEM format.
How to view the private key information with OpenSSL?
You can view the encoded contents of your private key via the following command:
cat yourdomain.key
How to decode the private key with OpenSSL?
To decode your private key, run the command below:
openssl rsa -text -in yourdomain.key -noout
How to extract the public key with OpenSSL?
To extract your public key from the private key, use the following command:
openssl rsa -in yourdomain.key -pubout -out yourdomain_public.key
How to create your private key and CSR at once with OpenSSL?
OpenSSL is so versatile, there’s also a command to generate both your private key and CSR.
openssl req -new
-newkey rsa:2048 -nodes -keyout yourdomain.key
i>-out yourdomain.csr
-subj "/C=US/ST=CA/L=San Francisco/O=Your Company, Inc./OU=IT/CN=yourdomain.com"
This command generates the private key without a passphrase (-keyout yourdomain.key) and the CSR code (out yourdomain.csr).
How to check the CSR info with OpenSSL?
To ensure you’ve provided the correct information before submitting the CSR to your CA, run the command below:
openssl req -text -in yourdomain.csr -noout –verify
How to send the CSR to the CA?
Run the cat yourdomain.csr command to view and copy the entire contents of the CSR.
Make sure you include —–BEGIN CERTIFICATE REQUEST—– and —–END CERTIFICATE REQUEST— tags, and paste everything into your SSL vendor’s order form.
How to check a certificate in OpenSSL?
After your CA delivers the SSL certificate to your inbox, run the command below to ensure that the certificate’s info matches your private key.
openssl x509 -text -in yourdomain.crt –noout
This concludes our list of common OpenSSL commands. If you want, you can study all the OpenSSL commands. If you’re looking for more information on what OpenSSL is and how it works, this free book is an excellent resource.
Frequently Asked Questions
1. What does OpenSSL do?
OpenSSL is a free and open-source command line tool used to generate CSRs, create private keys, install an SSL certificate, and verify certificate information. OpenSSL is compatible with both Windows and Linux distributions.
2. Who uses OpenSSL?
Anyone can use OpenSSL to manage SSL certificate installations. Using OpenSSL on Windows and Linux is a quick and efficient way to encrypt websites. Both seasoned developers and novice admins benefit from OpenSSL command lines.
3. Where is OpenSSL installed?
By default, the OpenSSL directory is /usr/local/ssl for Linux distributions and C:OpenSSL-Win32 for Windows.
4. What is the difference between SSL and OpenSSL?
SSL stands for Secure Sockets Layer, a now-deprecated cryptographic protocol that encrypts communications between two computer applications over a network. When we refer to SSL certificates, they’re actually TLS (Transport Layer Security) certificates, with TLS being the successor of SSL. Learn more about the difference between SSL and TLS.
On the other hand, OpenSSL is a cryptographic utility that uses command lines to manage the generation, installation, and identification of SSL/TLS certificates
5. Is OpenSSL a Linux command?
OpenSSL commands are universally used on both Linux and Windows systems.
6. Is OpenSSL free to use?
Yes, OpenSSL is free to use for commercial and non-commercial purposes.
7. What is OpenSSL for Windows?
OpenSSL is a cryptographic utility that facilitates SSL certificate management. With OpenSSL command lines, you can perform a wide range of actions, including CSR generation, private key creation, certificate inspection, and many more.
8. How to open OpenSSL in Windows?
Once you’ve installed OpenSSL on Windows, double-click the Openssl.exe file to run it.
Conclusion
Now that you know what is OpenSSL and how it works, you can use its commands to generate, install and manage SSL certificates on various servers. Using OpenSSL is, sometimes, the only option when you don’t have a web hosting panel. It may take a while before you get comfortable with OpenSSL commands, but the more you use them, the better SSL certificate management becomes.

We offer some of the most competitive prices available.
In 2023, reduce the price
even further with this
10% discount coupon: SAVE10
OpenSSL is a small but powerful open source cross-platform utility, which can be used in various digital PKI certificate activities. OpenSSL can be used to convert the digital certificates from one to another format, export private keys from certificates, and build your own Certificate Authority. However, OpenSSL is included in basic packages in most of the popular Linux distributions. It is not required to install the OpenSSL on Linux. Well, the story is not similar in the case of the Windows platform. Don’t be disappointed, since OpenSSL is a cross-platform utility that supports Windows, Linux, and mac. You can install OpenSSL on the Windows platform just with few clicks.
Why Should You Install OpenSSL On Windows?
First of all, OpenSSL is not for normal users. It is not mandatory to install OpenSSL on the Windows platform. As we said earlier, OpenSSL is a cryptographic SSL/TLS tool kit, which provides a wide range of solutions for those who work on Digital Certificates, SSL/TLS testing, application development or implementation, application testing, and security testing. There are a lot of things you can do using OpenSSL. Only a few of them are listed here:
- You can create your own Certificate Authority and issue certificates on your network.
- Convert digital certificates from one to another format.
- Export or Import private keys from the certificates.
- Validate the HTTPS connections to the destination website.
- Verify the certificate of the destination website.
- Run benchmark tests of your server and remote website.
- Extract information like issuer, subject, issued and expiring dates, and fingerprint from certificates.
- Create CSR.
- Decode CSR and Certificates to verify contents.
You can enjoy the features of OpenSSL if you have installed it on your Windows machine.
Let’s begin the procedure to install OpenSSL on the Windows platform.
How To Install OpenSSL On The Windows Platform?
The installation procedure is very simple and straight. You should download the OpenSSL installer, run it to install, and configure Environment variables.
Time needed: 10 minutes.
How to Install OpenSSL on The Windows Platform?
- Download the OpenSSL installer
Download the OpenSSL installer from the official OpenSSL download link: https://slproweb.com/products/Win32OpenSSL.html

- Run the OpenSSL installer to install
Execute the downloaded installer file and install the OpenSSL on the Windows machine.
The installation procedure is quite simple and straight.
1. Accept license agreement.
2. Specify the Installation location.
- Initiate installing OpenSSL
Set Start Menu location and the additional task then click on the Install button to initiate the OpenSSL installation.

- Installation in progress…….

- Complete the installation of OpenSSL.
The installation will take 5 to 10 seconds. Click Finish to complete the installation process.

- Set Environment variable
If you just want to set the environment varibles only for a login session, then run these commands.
>set OPENSSL_CONF=C:Program FilesOpenSSL-Win64binopenssl.cfg
>set Path= C:Program FilesOpenSSL-Win64binIf you want to set the env variable for permanently, then add OPENSSL_CONF and Path env variable on System Properties.
Open Run using ‘Windows’ + ‘r’ then type ‘sysdm.cpl‘. Go to Advanced > Environment Variable.Set OPENSSL_CONF and Path variables.

- Run OpenSSL
Open the command prompt using ‘Windows’ + ‘r’ then type ‘cmd‘ to open command prompt.
Type openssl version command on CLI to ensure OpenSSL is installed and configured on your Windows machine. You should see the version information if OpenSSL is configured correctly.


Thats’s it. This is how you can install OpenSSL on the Windows platform. Simple itn’t it?
Thanks for reading the small tutorial. Please follow us on this blog to see more such tutorials and security updates.

Arun KL
Hi All, I am Arun KL, an IT Security Professional. Founder of “thesecmaster.com”. Enthusiast, Security Blogger, Technical Writer, Editor, Author at TheSecMaster. To know more about me. Follow me on LinkedIn
What is OpenSSL?
OpenSSL is a single-system image clustering system that is open-source. It allows a group of computers to be viewed as a single colossal system, giving programs running on any one machine access to all of the cluster’s resources. [It is the culmination of a long development process that began with the development of LOCUS in the early 1980s.
OpenSSL allows a group of separate computers (nodes) to be regarded as one massive system. Processes running on any node have full access to all node resources.
Functionalities can be automatically transferred from node to node to balance system utilization. Alternatively, the cluster might be set up so that each node has direct access to the file system.
Step 1 Download OpenSSL Binaries
Link to Download OpenSSL binaries files: https://sourceforge.net/projects/openssl/files/
In our article, we are downloading
https://sourceforge.net/projects/openssl/files/openssl-1.0.2j-fips-x86_64/
Step 2 Unpack OpenSSL Zip files
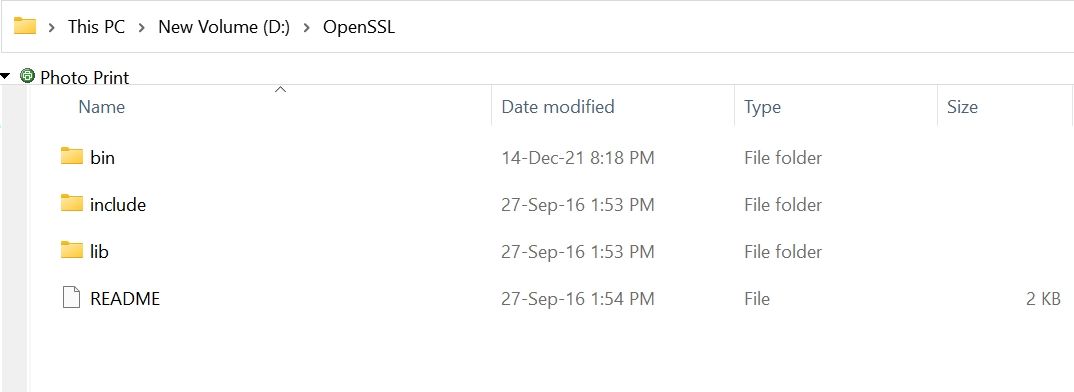
Unpack the content of (openssl-1.0.2j-fips-x86_64.zip) zip file into your desired location in our example we are using (D:OpenSSL) folder
This comes with three folders (bin, include & lib) as shown in the image
Step 3: Set OpenSSL Path in Windows path
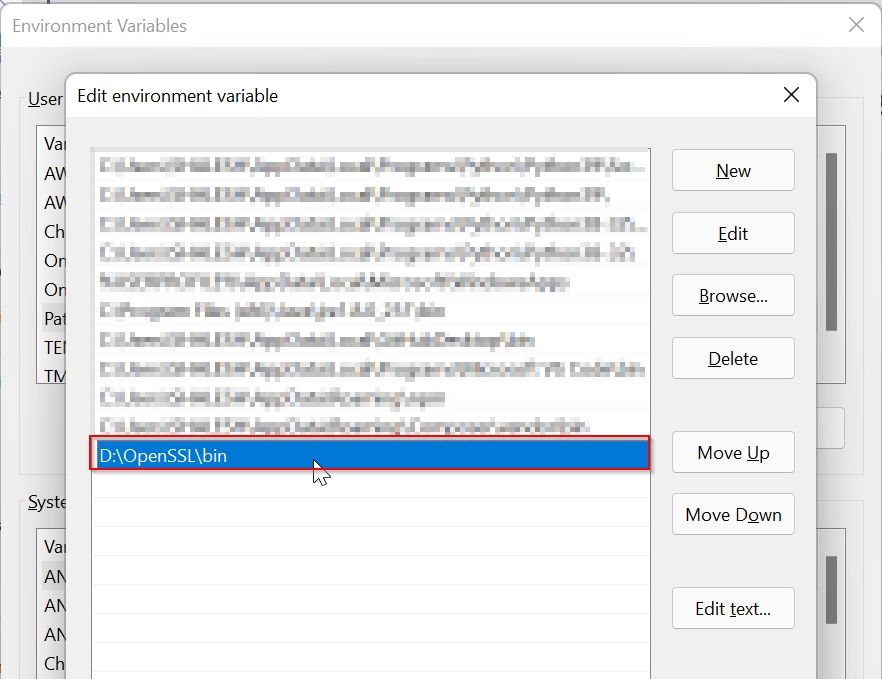
We have extracted OpenSSL files in directory D:OpenSSLbin
So our OpenSSL path is D:OpenSSLbin
Open explorer and right-mouse click on This PC icon as shown in the image
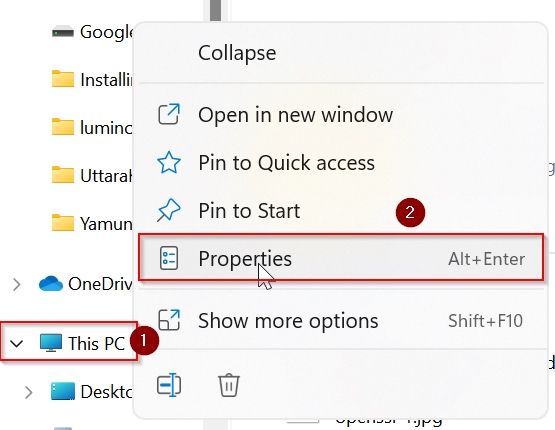
Under System About window click on the Advanced system settings button

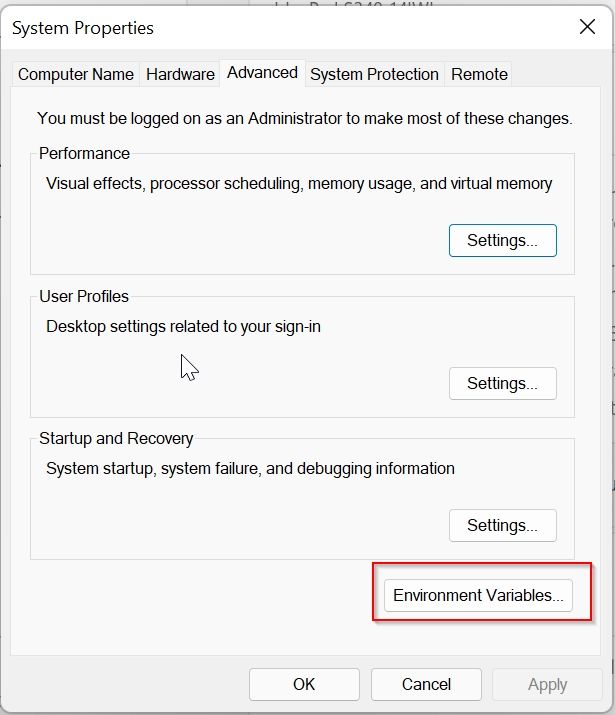
Under the System Property window click on the Environment Variables button
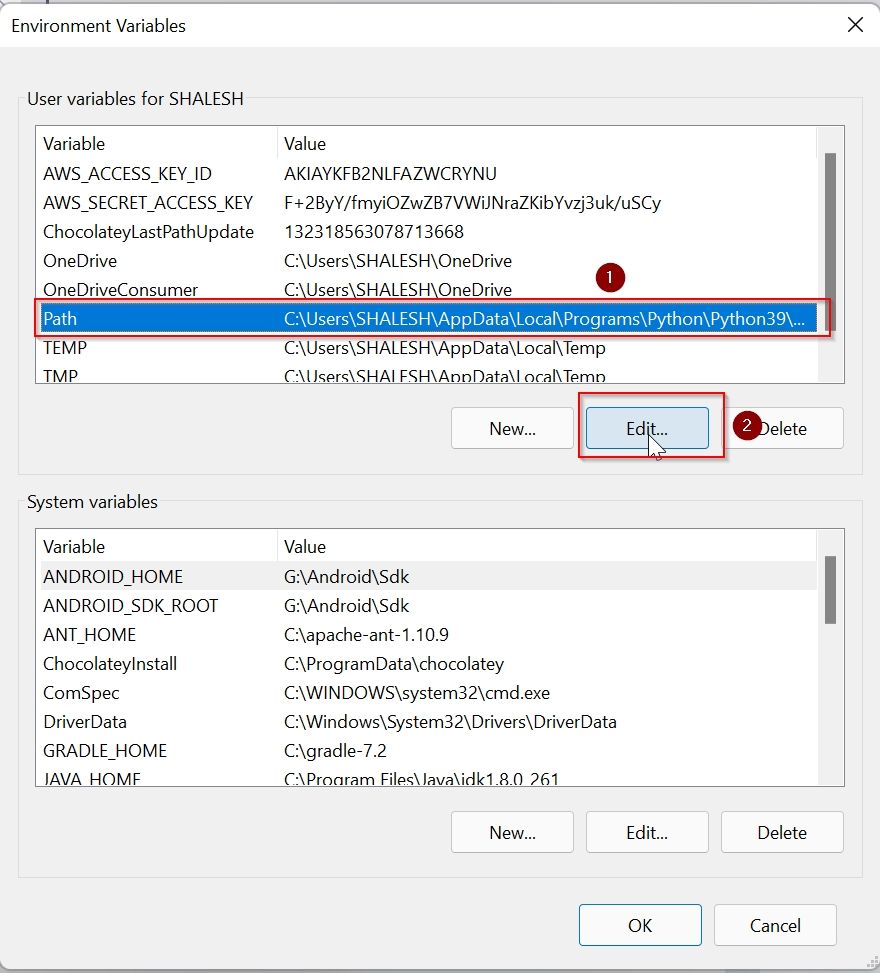
Under the Advanced Environment window select Path and then click on the Edit button
Under the Environment Variable window click on the New button
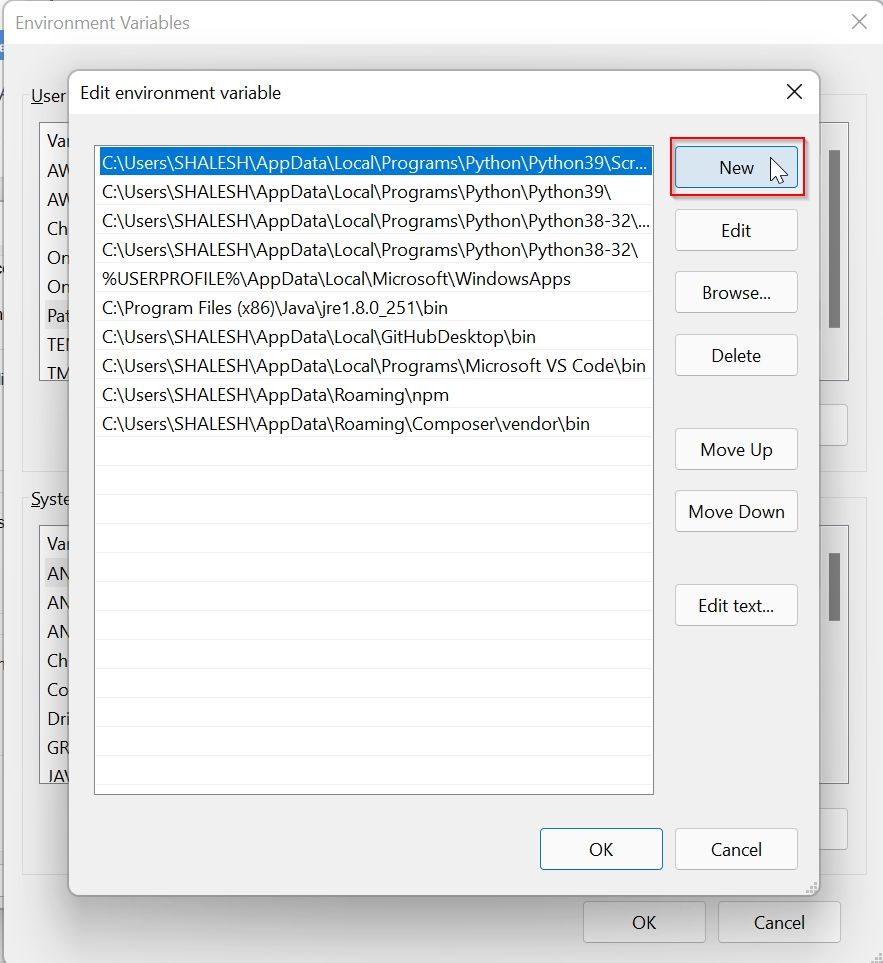
Paste the path of OpenSSL (D:OpenSSLbin) and click the OK button
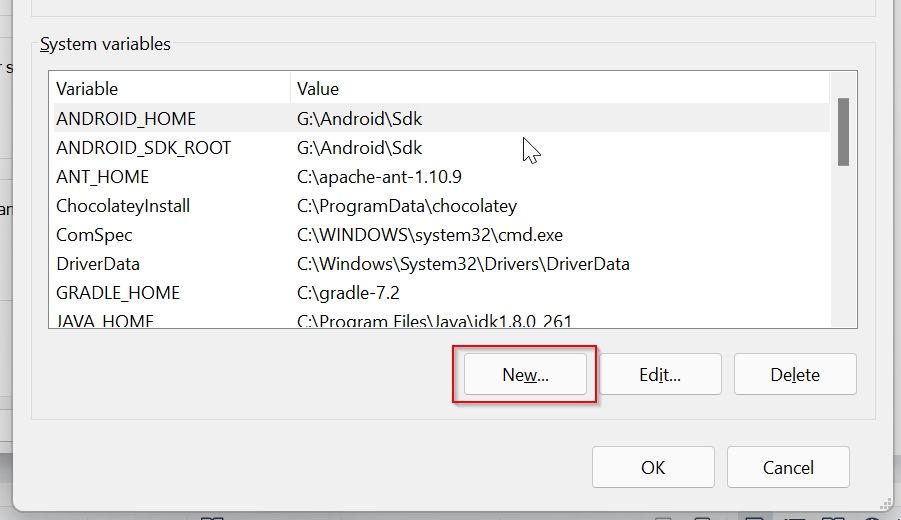
Step 4: Set System Variable for OPENSSL_CONF
Now to set system variable for OPENSSL_CONF
Click on the New button under the System Variable window
Now add system variable values as given, the path to your openssl.conf file location as shown below, and click on the OK button
Name: OPENSSL_CONF
Value: D:OpenSSLbinopenssl.cnf
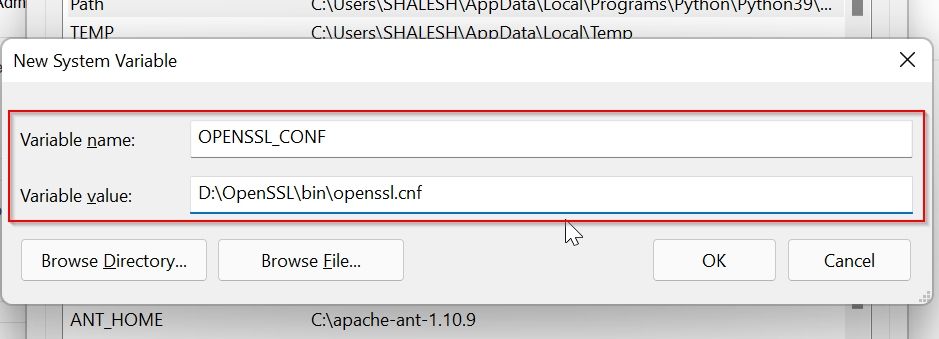
Now you can see that the system variable is set

For window 10 and 11 you don’t have to restart your system to effect changes, else you need to restart the system
Step5: Test OpenSSL
To test OpenSSL installed properly open the terminal and check the OpenSSL version
cmd: openssl version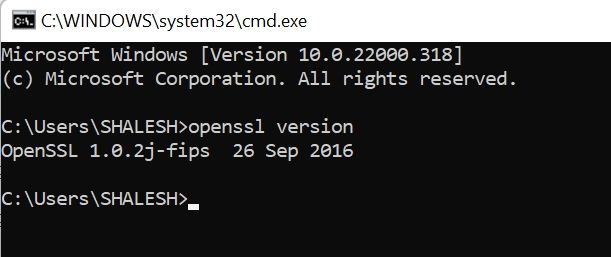
If it displays the OpenSSL version then OpenSSL is installed properly.
Important Commands for Open SSL
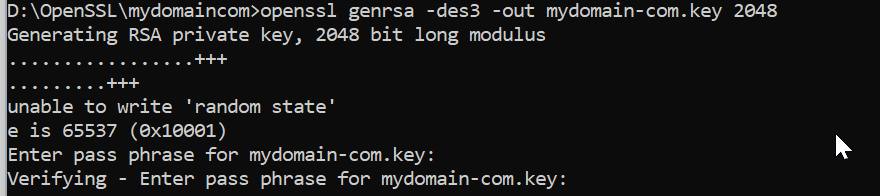
Creating a Private Key
Private Key is very important it is required for all operations in SSL, this Private key is required to create a CSR file.
openssl genrsa -des3 -out mydomain-com.key 2048It will ask for the password, please keep the password in a safe place because it is required in many places.
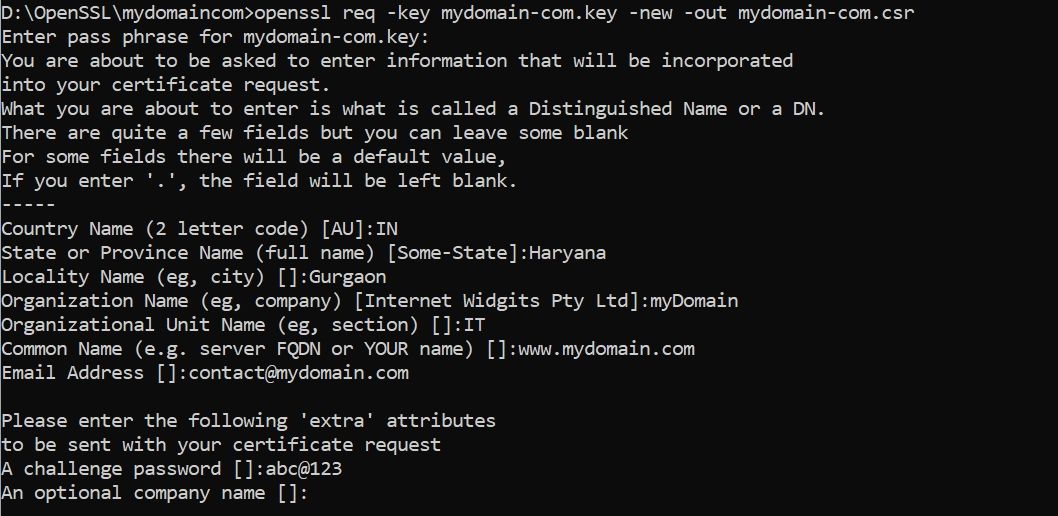
1. Create CSR Creating a Certificate Signing Request
CSR file is required to generate an SSL certificate.
This CSR file contains information about the certificate and private key
openssl req -key mydomain-com.key -new -out mydomain-com.csrInformation required by CSR:
Enter pass phrase for mydomain-com.key:
Country Name (2 letter code) [AU]:IN
State or Province Name (full name) [Some-State]:Haryana
Locality Name (eg, city) []:Gurgaon
Organization Name (eg, company) [Internet Widgits Pty Ltd]:myDomain
Organizational Unit Name (eg, section) []:IT
Common Name (e.g. server FQDN or YOUR name) []:www.mydomain.com
Email Address []:contact@mydomain.com
Please enter the following ‘extra’ attributes
to be sent with your certificate request
A challenge password []:
An optional company name []:
Important: Common Name is the Fully Qualified Domain Name for which you want an SSL certificate.
This CSR file is used by different SSL certificate companies to generate SSL Certificate
Generate Private key and CSR with Single command.
openssl req -newkey rsa:2048 -keyout mydomain-com.key -out mydomain-com.csrCreating a Self-Signed Certificate
A self-Signed Certificate is an SSL certificate is generated by using your own private key, it is not used for commercial purposes because it shows a warning that says the certificate is not trusted.
So self-signed certificate can be used for development and testing purposes.
openssl x509 -signkey mydomain-com.key -in mydomain-com.csr -req -days 365 -out mydomain-com.crt
Convert CRT file to PFX file
The .pfx file is required to install an SSL certificate in the windows system, this file contains Private Key and SSL certificate.
openssl pkcs12 -export -out mydomain-com.pfx -inkey mydomain-com.key -in mydomain-com.crtGenerate SHA265 Key from .crt file
openssl x509 -in mydomain.crt -pubkey -noout | openssl pkey -pubin -outform der | openssl dgst -sha256 -binary | openssl enc -base64Output:
XXXXXXxxXXXXXXXXXXXXXXXxXXXXxXXXX121XX=Generate PF12 file .crt file
openssl pkcs12 -export -out yourdomain.com.p12 -inkey yourdomain.com.key -in yourdomain.crt -certfile CACert.crtyourdomain.com.key: is the key file, it get generated when we create .CSR file
CACert.crt : root certificate, it comes with SSL certificate bundel file.
yourdomain.crt: is the main certificate file
John Mwaniki / 07 Jan 2022
In this article, you will learn what OpenSSL is, what it is used for, how to download and install it on your Windows PC and add its path to the environment variables in order to use it in your command prompt.
What is OpenSSL?
OpenSSL is a robust open-source software library/toolkit for general-purpose cryptography and secure communication.
OpenSSL allows users to perform various SSL related tasks, such as CSR (Certificate Signing Request), private keys generation, and SSL certificate installation.
It is available for Linux, Windows, macOS, and BSD systems. It comes pre-installed in most Linux distributions. However, if you are on Windows, you will have to install it yourself.
How to install OpenSSL in Windows
Follow the steps below to install OpenSSL on your Windows PC.
Step 1: Download the OpenSSL Installer for Windows. Choose the version that applies to your PC. In my case, I will download Win64 OpenSSL v3.0.1 (Light version).

Step 2: Run the just downloaded OpenSSL installer from your download folder or from whichever directory you select during the download by double-clicking on it.
 Step 3: Accept the license agreement then hit the «Next» button to proceed.
Step 4: Click on the «Next» button. You can also choose a difference installation directory at this point. I recommend you leave that as it is. Not this directory somewhere as you will require it later.

Step 5: Click on the «Next» button.

Step 6: Click on the «Next» button.

Step 7: Click on the «Install» button to start the installation process.

Step 8: At this point the installation is complete. There is an option to donate checked by default. Uncheck the box if you don’t want to donate then click on the «Finish» button to exit the installer.

At this point, you can start using OpenSSL on your PC. However, there is another important step that is not a must but very helpful.
Add the OpenSSL PATH in Windows environment variables
By default, after installation, OpenSSL is only available from the directory where it resides (C:Program FilesOpenSSL-Win64bin).
This means that if you try to use OpenSSL from the command line (command prompt) in any other directory than the above, the command will not be recognized and won’t work. It will give you something like the below.

It is more convenient to run OpenSSL commands from any directory of your choice on your PC. To do that, you have to add its PATH in the Environment Variables.
To do so, follow the following steps:
Step 1: Search for «Environment Variables» by pressing the Windows button and typing the term «Environment Variables». Click on the «Edit the system environment variables«.

Step 2: Click on the «Environment Variables» button.

Step 3: In the screen that appears, select the Path and then click on the «Edit» button.

Step 4: Click on the «browse» button.

Step 5: Browse through folders to «This PC > Windows (C:) > Program Files > OpenSSL — Win64 > bin». Make sure «bin» is selected at the box labeled folder at the bottom, then hit the «OK» button.

You should now be able to see the newly added OpenSSL path at the top of the other(s). Now click «OK» on this screen and the subsequent screens.
We are now done and you can start running the OpenSSL commands in the command prompt in any directory of your choice.
Note: If you already had the command prompt open before doing this process, you will need to close and reopen it for this to work.
That’s it!
It’s my hope you were able to follow along and it has helped you.