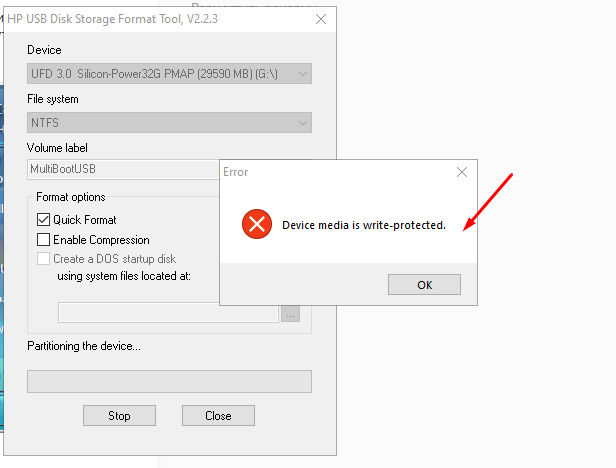
How to remove media write-protected error? What to do when media cannot be formatted when you try to format it with a formatter or DOS bootable usb maker like HP USB Disk Storage Format Tool? See how it appeared in the following editions of HP USB Format Tool v2.0.6 and v2.2.3.
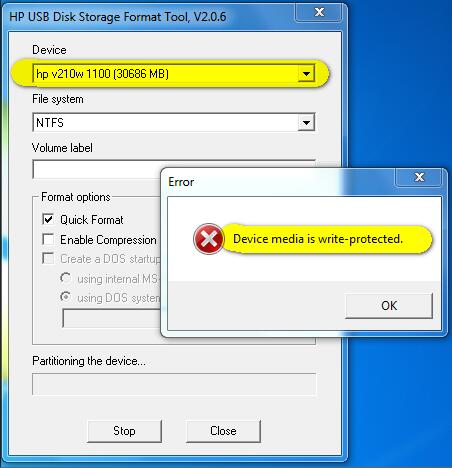 Device media is write protected with HP USB Format Tool v2.0.6
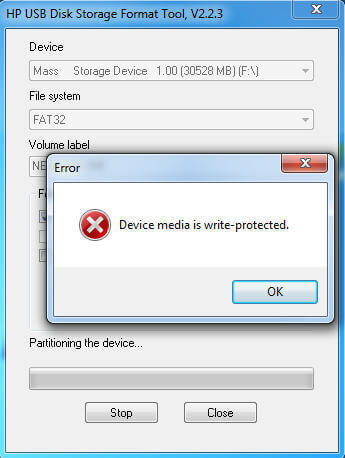 Device media is write protected with HP USB Format Tool v2.2.3
Also read: how to remove write protection, and how to fix can’t format usb
3 Efficient Ways to Fix Device Media Write Protected Error(Video guide included in the end)
Way 1 — Turn off the write protection switch if it was locked
Way 2 — Convert the media no matter usb stick or memory card to be MBR with diskpart
Here are some pre-steps that you need to get it done.
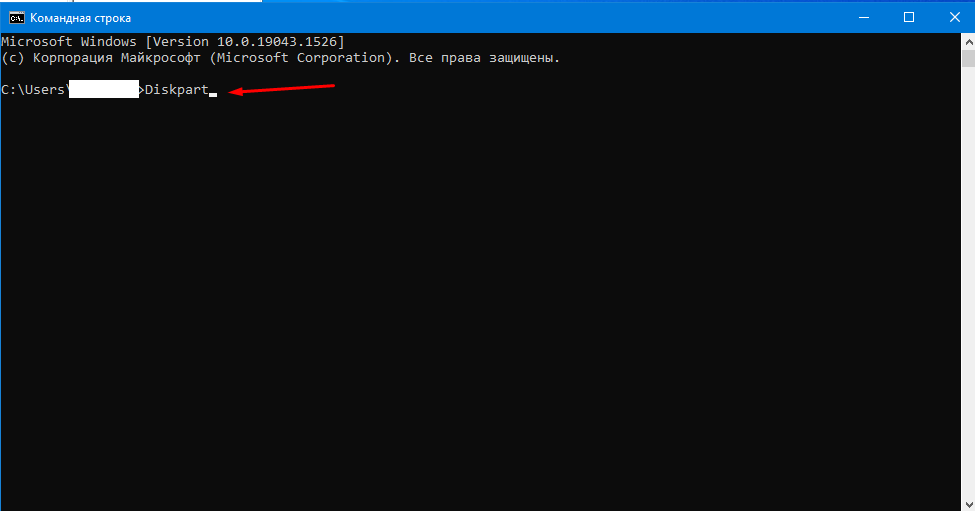
- Step1 — open cmd by pressing ‘Windows icon + R’ on your keyboard to start Run
- Step2 — type ‘diskpart’ to open the diskpart function
CMD to convert media MBR to get the write protection problem fixed
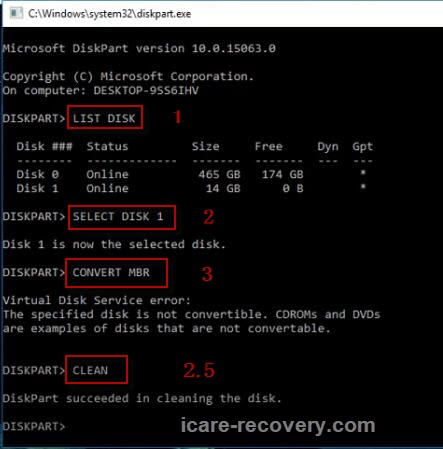
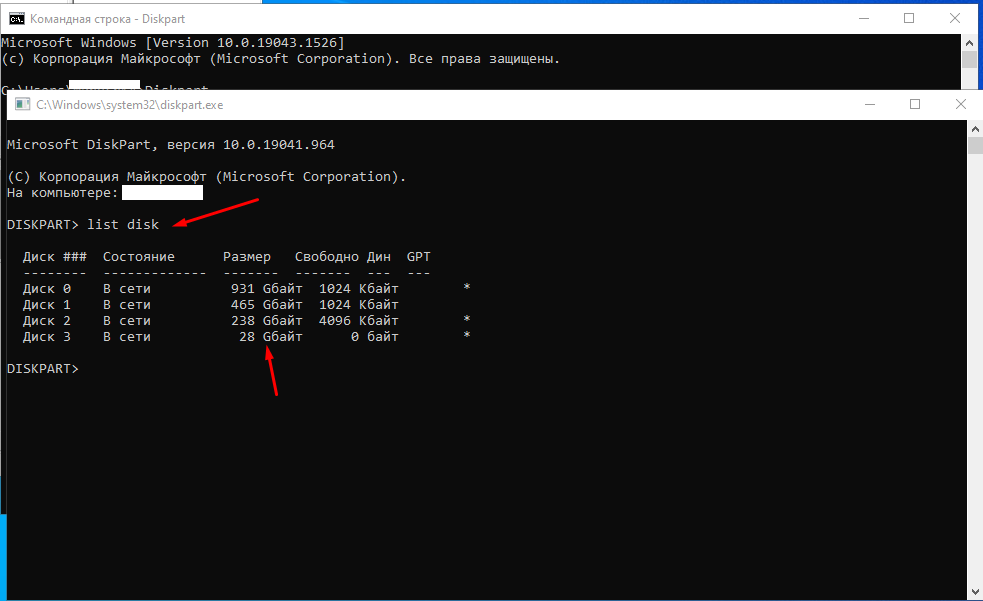
- Step1 — type ‘list disk’
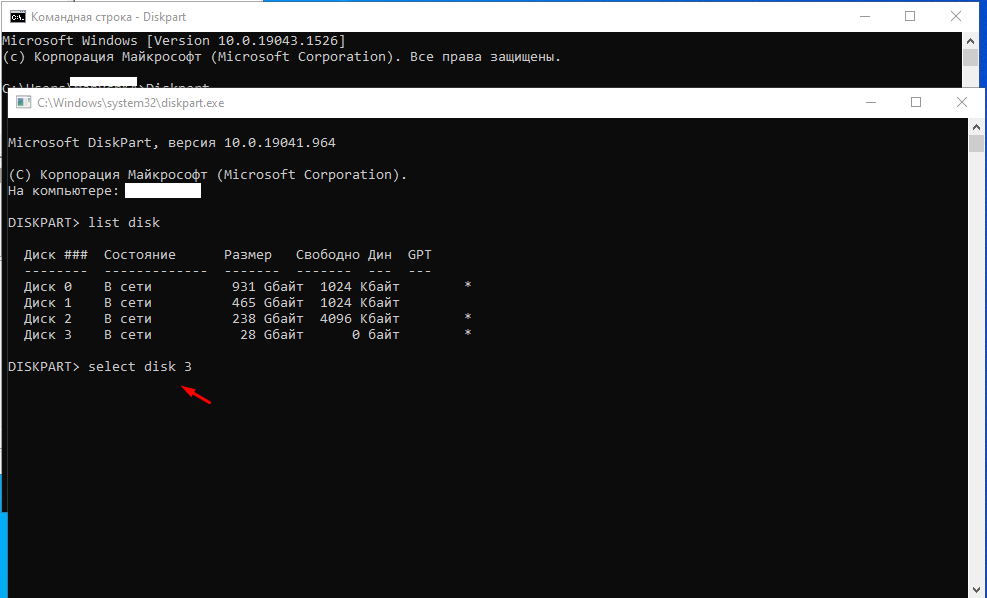
- Step2 — type ‘select disk *’ (* you may need to replace * with the drive letter of your media)
- Step3 — type «convert mbr»
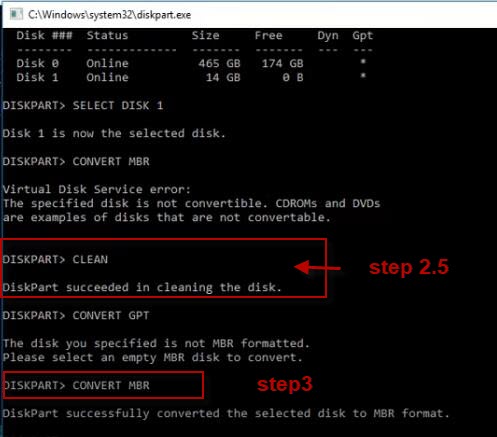
Note: if it does not work and reports some message like ‘The sepecified disk is not convertible’, here is another step that shall be added before the Step3.
- Step2.5 — type ‘clean’
The above step2.5 is to fix the error when it was not working with the convert MBR.
 Remove hp usb format tool write protected with cmd
 Remove hp usb format tool write protected with cmd
Video Guide — how to remove media is write protected error in HP USB Disk Storage Format Tool
Way 3 — Remove the write protection with cmd Attrib disk clean Readonly
Besides the above way2 method, you may also try the following cmd to remove the read-only attribution on your pendrive or disk.
 Remove HP usb format tool write protection readonly attribution
You need to get your media connected to your computer at first, and then start cmd and here are the steps.
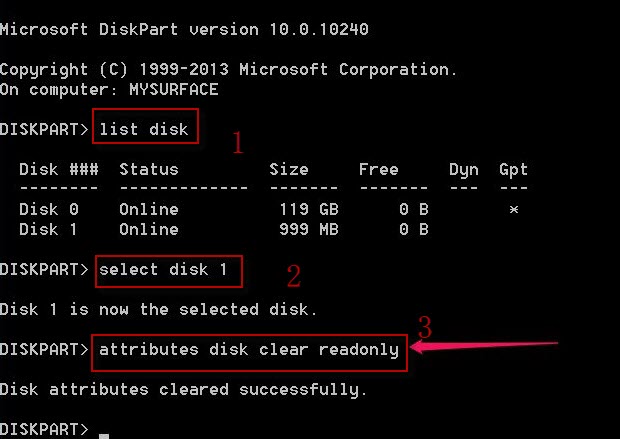
- list disk
- select disk * (You need to replace * with the drive letter of your media to remove the write protection error)
- attributes disk clear readonly
- exit
Or sometimes you may also use ‘attrib disk clear readonly’ as an alternative in the above steps when it comes to the step 3.
Did not work? Try more methods on this page: 10 free ways to remove write protection on usb drive
Last updated on Nov 01, 2022
Hot Articles
- How to recover memory card photos
- Unformatted pen drive data
- HP usb disk format tool alternatives
File Recovery Free > Format Recovery Utility > Howto >HP USB format tool media is write protected
A few days ago I tried to create a bootable MS-DOS bootable USB disk using the «HP USB Disk Storage Format Tool» and received the error «Device media is write protected». Since the above error is similar to the «Disk is write-protected» error that can occur when trying to format a USB disk with the Windows Format tool, I decided to write this tutorial to solve these problems.

How to FIX: «Disk is Write protected» & «Device media is write protected» when formatting a USB Drive on Windows 10/11.
Method 1. Check if there is a Physical Write-Protection Switch.
Some USB drives and SD Cards have a physical switch to prevent the drive from being modified. Therefore, make sure there is no such switch or, if there is, set it to OFF.
Method 2. Start USB Disk Storage Format Tool as Admin.
The second method to bypass the «Device media is write protected» error in HP USB format tool, is to start the tool with Administrative privileges’.
So, right-click at HP USB Disk Storage Format Tool and choose Run as Administrator. Then click YES at UAC warning and try to format the disk again.
Method 3. Delete Volume(s) on Disk using Disk Manager.
Important Note: Before you continue, unplug all unneeded storage devices from your computer (USB disks, Memory cards, etc.), to avoid loosing your data.
1. Press Windows ![]() + R keys to open the run command box.
+ R keys to open the run command box.
2. Type diskmgmt.msc and press OK to open Disk Management.

3. In Disk Management, right-click on the USB drive that you want to format and select Delete Volume.

4. Ask Yes at the warning message to remove the partition.

5. When the deletion is completed, try to format the drive again. *
* Note: If you follow these instructions to resolve the «Device media is write protected» error in the HP USB Format Tool utility, then don’t format the disk using Windows. Just run the ‘HP USB Disk Storage Format Tool’ and leave the tool to format it.
Method 4. Delete all Volumes and Partitions on USB disk using DISKPART tool.
1. Open Command Prompt as Administrator. To do that:
1. Press the Windows
+ R keys to open the ‘Run’ command box
2. Type CMD and then press CTRL + SHIFT + ENTER.

2. In Command Prompt type: diskpart
3. In diskpart, type the following command to list all the available drives (disks) and press Enter:
-
list disk
4. Now locate the disk number of the USB drive by its size in GB (or MB) and give the following command to select it:
-
select disk x
Note: Where «x» is the disk number of the USB disk. *
* In this example, the «Disk Write Protected» error occurred on the 2GB USB disk with number 1 (Disk 1), so the command will be:
-
select disk 1
5. Finally give the following command to clean all volumes and partitions on the selected disk: *
-
clean all
Notes:
1. The «clean all» command will take time to complete depending on the size of the disk. (For a 2GB size it took about 5-7 minutes).
2. If after giving the «clean all» command, you receive the error «DiskPart has encountered an error: Access is denied«, restart your PC and repeat the above steps.

6. When the operation is completed, type exit to close the DISKPAT tool.
7. Restart your PC and try to format the drive. *
* Note: If you follow these instructions to resolve the «Device media is write protected» error in the HP USB Format Tool utility, then don’t format the disk using Windows. Just run the ‘HP USB Disk Storage Format Tool’ and leave the tool to format it.
Method 5. Convert the Disk to GPT using DISKPART tool.
1. Open Command Prompt as Administrator
2. In Command Prompt type the following commands in order :
-
diskpart
-
list disk
3. Now select the USB disk with the write protection error, with this command:
-
select disk x
Note: Where «x» is the disk number of the USB disk. *
* In this example, the «Disk Write Protected» error occurred on the 2GB USB disk with number 1 (Disk 1), so the command will be:
-
select disk 1
4. Then give these commands to remove all partitions or volume formatting from the disk and to convert the partition style to MBR:*
-
clean
-
convert mbr
* Note. If after giving the «clean all» command, you receive the error «DiskPart has encountered an error: Access is denied«, restart your PC and repeat the above steps.
6. When the operation is completed, type exit to close the DISKPAT tool.

7. Now open the HP USB Disk Storage Format Tool and try to format the drive.
That’s all folks! Did it work for you?
Please leave a comment in the comment section below or even better: like and share this blog post in the social networks to help spread the word about this.
If this article was useful for you, please consider supporting us by making a donation. Even $1 can a make a huge difference for us.


Как форматировать защищенную флешку
Чем форматировать защищенную флешку.
HP USB Disk Storage Format Tool — Программа для форматирования флешки.
Эта небольшая утилита была создана известнейшей компанией Hewlett-Packard. С ее помощью можно с легкостью заниматься глубоким форматированием, а также качественно и быстро очищать оглавления.
Пользователям предлагается конструировать загрузочные диски (DOS).
Поддерживаются самые разнообразные файловые системы: NTFS, exFAT, FAT и FAT32.
Благодаря HP Disk Storage Format Tool возможно отформатировать даже те накопители, которые не поддерживаются классическими средствами платформы Windows.
Как правило, операционная система от Microsoft завершает подобные процедуры различными ошибками.
Но HPUSBFW все действие проводит эффективно и качественно.
Данное приложение полностью поддерживает съемные носители, а также высокоскоростные порты USB 3.0 и USB 2.0.
Если носители подключены через данные разъемы, то распознавание пройдет мгновенно. Есть уникальная возможность переименовать Flash накопитель, дав ему любое понравившееся название.
В роли первого загрузочного устройства требуется установить USB-HDD Device, чтобы осуществлять загрузку с флешки.
Делается это в BIOS Setup, а затем сохраняется.
При этом утилита представляет собой великолепный инструмент для молниеносного и безошибочного форматирования дисков съемного типа, а также реализации загрузочных устройств DOS.
Из-за по-настоящему скромного размера утилита совершенно не занимает никакого места на винчестере.
Русский язык поддерживает полностью, а скачать приложение получится абсолютно бесплатно.
Присутствует поддержка не только Windows 7, 8.1 и 8, но и новой Windows 10.
Программу можно установить и на Windows XP, которая до сих пор пользуется серьезной популярностью.
Интерфейс не только простой, но и предельно понятный на интуитивном уровне.
При форматировании флешки выдает ошибку device media is write-protected
Флешку невозможно форматировать в Windows
Основные преимущества утилиты:
- Чрезвычайно безопасное и моментальное форматирование.
- Правка ошибок, которые имеются в существующих разделах.
- Самое полное удаление всей информации.
- Диски подвергаются сканированию для обнаружения возможных ошибок.
- Создание больших разделов (FAT32), объем которых превышает 32 Гб.
- Идеальная совместимость практически со всеми современными дисками (Memory Stick Duo Pro, Compact Flash, SDHC, CF Card II, SDXC, Pen Drive и другие), а также их производителями.
- Утилита распространяется бесплатно.
- Быстрое соединение с определенными носителями через USB 2.0 и 3.0.
- Поддержка русского языка и практически всех версий ОС Windows.
- Работа со всеми файловыми системами.
- Расширенные возможности и прогрессивный инструментарий.
Программа для форматирование флешки: Скачать HP USB Disk Storage Format Tool
( 4 оценки, среднее 5 из 5 )


Иногда критические обновления для сервера HPE нужно установить с помощью флешки. Например, недавно собирался обновить BIOS на сервере HP Proliant. Файл прошивки нужно было записать на флешку с помощью утилиты HPE USB Key Utility.
USB Key Utility — приложение для Windows, которое позволяет пользователю записать содержимое ISO образа или DVD на USB флешку. Источниками ISO образов могут быть распространяемые HPE продукты. USB флешка получается загрузочной, можно воткнуть её в сервер и успешно с неё загрузиться.
HPE USB Key Utility для Windows
Однако, при попытке создать загрузочную флешку, произошла ошибка:
Device media is write-protected
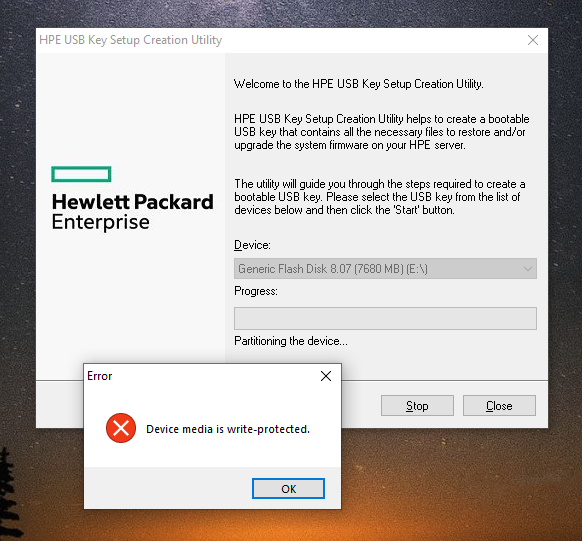
Будем лечить флешку.
Утилиту не закрываем, открываем командную строку под администратором и запускаем утилиту diskpart:
diskpartВыведем список всех доступных дисков:
list disk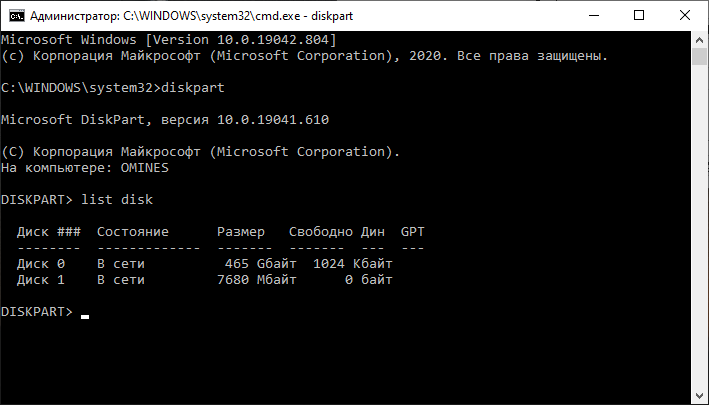
Теперь нам нужно определить номер флешки. У меня всего два диска, по размеру определяю что флешка это «Диск 1». Выбираем первый диск.
select disk 1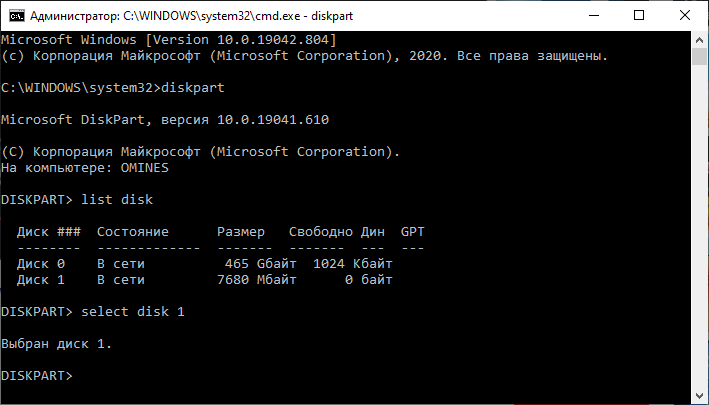
Наша задача, сконвертивать диск в MBR, однако, напрямую это не получается:
convert mbrУказанный диск нельзя преобразовать.
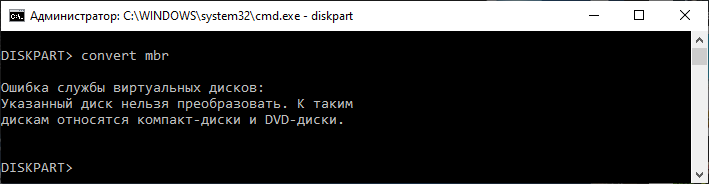
Ну как это нельзя, можно! Чистим диск.
clean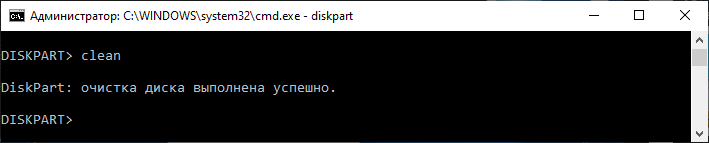
Преобразуем сначала в GTP, а потом в MBR:
convert gpt
convert mbr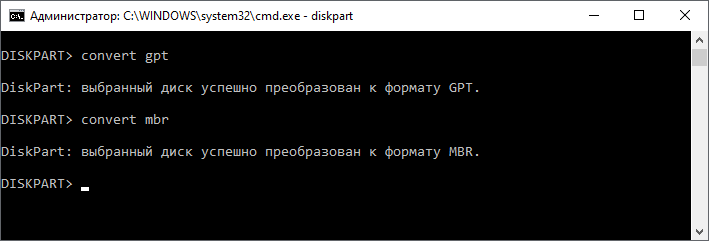
На этот раз преобразование удалось. Возвращаемся к утилите USB Key Utility.
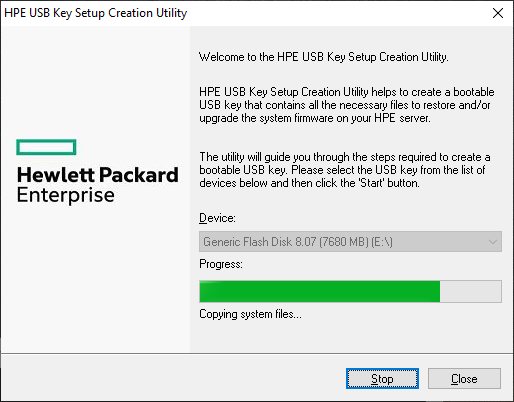
Загрузочная флешка теперь создаётся без проблем.
Всем привет! В общем, проблема достаточно простая – есть флэшка, на неё нельзя ничего записать, а также невозможно отформатироваться, так как сразу же вылезает ошибка «Диск защищен от записи» (Device media is write-protected). В статье мы как раз и рассмотрим вопрос – как с флешки снять защиту от записи. Способов достаточно много, но, как оказалось, в некоторых ситуациях помогает какой-то определенный. Если несложно – напишите в комментариях, какой вариант помог именно вам. Также вы можете задавать туда свои вопросы.
Содержание
- Способ 1: физическое отключение
- Способ 2: Через реестр
- Способ 3: Командная строка
- Способ 4: Редактор локальной групповой политики
- Способ 5: Программы
- Ничего не помогло, или флэшка опять выдает ошибку
- Задать вопрос автору статьи
Способ 1: физическое отключение
Если флешка или переносной диск защищен от записи, то в первую очередь нужно взять в руки это переносное средство и посмотреть на него. На многих аппаратах есть встроенная защита от вирусов, и выглядит подобная защита как переключатель. Там также могут быть значок в виде открытого или закрытого замочка, который символизируют два режима записи устройства «разрешено» и «запрещено».

Просто переведите бегунок в режим открытого замочка. Если у вас SD-карта памяти, то на них также очень часто устанавливают защиту. Там обычно пишется только одно слово «Lock», которое в переводе обозначение «блокировку». Поэтому в таком случае нужно перевести ушко переключателя в обратную сторону от «Lock». Если данный способ не дал результатов или такого переключателя нет, то идем дальше.
ПРИМЕЧАНИЕ! Функция достаточно полезная, если вы отдаете свою флэшку кому-то из друзей. Таким образом вы можете защитить её от вирусов.
Способ 2: Через реестр
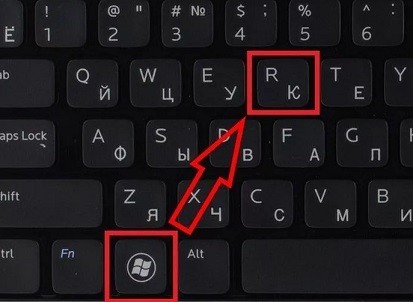
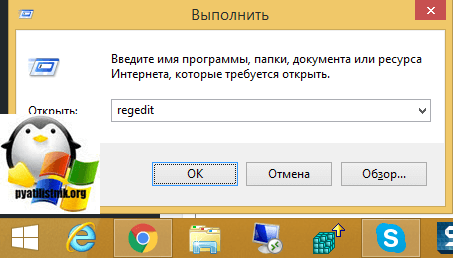
- Для того, чтобы быстрее зайти в реестр, найдите на клавиатуре две клавиши и английскую R – нажмите одновременно.
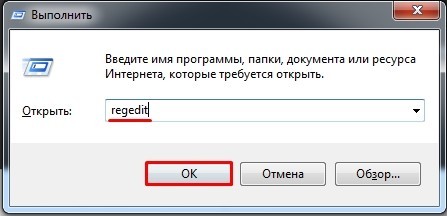
- Вписываем команду «regedit» и нажимаем «ОК».
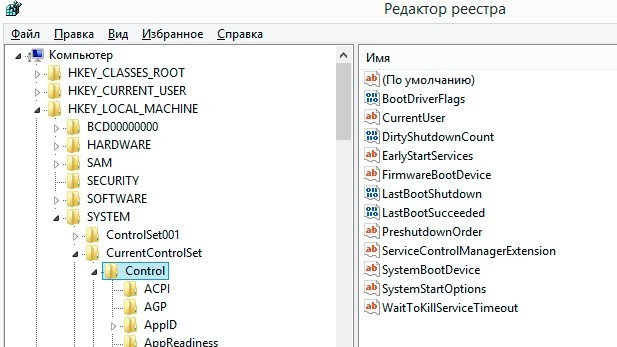
- Проходим по пути:
HKEY_LOCAL_MACHINESYSTEMCurrentControlSetControl
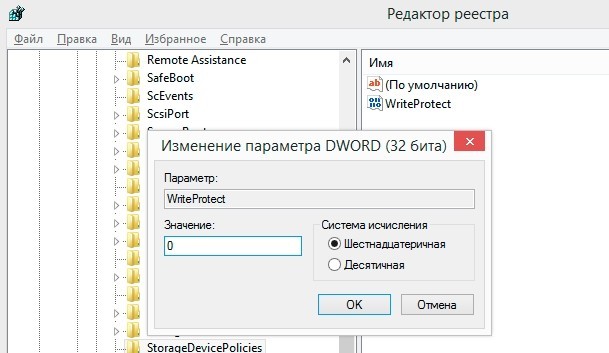
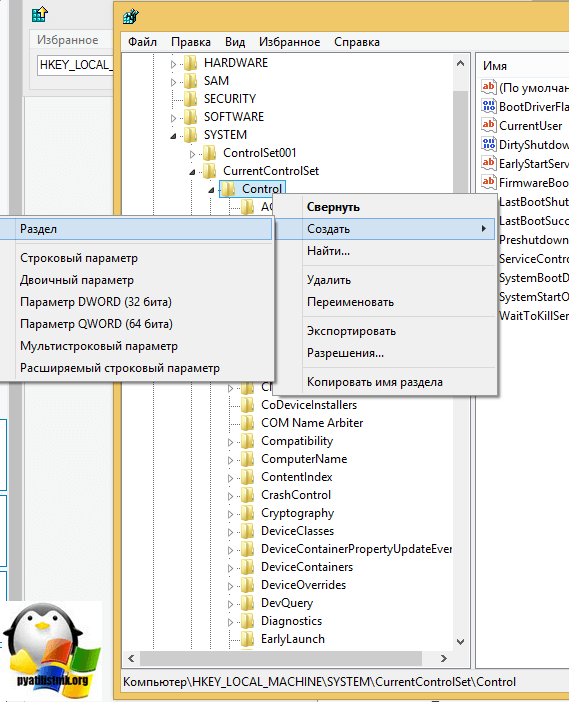
- Теперь найдите папку «StorageDevicePolicies» и зайдите туда. Если такой папочки нет, то создайте её – для этого нажмите на вышестоящий пункт «Control» правой кнопкой и потом выберите «Создать – Раздел» – впишите точное название «StorageDevicePolicies». Если папка уже была, то в ней нужно изменить параметр «WriteProtect». Если такого параметра нет, то нужно его создать – нажимаем правой кнопкой на пустую область, после этого выбираем из вариантов: «Создать» – «Параметр DWORD».
- Теперь устанавливаем значение ноль (0) и нажимаем «ОК».
- Перезагружаем компьютер и переформатируем флэшку, жесткий диск или SD карту памяти.
После того как вы снимите защиту от записи, попробуйте отформатировать устройство, и вновь на неё что-нибудь записать. Если у вас на ней присутствуют какие-то важные файлы, перенесите их на другой диск. Также настоятельно рекомендую сохранить эту статью, так как проблема может повториться, и чуть ниже я объясняю – почему это происходит.
Способ 3: Командная строка
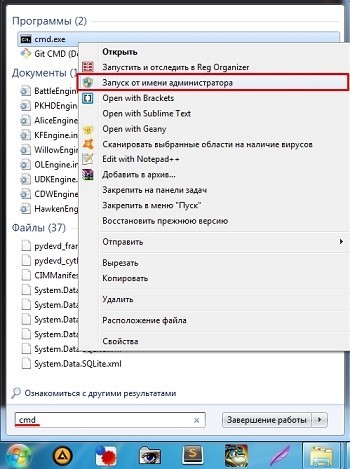
- Запускаем командную строку от имени администратора. Проще всего это сделать таким образом: заходим в меню «Пуск» (главная кнопка Windows, находящаяся в левом нижнем углу экрана); вводим в поисковую строку три буквы «cmd» или «командная строка»; в самом конце нажимаем по найденному приложению правой кнопкой мыши и выбираем «Запуск от имени администратора».
- Теперь, поочередно нужно вводить команды. Через дефис я буду давать пояснения. Смотрите по выделенному тексту, или ориентируйтесь на скриншот ниже:
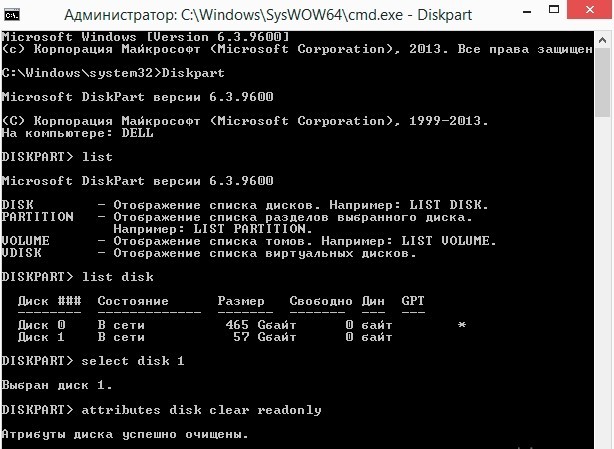
Diskpart
List disk – выводим список всех жестких дисков и флэшек. Найдите, под каким номером находится ваша флэшка. Тут остается ориентироваться только на размер. В моём случае это «1», но у вас может быть и другой номер. Если сомневаетесь, то зайдите в «Компьютер» и посмотрите какого размера у вас Flash-носитель.
Select disk – после этой команды через пробел указываем номер диска. Например, Select disk 1.
attributes disk clear readonly – завершающая команда, которая должна помочь.
Снять защиту флешки от записи может и получится, но радоваться пока рано. Обязательно отформатируйте USB флэшку и снова попытайтесь на неё что-нибудь записать. Если проблема повторится – смотрите главу ниже.
Способ 4: Редактор локальной групповой политики
- Нажимаем по нашим любимым клавишам и R.
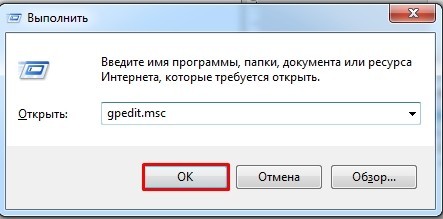
- Прописываем команду «gpedit.msc».
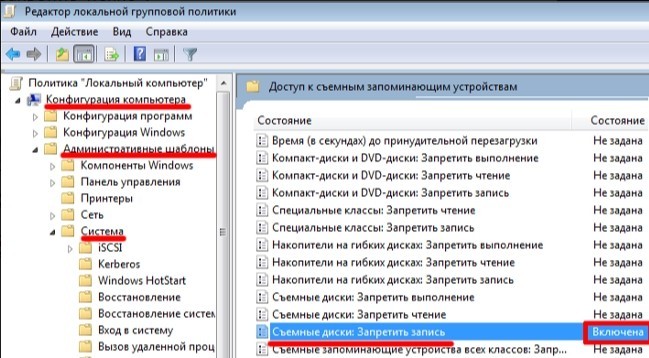
- Проходим по пути, указанному на картинке ниже, и нажимаем на папку «Система». Пролистываем в самый низ до пункта «Съемные диски: Запретить запись». Зайдите в параметр и выключите. После этого перезагрузите компьютер.
Способ 5: Программы
Если вы не знаете, как снять защиту, а прошлые варианты не дали результата, то можно воспользоваться специальными программами. Они позволят вам полностью удалить файлы и правильно отформатировать носитель. Писать какие-то инструкции нет смысла, и там всё очень просто. Скачиваем приложение, запускаем, выбираем вашу флешку, форматируем.
ПРИМЕЧАНИЕ! Программы без проблем можно найти в интернете – просто вбиваем название в поисковик, заходим на первую ссылку и скачиваем ПО. Почти все нижеперечисленные приложения не нуждаются в установке.
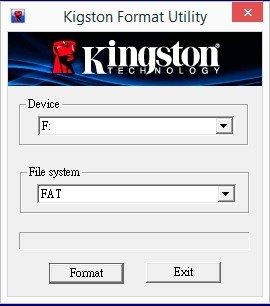
- Kingston Format Utility – фирменная программа, которая работает только с продукцией Kingston.
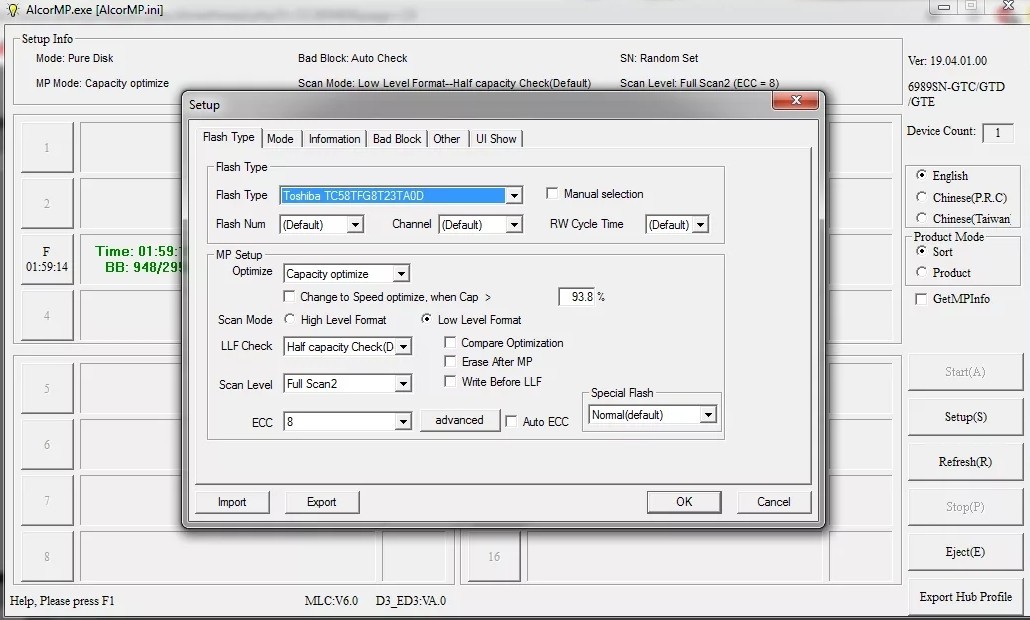
- AlcorMP – очень функциональное приложение. Единственный минус, что она имеет английский интерфейс.
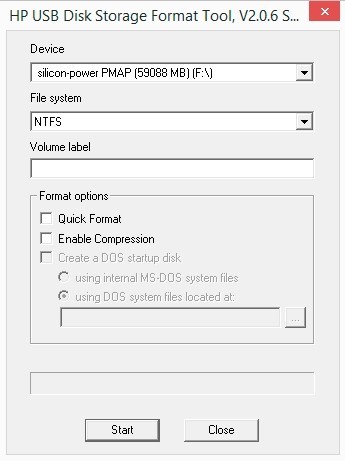
- HP USB Disk Storage Format Tool – очень простая программка. Выбираем диск и нажимаем на кнопку.
- Silicon Power Low Level Formatter – специальное ПО, которое занимается форматированием заблокированных флешек. После запуска вам предлагают отформатировать флэшку – просто нажимаем «Format».
Ничего не помогло, или флэшка опять выдает ошибку
Все вышеперечисленные способы помогают, но иногда бывает, что флешка работает какое-то время, её можно форматировать, но при переносе данных на другом ПК опять вылезает такая же ошибка. И как теперь снять защиту на флешке? – Конечно, можно вновь выполнить все действия через реестр или командную строку, но как показала практика, данная проблема может появиться вновь.
Конечно, делать это постоянно – нецелесообразно и просто неудобно. С данной проблемой я обратился к специалистам компании Kingston. Напомню, что эта одна из ведущих компаний, которая выпускает жесткие диски, Flash-накопители и карты памяти.
Вопрос: «Здравствуйте. Что делать если флешка защищена от записи, а разблокировать её на долгое время, просто не получается – ни через командную строку, ни через реестр. Через какое-то время ошибка вновь появляется. Как это исправить?»
Ответ: Здравствуйте. Иногда эту проблему нельзя решить на компьютере, так как она не всегда является программной и не зависит от операционной системы. Если носитель имеет физическую защиту и дело в нём, то можно попробовать отремонтировать переключатель, если он вышел из строя. Можно попробовать воспроизвести снятие защиты от записи через ОС или с помощью программ, но это может не дать результата, если проблема лежит на физическом уровне в контроллере. Особенно часто это бывает с китайскими флэшками или при сильном ударе. Если вы купили Flash-disk недавно, и на нем нет видимых физических повреждений, то его нужно сдать по гарантии в магазин. Программно или через ОС данная проблема пока не решается.
Теперь стало все понятно. Если у вашей флешки нет переключателя, и вылезает такая ошибка, то в первую очередь берем носитель и пробуем те способы, о которых я написал выше. После этого обязательно полностью форматируем флеш-диск и пробуем на него что-нибудь записать. Если всё нормально, то радоваться не стоит, так как таким образом у вас получается убрать не защиту, а проверку диска на вашей системе.
Если проблема кроется в контроллере или в плашках памяти, то таким образом защита от записи никуда не денется. Поэтому нужно проверить носитель на другом компьютере. Лучше всего с другой ОС: Windows 7, 8, 10 или даже XP. Если все повторяется, а вы купили флэшку недавно, то просто несите её по гарантии.
Обновлено 19.08.2021
Добрый день уважаемые читатели и подписчики блога pyatilistnik.org. Расскажу небольшую историю как люди ломают usb флешки и как их потом восстанавливать. Мой коллега, дал одному из сотрудников флешку, для переноса данных с одного компьютера на другой. Пользователь произвел перенос и отдал нам носитель. Далее мой коллега, вставил себе эту флешку и попытался на нее, что-либо записать и был очень удивлен, что она вообще не виделась, лишь сразу появилось окно, что ее нужно отформатировать, пробуем и получаем ошибку «Диск защищен от записи«. Давайте я покажу как решить данную проблему и вернуть носитель в рабочее состояние.
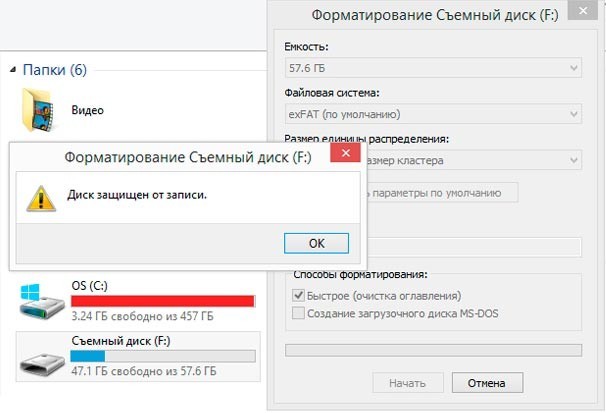
Как выглядят ошибки
Давайте покажу как выглядит ошибка. На первом окне форматирования съемного диска, вы увидите «Диск защищен от записи».
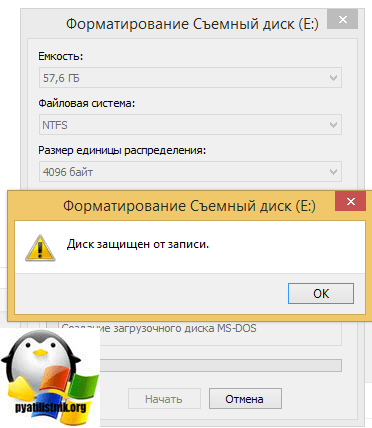
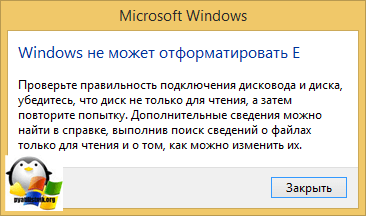
Нажав ок, вы увидите еще интересное предупреждение:
Windows не может отформатировать. Проверьте правильность подключения дисковода и диска, убедитесь, что диск не только для чтения, а затем повторите попытку. Дополнительные сведения можно найти в справке, выполнив поиск сведений о файлах только для чтения и о том, как можно изменить
Если открыть оснастку «Управление дисками», то вы обнаружите, что носитель имеет статус «Только для чтения»
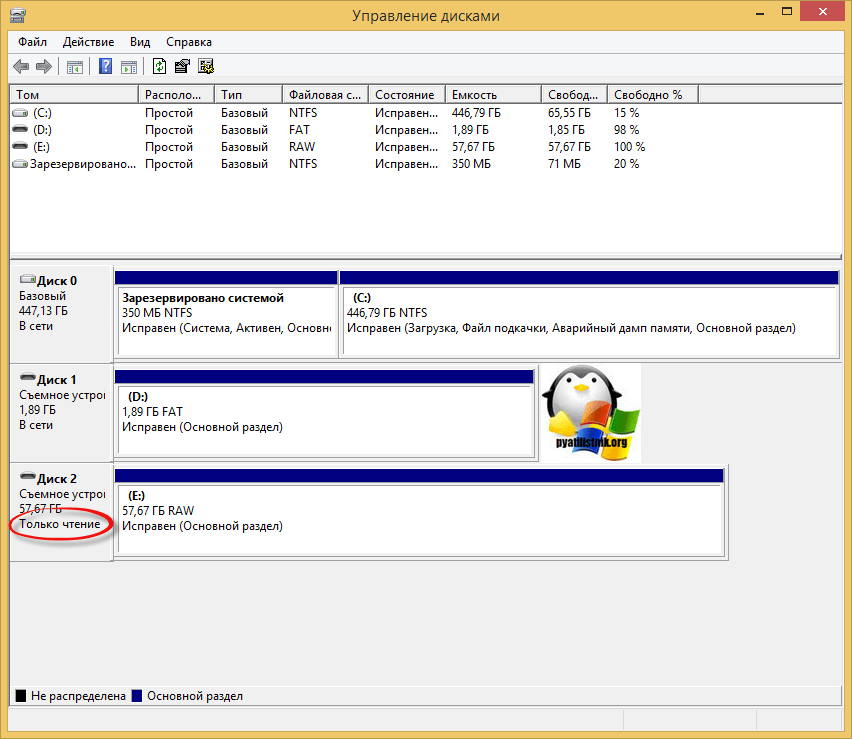
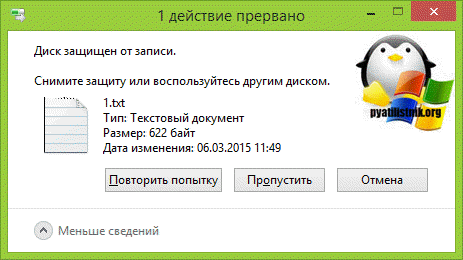
Еще бывает ситуация, что флешка видится и открывается, но вот записать туда ничего не дает, даже если учесть, что на вкладке «Безопасность» права на запись присутствуют. Тут вы уже видите сообщение «Снимите защиту или воспользуйтесь другим диском.»
Все эти симптомы мы с вами легко излечим.
Почему пишет диск защищен от записи
Давайте рассмотрим самые частые причины, приводящие к поломке USB носителя, как на физическом, так и на логическом уровне:
- Не правильное извлечение носителя из компьютера, на уровне операционной системы Windows. Уверен, что и вы этим грешите, в большинстве случаев пользователю, проще просто вытащить флешку, чем делать правильное ее извлечение,через специальное окно или программу. Как следствие вы увеличиваете вероятность краха файловой системы на ней, NTFS такого не любит.
- Большое количество ошибок на флешке
- Физический износ
- Проблема с драйверами
Убираем диск защищен от записи при форматировании
Когда с причинами все понятно, то давайте приступать к практике. Сразу покажу рабочий метод убирающий блокировку носителя «Только для чтения». В этом вам поможет утилита Formatter SiliconPower.
Скачать Formatter SiliconPower можно либо с официального сайта либо у меня.

Утилита полностью portable и не требует установки. Запускаем Formatter SiliconPower.
Перед запуском я вам советую оставить включенной только не рабочую флешку
У вас появится окно, в котором вам предложат произвести форматирование, соглашаемся и нажимаем «Format»
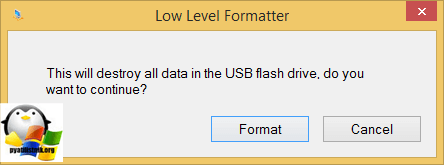
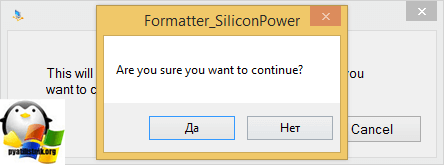
Вас предупредят, что все данные будут удалены, продолжаем операцию.
Начинается процесс восстановления, ни в коем случае не извлекайте флешку, пока не увидите окно, что все прошло успешно.
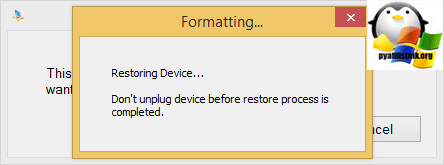
Вот так вот выглядит окно, что все выполнено и теперь usb носитель не защищен от записи, и работает в привычном вам режиме.

Убираем защиту от записи с USB в редакторе реестра Windows
Данный метод поможет в 99 процентах случаев, когда у вас флешка видится, но не дает ничего на себя записать. Тут вся проблема в одном ключе реестра, который нужно поправить или создать заново. И так, нажимаем одновременно кнопки Win и R, и в открывшемся окне «Выполнить» пишем regedit.
Переходите в раздел:
HKEY_LOCAL_MACHINESYSTEMCurrentControlSetControlStorageDevicePolicies
Если такого раздела не будет, то вам придется его создать через правый клик и задать ему имя StorageDevicePolicies
Кто лентяй, тот может уже скачать готовый ключ реестра с нужным значением, скачать WriteProtect. При запуске согласитесь с добавлением ключа
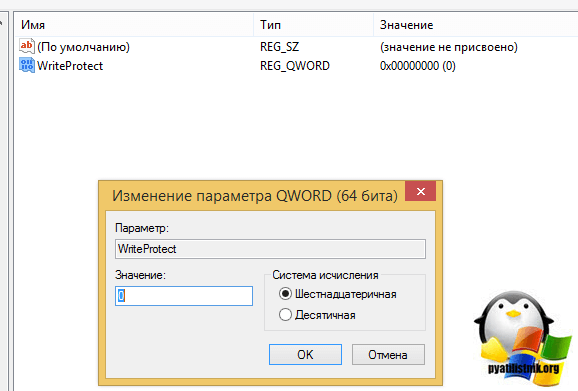
В разделе StorageDevicePolicies вам необходимо создать ключ реестра «Параметр QWORD (64 бита)» с именем WriteProtect и дать ему значение 0.
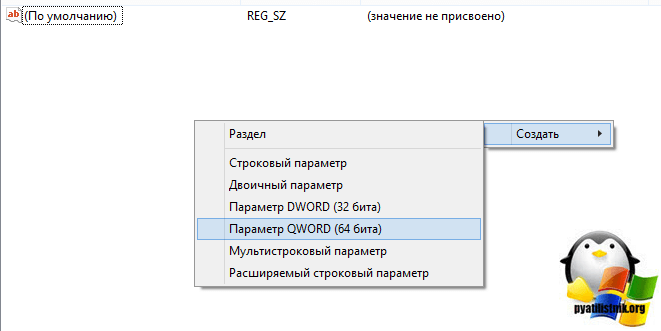
Если ключ WriteProtect уже был у вас в реестре и имел значение 1, то это он запрещал форматирование флешки и писал, что диск защищен от записи, меняем на ноль.
После внесения изменений в реестр, вам необходимо перезагрузить компьютер, иначе настройки не вступят в силу.
Как убрать защиту от записи в командной строке (cmd)
Если у вас по прежнему ваш съемный носитель выдает сообщение «Что usb диск защищен от записи» не спешите расстраиваться, у нас с вами есть в запасе утилита Diskpart. Запустить ее можно через командную строку Windows от имени администратора.
- Запустите командную строку от имени администратора.
- В командной строке введите Diskpart и нажмите Enter. Затем введите команду list disk и в списке дисков найдите свою флешку, вам потребуется ее номер. Введите по порядку следующие команды, нажимая Enter после каждой.
- select disk N (где N номер флешки из предыдущего шага)
- attributes disk clear readonly
- exit
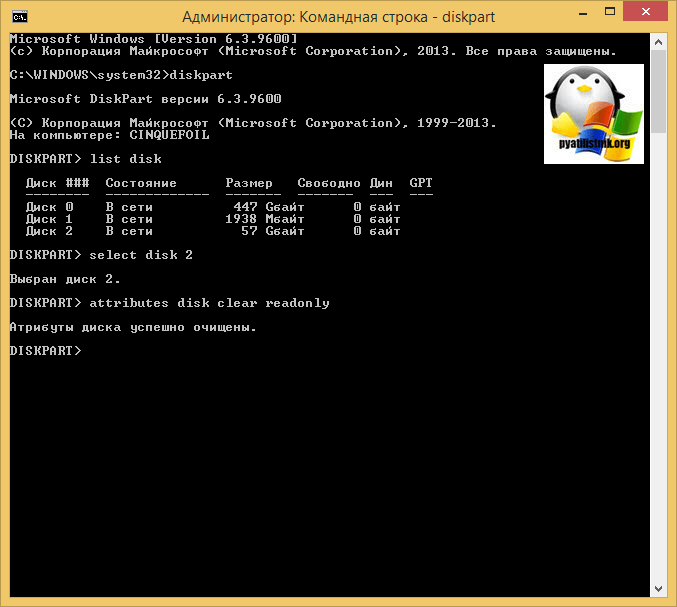
Как видите, утилита diskpart отработала, теперь можно проверять результат ее выполнения.
Не форматируется Trancend флешка
Есть еще специфические методы для USB носителей, определенных производителей, так например, для Trancend, есть специальная утилита JetFlash Online Recovery.
Скачать JetFlash Online Recovery https://ru.transcend-info.com/Support/Software-3/
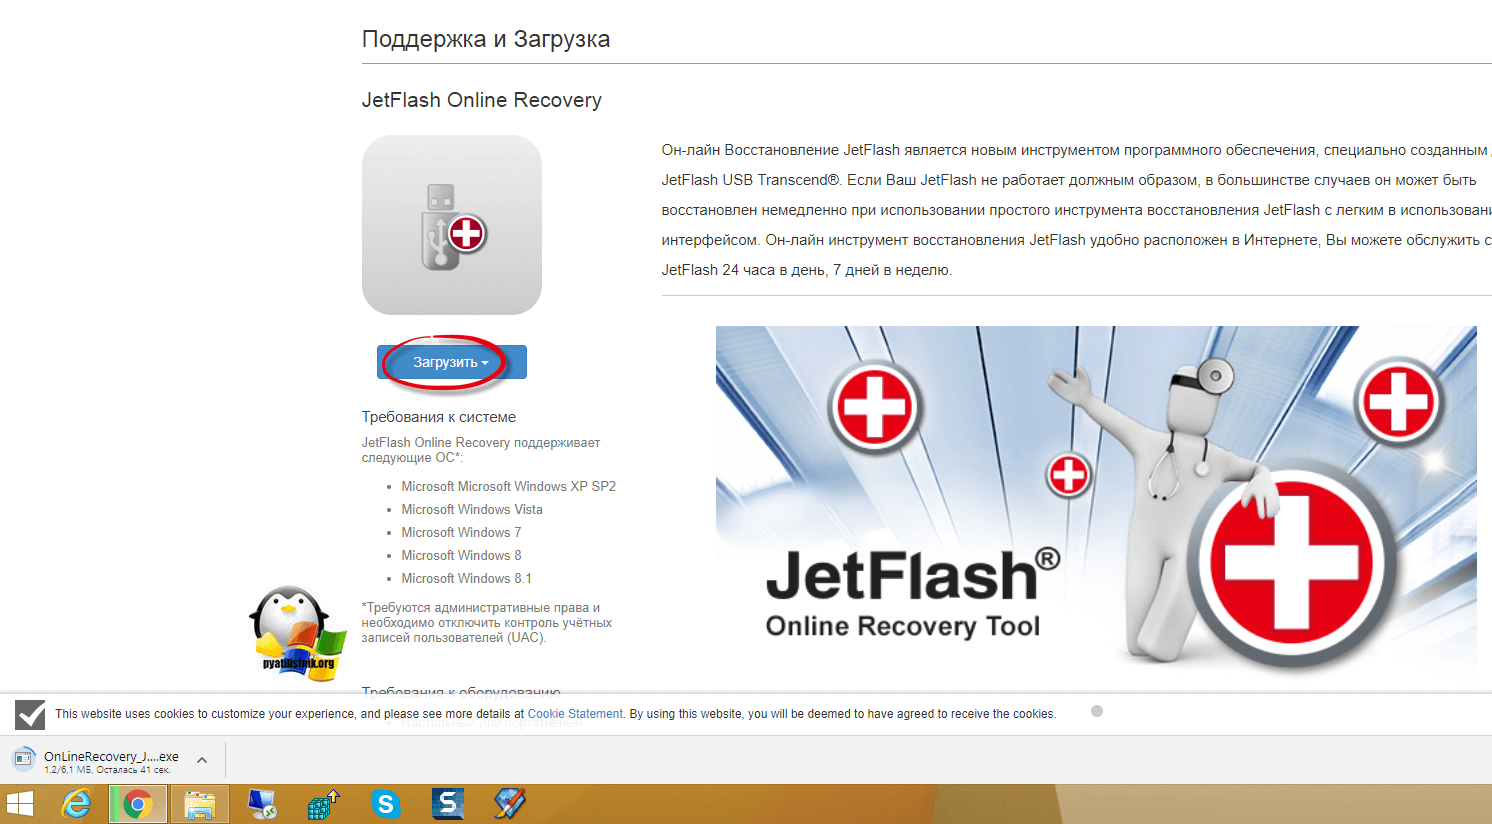
Сама утилита очень простая, запускаете ее и нажимаете Start.
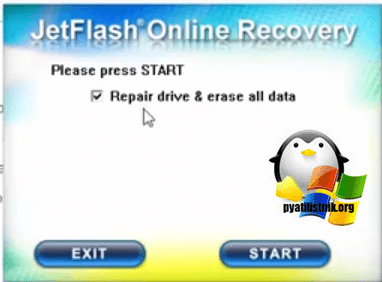
Начнется процесс восстановления usb носителя.
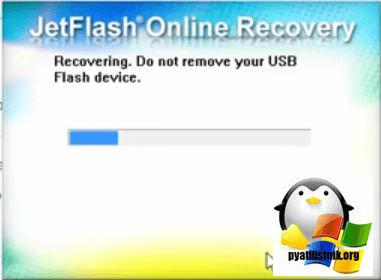
Как видите все успешно выполнилось и флешка спокойно открылась.

Резюме
Как видите ошибка с невозможностью прочитать или отформатировать флешку решается очень просто, для этого есть как встроенные утилиты, так и утилиты от производителей, выбираете подходящий для вас способ и ремонтируйте, если есть вопросы, то пишите их в комментариях, я постараюсь на них ответить, всем спасибо.
Полезный совет от пользователя Сергей (Fin)
Сейчас препарировал трупика и обнаружил окисление контактов USB. У радиолюбителей есть спрей такой Contact CLEANER называется, вот им и воспользовался. Контакты блестят, флешка читается, записывается и форматируется. Надеюсь и дальше будет радовать меня своей работоспособностью (хотя это уже под большим вопросом, общий возраст ее около 8 лет).
Вам Иван, спасибо за статью и всех благ!
Надеюсь поможет остальным вашим читателям.
PS: кто постирал флешку или уронил в воду — разберите, просушите, затем почистите зубной щеткой со спиртом саму плату с обоих сторон. Должна ожить — сам делал так несколько раз =) Удачи!
Solve the error in no time to regain access to your drive
by Madalina Dinita
Madalina has been a Windows fan ever since she got her hands on her first Windows XP computer. She is interested in all things technology, especially emerging technologies… read more
Updated on December 30, 2022
Reviewed by
Alex Serban

After moving away from the corporate work-style, Alex has found rewards in a lifestyle of constant analysis, team coordination and pestering his colleagues. Holding an MCSA Windows Server… read more
- The ERROR_WRITE_PROTECT error code, also known as error 19 (0x13) usually occurs when you try to write data on internal or external storage devices. Follow the complete step by step guide below to fix this problem.
- The message can also come as The media is write protected» which won’t let you make any edits.
- The most common cause is the disk finds some kind of issue and won’t let you modify anything on it.
XINSTALL BY CLICKING THE DOWNLOAD FILE
This software will repair common computer errors, protect you from file loss, malware, hardware failure and optimize your PC for maximum performance. Fix PC issues and remove viruses now in 3 easy steps:
- Download Restoro PC Repair Tool that comes with Patented Technologies (patent available here).
- Click Start Scan to find Windows issues that could be causing PC problems.
- Click Repair All to fix issues affecting your computer’s security and performance
- Restoro has been downloaded by 0 readers this month.
If you’re getting the ERROR_WRITE_PROTECT error code with The media is write protected description, follow the troubleshooting steps listed in this article to fix it.
The ‘ERROR_WRITE_PROTECT’ error message, also known as error 19 (0x13) usually occurs when users try to write data on internal or external storage devices.
This error prevents users from actually writing any files to their PC hard drive, external drive, USB flash drive, etc.
There are various elements triggering this issue, including corrupted files and folders, broken EXE, DLL or SYS files, malware infection, outdated software versions, and more.
In this article, we’re going to show you how to fix the ‘ERROR_WRITE_PROTECT’ error code both on internal drives, as well as on external drives.
- Fix The media is write protected error on internal hard drives
- 1. Run a full system scan
- 2. Repair your registry using CCleaner
- 3. Use Microsoft’s System File Checker to check for system file corruption
- 4. Update your OS
- 5. Check your disk for errors
- 6. Clean your temporary files and folders
- 7. Use system recovery options
- 8. Fix The media is write protected error on external hard drives/ USB flash drives
- Solution 1 — Tweak the StorageDevicePolicies key
- Solution 2 — Remove write protect using Command Prompt
- Solution 3 — Install the HP USB Disk Storage Format Tool
1. Run a full system scan
Malware may cause various issues on your computer, including errors. Perform a full system scan in order to detect any malware running on your computer. You can use Windows’ built-in antivirus, Windows Defender, or third-party antivirus solutions.
2. Repair your registry using CCleaner
The simplest way to repair your registry is to use a dedicated tool, such as CCleaner. Don’t forget to first back up your registry in case anything goes wrong.
3. Use Microsoft’s System File Checker to check for system file corruption
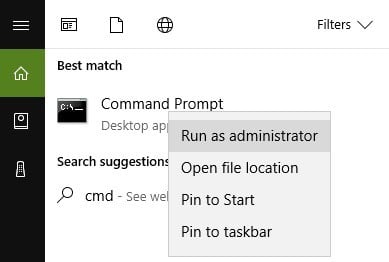
1. Go to Start > type cmd > right-click Command Prompt > select Run as Administrator
2. Now type the sfc /scannow command
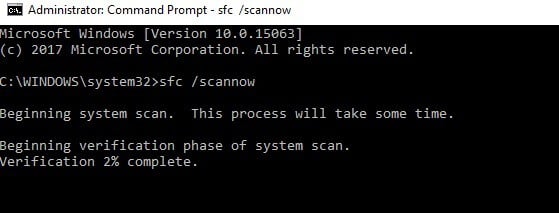
3. Wait for the scanning process to complete and then restart your computer. All corrupted files will be replaced on reboot.
4. Update your OS
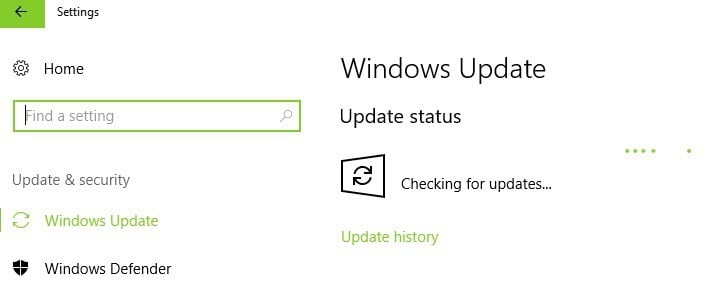
Make sure that you’re running the latest Windows OS updates on your machine. As a quick reminder, Microsoft constantly rolls out Windows updates in order to improve the system’s stability and fix various issues.
Go to Windows Update, check for updates and install the available updates. To access the Windows Update section, you can simply type update in the search box. This method works on all Windows versions.
5. Check your disk for errors
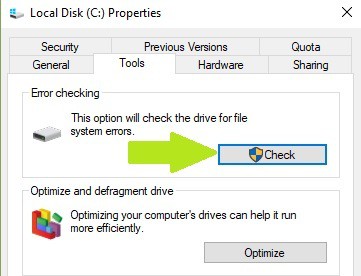
On Windows 10, you can run a disk check using Command Prompt.
Start Command Prompt as administrator and type the chkdsk C: /f command followed by Enter. Replace C with the letter of your hard drive partition.
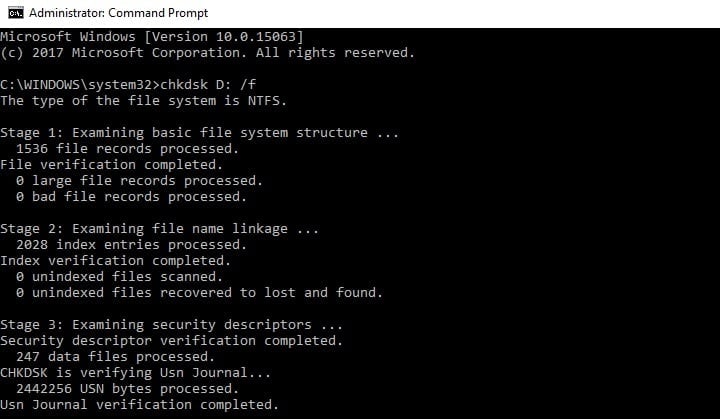
On Windows 7, go to hard drives > right-click the drive that you want to check > select Properties > Tool. Under the ‘Error checking’ section, click Check.
6. Clean your temporary files and folders
The simplest and quickest manner to delete your temporary files and folders is to use Disk Cleanup. As you use your computer or browse the Internet, your PC accumulates various unnecessary files.
These so-called junk files may affect your computer’s processing speed, causing apps to respond slowly and may also trigger various error codes, including the ERROR_WRITE_PROTECT error code.
Clean your temporary files and then try to write data on the problematic storage device again.
Here’s how to use Disk Cleanup on Windows 10:
Some PC issues are hard to tackle, especially when it comes to corrupted repositories or missing Windows files. If you are having troubles fixing an error, your system may be partially broken.
We recommend installing Restoro, a tool that will scan your machine and identify what the fault is.
Click here to download and start repairing.
1. Go to Start > type Disk Cleanup > launch the tool
2. Select the disk that you want to clean > the tool will then tell you how much space you can free up
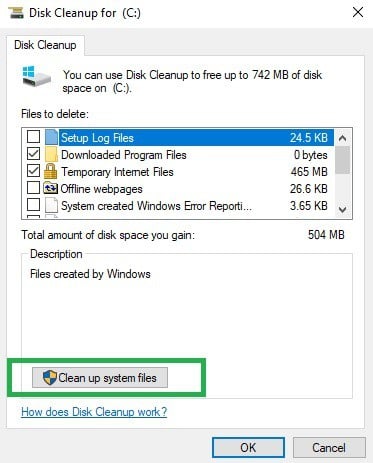
3. Select the Clean up system files button.
4. For Windows 7 go to Start, type Disk Cleanup, and click on it Disk Cleanup.
- In Disk Cleanup’s description section, select Clean up system files and select the drive that you want to clean up > click OK.
- On the Disk Cleanup tab, select the checkboxes for the file types that you want to delete > click OK > select Delete files.
7. Use system recovery options
The System Restore option allows you to restore the previous well-performing system configuration without losing any files, except for a few customizable features and settings.
If System Restore is enabled, follow the instructions listed below:
- Go to Search > type system properties > open System Properties.
- Go to System Protection > click on System Restore.
- Click Next > choose the preferred restore point in the new window.
- Once you’ve selected your preferred restore point, click Next > click Finish.
- Your PC will restart and the restoring process will start.
After the procedure has been completed, try to write data on the problematic storage device again to see if the problem still persists.
Windows 10 offers a series of advanced recovery option that allows users to clean install the OS. If you’re a Windows 10 user, you can also use ‘Reset this PC’ recovery option.
- Go to Settings > Update & Security > click on Recovery under the left pane.
- Click on Get Started under Reset this PC > choose to Keep your files.
- Follow the on-screen instructions to complete the reset.
8. Fix The media is write protected error on external hard drives/ USB flash drives
Solution 1 — Tweak the StorageDevicePolicies key
1. Go to Start > type regedit > hit Enter
2. Go to HKEY_LOCAL_MACHINESYSTEMCurrentcontrolsetControlStorageDevicePolicies
If you can’t find StorageDevicePolicies, here’s how to create it:
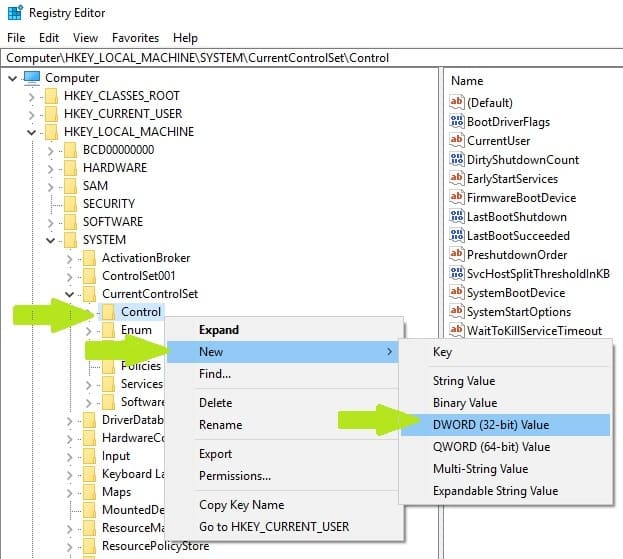
- Go to HKEY_LOCAL_MACHINESYSTEMCurrentcontrolsetcontrol > right click Control
- Select New > Key > rename the new key into StorageDevicePolicies
- Right click the StorageDevicePolicies folder > select new DWORD(32-bit) Value/ DWORD(64-bit) depending on your OS
- Rename the dword folder into WriteProtect > double click WriteProtect > change the value data into 0 (zero) > close the registry
4. If the StorageDevicePolicies key is available, select it > you’ll see a WriteProtect DWORD key in the right-hand pane.
5. Double click WriteProtect > replace the Value Data 1 with a 0 (zero)
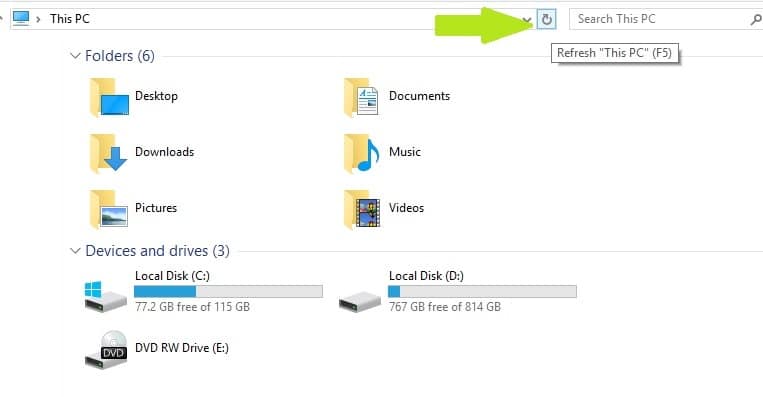
6. Go to My Computer (Windows 7) or This PC (Windows 10) and refresh it a few times. You can also reboot your computer.
7. Eject your flash drive > plug it back in and format it using exfat instead of fat32. After this action, ‘The Media is write protected’ message should be history.
Solution 2 — Remove write protect using Command Prompt
1. Go to Start > type cmd > right-click the first result > launch Command Prompt as Admin
2.Type the following commands, hitting Enter after each one:
DISKPART
LIST VOLUME
SELECT VOLUME X — X is the volume number you want to remove the write protect from.
ATTRIBUTES DISK CLEAR READONLY
3. A prompt should appear informing you that the write protect has been removed.
4. Close Command Prompt > test your flash drive.
Solution 3 — Install the HP USB Disk Storage Format Tool
Users also confirmed that the HP USB Disk Storage Format Tool successfully removed write protection off their USB flash drives. This tool was created to format USB drives and computers that run older Windows versions. As a matter of fact, the UI is strikingly similar Windows XP’s format option.
The formatting tool works with newer Windows versions, but the results may vary. If you are going to run the HP USB Disk Storage Format Tool on your Windows 10 PC, you should do it as an Admin in Safe Mode in order to avoid errors. Sometimes, the tool may look like it has frozen. Rest assured, it’s still working in the background, but it needs more to complete the task.
There you go, we hope that the solutions listed above helped you fix ‘The media is write protected‘ error code. If you’ve come across other workarounds to fix this problem, you can help the Windows community by listing the troubleshooting steps in the comments below.
![]()
Newsletter
Contents
- What Is Write Protection on Windows 10?
- Why Am I seeing the ‘Media Is Write Protected’ Error?
- How to Remove ‘Media Is Write Protected’ Message on Windows 10
- 1] Turn Off the Hardware Switch
- 2] Scan Your Computer for Malware
- 3] Remove Write Protection from Files and Folders
- 4] Use Diskpart to Remove Read-Only State
- 5] Check Your Disk for Errors
- 6] Turn off BitLocker
- 7] Clean Your Temporary Files and Folders
- 8] Repair System Files Using an SFC Scan
- 9] Disable Write Protection Using the Registry Editor
- 10] Disable Write Protection Using Group Policy
- Final Word

When transferring files to a USB drive or SD card, you may receive a “Media is write protected” error message. The same error can occur when overwriting a file or deleting a file from the media. Users do not understand why this error occurs or what it means, especially when their devices often operate without errors.
This article explains how to remove the “media is write protected” error message from a USB drive or SD card files. Instructions here apply to Windows 10 but can also be used on Windows 8 and Windows 7.
What Is Write Protection on Windows 10?
Users encounter the “media is write protected” issue, also called the “ERROR_WRITE_PROTECT” error message, when they try to write data on a storage device. Although the storage device is usually external, like a USB or an SD card drive, sometimes, this error can occur in internal devices. Now, what does it mean when the media is write protected?
Media Write Protection is a feature available in some USB, SD, and other storage devices that ensures the files are not accidentally modified or deleted. In most devices, the media write protection feature is a physical switch that you can toggle on and off.
When a file is write protected in a USB drive or SD card, you can’t change, transfer, or modify it. You can still read and copy files from write protected media, but you can’t format the drive or write and delete the files in it.
For starters, you may see the “media is write protected” error if you accidentally switched on the write protection lock feature. You can only be able to format or write on the drive if you toggle it off.
However, this is not the only case.
Sometimes, your SD card or USB drive may become write protected because of one or more of the following reasons:
- There’s malware infection in your system.
- The drive (USB/SD) is full.
- You’re trying to overwrite a read-only file.
- Security settings on the device are blocking your action.
- The drive is corrupted.
- The removable drive is broken or physically damaged.
- There’s a broken EXE, DLL, or SYS file.
Note: If your computer glitches and crashes frequently, it is likely that there is a fault with the registry. Corrupt, damaged, or broken registry entries can adversely affect the whole system.
You can use the Auslogics BoostSpeed 12 Registry Cleaner to eliminate those annoying glitches and stabilize the PC.
If you encounter the “media is write protected” error message, follow the complete step-by-step guides in the solutions below.
1] Turn Off the Hardware Switch
Some disks and media devices come with a small write protection switch or notch, which enables or disables the write protection feature. Although the switch is marked clearly, it could be too small to notice. Besides, you could push it up by mistake.
Turn the switch off, and you will remove write protection on the USB or SD card. Once done, try and see if you can write on the disk or delete something from it.
2] Scan Your Computer for Malware
Malware can cause various issues, including errors, on your computer. Some malware can write-protect disks or drives to prevent their own deletion.
This is not the most likely case you’re getting the write protection error. However, you need to perform a full system scan to help you detect any malware running on your system.
You can use the Windows built-in Windows Defender antivirus or trusted third-party security solutions.
To perform a system scan using Windows Defender, use the below steps:
- Press the Windows Key + I to launch the Settings app.
- On Settings, click on the Update & Security tile.
- On the left pane, click on Windows Security.
- Under Protection Areas, in the right pane, click on Virus & Threat Protection.
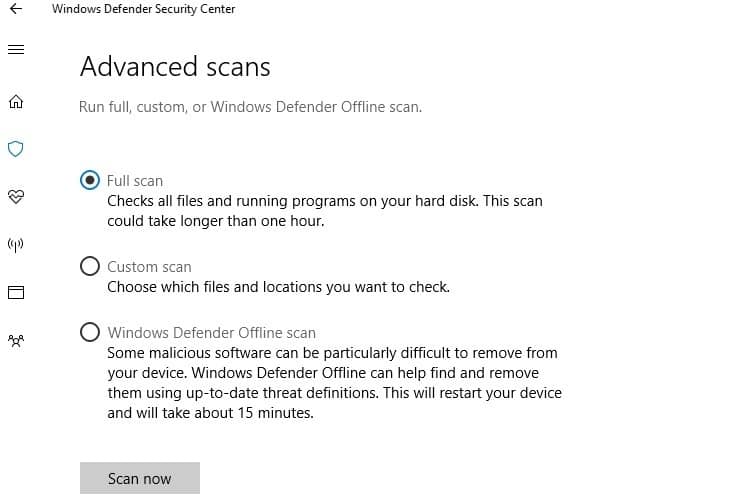
- Now, in the Virus & Threat Protection window, click on the Scan Options link.
- Next, select the “Microsoft Defender Offline scan” option, then click Scan Now.
- This will help you remove the difficult malware that hides in your system.
Once you’re done, restart your system and see if the write protection error has been resolved.
3] Remove Write Protection from Files and Folders
Sometimes, your problem with write protection could be on specific files and not the entire disk. In this case, you can remove the protection using File Explorer. Here’s what to do:
- Press the Windows Key + E to launch File Explorer.
- Navigate to the write-protected file/folder and
- Select the files/folders to locate and right-click on it (them).
- From the context menu, select Properties.
- Now, under the General tab, locate Read-Only next to Attributes.
- Ensure the box next to the Read-Only attribute is unchecked.
- Click on Apply, then click OK.
- Try again to modify the file/folder and see if the write protection issue is solved.
Note: If you select a folder that contains files or other folders, the system will ask you to confirm that the attribute change also applies to them. Allow this request and your problem will be sorted.
4] Use Diskpart to Remove Read-Only State
The disk may be in a read-only state. This can cause the write protection error.
You can remove the disk’s read-only state through the Diskpart tool in the Command Prompt.
Follow the below steps to remove the disk from the read-only state:
- Press the Windows key, then type “cmd” (no quotes).
- Right-click Command Prompt from the results, then select Run as Administrator.
- In the Command Prompt window, perform the following actions:
- Type “diskpart” (no quotes), then press Enter.
- Type “list disk” or “list volume” (no quotes) and press Enter. This will reveal all disks on your Windows PC.
- Now, select Disk X and press Enter. In this case, X represents the disk number of this you want to remove the write protection from, such as the SD card.
- Next, still in the Command Prompt, type “attributes disk clear readonly” (no quotes) and press Enter.
- You should see a prompt informing you that the system removed the write protection.
- Close the Command Prompt.
- Finally, try to delete a file or write on a file and see if the issue was resolved.
5] Check Your Disk for Errors
If the problem is not read-only on the disk, perhaps the PC’s hard disk has a problem. You can use the check disk tool to find out the problem and fix it. Here’s what to do:
- Press Windows Key+R on your keyboard to launch the Run dialog box.
- Type “cmd” (no quotes), then press Ctrl+Shift+Enter to launch Command Prompt as an administrator.
- In the Command Prompt window, type “chkdsk C: /f” (no quotes) and press Enter. Replace C with the disk you want to check (hard drive partition).
- Allow the tool to check and find disk problems (if any). The command will inform you about any errors.
- Once done, you can try deleting or writing a file to see if the write protection issue has been resolved.
6] Turn off BitLocker
Bitlocker is a creative Windows feature if you want to encrypt and protect files. It is possible that you enabled Bitlocker for the media or SD card by mistake. On Windows, any drive that has Bitlocker enabled will display a lock or sometimes show the “Media is write protected” error when viewed on File Explorer.
If that’s the case, you may want to turn off BitLocker.
To turn off BitLocker, you will need admin rights.
Turning off the BitLocker feature is easy but takes some time. Here’s what to do:
- Right-click on the drive that is locked with BitLocker.
- Choose to Turn off Bitlocker.
You can also enable Bitlocker via the Control panel using the following steps:
- Press the Windows Key + R to launch the Run dialog box.
- Type “control” (no quotes) and press Enter.
- This will open the Control Panel.
- From the list of items, choose BitLocker Drive Encryption.
- Expand the BitLocker-protected drive and choose Unlock drive.
- Then input the password to confirm your admin rights.
- Now, click Turn off BitLocker for the drive you choose.
7] Clean Your Temporary Files and Folders
As you browse the Internet and continue using your computer, you accumulate various junk and unnecessary files. These temporary files and folders may affect your PC’s processing speed, causing apps to slow and even trigger various errors like the write protection issue.
Use the following steps to clean up the junk files using Disk Cleanup:
- Go to Windows Start.
- Type “Disk Cleanup” (no quotes).
- Launch the Disk Cleanup tool.
- In the Disk Cleanup Window, select the disk that you want to clean.
- Wait as the tool calculates how much space you can free up.
- Now, click the Cleanup system files button.
- Click Yes if prompted with a User Account Control.
You can repeat the same process for all other disks in your system to clean all the possible junk files that may be causing errors. Once done, restart your system and see the write protection error is gone.
8] Repair System Files Using an SFC Scan
You can use Windows built-in System File Checker (SFC) to check for and fix system file corruption automatically. Here’s how to run the SFC scan:
- Press the Windows key, then type “cmd” (no quotes).
- Right-click Command Prompt, then select Run as Administrator to launch an elevated Command Prompt.
- In the Command Prompt window, type “chkdsk sfc/ scannow” (no quotes) and press Enter.
- Allow the scan to run to completion, then restart your computer.
- The system will replace all the corrupt files on reboot.
- Once done, try to delete or write on a file and see if the write protection is now gone.
9] Disable Write Protection Using the Registry Editor
Registry editing is not for everyone. It’s tricky and, if anything goes wrong, can render your computer inoperable. So, before beginning any operation on the registry, create a restore point.
To disable the write protection using the Registry Editor, follow these steps:
- If the drive you want to modify is external, insert it into the PC using a USB/SD card port.
- Press Windows Key + R to launch the Run dialog prompt.
- Type “Regedit” (no quotes) and press Enter.
- If prompted by UAC, click Yes.
- In the Registry Editor window, navigate to the following path: ComputerHKEY_LOCAL_MACHINESYSTEMCurrentControlSetControlStorageDevicePolicies.
- On the right pane, double-click on WriteProtect.
- This will open the Edit DWORD.
- Now, in the Value data section, change the value from “1” to “0” to remove the read-only state.
- Click OK and close the Registry Editor, then restart your computer.
If you cannot locate the StorageDevicePolicies folder in the Registry Editor, you will need to create it. Here’s how:
- Press the Windows key + R to launch the Run dialog prompt.
- Type “Regedit” (no quotes) and press Enter.
- If prompted by UAC, click yes.
- Now, navigate to the following path:
HKEY_LOCAL_MACHINE > SYSTEM > CurrentControlSet > Control.
- Right-click on the Control folder.
- In the right pane, select New, then select Key.
- Name the new folder StorageDevicePolicies and press Enter to confirm.
- Now, right-click on the StorageDevicePolicies folder, and select New, then select DWORD.
- Name it WriteProtect and press the Enter to confirm.
- Now, you can proceed and edit the StorageDevicePolicies registry as shown above.
10] Disable Write Protection Using Group Policy
This option is only available for Windows 10 Pro, Education, and Enterprise editions. So, if you’re using Windows 10 Home, your option is using the Registry Editor.
To disable the write protection using Group Policy, follow the steps below:
- Press the Windows Key + R to launch the Run prompt.
- In the Run box, type “gpedit.msc” (no quotes) and press Enter.
- This will direct you to the Group Policy Editor.
- Next, in the editor, navigate to the following path:
Computer Configuration > Administrative Templates > System > Removable Storage Access
- Depending on the media device with issues like CD, USB, or Tape, change the Write access to disabled.
- Once done, close the group policy editor and restart your system.
Final Word
That’s it. We believe these methods will help you remove the “media is write protected” error message on Windows 10. Please share with us any feedback or questions you have through the comments section.
Что делать если появляется сообщение «Device media is write-protected» во время форматирования
Совсем недавно ко мне обратился знакомый с проблемой, он не мог отформатировать обычную флешку, во время этого процесса появлялось сообщение «Device media is write-protected/диск защищён от записи». Лично я за всю свою практику не встречал таких проблем с обычными флешками. Подобного рода сообщения могут появляться на различных CD картах, у которых есть специальный замок на корпусе. Причин по которым флешку вдруг стала защищенной от записи может быть много, соответственно и решений. Сегодня хочу поделиться самым простым способом, который помогает в 80 % процентов случаях. О такой статистики мне рассказали знакомые из сервисного центра.
Для решение этой проблемы нужно воспользоваться командной строкой и специальной утилитой Diskpart, она позволяет сбросить атрибуты.
Ошибка может появляется как во время форматирования флешки встроенными средствами ОС так и с использованием сторонних программ. Само сообщение может выглядеть вот так. Либо если форматирование производиться стандартными средствами на «Диск защищён от записи».
Device media is write-protected
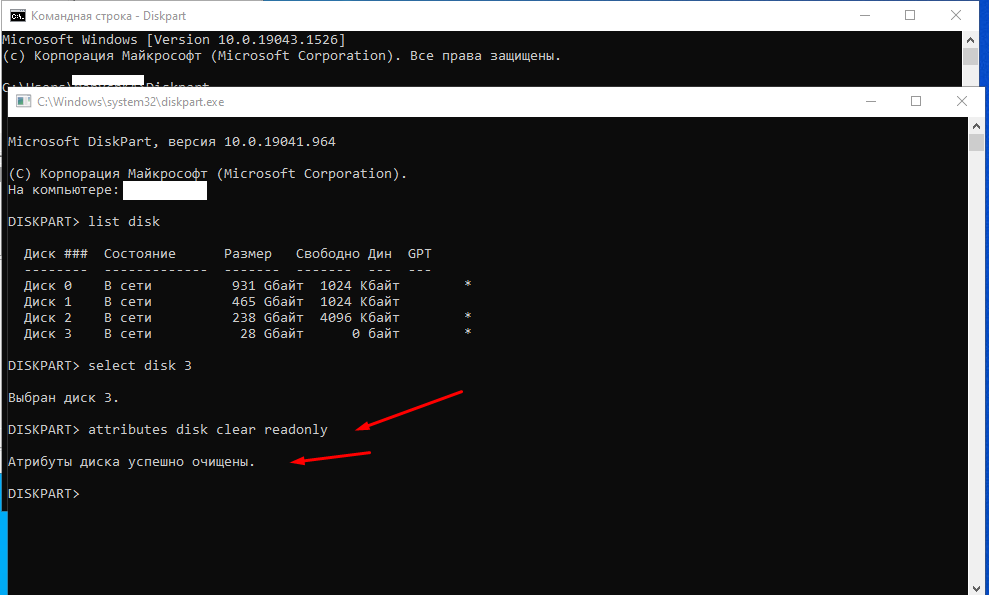
Для сброса атрибутов, необходимо запустить командную строку от имени администратора и ввести.
Diskpart
Далее вводим команда которая отобразить все подключенные к компьютеру диски.
list disk
После чего выбираем выбираем съемный диск командой.
select disk N — номер диска
И собственно очищаем сбрасываем атрибуты «Только для чтения».
attributes disk clear readonly
После этого пробуем произвести форматирование флешки. Если это вам не помогло можно воспользоваться специальными утилитами для восстановления флешек, они есть практически у каждого производителя.
Transcend JetFlash — https://ru.transcend-info.com/supports/special.aspx?no=3
Silicon Power — www.silicon-power.com/web/download-USBrecovery
Kingston — https://www.kingston.com/ru/support/technical/downloads/111247
ADATA — https://www.adata.com/ru/ss/usbdiy/
SD Memory Card — https://www.sdcard.org/downloads/formatter/
Если Вы знаете более простой способ, прошу поделиться, так как в текущей ситуации в мире флешки стоит беречь.