Hyper-V is Microsoft’s virtualization platform. It is available on Windows Server operating systems and Microsoft has also added the Hyper-V functionality to Windows 8.1, Windows 10, and Windows 11.
Unfortunately, the Hyper-V feature is only available in Windows 10 Professional, Enterprise, and Education editions. You can’t install it on Windows 10 Home edition by default.
However, using the steps in this article, we’ll show you how to enable Hyper-V in the Windows 10 Home edition.
Table of contents
- Does Your System Support Virtualization?
- Enable Virtualization in Firmware/BIOS
- Install Hyper-V in Windows 10 Home
- How to Enable Hyper-V on Windows 10 (Pro, Enterprise, Education)
- Enable Hyper-V from Optional Features
- Enable Hyper-V from Command Prompt
- Enable Hyper-V from Windows PowerShell
- How to Disable Hyper-V in Windows 10 (Home, Pro, Enterprise, Education)
- Closing Thoughts
Does Your System Support Virtualization?
Before moving forward, we need to check if our system supports virtualization. Hardware virtualization is required for Hyper-V to function correctly. Otherwise, you can use other virtualization platforms like Virtualbox and VMWare.
There are four basic requirements for Hyper-V to be installed on a Windows 10 computer:
- VM Monitor Mode Extensions
- Virtualization enabled in firmware
- Second Level Address Translation (SLAT)
- Data Execution Prevention
All four of these requirements can be easily checked through a Command Prompt cmdlet. Run the following cmdlet in an elevated Command Prompt and obtain the results on the four requirements:
systeminfoThis will generate a list, and you will find the section “Hyper-V Requirements” at the end of the list containing the details of the 4 requirements, as in the image below:
 2")
If these requirements are met, the results will display “Yes.” However, if you find that “Virtualization Enabled In Firmware” states “No,” you need to enable it using the guide below.
Enable Virtualization in Firmware/BIOS
Most modern computers support all the requirements of Hyper-V. But some systems have virtualization disabled from BIOS. You can go to the BIOS setup computer at the startup and enable Virtualization using the following steps:
-
Restart your computer and enter the BIOS setup using the hotkey.
-
Here, look for the “Virtualization” tab and click on it, or use the arrow keys on the keyboard to highlight it and press Enter.
-
Now enable Virtualization.
 3")
Enable virtualization from BIOS -
Now save the new settings and exit BIOS. The system will now reboot normally.
 3")
When it reboots, continue with the following steps to install and enable Hyper-V.
Install Hyper-V in Windows 10 Home
Note: Since Windows Home edition comes without Hyper-V, you must first install it. If you have the Pro, Education, or Enterprise editions, then you may skip this step and proceed to the next section of this article. To check which edition you have, type in winver in the Run Command box and obtain your operating system’s details.
Follow the steps below to install and enable Hyper-V in Windows 10 Home:
-
Download Hyper-V Installer by clicking on the following link:
Hyper-V installer and enabler for Windows 10 Home (317 bytes, 34,966 hits)
-
Once downloaded, right-click on the file and select Run as Administrator from the context menu. This will trigger the installation script.
 5")
Run as admin -
If prompted with a UAC, click Yes.
Click Yes on User Access Control It may take some time to complete the installation. Please let it complete without interruption.
-
Once complete, press Y to continue.
Press Y to continue The computer will now reboot and update.
 5")
 6")
 7")
Once rebooted, Hyper-V will have installed and automatically enabled on your Windows Home.
How to Enable Hyper-V on Windows 10 (Pro, Enterprise, Education)
The method given above automatically enables Hyper-V as well as installing it on a Windows Home. However, if you are running Windows Pro, Education, or Enterprise edition, then you can enable Hyper-V using any one of the following methods.
Enable Hyper-V from Optional Features
Since Hyper-V is an optional feature that one can enable when needed, you can enable it from the Optional Features applet. Here is how:
-
Open the Optional Features applet by typing in optionalfeatures in the Run Command box.
 8")
Open the Optional Features applet -
Now look for the “Hyper-V” option from the list and check the box next to it. Then click Ok.
 9")
Enable Hyper V from Optional Features -
You will now see a window applying the changes. Click Close when it is done.
 10")
Close installation window
 8")
 9")
 10")
Hyper-V will now be installed and enabled. You can now access the Hyper-V manager by searching for it in the search box in the taskbar or through the Start menu.
 11")
Alternatively, you can also use the other 2 command-line methods to enable Hyper-V on Windows 10.
Enable Hyper-V from Command Prompt
Follow these steps to enable Hyper-V using the DISM command tool in the Command Prompt:
-
Run the following cmdlet in an elevated Command Prompt:
DISM /Online /Enable-Feature /All /FeatureName:Microsoft-Hyper-VEnable Hyper V from Command Prompt -
When asked, enter Y to restart the computer:
Enter Y
 12")
 13")
The computer will now restart, When it does, Hyper-V should be enabled successfully.
Enable Hyper-V from Windows PowerShell
If you’d rather prefer to use Windows PowerShell, here is how to enable Hyper-V:
-
Run the following cmdlet in an elevated PowerShell:
Enable-WindowsOptionalFeature -Online -FeatureName Microsoft-Hyper-V-AllEnable Hyper V using PowerShell -
When asked, enter Y and hit Enter to restart the computer:
Enter Y When the computer reboots, Hyper-V will have installed successfully.
 14")
 15")
These are the 3 methods to enable Hyper-V in Windows 10, provided that the hardware is supported and Hyper-V is installed.
How to Disable Hyper-V in Windows 10 (Home, Pro, Enterprise, Education)
If you don’t want this functionality on your computer, you can always disable it. There are three ways to disable it:
-
From Optional Features
-
Open the Optional Features applet by typing in optionalfeatures in the Run Command box.
Open Optional Features applet -
Uncheck the box next to Hyper-V and click Ok.
 17")
Disable Hyper-V from Optional Features -
When done, click Restart now to finalize the changes.
Restart PC
-
-
From Command Prompt
Run the following cmdlet in an elevated Command Prompt to disable Hyper-V:
DISM /Online /Disable-Feature /FeatureName:Microsoft-Hyper-V-allIf asked for a reboot, enter Y for Yes.
Disable Hyper V from Command Prompt -
From PowerShell
Run the following cmdlet in an elevated PowerShell to disable Hyper-V:
Disable-WindowsOptionalFeature -Online -FeatureName Microsoft-Hyper-V-AllIf asked for a reboot, enter Y for Yes.
Disable Hyper V from Windows PowerShell
 17")
 18")
 19")
 20")
Closing Thoughts
Sometimes Hyper-V is very useful even for home users. It can be used to test and evaluate new software without hurting the host system. But there are times when enabling virtualization support or installing Hyper-V is not recommended.
Hyper-V requires some system resources to run its virtual machines. For example, if you have 4 GB RAM, you won’t be able to give any resources to the virtual machine. So it would not be wise to enable Hyper-V functionality.
For what purpose do you want to enable Hyper-V functionality on your Windows 10 Home computer? Please share your thoughts in the comments below.
Also see:
Usman Khurshid is a seasoned IT Pro with over 15 years of experience in the IT industry. He has experience in everything from IT support, helpdesk, sysadmin, network admin, and cloud computing. He is also certified in Microsoft Technologies (MCTS and MCSA) and also Cisco Certified Professional in Routing and Switching.
Редакция Windows HOME (домашняя) не имеет встроенной виртуальной машины Hyper-V, но есть способ, как активировать функцию для включения виртуализации и установки Hyper-V.
Как активировать Hyper-V в Windows 10 Home
Шаг 1. Нажмите правой кнопкой мыши на пустом месте рабочего стола и выберите «Создать» > «Текстовый документ«.
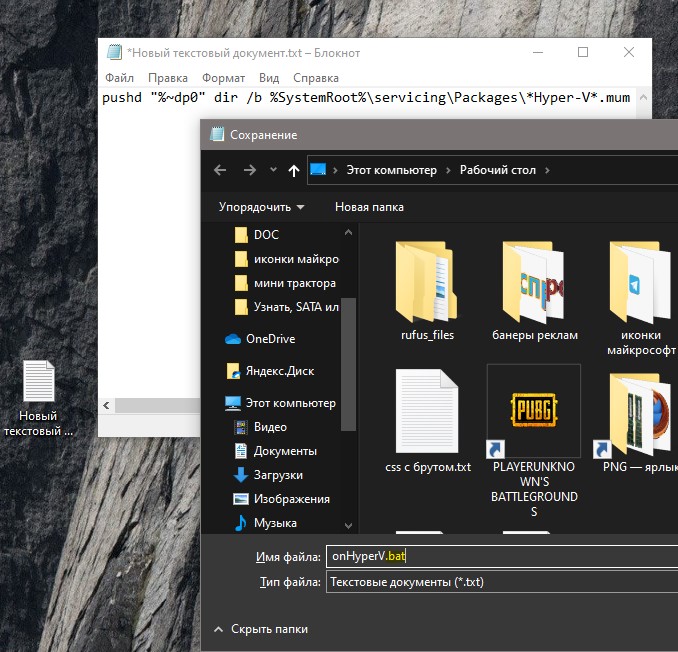
Шаг 2. Помести ниже скрипт написанный командной Microsoft Virtualization на Github в текстовый документ. Далее нажмите на вкладку сверху «Файл» > «Сохранить как«. В поле «Имя файла» укажите любое имя, но с расширением .bat и сохраните его на рабочий стол.
pushd "%~dp0"
dir /b %SystemRoot%servicingPackages*Hyper-V*.mum >hyper-v.txt
for /f %%i in ('findstr /i . hyper-v.txt 2^>nul') do dism /online /norestart /add-package:"%SystemRoot%servicingPackages%%i"
del hyper-v.txt
Dism /online /enable-feature /featurename:Microsoft-Hyper-V -All /LimitAccess /ALL
pause
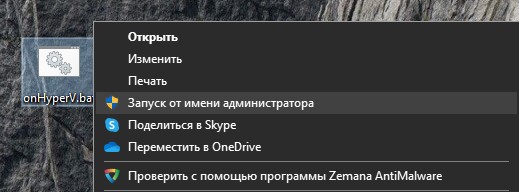
Шаг 3. На рабочем столе нажмите правой кнопкой мыши по созданному бат-файлу и выберите «Запустить от имени администратора«. Далее появится окно командной строки, где будет предложено перезагрузить компьютер нажав на Y.
Шаг 4. Нажмите Win+R и введите optionalfeatures.exe, чтобы быстро открыть компоненты системы. Найдите Hyper-V и установите галочку, после чего нажмите OK.
После установки всех необходимых компонентов вы можете набрать в поиске меню «Hyper» и запустить виртуальную машину в Windows 10 HOME.

Смотрите еще:
- Windows 10 Home: Активировать локальную групповую политику
- Hyper-V: Встроенная виртуальная машина в Windows 10
- Как использовать вместе VMware, VirtualBox с Hyper-V и WSL в Windows 10
- Невозможно запустить движок виртуализации BlueStacks в Windows 10
- Как пользоваться WHOIS при помощи CMD в Windows
[ Telegram | Поддержать ]
Hyper-V is a Microsoft-owned Windows Hypervisor platform (Type-1) that allows users to run virtual machines with high performance. However, if you are using Windows 10 Home Edition, then you will not have the “Hyper-V” option in the “Turns Windows feature on or off” to run virtual computers because it is available only for Windows 10 Professional, Education, and Enterprise Editions (know the difference). However, still, there is a way to easily download, install and enable the Hyper-V feature on Windows 10 Home using the command line.
Requirements:
- Windows 10 Home OS
- Administrator access
- Virtualization must be enabled in BIOS to create VMs
- Active Internet connection
Although, in modern systems Virtualization is enabled in BIOS by default, however, to confirm it, just right-click on Taskbar and select Task manager ⇒ Performance and find whether it is on or off.


Well, if you don’t want to use Hyper-V then try out some other best third-party Virtual machine creator software programs.
Steps to Activate Hyper-v Feature on Windows 10 Home
Here are the simple steps that we can follow to download and install Hypervisor using a Command-line script.
1. Script to download Hyper v for Windows 10 home
There is a code available on Github that allows users to automate the process of downloading and enabling the Hyper-V feature. Here is that
 pushd "%~dp0"
dir /b %SystemRoot%servicingPackages*Hyper-V*.mum >hyper-v.txt
for /f %%i in ('findstr /i . hyper-v.txt 2^>nul') do dism /online /norestart /add-package:"%SystemRoot%servicingPackages%%i"
del hyper-v.txt
Dism /online /enable-feature /featurename:Microsoft-Hyper-V -All /LimitAccess /ALL
pause
What we have to do is – Right-click on the Desktop and select Text Document. A new file will be created, now open it and paste the above code in that. After that rename that file to Hyper-V Enabler.bat
Alternative- However, to make all this easy for you, we already have created this bat file that you can download directly using this link.
2. Run Hyper-V Enabler Batch file
Once you downloaded or created a Batch file with the given code by yourself on your Desktop. Right-click on that and select “Run as Administrator“.

3. Feature installation will start
As we run the Batch file, it will open a Command prompt to run the code saved in it. Make sure you have an active internet connection on your system to download files required to install and activate Hyper-V on Windows 10 Home. This will take some time depending upon your network speed.
4. Restart your Windows 10 System
Once the installation is complete, the Hyper-v will automatically get enabled on your system. Thus, to make changes into effect, the system will ask you to restart it. Simply type Y on your command terminal and press the Enter key.

5. Run Hyper-V Manager on Windows 10 home
Let’s check whether this Microsoft Windows Hypervisor feature is on our system or not. For that, in the search box type- Turn Windows features on or off, as its icon appears, click to open it.

There scroll and find -Hyper-V and make sure all its tools are checked as shown in the above screenshot, if not already, and then hit the OK button.
Now, we know this free Microsoft virtualization software is on our system, it’s time to run it and start creating virtual machines.
Go to Windows 10 Search box again or simply press the Win key on your keyboard and this time type- Hyper-V, click on its icon when appears.
Alternatively, we can use a command to run Hypervisor- open CMD or the RUN box (shortcut key- Win key + R) and type – virtmgmt.msc

6. Create a Virtual Machine
- To create a virtual machine in Hyper-V Manager, right-click on the connected server and select the New option.

- Click on the Next button and give some name to your virtual machine. For example Ubuntu.
- Choose the Generation for your Virtual machine. If the operating system you want to install supports 32-bit or 64-bit and requires legacy BIOS features then go for Generation 1. Whereas for the latest features and only 64-bit with UEFI boot supported OS users can go for Generation 2. However, you can leave the default selection as it is if you are not sure about this.
- Assign the amount of RAM or Memory you want to use.
- Configure Network. For that select the Default Switch from the Drop-down box. If you don’t have then first create one.
- Select the Size of Virtual Disk.
- Assign the ISO file of the OS you want to install.

To get a step by step guide you can see our article- How to use hyper-v to install Linux Virtual machine on Windows 10
7. Uninstall or Disable Hyper-V feature on Windows 10 Home
Hyper-V is not compatible completely with other Type- 2 virtualizers, even though the latest version of Vmware and Virtualbox can run along with it, there will be a huge performance issue. Thus, if you are planning to use Vmware player or Virtualbox on Windows 10 Home, then first, Deactivate the Hyper-V.
To uninstall this feature, we need to uncheck it from the “Turns Windows features on or off” section. To open it you can either find it from the Search box of Windows 10 or simply press Win Key + R to open the RUN box and type- optionalfeatures.exe

Now uncheck the box given for Hyper-v.

7.1 Command line to disable windows virtualization feature (optional)
If you want then can use a very straightforward method that is either using command prompt or PowerShell command line-
On Powershell run this
Disable-WindowsOptionalFeature -Online -FeatureName Microsoft-Hyper-V-All
Whereas on Command prompt, use this one-
dism.exe /Online /Disable-Feature:Microsoft-Hyper-V-All
7.2 Restart your system
To make sure the hypervisor feature gets disabled completely, now restart your system. This uninstalls it completely.
7.3- In case you want to enable it again (optional)
In the future if you want to enable Microsoft Hypervisor again then you don’t need to run the Batch file this time, just got Windows Features and select it. Or use the command line-
Powershell
Enable-WindowsOptionalFeature -Online -FeatureName Microsoft-Hyper-V
CMD
DISM /Online /Enable-Feature /All /FeatureName:Microsoft-Hyper-V
Also See- Hyper-V vs VirtualBox: A basic comparison
Closing thoughts
Well, this was the quick way to use the Microsoft Windows hypervisor on Windows 10 Home edition. In case you are facing any problem while enabling it, let’s know, the comment section is all yours…
Hyper-V is a free Windows server tool. By default, the Hyper-V feature is available on all Windows 10 except for Home Edition. Sometimes you may need to enable Hyper-V on your Windows 10 Home Edition. So if you want to learn about the steps, follow our guide below.
- What is Hyper-V?
- How to check your system support virtualization?
- Steps to Enable Hyper-V in Windows 10 Home
- Steps to Disable Hyper-V from Windows 10 Home
- Verdict
Quick steps
Enable Hyper-V on Windows 10 Home:
Enable Hyper-V:
- Copy the below code and paste any text editor:
pushd "%~dp0" dir /b %SystemRoot%servicingPackages*Hyper-V*.mum >hyper-v.txt for /f %%i in ('findstr /i . hyper-v.txt 2^>nul') do dism /online /norestart /add-package:"%SystemRoot%servicingPackages%%i" del hyper-v.txt Dism /online /enable-feature /featurename:Microsoft-Hyper-V -All /LimitAccess /ALL pause - Save the file as “HyperV Activation Script.bat.“
Right-click on the file and select Run as Administrator.
After the completion, you need to press Y to restart your PC.
Disable Hyper-V:
- Open the Run Command by pressing the Windows Key + R.
- Search for “optionalfeatures,” and uncheck the Hyper-V credentials.
- Restart the system.
Using PowerShell
- Open the Windows PowerShell and execute the below code: Disable-WindowsOptionalFeature -Online -FeatureName Microsoft-Hyper-V -All.
Using Command Prompt:
- Open the command prompt and run the below code: DISM /Online /Disable-Feature /All /FeatureName:Microsoft-Hyper-V
- For detailed information, follow the below-given instructions.
What is Hyper-V?
Hyper-V is Microsoft’s virtualization product. It allows you to create and run a software version of a computer. Hyper-V runs each virtual machine in its own isolated space. So you can run more than one virtual machine on the same hardware at the same time.
It is available on Windows Server, Windows 8.1, and Windows 10. Unfortunately, you can’t install it on Windows 10 Home Edition by default.
How to check your system support virtualization?
Before that, you need to check your system does support the virtualization for Hyper-V to function correctly. Otherwise, you can use other virtualization platforms such as VirtualBox and VMWare.
So, for Hyper-V to be installed, your Windows 10 system must meet four basic requirements:
- Does your system support VM Monitor Mode Extensions?
- Is virtualization enabled in your firmware?
- Can your system handle second address level translation?
- Does your PC support data execution prevention (DEP)?
To verify these requirements, you can use the below steps.
- Open the Command Prompt from the Start menu or through the Run Command (Run–> cmd).
- Here, you need to run the “systeminfo” command.
- Now you can check the Hyper-V requirements section.
- Primarily, modern computers support all the requirements of Hyper-V. However, some PCs’ may have virtualization disabled from BIOS.
- So, you can go to the BIOS setup from the start menu and enable it.
To enable the Hyper-V in Windows 10 Home, follow the below steps.
- First, you have to create a “.bat” file on your Windows system.
- For that, you need to copy the below code and paste it into any text editor like Notepad or Visual Studio Code.
pushd "%~dp0" dir /b %SystemRoot%servicingPackages*Hyper-V*.mum >hyper-v.txt for /f %%i in ('findstr /i . hyper-v.txt 2^>nul') do dism /online /norestart /add-package:"%SystemRoot%servicingPackages%%i" del hyper-v.txt Dism /online /enable-feature /featurename:Microsoft-Hyper-V -All /LimitAccess /ALL pause - You have to save the file as “HyperV Activation Script.bat” on your desktop.
- Right-click on the file and select Run as Administrator.
- It will show some warnings from your system about running .bat files. However, the file is safe to run (after all, you created it), so you can allow it.
- It may take a few minutes to run, so let it complete without interruption.
- After the completion, you press Y to restart your PC.
- Now open the Run command and search for “optionalfeatures” to check Hyper-V option is available.
- Finally, you can search for Hyper-V at the start menu on your Windows 10 Home.
- If the Hyper-V is not showing in the search box, you can run the following code in the Run Command:
virtmgmt.msc
- It will directly open Hyper-V manager on your Windows 10 Home PC.
Steps to Disable Hyper-V from Windows 10 Home:
If you want to disable this functionality on your computer, you can permanently disable it. Here we will show the three methods to disable this feature.
- Open the Run Command by pressing the Windows Key + R.
- Search for optional features, and it will open the Windows Features window.
- It would be best to uncheck the Hyper-V and Hyper- V management tools here.
- Restart the computer.
Using Windows PowerShell:
- Open the Windows PowerShell and execute the following command.
Disable-WindowsOptionalFeature -Online -FeatureName Microsoft-Hyper-V -All
Using Command Prompt:
- Open the Command Prompt from the Start menu.
- Run the following command: DISM /Online /Disable-Feature /All /FeatureName:Microsoft-Hyper-V
- You can easily disable the Hyper-V functionality on your PC from these methods.
Verdict:
That’s all. We have enabled the Hyper-V Manager in our Windows 10 Home edition. Hope that this article is helpful to you. Please share your thoughts and questions in the below comment box.
Read Also:
- Where are Themes Stored in Windows 10 & How to Change it?
- How to Disable All the Settings of Windows 10 Taskbar? {2 Simple Ways}
Выпуск Windows 10 Home не поддерживает функцию Hyper-V, ее можно включить только в Windows 10 Enterprise, Pro или Education. Если вы хотите использовать виртуальную машину, вам необходимо использовать стороннее программное обеспечение виртуальных машин, такое как VMware и VirtualBox. … Функции, необходимые для Hyper-V, отображаться не будут.
Обновление Windows 10 Creators Update (Windows 10 версии 1703)
- Откройте диспетчер Hyper-V из меню «Пуск».
- В диспетчере Hyper-V найдите «Быстрое создание» в правом меню «Действия».
- Настройте свою виртуальную машину. (необязательно) Дайте виртуальной машине имя. …
- Щелкните Подключить, чтобы запустить виртуальную машину.
Как включить Hyper-V в домашней BIOS Windows 10?
Шаг 2: настройка Hyper-V
- Убедитесь, что в настройках BIOS включена поддержка аппаратной виртуализации.
- Сохраните настройки BIOS и загрузите машину в обычном режиме.
- Щелкните значок поиска (увеличенное стекло) на панели задач.
- Введите включить или выключить функции Windows и выберите этот элемент.
- Выберите и включите Hyper-V.
Есть ли в Windows 10 виртуальная машина?
Одним из самых мощных инструментов Windows 10 является встроенная платформа виртуализации, Hyper-V,. Используя Hyper-V, вы можете создать виртуальную машину и использовать ее для оценки программного обеспечения и услуг, не подвергая риску целостность или стабильность своего «реального» ПК.
Hyper-V хорош?
Hyper-V — это хорошо подходит для виртуализации рабочих нагрузок Windows Server а также инфраструктура виртуальных рабочих столов. Он также хорошо подходит для создания сред разработки и тестирования с меньшими затратами. Hyper-V менее подходит для сред с несколькими операционными системами, включая Linux и Apple OSx.
Почему на моем компьютере нет Hyper-V?
Тебе нужно иметь Виртуализация включена в BIOS, иначе Hyper-V не будет работать в вашей системе. Если в вашей системе этого нет, Hyper-V вообще не будет работать в вашей системе.
Выпускает ли Microsoft Windows 11?
Microsoft подтвердила, что Windows 11 будет официально запущена 5 октября. Необходимо как бесплатное обновление для тех устройств с Windows 10, которые соответствуют требованиям, так и предварительно загруженные на новые компьютеры.
Как мне перейти с Windows 10 для дома на профессиональную?
Нажмите кнопку «Пуск», затем выберите «Настройки»> Обновить & Безопасность> Активация. Выберите Изменить ключ продукта, а затем введите 25-значный ключ продукта Windows 10 Pro. Нажмите Далее, чтобы начать обновление до Windows 10 Pro.
Нужна ли мне лицензия Windows для каждой виртуальной машины?
Поскольку устройства обращаются только к операционной системе Windows Server, им не требуется дополнительное лицензирование для настольной операционной системы Windows. … Пользователю нужен Windows VDA на лицензию на пользователя— разрешить доступ до четырех одновременно работающих виртуальных машин Windows, работающих в центре обработки данных, с любого устройства.
Какая виртуальная машина лучше всего подходит для Windows 10?
Лучшая виртуальная машина для Windows 10
- Виртуальный бокс.
- VMware Workstation Pro и Workstation Player.
- VMware ESXi.
- Microsoft Hyper-V.
- VMware Fusion Pro и Fusion Player.
Что лучше Hyper-V или VMware?
Если вам требуется более широкая поддержка, особенно для старых операционных систем, VMware — это хороший выбор. Если вы работаете в основном с виртуальными машинами Windows, Hyper-V — подходящая альтернатива. … Например, в то время как VMware может использовать больше логических процессоров и виртуальных процессоров на хост, Hyper-V может разместить больше физической памяти на каждом хосте и виртуальной машине.