Since 2008, Microsoft has provided two deployment options for the Hyper-V hypervisor – a standalone installation of Hyper-V Server and a Hyper-V role that can be added onto an existing Windows Server operating system. Which Hyper-V edition is better for you? Today’s blog post compares and contrasts Hyper-V Server 2016 with the Hyper-V role for Windows Server 2016. Licensing, installation, user interface, VM management, clustering, and use cases are explored. After reviewing each deployment type in detail, we explore their advantages and disadvantages to help you determine what option suits your virtual environment best.
Hyper-V Server 2016
The first type of deployment for Hyper-V reviewed in this blog post is the standalone Hyper-V Server 2016.
Licensing
Hyper-V Server 2016 is distributed for free and can be downloaded from Microsoft’s site. You can use Hyper-V Server 2016 for an unlimited period of time without paying anything and without activation, but there are no licenses provided for guest VMs running Windows. As a result, you must purchase licenses for guest Windows systems according to Microsoft’s license agreement. There are no licensing issues if you deploy VMs running Linux. Be aware that Microsoft prohibits the use of a standalone Hyper-V Server 2016 as a web server, file server, database server, or any other type of server whose role is not hosting virtual machines.
Installation
The installation process of Hyper-V Server 2016 is similar to installing Microsoft Windows Server Core. It looks like Windows Server Core with the minimal set of features needed for it to function as a hypervisor. Configuration of Hyper-V Server 2016 is also minimal – the hypervisor is ready to work right after installation.
User interface
Similarly to Windows Server Core, Hyper-V Server is lightweight and has no GUI (graphical user interface); only a command line interface (CLI) is provided. You will not find any options related to Hyper-V in the console-based server configuration menu. You can create users, install updates, change computer names, manage network settings, enable remote management, shut down or restart the server, and exit to CMD. You can enter PowerShell from CMD. VMs can be created, deleted, started, stopped, renamed etc. with PowerShell.

VM management
You can create, delete, start, and stop VMs on your instance of Hyper-V Server with PowerShell locally and remotely. If this VM management method is not convenient for you, use Hyper-V Manager remotely. For this, you need another Windows machine with the Hyper-V role installed. When you install the Hyper-V role on a Windows machine, Hyper-V manager is installed by default. Open Hyper-V Manager, connect to your headless Hyper-V Server 2016, and manage your VMs. As an alternative to Hyper-V Manager, you can use another GUI tool for centralized management called System Center Virtual Machine Manager (SCVMM). Note that while Hyper-V Manager is free, you have to pay for SCVMM.
Clustering features
Clustering is supported by Hyper-V Server 2016. The requirements are the same as the requirements for a Hyper-V Failover Cluster built on Windows Server 2016 nodes with the Hyper-V role installed. The entire cluster configuration can be done with PowerShell.
Use cases
The free Hyper-V Server 2016 is a nice solution for virtualizing existing Windows servers and Windows desktops that are already licensed, as well as running Linux machines that don’t require licenses. Hyper-V Server 2016 can also be used for educational and testing purposes or for companies that do not have high numbers of VMs that must be licensed.
Hyper-V 2016 Role on Windows Server 2016
Let’s now explore the same categories for the Hyper-V role on Windows Server 2016.
Licensing
A paid license must be applied to Windows Server 2016 on a per-core basis (except for the Essentials edition – but using this is not rational for Hyper-V). You can select the Standard or Datacenter edition. The Windows Server 2016 Standard edition includes licenses for two Windows-based Hyper-V virtual machines and is suitable for smaller virtualized environments. Windows Server 2016 Datacenter Edition includes licenses for unlimited numbers of Hyper-V virtual machines running Windows, and accordingly is recommended for highly virtualized environments. Moreover, the Datacenter edition allows you to deploy shielded VMs and use Storage Spaces Direct, with storage replicas and a software-defined networking stack.
You do not pay for the ability to install the Hyper-V role; you pay for the instance of Windows Server running on your host and the Windows OS running on your VMs.
Installation
Windows Server 2016 must first be installed to enable the Hyper-V role. Windows Server 2016 can be installed in the core mode (which is similar to the installation of Hyper-V Server) or in GUI mode. Using the GUI mode (the “desktop experience”) is more convenient, and Hyper-V Manager could be used locally on Windows Server 2016 with the Hyper-V role in this case. If you enable the Hyper-V role on Windows Server 2016 Datacenter Core, despite the lack of GUI, you can deploy an unlimited number of VMs running Windows according to the license agreement.
Data Protection with NAKIVO Backup & Replication
NAKIVO Backup & Replication delivers high-end data protection for SMBs and enterprises with multiple backup, replication and recovery features, including VMware Backup, Hyper-V Backup, Office 365 Backup and more. Get the Free Trial now!
User interface
Windows Server 2016 with the Hyper-V role allows you to use both command line and graphical user interfaces. As explained in the previous section, you can select the user interface in the beginning of Windows Server 2016 installation. Windows Server 2016 Core provides only a command line interface. Install Windows Server 2016 with the desktop experience if you want to use a GUI.
VM management
If you have installed Windows Server 2016 in the GUI mode and enabled the Hyper-V role, then you can use Hyper-V Manager to manage VMs residing on a local server and VMs residing on remote servers. You can also use PowerShell or System Center Virtual Machine Manager (SCVMM).

Clustering features
All Hyper-V failover clustering features are supported if you enable the Hyper-V role on Windows Server 2016. You can deploy a Hyper-V failover cluster with multiple nodes and shared storage to achieve high availability of Hyper-V VMs running on Hyper-V hosts.
Use cases
Windows Server 2016 with the Hyper-V role is adopted for use in production environments with Windows VMs. Windows Server 2016 Datacenter Edition is the best option in highly virtualized production environments where the most of Hyper-V VMs are running Windows. Note that Windows Server 2016 offers much more than just the Hyper-V role. You can deploy any other role on your server running Windows Server 2016.
Advantages and Disadvantages of the Two Hyper-V Deployments
Each type of Hyper-V deployment has its own advantages and disadvantages. This section outlines the pros and cons of the standalone Hyper-V Server 2016 and Windows Server 2016 with Hyper-V.
Advantages of Hyper-V Server 2016
- Zero price. Hyper-V Server 2016 is absolutely free. No activation required.
- Small footprint. Hyper-V Server 2016 is a lightweight distribution that occupies less disk space and consumes less memory than Windows Server 2016 with the Hyper-V role.
- Security. Fewer components are included in Hyper-V Server, which means fewer vulnerabilities. Only the components required to run VMs are present.
Disadvantages of Hyper-V Server 2016
- No Windows GUI.
- Limited management tools.
- Licensing limitations. Windows VMs must be licensed separately. No other roles except Hyper-V can be enabled on the server.
Advantages of Windows Server 2016 with a Hyper-V role (with GUI)
- Ease of use. The Windows GUI can be used, allowing you to manage a server conveniently.
- More tools and features available. Any server role can be installed.
- Full support (software and hardware).
- Includes licenses for Windows installed on Hyper-V VMs.
- Windows installed on Hyper-V VMs can be automatically activated (true for Datacenter edition).
Disadvantages of Windows Server 2016 with a Hyper-V role (GUI-based)
- Consumes more hardware resources.
- Cost. The license is expensive, and the Windows OS installed on hosts must be activated.
- More potential vulnerabilities.
Hyper-V Server 2016, similarly to Windows Server 2016 Core, does not include Windows Explorer, which is the main component of Windows graphical shell. (Internet Explorer is a part of Windows Explorer.) This is a less user-friendly solution, but it improves security. In the GUI mode, even if you use only tools such as MMC (Microsoft Management Console) for server management, without using Internet Explorer, Internet Explorer is still present in your system and could constitute a threat for your server. This is the reason many IT specialists may prefer installing the Core Edition of Windows Server operating system in some situations.
At the same time, some basic graphics features used for displaying windows that are not Explorer-related are available in the headless edition of Windows Server 2016 and Hyper-V Server 2016. For example, you can press Ctrl+Shift+Esc to run the Windows Task Manager.
One additional advantage of the standalone Hyper-V Server is that the smaller number of included components means you need less frequent updates (patches) and, as a result, fewer reboot events for the server.
Both Hyper-V Server 2016 and the Hyper-V role enabled on Windows Server 2016 are type 1 hypervisors. A type 1 hypervisor is a native hypervisor installed directly on hardware, whereas a type 2 hypervisor runs as an application on the installed operating system. The trick is that when Windows Server 2016 with the Hyper-V role is loaded, Hyper-V is initialized first, before starting Windows, which makes it type 1 hypervisor.
Conclusion
Today’s blog post has explored the similarities and differences between standalone Hyper-V Server 2016 and Windows Server 2016 with the Hyper-V role installed. Most of Hyper-V features are the same for these two types of Hyper-V deployment (the exceptions being shielded VMs and Storage Spaces Direct, which are available with Windows Server 2016 Datacenter Edition). The main differences are in licensing host operating systems and guest Windows operating systems – Hyper-V Server 2016 is free, but guest Windows installed on VMs must be licensed separately. Windows Server 2016 requires a paid license, but includes licenses for VMs running Windows. The user interfaces and management tools also differ. Hyper-V Server 2016 and Windows Server 2016 Core with Hyper-V don’t have GUIs, and hence must be managed either locally through CLIs or remotely from other machines with GUIs. Windows Server 2016 (with GUI/desktop experience) and Windows Server 2016 Core provide the same Hyper-V functionality, but Windows Server 2016 with GUI can be managed locally through GUI-based tools such as Hyper-V Manager.
Regardless of which edition of Hyper-V you decide to use in your environment, remember to back up your virtual machines. NAKIVO Backup & Replication can back up VMs running on standalone Hyper-V Server 2016, VMs running on Windows Server 2016 with the Hyper-V role, and VMs running in a Hyper-V Failover Cluster. Request a demo with one of our engineers to see for yourself how you could improve your Hyper-V data protection easily and effectively!

- Remove From My Forums
-
Вопрос
-
hi, experts, I am totally new to server knowledge
I found that there are versions of Hyper-V.
Hyper-V on Windows Server 2016
and Microsoft Hyper-V Server 2016
by what cases, I should select Microsoft Hyper-V Server 2016 to install? blade server? and create VM? am I correct?
by what cases, I should select Hyper-V on Windows Server 2016 ?
further, inside VM in blade server? do I need to install Hyper-V for replication, failover to configure? etc?
thank you very much!
delaynomore
delaynomore.
Ответы
-
Hi,
Hyper-V server standalone —> Hyper-V Server is a dedicated stand-alone product that contains the hypervisor, Windows Server driver model, virtualization capabilities, and supporting components such as failover clustering, but does
not contain the robust set of features and roles as the Windows Server operating system. When you install Hyper-V standalone server you will need to administer it remotelly because there is no GUI. It looks like server core .People usually install this to
reduce reboots and attack surface.Second thing why people choose hyper-v stand alone is because of licensing. It is free but you will need to have license for VMs that you will be running on top of the hypervisor.
Hyper-V role on WIndows server —> when you install it you will get all of the cool roles and features that you can install on the host machine but when it comes right down to it we generally keep the hosts as clean as possible from running
additional workloads outside of Hyper-V.Second thing is licensing. When you install full gui server and enable hyper-v role you will be able to license 2 VM which will run on that host with Standard and unlimited with Datacenter. What I mean by that is that you will be able to use host license
to license VMsREPLICATION —>You don’t need to install nothing inside VM itself. You will need to enable replication on Hyper-V host first.
Please take a look on my site how to enable replcation (https://nedimmehic.org/2017/01/29/hyper-v-2016-replication/)
————————————————————————————————————
If you found this post helpful, please give it a «Helpful» vote.
Please remember to mark the replies as answers if they help.-
Изменено
4 марта 2017 г. 8:12
-
Помечено в качестве ответа
delaynomore
4 марта 2017 г. 9:34
-
Изменено
-
A major consideration in making the selection between Hyper-V Server and Windows Server with the Hyper-V role is your comfort level with managing Hyper-V Server. It is designed to be managed remotely. There is no GUI on Hyper-V Server.
There is a command-line interface. So you need to be comfortable with managing and troubleshooting systems remotely or via command line. If you are not comfortable with this, you are better served by installing Windows Server with the desktop option.
The capabilities of Hyper-V are exactly the same, but management is different.
. : | : . : | : . tim
-
Помечено в качестве ответа
delaynomore
6 марта 2017 г. 1:43
-
Помечено в качестве ответа
- Remove From My Forums
-
Question
-
hi, experts, I am totally new to server knowledge
I found that there are versions of Hyper-V.
Hyper-V on Windows Server 2016
and Microsoft Hyper-V Server 2016
by what cases, I should select Microsoft Hyper-V Server 2016 to install? blade server? and create VM? am I correct?
by what cases, I should select Hyper-V on Windows Server 2016 ?
further, inside VM in blade server? do I need to install Hyper-V for replication, failover to configure? etc?
thank you very much!
delaynomore
delaynomore.
Answers
-
Hi,
Hyper-V server standalone —> Hyper-V Server is a dedicated stand-alone product that contains the hypervisor, Windows Server driver model, virtualization capabilities, and supporting components such as failover clustering, but does
not contain the robust set of features and roles as the Windows Server operating system. When you install Hyper-V standalone server you will need to administer it remotelly because there is no GUI. It looks like server core .People usually install this to
reduce reboots and attack surface.Second thing why people choose hyper-v stand alone is because of licensing. It is free but you will need to have license for VMs that you will be running on top of the hypervisor.
Hyper-V role on WIndows server —> when you install it you will get all of the cool roles and features that you can install on the host machine but when it comes right down to it we generally keep the hosts as clean as possible from running
additional workloads outside of Hyper-V.Second thing is licensing. When you install full gui server and enable hyper-v role you will be able to license 2 VM which will run on that host with Standard and unlimited with Datacenter. What I mean by that is that you will be able to use host license
to license VMsREPLICATION —>You don’t need to install nothing inside VM itself. You will need to enable replication on Hyper-V host first.
Please take a look on my site how to enable replcation (https://nedimmehic.org/2017/01/29/hyper-v-2016-replication/)
————————————————————————————————————
If you found this post helpful, please give it a «Helpful» vote.
Please remember to mark the replies as answers if they help.-
Edited by
Saturday, March 4, 2017 8:12 AM
-
Marked as answer by
delaynomore
Saturday, March 4, 2017 9:34 AM
-
Edited by
-
A major consideration in making the selection between Hyper-V Server and Windows Server with the Hyper-V role is your comfort level with managing Hyper-V Server. It is designed to be managed remotely. There is no GUI on Hyper-V Server.
There is a command-line interface. So you need to be comfortable with managing and troubleshooting systems remotely or via command line. If you are not comfortable with this, you are better served by installing Windows Server with the desktop option.
The capabilities of Hyper-V are exactly the same, but management is different.
. : | : . : | : . tim
-
Marked as answer by
delaynomore
Monday, March 6, 2017 1:43 AM
-
Marked as answer by
The Windows Server 2016 product family has been released, and with it, the free Hyper-V Server 2016 product. Now that we’ve had some time for the dust to settle and many thousands and thousands of words written about the new features, I’d like to take you through a more direct introduction to Microsoft’s free standalone hypervisor offering. This post is not about those new features; it’s about getting you up and running so you can start playing with them.
What is Distinct About “Hyper-V Server” as Opposed to Just “Hyper-V”?
The terms “Hyper-V” and “Hyper-V Server” are often treated interchangeably, which leads to some confusion. Microsoft has come up with some very creative code names for pre-release products, but any time you see a released Microsoft product with an interesting name, they either bought it from someone else or the gaming division came up with it. Let’s take a moment to distinguish these two terms.
- Hyper-V: Hyper-V is the name for Microsoft’s type 1 hypervisor. You can distinguish it from everything else by one simple fact: Hyper-V does not ship on its own. It is always included in some other product. Its most applicable classification would be “feature”. “Component” might also work. You can find Hyper-V in:
- Windows 10
- Windows Server
- Hyper-V Server
- Hyper-V Server: Hyper-V Server is a stand-alone product directly downloadable from Microsoft. Apparently, its proper name is now “Microsoft Hyper-V Server” and not just “Hyper-V Server”. I’m willing to bet that doesn’t catch on. You are not required to make any purchases in order to use this product. Unless something changes from previous version, you’ll be allowed to freely upgrade to the next version as well. The Hyper-V Server product includes the Hyper-V feature.
What is Distinct About “Hyper-V Server” as Opposed to “Windows Server”?
Hyper-V Server and Windows Server are both complete products in their own right, but it wouldn’t be completely out of line to think of Hyper-V Server as “Windows Server Lite”. Everything in Hyper-V Server can be found in Windows Server, but the opposite is not true. Almost every single role and feature available in Hyper-V Server can be listed on a single screen.
Notable role and feature differences in Hyper-V Server:
- Text-based shell. You can use CMD.EXE and PowerShell.
- Graphical capability is nearly non-existent. It’s difficult to say precisely what will and what will not work, but here are some guidelines:
- The Explorer renderer is not present. This means that there is no Windows Explorer, no Internet Explorer, and no way to operate Microsoft Management Console (MMC) snap-ins, among other things.
- The Windows Presentation Framework components (WPF) are not present. No applications based on WPF will operate, which means Windows Store applications and a great many other modern apps.
- The Windows Forms components (often abbreviated as WinForms) are present. That means that some WinForms-based applications will operate, but many depend upon components of Windows/Windows Server that are not present. Things that you can expect to work:
- regedit.exe
- notepad.exe
- Installer packages based on the Windows Installer API
- Only the most basic storage components are present. With the exception of Storage Spaces Direct, which requires Windows Server 2016 Datacenter Edition, none of the advanced storage components are supported on a system that is running Hyper-V anyway. However, some people might want to take the risk of running deduplication locally with Hyper-V. You must use Windows Server to do so.
- Routing and Remote Access Services are not present in Hyper-V Server. If this functionality is desired, it should be run on another physical server or from within a guest anyway.
- IIS is not available.
- Failover Clustering and the Remote Desktop Virtualization Host features are both available.
One strong distinction is that Windows Server has a “Core” mode that is commonly confused with Hyper-V Server. Despite many confusing labels that you’ll find in a number of places, Hyper-V Server is just Hyper-V Server. “Core” is a term that belongs to Windows Server. It is a GUI-less mode that is otherwise identical. It has the same offerings of roles and features as Windows Server (except those that are specifically dependent upon the GUI, of course).
While this article is only going to briefly touch on the concept of licensing, remember that Microsoft’s licensing approach for Hyper-V’s management operating system is that it can only provide services that are directly related to Hyper-V. Any other role, feature, or application causes forfeiture of a guest Windows Server license. If you use Hyper-V Server and its available roles and features, there are only a handful of simple ways to violate that license. Basically, don’t try to turn your Hyper-V Server into a file server and you’ll almost certainly be all right.
How is Hyper-V Server Licensed?
Every Microsoft product that I’ve ever seen has an attached license of some kind, and Hyper-V Server is no exception. What makes it stand out among Microsoft’s line-up of server products is that they don’t ask you to pay for it. You can install and use Hyper-V Server in any environment at no charge. The fact that you download it from TechNet’s “Evaluation Center” and that the web page has “evaluation” in its title is just misleading. It’s a fully packaged product with no expiration, free for the taking.
That should be enough to leave this section and move on to the fun technical stuff, but I do need to address a myth that I still see in circulation. You may have been told that, if you run Windows Server as a guest operating system, you get a licensing benefit by installing Windows Server on the hardware instead of Hyper-V Server on the hardware. If you’ve been told that, you’ve been lied to (“lie” is kind of a strong word, admittedly). Any operating system that you use as a Hyper-V guest must be properly licensed. That has nothing to do with Hyper-V, though. Any operating system that you use as an ESXi guest must be properly licensed. Same with Xen. And XenServer. And VirtualBox. And KVM. And RHV. And whatever else. Use whatever management operating system makes you happy — licensing for the guests is a separate issue.
The very first thing I noticed about Hyper-V Server is that even the graphical logon UI is gone. Hyper-V Server 2012 R2 and prior all used the same logon screen as their Windows Server counterpart. Hyper-V Server now greets you like this:
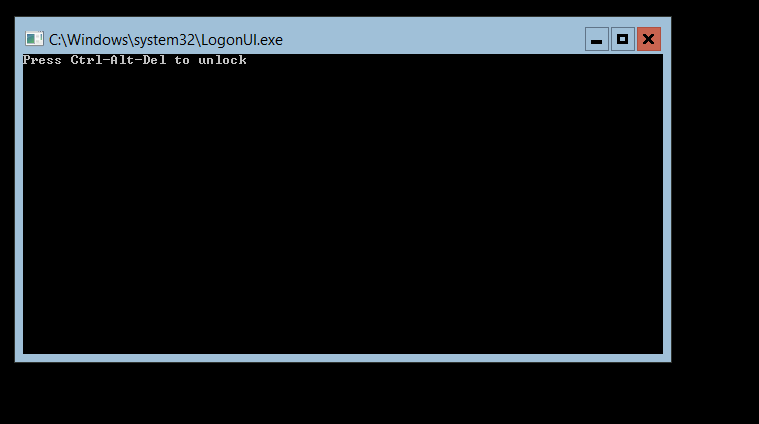
Hyper-V Server 2016 Logon
Hyper-V Server 2016’s entire login process is text-based.
After logging in, things look similar to previous versions. You’ll have two cmd.exe windows, one with sconfig.cmd and another waiting for input in your profile directory.
Meet the New SCONFIG, Same as the Old SCONFIG. Mostly
If you’ve never used SCONFIG.CMD before, it’s the text-based menu driven system that many use to configure Windows Server Core and Hyper-V Server. This tool is very straightforward to use and I’m not going to spend much time on it in this article. It can help you to configure:
- Computer Name and domain or workgroup membership
- Local administrator accounts
- Remote management firewall rules
- Windows Update
- Inbound Remote Desktop connections
- IPv4 and IPv6 network settings
- Date and time, including the time zone
- Telemetry
- Logging off, shutting down, and restarting the system
SCONFIG.CMD has not changed much from earlier versions:
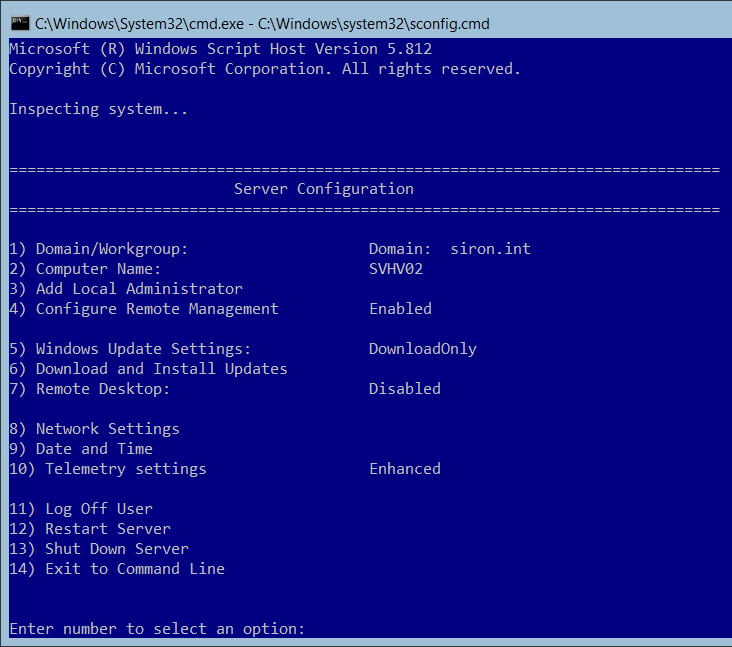
Hyper-V Server 2016 sconfig Root Screen
The “new” entry here is 10) Telemetry settings. “Telemetry” is basically the current incarnation of the “Customer Experience Improvement Program”, except that it doesn’t have a “no, thank you” mode. Using this interface, you can only select how much data is transmitted to Microsoft, not disable it entirely. Selecting option 10 shows you the following screen:
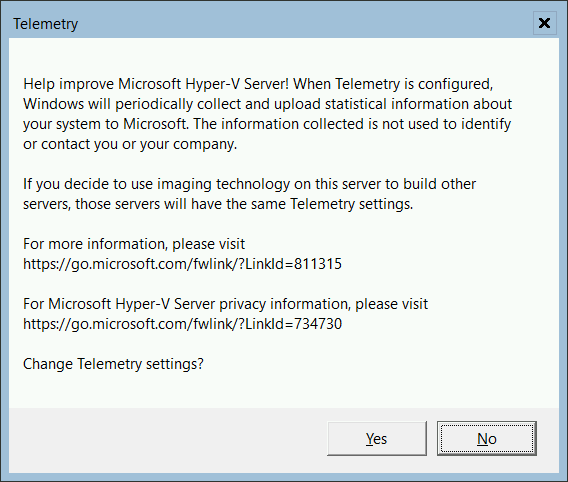
Telemetry Information Dialog
The nice thing about this dialog is that it proves what I was telling you earlier: WinForms works in Hyper-V Server 2016. That’s probably not what you were thinking about when you saw this message, though. In a move that’s certain to have the conspiracy theorist spheres abuzz, the “For more information” link just drops you to the Microsoft home page. The privacy link works, though. Despite whatever oversight caused that broken link to be deployed into production products, Microsoft is not trying to hide information about the telemetry service from you. TechNet has an extremely thorough article on what it is, what it does, and how to configure it. For even more information on what’s sending data to Microsoft and how to get rid of them, TechNet has another thorough article. I haven’t found anything by any credible source that makes me worry about what Microsoft is collecting, but if it bothers you, a bit of research will show you how to disable Telemetry. All I’m going to leave you with on this topic is that all of the people that ran Windows Media Center disabled CEIP, and now we don’t have Windows Media Center anymore.
Configuring Hyper-V Server 2016
I cannot stress enough that you should find a way to automate your system configuration. If you’re in a small shop on a budget, try something like the script that I created. Effort in automation is never wasted.
That said, here are some functions to help you configure a new Hyper-V Server 2016 system. I am going to specifically avoid those things that are best done in SCONFIG.CMD, so go through that utility first.
Most of the things I’m going to show you are done in PowerShell. All you need to do is use the empty command prompt window and type powershell and press [Enter]. There’s no UAC in Hyper-V Server, so don’t worry about being “elevated”. You just need to have logged on as a local administrator (which includes domain accounts that have been placed into the local administrator group). I have a starter course article on PowerShell whose concepts you should be familiar with.
Working with Network Adapters
SCONFIG can set an IP address and DNS information for an adapter, but that’s the extent of its powers. NETSH is still around and is perfectly acceptable if you remember how to use it. PowerShell is the current game, though.
List all network adapters:
Get-NetAdapter
If you’ve got hardware that supports Consistent Device Naming, then you’ll get descriptive names for your adapters. Personally, I haven’t got that good hardware, and I can’t make much sense out of “Ethernet” and “Ethernet 1”. What I do is turn off ports on my physical switch until I’ve identified each of the adapters (Get-NetAdapter will show that the port is unplugged), then I use a text file to match the MAC addresses of each adapter, the name that I give it, and the IP addressing information for it:
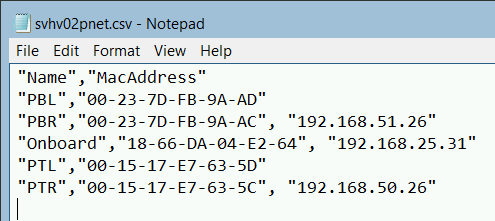
IP Info Sample
I could very easily just throw all of that information into my DHCP system with a very long lease and manage it all with IPAM, but that takes all the fun out of things (actually, it doesn’t). One thing that I do is rename all of my adapters:
Rename-NetAdapter 'Ethernet 1' 'PBR'
SCONFIG will set IPs, or you can use New-NetIPAddress.
Since I have multiple adapters and I don’t want any of my other systems to accidentally try to connect to one of my storage IPs, I disable DNS registration on all adapters except the primary:
Set-DnsClient -InterfaceAlias 'PBR', 'PTR', 'PBL', 'PTL' -RegisterThisConnectionsAddress $false
Microsoft is now allowing us to get rid of the dreadful SMB 1.0/CIFS protocol. If you have any need of that on Hyper-V Server, something is wrong. Let’s kill it immediately:
Remove-WindowsFeature FS-SMB1
Don’t forget about your virtual switch! New-VMSwitch will get you there. The -EnableEmbeddedTeaming switch will allow you to use the new switch-embedded teaming feature to combine your adapters into a team (switch independent mode only) and create a Hyper-V virtual switch on them in one cmdlet. For me, that’s:
New-VMSwitch -Name vSwitch -AllowManagementOS $false -NetAdapterName PTL, PBL -EnableEmbeddedTeaming $true -MinimumBandwidthMode Weight
For the record, the New-VMSwitch documentation STILL incorrectly says that the default QoS mode is “Weight”. After three versions of the documentation saying that, I’m starting to think that it’s just a joke.
Techniques for Installing Drivers on Windows Server 2016
Driver installation can sometimes be a chore, but you can figure out most problems if you pause for a bit to think about it. I have a Dell T20, and almost all of their installer packages require WPF if you use defaults. But, with a bit of effort, you can get most of them to work without a lot of drama. Getting the drivers to the server might be a bit of a challenge. I typically use a graphical station to download the files from the manufacturer and then place them on a common share. You can also burn them to an ISO or place them on a USB device.
If you have an .EXE from the manufacturer, the very first thing I would do is just try to run it and see if it works. If it doesn’t, the next thing that I do is try running the installer with the /? switch to see if it has alternatives, such as extraction or silent installation methods. If that doesn’t work, I go looking for raw driver files that aren’t part of an installer. So far, I believe that I’ve found solutions for everything.
Let’s look at an example. I have a Dell T20. The first thing that I needed to do was find drivers for that model. Want to do it by service tag but don’t want to digging? Ask PowerShell:
gwmi Win32_BIOS
The “SerialNumber” field has your service tag.
I’ve got my files now, and I want to install the Intel chipset drivers, which are packaged in a file named “Chipset_Driver_TTVVT_WN_9.4.0.1027_A03.EXE”. When I ran that file directly, I got an error about missing Windows components. So, that’s not going to work. But, I think ran it with the /? switch and discovered that it has a few options, like silent install. I don’t like silent installs much, so I went for the extraction technique first:
md C:SourceChipset
Chipset_Driver_TTVVT_WN_9.4.0.1027_A03.EXE /s /e=C:SourceChipset
That’s all it took, and I had extracted the Intel contents of the Dell driver package. Unlike Dell, Intel relies on fairly basic Windows Installer packages that will work just about anywhere:
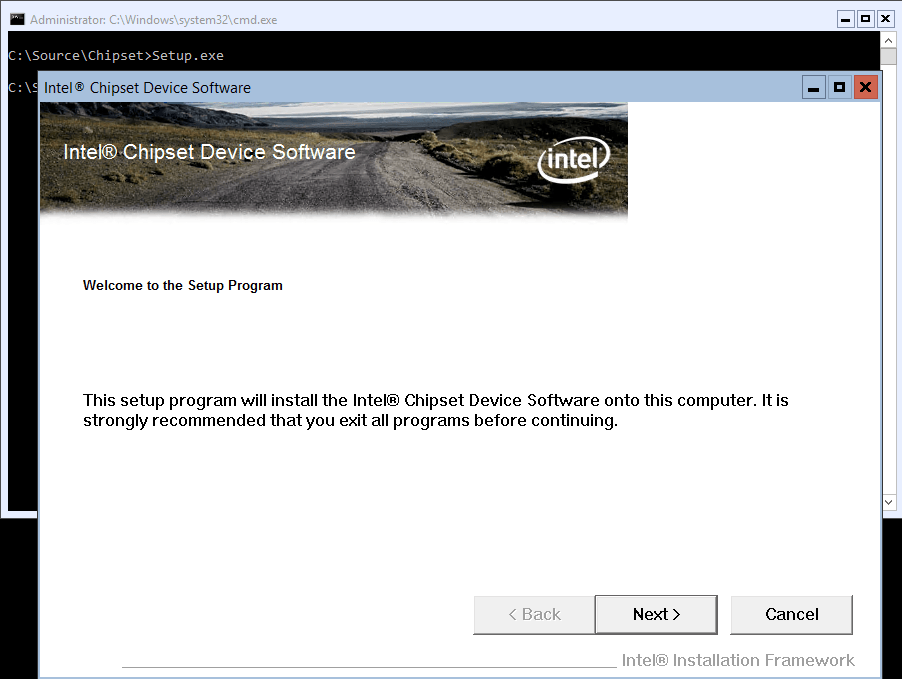
Intel Installer
The NIC drivers were a bit more interesting. I extended the T20 with some extra Intel NICs that are older, so the drivers from Dell aren’t going to cover them. After some digging, I determined that my best option was to just use the Intel CD, because it will install drivers for all of my adapters in one shot. The problem? They’re in a ZIP file. No problem for PowerShell in Hyper-V Server 2016:
Expand-Archive -Path C:SourceIntelSoftware21_1_cd.zip -DestinationPath C:SourceNetwork
Another problem easily solved:
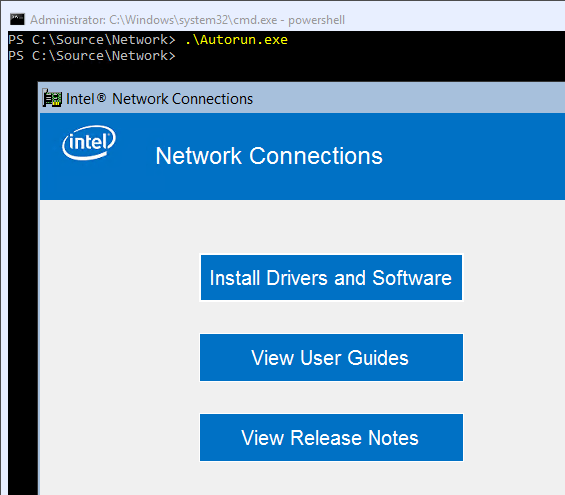
Intel Network Installer in Hyper-V Server 2016
The final place that you might find yourself is with the need to install from an .inf file because you can’t find a suitable installer. I did not have that problem with the T20 so I haven’t got any direct examples. However, the basic format is very simple (and you can do it from the standard command line instead of PowerShell, if you prefer):
pnputil -i -a <driverfile>.inf
What’s nice about PNPUTIL is that it works in a remote PowerShell session. I have installed updated network driver files that way. I lost connection, of course, but it then reconnected once the drivers were installed.
Device Manager does not work on Hyper-V Server 2016 or Windows Server 2016 Core. You can list installed drivers with pnputil -e .
Managing Hyper-V Server 2016
A very common complaint is that, out-of-the-box, Hyper-V Server is difficult to manage. There are two ways to look at this. One is that the complaint is correct. There are other freely-available hypervisors that ship with basic graphical interfaces, and if that’s your metric for “easy to manage”, then Hyper-V Server is not easy to manage.
The other way to look at it is that the complaint misses the point. I’ve said it before and I’ll say it again: Microsoft does not understand the small business very well and they did not build Hyper-V Server for the small business. In their minds, Hyper-V Server is just one cog in a larger cloud infrastructure. You deploy it with automated tools, you configure it with pre-defined scripts and automated systems, and you manage it from a remote system. It is entirely possible to have fully-functional Hyper-V Server systems that operate perfectly from cradle to grave without any human ever logging on locally. Why would anyone build a user-friendly interface for something like that?
But, I imagine that if you fielded the complaint, you haven’t got the budget or the expertise for that sort of environment. Just because Hyper-V Server is a free tool does not mean that it is intended for people that don’t have much money to spend. Smaller businesses are expected to use the graphical version of Windows Server because they have relaxed density requirements so GUI overhead is trivial, they are probably using internal storage so a larger disk footprint is trivial, and their security concerns are probably greater elsewhere. Windows Server is Hyper-V’s graphical interface. The differentiation is that its management environment is not free, not that it isn’t easy to use. Usability issues with the graphical tools are a topic for another article (or ten).
So, if you really want to manage Hyper-V Server locally, then you need to be prepared to do sysops like a professional. That means learning to navigate the native command shell and PowerShell. If you have these skills, then Hyper-V Server is not difficult to manage. I don’t think that having these skills is too much to ask, either. I’m still baffled by the existence of people that say they want to be systems administrators but don’t want to learn these things. That, to me, is like a surgeon that doesn’t want to see blood or a structural engineer that doesn’t want to do math. These attitudes are a sign that you selected the wrong career field.
Of course, there’s no requirement to manage Hyper-V Server locally. I am a big fan of using a single management computer that has all of the necessary tools installed. Here’s a Windows Server 2016 connected to and managing my Hyper-V Server 2016 installation:
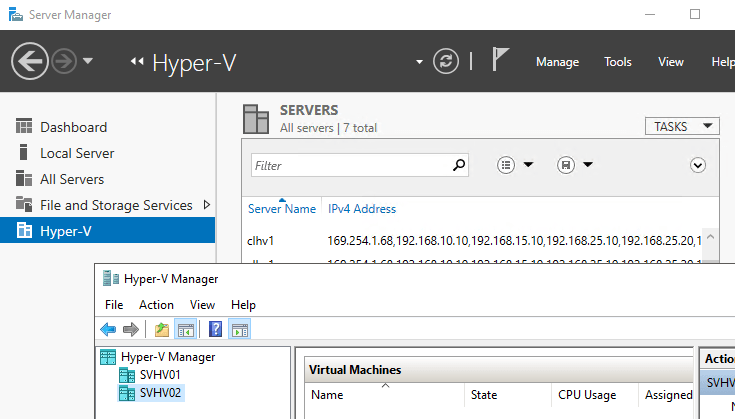
Remote Connections to Hyper-V Server 2016
I don’t even do PowerShell locally on Hyper-V Server. Hyper-V Server is intended to run “headless”, so that should be your goal.
Get Started!
That’s enough to create a fully functional Hyper-V Server deployment that’s ready to start running virtual machines. New-VM is one way to create them, but you’ll probably like your results better if you operate from a remote system with Hyper-V Manager. This article can help you get that connection made. Its contents aren’t for 2016 specifically, but 2016 is actually a bit easier than those older versions so you shouldn’t have any troubles.
Photo left to right: Fellow MVPs, Clint Wyckoff, Dave Kawula, Mr. Hyper-V (Ben Armstrong, Principal Program Manager Lead), Didier Van Hoye, Charbel Nemnom, and Andy Syrewicze.
/- Updated September 27, 2016 -/
Live from Microsoft Ignite 2016, Atlanta – Georgia.
In October 2014, Microsoft released the first Windows Server Technical Preview, on May 5th, 2015 Microsoft released the second Windows Server Technical Preview 2 which the final official name will be Windows Server 2016, and on August 19th they released Technical Preview 3, on November 19th Microsoft released Technical Preview 4, and on April 27th Microsoft released Windows Server 2016 Technical Preview 5.
At Microsoft Ignite 2016, the Windows Server team announced that they have released the Windows Server 2016 and System Center 2016 to the public. This is the Evaluation version of the Windows Server 2016 edition. In mid-October 2016, Windows Server 2016 will be generally available (GA). GA is the RTM version of Windows Server 2016 including additional updates that are expected to be available at GA.
This post is a detailed overview of all Windows Server 216 Hyper-V features that will be available at GA!
The Five Biggest Sports Clubs In Th…
Please enable JavaScript
Put your seat belt and let’s dive into the new Hyper-V features in Windows Server 2016 and later.
Table of Contents
Windows 10 includes three big new features for Hyper-V: support for nested virtualization, creating backward compatible virtual machines directly on Windows 10, and support for virtual Trusted Platform Module (vTPM).
On Windows 10 and similarly, on Windows Server 2016, you can create backward compatible virtual machines that can be imported into Windows Server 2012 R2 or Windows 8.1, so if you still have an earlier version of Hyper-V running in your environment, you can move VMs between the two environments easily. To do that, you need to use the following PowerShell command:
New-VM -Name DEMO-VM -Version 5.0
If you do not specify the version, you will get the highest version of Hyper-V that you are running. As of this writing, the current default version is 8.0.
To use Virtual TPM in a VM, you’ll first need to enable Isolated User Mode on your computer. To do that, go to the Control Panel, Program, and Features, and Turn Windows Features On or Off. Check Isolated User Mode, click Ok, and then restart when prompted.
The Virtual TPM is included as part of Gen2 Virtual Machines because the virtual TPM isn’t emulated in Software, you need a physical TPM to be installed in the computer, so if your computer doesn’t have a TPM or if TPM is disabled in the BIOS, then you will be missing the TPM feature in your VM settings under security.
However, in Windows Server 2016 Hyper-V and later, you can use TPM-based or Active Directory-based Attestation which is covered in the Shielded Virtual Machines section.

Microsoft introduced Credential Guard in Wind0ws 1o Enterprise Edition to make the most secure desktop Operating System that you can be using, Credential Guard uses virtualization-based security to isolate secrets so that only privileged system software can access them. Unauthorized access to these secrets can lead to credential theft attacks, such as Pass-the-Hash or Pass-The-Ticket.
To do that, you need to have all the requirements discussed in the section beside the Virtualization Based Security in Group Policy, open local group policy by running gpedit.msc.
In the Group Policy Editor, go to Computer Configuration, Administrative Templates, System, Device Guard. Double-click Turn On Virtualization Based Security. Set the policy to Enabled, Click Ok, and then reboot again.

You can read all about this technology here.
Many of the features in Windows Server 2016 Hyper-V listed below will be available in Windows 10 as well.
Hyper-V on Nano Server
New Windows Server installation option. It’s a Cloud-first refactoring essential for infrastructure and application OS requirements. The Server roles and features enabled for Nano Server targeting at the moment will be Hyper-V clustering, networking, and storage which are the three key Infrastructure as a Service (IaaS) scenarios.
Windows Server and Hyper-V Containers
Windows Server Containers is a new approach to building, shipping, deploying, and instantiating applications. Hyper-V Containers will be coming out very soon.
Virtual Machine Protection
Trust is the biggest blocker to cloud computing adaption let’s be honest. All the awesome technology that Microsoft is doing in Azure, is enabled through Hyper-V and the cloud platform. The number one thing that is holding the customer back is the issue of trust, you want to know that your data is safe, you want to know that no one else is accessing it, and you want to know that it hasn’t been fiddled with, it hasn’t been compromised. the customers want to know that their data is secure whatsoever. You are the only person who has access to that data!
So Microsoft in the next release in Windows Server they are doing a lot of work in the Hyper-V core platform to start providing these guarantees. Even if you trust or don’t trust your IT administrator, no one can access your data!
What is the technology behind Virtual Machine Protection: A virtual TPM (Trusted Platform Module) can be injected into a VM. Then you can enable BitLocker in the VM and protect your data from anyone outside of the VM. So you can now have a virtual machine running on someone’s else Hyper-V server or on someone’s else infrastructure and you can know that you are the only one who has access to that data. However, on the Hardware side, you need TPM Version 2.0 to be installed on the physical host. This is really an exciting technology!
Linux Secure Boot
Secure boot support for Linux virtual machines works now with Ubuntu 14.04 or later, and SUSE Linux Enterprise Server 12. The secure boot is an amazing feature that is so underrated in the world today. If you look at security issues at large, one of the biggest challenges out there is malware and rootkits. And one of the challenges is if you get compromised kernel mode code on a system there is pretty much nothing you can do to bring that system back, so at that stage your only option is to format and reinstall the system.
What secure boot does is it allows the hardware to verify that the kernel mode code is uncompromised. Microsoft in Windows Server 2012 R2 introduced Generation 2 virtual machines that support secure boot for Windows guest operating system so you could have this functionality and know that your workloads were secure. So now we have a secure boot for Linux Virtual machines as well.
In order to enable secure boot for Linux VMs, you need to change the secure boot Template for the virtual machine, you can do this with the PowerShell command:
Set-VMFirmware "VMName" –SecureBootTemplate MicrosoftUEFICertificateAuthorityShielded Virtual Machines
Shielded Virtual Machines can only run in fabrics that are designated as owners of that virtual machine. Shielded Virtual Machines will need to be encrypted (by BitLocker or other means) in order to ensure that only the designated owners can run this virtual machine. You can convert a running virtual machine into a Shielded Virtual Machines.
There are two attestation models for Hyper-V 2016: Hardware Trusted Attestation and Admin-Trusted Attestation. The former is the most secure model which relies on new hardware, such as Trusted Platform Module (TPM v2.0) chips in the hosts, whereas the latter simply requires that hosts are placed in a particular group in Active Directory. Admin-Trusted Attestation is appropriate when you trust your AD and fabric administrators.
If a local user tries to access the VM’s console, the user will receive the following error message!

Key Storage Drive for Gen 1 VMs
In Windows Server 2016 Hyper-V, Microsoft introduced a new feature called Key Storage Drive (KSD) for Generation 1 virtual machines only. KSD requires a special IDE device to be attached for each Gen1 VM that you want to protect. The default drive size is 42MB, so you can use different file systems (i.e. exFAT, FAT32, or NTFS). The content of the key storage drive is first compressed, encrypted, and then stored as part of the virtual machine Runtime State.
Key Storage Drive allows BitLocker encryption for Generation 1 VMs (Windows and Linux) by leveraging the same core guarded fabric infrastructure. The virtual machines with KSD are encrypted similar to Shielded VMs although, however, the key storage drive Gen1 VMs don’t have the same security assurances as Gen2 shielded VMs (No secure boot, no measurement on the VM), Microsoft is allowing using BitLocker to encrypt the disk within the guest.
For more information on how to enable Key Storage Drive, please refer to the following step-by-step guide.
Guest Virtual Secure Mode
As discussed at the beginning of this post, Credentials Guard and Device Guard deliver unparalleled levels of OS security for the host. Now you can benefit from these technologies which are enabled by Hyper-V virtualization and are available inside virtual machines as well.
Distributed Storage QoS
Leveraging Scale-Out File Server to allow you to:
Define IOPs reserves for important virtual hard disk
Define a IOPs reserve and limit that is shared by a group of virtual machines / virtual hard disks
You can find the complete details here
Host Resource Protection
Dynamically identify virtual machines that are not “playing well” and reduce their resource allocation. So what Microsoft actually did is to build heuristics in which they’ve identified patterns of access that should never happen if someone is just running standard Windows applications or Linux applications.
Host Resource Protection can dynamically detect that malicious VM and they will throttle back the resource on that evil virtual machine to reduce its impact on the system until its behavior returns to normal.
This is something that you can enable or disable for each VM on the Hyper-V server, it’s disabled by default on Windows Server 2016. You can enable it by running the PowerShell command:
Set-VMProcessor "VMName" -EnableHostResourceProtection $trueStorage and Cluster Resiliency
There are two features in Windows Server Technical Preview 2 to handle transitory failures and be more resilient:
Virtual Machine Storage Resiliency
Storage fabric outage no longer means that virtual machines crash.
Virtual machines pause and resume automatically in response to storage fabric problems.
Virtual Machine Cluster Resiliency
VMs continue to run even when a node falls out of cluster membership
Resiliency to transient failures
Repeat offenders are “quarantined”
In Windows Server 2012 R2, we had a feature in the Scale-Out File Server called resilient file handles, back then resilient file handles give us protection against really short storage outages. If you have a glitch in the system that causes storage to go out for 30 or 40 seconds, resilient file handles will have you covered. The activity will be buffered up and wait for the storage to come back, and then reconnect.
The problem is if that storage outage goes over 60 seconds! In Windows Server 2021 R2 if we have a storage outage that goes over 60 seconds, resilient file handles will go up to 60 seconds and just return I/O failure back to the guest. The result is that the VM just crashes!
So with the Storage Resiliency feature now when the resilient file handle expires and we get that storage failure, rather than returning the I/O failure to the guest, the virtual machine will be automatically paused, and put in a special state to indicate to you that like there’s a disk failure, the VM will be suspended to make sure it doesn’t crash. The VM will report Disk(s) encountered critical IO errors.
On the other hand, what does clustering do when you have a transitory failure in your network? In Windows Server 2012 R2 when Hyper-V Cluster see these transitory failures, the moment that clustering can’t talk to a node it assumes all the virtual machines are shot in the head and it starts failing them across to other nodes in the cluster. However, in Windows Server 2016 Microsoft is changing that, and all the behavior around that.
Now what will happen if you have a transient network failure, the cluster node will be put into an isolated state. The virtual machines will report as unmonitored, and then wait for 4 minutes by default to see if the node comes back naturally (This value is configurable, you can tune it to match your environment), and if it comes back in under four minutes, the cluster node will join back to the cluster and heal automatically.
But what if you have a cluster node that is having intermittent problems (The network is flapping, the node is going in and out of the cluster continuously), where if that happens, the cluster will detect that and say hey Mr. Node X, you went into an isolated state too many times. Then the cluster will mark that node as quarantined, and when it comes back all virtual machines will be live migrated off of it and no workload will be put on that cluster node until it looks like it’s healthy again.
Shared VHDX
Shared VHDX is a great feature that was introduced in Windows Server 2012 R2, it’s very easy to set up and do guest clustering. However, when you create a guest cluster with shared VHDX, you pretty much all the limitations of any other disk cluster with the exception it’s just using VHDX, but with guest clusters, you cannot do a host-level backup as you do with the physical clusters, you cannot do online resize for shared VHDX, you cannot do storage live migration for the shared VHDX, you cannot protect and replicate VMs with Hyper-V replica, so all these great features aren’t there.
In Windows Server 2016 Microsoft is working hard to start bringing all those capabilities back even when you are using shared VHDX.
There are three big things that have been introduced in Windows Server 2016 Hyper-V, the first one is allowing you to do host-based backup without any agent in the guest, so you can backup the guest clusters with shared VHDX, this is fantastic! The second one is you can online resize shared VHDX while the guest cluster is running…
Note: you can only expand a shared VHDX drive, but you cannot shrink it. The third one is the integration with Hyper-V Replica, so guest clusters can now have Shared VHDX protected by Hyper-V Replica for disaster recovery. In order for this to work, it requires to have Windows Server 2016 as a Hyper-V host and Windows Server 2016 as a guest OS.
As of this writing, the two limitations are, that you cannot do storage live migration for a VM with a shared VHD Set, and you cannot create a checkpoint.
The hot/add of shared VHDX was supported in Windows Server 2012 R2, however, in Windows Server 2016 a Shared Drive has its own category under the SCSI Controller when you Add a Shared virtual hard disk.

There is a new type of VHD file that Microsoft introduced called VHD Set (VHDS) and it’s necessary for some of the new shared VHDX functionality that we have. The Shared VHDX file still exists, so if you have existing guest clusters using the VHDX file you can continue to use those VHDX files for guest clusters.
However, you will not be able to do the online resize and the host-based backup. The good news is that Microsoft will provide tools to do a very quick and easy upgrade from a VHDX, to a VHDS file so you can take advantage of that.

Hyper-V Replica Hot Add/Remove
We love Hyper-V Replica, but the downside was if you want to hot add and remove disks to a replica virtual machine, then it gets all strange and then you have to redo the initial old Sync and send all the data over and it’s a real pain.
So the medicine is built-in Windows Server 2016 to take away that pain ![]()
When you add a new virtual hard disk to a virtual machine that is being replicated – it is automatically added to the no-replicated set. This set can be updated online with the following PowerShell command:
Set-VMReplication "VMName" –ReplicatedDisks (Get-VMHardDiskDrive "VMName")You can find the complete details here
Runtime Resize of Memory
Dynamic memory is great, but more can be done right, in Windows Server 2016 and Windows 10 guests, you can now increase and decrease the memory assigned to virtual machines while they are running. Please note that the VM cannot be decreased lower than current demand, or increased higher than physical system memory.
You can find the complete details here
Hot Add/Remove Network Adapters
This is only supported for Generation 2 VMs.
You can find the complete details here
Rolling Cluster Upgrade
Seamless Zero Downtime Rolling Clustering Upgrades, you can take a cluster at any size running 2012 R2 and you can go through one node at a time upgrade to Windows Server 2016, and then live migrate VMs around with no new hardware with no downtime, and at any stage, you can roll back, because we support live migration in both directions, you can actually even entirely upgrade a cluster to Windows Server 2016, and then you can roll it back to 2012 R2, and your virtual machines will still running the whole time, but the most important without upgrading the Cluster Functional Level or the VM version.
The process any size cluster 3 nodes, pick a node, you want to evict that node from the cluster, then format, reinstall Windows Server 2016, join it to the cluster, and rinse and repeat.

New VM Upgrade Process
In the previous versions of Hyper-V, whenever you upgraded your host to a new release, the moment Hyper-V sees your virtual machines, it will be upgraded automatically behind the scenes.
However, this has been changed in Windows Server 2016, Hyper-V will not automatically upgrade your virtual machines. The upgrade of a virtual machine is a manual operation that is separate from upgrading the host. This gives you the flexibility to move individual virtual machines back to earlier versions until they have been manually upgraded. This is what is called the point of no return.
Version 5.0 is the configuration version of Windows Server 2012 R2. Version 2.1a was for Windows Server 2008 R2 SP1. The configuration version was always there for internal usage based on the functionality and not based on the release, and it was not displayed to users. In Windows Server 2016 the version is 8.0.
The process to upgrade a virtual machine version requires the shutdown of the VM, and doing a manual upgrade. This is a one-way process so you can either do this through PowerShell or through the UI and in the UI you can see we have got this Upgrade Configuration Version.

To upgrade the VM Configuration File through PowerShell, you need to run the following cmdlet from an elevated Windows PowerShell:
Update-VMVersion "VMName"So why you would upgrade and why would you keep the same? Well, obviously you need to upgrade to get all the new features and functionality. You are only going to get those new features if you are running an 8.0 virtual machine.
On the flip side, if you keep a virtual machine at 5.0, we keep everything compatible with Windows Server 2012 R2. We keep the configuration compatible, we keep the safe state compatible, and we keep the checkpoints compatible.
So even if you are not doing a rolling cluster upgrade, if you just have an environment where you have some 2012 R2 servers and some Windows Server 2016 servers and you want to move virtual machines between those from time to time, then just keep it at version 5.0, and you can always freely move those virtual machines back and forth.
Production Checkpoints
Production checkpoint delivers the same Checkpoint experience that you had in Windows Server 2012 R2 – but is now fully supported for Production Environments. VSS is used instead of Saved State to create checkpoints. Restoring a checkpoint is just like restoring a system backup.

You can find the complete details here
PowerShell Direct
You can now script PowerShell in the Guest OS directly from the Host OS. This is just awesome ![]()
No need to configure PowerShell Remoting, or even have network connectivity, but you still, need to have guest credentials. You can completely configure a Guest OS directly from the host with no network access.
To connect and inject PowerShell scripts into the guest OS without network access, you need to run the following cmdlet from an elevated Windows PowerShell on the host:
$userPassword = ConvertTo-SecureString -String "Password" -AsPlainText -Force
$userCredential = New-Object -TypeName System.Management.Automation.PSCredential -ArgumentList "ContosoAdministrator", $userPassword

Invoke-Command -VMName VM01, VM02, VM03 -Credential $userCredential -ScriptBlock {
<RUN YOUR SCRIPT HERE>
}
Starting with Windows 10 and Windows Server 2016 Build#14280 or later… The Hyper-V team added new functionality into PowerShell Direct. You can now move data between the virtual machine and the Hyper-V host with persistent PowerShell Direct sessions!
The Hyper-V team also brought Just Enough Administration (JEA) supports into PowerShell Direct. The reason behind this additional capability is to bring PowerShell Direct into Cloud environments, traditionally if you want to use PowerShell Direct, you need to have valid credentials both on the host and the virtual machine, so a hoster or Service Provider cannot use PowerShell Direct to connect to the tenant virtual machine which they don’t have access to.
In Windows Server 2016, Microsoft enabled a new capability where a tenant can now choose to expose PowerShell Direct to their hoster using Just Enough Administration (JEA) platform.
ReFS Accelerated VHDX Operations
Take advantage of an intelligent Resilient File System (ReFS) for instant fixed VHDX disk creation and instant disk merge operations.
So in Windows Server 2016, if you create a ReFS volume and you use it to run your virtual machines on, you will get instant fix disk creation and instant disk merge on your virtual hard drives. This is amazingly powerful stuff!
Hyper-V Manager and PowerShell Improvements
Multiple improvements to make it easier to remotely manage and troubleshoot Hyper-V Servers:
Support for alternate credentials
Connecting via IP address
Connecting via WinRM

Cross-Version Management
You can manage Windows Server 2012 and Windows Server 2012 R2 hosts with Hyper-V Manager UI in Windows Server 2016 (Single Console). Hyper-V PowerShell in Windows 10 / Server 2016 and 2012 R2 module included in-box Version 1.1 and Version 2.0.
NAT Network
In Windows Server 2016 Technical Preview 5 and the latest Windows 10 build #14295 or later, Microsoft introduced a new feature called “NAT” network which can be integrated into the Hyper-V virtual switch in order to provide external/internet network access for virtual machines. For more information on how to enable this feature, please refer to the following step-by-step guide.
VM Groups
There are two different types of VM Groups:
- VM Collection Groups
- Management Collection Groups
VM collection groups are a logical collection of virtual machines. This type of group makes it possible to carry out tasks on specific VM groups, rather than having to carry them out on each individual VM separately.
Management collection groups are a logical collection of VM collection groups. With this type of group, you can nest VM collection groups as well. In other words, you can have a management collection group inside another management collection group. The main difference between VM collection groups and management collection groups is that management groups can contain both VM groups and other management groups as well.
The two main scenarios for which Microsoft developed VM groups are backups and VM replications. In some situations, because of distributed applications, virtual machines should be treated as a single unit instead of managing them individually. This is true in both backup and VM replica situations where you want to backup or replicates a multi-tier application.
The following new PowerShell cmdlets have been added to the Hyper-V module to facilitate VM Groups scripting:
Add-VMGroupMember
Get-VMGroup
New-VMGroup
Remove-VMGroup
Remove-VMGroupMember
Rename-VMGroup
For more information on how to use this feature, please refer to the following step-by-step guide.
VM Start Ordering
VM Start Ordering is a new feature introduced in Windows Server 2016 Technical Preview 5 Failover Clusters, which gives you more control over clustered virtual machines that are started or restarted first. This makes it much easier to start a virtual machine that provides services before virtual machines that use those services.
An example of a complex starting order is a multi-tier application and all its interdependencies on Domain Controller, SQL Server, IIS Server, Application Server, Load Balancer, etc… You need to define sets, place virtual machines in sets, and then specify dependencies. In order to do so, you need to use the following new PowerShell cmdlets to manage the VM Sets:
# Managing Group Set
New-ClusterGroupSet
Remove-ClusterGroupSet
Set-ClusterGroupSet
Get-ClusterGroupSet
Add-ClusterGroupToSet
Remove-ClusterGroupFromSet

# Managing Group Dependency
Add-ClusterGroupDependency
Get-ClusterGroupDependency
Remove-ClusterGroupDependency

# Managing Group Set Dependency
Add-ClusterGroupSetDependency
Get-ClusterGroupSetDependency
Remove-ClusterGroupSetDependency
For more information on how to use this feature, please refer to the following step-by-step guide.
Integration Services
In Windows 8.1 and Server 2012 R2, Virtual Machine Servicing for VM drivers (integration services) gets updated with each host release. This requires that the VM driver version matches the host and the drivers hipped with the Host Operating System.
However, in Windows Server 2016 the Integration Services Setup Disk is absolutely gone.
Because when your deployment gets bigger, it became increasingly more difficult to update the integration components by logging into the virtual machine, mounting a DVD opening the DVD installing the integration services, then checking if the integration services version on the host matches the guest, the entire process just became a hassle.


The days of matching integration services version to the host version are over, so what Microsoft has done in Windows Server 2016, Windows 10, and going forward is the integration services are actually available through Windows Update, they are set as a critical update, they apply to virtual machines running on the correct version of Hyper-V they just all handle it for you as long as you are getting updates inside your virtual machine, they are there, you can install them using WSUS or through normal Windows updates to keep your virtual machines up to date.
Evolving Hyper-V Backup
New architecture to improve reliability, scale, and performance.
Decoupling backing up virtual machines from backing up the underlying storage. No longer dependent on hardware snapshots for core backup functionality, but still able to take advantage of hardware capabilities when they are present.
Microsoft is building a change tracking into the platform called Resilient Change Tracking (RCT). What this means is that it’s no longer necessary for backup partners to develop kernel mode filters that run in the parent partition. This means you have less stuff installed in your parent partition, and increases the reliability of the system overall.
VM Configuration Changes
Microsoft in Windows Server technical preview they have introduced a new configuration file format for Virtual Machines which is designed to increase the efficiency of reading and writing virtual machine configuration data. It is also designed to reduce the potential for data corruption in the event of a storage failure.
The new configuration files use the .VMCX extension (Replaced the old .XML files) for virtual machine configuration data, and the .VMRS extension (Replaced the old .VSV/.BIN files) for VM runtime state data.

So we are moving away from the XML format to a binary format. Thus you cannot open and edit the XML file anymore. However, you should be able to do everything through PowerShell.
Hyper-V Cluster Management
Providing a single view of an entire Hyper-V cluster through WMI. You can manage an entire Hyper-V cluster like it were just one big Hyper-V Server.
So for example with Get-VM, if you actually point it to a single Hyper-V host you get all the virtual machines on that particular host, however, if you point it at your Hyper-V cluster, what’s going to do, it’s going to return all the virtual machines on that cluster, so you can take the output and pipe it into all various PowerShell commands, makes it a lot easier to start operating on a cluster of Hyper-V using PowerShell.
Hypervisor Power Management Improvements
Updated hypervisor power management model to support new modes of power management.
So now you can now Turn on Hyper-V on your Microsoft Surface Pro tablet and not worry about your battery uptime, the Connected Standby just works in Windows 10 and later on all devices that support connected standby mode.
Hyper-V Nested Virtualization
In May 2015 at the build conference, Microsoft announced that Windows Server 2016 will support Nested Virtualization so you could run Hyper-V Containers in Hyper-V virtual machines.
But the good news is that Windows 10 will support Nested Virtualization as well!
Microsoft just announced the release of build 10565 to Windows Insiders on the Fast ring. This build contains an early preview of nested virtualization.
In short, Nested virtualization exposes hardware virtualization support to guest virtual machines. This allows you to install Hyper-V in a guest virtual machine, and create more virtual machines “within” that underlying virtual machine (VMs in VMs!).
The primary motivation for nested virtualization is support for Hyper-V Containers in any cloud environment, and the second benefit is for lab and training scenarios.
Hyper-V Direct Device Assignment (DDA)
In Windows Server 2016 Hyper-V, you can allow NVMe/GPU devices to be assigned to guest VMs! Now Microsoft recommends that these VMs only be those that are under the control of the same administration team that manages the host and the guest.
Other types of devices may work when passed through to a guest VM. Many will work such as USB 3.0, RAID/SAS controllers, but none will be candidates for official support from Microsoft at the time of writing this post. Things might change in the future, so consider these devices to be in the “experimental” category.

Headless Virtual Machine
This feature gives you the ability to boot a VM without display devices which reduces the memory footprint of the virtual machines and simulates a true headless server. This is something that you can enable or disable for each VM on the Hyper-V server, it’s enabled by default, you can disable it by running the PowerShell command:
Disable-VMConsoleSupport -VMName <VMName> -VerboseThis will remove and disable the keyboard, video, and mouse for virtual machines.
Improved support for High DPI Devices
The Hyper-V team has made some strategic changes to address Hyper-V’s usability on High DPI systems. They have made Virtual Machine Connection (vmconnect.exe) completely DPI aware, they have worked to get new icons for all of the Hyper-V UI buttons as shown in the following screenshot.
So, all of which are available at all DPI points, and lastly they have changed the display when you connect to a virtual machine using enhanced or basic mode, so the virtual machine will get and match the DPI information from the host.

Windows Server 2016 Hyper-V scale limits
Based on the feedback throughout the Windows Server 2016 Technical Preview, Microsoft had numerous requests to push Hyper-V scalability to new heights to embrace interesting new scenarios around huge databases and machine learning.
With Windows Server 2016, Microsoft is delivering new industry-leading scalability to virtualize any and every workload without exception. Up to 24 TB of memory per physical server, up to 512 logical processors per physical server, up to 12 TB memory per VM, and up to 240 virtual processors per VM.
RemoteFX Improvements
Support for Generation 2 VMs including OpenGL 4.4 and OpenCL 1.1 API. Up to 1GB dedicated vRAM for the RemoteFX display device attached to a VM. Improved graphics compression performance using the new AVC444 mode as part of the Remote Desktop Protocol (RDP) and support for Windows Server 2016 personal VM.
Hyper-V Sockets
This new feature will deliver a platform for developers to build something great on. It extends the Windows Socket API and makes fast, efficient communication between the host and the guest easy and accessible.
I hope this article gave you enough details about the new features that will be available to you in Windows Server 2016 Hyper-V.
Until then… enjoy your day!
Cheers,
//Ch@rbel