Please disable your adblock and script blockers to view this page, and wait a few seconds.
| Ⅰ | This article along with all titles and tags are the original content of AppNee. All rights reserved. To repost or reproduce, you must add an explicit footnote along with the URL to this article! |
| Ⅱ | Any manual or automated whole-website collecting/crawling behaviors are strictly prohibited. |
| Ⅲ | Any resources shared on AppNee are limited to personal study and research only, any form of commercial behaviors are strictly prohibited. Otherwise, you may receive a variety of copyright complaints and have to deal with them by yourself. |
| Ⅳ | Before using (especially downloading) any resources shared by AppNee, please first go to read our F.A.Q. page more or less. Otherwise, please bear all the consequences by yourself. |
| This work is licensed under a Creative Commons Attribution-NonCommercial-ShareAlike 4.0 International License. |
The JetBrains (formerly IntelliJ) from Czech Republic has offered many excellent IDEs for various website and application developers. For example, the IntelliJ IDEA has been recognized as one of the best Java developing tools in the industry.
Here, of course, what AppNee concerns about is all the approaches that can effectively activate JetBrains/IntelliJ all products. Especially from IntelliJ IDEA 2016, as far as I know, the working activation/registration method is really few on the Internet. But since this post from AppNee, this will no longer be a headache problem. As you can see, this kind of post at AppNee will get our continuous updating and maintaining work.
// Supported Products //
| IDE | Intro |
| IntelliJ IDEA | The most intelligent Java IDE |
| PhpStorm | Lightning-smart PHP IDE |
| PyCharm | Python IDE for professional developers |
| RubyMine | The most intelligent Ruby IDE |
| WebStorm | The smartest JavaScript IDE |
| AppCode | Smart IDE for iOS/OS X development |
| CLion | A smart cross-platform IDE for C and C++ |
| DataGrip | Your Swiss Army knife for databases & SQL |
| Rider | A cross-platform C# IDE based on IntelliJ platform and ReSharper |
Products & Versions supported by license server (in theory):
- IntelliJ IDEA 7.0 or higher
- ReSharper 3.1 or higher
- ReSharper Cpp 1.0 or higher
- dotTrace 5.5 or higher
- dotMemory 4.0 or higher
- dotCover 1.0 or higher
- RubyMine 1.0 or higher
- PyCharm 1.0 or higher
- WebStorm 1.0 or higher
- PhpStorm 1.0 or higher
- AppCode 1.0 or higher
- CLion 1.0 or higher
Main products passed AppNee’s test:
- IntelliJ IDEA
- PhpStorm
- PyCharm
// Supported Languages //
- Java, Kotlin, Groovy, Scala
- Android
- Maven, Gradle, SBT
- Git, SVN, Mercurial, CVS
- Detecting Duplicates
- Perforce, TFS
- JavaScript, TypeScript
- Java EE, Spring, GWT, Vaadin, Play, Grails, Other Frameworks
- Database Tools, SQL
// Use Instructions //
for 2022.1.x (with License Agent by ja-netfilter, taking PhpStorm on Windows for example):
- Download and install the latest version of IntelliJ product from official site
- Copy “ja-netfilter-all folder” to “C:“
- Open the “xxx.vmoptions” file under path like “C:Program FilesJetBrainsPhpStorm 2022.1bin” with your notepad
- Add the following line to the end:
- -javaagent:C:ja-netfilter-allja-netfilter.jar=jetbrains
- Run program, select “License server“, enter “https://jetbra.in/”, and click ‘Activate‘
- If it shows you this error (License Server response has not passed data integrity check: Certificate used to sign the license is not signed by JetBrains root certificate, exit program, enter “C:ja-netfilter-allvmoptions“, open the corresponding “xxx.vmoptions” file, and add the same line to the end
- Repeat step 5
- Done
for 2020.1.x (with Agent):
- Download and install the latest version of IntelliJ product from official site
- Run program, select “Evaluate for free” at the “License Activation” window, and click ‘Evaluate‘
- Drag and drop the universal agent file “jetbrains-agent.zip” onto the “Welcome to xxx” window, and click ‘Restart‘ (this is to install it as a plugin, ignore any error)
- Wait a few seconds, select “Activation code“, click ‘Install for xxx‘, and click ‘Yes‘
- Done
for 2019.3.x-:
- Download and install the latest version of IntelliJ product from official site
- Download and copy the universal licensing agent file to the installation folder like “C:Program FilesJetBrains“
- Run program, select “Evaluate for free“, and click ‘Evaluate‘
- Enter “Help/Edit Custom VM Options…“
- Add strings like “-javaagent:/absolute/path/to/jetbrains-agent.jar” to the end, e.g.:
- for Windows: -javaagent:C:Program FilesJetBrainsjetbrains-agent.jar
- Restart program
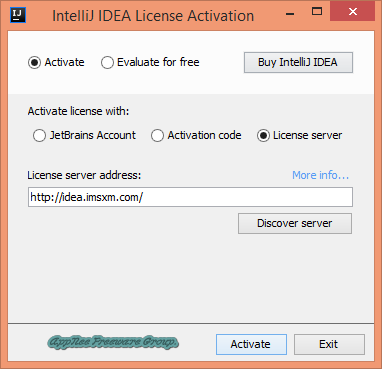
- Enter “Help/Register…“
- Select “License server“
- Input “http://jetbrains-license-server” as license server address (or just click ‘Discover Server‘ to fill automatically)
- Click ‘Activate‘
- Done
for 2018.x.x ~ 2019.1.x:
- Method I – use hosts and activation code:
- Download and install or extract the latest version of IntelliJ IDEA from official site
- For Windows:
- Open your hosts file (C:WindowsSystem32driversetc)
- Add the following lines:
- 0.0.0.0 account.jetbrains.com
- 0.0.0.0 www.jetbrains.com
- For Mac:
- Run terminal, type “cd /private/etc/“
- type “sudo vi hosts“
- press ‘i’, input “0.0.0.0 account.jetbrains.com” (maybe another line 0.0.0.0 www.jetbrains.com) at the end
- type “:wq” to save and exit
- Run program and select “Activation code“
- Download and use the universal “Universal License Key” below to activate program
- Done
- Method II – use this universal license server (no expiration):
- http://xidea.online/servers.html (open it in browser)
- Method III – use local (DVT) license server to activate (as follows)
for 16 and higher:
Method 1 (recommended):
- Install or extract your IntelliJ product from official site
- Run program
- Choose ‘License server‘
- In the ‘License server address:‘ field, use any one license server below:
- http://xidea.online/servers.html (open it in browser)
- Click ‘Discover server‘ or ‘Activate‘ button to finish registration
- Restart your IntelliJ IDEA, enjoy!
Method 2 (abandoned):
Use either Universal License Key for 16 and higher or Universal Unlock Patch for 16, nothing else required.
*** The activation code is genuine, no unlock path required. It’s valid from 2017.01.31 to 2018.01.30.
*** Unlock Patch does not require activation code.
*** And you should add the following line to your hosts file in the use of IntelliJ IDEA:
- 0.0.0.0 account.jetbrains.com
for 15:
Method 1:
- Use the license key Universal License Key for 15 or generate using the Universal Keygen for 14/15 when required
- Use the Universal Unlock Patch for 15
Method 2:
- The same as 16.
// How to use Local License Server //
- Install or extract any product of JetBrains/IntelliJ from official site
- Either direct run the license server on your own PC, or upload it to and run it on a (dedicated) server:
- darwin – MacOSX ( x86, x64 )
- freebsd – FreeBSD ( x86, x64, ARM)
- linux – Linux ( x86, x64, ARM, ARM64 )
- windows – Windows ( x86, x64 )
- Copy the corresponding binary file of the license server to a permanent directory, such as “C:license-server” or “/opt/license-server/“
- Then, on Windows:
- Run a CMD as administrator
- Enter the folder where you put the license server by using “cd” command
- Install the license server as a windows service (If you want to remove it, use “-mode uninstall” instead):
- for x86: dvt-jb_licsrv.386.exe -mode install
- for x64: dvt-jb_licsrv.amd64.exe -mode install
- Run “services.msc” and start the service. Alternatively, use “net start” command instead, or just restart your PC/serve
- On Unix-like OS:
- Enter the folder where you put the license server
- Install a new service by executing the binary file either as root or using the following command (platform = your OS; arch = your system architecture; to uninstall, use “-mode uninstall” instead):
- sudo: dvt-jb_licsrv.[platform].[arch] -mode install
- Start this service using your standard service tools
- Launch your JetBrains/IntelliJ application, and use your own license server to license all clients on any platforms.
Notes: If you are running the license server on the same host, you should use “http://127.0.0.1:1337” as license server instead. Otherwise, use the IP address or hostname of your license server.
// Related Links //
- Latest IntelliJ IDEA Released (EXE, ZIP) download
- Previous IntelliJ IDEA Releases (EXE, ZIP) download
// Download URLs //
| For Version | Type | Download | Size |
| Either is OK | |||
| 16+ | Universal License Key |  |
26.7 KB |
| v2.9 | Universal Unlock Patch | reserved | 525 KB |
| v2.10 | reserved | n/a | |
| v3.1 | reserved | n/a | |
| Both Required | |||
| 15 | Universal License Key | reserved | 2.32 KB |
| 15 | Universal Unlock Patch | reserved | 317 KB |
| Spare | |||
| 14, 15, 16 | Universal Keygen | reserved | 177 KB |
| JetBrains/IntelliJ All Products Local License Servers | |||
| All | Universal License Server | |
24.2 MB |
| JetBrains/IntelliJ All Products Licensing Agent | |||
| v2018.x.x~v2020.1.x | Universal Licensing Agent | |
2.34 MB |
| All | |
131 KB |
(Homepage)
| If some download link is missing, and you do need it, just please send an email (along with post link and missing link) to remind us to reupload the missing file for you. And, give us some time to respond. | |
| If there is a password for an archive, it should be «appnee.com». | |
| Most of the reserved downloads (including the 32-bit version) can be requested to reupload via email. |
Recommend high-quality, practical, portable freeware, free game, free eBook, and more
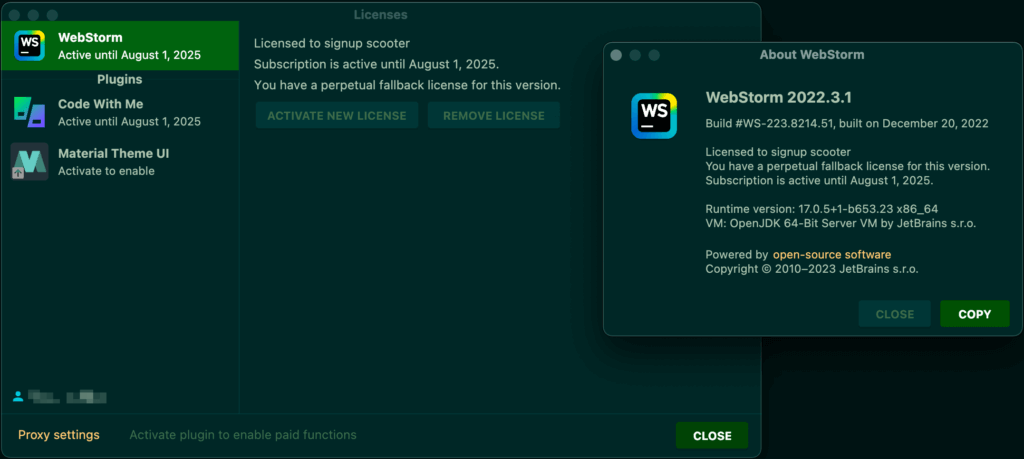
You can evaluate IntelliJ IDEA Ultimate for up to 30 days. After installing the IDE, log in to your JetBrains Account to start using the IntelliJ IDEA’s trial version.
Start the free trial
-
In the Licenses dialog that opens when you start IntelliJ IDEA, select the Start trial option and click Log in to JetBrains Account. You will be redirected to the JetBrains Account website.

-
Log in to your JetBrains Account on the website and click the Start Trial button in the Licenses dialog to start your trial period.


Upon the expiration of the trial version, you need to buy and register a license to continue using IntelliJ IDEA Ultimate. A new trial period will be available for the next released version of IntelliJ IDEA Ultimate.
Activate IntelliJ IDEA license
-
Do one of the following to open the Licenses dialog:
-
From the main menu, select
-
On the Welcome screen, click
-
-
If necessary, log in to your JetBrains Account.
-
Select how you want to register IntelliJ IDEA or a plugin that requires a license:
Register using the JetBrains Account.
IntelliJ IDEA will automatically show the list of your licenses and their details like expiration date and identifier. Click Activate to start using your license.
If your license is not shown on the list, click Refresh license list.
Register using an activation code.
You can get an activation code when you purchase a license for the corresponding product.
Register using the Floating License Server.
When performing silent installation or managing IntelliJ IDEA installations on multiple machines, you can set the
JETBRAINS_LICENSE_SERVERenvironment variable to point the installation to the Floating License Server URL.Alternatively, you can set the Floating License Server URL by adding the
-DJETBRAINS_LICENSE_SERVERJVM option.


Early Access Program
Pre-release builds of IntelliJ IDEA Ultimate that are part of the Early Access Program are shipped with a 30-days license. Log in with your JetBrains Account to start using IntelliJ IDEA Ultimate EAP.
You can use either your JetBrains Account directly or your Google, GitHub, GitLab, or BitBucket account for authorization. You can also create a new JetBrains Account if you don’t have one yet.
Login options
-
Click Log in to JetBrains Account. You will be automatically redirected to the JetBrains Account website.

-
On the website, log in using your JetBrains Account credentials.
-
Once you’ve successfully logged in, you can start using IntelliJ IDEA EAP by clicking Get Started.
If you want to participate in EAP-related activities and provide your feedback, make sure to select the Send me EAP-related feedback requests and surveys option.


-
Click the Create an account link. You will be automatically redirected to the JetBrains Account website. Follow the instructions on the website to register a new JetBrains Account.
-
Once you’ve successfully logged in, you can start using IntelliJ IDEA EAP by clicking Get Started.
If you want to participate in EAP-related activities and provide your feedback, make sure to select the Send me EAP-related feedback requests and surveys option.

-
Click the icon of the service that you want to use for logging in. You will be redirected to the login page on the website of the selected service.
-
Once you’ve successfully logged in, you can start using IntelliJ IDEA EAP by clicking Get Started.
If you want to participate in EAP-related activities and provide your feedback, make sure to select the Send me EAP-related feedback requests and surveys option.

Access to JetBrains Account: Troubleshooting
If you encounter problems when attempting to log in to your JetBrains Account, this may be due to one of the following reasons:
No free ports
IntelliJ IDEA waits for a response about successful login from the JetBrains Account website. If there are no ports available, IntelliJ IDEA will suggest logging in with an authorization token.
Unable to open JetBrains Account in your browser
When you click Log in to JetBrains Account, IntelliJ IDEA redirects you to the JetBrains Account website. If your system browser doesn’t start, use the Troubles emergency button. IntelliJ IDEA will suggest logging in with an authorization token.
No access to JetBrains Account
The login process requires access to the JetBrains Account website. IntelliJ IDEA automatically redirects you to the website or lets you log in with an authorization token. If both options don’t work and you cannot access the website, contact your system administrator. Otherwise, it will not be possible for you to log in and start using IntelliJ IDEA.
Log in with an authorization token
An authorization token is a way to log in to your JetBrains Account if your system doesn’t allow for redirection from the IDE directly, for example, due to your company’s security policy. IntelliJ IDEA recognizes when redirection to the JetBrains Account website is impossible. It enables you to copy a link to generate an authorization token manually.
-
Click Copy link and open the copied link in your browser.

-
Log in to your JetBrains Account to generate an authorization token. After that, copy the token, paste it to the IDE authorization token field and click Check token. Once you’ve successfully logged in, you can start using IntelliJ IDEA.

Last modified: 29 December 2022
В данной статье я расскажу как активировать продукты JetBrains версии 2022.2.X и 2022.3 такие как PhpStorm, WebStorm, IntelliJ IDEA, RubyMine, PyCharm и другие, а также плагины такие как например Laravel Idea.
Для начала скачиваем архив ниже.
Распаковываем например в корень диска C:
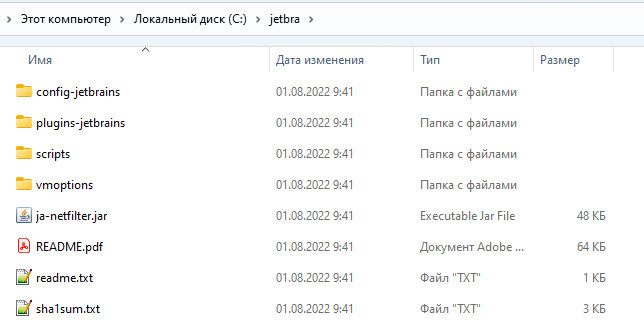
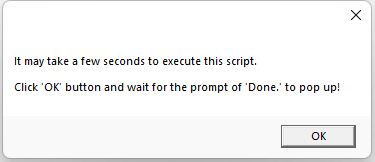
Далее переходим в папку scripts и выполняем скрипт.
install-current-user.vbs — для текущего пользователя Windows.
install-all-users.vbs — для всех пользователей Windows.
install.sh — для Linux и Mac
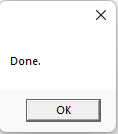
В Windows должны увидеть такой результат:
В Linux результат должен быть таким:
![]()
Обязательно требуется перезагрузка после выполнения скрипта в linux!
Далее в файл phpstorm64.exe.vmoptions необходимо добавить строку
-javaagent:C:jetbraja-netfilter.jar=jetbrainsОбратите внимание! Название файла vmoptions отличается в зависимости от IDE. В WebStorm файл будет называться webstorm64.exe.vmoptions, а в PyCharm pycharm64.exe.vmoptions соответственно.
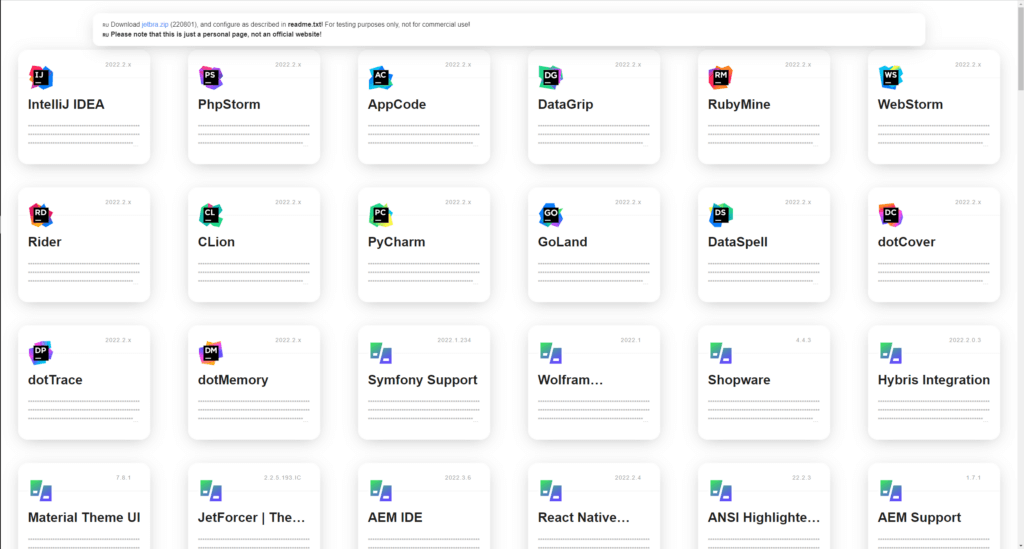
Переходим на сайт 3.jetbra.in и выбираем любой доступный хост. Я выбрал первый ipfs.io.
Попадаем в список с продуктами JetBrains и ищем нужный нам продукт. У меня это PhpStorm.
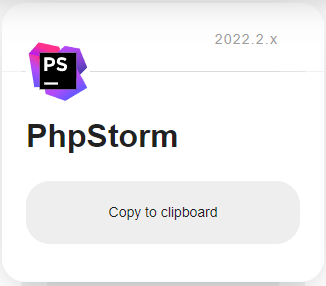
Жмем Copy to clipboard
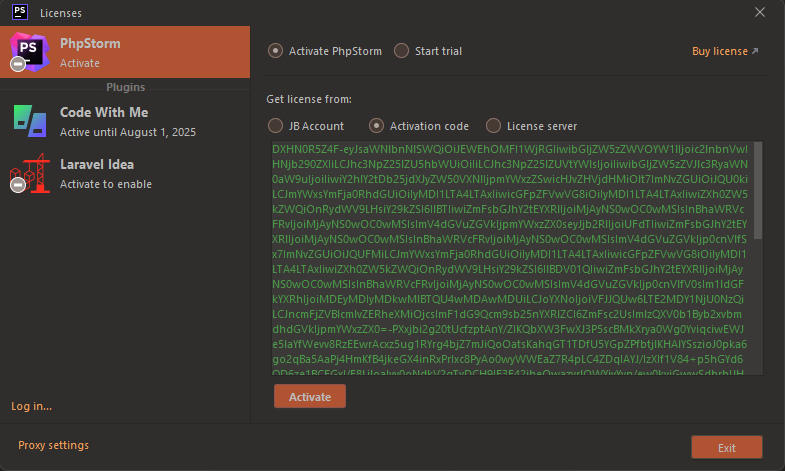
Запускаем IDE, в моем случае это PhpStorm и идем в Help -> Register. Выбираем Activation Code и вставляем скопированный ранее код.
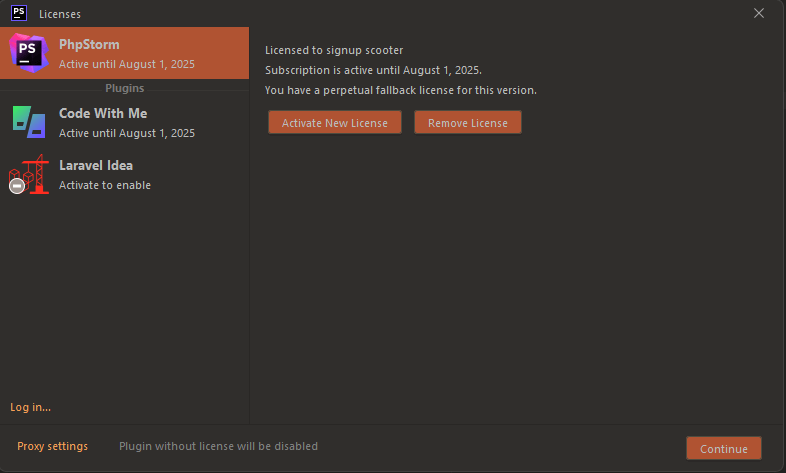
В результате получаем активированную IDE до 2025 года. Вроде как друзья китайцы писали, что активация по факту до 2099, но это не точно. Время покажет)
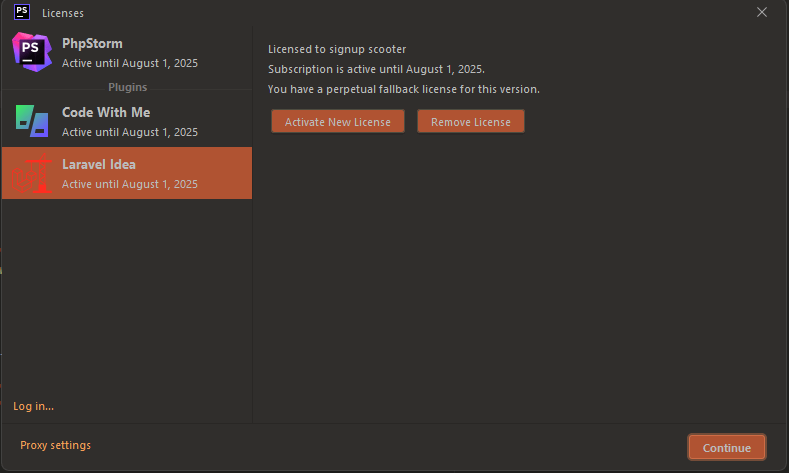
С таким же успехом можно активировать и плагины для ваших IDE которые есть в списке на 3.jetbra.in. Например я активировал Laravel Idea.
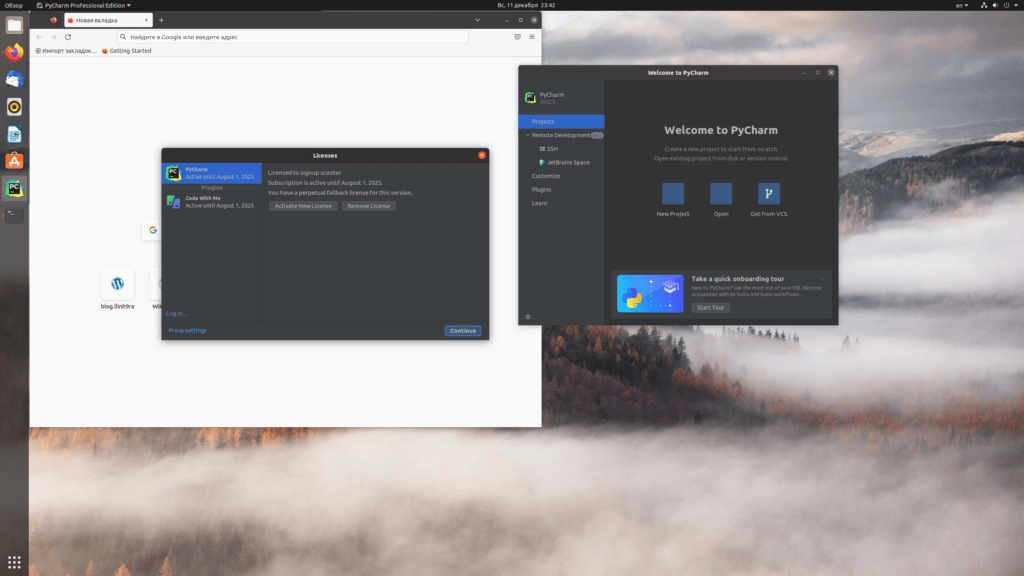
Проверил активацию PyCharm 2022.3 в Ubuntu 22.04. Результат на скриншоте ниже.
Надеюсь данная статья вам была полезна. Возникшие вопросы задавайте в комментариях.
UPD 11.01.2022 Друг проверил на MacOS версию 2022.3.1. Достаточно только выполнения скрипта. Все отлично активировалось.
![]() Загрузка …
Загрузка …
![]() Загрузка …
Загрузка …
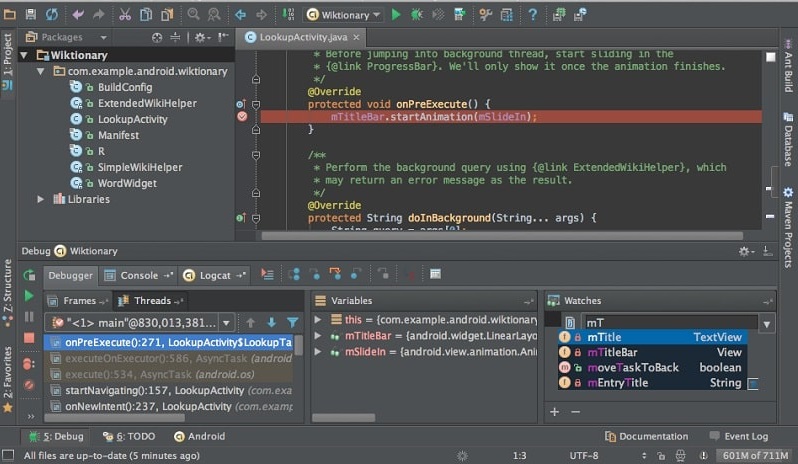
Удобная среда программирования – одна из причин создания качественного, синтаксически правильного и читабельного кода на любом языке. И, как результат, залог успешного выполнения проекта. Именно таким приложением по своей сути является IntelliJ IDEA, которое ориентировано прежде всего на Java разработчиков. Одним только этим языком список функций, естественно, не ограничивается, только по-настоящему опытный специалист сможет оценить весь комплекс инструментов пакета. При желании здесь можно охватить сразу несколько технологий: языки на базе JVM, вроде Groovy и Scala, фреймворки enterprise уровня — Spring, JBoss, Grails и другие, полный цикл web-разработки — от обычного сайта на HTML5 до более сложных задач с применением серверных javascript реализаций, вроде React, AngularJS. Нельзя не упомянуть и об инструментарии для создании Android приложений, набор возможностей ничем не уступает официальной IDE от Google — Android Studio. Всё описанное в первом абзаце лишь вершина айсберга, краткий обзор. Если зайти на сайт разработчика программы в раздел всех возможностей, то можно потратить более часа, просматривая описания различных, уже имеющиеся дополнительных модулей, утилит и техник, обеспечивающие эргономику и высокую скорость работы, а также списки новшеств, появляющихся с каждым новым релизом продукта.
Будучи фермером Java-кода, IntelliJ IDEA можно охарактеризовать как инструмент разработки N0.1, который практичен и удобен, что значительно повышает скорость разработки и удовольствие от разработки.
Хотя я здесь, чтобы научить вас создавать сервер авторизации, большой парень все еще поддерживает других. В конце концов, они все являются фермерами кода. Адрес покупки идеи:https://www.jetbrains.com/idea/buy/
Пейте воду и не забывайте хорошо копать, здесь автору серверного программного обеспеченияLanyuВыразите мою сердечную благодарность.
Адрес загрузки сервера:Нажмите меня
После загрузки существует много версий. Если на вашем компьютере установлена Windows, используется соответствующий суффикс Windows, а в Mac OS используется суффикс darwin.
Для Ubuntu / centos и т. д., которые не имеют соответствующего суффикса, обратите внимание на разницу между 32/64 битами, amd64 - 64 битами, 386 - 32 битами.
Сервер Linux
Загрузите сжатый пакет IntelliJIDEALicenseServer1.6.zip на сервер Centos и распакуйте его. После завершения распаковки войдите в каталог распаковки и запустите IntelliJIDEALicenseServer bin start.sh
#!/bin/sh
rm -f tpid

nohup ../IntelliJIDEALicenseServer_linux_amd64 > info.log 2>&1 &

echo $! > tpid
Подключите картинку после успешной операции:

обратный прокси niginx
nginx.conf
#user  nobody;
worker_processes  1;

#error_log  logs/error.log;
#error_log  logs/error.log  notice;
#error_log  logs/error.log  info;

#pid        logs/nginx.pid;


events {
    worker_connections  1024;
}


http {

    upstream wangziming {
        keepalive 20;
        server 127.0.0.1:1027;
    }


    sendfile        on;
    keepalive_timeout  20;

    server {
        listen       80;
        server_name  ziming.xin;

        location / {
        proxy_next_upstream http_502 http_504 error timeout invalid_header;
                proxy_pass http://wangziming;
                proxy_redirect off;
                proxy_set_header Host $host;
                proxy_set_header X-Real-IP $remote_addr;
                proxy_set_header X-Forwarded-For $proxy_add_x_forwarded_for;
        }


        error_page   500 502 503 504  /50x.html;
        location = /50x.html {
            root   html;
        }


    }


}
Запустить nginx
sudo /usr/local/nginx/sbin/nginx -c /usr/local/nginx/conf/nginx.conf

JetBrains IntelliJ IDEA Ultimate – это наиболее интеллектуальное и комфортное средство для программирования на основе открытого кода. Продукт поддерживает все инновационные технологии и фреймворки и подходит для разработки коммерческих, мобильных и веб-приложений.
Много пользователей пытается найти программу IntelliJ IDEA Ultimate и скачать бесплатно на русском языке. Но русифицированной версии программы не существует. Да и смысла ее переводить нет. Она разработана для профессионалов, которым и так должно быть все понятно.
Скачать бесплатно IntelliJ IDEA Ultimate 2022.2 + crack
Инструкция по активации
- Перед установкой рекомендуется удалить все предыдущие версии, почистив реестр. Отключить интернет и антивирус
- Извлечь папку из архива в любое удобное место на ПК. Установить программу
- Скопировать папку ja-netfilter-all на диск C:/
- Запустить от имени администратора файл scriptsinstall-current-user.vbs для автогенерации файла vmoptions
- Запустить программу, выбрать «Activate <IDE NAME>» — «Activation Code» — ввести код активации из текстового файла
[свернуть]
Пароль ко всем архивам: 1progs
После того, как вы нажали download и загрузили IntelliJ IDEA Ultimate на свое устройство, при ее установке, для того чтобы начать использовать программу, нужно нажать activation code и ввести код активации, либо – license server и добавить адрес сервера лицензий. После чего выполнится активация.
Благодаря программе:
- программисту не нужно выполнять рутинную работу;
- вовремя устраняются проблемы;
- возрастает качество кода.
Если у вас была установлена пробная версия программы и по истечению срока ее действия вы хотите дальше пользоваться ПО, то вам будет нужен лицензионный ключ. Можно отыскать Key и скачать его. Также можно скачать IntelliJ IDEA Ultimate Crack + Keygen бесплатно на данной странице.
Аналоги программы вы всегда можете найти в наших подборках: