В статье расскажем, как установить службу Internet Information Services (IIS) на серверы с операционной системой Windows Server 2019. Инструкция подойдет и для ОС Windows Server 2016.
IIS (Internet Information Services) — набор сервисов от компании Microsoft для работы веб-сервера и других интернет служб. IIS устанавливается на сервер и работает с протоколами HTTP/HTTPS, POP3, SMTP, FTP, NNTP.
Чтобы приступить к установке, зайдите на сервер с правами администратора.
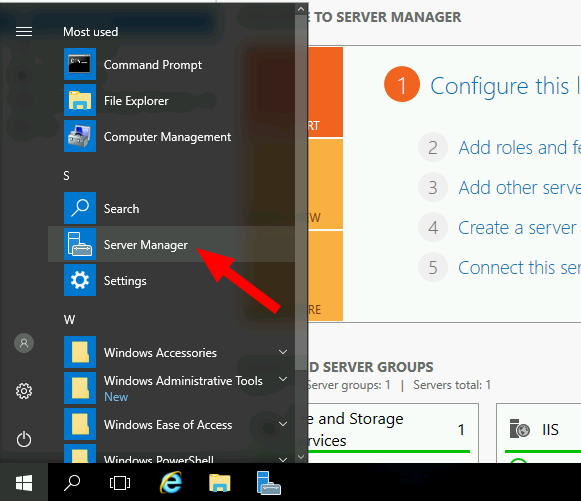
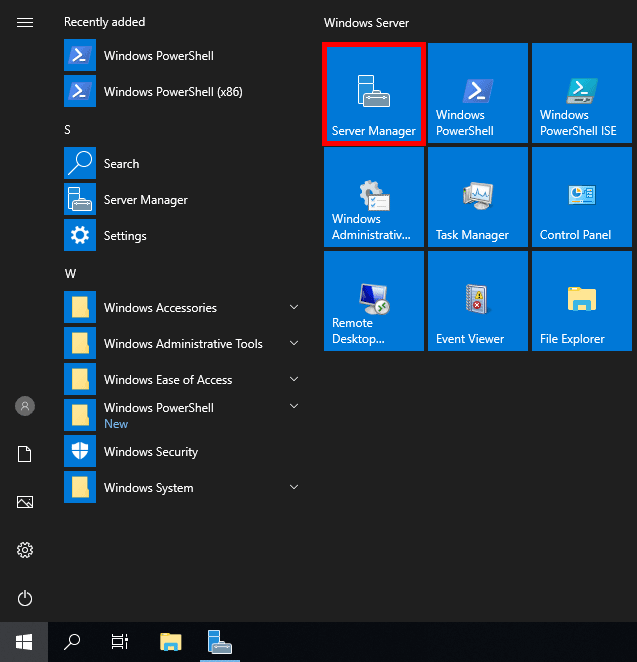
«Диспетчер серверов» (Server Manager) будет уже запущен (запускается автоматически при старте ОС) или запустите его вручную из меню «Пуск».
То же самое можно сделать через панель «Локальный сервер» (Local Server) — «Управление» (Manage).
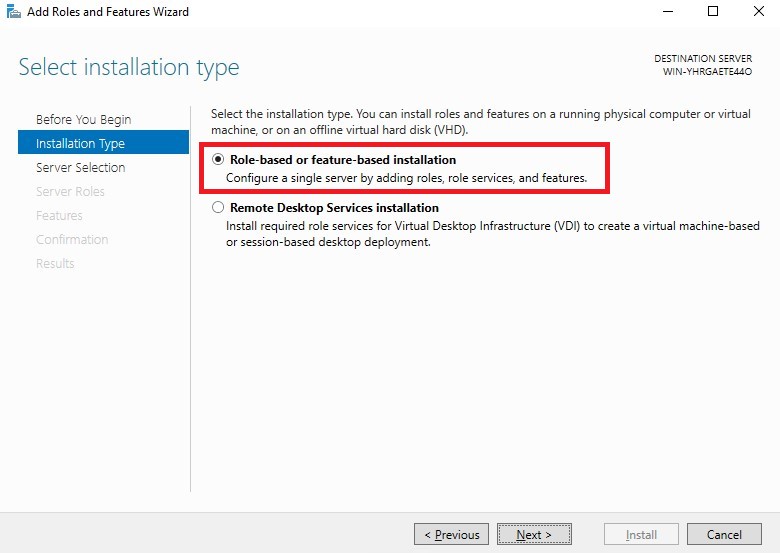
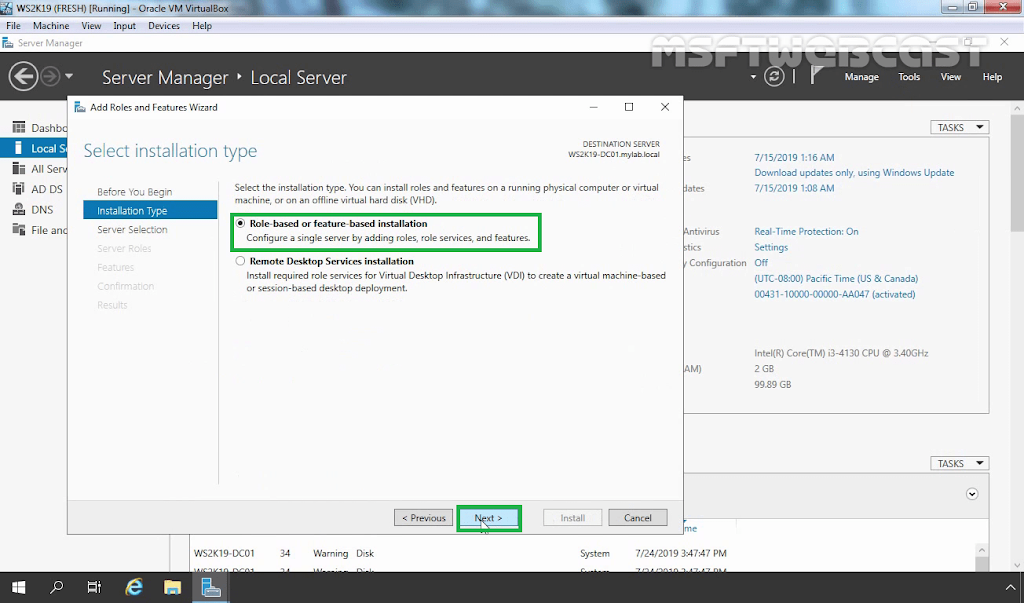
 Выберите тип установки «Установка ролей или компонентов» (Role-based or feature-based installation) и нажмите «Далее» (Next).
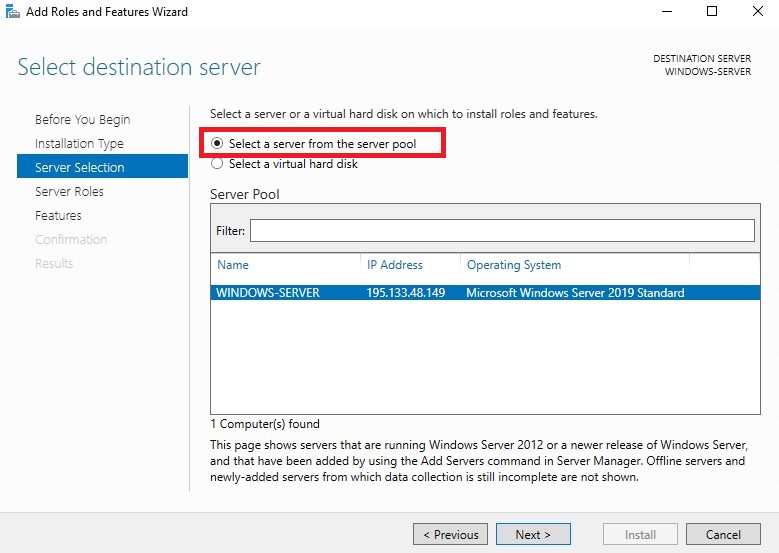
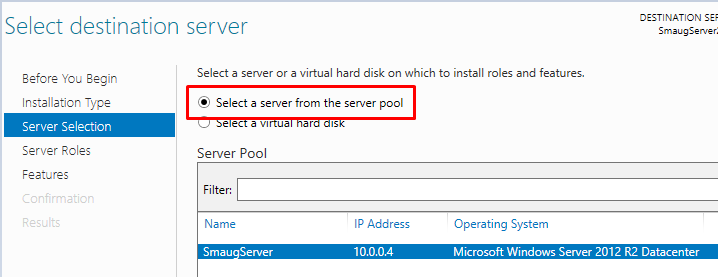 Выберите сервер из пула серверов (Select a server from the server pool) и отметьте имя вашего сервера. Нажмите «Далее» (Next).
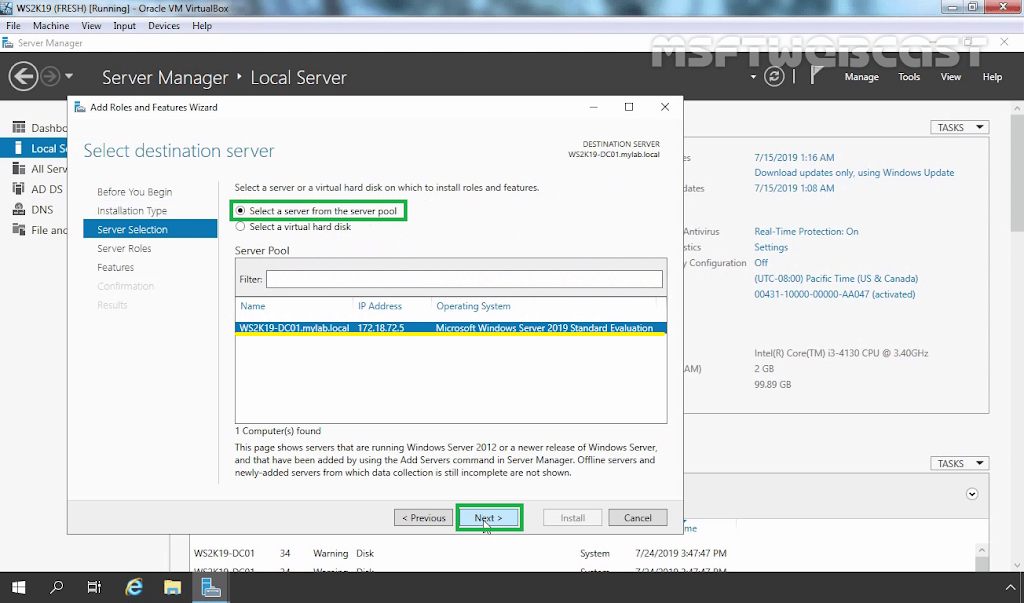
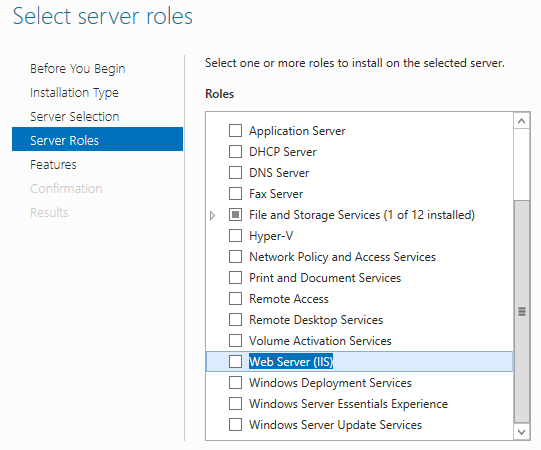
Обратите внимание, что служба FTP по умолчанию не устанавливается. Если в дальнейшем вам понадобятся новые роли, то вы сможете их добавить без переустановки IIS.
При необходимости отметьте «Автоматический перезапуск конечного сервера» (Restart the destination server automatically if required), если пункт не выбран, то перезагрузите сервер самостоятельно после окончания установки.
 Запустите «Диспетчер серверов» (Server Manager) из меню «Пуск» (Start).
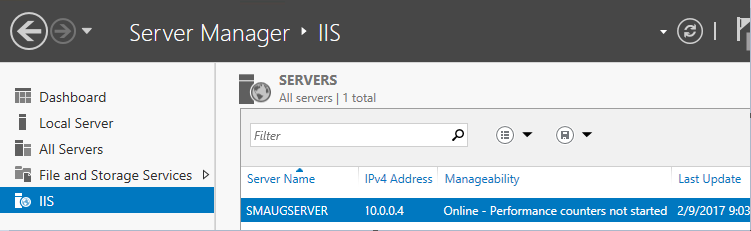
В списке содержимого появится установленная служба IIS.
 Панель «Просмотр возможностей» (Features View)
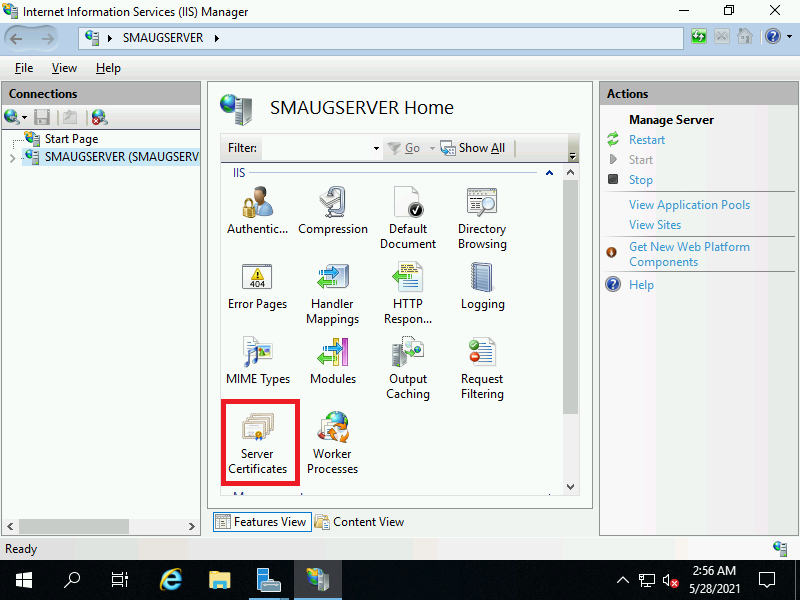
Возможности, доступные вам в службе IIS, перечислены на панели Просмотр возможностей (Features View). Отсюда управляйте возможностями IIS, настраивайте и перезапускайте. Например, настройте SSL-сертификаты.
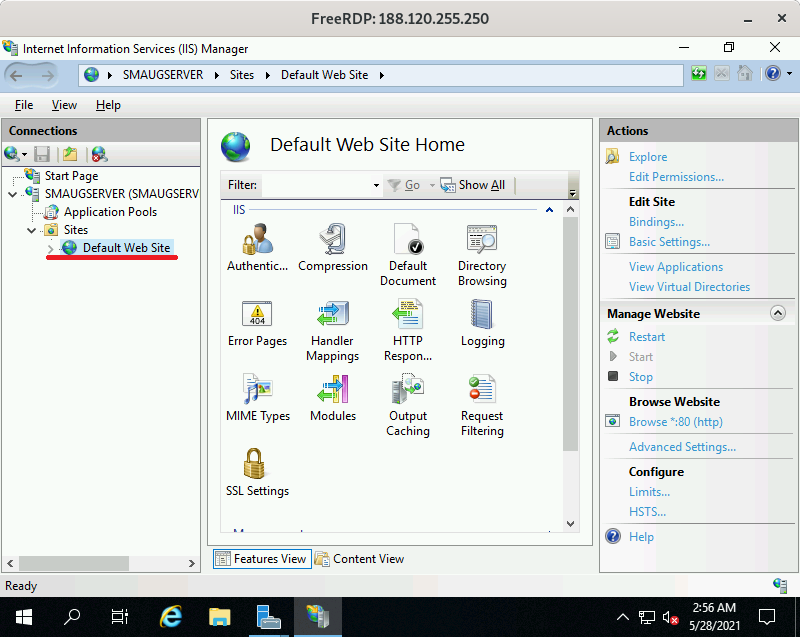 Сразу после установки IIS по умолчанию создается пустой сайт Default Web Site.
 Добавьте сайты, которые будут обслуживаться этим веб-сервером. Для этого в контекстном меню пункта «Сайты» (Sites) на вкладке «Подключения» (Connections) выберите «Добавить сайт» (Add Website).
 Заполните поля формы данными о сайте и нажмите ОК.
 В списке сайтов IIS появится только что добавленный.
Этот материал был полезен?
В статье ниже, будут рассмотрены способы установки веб-сервера Internet Information Services (IIS) на операционной системе Microsoft Windows Server 2019. Существует два основных способа установки IIS на Windows Server.Первый способ традиционный, с помощью графического интерфейса, второй — при помощи PowerShell. Оба метода будут показаны в данной статье.
Для чего нужен IIS
IIS (Internet Information Services) — это встроенный в операционную систему Windows Server набор серверов. В этот набор входят следующие серверы:
- Web-сервер — является основным и наиболее часто используемым компонентом IIS.
- FTP-сервер — сервер для обмена файлами
- SMTP-сервер — сервер отправки почты (устанавливается как Feature, но управляется консолью IIS6)
Как правило, исходя из целевого назначения используется соответсвующий компонент или их набор IIS.
Установка IIS Web сервер при помощи PowerShell
Если на сервере не установлен графический интерфейс, необходимо автоматизировать процесс установки или Вы просто хотите использовать самый быстрый способ установки Web сервера IIS, то необходимо:
1. Выполнить вход на сервер с правами администратора
2. Запустить PoweShell от имени администратора 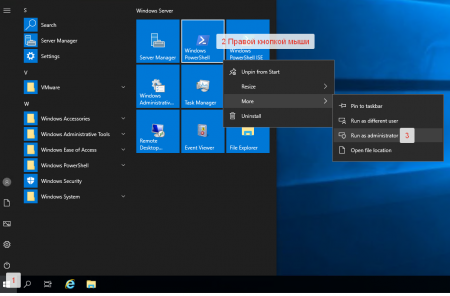
3. Выполнить команду:
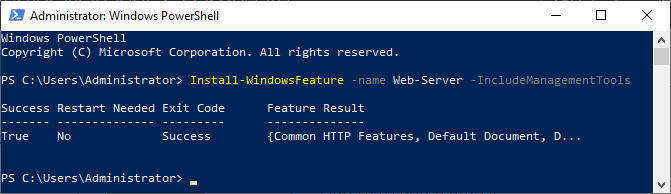
Install-WindowsFeature -name Web-Server -IncludeManagementToolsРезультат выполнения команды на скриншоте ниже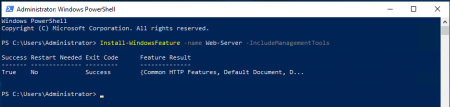 IIS Web сервер установлен.
Установка IIS Web сервер через графический интерфейс
1. Выполнить вход на сервер с правами администратора
2. Если автоматически не запустилась консоль Server Manager, то необходимо запустить ее вручную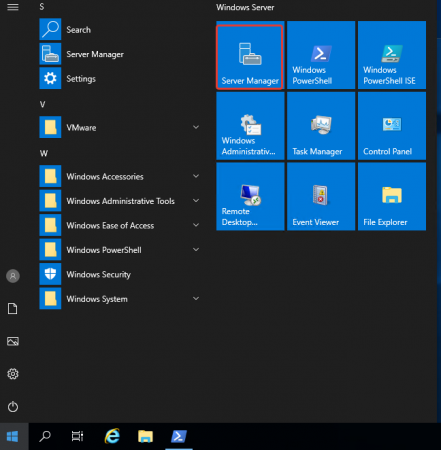
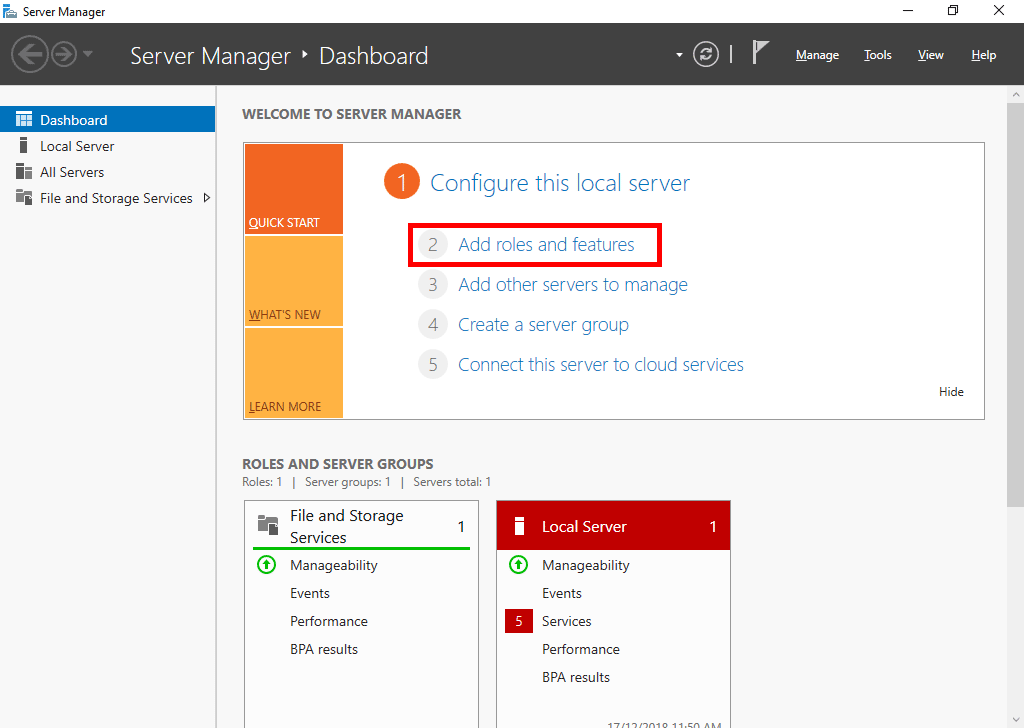
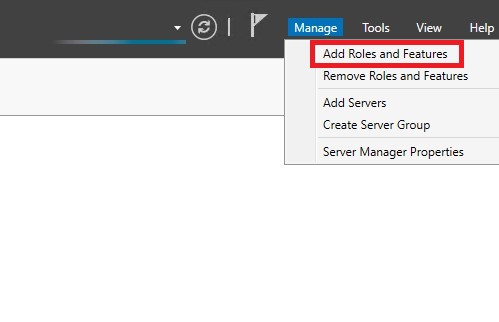
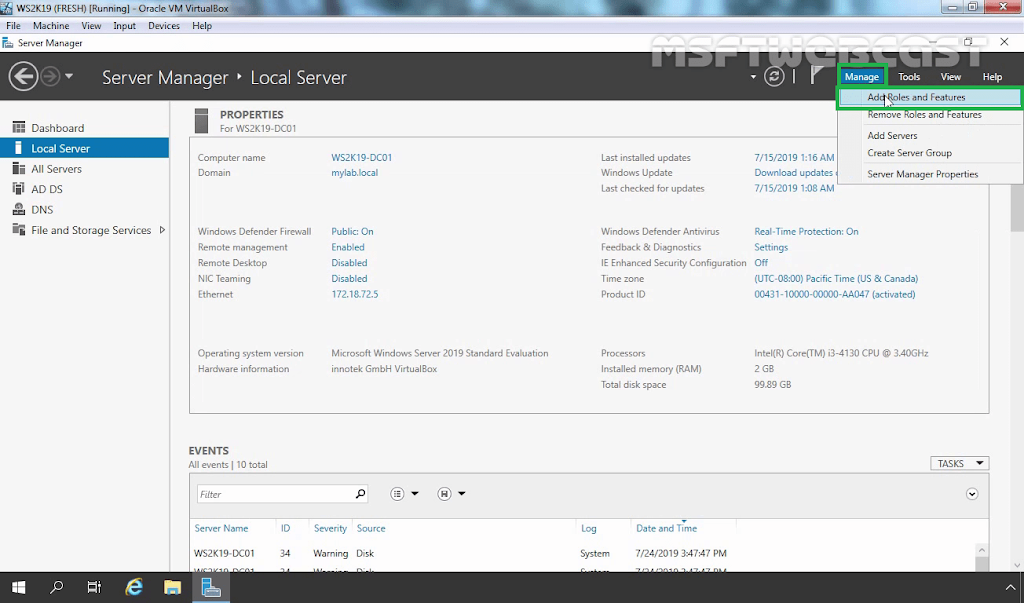
3. в консоли Server Manager выбрать Manage -> Add Roles and Features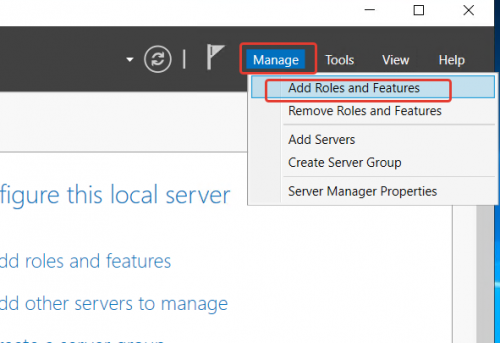
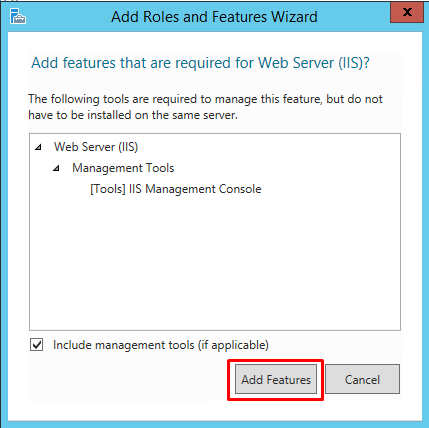
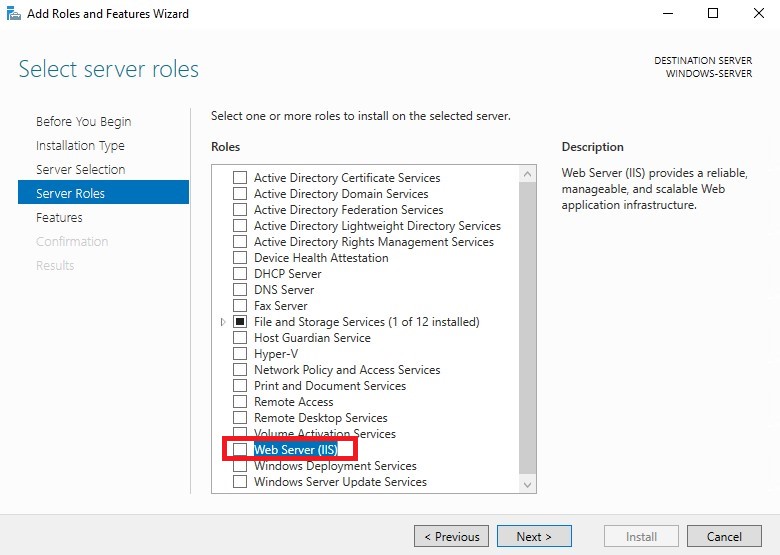
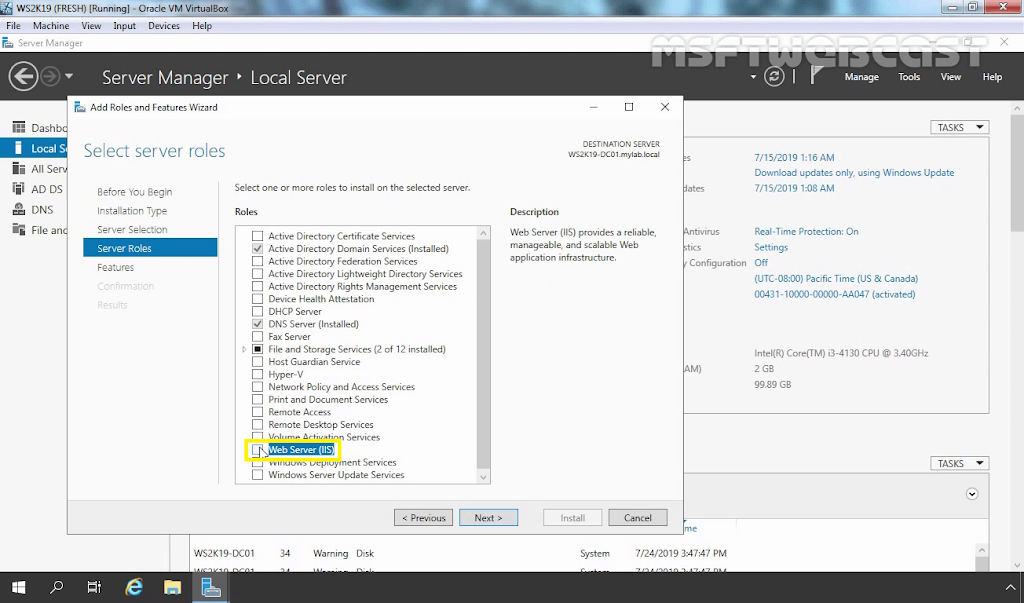
4. Если выполняется установка IIS на единичном локальном сервере, по в появившемся мастере установки ролей, необходимо нажать Next 2 раза. И на данном шаге выбрать установку Web Server (IIS). 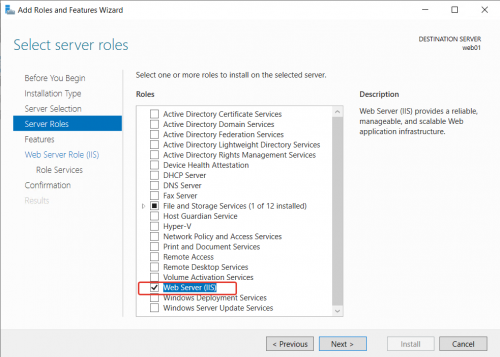 В появившемся всплывающем окне согласиться с установкой IIS Management Console.
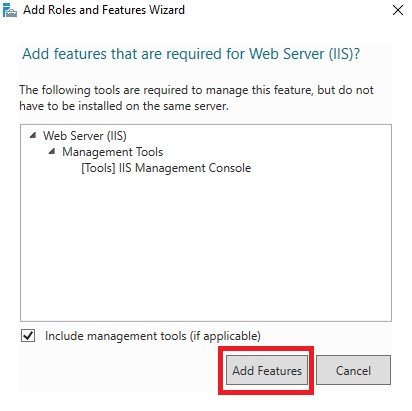
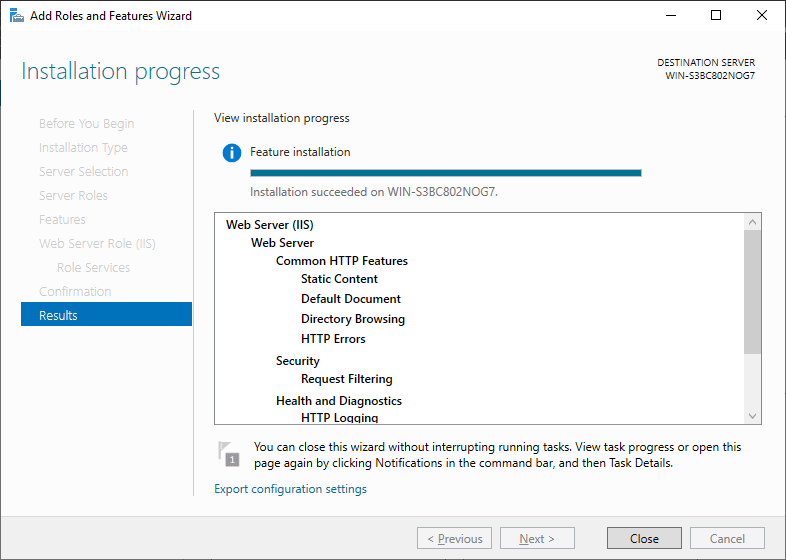
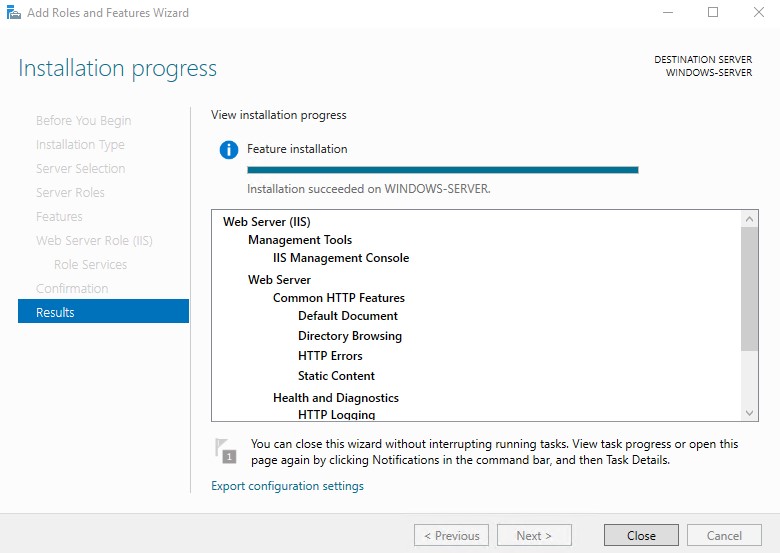
5. Если установка выполняется в режиме по умолчанию, то стоит нажать 4 раза Next, а затем Install.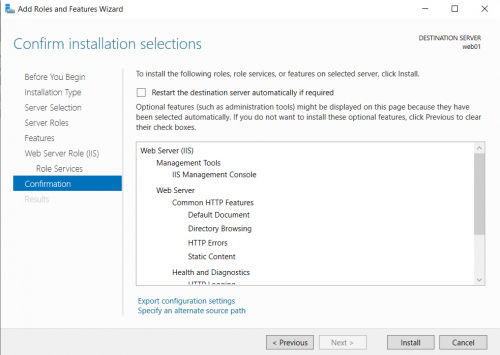 6.Ожидать завершения процесса установки.
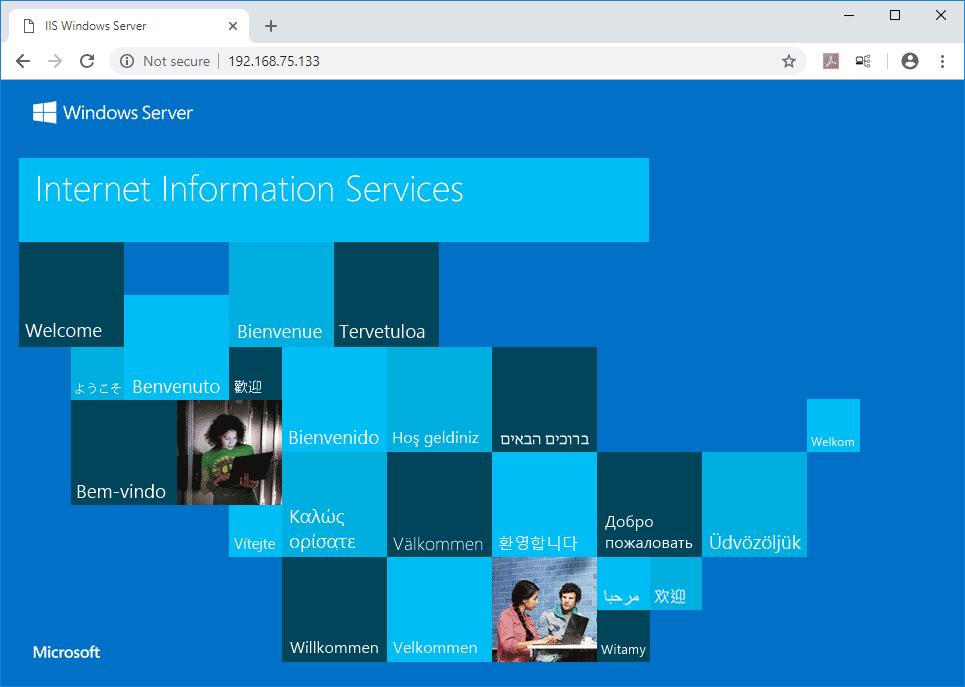
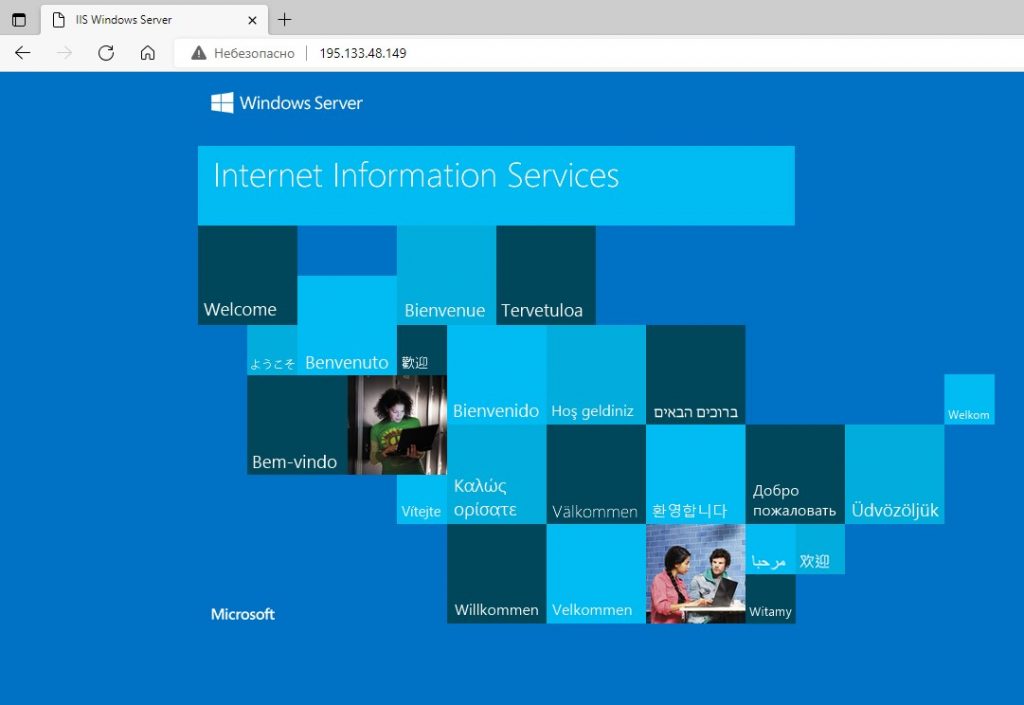
В обоих способах установки IIS, после завершения установки, веб сервер запущен и работать по протоколу http, со страницей по умолчанию, как на скриншоте ниже: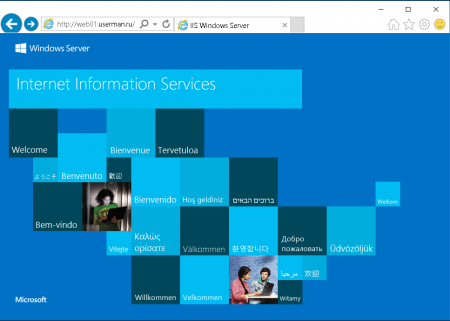
Как удалить ранее установленный IIS?
В PowerShell, запущенной от имени администратора,выполнить команду:
Remove-WindowsFeature -Name Web-ServerПо завершении удаления web сервера IIS необходимо выполнить перезагрузку сервера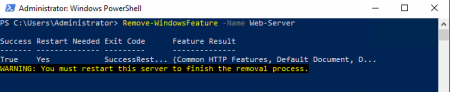
Posted by
on December 19, 2018
Here we’re going to show you how to install the Internet Information Services (IIS) web server version 10.0 in Microsoft’s Windows Server 2019 operating system.
This can be done both with PowerShell or through the GUI, we’ll cover both methods here.
Install IIS With PowerShell
If you don’t have the GUI installed or just want to use the PowerShell command line interface (CLI) instead, follow these steps. This method is a lot faster than going through all of the GUI options.
- Open PowerShell with administrative privileges and run the Install-WindowsFeature cmdlet as shown below.
Install-WindowsFeature -name Web-Server -IncludeManagementTools

Here we include the management tools so that you can manage IIS on this server, as these are generally installed when using the GUI, making this PowerShell command equivalent with the GUI method below. If you do not plan on managing IIS through this server then you may prefer to not include this option.
- Once the installation has succeeded, you’ll be returned to the PowerShell prompt. At this point IIS should be running on port 80 by default with the firewall rule “World Wide Web Services (HTTP Traffic-In)” enabled in Windows firewall automatically.
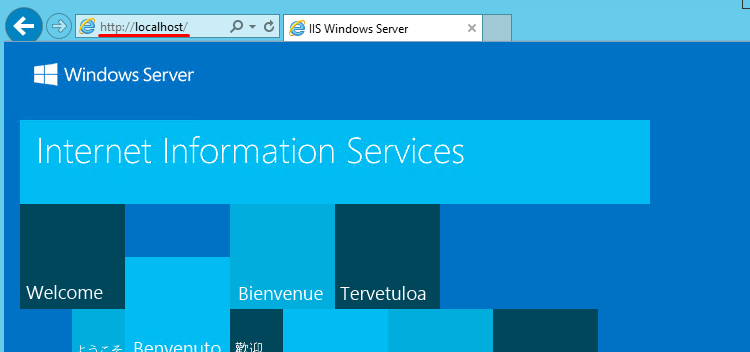
- We can perform a simple test by opening up a web browser and browsing to the server that we have installed IIS on. You should see the default IIS page.

Install IIS Through GUI
If your server has the graphical user interface component installed you can also install IIS by following these steps.
- Open Server Manager, this can be found in the start menu. If it’s not there simply type “Server Manager” with the start menu open and it should be found in the search.

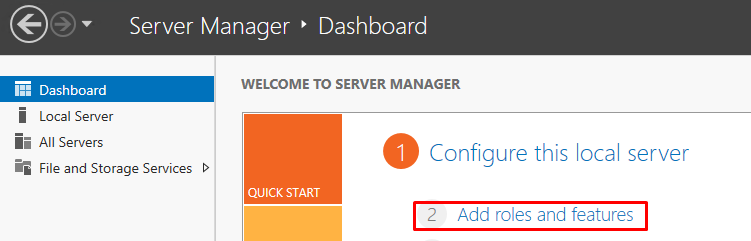
- Click the “Add roles and features” text.

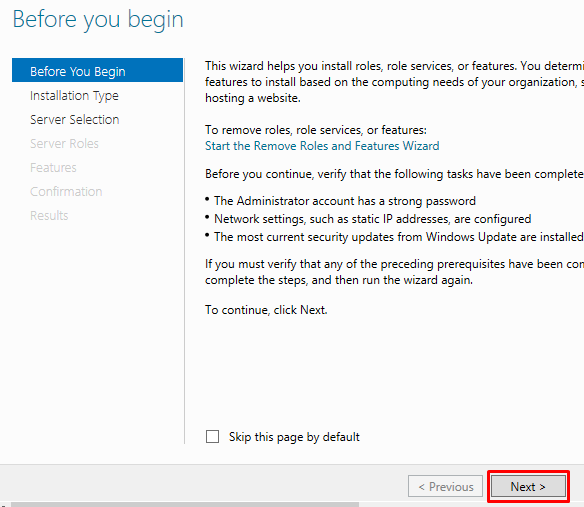
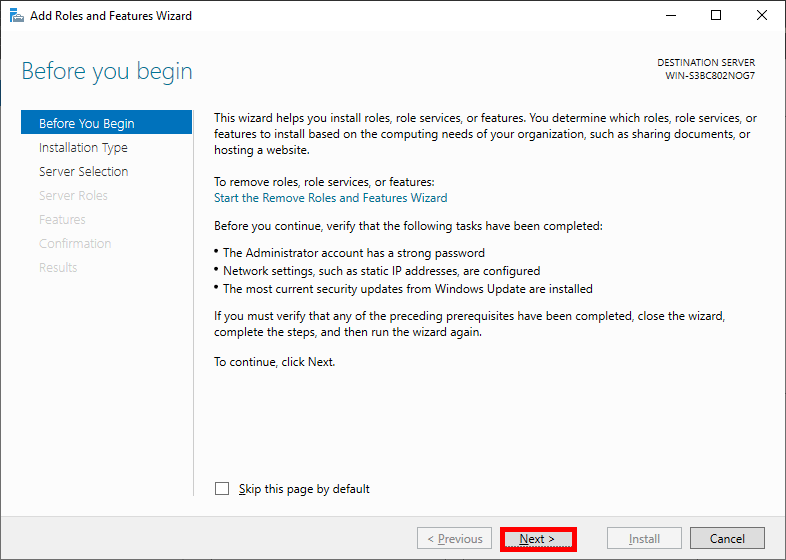
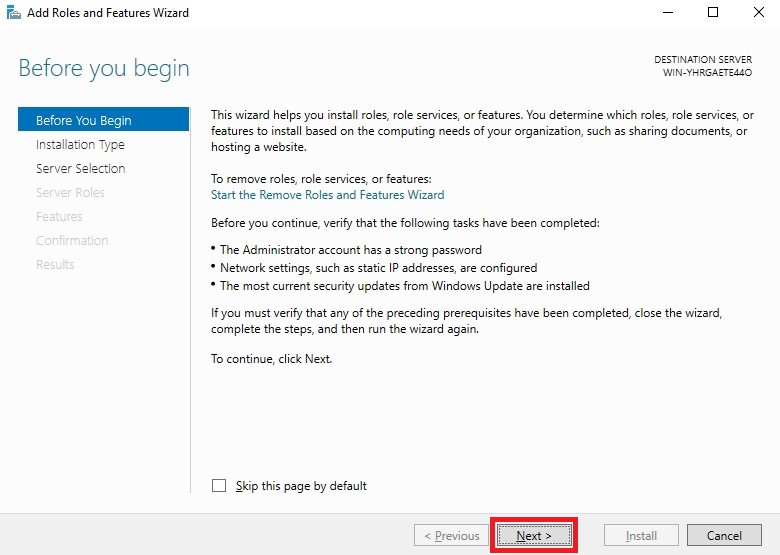
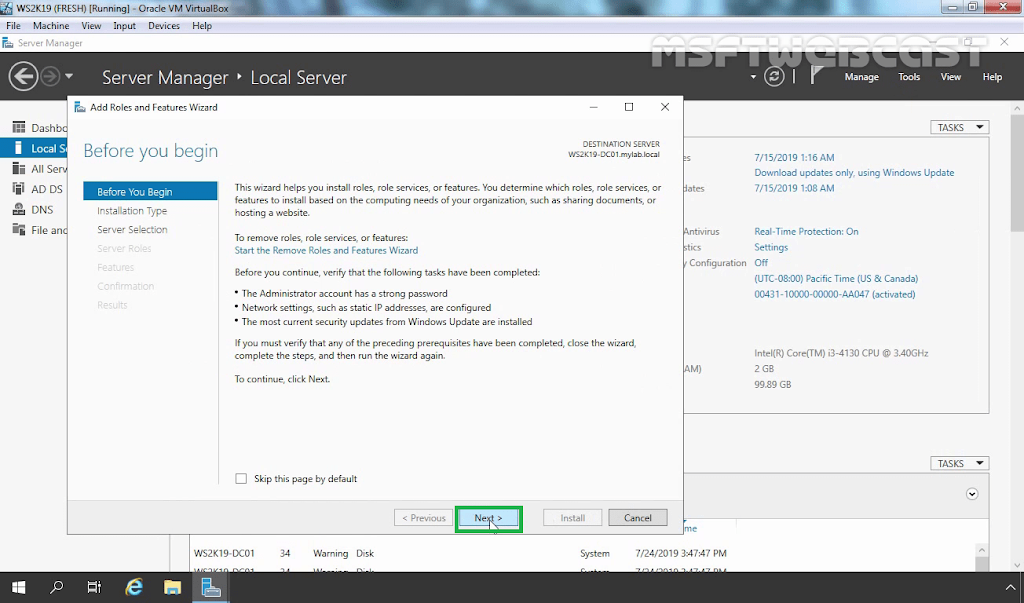
- On the “Before you begin” window, simply click the Next button.

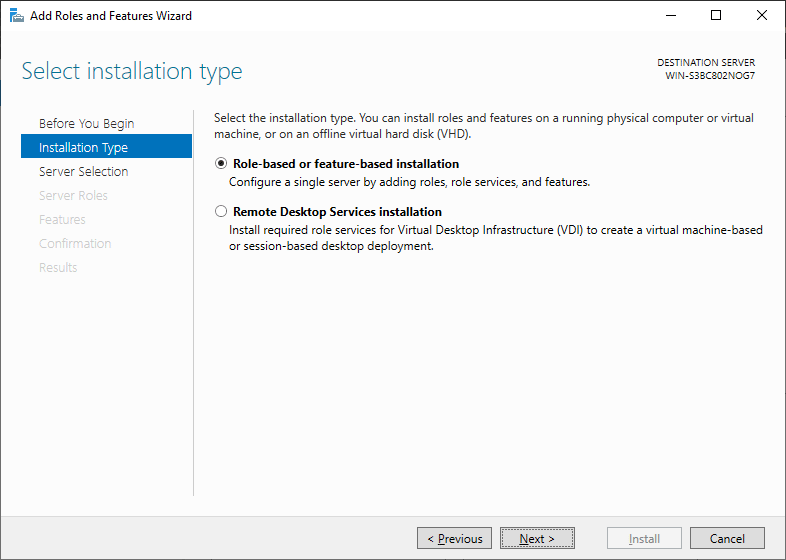
- On the “Select installation type” window, leave “Role-based or feature-based installation” selected and click Next.
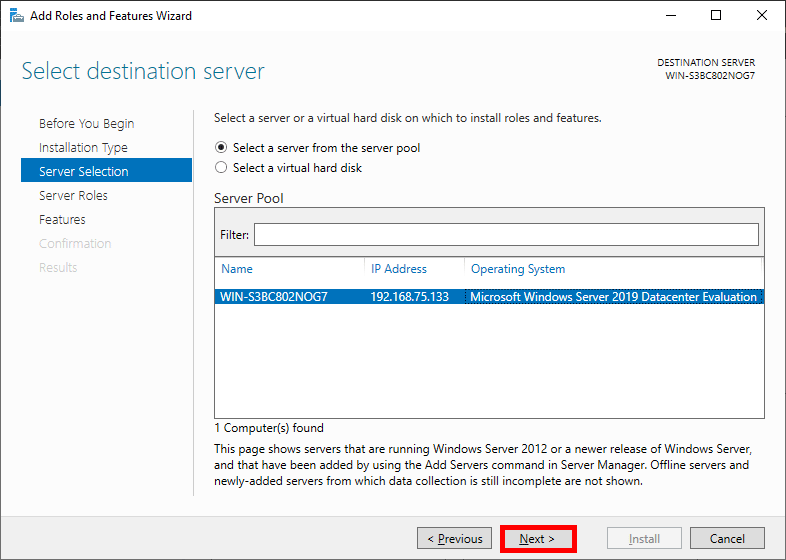
- As we’re installing to our local machine, leave “Select a server from the server pool” with the current machine selected and click Next. Alternatively you can select another server that you are managing from here, or a VHD.
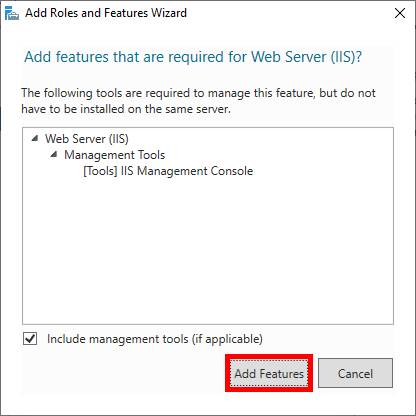
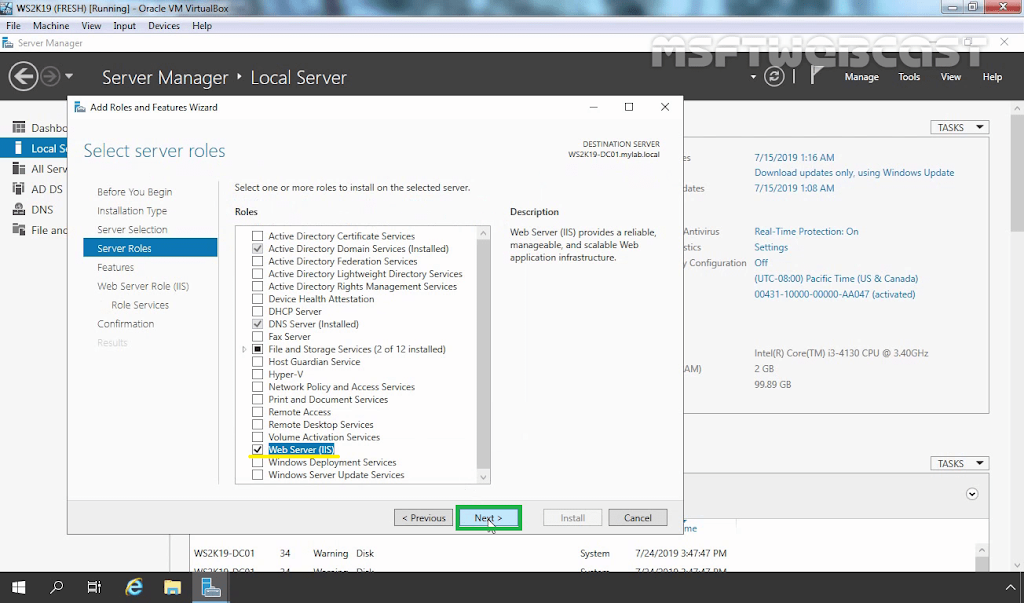
- From the “Select server roles” window, check the box next to “Web Server (IIS)”. Doing this may open up a new window advising that additional features are required, simply click the “Add Features” button to install these as well. Click Next back on the Select server roles menu once this is complete.

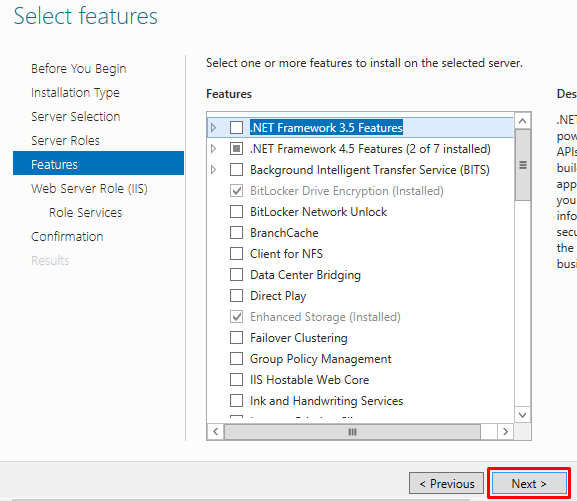
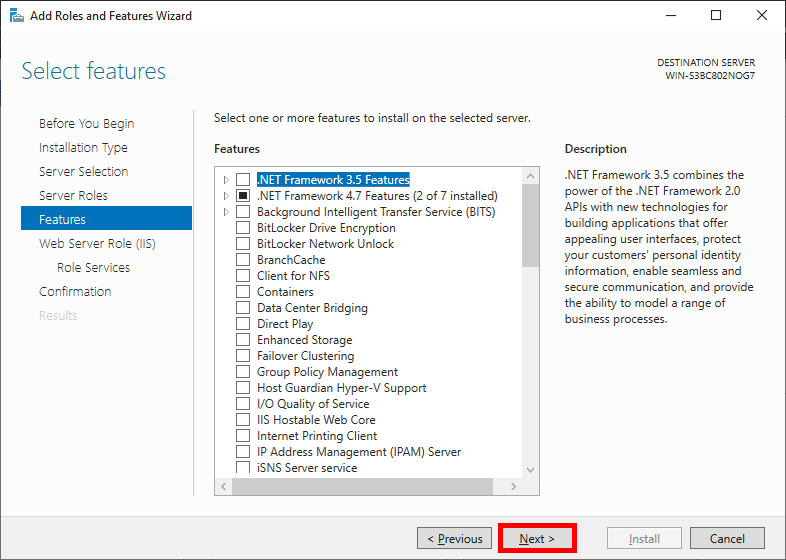
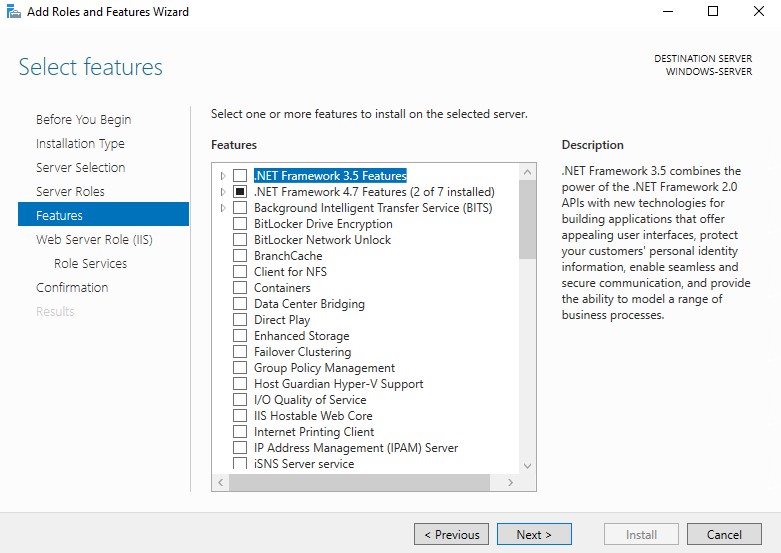
- We will not be installing any additional features at this stage, so simply click Next on the “Select features” window.
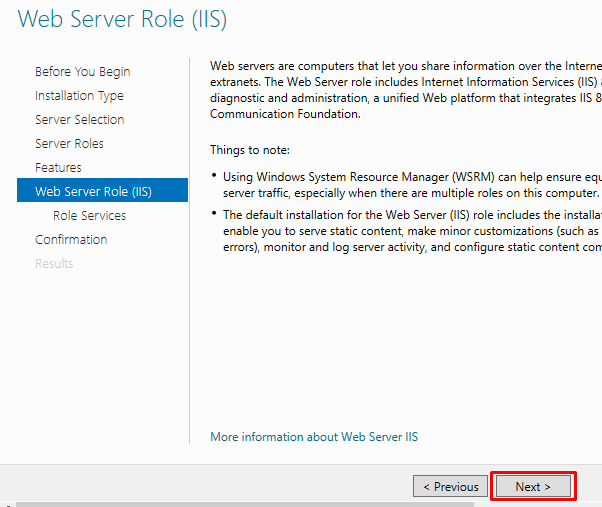
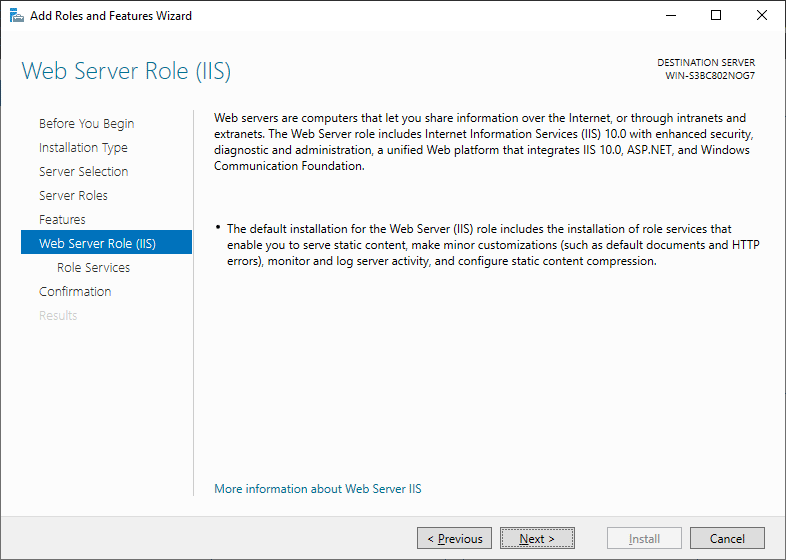
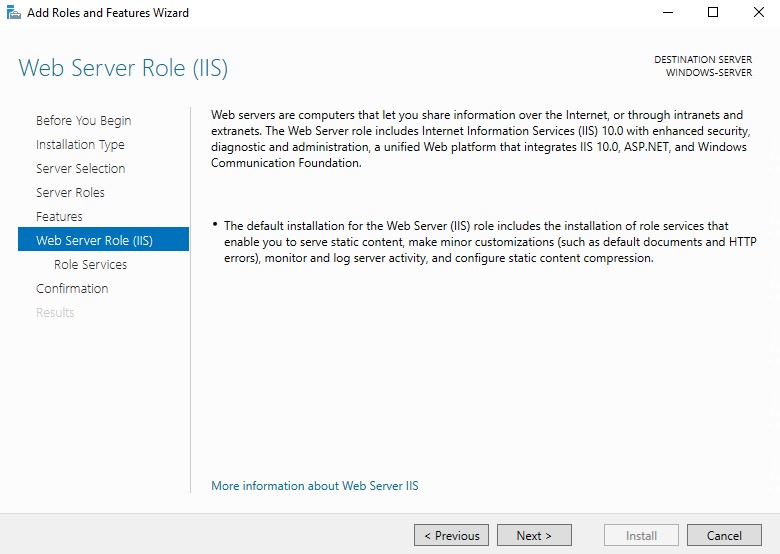
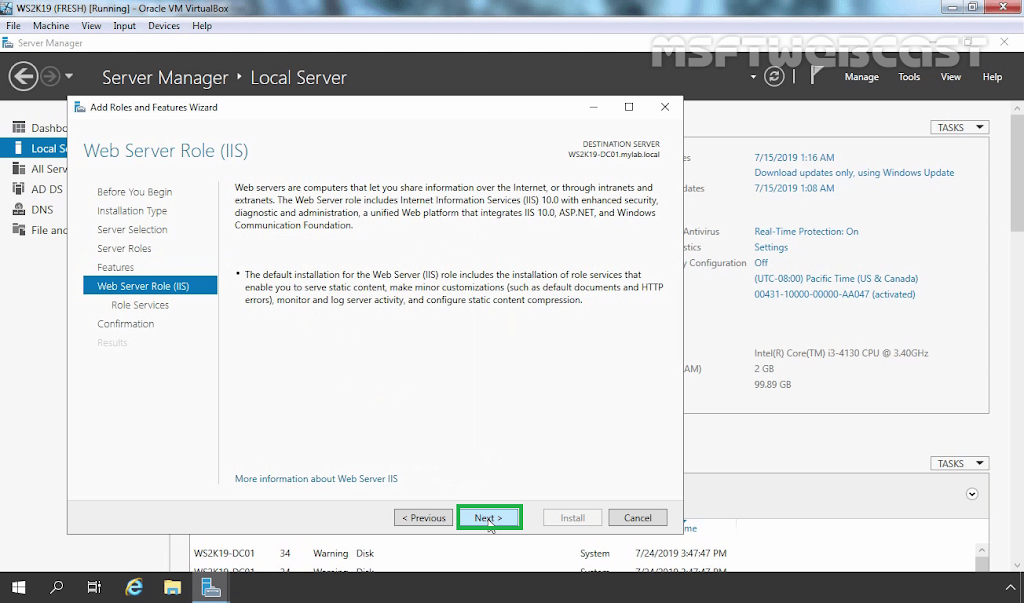
- Click Next on the “Web Server Role (IIS)” window after reading the information provided.
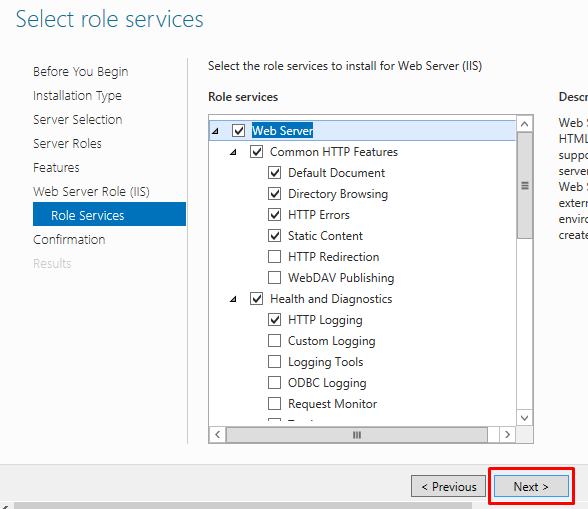
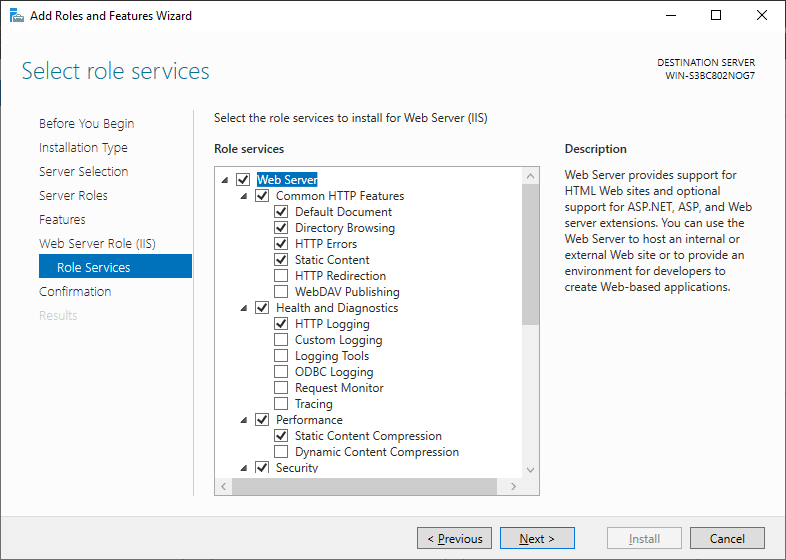
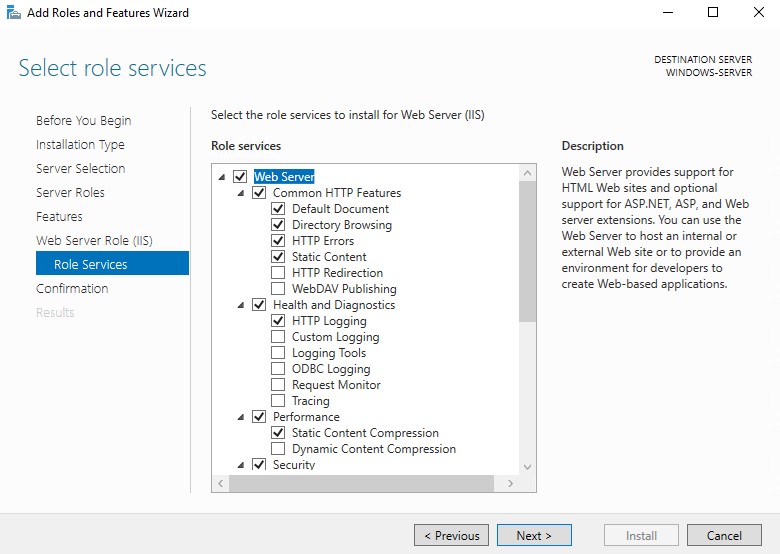
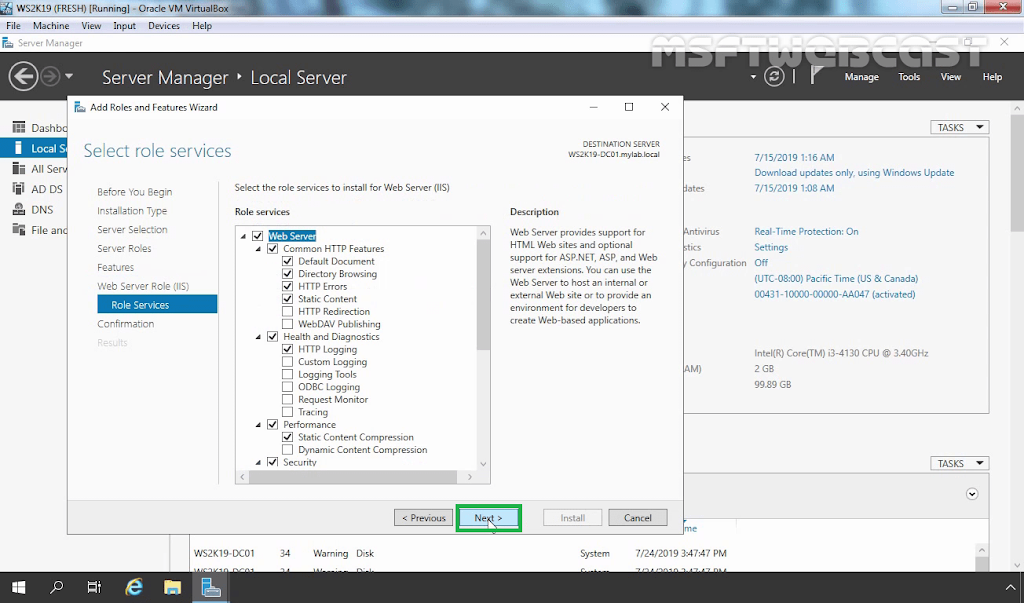
- At this point on the “Select role services” window you can install additional services for IIS if required. You don’t have to worry about this now as you can always come back and add more later, so just click Next for now to install the defaults.
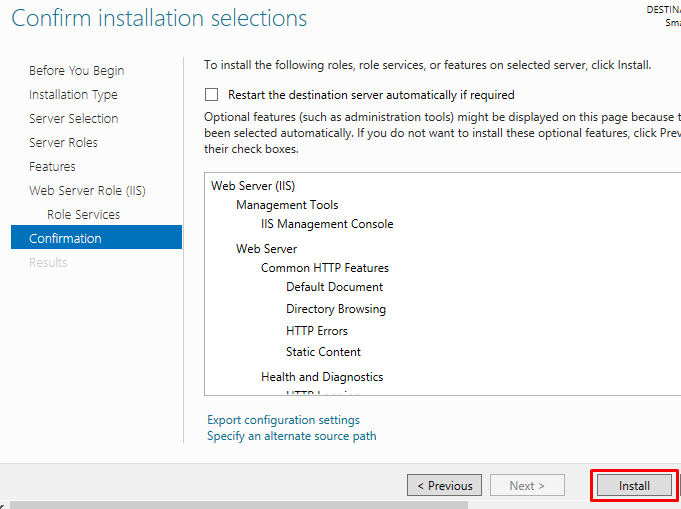
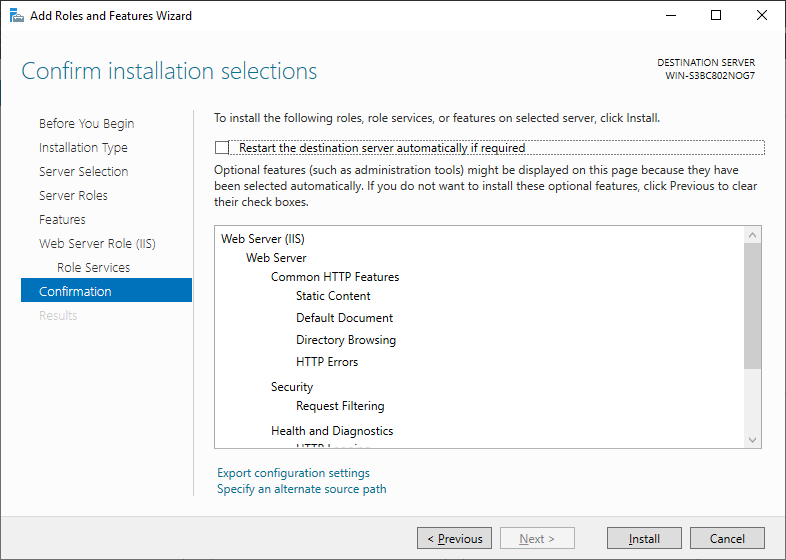
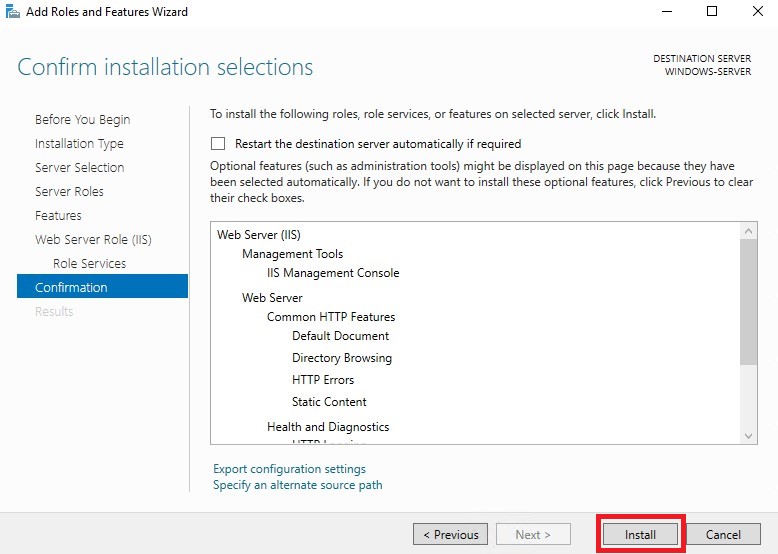
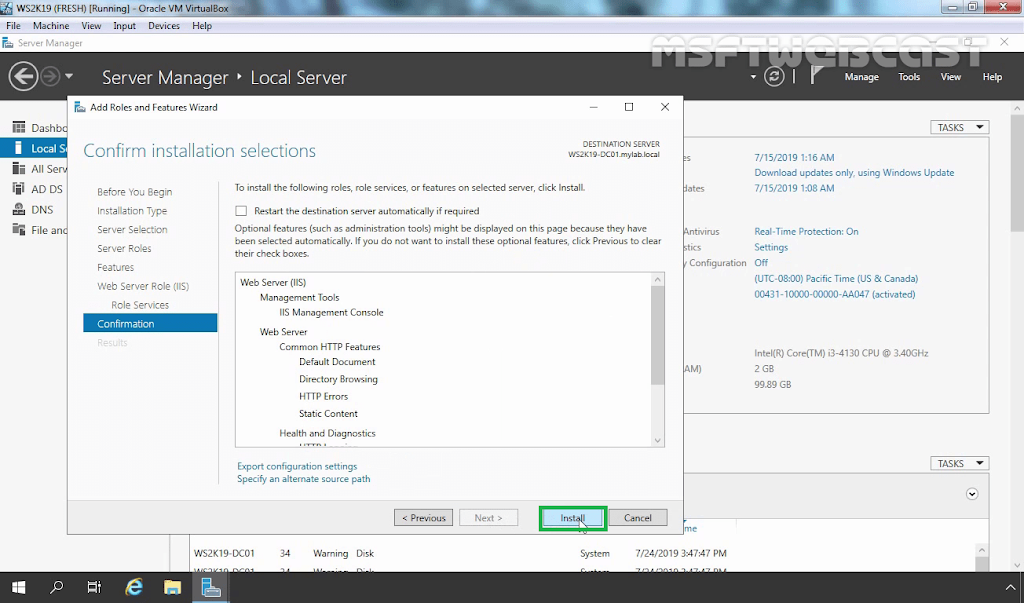
- Finally on the “Confirm installation selections” window , review the items that are to be installed and click Install when you’re ready to proceed with installing the IIS web server.
No reboot should be required with a standard IIS installation, however if you remove the role a reboot will be needed.
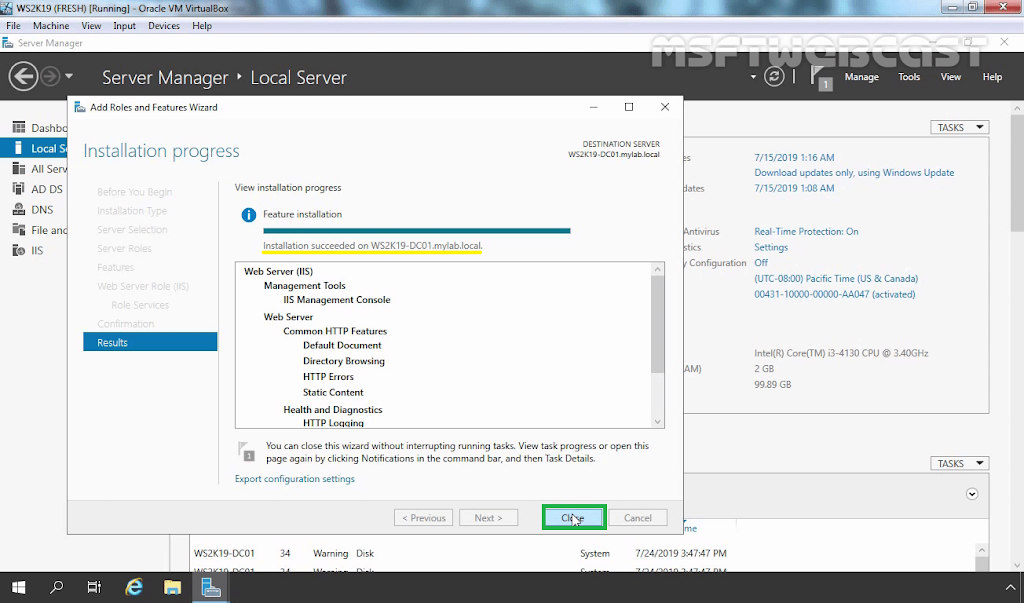
- Once the installation has succeeded, click the close button. At this point IIS should be running on port 80 by default with the firewall rule “World Wide Web Services (HTTP Traffic-In)” enabled in Windows firewall automatically.
- We can perform a simple test by opening up a web browser and browsing to the server that we have installed IIS on. You should see the default IIS page.

As you can hopefully see, it’s quite a lot faster to use PowerShell to perform the same task.
Summary
As shown we can easily install the IIS web server in Windows Server 2019 with both the PowerShell command line or the graphical user interface.
How to Install IIS Web Server on Windows Server 2019. IIS Web Server is for Windows Server that can be installed on different versions of Windows. IIS Web Server allows Windows to respond to web requests.
The IIS web server has fewer users than Apache and Nginx, which may be due to slower speeds.
IIS stands for Internet Information Server. IIS is a web server-dependent Visual Basic application that responds to a browser request.
In this article, we will teach you how to install IIS Web Server on Windows Server 2019.
Choose your perfect Windows Virtual Private Server Packages in Eldernode
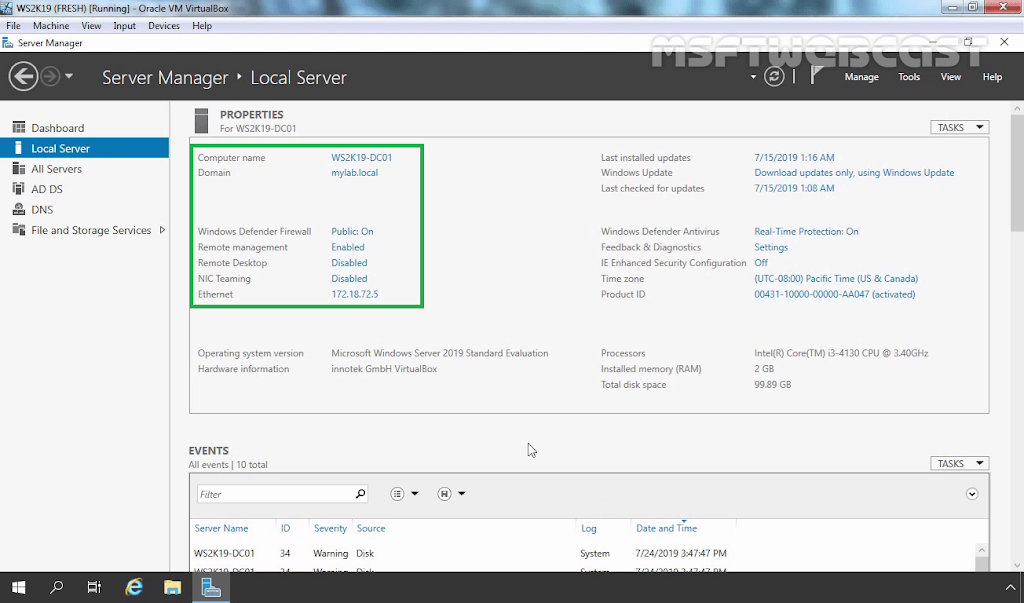
1) Open Server Manager
You have to go to the Server Manager to begin the installation. Hit your Windows key and search for the Server Manager.
Once open, click on Add Roles and Features.
On the first page of the Add Roles and Features Wizard, click Next.
2) Installation Type
In the Select Installation type page, select Role-based or feature-based installation and click Next.
3) Destination Server
Select the server you will install NFS on and click Next.
4) Server Roles
In the Select server roles section, check WebServer (IIS) in the middle window.
5) Features
In the pop-up window, click on Add Features then hit Next.
After that click Next on the next three consecutive windows as illustrated below:
*
**
***
6) Confirmation
On the Confirm installation selections page click on Install.
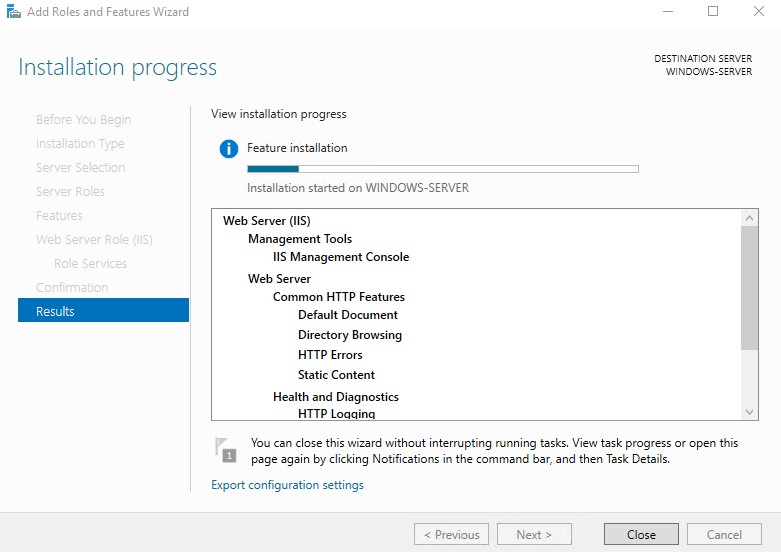
Afford it some time to finish after which you just click Close.
*
7) Prove the Web Server is running
Open your browser either within the server or on a computer that can access your IIS Server network and input its IP Address on the browser’s search as shown below:
This is where the IIS Webserver installation was completed successfully. In the following articles, we will teach you how to configure IIS Webserver in Windows Server 2019.
Also, see:
1.Windows Server 2019 installation and configuration tutorial
2.Tutorial Configure NTP Server in Windows Server 2019
3.Tutorial Configure Virtual Directory on Windows IIS Server 2019
4.How to Install and Configure Hyper-V on Windows Server 2019
5.How to install Active Directory on Windows Server 2019
6.How to Install and Configure Windows Admin Center on Windows Server
Dear user, we hope you would enjoy this tutorial, you can ask questions about this training in the comments section, or to solve other problems in the field of Eldernode training, refer to the Ask page section and raise your problem in it as soon as possible. Make time for other users and experts to answer your questions.
Goodluck.
— Advertisement —
Hello, how are you? In this opportunity, we are going to talk about one of the functions that bring Windows Server 2019. When we use this operating system to host our platform, it is likely that common web server solutions for Linux like Apache or Nginx, are more difficult to install. However, Windows Server has the ability to deploy a web server using IIS (Internet Information Server) services. For that reason, let’s see how to install Internet Information Services (IIS) on Windows Server 2019.
What is Internet Information Services (IIS).
It is a web server and a set of services for the Microsoft Windows operating system. It was originally part of the Option Pack for Windows NT. The services offered are FTP, SMTP, NNTP and HTTP/HTTPS.2 In other words, it is an extensible web server that provides a set of services for Windows operating systems. This service converts a PC into a web server for the Internet or for an intranet, that is, computers that have this service installed can publish web pages both locally and remotely.
Install IIS on Windows Server 2019.
To activate IIS, we need to use the Server Manager. It is a central system of administration and management of the servers. It allows you to add and remove features from the servers without having to physically access them. He starts by default when you start the server. Once opened, select Add roles and features

On the next page, a window will appear with the introduction of the wizard. Please press next to continue the process.

Next, you have to select Role-based or feature-based installation

Now, select the server where the feature will be installed. Press Next to continue with the installation.

Furthermore, you need to search the Web server (IIS) box and activate it.

At the moment of selecting the feature, a floating window will be displayed. Please click on Add Features to continue the installation.

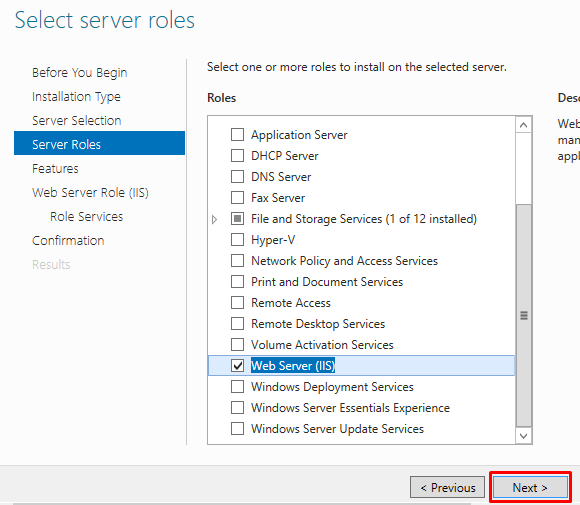
The web server (IIS) is now selected for installation. Click Next to continue

Next, we’ll see the “features” section. Just press Next to continue the installation.

Additionally, we will see a summary of the features that IIS brings to the Windows server 2019.

In the following window, you can manage the server services roles. This is an important step to customize the installation. As a matter of fact, we can manage elements related to safety, performance, management tools, etc. In like manner, you can leave the default options, or choose the features you want for your server.

Pressing install will start the installation process.

The wizard will start installing each element of the web server. When the installation is finished, we will see the following window. Press close to continue working.
Running and configuring IIS Web Server
You can access IIS from the Server Manager. With this intention, please locate in the left panel “IIS”.

Once the server is selected, please right-click on it to launch the IIS manager.

In the manager, there are two panels on the left. The home page and the name of the server.

When you click on the name of the server, you will see the different configurations to use. In the same way, you can configure all the options according to your needs.

Testing IIS
To check the functioning of the server, please go to any browser and open the following address:
http://localhost
If everything is in order, you will see the following information:

Ultimately, we have seen how to install Internet Information Services IIS on Windows Server 2019. From there, we will be able to configure them and use them for our web server. Before saying goodbye I want to invite you to review our post on how to add windows 10 to a domain in Windows Server 2019
Во многих web-проектах активно используются различные системы управления базами данных (СУБД). Применение их довольно обширно, при том, что создание, хранение баз данных, управление ими может осуществляться как через разнообразные приложения, так и посредством доступа к ним через web-сайт. В данном руководстве мы рассмотрим установку web-сервера из состава MS IIS и СУБД MS SQL Server на виртуальный сервер, работающий под управлением операционной системой Windows Server 2019.
IIS (Internet Information Services) – набор служб и серверов от Microsoft, входящий в состав операционных систем Windows Server. В данном мануале IIS будет интересовать нас прежде всего как web-сервер, на котором мы запустим собственный сайт.
MS SQL Server также разработан Microsoft и является одной из самых распространённых СУБД. Функционально, MS SQL Server использует реляционную модель организации структуры баз данных.
Установка IIS
Чтобы начать установку IIS запустите Диспетчер серверов (Server Manager). Далее, перейдите Manage 🠒 Add Roles and Features.
В стартовом окне открывшегося мастера нажмите Next >.
На следующем шаге отметьте тип установки как Role-based or feature-based installation и нажмите Next >.
Далее, выберите опцию Select a server from the server pool и в списке доступных серверов укажите тот, на который планируете произвести установку. После чего нажмите Next > (в нашем примере доступен всего один сервер).
На следующей странице необходимо выбрать роль Web Server (IIS).
После чего откроется окно, в котором не внося никаких изменений нажмите Add Features.
В результате роль Web Server (IIS) станет активной. Если это так, нажмите Next >.

Если вы устанавливаете только IIS, то на следующих страницах можно всё оставить без изменений и так же нажимать Next >.
Наконец, в окне подтверждения запуска установки нажмите Install.
В результате запустится процесс инсталляции IIS.
По окончании установки необходимо будет перезагрузить сервер.
В результате, когда вы в браузере введёте IP-адрес вашего сервера, должна открыться дефолтная страница IIS.
Запуск сайта
Теперь, когда IIS работает, можно запустить на нём свой домен. Для того, чтобы ваш сайт стал доступен по своему доменному имени, на имя вашего сайта должна указывать A-запись в настройках DNS-записей домена. Отредактировать DNS-записи можно в списке ваших доменов. В нашем примере мы будем использовать имя домена my-domain.host, которое связано с IP-адресом нашей виртуалки именно через A-запись.

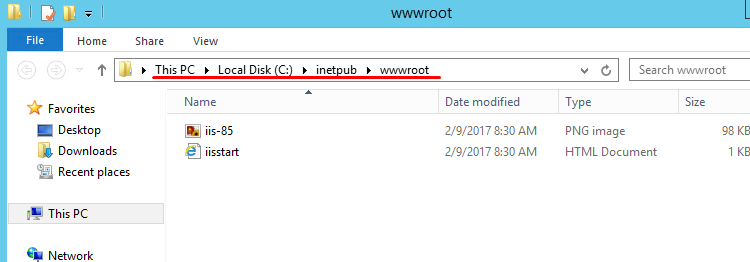
По умолчанию файлы сайтов IIS расположены в каталоге C:inetpub. В свою очередь, файлы дефолтной страницы IIS находятся в директории C:inetpubwwwroot. Мы же создадим отдельный каталог для нашего сайта. Таким каталогом будет C:inetpubmy-domain. В него мы положим файл стартовой страницы сайта index.html со следующим содержимым:
<html>
<head>
<title>
Domain on IIS
</title>
</head>
<body>
<h1>
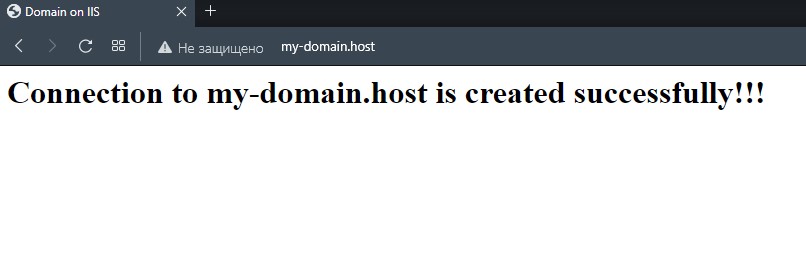
Connection to my-domain.host is created successfully!!!
</h1>
</body>
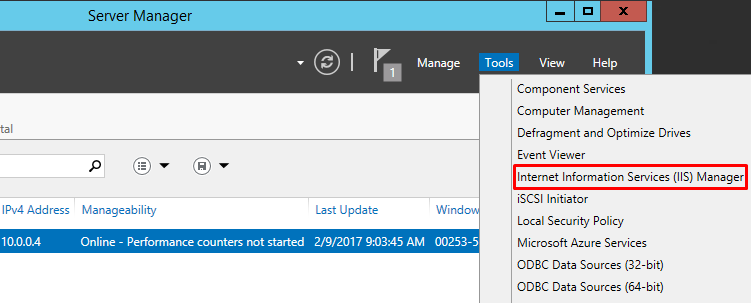
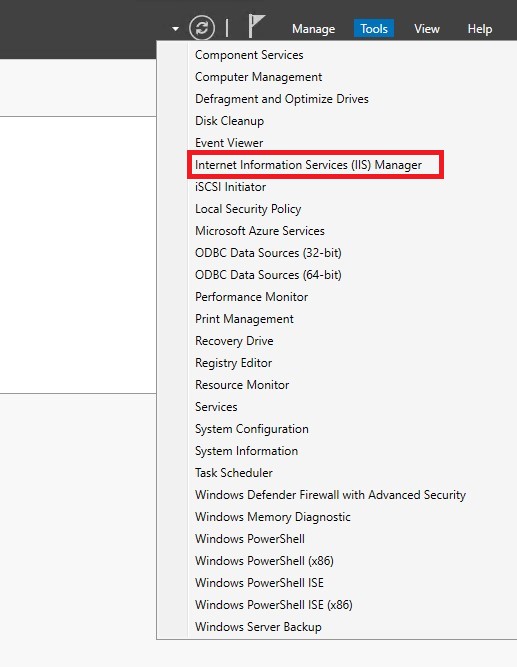
</html>Теперь, когда файл стартовой страницы сайта готов, в Диспетчере серверов перейдите в Tools 🠒 Internet Information Services (IIS) Manager.
В открывшемся окне менеджера IIS раскройте ветку своего сервера и перейдите на ветку Sites.
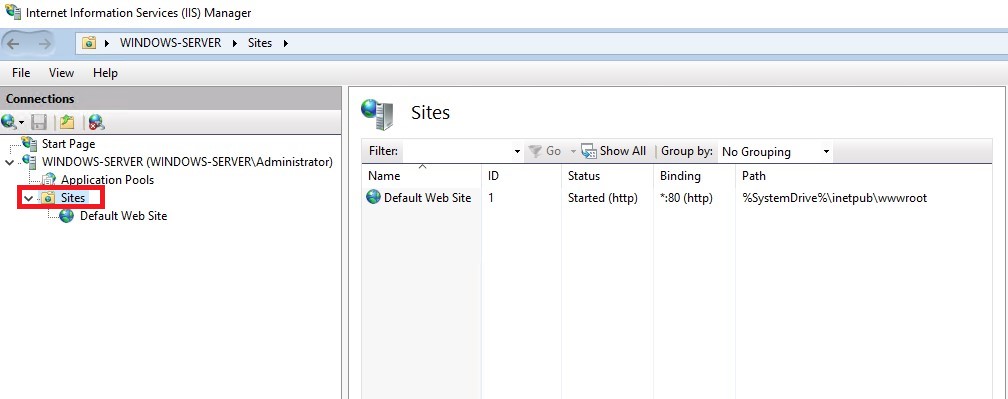
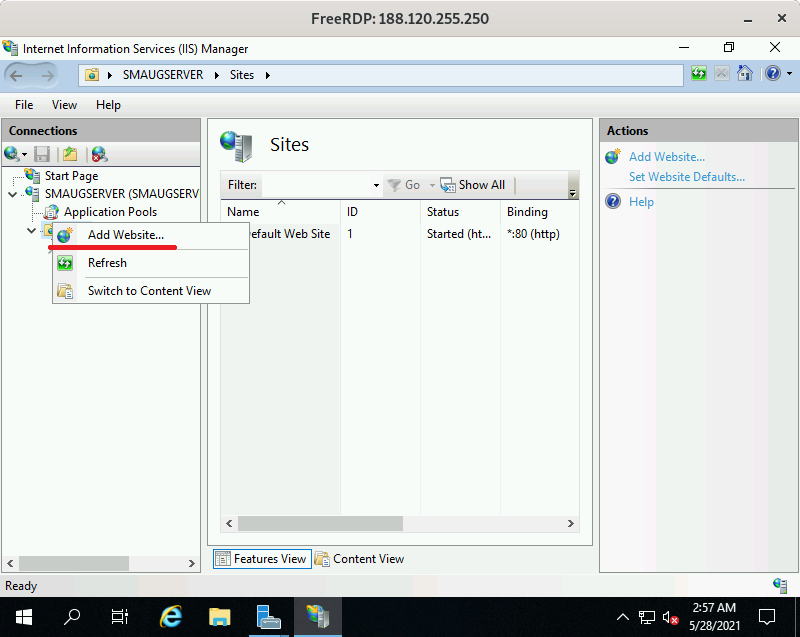
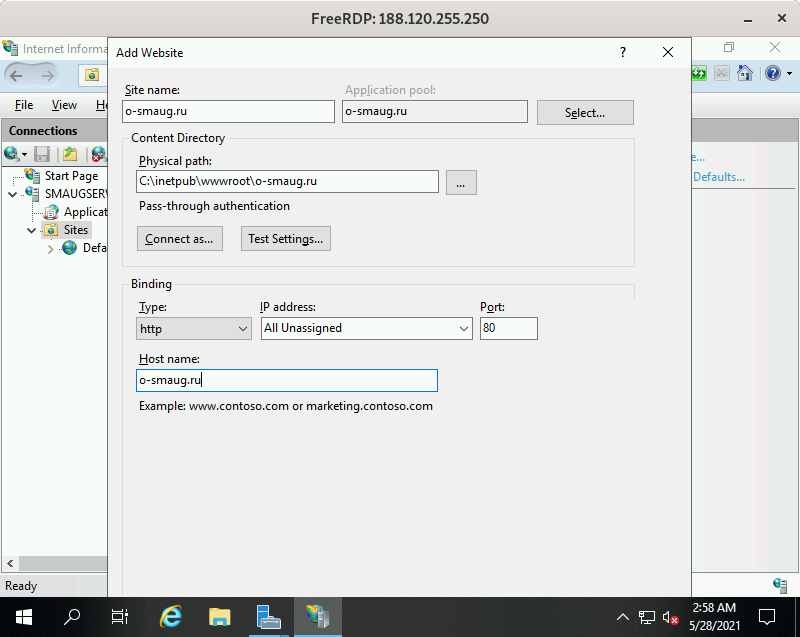
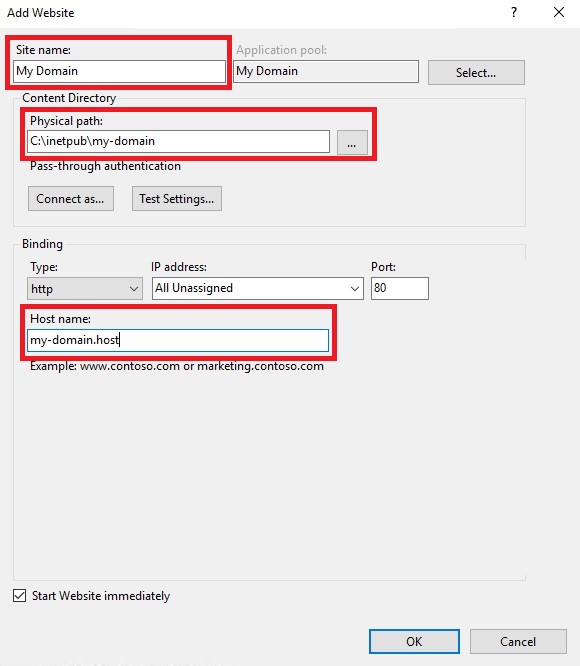
В эту ветку необходимо добавить новый сайт. Для чего на заголовке Sites нажмите правую кнопку мыши и выберите Add Website.... В открывшемся окне заполните поля Site name, Physical path и Host name. После чего нажмите ОК.
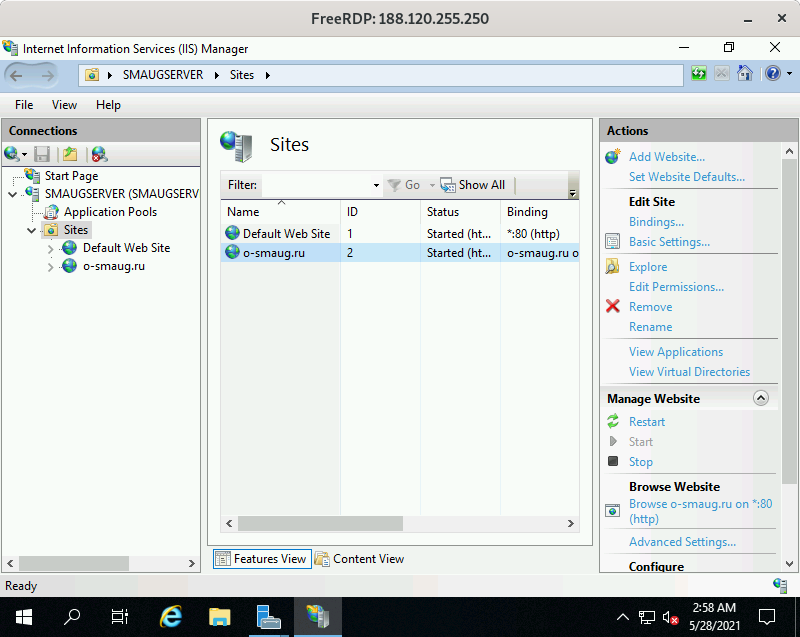
Теперь, если вы наберёте в браузере адрес вашего сайта, например, http://my-domain.host, браузер должен будет открыть его стартовую страницу.
Установка MS SQL Server
На нашем виртуальном сервере мы будем устанавливать MS SQL Server 2019. Данная СУБД была выпущена в следующих редакциях:
- Enterprise Edition – полноценная редакция MS SQL Server, предназначенная для использования в реальных проектах и не имеющая ограничений по вычислительным мощностям.
- Standard Edition – также полноценный выпуск, но имеющий определённые аппаратные ограничения.
- Express Edition – бесплатный выпуск для работы простых приложений. Может использоваться для решения реальных задач, но имеет некоторые аппаратные ограничения.
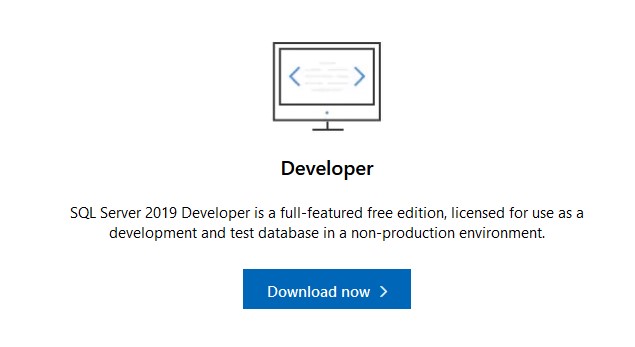
- Developer Edition – полнофункциональная бесплатная редакция, нацеленная на разработчиков. Данный выпуск не может использоваться для работы в качестве реального SQL-сервера, но может быть применён для изучения и тестирования механики MS SQL Server.
Запуск SQL-сервера рассмотрим на примере установки редакции Developer Edition.
Для загрузки инсталлятора перейдите на страницу MS SQL Server. Нажмите Download now > на версии Developer.
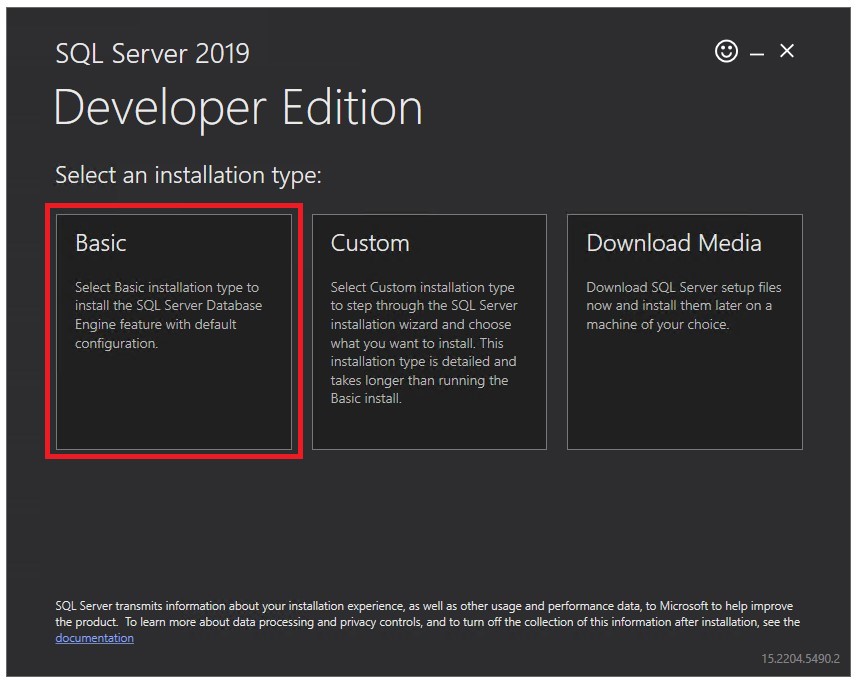
По окончании загрузки запустите установщик от имени администратора. Инсталляция MS SQL Server может производиться двумя вариантами: базовый (basic) и пользовательский (custom). Базовый вариант установки является более простым и не требует дополнительных настроек. Чтобы выбрать этот метод, необходимо выбрать соответствующий тип инсталляции.
В следующем окне нажмите Accept, чтобы принять условия лицензии.

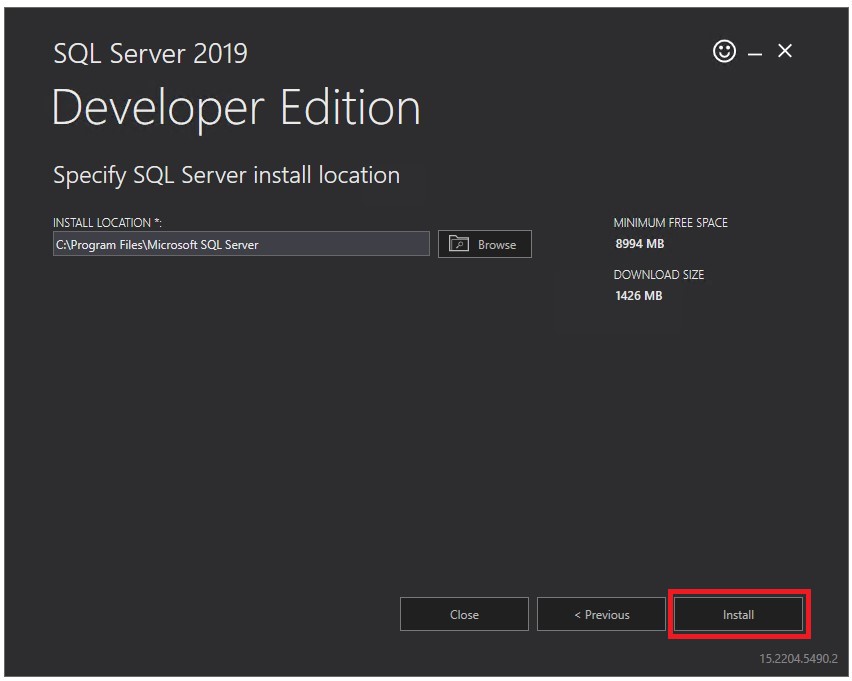
Далее, установщик укажет каталог, в который планирует инсталлировать SQL Server. Вы можете изменить его, если нужно. После чего нажмите Install.
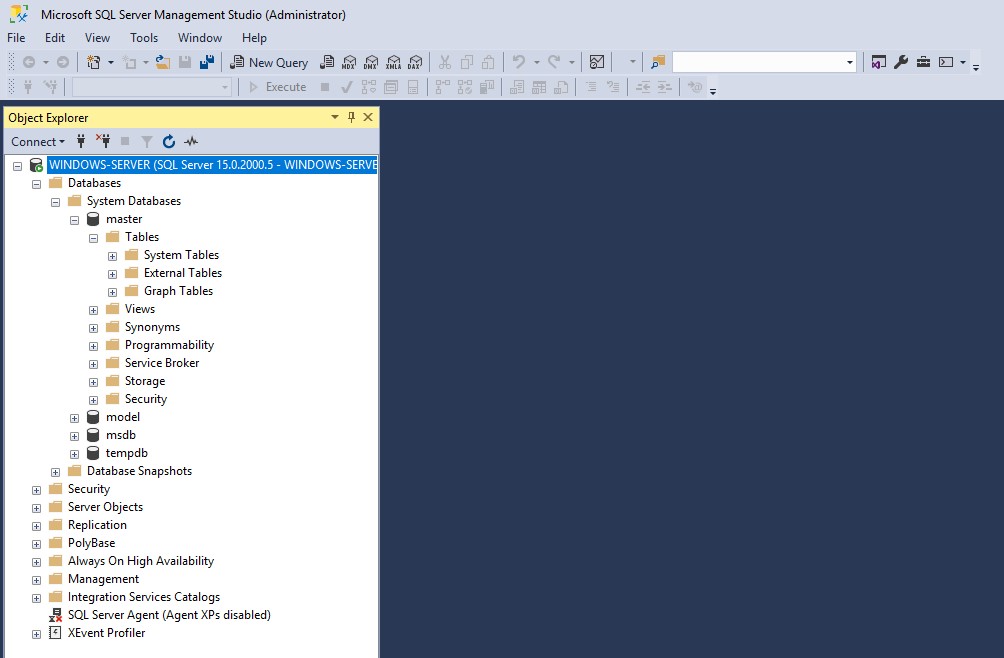
Завершив установку мастер покажет итоговую информацию, которая будет необходима для дальнейшей эксплуатации SQL-сервера. В частности, в строке INSTANCE NAME указано имя экземпляра SQL Server. В одной операционной системе может работать до пятидесяти экземпляров, и каждый из них должен иметь своё собственное имя. Также, в этом окне прописана строка подключения CONNECTION STRING. С помощью содержимого этой строки вы сможете подключаться к SQL-серверу из других приложений, работающих на вашем VPS.
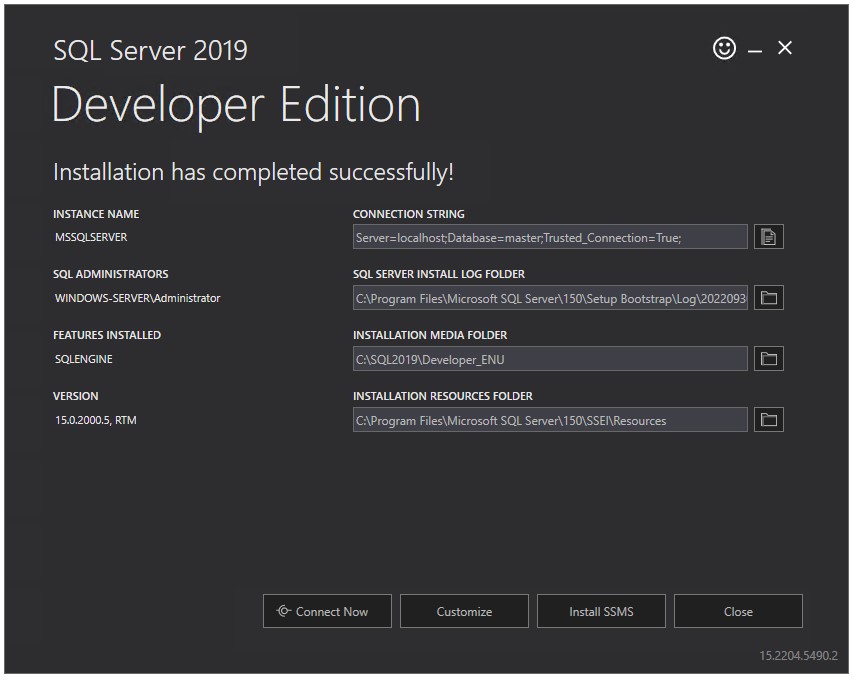
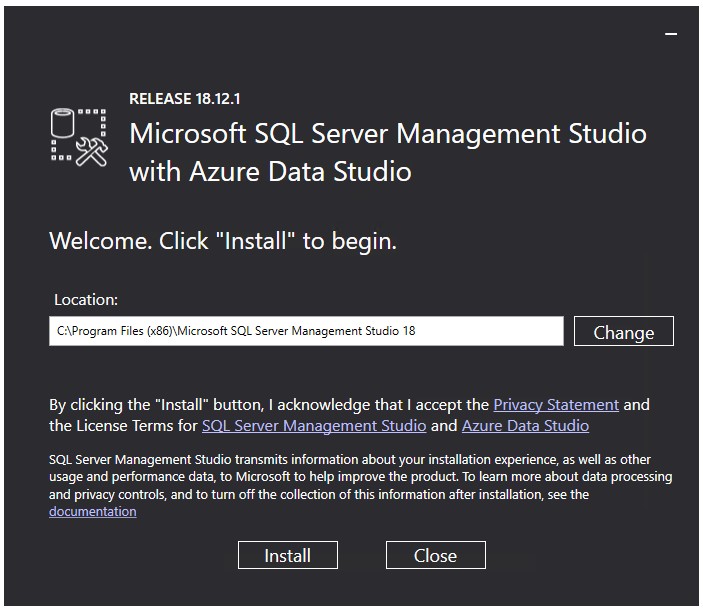
Здесь же есть кнопка Connect Now, с помощью которой вы можете проверить работоспособность данного экземпляра SQL-сервера, подключившись к нему через консольный терминал. В свою очередь, кнопка Install SSMS представляет собой ссылку на загрузку SQL Server Management Studio. Данное приложение является графической средой, содержащей инструментарий для управления инфраструктурой MS SQL Server. При переходе по ссылке загрузите инсталлятор SSMS, и запустите его от имени администратора. Установка начнётся по нажатию кнопки Install.
После завершения инсталляции необходимо будет перезагрузить сервер.
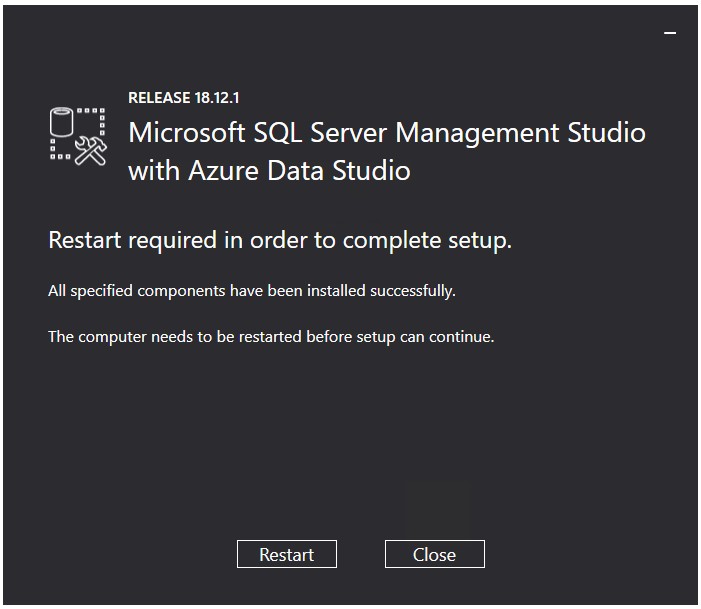
Перезапустив VPS уже можно будет подключиться к SQL-серверу при помощи графической оболочки и приступить к работе с ним.
This article describes the steps to install IIS (Internet Information Service) version 10 in Windows Server 2019. The Web Server (IIS) role in Windows Server 2019 provides a secure, easy-to-manage, modular and extensible platform for reliably hosting websites, services, and applications.
Open Server Manager Console.
Click on Manage and select Add Roles and Features.
On before you begin screen, click Next.
On the Select installation type window, leave Role-based or feature-based installation selected and click Next.
Select the appropriate server. The local server is selected by default. Click Next.
From the Select server roles window, check the box next to Web Server (IIS).
Click on the Add Features button to install the required features as well.

Make sure Web server role is selected, Click on Next.
No additional features are necessary to install the Web Server role, so click Next.

On the Web Server Role (IIS) dialog box, click Next.
On the Select role services dialog box, you can install additional services for IIS if required. Click Next.
Verify that your settings are correct and click Install.
When the installation completes, click Close to exit the wizard.
At this point, the default website should be running on TCP port number 80.
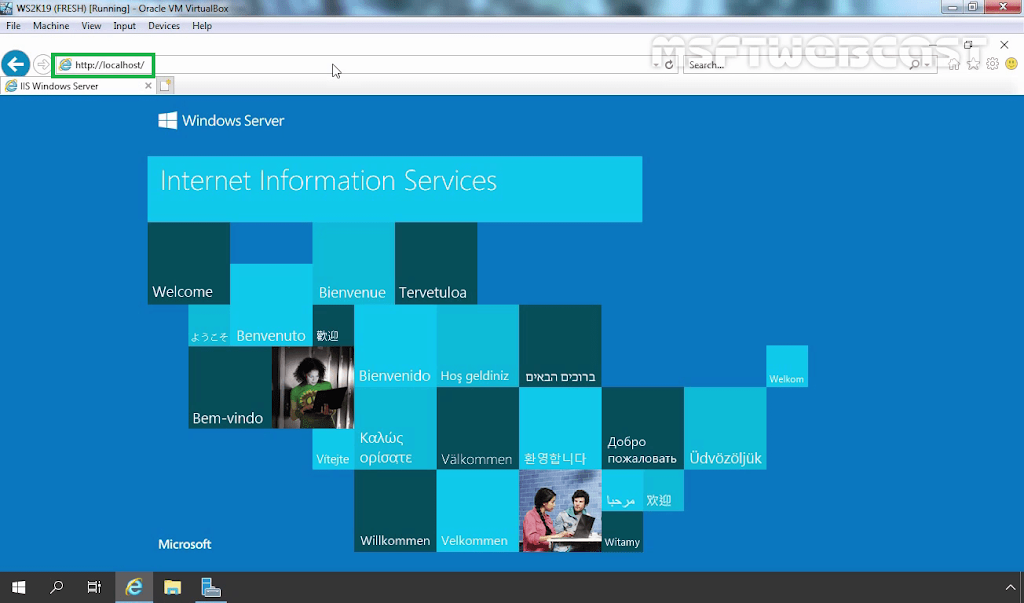
Let’s test that by opening up a web browser. Type the URL http://localhost or http://IP_Address of the server in the browser and press enter key. You should see the default IIS web page in your web browser.
Congratulations! You have installed IIS 10 on Windows Server 2019 successfully.
Post Views: 2,484