Hello,
In this guide, I will show you how to install XILINX ISE 14.7 on Windows 10.
Step1: Go to the XILINX official website and click on the XILINX ISE WebPACK design software link.
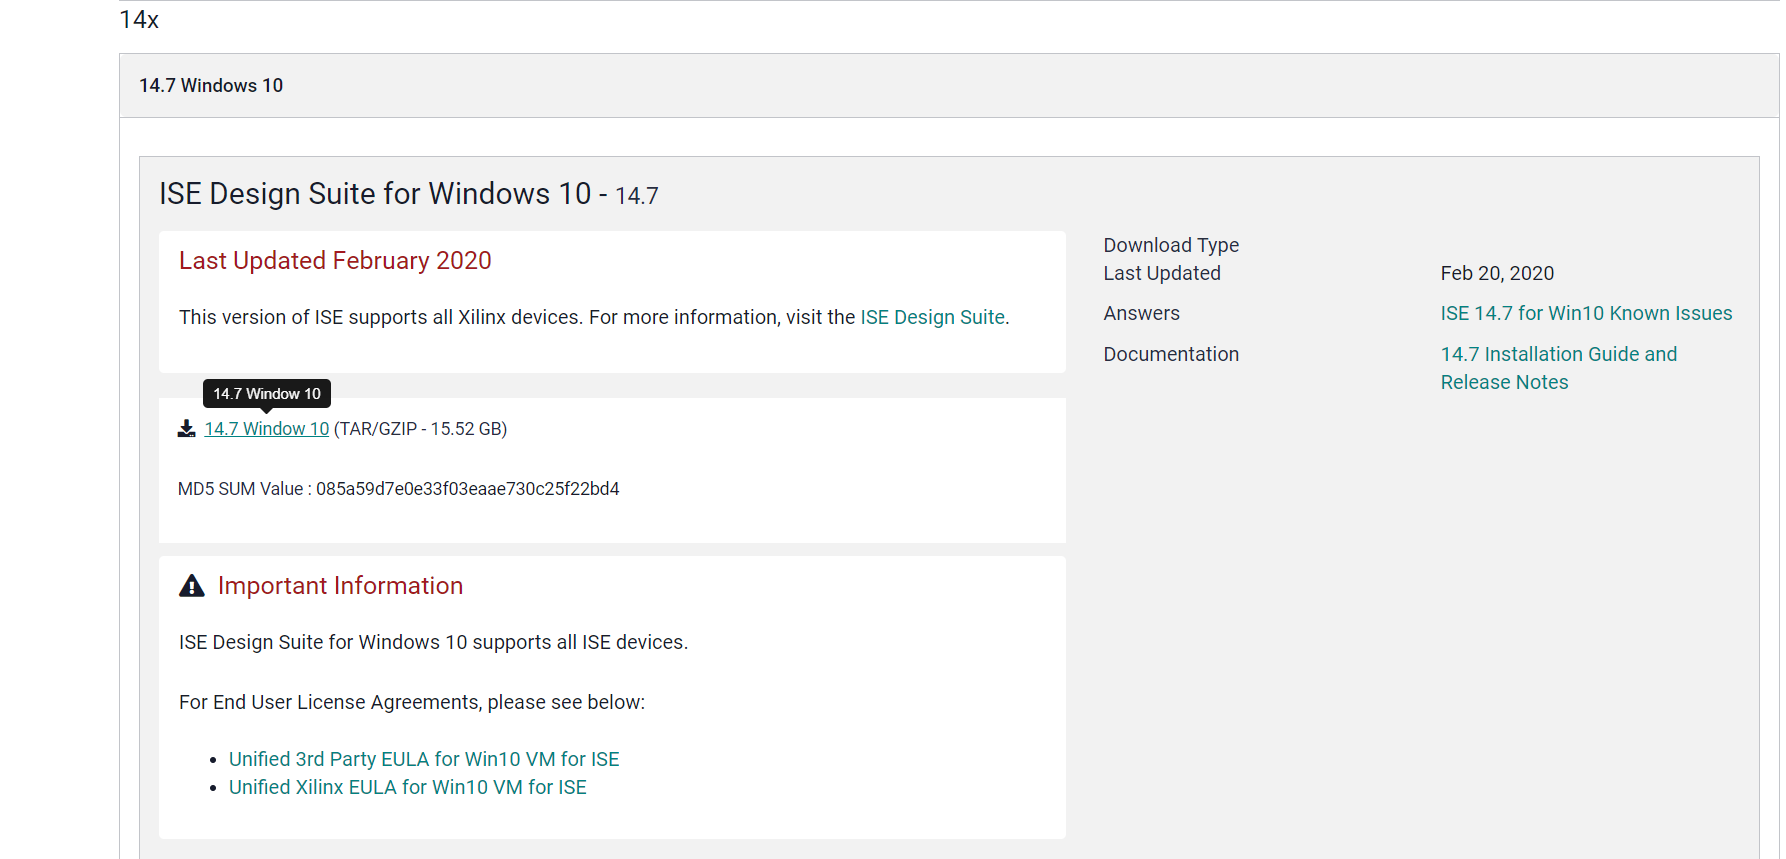
 Step 2: Click on the Download and select the 14.7 Windows 10 edition.
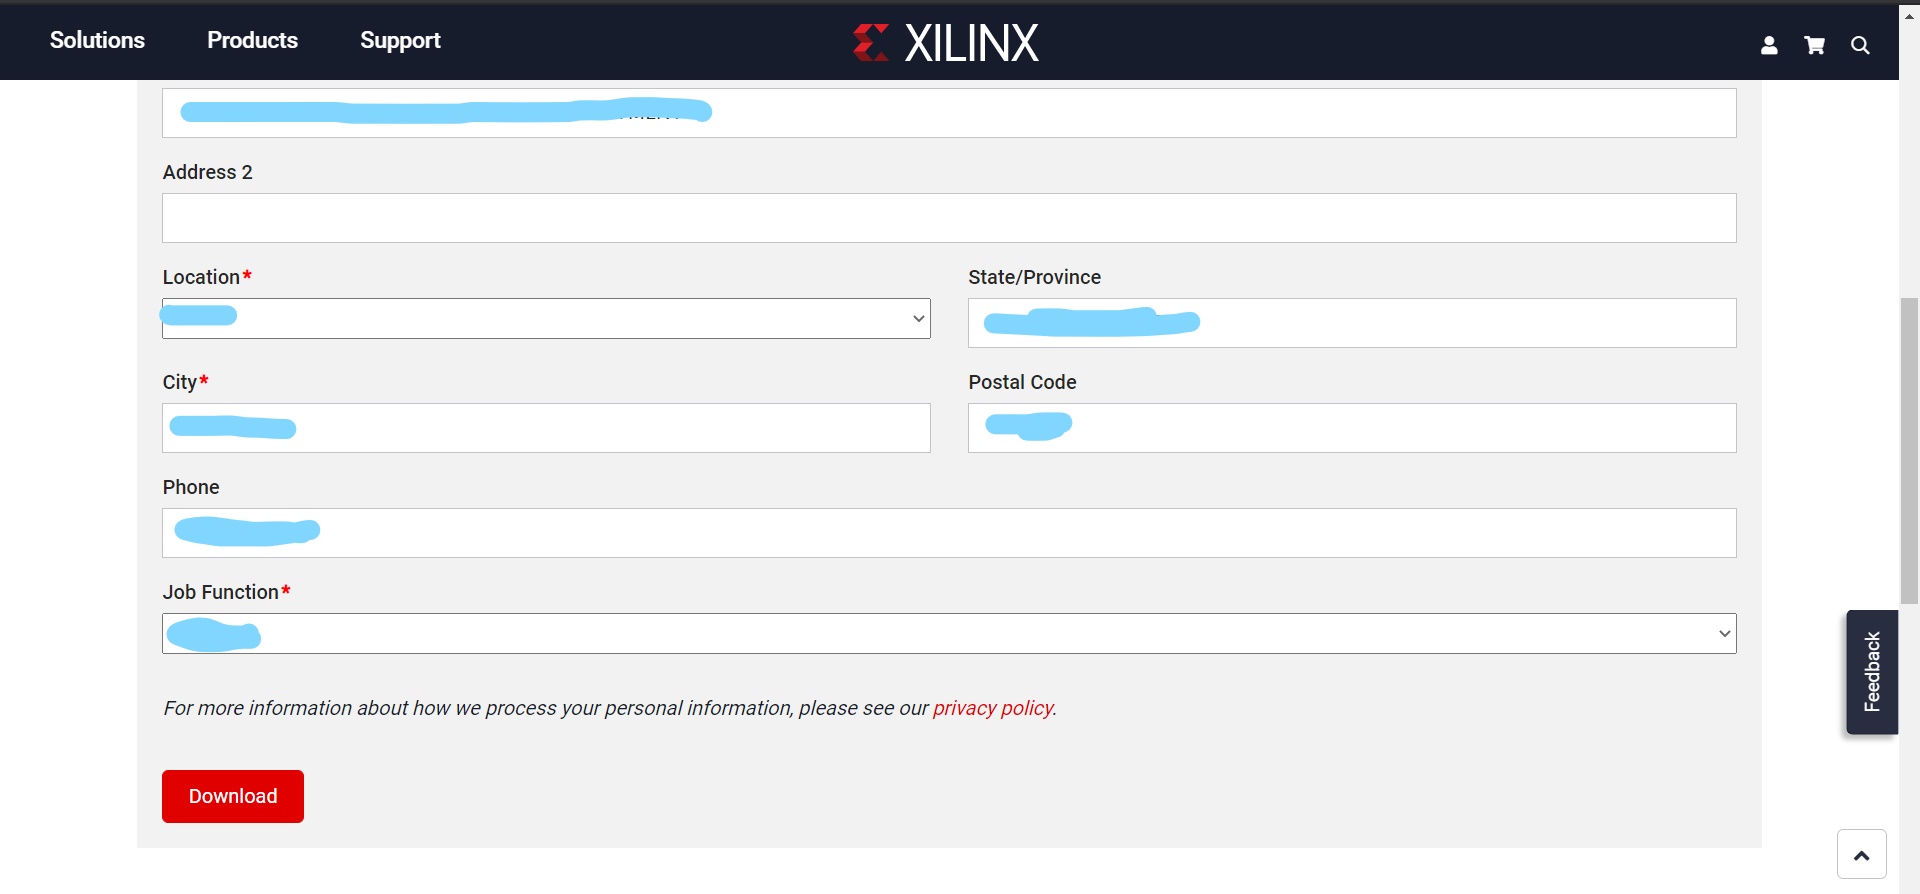
Step 3: Sign in with your Email id and password and fill up the agreement to begin downloading.
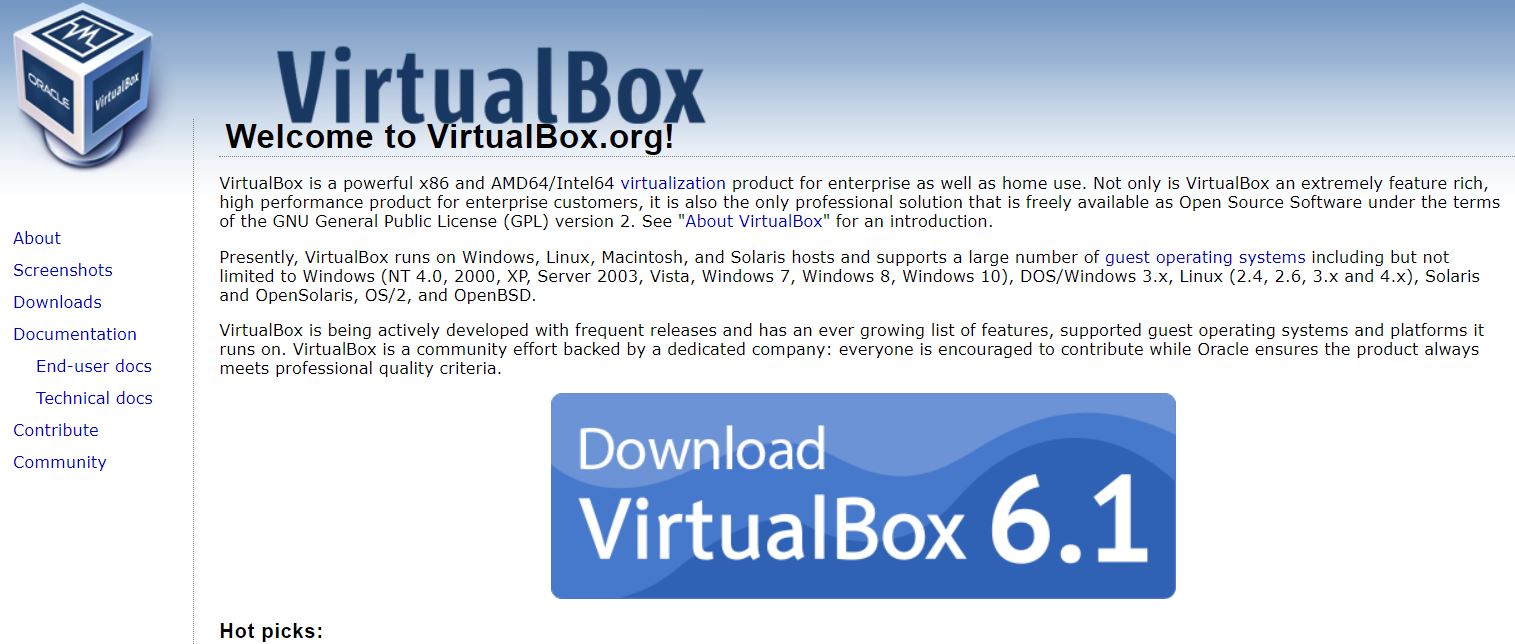
Step 4: After the download is started, we need to download a virtual box called Oracle VM Virtualbox (the driver which helps in detecting the FPGA works best on Linux or Windows 7 so we use a Virtual box). Download the latest version of the tool depending upon your OS.
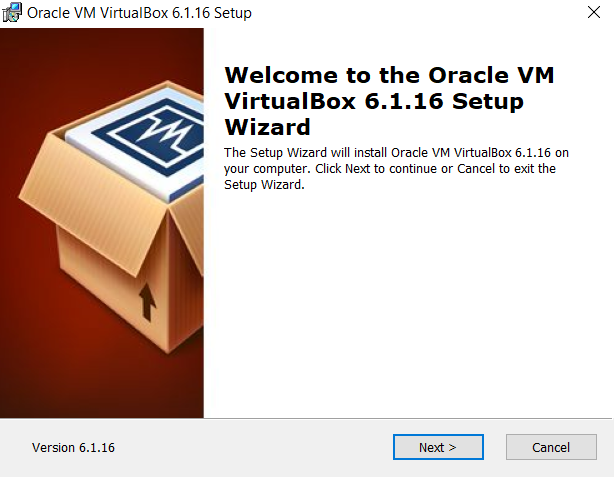
Step 5: Launch the VirtualBox installer and click next.
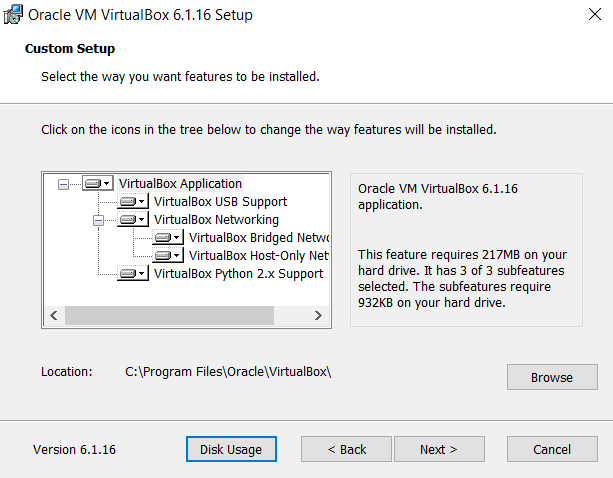
Step 6: Select the installation directory and click next.
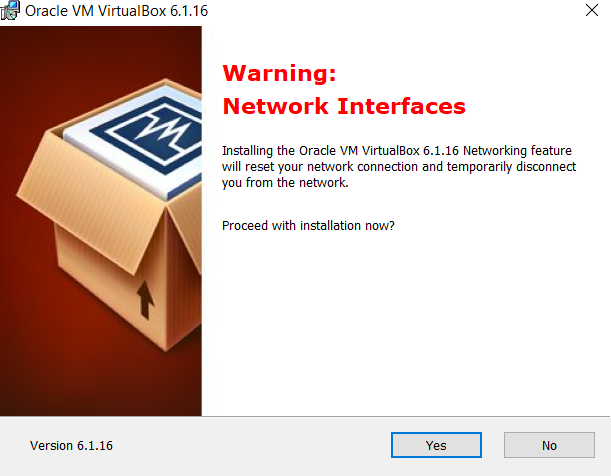
Step 7: click next on the next window and after that window, there will be a warning on network interfaces so click yes.
Step 8: On the next window click install and installation will begin. after the Virtualbox is installed don’t change any settings and begin the installation of XILINX ISE 14.7.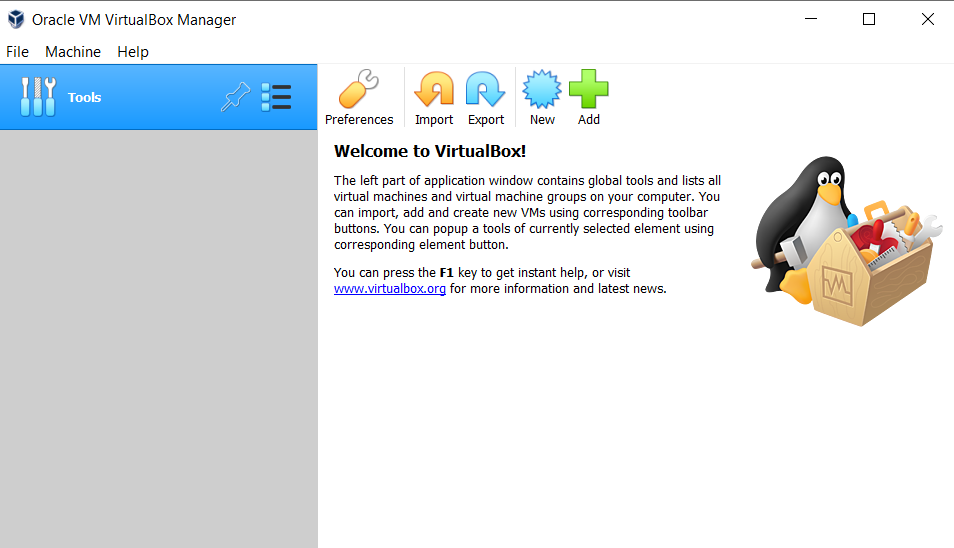
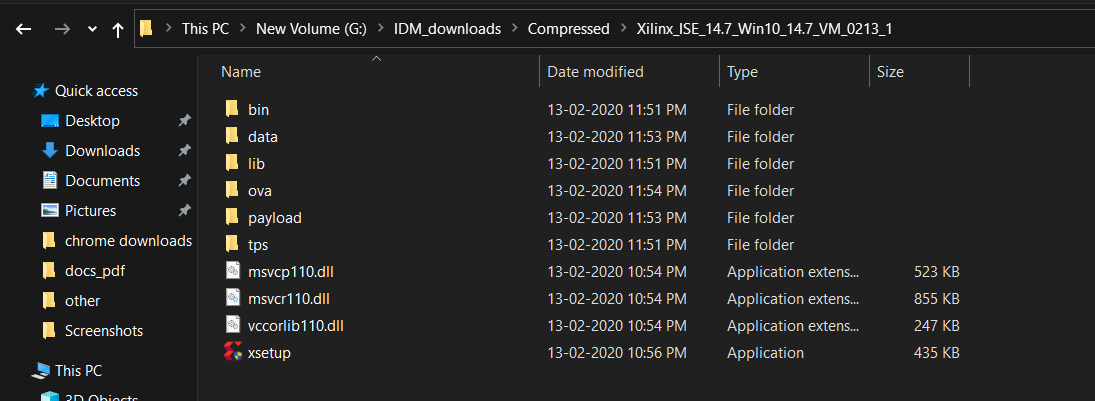
Step 9: the WinRAR tool can be used to extract the ISE setup then and double-click the xsetup.exe file.
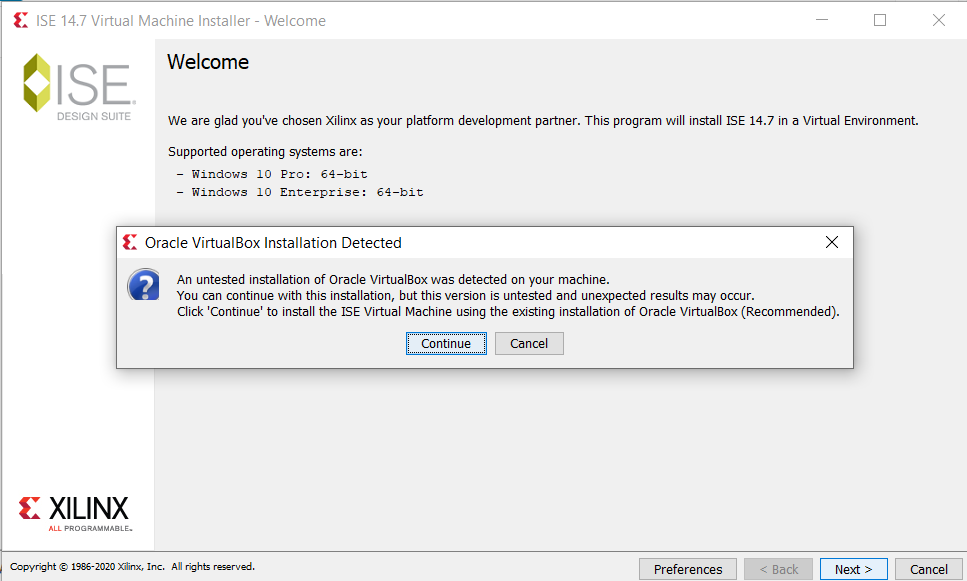
Step 10: Allow access to Java(TM) Platform SE binary then a window will appear for ISE 14.7 Virtual machine installer. Click next on that window. Then a pop will appear saying “Oracle VirtualBox Installation Detected” (you can refer to the manual on Xilinx to check the supported versions of VirtualBox but the latest versions work fine as well). Click continue on that pop-up.
Step 11: On the next window accept the license agreements and click next till you reach the “select destination directory” window. In this window select your preferred drive for installation and select a directory to share with VM. (This directory will appear in your virtual machine for sharing the files between VM and Host PC). Select the path and folder based on your storage available, Then click next.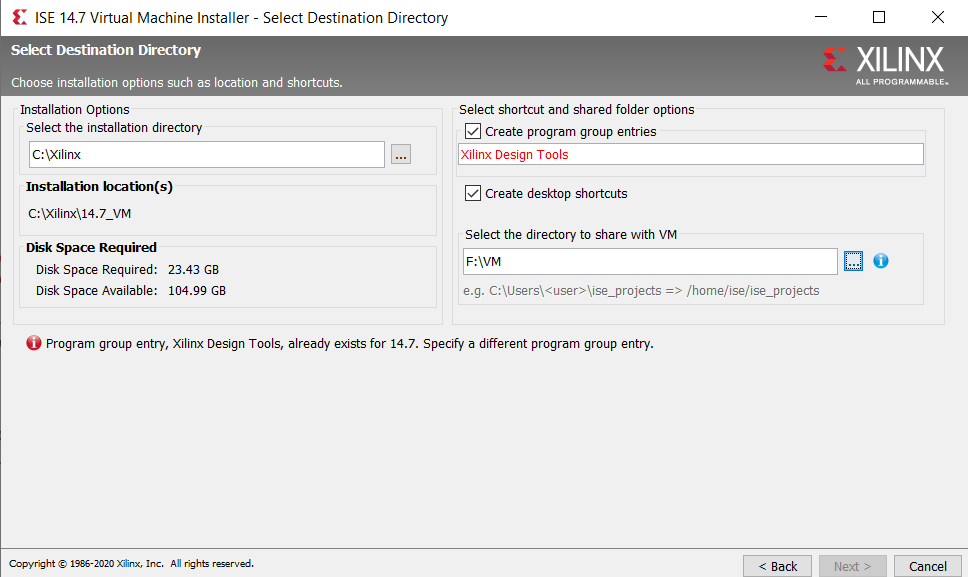
Note:- If you get a warning like shown in the image above then uncheck the create program group entries.
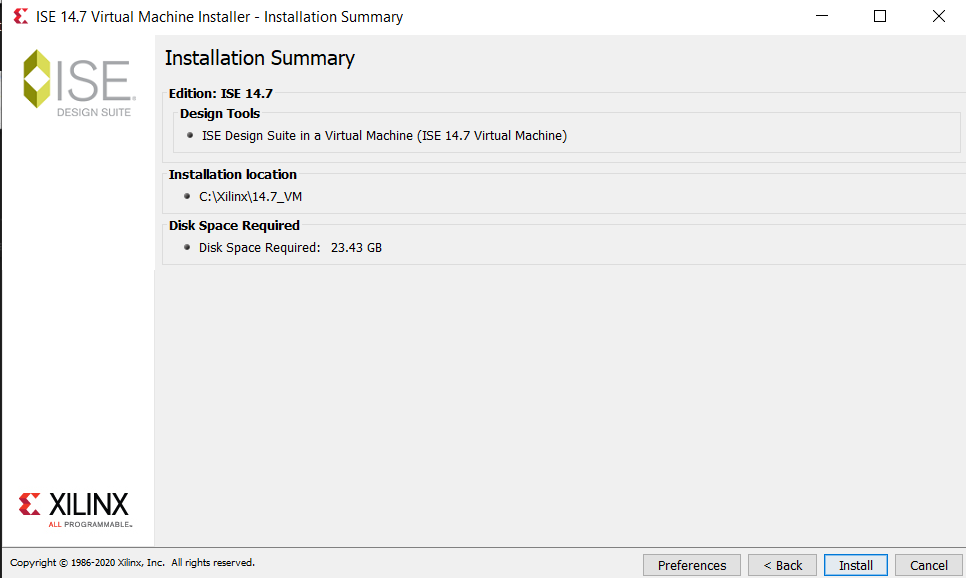
Step 12: On the next window click install.
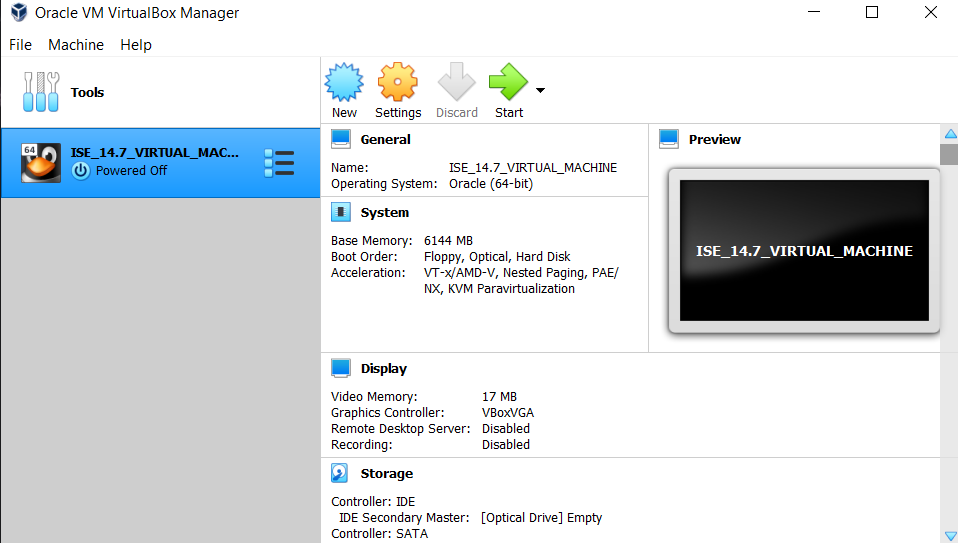
Step 13: Installation will take some time. After the installation is finished you will see “ISE_14.7__Virtual_Machine” added to your Oracle VirtualBox.
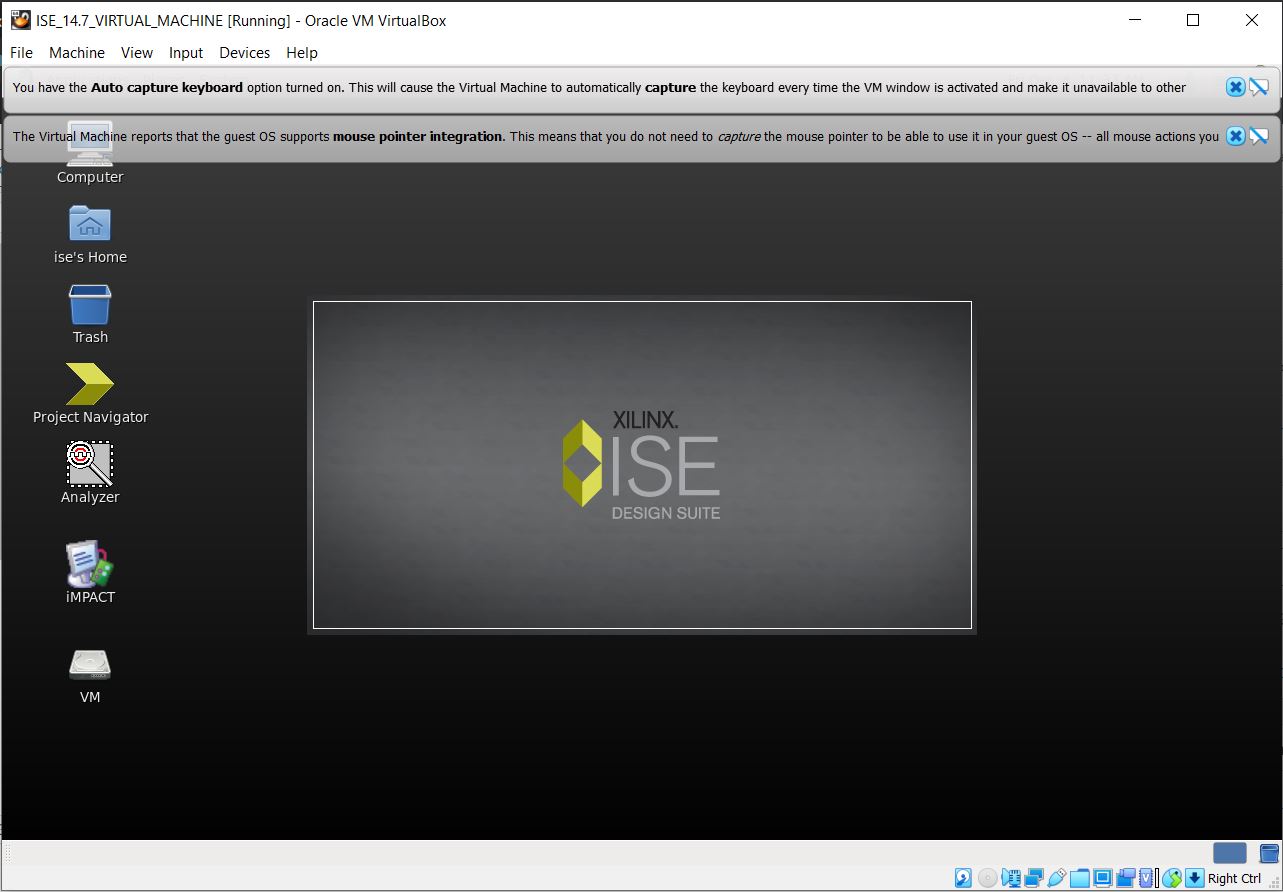
Step 14: Double click on ISE Virtual machine, You will see the Linux OS is loading and the home screen will open. (Ignore the auto-capture keyboard and mouse pointer integration).
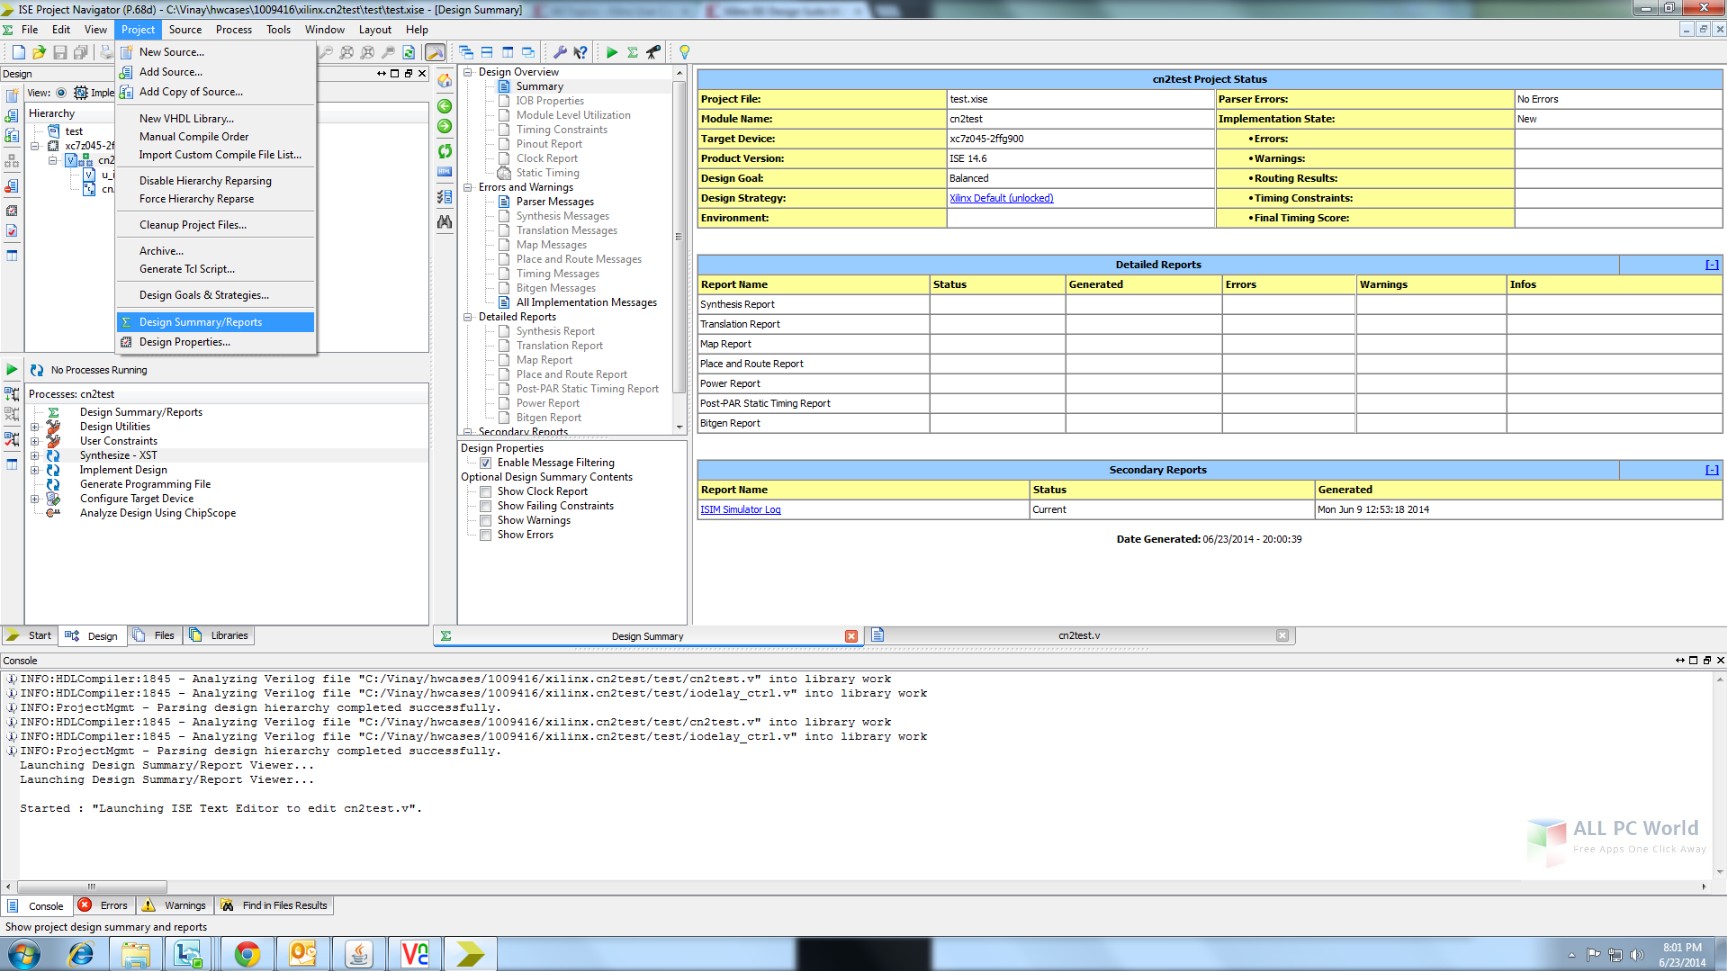
Step 15: Double click the project navigator, the ISE 14.7 tool will start.

Step 16: Create a new project and you are good to go to start writing and synthesizing the modules. (For licensing guide click here to get a free license and how to load the license inside the tool).
Happy coding;
Xilinx Design Suite 14.7 patch for Windows10 32/64
Allows running Xilinx Design Suite version 14.7 under Windows 10 32/64 bit.
All ISE Design Tools will be patched by replacing the libPortability.dll with a library that is Win10 compatible libPortabilityNOSH.dll that has SmartHeap disabled.
The patch does not negatively impact operation and performance of the tools. The patch scripts have to be executed in the Xilinx installation folder. The usage below assumes installation to C:Xilinx folder. You can change that to your folder, if different.
For PlanAhead 14.7 you still need to manually add ‘-m32’ to the shortcut or start menu so that the target becomes:
C:Xilinx14.7ISE_DSPlanAheadbinplanAhead.bat -m32
environment variables
set XILINX = C:Xilinx14.7ISE_DSISE
set XILINX_EDK = C:Xilinx14.7ISE_DSEDK
patch usage
c:Xilinxpatch.bat
revert to original
c:Xilinxrevert.bat
Installing Platform Cable USB Drivers
Sometimes the USB-to-JTAG adapter is not getting recognized (LED off). This requires uninstalling existing drivers and then installing the right drivers.
Step 1 — Uninstalling
cd C:Xilinx14.7ISE_DScommonbinnt64   <- this is the default install location, yours may be different, adjust as needed
wdreg -inf windrvr6.inf uninstall
wdreg -inf xusbdrvr.inf uninstall
net stop XilinxPC4Driver
del "%WINDIR%system32driverswindrvr6.sys"
del "%WINDIR%system32driversxusb*.sys"
del "%WINDIR%system32driversxpc4drvr.sys"
Step 2 — Installing
wdreg -inf windrvr6.inf install
wdreg -inf xusbdrvr.inf install
If the procedure executed correctly the LED on the USB adapter should turn ON. The LED should be Yellow if target is powered off or JTAG cable not connected to the adapter; Green if target is powered on and JTAG connected to the adapter).
Alternate USB Cable Installation Method (Windows)
disconnect all Xilinx USB cables from the host computer
download ug344_windows.zip from xilinx.com: https://www.xilinx.com/member/forms/download/design-license.html?cid=100840
extract content of the downloaded archive file
in CMD with admin rights execute install_xusb.bat
okay the «Always trust software from Xilinx» dialog box
check that the USB adapter LED turned ON
Alternate USB Cable Installation Method (Linux)
disconnect all Xilinx USB cables from host computer
in a shell console, with root rights:
download install_drivers.tar.gz from xilinx.com: https://www.xilinx.com/member/forms/download/design-license.html?cid=103670
extract content of the downloaded archive file: tar xzvf install_drivers.tar.gz
cd install_drivers
./install_drivers
check that the USB adapter LED turned ON
Каталог статей
- Один, установочный пакет
- Во-вторых, установите ISE WebPACK
- 1. Распаковать и запустить от имени администратора.
- 2. Примите соглашение
- 3. Выберите версию ISE WebPACK.
- 4. Непосредственно рядом
- 5. Выберите место для установки.
- 6. Установите всплывающий аксессуар WinPcap.
- 7. Установите всплывающий аксессуар для кабелей.
- 8. После установки
- В-третьих, устранить сбой ISE14.7
- 4. Решите проблему падения PlanAhead
- 5. Сертификат
- Reference
1. Инсталляционный пакет
Ссылка:https://pan.baidu.com/s/1BhbK8TBE6zTwikLfONGn2Q Код извлечения:
etsi
Используйте только один из нихISE.7z.001сxilinx_ise.licсwin8planaheadfix
Во-вторых, установите ISE WebPACK
1. Распаковать и запустить от имени администратора.


2. Примите соглашение


3. Выберите версию ISE WebPACK.

4. Непосредственно рядом

5. Выберите место установки.


6. Установите всплывающий аксессуар WinPcap.


7. Установите всплывающий аксессуар для кабелей.


8. После установки

В это время при нажатии на программное обеспечение ISE Design Suite 14.7 произойдет сбой.
3. Решить крах ISE14.7

- Откройте место установки: например,
C:Xilinx14.7ISE_DSвнизISElibnt64 - Положить внутрь
libPortability.dllСуффикс файла.origзаlibPortability.dll.orig

- А потом внутри
libPortabilityNOSH.dllСделайте копию и переименуйте скопированный файлlibPortability.dll(Теперь в этой папкеlibPortability.dll.orig、libPortabilityNOSH.dll、libPortability.dll)
- А потом внутри
libPortabilityNOSH.dllСделайте копию, но на этот раз вставьте ее в другое место,C:Xilinx14.7ISE_DSвнизcommonlibnt64 - будем
C:Xilinx14.7ISE_DSвнизcommonlibnt64внутриlibPortability.dllСуффикс файла.origзаlibPortability.dll.orig - Скопируйте только что скопированный файл в
libPortabilityNOSH.dllпереименовать вlibPortability.dll - Успешно начато


4. Решите проблему падения PlanAhead

- Откройте место установки: например,
C:Xilinx14.7ISE_DSвнизPlanAheadbin - будем
win8planaheadfixРаспакованныйrdiArgs.batПереименован вrdiArgs.bat.orig
- Скачаю
rdiArgs.batДвигайтесь сюда (C:Xilinx14.7ISE_DSвнизPlanAheadbin)


5. Сертификат
Открытие ISE Design предложит установить сертификат


Выберите файл сертификатаxilinx_ise.lic, И тогда это подскажет успех, хорошо, вы можете закрыть всплывающую программу управления сертификатами.
Reference
Решение проблем совместимости между Xilinx ISE14.7 и системой PlanAhead и win10
Download Xilinx ISE Design Suite 14.7 free latest version offline setup for Windows 32-bit and 64-bit. Xilinx ISE Design Suite 14.7 is a professional solution for designing Xilinx programmable devices.
A professional application for optimizing the power and cost of different systems, Xilinx ISE Design Suite provides a reliable solution to design for different Xilinx programmable devices. It provides a very easy to use environment with a variety of professional tools and numerous powerful options to reduce the power consumption up to 30 percent.

The new application includes time-driven timing reservations as well as plug and play design support. It provides a fourth-generation visual design streaming capability that enhances the systems and incredibly reduces the cost of the systems.
Moreover, it comes with support for Xilinx Virtex-6 and Spartan-6 FPGA families. The configuration wizards and IPs collection makes the designing even easier. All in all, it is a reliable program to design for Xilinx Programmable devices and reduces the cost.
Features of Xilinx ISE Design Suite 14.7
Some of the features of Xilinx ISE Design Suite 14 includes:
- Powerful application for Xilinx programmable devices
- Optimizes the power and the cost through the design efficiency
- Provides ISE design tools and with clock gating smart technology
- Plug and play design support and fourth generation visual design
- Supports Xilinx Spartan-6 and Virtex-6 FPGA families
- A collection of programming environment tools
- Reducing the power consumption up to 30%
- Different configuration wizards and IPs to make design easier
- Highly parameterized designing with support for better designs
- Digital signal processing with a greater degree of customization
- Enable the use of accelerators and optimizes the workflow
- Advance time-driven design reservation with reconfiguration
- Domain-specific designing and a lot more
Technical Details of Xilinx ISE Design Suite 14.7
- Software Name: Xilinx ISE Design Suite 14.7
- Software File Name: Xilinx.ISE.Design.Suite.v14.7.zip
- File Size: 6.1 GB
- Developer: Xilinx
System Requirements for Xilinx ISE Design Suite 14.7
- Operating System: Windows 10/8/7
- Free Hard Disk Space: 10 GB of free HDD
- Installed Memory: 1 GB of minimum RAM
- Processor: Intel Core 2 Duo or higher
Xilinx ISE Design Suite 14.7 Free Download
Click on the below link to download the latest offline setup of Xilinx ISE Design Suite 14.7 for Windows x86 and x64 architecture. You can also download Xilinx Vivado Design Suite HLx Editions 2017.
Installing ISE
ISE is a program created by Xilinx to support their FPGAs. It includes a bunch of other tools that will be useful for creating your projects. ISE is required to do any work because it is what actually synthesizes your designs into bit files that can be loaded onto the Mojo.
The process is fairly long, but it shouldn’t be too tricky if you follow these instructions. These instructions were written for ISE 14.7 and tested on Ubuntu 12.04, Ubuntu 12.10, Linux Mint, Windows 7, Windows 8, and Windows 10.
A quick note for Windows 10. Xilinx doesn’t officially support Windows 10 but with a simple work around it should run just fine. They recently released a «Windows 10» version that is really just the Linux version bundled with a virtual machine to run on Windows. This version won’t work with the Mojo IDE. I highly recommend using the older version which is now labeled as «Windows 7» even on Windows 10. There is a simple workaround explained in the «Windows 10 64bit» section below that makes this version work.
First click here to go to the Xilinx downloads page. Under «Version» select 14.7. Do not select «14.7 (Windows 10)» even if you are using Windows 10. Scroll down a bit until you see ISE Design Suite. Under that header you should see full installers for Windows and Linux. Choose the one for the system you are installing ISE on.
You will then be prompted to login. If you don’t have an account, create one. Once you have logged in the download should start.
If you have Java installed, you may be prompted to use their «Download Manager», if not it will just start like any other download. The method you use does not make a difference; however, if you have problems with the download manager you can disable Java in your browser and try again to prevent it from using it.
The file is big, about 6.5GB, so make sure you have plenty of space! (Also, the installation requires a further 16GB of space.)
Once the file is downloaded you need to decompress it. The file is a tar file so if you are on Windows you will need to install something like 7-Zip. Some tar extractors fail to properly extact this archive. 7-Zip is known to work so if you have trouble with the installer, try extracting it with 7-Zip.
For Windows, just open the folder and double click on xsetup to start the installation.
For Linux, you will need to open up a terminal and cd into the directory where you extracted the files. Then run the setup with sudo ./xsetup.
Once in the setup, accept all the license agreements. Once you are on the page that asks which edition to install, choose the ISE WebPACK option and click next.
You are then prompted to select what you would like to install. You only need to select the first option as shown. If you are running Windows 8 on a 64bit computer, you don’t need to check anything as the built-in license manager doesn’t work anyways. I’ve also been told that having Use multiple CPU cores for faster installation can cause it to lock up during install, but I personally haven’t had that happen.
Once the install is done you should be prompted to get a license.
Choose the Get Free ISE WebPack License option and click next.
If you are using Windows clicking Connect Now should open up a webpage for you. If you are on Linux you will probably be shown the same prompt, but if clicking Connect Now doesn’t work you can go to http://www.xilinx.com/getlicense.
From that page login and select ISE Design Suite: WebPACK License. Click on the button in the bottom left labeled Generate Node-Locked License.
Click next twice and you should be emailed your license! Open up your email and download the .lic file.
Now go back to the installation window. Under the Manage Xilinx Licenses tab click Copy License… and select your .lic file. If you are on Windows 8, clicking Copy License… will crash the license manager. See below how to get your license setup in Windows 8.
Once it finishes copying the license file you can close the window. ISE is now installed and ready to use!
If you are a Windows user you can stop here. However, if you are using Linux the following steps will make it easier to use ISE.
Windows 8.1/10
Xilinx has released a guide for overcoming the common problems with Windows 8.1 and 10. Check out the guide here.
Windows 10 64bit
The latest updates to Windows 10 seem to break PlanAhead. The second part of this post titled «Fixing PlanAhead not opening from 64-bit Project Navigator» seemed to fix the issue.
Windows 8 64bit
To get your license installed in Windows 8 you need to create a folder in the root of your home drive (usually C). Name the folder «.xilinx.» note both dots. Once you made the folder it should show up as «.xilinx» (no trailing dot). For whatever reason, Windows requires you to have that trailing dot and it removes it automatically. Once you have that folder created just drop your Xilinx.lic file into it. ISE should now find the license file and open without complaints.
The 64bit version of ISE doesn’t work correctly in Windows 8. Every time it tries to open a file dialog it crashes. To fix this you need to use the 32bit version.
First navigate to C:Xilinx14.7ISE_DSISEbin
The nt folders contain the executables. Right now any shortcuts you have and file associations point to the 64bit version. Move into the nt folder.
Copy the file ise. Move back to the bin folder and into the nt64 folder. Rename the current ise file to ise64 and paste the 32bit version of the ise file. This will make sure you use the 32bit version.
If you would like a shortcut on your start screen, rename the file you just pasted into nt64 to ISE Design Suite. Then right click it and choose pin to start.
Once it is pinned you need to rename it back to ise. I found that trick of renaming, pinning, change name back to be useful to make the launcher on the start page.
Creating a launcher in Linux
Open up a terminal and enter
In the text editor paste the following code.
Make sure you replace XX with the type of computer you are using (32 for 32bit computers; 64 for 64bit computers).
Save and close the file. Then back in the command line enter the following.
This will make the file you just created executable.
The following applies to Ubuntu. If you are using Linux Mint just right click on the Menu button and click Edit menu. From there you can create a launcher the same way as shown below.
Enter the following in the terminal.
Fill out the form as shown. For the command select the run_ise.sh file you created in /opt/Xilinx/14.7/ISE_DS.
An icon can be found at /opt/Xilinx/14.7/ISE_DS/ISE/data/images/pn-ise.png
Click OK to create the launcher.
ISE should now show up in Unity.
Table of Contents
- Overview
-
Why ISE and not a newer toolset?
- Legacy & EOL’d
- Cost Optimized
- Series 7 Generation
- UltraScale
- UltraScale+
-
The Development Tools
- Current Xilinx Development Environments
- Legacy Xilinx Development Environments
-
Which Tool For The Job?
- Vivado and Vitis
-
Xilinx ISE
- All Spartan6 Devices
- All Spartan3 and some Spartan6 Devices
-
Accessing the ISE 14.7 Feb 2020 Release Installation Medium on Linux/MacOSX System
- Accessing The Xilinx ISE Files Using Virtual Machine
-
Accessing The Xilinx ISE Files Without Virtual Machine
- Extract the VMDK file
-
Convert VMDK File Into Raw Image File
- Linux View And Mount
- Mac OS X View and Mount
- Copying Data To Your Target System
- Cleaning Up Mounted Filesystem
- Next Up
Overview
This article goes into the Xilinx ISE development and build environment for Xilinx’s Spartan6 and Spartan3 line of chips. I write a bit about why one would use the older ISE toolset and cover how one can get access to the toolset from the Xilinx installation materials.
Note, you will need a license from Xilinx to use the tools in question. Xilinx offers free licenses for their legacy tools.
Legacy chips and older chips. It’s all about the legacy and older chips.
Looking at the current status of chips at the time of the writing of this article:
Legacy & EOL’d
- Spartan3 (EOL’d)
- EOL’d, however, still a LARGE amount of the chips out in the market and in various installed devices…
Cost Optimized
- Spartan6
- Considered Legacy for many situations as the Spartan7’s platform takes over. Still, a good deal of supply and inventory out there.
- Spartan7
- Baseline core for the new generation of FPGA from Xilinx.
- Artix-7
- Zynq-7000 series
Series 7 Generation
- Spartan 7
- Artix(spartan7 based)
- Virtex(spartan7 based)
- Kintex(spartan7 based)
UltraScale
- Virtex(spartan7 based)
- Kintex(spartan7 based)
- Artix(ultrascale)
- Kintex(ultrascale)
UltraScale+
- Artix(ultrascale+)
- Kintex(ultrascale+)
- Virtex(ultrascale+)
And as with the chips that Xilinx supports, so goes their development environments. Newer software solutions Xilinx offers will generally not support EOL’d or other older products.
Current Xilinx Development Environments
- Vitas AI
- Vitas Unified
- Vivado
- Vivado ML (machine learning geared Vivado)
Legacy Xilinx Development Environments
- ISE
Vivado and Vitis
From Xilinx’s Support Response: https://www.xilinx.com/support/answers/53109.html:
- “The Vivado tool has been created for the 7 Series devices (Virtex-7, Kintex-7, Artix-7, and Zynq-7000).”
- “To support the Spartan-6 devices (or any non 7 Series devices), you will need to use the latest ISE design tools, which work best regardless of the complexity of the design.”
So, for anything Series 7, like the Virtex, Kintex, Artix, and ZYNQ, Vivado is the way to go.
Vitis further requires that the chip in question be a SoC with an onboard ARM processor and not just an FPGA.
Xilinx ISE
To support hardware from the Spartan-6 family, you will need to use Xilinx ISE 14.7’s Feb 2020 release. This version runs under Windows 10, however, is actually a virtual machine running the Linux version of ISE 14.7 with an expanded set of Spartan-6 chip support.
There is another version of ISE 14.7, released Oct 2013, which supports Spartan3 devices, though does not support all sizes of Spartan6 devices.
You can install one version or both versions, if you have need to support Spartan3 and Spartan6 devices.
All Spartan6 Devices
- ISE 14.7 Feb 2020 Release
- https://www.xilinx.com/member/forms/download/xef.html?filename=Xilinx_ISE_14.7_Win10_14.7_VM_0213_1.zip
- 16GB ZIP file with 16GB OVA(posix tar) file with embedded 16GB VMDK(vmware disk image). So you will need at least 36-40GB of working space at any given time to access the files of interest. If you are just going to run the virtual machine like that. If you intend to install on your own custom Linux installation(docker,etc), you will need to add an additional 64GB on top to factor in for the raw disk image. Having at least 128GB available to allow for conversion is definitely recommended.
All Spartan3 and some Spartan6 Devices
- ISE 14.7 Oct 2013 Release
- https://www.xilinx.com/member/forms/download/xef.html?filename=Xilinx_ISE_DS_14.7_1015_1.tar
- 7GB download image
- Contains both the Windows and Linux installation materials.
Accessing the ISE 14.7 Feb 2020 Release Installation Medium on Linux/MacOSX System
- Download the zip file from Xilinx’s download page
- unzip the Xilinx_ISE_14.7_Win10_14.7_VM_0213_1.zip file.
- You will be presented with a bunch of Windows support/installation files. Ignore these as you are only interested in the file:
ova/14.7_VM.ovafile. - Linux portions of commands are run inside of a Docker instance running Ubuntu 20.10
Accessing The Xilinx ISE Files Using Virtual Machine
The zip file downloaded from Xilinx will yield an ova file when unzipped.
Just unzip the zip file and import the ova file and import. This ova file can be imported by VMware’s Fusion/Workstation/Player and Oracle’s VirtualBox.
When the virtual machine finishes booting up, you can access the Xilinx ISE installation from the /opt/Xilinx folder. The usual rsync works great for this. The footprint is around 20GB.
Accessing The Xilinx ISE Files Without Virtual Machine
But let’s say you want to fire up ISE in a Docker environment or you just want access without loading any virtualization software. To do this, you will need to unwrap the downloaded file like an onion.
Extract the VMDK file
The 14.7_VM-disk001.vmdk is a VMware virtual disk. However, you should be able to access the contents
[email protected]:/opt/ova# tar -tvf 14.7_VM.ova
-rw-r----- vboxovf10/vbox_v5.2.30r130521 11422 2019-10-16 20:37 14.7_VM.ovf
-rw-rw---- vboxovf10/vbox_v5.2.30r130521 16902340608 2019-10-16 20:37 14.7_VM-disk001.vmdk
[email protected]:/opt/ova# tar xf 14.7_VM.ova 14.7_VM-disk001.vmdk
Convert VMDK File Into Raw Image File
In order to access the contents of the VMDK file without using a virtual machine, you will need a few tools:
- Qemu (Mac OS X & Linux)
- MacFuse (Mac OS X only)
- Ext4Fuse (Mac OS X only)
qemu-img convert -f vmdk -O raw 14.7_VM-disk001.vmdk ise14.7-disk.raw
Linux View And Mount
On Linux, you can use the partx and/or fdisk tools to examine the raw image file. You will see that it contains two partitions. The 58GB partition is the root filesystem. The 6GB partition is the swap partition. You _CAN_ skip this step, however, it is always good to verify that nothing has changed.
# In a Linux Docker Container
[email protected]:/opt/ova# partx -s ise14.7-disk.raw
NR     START       END   SECTORS SIZE NAME UUID
 1      2048 121634815 121632768  58G      0001f057-01
 2 121634816 134217727  12582912   6G      0001f057-02
# In a Linux Docker Container
[email protected]:/opt/ova# fdisk /opt/ova/ise14.7-disk.raw

Welcome to fdisk (util-linux 2.36).
Changes will remain in memory only, until you decide to write them.
Be careful before using the write command.


Command (m for help): p
Disk /opt/ova/ise14.7-disk.raw: 64 GiB, 68719476736 bytes, 134217728 sectors
Units: sectors of 1 * 512 = 512 bytes
Sector size (logical/physical): 512 bytes / 512 bytes
I/O size (minimum/optimal): 512 bytes / 512 bytes
Disklabel type: dos
Disk identifier: 0x0001f057

Device                     Boot     Start       End   Sectors Size Id Type
/opt/ova/ise14.7-disk.raw1 *         2048 121634815 121632768  58G 83 Linux
/opt/ova/ise14.7-disk.raw2      121634816 134217727  12582912   6G 82 Linux swap / Solaris

Command (m for help):
Mounting will be accomplished via loopback mounting:
- Note that the first partition starts at block 2048. The block size is 512 bytes. So the offset in bytes for the first partition is 1048576. If the start block differs for you, re-calculate accordingly.
mkdir -p /mnt/ISE_MEDIA
mount -o loop,offset=1048576 /opt/ova/ise14.7-disk.raw /mnt/ISE_MEDIA
This should now give you access to the filesystem. Skip to the next section.
Mac OS X View and Mount
Unfortunately, Mac OS X cannot mount the raw file directly. You will need to install MacFUSE as well as EXT4FUSE:
brew install --cask macfuse
brew install ext4fuse
You will need to reboot after installing MacFUSE. When installing ext4fuse, you might get a “ext4fuse disabled because of closed source MacFUSE”, etc. There is a good description on how to work around this issue:
https://github.com/gerard/ext4fuse/issues/66
# ext4fuse.rb from the page above. Copying here in the event the original URL vanishes.

class MacFuseRequirement < Requirement
  fatal true

  satisfy(build_env: false) { self.class.binary_mac_fuse_installed? }

  def self.binary_mac_fuse_installed?
    File.exist?("/usr/local/include/fuse/fuse.h") &&
      !File.symlink?("/usr/local/include/fuse")
  end

  env do
    ENV.append_path "PKG_CONFIG_PATH", HOMEBREW_LIBRARY/"Homebrew/os/mac/pkgconfig/fuse"

    unless HOMEBREW_PREFIX.to_s == "/usr/local"
      ENV.append_path "HOMEBREW_LIBRARY_PATHS", "/usr/local/lib"
      ENV.append_path "HOMEBREW_INCLUDE_PATHS", "/usr/local/include/fuse"
    end
  end

  def message
    "macFUSE is required. Please run `brew install --cask macfuse` first."
  end
end

class Ext4fuse < Formula
  desc "Read-only implementation of ext4 for FUSE"
  homepage "https://github.com/gerard/ext4fuse"
  url "https://github.com/gerard/ext4fuse/archive/v0.1.3.tar.gz"
  sha256 "550f1e152c4de7d4ea517ee1c708f57bfebb0856281c508511419db45aa3ca9f"
  license "GPL-2.0"
  head "https://github.com/gerard/ext4fuse.git"

  bottle do
    sha256 cellar: :any, catalina:    "446dde5e84b058966ead0cde5e38e9411f465732527f6decfa1c0dcdbd4abbef"
    sha256 cellar: :any, mojave:      "88c4918bf5218f99295e539fe4499152edb3b60b6659e44ddd68b22359f512ae"
    sha256 cellar: :any, high_sierra: "fc69c8993afd0ffc16a73c9c036ca8f83c77ac2a19b3237f76f9ccee8b30bbc9"
    sha256 cellar: :any, sierra:      "fe8bbe7cd5362f00ff06ef750926bf349d60563c20b0ecf212778631c8912ba2"
    sha256 cellar: :any, el_capitan:  "291047c821b7b205d85be853fb005510c6ab01bd4c2a2193c192299b6f049d35"
    sha256 cellar: :any, yosemite:    "b11f564b7e7c08af0b0a3e9854973d39809bf2d8a56014f4882772b2f7307ac1"
  end

  depends_on "pkg-config" => :build

  on_macos do
    depends_on MacFuseRequirement => :build
  end

  on_linux do
    depends_on "libfuse"
  end

  def install
    system "make"
    bin.install "ext4fuse"
  end
end
# Create the ext4fuse.rb from the content at the page listed above.
brew install --formula --build-from-source ./ext4fuse.rb
Once you have rebooted and allowed the extension to load in Preferences, you will now be able to mount the raw file.
# From Mac OS X
sudo  hdiutil attach -imagekey diskimage-class=CRawDiskImage -nomount /Users/wingtangwong/DOCKER/xilinx/runtime/opt/ova/ise14.7-disk.raw
mkdir -p /Volumes/ISE_MEDIA
sudo ext4fuse /dev/disk2s1 /Volumes/ISE_MEDIA
You should now have access to the contents of the filesystem:
Wings-MacBook-Pro:Xilinx root# ls -al /Volumes/ISE_MEDIA/
total 272
[email protected]  26 root  wheel   4096 Oct 16  2019 .
drwxr-xr-x    4 root  wheel    128 Jul 25 14:36 ..
dr-x------    3 root  wheel   4096 Jul 22  2016 .dbus
dr-xr-xr-x    2 root  wheel   4096 Aug 24  2016 bin
dr-xr-xr-x    4 root  wheel   4096 Dec  6  2017 boot
dr-xr-xr-x   10 root  wheel   4096 Jul 22  2016 cgroup
dr-xr-xr-x    2 root  wheel   4096 Jul 22  2016 dev
dr-xr-xr-x  124 root  wheel  12288 Oct 16  2019 etc
dr-xr-xr-x    3 root  wheel   4096 Jul 22  2016 home
dr-xr-xr-x   13 root  wheel   4096 Nov  9  2016 lib
dr-xr-xr-x   10 root  wheel  12288 Aug 24  2016 lib64
dr-x------    2 root  wheel  16384 Jul 22  2016 lost+found
dr-xr-xr-x    2 root  wheel   4096 Dec  6  2017 media
dr-xr-xr-x    2 root  wheel   4096 Feb 24  2013 misc
dr-xr-xr-x    2 root  wheel   4096 Nov  1  2011 mnt
dr-xr-xr-x    2 root  wheel   4096 Feb 24  2013 net
dr-xr-xr-x    6 root  wheel   4096 Sep 24  2019 opt
dr-xr-xr-x    2 root  wheel   4096 Jul 22  2016 proc
dr-xr-x---   27 root  wheel   4096 Aug 27  2019 root
dr-xr-xr-x    2 root  wheel  12288 Dec  6  2017 sbin
dr-xr-xr-x    2 root  wheel   4096 Jul 22  2016 selinux
dr-xr-xr-x    2 root  wheel   4096 Nov  1  2011 srv
dr-xr-xr-x    2 root  wheel   4096 Jul 22  2016 sys
dr-xr-xr-t   26 root  wheel   4096 Oct 16  2019 tmp
dr-xr-xr-x   13 root  wheel   4096 Jul 22  2016 usr
dr-xr-xr-x   22 root  wheel   4096 Jul 22  2016 var
Wings-MacBook-Pro:opt root# cd Xilinx/
Wings-MacBook-Pro:Xilinx root# ls
14.7
Wings-MacBook-Pro:Xilinx root# cd 14.7/
Wings-MacBook-Pro:14.7 root# ls -al
total 24
dr-xr-xr-x  3 500  500  4096 Sep 24  2019 .
dr-xr-xr-x  3 500  500  4096 Sep 24  2019 ..
dr-xr-xr-x  8 500  500  4096 Sep 24  2019 ISE_DS
Wings-MacBook-Pro:14.7 root# pwd
/Volumes/ISE_MEDIA/opt/Xilinx/14.7
Wings-MacBook-Pro:14.7 root# ls -al
total 24
dr-xr-xr-x  3 500  500  4096 Sep 24  2019 .
dr-xr-xr-x  3 500  500  4096 Sep 24  2019 ..
dr-xr-xr-x  8 500  500  4096 Sep 24  2019 ISE_DS
Wings-MacBook-Pro:14.7 root# ls -al ISE_DS/
total 96
dr-xr-xr-x    8 500  500  4096 Sep 24  2019 .
dr-xr-xr-x    3 500  500  4096 Sep 24  2019 ..
dr-xr-xr-x    6 500  500  4096 Sep 24  2019 .xinstall
dr-xr-xr-x   14 500  500  4096 Sep 24  2019 EDK
dr-xr-xr-x  109 500  500  4096 Sep 25  2019 ISE
dr-xr-xr-x   12 500  500  4096 Sep 24  2019 PlanAhead
dr-xr-xr-x    3 500  500  4096 Sep 24  2019 SysGen
dr-xr-xr-x    9 500  500  4096 Sep 25  2019 common
-r--r--r--    1 500  500  1401 Sep 24  2019 settings32.csh
-r--r--r--    1 500  500  1300 Sep 24  2019 settings32.sh
-r--r--r--    1 500  500  1401 Sep 24  2019 settings64.csh
-r--r--r--    1 500  500  1300 Sep 24  2019 settings64.sh

Wings-MacBook-Pro:14.7 root# du -sh .
 20G	.
Copying Data To Your Target System
Now that you have access to the filesystem, you can copy the Xilinx ISE to your folder/system of choice. I will be installing mine into my Docker environment. You might be copying into your Docker/VM/BareMetal/etc. I’m using rsync:
Wings-MacBook-Pro:opt root# rsync -arv ./Xilinx/ /Users/wingtangwong/DOCKER/xilinx/runtime/opt/Xilinx/
Note, since the ext4fuse mount was performed under sudo, only root will be able to see the filesystem. Depending on your setup, this copy will take a while. It’s 20GB of data.
Note, I am copying the /opt/Xilinx folder into my own /opt/Xilinx folder. There are symlinks in the Xilinx folders that expects Xilinx to be installed where it is. This is consistent between different versions of the ISE.
...
...
...
sent 21041015678 bytes  received 5274542 bytes  18325024.14 bytes/sec
total size is 21021935480  speedup is 1.00
Wings-MacBook-Pro:opt root#
Note, because the Feb 2020 and Oct 2013 ISE are both version 14.7, if you want to have both versions installed in the same environment, you will need to rename the folders to something else.
# Example paths
/opt/Xilinx/14.7_all_spartan6
/opt/Xilinx/14.7_support_spartan3

# Or something like that...
Cleaning Up Mounted Filesystem
When you are done copying, you can unmount the mounted image:
# Linux
umount /mnt/ISE_MEDIA
# Mac OS X
umount /Volumes/ISE_MEDIA
# If disk2 is what hdiutil attach assigned you...
hdiutil detach /dev/disk2
Next Up
This article is the start of my documentation for getting Xilinx’s legacy ISE 14.7 environment setup for Spartan6 development. In the next article, I go over the Docker container configuration for Xilinx ISE 14.7
About Post Author

Wing Wong
Husband, Father, and all around technology tinkerer. 🙂