Adobe Flash и Java – это две загрузки, которые большинство из нас установили на наших компьютерах с Windows, поскольку они дают нам больше возможностей для работы в Интернете и просмотра веб-страниц. Мы уже видели, как управлять настройками Adobe Flash .
Сегодня мы узнаем о настройках Java в Windows 10/8/7.
Содержание
- Что такое Java
- Панель управления Java
- Удалить временные файлы Java
- Очистить кеш Java с помощью командной строки
- Обновление Java
- Другие настройки Java
- Удалить старые версии Java
- Java Скачать
Что такое Java
Java – это язык программирования и вычислительная платформа, которая поддерживает самые современные программы, включая утилиты, игры и бизнес-приложения. Он позволяет играть в онлайн-игры, общаться с людьми по всему миру, просматривать изображения в 3D и многое другое.
Панель управления Java
Программное обеспечение Java или среда выполнения Java также называются средой выполнения Java, средой выполнения, средой выполнения, JRE, виртуальной машиной Java и т. Д. Им можно управлять из панели управления Java. Чтобы получить доступ к панели управления Java, откройте панель управления и нажмите «Java». Здесь вы сможете получить информацию о номере версии, а также просмотреть файлы.

Удалить временные файлы Java
Когда вы просматриваете Интернет, всякий раз, когда ваш браузер использует Java, файлы Java хранятся в специальных папках для более быстрого выполнения в дальнейшем.
Чтобы просмотреть местоположение папки и другие сведения, нажмите кнопку Настройки .

По умолчанию эти временные файлы Java хранятся в
C: Users Имя пользователя AppData LocalLow Sun Java Deployment кэш
папка в формате JAR. Вы можете установить уровень сжатия для этих файлов JAR и даже установить сумму, которая будет выделена для хранения этих файлов.
Вы можете просмотреть файлы, нажав кнопку Просмотр .

Чтобы удалить эти временные файлы JAR Java, нажмите Удалить файлы . Теперь вы можете выбрать, какие файлы вы хотите удалить, и нажмите кнопку ОК.

Очистить кеш Java с помощью командной строки
Чтобы очистить кэш Java с помощью командной строки, откройте окна командной строки, введите следующую команду и нажмите Enter:
javaws -uninstall
Обновление Java
Мы склонны игнорировать обновление нашей Java. Но очень важно, чтобы мы всегда были уверены, что вы используете последнюю версию Java, поскольку уязвимости в Java часто используются для компрометации вашего компьютера. Последняя версия Java содержит важные улучшения для повышения безопасности, производительности и стабильности приложений Java, которые работают на вашем компьютере. Всякий раз, когда дыры в безопасности обнаруживаются, они исправляются, и поэтому обязательно убедитесь, что у вас установлена последняя версия java, поскольку она включает исправления уязвимостей.
Вы можете настроить параметры обновления Java, нажав на вкладку Обновить .

Убедитесь, что Автоматически проверять наличие обновлений . Нажав на кнопку Дополнительно , вы сможете установить частоту проверок обновлений.

Кстати, я заметил, что прошло много времени с тех пор, как я обновил Java. Поэтому я нажал на Обновить сейчас , чтобы начать процесс обновления. Это запустит процесс juscheck.exe , который проверит наличие обновлений и, соответственно, проинформирует вас.

Нажав на кнопку «Установить», вы начнете процесс обновления. По завершении нажмите «Закрыть».

Другие настройки Java
Вкладка Java позволяет просматривать и управлять версиями и настройками среды выполнения Java для приложений и апплетов Java.
Вкладка Безопасность позволяет просматривать типы сертификатов, позволяющие идентифицировать себя.
На вкладке Дополнительно можно настроить другие параметры.
Удалить старые версии Java
Хранение старых и неподдерживаемых версий Java в вашей системе представляет серьезную угрозу безопасности.
Более старые версии SunJava (до JRE 6 с обновлением 7) действительно сохранялись при установке обновлений и должны быть удалены, так как более старые версии SunJava очень уязвимы для Winfixer/Vundo. С 2005 года вплоть до обновления в конце прошлого года до обновления 10 JRE 6 для SunMicrosystems и Sun Microsystems, чтобы автообновление SunJava удаляло предыдущие (уязвимые) версии программы. Обновления от JRE 6 Update 10 forward находятся в автономной папке «jre6», которая перезаписывается, если установлена новая JRE. Даже при использовании самой последней версии SunJava, если на вашем компьютере все еще находятся более ранние, уязвимые версии, они уязвимы для заражения.К сожалению, простое использование программ «Установка и удаление программ» для удаления старых версий неэффективно.
Мы предлагаем вам попробовать JavaRa. После обновления Java до его последней версии сегодня я запустил JavaRa и использовал его для удаления старых версий Java.

Он обнаружил две старые версии на моем компьютере, которые я затем удалил.

ПРИМЕЧАНИЕ. Мой коллега по MVP и мод Corrine TWCF добавляет: JavaRa не была обновлена для поддержки удаления JRE 7 и, по-видимому, фактически имеет проблемы после JRE 6u32. Он перешел на SingularLabs.com. Кроме того, Пол Маклейн больше не поддерживает JavaRa, а Фриде Фрис все еще поддерживает.
Java Скачать
Вы можете скачать и установить Java для Windows вручную с Java.com здесь.
Надеюсь, вы узнали что-то новое здесь, в этом посте. Если у вас есть что добавить, пожалуйста, сделайте это в разделе комментариев.
Содержание
- Понимать и управлять настройками Java в Windows 10/8/7
- Что такое Java
- Панель управления Java
- Удалить временные файлы Java
- Очистить кеш Java с помощью командной строки
- Обновление Java
- Другие настройки Java
- Удалить старые версии Java
- Java Скачать
- Как обновить Java в Windows 10 до последней версии
- Java Control Panel
- Ручное обновление с сайта Java
- Решено: Как открыть Панель управления Java
- Управление настройками Java в Windows 10/8/7 2022
- Что такое Java
- Панель управления Java
- Удаление временных файлов Java
- Очистить кеш Java с помощью командной строки
- Обновление Java
- Другие настройки Java
- Удаление старых версий Java
- Загрузка Java
- Управление брандмауэром Windows: настройка и управление настройками брандмауэра Windows
- Управление настройками синхронизации приложений для почты в Windows 10
- Управление настройками и ресурсами Windows с помощью System Nucleus
- 9 Java Control Panel
- Overview of Java Control Panel
- General Tab in the Java Control Panel
- Update Tab in the Java Control Panel
- Scheduling the Check for Updates
- Java Update Scheduler
- Desktop Settings Tab in the Java Control Panel
- Editing Desktop Settings
- Java Runtime Parameters
- Setting classpath or cp
- Enabling and Disabling Assertion Support
- Tracing and Logging Support
- Debugging Applets in Java Plug-in
- Default Connection Timeout
- Web Settings Tab in the Java Control Panel
- Exception Site List Tab
- Deployment Rule Set Tab
- Temporary Files Settings Tab
- Network Settings Tab
- Java Cache Viewer Tab
- Security Tab in the Java Control Panel
- General Security Settings Tab
- Manage Certificates Tab
- User-Level Certificates
- System-Level Certificates
- Advanced Tab in the Java Control Panel
- Debugging
- Java Console
- Shortcut Creation
- JNLP File/MIME Association
- Application Installation
- Execution Environment Security Settings
- Mixed code (sandboxed vs. trusted) security verification
- Perform signed code certificate revocation checks on
- Check for signed code certificate revocation using
- Perform TLS certificate revocation checks on
- Check for signed code certificate revocation using
- Advanced Security Settings
- Miscellaneous
Понимать и управлять настройками Java в Windows 10/8/7
Сегодня мы узнаем о настройках Java в Windows 10/8/7.
Что такое Java
Java – это язык программирования и вычислительная платформа, которая поддерживает самые современные программы, включая утилиты, игры и бизнес-приложения. Он позволяет играть в онлайн-игры, общаться с людьми по всему миру, просматривать изображения в 3D и многое другое.
Панель управления Java
Программное обеспечение Java или среда выполнения Java также называются средой выполнения Java, средой выполнения, средой выполнения, JRE, виртуальной машиной Java и т. Д. Им можно управлять из панели управления Java. Чтобы получить доступ к панели управления Java, откройте панель управления и нажмите «Java». Здесь вы сможете получить информацию о номере версии, а также просмотреть файлы.

Удалить временные файлы Java
Когда вы просматриваете Интернет, всякий раз, когда ваш браузер использует Java, файлы Java хранятся в специальных папках для более быстрого выполнения в дальнейшем.
По умолчанию эти временные файлы Java хранятся в
C: Users Имя пользователя AppData LocalLow Sun Java Deployment кэш
папка в формате JAR. Вы можете установить уровень сжатия для этих файлов JAR и даже установить сумму, которая будет выделена для хранения этих файлов.
Очистить кеш Java с помощью командной строки
Чтобы очистить кэш Java с помощью командной строки, откройте окна командной строки, введите следующую команду и нажмите Enter:
Обновление Java
Мы склонны игнорировать обновление нашей Java. Но очень важно, чтобы мы всегда были уверены, что вы используете последнюю версию Java, поскольку уязвимости в Java часто используются для компрометации вашего компьютера. Последняя версия Java содержит важные улучшения для повышения безопасности, производительности и стабильности приложений Java, которые работают на вашем компьютере. Всякий раз, когда дыры в безопасности обнаруживаются, они исправляются, и поэтому обязательно убедитесь, что у вас установлена последняя версия java, поскольку она включает исправления уязвимостей.
Нажав на кнопку «Установить», вы начнете процесс обновления. По завершении нажмите «Закрыть».
Другие настройки Java
Вкладка Java позволяет просматривать и управлять версиями и настройками среды выполнения Java для приложений и апплетов Java.
Вкладка Безопасность позволяет просматривать типы сертификатов, позволяющие идентифицировать себя.
На вкладке Дополнительно можно настроить другие параметры.
Удалить старые версии Java
Хранение старых и неподдерживаемых версий Java в вашей системе представляет серьезную угрозу безопасности.
Более старые версии SunJava (до JRE 6 с обновлением 7) действительно сохранялись при установке обновлений и должны быть удалены, так как более старые версии SunJava очень уязвимы для Winfixer/Vundo. С 2005 года вплоть до обновления в конце прошлого года до обновления 10 JRE 6 для SunMicrosystems и Sun Microsystems, чтобы автообновление SunJava удаляло предыдущие (уязвимые) версии программы. Обновления от JRE 6 Update 10 forward находятся в автономной папке «jre6», которая перезаписывается, если установлена новая JRE. Даже при использовании самой последней версии SunJava, если на вашем компьютере все еще находятся более ранние, уязвимые версии, они уязвимы для заражения.К сожалению, простое использование программ «Установка и удаление программ» для удаления старых версий неэффективно.
Мы предлагаем вам попробовать JavaRa. После обновления Java до его последней версии сегодня я запустил JavaRa и использовал его для удаления старых версий Java.
Он обнаружил две старые версии на моем компьютере, которые я затем удалил.
ПРИМЕЧАНИЕ. Мой коллега по MVP и мод Corrine TWCF добавляет: JavaRa не была обновлена для поддержки удаления JRE 7 и, по-видимому, фактически имеет проблемы после JRE 6u32. Он перешел на SingularLabs.com. Кроме того, Пол Маклейн больше не поддерживает JavaRa, а Фриде Фрис все еще поддерживает.
Java Скачать
Вы можете скачать и установить Java для Windows вручную с Java.com здесь.
Надеюсь, вы узнали что-то новое здесь, в этом посте. Если у вас есть что добавить, пожалуйста, сделайте это в разделе комментариев.
Источник
Как обновить Java в Windows 10 до последней версии
Для корректной работы в Windows 10 многим приложениям требуется актуальная версия библиотеки Java. Обычно утилита уже установлена на компьютере, и ее нужно просто обновить. Делается это легко, однако неопытные пользователи могут испытывать трудности при выполнении данной процедуры. Для них то мы и подготовили коротенькую инструкцию. Итак, давайте посмотрим, как обновить Java в Windows 10 до последней версии.
Java Control Panel
Компонент Java устанавливается вместе со специальной панелью Java Control Panel, предоставляющей графический интерфейс для управления библиотекой. Этот же инструмент дает возможность обновить утилиту. Для запуска Java Control Panel нужно открыть классическую Панель управления Windows 10 (команда control в окне «Выполнить»), а потом выбрать пункт «Java».

В открывшемся окне следует перейти на вкладку «Update», а потом внизу нажать на кнопку «Update now».

Далее в диалоговых окнах нажимаем «Update» и «Install», соглашаясь с условиями лицензионного соглашения и запуская установку последней версии Java.


После завершения процедуры появится соответствующее уведомление.

Ручное обновление с сайта Java
Если по какой-то причине вы не смогли найти панель Java на своем компьютере, или она не запустилась, скачайте и установите актуальную версию библиотеки с официального сайта Java. Для этого перейдите в браузере по адресу https://www.java.com/ru/, а потом нажмите кнопку «Загрузить Java бесплатно».

На следующей странице выберите «Согласиться и начать бесплатную загрузку».

Сохраните файл установщика на компьютер и запустите его.

Нажмите «Install» для выполнения установки компонента.

Дождитесь завершения процедуры и появления соответствующего сообщения.
На этом все. Мы рассмотрели два способа, как обновить Java на Windows 10. При необходимости вы можете настроить параметры автоматической проверки наличия обновлений на вкладке «Update» панели Java Control Panel. При обнаружении новой версии библиотеки утилита будет выдавать уведомление. Таким образом легче поддерживать актуальность компонента Java.
Источник
Решено: Как открыть Панель управления Java
[nx_heading style=»underlined» heading_tag=»h1″ size=»32″]Как открыть Панель управления Java[/nx_heading]
Дата обновления статьи: 26.09.2016
Для того чтобы открыть Панель управления Java в Windows 10 и 8.1, щелкаем по кнопке Пуск правой клавишей мыши, в выпадающем окне выбираем пункт Панель управления.
 Изображение 1. Открываем Панель управления в Windows 10 и 8.1
Для того чтобы открыть Панель управления Java в Windows 7 и Windows XP, щелкаем по кнопке Пуск левой клавишей мыши, в открывшемся меню выбираем пункт Панель управления.
 Изображение 2. Открываем Панель управления в Windows 7 и XP
Дальнейшие действия будут одинаковы для всех версий Windows.
По-умолчанию Панель управления Windows отображает только категории.
Изменим вид панели для отображения всех доступных значков.
 Изображение 3. Изменяем отображение значков Панели управления Windows
В меню Просмотр, укажем Мелкие значки.
Немного подождем отображения всех доступных значков.
Находим значок Java и дважды щелкаем по нему левой клавишей мыши.
 Изображение 4. Запускаем Java
Если в вашей Панели управления нет значка Java, значит на вашем компьютере не установлена Java, в этом случае рекомендую произвести установку по статье — Как установить Java.
Ожидаем появления окна Java Control Panel, иногда это может занять длительное время.
Для надежности рекомендую запускать Панель управления щелчком правой клавиши мыши по значку Java и выбрать пункт Открыть.
[nx_row][nx_column size=»1/6″]
ВНИМАНИЕ:
[/nx_column]
[nx_column size=»5/6″]Если Панель управления Java вообще не появляется, вероятно у вас повреждена установленная Java, в этом случае рекомендую переустановить Java.[/nx_column][/nx_row]
 Изображение 5. Окно Панель управления Java в Windows
Если у вас появилось данное окно (изображение 5), значит Панель управления Java запущена и можно переходить к другим действиям, например узнать версию Java, добавить сайт в список исключений Java или очистить кеш Java и выполнить сброс настроек.
[nx_heading style=»coloredline» heading_tag=»h4″ size=»24″ align=»left»]От автора:[/nx_heading]
Если проблема решена, один из способов сказать «Спасибо» автору — здесь.
Если же проблему разрешить не удалось и появились дополнительные вопросы, задать их можно на нашем форуме, в специальном разделе.
Источник
Управление настройками Java в Windows 10/8/7 2022
Сегодня мы узнаем о настройках Java в Windows 10/8/7.
Что такое Java
Панель управления Java
Программное обеспечение Java или среда выполнения Java также называются Java Runtime, Runtime Environment, Runtime, JRE, Java Virtual Machine и т. Д. Его можно управлять с панели управления Java. Чтобы открыть панель управления Java, откройте «Панель управления» и нажмите «Java». Здесь вы сможете получить информацию о номере версии, а также о просмотре файлов.

Удаление временных файлов Java
При просмотре интернета, когда ваш браузер использует Java, файлы Java хранятся в специальных папках для более быстрого позже.

По умолчанию эти временные Java-файлы хранятся в
C: Пользователи Имя пользователя AppData LocalLow Sun Java Deployment cache
в формате JAR. Вы можете установить уровень сжатия для этих файлов JAR и даже установить размер для хранения этих файлов.


Очистить кеш Java с помощью командной строки
Чтобы очистить кеш Java с помощью командной строки, откройте окно командной строки, введите следующее и нажмите Enter:
Обновление Java
Мы склонны игнорировать обновление нашей Java. Но очень важно, чтобы мы всегда следили за тем, чтобы вы использовали последнюю версию Java, поскольку уязвимости в Java часто используются для компрометации вашего компьютера. Последняя версия Java содержит важные улучшения для повышения безопасности, производительности и стабильности приложений Java, работающих на вашем компьютере. Всякий раз, когда обнаруживаются дыры в безопасности, они исправляются, поэтому настоятельно необходимо убедиться, что у вас установлена последняя версия java, так как она включает исправления для уязвимостей.


Нажав на Install, вы запустите процесс обновления. После того, как он будет завершен, нажмите «Закрыть».

Другие настройки Java
Вкладка Java позволяет просматривать и управлять версиями и настройками Java Runtime для приложений и апплетов Java.
Безопасность позволяет просматривать тип сертификатов для идентификации себя.
Вкладка Дополнительно позволяет настраивать другие параметры.
Удаление старых версий Java
Сохранение старых и неподдерживаемых версии Java в вашей системе представляют серьезную угрозу безопасности.
Старые версии SunJava (вплоть до JRE 6 update 7) действительно остались, когда были установлены обновления и их нужно удалить, поскольку более старые версии SunJava очень уязвимы для Winfixer / Vundo. Это произошло с 2005 года до обновления в конце прошлого года до версии JRE 6 10 для SunMicrosystems для Sun Microsystems, чтобы заставить autoupdater SunJava удалить предыдущие (уязвимые) версии программы. Обновления от JRE 6 Обновление 10 вперед находятся в автономной папке «jre6», которая перезаписывается, если установлена новая JRE. Даже при использовании самой современной версии SunJava, если старые, уязвимые, версии (ы) все еще находятся на вашем компьютере, они уязвимы для заражения. К сожалению, просто использование «Установка и удаление программ» для удаления старых версий не является полностью аффективным.
Мы предлагаем вам попробовать JavaRa. После обновления Java до последней версии сегодня я запустил JavaRa и использовал его для удаления старых версий Java.

Он обнаружил две старые версии на моем компьютере, которые я удалил.

ПРИМЕЧАНИЕ. Мой коллега MVP и TWCF Mod Corrine добавляет: JavaRa не был обновлен, чтобы поддержать удаление JRE 7 и, по сути, у него проблемы с JRE 6u32. Он перешел на SingularLabs.com. Кроме того, Пол Маклейн больше не поддерживает JavaRa, но Freð ðe Vries все еще делает.
Загрузка Java
Вы можете загрузить и установить Java для Windows вручную с сайта Java.com.
Надеюсь, что вы узнали что-то новое здесь эта почта. Если у вас есть что добавить, пожалуйста, сделайте это в разделе комментариев.
Управление брандмауэром Windows: настройка и управление настройками брандмауэра Windows

Управление настройками синхронизации приложений для почты в Windows 10

Узнайте, как изменить настройки синхронизации почтового ящика для приложения Windows 10 Mail. См. Параметры синхронизации электронной почты, контактов, календаря и т. Д.
Управление настройками и ресурсами Windows с помощью System Nucleus

Источник
9 Java Control Panel
The Java Control Panel includes the following tabs:
Every tab contains a search field. Use this field to find settings related to the search term entered.
Overview of Java Control Panel
The Java Control Panel maintains settings that manage how Java and JavaFX applications embedded in or launched from a browser are run.
Although available and supported in JDK 9, the Applet API and the Java Plug-in are marked as deprecated in preparation for removal in a future release. Alternatives for applets and embedded JavaFX applications include Java Web Start and self-contained applications.
In JDK 9, the Java Control Panel was rewritten as a JavaFX application and the location of some functions has changed.
To start the Java Control Panel from the command line, enter binjavacpl.exe on Windows, or /bin/jcontrol on macOS or Linux. The Java Control Panel provides the following capabilities:
View and delete temporary files used by the Java Plug-in, which runs applets and JavaFX applications that are embedded in a browser, and by Java Web Start, which enables you to run Java and JavaFX applications over the network.
Update your version of the Java platform so that you always have the latest Java Runtime Environment (JRE).
Manage the JREs on your system and set runtime parameters for them.
View the active deployment rule set on your system, if any.
Manage the exception site list for your system.
Configure proxy settings.
Enable enhanced security restrictions for Java and JavaFX applications embedded in or launched from a browser.
Configure settings for debugging, applet handling, and other functions.
Search the Java Control Panel for settings to configure.
General Tab in the Java Control Panel
The General tab shows the version of the Java runtime (JRE) that you are running and the security status of the JRE.
The JRE that is running is identified by the Java version number and the build number. Security status is determined by the following attributes:
If your JRE is below the security baseline or past the expiration date, you are encouraged to upgrade to the latest version.
Update Tab in the Java Control Panel
The Update tab shows when the check for updates is done and enables you to change the settings for the update process.
Automatic updates are supported only on Microsoft Windows and macOS. The update feature works with the Java Update Scheduler ( jusched.exe ) to provide you with the latest Java updates. You must have Administrative privileges to update the JRE.
From this tab, you can automatically or manually update the system JRE that is installed. If you have more than one JRE installed, the Desktop Settings tab shows you which JRE is considered the system JRE. See Desktop Settings Tab in the Java Control Panel.
The Update tab provides the options shown in the following table, not all options are available on both platforms:
Notify me before an update is
Indicates when you want to be notified that an update is available. The options are:
Automatically check for updates (Recommended)
Indicates if the check for updates is done automatically. This option is enabled by default. The time when the check is scheduled is shown. See Scheduling the Check for Updates to set the schedule.
Checks for updates when clicked. The time of the last check is shown above the button.
Download the latest version of Java from java.com
Provides a link to where you can download the latest JRE.
Scheduling the Check for Updates
Set the time and frequency for automatic updates of your JRE from the Update tab of the Java Control Panel. A manual check can be done at any time from the same tab.
You must have Administrative privileges to update the JRE. The following instructions are for Microsoft Windows. Not all options are available for macOS. To check for an update:
To schedule an automatic check for updates:
From the Notify Me Before an Update is drop-down list, choose to be notified either before the update is downloaded, or after the update is downloaded but before the update is installed.
Click the date and time shown for Check for Updates to set up the schedule for updates.
The Automatic Update Advanced Settings window is shown.
Select how often you want the check to run and the day and time to run it.
Close the Automatic Update Advanced Settings window to see your selection in the Update tab.
Click Apply to save your changes, or OK to save your changes and close the Java Control Panel.
Java Update Scheduler
jusched.exe is launched when the user reboots the computer after installing the JDK or JRE. It is normally transparent to the user, but can be viewed in the Processes tab of the Windows Task Manager. If you do not want the scheduler to run, use the End Process button of the Processes tab to kill the process.
Desktop Settings Tab in the Java Control Panel
The Desktop Settings tab shows information about the JREs that are installed on your system and enables you to choose the JREs that you want to use to run applications that are embedded in a web page or launched from a browser.
The following table describes the information that is shown for each JRE found on your computer:
Flag that indicates which of the JRE versions are considered when running an application using Java Plug-in or Java Web Start. Settings in the Java Control Panel do not apply to standalone or self-contained applications. If the check box for a JRE is not selected, then Java Plug-in and Java Web Start will not use the JRE to launch Java applications. However, the current JRE might be used even if it is not marked as enabled.
Note: If Java content in the browser is disabled in the Security tab of the Java Control Panel, enabling the JRE in the Desktop Settings tab has no effect.
Java platform number for the JRE, for example, 1.8 or 9
Full version number of the JRE, including the update number, for example, 1.8.0_101
Architecture of the JRE
Type of JRE found, which is one of the following values:
Full path to the JRE
Optional custom options used to override the Java Plug-in default startup parameters, see Java Runtime Parameters
The table always has at least one entry, which is the most recently installed JRE. This is the JRE that is associated with the Java Control Panel.
On Microsoft Windows all of the JREs that are installed on a computer are shown. The Java Control Panel finds the JREs by looking in the registry. On Solaris, Linux, and macOS, the JRE that Java Web Start or Java Plug-in is using to deploy applications is the JRE that is considered registered. Use the Add and Remove buttons to change which JREs are listed in the table, see Editing Desktop Settings. On macOS, only the currently installed JRE is displayed, JDKs are not included.
Editing Desktop Settings
JREs can be added and removed from the table in the Desktop Settings tab and runtime parameters can be set for each JRE.
The following functions are available for managing JREs on a computer:
To change the runtime parameters for a user JRE, select the JRE, click the cell in the Runtime Parameters column, and edit the value.
The System JRE cannot be removed.
Java Runtime Parameters
To override Java Plug-in default startup parameters, specify custom options in the Runtime Parameters column for a JRE shown in the Desktop Settings tab of the Java Control panel.
Although available and supported in JDK 9, the Java Plug-in has been marked as deprecated in preparation for removal in a future release. Alternatives for applets and embedded JavaFX applications, which require the plug-in, include Java Web Start and self-contained applications.
The following sections provide examples of Java runtime parameters:
See the java command in Java Platform, Standard Edition Tools Reference for a full list of command line options.
Setting classpath or cp
The following format should be used for setting classpath or cp in Java Plug-in. It differs slightly from the java command line format, which uses a space instead of the equal (=) sign.
Enabling and Disabling Assertion Support
System properties are used to enable and disable assertion support.
The following system property is used to enable assertion support:
The following system property is used to disable assertion in the Java Plug-in:
Assertion is disabled in Java Plug-in code by default. The effect of assertion is determined during Java Plug-in startup. If you change the assertion settings in the Java Plug-in Control Panel, you must restart the browser for the new settings to take effect.
Because Java code in Java Plug-in also has built-in assertion, it is possible to enable the assertion in Java Plug-in code using the following parameter:
Tracing and Logging Support
If you do not want to use the default trace file name, use the following parameter to specify a different name:
If you do not want to use the default log file name, use the following parameter to specify a different name:
Furthermore, if you do not want to overwrite the trace and log files each session, you can use the following parameter:
Tracing and logging set through the Java Control Panel take effect when the Plug-in is launched. However, changes made through the Java Control Panel while a Plug-in is running have no effect until a restart.
Debugging Applets in Java Plug-in
The following parameters are used when debugging applets in the Java Plug-in:
Although available and supported in JDK 9, the Applet API and the Java Plug-in are marked as deprecated in preparation for removal in a future release. Alternatives for applets and embedded JavaFX applications include Java Web Start and self-contained applications.
Default Connection Timeout
The default network timeout value for all HTTP connections is two minutes. You can override this setting by using the following parameter:
Java Plug-in does not set sun.net.client.defaultReadTimeout by default. If you want to set it, do so through the Java Runtime Parameters as shown above.
sun.net.client.defaultConnectTimeout specifies the timeout in milliseconds to establish the connection to the host. For example, for HTTP connections, it is the timeout when establishing the connection to the HTTP server. For FTP connections it is the timeout when establishing the connection to FTP servers.
sun.net.client.defaultReadTimeout specifies the timeout in milliseconds when reading from an input stream when a connection is established to a resource.
Web Settings Tab in the Java Control Panel
The Web Settings tab contains the following tabs:
Exception Site List Tab
The Exception Site List tab in the Web Settings tab enables you to manage Rich Internet Applications (RIAs) that users want to run even if the RIAs are normally blocked by security checks.
RIAs from the locations listed are allowed to run with applicable security prompts. Use the following controls to manage the list:
Click Add to add a location.
Select an entry and click Remove to remove a location.
Double-click an entry to edit it.
Use the Filter field to search the list for sites that contain the search term.
The following rules apply to the format of the location URL:
A protocol is required.
A domain is required.
A port number is required only if the default port is not used.
A path is optional.
The format must be the same as the format used for the RIA URL or href attribute.
Deployment Rule Set Tab
The Deployment Rule Set tab in the Web Settings tab shows the active deployment rule set, which manages the running and blocking of Rich Internet Applications (RIAs).
If an active deployment rule set is installed on the system, the following information is shown:
Notice that the rule set is valid or a warning that it is not valid
Text box that shows the rules in the Rules tab and information about the certificate used to sign the rule set in the Certificate Details tab
Timestamp of the rule set signature
Location of the rule set
Expiration date of the rule set signature
When a rule set is available, the rules determine if a RIA is run without security prompts, run with security prompts, or blocked. Deployment rules and rule sets are described in Deployment Rule Set.
Temporary Files Settings Tab
The Temporary Files Settings tab in the Web Settings tab enables you to manage files that are cached for applications that are embedded in a web page or launched from a web page.
From this tab, you can perform the following actions:
Select if you want to keep temporary files on your computer.
Set the location where temporary files are kept.
Set the compression level for JAR files that are cached. The higher the compression level, the more compressed the file.
Set the amount of disk space for storing temporary files.
Trace and Log Files
Cached Applications and Applets
Installed Applications and Applets
Network Settings Tab
The Network Settings tab in the Web Settings tab enables you to configure your connection to the network.
The available options are shown in the following table:
Use browser settings
Select this option to use the browser default proxy settings. This is the default setting.
Select this option to provide the address and port number of the proxy server that you want to use. The option to bypass the proxy server for local addresses is available.
To provide separate addresses for different protocols, click Advanced. You can also specify address that bypass the proxy server.
Use automatic proxy configuration script
Select this option if you do not want to use a proxy.
Java Cache Viewer Tab
The Java Cache Viewer tab in the Web Settings tab shows the applications, resources, and deleted applications stored in the Java cache.
From this tab, you can perform the following actions for users or for the system by using the icons or by right-clicking an application:
Visit the Web page of applications.
View the JNLP file of applications.
Install shortcuts to applications.
Remove applications from the list. Applications are moved to the list of deleted applications.
View JNLP file resources.
For deleted applications:
Install deleted applications.
Remove applications from the cache.
View JNLP file resources.
Install deleted applications.
Security Tab in the Java Control Panel
The Security tab contains the following tabs:
General Security Settings Tab
The General tab of the Security tab shows the security settings that are in place. This tab also enables you to restore security prompts.
The following table shows the options that are available.
Enable Java Content in the Browser
Enables Java applications to be run in a browser or launched from a browser. To prevent these types of applications from running, do not select this option. This option is selected by default.
Enable enhanced security restrictions
Adds the additional restriction of requiring that the system must be able to check the revocation status of the certificate used to sign the application, or the application is blocked.
If not selected, applications that are signed with a valid certificate that is located in the Signer CA keystore, and include the Permissions attribute in the manifest for the main JAR file are allowed to run with security prompts. This option is not selected by default.
Restore Security Prompts
To insure the continued security of your system, it is recommended that you periodically restore the prompts that were hidden. Seeing the prompts again provides an opportunity to review the applications and ensure that you still want them to run.
Manage Certificates Tab
User-level and system-level certificates used to verify RIAs that you run can be managed from the Manage Certificates tab of the Security tab.
From this tab, you can import, export, remove, and view the details for certificates. Information is provided for the following types of certificates:
User-Level Certificates
You can export, import, remove, and view the details of user-level certificates using the buttons provided in the Certificates dialog. To export, remove, or view the details, first select a certificate from the list.
The following table shows the default location of the keystore files.
Table 9-1 Default Keystore Location
Solaris, Linux, macOS
For example, the default location on Microsoft Windows 7 for user jsmith is
To specify a user-level keystore in a location other than the default location, set properties in the user-level deployment.properties file. The following table describes the property to set for each type of certificate.
Table 9-2 Properties for User-Level Keystore Locations
| Operating System | Location |
|---|---|
System-Level Certificates
You can export and view the details of system-level certificates using the buttons provided in the Certificates dialog. System-level certificates cannot be imported or removed by an end user.
Trusted, Secure Site, and Client Authentication certificate keystore files do not exist by default. The following table shows the default location for the Signer CA keystore file.
Table 9-3 Default Location for the Signer CA Keystore
| Certificate Type | Property Name |
|---|---|
The following table shows the default location for the Secure Site CA keystore.
Table 9-4 Default Location for the Secure Site CA Keystore
| Operating System | Location |
|---|---|
Solaris, Linux, or macOS
To specify a system-level keystore in a location other than the default location, set properties in the system-level deployment.properties file. The System-Level deployment.properties file does not exist by default. The following table describes the property to set for each type of certificate.
Table 9-5 Properties for System-Level Keystore Locations
| Operating System | Location |
|---|---|
Advanced Tab in the Java Control Panel
The following options are available:
Debugging
Enable tracing, logging, and the showing of applet lifecycle exceptions by selecting the appropriate check boxes. If the boxes are not checked, the options are disabled.
Java Console
The Java Console is a debugging aid for Java applets and Java Web Start applications. System.out and System.err messages and tracing and logging output are shown in the console.
The following choices for viewing the console are available:
Hide the console (default)
Do not start the console
Shortcut Creation
This option provides the following choices for Java Web Start for creating shortcuts on the desktop, select only one:
Ask user if untrusted (default)
JNLP File/MIME Association
This option enables you to associate files with the JNLP MIME type. The following choices are available, select only one:
Prompt user (default)
Application Installation
The following choices are available, select only one:
Install if hinted (default)
Install if shortcut created
Install if hinted and shortcut
A Java application or applet that is launched with Java Web Start can either be installed or cached on the client computer. If the Java application is cached, then Java Web Start stores the entire application in its cache; the application is removed from the client computer when Java Web Start empties its cache. If the Java application is installed, then the application has an entry in the Add or Remove Programs applet in Windows Control Panel.
Execution Environment Security Settings
The following choices are available, more than one can be selected:
Allow user to grant permissions to signed content
Show sandbox warning banner
Allow user to accept JNLP security requests
Don’t prompt for client certificate selection when no certificates or only one exists
Warn if site certificate does not match hostname
Show site certificate from server even if it is valid (not checked by default)
Mixed code (sandboxed vs. trusted) security verification
The following choices are available, select only one:
Disable verification (not recommended)
Perform signed code certificate revocation checks on
Before a signed applet or Java Web Start application is run, the certificates used to sign the JAR file can be checked to ensure that none have been revoked. You can have all certificates checked, or only the certificate from the publisher of the app. If a certificate has been revoked, any RIA that is signed with the certificate is not allowed to run. This check can be disabled, but that is not recommended. The following choices are available, select only one:
Publisher’s certificate only
All certificates in the chain of trust (selected by default)
Do not check (not recommended)
Check for signed code certificate revocation using
The following options indicate what to use to determine if a certificate has been revoked, select only one:
Certificate Revocations Lists (CRLs)
Online Certificate Status Protocol (OCSP)
Both CRLs and OCSP (selected by default)
If Do Not Check is selected for Perform signed code certificate revocation checks on, this setting is ignored.
Perform TLS certificate revocation checks on
Before a signed applet or Java Web Start application is run from a secure server, the certificates used to authenticate the secure server can be checked to ensure that none have been revoked. You can have all certificates checked, or only the certificate from the server. If a certificate has been revoked, any RIA that is signed with the certificate is not allowed to run. This check can be disabled, but that is not recommended. The following choices are available, select only one:
Server certificate only
All certificates in the chain of trust (selected by default)
Do not check (not recommended)
Check for signed code certificate revocation using
The following options indicate what to use to determine if the certificate for a secure server has been revoked, select only one:
Certificate Revocations Lists (CRLs)
Online Certificate Status Protocol (OCSP)
Both CRLs and OCSP (selected by default)
If Do Not Check is selected for Perform TLS certificate revocation checks on, this setting is ignored.
Advanced Security Settings
The following choices are available, more than one can be selected:
Enable the operating system’s restricted environment (native sandbox) (Windows only, not checked by default)
Use certificates and keys in browser keystore
Enable blacklist revocation check
Enable caching password for authentication
Use SSL 2.0 compatible ClientHello format (not checked by default)
The native sandbox option is available only on Windows. When the native sandbox is enabled, sandbox applets and Java Web Start applications run in a restricted environment that is provided by the operating system. All-permission applications are not affected and continue to run as before.
The following conditions apply:
The native sandbox is disabled for applications included in the Exception Site List or when a Deployment Rule Set is used.
Sandbox applets deployed with the HTML applet tag, which includes all-permissions JAR files from the Class-Path manifest attribute, run in the native sandbox. In this case, a special warning dialog is shown to inform the user that the applet might not work properly when it tries to access the all-permission JAR files.
The custom preloader is disabled in the following cases when the native sandbox is enabled:
The custom preloader is disabled when a sandbox applet or Java Web Start application is initializing. The default preloader is used instead. After the application is initialized, Java VM restarts with the native sandbox enabled and the custom preloader is used.
For all-permission applications, the custom preloader is disabled if it is located in a JNLP file that has sandbox permission, until the user agrees to run the application from the Security Dialog, which grants unrestricted access (privileged) to the application.
Miscellaneous
The following choices are available depending on your platform, none are checked by default:
Store user settings in the roaming profile (Windows only)
Local application properties
Blacklisted JAR files
User certificate stores
Exception site list
Place Java icon in system tray
Suppress sponsor offers when installing or updating Java
Select this option if you do not want to be provided with offers from sponsors during the installation or update process.
Источник
Adblock
detector
| Certificate Type | Property Name |
|---|---|
На чтение 6 мин. Опубликовано 15.12.2019
Java — язык программирования и вычислительная платформа. Используется для работы огромного числа приложений и современных игр. С точки зрения программного кода имеет массу проблем, особенно с безопасностью, но достойных альтернатив нет.
Без этой маленькой программки не будет работать большое количество приложений и на “семерке”, и на XP, и на Ubuntu. Обычно установка таких программ самостоятельно “подтягивает” нужные компоненты, но вы можете установить их вручную.
Во многих операционных системах типа Linux Java установлена по-умолчанию. Но Windows, причем от XP до 10, повезло меньше, и чтобы воспользоваться всеми возможностями этого мало кем любимого, но порой очень нужного программного обеспечения, его нужно загрузить, установить и настроить.
Стоит отметить, что новейшая ОС Windows 10, а точнее ее веб-браузер Edge с Java не работает, но она используется сторонними браузерами.
Содержание
- Процесс инсталляции
- Изучаем Control Panel
- Windows 8
- Windows 7 и Windows Vista
- Windows XP
- Internet Explorer
- Google Chrome
- Mozilla Firefox
Процесс инсталляции
Установка Java — процесс элементарный: скачайте файл с официального сайта, запустите (возможно потребуются права администратора) и нажмите кнопку Install.

Окошко может выглядеть немного иначе, ведь версии регулярно обновляются, а в XP или 10 они немного отличаются. Наверняка установщик предложит поставить некоторые другие программы, так как компания Oracle сотрудничает со многими производителями ПО. Вам решать, нужны эти программы на ПК или нет. После некоторого времени вы получите сообщение, о том, что Java успешно установлена.
Вы можете перейти по ссылке java.com/ru/download/installed.jsp, чтобы проверить вашу установленную версию.
Изучаем Control Panel
Настройка Java в рамках операционных систем Windows осуществляется через Java Control Panel, найти которую можно в Панели управления. Независимо от версии операционной системы (XP, Vista, 7, 8 или 10) нужная иконка будет выглядеть примерно так:

Щелкнув по ней, вы откроете такую панель:

Она содержит вкладки:
- General — Базовая настройка;
- Update — Обновление;
- Java — перевод не требуется;
- Security — Безопасность;
- Advanced — Дополнительные настройки.
В первую очередь стоит заглянуть в раздел Security. В зависимости от версии Java окошко может выглядеть так (для 7-ой версии):

Или так для более поздних версий:

Как видите настройка безопасности в старых и новых версиях слегка отличается. Уровень Medium (Средний) был удален, так как с ним Windows становится более уязвимой к вредоносному ПО. Ваша задача на данном этапе выбрать уровень High (Высокий) или Very High (Очень высокий).
Первый используется по-умолчанию. Если вам нужно, чтобы все просто работало, оставьте настройки как есть. При установке очень высокого уровня безопасности с программной платформой будут работать только приложения со специальным сертификатом, а остальные будут блокироваться.
Здесь же есть полезная кнопка Edit Site List, с помощью которой можно настроить список сайтов-исключений. Просто добавляйте ссылку и жмите Add. Кнопкой Remove сайт удаляется из перечня.

На сайтах из списка становится возможным выполнение RIA-приложений (загружаемых с сайта на жесткий диск), не проходящих проверку системы безопасности.
Если вы хотите, чтобы платформа, установленная в Windows, не обновлялась без вашего ведома, уберите галку здесь:

Вы можете обновить Java вручную немедленно, нажав кнопку Update Now. По кнопке Advanced доступна установка точной даты и времени проверки обновления.
Для полноценной работы Java на ОС Windows от XP до 10 этих настроек вполне достаточно.
Java Control Panel или по-русски Панель управления Java можно всегда найти в Панели управления Windows. В разных версиях Windows добраться туда можно по-разному.
Windows 8
Первый способ, нажимаем комбинацию клавиш Win + R, набираем там control и жмём ОК.
Второй способ, запускаем Проводник (кликаем по значку папки в нижней правой части экрана).
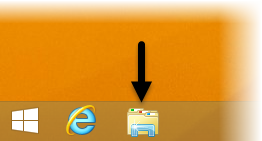
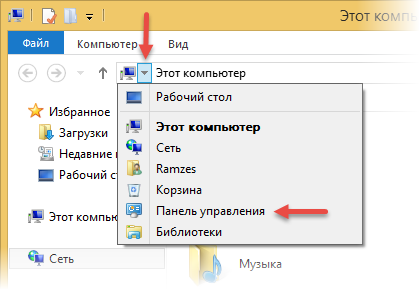
Нажимаем на маленькую стрелочку в верхней части окна, рядом с надписью Этот компьютер, в раскрывшемся списке выбираем Панель управления.
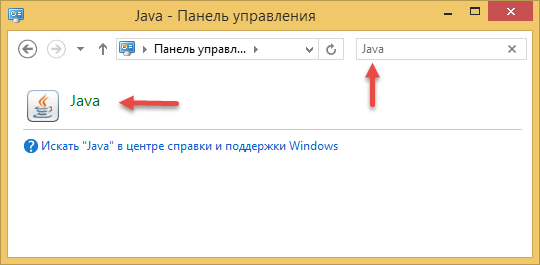
В открывшемся окне Панели управления в строке поиска набираем Java и кликаем по значку Java чтобы запустить Java Control Panel.
Windows 7 и Windows Vista
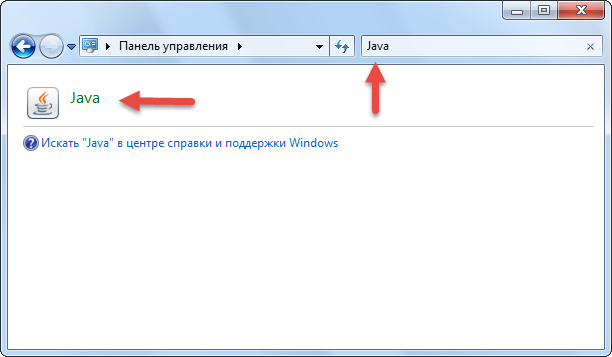
Здесь всё прощё, нажимаем кнопку Пуск, выбираем Панель управления. В открывшемся окне в строке поиска набираем Java и кликаем по значку Java.
Windows XP
Здесь также нужно нажать Пуск и выбрать Панель управления. Дальше визуально находим значок Java и запускаем его двойным кликом мышки.
После того, как программное обеспечение установлено, необходимо подготовить компьютер к работе Web-кабинета, выполнив следующие настройки Java:
- настройку безопасности Java;
- настройку Java в браузера;
- настройку безопасности ОС Windows для работы Java.
Для того чтобы исключить возникновение проблем в работе Java, рекомендуется в приложении понизить уровень безопасности до уровня medium или high (в зависимости от внутренней политики безопасности компании). Для этого необходимо:
- открыть Панель управления Windows → Java Control Panel → Security (рис. 1,1);
- переместить риску на шкале безопасности до уровня medium или high (рис. 1,2);
- нажать кнопку ОК для применения настроек (рис. 1,3).
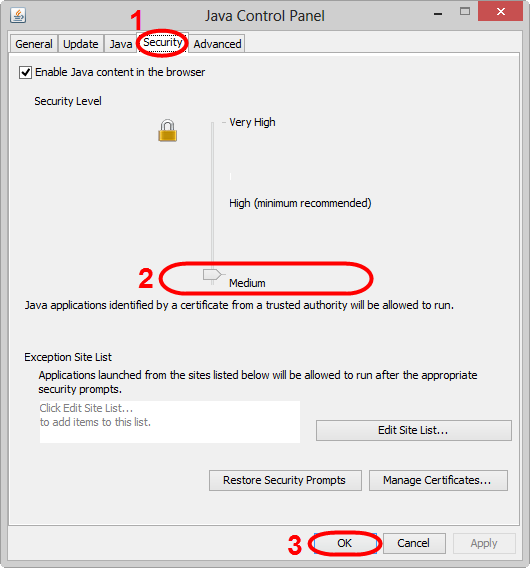
Рисунок 1 – настройка безопасности Java
Для работы Java в браузере необходимо проверить, подключено ли данное приложение в браузере. Если нет – подключить.
 Internet Explorer
 Internet Explorer
Для того чтобы включить Java в браузере Internet Explorer необходимо:
- перейти в меню Сервис→Свойства браузера;
- открыть вкладку Безопасность и нажать кнопку Другой;
- найти в списке Выполнять сценарии приложений Java (рис. 2,1);
Рисунок 2 – активация приложения в браузере Internet Explorer

Google Chrome
 Google Chrome
Для того чтобы включить Java в браузере Chrome необходимо:
- ввести в адресной строке браузера about:plugins. В результате откроется экранная форма Подключаемые модули (рис. 3);
Рисунок 3 – активация приложения в браузере Chrome - найти в списке модуль Java. Если поддержка Java отключена, кнопка Включить будет активна;
- нажать кнопку Включить для разрешения использования Java.

Рекомендуется установить флажок Разрешать всегда для отключения информационных сообщений, всплывающих в браузере при запуске Java.
Mozilla Firefox
 Mozilla Firefox
Для того чтобы включить Java в браузере Mozilla Firefox необходимо:
- запустить браузер Mozilla Firefox (перезапустите, если уже запущен);
- нажать Firefox (или перейдите в меню Сервис в Windows XP). В открывшемся контекстном меню выбрать Дополнения→раздел Плагины;
- найти в списке модуль Java (TM) Platform (рис. 4,1);
Рисунок 4 – активация приложения в браузере Mozilla Firefox - выбрать пункт Включать всегда в раскрывающемся списке (рис. 4,2).

Работа Java может блокироваться из-за настроек ОС Window. Предположительно Java может блокироваться антивирусной программой. В таком случае следует в расширенных настройках антивирусной программы добавить Java в доверенные приложения, указав путь (например, C:Program Files (x86)Javajre7injava.exe), а также рекомендуется отключить проверку трафика для браузера, которое взаимодействует с Java для работы Web-кабинета.
Для исключения возможной блокировки работы приложения необходимо понизить уровень безопасности OC Windows. Для этого следует перейти в Панель управления→Параметры управления учетными записями пользователя, понизить уровень безопасности (рис. 5,1) и нажать кнопку ОК (рис. 5,2) для применения настроек.
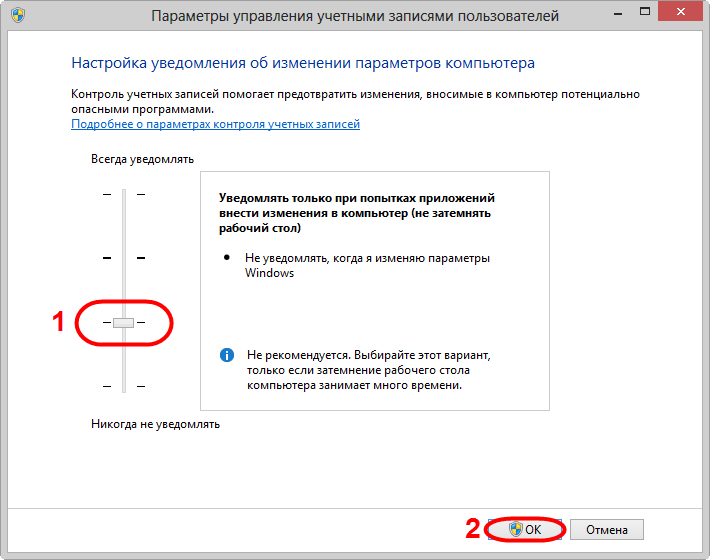
Рисунок 5 – настройка безопасности
Далее необходимо сохранить файл открытого ключа для получения логина и пароля Далее »
C: Users Имя пользователя AppData LocalLow Sun Java Deployment кэш
папка в формате JAR. Вы можете установить уровень сжатия для этих файлов JAR и даже установить сумму, которая будет выделена для хранения этих файлов.
Вы можете просмотреть файлы, нажав кнопку Просмотр .
Чтобы удалить эти временные файлы JAR Java, нажмите Удалить файлы . Теперь вы можете выбрать, какие файлы вы хотите удалить, и нажмите кнопку ОК.
Чтобы очистить кэш Java с помощью командной строки, откройте окна командной строки, введите следующую команду и нажмите Enter:
Мы склонны игнорировать обновление нашей Java. Но очень важно, чтобы мы всегда были уверены, что вы используете последнюю версию Java, поскольку уязвимости в Java часто используются для компрометации вашего компьютера. Последняя версия Java содержит важные улучшения для повышения безопасности, производительности и стабильности приложений Java, которые работают на вашем компьютере. Всякий раз, когда дыры в безопасности обнаруживаются, они исправляются, и поэтому обязательно убедитесь, что у вас установлена последняя версия java, поскольку она включает исправления уязвимостей.
Вы можете настроить параметры обновления Java, нажав на вкладку Обновить .
Убедитесь, что Автоматически проверять наличие обновлений . Нажав на кнопку Дополнительно , вы сможете установить частоту проверок обновлений.
Кстати, я заметил, что прошло много времени с тех пор, как я обновил Java. Поэтому я нажал на Обновить сейчас , чтобы начать процесс обновления. Это запустит процесс juscheck.exe , который проверит наличие обновлений и, соответственно, проинформирует вас.
Нажав на кнопку «Установить», вы начнете процесс обновления. По завершении нажмите «Закрыть».
Вкладка Java позволяет просматривать и управлять версиями и настройками среды выполнения Java для приложений и апплетов Java.
Вкладка Безопасность позволяет просматривать типы сертификатов, позволяющие идентифицировать себя.
На вкладке Дополнительно можно настроить другие параметры.
Хранение старых и неподдерживаемых версий Java в вашей системе представляет серьезную угрозу безопасности.
Более старые версии SunJava (до JRE 6 с обновлением 7) действительно сохранялись при установке обновлений и должны быть удалены, так как более старые версии SunJava очень уязвимы для Winfixer/Vundo. С 2005 года вплоть до обновления в конце прошлого года до обновления 10 JRE 6 для SunMicrosystems и Sun Microsystems, чтобы автообновление SunJava удаляло предыдущие (уязвимые) версии программы. Обновления от JRE 6 Update 10 forward находятся в автономной папке «jre6», которая перезаписывается, если установлена новая JRE. Даже при использовании самой последней версии SunJava, если на вашем компьютере все еще находятся более ранние, уязвимые версии, они уязвимы для заражения.К сожалению, простое использование программ «Установка и удаление программ» для удаления старых версий неэффективно.
Мы предлагаем вам попробовать JavaRa. После обновления Java до его последней версии сегодня я запустил JavaRa и использовал его для удаления старых версий Java.
Он обнаружил две старые версии на моем компьютере, которые я затем удалил.
ПРИМЕЧАНИЕ. Мой коллега по MVP и мод Corrine TWCF добавляет: JavaRa не была обновлена для поддержки удаления JRE 7 и, по-видимому, фактически имеет проблемы после JRE 6u32. Он перешел на SingularLabs.com. Кроме того, Пол Маклейн больше не поддерживает JavaRa, а Фриде Фрис все еще поддерживает.
Java Скачать
Вы можете скачать и установить Java для Windows вручную с Java.com здесь.
Надеюсь, вы узнали что-то новое здесь, в этом посте. Если у вас есть что добавить, пожалуйста, сделайте это в разделе комментариев.
9 Installation of the JDK and the JRE on Microsoft Windows Platforms
System Requirements for Installing the JDK and the JRE on 64-Bit Windows Platform
The JDK and the JRE have minimum processor, disk space, and memory requirements for 64-bit Windows platform.
Before installing the JDK or the JRE on your 64-bit Windows platform, you must verify that it meets the following minimum processor, disk space, and memory requirements.
Both the JDK and JRE require at minimum a Pentium 2 266 MHz processor.
Disk Space Requirements
For JDK 10 , you are given the option of installing the following features:
Public Java Runtime Environment
When you install 64-bit JDK, then 64-bit public JRE also gets installed. The following table provides the disk requirements for the installed features:
| JDK | Installed Image |
|---|---|
| Development Tools: 64-bit platform | 500 MB |
| Source Code | 54.2 MB |
| JRE | Installed Image |
|---|---|
| Public Java Runtime Environment | 200 MB |
| Java Update | 2 MB |
On Windows 64-bit operating systems, the Java runtime requires a minimum of 128 MB of memory.
The minimum physical RAM is required to run graphically based applications. More RAM is recommended for applets running within a browser using the Java Plug-in. Running with less memory may cause disk swapping, which has a severe effect on performance. Very large programs may require more RAM for adequate performance.
JDK and JRE Installation Instruction Notation for Windows
For any text in this document that contains the following notation, you must substitute the appropriate update version number:
If you are downloading the JDK installer for 64-bit systems for update 10 Interim 0, Update 2, and Patch 1, then the file name jdk- 10 . interim.update.patch _windows-x64_bin.exe becomes jdk- 10 .0.2.1_windows-x64_bin.exe .
If you are downloading the JRE installer for 64-bit systems for update 10 Interim 0, Update 2, and Patch 1, then the file name jre- 10 . interim.update.patch _windows-x64_bin.exe becomes jre- 10 .0.2.1_windows-x64_bin.exe .
JDK Installation Instructions for Windows
You run a self-installing executable file to unpack and install the JDK on Windows computers.
Install JDK on Windows computers by performing the actions described in the following topics:
Downloading the JDK Installer
In a browser, go to the Java SE Development Kit 10 Downloads page and click Accept License Agreement . Under the Download menu, click the Download link that corresponds to the .exe for your version of Windows.
Download the file jdk- 10 . interim.update.patch _windows-x64_bin.exe .
Verify the successful completion of file download by comparing the file size on the download page and your local drive.
Running the JDK Installer
- Start the JDK 10 installer by double-clicking the installer’s icon or file name in the download location.
- Follow the instructions provided by the Installation wizard.
Installing the JDK Silently
Instead of double-clicking or opening the JDK installer, you can perform a silent, noninteractive, JDK installation by using command-line arguments.
The following table lists example installation scenarios and the commands required to perform them. The notation jdk stands for the downloaded installer file base name, such as jdk- 10 _windows-x64_bin.exe .
| Installation Scenario | Command |
|---|---|
| Install JDK and public JRE in silent mode. | |
| Install development tools and source code in silent mode but not the public JRE. | |
| Install development tools, source code, and the public JRE in silent mode. | |
| Install the public JRE in the specified directory C:test in silent mode. |
Setting the PATH Environment Variable
It is useful to set the PATH variable permanently for JDK 10 so that it is persistent after rebooting.
The PATH variable is set automatically for the JRE. This topic only applies to the JDK.
If you do not set the PATH variable, then you must specify the full path to the executable file every time that you run it. For example:
- Select Control Panel and then System .
- Click Advanced and then Environment Variables .
- Add the location of the bin folder of the JDK installation to the PATH variable in System Variables .
The PATH environment variable is a series of directories separated by semicolons (;) and is not case-sensitive. Microsoft Windows looks for programs in the PATH directories in order, from left to right.
You should only have one bin directory for a JDK in the path at a time. Those following the first instance are ignored.
If you are not sure where to add the JDK path, append it.
The new path takes effect in each new command window that you open after setting the PATH variable.
The following is a typical value for the PATH variable:
JRE Installation Instructions for Windows
When installing JRE on Windows computers, you must select the JRE installer that is appropriate for your Windows system.
The 64-bit Windows operating systems come with a 64-bit Internet Explorer (IE) browser as the standard (default) for viewing web pages.
Install JRE on Windows computers by performing the actions described in the following topics:
JRE Proxy Settings and Authentication
To use the Windows Online Installer, you must be connected to the internet.
If you are running behind a proxy server, then you must have your proxy settings correctly configured. If they are not configured, or are incorrectly configured, then the installer will terminate with the following message:
The installer cannot proceed with the current Internet Connection settings.
Please visit the following website for more information.
If you see this message, check your proxy settings:
In the Control Panel , double-click Internet Options , select the Connections tab, and click the LAN Settings .
If you do not know what the correct settings should be, check with your internet provider or system administrator.
Downloading the JRE Installer
The JRE Installer is located on the Java SE Runtime Environment 10 Downloads page.
- In a browser, go to the Java SE Runtime Environment 10 Downloads page.
The following JRE installers are available for you to download:
Windows Offline: jre- 10 . interim.update.patch _windows-x64_bin.exe
Windows Tar: jre- 10 . interim.update.patch _windows-x64_bin.tar.gz
The Windows Offline installer and Windows installer contains everything that is required to install the JRE.
The Microsoft Windows Installer (MSI) Enterprise JRE Installer is also available, which enables you to install the JRE across your enterprise. It requires a commercial license for use in production.
Running the JRE Installer
- Start the JRE 10 Installer by double-clicking the installer’s icon or file name in the download location.
- Follow the instructions provided by the Installation wizard.
The private JRE installed with the JDK is not registered. To register the JRE, you must set the PATH environment variable to point to JAVA_HOME bin , where JAVA_HOME is the location where you installed the private JRE . See Setting the PATH Environment Variable.
By default, the Java Access Bridge is disabled. To enable it, see Enabling and Testing Java Access Bridge in the Java Platform, Standard Edition Java Accessibility Guide .
To access essential Java information and functions in Microsoft Windows 7 and Windows 10 machines, after installation, click the Start menu and then select Java . The Java directory provides access to Help, Check for Updates, and Configure Java.
The Microsoft Windows 8 and Windows 8.1 do not have a Start menu. However, the Java information is available in the following Start directory: %ALLUSERSPROFILE%MicrosoftWindowsStart MenuPrograms .
Windows Registry Settings
The installation program for the Microsoft Windows version of the Java SE Runtime Environment uses the registry to store path and version information.
It creates the following registry keys:
This key contains the string CurrentVersion , with a value that is the highest installed version on the system.
JavaHome : the full path name of the directory in which the JRE is installed
RuntimeLib : the full path name of the Java runtime DLL
HKEY_LOCAL_MACHINESoftwareJavaSoftJava Web Start
This key is created for Java Web Start.
If there are two versions of JDK or JRE installed on a system, one with the new version-string format introduced in JDK 10 , and the other with the older version format, then there will be two different CurrentVersion registry key values. For example, if JDK 1.8.0 and JDK 10 are installed, then the following registry keys are created:
«HKEY_LOCAL_MACHINESOFTWAREJavaSoftJava Development Kit» for JDK 1.8.0 and «HKEY_LOCAL_MACHINESOFTWAREJavaSoftJDK» for JDK 10 .
The registry layout for this example is:
The @CurrentVersion is a registry string in the «JDK» or «Java Development Kit» key.
For the same example, if the JRE is installed, then the registry layout is:
The @CurrentVersion is a registry string in the «JRE» or «Java Runtime Environment» key.
Beginning to Use the JDK
Use the Java item in the Windows Start menu to access essential Java information and functions, including Help, API documentation, the Java Control Panel, checking for updates, and Java Mission Control.
Java Start Menu Installed by JDK
During JDK install, Java menu items are added to the Windows Start menu to provide easy access to Java resources and a Java Development Kit folder is created in the Windows Start menu, which contains the following items:
Reference Documentation : Opens the Online API documentation web page.
Java Mission Control : Opens the Java Mission Control profiling and diagnostics tools suite.
Java Mission Control is a commercial feature available to users with a Java SE Advanced license.
During JDK installation and uninstallation processes, the appropriate start menu items are updated so that they are associated with the latest JDK version on the system
The Windows 7 and Windows 10 have a Start menu; however, the menu is not available in Windows 8 and Windows 8.1. The JDK and Java information in Windows 8 and Windows 8.1 is available in the following Start directory: %ALLUSERSPROFILE%MicrosoftWindowsStart MenuPrograms .
Java Start Menu Installed by JRE
During JRE installation, Java menu items are added to the Windows Start menu to provide easy access to Java resources and a Java folder is created in the Windows Start menu, which contains the following items:
About Java : Opens the Java Control Panel with focus on the General tab. The tab displays the latest JRE version installed on the system.
Check for Updates : Opens the Java Control Panel with focus on the Update tab
Configure Java : Opens the Java Control Panel with focus on the General tab
Get Help : Opens the Java Help Center
Visit Java.com : Opens the Java Download page
During JRE installation and uninstallation processes, the appropriate start menu items are updated so that they are associated with the latest JRE version on the system.
The Windows 7 and Windows 10 have Start menu, however the menu is not available in Windows 8 and Windows 8.1. The JRE and Java information in Windows 8 and Windows 8.1 is available in the following Start directory: %ALLUSERSPROFILE%MicrosoftWindowsStart MenuPrograms .
Java Web Start
Java Web Start is an application-deployment technology that gives you the power to run full-featured applications with a single click from your web browser.
With Java Web Start, you can download and run applications, such as a complete spreadsheet program or an internet chat client, without going through complicated installation procedures. With Java Web Start, you run applications simply by clicking a web page link. If the application is not present on your computer, Java Web Start automatically downloads all necessary files. It then caches the files on your computer so that the application is always ready to be run anytime that you want — either from an icon on your desktop or from the browser link. No matter which method you use to run the application, the most current, available version of the application is always presented to you.
Upgrading from Previous Versions
If you have a previous version of Java Web Start, do not uninstall it. Uninstalling it will cause the download cache to be cleared, and all previously installed Java Web Start application data will have to be downloaded again. The new version will write over previous installations and automatically update browsers to use the new version. The configuration files and the program files folder used by Java Web Start have changed, but all your settings will remain intact after the upgrade because Java Web Start will translate your settings to the new form.
The only way to uninstall Java Web Start is to uninstall the JDK or JRE. Uninstalling the JDK or JRE will not, however, remove the cache for previous versions of Java Web Start. Previous releases have separate uninstallation instructions for Java Web Start.
You may see a misleading message if you do the following:
Download and cache a Java Web Start application with the JDK or JRE.
Remove the JDK or JRE using Add or Remove Programs from the Windows Control Panel .
Remove the Java Web Start application using Add or Remove Programs .
When you remove the application, you see an Uninstaller Error dialog box saying:
An error occurred while trying to remove Java-Application: name App. It may have already been uninstalled. Would you like to remove Java-Application: name App from the Add or Remove program list?
If you say Yes to this, then you will see another Uninstaller Error dialog box saying:
You do not have sufficient access to remove Java-Application: name App from the Add or Remove Program list. Please contact your system administrator.
The message is displayed when you have removed the Java Web Start application while uninstallating the JDK or JRE, but this is not reflected in the Add or Remove Programs . Refresh the Add or Remove Programs by pressing F5 or reopen the panel.
To avoid seeing the misleading message, either press F5 or reopen the dialog box. Any Java Web Start application that was downloaded and cached with the JDK or JRE will no longer appear in the list of currently installed programs.
Java Plug-in
Java Plug-in technology, included as part of the JRE, establishes a connection between popular browsers and the Java platform. This connection enables applets on websites to be run within a browser on the desktop.
The Java Plug-in is automatically enabled for supported web browsers during installation of the JRE. No user intervention is necessary.
In Java SE 10 , the version of the Java Plug-in that is available in versions of the JRE prior to Java SE 6 Update 10 has been deprecated. However, this earlier version of the Java Plug-in is still shipped with Java SE 10 for compatibility purposes but is no longer fully supported. It will be removed in a future release.
Option to Disable the JRE Out-of-Date Warning
When the installed JRE falls below the security baseline or passes its built-in expiration date, an additional warning is shown to users to update their installed JRE to the latest version. For businesses that manage the update process centrally, users attempting to update their JRE individually, may cause problems.
A deployment property, deployment.expiration.check.enabled is available that can be used to disable the JRE out of date warning. To suppress this specific warning message, add the following entry in the deployment properties file:
To disable automatic updates, on the Update tab of the Java Control Panel, deselect the Check for Updates Automatically check box.
Uninstalling the JDK on Windows
Uninstalling the JRE on Windows
Use either of the following ways to uninstall JRE:
Go to Add/Remove Programs utility in the Microsoft Windows Control Panel and uninstall the older versions of JRE.
Remove JRE using the online Java Uninstall Tool.
The Java Removal Tool is integrated with the JRE installer. After JRE 10 is installed, the Java Removal Tool provides the list of outdated Java versions in the system and helps you to remove them.
The Java Uninstall tool will not run if your system administrator specified a deployment rule set in your organization.
A deployment rule set enables enterprises to manage their Java desktop environment directly and continue using legacy business applications in an environment of ever-tightening Java applet and Java Web Start application security policies. A deployment rule set enables administrators to specify rules for applets and Java Web Start applications; these rules may specify that a specific JRE version must be used. Consequently, the Java Uninstall tool will not run if it detects a deployment rule set to ensure that no required JREs are uninstalled.
See Deployment Rule Set in the Java Platform, Standard Edition Deployment Guide .
JDK Installation Troubleshooting
The following sections provide tips for working around problems that are sometimes seen during or while following installation instructions.
System Error During Decompression
If you see the error message system error during decompression , then you might not have enough space on the disk that contains your TEMP directory.
Program Cannot Be Run in DOS Mode
If you see the error message This program cannot be run in DOS mode , then do the following:
Open the MS-DOS shell or command prompt window.
Right-click the title bar.
Select the Program tab.
Ensure that the item Prevent MS-DOS-based programs from detecting Windows is not selected.
Select OK again.
Exit the MS-DOS shell.
Restart your computer.
Source Files in Notepad
In Microsoft Windows, when you create a new file in Microsoft Notepad and then save it for the first time, Notepad usually adds the .txt extension to the file name. Therefore, a file that you name Test.java is actually saved as Test.java.txt . Note that you cannot see the .txt extension unless you turn on the viewing of file extensions (in Microsoft Windows Explorer, deselect Hide file extensions for known file types under Folder Options ). To prevent the .txt extension, enclose the file name in quotation marks, such as «Test.java» when entering information in the Save As dialog box.
Characters That Are Not Part of the System Code Page
It is possible to name directories using characters that are not part of the system locale’s code page. If such a directory is part of the installation path, then generic error 1722 occurs, and installation is not completed. Error 1722 is a Windows installer error code. It indicates that the installation process has failed. The exact reason for this error is not known at this time.
To prevent this problem, ensure that the user and system locales are identical, and that the installation path contains only characters that are part of the system locale’s code page. User and system locales can be set in the Regional Options or Regional Settings control panel.
The associated bug number is 4895647.
Windows Online Installation and Java Update FAQ
These are frequently asked questions about JDK 10 and JRE 10 online installation and Java updates on Windows computers.
1. I downloaded the installer and it is less than 1 megabyte. Why is it so small?
The Windows Online Installer for the JRE will download more installer files. Using this installer helps users to avoid downloading unnecessary files.
2. I had the Java Control Panel open for Java Update and the About tab showed the version of the JRE installed in my computer. Then I ran Java Update, and the version of the JRE that the Java Control Panel is showing has not changed. Why is this?
You need to close and restart the Java Control Panel to get the updated Control Panel.
3. Netscape/Mozilla is not working correctly with Java Plug-in. Why?
First, close all the browsers sessions. If this does not work, reboot the system and try again.
4. I try to install on the D: drive and Java Update is still installing files onto the C: drive. Why?
Regardless of whether an alternate target directory was selected, Java Update needs to install some files on the Windows system drive.
5. How can I uninstall the Java Update version that I just installed?
If you want to uninstall the JRE, then use the Add/Remove Programs utility in the Microsoft Windows . Select the Control Panel and then Add/Remove Programs .
6. After the JRE bootstrap installer is downloaded and executed, why does the message «This installer cannot proceed with the current Internet Connection settings of your system. In your Windows Control Panel, please check Internet Options -> Connections to make sure the settings and proxy information are correct.» appear?
The JRE bootstrap installer uses the system Internet Connection settings to connect to the web for downloading extra files. If you are behind a firewall and require proxy settings, then ensure that the proxy settings in Internet Options/Internet Properties are set up properly (select Start , then Control Panel , then Internet Options/Internet Properties , then Connections , and then LAN Settings ). If you can browse the external web (for example, outside the firewall) with Internet Explorer, then your proxy settings are properly set up. The installer does not understand the proxy settings specified in Netscape/Mozilla.
7. I found the jusched.exe process running in the background of my system after installing JRE. Is there a way to shut it down?
The jusched.exe is the scheduler process of Java Update. This process runs automatically. To shut in the Java Control Panel on the Update tab, deselect the Check for Updates Automatically check box.
8. When I click the Update Now button from the Java Control Panel, it complains about the system being «offline.» What does that mean?
Java Update can be run only if the system is connected to the network. A system that is not connected to the network is referred to as being offline. When the Update Now is clicked, it will check the online/offline status of your system. If your computer does not have internet access, then the error message is displayed. Check that your system is currently connected to the internet and try again.
9. I followed the instructions to install a specific version of the JRE. After the installation, a message is displayed from system tray saying an update is available for download. What should I do?
The message is part of the Java Auto Update mechanism, which detects at user login time if a newer version of the JRE is available for download. In the system tray, click the Java Update icon to download and install the update.
10. I encountered the error «This installation package could not be opened. Contact the application vendor to verify that this is a valid Windows Installer package.» when running the Java SE installer.
There are several possible reasons for this error to be displayed; a few are listed:
Network connection fails.
Download manager software interrupts the download process.
Another application, such as an antivirus application, may interrupt the installation process.
To address these problems, ensure that the third-party downloader applications are turned off and the network connection is configured properly. Also, if a proxy is in use, then ensure that the proxy authentication is turned off.
11. I encountered the error «Error 1722. There is a problem with this Windows installer package. A program run as part of the setup did not finish as expected. Contact your support personnel or package vendor.»
See Error 1722: Problem with Windows Installer Package. If you encounter any other errors or issues, then you can access Java Help Center, which contains solutions for issues that you might encounter when downloading and installing Java on your system. In particular, you can search for solutions by error number. Searching for «Error 1722» returns a solution to this issue.
. как установить Java на Windows?
Во многих моих тренингах так или иначе используется Java, либо как язык программирования для разработки автотестов, либо как виртуальная машина для запуска приложений, написанных на Java — инструментов тестирования, сред разработки, и даже клиент системы видеоконференций GotoWebinar требует наличия Java.
Поэтому я решил описать процедуру установки Java для операционной системы Windows и последующей настройки системы, потому что, к сожалению, недостаточно просто “запустить инсталлятор и всегда нажимать кнопку Next”.
1. Где взять Java?
2. Какую версию выбрать?
Разумеется, последнюю доступную (на момент написания инструкции это Java 8).
Выбирая из 32-битной и 64-битной версий, берите 64-битную, если ваша операционная система это позволяет, потому что у неё менее строгие ограничения по памяти, доступной исполняемым Java-приложениям.
3. Что устанавливать, JRE или JDK?
Java Runtime Environment, или JRE — это виртуальная машина, позволяющая запускать приложения, написанные на языке программирования Java.
Java Development Kit, или JDK — это набор инструментов, для разработки программ на языке программирования Java (компилятор, архиватор, генератор документации и прочие). JRE разумеется тоже входит в дистрибутив JDK.
Правило очень простое: если вы собираетесь что-нибудь писать на языке программирования Java, значит вам потребуется JDK. А если только запускать готовые программы — тогда достаточно JRE.
4. Установка Java
Вот тут, действительно, всё просто — нужно запустить инсталлятор и следовать указаниям визарда. Можно просто всё время нажимать кнопку Next.
5. Настройка переменных окружения
К сожалению, инсталлятор Java не выполняет настройку переменных окружения, поэтому придётся сделать это вручную после установки.
Во-первых, необходимо установить переменную JAVA_HOME , которая должна указывать на директорию, в которую установлена Java. Многие программы используют эту переменную, чтобы определить, где находится Java.
Во-вторых, надо в переменную PATH добавить путь к директории %JAVA_HOME%bin . Эта переменная указывает операционной системе список директорий, в которых нужно искать исполняемые файлы, и чтобы можно было запускать Java из консоли, переменная PATH должна быть правильно настроена.
Для установки переменных окружения сначала нужно открыть свойства компьютера, либо использовав сочетание клавиш Win-Pause, либо через меню “Пуск”:
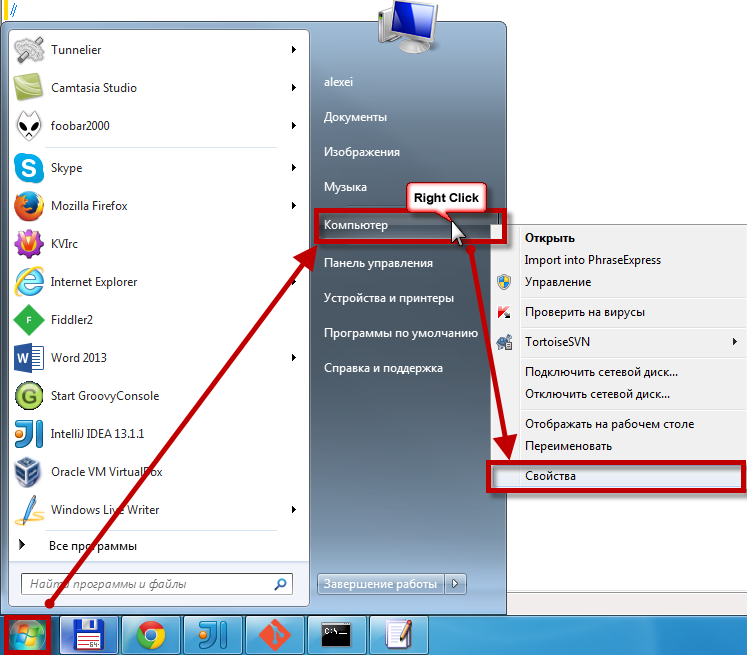
Затем нужно выбрать “Дополнительные параметры системы”, в открывшемся диалоге перейти на вкладку “Дополнительно” и нажать кнопку “Переменные среды”, после чего появится диалог настройки переменных окружения.
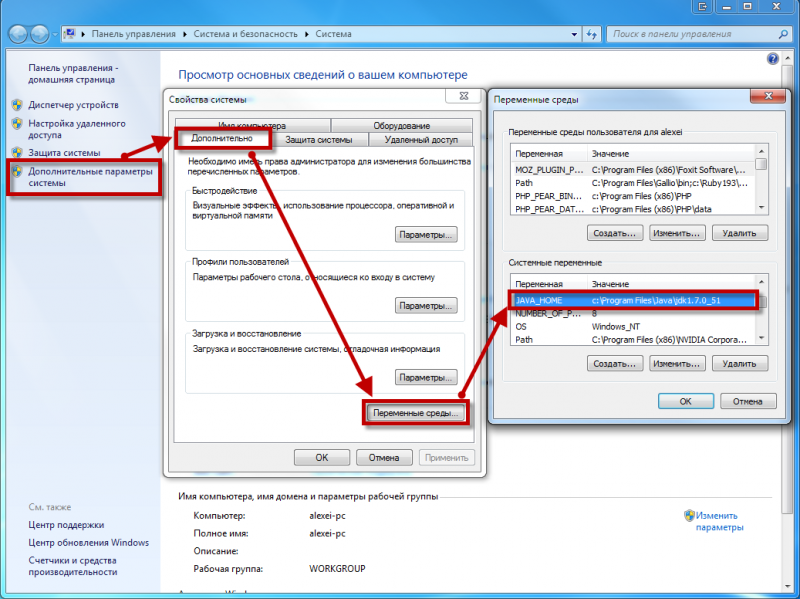
Если у вас уже есть переменная окружения JAVA_HOME — надо её отредактировать, если нет — создать новую. В качестве значения нужно указать путь к директории, куда установлена Java, то есть, например c:Program FilesJavajdk1.8.0_25 , если вы установили JDK, либо c:Program FilesJavajre1.8.0_25 , если вы установили только JRE.
После того, как вы установили значение переменной JAVA_HOME , необходимо отредактировать значение переменной PATH, добавив туда путь к директории, где находятся исполняемые файлы Java, то есть %JAVA_HOME%bin
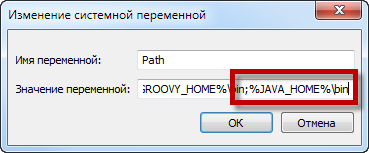
И сохранить всё это, закрыв все открытые диалоги в обратном порядке кнопками OK.
Обратите внимание, что если вы устанавливаете JDK, то в названии директории указывается номер версии, поэтому впоследствии, когда вы решите установить более новую версию, не забудьте поменять значение переменной окружения JAVA_HOME .
После того, как вы изменили переменные окружения, новые значения будут действительны только для новых запускаемых программ, уже запущенные программы не узнают о том, что переменные окружения поменялись. Поэтому если вы, например, пытались запустить Java из консоли и у вас не получилось из-за неправильных настроек переменной PATH , вам придётся перезапустить консоль после того, как вы поменяли значение переменной.
6. Удаление лишних файлов
Запустите консоль ( cmd ) и выполните в ней команду where java .
В результате вы должны увидеть путь к исполняемому файлу java.exe , который операционная система должна успешно обнаружить в том месте, куда вы установили Java. Если файл не нашёлся — значит неправильно настроена переменная PATH и нужно вернуться к предыдущему пункту.
Однако иногда бывает и наоборот, находятся «лишние» исполняемые файлы:
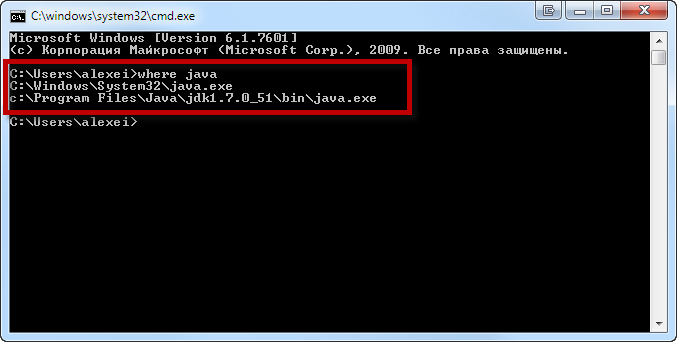
Происходит это из-за того, что инсталлятор Java вместо того, чтобы правильно настроить переменные окружения, пытается положить исполняемые файлы в директорию C:Windowssystem32
Это не очень хорошо — засоряется системная директория, может возникнуть рассогласование версий Java (в разных директориях разные версии). Поэтому надо удалить из каталога C:Windowssystem32 исполняемые файлы java.exe , javaw.exe и javaws.exe , если они там обнаружатся.
Вот и всё, теперь можно пользоваться Java. Только не забывайте о том, что после установки новой версии надо будет обновить переменную окружения JAVA_HOME !

Автор: Алексей Баранцев
Если вам понравилась эта статья, вы можете поделиться ею в социальных сетях (кнопочки ниже), а потом вернуться на главную страницу блога и почитать другие мои статьи.
Ну а если вы не согласны с чем-то или хотите что-нибудь дополнить – оставьте комментарий ниже, может быть это послужит поводом для написания новой интересной статьи.
9 Installation of the JDK and the JRE on Microsoft Windows Platforms
System Requirements for Installing the JDK and the JRE on 64-Bit Windows Platform
The JDK and the JRE have minimum processor, disk space, and memory requirements for 64-bit Windows platform.
Before installing the JDK or the JRE on your 64-bit Windows platform, you must verify that it meets the following minimum processor, disk space, and memory requirements.
Both the JDK and JRE require at minimum a Pentium 2 266 MHz processor.
Disk Space Requirements
For JDK 10 , you are given the option of installing the following features:
Public Java Runtime Environment
When you install 64-bit JDK, then 64-bit public JRE also gets installed. The following table provides the disk requirements for the installed features:
| JDK | Installed Image |
|---|---|
| Development Tools: 64-bit platform | 500 MB |
| Source Code | 54.2 MB |
| JRE | Installed Image |
|---|---|
| Public Java Runtime Environment | 200 MB |
| Java Update | 2 MB |
On Windows 64-bit operating systems, the Java runtime requires a minimum of 128 MB of memory.
The minimum physical RAM is required to run graphically based applications. More RAM is recommended for applets running within a browser using the Java Plug-in. Running with less memory may cause disk swapping, which has a severe effect on performance. Very large programs may require more RAM for adequate performance.
JDK and JRE Installation Instruction Notation for Windows
For any text in this document that contains the following notation, you must substitute the appropriate update version number:
If you are downloading the JDK installer for 64-bit systems for update 10 Interim 0, Update 2, and Patch 1, then the file name jdk- 10 . interim.update.patch _windows-x64_bin.exe becomes jdk- 10 .0.2.1_windows-x64_bin.exe .
If you are downloading the JRE installer for 64-bit systems for update 10 Interim 0, Update 2, and Patch 1, then the file name jre- 10 . interim.update.patch _windows-x64_bin.exe becomes jre- 10 .0.2.1_windows-x64_bin.exe .
JDK Installation Instructions for Windows
You run a self-installing executable file to unpack and install the JDK on Windows computers.
Install JDK on Windows computers by performing the actions described in the following topics:
Downloading the JDK Installer
In a browser, go to the Java SE Development Kit 10 Downloads page and click Accept License Agreement . Under the Download menu, click the Download link that corresponds to the .exe for your version of Windows.
Download the file jdk- 10 . interim.update.patch _windows-x64_bin.exe .
Verify the successful completion of file download by comparing the file size on the download page and your local drive.
Running the JDK Installer
- Start the JDK 10 installer by double-clicking the installer’s icon or file name in the download location.
- Follow the instructions provided by the Installation wizard.
Installing the JDK Silently
Instead of double-clicking or opening the JDK installer, you can perform a silent, noninteractive, JDK installation by using command-line arguments.
The following table lists example installation scenarios and the commands required to perform them. The notation jdk stands for the downloaded installer file base name, such as jdk- 10 _windows-x64_bin.exe .
| Installation Scenario | Command |
|---|---|
| Install JDK and public JRE in silent mode. | |
| Install development tools and source code in silent mode but not the public JRE. | |
| Install development tools, source code, and the public JRE in silent mode. | |
| Install the public JRE in the specified directory C:test in silent mode. |
Setting the PATH Environment Variable
It is useful to set the PATH variable permanently for JDK 10 so that it is persistent after rebooting.
The PATH variable is set automatically for the JRE. This topic only applies to the JDK.
If you do not set the PATH variable, then you must specify the full path to the executable file every time that you run it. For example:
- Select Control Panel and then System .
- Click Advanced and then Environment Variables .
- Add the location of the bin folder of the JDK installation to the PATH variable in System Variables .
The PATH environment variable is a series of directories separated by semicolons (;) and is not case-sensitive. Microsoft Windows looks for programs in the PATH directories in order, from left to right.
You should only have one bin directory for a JDK in the path at a time. Those following the first instance are ignored.
If you are not sure where to add the JDK path, append it.
The new path takes effect in each new command window that you open after setting the PATH variable.
The following is a typical value for the PATH variable:
JRE Installation Instructions for Windows
When installing JRE on Windows computers, you must select the JRE installer that is appropriate for your Windows system.
The 64-bit Windows operating systems come with a 64-bit Internet Explorer (IE) browser as the standard (default) for viewing web pages.
Install JRE on Windows computers by performing the actions described in the following topics:
JRE Proxy Settings and Authentication
To use the Windows Online Installer, you must be connected to the internet.
If you are running behind a proxy server, then you must have your proxy settings correctly configured. If they are not configured, or are incorrectly configured, then the installer will terminate with the following message:
The installer cannot proceed with the current Internet Connection settings.
Please visit the following website for more information.
If you see this message, check your proxy settings:
In the Control Panel , double-click Internet Options , select the Connections tab, and click the LAN Settings .
If you do not know what the correct settings should be, check with your internet provider or system administrator.
Downloading the JRE Installer
The JRE Installer is located on the Java SE Runtime Environment 10 Downloads page.
- In a browser, go to the Java SE Runtime Environment 10 Downloads page.
The following JRE installers are available for you to download:
Windows Offline: jre- 10 . interim.update.patch _windows-x64_bin.exe
Windows Tar: jre- 10 . interim.update.patch _windows-x64_bin.tar.gz
The Windows Offline installer and Windows installer contains everything that is required to install the JRE.
The Microsoft Windows Installer (MSI) Enterprise JRE Installer is also available, which enables you to install the JRE across your enterprise. It requires a commercial license for use in production.
Running the JRE Installer
- Start the JRE 10 Installer by double-clicking the installer’s icon or file name in the download location.
- Follow the instructions provided by the Installation wizard.
The private JRE installed with the JDK is not registered. To register the JRE, you must set the PATH environment variable to point to JAVA_HOME bin , where JAVA_HOME is the location where you installed the private JRE . See Setting the PATH Environment Variable.
By default, the Java Access Bridge is disabled. To enable it, see Enabling and Testing Java Access Bridge in the Java Platform, Standard Edition Java Accessibility Guide .
To access essential Java information and functions in Microsoft Windows 7 and Windows 10 machines, after installation, click the Start menu and then select Java . The Java directory provides access to Help, Check for Updates, and Configure Java.
The Microsoft Windows 8 and Windows 8.1 do not have a Start menu. However, the Java information is available in the following Start directory: %ALLUSERSPROFILE%MicrosoftWindowsStart MenuPrograms .
Windows Registry Settings
The installation program for the Microsoft Windows version of the Java SE Runtime Environment uses the registry to store path and version information.
It creates the following registry keys:
This key contains the string CurrentVersion , with a value that is the highest installed version on the system.
JavaHome : the full path name of the directory in which the JRE is installed
RuntimeLib : the full path name of the Java runtime DLL
HKEY_LOCAL_MACHINESoftwareJavaSoftJava Web Start
This key is created for Java Web Start.
If there are two versions of JDK or JRE installed on a system, one with the new version-string format introduced in JDK 10 , and the other with the older version format, then there will be two different CurrentVersion registry key values. For example, if JDK 1.8.0 and JDK 10 are installed, then the following registry keys are created:
«HKEY_LOCAL_MACHINESOFTWAREJavaSoftJava Development Kit» for JDK 1.8.0 and «HKEY_LOCAL_MACHINESOFTWAREJavaSoftJDK» for JDK 10 .
The registry layout for this example is:
The @CurrentVersion is a registry string in the «JDK» or «Java Development Kit» key.
For the same example, if the JRE is installed, then the registry layout is:
The @CurrentVersion is a registry string in the «JRE» or «Java Runtime Environment» key.
Beginning to Use the JDK
Use the Java item in the Windows Start menu to access essential Java information and functions, including Help, API documentation, the Java Control Panel, checking for updates, and Java Mission Control.
Java Start Menu Installed by JDK
During JDK install, Java menu items are added to the Windows Start menu to provide easy access to Java resources and a Java Development Kit folder is created in the Windows Start menu, which contains the following items:
Reference Documentation : Opens the Online API documentation web page.
Java Mission Control : Opens the Java Mission Control profiling and diagnostics tools suite.
Java Mission Control is a commercial feature available to users with a Java SE Advanced license.
During JDK installation and uninstallation processes, the appropriate start menu items are updated so that they are associated with the latest JDK version on the system
The Windows 7 and Windows 10 have a Start menu; however, the menu is not available in Windows 8 and Windows 8.1. The JDK and Java information in Windows 8 and Windows 8.1 is available in the following Start directory: %ALLUSERSPROFILE%MicrosoftWindowsStart MenuPrograms .
Java Start Menu Installed by JRE
During JRE installation, Java menu items are added to the Windows Start menu to provide easy access to Java resources and a Java folder is created in the Windows Start menu, which contains the following items:
About Java : Opens the Java Control Panel with focus on the General tab. The tab displays the latest JRE version installed on the system.
Check for Updates : Opens the Java Control Panel with focus on the Update tab
Configure Java : Opens the Java Control Panel with focus on the General tab
Get Help : Opens the Java Help Center
Visit Java.com : Opens the Java Download page
During JRE installation and uninstallation processes, the appropriate start menu items are updated so that they are associated with the latest JRE version on the system.
The Windows 7 and Windows 10 have Start menu, however the menu is not available in Windows 8 and Windows 8.1. The JRE and Java information in Windows 8 and Windows 8.1 is available in the following Start directory: %ALLUSERSPROFILE%MicrosoftWindowsStart MenuPrograms .
Java Web Start
Java Web Start is an application-deployment technology that gives you the power to run full-featured applications with a single click from your web browser.
With Java Web Start, you can download and run applications, such as a complete spreadsheet program or an internet chat client, without going through complicated installation procedures. With Java Web Start, you run applications simply by clicking a web page link. If the application is not present on your computer, Java Web Start automatically downloads all necessary files. It then caches the files on your computer so that the application is always ready to be run anytime that you want — either from an icon on your desktop or from the browser link. No matter which method you use to run the application, the most current, available version of the application is always presented to you.
Upgrading from Previous Versions
If you have a previous version of Java Web Start, do not uninstall it. Uninstalling it will cause the download cache to be cleared, and all previously installed Java Web Start application data will have to be downloaded again. The new version will write over previous installations and automatically update browsers to use the new version. The configuration files and the program files folder used by Java Web Start have changed, but all your settings will remain intact after the upgrade because Java Web Start will translate your settings to the new form.
The only way to uninstall Java Web Start is to uninstall the JDK or JRE. Uninstalling the JDK or JRE will not, however, remove the cache for previous versions of Java Web Start. Previous releases have separate uninstallation instructions for Java Web Start.
You may see a misleading message if you do the following:
Download and cache a Java Web Start application with the JDK or JRE.
Remove the JDK or JRE using Add or Remove Programs from the Windows Control Panel .
Remove the Java Web Start application using Add or Remove Programs .
When you remove the application, you see an Uninstaller Error dialog box saying:
An error occurred while trying to remove Java-Application: name App. It may have already been uninstalled. Would you like to remove Java-Application: name App from the Add or Remove program list?
If you say Yes to this, then you will see another Uninstaller Error dialog box saying:
You do not have sufficient access to remove Java-Application: name App from the Add or Remove Program list. Please contact your system administrator.
The message is displayed when you have removed the Java Web Start application while uninstallating the JDK or JRE, but this is not reflected in the Add or Remove Programs . Refresh the Add or Remove Programs by pressing F5 or reopen the panel.
To avoid seeing the misleading message, either press F5 or reopen the dialog box. Any Java Web Start application that was downloaded and cached with the JDK or JRE will no longer appear in the list of currently installed programs.
Java Plug-in
Java Plug-in technology, included as part of the JRE, establishes a connection between popular browsers and the Java platform. This connection enables applets on websites to be run within a browser on the desktop.
The Java Plug-in is automatically enabled for supported web browsers during installation of the JRE. No user intervention is necessary.
In Java SE 10 , the version of the Java Plug-in that is available in versions of the JRE prior to Java SE 6 Update 10 has been deprecated. However, this earlier version of the Java Plug-in is still shipped with Java SE 10 for compatibility purposes but is no longer fully supported. It will be removed in a future release.
Option to Disable the JRE Out-of-Date Warning
When the installed JRE falls below the security baseline or passes its built-in expiration date, an additional warning is shown to users to update their installed JRE to the latest version. For businesses that manage the update process centrally, users attempting to update their JRE individually, may cause problems.
A deployment property, deployment.expiration.check.enabled is available that can be used to disable the JRE out of date warning. To suppress this specific warning message, add the following entry in the deployment properties file:
To disable automatic updates, on the Update tab of the Java Control Panel, deselect the Check for Updates Automatically check box.
Uninstalling the JDK on Windows
Uninstalling the JRE on Windows
Use either of the following ways to uninstall JRE:
Go to Add/Remove Programs utility in the Microsoft Windows Control Panel and uninstall the older versions of JRE.
Remove JRE using the online Java Uninstall Tool.
The Java Removal Tool is integrated with the JRE installer. After JRE 10 is installed, the Java Removal Tool provides the list of outdated Java versions in the system and helps you to remove them.
The Java Uninstall tool will not run if your system administrator specified a deployment rule set in your organization.
A deployment rule set enables enterprises to manage their Java desktop environment directly and continue using legacy business applications in an environment of ever-tightening Java applet and Java Web Start application security policies. A deployment rule set enables administrators to specify rules for applets and Java Web Start applications; these rules may specify that a specific JRE version must be used. Consequently, the Java Uninstall tool will not run if it detects a deployment rule set to ensure that no required JREs are uninstalled.
See Deployment Rule Set in the Java Platform, Standard Edition Deployment Guide .
JDK Installation Troubleshooting
The following sections provide tips for working around problems that are sometimes seen during or while following installation instructions.
System Error During Decompression
If you see the error message system error during decompression , then you might not have enough space on the disk that contains your TEMP directory.
Program Cannot Be Run in DOS Mode
If you see the error message This program cannot be run in DOS mode , then do the following:
Open the MS-DOS shell or command prompt window.
Right-click the title bar.
Select the Program tab.
Ensure that the item Prevent MS-DOS-based programs from detecting Windows is not selected.
Select OK again.
Exit the MS-DOS shell.
Restart your computer.
Source Files in Notepad
In Microsoft Windows, when you create a new file in Microsoft Notepad and then save it for the first time, Notepad usually adds the .txt extension to the file name. Therefore, a file that you name Test.java is actually saved as Test.java.txt . Note that you cannot see the .txt extension unless you turn on the viewing of file extensions (in Microsoft Windows Explorer, deselect Hide file extensions for known file types under Folder Options ). To prevent the .txt extension, enclose the file name in quotation marks, such as «Test.java» when entering information in the Save As dialog box.
Characters That Are Not Part of the System Code Page
It is possible to name directories using characters that are not part of the system locale’s code page. If such a directory is part of the installation path, then generic error 1722 occurs, and installation is not completed. Error 1722 is a Windows installer error code. It indicates that the installation process has failed. The exact reason for this error is not known at this time.
To prevent this problem, ensure that the user and system locales are identical, and that the installation path contains only characters that are part of the system locale’s code page. User and system locales can be set in the Regional Options or Regional Settings control panel.
The associated bug number is 4895647.
Windows Online Installation and Java Update FAQ
These are frequently asked questions about JDK 10 and JRE 10 online installation and Java updates on Windows computers.
1. I downloaded the installer and it is less than 1 megabyte. Why is it so small?
The Windows Online Installer for the JRE will download more installer files. Using this installer helps users to avoid downloading unnecessary files.
2. I had the Java Control Panel open for Java Update and the About tab showed the version of the JRE installed in my computer. Then I ran Java Update, and the version of the JRE that the Java Control Panel is showing has not changed. Why is this?
You need to close and restart the Java Control Panel to get the updated Control Panel.
3. Netscape/Mozilla is not working correctly with Java Plug-in. Why?
First, close all the browsers sessions. If this does not work, reboot the system and try again.
4. I try to install on the D: drive and Java Update is still installing files onto the C: drive. Why?
Regardless of whether an alternate target directory was selected, Java Update needs to install some files on the Windows system drive.
5. How can I uninstall the Java Update version that I just installed?
If you want to uninstall the JRE, then use the Add/Remove Programs utility in the Microsoft Windows . Select the Control Panel and then Add/Remove Programs .
6. After the JRE bootstrap installer is downloaded and executed, why does the message «This installer cannot proceed with the current Internet Connection settings of your system. In your Windows Control Panel, please check Internet Options -> Connections to make sure the settings and proxy information are correct.» appear?
The JRE bootstrap installer uses the system Internet Connection settings to connect to the web for downloading extra files. If you are behind a firewall and require proxy settings, then ensure that the proxy settings in Internet Options/Internet Properties are set up properly (select Start , then Control Panel , then Internet Options/Internet Properties , then Connections , and then LAN Settings ). If you can browse the external web (for example, outside the firewall) with Internet Explorer, then your proxy settings are properly set up. The installer does not understand the proxy settings specified in Netscape/Mozilla.
7. I found the jusched.exe process running in the background of my system after installing JRE. Is there a way to shut it down?
The jusched.exe is the scheduler process of Java Update. This process runs automatically. To shut in the Java Control Panel on the Update tab, deselect the Check for Updates Automatically check box.
8. When I click the Update Now button from the Java Control Panel, it complains about the system being «offline.» What does that mean?
Java Update can be run only if the system is connected to the network. A system that is not connected to the network is referred to as being offline. When the Update Now is clicked, it will check the online/offline status of your system. If your computer does not have internet access, then the error message is displayed. Check that your system is currently connected to the internet and try again.
9. I followed the instructions to install a specific version of the JRE. After the installation, a message is displayed from system tray saying an update is available for download. What should I do?
The message is part of the Java Auto Update mechanism, which detects at user login time if a newer version of the JRE is available for download. In the system tray, click the Java Update icon to download and install the update.
10. I encountered the error «This installation package could not be opened. Contact the application vendor to verify that this is a valid Windows Installer package.» when running the Java SE installer.
There are several possible reasons for this error to be displayed; a few are listed:
Network connection fails.
Download manager software interrupts the download process.
Another application, such as an antivirus application, may interrupt the installation process.
To address these problems, ensure that the third-party downloader applications are turned off and the network connection is configured properly. Also, if a proxy is in use, then ensure that the proxy authentication is turned off.
11. I encountered the error «Error 1722. There is a problem with this Windows installer package. A program run as part of the setup did not finish as expected. Contact your support personnel or package vendor.»
See Error 1722: Problem with Windows Installer Package. If you encounter any other errors or issues, then you can access Java Help Center, which contains solutions for issues that you might encounter when downloading and installing Java on your system. In particular, you can search for solutions by error number. Searching for «Error 1722» returns a solution to this issue.
Понимать и управлять настройками Java в Windows 10/8/7
Adobe Flash и Java – это две загрузки, которые большинство из нас установили на наших компьютерах с Windows, поскольку они дают нам больше возможностей для работы в Интернете и просмотра веб-страниц. Мы уже видели, как управлять настройками Adobe Flash .
Сегодня мы узнаем о настройках Java в Windows 10/8/7.
Что такое Java
Java – это язык программирования и вычислительная платформа, которая поддерживает самые современные программы, включая утилиты, игры и бизнес-приложения. Он позволяет играть в онлайн-игры, общаться с людьми по всему миру, просматривать изображения в 3D и многое другое.
Панель управления Java
Программное обеспечение Java или среда выполнения Java также называются средой выполнения Java, средой выполнения, средой выполнения, JRE, виртуальной машиной Java и т. Д. Им можно управлять из панели управления Java. Чтобы получить доступ к панели управления Java, откройте панель управления и нажмите «Java». Здесь вы сможете получить информацию о номере версии, а также просмотреть файлы.
Удалить временные файлы Java
Когда вы просматриваете Интернет, всякий раз, когда ваш браузер использует Java, файлы Java хранятся в специальных папках для более быстрого выполнения в дальнейшем.
Чтобы просмотреть местоположение папки и другие сведения, нажмите кнопку Настройки .
По умолчанию эти временные файлы Java хранятся в
C: Users Имя пользователя AppData LocalLow Sun Java Deployment кэш
папка в формате JAR. Вы можете установить уровень сжатия для этих файлов JAR и даже установить сумму, которая будет выделена для хранения этих файлов.
Вы можете просмотреть файлы, нажав кнопку Просмотр .
Чтобы удалить эти временные файлы JAR Java, нажмите Удалить файлы . Теперь вы можете выбрать, какие файлы вы хотите удалить, и нажмите кнопку ОК.
Очистить кеш Java с помощью командной строки
Чтобы очистить кэш Java с помощью командной строки, откройте окна командной строки, введите следующую команду и нажмите Enter:
Обновление Java
Мы склонны игнорировать обновление нашей Java. Но очень важно, чтобы мы всегда были уверены, что вы используете последнюю версию Java, поскольку уязвимости в Java часто используются для компрометации вашего компьютера. Последняя версия Java содержит важные улучшения для повышения безопасности, производительности и стабильности приложений Java, которые работают на вашем компьютере. Всякий раз, когда дыры в безопасности обнаруживаются, они исправляются, и поэтому обязательно убедитесь, что у вас установлена последняя версия java, поскольку она включает исправления уязвимостей.
Вы можете настроить параметры обновления Java, нажав на вкладку Обновить .
Убедитесь, что Автоматически проверять наличие обновлений . Нажав на кнопку Дополнительно , вы сможете установить частоту проверок обновлений.
Кстати, я заметил, что прошло много времени с тех пор, как я обновил Java. Поэтому я нажал на Обновить сейчас , чтобы начать процесс обновления. Это запустит процесс juscheck.exe , который проверит наличие обновлений и, соответственно, проинформирует вас.
Нажав на кнопку «Установить», вы начнете процесс обновления. По завершении нажмите «Закрыть».
Другие настройки Java
Вкладка Java позволяет просматривать и управлять версиями и настройками среды выполнения Java для приложений и апплетов Java.
Вкладка Безопасность позволяет просматривать типы сертификатов, позволяющие идентифицировать себя.
На вкладке Дополнительно можно настроить другие параметры.
Удалить старые версии Java
Хранение старых и неподдерживаемых версий Java в вашей системе представляет серьезную угрозу безопасности.
Более старые версии SunJava (до JRE 6 с обновлением 7) действительно сохранялись при установке обновлений и должны быть удалены, так как более старые версии SunJava очень уязвимы для Winfixer/Vundo. С 2005 года вплоть до обновления в конце прошлого года до обновления 10 JRE 6 для SunMicrosystems и Sun Microsystems, чтобы автообновление SunJava удаляло предыдущие (уязвимые) версии программы. Обновления от JRE 6 Update 10 forward находятся в автономной папке «jre6», которая перезаписывается, если установлена новая JRE. Даже при использовании самой последней версии SunJava, если на вашем компьютере все еще находятся более ранние, уязвимые версии, они уязвимы для заражения.К сожалению, простое использование программ «Установка и удаление программ» для удаления старых версий неэффективно.
Мы предлагаем вам попробовать JavaRa. После обновления Java до его последней версии сегодня я запустил JavaRa и использовал его для удаления старых версий Java.
Он обнаружил две старые версии на моем компьютере, которые я затем удалил.
ПРИМЕЧАНИЕ. Мой коллега по MVP и мод Corrine TWCF добавляет: JavaRa не была обновлена для поддержки удаления JRE 7 и, по-видимому, фактически имеет проблемы после JRE 6u32. Он перешел на SingularLabs.com. Кроме того, Пол Маклейн больше не поддерживает JavaRa, а Фриде Фрис все еще поддерживает.
Java Скачать
Вы можете скачать и установить Java для Windows вручную с Java.com здесь.
Надеюсь, вы узнали что-то новое здесь, в этом посте. Если у вас есть что добавить, пожалуйста, сделайте это в разделе комментариев.
После того, как программное обеспечение установлено, необходимо подготовить компьютер к работе Web-кабинета, выполнив следующие настройки Java:
- настройку безопасности Java;
- настройку Java в браузера;
- настройку безопасности ОС Windows для работы Java.
Для того чтобы исключить возникновение проблем в работе Java, рекомендуется в приложении понизить уровень безопасности до уровня medium или high (в зависимости от внутренней политики безопасности компании). Для этого необходимо:
- открыть Панель управления Windows → Java Control Panel → Security (рис. 1,1);
- переместить риску на шкале безопасности до уровня medium или high (рис. 1,2);
- нажать кнопку ОК для применения настроек (рис. 1,3).
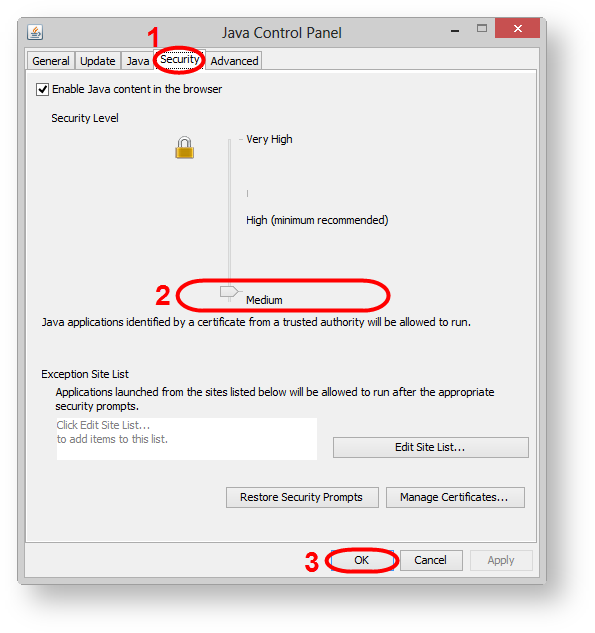
Рисунок 1 – настройка безопасности Java
Настройка браузера для работы Java
Для работы Java в браузере необходимо проверить, подключено ли данное приложение в браузере. Если нет – подключить.
Internet Explorer

Для того чтобы включить Java в браузере Internet Explorer необходимо:
- перейти в меню Сервис→Свойства браузера;
- открыть вкладку Безопасность и нажать кнопку Другой;
- найти в списке Выполнять сценарии приложений Java (рис. 2,1);

Рисунок 2 – активация приложения в браузере Internet Explorer - активировать флажок напротив параметра Включить;
- сохранить настройки, нажав OK (см. рис. 2,2).

Google Chrome

Для того чтобы включить Java в браузере Chrome необходимо:
- ввести в адресной строке браузера about:plugins. В результате откроется экранная форма Подключаемые модули (рис. 3);

Рисунок 3 – активация приложения в браузере Chrome - найти в списке модуль Java. Если поддержка Java отключена, кнопка Включить будет активна;
- нажать кнопку Включить для разрешения использования Java.

Рекомендуется установить флажок Разрешать всегда для отключения информационных сообщений, всплывающих в браузере при запуске Java.
 Mozilla Firefox
Для того чтобы включить Java в браузере Mozilla Firefox необходимо:
- запустить браузер Mozilla Firefox (перезапустите, если уже запущен);
- нажать Firefox (или перейдите в меню Сервис в Windows XP). В открывшемся контекстном меню выбрать Дополнения→раздел Плагины;
- найти в списке модуль Java (TM) Platform (рис. 4,1);
Рисунок 4 – активация приложения в браузере Mozilla Firefox - выбрать пункт Включать всегда в раскрывающемся списке (рис. 4,2).
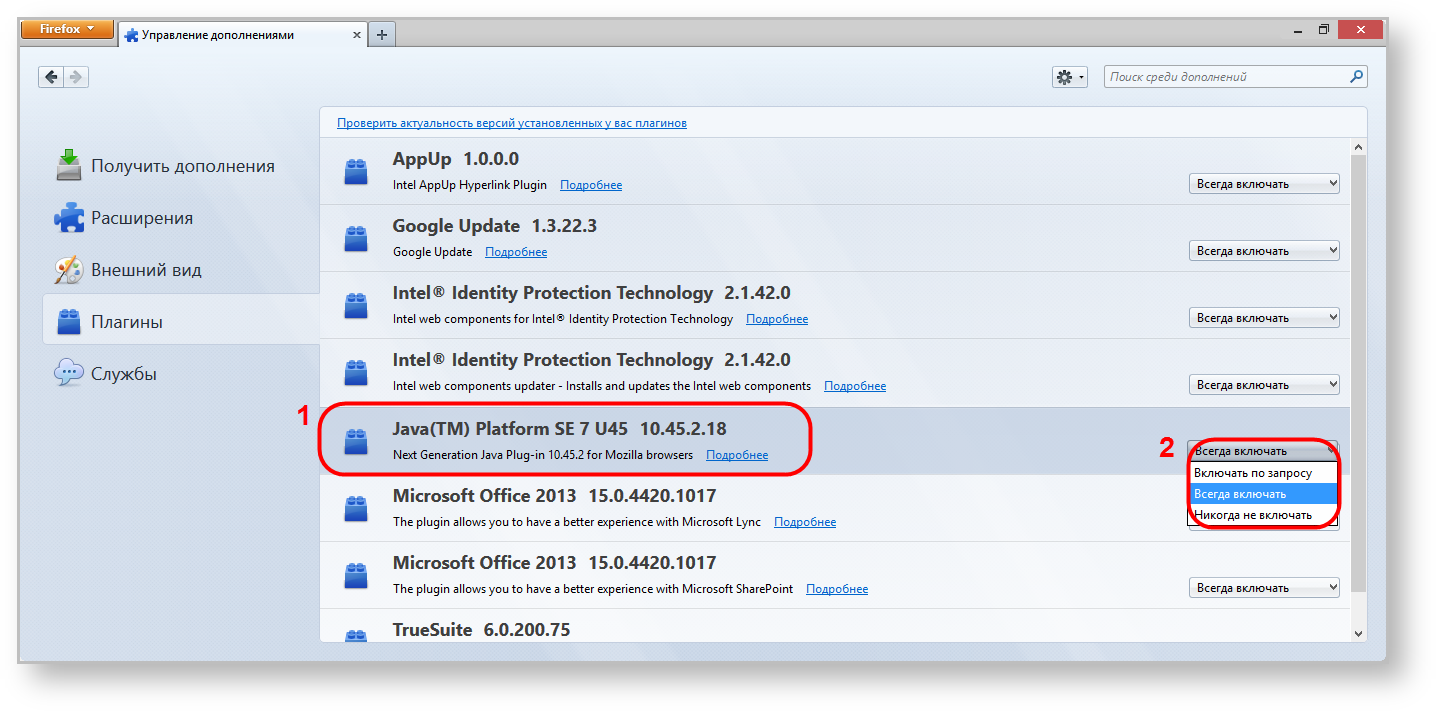
Настройка ОС Windows для работы Java
Работа Java может блокироваться из-за настроек ОС Window. Предположительно Java может блокироваться антивирусной программой. В таком случае следует в расширенных настройках антивирусной программы добавить Java в доверенные приложения, указав путь (например, C:Program Files (x86)Javajre7binjava.exe), а также рекомендуется отключить проверку трафика для браузера, которое взаимодействует с Java для работы Web-кабинета.
Для исключения возможной блокировки работы приложения необходимо понизить уровень безопасности OC Windows. Для этого следует перейти в Панель управления→Параметры управления учетными записями пользователя, понизить уровень безопасности (рис. 5,1) и нажать кнопку ОК (рис. 5,2) для применения настроек.
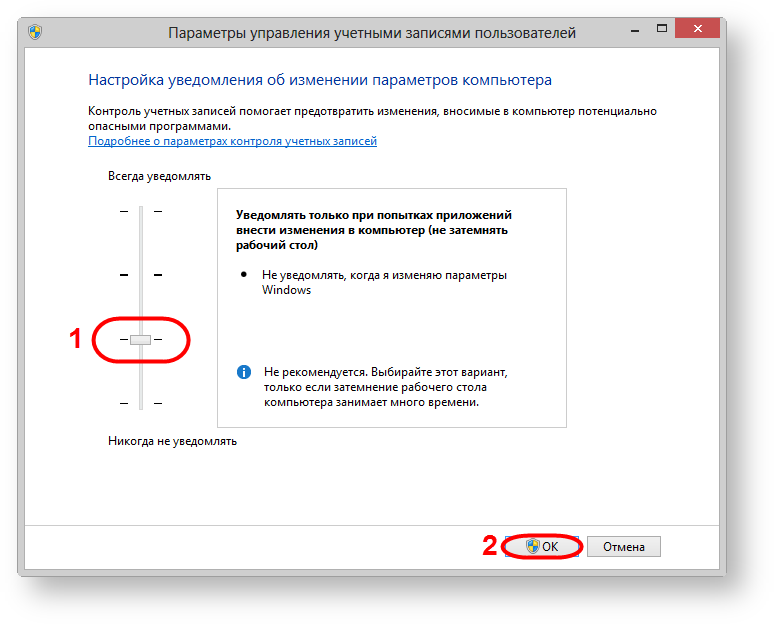
Рисунок 5 – настройка безопасности
Далее необходимо сохранить файл открытого ключа для получения логина и пароля
Далее »
Многие программы и приложения, встроенные в операционную систему Windows 10, а также сторонние ресурсы, написаны на языке программирования Java. Некоторые скрипты в сайтах также созданы на нем. Для того, чтобы в работе системы не возникали проблемы и сбои, необходимо знать, как обновить java до последней версии. В этом нет ничего сложного, знаний уровня программиста не потребуются. В статье рассмотрим все способы, которые могут применяться для установки актуальной версии утилиты Java.
Существует два способа апдейта программы — скачивание инсталлятора с официального сайта производителя и использование встроенных инструментов Windows. Выбор варианта зависит от предпочтений пользователя. В любом случае лучше знать оба, т.к. иногда альтернативный способ может пригодиться, если привычный перестал работать. Для большей наглядности всю процедуру пройду у себя на компьютере.
В каких случаях требуется обновление Джава
Приложения, которые используют Java, реализуют на сайтах сложные функции диалога и защиты информации при обмене данными. К примеру, такие скрипты применяются при передаче персональных данных, также в системе онлайн-банк. На хостинг-серверах, веб-ресурсах обновление происходит автоматически. Если у вас на компьютере установлена старая версия Java, то при взаимодействии с сайтами и сторонними приложениями могут возникать различные ошибки:
- не открывается диалоговое окно;
- зависают процессы взаимодействия при передаче данных;
- не удается найти ключ шифрования;
- возникают иные проблемы взаимодействия с интерактивными веб-ресурсами;
- появляются ошибки при запуске и работе сторонних программ и приложений.
В таких ситуациях пользователи часто видят сообщение о необходимости обновления утилиты Java, установленной на вашем компьютере “Java Update Needed”. Проблема может возникнуть при запуске некоторых игр, в частности, Minecraft.
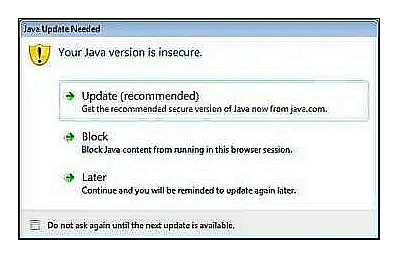
Читайте также: Исправляем ошибку файла java.dll.
Доступны четыре варианта дальнейших действий:
- Update (recommended) – “Обновить (рекомендуется)”.
С сайта java.com будет загружена новейшая безопасная версия платформы. - Block – “Блокировать”.
В этой сессии подключаемый модуль будет блокироваться в браузере. - Later — “Позже”.
Загрузка модуля продолжится. О необходимости обновления будет напомнено позже. Приложение будет запущено, если позволят параметры защиты. - Do not ask again — “Больше не спрашивать”.
Этот флажок блокирует сообщение «Требуется обновление Джава» до выхода следующего обновления.
Внимание! Рекомендуется выбрать первый пункт и провести обновление утилиты с официального сайта java.com. Ручные способы апдейта, указанные в данной статье, абсолютно безопасны для вашего компьютера. Все действия следует выполнять с правами Администратора.
Использование Java Control Panel
Встроенная Контрольная панель Виндовс 10 выполняет несколько функций, одной из которых как раз является управление и обновление библиотеки Java. Чтобы запустить приложение, необходимо войти в классическую “Панель управления”. Для этого воспользуемся одним из двух способов.
Открываем окно “Выполнить” нажав одновременно Win+R, вводим команду “control” без кавычек и Enter или “OK”.
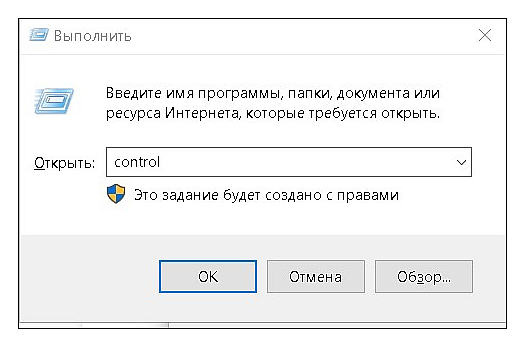
Открываем “Пуск” и в “Служебные — Windows” запускаем “Панель управления”
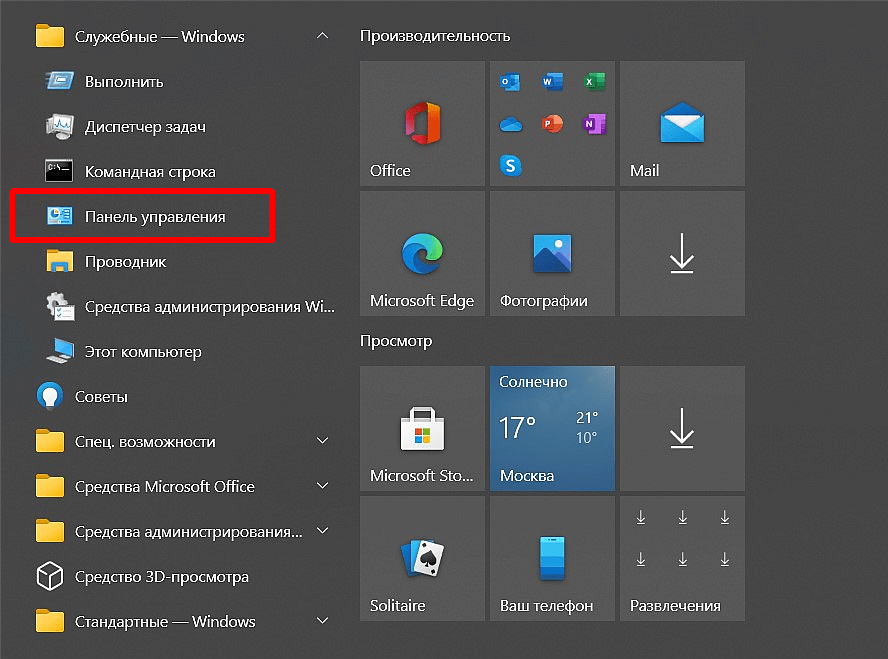
В открывшемся списке выбираем пункт “Java”.
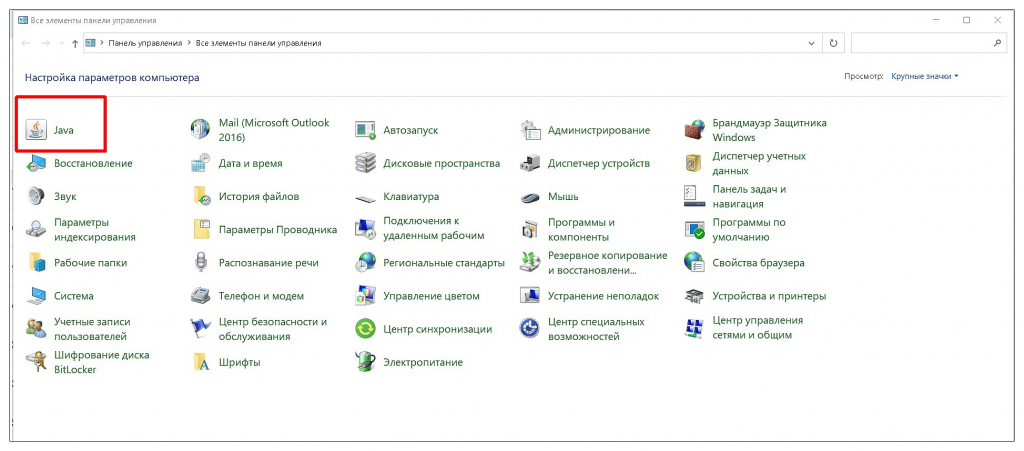
Далее переходим во вкладку “Update” и внизу нажимаем “Update now”.

Откроется диалоговое окно запуска обновления, в котором нажимаем кнопку “Update”.

В следующем окне щелкните по “Install”, чтобы запустить процесс инсталляции.
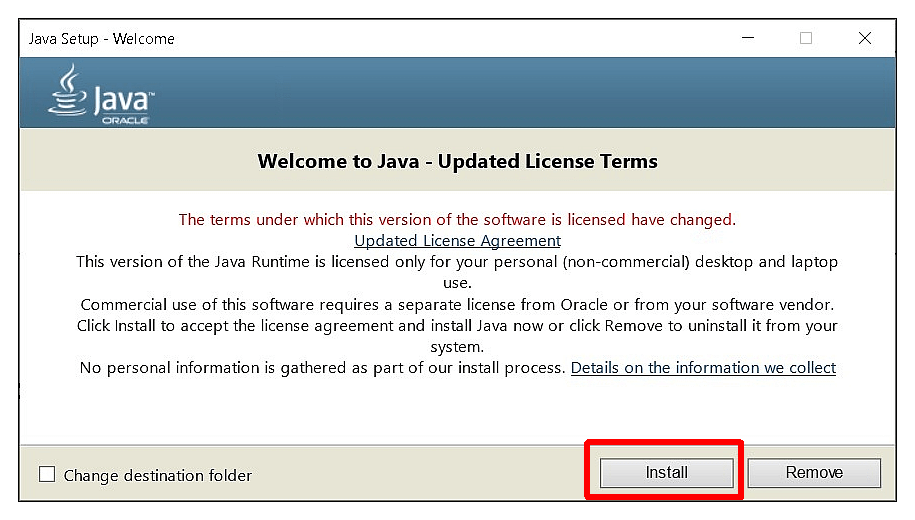
Время установки зависит от скорости интернета и ресурсной мощности компьютера и обычно занимает несколько минут. В случае удачного завершения установки — вы увидите такое окно, где нажмите “Close”.

Процесс обновления Java на этом завершен. Если вы столкнулись с ошибкой взаимодействия со сторонними ресурсами по причине неактуальности Джава, то она исчезнет.
Апдейт с официального сайта чаще всего используется, когда возникают проблемы обновления через Java Control Panel. Перейдите на сайт разработчика.Нажмите на “Загрузить Java бесплатно”.
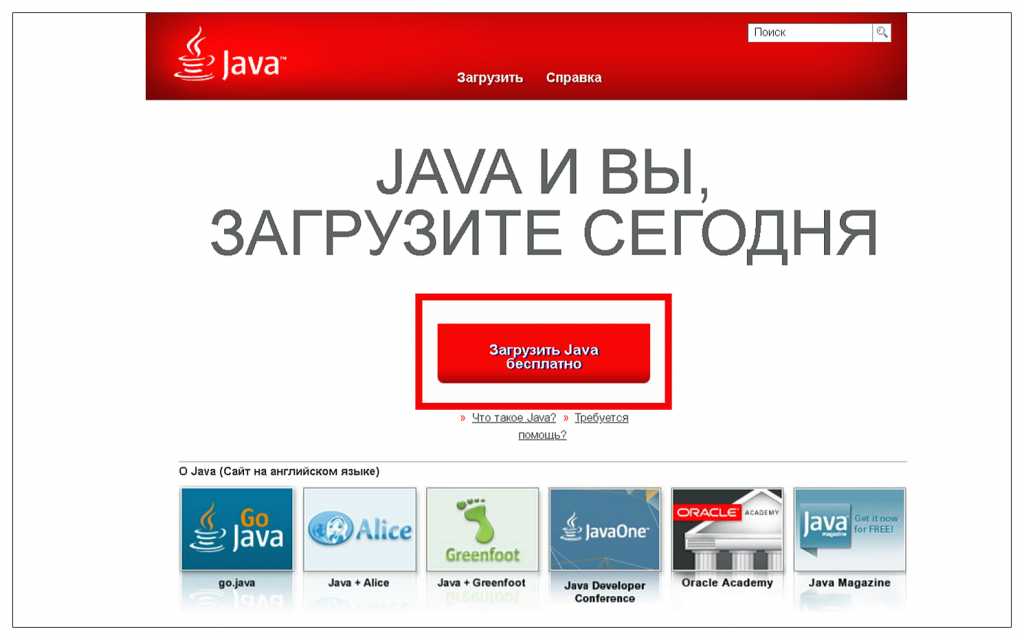
В открывшемся окне нажмите на кнопку “Согласиться начать бесплатную загрузку”.
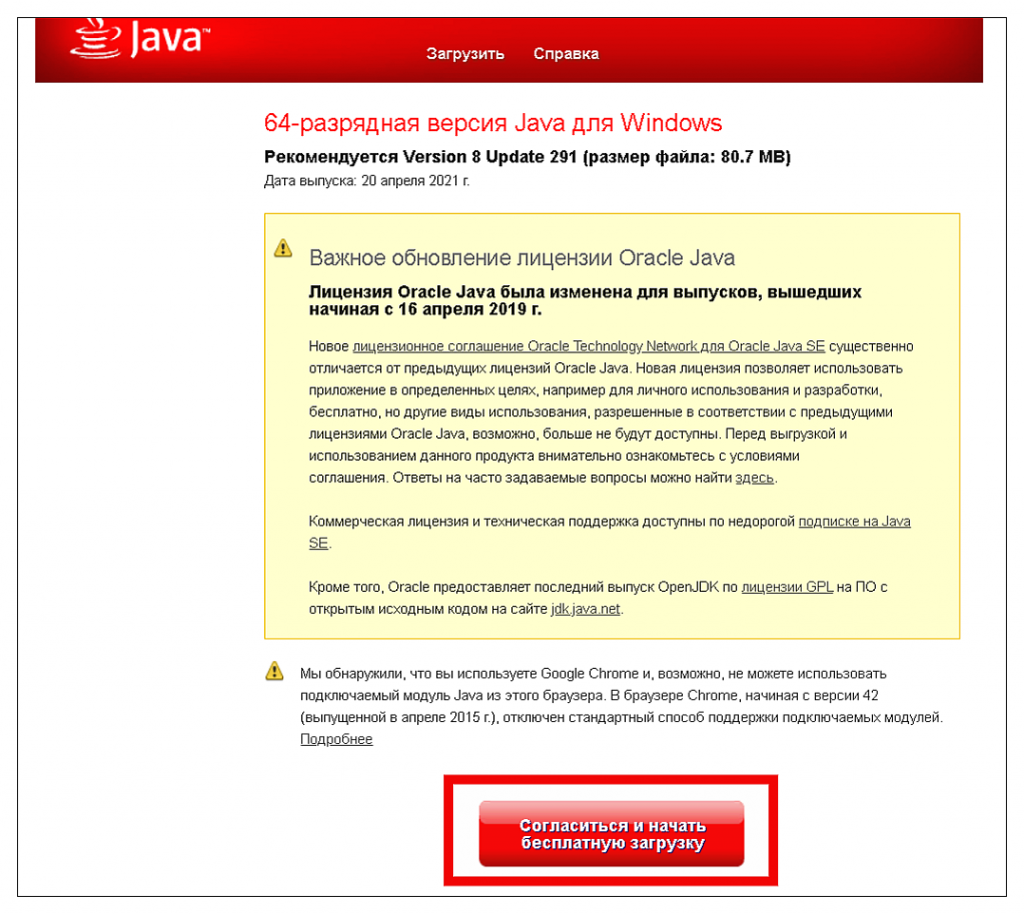
Произойдет скачивание файла установки jre-8u291-windows-x64.exe на компьютер. Запустите исполняемый файл, в диалоговом окне нажмите “Install”.

Произойдет распаковка установщика, которая займет некоторое время. При удачной инсталляции вы получите уведомление о завершении процесса.
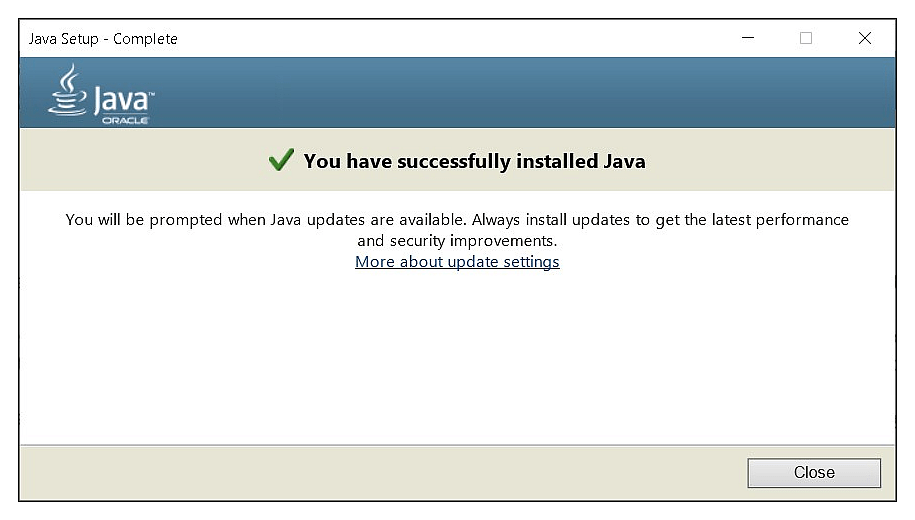
Остается нажать кнопку “Close”. На этом процедура обновления Java с официального сайта завершена.
Примечание. Обычно проблем с установкой обновлений Java не возникает. Если процесс все-таки не запускается, прерывается — попробуйте смягчить политику блокировки антивируса. Скачивание утилиты с официального сайта абсолютно бесплатно и безопасно. Не пользуйтесь другими ресурсами сомнительного прохождения для получения обновлений!
Перед скачиванием установщика обязательно проверьте разрядность вашего процессора и выбирайте соответствующее обновление для 32-х или 64-х bit. По умолчанию на сайте доступна утилита для компьютеров с 64-разрядным CPU. Альтернативное ПО, в т.ч. для OS Linux и MacOS, находится здесь.

Настройка автоматического обновления
Чтобы не решать проблему актуализации библиотеки в момент возникновения, в Java Control Panel предусмотрены варианты автоматического обновления. Для настройки запустите “Контрольную панель Джава” как указано выше. Перейдите во вкладку “Update”. Здесь установите галочку в окошке “Check for update automatically” и нажмите “Advanced”. Выберете порядок проверки актуальности библиотек и их автообновления: ежедневное, раз в неделю, ежемесячно. Установите желаемое время по расписанию. Теперь проверка актуальности библиотеки и поступление уведомлений будут происходить автоматически с заданной периодичностью.
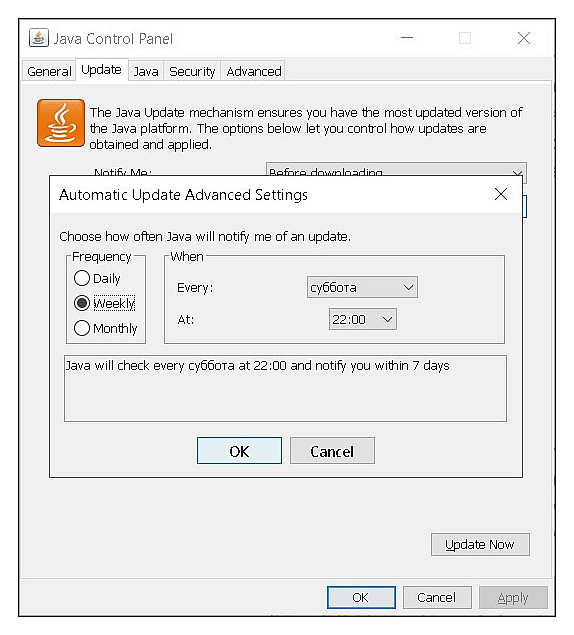
Внимание! Блокировать функцию автоматической проверки обновлений Java не рекомендуется в целях избежания проблем с безопасностью на вашем компьютере. Для управления процессом апдейта настройте расписание. По умолчанию уведомления о выходе новых версий отображаются раз в неделю.
Решение дополнительных проблем с обновлением Джава
У некоторых пользователей возникают сложности с апдейтом Java любым из двух перечисленных способов. Решением может служить удаление предыдущей версии платформы и установка актуальной. Для этого в “Параметрах“ Windows 10 используйте функцию удаления компонентов во вкладке “Приложения и возможности”.
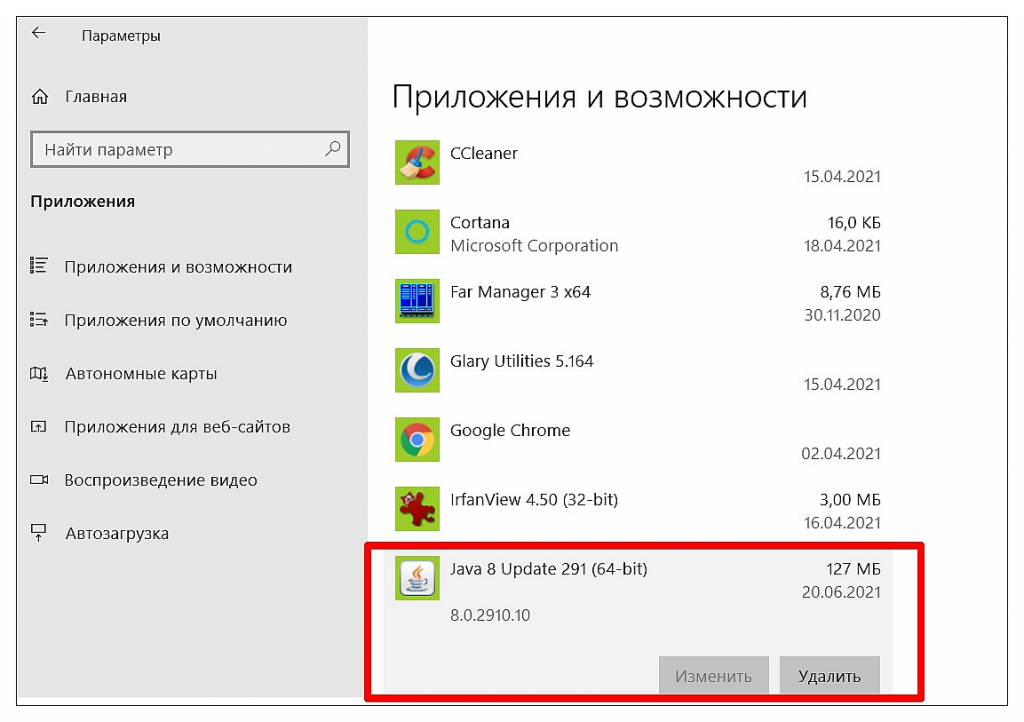
Альтернативным вариантом удаления устаревших версий приложения с компьютера будет использование специального инструмента Java. Перейдите на соответствующую страницу сайта. Далее откройте “Средство удаления Java“.
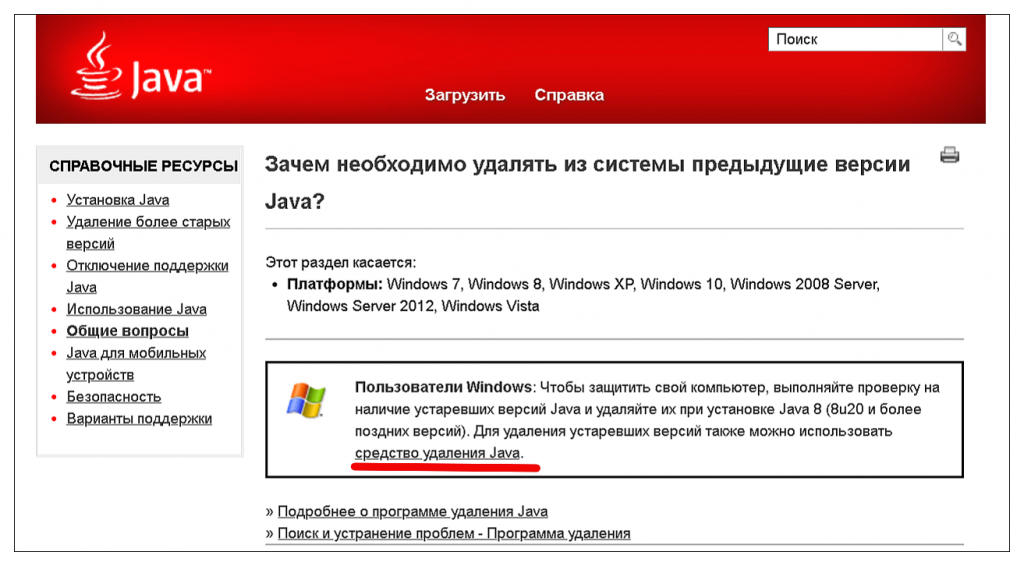
В открывшемся окне примите условия Лицензионного соглашения, скачайте файл деинсталляции JavaUninstallTool.exe. Запустите его и пройдите процедуру удаления ПО.
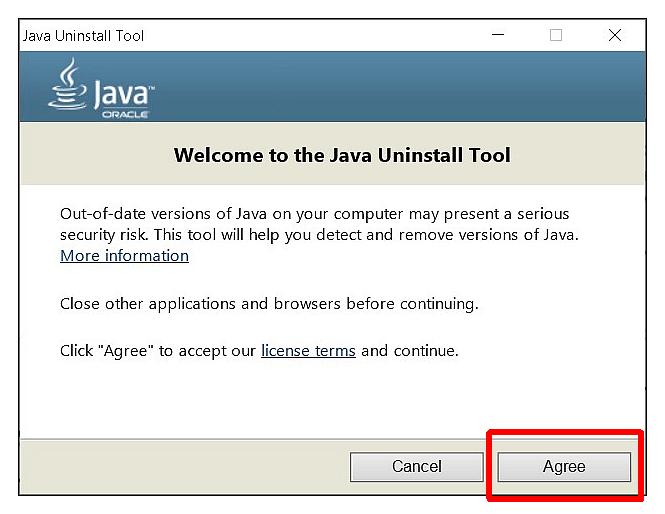
Чтобы полостью удалить следы присутствия программы, в том числе в Реестре Виндовс, воспользуйтесь утилитой CCleaner. Теперь скачайте требуемую версию с сайта Java. Данный способ рекомендуется в сложных ситуациях, когда необходимо установить определенный релиз приложения. Чаще всего это Update 45.
Заключение
Как видите, у меня не возникло никаких сложностей с апдейтом Java обоими из описанных способов. Также в статье даны рекомендации по решению возможных проблем при обновлении утилиты. В Java Control Panel доступны дополнительные настройки приложения. Рядовому пользователю этот инструментарий скорее всего не понадобится. Достаточно регулярно актуализировать библиотеку.
Post Views: 380
Содержание
- Обновляем Java в Windows 10
- Способ 1: Java Control Panel
- Способ 2: Официальный сайт
- Вопросы и ответы
Java — популярный язык программирования, который сейчас применяется во многих сферах. Множество программ и сайтов функционируют благодаря отдельным модулям, которые были написаны именно при помощи данного ЯП. Для корректного взаимодействия с такими веб-ресурсами или программами пользователю нужно лишь обеспечить наличие фирменной утилиты от Java в своей операционной системе, а также регулярно обновлять ее, поскольку новые версии выходят часто. Как раз с последним мы и хотим помочь разобраться начинающим юзерам Windows 10, показав, как именно осуществляется обновление этого компонента.
Существует два варианта загрузки актуальной версии Java для обновления — предустановленная панель управления в операционной системе или ручное скачивание инсталлятора с официального сайта. Каждый из этих методов приводит к одному и тому же результату, а выбор зависит от предпочтений пользователя и сложившейся ситуации. Давайте начнем с более популярного способа.
Способ 1: Java Control Panel
Java Control Panel — панель управления, которая устанавливается в Виндовс вместе с одной из версий данного компонента. В ней присутствует графический интерфейс с пунктами меню, которые позволяют управлять этой утилитой и обновлять ее. Как раз эту операцию мы и рассматриваем сегодня, а осуществляется она так:
- Откройте «Пуск» и через поиск отыщите классическое приложение «Панель управления».
- В нем перейдите в «Java».
- Дождитесь появления окна «Control Panel». В нем переместитесь на вкладку «Update».
- Вы можете заранее установить режим автоматической проверки обновлений и настроить дополнительные параметры, например, установку без предупреждений или появление отдельных уведомлений о наличии апдейта. После этого кликните на «Update Now», чтобы проверить наличие новой версии.
- Отобразится окно, в котором появится уведомление о том, что обновление готово для скачивания. Щелкните на «Update», чтобы запустить этот процесс.
- Подтвердите свои намерения в установке файлов, щелкнув по кнопке «Install».
- Ожидайте завершения скачивания и установки.
- После этого появится уведомление об успешном завершении установки.
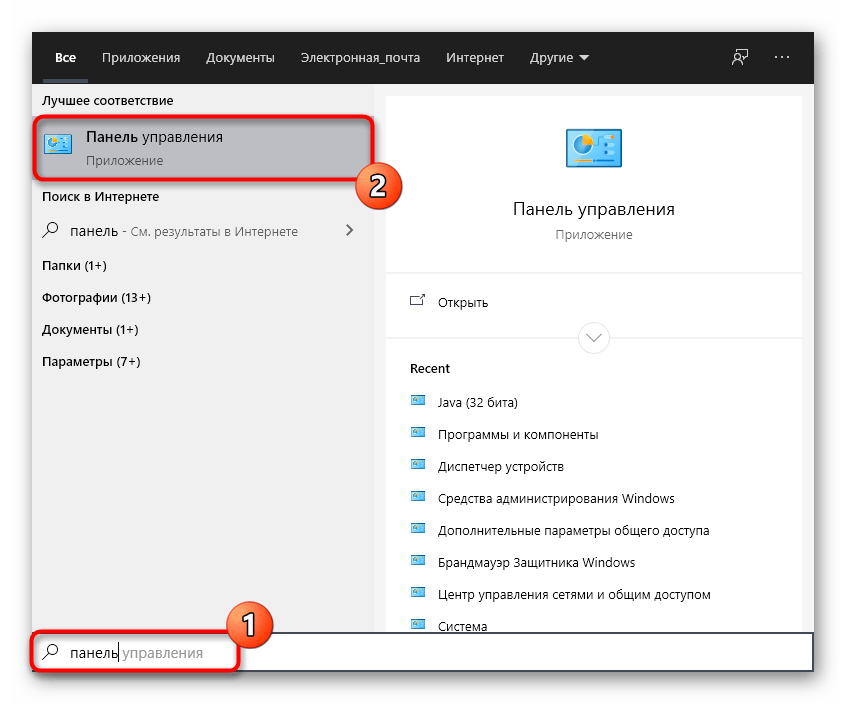
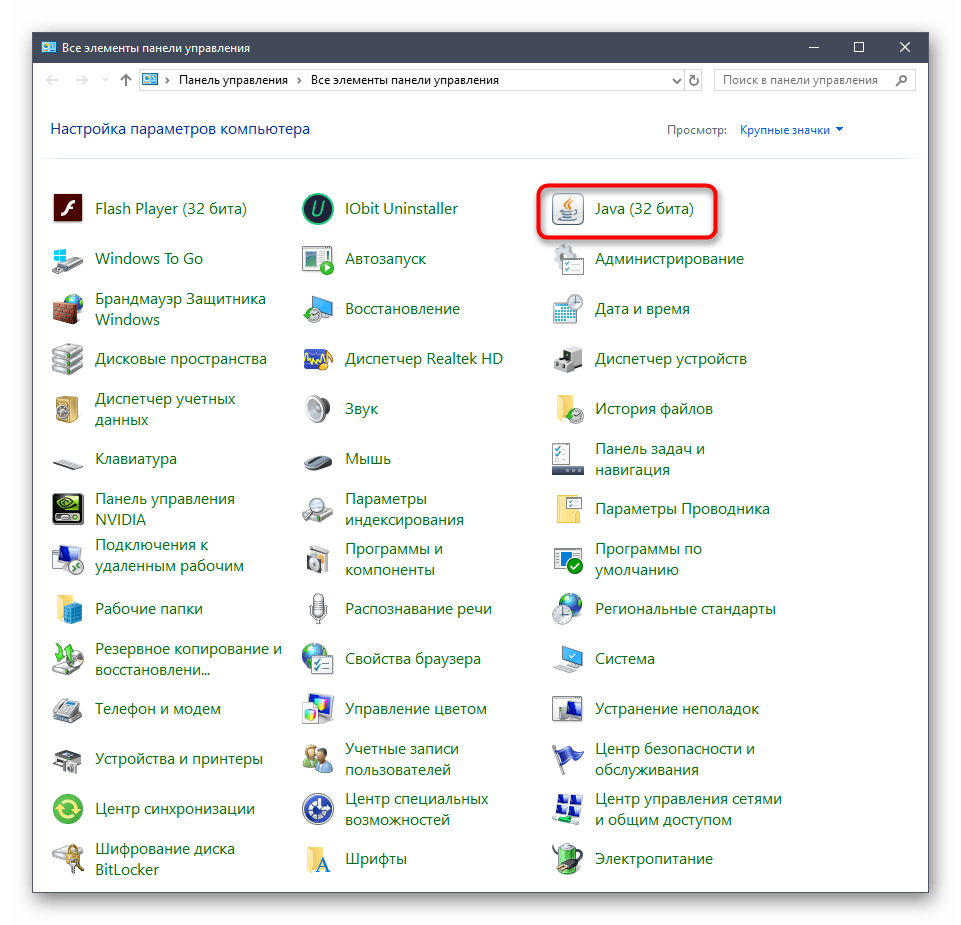
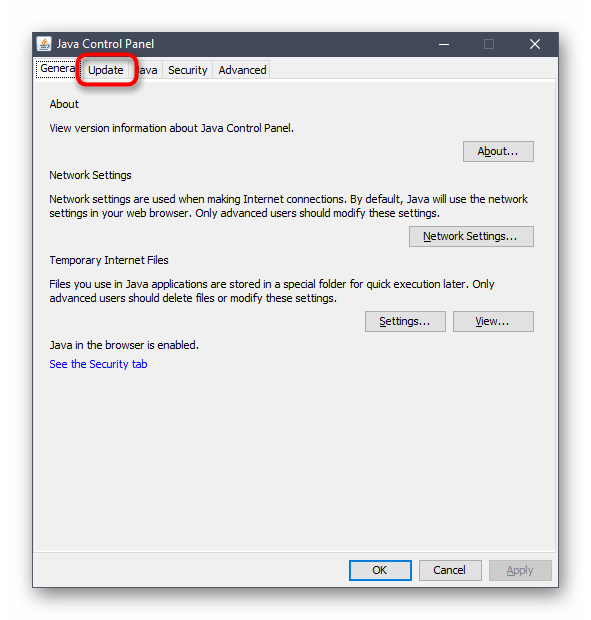
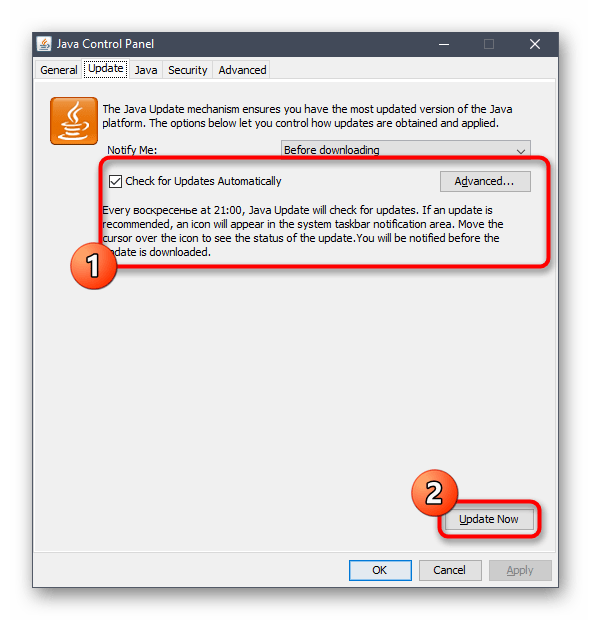
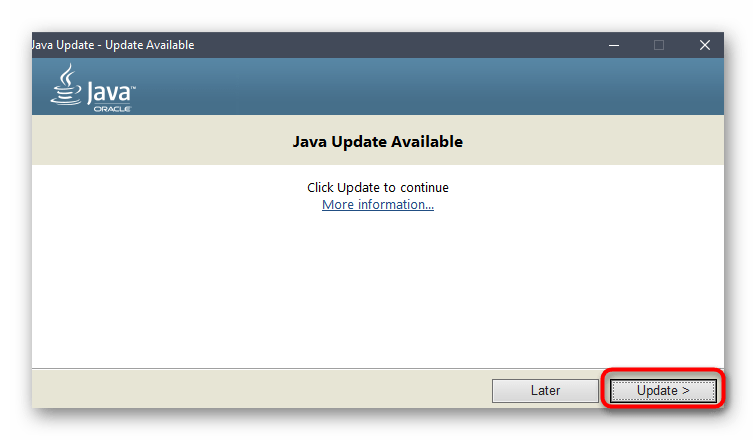
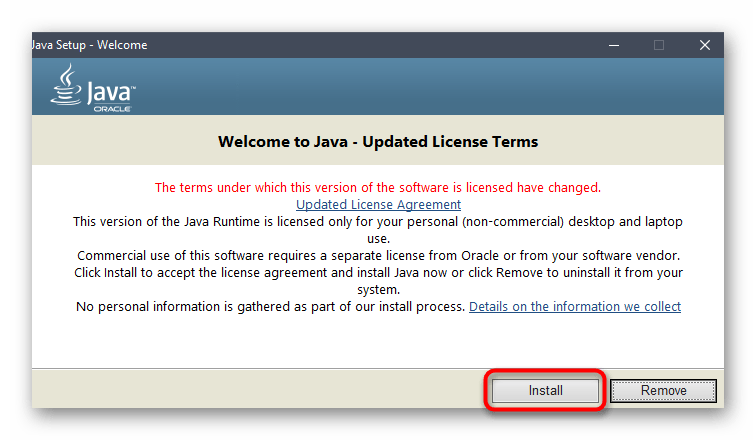

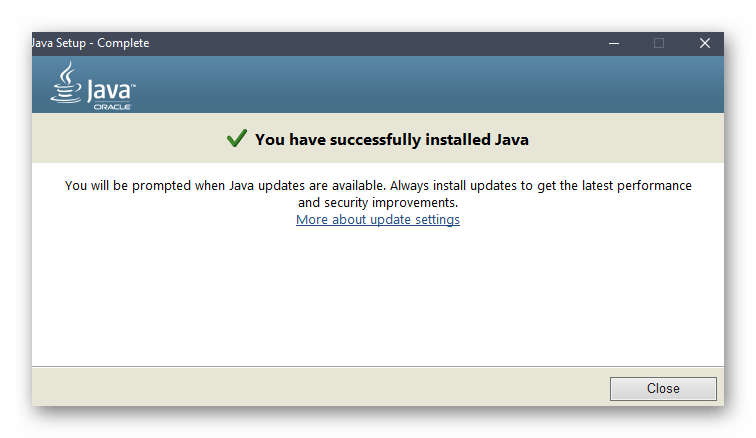
Теперь можно переходить к взаимодействию с программой или сайтом, которая требовала обновления рассматриваемого компонента. Перезагружать для этого компьютер не нужно, поскольку все изменения будут применены сразу же.
Способ 2: Официальный сайт
Второй способ заключается в скачивании последней доступной версии Java с официального сайта. Этот вариант подойдет в тех случаях, когда по каким-то причинам панель управления не функционирует или на целевом компьютере отсутствует подключение к интернету, чтобы сразу загрузить нужные файлы.
Перейти на официальный сайт Java

- Перейдите самостоятельно на главную страницу Java или воспользуйтесь приведенной выше ссылкой, чтобы сделать это. Там нажмите по кнопке «Загрузить Java бесплатно».
- Подтвердите условия лицензионного соглашения, чтобы продолжить.
- После завершения этой операции запустите исполняемый файл.
- Подтвердите начало установки, щелкнув по кнопке «Install».
- Дождитесь окончания распаковки установщика.
- Теперь начнется процесс установки самой утилиты. Он займет буквально несколько минут.
- Вы будете уведомлены об успешно выполненной задаче.
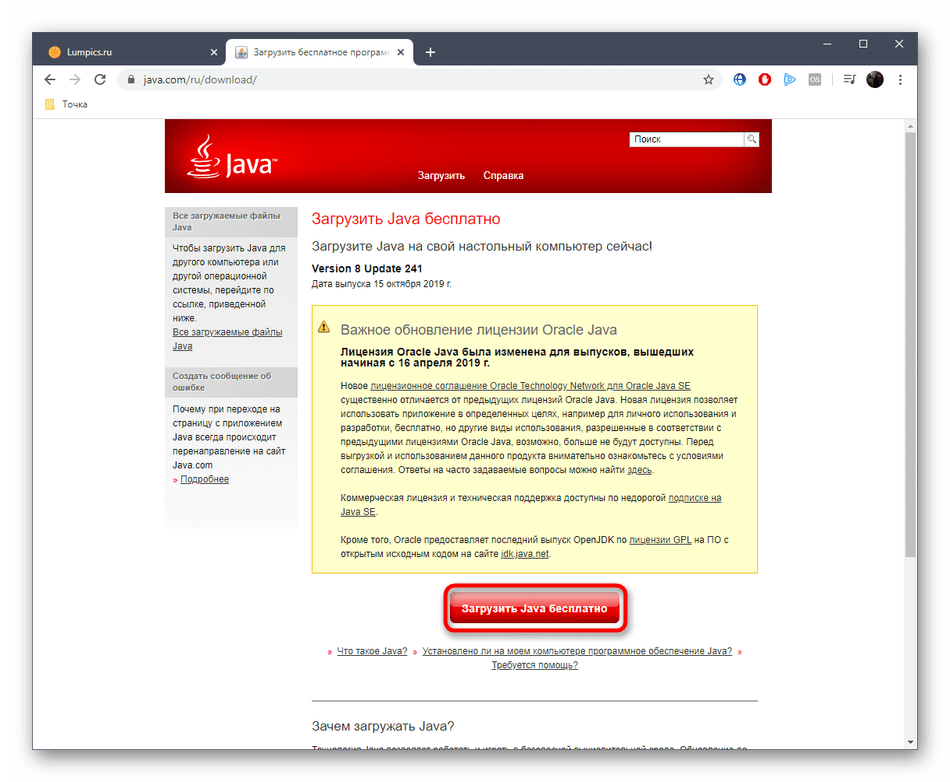
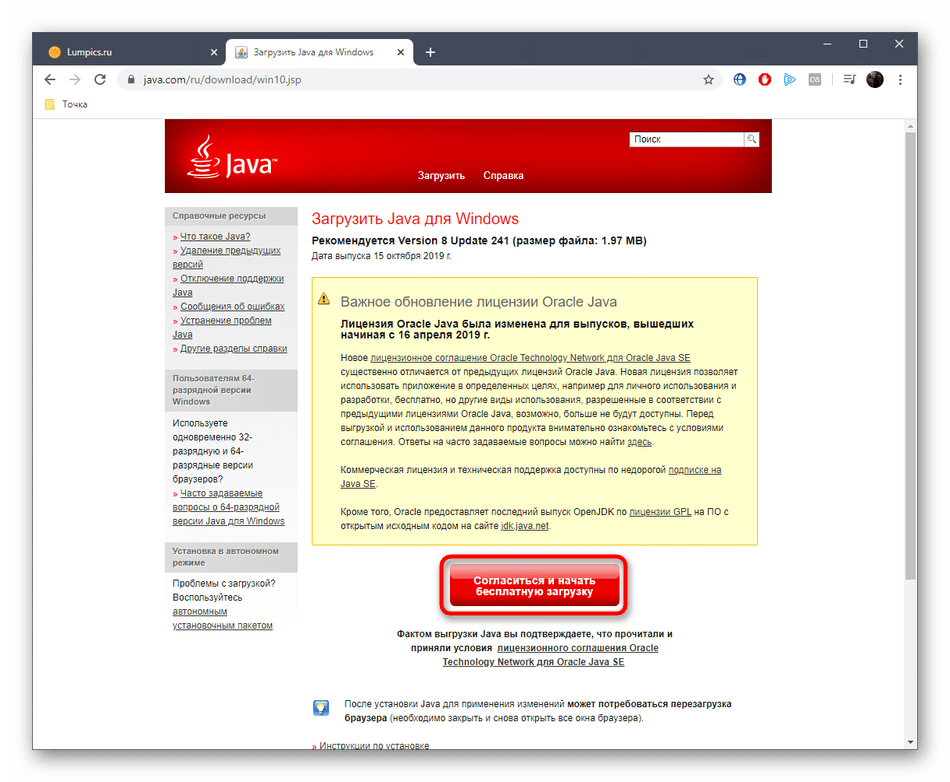
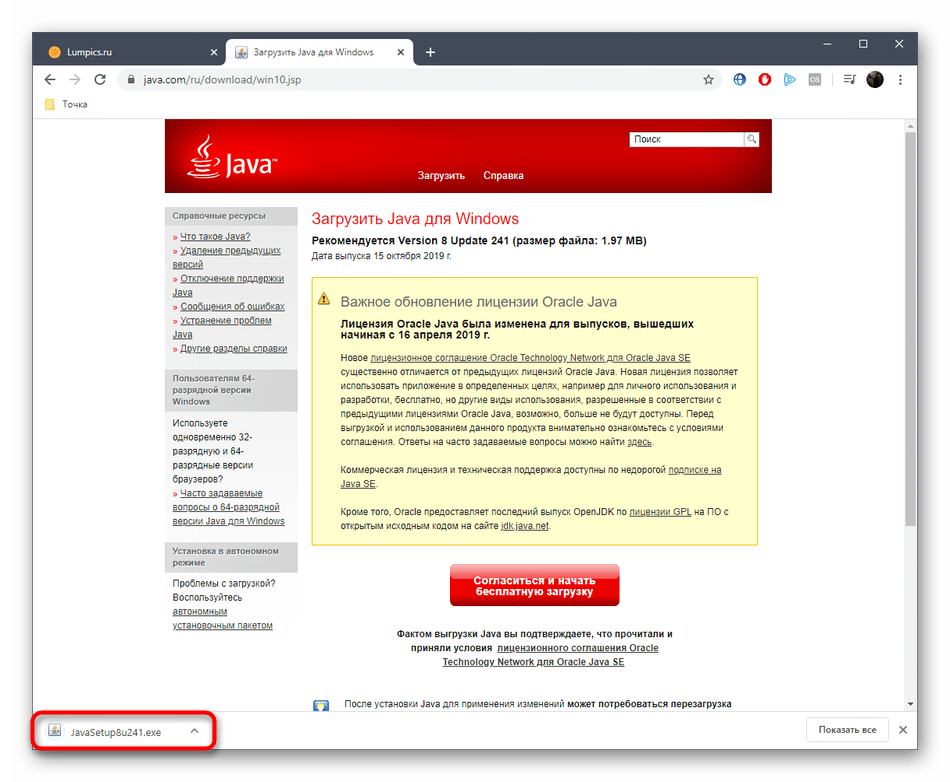
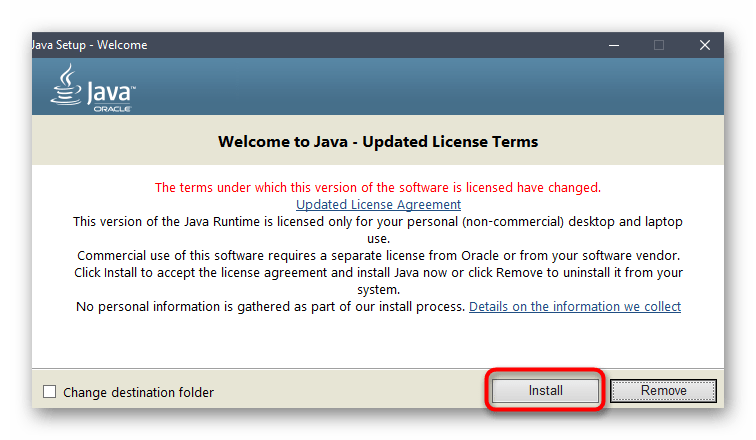
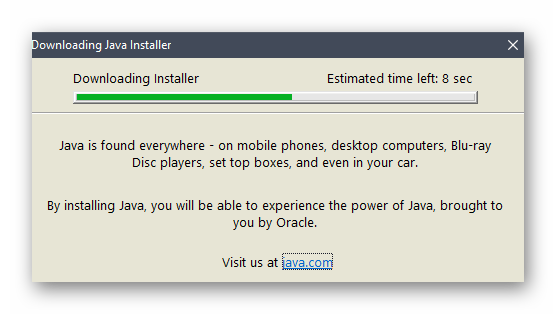

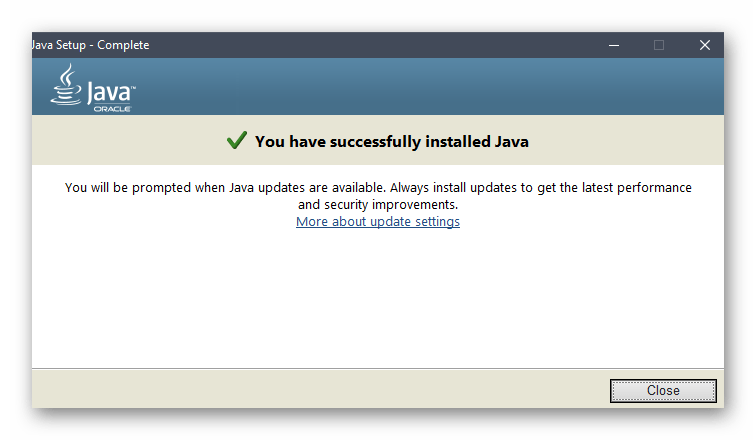
Только что вы ознакомились с двумя методами обновления Java в Windows. Как видно, осуществляется эта процедура буквально в несколько кликов и справится с ней даже начинающий пользователь, просто следуя приведенным. Отметим, что при необходимости вы можете без проблем удалить Java, чтобы потом, например, инсталлировать последнюю версию заново, что поможет избавиться от возможных проблем с функционированием этого компонента. Детальные руководства по этой теме ищите в материале ниже.
Подробнее: Удаление Java с компьютера под управлением Windows 10
Еще статьи по данной теме: