Related articles
- Arch boot process
- Master Boot Record
- GUID Partition Table
- Unified Extensible Firmware Interface
- GRUB Legacy
- /EFI examples
- /Tips and tricks
- Multiboot USB drive
GRUB (GRand Unified Bootloader) is a boot loader. The current GRUB is also referred to as GRUB 2. The original GRUB, or GRUB Legacy, corresponds to versions 0.9x. This page exclusively describes GRUB 2.
Note: In the entire article esp denotes the mountpoint of the EFI system partition aka ESP.
UEFI systems
Note:
- It is recommended to read and understand the Unified Extensible Firmware Interface, Partitioning#GUID Partition Table and Arch boot process#Under UEFI pages.
- When installing to use UEFI it is important to boot the installation media in UEFI mode, otherwise efibootmgr will not be able to add the GRUB UEFI boot entry. Installing to the fallback boot path will still work even in BIOS mode since it does not touch the NVRAM.
- To boot from a disk using UEFI, an EFI system partition is required. Follow EFI system partition#Check for an existing partition to find out if you have one already, otherwise you need to create it.
- This whole article assumes that inserting additional GRUB2 modules via
insmodis possible. As discussed in Unified Extensible Firmware Interface/Secure Boot#shim with key and GRUB, this is not the case on UEFI systems with Secure Boot enabled. If you want to use any additional GRUB module that is not included in the standard GRUB EFI filegrubx64.efion a Secure Boot system, you have to re-generate the GRUB EFIgrubx64.efiwithgrub-mkstandalonewith the additional GRUB modules included.
Installation
Note:
- UEFI firmwares are not implemented consistently across manufacturers. The procedure described below is intended to work on a wide range of UEFI systems but those experiencing problems despite applying this method are encouraged to share detailed information, and if possible the workarounds found, for their hardware-specific case. A /EFI examples article has been provided for such cases.
- The section assumes you are installing GRUB for x86_64 systems. For IA32 (32-bit) UEFI systems (not to be confused with 32-bit CPUs), replace
x86_64-efiwithi386-efiwhere appropriate..
First, install the packages grub and efibootmgr: GRUB is the boot loader while efibootmgr is used by the GRUB installation script to write boot entries to NVRAM.
Then follow the below steps to install GRUB to your disk:
- Mount the EFI system partition and in the remainder of this section, substitute
espwith its mount point. - Choose a boot loader identifier, here named
GRUB. A directory of that name will be created inesp/EFI/to store the EFI binary and this is the name that will appear in the UEFI boot menu to identify the GRUB boot entry. - Execute the following command to install the GRUB EFI application
grubx64.efitoesp/EFI/GRUB/and install its modules to/boot/grub/x86_64-efi/.
-
-
Note:
- Make sure to install the packages and run the
grub-installcommand from the system in which GRUB will be installed as the boot loader. That means if you are booting from the live installation environment, you need to be inside the chroot when runninggrub-install. If for some reason it is necessary to rungrub-installfrom outside of the installed system, append the--boot-directory=option with the path to the mounted/bootdirectory, e.g--boot-directory=/mnt/boot. - Some motherboards cannot handle
bootloader-idwith spaces in it.
- Make sure to install the packages and run the
-
# grub-install --target=x86_64-efi --efi-directory=esp --bootloader-id=GRUB
-
https://wiki.archlinux.org/title/Unified_Extensible_Firmware_Interface/Secure_Boot#sbctl
After the above installation completed, the main GRUB directory is located at /boot/grub/. Read /Tips and tricks#Alternative install method for how to specify an alternative location. Note that grub-install also tries to create an entry in the firmware boot manager, named GRUB in the above example – this will, however, fail if your boot entries are full; use efibootmgr to remove unnecessary entries.
Remember to #Generate the main configuration file after finalizing the configuration.
Tip: If you use the option --removable then GRUB will be installed to esp/EFI/BOOT/BOOTX64.EFI (or esp/EFI/BOOT/BOOTIA32.EFI for the i386-efi target) and you will have the additional ability of being able to boot from the drive in case EFI variables are reset or you move the drive to another computer. Usually you can do this by selecting the drive itself similar to how you would using BIOS. If dual booting with Windows, be aware Windows usually places an EFI executable there, but its only purpose is to recreate the UEFI boot entry for Windows. If you are installing GRUB on a Mac, you will have to use this option.
Note:
--efi-directoryand--bootloader-idare specific to GRUB UEFI,--efi-directoryreplaces--root-directorywhich is deprecated.- You might note the absence of a device_path option (e.g.:
/dev/sda) in thegrub-installcommand. In fact any device_path provided will be ignored by the GRUB UEFI install script. Indeed, UEFI boot loaders do not use a MBR bootcode or partition boot sector at all.
See UEFI troubleshooting in case of problems. Additionally see /Tips and tricks#UEFI further reading.
Secure Boot support
Grub fully supports secure boot utilising either CA keys or shim, the installation command however is different depending on which you intend to use.
To make use of CA Keys the command is
# grub-install --target=x86_64-efi --efi-directory=esp --bootloader-id=GRUB --modules="tpm" --disable-shim-lock
To make use of shim-lock the command is
# grub-install --target=x86_64-efi --efi-directory=esp --bootloader-id=GRUB--modules="normal test efi_gop efi_uga search echo linux all_video gfxmenu gfxterm_background gfxterm_menu gfxterm loadenv configfile tpm"
After installation see Secure Boot for instructions on implementing it
Warning:
- Incorrectly configuring Secure Boot can render your system unbootable. If for any reason you cannot boot after enabling secure boot then you should disable it in firmware and reboot the system.
- Loading unnecessary modules in your bootloader has the potential to present a security risk, only use these commands if you need them.
BIOS systems
GUID Partition Table (GPT) specific instructions
On a BIOS/GPT configuration, a BIOS boot partition is required. GRUB embeds its core.img into this partition.
Note:
- Before attempting this method keep in mind that not all systems will be able to support this partitioning scheme. Read more on Partitioning#GUID Partition Table.
- The BIOS boot partition is only needed by GRUB on a BIOS/GPT setup. On a BIOS/MBR setup, GRUB uses the post-MBR gap for the embedding the
core.img. On GPT, however, there is no guaranteed unused space before the first partition. - For UEFI systems this extra partition is not required, since no embedding of boot sectors takes place in that case. However, UEFI systems still require an EFI system partition.
Create a mebibyte partition (+1M with fdisk or gdisk) on the disk with no file system and with partition type GUID 21686148-6449-6E6F-744E-656564454649.
- Select partition type
BIOS bootfor fdisk. - Select partition type code
ef02for gdisk. - For parted set/activate the flag
bios_grubon the partition.
This partition can be in any position order but has to be on the first 2 TiB of the disk. This partition needs to be created before GRUB installation. When the partition is ready, install the boot loader as per the instructions below.
The space before the first partition can also be used as the BIOS boot partition though it will be out of GPT alignment specification. Since the partition will not be regularly accessed performance issues can be disregarded, though some disk utilities will display a warning about it. In fdisk or gdisk create a new partition starting at sector 34 and spanning to 2047 and set the type. To have the viewable partitions begin at the base consider adding this partition last.
Master Boot Record (MBR) specific instructions
Usually the post-MBR gap (after the 512 byte MBR region and before the start of the first partition) in many MBR partitioned systems is 31 KiB when DOS compatibility cylinder alignment issues are satisfied in the partition table. However a post-MBR gap of about 1 to 2 MiB is recommended to provide sufficient room for embedding GRUB’s core.img (FS#24103). It is advisable to use a partitioning tool that supports 1 MiB partition alignment to obtain this space as well as to satisfy other non-512-byte-sector issues (which are unrelated to embedding of core.img).
Installation
Install the grub package. (It will replace grub-legacyAUR if that is already installed.) Then do:
# grub-install --target=i386-pc /dev/sdX
where i386-pc is deliberately used regardless of your actual architecture, and /dev/sdX is the disk (not a partition) where GRUB is to be installed. For example /dev/sda or /dev/nvme0n1, or /dev/mmcblk0. See Device file#Block device names for a description of the block device naming scheme.
Now you must generate the main configuration file.
If you use LVM for your /boot, you can install GRUB on multiple physical disks.
See grub-install(8) and GRUB Manual for more details on the grub-install command.
Configuration
On an installed system, GRUB loads the /boot/grub/grub.cfg configuration file each boot. You can follow #Generated grub.cfg for using a tool, or #Custom grub.cfg for a manual creation.
Generated grub.cfg
This section only covers editing the /etc/default/grub configuration file. See /Tips and tricks for more information.
Note: Remember to always generate the main configuration file after making changes to /etc/default/grub and/or files in /etc/grub.d/.
Warning: Update/reinstall the boot loader (see #UEFI systems or #BIOS systems) if a new GRUB version changes the syntax of the configuration file: mismatching configuration can result in an unbootable system.
Generate the main configuration file
After the installation, the main configuration file /boot/grub/grub.cfg needs to be generated. The generation process can be influenced by a variety of options in /etc/default/grub and scripts in /etc/grub.d/.
If you have not done additional configuration, the automatic generation will determine the root filesystem of the system to boot for the configuration file. For that to succeed it is important that the system is either booted or chrooted into.
Note:
- The default file path is
/boot/grub/grub.cfg, not/boot/grub/i386-pc/grub.cfg. - If you are trying to run grub-mkconfig in a chroot or systemd-nspawn container, you might notice that it does not work:
grub-probe: error: failed to get canonical path of /dev/sdaX. In this case, try using arch-chroot as described in the BBS post.
Use the grub-mkconfig tool to generate /boot/grub/grub.cfg:
# grub-mkconfig -o /boot/grub/grub.cfg
By default the generation scripts automatically add menu entries for all installed Arch Linux kernels to the generated configuration.
Tip:
- After installing or removing a kernel, you just need to re-run the above grub-mkconfig command.
- For tips on managing multiple GRUB entries, for example when using both linux and linux-lts kernels, see /Tips and tricks#Multiple entries.
To automatically add entries for other installed operating systems, see #Detecting other operating systems.
You can add additional custom menu entries by editing /etc/grub.d/40_custom and re-generating /boot/grub/grub.cfg. Or you can create /boot/grub/custom.cfg and add them there. Changes to /boot/grub/custom.cfg do not require re-running grub-mkconfig, since /etc/grub.d/41_custom adds the necessary source statement to the generated configuration file.
Tip: /etc/grub.d/40_custom can be used as a template to create /etc/grub.d/nn_custom, where nn defines the precedence, indicating the order the script is executed. The order scripts are executed determine the placement in the GRUB boot menu. nn should be greater than 06 to ensure necessary scripts are executed first.
See #Boot menu entry examples for custom menu entry examples.
Detecting other operating systems
To have grub-mkconfig search for other installed systems and automatically add them to the menu, install the os-prober package and mount the partitions from which the other systems boot. Then re-run grub-mkconfig. If you get the following output: Warning: os-prober will not be executed to detect other bootable partitions then edit /etc/default/grub and add/uncomment:
GRUB_DISABLE_OS_PROBER=false
Then try again.
Note:
- The exact mount point does not matter, os-prober reads the
mtabto identify places to search for bootable entries. - Remember to mount the partitions each time you run grub-mkconfig in order to include the other operating systems every time.
Windows
For Windows installed in UEFI mode, make sure the EFI system partition containing the Windows Boot Manager (bootmgfw.efi) is mounted. Run os-prober as root to detect and generate an entry for it.
For Windows installed in BIOS mode, mount the Windows system partition (its file system label should be System Reserved or SYSTEM). Run os-prober as root to detect and generate an entry for it.
Note: For Windows installed in BIOS mode:
- NTFS partitions may not always be detected when mounted with the default Linux drivers. If GRUB is not detecting it, try installing NTFS-3G and remounting.
![]() This article or section is out of date.
This article or section is out of date.![]()
Reason: Since Windows 7, bootmgr is placed in the system partition which is not encrypted. (Discuss in Talk:GRUB)
- Encrypted Windows partitions may need to be decrypted before mounting. For BitLocker, this can be done with cryptsetup or dislockerAUR. This should be sufficient for os-prober to add the correct entry.
Additional arguments
To pass custom additional arguments to the Linux image, you can set the GRUB_CMDLINE_LINUX + GRUB_CMDLINE_LINUX_DEFAULT variables in /etc/default/grub. The two are appended to each other and passed to kernel when generating regular boot entries. For the recovery boot entry, only GRUB_CMDLINE_LINUX is used in the generation.
It is not necessary to use both, but can be useful. For example, you could use GRUB_CMDLINE_LINUX_DEFAULT="resume=UUID=uuid-of-swap-partition quiet" where uuid-of-swap-partition is the UUID of your swap partition to enable resume after hibernation. This would generate a recovery boot entry without the resume and without quiet suppressing kernel messages during a boot from that menu entry. Though, the other (regular) menu entries would have them as options.
By default grub-mkconfig determines the UUID of the root filesystem for the configuration. To disable this, uncomment GRUB_DISABLE_LINUX_UUID=true.
For generating the GRUB recovery entry you have to ensure that GRUB_DISABLE_RECOVERY is not set to true in /etc/default/grub.
See Kernel parameters for more info.
By default, grub-mkconfig sorts the included kernels using sort -V and uses the first kernel in that list as the top-level entry. This means that, for example, since /boot/vmlinuz-linux-lts is sorted before /boot/vmlinuz-linux, if you have both linux-lts and linux installed, the LTS kernel will be the top-level menu entry, which may not be desirable. This can be overridden by specifying GRUB_TOP_LEVEL=path_to_kernel" in /etc/default/grub. For example, to make the regular kernel be the top-level menu entry, you can use GRUB_TOP_LEVEL="/boot/vmlinuz-linux".
LVM
![]() This article or section is a candidate for merging with #Installation.
This article or section is a candidate for merging with #Installation.![]()
Notes: grub-mkconfig is capable of detecting that it needs the lvm module, specifying it in GRUB_PRELOAD_MODULES is not required. Move warning to #Installation & #Installation_2 or create a Known issues section and document it there. (Discuss in Talk:GRUB)
Warning: GRUB does not support thin-provisioned logical volumes.
If you use LVM for your /boot or / root partition, make sure that the lvm module is preloaded:
/etc/default/grub
GRUB_PRELOAD_MODULES="... lvm"
RAID
![]() This article or section is a candidate for merging with #Installation.
This article or section is a candidate for merging with #Installation.![]()
Notes: grub-mkconfig is capable of detecting that it needs the mdraid09 and/or mdraid1x modules, specifying them in GRUB_PRELOAD_MODULES is not required. Summarize the double grub-install in a note and move it to #Installation; move set root stuff to #Custom grub.cfg. (Discuss in Talk:GRUB)
GRUB provides convenient handling of RAID volumes. You need to load GRUB modules mdraid09 or mdraid1x to allow you to address the volume natively:
/etc/default/grub
GRUB_PRELOAD_MODULES="... mdraid09 mdraid1x"
For example, /dev/md0 becomes:
set root=(md/0)
whereas a partitioned RAID volume (e.g. /dev/md0p1) becomes:
set root=(md/0,1)
To install grub when using RAID1 as the /boot partition (or using /boot housed on a RAID1 root partition), on BIOS systems, simply run grub-install on both of the drives, such as:
# grub-install --target=i386-pc --debug /dev/sda
# grub-install --target=i386-pc --debug /dev/sdb
Where the RAID 1 array housing /boot is housed on /dev/sda and /dev/sdb.
Note: GRUB supports booting from Btrfs RAID 0/1/10, but not RAID 5/6. You may use mdadm for RAID 5/6, which is supported by GRUB.
Encrypted /boot
GRUB also has special support for booting with an encrypted /boot. This is done by unlocking a LUKS blockdevice in order to read its configuration and load any initramfs and kernel from it. This option tries to solve the issue of having an unencrypted boot partition.
Tip: /boot is not required to be kept in a separate partition; it may also stay under the system’s root / directory tree.
Warning: GRUB 2.06 has limited support for LUKS2. See the #LUKS2 section below for details.
To enable this feature encrypt the partition with /boot residing on it using LUKS as normal. Then add the following option to /etc/default/grub:
/etc/default/grub
GRUB_ENABLE_CRYPTODISK=y
This option is used by grub-install to generate the grub core.img.
Make sure to install grub after modifying this option or encrypting the partition.
Without further changes you will be prompted twice for a passphrase: the first for GRUB to unlock the /boot mount point in early boot, the second to unlock the root filesystem itself as implemented by the initramfs. You can use a keyfile to avoid this.
Warning:
- If you want to generate the main configuration file, make sure that
/bootis mounted. - In order to perform system updates involving the
/bootmount point, ensure that the encrypted/bootis unlocked and mounted before performing an update. With a separate/bootpartition, this may be accomplished automatically on boot by using crypttab with a keyfile.
Note:
- If you use a special keymap, a default GRUB installation will not know it. This is relevant for how to enter the passphrase to unlock the LUKS blockdevice. See /Tips and tricks#Manual configuration of core image for early boot.
- If you experience issues getting the prompt for a password to display (errors regarding cryptouuid, cryptodisk, or «device not found»), try reinstalling GRUB and appending
--modules="part_gpt part_msdos"to the end of yourgrub-installcommand.
Tip: You can use pacman hooks to automount your /boot when upgrades need to access related files.
LUKS2
- GRUB 2.06 has limited support for LUKS2. See GRUB bug #55093.
- Argon2id (cryptsetup default) and Argon2i PBKDFs are not supported (GRUB bug #59409), only PBKDF2 is.
grub-installdoes not support creating a core image that could be used for unlocking LUKS2. See the comments below or on grub-gitAUR for a workaround.
Tip: You can use grub-improved-luks2-gitAUR that has been patched for LUKS2 as well as Argon support.
- Use
grub-installas described in the #Installation section to populate the GRUB module directory. Do not forget to edit/etc/default/gruband rungrub-mkconfig -o /boot/grub/grub.cfg, as described above. The generated EFI binary does not support LUKS2 and will be replaced in the next step.
- Create
/boot/grub/grub-pre.cfg. ReplaceUUIDwith the LUKS encrypted device UUID. Uselvm/NameOfVolumeGroup-NameOfLogicalVolumeinstead ofcrypto0if your root drive is on an LVM logical volume inside the LUKS volume, otherwise do not changecrypto0, this is how GRUB names encrypted volumes.
/boot/grub/grub-pre.cfg
set crypto_uuid=UUID
cryptomount -u $crypto_uuid
set root=crypto0
set prefix=($root)/boot/grub
insmod normal
normal
Note: Whenever you make changes to grub-pre.cfg, you will have to do the following steps again.
Warning: If using Btrfs and /boot/grub is located on a subvolume, the prefix must include the full path from the top level Btrfs subvolume (subvolid = 5). For example, if /boot/grub is located on a subvolume called my_subvolume (subvolid ≠ 5), set the line to set prefix=($root)/my_subvolume/boot/grub. This is true even if you have set my_subvolume as default with btrfs subvolume set-default before.
- Add
lvmif you use LVM. Replaceext2withbtrfsor another filesystem module, if needed. Depending on the settings of your key slot, replacegcry_sha256withgcry_sha512orgcry_whirlpoolif need be:
$ grub-mkimage -p /boot/grub -O x86_64-efi -c grub-pre.cfg -o /tmp/grubx64.efi luks2 part_gpt cryptodisk gcry_rijndael pbkdf2 gcry_sha256 ext2
If it cannot find grub-pre.cfg, simply change to -c /boot/grub/grub-pre.cfg above.
- Copy to ESP:
# install -v /tmp/grubx64.efi esp/EFI/GRUB/grubx64.efi
If you enter an invalid passphrase during boot and end up at the GRUB rescue shell, try cryptomount -a to mount all (hopefully only one) encrypted partitions or use cryptomount -u $crypto_uuid to mount a specific one. Then proceed with insmod normal and normal as usual.
If you enter a correct passphrase, but an Invalid passphrase error is immediately returned, make sure that the right cryptographic modules are specified. Use cryptsetup luksDump /dev/nvme0n1p2 and check whether the hash function (SHA-256, SHA-512) matches the modules (gcry_sha256, gcry_sha512) installed and the PBKDF algorithm is pbkdf2. The hash and PBDKDF algorithms can be changed for existing keys by using cryptsetup luksConvertKey --hash sha256 --pbkdf pbkdf2 /dev/nvme0n1p2. Under normal circumstances it should take a few seconds before the passphrase is processed.
Custom grub.cfg
![]() This article or section needs expansion.
This article or section needs expansion.![]()
This section describes the manual creation of GRUB boot entries in /boot/grub/grub.cfg instead of relying on grub-mkconfig.
A basic GRUB config file uses the following options:
(hdX,Y)is the partition Y on disk X, partition numbers starting at 1, disk numbers starting at 0set default=Nis the default boot entry that is chosen after timeout for user actionset timeout=Mis the time M to wait in seconds for a user selection before default is bootedmenuentry "title" {entry options}is a boot entry titledtitleset root=(hdX,Y)sets the boot partition, where the kernel and GRUB modules are stored (boot need not be a separate partition, and may simply be a directory under the «root» partition (/)
Tip: These boot entries can also be used when using a /boot/grub/grub.cfg generated by grub-mkconfig. Add them to /etc/grub.d/40_custom and re-generate the main configuration file or add them to /boot/grub/custom.cfg.
For tips on managing multiple GRUB entries, for example when using both linux and linux-lts kernels, see /Tips and tricks#Multiple entries.
For Archiso and Archboot boot menu entries see Multiboot USB drive#Boot entries.
GRUB commands
menuentry "System shutdown" {
	echo "System shutting down..."
	halt
}
menuentry "System restart" {
	echo "System rebooting..."
	reboot
}
if [ ${grub_platform} == "efi" ]; then
	menuentry 'UEFI Firmware Settings' --id 'uefi-firmware' {
		fwsetup
	}
fi
EFI binaries
When launched in UEFI mode, GRUB can chainload other EFI binaries.
Tip: To show these menu entries only when GRUB is launched in UEFI mode, enclose them in the following if statement:
if [ ${grub_platform} == "efi" ]; then
	place UEFI-only menu entries here
fi
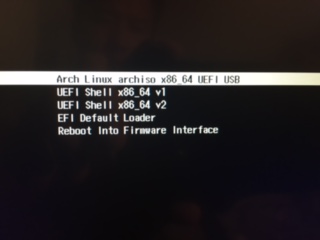
UEFI Shell
You can launch UEFI Shell by placing it in the root of the EFI system partition and adding this menu entry:
menuentry "UEFI Shell" {
	insmod fat
	insmod chain
	search --no-floppy --set=root --file /shellx64.efi
	chainloader /shellx64.efi
}
gdisk
Download the gdisk EFI application and copy gdisk_x64.efi to esp/EFI/tools/.
menuentry "gdisk" {
	insmod fat
	insmod chain
	search --no-floppy --set=root --file /EFI/tools/gdisk_x64.efi
	chainloader /EFI/tools/gdisk_x64.efi
}
Chainloading a unified kernel image
If you have a unified kernel image generated from following Secure Boot or other means, you can add it to the boot menu. For example:
menuentry "Arch Linux" {
	insmod fat
	insmod chain
	search --no-floppy --set=root --fs-uuid FILESYSTEM_UUID
	chainloader /EFI/Linux/Arch-linux.efi
}
Dual-booting
GNU/Linux
Assuming that the other distribution is on partition sda2:
menuentry "Other Linux" {
	set root=(hd0,2)
	linux /boot/vmlinuz (add other options here as required)
	initrd /boot/initrd.img (if the other kernel uses/needs one)
}
Alternatively let GRUB search for the right partition by UUID or file system label:
menuentry "Other Linux" {
        # assuming that UUID is 763A-9CB6
	search --no-floppy --set=root --fs-uuid 763A-9CB6

        # search by label OTHER_LINUX (make sure that partition label is unambiguous)
        #search --no-floppy --set=root --label OTHER_LINUX

	linux /boot/vmlinuz (add other options here as required, for example: root=UUID=763A-9CB6)
	initrd /boot/initrd.img (if the other kernel uses/needs one)
}
If the other distribution has already a valid /boot folder with installed GRUB, grub.cfg, kernel and initramfs, GRUB can be instructed to load these other grub.cfg files on-the-fly during boot. For example, for hd0 and the fourth GPT partition:
menuentry "configfile hd0,gpt4"  {
        insmod part_gpt
        insmod btrfs
        insmod ext2
        set root='hd0,gpt4'
        configfile /boot/grub/grub.cfg
}
When choosing this entry, GRUB loads the grub.cfg file from the other volume and displays that menu. Any environment variable changes made by the commands in file will not be preserved after configfile returns. Press Esc to return to the first GRUB menu.
Windows installed in UEFI/GPT mode
This mode determines where the Windows boot loader resides and chain-loads it after GRUB when the menu entry is selected. The main task here is finding the EFI system partition and running the bootloader from it.
if [ "${grub_platform}" == "efi" ]; then
	menuentry "Microsoft Windows Vista/7/8/8.1 UEFI/GPT" {
		insmod part_gpt
		insmod fat
		insmod chain
		search --no-floppy --fs-uuid --set=root $hints_string $fs_uuid
		chainloader /EFI/Microsoft/Boot/bootmgfw.efi
	}
fi
where $hints_string and $fs_uuid are obtained with the following two commands.
The $fs_uuid command determines the UUID of the EFI system partition:
# grub-probe --target=fs_uuid esp/EFI/Microsoft/Boot/bootmgfw.efi
1ce5-7f28
Alternatively one can run lsblk --fs and read the UUID of the EFI system partition from there.
The $hints_string command will determine the location of the EFI system partition, in this case harddrive 0:
# grub-probe --target=hints_string esp/EFI/Microsoft/Boot/bootmgfw.efi
--hint-bios=hd0,gpt1 --hint-efi=hd0,gpt1 --hint-baremetal=ahci0,gpt1
These two commands assume the ESP Windows uses is mounted at esp. There might be case differences in the path to Windows’s EFI file, what with being Windows, and all.
Windows installed in BIOS/MBR mode
Note: GRUB supports booting bootmgr directly and chainloading of partition boot sector is no longer required to boot Windows in a BIOS/MBR setup.
Warning: It is the system partition that has /bootmgr, not your «real» Windows partition (usually C:). The system partition’s filesystem label is System Reserved or SYSTEM and the partition is only about 100 to 549 MiB in size. See Wikipedia:System partition and boot partition for more information.
Throughout this section, it is assumed your Windows partition is /dev/sda1. A different partition will change every instance of hd0,msdos1.
In both examples XXXX-XXXX is the filesystem UUID which can be found with command lsblk --fs.
For Windows Vista/7/8/8.1/10:
if [ "${grub_platform}" == "pc" ]; then
	menuentry "Microsoft Windows Vista/7/8/8.1/10 BIOS/MBR" {
		insmod part_msdos
		insmod ntfs
		insmod ntldr
		search --no-floppy --fs-uuid --set=root --hint-bios=hd0,msdos1 --hint-efi=hd0,msdos1 --hint-baremetal=ahci0,msdos1 XXXX-XXXX
		ntldr /bootmgr
	}
fi
For Windows XP:
if [ "${grub_platform}" == "pc" ]; then
	menuentry "Microsoft Windows XP" {
		insmod part_msdos
		insmod ntfs
		insmod ntldr
		search --no-floppy --fs-uuid --set=root --hint-bios=hd0,msdos1 --hint-efi=hd0,msdos1 --hint-baremetal=ahci0,msdos1 XXXX-XXXX
		ntldr /ntldr
	}
fi
Note: In some cases, GRUB may be installed without a clean Windows 8, in which case you cannot boot Windows without having an error with bootbcd (error code 0xc000000f). You can fix it by going to Windows Recovery Console (cmd.exe from install disk) and executing:
X:> bootrec.exe /fixboot
X:> bootrec.exe /RebuildBcd
Do not use bootrec.exe /Fixmbr because it will wipe GRUB out.
Or you can use Boot Repair function in the Troubleshooting menu — it will not wipe out GRUB but will fix most errors.
Also you would better keep plugged in both the target hard drive and your bootable device ONLY. Windows usually fails to repair boot information if any other devices are connected.
Using labels
It is possible to use file system labels, human-readable strings attached to file systems, by using the --label option to search. First of all, make sure your file system has a label.
Then, add an entry using labels. An example of this:
menuentry "Arch Linux, session texte" {
  search --label --set=root archroot
  linux /boot/vmlinuz-linux root=/dev/disk/by-label/archroot ro
  initrd /boot/initramfs-linux.img
}
Using the command shell
Since the MBR is too small to store all GRUB modules, only the menu and a few basic commands reside there. The majority of GRUB functionality remains in modules in /boot/grub/, which are inserted as needed. In error conditions (e.g. if the partition layout changes) GRUB may fail to boot. When this happens, a command shell may appear.
GRUB offers multiple shells/prompts. If there is a problem reading the menu but the bootloader is able to find the disk, you will likely be dropped to the «normal» shell:
grub>
If there is a more serious problem (e.g. GRUB cannot find required files), you may instead be dropped to the «rescue» shell:
grub rescue>
The rescue shell is a restricted subset of the normal shell, offering much less functionality. If dumped to the rescue shell, first try inserting the «normal» module, then starting the «normal» shell:
grub rescue> set prefix=(hdX,Y)/boot/grub
grub rescue> insmod (hdX,Y)/boot/grub/i386-pc/normal.mod
rescue:grub> normal
GRUB supports pager for reading commands that provide long output (like the help command). This works only in normal shell mode and not in rescue mode. To enable pager, in GRUB command shell type:
sh:grub> set pager=1
Using the command shell environment to boot operating systems
grub>
The GRUB’s command shell environment can be used to boot operating systems.
A common scenario may be to boot Windows / Linux stored on a drive/partition via chainloading.
Chainloading means to load another boot-loader from the current one, ie, chain-loading.
The other bootloader may be embedded at the start of a partitioned disk (MBR), at the start of a partition or a partitionless disk (VBR), or as an EFI binary in the case of UEFI.
Chainloading a partition’s VBR
set root=(hdX,Y)
chainloader +1
boot
X=0,1,2…
Y=1,2,3…
For example to chainload Windows stored in the first partition of the first hard disk,
set root=(hd0,1)
chainloader +1
boot
Similarly GRUB installed to a partition can be chainloaded.
Chainloading a disk’s MBR or a partitionless disk’s VBR
set root=hdX
chainloader +1
boot
Chainloading Windows/Linux installed in UEFI mode
insmod fat
set root=(hd0,gpt4)
chainloader (${root})/EFI/Microsoft/Boot/bootmgfw.efi
boot
insmod fat is used for loading the FAT file system module for accessing the Windows bootloader on the EFI system partition.
(hd0,gpt4) or /dev/sda4 is the EFI system partition in this example.
The entry in the chainloader line specifies the path of the .efi file to be chain-loaded.
Normal loading
See the examples in #Using the rescue console
Using the rescue console
See #Using the command shell first. If unable to activate the standard shell, one possible solution is to boot using a live CD or some other rescue disk to correct configuration errors and reinstall GRUB. However, such a boot disk is not always available (nor necessary); the rescue console is surprisingly robust.
The available commands in GRUB rescue include insmod, ls, set, and unset. This example uses set and insmod. set modifies variables and insmod inserts new modules to add functionality.
Before starting, the user must know the location of their /boot partition (be it a separate partition, or a subdirectory under their root):
grub rescue> set prefix=(hdX,Y)/boot/grub
where X is the physical drive number and Y is the partition number.
Note: With a separate boot partition, omit /boot from the path (i.e. type set prefix=(hdX,Y)/grub).
To expand console capabilities, insert the linux module:
grub rescue> insmod i386-pc/linux.mod
or simply
grub rescue> insmod linux
This introduces the linux and initrd commands, which should be familiar.
An example, booting Arch Linux:
set root=(hd0,5)
linux /boot/vmlinuz-linux root=/dev/sda5
initrd /boot/initramfs-linux.img
boot
With a separate boot partition (e.g. when using UEFI), again change the lines accordingly:
Note: Since boot is a separate partition and not part of your root partition, you must address the boot partition manually, in the same way as for the prefix variable.
set root=(hd0,5)
linux (hdX,Y)/vmlinuz-linux root=/dev/sda6
initrd (hdX,Y)/initramfs-linux.img
boot
Note: If you experienced error: premature end of file /YOUR_KERNEL_NAME during execution of linux command, you can try linux16 instead.
After successfully booting the Arch Linux installation, users can correct grub.cfg as needed and then reinstall GRUB.
To reinstall GRUB and fix the problem completely, changing /dev/sda if needed. See #Installation for details.
GRUB removal
![]() This article or section needs expansion.
This article or section needs expansion.![]()
Reason: Migrating from BIOS booting to UEFI is not the only case where GRUB could be removed. Section needs to either cover how to remove GRUB installed for UEFI booting or it should be removed altogether as too trivial. (Discuss in Talk:GRUB)
In general, in order to remove grub, one has to do the installation steps in reverse order. Perhaps cleaning any left over at the end. However, before doing anything, one has to decide if, and how, the machine will boot after the removal. Assuming one removes grub because they would like to use another boot loader, a safe, though a bit difficult, method is to make sure the other boot loader is working before removing grub.
In any case, even when removing grub before installing another boot loader, for the UEFI case, run:
$ efibootmgr
And verify the other boot loader is listed in the BootOrder line. If grub was not removed, the other boot loader should be listed before grub. If grub is already removed, grub should not be mentioned in that line. But note this is only a necessary, but not sufficient, condition for the machine to boot with the other boot loader. Neither it is a sufficient condition for the full removal of grub.
For both UEFI and non UEFI machines, grub-install was manually run as part of the installation of grub. One of its jobs for the UEFI case was to run the equivalent of efibootmgr --create. As part of grub removal, one has to remove the products of grub-install. The opposite of efibootmgr --create is efibootmgr --delete-bootnum, or an equivalent program. One way to obtain the number of the boot entry for the efibootmgr --delete-bootnum command is from the output of efibootmgr (with no arguments).
grub-install creates the /boot/grub directory that needs to be removed manually. Though some users will want to keep it, should they want to install grub again.
After migrating to GPT/UEFI one may want to remove the MBR boot code using dd:
# dd if=/dev/zero of=/dev/sdX bs=440 count=1
Troubleshooting
Unsupported file systems
In case that GRUB does not support the root file system, an alternative /boot partition with a supported file system must be created. In some cases, the development version of GRUB grub-gitAUR may have native support for the file system.
If GRUB is used with an unsupported file system it is not able to extract the UUID of your drive so it uses classic non-persistent /dev/sdXx names instead. In this case you might have to manually edit /boot/grub/grub.cfg and replace root=/dev/sdXx with root=UUID=XXXXXXXX-XXXX-XXXX-XXXX-XXXXXXXXXXXX. You can use the blkid command to get the UUID of your device, see Persistent block device naming.
While GRUB supports F2FS since version 2.0.4, it cannot correctly read its boot files from an F2FS partition that was created with the extra_attr flag enabled.
Enable debug messages
Note: This change is overwritten when #Generate the main configuration file.
Add:
set pager=1
set debug=all
to grub.cfg.
msdos-style error message
grub-setup: warn: This msdos-style partition label has no post-MBR gap; embedding will not be possible!
grub-setup: warn: Embedding is not possible. GRUB can only be installed in this setup by using blocklists.
            However, blocklists are UNRELIABLE and its use is discouraged.
grub-setup: error: If you really want blocklists, use --force.
This error may occur when you try installing GRUB in a VMware container. Read more about it here. It happens when the first partition starts just after the MBR (block 63), without the usual space of 1 MiB (2048 blocks) before the first partition. Read #Master Boot Record (MBR) specific instructions
UEFI
Common installation errors
- If you have a problem when running grub-install with sysfs or procfs and it says you must run
modprobe efivarfsor it returns an error likeCould not prepare Boot variable: Read-only file system, try mounting the efivarfs. Also see the Gentoo Wiki on installing the boot loader. - Without
--targetor--directoryoption, grub-install cannot determine for which firmware to install. In such casesgrub-installwill printsource_dir does not exist. Please specify --target or --directory. - If after running grub-install you are told your partition does not look like an EFI partition then the partition is most likely not
Fat32.
Create a GRUB entry in the firmware boot manager
grub-install automatically tries to create a menu entry in the boot manager. If it does not, then see UEFI#efibootmgr for instructions to use efibootmgr to create a menu entry. However, the problem is likely to be that you have not booted your CD/USB in UEFI mode, as in UEFI#Create UEFI bootable USB from ISO.
As another example of creating a GRUB entry in the firmware boot manager, consider efibootmgr -c. This assumes that /dev/sda1 is the EFI System Partition, and is mounted at /boot/efi. Which are the default behavior of efibootmgr. It creates a new boot option, called «Linux», and puts it at the top of the boot order list. Options may be passed to modify the default behavior. The default OS Loader is EFIarchgrub.efi.
Drop to rescue shell
If GRUB loads but drops into the rescue shell with no errors, it can be due to one of these two reasons:
- It may be because of a missing or misplaced
grub.cfg. This will happen if GRUB UEFI was installed with--boot-directoryandgrub.cfgis missing, - It also happens if the boot partition, which is hardcoded into the
grubx64.efifile, has changed.
GRUB UEFI not loaded
An example of a working UEFI:
# efibootmgr -v
BootCurrent: 0000
Timeout: 3 seconds
BootOrder: 0000,0001,0002
Boot0000* GRUB HD(1,800,32000,23532fbb-1bfa-4e46-851a-b494bfe9478c)File(EFIGRUBgrubx64.efi)
Boot0001* Shell HD(1,800,32000,23532fbb-1bfa-4e46-851a-b494bfe9478c)File(shellx64.efi)
Boot0002* Festplatte BIOS(2,0,00)P0: SAMSUNG HD204UI
If the screen only goes black for a second and the next boot option is tried afterwards, according to this post, moving GRUB to the partition root can help. The boot option has to be deleted and recreated afterwards. The entry for GRUB should look like this then:
Boot0000* GRUB HD(1,800,32000,23532fbb-1bfa-4e46-851a-b494bfe9478c)File(grubx64.efi)
Default/fallback boot path
Some UEFI firmwares require a bootable file at a known location before they will show UEFI NVRAM boot entries. If this is the case, grub-install will claim efibootmgr has added an entry to boot GRUB, however the entry will not show up in the VisualBIOS boot order selector. The solution is to install GRUB at the default/fallback boot path:
# grub-install --target=x86_64-efi --efi-directory=esp --removable
Alternatively you can move an already installed GRUB EFI executable to the default/fallback path:
# mv esp/EFI/grub esp/EFI/BOOT
# mv esp/EFI/BOOT/grubx64.efi esp/EFI/BOOT/BOOTX64.EFI
Invalid signature
If trying to boot Windows results in an «invalid signature» error, e.g. after reconfiguring partitions or adding additional hard drives, (re)move GRUB’s device configuration and let it reconfigure:
# mv /boot/grub/device.map /boot/grub/device.map-old
# grub-mkconfig -o /boot/grub/grub.cfg
grub-mkconfig should now mention all found boot options, including Windows. If it works, remove /boot/grub/device.map-old.
Boot freezes
If booting gets stuck without any error message after GRUB loading the kernel and the initial ramdisk, try removing the add_efi_memmap kernel parameter.
Arch not found from other OS
Some have reported that other distributions may have trouble finding Arch Linux automatically with os-prober. If this problem arises, it has been reported that detection can be improved with the presence of /etc/lsb-release. This file and updating tool is available with the package lsb-release.
Warning when installing in chroot
When installing GRUB on a LVM system in a chroot environment (e.g. during system installation), you may receive warnings like
/run/lvm/lvmetad.socket: connect failed: No such file or directory
or
WARNING: failed to connect to lvmetad: No such file or directory. Falling back to internal scanning.
This is because /run is not available inside the chroot. These warnings will not prevent the system from booting, provided that everything has been done correctly, so you may continue with the installation.
GRUB loads slowly
GRUB can take a long time to load when disk space is low. Check if you have sufficient free disk space on your /boot or / partition when you are having problems.
error: unknown filesystem
GRUB may output error: unknown filesystem and refuse to boot for a few reasons. If you are certain that all UUIDs are correct and all filesystems are valid and supported, it may be because your BIOS Boot Partition is located outside the first 2 TiB of the drive [1]. Use a partitioning tool of your choice to ensure this partition is located fully within the first 2 TiB, then reinstall and reconfigure GRUB.
This error might also be caused by an ext4 filesystem having unsupported features set:
large_dir— unsupported.metadata_csum_seed— will be supported in GRUB 2.11 (commit).
Warning: Make sure to check GRUB support for new file system features before you enable them on your /boot file system.
grub-reboot not resetting
GRUB seems to be unable to write to root Btrfs partitions [2]. If you use grub-reboot to boot into another entry it will therefore be unable to update its on-disk environment. Either run grub-reboot from the other entry (for example when switching between various distributions) or consider a different file system. You can reset a «sticky» entry by executing grub-editenv create and setting GRUB_DEFAULT=0 in your /etc/default/grub (do not forget grub-mkconfig -o /boot/grub/grub.cfg).
Old Btrfs prevents installation
If a drive is formatted with Btrfs without creating a partition table (eg. /dev/sdx), then later has partition table written to, there are parts of the BTRFS format that persist. Most utilities and OS’s do not see this, but GRUB will refuse to install, even with —force
# grub-install: warning: Attempting to install GRUB to a disk with multiple partition labels. This is not supported yet..
# grub-install: error: filesystem `btrfs' does not support blocklists.
You can zero the drive, but the easy solution that leaves your data alone is to erase the Btrfs superblock with wipefs -o 0x10040 /dev/sdx
Windows 8/10 not found
A setting in Windows 8/10 called «Hiberboot», «Hybrid Boot» or «Fast Boot» can prevent the Windows partition from being mounted, so grub-mkconfig will not find a Windows install. Disabling Hiberboot in Windows will allow it to be added to the GRUB menu.
VirtualBox EFI mode
For VirtualBox < 6.1, install GRUB to the default/fallback boot path.
See also VirtualBox#Installation in EFI mode on VirtualBox < 6.1.
GRUB rescue and encrypted /boot
When using an encrypted /boot, and you fail to input a correct password, you will be dropped in grub-rescue prompt.
This grub-rescue prompt has limited capabilities. Use the following commands to complete the boot:
grub rescue> cryptomount <partition>
grub rescue> insmod normal
grub rescue> normal
See this blog post for a better description.
Check /etc/default/grub if GRUB_TIMEOUT is set to 0, in which case set it to a positive number: it sets the number of seconds before the default GRUB entry is loaded. Also check if GRUB_TIMEOUT_STYLE is set to hidden and set it to menu, so that the menu will be shown by default. Then regenerate the main configuration file and reboot to check if it worked.
See also
- Wikipedia:GNU GRUB
- Official GRUB Manual
- Ubuntu wiki page for GRUB
- GRUB wiki page describing steps to compile for UEFI systems
- Wikipedia:BIOS Boot partition
- How to configure GRUB
- Detecting efi files and booting them from grub
I just installed Arch Linux and with GRUB and want to add my windows 10 with EFI partition to grub.
Now I have Arch installed on the hard drive /dev/sdc/ with a EFI system on /dev/sdc1. On an other hard drive I have Windows 10 installed where the efi drive is /dev/sda1 .
I tried to follow the arch wiki but could not find out were to get the EFI system partition for the command esp/EFI/Microsoft/Boot/bootmgfw.efi. Do I have to mount the windows 10 drive if yes where should I mount it to?
asked Mar 19, 2018 at 21:00
![]()
Get the UUID with: sudo grub-probe -t fs_uuid -d /dev/sda1
and then add an entry for Windows at the end of your grub.cfg:
menuentry "Windows 10" {
insmod part_gpt
insmod fat
insmod search_fs_uuid
insmod chain
search --fs-uuid --no-floppy --set=root XXXXXXXXX
chainloader (${root})/efi/Microsoft/Boot/bootmgfw.efi
}
![]()
Prvt_Yadav
5,6227 gold badges33 silver badges47 bronze badges
answered May 20, 2018 at 7:31
![]()
Mark RoiMark Roi
1641 silver badge11 bronze badges
Normally grub-mkconfig should auto-detect dual booted operating systems (via the os-prober utility). This, however, requires you to have the Windows drive mounted. For example, try this:
$ mkdir -p /mnt/windows
$ mount /dev/sda1 /mnt/windows
$ grub-mkconfig -o /boot/grub/grub.cfg
It should now automatically detect your Windows installation and you should be able to boot into Windows.
Another important thing to note regarding the previous answer to this question: you should never manually edit /boot/grub/grub.cfg, since it can easily be overwritten by tools like grub-mkconfig (and the syntax isn’t really all that intuitive either way).
![]()
fra-san
9,5612 gold badges22 silver badges40 bronze badges
answered Apr 15, 2019 at 6:33
![]()
1
Arch Linux installation (Windows 10 dual boot)
Before
- Disable Windows Fast-Startup
- Disable Secure Boot
Partitioning
Windows 10 Efi partitioning
| Partition | Location | Size | File system |
|---|---|---|---|
| Recovery | sda1 | 500 MB | ntfs |
| ESP | sda2 | 100 MB | vfat |
| Reserved | sda3 | 16 MB | ? |
| Windows 10 | sda4 | 80 GB | ntfs |
Connect to the internet (Wi-Fi)
# wifi-menu
# ping  -c 3 www.google.com
Format and mount disks
# mkfs.ext4 /dev/sdb1
# mkfs.ext4 /dev/sdb2
# mount /dev/sdb2 /mnt
# mkdir /mnt/boot
# mkdir /mnt/home
# mount /dev/sdb1 /mnt/boot
# mount /dev/sdb3 /mnt/home
Install
# pacstrap /mnt base base-devel
Generate fstab
# genfstab -U /mnt >> /mnt/etc/fstab
Chroot and configure base system
# arch-chroot /mnt
Timezone
# ln -sf /usr/share/zoneinfo/Asia/Jakarta /etc/localtime
Hardware clock
# hwclock --systohc
Locale
# nano /etc/locale.gen
uncomment en_US.UTF-8
# locale-gen
# echo LANG=en_US.UTF-8 > /etc/locale.conf
# export LANG=en_US.UTF-8
Hostname
# echo arch >> /etc/hostname
# nano /etc/hosts
/etc/hosts should look like:
127.0.0.1   localhost.localdomain   localhost
::1         localhost.localdomain   localhost
127.0.1.1   arch.localdomain        arch
Root password
# passwd
Initial ramdisk environment
$ mkinitcpio -p linux
Systemd-Boot
# bootctl --path=/boot install
Then add following content to /boot/loader/entries/arch.conf
tittle    Arch
linux     /vmlinuz-linux
initrd    /initramfs-linux.img
initrd    /intel-ucode.img
options   root=/dev/sda6 rw
and following content to /boot/loader/loader.conf
timeout 5
default arch
GRUB
$ pacman -S dosfstools grub efibootmgr intel-ucode
$ mkdir /boot/efi
$ mount /dev/sda1 /boot/efi
Edit /etc/default/grub, set DEFAULT_TIMEOUT=30.
$ grub-install --target=x86_64-efi --efi-directory=/boot/efi --bootloader-id=grub --recheck
$ grub-mkconfig -o boot/grub/grub.cfg
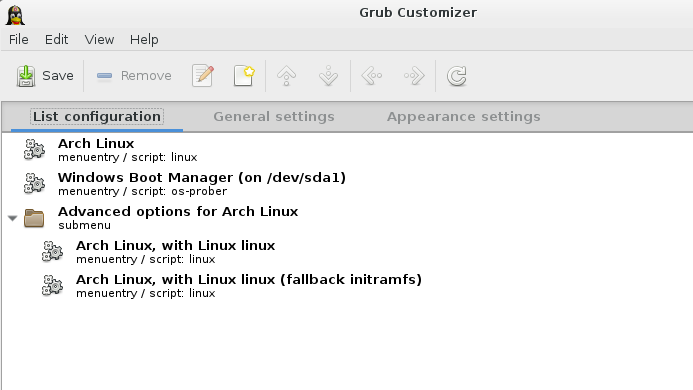
Now, let’s add Windows to the GRUB menu. Edit /boot/grub/grub.cfg and add the following menuentry after the Arch Linux menuentries:
menuentry "Windows 10" --class windows --class os {
    insmod part_gpt
    insmod fat
    insmod search_fs_uuid
    insmod chain
    search --fs-uuid --set=root $hints_string $fs_uuid
    chainloader /EFI/Microsoft/Boot/bootmgfw.efi
}
Now change:
-
$hints_stringby the output of$ grub-probe --target=fs_uuid /boot/efi/EFI/Microsoft/Boot/bootmgfw.efi -
$fs_uuidby the output of$ grub-probe --target=hints_string /boot/efi/EFI/Microsoft/Boot/bootmgfw.efi
Network configuration (Wi-Fi)
# pacman -S iw wpa_supplicant dialog networkmanager
Other
# pacman -S zsh reflector ntfs-3g
Unmount and reboot
$ exit      # If still on arch-chroot mode
$ umount -R /mnt
$ reboot
References
Installation
- Arch Linux Wiki: Beginners Guide
- Arch Linux Wiki: GRUB
- Arch Linux Wiki: Installation
- Arch Linux Wiki: Windows and Arch dual boot
Многие новички и опытные пользователи Linux держат также установленной на своем компьютере операционную систему Windows, например, последней, десятой версии. Новичкам это нужно чтобы иметь запасную операционную систему, к которой они смогут вернуться, если их Linux сломается. А для опытных пользователей важно программное обеспечение, которое не поддерживается ни в Linux, ни даже с помощью эмулятора Wine, а таких программ достаточно много.
Но временами случается такая ситуация, что загрузчик Grub не распознает установленную Windows и не отображает ее в списке для систем для загрузки. В этой статье мы рассмотрим почему возникает ошибка grub не видит Windows 10 и как ее решить.
Причин такой ошибки может быть несколько, начиная от того, что система установлена на другом жестком диске, и заканчивая неизвестными глюками пакета os-prober, который и занимается определением операционных систем в Linux. Также, если у вас есть несколько версий Windows на компьютере, то программа может видеть только одну из них.
Сначала можно попытаться сделать наш с Windows раздел более видимым для программы. Для этого примонтируйте его в какую-либо папку. Например, в /mnt/:
sudo mount -t ntfs-3g -o ro /dev/sda1
Я предполагаю, что система Windows установлена на разделе, который определяется в Linux, как /dev/sda1. Дальше запустите утилиту os-prober:
sudo os-prober

Если программа обнаружит Windows, то вам останется обновить конфигурацию загрузчика Grub:
sudo update-grub

Или:
sudo grub2-mkconfig -o /boot/grub/grub.cfg
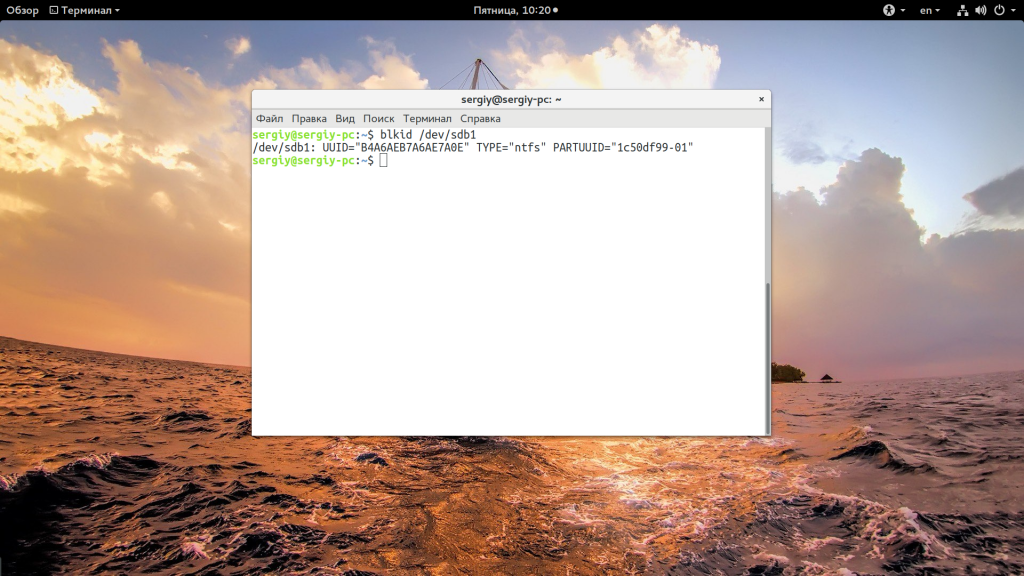
Если же этот способ не сработает, а он, скорее всего, не сработает, то вам останется только вручную добавить пункт меню для Windows. Это не самое простое, но зато эффективное решение. Сначала нам нужно узнать UUID раздела диска, на который установлена Windows, например, /dev/sda1:
blkid /dev/sda1
Затем откройте файл /etc/grub.d/40_custom и добавьте туда такой код:
menuentry "Windows 10" {

insmod ntfs

set root='(hd0,1)'

search --no-floppy --fs-uuid --set B4A6AEB7A6AE7A0E

chainloader +1

}
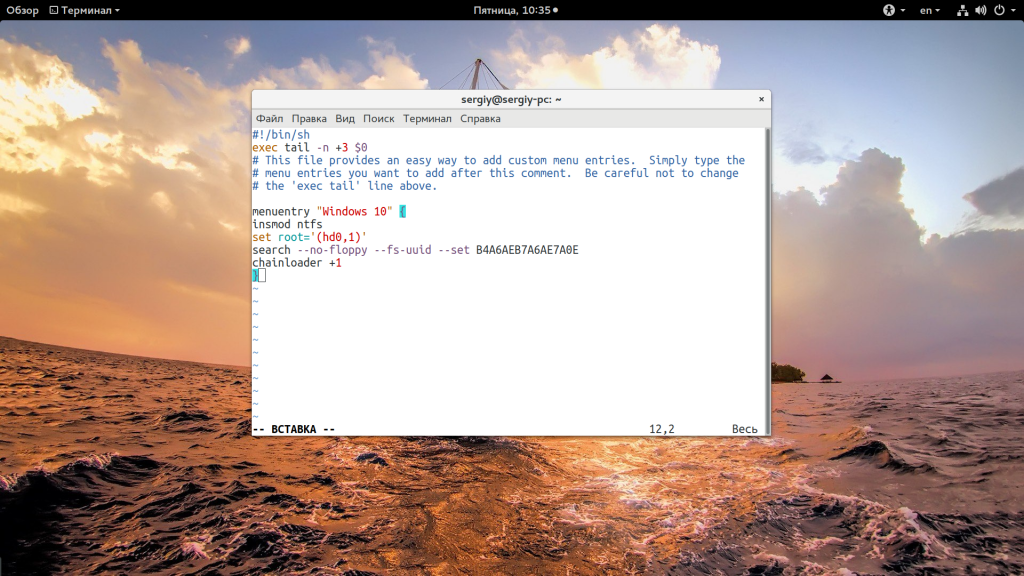
Если кратко, то здесь мы устанавливаем в качестве корня первый раздел первого диска, а затем указываем загрузчику, что нужно найти раздел с нужным нам UUID. Затем передаем управление загрузчику на этом разделе с помощью chainloader. Дальше осталось обновить конфигурацию Grub:
sudo update-grub
Мы использовали такой метод потому что теперь настройка не собьется после обновления ядра или другого процесса, инициализирующего обновление конфигурации. Потому что если бы мы добавили эти строки в /boot/grub/grub.cfg, то они были бы перезаписаны если не при первом, то при одном из следующих обновлений системы.
Когда конфигурация обновлена вы можете перезагрузить компьютер и загружать Windows с помощью нового пункта. Таким образом, можно добавить несколько пунктов, только для разных разделов нужно указывать их UUID.
Выводы
В этой небольшой статье мы разобрали что делать когда у вас возникнет ошибка grub не видит windows 10 и какими способами ее можно исправить. На самом деле решение очень простое, если вы не используете систему с UEFI. В варианте с EFI загрузка Windows управляется не Grub, а загрузчиком UEFI, но при использовании Linux рекомендуется отключить эту технологию.

Статья распространяется под лицензией Creative Commons ShareAlike 4.0 при копировании материала ссылка на источник обязательна .
Об авторе
![]()
Основатель и администратор сайта losst.ru, увлекаюсь открытым программным обеспечением и операционной системой Linux. В качестве основной ОС сейчас использую Ubuntu. Кроме Linux, интересуюсь всем, что связано с информационными технологиями и современной наукой.

Notes About Some Basics
-
General instruction from Arch wiki.
Dual boot with Windows – ArchWikiDual boot with Windows – ArchWiki Mind that there is no need to create an additional EFI System Partition, since it already exists (see above): when required, mount this to
/boot, install your bootloader to it and save the entry in
/etc/fstab. read more. -
Partitioning
Size and tools go to – here
-
Partition table types
If you are installing alongside an existing installation (i.e. dual-booting), a partition table will already be in use. If the devices are not partitioned, or the current partitions table or scheme needs to be changed, you will first have to determine the partition tables (one for each device) in use or to be used.
There are two types of partition table:
- GPT -gpt
- MBR -msdos
Any existing partition table can be identified with the following command for each device:
For GPT, you are looking for “Partition Table: GPT”. For EFI, you are looking for a small (512 MiB or less) partition with a vfat file system and the boot flag enabled. On it, there should be a directory named “EFI”. If these criteria are met, this is your ESP. Make note of the partition number. You will need to know which one it is, so you can mount it later on while installing GRUB to it.
-
Partitioning tools
For each device to be partitioned, a proper tool must be chosen according to the partition table to be used. Several partitioning tools are provided by the Arch installation medium, including:
parted GPT and MBR fdisk, cfdisk, sfdisk GPT and MBR gdisk, cgdisk, sgdisk GPT - INSTALL ARCHLINUX ON IDEAPAD Y700 some notes on ideapad Y700, http://mkeswani.blogspot.com/2015/12/install-archlinux-on-ideapad-y700.html
- Yet another tutorial with preinstalled windows 8 https://gist.github.com/miguelfrde/5dde43aa08b076106b9e
- Partition Type ID https://en.wikipedia.org/wiki/Partition_type#PID_83h 0x83 native to Linux
-
The best way to detect windows boot mode Most of the linux bootloaders installed for one firmware type cannot launch or chainload bootloaders of other firmware type.
http://www.eightforums.com/tutorials/29504-bios-mode-see-if-windows-boot-uefi-legacy-mode.html
- Boot into Windows
- Press Win key and ’R’ to start the Run dialog
- In the Run dialog type “msinfo32” and press Enter
- In the System Information windows, select System Summary on the left and check the value of BIOS mode item on the right
- If the value is UEFI, Windows boots in UEFI-GPT mode. If the value is Legacy, Windows boots in BIOS-MBR mode.
Prepare Preinstalled Windows
Shrink some space for Linux in Windows
- Make some space for Arch Linux in Windows
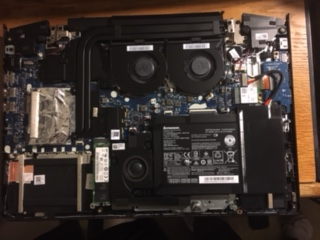
-
Win+R and type diskmgmt.msc and hit enter shrink one of the partitions. I also delete the two partitions for reserved for recovery. Want to put a new SSD HD in, I do not have the connecting cable and bracket for the moment.

- Make a bootable installation media for Arch Linux
-
This laptop doesn’t have any CD/DVD drive so the first thing is to make a bootable USB drive.
Boot into Windows 10. In Windows, download archlinux iso from the following website
www.archlinux.org/download
Use the mirror which is closest to you and download the dual iso. archlinux-2015.12.01-dual.iso
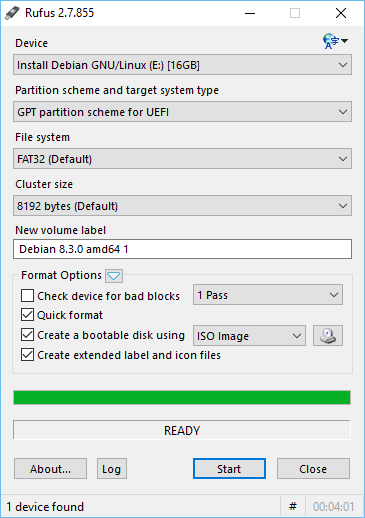
Download Rufus from the following location https://rufus.akeo.ie/
Plugin any usb drive/pendrive in your usb port. Make sure that you backup data from this usb drive
- Attach it to your computer
Turn off Windows fast boot and secure boot
- Shutdown Windows after disabling fast start following instruction here or here. And use the command shutdown -s -t 0 to do so.
-
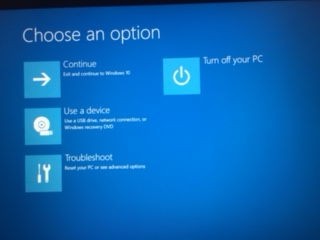
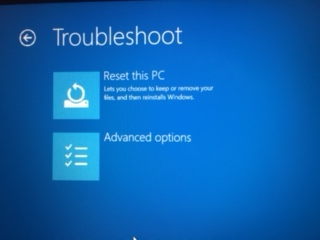
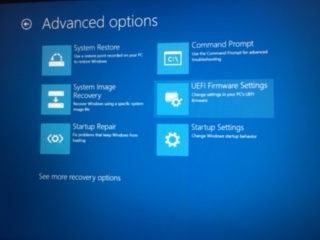
Restart windows by clicking on Power -> Restart. Make sure that when hitting restart, you are press down Shift key Windows will give you options for Troubleshoot/Adanced Options/UEFI Firmware/
-
Once you restart your machine you should be able to see the BIOS settings.
Under Configuration you should disable Intel Fast boot, disable SecureBoot (more here). Make sure you change the settings for Graphics from Switchable to Internal. This is needed only to install, you can then modify it later. Save the changes and exit.
-
-
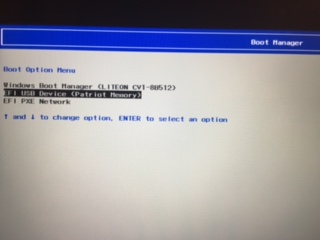
Once the machine restarts press and hold F12 key.
This will give you option to boot from various available devices and your USB drive would be one of them
- Select your USB drive to boot
-
Select the UEFI boot mode when you see the ArchLinux boot screen.
Once the usb has booted you will see the root prompt.
Partition HD with Live CD
Load keyboard layout
$ loadkeys la-latin1
Connect to the internet (Wi-Fi)
|
rfkill unblock wifi # I need to do this for Lenovo Ideapad $ iw dev # Get the interface name $ wifi—menu <wifi_interface_name> ping google.com # check internet |
Creat Partitions for boot, swap and root
- Boot into Arch Linux Installation media in UEFI Mode.
-
Create three partitions in that empty space: (a) boot 200MB (b) Swap 8GB (c) Root Partition
1
2
3
4
5
6
7
8
9
10
11
12
13
14
15
16
17
18
19
20
21
gdisk /dev/sda
n #Wanna create new partition!
#Hit enter, don’t care about partition number
#Hit enter, automatically first sector will be starting of unallocated space
+200MB #Specify the size of the boot partition
8300 #Hex code for the Linux boot partition.
n #Wanna create new partition!
#Hit enter, don’t care about partition number
#Hit enter, automatically first sector will be starting of unallocated space
+8GB #Specify the size of the swap partition
8300 #Hex code for the Linux boot partition.
n #Wanna create new partition!
#Hit enter, don’t care about partition number
#Hit enter, automatically first sector will be starting of unallocated space
#Hit enter, automatically take the rest of space
8300 #Hex code for the Linux boot partition.
w #Write changes to disk
Y #Confirm!
Type gdisk —l /dev/sda to find out the partition number of the
swap partition. In my case, it is 5.
The final partition table in my case:
$ lsblk
NAME MAJ:MIN RM SIZE RO TYPE MOUNTPOINT
sda 8:0 0 477G 0 disk
├─sda1 8:1 0 260M 0 part /boot/efi
├─sda2 8:2 0 16M 0 part
├─sda3 8:3 0 234.2G 0 part
├─sda4 8:4 0 200M 0 part /boot
├─sda5 8:5 0 8G 0 part [SWAP]
├─sda6 8:6 0 187.1G 0 part
│ └─cryptroot 254:0 0 187.1G 0 crypt /
├─sda7 8:7 0 25G 0 part
├─sda8 8:8 0 1000M 0 part
├─sda9 8:9 0 20.2G 0 part
└─sda10 8:10 0 1000M 0 part
Encrypt the root partition with LUKS Link
Preparing the disk
chech the info about dm-crypt module
dm-cryptwipe on an empty disk or partition
First, create a temporary encrypted container on the partition (sdXY) or the full disk (sdX) you want to encrypt, e.g. using default encryption parameters and a random key via the –key-file /dev/{u}random option (see also Random number generation):
|
# cryptsetup open —type plain /dev/sdXY container —key-file /dev/random |
Second, check it exists
|
# fdisk -l ————————————————— Disk /dev/mapper/container: 1000 MB, 1000277504 bytes ... Disk /dev/mapper/container does not contain a valid partition table |
Finally, wipe it with pseudorandom (because encrypted) data. A use of if=/dev/urandom is not required as the encryption cipher is used for randomness.
|
# dd if=/dev/zero of=/dev/mapper/container status=progress // dd: writing to ‘/dev/mapper/container’: No space left on device |
Preparing non-boot partitions
The following commands create and mount the encrypted root partition. They correspond to the procedure described in detail in Dm-crypt/Encrypting a non-root file system#Partition (which, despite the title, can be applied to root partitions, as long as mkinitcpio and the boot loader are correctly configured). If you want to use particular non-default encryption options (e.g. cipher, key length), see the encryption options before executing the first command:
|
# cryptsetup -y -v luksFormat /dev/sdaX # cryptsetup open /dev/sdaX cryptroot # mkfs -t ext4 -L «Arch Linux» /dev/mapper/cryptroot #or, mkfs.ext4 # mount -t ext4 /dev/mapper/cryptroot /mnt |
Type
gdisk —l /dev/sda to find out the partition number of the newly created partition and EFI partition.
Check the mapping works as intended:
|
# umount /mnt # cryptsetup close cryptroot # cryptsetup open /dev/sdaX cryptroot # mount -t ext4 /dev/mapper/cryptroot /mnt |
If you created separate partitions (e.g. /home), these steps have to be adapted and repeated for all of them, except for /boot. See Dm-crypt/Encrypting a non-root file system#Automated unlocking and mounting on how to handle additional partitions at boot.
Note that each blockdevice requires its own passphrase. This may be inconvenient, because it results in a separate passphrase to be input during boot. An alternative is to use a keyfile stored in the system partition to unlock the separate partition via crypttab. See Dm-crypt/Device encryption#Using LUKS to Format Partitions with a Keyfile for instructions.
Prepare Swap partition
|
mkswap —L «Linux Swap» /dev/sda5 #Linux Swap is the label swapon /dev/sda5 #Turn on swap! free —m #Last line will confirm whether swap space has been turned on or not. |
Preparing the boot partition
What you do have to setup is a non-encrypted /boot partition, which is needed for a crypted root. For a standard MBR/non-EFI /boot partition, for example, execute:
|
# mkfs -t ext4 /dev/sdaY # mkdir /mnt/boot # mount -t ext4 /dev/sdaY /mnt/boot |
Find and mount the efi partition to /mnt/boot/efi
|
mkdir —p /mnt/boot/efi #Type gdisk -l to figure out the partition number of the existing EFI partition for MS Windows. mount /dev/sda1 /mnt/boot/efi |
If you want to encrypt boot partition (with GRUB), see here; I did not do it.
Format the partition into filesystems.
-
Mount the partition in which Arch Linux files will be present to /mnt
mount /dev/mapper/cryptroot /mnt
-
Use pacstrap to initialize the Arch Installation If you are behind a proxy server, type: export http_proxy=http://proxy_ip_or_domain:proxy_port
pacstrap /mnt base <base—devel>
-
mount EFI partition
mkdir —p /mnt/boot/efi
mount /dev/sda1 /mnt/boot/efi
-
Generate the fstab, so that required partitions are mounted on reboot.
genfstab —U —p /mnt >> /mnt/etc/fstab
-
Make sure that
/boot and
/boot/efi are listed; add them manually if not.nano /mnt/etc/fstab
——————————————————————————
# /dev/mapper/cryptboot LABEL=Arch134x20Linux
UUID=1de833a9—36b8—4bab—91d6—65360080e71c / ext4 rw,relatime,data=ordered 0 1
# /dev/sda4
UUID=bd82cb16—7b65—4d39—bcca—186edd33bddd /boot ext4 rw,relatime,data=ordered 0 2
# /dev/sda1 LABEL=SYSTEM_DRV
UUID=4606—2DA8 /boot/efi vfat rw,relatime,fmask=0022,dmask=0022,codepage=437,ioc ...
# /dev/sda5 LABEL=Linux134x20Swap
UUID=3c8c0892—f275—485f—9ea5—4f87f34d4e76 none swap defaults 0 0
use the following to retrieve UUID:
ls —l /dev/disk/by—uuid/
————————————————————
lrwxrwxrwx 1 root root 10 May 4 21:57 0C5E30345E3018C2 -> ../../sda6
lrwxrwxrwx 1 root root 10 May 4 21:46 12429E3A429E2311 -> ../../sdb3
lrwxrwxrwx 1 root root 10 May 4 21:57 12A013A6A0138F7B -> ../../sda5
lrwxrwxrwx 1 root root 11 May 4 21:57 1de833a9—36b8—4bab—91d6—65360080e71c -> ../../sda10
lrwxrwxrwx 1 root root 10 May 4 21:57 3c8c0892—f275—485f—9ea5—4f87f34d4e76 -> ../../sda9
lrwxrwxrwx 1 root root 10 May 4 21:57 4606—2DA8 -> ../../sda1
...
How to change LUKS passphrase
The followings are adapted from here.
In LUKS scheme, you have 8 “slots” for passwords or key files. First, check, which of them are used:
|
cryptsetup luksDump /dev/<device> |grep BLED |
Then you can add, change or delete chosen keys:
|
cryptsetup luksAddKey /dev/<device> (/path/to/<additionalkeyfile>) cryptsetup luksChangeKey /dev/<device> —S 6 |
As for deleting keys, you have 2 options:
-
delete any key that matches your entered password:
cryptsetup luksRemoveKey /dev/<device>
-
delete a key in specified slot:
cryptsetup luksKillSlot /dev/<device> 6
Arch and Grub Installation after chroot in.
-
chroot into the arch installation (from live CD).
arch—chroot /mnt [/bin/bash]
-
Configure timezone, generate initial RAM disk. #Chang password for root user
passwd
ln —s /usr/share/zoneinfo/America/Los_Angeles /etc/localtime
-
Install the bootloader – grub.
Install the packages grub and efibootmgr. GRUB is the bootloader, efibootmgr creates bootable .efi stub entries used by the GRUB installation script.
pacman —Syu grub efibootmgr [dosfstools]
Generate the main configuration file
-
Make sure all partitions are mounted, i.e.
/
/boot
/boot/efi1
2
3
4
5
6
7
8
9
10
11
12
13
14
15
16
17
mount —a
lsblk
——————————————————————————
NAME MAJ:MIN RM SIZE RO TYPE MOUNTPOINT
sda 8:0 0 477G 0 disk
├─sda1 8:1 0 260M 0 part /boot/efi
├─sda2 8:2 0 16M 0 part
├─sda3 8:3 0 234.2G 0 part
├─sda4 8:4 0 25G 0 part
├─sda5 8:5 0 1000M 0 part
├─sda6 8:6 0 20.2G 0 part
├─sda7 8:7 0 1000M 0 part
├─sda8 8:8 0 200M 0 part /boot
├─sda9 8:9 0 8G 0 part [SWAP]
└─sda10 8:10 0 187.1G 0 part
└─cryptroot 254:0 0 187.1G 0 crypt /
-
Intial Ramdisk Environment
Add the encrypt hook to mkinitcpio.conf: link here
etc/mkinitcpio.conf
HOOKS=«… encrypt … filesystems …»
-
update /etc/default/grub
GRUB_CMDLINE_LINUX_DEFAULT=«i915.preliminary_hw_support=1»
GRUB_ENABLE_CRYPTODISK=y
GRUB_CMDLINE_LINUX=«cryptdevice=UUID=1de833a9—36b8—4bab—91d6—65360080e71c:cryptroot root=/dev$
- install os-prober, only detect the correct Windows boot after boot into Linux, not from chroot with live CD.
-
configure grub
The following steps install the GRUB UEFI application to $esp/EFI/grub, install its modules to /boot/grub/x86_64-efi, and place the bootable grubx64.efi stub in $esp/EFI/grub.
First, tell GRUB to use UEFI, set the boot directory and set the bootloader ID. Mount the ESP partition to e.g. /boot or /boot/efi and in the following change $esp to that mount point (usually /boot):
# grub-install —target=x86_64-efi —efi-directory=/boot/efi —bootloader-id=grub
The –bootloader-id is what appears in the boot options to identify the GRUB EFI boot option; make sure this is something you will recognize later. The install will create a directory of the same name under $esp/EFI/ where the EFI binary bootloader will be placed.
grub—mkconfig —o /boot/grub/grub.cfg #Generate initial grub config.
Now, let’s add Windows to the GRUB menu. Edit /boot/efi/EFI/grub/grub.cfg and add the following menuentry after the Arch Linux menuentries [Note: grub boot loader does not locate Windows OS, but this is necessary for grub to load Arch Linux in my case. After I boot into arch linux, I ran
sudo os—prober and update grub config.] See here for details.if [ «${grub_platform}» == «efi» ]; then
menuentry «Microsoft Windows Vista/7/8/10 UEFI-GPT» {
insmod part_gpt
insmod fat
insmod search_fs_uuid
insmod chain
search —fs—uuid —set=root $hints_string $fs_uuid
chainloader /EFI/Microsoft/Boot/bootmgfw.efi
}
fi
and update the string with following output:
$latex hints_string with the output of
$ grub—probe –target=fs_uuid /boot/efi/EFI/Microsoft/Boot/bootmgfw.efi
$latex fs_uuid with the output of
$ grub—probe –target=hints_string /boot/efi/EFI/Microsoft/Boot/bootmgfw.efi
Unmount and Reboot
Finish Up Arch Linux Installation
- Install the desktop environment, display manager, and vim and xterm. packman -Syu gnome-desktop xterm vim gnome-display-manager systemctl enable gdm #Start gdm on boot
- Create a new user and add him to the group wheel. useradd -G wheel -s /bin/bash -m -c “Nehal J Wani” wani passwd wani
- Reboot into Arch Linux
-
Install os-prober. Regenerate grub configuration. Reboot.
pacman —Syu os—prober
sudo os—prober
#/dev/sda1@/EFI/Microsoft/Boot/bootmgfw.efi:Windows Boot Manager:Windows:efi
grub—mkconfig —o /boot/grub/grub.cfg
Done! Now you can choose between Windows and Arch Linux at the start. Yay!
Install Arch Linux
-
Retrieve package list from another system To create a list of all official repository installed packages do:
$ pacman —Qqe | grep —v «$(pacman -Qqm)» > /mnt/backup/pkglist—off.txt
To create a list of all local installed packages do (includes packages installed from the AUR):
$ pacman —Qqm > /mnt/backup/pkglist—loc.txt
-
install package in new system To reinstall packages using the backup package list:
pacman —needed —S — < /mnt/backup/pkglist—off.txt
#use pacaur or yaourt for local packages
- Restore configuration with instruction here (use rsync with -a to mantain symlinks).
-
install python modules
pip freeze > pipfile #populate list
pip install —r pipfile
-
install node.js modules
npm list —g —depth=0 >npm #or
ls `npm root —g` >npm—global
-
The new system
Some further tweaks
Wifi fix
|
modprobe –rfv ideapad_laptop #needed for internet connection |
Next is to make sure that we unblock hw killed wifi due to the above module
|
rfkill –list rfkill unblock all modprobe –rfv iwlmvm modprobe —fv iwlmvm wifi—menu |
/etc/modprobe.d/blacklist.conf
|
Add the following lines blacklist ideapad_laptop blacklist nouveau |
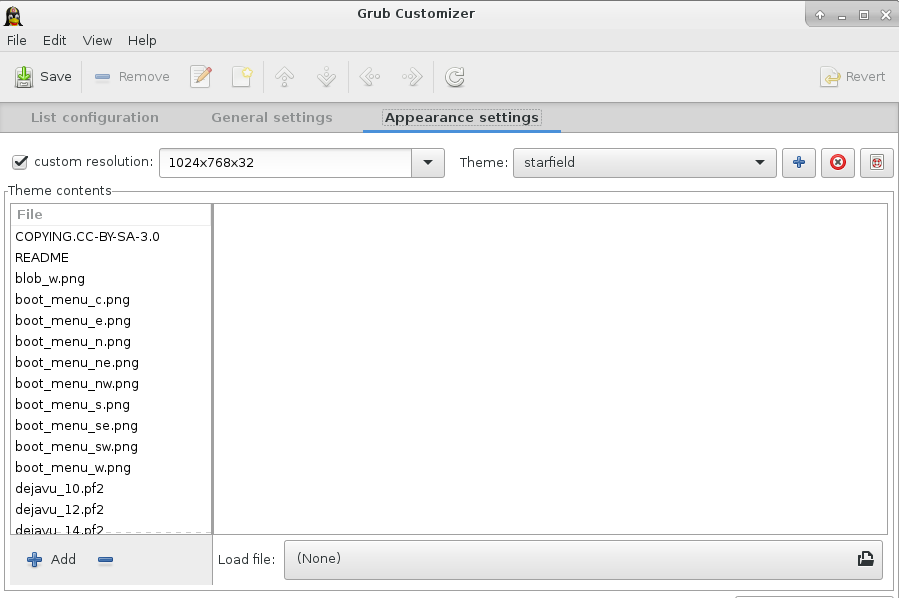
Customize Grub
install
grub—customizer with pacman, and customize grub loader
starfield theme is chosen here.
Bumblebee Switch the Graphics Card
Bluetooth
Encrypting a non-root file system
You can encrypt a secondary filesystem from a partition to protect only sensitive data. The following shows how to create a common partition for all user’s /home directories.
-
First, make sure the partition is empty (has no file system attached to it). Delete the partition and create an empty one if it has a file system.
Create the partition which will contain the encrypted container.
-
Then setup the LUKS header with the following:
# cryptsetup options luksFormat device
Replace
device with the previously created partition.To gain access to the encrypted partition, unlock it with the device mapper, using:
# cryptsetup open device name
After unlocking the partition, it will be available at
/dev/mapper/name. Now create a file system of your choice with:# mkfs.fstype /dev/mapper/name
- Mount the file system to
/home, or if it should be accessible to only one user to
/home/username Tip: Unmount and mount once to verify that the mapping is working as intended. -
To mount the partition manually:
# cryptsetup open device name
# mount -t fstype /dev/mapper/name /mnt/home
-
To unmount it manually:
# umount /mnt/home
# cryptsetup close name
Mount at boot automatically
-
generate key file
# cryptsetup luksAddKey /dev/<device> -S 6
Enter any passphrase:
Enter new passphrase for key slot:
Verify passphrase:
-
create crypttab If the keyfile for a secondary file system is itself stored inside an encrypted root, it is safe while the system is powered off and can be sourced to automatically unlock the mount during with boot via
crypttab. For example, unlock a crypt specified by UUID:/etc/crypttab
home—crypt UUID=UUID—identifier /etc/mykeyfile
-
then add it to fstab Then use the device mapper’s name (defined in
/etc/crypttab) to make an entry in
/etc/fstab:/etc/fstab
/dev/mapper/home—crypt /home ext4 defaults 0 2
2
MAR
In this guide, you will learn how to Dual boot Arch Linux with Windows 10 on UEFI system. This guide assumes that you already have Windows 10 installed on your system.
Prerequisites
Before you begin configuring the dual-boot setup, ensure that the following requirements are met:
- A bootable installation medium of Arch Linux (Either USB or DVD). To download the latest Arch Linux ISO, proceed to the official Arch Linux download page. Once you have downloaded the ISO image, grab an 8GB USB drive and make it bootable using Rufus tool or any other application that can create a bootable USB drive.
- A fast and stable internet connection for downloading and installing software packages.
Step 1) Create a separate partition for installation of Arch Linux
For the dual boot setup to work, we need to create a separate partition on the hard drive on which Arch Linux will be installed. To do so, head over to the disk management utility by pressing Windows Key + R. In the dialogue box, type diskmgmt.msc and hit ENTER.
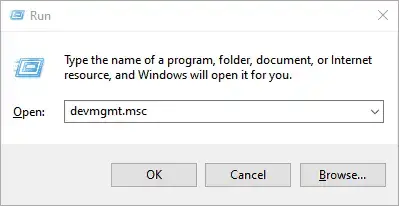
This launches the disk management utility displaying the various disk partitions on your hard drive. We are going to create an unallocated partition by shrinking the C drive. If you have a bigger partition than the C drive, feel free to use it for creating the separate partition,
So, we are going to right-click on drive C and select the ‘Shrink Volume’ option as shown
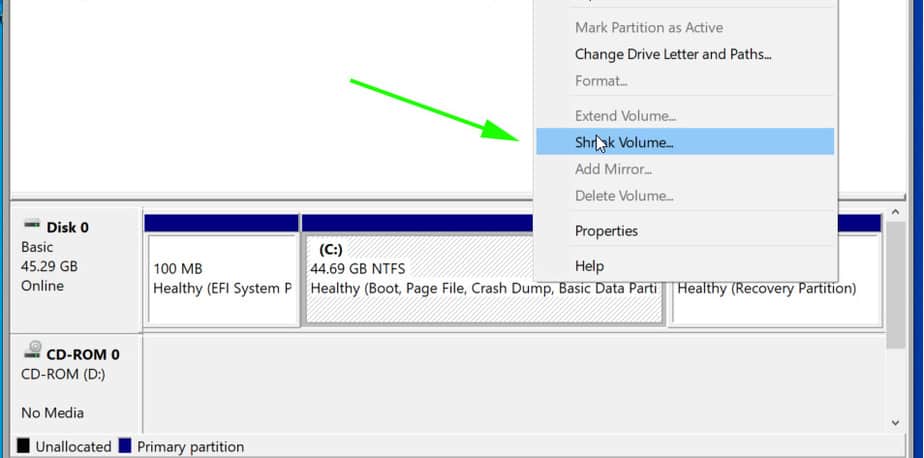
On the pop-up dialogue box that appears, we are going to specify the amount to shrink as shown. This is the amount that will be designated for the installation of Arch Linux. In our example, we have shrunk 20 GB of hard disk space will serve as the unallocated space.
Once you are satisfied, click on the ‘Shrink’ button.

Your unallocated space will be indicated as shown below. In our case, we have set aside approximately 20G for the installation of Arch Linux.
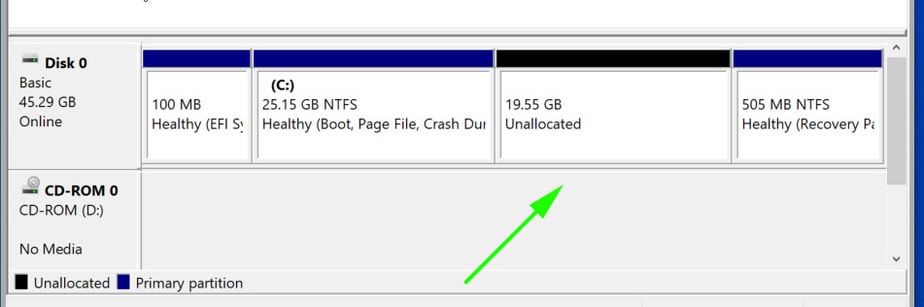
With the unallocated partition in place, plug in your bootable USB and reboot your PC.
Step 2) Configure BIOS to boot from bootable medium
Before you begin with the installation process, it’s prudent to set the boot priority in the BIOS to select your bootable medium as the most preferred option. Depending on your vendor, you can press the Esc, or F10 key to enter the BIOS and navigate to the boot priority Menu.
Also note that we are using the UEFI mode for installation.

Once you have selected your boot medium, press the ESC button to continue with the booting process.
Step 3) Begin the installation of Arch Linux
On the bootup screen, you will be presented with options as shown below. Select the first option – Arch Linux install medium (x86_64, UEFI) and hit ENTER.
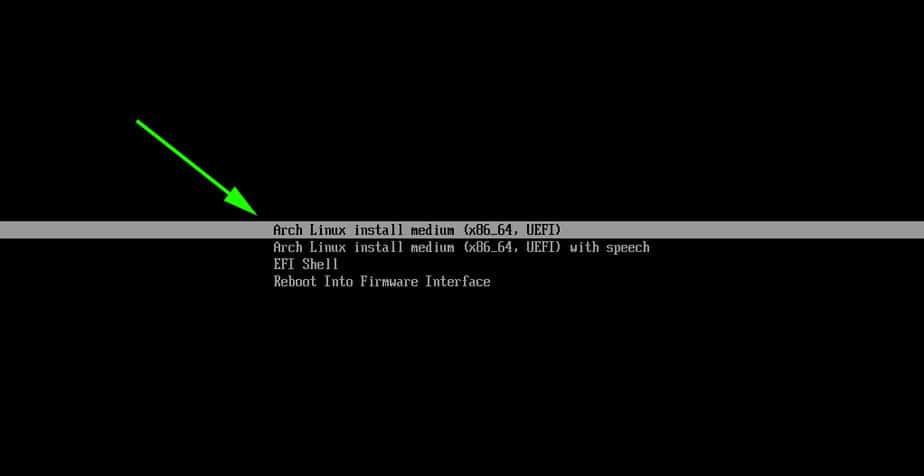
This initialize Arch Linux as evidenced by the boot messages on the screen.
After a few seconds, this ushers you to the prompt as shown below.

To confirm that you have EFI support, run the command:
# ls /sys/firmware/efi/efivars
You should get some entries on the screen as shown. If nothing is listed on your screen, then it means you are using MBR and this guide won’t work for you in configuring up a dual boot setup.
As you begin the installation, you might want to ensure that you have internet connectivity. Internet connectivity is crucial in setting time and date.
You can ping Google’s DNS as shown:
# ping 8.8.8.8 -c 4
You should get a positive reply as shown.
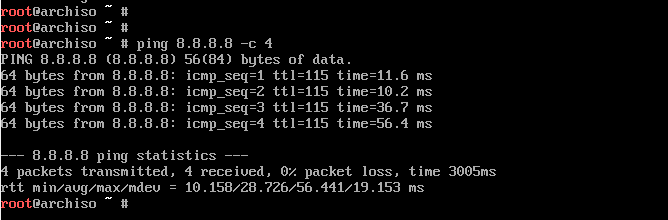
Step 4) Update time and date
Next, we are going to update the system time and date using the timedatectl command as shown.
# timedatectl set-ntp true
You can thereafter confirm the time and date using the command
# timedatectl status
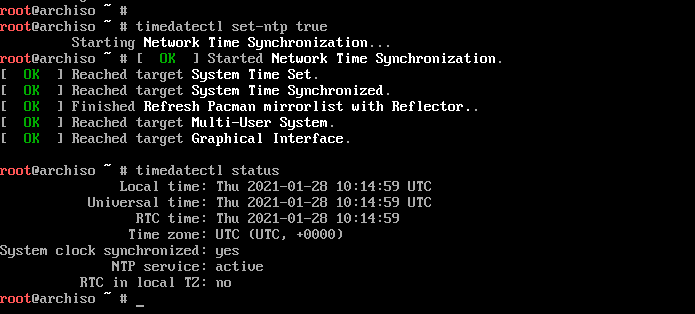
Step 5) Create & format Linux partitions
Next, we are going to partition our hard drive and create some Linux partitions. An easy way of doing this is using the cfdisk utility. Run the command:
# cfdisk
This displays all the partitions available including Windows partitions.
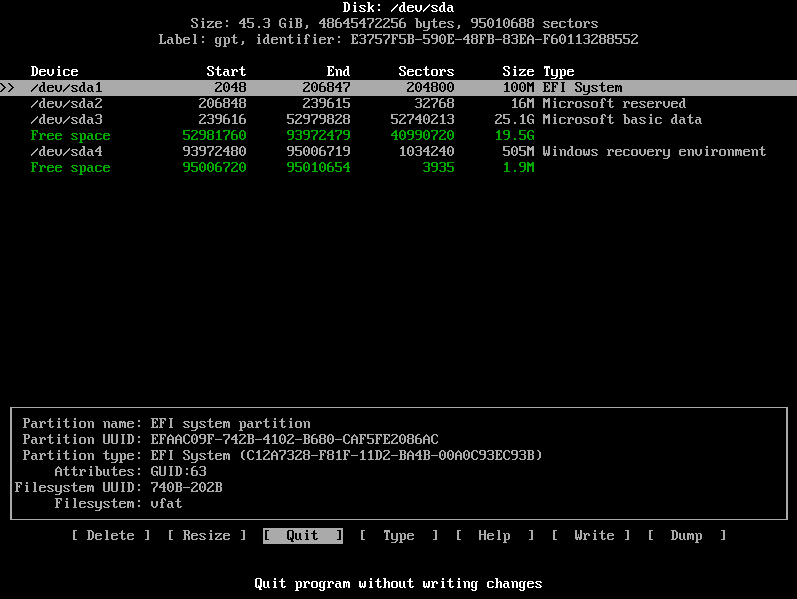
As you can see, we have some free space of 19.5G that we created earlier in step 1 from shrinking drive C on the Windows side. Using this partition, we shall create the following Linux partitions :
- Root partition / 12G
- swap partition 4G
To achieve this, we will navigate to the free space with 19.5G just after /dev/sda3 volume and hit ENTER. We will then specify the volume as 12G for the root partition as shown below. Then hit ENTER.
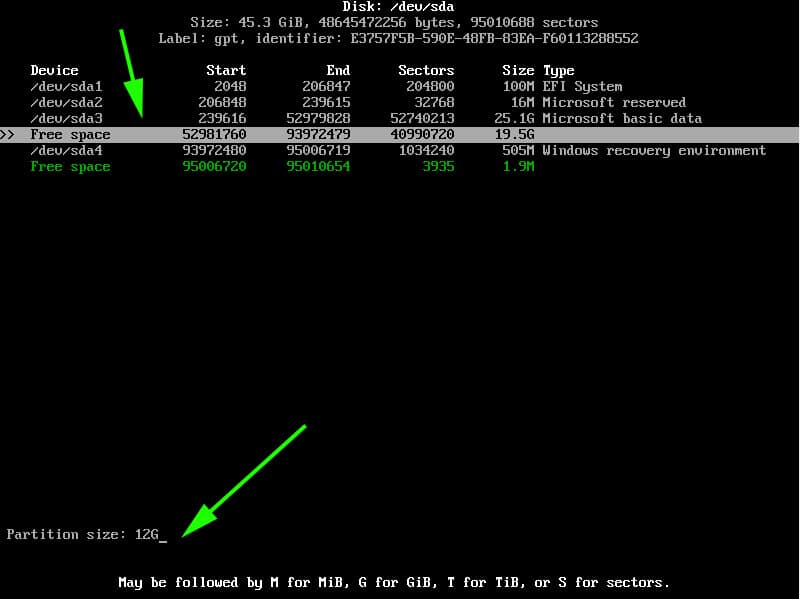
The root partition will be created with the Linux filesystem type as shown.
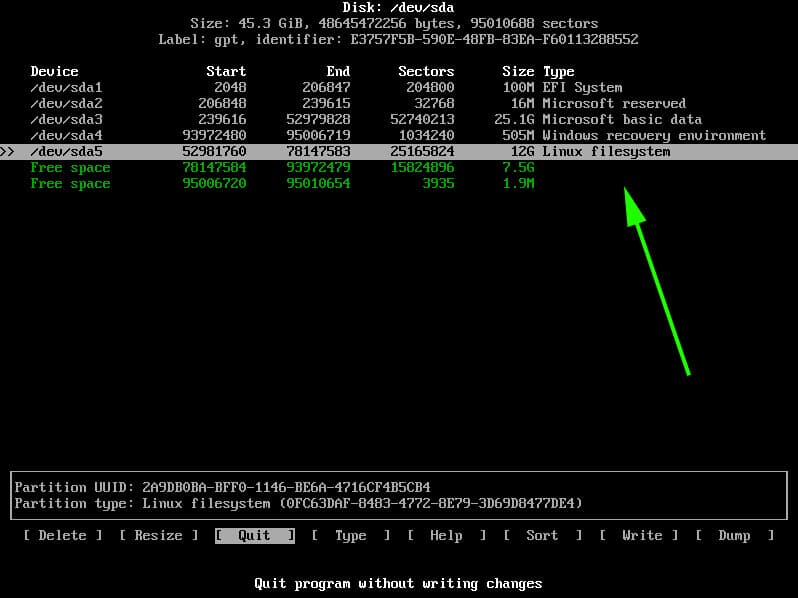
Next, we will create another partition for swap. Using the same method, we will proceed to the remaining free partition of 7G and select the ‘New’ option.
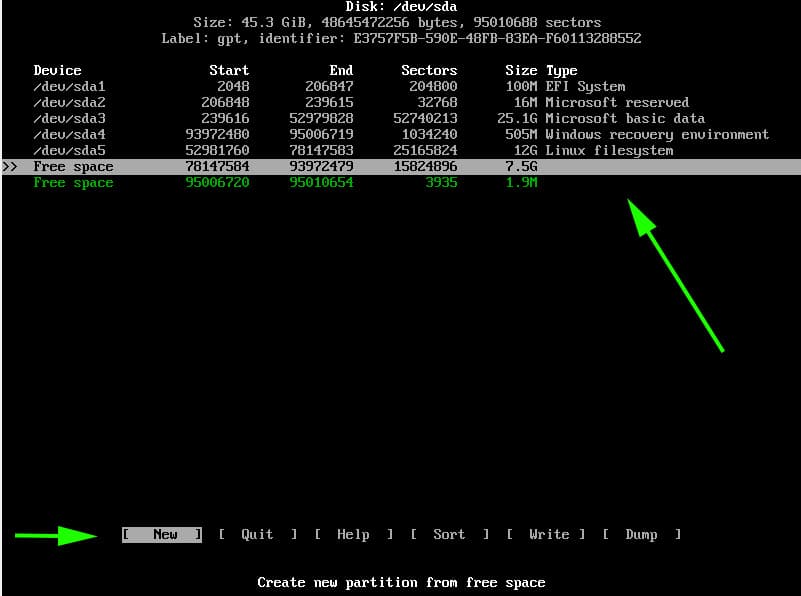
Specify the partition size as 4G
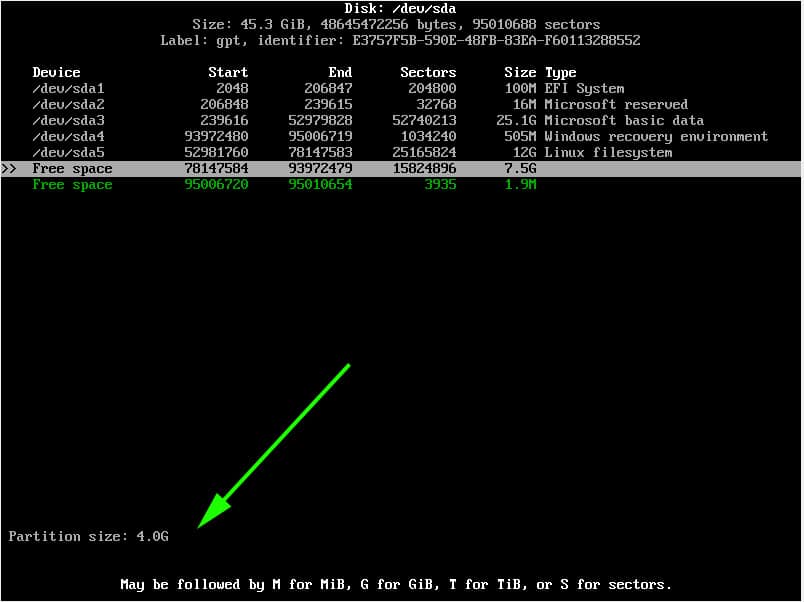
Since this will be our swap partition, we need to go the extra step and modify the partition type. Therefore, we will select the ‘type’ option and hit ENTER.
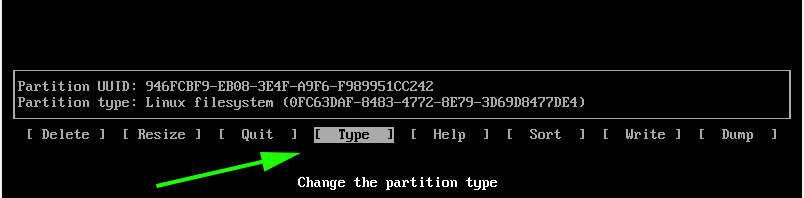
In the list that appears, select ‘Linux Swap’ and hit ENTER.
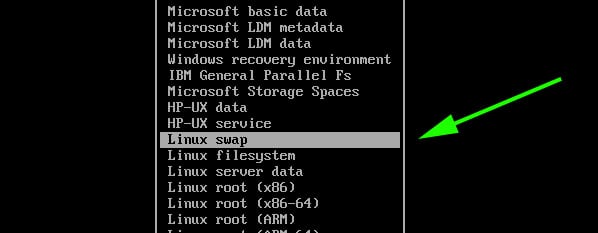
At this point, both the root and Linux swap partitions are created as seen from the partition table below.
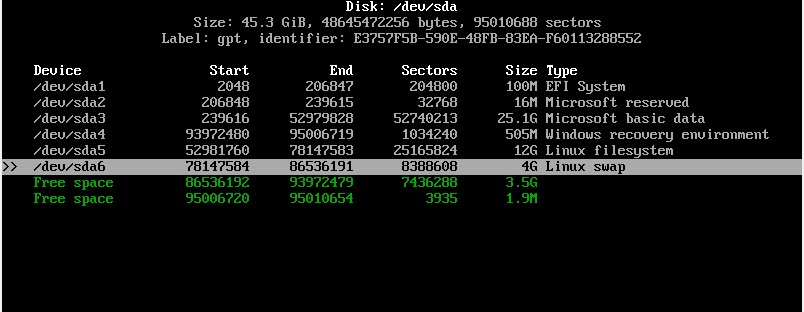
To save the partitions, select the ‘Write’ option and hit ENTER.
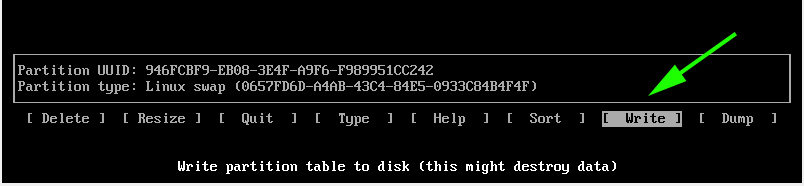
When prompted if you want to write the partition to disk, simply type ‘yes’ and hit ENTER.
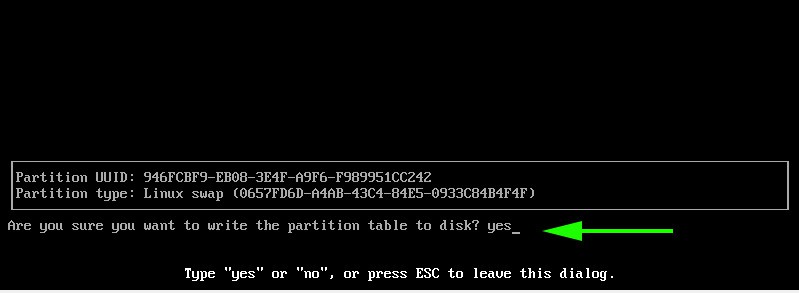
To exit cfdisk utility, select the ‘Quit’ option and hit ENTER.
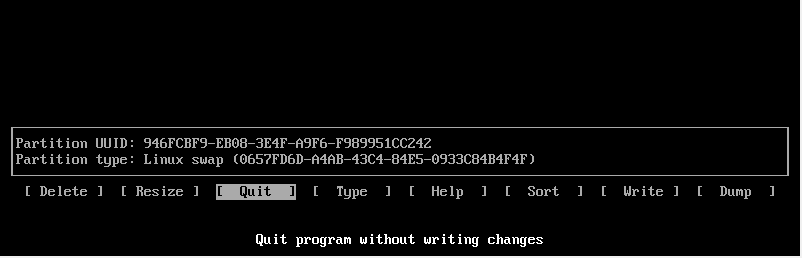
Step 6) Format and mount the partitions
For the partitions to become usable and available for use, we need to format them and later mount them.
To format the root partition, run the command:
# mkfs.ext4 /dev/sda5
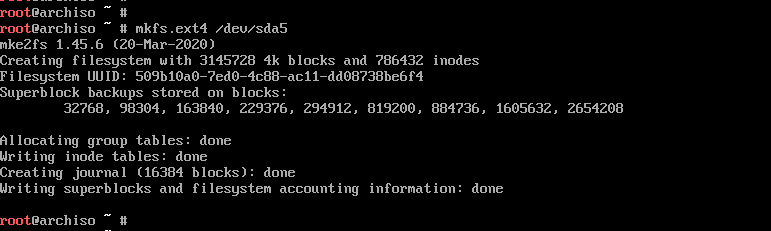
For swap partition, use the command:
# mkswap /dev/sda6
Then enable swap using the swapon command shown:
# swapon /dev/sda6
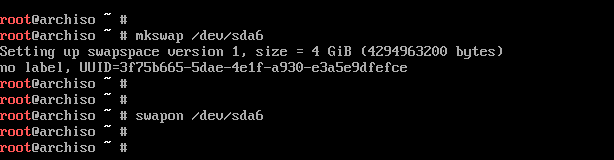
Next, mount the root partition to the /mnt directory
# mount /dev/sda5 /mnt
Additionally, we are going to create a directory for the EFI partition on which we will mount the Windows EFI system which , in our case is located on the /dev/sda1 partition.
# mkdir /mnt/efi
Then mount the EFI partition on the EFI mount point.
# mount /dev/sda1 /mnt/efi

Step 7) Install base system and other required Linux firmware packages
Next, we are going to install the central packages for our Linux system including the base and Linux-firmware packages.
# pacstrap /mnt base linux linux-firmware

This is going to take quite some time. At this point, you can take a much-deserved break and head out for a stroll and grab some coffee. When the installation is successful, you should get the following output.
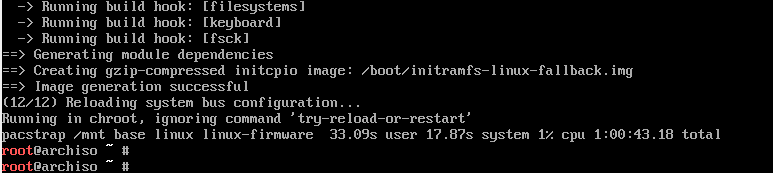
Step Generate fstab file
 Generate fstab file
The next step will be to generate the fstab file on the /mnt directory as follows.
# genfstab -U /mnt >> /mnt/etc/fstab
Step 9) Setup timezone
After generating the ftab file, navigate to the newly created root filesystem
# arch-chroot /mnt
You can verify that you are in the root filesystem using the command as shown.
# ls
Time zone information is found in the /usr/share/zoneinfo/ directory. To set your timezone, create a symbolic link to the /etc/localtime
Path.
# ln -sf /usr/share/zoneinfo/US/Pacific /etc/localtime
Next, sync the hardware clock using the command:
# hwclock --systohc
Step 10) Set up locale
The locale determines the system language, currency format, numbering and date on your system. This information is contained in the /etc/locale.gen file. So, open the file using the vim editor.
# vim /etc/locale.gen
NOTE: To install the vim editor, use the pacman command as follows:
# pacman -Sy vim
Once you have accessed the file, scroll and uncomment your preferred locale. In this case, we have decided to go with en_US.UTF-8 UTF-8
Save and exit the file. Next generate the locale configuration using the command.
# locale-gen
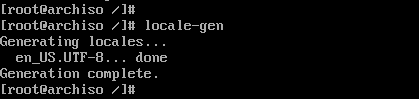
Next, create a new locale configuration file and save the locale as shown.
# echo "LANG=EN_US.UTF-8" > /etc/locale.conf
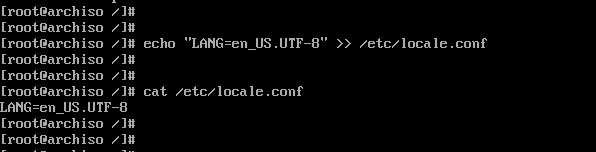
Step 11) Set up hostname
Next, we are going to configure the hostname of our Arch System. First, create a new file and specify the hostname as shown.
# echo linuxtechi > /etc/hostname

Afterwards, modify the /etc/hosts file as follows.
# echo "127.0.1.1 linuxtechi" >> /etc/hosts
Step 12) Install netctl Network Manager
To use the internet once the installation is complete and upon a reboot, we need to install a network manager. In this example we wil install the netctl network manager as follows
# pacman -Sy netctl
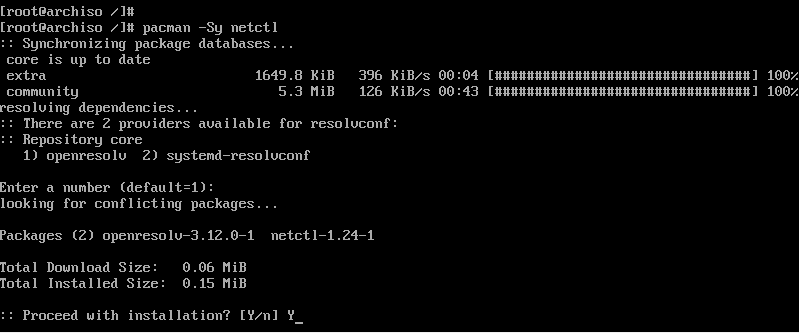
During the installation some optional dependencies for netctl are listed. We are going to install the following dependencies. These are:
- dhcpcd – For DHCP support
- wpa-supplicant – For wireless networking
- ifplugd – For wired connections networking
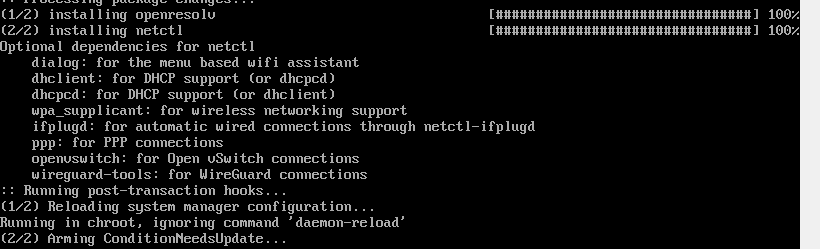
These dependencies will help you set up networking without a problem when you next boot in to Arch Linux.
To install the optional dependencies, run the command below:
# pacman -Sy dhcpcd wpa-supplicant ifplugd
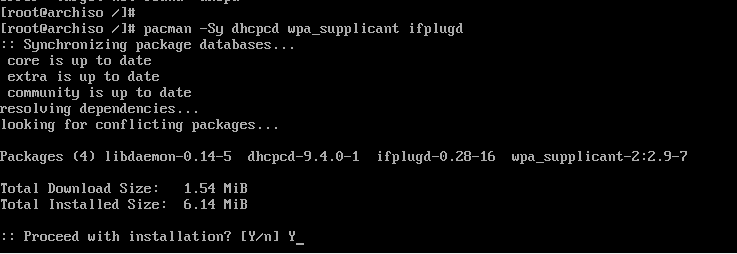
Step 13) Create a regular user
Next, we will create a regular user called linuxtechi and place him in the wheel group as follows.
# useradd -G wheel -m linuxtechi
The next step will be to assign a password to the user.
# passwd linuxtechi
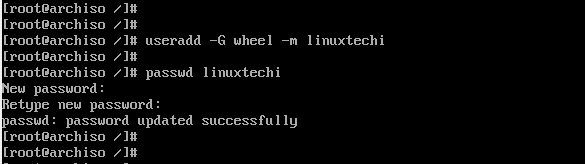
Step 14) Install GRUB bootloader
We are getting close to the finish line. In this step, we will install the grub bootloader to enable us boot into our Arch Linux system upon a reboot.
We will install the grub bootloader package alongside the efi boot manager package since we are using the UEFI mode.
# pacman -S grub efibootmgr
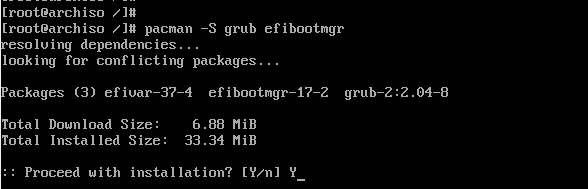
Next, install the os-prober package which will enable Arch Linux to detect the Windows operating system.
# pacman -S os-prober

Then install grub on the EFI directory as shown.
# grub-install --target=x86_64-efi --efi-directory=/efi --bootloader-id=GRUB

And install a grub configuration file as shown.
# grub-mkconfig -o /boot/grub/grub.cfg
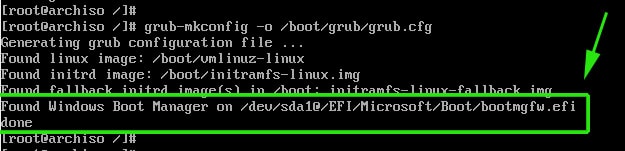
The last line is an indication that Arch has detected the presence of Windows Boot manager on /dev/sda1 partition. Perfect!
The finally, set a password for the root user as shown.
# passwd
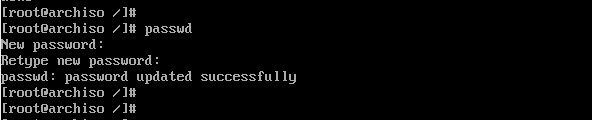
Then exit and reboot your system.
# exit
# reboot
Step 15) Boot into Arch Linux
When booting, the GRUB bootloader will display various options including booting into Arch Linux, which is the first option, and also booting into Windows which is the last option in my case.
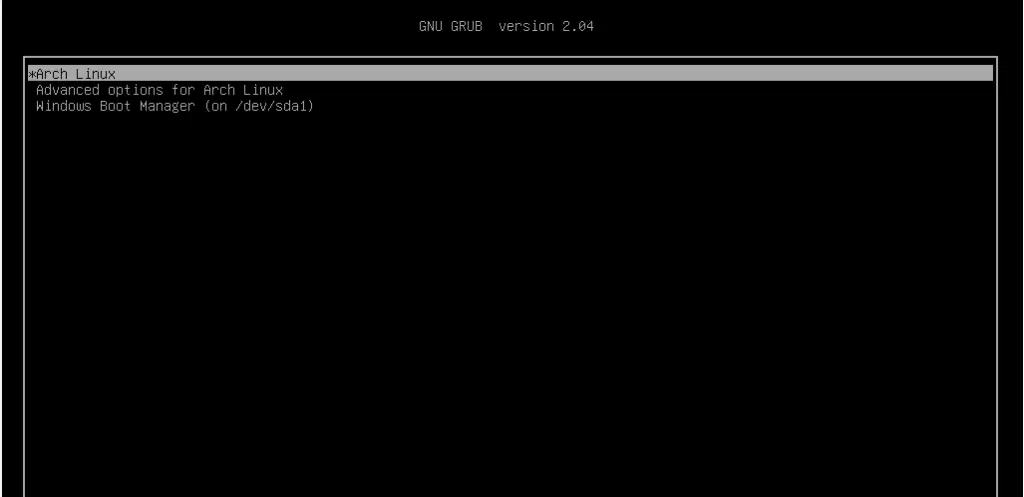
Log in as your regular user as shown

Step 16) Post Installation tasks
One of the things I noted when I logged in is that I do not have any internet connection. This is an issue caused by the default dhcp profile settings which need to be modified to accommodate the network interface attached to the Arch Linux system.
To find the interfaces attached run the command:
$ ip link
The output confirms that our network interface is enp0s3
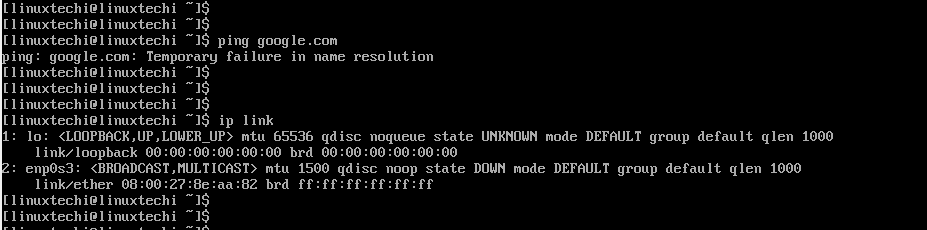
We need to modify the ethernet-dhcp file in the /etc/netctl/examples/ path and edit out network interface.
But first, lets copy the file to the /etc/netctl directory.
Switch to the root user
# su
Copy the ethernet-dhcp file to the /etc/netctl directory.
# cp /etc/netctl/examples/ethernet-dhcp /etc/netctl/custom-dhcp-profile
Next, navigate to the /etc/netctl directory.
# cd /etc/netctl
Use the vim editor to edit the file.
# vim custom-dhcp-profile
The interface attribute is set to eth0.
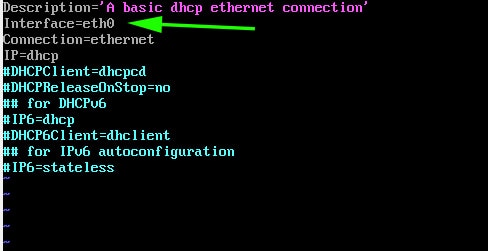
However, as we saw earlier, our network interface is enp0s3. Therefore, modify it to enp0s3. Additionally, uncomment the line starting with the DHCPClient parameter.
DHCPClient=dhcpcd
This enables the system to accept IP addresses using the dhcp service.
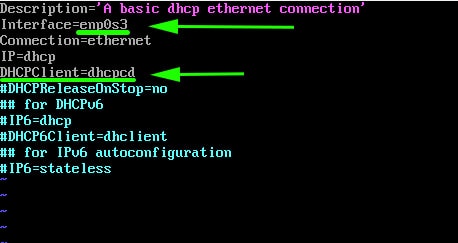
Save and exit the configuration file. Next, enable the custom dhcp profile.
# netctl enable custom-dhcp-profile

And finally enable the dhcp service.
# systemctl enable dhcpcd.service

Your interface should now pick an IP address from the router and you should have an internet connection.
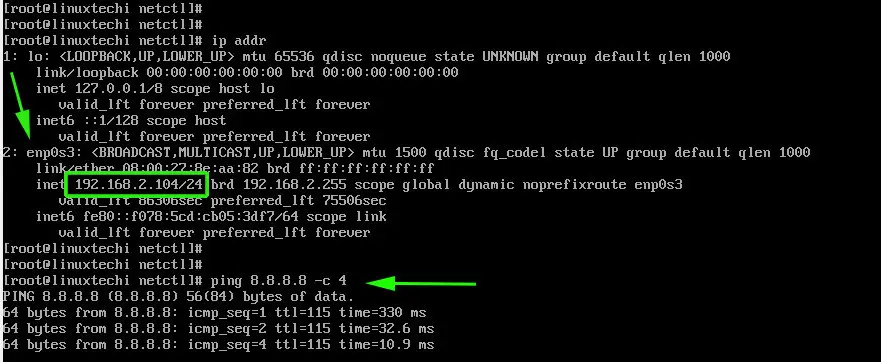
You can install an X windows system as shown,
$ sudo pacman -S xorg xorg-server
Then install a display manager. For example, to install GNOME, run:
$ sudo pacman -S gnome
Then start and enable gdm service
$ sudo systemctl start gdm
$ sudo systemctl enable gdm
This brings us to the end of this lengthy topic. Hopefully, you are now in a position to Dual boot Arch Linux with Windows on UEFI system.
Read Also : How to Create and Configure Sudo User on Arch Linux
It looks like you’ve followed an old guide that expects Windows to use MBR partitioning.
The «invalid signature» error suggests Secure Boot is enabled. When Secure Boot is enabled, all bootloaders must be signed with a private key, and a matching public key must be included in the Secure Boot variables in the firmware NVRAM. GRUB is dutifully reading the first sector of the partition you’ve specified, but since it does not contain the appropriate Secure Boot signature, the firmware refuses to execute it.
Secure Boot requires native UEFI-style boot as a prerequisite. You may be able to disable Secure Boot on your system, but since GRUB already starts for you, there is probably no need to do that.
Your insmod part_gpt suggest you expect the disk to have a GPT-style partitioning which usually goes together with UEFI boot style, but on the other hand, set root=(hd0,msdos2) expects a MBR partition.
On my Debian system with GPT partitioning, the set root line reads: set root='hd0,gpt1'. If your system uses GPT partitioning, use the gptN partition identifiers instead of msdosN.
Also chainloader +1 tells GRUB to read the boot block from the first block of the partition; in UEFI native boot, there is no such thing. To boot Windows in UEFI mode, the set root line should point to the EFI System Partition that contains the Windows bootloader, and the chainloader line should be chainloader /EFI/Microsoft/Boot/bootmgfw.efi.