- Remove From My Forums
-
Question
-
A security scan gives the following Failure Report. When I try to install the update I get a message that the update is not compatible with the Operating System. Does anyone have experience installing an update or is it possible to disable OpenSSL
provided the WebApp does not require it to run?THREAT:
OpenSSL is a toolkit that implements the Secure Sockets Layer (SSL v2/v3) and Transport Layer Security (TLS v1) protocols as well as a
full-strength general purpose cryptography library. For more details about the detection please refer to the Qualys community article
heartbleed-detection-update (https://community.qualys.com/blogs/qualys-tech/2014/04/09/heartbleed-detection-update).
OpenSSL is exposed to a security vulnerability due to a missing bounds check in the handling of the TLS heartbeat extension.
Affected Versions:
OpenSSL 1.0.1f, 1.0.1e, 1.0.1d, 1.0.1c, 1.0.1b, 1.0.1a, 1.0.1
PLEASE NOTE:
This QID will be reported as possible vulnerability (YELLOW) if it was triggered because the target host has a vulnerable OpenSSL banner.
This QID will be reports as confirmed vulnerability (RED) if the target responds to the SSL heartbeat request in a vulnerable fashion (irrespective of
the OpenSSL banner).
IMPACT:
The vulnerabilities can be exploited by malicious users to reveal up to 64kB of memory to a connected client or server that may aid in launching
further attacks.
SOLUTION:
Update to Version 1.0.1g to resolve this issue. The latest version is available for download fromOpenSSL Web site (http://www.openssl.org/source/).
Answers
-
Hi RickClift,
The OpenSSL is an open source software and it has various of distribution, you must confirm your distribution version is support running on Windows 2012r2 first, and if you
are using Windows built in SSL3.0 you can install the following hotfix to prevent the known issue in SSL 3.0.The Hotfix:
Microsoft security advisory: Vulnerability in SSL 3.0 could allow information disclosure: October 15, 2014
http://support.microsoft.com/kb/3009008
I’m glad to be of help to you!
Please remember to mark the replies as answers if they help and unmark them if they provide no help. If you have feedback for TechNet Support, contact tnmff@microsoft.com
-
Edited by
Saturday, February 28, 2015 3:26 AM
-
Marked as answer by
Alex Lv
Friday, March 6, 2015 3:20 AM
-
Edited by
1. 
When we build and ship Certify One and FireDaemon Fusion we try to ensure it contains the most recent version of OpenSSL. We thought it would be useful to make our OpenSSL Binary Distribution available for you to download and use in a standalone fashion or in your own software projects for free.
Table of Contents
- Download OpenSSL ZIP File
- OpenSSL ZIP File Installation Instructions
- Download OpenSSL 3.0 Windows Installer
- OpenSSL Screenshot
- OpenSSL Documentation
- Checking SSL / TLS Certificate Validity with Certify One
- Compiling OpenSSL From Source
- Source
- Release Policy
- Compilation and Build Script
- Dependencies
- Integrating OpenSSL with Your Visual Studio Project
- Additional Include Directories
- Additional Library Directories
- Privilege Escalation Mitigation
- Compatibility and Support Matrix
- License, Warranty, and Support
- Acknowledgments
- Buy SSL / TLS Certificates
Download OpenSSL ZIP File
|
Download OpenSSL Binary Distribution for Microsoft Windows |
|
|
Pre-compiled executables (EXE) and libraries (DLL) for Microsoft Windows Operating Systems. The distributions can be used standalone or integrated into any Windows application. The EXE and DLL are digitally signed with our Extended Validation (EV) EV code signing certificate. The distributions depend on the Microsoft Visual Studio runtime which is included in the ZIP file. |
|
|
November 2022 |
|
|
For 64-bit / Win64 / x64 and 32-bit / Win32 / x86 Microsoft Windows Operating Systems OpenSSL maintains a list of 3rd-party maintained binary distributions of OpenSSL. Please review our Release Policy before downloading and using this distribution. |


OpenSSL ZIP File Installation Instructions
- Follow the instructions below if you have downloaded one of the ZIP files above and want to deploy OpenSSL manually (e.g. on the local hard disk or on a USB drive for a portable installation)
- Download the appropriate FireDaemon OpenSSL Binary Distribution ZIP file via the links above.
- Unpack the contents of the «openssl-1.1» or «openssl-3» folder in the respective ZIP file to a temporary directory (e.g. C:Temp)
- Copy the contents of (i.e. the files and directories contained within) the x64 folder or x86 folder to your target directory (e.g. C:OpenSSL)
- Copy the ssl folder and contents to the target directory
- Copy the prerequisites folders and contents to the target directory
- Install the appropriate Visual Studio C++ Runtime found in the prerequisites folder. Install VC_redist.x64.exe on 64-bit systems. Install VC_redist.x86.exe on 32-bit systems.
- To use OpenSSL, simply open an elevated Command Prompt then (adjusting the path in OPENSSL_HOME to suit your manual installation):
REM You can set OPENSSL_HOME=%~dp0 in a batch script for portable installs
set OPENSSL_HOME=C:OpenSSL
set OPENSSL_CONF=%OPENSSL_HOME%sslopenssl.cnf
set PATH=%OPENSSL_HOME%bin;%PATH%
cd /d %OPENSSL_HOME%
openssl version -a
To create a certificate signing request and private key using the same environment variables as above :
openssl genrsa -out server.key 4096
openssl req -new -key server.key -out server.csr -sha256
openssl x509 -req -days 365 -in server.csr -signkey server.key -out server.crt
Download OpenSSL 3.0 Windows Installer
Instead of downloading the ZIP file, and for convenience, you can download our Windows installer which will deploy OpenSSL 3.0 x64 (64-bit). OpenSSL is installed into the following file system locations. These locations are specified during the build and follow OpenSSL’s own conventions. Thanks to Advanced Installer for helping us out.
%PROGRAMFILES%FireDaemon OpenSSL 3
%PROGRAMFILES%Common FilesFireDaemon SSL 3
OpenSSL Screenshot
Below is a screenshot showing the executed commands at an elevated command prompt:

OpenSSL Documentation
Please refer to OpenSSL’s documentation.
Checking SSL / TLS Certificate Validity with Certify One
FireDaemon Certify One allows you to audit, check, inspect, and validate SSL / TLS certificates and certificate chains. Fortify also has a browser-based TLS Encryption Check Tool available.
Compiling OpenSSL From Source
Source
We directly pull from OpenSSL’s official GitHub repository.
Release Policy
Whenever we release an updated version of FireDaemon Fusion, Certify One, or OpenSSL gets updated with security fixes, we will provide the latest tagged version of the OpenSSL stable branch. The currently deployed OpenSSL library is version 3.0.7 and 1.1.1s at commit openssl-3.0.7-0-g19cc035b6c and OpenSSL_1_1_1s-0-g129058165d respectively:
git describe --always --tag --long --first-parent --dirty
Compilation and Build Script
The actual command line to build OpenSSL is as follows (where %toolset% is VC-WIN32 and VC-WIN64A respectively):
perl ..Configure %toolset% no-asm no-ssl3 no-zlib no-comp no-ui-console no-autoload-config --api=1.1.0 --prefix="%installdir%" --openssldir="%commoninstalldir%" -DOPENSSL_NO_DEPRECATED
For reference, the build script used to create the binary distributions is attached to this article. The build script has the following dependencies:
- Visual Studio Community Edition
- Git for Windows
- Strawberry Perl.
Dependencies
The OpenSSL binary distribution depends on the Microsoft Visual Studio runtime. The OpenSSL 1.1.1 binaries are built with the Microsoft Visual C++ (MSVC) 14.29 compiler and toolset. The OpenSSL 3 binaries are built with the Microsoft Visual C++ (MSVC) 14.33 compiler and toolset. The external dependency creates much smaller modules and .pdb files and integrates nicely with FireDaemon Fusion and Certify One. We believe that this shouldn’t be problematic since the MSVC 14.3 runtime is binary compatible with applications built using the MSVC 14.0 or 14.1 runtimes, and once installed the Universal C Runtime (CRT) is subject to automatic Windows updates.
Integrating OpenSSL with Your Visual Studio Project
To use the headers and libraries present in OpenSSL in your Visual Studio project, you will need to configure the properties of your project.
Additional Include Directories
Prepend «C:Program FilesFireDaemon Open SSL 3include»; to Property Pages -> C/C++ -> General -> Additional Include Directories in your project per the screenshot below (adjusting the prepended path to suit your installation):

Additional Library Directories
Prepend «C:Program FilesFireDaemon Open SSL 3lib»; to Property Pages -> Linker -> General -> Additional Library Directories in your project per the screenshot below (adjusting the prepended path to suit your installation):

Privilege Escalation Mitigation
When building OpenSSL, the build scripts bake the default location of the library (ie. the installation directory) and the SSL configuration into the final product. By default, OpenSSL automatically loads the SSL configuration file from the default file system location. This leads to an easily exploitable privilege escalation scenario documented in CVE-2019-12572. Our build of OpenSSL mitigates this flaw using the following preventative measures:
- The target directories we have chosen are Windows’ default system program files directories assuming a 64-bit architecture with a shared configuration file directory common to both x64 and x86:
- x64: C:Program FilesFireDaemon OpenSSL, C:Program FilesCommon FilesFireDaemon SSL
- x86: C:Program Files (x86)FireDaemon OpenSSL, C:Program FilesCommon FilesFireDaemon SSL
- To mitigate security holes even on non-default installations, we build the library such that it doesn’t automatically load the SSL configuration. Hence, when using the OpenSSL tools or the DLLs in your products you have to explicitly load the SSL configuration.
- All FireDaemon software products that utilise OpenSSL initialise the OpenSSL library at runtime using a flag that prevents the loading of the default configuration.
Compatibility and Support Matrix
The table below provides a compatibility and support matrix, mapping specific compatible Microsoft Windows operating system versions to specific FireDaemon OpenSSL software versions.
| OpenSSL Versions |
OpenSSL 3.0 and OpenSSL 1.1.1 | |
| Windows Operating System Version | 32-bit (x86) | 64-bit (x64) |
| Windows XP (1) | ||
| Windows Vista (1) | ||
| Windows 7 (1) | ||
| Windows 8 (1) | ||
| Windows 8.1 (1) | ||
| Windows 10 | ||
| Windows 11 | ||
| Server 2008 (2) | ||
| Server 2008 R2 (2) | ||
| Server 2012 | ||
| Server 2012 R2 | ||
| Server 2016 | ||
| Server 2019 | ||
| Server 2022 |
(1) Windows Desktop Operating System is End of Support
(2) Windows Server Operating System is End of Support
| Compatible / Supported | The software product is designed to be installed on the Microsoft Windows operating system version. The operating system version plus software version combination is actively supported by us on the proviso that the 32-bit (x86) version is deployed on a 32-bit (x86) operating system and the 64-bit (x64) version is deployed on a 64-bit (x64) operating system. Please see the License, Warranty, and Support section below. |
| Compatible / Unsupported | The software product should install on the Microsoft Windows operating system version. The operating system version plus software version combination is not supported by us. This is typically due to the operating system version reaching End of Support. |
| Incompatible / Unsupported | The software product should not or does not install on the Microsoft Windows operating system version or does not work. The operating system version plus software version combination is not supported by us. |
License, Warranty, and Support
Our OpenSSL Binary Distribution is free to use and redistribute. Product use, redistribution, and warranty are governed by the OpenSSL License. If you have questions regarding OpenSSL, wish to report bugs, or require implementation guidance please consider joining the OpenSSL Community.
Acknowledgments
This product includes:
- Software developed by the OpenSSL Project for use in the OpenSSL Toolkit
- Cryptographic software written by Eric Young
- Software written by Tim Hudson.
Buy SSL / TLS Certificates

Содержание
- How to install the most recent version of OpenSSL on Windows 10 in 64 Bit
- Как обновить OpenSSL на Windows 7?
- How to install OpenSSL in windows 10?
- 10 Answers 10
- ✔️ Как установить самую последнюю версию OpenSSL на Windows 10
- Шаг 1. Скачать бинарник
- Шаг 2. Запустите установщик
- Шаг 3. Запустите бинарный файл OpenSSL
- Установите OpenSSL в Windows с помощью Cygwin
- Установите Cygwin и OpenSSL
- Обучающие видео по OpenSSL
How to install the most recent version of OpenSSL on Windows 10 in 64 Bit
In the age of cyber warfare, being paranoid is the only reasonable attitude and that means, among other things, being paranoid about software updates.
Take for example OpenSSL. This open source cryptography library that implements the Transport Layer Security (TLS) and Secure Sockets Layer (SSL) protocols is designed to “secure communications over computer networks against eavesdropping”, but guess what: it has been riddled with bugs since its inception. This may be unavoidable, to a certain degree — after all, we are speaking about software. Even so, the inherent flaws of OpenSSL should not be an excuse for not keeping the version you use as bullet-proof as possible. Let’s not forget that your car is most likely hackable by a 15 year old and yet you still (presumably) lock the doors.
While you can’t do much about the yet-to-be-identified bugs, you can at least protect your systems from those bugs that have been already patched up and widely documented.
Too bad the official OpenSSL website offers Linux sources only.
While Linux distributions routinely come loaded with OpenSSL, this is not the case for Windows… or shall we say “Windows distributions”. (Didn’t Microsoft want to “Linuxify” its flaggship OS? Never mind.) If you want to run it, you need a Windows binary, and unless you are willing to compile it yourself, you have to to rely on someone else.
Here is how you can set up OpenSSL on Windows without having to deal with the code.
Step 1. Get hold of the binaries
Finding Windows binaries of OpenSSL is not an easy task, but don’t get discouraged. They do exist. To download them, navigate to:
Don’t be fooled by the Win32 string in the URL nor by the navigation pointing you to a seemingly ancient download page from way back in 2004 (from the “Products” tab through the “Win32 OpenSSL link”). Scroll down the page to the section “Download Win32 OpenSSL”, ignoring the confusing string. Now you need to pick the right binary from the list. For each version, there are two basic types: the full installer and the light installer.
Download the one named “Win64 OpenSSL v1.1.0f” (or a higher-numbered version once it becomes available) to get the full installer.
The current version as of this writing (OpenSSL 1.1.0h) is very different from previous releases. It is not the same thing at all so pay attention to the release numbers! The worst thing you can do is use an old version that has documented bugs that anyone could exploit following a howto!
Step 2. Run the installer
We recommend installing OpenSSL outside of your Windows system directory.
Step 3. Start the OpenSSL binary
To invoke OpenSSL, you can simply right-click on it in the Windows Explorer at its install location, for example in:
then choose “Run as Administrator”.
 Starting the OpenSSL binary on Windows
It will open a cmd window with the OpenSSL command prompt. Here is what to expect.
 Verifying the version of OpenSSL on Windows
Now you are ready to start creating your OpenSSL keys. (Speaking of which: users of the remote access utility PuTTY can export an OpenSSH key from PuTTYgen.) When using OpenSSL on Windows in this way, you simply omit the openssl command you see at the prompt. For example, to generate your key pair using OpenSSL on Windows, you may enter:
and follow the onscreen instructions as usual. To review the certificate:
Источник
Как обновить OpenSSL на Windows 7?
Я использую Windows 7 x64, а в моем приглашении cgywin я могу запустить
и посмотреть текущую версию. Я хочу обновить эту версию до последней версии, но не могу найти официальный источник, как это сделать. Какой самый простой способ сделать это? Я надеюсь, что их командную строку я могу использовать в том же окне.
Чтобы обновить Cygwin openssl, вам просто нужно запустить установщик и выбрать более новую версию. Сайт Cygwin утверждает следующее:
Утилита setup.exe отслеживает версии всех установленных компонентов и предоставляет механизм для установки или обновления всех доступных на этом сайте для Cygwin.
Действия по обновлению следующие:
- Перейдите на сайт Cygwin и загрузите setup.exe.
Запустите setup.exe и нажмите дальше, пока не нажмете на страницу «Выбрать пакеты».
Введите пакет, который вы хотите обновить (openssl) в поле поиска.
Выберите версию, которую хотите установить.
Нажмите «Далее» и дождитесь его установки/загрузки.

После завершения установки/обновления вы сможете увидеть новую версию в Cygwin с помощью следующей команды:
Вы также можете создать Openssl из исходного кода, но я никогда не пробовал. Я считаю, что Cygwin обрабатывает установку/обновление по какой-либо причине.
Источник
How to install OpenSSL in windows 10?

10 Answers 10
I also wanted to create OPEN SSL for Windows 10. An easy way of getting it done without running into a risk of installing unknown software from 3rd party websites and risking entries of viruses, is by using the openssl.exe that comes inside your Git for Windows installation. In my case, I found the open SSL in the following location of Git for Windows Installation.
If you also want instructions on how to use OPENSSL to generate and use Certificates. Here is a write-up on my blog. The step by step instructions first explains how to use Microsoft Windows Default Tool and also OPEN SSL and explains the difference between them.

If you have chocolatey installed you can install openssl via a single command i.e.

In case you have Git installed,
Do you have Git installed? You can access openssl command from git bash without adding any environment variable.
But, if you want to access the openssl command from windows cmd, then follow me:
then add the path your environment variable (User variables->Path):

Either set the openssl present in Git as your default openssl and include that into your path in environmental variables (quick way)

Necroposting, but might be useful for others:
There’s always the official page: [OpenSSL.Wiki]: Binaries which contains useful URLs
There are other repositories which contain unofficial builds
v1.0.2u is built with OpenSSL-FIPS 2.0.16
Artefacts are .zips that should be unpacked in «C:Program Files» (please take a look at the Readme.md file, and also at the one at the repository root)
And of course you can build it yourself from sources, but that requires some deeper knowledge

I recently needed to document how to get a version of it installed, so I’ve copied my steps here, as the other answers were using different sources from what I recommend, which is Cygwin. I like Cygwin because it is well maintained and provides a wealth of other utilities for Windows. Cygwin also allows you to easily update the versions as needed when vulnerabilities are fixed. Please update your version of OpenSSL often!
Open a Windows Command prompt and check to see if you have OpenSSL installed by entering: openssl version
If you get an error message that the command is NOT recognized, then install OpenSSL by referring to Cygwin following the summary steps below:
Basically, download and run the Cygwin Windows Setup App to install and to update as needed the OpenSSL application:
Источник
✔️ Как установить самую последнюю версию OpenSSL на Windows 10
В эпоху кибервойн единственная разумная позиция – быть параноиком, а это означает, помимо прочего, быть параноиком по поводу обновлений программного обеспечения.
Взять к примеру OpenSSL.
Эта криптографическая библиотека с открытым исходным кодом, которая реализует протоколы Transport Layer Security (TLS) и Secure Sockets Layer (SSL), разработана для «защиты связи по компьютерным сетям от перехвата», но угадайте, что?
С самого начала она была пронизана ошибками.
Это может быть неизбежно, в определенной степени – в конце концов, мы говорим о программном обеспечении.
Несмотря на то, что вы не можете ничего сделать с ошибками, которые еще предстоит идентифицировать, вы можете по крайней мере защитить свои системы от тех ошибок, которые уже исправлены и задокументированы.
Жаль, что официальный сайт OpenSSL предлагает только исходники для Linux.
Хотя дистрибутивы Linux обычно поставляются с OpenSSL, это не никак относится к Windows … или, скажем, «дистрибутивам Windows».
Если вы хотите запустить его, вам нужен бинарник под Windows, и если вы не хотите его собирать самостоятельно, вы должны найти другой вариант.
В этой статье я покажу,как можно настроить OpenSSL в Windows, не имея дело при этом дела со сборкой из исходников.
Шаг 1. Скачать бинарник
Поиск бинарных файлов OpenSSL для Windows – непростая задача, но не отчаивайтесь.
Чтобы загрузить нужный, перейдите по ссылке:
Не дайте себя одурачить ни строкой Win32 в URL-адресе, ни навигацией, указывающей на казалось бы древнюю страницу загрузки еще с 2004 года.
Прокрутите страницу вниз до раздела «Download Win32 OpenSSL».
Теперь вам нужно выбрать правильный файл из этого списка.
Для каждой версии есть два основных типа: light и full.
Загрузите файл под названием «Win64 OpenSSL v1.1.0f» (или версию с более новой версией, как только она станет доступна), чтобы скачать фулл установщик.

Шаг 2. Запустите установщик
Мы рекомендуем установить OpenSSL вне вашей системной директории Windows.
Следуйте инструкциям по установке через GUI.
Шаг 3. Запустите бинарный файл OpenSSL
Чтобы начать работу с OpenSSL, вы можете просто щелкнуть по нему правой кнопкой мыши в проводнике Windows в месте его установки, например в моем случае:
Источник
Установите OpenSSL в Windows с помощью Cygwin
Установите Cygwin и OpenSSL
Cygwin предлагает простой способ установить большую коллекцию бесплатного программного обеспечения с открытым исходным кодом (включая OpenSSL) в Windows. Чтобы установить Cygwin с OpenSSL:
Играть https://cygwin.com/install.html и загрузите соответствующий установщик для вашей ОС (32- или 64-разрядный).


Убедитесь, что Установить из интернета затем нажмите Следующая> кнопку.

Оставлять Корневая директория и Установить для с настройками по умолчанию (если вы не знаете, что у вас есть причины их изменить), затем нажмите Следующая> кнопку.

Выберите локальный каталог пакета, затем щелкните значок Следующая> кнопка. (Опять же, по умолчанию, вероятно, хорошо.)

Выберите подходящий параметр для подключения к Интернету, затем щелкните значок Следующая> кнопку.

Выберите сайт загрузки из списка, затем нажмите Следующая> кнопку.

Установщик загрузит приложение установки и запустит его.

Введите «openssl» в Поиск поле, затем перейдите к Все> База в Упаковка колонка.
Найдите линию с OpenSSLзатем выберите самую последнюю версию в раскрывающемся меню справа от НОВИНКИ колонка.

На этом этапе вы можете продолжить поиск и выбор пакетов, которые хотите установить, или просто продолжить установку (вы всегда можете повторно запустить приложение, чтобы установить или удалить отдельные пакеты). Когда будете готовы, щелкните Следующая> кнопку.

Нажмите на Следующая> снова.

Cygwin Setup начнет загрузку необходимых файлов для установки. В базовой установке Cygwin много файлов, поэтому для ее завершения может потребоваться некоторое время.

Выберите, хотите ли вы создавать значки на рабочем столе и / или в меню «Пуск», затем нажмите кнопку Завершить кнопку.

Убедитесь, что вы установили OpenSSL, открыв приложение терминала Cygwin и набрав openssl version в командной строке. Все готово!

Обучающие видео по OpenSSL
Источник
- Remove From My Forums
-
Question
-
A security scan gives the following Failure Report. When I try to install the update I get a message that the update is not compatible with the Operating System. Does anyone have experience installing an update or is it possible to disable OpenSSL
provided the WebApp does not require it to run?THREAT:
OpenSSL is a toolkit that implements the Secure Sockets Layer (SSL v2/v3) and Transport Layer Security (TLS v1) protocols as well as a
full-strength general purpose cryptography library. For more details about the detection please refer to the Qualys community article
heartbleed-detection-update (https://community.qualys.com/blogs/qualys-tech/2014/04/09/heartbleed-detection-update).
OpenSSL is exposed to a security vulnerability due to a missing bounds check in the handling of the TLS heartbeat extension.
Affected Versions:
OpenSSL 1.0.1f, 1.0.1e, 1.0.1d, 1.0.1c, 1.0.1b, 1.0.1a, 1.0.1
PLEASE NOTE:
This QID will be reported as possible vulnerability (YELLOW) if it was triggered because the target host has a vulnerable OpenSSL banner.
This QID will be reports as confirmed vulnerability (RED) if the target responds to the SSL heartbeat request in a vulnerable fashion (irrespective of
the OpenSSL banner).
IMPACT:
The vulnerabilities can be exploited by malicious users to reveal up to 64kB of memory to a connected client or server that may aid in launching
further attacks.
SOLUTION:
Update to Version 1.0.1g to resolve this issue. The latest version is available for download fromOpenSSL Web site (http://www.openssl.org/source/).
Answers
-
Hi RickClift,
The OpenSSL is an open source software and it has various of distribution, you must confirm your distribution version is support running on Windows 2012r2 first, and if you
are using Windows built in SSL3.0 you can install the following hotfix to prevent the known issue in SSL 3.0.The Hotfix:
Microsoft security advisory: Vulnerability in SSL 3.0 could allow information disclosure: October 15, 2014
http://support.microsoft.com/kb/3009008
I’m glad to be of help to you!
Please remember to mark the replies as answers if they help and unmark them if they provide no help. If you have feedback for TechNet Support, contact tnmff@microsoft.com
-
Edited by
Saturday, February 28, 2015 3:26 AM
-
Marked as answer by
Alex Lv
Friday, March 6, 2015 3:20 AM
-
Edited by
Build and Install
This document describes installation on all supported operating
systems (the Unix/Linux family, including macOS), OpenVMS,
and Windows).
Table of Contents
- Prerequisites
- Notational Conventions
- Quick Installation Guide
- Building OpenSSL
- Installing OpenSSL
- Configuration Options
- API Level
- Cross Compile Prefix
- Build Type
- Directories
- Compiler Warnings
- Compression Algorithm Flags
- Seeding the Random Generator
- Setting the FIPS HMAC key
- Enable and Disable Features
- Displaying configuration data
- Installation Steps in Detail
- Configure
- Build
- Test
- Install
- Advanced Build Options
- Environment Variables
- Makefile Targets
- Running Selected Tests
- Troubleshooting
- Configuration Problems
- Build Failures
- Test Failures
- Notes
- Notes on multi-threading
- Notes on shared libraries
- Notes on random number generation
- Notes on assembler modules compilation
Prerequisites
To install OpenSSL, you will need:
- A «make» implementation
- Perl 5 with core modules (please read NOTES-PERL.md)
- The Perl module
Text::Template(please read NOTES-PERL.md) - an ANSI C compiler
- a development environment in the form of development libraries and C
header files - a supported operating system
For additional platform specific requirements, solutions to specific
issues and other details, please read one of these:
- Notes for UNIX-like platforms
- Notes for Android platforms
- Notes for Windows platforms
- Notes for the DOS platform with DJGPP
- Notes for the OpenVMS platform
- Notes on Perl
- Notes on Valgrind
Notational conventions
Throughout this document, we use the following conventions.
Commands
Any line starting with a dollar sign is a command line.
The dollar sign indicates the shell prompt and is not to be entered as
part of the command.
Choices
Several words in curly braces separated by pipe characters indicate a
mandatory choice, to be replaced with one of the given words.
For example, the line
$ echo { WORD1 | WORD2 | WORD3 }
represents one of the following three commands
$ echo WORD1
- or -
$ echo WORD2
- or -
$ echo WORD3
One or several words in square brackets separated by pipe characters
denote an optional choice. It is similar to the mandatory choice,
but it can also be omitted entirely.
So the line
$ echo [ WORD1 | WORD2 | WORD3 ]
represents one of the four commands
$ echo WORD1
- or -
$ echo WORD2
- or -
$ echo WORD3
- or -
$ echo
Arguments
Optional Arguments are enclosed in square brackets.
A trailing ellipsis means that more than one could be specified.
Quick Installation Guide
If you just want to get OpenSSL installed without bothering too much
about the details, here is the short version of how to build and install
OpenSSL. If any of the following steps fails, please consult the
Installation in Detail section below.
Building OpenSSL
Use the following commands to configure, build and test OpenSSL.
The testing is optional, but recommended if you intend to install
OpenSSL for production use.
Unix / Linux / macOS
$ ./Configure
$ make
$ make test
OpenVMS
Use the following commands to build OpenSSL:
$ perl Configure
$ mms
$ mms test
Windows
If you are using Visual Studio, open a Developer Command Prompt and
issue the following commands to build OpenSSL.
$ perl Configure
$ nmake
$ nmake test
As mentioned in the Choices section, you need to pick one
of the four Configure targets in the first command.
Most likely you will be using the VC-WIN64A target for 64bit Windows
binaries (AMD64) or VC-WIN32 for 32bit Windows binaries (X86).
The other two options are VC-WIN64I (Intel IA64, Itanium) and
VC-CE (Windows CE) are rather uncommon nowadays.
Installing OpenSSL
The following commands will install OpenSSL to a default system location.
Danger Zone: even if you are impatient, please read the following two
paragraphs carefully before you install OpenSSL.
For security reasons the default system location is by default not writable
for unprivileged users. So for the final installation step administrative
privileges are required. The default system location and the procedure to
obtain administrative privileges depends on the operating system.
It is recommended to compile and test OpenSSL with normal user privileges
and use administrative privileges only for the final installation step.
On some platforms OpenSSL is preinstalled as part of the Operating System.
In this case it is highly recommended not to overwrite the system versions,
because other applications or libraries might depend on it.
To avoid breaking other applications, install your copy of OpenSSL to a
different location which is not in
the global search path for system libraries.
Finally, if you plan on using the FIPS module, you need to read the
Post-installation Notes further down.
Unix / Linux / macOS
Depending on your distribution, you need to run the following command as
root user or prepend sudo to the command:
By default, OpenSSL will be installed to
More precisely, the files will be installed into the subdirectories
/usr/local/bin
/usr/local/lib
/usr/local/include
...
depending on the file type, as it is custom on Unix-like operating systems.
OpenVMS
Use the following command to install OpenSSL.
By default, OpenSSL will be installed to
Windows
If you are using Visual Studio, open the Developer Command Prompt elevated
and issue the following command.
The easiest way to elevate the Command Prompt is to press and hold down both
the <CTRL> and <SHIFT> keys while clicking the menu item in the task menu.
The default installation location is
for native binaries, or
C:Program Files (x86)OpenSSL
for 32bit binaries on 64bit Windows (WOW64).
Installing to a different location
To install OpenSSL to a different location (for example into your home
directory for testing purposes) run Configure as shown in the following
examples.
The options --prefix and --openssldir are explained in further detail in
Directories below, and the values used here are mere examples.
On Unix:
$ ./Configure --prefix=/opt/openssl --openssldir=/usr/local/ssl
On OpenVMS:
$ perl Configure --prefix=PROGRAM:[INSTALLS] --openssldir=SYS$MANAGER:[OPENSSL]
Note: if you do add options to the configuration command, please make sure
you’ve read more than just this Quick Start, such as relevant NOTES-* files,
the options outline below, as configuration options may change the outcome
in otherwise unexpected ways.
Configuration Options
There are several options to ./Configure to customize the build (note that
for Windows, the defaults for --prefix and --openssldir depend on what
configuration is used and what Windows implementation OpenSSL is built on.
For more information, see the Notes for Windows platforms.
API Level
Build the OpenSSL libraries to support the API for the specified version.
If no-deprecated is also given, don’t build with support
for deprecated APIs in or below the specified version number. For example,
adding
--api=1.1.0 no-deprecated
will remove support for all APIs that were deprecated in OpenSSL version
1.1.0 or below. This is a rather specialized option for developers.
If you just intend to remove all deprecated APIs up to the current version
entirely, just specify no-deprecated.
If --api isn’t given, it defaults to the current (minor) OpenSSL version.
Cross Compile Prefix
--cross-compile-prefix=<PREFIX>
The <PREFIX> to include in front of commands for your toolchain.
It is likely to have to end with dash, e.g. a-b-c- would invoke GNU compiler
as a-b-c-gcc, etc. Unfortunately cross-compiling is too case-specific to put
together one-size-fits-all instructions. You might have to pass more flags or
set up environment variables to actually make it work. Android and iOS cases
are discussed in corresponding Configurations/15-*.conf files. But there are
cases when this option alone is sufficient. For example to build the mingw64
target on Linux --cross-compile-prefix=x86_64-w64-mingw32- works. Naturally
provided that mingw packages are installed. Today Debian and Ubuntu users
have option to install a number of prepackaged cross-compilers along with
corresponding run-time and development packages for «alien» hardware. To give
another example --cross-compile-prefix=mipsel-linux-gnu- suffices in such
case.
For cross compilation, you must configure manually.
Also, note that --openssldir refers to target’s file system, not one you are
building on.
Build Type
Build OpenSSL with debugging symbols and zero optimization level.
Build OpenSSL without debugging symbols. This is the default.
Directories
libdir
The name of the directory under the top of the installation directory tree
(see the --prefix option) where libraries will be installed. By default
this is lib. Note that on Windows only static libraries (*.lib) will
be stored in this location. Shared libraries (*.dll) will always be
installed to the bin directory.
Some build targets have a multilib postfix set in the build configuration.
For these targets the default libdir is lib<multilib-postfix>. Please use
--libdir=lib to override the libdir if adding the postfix is undesirable.
openssldir
Directory for OpenSSL configuration files, and also the default certificate
and key store. Defaults are:
Unix:           /usr/local/ssl
Windows:        C:Program FilesCommon FilesSSL
OpenVMS:        SYS$COMMON:[OPENSSL-COMMON]
For 32bit Windows applications on Windows 64bit (WOW64), always replace
C:Program Files by C:Program Files (x86).
prefix
The top of the installation directory tree. Defaults are:
Unix:           /usr/local
Windows:        C:Program FilesOpenSSL
OpenVMS:        SYS$COMMON:[OPENSSL]
Compiler Warnings
This is a developer flag that switches on various compiler options recommended
for OpenSSL development. It only works when using gcc or clang as the compiler.
If you are developing a patch for OpenSSL then it is recommended that you use
this option where possible.
Compression Algorithm Flags
with-brotli-include
--with-brotli-include=DIR
The directory for the location of the brotli include files (i.e. the location
of the brotli include directory). This option is only necessary if
enable-brotli is used and the include files are not already
on the system include path.
with-brotli-lib
On Unix: this is the directory containing the brotli libraries.
If not provided, the system library path will be used.
The names of the libraries are:
- libbrotlicommon.a or libbrotlicommon.so
- libbrotlidec.a or libbrotlidec.so
- libbrotlienc.a or libbrotlienc.so
On Windows: this is the directory containing the brotli libraries.
If not provided, the system library path will be used.
The names of the libraries are:
- brotlicommon.lib
- brotlidec.lib
- brotlienc.lib
with-zlib-include
The directory for the location of the zlib include file. This option is only
necessary if zlib is used and the include file is not
already on the system include path.
with-zlib-lib
On Unix: this is the directory containing the zlib library.
If not provided the system library path will be used.
On Windows: this is the filename of the zlib library (with or
without a path). This flag must be provided if the
zlib-dynamic option is not also used. If zlib-dynamic is used
then this flag is optional and defaults to ZLIB1 if not provided.
On VMS: this is the filename of the zlib library (with or without a path).
This flag is optional and if not provided then GNV$LIBZSHR, GNV$LIBZSHR32
or GNV$LIBZSHR64 is used by default depending on the pointer size chosen.
with-zstd-include
The directory for the location of the Zstd include file. This option is only
necessary if enable-std is used and the include file is not
already on the system include path.
OpenSSL requires Zstd 1.4 or greater. The Linux kernel source contains a
zstd.h file that is not compatible with the 1.4.x Zstd distribution, the
compilation will generate an error if the Linux zstd.h is included before
(or instead of) the Zstd distribution header.
with-zstd-lib
On Unix: this is the directory containing the Zstd library.
If not provided the system library path will be used.
On Windows: this is the filename of the Zstd library (with or
without a path). This flag must be provided if the
enable-zstd-dynamic option is not also used.
If zstd-dynamic is used then this flag is optional and defaults
to LIBZSTD if not provided.
Seeding the Random Generator
--with-rand-seed=seed1[,seed2,...]
A comma separated list of seeding methods which will be tried by OpenSSL
in order to obtain random input (a.k.a «entropy») for seeding its
cryptographically secure random number generator (CSPRNG).
The current seeding methods are:
os
Use a trusted operating system entropy source.
This is the default method if such an entropy source exists.
getrandom
Use the getrandom(2) or equivalent system call.
devrandom
Use the first device from the DEVRANDOM list which can be opened to read
random bytes. The DEVRANDOM preprocessor constant expands to
"/dev/urandom","/dev/random","/dev/srandom"
on most unix-ish operating systems.
egd
Check for an entropy generating daemon.
This source is ignored by the FIPS provider.
rdcpu
Use the RDSEED or RDRAND command on x86 or RNDRRS command on aarch64
if provided by the CPU.
librandom
Use librandom (not implemented yet).
This source is ignored by the FIPS provider.
none
Disable automatic seeding. This is the default on some operating systems where
no suitable entropy source exists, or no support for it is implemented yet.
This option is ignored by the FIPS provider.
For more information, see the section Notes on random number generation
at the end of this document.
Setting the FIPS HMAC key
As part of its self-test validation, the FIPS module must verify itself
by performing a SHA-256 HMAC computation on itself. The default key is
the SHA256 value of «the holy handgrenade of antioch» and is sufficient
for meeting the FIPS requirements.
To change the key to a different value, use this flag. The value should
be a hex string no more than 64 characters.
Enable and Disable Features
Feature options always come in pairs, an option to enable feature
xxxx, and an option to disable it:
[ enable-xxxx | no-xxxx ]
Whether a feature is enabled or disabled by default, depends on the feature.
In the following list, always the non-default variant is documented: if
feature xxxx is disabled by default then enable-xxxx is documented and
if feature xxxx is enabled by default then no-xxxx is documented.
no-afalgeng
Don’t build the AFALG engine.
This option will be forced on a platform that does not support AFALG.
enable-ktls
Build with Kernel TLS support.
This option will enable the use of the Kernel TLS data-path, which can improve
performance and allow for the use of sendfile and splice system calls on
TLS sockets. The Kernel may use TLS accelerators if any are available on the
system. This option will be forced off on systems that do not support the
Kernel TLS data-path.
enable-asan
Build with the Address sanitiser.
This is a developer option only. It may not work on all platforms and should
never be used in production environments. It will only work when used with
gcc or clang and should be used in conjunction with the no-shared
option.
enable-acvp-tests
Build support for Automated Cryptographic Validation Protocol (ACVP)
tests.
This is required for FIPS validation purposes. Certain ACVP tests require
access to algorithm internals that are not normally accessible.
Additional information related to ACVP can be found at
https://github.com/usnistgov/ACVP.
no-asm
Do not use assembler code.
This should be viewed as debugging/troubleshooting option rather than for
production use. On some platforms a small amount of assembler code may still
be used even with this option.
no-async
Do not build support for async operations.
no-autoalginit
Don’t automatically load all supported ciphers and digests.
Typically OpenSSL will make available all of its supported ciphers and digests.
For a statically linked application this may be undesirable if small executable
size is an objective. This only affects libcrypto. Ciphers and digests will
have to be loaded manually using EVP_add_cipher() and EVP_add_digest()
if this option is used. This option will force a non-shared build.
no-autoerrinit
Don’t automatically load all libcrypto/libssl error strings.
Typically OpenSSL will automatically load human readable error strings. For a
statically linked application this may be undesirable if small executable size
is an objective.
enable-brotli
Build with support for brotli compression/decompression.
enable-brotli-dynamic
Like the enable-brotli option, but has OpenSSL load the brotli library dynamically
when needed.
This is only supported on systems where loading of shared libraries is supported.
no-autoload-config
Don’t automatically load the default openssl.cnf file.
Typically OpenSSL will automatically load a system config file which configures
default SSL options.
enable-buildtest-c++
While testing, generate C++ buildtest files that simply check that the public
OpenSSL header files are usable standalone with C++.
Enabling this option demands extra care. For any compiler flag given directly
as configuration option, you must ensure that it’s valid for both the C and
the C++ compiler. If not, the C++ build test will most likely break. As an
alternative, you can use the language specific variables, CFLAGS and CXXFLAGS.
—banner=text
Use the specified text instead of the default banner at the end of
configuration.
—w
On platforms where the choice of 32-bit or 64-bit architecture
is not explicitly specified, Configure will print a warning
message and wait for a few seconds to let you interrupt the
configuration. Using this flag skips the wait.
no-bulk
Build only some minimal set of features.
This is a developer option used internally for CI build tests of the project.
no-cached-fetch
Never cache algorithms when they are fetched from a provider. Normally, a
provider indicates if the algorithms it supplies can be cached or not. Using
this option will reduce run-time memory usage but it also introduces a
significant performance penalty. This option is primarily designed to help
with detecting incorrect reference counting.
no-capieng
Don’t build the CAPI engine.
This option will be forced if on a platform that does not support CAPI.
no-cmp
Don’t build support for Certificate Management Protocol (CMP)
and Certificate Request Message Format (CRMF).
no-cms
Don’t build support for Cryptographic Message Syntax (CMS).
no-comp
Don’t build support for SSL/TLS compression.
If this option is enabled (the default), then compression will only work if
the zlib or zlib-dynamic options are also chosen.
enable-crypto-mdebug
This now only enables the failed-malloc feature.
enable-crypto-mdebug-backtrace
This is a no-op; the project uses the compiler’s address/leak sanitizer instead.
no-ct
Don’t build support for Certificate Transparency (CT).
no-deprecated
Don’t build with support for deprecated APIs up until and including the version
given with --api (or the current version, if --api wasn’t specified).
no-dgram
Don’t build support for datagram based BIOs.
Selecting this option will also force the disabling of DTLS.
no-dso
Don’t build support for loading Dynamic Shared Objects (DSO)
enable-devcryptoeng
Build the /dev/crypto engine.
This option is automatically selected on the BSD platform, in which case it can
be disabled with no-devcryptoeng.
no-dynamic-engine
Don’t build the dynamically loaded engines.
This only has an effect in a shared build.
no-ec
Don’t build support for Elliptic Curves.
no-ec2m
Don’t build support for binary Elliptic Curves
enable-ec_nistp_64_gcc_128
Enable support for optimised implementations of some commonly used NIST
elliptic curves.
This option is only supported on platforms:
- with little-endian storage of non-byte types
- that tolerate misaligned memory references
- where the compiler:
- supports the non-standard type
__uint128_t - defines the built-in macro
__SIZEOF_INT128__
- supports the non-standard type
enable-egd
Build support for gathering entropy from the Entropy Gathering Daemon (EGD).
no-engine
Don’t build support for loading engines.
no-err
Don’t compile in any error strings.
enable-external-tests
Enable building of integration with external test suites.
This is a developer option and may not work on all platforms. The following
external test suites are currently supported:
- GOST engine test suite
- Python PYCA/Cryptography test suite
- krb5 test suite
See the file test/README-external.md
for further details.
no-filenames
Don’t compile in filename and line number information (e.g. for errors and
memory allocation).
enable-fips
Build (and install) the FIPS provider
no-fips-securitychecks
Don’t perform FIPS module run-time checks related to enforcement of security
parameters such as minimum security strength of keys.
enable-fuzz-libfuzzer, enable-fuzz-afl
Build with support for fuzzing using either libfuzzer or AFL.
These are developer options only. They may not work on all platforms and
should never be used in production environments.
See the file fuzz/README.md for further details.
no-gost
Don’t build support for GOST based ciphersuites.
Note that if this feature is enabled then GOST ciphersuites are only available
if the GOST algorithms are also available through loading an externally supplied
engine.
no-legacy
Don’t build the legacy provider.
Disabling this also disables the legacy algorithms: MD2 (already disabled by default).
no-makedepend
Don’t generate dependencies.
no-module
Don’t build any dynamically loadable engines.
This also implies no-dynamic-engine.
no-multiblock
Don’t build support for writing multiple records in one go in libssl
Note: this is a different capability to the pipelining functionality.
no-nextprotoneg
Don’t build support for the Next Protocol Negotiation (NPN) TLS extension.
no-ocsp
Don’t build support for Online Certificate Status Protocol (OCSP).
no-padlockeng
Don’t build the padlock engine.
no-hw-padlock
As synonym for no-padlockeng. Deprecated and should not be used.
no-pic
Don’t build with support for Position Independent Code.
no-pinshared
Don’t pin the shared libraries.
By default OpenSSL will attempt to stay in memory until the process exits.
This is so that libcrypto and libssl can be properly cleaned up automatically
via an atexit() handler. The handler is registered by libcrypto and cleans
up both libraries. On some platforms the atexit() handler will run on unload of
libcrypto (if it has been dynamically loaded) rather than at process exit. This
option can be used to stop OpenSSL from attempting to stay in memory until the
process exits. This could lead to crashes if either libcrypto or libssl have
already been unloaded at the point that the atexit handler is invoked, e.g. on a
platform which calls atexit() on unload of the library, and libssl is unloaded
before libcrypto then a crash is likely to happen. Applications can suppress
running of the atexit() handler at run time by using the
OPENSSL_INIT_NO_ATEXIT option to OPENSSL_init_crypto().
See the man page for it for further details.
no-posix-io
Don’t use POSIX IO capabilities.
no-psk
Don’t build support for Pre-Shared Key based ciphersuites.
no-rdrand
Don’t use hardware RDRAND capabilities.
no-rfc3779
Don’t build support for RFC3779, «X.509 Extensions for IP Addresses and
AS Identifiers».
sctp
Build support for Stream Control Transmission Protocol (SCTP).
no-shared
Do not create shared libraries, only static ones.
See Notes on shared libraries below.
no-sock
Don’t build support for socket BIOs.
no-srp
Don’t build support for Secure Remote Password (SRP) protocol or
SRP based ciphersuites.
no-srtp
Don’t build Secure Real-Time Transport Protocol (SRTP) support.
no-sse2
Exclude SSE2 code paths from 32-bit x86 assembly modules.
Normally SSE2 extension is detected at run-time, but the decision whether or not
the machine code will be executed is taken solely on CPU capability vector. This
means that if you happen to run OS kernel which does not support SSE2 extension
on Intel P4 processor, then your application might be exposed to «illegal
instruction» exception. There might be a way to enable support in kernel, e.g.
FreeBSD kernel can be compiled with CPU_ENABLE_SSE, and there is a way to
disengage SSE2 code paths upon application start-up, but if you aim for wider
«audience» running such kernel, consider no-sse2. Both the 386 and no-asm
options imply no-sse2.
no-ssl-trace
Don’t build with SSL Trace capabilities.
This removes the -trace option from s_client and s_server, and omits the
SSL_trace() function from libssl.
Disabling ssl-trace may provide a small reduction in libssl binary size.
no-static-engine
Don’t build the statically linked engines.
This only has an impact when not built «shared».
no-stdio
Don’t use anything from the C header file stdio.h that makes use of the FILE
type. Only libcrypto and libssl can be built in this way. Using this option will
suppress building the command line applications. Additionally, since the OpenSSL
tests also use the command line applications, the tests will also be skipped.
no-tests
Don’t build test programs or run any tests.
enable-tfo
Build with support for TCP Fast Open (RFC7413). Supported on Linux, macOS and FreeBSD.
enable-quic
Build with QUIC support. This is currently just for developers as the
implementation is by no means complete and usable.
no-threads
Don’t build with support for multi-threaded applications.
threads
Build with support for multi-threaded applications. Most platforms will enable
this by default. However, if on a platform where this is not the case then this
will usually require additional system-dependent options!
See Notes on multi-threading below.
no-thread-pool
Don’t build with support for thread pool functionality.
thread-pool
Build with thread pool functionality. If enabled, OpenSSL algorithms may
use the thread pool to perform parallel computation. This option in itself
does not enable OpenSSL to spawn new threads. Currently the only supported
thread pool mechanism is the default thread pool.
no-default-thread-pool
Don’t build with support for default thread pool functionality.
default-thread-pool
Build with default thread pool functionality. If enabled, OpenSSL may create
and manage threads up to a maximum number of threads authorized by the
application. Supported on POSIX compliant platforms and Windows.
enable-trace
Build with support for the integrated tracing api.
See manual pages OSSL_trace_set_channel(3) and OSSL_trace_enabled(3) for details.
no-ts
Don’t build Time Stamping (TS) Authority support.
enable-ubsan
Build with the Undefined Behaviour sanitiser (UBSAN).
This is a developer option only. It may not work on all platforms and should
never be used in production environments. It will only work when used with
gcc or clang and should be used in conjunction with the -DPEDANTIC option
(or the --strict-warnings option).
no-ui-console
Don’t build with the User Interface (UI) console method
The User Interface console method enables text based console prompts.
enable-unit-test
Enable additional unit test APIs.
This should not typically be used in production deployments.
no-uplink
Don’t build support for UPLINK interface.
enable-weak-ssl-ciphers
Build support for SSL/TLS ciphers that are considered «weak»
Enabling this includes for example the RC4 based ciphersuites.
zlib
Build with support for zlib compression/decompression.
zlib-dynamic
Like the zlib option, but has OpenSSL load the zlib library dynamically
when needed.
This is only supported on systems where loading of shared libraries is supported.
enable-zstd
Build with support for Zstd compression/decompression.
enable-zstd-dynamic
Like the enable-zstd option, but has OpenSSL load the Zstd library dynamically
when needed.
This is only supported on systems where loading of shared libraries is supported.
386
In 32-bit x86 builds, use the 80386 instruction set only in assembly modules
The default x86 code is more efficient, but requires at least an 486 processor.
Note: This doesn’t affect compiler generated code, so this option needs to be
accompanied by a corresponding compiler-specific option.
no-{protocol}
no-{ssl|ssl3|tls|tls1|tls1_1|tls1_2|tls1_3|dtls|dtls1|dtls1_2}
Don’t build support for negotiating the specified SSL/TLS protocol.
If no-tls is selected then all of tls1, tls1_1, tls1_2 and tls1_3
are disabled.
Similarly no-dtls will disable dtls1 and dtls1_2. The no-ssl option is
synonymous with no-ssl3. Note this only affects version negotiation.
OpenSSL will still provide the methods for applications to explicitly select
the individual protocol versions.
no-{protocol}-method
no-{ssl3|tls1|tls1_1|tls1_2|dtls1|dtls1_2}-method
Analogous to no-{protocol} but in addition do not build the methods for
applications to explicitly select individual protocol versions. Note that there
is no no-tls1_3-method option because there is no application method for
TLSv1.3.
Using individual protocol methods directly is deprecated. Applications should
use TLS_method() instead.
enable-{algorithm}
Build with support for the specified algorithm.
no-{algorithm}
no-{aria|bf|blake2|camellia|cast|chacha|cmac|
    des|dh|dsa|ecdh|ecdsa|idea|md4|mdc2|ocb|
    poly1305|rc2|rc4|rmd160|scrypt|seed|
    siphash|siv|sm2|sm3|sm4|whirlpool}
Build without support for the specified algorithm.
The ripemd algorithm is deprecated and if used is synonymous with rmd160.
Compiler-specific options
-Dxxx, -Ixxx, -Wp, -lxxx, -Lxxx, -Wl, -rpath, -R, -framework, -static
These system specific options will be recognised and passed through to the
compiler to allow you to define preprocessor symbols, specify additional
libraries, library directories or other compiler options. It might be worth
noting that some compilers generate code specifically for processor the
compiler currently executes on. This is not necessarily what you might have
in mind, since it might be unsuitable for execution on other, typically older,
processor. Consult your compiler documentation.
Take note of the Environment Variables documentation
below and how these flags interact with those variables.
Additional options that are not otherwise recognised are passed through as
they are to the compiler as well. Unix-style options beginning with a
- or + and Windows-style options beginning with a / are recognised.
Again, consult your compiler documentation.
If the option contains arguments separated by spaces, then the URL-style
notation %20 can be used for the space character in order to avoid having
to quote the option. For example, -opt%20arg gets expanded to -opt arg.
In fact, any ASCII character can be encoded as %xx using its hexadecimal
encoding.
Take note of the Environment Variables documentation
below and how these flags interact with those variables.
Environment Variables
Assign the given value to the environment variable VAR for Configure.
These work just like normal environment variable assignments, but are supported
on all platforms and are confined to the configuration scripts only.
These assignments override the corresponding value in the inherited environment,
if there is one.
The following variables are used as «make variables» and can be used as an
alternative to giving preprocessor, compiler and linker options directly as
configuration. The following variables are supported:
AR              The static library archiver.
ARFLAGS         Flags for the static library archiver.
AS              The assembler compiler.
ASFLAGS         Flags for the assembler compiler.
CC              The C compiler.
CFLAGS          Flags for the C compiler.
CXX             The C++ compiler.
CXXFLAGS        Flags for the C++ compiler.
CPP             The C/C++ preprocessor.
CPPFLAGS        Flags for the C/C++ preprocessor.
CPPDEFINES      List of CPP macro definitions, separated
                by a platform specific character (':' or
                space for Unix, ';' for Windows, ',' for
                VMS).  This can be used instead of using
                -D (or what corresponds to that on your
                compiler) in CPPFLAGS.
CPPINCLUDES     List of CPP inclusion directories, separated
                the same way as for CPPDEFINES.  This can
                be used instead of -I (or what corresponds
                to that on your compiler) in CPPFLAGS.
HASHBANGPERL    Perl invocation to be inserted after '#!'
                in public perl scripts (only relevant on
                Unix).
LD              The program linker (not used on Unix, $(CC)
                is used there).
LDFLAGS         Flags for the shared library, DSO and
                program linker.
LDLIBS          Extra libraries to use when linking.
                Takes the form of a space separated list
                of library specifications on Unix and
                Windows, and as a comma separated list of
                libraries on VMS.
RANLIB          The library archive indexer.
RC              The Windows resource compiler.
RCFLAGS         Flags for the Windows resource compiler.
RM              The command to remove files and directories.
These cannot be mixed with compiling/linking flags given on the command line.
In other words, something like this isn’t permitted.
$ ./Configure -DFOO CPPFLAGS=-DBAR -DCOOKIE
Backward compatibility note:
To be compatible with older configuration scripts, the environment variables
are ignored if compiling/linking flags are given on the command line, except
for the following:
AR, CC, CXX, CROSS_COMPILE, HASHBANGPERL, PERL, RANLIB, RC, and WINDRES
For example, the following command will not see -DBAR:
$ CPPFLAGS=-DBAR ./Configure -DCOOKIE
However, the following will see both set variables:
$ CC=gcc CROSS_COMPILE=x86_64-w64-mingw32- ./Configure -DCOOKIE
If CC is set, it is advisable to also set CXX to ensure both the C and C++
compiler are in the same «family». This becomes relevant with
enable-external-tests and enable-buildtest-c++.
Reconfigure
Reconfigure from earlier data.
This fetches the previous command line options and environment from data
saved in configdata.pm and runs the configuration process again, using
these options and environment. Note: NO other option is permitted together
with reconf. Note: The original configuration saves away values for ALL
environment variables that were used, and if they weren’t defined, they are
still saved away with information that they weren’t originally defined.
This information takes precedence over environment variables that are
defined when reconfiguring.
Displaying configuration data
The configuration script itself will say very little, and finishes by
creating configdata.pm. This perl module can be loaded by other scripts
to find all the configuration data, and it can also be used as a script to
display all sorts of configuration data in a human readable form.
For more information, please do:
$ ./configdata.pm --help # Unix
or
$ perl configdata.pm --help # Windows and VMS
Installation Steps in Detail
Configure OpenSSL
Automatic Configuration
In previous version, the config script determined the platform type and
compiler and then called Configure. Starting with this release, they are
the same.
Unix / Linux / macOS
$ ./Configure [options...]
OpenVMS
$ perl Configure [options...]
Windows
$ perl Configure [options...]
Manual Configuration
OpenSSL knows about a range of different operating system, hardware and
compiler combinations. To see the ones it knows about, run
$ ./Configure LIST # Unix
or
$ perl Configure LIST # All other platforms
For the remainder of this text, the Unix form will be used in all examples.
Please use the appropriate form for your platform.
Pick a suitable name from the list that matches your system. For most
operating systems there is a choice between using cc or gcc.
When you have identified your system (and if necessary compiler) use this
name as the argument to Configure. For example, a linux-elf user would
run:
$ ./Configure linux-elf [options...]
Creating your own Configuration
If your system isn’t listed, you will have to create a configuration
file named Configurations/YOURFILENAME.conf (replace YOURFILENAME
with a filename of your choosing) and add the correct
configuration for your system. See the available configs as examples
and read Configurations/README.md and
Configurations/README-design.md
for more information.
The generic configurations cc or gcc should usually work on 32 bit
Unix-like systems.
Configure creates a build file (Makefile on Unix, makefile on Windows
and descrip.mms on OpenVMS) from a suitable template in Configurations/,
and defines various macros in include/openssl/configuration.h (generated
from include/openssl/configuration.h.in.
If none of the generated build files suit your purpose, it’s possible to
write your own build file template and give its name through the environment
variable BUILDFILE. For example, Ninja build files could be supported by
writing Configurations/build.ninja.tmpl and then configure with BUILDFILE
set like this (Unix syntax shown, you’ll have to adapt for other platforms):
$ BUILDFILE=build.ninja perl Configure [options...]
Out of Tree Builds
OpenSSL can be configured to build in a build directory separate from the
source code directory. It’s done by placing yourself in some other
directory and invoking the configuration commands from there.
Unix example
$ mkdir /var/tmp/openssl-build
$ cd /var/tmp/openssl-build
$ /PATH/TO/OPENSSL/SOURCE/Configure [options...]
OpenVMS example
$ set default sys$login:
$ create/dir [.tmp.openssl-build]
$ set default [.tmp.openssl-build]
$ perl D:[PATH.TO.OPENSSL.SOURCE]Configure [options...]
Windows example
$ C:
$ mkdir temp-openssl
$ cd temp-openssl
$ perl d:PATHTOOPENSSLSOURCEConfigure [options...]
Paths can be relative just as well as absolute. Configure will do its best
to translate them to relative paths whenever possible.
Build OpenSSL
Build OpenSSL by running:
$ make                                           # Unix
$ mms                                            ! (or mmk) OpenVMS
$ nmake                                          # Windows
This will build the OpenSSL libraries (libcrypto.a and libssl.a on
Unix, corresponding on other platforms) and the OpenSSL binary
(openssl). The libraries will be built in the top-level directory,
and the binary will be in the apps/ subdirectory.
If the build fails, take a look at the Build Failures
subsection of the Troubleshooting section.
Test OpenSSL
After a successful build, and before installing, the libraries should
be tested. Run:
$ make test                                      # Unix
$ mms test                                       ! OpenVMS
$ nmake test                                     # Windows
Warning: you MUST run the tests from an unprivileged account (or disable
your privileges temporarily if your platform allows it).
See test/README.md for further details how run tests.
See test/README-dev.md for guidelines on adding tests.
Install OpenSSL
If everything tests ok, install OpenSSL with
$ make install                                   # Unix
$ mms install                                    ! OpenVMS
$ nmake install                                  # Windows
Note that in order to perform the install step above you need to have
appropriate permissions to write to the installation directory.
The above commands will install all the software components in this
directory tree under <PREFIX> (the directory given with --prefix or
its default):
Unix / Linux / macOS
bin/           Contains the openssl binary and a few other
               utility scripts.
include/openssl
               Contains the header files needed if you want
               to build your own programs that use libcrypto
               or libssl.
lib            Contains the OpenSSL library files.
lib/engines    Contains the OpenSSL dynamically loadable engines.

share/man/man1 Contains the OpenSSL command line man-pages.
share/man/man3 Contains the OpenSSL library calls man-pages.
share/man/man5 Contains the OpenSSL configuration format man-pages.
share/man/man7 Contains the OpenSSL other misc man-pages.

share/doc/openssl/html/man1
share/doc/openssl/html/man3
share/doc/openssl/html/man5
share/doc/openssl/html/man7
               Contains the HTML rendition of the man-pages.
OpenVMS
‘arch’ is replaced with the architecture name, ALPHA or IA64,
‘sover’ is replaced with the shared library version (0101 for 1.1), and
‘pz’ is replaced with the pointer size OpenSSL was built with:
[.EXE.'arch']  Contains the openssl binary.
[.EXE]         Contains a few utility scripts.
[.include.openssl]
               Contains the header files needed if you want
               to build your own programs that use libcrypto
               or libssl.
[.LIB.'arch']  Contains the OpenSSL library files.
[.ENGINES'sover''pz'.'arch']
               Contains the OpenSSL dynamically loadable engines.
[.SYS$STARTUP] Contains startup, login and shutdown scripts.
               These define appropriate logical names and
               command symbols.
[.SYSTEST]     Contains the installation verification procedure.
[.HTML]        Contains the HTML rendition of the manual pages.
Additional Directories
Additionally, install will add the following directories under
OPENSSLDIR (the directory given with --openssldir or its default)
for you convenience:
certs          Initially empty, this is the default location
               for certificate files.
private        Initially empty, this is the default location
               for private key files.
misc           Various scripts.
The installation directory should be appropriately protected to ensure
unprivileged users cannot make changes to OpenSSL binaries or files, or
install engines. If you already have a pre-installed version of OpenSSL as
part of your Operating System it is recommended that you do not overwrite
the system version and instead install to somewhere else.
Package builders who want to configure the library for standard locations,
but have the package installed somewhere else so that it can easily be
packaged, can use
$ make DESTDIR=/tmp/package-root install         # Unix
$ mms/macro="DESTDIR=TMP:[PACKAGE-ROOT]" install ! OpenVMS
The specified destination directory will be prepended to all installation
target paths.
Compatibility issues with previous OpenSSL versions
COMPILING existing applications
Starting with version 1.1.0, OpenSSL hides a number of structures that were
previously open. This includes all internal libssl structures and a number
of EVP types. Accessor functions have been added to allow controlled access
to the structures’ data.
This means that some software needs to be rewritten to adapt to the new ways
of doing things. This often amounts to allocating an instance of a structure
explicitly where you could previously allocate them on the stack as automatic
variables, and using the provided accessor functions where you would previously
access a structure’s field directly.
Some APIs have changed as well. However, older APIs have been preserved when
possible.
Post-installation Notes
With the default OpenSSL installation comes a FIPS provider module, which
needs some post-installation attention, without which it will not be usable.
This involves using the following command:
See the openssl-fipsinstall(1) manual for details and examples.
Advanced Build Options
Environment Variables
A number of environment variables can be used to provide additional control
over the build process. Typically these should be defined prior to running
Configure. Not all environment variables are relevant to all platforms.
AR
               The name of the ar executable to use.

BUILDFILE
               Use a different build file name than the platform default
               ("Makefile" on Unix-like platforms, "makefile" on native Windows,
               "descrip.mms" on OpenVMS).  This requires that there is a
               corresponding build file template.
               See [Configurations/README.md](Configurations/README.md)
               for further information.

CC
               The compiler to use. Configure will attempt to pick a default
               compiler for your platform but this choice can be overridden
               using this variable. Set it to the compiler executable you wish
               to use, e.g. gcc or clang.

CROSS_COMPILE
               This environment variable has the same meaning as for the
               "--cross-compile-prefix" Configure flag described above. If both
               are set then the Configure flag takes precedence.

HASHBANGPERL
               The command string for the Perl executable to insert in the
               #! line of perl scripts that will be publicly installed.
               Default: /usr/bin/env perl
               Note: the value of this variable is added to the same scripts
               on all platforms, but it's only relevant on Unix-like platforms.

KERNEL_BITS
               This can be the value `32` or `64` to specify the architecture
               when it is not "obvious" to the configuration. It should generally
               not be necessary to specify this environment variable.

NM
               The name of the nm executable to use.

OPENSSL_LOCAL_CONFIG_DIR
               OpenSSL comes with a database of information about how it
               should be built on different platforms as well as build file
               templates for those platforms. The database is comprised of
               ".conf" files in the Configurations directory.  The build
               file templates reside there as well as ".tmpl" files. See the
               file [Configurations/README.md](Configurations/README.md)
               for further information about the format of ".conf" files
               as well as information on the ".tmpl" files.
               In addition to the standard ".conf" and ".tmpl" files, it is
               possible to create your own ".conf" and ".tmpl" files and
               store them locally, outside the OpenSSL source tree.
               This environment variable can be set to the directory where
               these files are held and will be considered by Configure
               before it looks in the standard directories.

PERL
               The name of the Perl executable to use when building OpenSSL.
               Only needed if builing should use a different Perl executable
               than what is used to run the Configure script.

RANLIB
               The name of the ranlib executable to use.

RC
               The name of the rc executable to use. The default will be as
               defined for the target platform in the ".conf" file. If not
               defined then "windres" will be used. The WINDRES environment
               variable is synonymous to this. If both are defined then RC
               takes precedence.

WINDRES
               See RC.
Makefile Targets
The Configure script generates a Makefile in a format relevant to the specific
platform. The Makefiles provide a number of targets that can be used. Not all
targets may be available on all platforms. Only the most common targets are
described here. Examine the Makefiles themselves for the full list.
all
               The target to build all the software components and
               documentation.

build_sw
               Build all the software components.
               THIS IS THE DEFAULT TARGET.

build_docs
               Build all documentation components.

clean
               Remove all build artefacts and return the directory to a "clean"
               state.

depend
               Rebuild the dependencies in the Makefiles. This is a legacy
               option that no longer needs to be used since OpenSSL 1.1.0.

install
               Install all OpenSSL components.

install_sw
               Only install the OpenSSL software components.

install_docs
               Only install the OpenSSL documentation components.

install_man_docs
               Only install the OpenSSL man pages (Unix only).

install_html_docs
               Only install the OpenSSL HTML documentation.

install_fips
               Install the FIPS provider module configuration file.

list-tests
               Prints a list of all the self test names.

test
               Build and run the OpenSSL self tests.

uninstall
               Uninstall all OpenSSL components.

reconfigure
reconf
               Re-run the configuration process, as exactly as the last time
               as possible.

update
               This is a developer option. If you are developing a patch for
               OpenSSL you may need to use this if you want to update
               automatically generated files; add new error codes or add new
               (or change the visibility of) public API functions. (Unix only).
Running Selected Tests
You can specify a set of tests to be performed
using the make variable TESTS.
See the section Running Selected Tests of
test/README.md.
Troubleshooting
Configuration Problems
Selecting the correct target
The ./Configure script tries hard to guess your operating system, but in some
cases it does not succeed. You will see a message like the following:
$ ./Configure
Operating system: x86-whatever-minix
This system (minix) is not supported. See file INSTALL.md for details.
Even if the automatic target selection by the ./Configure script fails,
chances are that you still might find a suitable target in the Configurations
directory, which you can supply to the ./Configure command,
possibly after some adjustment.
The Configurations/ directory contains a lot of examples of such targets.
The main configuration file is 10-main.conf, which contains all targets that
are officially supported by the OpenSSL team. Other configuration files contain
targets contributed by other OpenSSL users. The list of targets can be found in
a Perl list my %targets = ( ... ).
my %targets = (
...
"target-name" => {
    inherit_from     => [ "base-target" ],
    CC               => "...",
    cflags           => add("..."),
    asm_arch         => '...',
    perlasm_scheme   => "...",
},
...
)
If you call ./Configure without arguments, it will give you a list of all
known targets. Using grep, you can lookup the target definition in the
Configurations/ directory. For example the android-x86_64 can be found in
Configurations/15-android.conf.
The directory contains two README files, which explain the general syntax and
design of the configuration files.
- Configurations/README.md
- Configurations/README-design.md
If you need further help, try to search the openssl-users mailing list
or the GitHub Issues for existing solutions. If you don’t find anything,
you can raise an issue to ask a question yourself.
More about our support resources can be found in the SUPPORT file.
Configuration Errors
If the ./Configure or ./Configure command fails with an error message,
read the error message carefully and try to figure out whether you made
a mistake (e.g., by providing a wrong option), or whether the script is
working incorrectly. If you think you encountered a bug, please
raise an issue on GitHub to file a bug report.
Along with a short description of the bug, please provide the complete
configure command line and the relevant output including the error message.
Note: To make the output readable, please add a ‘code fence’ (three backquotes
``` on a separate line) before and after your output:
 ```
 ./Configure [your arguments...]

 [output...]

 ```
Build Failures
If the build fails, look carefully at the output. Try to locate and understand
the error message. It might be that the compiler is already telling you
exactly what you need to do to fix your problem.
There may be reasons for the failure that aren’t problems in OpenSSL itself,
for example if the compiler reports missing standard or third party headers.
If the build succeeded previously, but fails after a source or configuration
change, it might be helpful to clean the build tree before attempting another
build. Use this command:
$ make clean                                     # Unix
$ mms clean                                      ! (or mmk) OpenVMS
$ nmake clean                                    # Windows
Assembler error messages can sometimes be sidestepped by using the no-asm
configuration option. See also notes.
Compiling parts of OpenSSL with gcc and others with the system compiler will
result in unresolved symbols on some systems.
If you are still having problems, try to search the openssl-users mailing
list or the GitHub Issues for existing solutions. If you think you
encountered an OpenSSL bug, please raise an issue to file a bug report.
Please take the time to review the existing issues first; maybe the bug was
already reported or has already been fixed.
Test Failures
If some tests fail, look at the output. There may be reasons for the failure
that isn’t a problem in OpenSSL itself (like an OS malfunction or a Perl issue).
You may want increased verbosity, that can be accomplished as described in
section Test Failures of test/README.md.
You may also want to selectively specify which test(s) to perform. This can be
done using the make variable TESTS as described in section Running
Selected Tests of test/README.md.
If you find a problem with OpenSSL itself, try removing any
compiler optimization flags from the CFLAGS line in the Makefile and
run make clean; make or corresponding.
To report a bug please open an issue on GitHub, at
https://github.com/openssl/openssl/issues.
Notes
Notes on multi-threading
For some systems, the OpenSSL Configure script knows what compiler options
are needed to generate a library that is suitable for multi-threaded
applications. On these systems, support for multi-threading is enabled
by default; use the no-threads option to disable (this should never be
necessary).
On other systems, to enable support for multi-threading, you will have
to specify at least two options: threads, and a system-dependent option.
(The latter is -D_REENTRANT on various systems.) The default in this
case, obviously, is not to include support for multi-threading (but
you can still use no-threads to suppress an annoying warning message
from the Configure script.)
OpenSSL provides built-in support for two threading models: pthreads (found on
most UNIX/Linux systems), and Windows threads. No other threading models are
supported. If your platform does not provide pthreads or Windows threads then
you should use Configure with the no-threads option.
For pthreads, all locks are non-recursive. In addition, in a debug build,
the mutex attribute PTHREAD_MUTEX_ERRORCHECK is used. If this is not
available on your platform, you might have to add
-DOPENSSL_NO_MUTEX_ERRORCHECK to your Configure invocation.
(On Linux PTHREAD_MUTEX_ERRORCHECK is an enum value, so a built-in
ifdef test cannot be used.)
Notes on shared libraries
For most systems the OpenSSL Configure script knows what is needed to
build shared libraries for libcrypto and libssl. On these systems
the shared libraries will be created by default. This can be suppressed and
only static libraries created by using the no-shared option. On systems
where OpenSSL does not know how to build shared libraries the no-shared
option will be forced and only static libraries will be created.
Shared libraries are named a little differently on different platforms.
One way or another, they all have the major OpenSSL version number as
part of the file name, i.e. for OpenSSL 1.1.x, 1.1 is somehow part of
the name.
On most POSIX platforms, shared libraries are named libcrypto.so.1.1
and libssl.so.1.1.
on Cygwin, shared libraries are named cygcrypto-1.1.dll and cygssl-1.1.dll
with import libraries libcrypto.dll.a and libssl.dll.a.
On Windows build with MSVC or using MingW, shared libraries are named
libcrypto-1_1.dll and libssl-1_1.dll for 32-bit Windows,
libcrypto-1_1-x64.dll and libssl-1_1-x64.dll for 64-bit x86_64 Windows,
and libcrypto-1_1-ia64.dll and libssl-1_1-ia64.dll for IA64 Windows.
With MSVC, the import libraries are named libcrypto.lib and libssl.lib,
while with MingW, they are named libcrypto.dll.a and libssl.dll.a.
On VMS, shareable images (VMS speak for shared libraries) are named
ossl$libcrypto0101_shr.exe and ossl$libssl0101_shr.exe. However, when
OpenSSL is specifically built for 32-bit pointers, the shareable images
are named ossl$libcrypto0101_shr32.exe and ossl$libssl0101_shr32.exe
instead, and when built for 64-bit pointers, they are named
ossl$libcrypto0101_shr64.exe and ossl$libssl0101_shr64.exe.
Notes on random number generation
Availability of cryptographically secure random numbers is required for
secret key generation. OpenSSL provides several options to seed the
internal CSPRNG. If not properly seeded, the internal CSPRNG will refuse
to deliver random bytes and a «PRNG not seeded error» will occur.
The seeding method can be configured using the --with-rand-seed option,
which can be used to specify a comma separated list of seed methods.
However, in most cases OpenSSL will choose a suitable default method,
so it is not necessary to explicitly provide this option. Note also
that not all methods are available on all platforms. The FIPS provider will
silently ignore seed sources that were not validated.
I) On operating systems which provide a suitable randomness source (in
form of a system call or system device), OpenSSL will use the optimal
available method to seed the CSPRNG from the operating system’s
randomness sources. This corresponds to the option --with-rand-seed=os.
II) On systems without such a suitable randomness source, automatic seeding
and reseeding is disabled (--with-rand-seed=none) and it may be necessary
to install additional support software to obtain a random seed and reseed
the CSPRNG manually. Please check out the manual pages for RAND_add(),
RAND_bytes(), RAND_egd(), and the FAQ for more information.
Notes on assembler modules compilation
Compilation of some code paths in assembler modules might depend on whether the
current assembler version supports certain ISA extensions or not. Code paths
that use the AES-NI, PCLMULQDQ, SSSE3, and SHA extensions are always assembled.
Apart from that, the minimum requirements for the assembler versions are shown
in the table below:
| ISA extension | GNU as | nasm | llvm |
|---|---|---|---|
| AVX | 2.19 | 2.09 | 3.0 |
| AVX2 | 2.22 | 2.10 | 3.1 |
| ADCX/ADOX | 2.23 | 2.10 | 3.3 |
| AVX512 | 2.25 | 2.11.8 | 3.6 (*) |
| AVX512IFMA | 2.26 | 2.11.8 | 6.0 (*) |
| VAES | 2.30 | 2.13.3 | 6.0 (*) |
(*) Even though AVX512 support was implemented in llvm 3.6, prior to version 7.0
an explicit -march flag was apparently required to compile assembly modules. But
then the compiler generates processor-specific code, which in turn contradicts
the idea of performing dispatch at run-time, which is facilitated by the special
variable OPENSSL_ia32cap. For versions older than 7.0, it is possible to work
around the problem by forcing the build procedure to use the following script:
#!/bin/sh
exec clang -no-integrated-as "$@"
instead of the real clang. In which case it doesn’t matter what clang version
is used, as it is the version of the GNU assembler that will be checked.
idk, if it may help you, but I installed .Net framework 4.8 on 2012 R2 server.
Then I was able to use tls13 in my .net application.
https://support.microsoft.com/en-us/help/4503548/microsoft-net-framework-4-8-offline-installer-for-windows
It includes system updates:
In Windows Server 2012, Update for Microsoft Windows (KB4486081) is
displayed under Installed Updates in Control Panel. In Windows RT 8.1,
Windows 8.1 or Windows Server 2012 R2, Update for Microsoft Windows
(KB4486105) is displayed under Installed Updates in Control Panel.
You also may try to install these updates only, but I am not sure about that at all.
answered May 15, 2020 at 9:25
![]()
1
There is no way to enable TLS 1.3 on Windows Server 2012 R2 as of October 2020. Windows Server 2012 R2 does not support TLS 1.3.
answered Oct 2, 2020 at 18:16
![]()
В эпоху кибервойн единственная разумная позиция – быть параноиком, а это означает, помимо прочего, быть параноиком по поводу обновлений программного обеспечения.
Взять к примеру OpenSSL.
Эта криптографическая библиотека с открытым исходным кодом, которая реализует протоколы Transport Layer Security (TLS) и Secure Sockets Layer (SSL), разработана для «защиты связи по компьютерным сетям от перехвата», но угадайте, что?
С самого начала она была пронизана ошибками.
Это может быть неизбежно, в определенной степени – в конце концов, мы говорим о программном обеспечении.
Несмотря на то, что вы не можете ничего сделать с ошибками, которые еще предстоит идентифицировать, вы можете по крайней мере защитить свои системы от тех ошибок, которые уже исправлены и задокументированы.
Жаль, что официальный сайт OpenSSL предлагает только исходники для Linux.
Хотя дистрибутивы Linux обычно поставляются с OpenSSL, это не никак относится к Windows … или, скажем, «дистрибутивам Windows».
Если вы хотите запустить его, вам нужен бинарник под Windows, и если вы не хотите его собирать самостоятельно, вы должны найти другой вариант.
В этой статье я покажу,как можно настроить OpenSSL в Windows, не имея дело при этом дела со сборкой из исходников.
Содержание
- Шаг 1. Скачать бинарник
- Шаг 2. Запустите установщик
- Шаг 3. Запустите бинарный файл OpenSSL
Шаг 1. Скачать бинарник
Поиск бинарных файлов OpenSSL для Windows – непростая задача, но не отчаивайтесь.
Они существуют.
Чтобы загрузить нужный, перейдите по ссылке:
https://slproweb.com/products/Win32OpenSSL.html
Не дайте себя одурачить ни строкой Win32 в URL-адресе, ни навигацией, указывающей на казалось бы древнюю страницу загрузки еще с 2004 года.
Прокрутите страницу вниз до раздела «Download Win32 OpenSSL».
Теперь вам нужно выбрать правильный файл из этого списка.
Для каждой версии есть два основных типа: light и full.
Загрузите файл под названием «Win64 OpenSSL v1.1.0f» (или версию с более новой версией, как только она станет доступна), чтобы скачать фулл установщик.
Текущая версия на момент написания этой статьи (OpenSSL 1.1.0h) сильно отличается от предыдущих версий.
Это совсем не одно и то же, поэтому обратите внимание на номера релизов!
Худшее, что вы можете сделать, – это использовать старую версию, в которой есть задокументированные ошибки.
Шаг 2. Запустите установщик
Мы рекомендуем установить OpenSSL вне вашей системной директории Windows.
Следуйте инструкциям по установке через GUI.
Шаг 3. Запустите бинарный файл OpenSSL
Чтобы начать работу с OpenSSL, вы можете просто щелкнуть по нему правой кнопкой мыши в проводнике Windows в месте его установки, например в моем случае:
C:OpenSSL-Win64bin
затем выберите «Запуск от имени администратора».
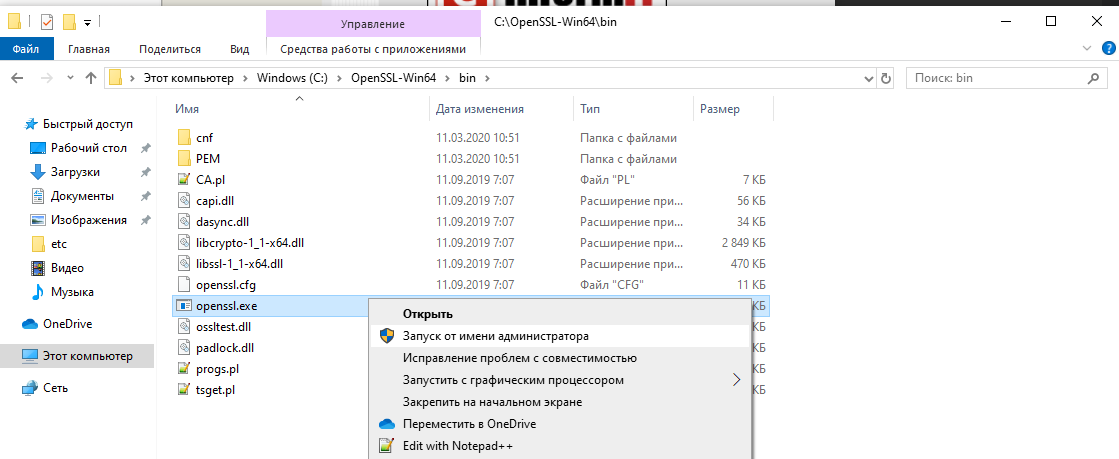
Откроется окно cmd с командной строкой OpenSSL:
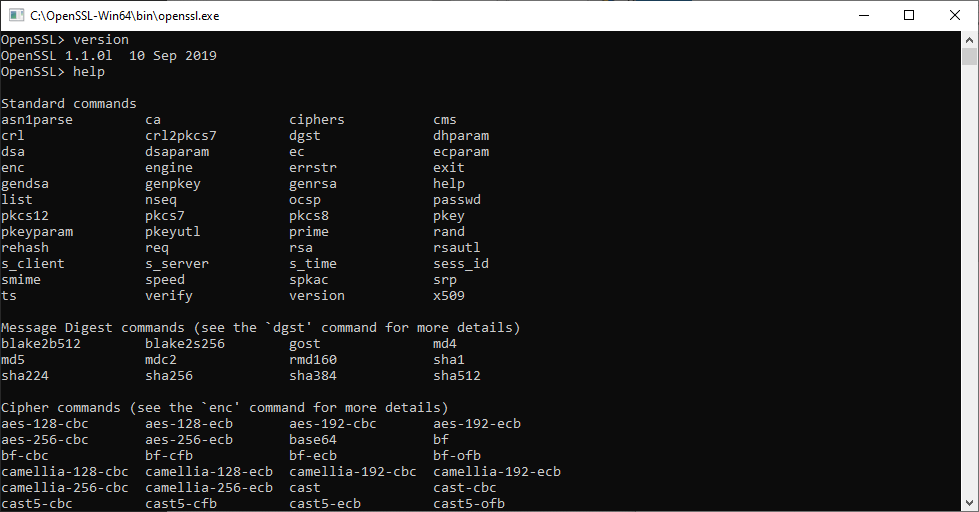
Теперь вы можете начать создавать ключи OpenSSL. (Кстати, пользователи утилиты удаленного доступа PuTTY могут экспортировать ключ OpenSSH из PuTTYgen.)
При использовании OpenSSL в Windows таким способом вы просто пропускаете команду openssl, которую видите в приглашении.
Например, чтобы создать пару ключей с помощью OpenSSL в Windows, вы можете ввести:
openssl req -newkey rsa:2048 -nodes -keyout key.pem -x509 -days 365 -out certificate.pem
и следуйте инструкциям на экране, как обычно.
Чтобы просмотреть сертификат:
openssl x509 -text -noout -in certificate.pem
The below content is superseded — for information on updating your certificates please see:
- Token signing and decryption
- SSL certificate
Active Directory Federation Services (AD FS) heavily leverages X.509 certificates to allow the solution to function securely. As with all of the other certificates that you deploy within your enterprise, there must be a process to manage and renew certificates prior to them expiring. If a certificate expires this can be summarised quite simply as not good!
The Office 365 Portal will provide notifications to indicate that one or more of your AD FS certificates will expire shortly. This may be the SSL certificate, service communication certificate, token decryption or token signing certificates. If one of these are about to expire, you will get the alert as shown below in the Office 365 Portal.

Clicking the link in the alert will take you to: Renewing Federation Certificates for Office 365 and Azure AD. That will walk you through renewing the token decryption and token signing certificates. This blog post discusses renewing the SSL certificate and service communications certificate.
In the AD FS management console, the certificate expiration dates are highlighted.

The PowerShell commands to get the same information on the AD FS servers are: Get-AdfsCertificate and Get-AdfsSslCertificate
On the Web Application Proxy (WAP) servers we can use Get-WebApplicationProxySslCertificate. More on the PowerShell cmdlets later.
What’s The Worst That Can Happen If I Don’t Do This?
If you do not follow your process to renew AD FS certificates, or see the additional prompt in the Office 365 Portal, then expect the wheels to fall off the bus.
Users will be unable to access Office 365 services in most cases. The below are some images that you will most likely NOT want to see in production. The below SSL and service communication certificate has expired. The below images were taken after the 8th of February 2016.

If we then browse to the AD FS metadata page, IE is not happy either.

Clicking to continue on, we can then review the certificate.

Telling users that the above is situation is fine to proceed, is unacceptable and irresponsible on our part. All that we are doing is teaching people that it is OK to click here to either see the dancing pigs, or re-confirm your online banking credentials. Not good.
This is why it is critical that we proactively renew certificates so we provide a secure environment to users, and promote correct behaviours.
That’s enough doom and gloom, time to get back to ensuring this does not happen!
If we review Certificate Requirements for Federation Servers on TechNet, there are multiple certificate types that come into play. To list them out:
- Token-decryption certificate
- Token-signing certificate
- Secure Sockets Layer (SSL) certificate
- Service communication certificate
By default the token signing and token decryption certificates are self signed and will automatically manage themselves in the default configuration. As long as Office 365 is able to retrieve the AD FS metadata, then Office 365 automatically updates with no additional scripts or manual intervention. Note – this assumes that you are current on Windows updates, else the certificates do not roll over properly. Blog post on that later.
The last two are separate but are often blended together. By default, the service communication certificate uses the same certificate as the Secure Sockets Layer (SSL) certificate. Federation servers use a server authentication certificate, also known as a service communication for Windows Communication Foundation (WCF) Message Security.
Regarding the SSL certificate, Federation servers use an SSL certificate to secure Web services traffic for SSL communication with Web clients and with federation server proxies.
Because of this, we have two PowerShell commands to manage the SSL certificate and service communication certificate. The commands are Set-AdfsSslCertificate and Set-AdfsCertificate. They are very similar, and appear to be the same but are not.
If we look at them this way the difference is more apparent.
Set-AdfsSslCertificate
Set-AdfsCertificate
Keep in mind that there are two separate commands and we will come back to them later in the post.
Note that the GUI is not used in this post as it is not able to perform all of the changes we require to update the certificates in Windows Server 2012 R2 AD FS.
A high level overview of the steps we will perform are:
- Obtain new certificate
- Install new certificate on all AD FS servers
- Install new certificate on all WAP servers
- Set SSL certificate on all AD FS servers
- Set Service Communication certificate
- Set SSL certificate on all WAP servers
- Verify and test
Obtain New Certificate
This section is not only about requesting a new certificate, but also about ensuring that it is correctly installed and then preparing for the subsequent steps.
There are a few ways in which you can request a SSL/TLS certificate. Some Exchange people use the Exchange toolset to do this, though you may not be able to do so. In such cases we can use this process How To Request Certificate Without Using IIS or Exchange to manually generate the certificate request and process it directly on an AD FS 2012 R2 server. Please see the aforementioned blog post on the details, and how to edit the template. The certificate used here only has a subject name, there are no SAN entries. Your use case may also involve Device Registration, and have an additional name on the certificate.
We will generate the new certificate with the same name as before: adfs.tailspintoys.ca
Certreq.exe is used to generate the pending certificate request, which is called newcert.req.

The pending request (newcert.req) was then submitted and processed by the issuing CA. Follow the steps in your vendor’s documentation to complete this process. The signed response from the CA has been copied back to the same AD FS server and is the file called adfs_tailspintoys_ca.cer.
Certreq.exe is then used to mate the pending request with the signed CA response.

Part of my standard certificate drills are to then immediately check to ensure the following are OK:
-
Certificate subject name is correct – ensure there are no typos!
-
Certificate Subject Alternative Names (SAN) are correct – SAN names might not apply in your environment.
-
Valid from
-
Valid to
-
Certificate has private key
-
Certificate chains correctly
-
Any intermediate CA certificates that were required to be updated
The last point is important. With the move to SHA2 certificates, there is a good chance that a different intermediate issuing CA is going to be used. What is the best thing to do? Read the documentation from your CA provider, and follow the installation instructions that come with your certificate. Some vendors have a tool that does all this for you, others require you to manually install updated certs. Either will work, you must ensure that the requisite steps are performed.
We need to know the new certificate’s thumbprint so that we can specify it in later steps. To determine the thumbprint, one option is to list the certificates in the local machine store using PowerShell:
Get-ChildItem –Path Cert:LocalMachinemy
The above is the bare minimum to type, and will show all the certs in the local machine’s store. If you have several, the following command may be more beneficial:
Get-ChildItem -Path Cert:LocalMachinemy | Select-Object FriendlyName, Thumbprint, Subject, NotBefore, NotAfter
The thumbprint can also be obtained by looking at the certificate’s properties in the certificate MMC. Note the highlighted line below:

In this case the thumbprint is B4E3C4EC85B50BAD7CF5F8093EA546CF7F84674A – yours will be different.
Now we have our shiny new certificate. This needs to be exported out, and deployed to the other servers. To export the certificate, we can use the certificate MMC, just be sure to chose the option to export out the private key. Hint – if the file type is not .PFX then you have not chosen to export the private key. A strong password was set during the export operation, as we want to provide as much protection as possible.
Alternatively you can export out using Export-PfxCertificate.
Install New Certificate on All AD FS Servers
The certificate needs to be deployed onto the remaining AD FS servers. As with the export there are different ways to accomplish this. For example:
- Double click the .PFX file and import using wizard
- Open certificate manager, and import to the local computer’s personal store
- Use Import-PFX
As with the initial install, ensure the following are OK:
-
Valid from
-
Valid to
-
Certificate has private key
-
Certificate chains correctly
-
Any intermediate CA certificates that were required to be updated were updated
Install New Certificate on All WAP Servers
The same process to copy over and install the certificate needs to be followed on all WAP servers.
Set SSL certificate on all AD FS servers
Now that the new certificate has been deployed, onto all of the AD FS servers we can then enable it as the SSL certificate using PowerShell
Set-AdfsSslCertificate –Thumbprint XXXXXXXX
In our example this will be:
Set-AdfsSslCertificate –Thumbprint B4E3C4EC85B50BAD7CF5F8093EA546CF7F84674A
This step must be performed on all AD FS servers.
The AD FS service account[s] also require access to the new certificate’s key. If we look at the certificate’s private key permissions after running the previous command, note the ACLs that are present:

Manually adding those permissions was not required in this lab. In TechNet’s Obtain and Configure an SSL Certificate for AD FS article it states:
The following message will inform you that you need to set the private key permissions correctly on the new certificate: “Ensure that the private key for the chosen certificate is accessible to the service account for this Federation Service on each server in the farm.” Update the permissions on the SSL and the service communication certificates to allow Read access for the AD FS service and DRS services. You have to complete the following procedure on all federation servers in your farm.
We can look at the HTTPS.sys binding using netsh http show sslcert
Do NOT make modifications using netsh in AD FS 2012 R2. It is mentioned as a read only verification step here.
Set Service Communication certificate
This is where we come back to the two cmdlets referenced at the start of this post. In the previous section we ran the Set-AdfsSslCertificate cmdlet. Now we must also run the Set-ADFSCertificate to complete the process. Execute the Set-ADFSCertificate command only on the Primary ADFS node. If you are not sure which is primary, run Get-AdfsSyncProperties. Note this command is not to be executed on every AD FS server. It is to be executed once. Stating to execute the Set-ADFSCertificate on the primary is a simple statement and covers all cases.
We have to instruct AD FS to use the new certificate for the service communications cert. This is done using PowerShell:
Set-AdfsCertificate -CertificateType Service-Communications –Thumbprint XXXXXXX
In our example:
Set-AdfsCertificate -CertificateType Service-Communications –Thumbprint B4E3C4EC85B50BAD7CF5F8093EA546CF7F84674A

As prompted, restart the Active Directory Federation Services service (adfssrv) on all AD FS servers in the farm.
Set SSL certificate on all WAP servers
To enable the SSL certificate on the WAP servers, we need to run Set-WebApplicationProxySslCertificate on each server. Remember that the new certificate was previously deployed to all WAP servers. In this stage we are simply enabling it.
Set-WebApplicationProxySslCertificate -Thumbprint XXXX
In our example:
Set-WebApplicationProxySslCertificate -Thumbprint B4E3C4EC85B50BAD7CF5F8093EA546CF7F84674A

Verify and Test
At this point we need to test and ensure that AD FS is able to authentication and sign in clients internally and externally.
Cleanup –Optional
Once you have verified that all aspects of AD FS are functioning, you may want to go back and archive the old SSL certificates from the servers to keep the certificate stores clean.
Automating AD FS Service Certificate Change
If you wish to automate or script changing the SSL/TLS certificates, then you are in luck! Pierre Audonnet has published the below script to the TechNet scripting gallery to help with automating this change.

Bootnote
For reference TechNet has the following verbiage on the certificate cmdlets for AD FS servers.
The Set-AdfsSslCertificate cmdlet sets an SSL certificate for HTTPS bindings for Active Directory Federation Services (AD FS) and, if configured, the device registration service. The subject name of the specified certificate must match the federation service name. Use this cmdlet to change the SSL certificate associated with the AD FS service. You must run this cmdlet on each AD FS server in the AD FS farm
The Set-AdfsCertificate cmdlet sets the properties of an existing certificate that Active Directory Federation Services (AD FS) uses to sign, decrypt, or secure communications..
All of the AD FS Cmdlets in Windows PowerShell are listed here.
Cheers,
Rhoderick