![How to Update Python Version? - [Upgrade Python Version]](https://monovm.com/wp-content/uploads/2022/11/how-to-update-python-version731-847xAuto.webp)
List of content you will read in this article:
- 1. What is PIP?
- 2. How to update Python on Windows Operating System?
- 3. How To Upgrade Python on macOS?
- 4. How to Update Python version on LINUX?
- 5. Conclusion
- 6. FAQ
Python is an open-source high-level programming language that allows users to execute commands, plugins on their machine, and even software from several major suppliers. It means you can operate it on many different operating systems, including the Windows VPS Server. Python is a cross-platform programing language.
Pip is one of the best applications for Python package installation and administration. Pip’s popularity stems from the many apps that use this tool. Pip enables 3rd Party package installed to manage binary packages with the quickly configured package manager. Since Python’s latest releases have piping as normal, this guide will explain how to install PIP and how to update Python version with a complete step-by-step guide.
What is PIP?
PIP is a software management framework for installing and managing Python-written program packages. It is called the ‘preferred software installer’ or ‘Pip Installs Packages.’ PIP, used for Python, is a command-line interface for handling PyPI program installation. You might need to upgrade PIP if you’re using an earlier version of Python on Windows. Download the application file, open the command- line and start the installer to run PIP on Windows quickly. It will teach you how PIP is installed on Windows and how it can be modified, upgraded, and set up.
How to update Python on Windows Operating System?
There are two simple ways to update your current Python version with the latest one. They are as follows:
- Using the Python Installer
- Using the Windows Chocolatey Package Manager
So let’s see how we can update the Python version with these two methods, one by one.
Method 1: Update the Version of Python on Windows using the Python Installer
This method of updating the Python version will work if Python is installed or not on your System.
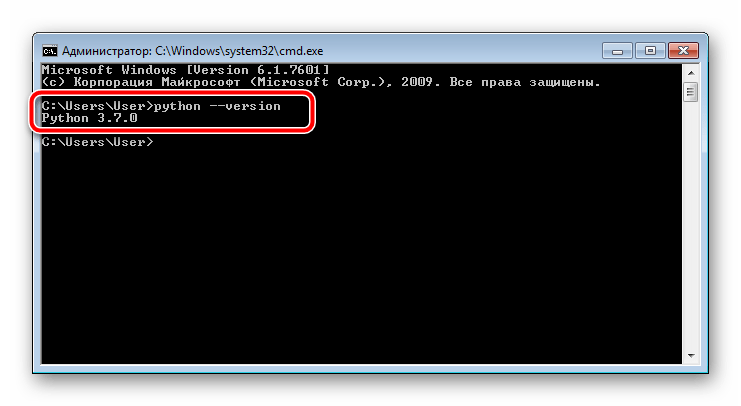
If Python is already installed on your system, you can check it using the python -V command.

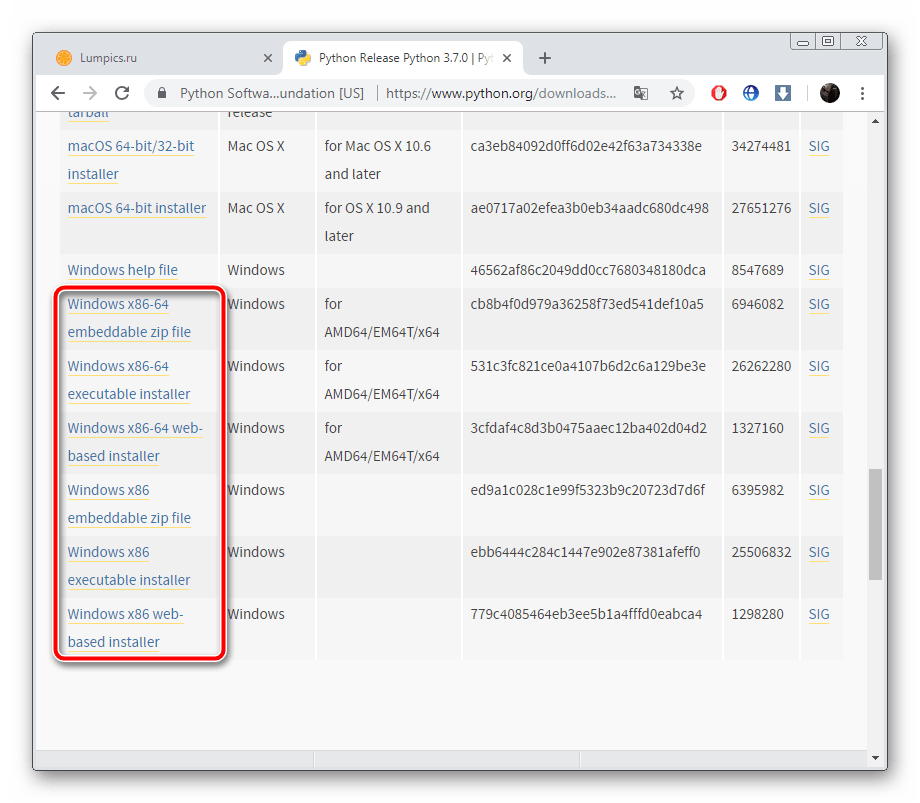
Step 1: Download the Python installer from the Official Website of Python
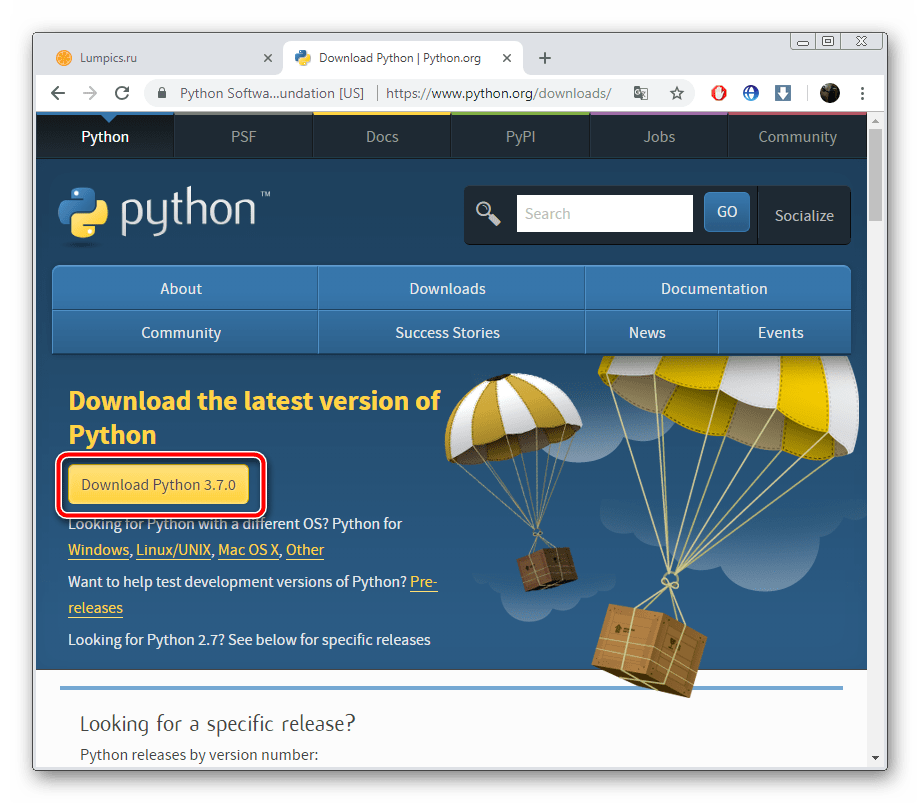
The easiest way to update the Python version is to download the latest version from the official website (https://www.python.org/downloads/)
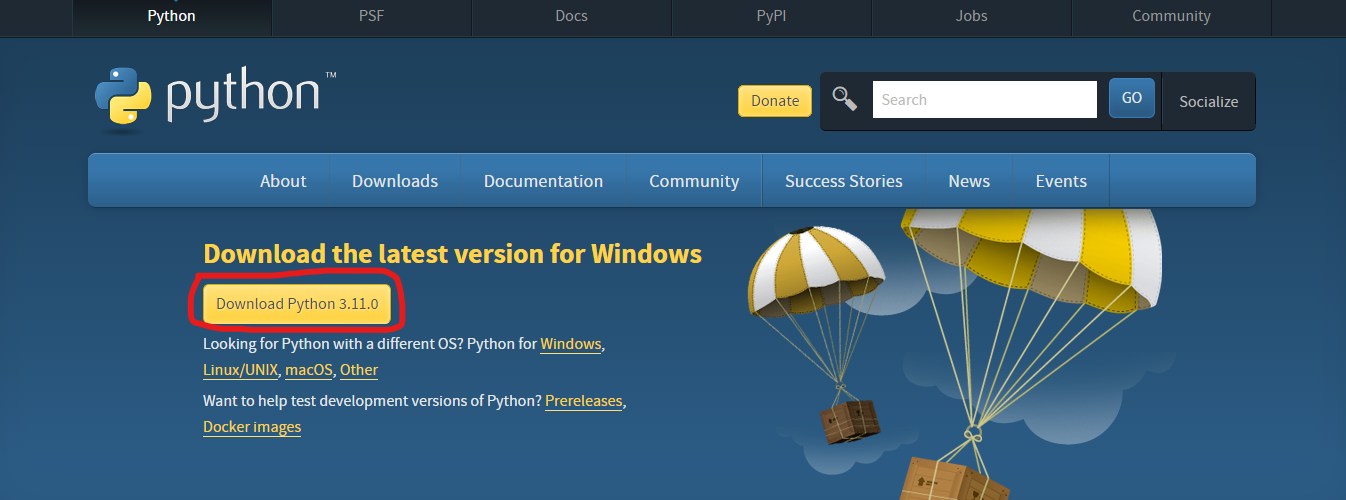
You can click on the Download Python 3.11.0 button, and it will download the latest compatible Python version for your system.
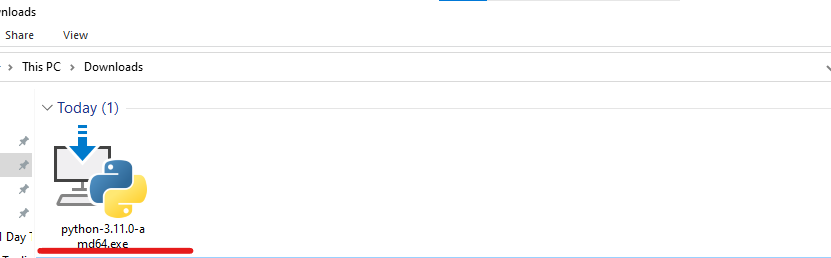
Step 2: Install the Downloaded Python Installer
After downloading the exe file, double-click on it to install Python.
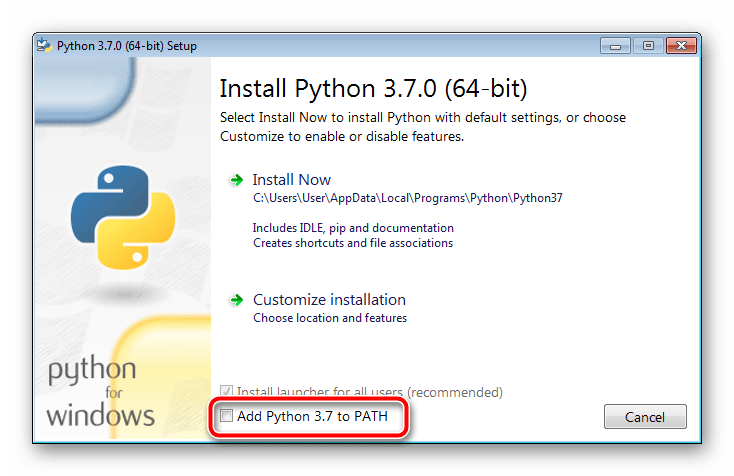
Step 3: Install Python
Now, you can install the latest version of Python.
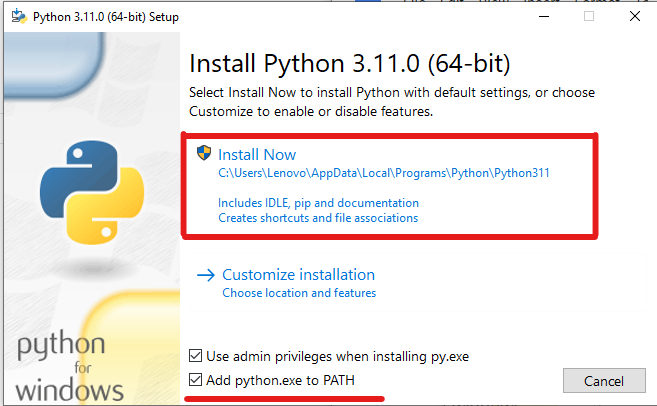
Check the “Add python.ext to PATH”, then click on the “Install Now” button.
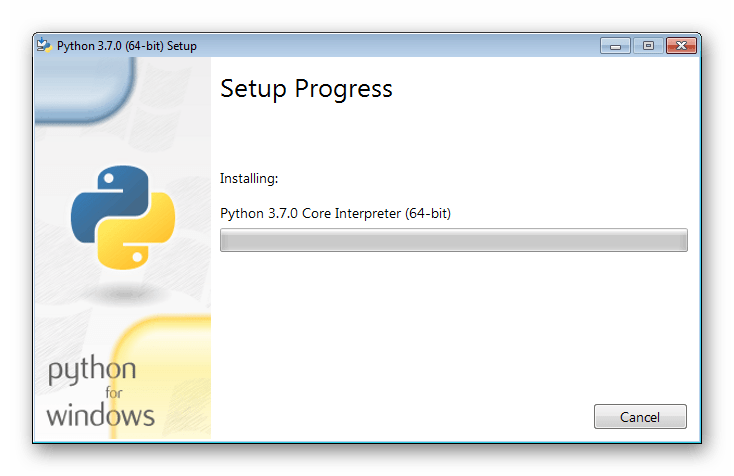
This will start the installation process.
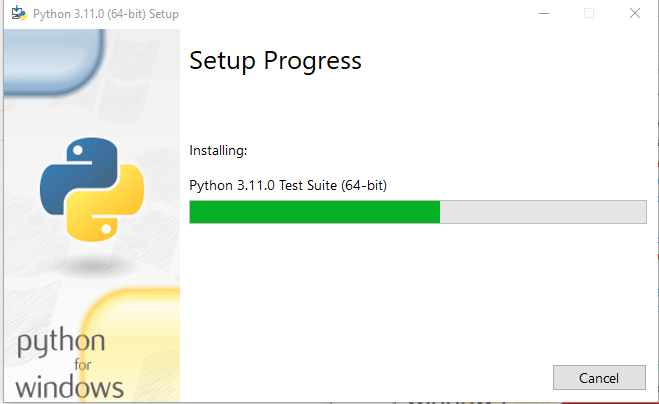
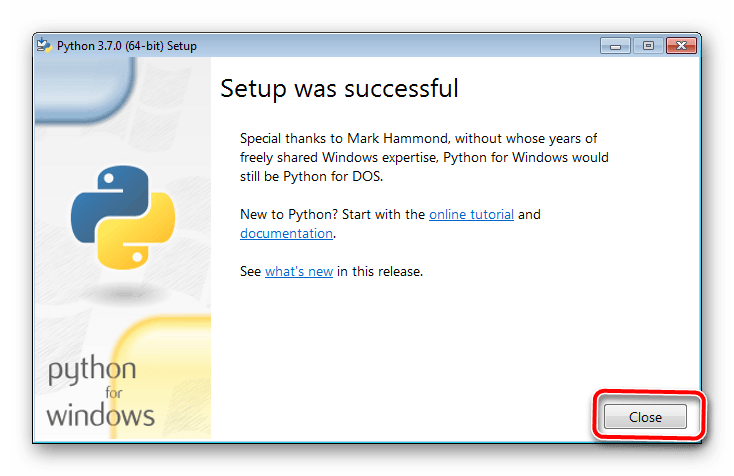
After processing, the latest version of Python will be installed on your system.
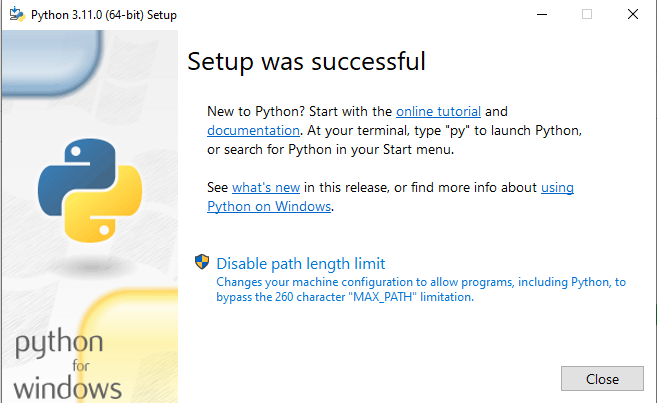
Click on the “Close” Button.
Step 4: Verify the Update
After successful installation, you can verify whether or not the latest version is installed on your system. To check the version, you can again run the same command, python -V, on the prompt command.

Now, you can see that it is showing the latest installed version, i.e., Python 3.11.0.
Note: If it still shows the old version, you may restart your system. Or uninstall the old version from the control panel.
Method 2: Install Python using Command Line Only using the Chocolatey Package Manager
Chocolatey is a Package Manager command line tool for windows, and we can use it to install software for our window system. In our case, we can use it to install Python or update the current version of Python.
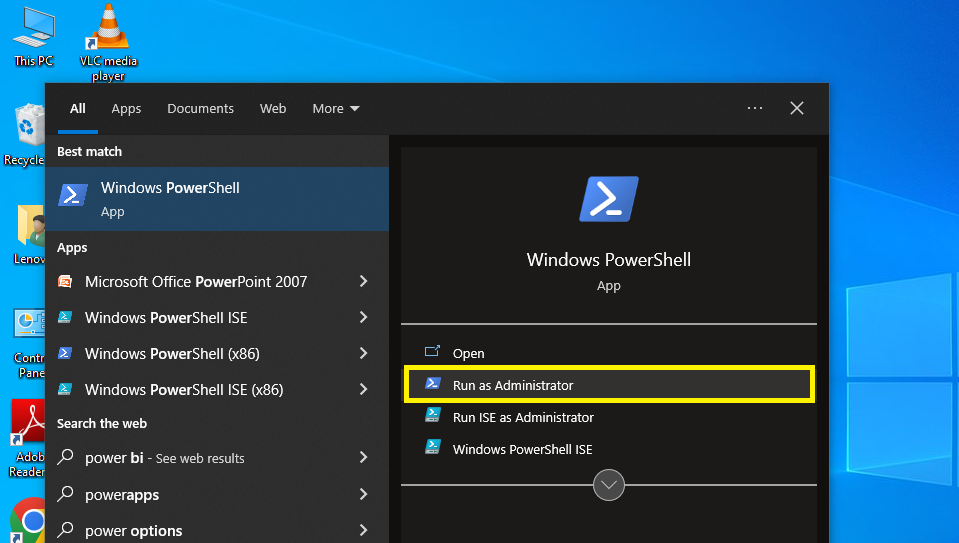
Step 1 Open The Powershell as Administrator
To install Chocolatey, you need to open PowerShell as Administrator.
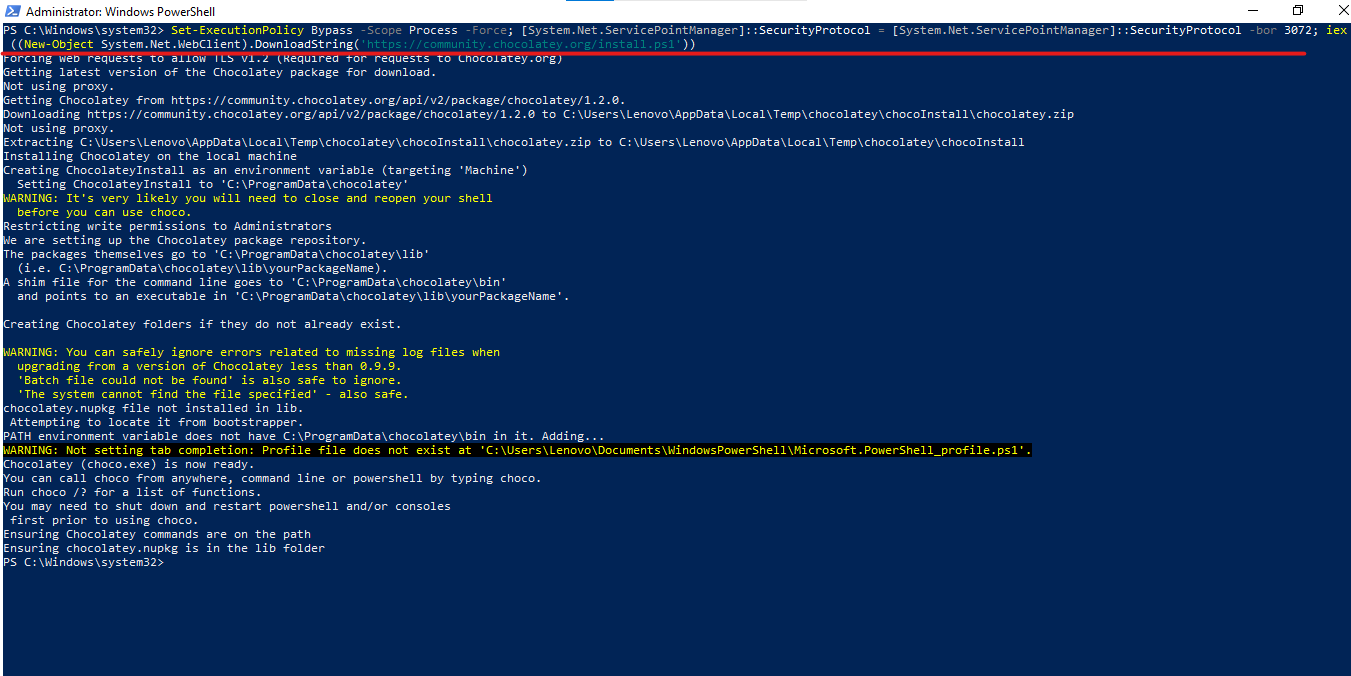
Step 2: Install the Chocolatey Package Manager Command
Now, you can install the Chocolatey package manager using the following command.
Set-ExecutionPolicy Bypass -Scope Process -Force; [System.Net.ServicePointManager]::SecurityProtocol = [System.Net.ServicePointManager]::SecurityProtocol -bor 3072; iex ((New-Object System.Net.WebClient).DownloadString('https://community.chocolatey.org/install.ps1'))
Step 3: Verify the Chocolatey Installation
Now, you need to check whether Chocolatey has been installed successfully. To check it, run the “choco” command.

It is installed successfully because it is showing version Chocolatey v1.2.0.
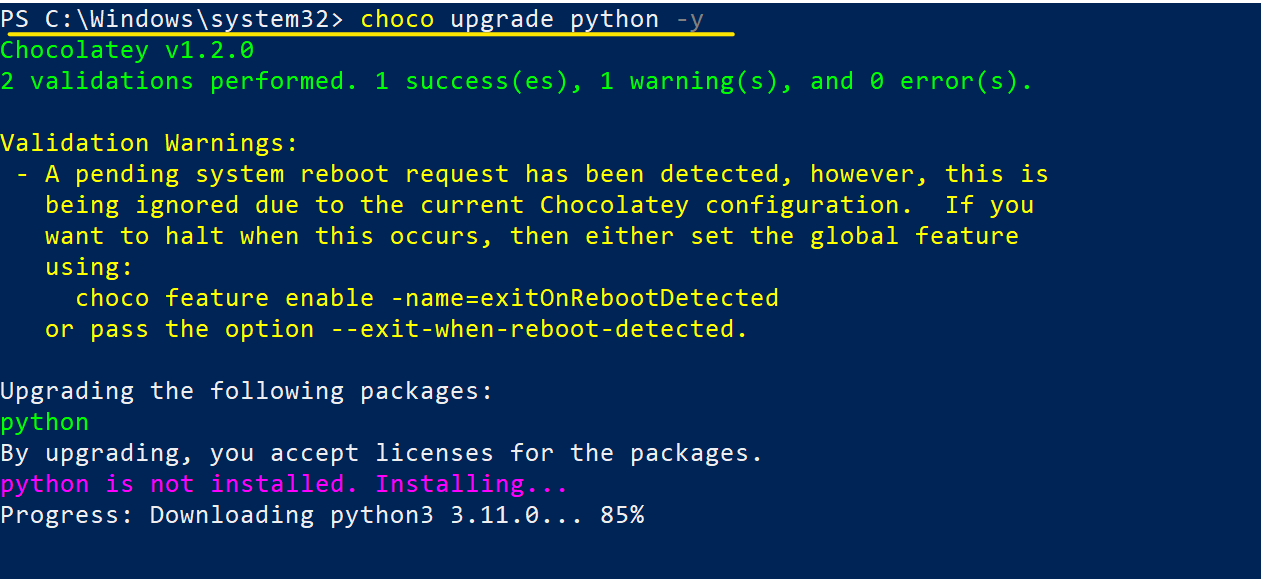
Step 4: Update Python with Chocolatey
With the help of the choco upgrade command, we can update our current Python version.
choco upgrade python -y
Step 5: Verify the Version
You can again check the latest installed Python version using the following command.
python -V
![]()
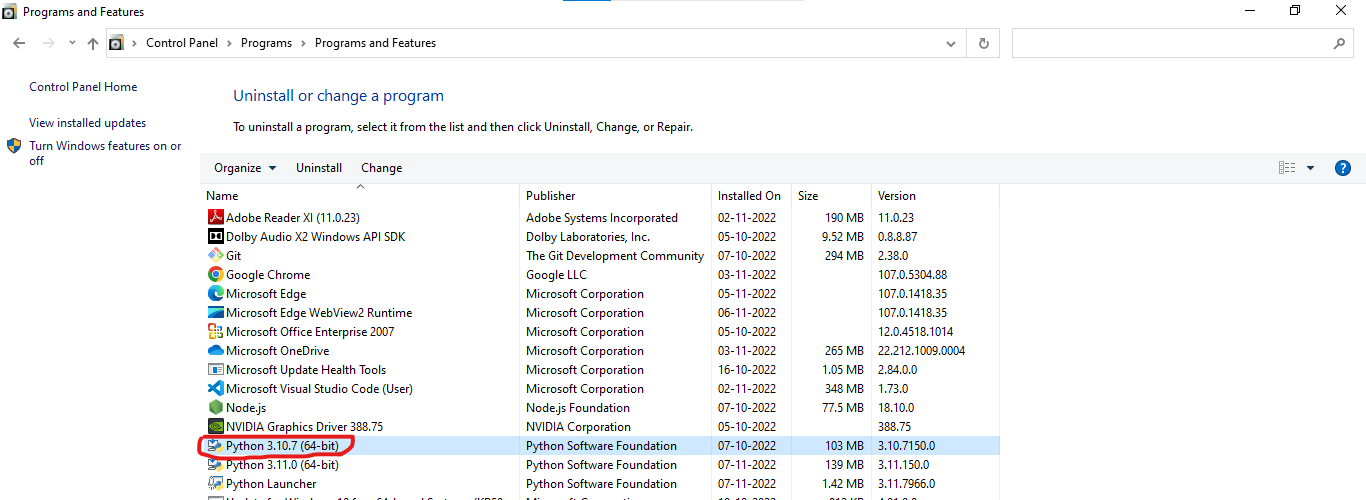
Note: The old version of Python will remain on your system. You can uninstall the old version from the control panel.
How To Upgrade Python on macOS?
You can download the latest version of Python for macOS from the official Python website, similar to what you did on windows OS to update Python version on your system. To check whether it is updated to the lasted version or not, follow the below-listed commands to check the Python version.
$ python --version
Python 2.x.x
$ python3 --version
Python 3.9.0
If you want to execute this new Python release with the python command instead of python3, install an alias in your $HOME directory’s bash profile file.
Open the terminal window and type the following commands:
$ cd $HOME$ nano .bash_profile
Then, at the bottom, add this segment.
alias python="python3"
Python 3.9 version can be checked using the following command.
$ python --version
Python 3.9.0
How to Update Python version on LINUX?
Users can use the below listed Linux commands to upgrade Python version on the Linux server:
ppa:deadsnakes/ppa can be added to the system’s Software Sources to upgrade the machine with unsupported packages from this untrusted PPA.
$ sudo add-apt-repository ppa:deadsnakes/ppa
This command is used to update the Python package.
$ sudo apt update$ sudo apt install python3.9
Then, using the commands below, you can search the versions of your new and current Python installations:
This command will show you the following version of python installed in your system
$ sudo python --version
2.x.x
$ sudo python3 --version
3.8.x
$ sudo python3.9 --version
3.9.0
Conclusion
We have seen how to update Python version on operating systems like Windows, Mac OS, and Linux. Follow the guide carefully to update your python software. We believe this guide fulfills your requirement though you can install the latest version successfully. Leave your comments below for your feedback and queries.
People Are Also Reading:
- How to Learn Python
- How to Install Python on Windows
- How to Install Python on Ubuntu
- How to Check Python Version?
More Robust Solution
For pip3, use this:
pip3 freeze --local |sed -rn 's/^([^=# t\][^ t=]*)=.*/echo; echo Processing 1 ...; pip3 install -U 1/p' |sh
For pip, just remove the 3s as such:
pip freeze --local |sed -rn 's/^([^=# t\][^ t=]*)=.*/echo; echo Processing 1 ...; pip install -U 1/p' |sh
OS X Oddity
OS X, as of July 2017, ships with a very old version of sed (a dozen years old). To get extended regular expressions, use -E instead of -r in the solution above.
Solving Issues with Popular Solutions
This solution is well designed and tested1, whereas there are problems with even the most popular solutions.
- Portability issues due to changing pip command line features
- Crashing of xargs because of common pip or pip3 child process failures
- Crowded logging from the raw xargs output
- Relying on a Python-to-OS bridge while potentially upgrading it3
The above command uses the simplest and most portable pip syntax in combination with sed and sh to overcome these issues completely. Details of the sed operation can be scrutinized with the commented version2.
Details
[1] Tested and regularly used in a Linux 4.8.16-200.fc24.x86_64 cluster and tested on five other Linux/Unix flavors. It also runs on Cygwin64 installed on Windows 10. Testing on iOS is needed.
[2] To see the anatomy of the command more clearly, this is the exact equivalent of the above pip3 command with comments:
# Match lines from pip's local package list output
# that meet the following three criteria and pass the
# package name to the replacement string in group 1.
# (a) Do not start with invalid characters
# (b) Follow the rule of no white space in the package names
# (c) Immediately follow the package name with an equal sign
sed="s/^([^=# t\][^ t=]*)=.*"

# Separate the output of package upgrades with a blank line
sed="$sed/echo"

# Indicate what package is being processed
sed="$sed; echo Processing 1 ..."

# Perform the upgrade using just the valid package name
sed="$sed; pip3 install -U 1"

# Output the commands
sed="$sed/p"

# Stream edit the list as above
# and pass the commands to a shell
pip3 freeze --local | sed -rn "$sed" | sh
[3] Upgrading a Python or PIP component that is also used in the upgrading of a Python or PIP component can be a potential cause of a deadlock or package database corruption.
Зачастую возникает необходимость обновления PIP. В данном руководстве будет дана поэтапная инструкция для обновления PIP в Windows.
Содержание статьи
- План обновления PIP в Windows
- Проверка текущей версии PIP
- Инструмент для обновления PIP в Windows
- Как вернуться к предыдущей версии PIP
Столкнуться с необходимостью обновления PIP можно при установке любого пакета, используя PIP.
Выводится следующее сообщение:

Вы используете версию pip 19.3.1; однако, доступна версия 20.1.1. Вам стоит сделать обновление через команду ‘python -m pip install –upgrade pip’.
Есть вопросы по Python?
На нашем форуме вы можете задать любой вопрос и получить ответ от всего нашего сообщества!
Telegram Чат & Канал
Вступите в наш дружный чат по Python и начните общение с единомышленниками! Станьте частью большого сообщества!
Паблик VK
Одно из самых больших сообществ по Python в социальной сети ВК. Видео уроки и книги для вас!
Для обновления PIP в Windows нужно открыть Windows Command Prompt, а затем набрать/скопировать туда указанную команду. Обратите внимание, что данный метод сработает только если у вас уже добавлен Python в Windows PATH. Ничего страшного, если вы не знаете, что это такое. Далее мы подробно разберем все шаги обновления PIP.
|
python —m pip install —upgrade pip |
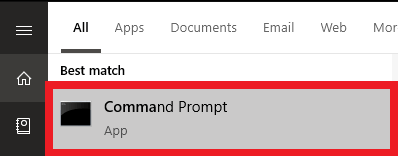
В поисковике Windows наберите Command Prompt (Командная строка):
![]()
Затем откройте Command Prompt (Командную строку). Во избежание проблем с уровнем доступа сделайте это от имени администратора. Для этого кликлинте правой кнопкой мыши и выберите пункт Run as administrator (Запустить от имени администратора):
В командной строке наберите cd , чтобы удостовериться, что в начальной точке только название диска:

Нажмите Enter. Вы увидите название диска C:>

Найдите путь к Python, что является папкой, куда установлен Python.
В нашем случае путь приложения Python следующий:
C:UsersRonAppDataLocalProgramsPythonPython37-32
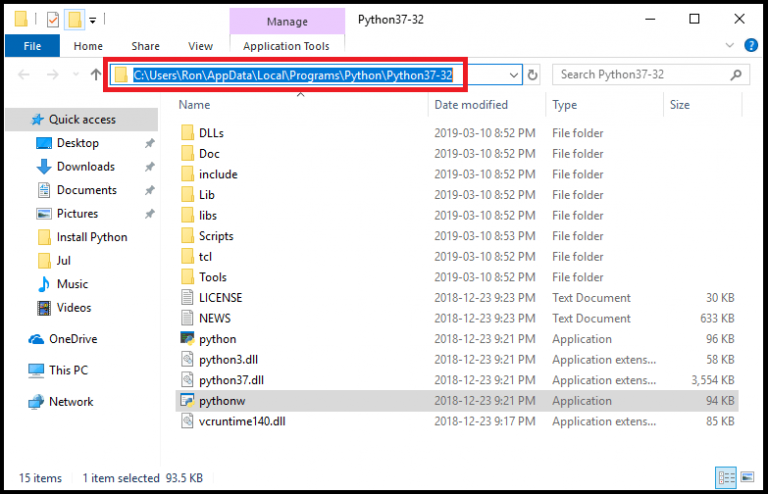
После получения пути к Python наберите следующую команду в командной строке: cd, за которым следует путь к приложению Python.
В нашем случае это выглядит следующим образом:

Нажмите Enter, вы увидите:

Обновите PIP, использовав данную команду, затем нажмите Enter:
|
python —m pip install —upgrade pip |
В командной строке команда будет выглядеть следующим образом:

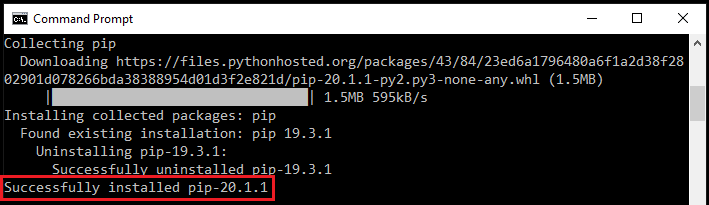
Обратите внимание, что будет установлена последняя версия PIP:
Проверка текущей версии PIP
Для проверки текущей версии PIP нужно использовать путь скриптов Python вместо пути приложения.
Наберите cd, чтобы убедиться, что стартовой точкой является только название диска:

Затем найдите путь к Python скриптов. Папка скриптов должна находиться внутри пути приложения Pythоn.
В нашем случае путь Python скриптов следующий:
C:UsersRonAppDataLocalProgramsPythonPython37-32Scripts
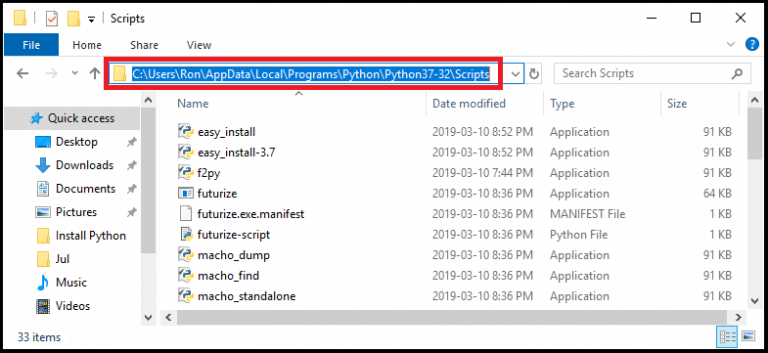
Затем наберите cd, после которой следует путь к Python скриптам, и нажмите Enter.

В конечном итоге наберите следующую команду для проверки версии PIP:

Нажмите Enter, после этого будет показана версия PIP.

Разберем простой инструмент для обновления PIP.
Обратите внимание, что вам нужно добавить Python к Windows PATH для использования данного инструмента.
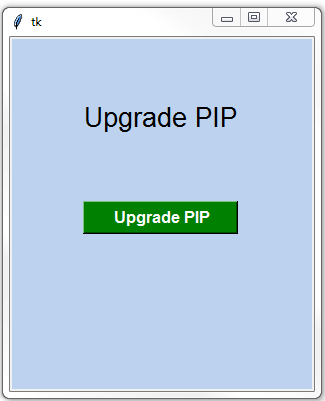
Далее дан полный код Python для инструмента обновления PIP используя Tkinter:
|
1 2 3 4 5 6 7 8 9 10 11 12 13 14 15 16 17 18 19 |
import os import tkinter as tk root= tk.Tk() canvas1 = tk.Canvas(root, width = 300, height = 350, bg = ‘lightsteelblue2’, relief = ‘raised’) canvas1.pack() label1 = tk.Label(root, text=‘Upgrade PIP’, bg = ‘lightsteelblue2’) label1.config(font=(‘helvetica’, 20)) canvas1.create_window(150, 80, window=label1) def upgradePIP (): os.system(‘start cmd /k python.exe -m pip install —upgrade pip’) button1 = tk.Button(text=‘ Upgrade PIP ‘, command=upgradePIP, bg=‘green’, fg=‘white’, font=(‘helvetica’, 12, ‘bold’)) canvas1.create_window(150, 180, window=button1) root.mainloop() |
Просто запустите код и затем нажмите на кнопку Upgrade PIP, после чего команда выполнится.
Что, если нужно откатиться к предыдущей версии PIP?
Выполнив следующие шаги, вернуться к предыдущей версии PIP не составит особого труда.
Как вернуться к предыдущей версии PIP
Перейдите в папку где установлен Python. Если сейчас настроен путь к скриптам, тогда просто наберите cd .. (и затем нажмите Enter), и вы вернетесь к папке с установленным Python.

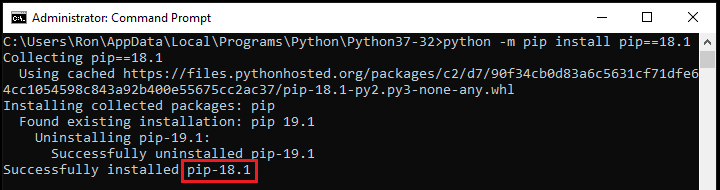
Предположим, нам нужно вернуться к версии 18.1.
Для этого просто наберите следующую команду и затем нажмите Enter:
|
python —m pip install pip==18.1 |
Вы должны увидеть указанную версию PIP:

Являюсь администратором нескольких порталов по обучению языков программирования Python, Golang и Kotlin. В составе небольшой команды единомышленников, мы занимаемся популяризацией языков программирования на русскоязычную аудиторию. Большая часть статей была адаптирована нами на русский язык и распространяется бесплатно.
E-mail: vasile.buldumac@ati.utm.md
Образование
Universitatea Tehnică a Moldovei (utm.md)
- 2014 — 2018 Технический Университет Молдовы, ИТ-Инженер. Тема дипломной работы «Автоматизация покупки и продажи криптовалюты используя технический анализ»
- 2018 — 2020 Технический Университет Молдовы, Магистр, Магистерская диссертация «Идентификация человека в киберпространстве по фотографии лица»
User Guide
Running pip
pip is a command line program. When you install pip, a pip command is added
to your system, which can be run from the command prompt as follows:
.. tab:: Unix/macOS

   .. code-block:: shell

      python -m pip <pip arguments>

   ``python -m pip`` executes pip using the Python interpreter you
   specified as python. So ``/usr/bin/python3.7 -m pip`` means
   you are executing pip for your interpreter located at ``/usr/bin/python3.7``.
.. tab:: Windows

   .. code-block:: shell

      py -m pip <pip arguments>

   ``py -m pip`` executes pip using the latest Python interpreter you
   have installed. For more details, read the `Python Windows launcher`_ docs.
Installing Packages
pip supports installing from PyPI, version control, local projects, and
directly from distribution files.
The most common scenario is to install from PyPI using :ref:`Requirement
Specifiers`
.. tab:: Unix/macOS

   .. code-block:: shell

      python -m pip install SomePackage            # latest version
      python -m pip install SomePackage==1.0.4     # specific version
      python -m pip install 'SomePackage>=1.0.4'     # minimum version
.. tab:: Windows

   .. code-block:: shell

      py -m pip install SomePackage            # latest version
      py -m pip install SomePackage==1.0.4     # specific version
      py -m pip install 'SomePackage>=1.0.4'   # minimum version
For more information and examples, see the :ref:`pip install` reference.
Basic Authentication Credentials
This is now covered in :doc:`topics/authentication`.
netrc Support
This is now covered in :doc:`topics/authentication`.
Keyring Support
This is now covered in :doc:`topics/authentication`.
Using a Proxy Server
When installing packages from PyPI, pip requires internet access, which
in many corporate environments requires an outbound HTTP proxy server.
pip can be configured to connect through a proxy server in various ways:
- using the
--proxycommand-line option to specify a proxy in the form
scheme://[user:passwd@]proxy.server:port - using
proxyin a :ref:`config-file` - by setting the standard environment-variables
http_proxy,https_proxy
andno_proxy. - using the environment variable
PIP_USER_AGENT_USER_DATAto include
a JSON-encoded string in the user-agent variable used in pip’s requests.
Requirements Files
«Requirements files» are files containing a list of items to be
installed using :ref:`pip install` like so:
.. tab:: Unix/macOS

   .. code-block:: shell

      python -m pip install -r requirements.txt
.. tab:: Windows

   .. code-block:: shell

      py -m pip install -r requirements.txt
Details on the format of the files are here: :ref:`requirements-file-format`.
Logically, a Requirements file is just a list of :ref:`pip install` arguments
placed in a file. Note that you should not rely on the items in the file being
installed by pip in any particular order.
In practice, there are 4 common uses of Requirements files:
-
Requirements files are used to hold the result from :ref:`pip freeze` for the
purpose of achieving :doc:`topics/repeatable-installs`. In
this case, your requirement file contains a pinned version of everything that
was installed whenpip freezewas run... tab:: Unix/macOS .. code-block:: shell python -m pip freeze > requirements.txt python -m pip install -r requirements.txt.. tab:: Windows .. code-block:: shell py -m pip freeze > requirements.txt py -m pip install -r requirements.txt -
Requirements files are used to force pip to properly resolve dependencies.
pip 20.2 and earlier doesn’t have true dependency resolution, but instead simply uses the first
specification it finds for a project. E.g. ifpkg1requires
pkg3>=1.0andpkg2requirespkg3>=1.0,<=2.0, and ifpkg1is
resolved first, pip will only usepkg3>=1.0, and could easily end up
installing a version ofpkg3that conflicts with the needs ofpkg2.
To solve this problem, you can placepkg3>=1.0,<=2.0(i.e. the correct
specification) into your requirements file directly along with the other top
level requirements. Like so:pkg1 pkg2 pkg3>=1.0,<=2.0
-
Requirements files are used to force pip to install an alternate version of a
sub-dependency. For example, supposeProjectAin your requirements file
requiresProjectB, but the latest version (v1.3) has a bug, you can force
pip to accept earlier versions like so:ProjectA ProjectB<1.3
-
Requirements files are used to override a dependency with a local patch that
lives in version control. For example, suppose a dependency
SomeDependencyfrom PyPI has a bug, and you can’t wait for an upstream
fix.
You could clone/copy the src, make the fix, and place it in VCS with the tag
sometag. You’d reference it in your requirements file with a line like
so:git+https://myvcs.com/some_dependency@sometag#egg=SomeDependency
If
SomeDependencywas previously a top-level requirement in your
requirements file, then replace that line with the new line. If
SomeDependencyis a sub-dependency, then add the new line.
It’s important to be clear that pip determines package dependencies using
install_requires metadata,
not by discovering requirements.txt files embedded in projects.
See also:
- :ref:`requirements-file-format`
- :ref:`pip freeze`
- «setup.py vs requirements.txt» (an article by Donald Stufft)
Constraints Files
Constraints files are requirements files that only control which version of a
requirement is installed, not whether it is installed or not. Their syntax and
contents is a subset of :ref:`Requirements Files`, with several kinds of syntax
not allowed: constraints must have a name, they cannot be editable, and they
cannot specify extras. In terms of semantics, there is one key difference:
Including a package in a constraints file does not trigger installation of the
package.
Use a constraints file like so:
.. tab:: Unix/macOS

   .. code-block:: shell

      python -m pip install -c constraints.txt
.. tab:: Windows

   .. code-block:: shell

      py -m pip install -c constraints.txt
Constraints files are used for exactly the same reason as requirements files
when you don’t know exactly what things you want to install. For instance, say
that the «helloworld» package doesn’t work in your environment, so you have a
local patched version. Some things you install depend on «helloworld», and some
don’t.
One way to ensure that the patched version is used consistently is to
manually audit the dependencies of everything you install, and if «helloworld»
is present, write a requirements file to use when installing that thing.
Constraints files offer a better way: write a single constraints file for your
organisation and use that everywhere. If the thing being installed requires
«helloworld» to be installed, your fixed version specified in your constraints
file will be used.
Constraints file support was added in pip 7.1. In :ref:`Resolver
changes 2020` we did a fairly comprehensive overhaul, removing several
undocumented and unsupported quirks from the previous implementation,
and stripped constraints files down to being purely a way to specify
global (version) limits for packages.
Installing from Wheels
«Wheel» is a built, archive format that can greatly speed installation compared
to building and installing from source archives. For more information, see the
Wheel docs , PEP 427, and PEP 425.
pip prefers Wheels where they are available. To disable this, use the
:ref:`—no-binary <install_—no-binary>` flag for :ref:`pip install`.
If no satisfactory wheels are found, pip will default to finding source
archives.
To install directly from a wheel archive:
.. tab:: Unix/macOS

   .. code-block:: shell

      python -m pip install SomePackage-1.0-py2.py3-none-any.whl
.. tab:: Windows

   .. code-block:: shell

      py -m pip install SomePackage-1.0-py2.py3-none-any.whl
To include optional dependencies provided in the provides_extras
metadata in the wheel, you must add quotes around the install target
name:
.. tab:: Unix/macOS

   .. code-block:: shell

      python -m pip install './somepackage-1.0-py2.py3-none-any.whl[my-extras]'
.. tab:: Windows

   .. code-block:: shell

      py -m pip install './somepackage-1.0-py2.py3-none-any.whl[my-extras]'
Note
In the future, the path[extras] syntax may become deprecated. It is
recommended to use PEP 508 syntax wherever possible.
For the cases where wheels are not available, pip offers :ref:`pip wheel` as a
convenience, to build wheels for all your requirements and dependencies.
:ref:`pip wheel` requires the wheel package to be installed, which provides the
«bdist_wheel» setuptools extension that it uses.
To build wheels for your requirements and all their dependencies to a local
directory:
.. tab:: Unix/macOS

   .. code-block:: shell

      python -m pip install wheel
      python -m pip wheel --wheel-dir=/local/wheels -r requirements.txt
.. tab:: Windows

   .. code-block:: shell

      py -m pip install wheel
      py -m pip wheel --wheel-dir=/local/wheels -r requirements.txt
And then to install those requirements just using your local directory of
wheels (and not from PyPI):
.. tab:: Unix/macOS

   .. code-block:: shell

      python -m pip install --no-index --find-links=/local/wheels -r requirements.txt
.. tab:: Windows

   .. code-block:: shell

      py -m pip install --no-index --find-links=/local/wheels -r requirements.txt
Uninstalling Packages
pip is able to uninstall most packages like so:
.. tab:: Unix/macOS

   .. code-block:: shell

      python -m pip uninstall SomePackage
.. tab:: Windows

   .. code-block:: shell

      py -m pip uninstall SomePackage
pip also performs an automatic uninstall of an old version of a package
before upgrading to a newer version.
For more information and examples, see the :ref:`pip uninstall` reference.
Listing Packages
To list installed packages:
.. tab:: Unix/macOS

   .. code-block:: console

      $ python -m pip list
      docutils (0.9.1)
      Jinja2 (2.6)
      Pygments (1.5)
      Sphinx (1.1.2)
.. tab:: Windows

   .. code-block:: console

      C:> py -m pip list
      docutils (0.9.1)
      Jinja2 (2.6)
      Pygments (1.5)
      Sphinx (1.1.2)
To list outdated packages, and show the latest version available:
.. tab:: Unix/macOS

   .. code-block:: console

      $ python -m pip list --outdated
      docutils (Current: 0.9.1 Latest: 0.10)
      Sphinx (Current: 1.1.2 Latest: 1.1.3)
.. tab:: Windows

   .. code-block:: console

      C:> py -m pip list --outdated
      docutils (Current: 0.9.1 Latest: 0.10)
      Sphinx (Current: 1.1.2 Latest: 1.1.3)
To show details about an installed package:
.. tab:: Unix/macOS

   .. code-block:: console

      $ python -m pip show sphinx
      ---
      Name: Sphinx
      Version: 1.1.3
      Location: /my/env/lib/pythonx.x/site-packages
      Requires: Pygments, Jinja2, docutils
.. tab:: Windows

   .. code-block:: console

      C:> py -m pip show sphinx
      ---
      Name: Sphinx
      Version: 1.1.3
      Location: /my/env/lib/pythonx.x/site-packages
      Requires: Pygments, Jinja2, docutils
For more information and examples, see the :ref:`pip list` and :ref:`pip show`
reference pages.
Searching for Packages
pip can search PyPI for packages using the pip search
command:
.. tab:: Unix/macOS

   .. code-block:: shell

      python -m pip search "query"
.. tab:: Windows

   .. code-block:: shell

      py -m pip search "query"
The query will be used to search the names and summaries of all
packages.
For more information and examples, see the :ref:`pip search` reference.
Configuration
This is now covered in :doc:`topics/configuration`.
Config file
This is now covered in :doc:`topics/configuration`.
Environment Variables
This is now covered in :doc:`topics/configuration`.
Config Precedence
This is now covered in :doc:`topics/configuration`.
Command Completion
pip comes with support for command line completion in bash, zsh and fish.
To setup for bash:
python -m pip completion --bash >> ~/.profile
To setup for zsh:
python -m pip completion --zsh >> ~/.zprofile
To setup for fish:
python -m pip completion --fish > ~/.config/fish/completions/pip.fish
To setup for powershell:
python -m pip completion --powershell | Out-File -Encoding default -Append $PROFILE
Alternatively, you can use the result of the completion command directly
with the eval function of your shell, e.g. by adding the following to your
startup file:
eval "`pip completion --bash`"
Installing from local packages
In some cases, you may want to install from local packages only, with no traffic
to PyPI.
First, download the archives that fulfill your requirements:
.. tab:: Unix/macOS

   .. code-block:: shell

      python -m pip download --destination-directory DIR -r requirements.txt
.. tab:: Windows

   .. code-block:: shell

      py -m pip download --destination-directory DIR -r requirements.txt
Note that pip download will look in your wheel cache first, before
trying to download from PyPI. If you’ve never installed your requirements
before, you won’t have a wheel cache for those items. In that case, if some of
your requirements don’t come as wheels from PyPI, and you want wheels, then run
this instead:
.. tab:: Unix/macOS

   .. code-block:: shell

      python -m pip wheel --wheel-dir DIR -r requirements.txt
.. tab:: Windows

   .. code-block:: shell

      py -m pip wheel --wheel-dir DIR -r requirements.txt
Then, to install from local only, you’ll be using :ref:`—find-links
<install_—find-links>` and :ref:`—no-index <install_—no-index>` like so:
.. tab:: Unix/macOS

   .. code-block:: shell

      python -m pip install --no-index --find-links=DIR -r requirements.txt
.. tab:: Windows

   .. code-block:: shell

      py -m pip install --no-index --find-links=DIR -r requirements.txt
«Only if needed» Recursive Upgrade
pip install --upgrade now has a --upgrade-strategy option which
controls how pip handles upgrading of dependencies. There are 2 upgrade
strategies supported:
eager: upgrades all dependencies regardless of whether they still satisfy
the new parent requirementsonly-if-needed: upgrades a dependency only if it does not satisfy the new
parent requirements
The default strategy is only-if-needed. This was changed in pip 10.0 due to
the breaking nature of eager when upgrading conflicting dependencies.
It is important to note that --upgrade affects direct requirements (e.g.
those specified on the command-line or via a requirements file) while
--upgrade-strategy affects indirect requirements (dependencies of direct
requirements).
As an example, say SomePackage has a dependency, SomeDependency, and
both of them are already installed but are not the latest available versions:
pip install SomePackage: will not upgrade the existingSomePackageor
SomeDependency.pip install --upgrade SomePackage: will upgradeSomePackage, but not
SomeDependency(unless a minimum requirement is not met).pip install --upgrade SomePackage --upgrade-strategy=eager: upgrades both
SomePackageandSomeDependency.
As an historic note, an earlier «fix» for getting the only-if-needed
behaviour was:
.. tab:: Unix/macOS

   .. code-block:: shell

      python -m pip install --upgrade --no-deps SomePackage
      python -m pip install SomePackage
.. tab:: Windows

   .. code-block:: shell

      py -m pip install --upgrade --no-deps SomePackage
      py -m pip install SomePackage
A proposal for an upgrade-all command is being considered as a safer
alternative to the behaviour of eager upgrading.
User Installs
With Python 2.6 came the «user scheme» for installation,
which means that all Python distributions support an alternative install
location that is specific to a user. The default location for each OS is
explained in the python documentation for the site.USER_BASE variable.
This mode of installation can be turned on by specifying the :ref:`—user
<install_—user>` option to pip install.
Moreover, the «user scheme» can be customized by setting the
PYTHONUSERBASE environment variable, which updates the value of
site.USER_BASE.
To install «SomePackage» into an environment with site.USER_BASE customized to
‘/myappenv’, do the following:
.. tab:: Unix/macOS

   .. code-block:: shell

      export PYTHONUSERBASE=/myappenv
      python -m pip install --user SomePackage
.. tab:: Windows

   .. code-block:: shell

      set PYTHONUSERBASE=c:/myappenv
      py -m pip install --user SomePackage
pip install --user follows four rules:
- When globally installed packages are on the python path, and they conflict
with the installation requirements, they are ignored, and not
uninstalled. - When globally installed packages are on the python path, and they satisfy
the installation requirements, pip does nothing, and reports that
requirement is satisfied (similar to how global packages can satisfy
requirements when installing packages in a--system-site-packages
virtualenv). - pip will not perform a
--userinstall in a--no-site-packages
virtualenv (i.e. the default kind of virtualenv), due to the user site not
being on the python path. The installation would be pointless. - In a
--system-site-packagesvirtualenv, pip will not install a package
that conflicts with a package in the virtualenv site-packages. The —user
installation would lack sys.path precedence and be pointless.
To make the rules clearer, here are some examples:
From within a --no-site-packages virtualenv (i.e. the default kind):
.. tab:: Unix/macOS

   .. code-block:: console

      $ python -m pip install --user SomePackage
      Can not perform a '--user' install. User site-packages are not visible in this virtualenv.
.. tab:: Windows

   .. code-block:: console

      C:> py -m pip install --user SomePackage
      Can not perform a '--user' install. User site-packages are not visible in this virtualenv.
From within a --system-site-packages virtualenv where SomePackage==0.3
is already installed in the virtualenv:
.. tab:: Unix/macOS

   .. code-block:: console

      $ python -m pip install --user SomePackage==0.4
      Will not install to the user site because it will lack sys.path precedence
.. tab:: Windows

   .. code-block:: console

      C:> py -m pip install --user SomePackage==0.4
      Will not install to the user site because it will lack sys.path precedence
From within a real python, where SomePackage is not installed globally:
.. tab:: Unix/macOS

   .. code-block:: console

      $ python -m pip install --user SomePackage
      [...]
      Successfully installed SomePackage
.. tab:: Windows

   .. code-block:: console

      C:> py -m pip install --user SomePackage
      [...]
      Successfully installed SomePackage
From within a real python, where SomePackage is installed globally, but
is not the latest version:
.. tab:: Unix/macOS

   .. code-block:: console

      $ python -m pip install --user SomePackage
      [...]
      Requirement already satisfied (use --upgrade to upgrade)
      $ python -m pip install --user --upgrade SomePackage
      [...]
      Successfully installed SomePackage
.. tab:: Windows

   .. code-block:: console

      C:> py -m pip install --user SomePackage
      [...]
      Requirement already satisfied (use --upgrade to upgrade)
      C:> py -m pip install --user --upgrade SomePackage
      [...]
      Successfully installed SomePackage
From within a real python, where SomePackage is installed globally, and
is the latest version:
.. tab:: Unix/macOS

   .. code-block:: console

      $ python -m pip install --user SomePackage
      [...]
      Requirement already satisfied (use --upgrade to upgrade)
      $ python -m pip install --user --upgrade SomePackage
      [...]
      Requirement already up-to-date: SomePackage
      # force the install
      $ python -m pip install --user --ignore-installed SomePackage
      [...]
      Successfully installed SomePackage
.. tab:: Windows

   .. code-block:: console

      C:> py -m pip install --user SomePackage
      [...]
      Requirement already satisfied (use --upgrade to upgrade)
      C:> py -m pip install --user --upgrade SomePackage
      [...]
      Requirement already up-to-date: SomePackage
      # force the install
      C:> py -m pip install --user --ignore-installed SomePackage
      [...]
      Successfully installed SomePackage
Ensuring Repeatability
This is now covered in :doc:`../topics/repeatable-installs`.
Fixing conflicting dependencies
This is now covered in :doc:`../topics/dependency-resolution`.
Using pip from your program
As noted previously, pip is a command line program. While it is implemented in
Python, and so is available from your Python code via import pip, you must
not use pip’s internal APIs in this way. There are a number of reasons for this:
- The pip code assumes that it is in sole control of the global state of the
program.
pip manages things like the logging system configuration, or the values of
the standard IO streams, without considering the possibility that user code
might be affected. - pip’s code is not thread safe. If you were to run pip in a thread, there
is no guarantee that either your code or pip’s would work as you expect. - pip assumes that once it has finished its work, the process will terminate.
It doesn’t need to handle the possibility that other code will continue to
run after that point, so (for example) calling pip twice in the same process
is likely to have issues.
This does not mean that the pip developers are opposed in principle to the idea
that pip could be used as a library — it’s just that this isn’t how it was
written, and it would be a lot of work to redesign the internals for use as a
library, handling all of the above issues, and designing a usable, robust and
stable API that we could guarantee would remain available across multiple
releases of pip. And we simply don’t currently have the resources to even
consider such a task.
What this means in practice is that everything inside of pip is considered an
implementation detail. Even the fact that the import name is pip is subject
to change without notice. While we do try not to break things as much as
possible, all the internal APIs can change at any time, for any reason. It also
means that we generally won’t fix issues that are a result of using pip in an
unsupported way.
It should also be noted that installing packages into sys.path in a running
Python process is something that should only be done with care. The import
system caches certain data, and installing new packages while a program is
running may not always behave as expected. In practice, there is rarely an
issue, but it is something to be aware of.
Having said all of the above, it is worth covering the options available if you
decide that you do want to run pip from within your program. The most reliable
approach, and the one that is fully supported, is to run pip in a subprocess.
This is easily done using the standard subprocess module:
subprocess.check_call([sys.executable, '-m', 'pip', 'install', 'my_package'])
If you want to process the output further, use one of the other APIs in the module.
We are using freeze here which outputs installed packages in requirements format.:
reqs = subprocess.check_output([sys.executable, '-m', 'pip', 'freeze'])
If you don’t want to use pip’s command line functionality, but are rather
trying to implement code that works with Python packages, their metadata, or
PyPI, then you should consider other, supported, packages that offer this type
of ability. Some examples that you could consider include:
packaging— Utilities to work with standard package metadata (versions,
requirements, etc.)setuptools(specificallypkg_resources) — Functions for querying what
packages the user has installed on their system.distlib— Packaging and distribution utilities (including functions for
interacting with PyPI).
Changes to the pip dependency resolver in 20.3 (2020)
pip 20.3 has a new dependency resolver, on by default for Python 3
users. (pip 20.1 and 20.2 included pre-release versions of the new
dependency resolver, hidden behind optional user flags.) Read below
for a migration guide, how to invoke the legacy resolver, and the
deprecation timeline. We also made a two-minute video explanation
you can watch.
We will continue to improve the pip dependency resolver in response to
testers’ feedback. Please give us feedback through the resolver
testing survey.
Watch out for
The big change in this release is to the pip dependency resolver
within pip.
Computers need to know the right order to install pieces of software
(«to install x, you need to install y first»). So, when Python
programmers share software as packages, they have to precisely describe
those installation prerequisites, and pip needs to navigate tricky
situations where it’s getting conflicting instructions. This new
dependency resolver will make pip better at handling that tricky
logic, and make pip easier for you to use and troubleshoot.
The most significant changes to the resolver are:
- It will reduce inconsistency: it will no longer install a
combination of packages that is mutually inconsistent. In older
versions of pip, it is possible for pip to install a package which
does not satisfy the declared requirements of another installed
package. For example, in pip 20.0,pip install "six<1.12"does the wrong thing, “successfully” installing
"virtualenv==20.0.2"
six==1.11, even thoughvirtualenv==20.0.2requires
six>=1.12.0,<2(defined here).
The new resolver, instead, outright rejects installing anything if it
gets that input. - It will be stricter — if you ask pip to install two packages with
incompatible requirements, it will refuse (rather than installing a
broken combination, like it did in previous versions).
So, if you have been using workarounds to force pip to deal with
incompatible or inconsistent requirements combinations, now’s a good
time to fix the underlying problem in the packages, because pip will
be stricter from here on out.
This also means that, when you run a pip install command, pip only
considers the packages you are installing in that command, and may
break already-installed packages. It will not guarantee that your
environment will be consistent all the time. If you pip install x
and then pip install y, it’s possible that the version of y
you get will be different than it would be if you had run pip in a single command. We are considering changing this
install x y
behavior (per :issue:`7744`) and would like your thoughts on what
pip’s behavior should be; please answer our survey on upgrades that
create conflicts.
We are also changing our support for :ref:`Constraints Files`,
editable installs, and related functionality. We did a fairly
comprehensive overhaul and stripped constraints files down to being
purely a way to specify global (version) limits for packages, and so
some combinations that used to be allowed will now cause
errors. Specifically:
- Constraints don’t override the existing requirements; they simply
constrain what versions are visible as input to the resolver (see
:issue:`9020`) - Providing an editable requirement (
-e .) does not cause pip to
ignore version specifiers or constraints (see :issue:`8076`), and if
you have a conflict between a pinned requirement and a local
directory then pip will indicate that it cannot find a version
satisfying both (see :issue:`8307`) - Hash-checking mode requires that all requirements are specified as a
==match on a version and may not work well in combination with
constraints (see :issue:`9020` and :issue:`8792`) - If necessary to satisfy constraints, pip will happily reinstall
packages, upgrading or downgrading, without needing any additional
command-line options (see :issue:`8115` and :doc:`development/architecture/upgrade-options`) - Unnamed requirements are not allowed as constraints (see :issue:`6628` and :issue:`8210`)
- Links are not allowed as constraints (see :issue:`8253`)
- Constraints cannot have extras (see :issue:`6628`)
Per our :ref:`Python 2 Support` policy, pip 20.3 users who are using
Python 2 will use the legacy resolver by default. Python 2 users
should upgrade to Python 3 as soon as possible, since in pip 21.0 in
January 2021, pip dropped support for Python 2 altogether.
How to upgrade and migrate
-
Install pip 20.3 with
python -m pip install --upgrade pip. -
Validate your current environment by running
pip check. This
will report if you have any inconsistencies in your set of installed
packages. Having a clean installation will make it much less likely
that you will hit issues with the new resolver (and may
address hidden problems in your current environment!). If you run
pip checkand run into stuff you can’t figure out, please ask
for help in our issue tracker or chat. -
Test the new version of pip.
While we have tried to make sure that pip’s test suite covers as
many cases as we can, we are very aware that there are people using
pip with many different workflows and build processes, and we will
not be able to cover all of those without your help.- If you use pip to install your software, try out the new resolver
and let us know if it works for you withpip install. Try:- installing several packages simultaneously
- re-creating an environment using a
requirements.txtfile - using
pip install --force-reinstallto check whether
it does what you think it should - using constraints files
- the «Setups to test with special attention» and «Examples to try» below
- If you have a build pipeline that depends on pip installing your
dependencies for you, check that the new resolver does what you
need. - Run your project’s CI (test suite, build process, etc.) using the
new resolver, and let us know of any issues. - If you have encountered resolver issues with pip in the past,
check whether the new resolver fixes them, and read :ref:`Fixing
conflicting dependencies`. Also, let us know if the new resolver
has issues with any workarounds you put in to address the
current resolver’s limitations. We’ll need to ensure that people
can transition off such workarounds smoothly. - If you develop or support a tool that wraps pip or uses it to
deliver part of your functionality, please test your integration
with pip 20.3.
- If you use pip to install your software, try out the new resolver
-
Troubleshoot and try these workarounds if necessary.
- If pip is taking longer to install packages, read :doc:`Dependency
resolution backtracking <topics/dependency-resolution>` for ways to
reduce the time pip spends backtracking due to dependency conflicts. - If you don’t want pip to actually resolve dependencies, use the
--no-depsoption. This is useful when you have a set of package
versions that work together in reality, even though their metadata says
that they conflict. For guidance on a long-term fix, read
:ref:`Fixing conflicting dependencies`. - If you run into resolution errors and need a workaround while you’re
fixing their root causes, you can choose the old resolver behavior using
the flag--use-deprecated=legacy-resolver. This will work until we
release pip 21.0 (see
:ref:`Deprecation timeline for 2020 resolver changes`).
- If pip is taking longer to install packages, read :doc:`Dependency
-
Please report bugs through the resolver testing survey.
Setups to test with special attention
- Requirements files with 100+ packages
- Installation workflows that involve multiple requirements files
- Requirements files that include hashes (:ref:`hash-checking mode`)
or pinned dependencies (perhaps as output frompip-compilewithin
pip-tools) - Using :ref:`Constraints Files`
- Continuous integration/continuous deployment setups
- Installing from any kind of version control systems (i.e., Git, Subversion, Mercurial, or CVS), per :doc:`topics/vcs-support`
- Installing from source code held in local directories
Examples to try
Install:
- tensorflow
hackingpycodestylepandastablibelasticsearchandrequeststogethersixandcherrypytogetherpip install flake8-import-order==0.17.1 flake8==3.5.0 --use-feature=2020-resolverpip install tornado==5.0 sprockets.http==1.5.0 --use-feature=2020-resolver
Try:
pip installpip uninstallpip checkpip cache
Tell us about
Specific things we’d love to get feedback on:
- Cases where the new resolver produces the wrong result,
obviously. We hope there won’t be too many of these, but we’d like
to trap such bugs before we remove the legacy resolver. - Cases where the resolver produced an error when you believe it
should have been able to work out what to do. - Cases where the resolver gives an error because there’s a problem
with your requirements, but you need better information to work out
what’s wrong. - If you have workarounds to address issues with the current resolver,
does the new resolver let you remove those workarounds? Tell us!
Please let us know through the resolver testing survey.
Deprecation timeline
We plan for the resolver changeover to proceed as follows, using
:ref:`Feature Flags` and following our :ref:`Release Cadence`:
- pip 20.1: an alpha version of the new resolver was available,
opt-in, using the optional flag
--unstable-feature=resolver. pip defaulted to legacy
behavior. - pip 20.2: a beta of the new resolver was available, opt-in, using
the flag--use-feature=2020-resolver. pip defaulted to legacy
behavior. Users of pip 20.2 who want pip to default to using the
new resolver can runpip config set global.use-feature(for more on that and the alternate
2020-resolver
PIP_USE_FEATUREenvironment variable option, see issue
8661). - pip 20.3: pip defaults to the new resolver in Python 3 environments,
but a user can opt-out and choose the old resolver behavior,
using the flag--use-deprecated=legacy-resolver. In Python 2
environments, pip defaults to the old resolver, and the new one is
available using the flag--use-feature=2020-resolver. - pip 21.0: pip uses new resolver by default, and the old resolver is
no longer supported. It will be removed after a currently undecided
amount of time, as the removal is dependent on pip’s volunteer
maintainers’ availability. Python 2 support is removed per our
:ref:`Python 2 Support` policy.
Since this work will not change user-visible behavior described in the
pip documentation, this change is not covered by the :ref:`Deprecation
Policy`.
Context and followup
As discussed in our announcement on the PSF blog, the pip team are
in the process of developing a new «dependency resolver» (the part of
pip that works out what to install based on your requirements).
We’re tracking our rollout in :issue:`6536` and you can watch for
announcements on the low-traffic packaging announcements list and
the official Python blog.
Using system trust stores for verifying HTTPS
This is now covered in :doc:`topics/https-certificates`.
Python-сообщество
Совершенно случайно узнал, что таким способом можно обновлять устанвленные пакеты Не надо ничего ручками скачивать и ставить ручками..
python -m pip install —upgrade pip
pip install —upgrade beautifulsoup4
Хорошо было бы и сам питом таким же образом обновлять
#2 Фев. 10, 2016 22:46:41
Можно обновлять питон через командную строку?
Если новая версия будет в репозитории, то обновить питон можно как и все остальные программы, через sudo apt-get upgrade и тому подобное
#3 Фев. 10, 2016 22:55:10
Можно обновлять питон через командную строку?
Sudo это касается линукс-машин? У меня вин32.. забыл указать.. сейчас подпись в профиле поправлю спасибо за отклик.
#4 Фев. 11, 2016 06:42:43
Можно обновлять питон через командную строку?
newpy
В виндоусе качаете msi или что там счаз за установочник и обновляете. Для Windows платформ ничего другого, более удобного, на данный момент не придумали.
_________________________________________________________________________________
полезный блог о python john16blog.blogspot.com
#5 Фев. 11, 2016 08:16:36
Можно обновлять питон через командную строку?
- можно поставить виртуальную машину с юниксом.
- можно поставить более простые эмуляторы unix cygwin, msys2
- можно поставить поделку типа conda/miniconda
Если вы задаетесь таким вопросом то это скорее всего первый шаг перед окончательным переходом на unix
Обновление PIP для Python

PIP – утилита «Командной строки», предназначенная для работы с компонентами PyPI. Если данная программа инсталлирована на компьютере, это значительно облегчает процесс установки различных сторонних библиотек для языка программирования Python. Периодически рассматриваемый компонент обновляется, совершенствуется его код и добавляются нововведения. Далее мы рассмотрим процедуру обновления утилиты с помощью двух способов.
Обновляем PIP для Python
Система управления пакетами будет работать корректно только в том случае, когда используется ее стабильная версия. Периодически программные компоненты меняют свой вид, вследствие чего нуждается в обновлении и PIP. Давайте рассмотрим два разных метода инсталляции новой сборки, которые будут наиболее подходящими в определенных ситуациях.
Способ 1: Загрузка новой версии Python
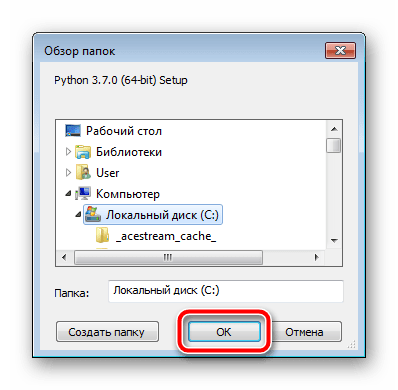
PIP ставится на ПК вместе с Python, скачанным с официального сайта. Поэтому самым простым вариантом обновления будет скачивание самой свежей сборки Питон. Перед этим не обязательно удалять старую, новую можно поставить поверх или сохранить файлы в другом месте. Сначала мы рекомендуем убедиться в том, что установка свежей версии необходима. Для этого произведите следующие действия:
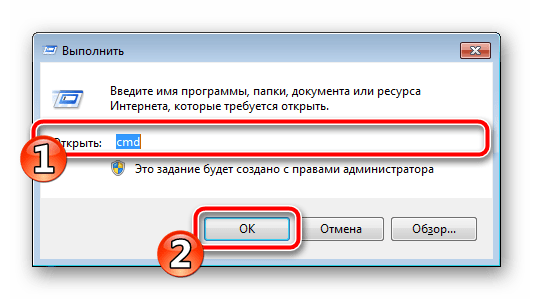
- Откройте окно «Выполнить» путем нажатия комбинации клавиш Win + R, впишите cmd и нажмите Enter.
Процедура загрузки и распаковки новой версии происходит так:
- Перейдите на официальный сайт Python по ссылке выше или через поиск в любом удобном браузере.
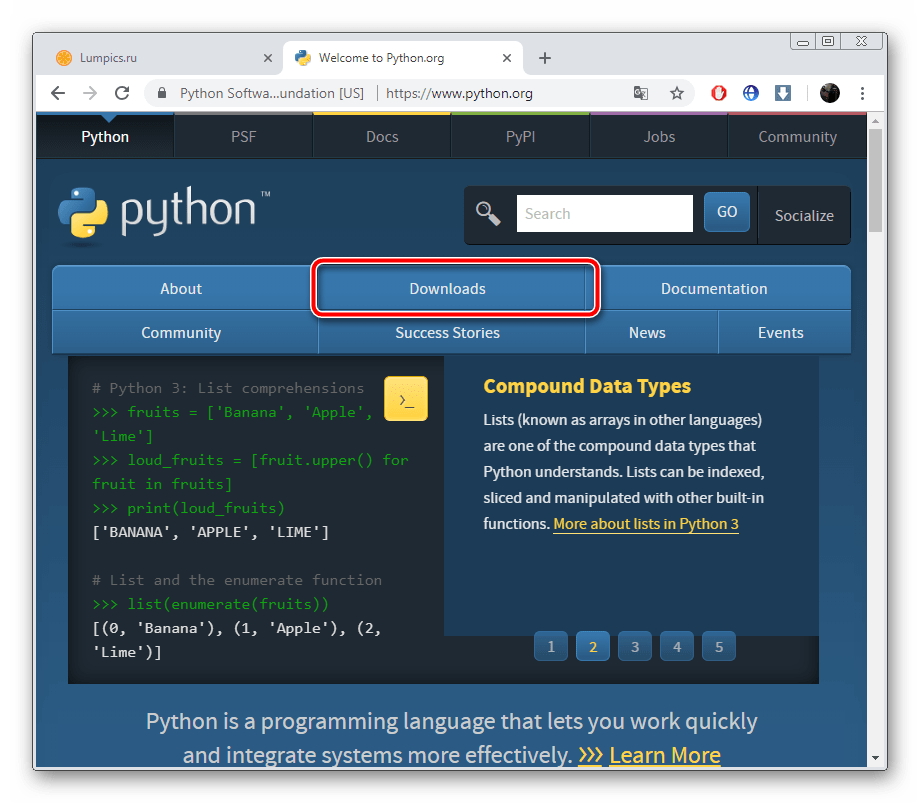
- Выберите раздел «Downloads».

Теперь команда PIP из системы управления пакетами с одноименным названием будет работать корректно со всеми дополнительными модулями и библиотеками. По завершении установки вы можете переходить к утилите и взаимодействовать с ней.
Способ 2: Ручное обновление PIP
Иногда метод с обновлением всего Python для получения свежей версии PIP не подходит по причине ненадобности выполнения этой процедуры. В таком случае мы рекомендуем загрузить компонент управления пакетами вручную, а затем внедрить его в программу и переходить к работе. Вам потребуется сделать всего несколько манипуляций:
- Перейдите на официальную страницу скачивания PIP по ссылке выше.
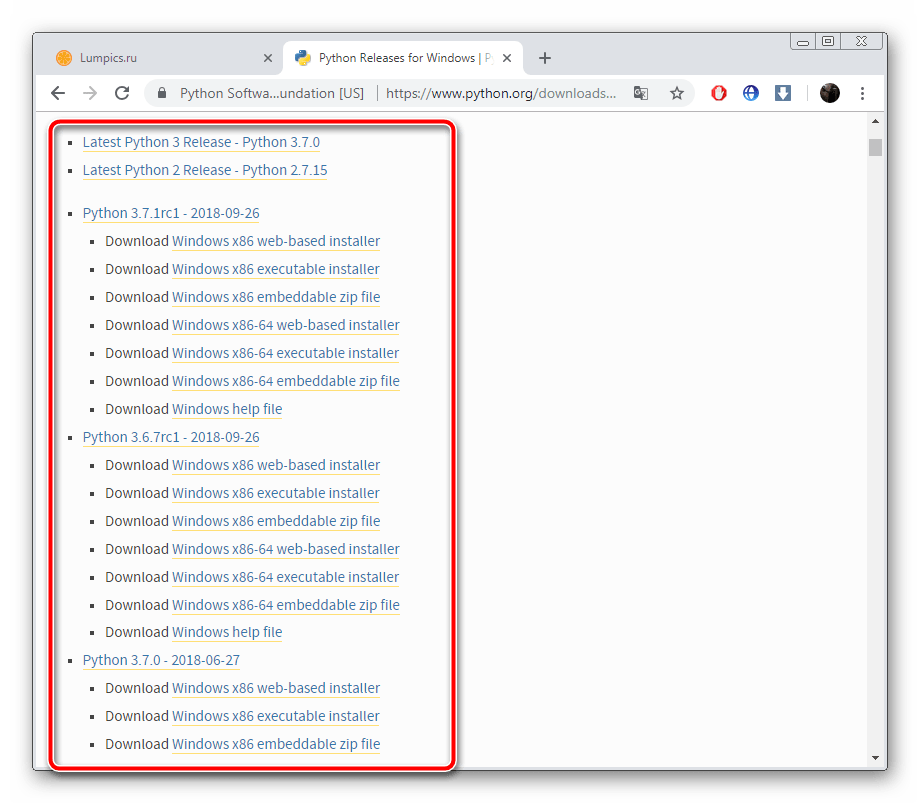
- Определитесь с подходящей версией из трех предложенных.


На этом процесс обновления закончен. Вы можете смело пользоваться утилитой, загружать дополнительные модули и библиотеки. Однако если при вводе команд возникают ошибки, рекомендуем произвести следующие действия, а после снова зайти в «Командную строку» и начать инсталляцию PIP.
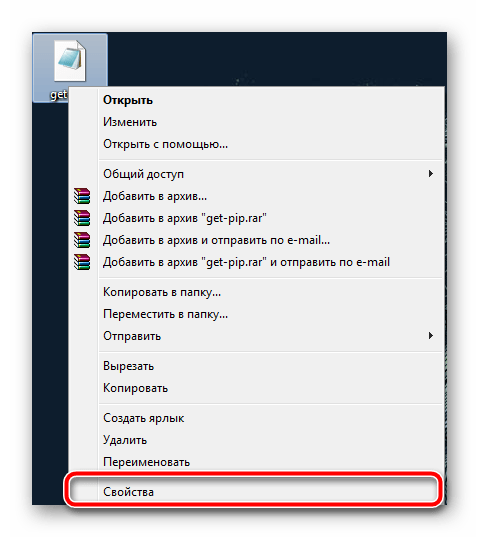
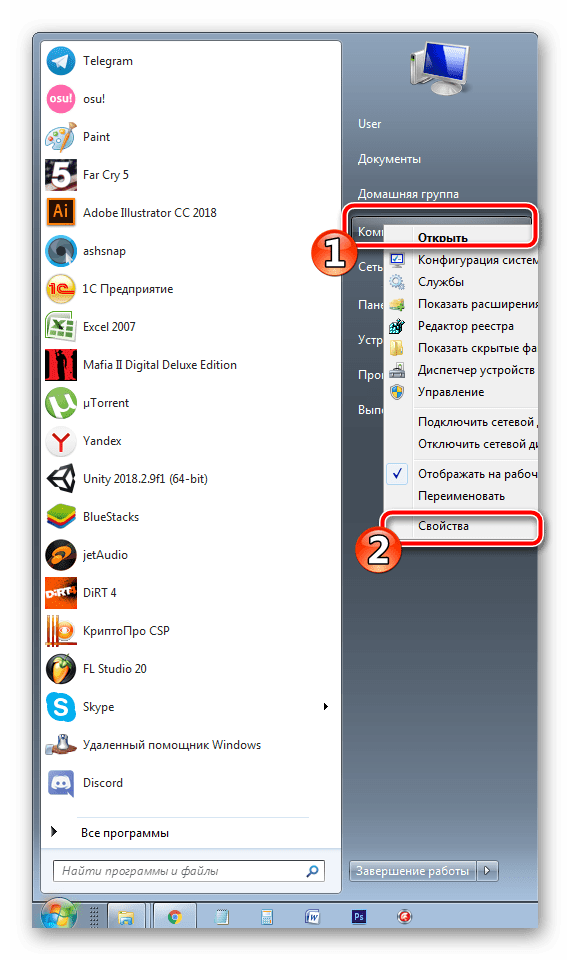
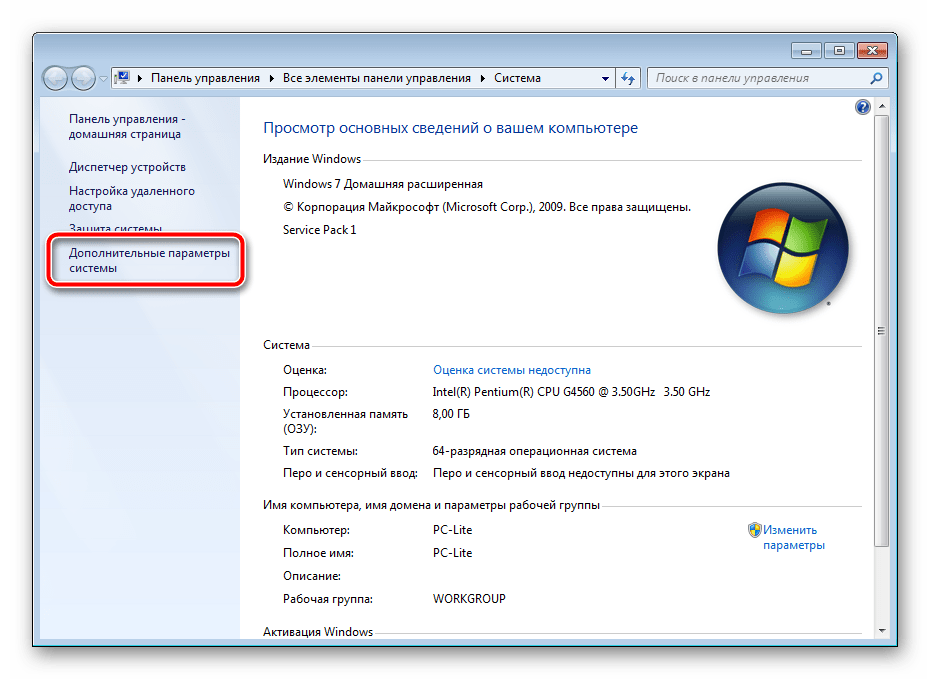
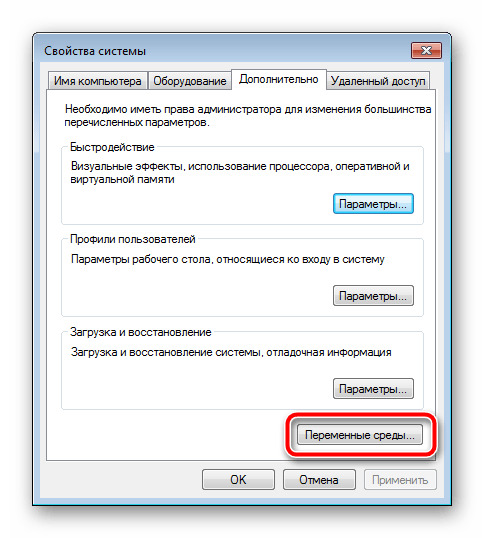
- Дело в том, что не всегда при распаковке Питон разных сборок происходит добавление системных переменных. Связано это чаще всего с невнимательностью пользователей. Для ручного создания этих данных сначала перейдите в меню «Пуск», где нажмите ПКМ на «Компьютер» и выберите пункт «Свойства».
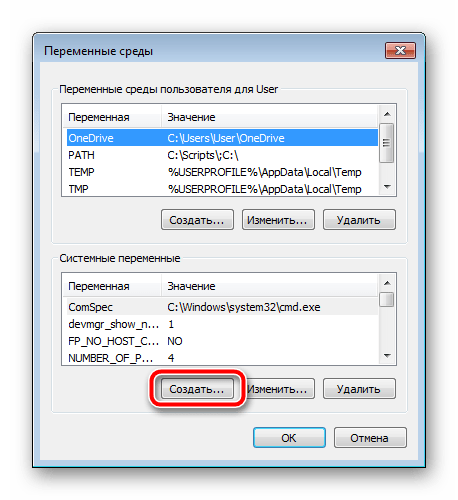
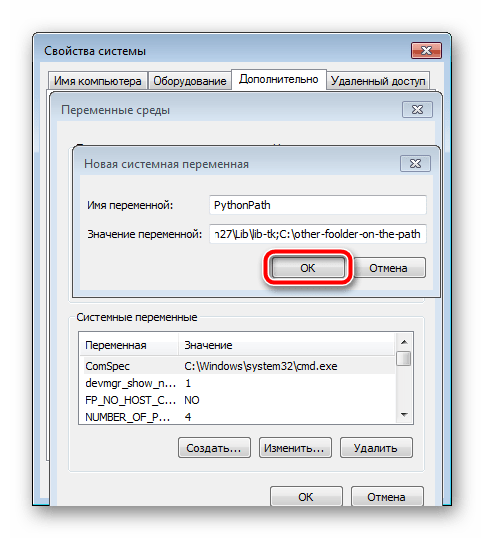
Python№ — директория программы (Название меняется в зависимости от установленной версии).
Теперь можно закрыть все окна, перезагрузить компьютер и перейти к повторному выполнению второго метода обновления системы управления пакетами PIP.
Альтернативный метод добавления библиотек
Не у каждого юзера получается обновить PIP и пользоваться его встроенной утилитой для добавления модулей к Питон. К тому же не все версии программы корректно работают с данной системой. Поэтому мы предлагаем использовать альтернативный способ, который не требует предварительной инсталляции дополнительных компонентов. Вам нужно выполнить следующее:
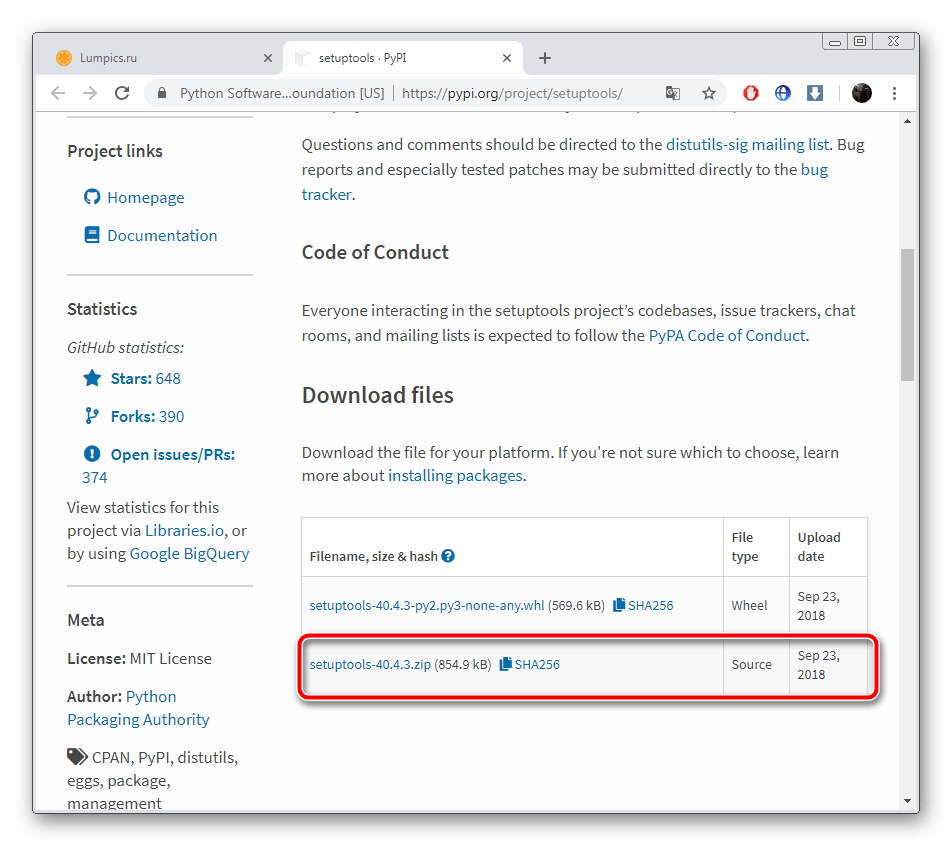
- Перейдите на сайт загрузки модулей и скачайте их в виде архива.

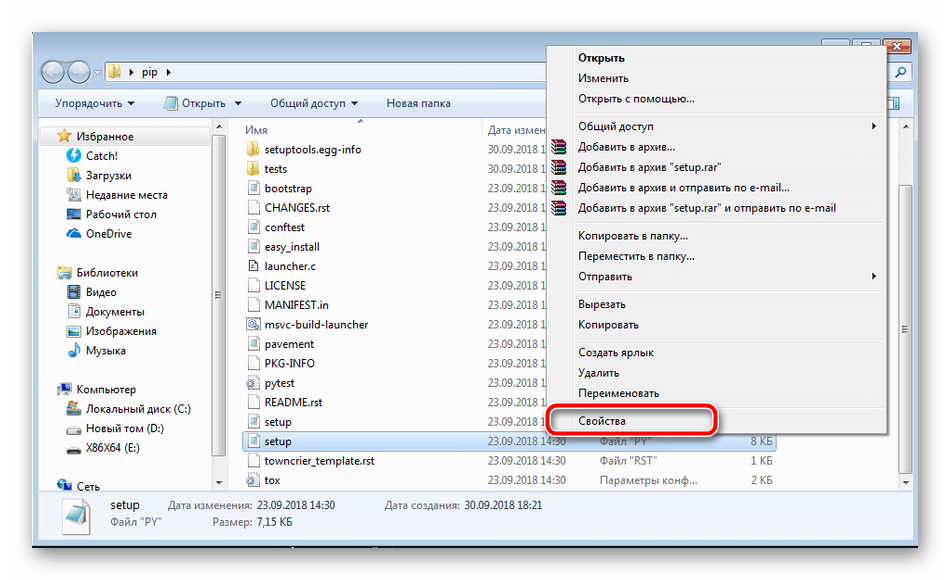
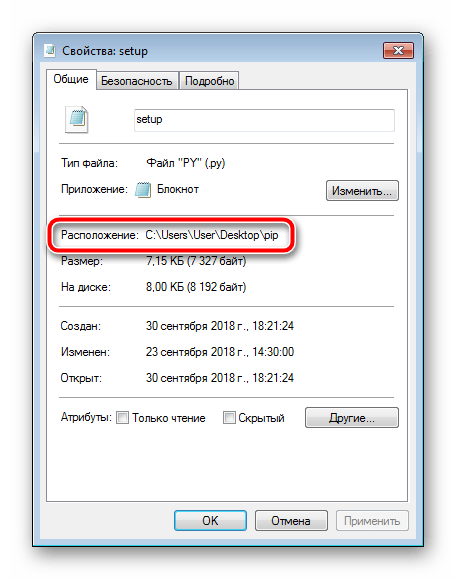

Python setup.py install
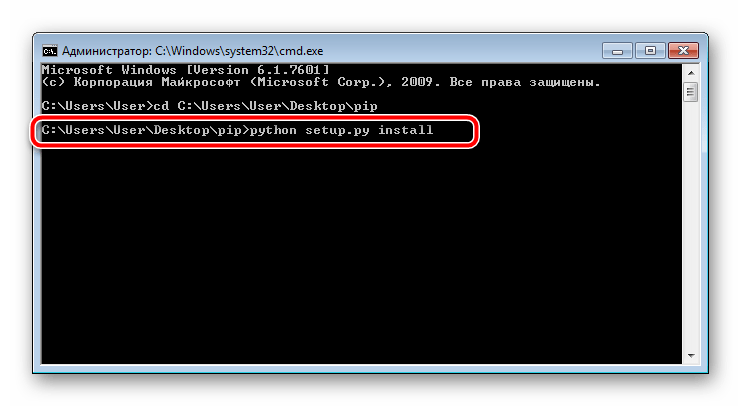
Осталось только дождаться завершения инсталляции, после чего можно переходить к работе с модулями.
Как видите, процесс обновления PIP довольно сложный, однако все получится, если следовать приведенным выше инструкциям. Если же утилита PIP не работает или не обновляется, мы предложили альтернативный метод установки библиотек, который в большинстве случаев функционирует корректно.
 Мы рады, что смогли помочь Вам в решении проблемы. Опишите, что у вас не получилось. Наши специалисты постараются ответить максимально быстро.
Помогла ли вам эта статья?
Еще статьи по данной теме:
Ваша статья очень помогла.
Была проблема с обновлением pip.
Здравствуйте, Сергей. Рады, что наши инструкции помогли решить Вашу проблему.
У меня cmd ни одну из команд не хочет признавать командой
Необходимо перейти к самому Python, а узнать где он лежит можно таким образом:
1.Запустить Python IDLE
2.Написать import os нажать Enter
3.Написать os.getcwd() нажать Enter
4.Всё вы знаете где находится Python
Здравствуйте! не получается обновить pip. При вводе команды обновления, не обновляет и выдает одно и тоже сообщение.

Здравствуйте, нашли решение данной проблемы ?
Ответить хтось или нет.
Здравствуйте, аноним. Эта проблема относится к отсутствию прав доступа на внесение изменений в библиотеку, о чем и говорится в сообщении. Есть три решения данной проблемы:
1. Запустите «Командную строку от имени администратора», после чего вводите команду для обновления версии.
2. Используйте атрибут —user , чтобы установить новую версию в пользовательскую папку. Так вы обойдете ограничения на внесение изменений. Команда должна обрести следующий вид: -m pip install —upgrade pip —user .
3. Перейдите по пути C:Program Files (x86) и найдите там каталог Python37. Щелкните по нему правой кнопкой мыши и через контекстное меню перейдите в «Свойства». Откройте вкладку «Безопасность» и предоставьте полный доступ, после чего сохраните изменения.
Один из этих методов должен помочь решить проблему, поэтому используйте их по очереди, проверяя, как это сказывается на установке обновлений.
Windows Command Line Python Change Version
How can I run my python setup.py build/install on 2.6 instead?
Many thanks in advance,
6 Answers 6
You can use explicit paths:
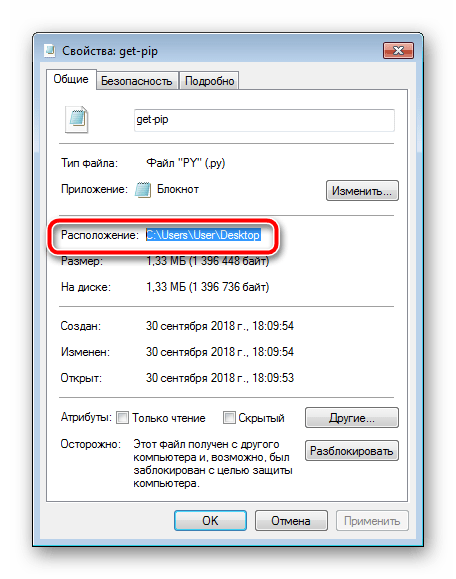
Recent versions of Python install PyLauncher. It is installed in the path so no need to add an explicit Python to the path, and it allows easy switching between multiple Python versions.
The default version can be specified in the environment variable PY_PYTHON , e.g. PY_PYTHON=3 (latest Python 3).
![]()
It depends on your operating system. If you have python 2.6 installed, you need to change your environment path to point to the 2.6 executable rather than the 2.5 executable. Do a Google search for changing your PATH variable on your operating system.
If you’re on Windows and you just need to run a different version of Python temporarily or, as was the case for me, a third party program needs to run a different version of Python, then modify your path at the command prompt:
This allowed the third party program to install successfully. The PATH modification only affects programs running in the same command prompt session and only lasts as long as the command prompt session..
They are a couple of ways you can do this 1) python virtual environment 2) pylauncher 3) Changing your windows path variable, tedious to say the least
Как любой серьёзный язык программирования, Python поддерживает сторонние библиотеки и фреймворки. Их устанавливают, чтобы не изобретать колесо в каждом новом проекте. Необходимы пакеты можно найти в центральном репозитории Python — PyPI (Python Package Index — каталог пакетов Python).
Однако скачивание, установка и работа с этими пакетами вручную утомительны и занимают много времени. Именно поэтому многие разработчики полагаются на специальный инструмент PIP для Python, который всё делает гораздо быстрее и проще.
Сама аббревиатура — рекурсивный акроним, который на русском звучит как “PIP установщик пакетов” или “Предпочитаемый установщик программ”. Это утилита командной строки, которая позволяет устанавливать, переустанавливать и деинсталлировать PyPI пакеты простой командой pip.
Если вы когда-нибудь работали с командной строкой Windows и с терминалом на Linux или Mac и чувствуете себя уверенно, можете пропустить инструкции по установке.
Устанавливается ли PIP вместе с Python?
Если вы пользуетесь Python 2.7.9 (и выше) или Python 3.4 (и выше), PIP устанавливается вместе с Python по умолчанию. Если же у вас более старая версия Python, то сначала ознакомьтесь с инструкцией по установке.
Правильно ли Python установлен?
Вы должны быть уверены, что Python должным образом установлен на вашей системе. На Windows откройте командную строку с помощью комбинации Win+X. На Mac запустите терминал с помощью Command+пробел, а на Linux – комбинацией Ctrl+Alt+T или как-то иначе именно для вашего дистрибутива.
Затем введите команду:
python --version
На Linux пользователям Python 3.x следует ввести:
python3 --version
Если вы получили номер версии (например, Python 2.7.5), значит Python готов к использованию.
Если вы получили сообщение Python is not defined (Python не установлен), значит, для начала вам следует установить Python. Это уже не по теме статьи. Подробные инструкции по установке Python читайте в теме: Скачать и установить Python.
Как установить PIP на Windows.
Следующие инструкции подойдут для Windows 7, Windows 8.1 и Windows 10.
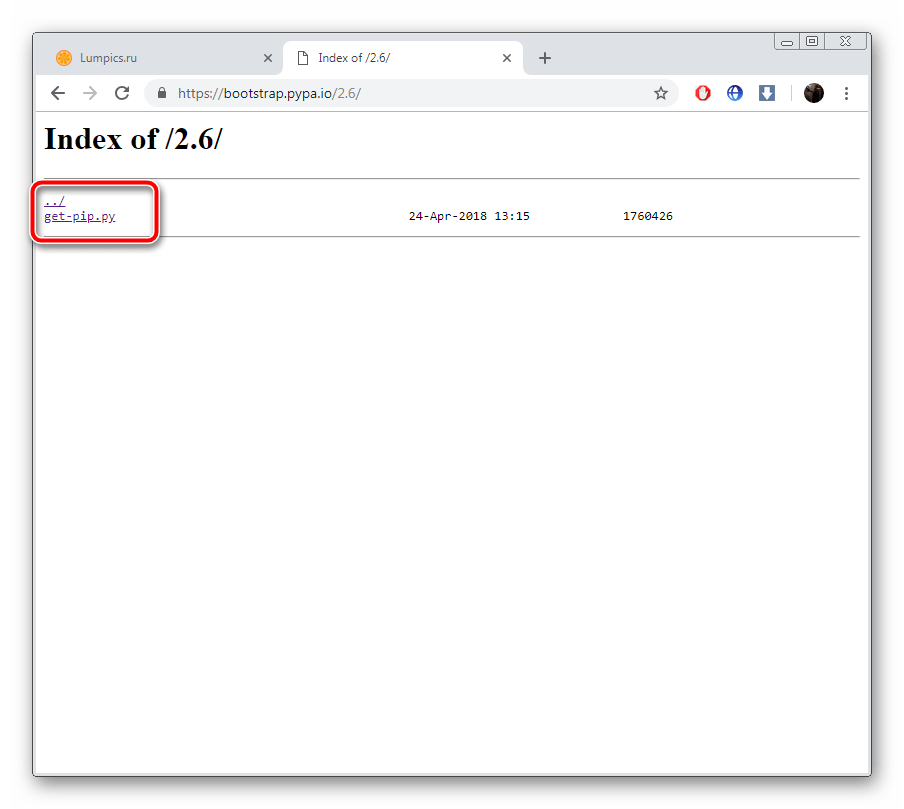
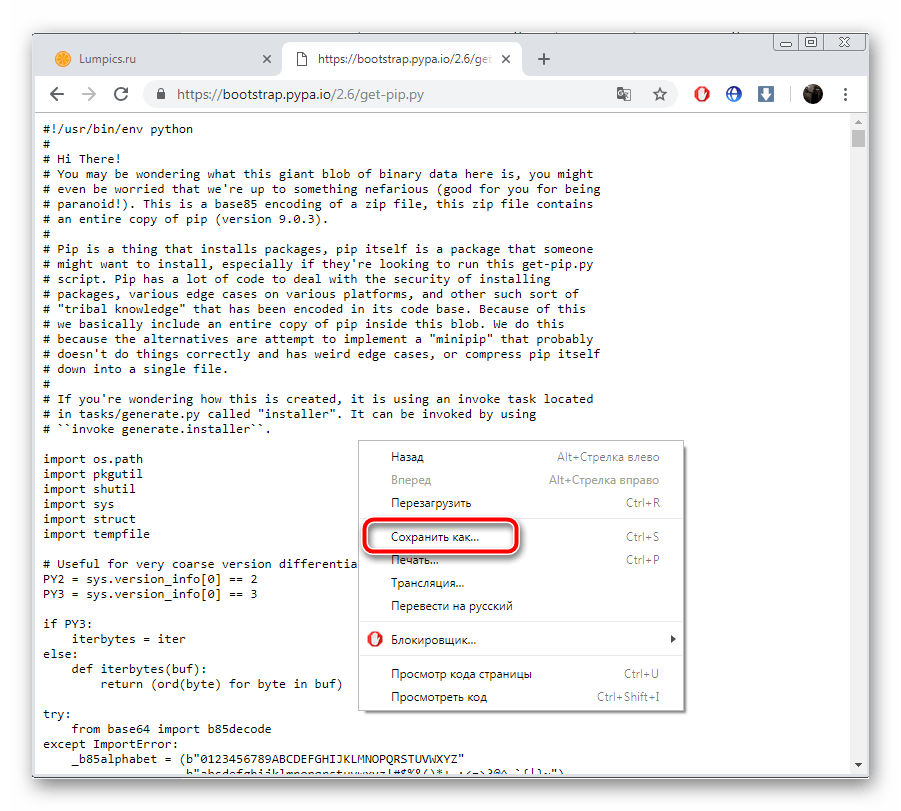
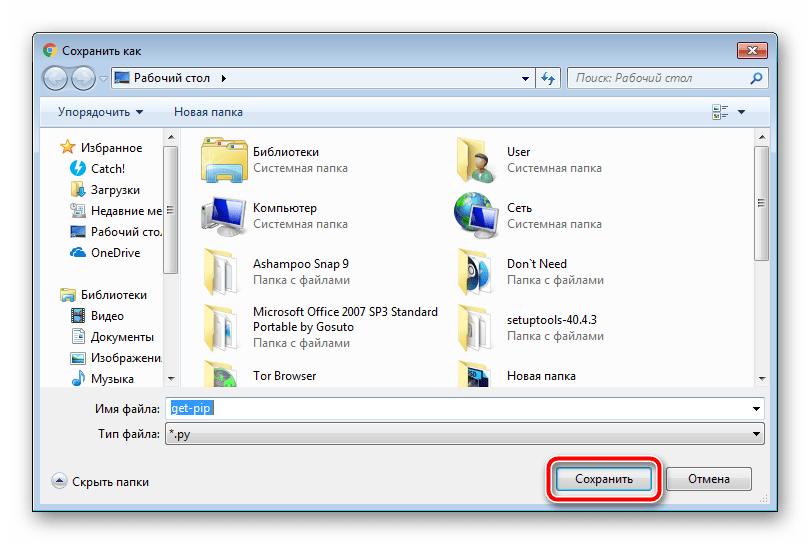
- Скачайте установочный скрипт get-pip.py. Если у вас Python 3.2, версия get-pip.py должны быть такой же. В любом случае щелкайте правой кнопкой мыши на ссылке и нажмите “Сохранить как…” и сохраните скрипт в любую безопасную папку, например в “Загрузки”.
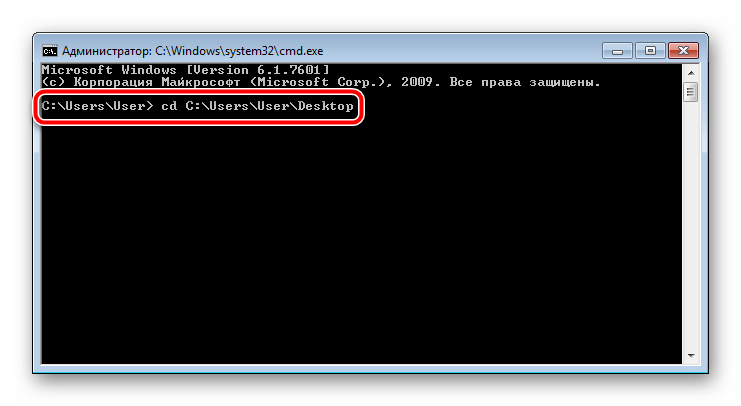
- Откройте командную строку и перейдите к каталогу с файлом get-pip.py.
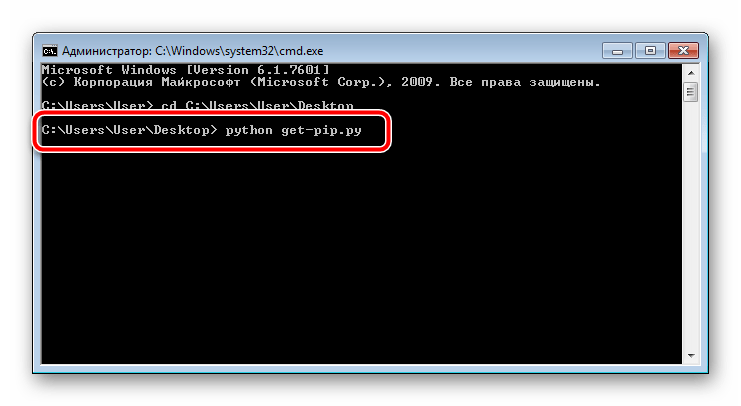
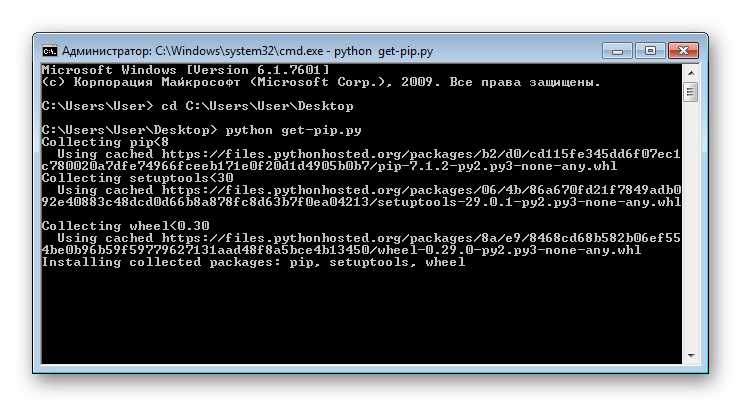
- Запустите следующую команду:
python get-pip.py
Как установить PIP на Mac
Современные версии Mac идут с установленными Python и PIP. Так или иначе версия Python устаревает, а это не лучший вариант для серьёзного разработчика. Так что рекомендуется установить актуальные версии Python и PIP.
Если вы хотите использовать родную систему Python, но у вас нет доступного PIP, его можно установить следующей командой через терминал:
sudo easy_install pip
Если вы предпочитаете более свежие версии Python, используйте Homebrew. Следующие инструкции предполагают, что Homebrew уже установлен и готов к работе.
Установка Python с помощью Homebrew производится посредством одной команды:
brew install python
Будет установлена последняя версия Python, в которую может входить PIP. Если после успешной установки пакет недоступен, необходимо выполнить перелинковку Python следующей командой:
brew unlink python && brew link python
Как установить PIP на Linux
Если у вас дистрибутив Linux с уже установленным на нем Python, то скорее всего возможно установить PIP, используя системный пакетный менеджер. Это более удачный способ, потому что системные версии Python не слишком хорошо работают со скриптом get-pip.py, используемым в Windows и Mac.
Advanced Package Tool (Python 2.x)
sudo apt-get install python-pip
Advanced Package Tool (Python 3.x)
sudo apt-get install python3-pip
pacman Package Manager (Python 2.x)
sudo pacman -S python2-pip
pacman Package Manager (Python 3.x)
sudo pacman -S python-pip
Yum Package Manager (Python 2.x)
sudo yum upgrade python-setuptools
sudo yum install python-pip python-wheel
Yum Package Manager (Python 3.x)
sudo yum install python3 python3-wheel
Dandified Yum (Python 2.x)
sudo dnf upgrade python-setuptools
sudo dnf install python-pip python-wheel
Dandified Yum (Python 3.x)
sudo dnf install python3 python3-wheel
Zypper Package Manager (Python 2.x)
sudo zypper install python-pip python-setuptools python-wheel
Zypper Package Manager (Python 3.x)
sudo zypper install python3-pip python3-setuptools python3-wheel
Как установить PIP на Raspberry Pi
Как пользователь Raspberry, возможно, вы запускали Rapsbian до того, как появилась официальная и поддерживаемая версия системы. Можно установить другую систему, например, Ubuntu, но в этом случае вам придётся воспользоваться инструкциями по Linux.
Начиная с Rapsbian Jessie, PIP установлен по умолчанию. Это одна из серьёзных причин, чтобы обновиться до Rapsbian Jessie вместо использования Rapsbian Wheezy или Rapsbian Jessie Lite. Так или иначе, на старую версию, все равно можно установить PIP.
Для Python 2.x:
sudo apt-get install python-pip
Для Python 3.x:
sudo apt-get install python3-pip
На Rapsbian для Python 2.x следует пользоваться командой pip, а для Python 3.x — командой pip3 при использовании команд для PIP.
Как обновить PIP для Python
Пока PIP не слишком часто обновляется самостоятельно, очень важно постоянно иметь свежую версию. Это может иметь значение при исправлении багов, совместимости и дыр в защите.
К счастью, обновление PIP проходит просто и быстро.
Для Windows:
python -m pip install -U pip
Для Mac, Linux, или Raspberry Pi:
pip install -U pip
На текущих версиях Linux и Rapsbian Pi следует использовать команду pip3.
Как устанавливать библиотеки Python с помощью PIP
Если PIP работоспособен, можно начинать устанавливать пакеты из PyPI:
pip install package-name
Установка определённой версии вместо новейшей версии пакета:
pip install package-name==1.0.0
Поиск конкретного пакета:
pip search "query"
Просмотр деталей об установленном пакете:
pip show package-name
Список всех установленных пакетов:
pip list
Список всех устаревших пакетов:
pip list --outdated
Обновление устаревших пакетов:
pip install package-name --upgrade
Следует отметить, что старая версия пакета автоматически удаляется при обновлении до новой версии.
Полностью переустановить пакет:
pip install package-name --upgrade --force-reinstall
Полностью удалить пакет:
pip uninstall package-name
Содержание:развернуть
- Pip или pip3?
- Если pip не установлен
-
Windows
-
Linux (Ubuntu и Debian)
-
MacOS
- Как обновить PIP
- Команды PIP
- Пример работы с пакетами
PIP — это менеджер пакетов. Он позволяет устанавливать и управлять пакетами на Python.
Представьте себе ситуацию: вы собираете проект и подключаете множество сторонних библиотек для реализации своей задачи. Если это делать вручную, процесс выглядит примерно так:
- вы заходите на сайт, выбираете нужную версию пакета;
- скачиваете ее, разархивируете, перекидываете в папку проекта;
- подключаете, прописываете пути, тестируете.
Вполне вероятно, что эта версия библиотеки вообще не подходит, и весь процесс повторяется заново. А если таких библиотек 10? Устанавливать их вручную?
Нет 🙅🏻♂️
Менеджер пакетов PIP — решает данную проблему. Весь процесс установки пакета сводится к выполнению консольной команды pip install package-name. Несложно представить, сколько времени это экономит.
Если вы работали с другими языками программирования, концепция pip может показаться вам знакомой. Pip похож на npm (в Javascript), composer (в PHP) или gem (в Ruby).
Pip является стандартным менеджером пакетов в Python
Pip или pip3?
В зависимости от того, какая версия Python установлена в системе, может потребоваться использовать pip3 вместо pip.
Если вы не знаете какая версия Python установлена на вашей системе, выполните следующие команды:
python --version— для Python 2.xpython3 --version— для Python 3.xpython3.8 --version— для Python 3.8.x
Советуем использовать версию Python 3.6 и выше
Если команда «python» не найдена, установите Python по инструкции из предыдущей статьи.
Далее нужно убедиться, что сам PIP установлен и работает корректно. Узнать это поможет команда:
pip --version
Команда отобразит в консоли версию pip, путь до pip и версию python, для которой в дальнейшем будут устанавливаться пакеты:
pip 19.2.3 from /usr/local/lib/python3.8/site-packages/pip (python 3.8)
☝️ Важный момент: в зависимости от того, какую версию Python вы будете использовать, команда может выглядеть как pip , pip3 или pip3.8
Альтернативный вариант вызова pip:
python3.7 -m pip install package-name
Флаг -m сообщает Python-у запустить pip как исполняемый модуль.
Если pip не установлен
Pip поставляется вместе с Python, и доступен после его установки. Если по какой-то причине pip не установлен на вашей системе, установить его будет не сложно.
Windows
- Скачайте файл get-pip.py и сохраните у себя на компьютере.
- Откройте командную строку и перейдите в папку, в которой сохранен
get-pip.py. - В командной строке выполните команду:
python get-pip.pyилиpython3 get-pip.py. - PIP установлен 🎉!
Linux (Ubuntu и Debian)
Прежде, чем перейти к непосредственному описанию, хотим отметить, что все команды, описанные ниже, используются от имени root пользователя. Если же вы являетесь обычным пользователем на компьютере, то потребуется использовать команду sudo, чтобы получить привилегии root.
Для Питона 2-й версии, выполните команду:
apt-get install python-pip
Для Питона 3-ей версии:
apt-get install python3-pip
MacOS
- скачайте файл
get-pip.pyкомандойcurl https://bootstrap.pypa.io/get-pip.py -o get-pip.py; - запустите скачанный файл командой:
python get-pip.pyилиpython3 get-pip.py.
Должна появиться запись Successfully Installed. Процесс закончен, можно приступать к работе с PIP на MacOS!
Как обновить PIP
Иногда, при установке очередного пакета, можно видеть сообщение о том, что доступна новая версия pip.
WARNING: You are using pip version 19.2.3, however version 19.3.1 is available.
А в следующей за ней строке
You should consider upgrading via the 'python -m pip install --upgrade pip' command.
указана команда для обновления pip:
python -m pip install --upgrade pip
Команды PIP
Синтаксис pip выглядит следующим образом: pip + команда + доп. опции
pip <command> [options]
Со всеми командами pip можно ознакомиться, выполнив pip help . Информацию по конкретной команде выведет pip help <command>.
Рассмотрим команды pip:
pip install package-name— устанавливает последнюю версию пакета;pip install package-name==4.8.2— устанавливает пакет версии 4.8.2;pip install package-name --upgrade— обновляет версию пакета;pip download— скачивает пакеты;pip uninstall— удаляет пакеты;pip freeze— выводит список установленных пакетов в необходимом формате ( обычно используется для записи вrequirements.txt);pip list— выводит список установленных пакетов;pip list --outdated— выводит список устаревших пакетов;pip show— показывает информацию об установленном пакете;pip check— проверяет установленные пакеты на совместимость зависимостей;pip search— по введенному названию, ищет пакеты, опубликованные в PyPI;pip wheel— собирает wheel-архив по вашим требованиям и зависимостям;pip hash— вычисляет хеши архивов пакетов;pip completion— вспомогательная команда используется для завершения основной команды;pip help— помощь по командам.
Пример работы с пакетами
PIP позволяет устанавливать, обновлять и удалять пакеты на компьютере. Ниже попробуем разобраться с работой менеджера pip на примере парсинга названий свежих статей на сайте habr.com.
- установим нужные пакеты;
- импортируем пакет в свой скрипт;
- разберемся, что такое
requirements.txt; - обновим/удалим установленные пакеты.
Приступим 🙎🏻♂️
Шаг #1 Установка.
Для начала, нам необходимо установить beautifulsoup4 — библиотеку для парсинга информации с веб-сайтов.
pip3 install beautifulsoup4
pip найдет последнюю версию пакета в официальном репозитории pypi.org. После скачает его со всеми необходимыми зависимостями и установит в вашу систему. Если вам нужно установить определенную версию пакета, укажите её вручную:
pip3 install beautifulsoup4==4.8.2
Данная команда способна даже перезаписать текущую версию на ту, что вы укажите.
Также для работы beautifulsoup нам понадобится пакет lxml:
pip install lxml
☝️ Важный момент: по умолчанию pip устанавливает пакеты глобально. Это может привести к конфликтам между версиями пакетов. На практике, чтобы изолировать пакеты текущего проекта, создают виртуальное окружение (virtualenv).
Шаг #2 Импортирование в скрипте.
Для того чтобы воспользоваться функционалом установленного пакета, подключим его в наш скрипт, и напишем простой парсер:
from urllib.request import urlopen

from bs4 import BeautifulSoup
# скачиваем html
page = urlopen("https://habr.com/ru/top/")
content = page.read()
# сохраняем html в виде объекта BeautifulSoup
soup = BeautifulSoup(content, "lxml")
# Находим все теги "a" с классом "post__title_link"
all_a_titles = soup.findAll("a", { "class" : "post__title_link" })
# Проходим по каждому найденному тегу и выводим на экран название статьи
for a_title in all_a_titles:
print(a_title.text)
Шаг #3 requirements.txt.
Если вы просматривали какие-либо проекты Python на Github или где-либо еще, вы, вероятно, заметили файл под названием requirements.txt. Этот файл используется для указания того, какие пакеты необходимы для запуска проекта (в нашем случае beautifulsoup4 и lxml).
Файл requirements.txt создается командой:
pip freeze > requirements.txt
и выглядит следующим образом:
beautifulsoup4==4.8.2

lxml==4.4.2

soupsieve==1.9.5
Теперь ваш скрипт вместе с файлом requirements.txt можно сохранить в системе контроля версий (например git).
Для работы парсера в новом месте (например на компьютере другого разработчика или на удаленном сервере) необходимо затянуть файлы из системы контроля версий и выполнить команду:
pip install -r requirements.txt
Шаг #4 Обновление/удаление установленных пакетов.
Команда pip list --outdated выведет список всех устаревших пакетов. Обновить отдельно выбранный пакет поможет команда:
pip install package-name --upgrade
Однако бывают ситуации, когда нужно обновить сразу все пакеты из requirements.txt. Достаточно выполнить команду:
pip install -r requirements.txt --upgrade
Для удаления пакета выполните:
pip uninstall package-name
Для удаления всех пакетов из requirements.txt:
pip uninstall -r requirements.txt -y
Мы разобрали основы по работе с PIP. Как правило, этого достаточно для работы с большей частью проектов.
Renesh Bedre
6 minute read
- pip is Python’s official package manager and is a recommended method for installing, upgrading, and
uninstalling the Python packages.
- Check below how to install and upgrade the pip on Windows, Linux, and macOS for managing the Python packages
Installing and upgrading pip
pipis a package (bundle of software) installer for Python.- In order to use
pip, it is required to install Python (Python 3 >=3.4). You can check here
for installing Python 3 on Windows, Linux, and macOS from the source. Additionally, you can also check the Python installation
guide for installing Python from OS specific package manager.
Note: If you have installed Python 3 from the source, you should add the Python executable in the system path variable
to be able to run Python commands from any path in OS. Check how to add Python executable in system path variable for
Windows, Linux, and macOS
Learn more about Linux basic commands for beginners
Check pip version
- If you have already installed Python 3 (>=3.4), you can run the below shell command to check the
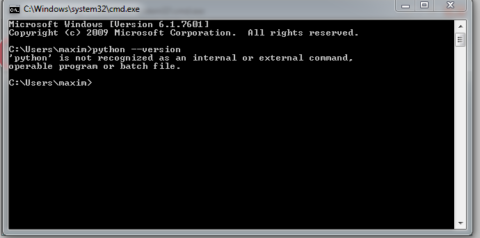
pipversion - If you get error as “ ‘pip’ is not recognized as an internal or external command “ on Windows, then you need to
add pip installation directory to the system variable (check here how to do this)
# Windows, Linux, and macOS
# using pip
pip --version
# output if installed
pip 22.3.1

python -m pip --version
# output if installed
pip 22.3.1
If pip is not installed, use ensurepip to install pip (see below)
Install pip using ensurepip, conda, or get-pip.py script
# Windows, Linux, and macOS
python -m ensurepip --default-pip

# within conda environment
conda install pip
To install using get-pip.py, first download the script and run following
command,
# Windows, Linux, and macOS
python get-pip.py
To install on Ubuntu, use the following command
# Ubuntu Linux
sudo apt update
sudo apt install python3-pip
upgrading pip to the latest version
# Windows, Linux, and macOS
# using pip
pip install --upgrade pip

# using Python
python -m pip install --upgrade pip
Installing a specific version of pip
# Windows, Linux, and macOS
# using pip
pip install --upgrade pip==21.0.1

# using Python
python -m pip install --upgrade pip==21.0.1

# using easy_install (deprecated)
easy_install pip==21.0.1
Installing and upgrading Python packages using pip
Installing Python packages
# Windows, Linux, and macOS
# using pip (replace bioinfokit with required python package name)
pip install bioinfokit

# using Python
python -m pip install bioinfokit
pipshould be used for installing or upgrading Python packages and it is not ideal for installing or upgrading
Python. If you want install or upgrade Python, you download the latest version of Python
and install them. In addition, you can also package manager for Linux (e.g. APT) or macOS (e.g. Homebrew) for installing
or upgrading Python.
Upgrading installed Python packages to the latest version
# Windows, Linux, and macOS
# using pip (replace bioinfokit with required python package name)
pip install --upgrade bioinfokit

# using Python
python -m pip install --upgrade bioinfokit

# upgrade all installed packages at same time using pip-review (need to install pip-review package)
pip-review --auto
Install a specific version of Python packages
General syntax to install the specific version of Python packages is pip install <python_package_name>==<version>. If
you don’t specify the version, the latest version of the Python package will be installed.
If you want to install the older version, you need to provide the specific version of Python package. For example,
to install the 1.22.0 version of NumPy, use the command as pip install numpy==1.22.0
See more examples,
# Windows, Linux, and macOS
# using pip (replace bioinfokit with required python package name)
pip install bioinfokit==2.0.0

# using Python
python -m pip install bioinfokit==2.0.0
Install specific packages from requirements file
- requirements file (
requirements.txt) let you install the multiple Python packages with specific or latest versions
at once - requirements file (requirements.txt) contains the name
of Python packages that need to be installed
# Windows, Linux, and macOS
# using pip
pip install -r requirements.txt

# using Python
python -m pip install -r requirements.txt
Uninstall Python packages
# Windows, Linux, and macOS
# using pip (replace bioinfokit with required python package name)
pip uninstall bioinfokit

# using Python
python -m pip uninstall bioinfokit
Check Python package version
# Windows, Linux, and macOS
# using pip (replace bioinfokit with required python package name)
pip show bioinfokit
# output
Name: bioinfokit
Version: 2.0.4
...

pip freeze # it will list all installed packages with their version
# output
adjustText==0.7.3
bioinfokit==2.0.4
...

# using Python
python -c "import bioinfokit; print(bioinfokit.__version__)"
2.0.4

# using Python interpreter
import bioinfokit
bioinfokit.__version__
'2.0.4'
Installing and upgrading Python packages using conda
In addition to pip, you can also use the conda
package manager for managing the Python packages. In addition to managing package dependencies, conda can create
multiple environments for managing package requirements for different projects.
Installing Python packages using conda,
# Windows, Linux, and macOS
conda install -c conda-forge numpy  # same as conda install numpy
Conda stores packages in channels and installs them from default channels. If the package is not in the default
channel, you should provide the channel name (e.g.-c bioconda) to install it. You can find the packages and their
channels in the conda public repository.
Upgrading Python packages using conda,
# Windows, Linux, and macOS
conda update numpy
Installing specific version of Python packages using conda,
# Windows, Linux, and macOS
conda install numpy=1.23.0
Virtual environments to install Python packages
- When you have multiple applications to run and each application has a specific requirement of Python packages, then
running those multiple applications with one Python installation is not convenient. For example, if one application
needs v1.0 of a specific Python package and another application needs v2.0 of the same Python package. - In such situations, the virtual environment is a helpful tool to install the specific versions of Python packages
required for each application. You can use either Python or conda to create virtual environment.
Create and activate a virtual environment
# using Python3
python -m venv example_venv

# using conda
conda create --name example_venv
To use a virtual environment, you need to first activate it
# Linux and macOS
source example_venv/bin/activate

# Windows
example_venv/Scripts/activate

# for virtual environment created using conda
conda activate example_venv
Once virtual environment is activated, you should see virtual environment name (example_venv) on your command prompt
Installing Python packages in a virtual environment
Once the virtual environment is activated, you can install the specific Python packages as discussed in the previous section
Enhance your skills with courses on Python
- Python for Data Science, AI & Development
- Python 3 Programming Specialization
- Python for Everybody Specialization
- Data Analysis Using Python
- Python for Genomic Data Science
References
- Installing Packages
- pip
- Virtual Environments and Packages
If you have any questions, comments or recommendations, please email me at
reneshbe@gmail.com
If you enhanced your knowledge and practical skills from this article, consider supporting me on

This work is licensed under a Creative Commons Attribution 4.0 International License
Some of the links on this page may be affiliate links, which means we may get an affiliate commission on a valid purchase.
The retailer will pay the commission at no additional cost to you.