In this post we’ll learn the steps to disable firewall in Windows Server 2012 R2. Security was always an area of concern for Microsoft Operating Systems, therefore Microsoft enhanced the security for all the new Operating Systems by enabling Firewall. It is enabled by default when you install the Windows Server 2012 R2. You would not be able to ping the computer on which firewall is enabled.
We would not recommend to disable the firewall for security reason but if you are using hardware firewall at organizational level and don’t want Software firewall to be enabled then follow the steps given below to disable Windows firewall on 2012 R2, you can follow the same steps for Windows Server 2008, Windows 8, etc.
https://www.itingredients.com//domain-controller-vs-member-server-vs-client/
1. Click start menu and click on the icon of Server Manager.

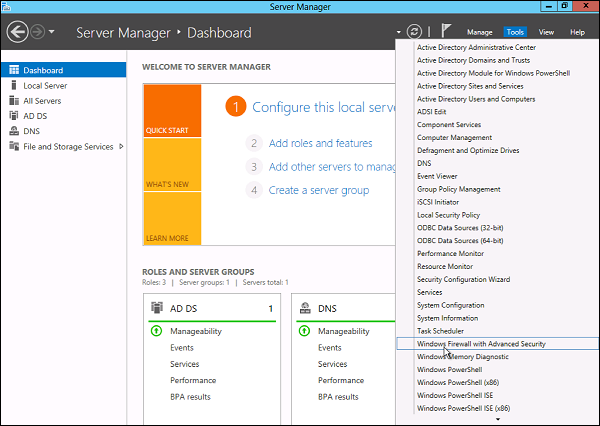
2. It opens the server manager then, click on “tools”.
https://www.itingredients.com//what-is-fsmo-roles-flexible-single-master-operations/
3. Select the option “Windows Firewall with Advanced Security” from the given options.

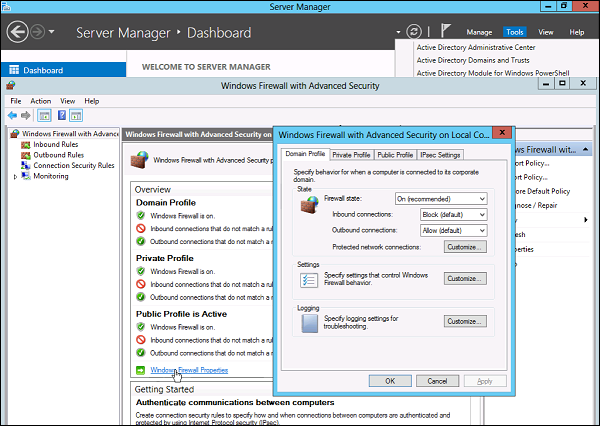
4. In Advanced Security window we can see Domain Profile, Private Profile and Public Profile, we have to disable all three of them. Click on “Windows Profile Properties”.
a) Domain Profile: It is used for the domain environment.
b) Private Profile: It is used for the network at home or at work where you know and trust the people.
c) Public Profile: It is primarily for the networks at public places e.g. airports, coffee shops, etc.

5. To disable the domain profile, drop down the firewall state and select “off”.

6. To disable the private profile, click drop-down and select “off”.

7. To disable the public profile, click drop-down and select “off”.

8. Here you can verify that all profiles are disabled. However, if you don’t want to disable all the profiles then you can even create inbound and outbound firewall rules. We’ll talk about those options in upcoming articles. We can even use Group Policy to apply firewall settings.

9. As we are done with the steps, now you can open a command prompt and try to ping the server and check if communication is working or not.
Hope you understood all the steps that we have listed on this article to disable Windows Server Firewall on 2012 R2. Feel free to leave your suggestions and comments in the below mentioned comment section. Besides that please confirm if you are using Hardware Firewall or Software Firewall in your Organization.
Брандмауэр Windows в режиме повышенной безопасности – это брандмауэр, который работает на Windows Server 2012 и включен по умолчанию. Настройки брандмауэра в Windows Server 2012 управляются из консоли управления Microsoft брандмауэра Windows . Чтобы настроить параметры брандмауэра, выполните следующие действия:
Шаг 1. Нажмите «Диспетчер серверов» на панели задач → Откройте меню «Инструменты» и выберите «Брандмауэр Windows в режиме повышенной безопасности».
Шаг 2. Чтобы просмотреть текущие параметры конфигурации, выберите « Свойства брандмауэра Windows» в консоли MMC. Это позволяет получить доступ к изменению настроек для каждого из трех профилей брандмауэра, а именно: настройки домена, частного и общего доступа, а также настроек IPsec.
Шаг 3 – Применение пользовательских правил, который будет включать следующие два шага –
-
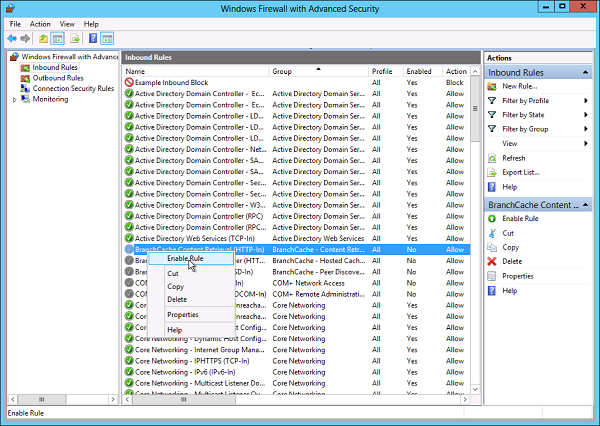
Выберите « Входящие правила» или « Исходящие правила» в разделе « Брандмауэр Windows в режиме повышенной безопасности» в левой части консоли управления. (Как вы знаете, исходящий трафик – это трафик, генерируемый сервером в Интернет, а входящий трафик – наоборот). Правила, которые в настоящее время включены, обозначены зеленым значком флажка, в то время как отключенные правила отображают серый значок флажка.
-
Правое нажатие на правило позволит вам включить / отключить.
Выберите « Входящие правила» или « Исходящие правила» в разделе « Брандмауэр Windows в режиме повышенной безопасности» в левой части консоли управления. (Как вы знаете, исходящий трафик – это трафик, генерируемый сервером в Интернет, а входящий трафик – наоборот). Правила, которые в настоящее время включены, обозначены зеленым значком флажка, в то время как отключенные правила отображают серый значок флажка.
Правое нажатие на правило позволит вам включить / отключить.
Как создать новое правило брандмауэра?
Чтобы создать новое правило брандмауэра, вы должны придерживаться следующих шагов –
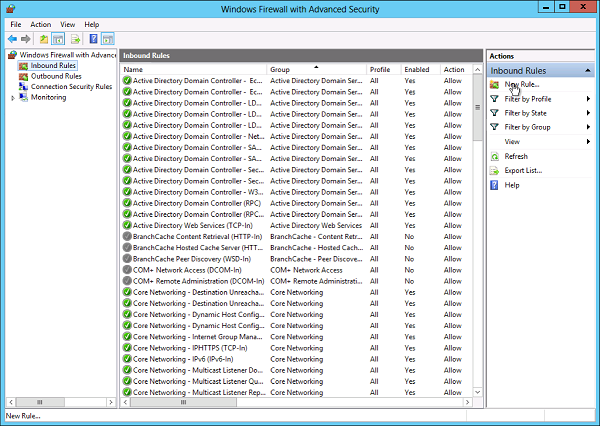
Шаг 1 – С правой стороны либо Правил входящих, либо Правил исходящих – нажмите «Новое правило».
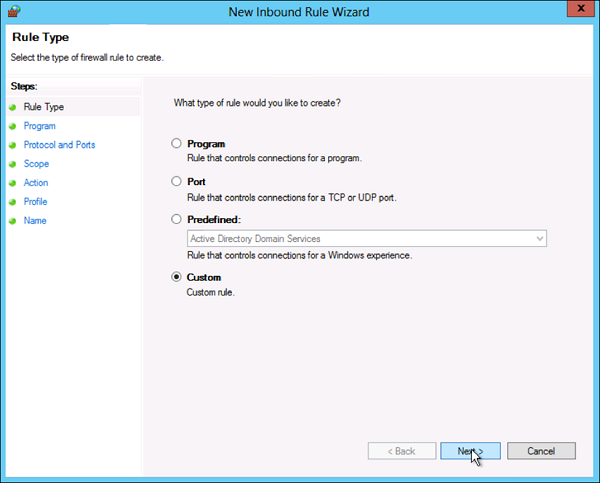
Шаг 2 – Пользовательский из радиальной кнопки Тип правила → нажмите Далее .
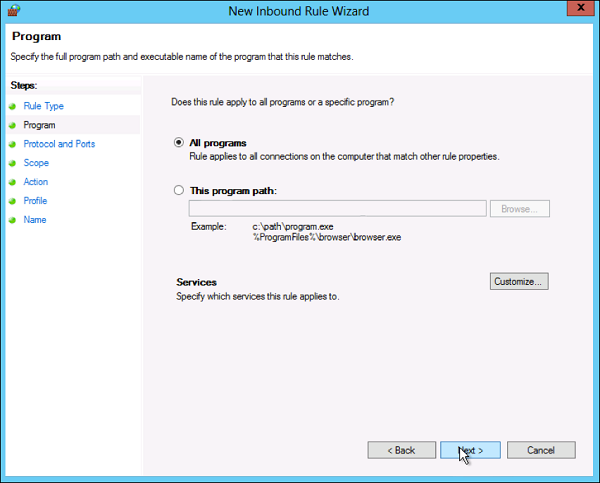
Шаг 3. Выберите ассоциацию программы для правила настраиваемого брандмауэра в качестве Все программы или путь к программе → нажмите Далее.
Шаг 4 – Поле типа протокола выберите тип протокола → нажмите Далее .

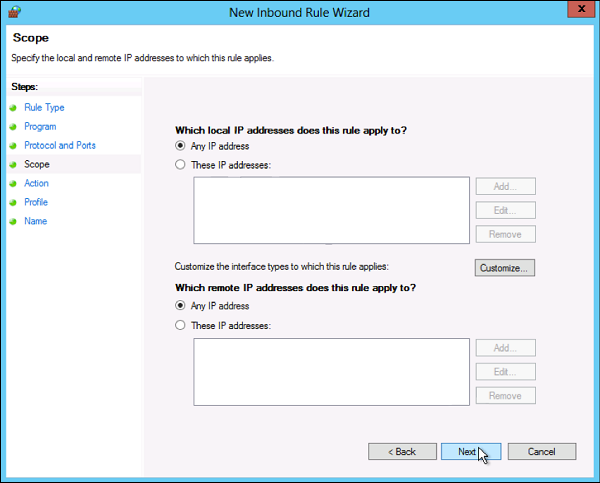
Шаг 5 – Выберите сопоставление IP-адресов для локальных и удаленных адресов → нажмите Далее .
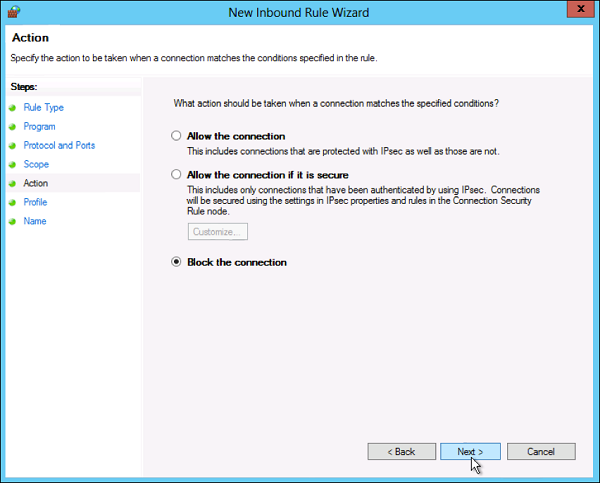
Шаг 6 – Выберите действие, которое нужно выполнить для соответствующего трафика → нажмите Далее.
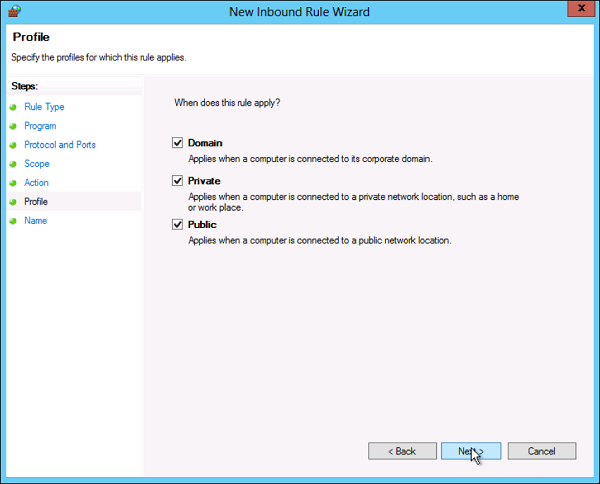
Шаг 7 – Выберите профили, связанные с пользовательским правилом → нажмите Далее .
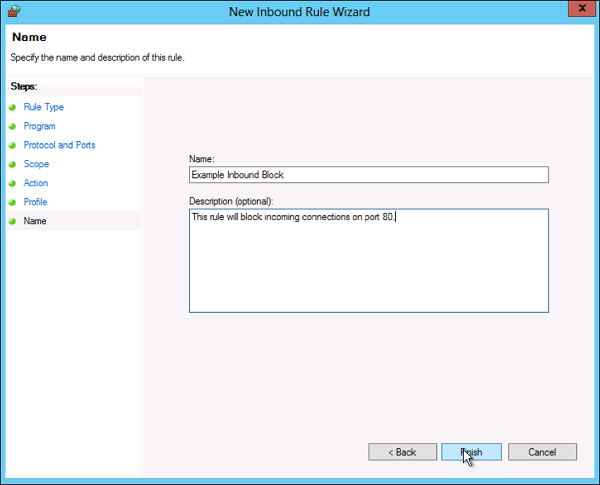
Шаг 8. Введите имя для правила брандмауэра и необязательное описание → Готово .
Шаг 9 – Правило брандмауэра можно найти на соответствующей вкладке «Правило», входящее или исходящее в зависимости от созданного типа. Чтобы отключить или удалить правило, найдите правило в MMC, щелкните его правой кнопкой мыши и выберите « Отключить правило» или « Удалить» .
In this article, we will learn that how we can disable the firewall in windows server although disabling a firewall is not a good option until and unless you are in an organization that is using hardware firewall all over the organization and you are working as a network administrator so you have decided to disable the software firewall.
Windows firewall with advanced security is a host-based firewall which means that it is located between the boundary of internal and external network and it can provide the variety of services. By default, the firewall is enabled in windows server so let’s begin with the procedure, the first log into the windows server as in this case we will disable the firewall in windows server 2012 R2.
Open the server manager either from the taskbar or search it by pressing the windows button. Once server manager is opened click on tools.

Scroll down and click on “windows firewall with advanced security” and it will open up a new window console.

As there are three types of profile showing up in windows firewall with advanced security so we will have to disable all of them. Click on windows profile properties in overview tab. It will open up a new windows console.

Domain Profile tab is automatically selected and it is that profile which is used for a domain environment. Click on the drop down option against firewall state and select off.

Click apply and select the “Private Profile” tab as the private profile is used for a network where you work or you can trust.

Click on drop-down option against firewall state and select off.

Click apply and select the last “Public Profile” tab as its name is suggesting this profile is used for the networks at public places.

Click on drop-down option against firewall state and select off.

Click apply and then press “Ok” to close the window and this is how we can disable the firewall on windows server.
Imran is a technology evangelist with 8 years of experience working with some of the Industry leading companies. Imran’s expertise includes On-Prem/Virtual Infrastructure deployments, IT Solutions for SMEs, End User Computing Support.
Table of Contents
- Introduction
- Requirements
- Procedure
- Conclusion
- Related Articles
- Other Languages
Introduction
This article will demonstrate how to disable the Windows Firewall on Hyper -V Server Core and Windows Server 2012 R2.
With this process we minimize many problems networks or Troubleshooting Hyper- V Server and Windows Server.
Requirements
Process will run on Windows Power Shell.
Procedure
The Power Shell can be performed in two ways , either by its icon in Graphic Interface version of Windows Server, or the » Command Prompt» with the command called
» powershell » , after that the command prompt run the binary «Windows Power Shell . «

Already with Windows Power Shell enabled, will have to run the command that will disable the Windows Firewall “netsh advfirewall set allprofiles state off” after click " Enter"

After having executed the command will display a message of " OK", confirming that the process was successful, and showing that the firewall was disabled.

After this process, Servers with Microsoft Hyper -V Core is important to make the restart of equipment to carry out this process run the command " Restart- Computer".

Remembering that for both processes in servers with Hyper -V or Windows Server Core , is not intended to be restarted servers " production" without a window is scheduled. With the command above you will restart your server that will get "Off -Line " for a few minutes .

Conclusion
In the above article we learned how to disable the Windows Firewall and Windows Server Hyper -V Server Core with Windows Power Shell.Related Articles
- Wiki: Management Portal