Содержание
- Способы решения проблемы
- Способ 1: Сканирование компьютера на вирусы
- Способ 2: Очистка от мусора и восстановление реестра
- Способ 3: Остановка процесса sppsvc.exe
- Вопросы и ответы

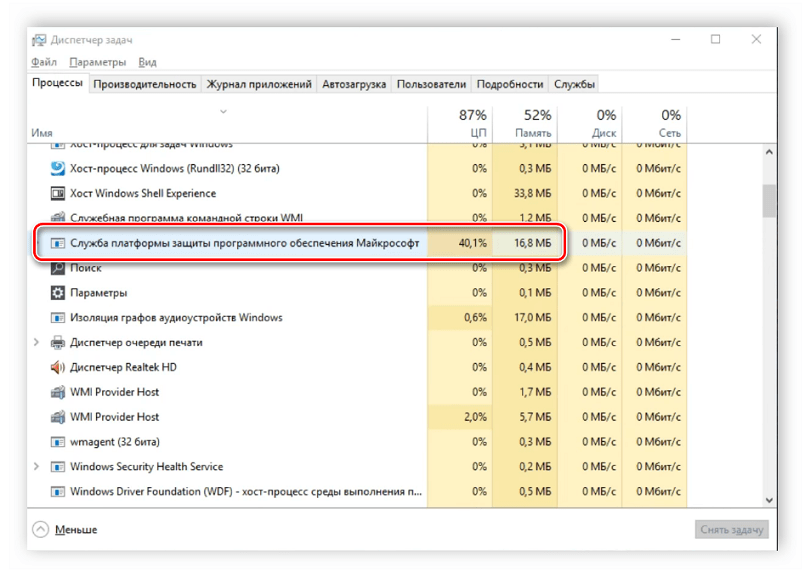
Некоторые обладатели операционной системы Windows 10 сталкиваются с такой проблемой, что служба платформы защиты программного обеспечения грузит процессор. Данная служба часто вызывает ошибки в работе компьютера, чаще всего она нагружает ЦП. В этой статье мы рассмотрим несколько причин возникновения подобной неполадки и опишем способы ее исправления.
Способы решения проблемы
Сама служба отображается в диспетчере задач, однако ее процесс носит название sppsvc.exe и найти его можно в окне монитора ресурсов. Сам по себе он не несет большую нагрузку на ЦП, но в случае сбоя в реестре или при заражениях вредоносными файлами она может подняться до 100%. Давайте приступим к решению этой проблемы.
Способ 1: Сканирование компьютера на вирусы
Вредоносные файлы, попадая на компьютер, часто маскируются под другие процессы и выполняют необходимые действия, будь то удаление файлов или вывод рекламы в браузере. Поэтому в первую очередь мы рекомендуем проверить, не является ли sppsvc.exe замаскированным вирусом. В этом вам поможет антивирус. Воспользуйтесь любым удобным, чтобы выполнить сканирование и в случае обнаружения удалить все вредоносные файлы.

Читайте также: Борьба с компьютерными вирусами
Способ 2: Очистка от мусора и восстановление реестра
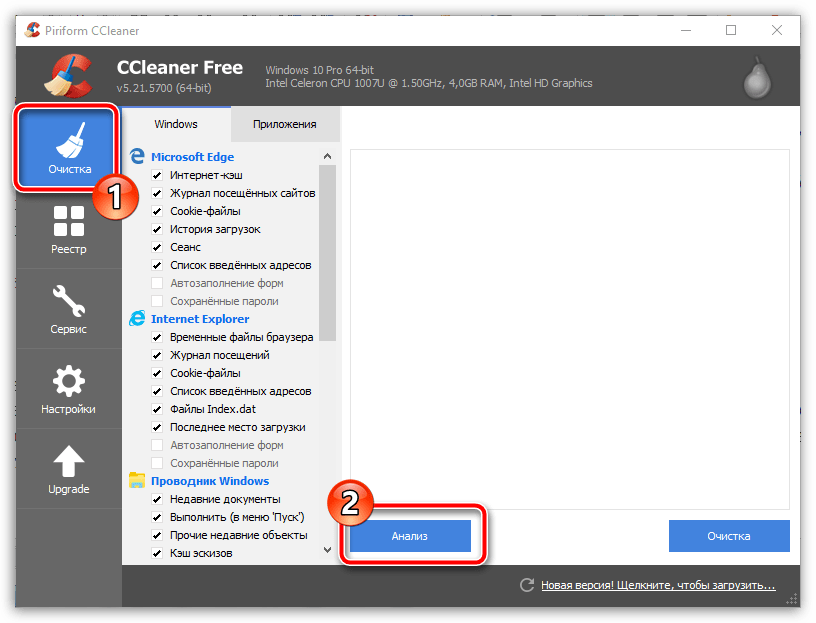
Изменения параметров реестра и скопление ненужных файлов на компьютере также могут привести к тому, что служба платформы защиты программного обеспечения будет грузить процессор. Поэтому не будет лишним провести чистку и восстановление реестра с помощью специальных программ. Подробнее о них читайте в статьях на нашем сайте.
Подробнее:
Как очистить компьютер от мусора с помощью программы CCleaner
Очистка Windows 10 от мусора
Проверка Windows 10 на наличие ошибок
Способ 3: Остановка процесса sppsvc.exe
Если ни один из вышеперечисленных способов вам не помог, то остается только выполнить крайнюю меру – остановить sppsvc.exe. На работоспособности системы это никак не отразится, она будет выполнять все свои функции корректно, однако это поможет разгрузить ЦП. Для остановки необходимо выполнить всего несколько действий:
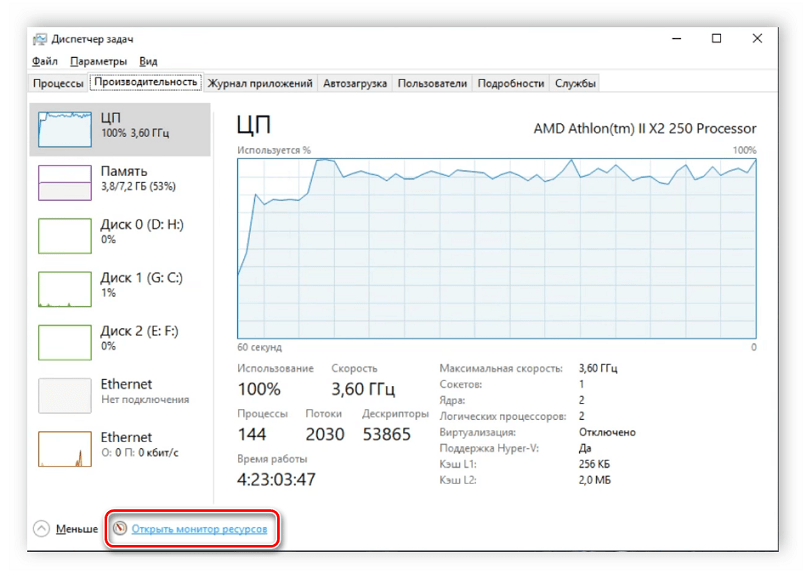
- Откройте диспетчер задач, зажав комбинацию клавиш Ctrl + Shit + Esc.
- Перейдите во вкладку «Производительность» и выберите «Открыть монитор ресурсов».
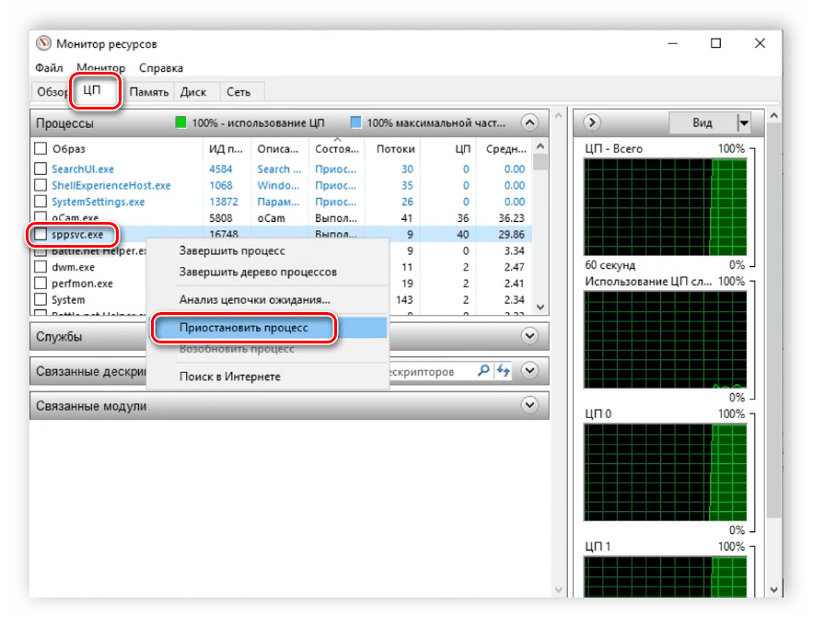
- Перейдите во вкладку «ЦП», нажмите правой кнопкой мыши на процесс «sppsvc.exe» и выберите «Приостановить процесс».
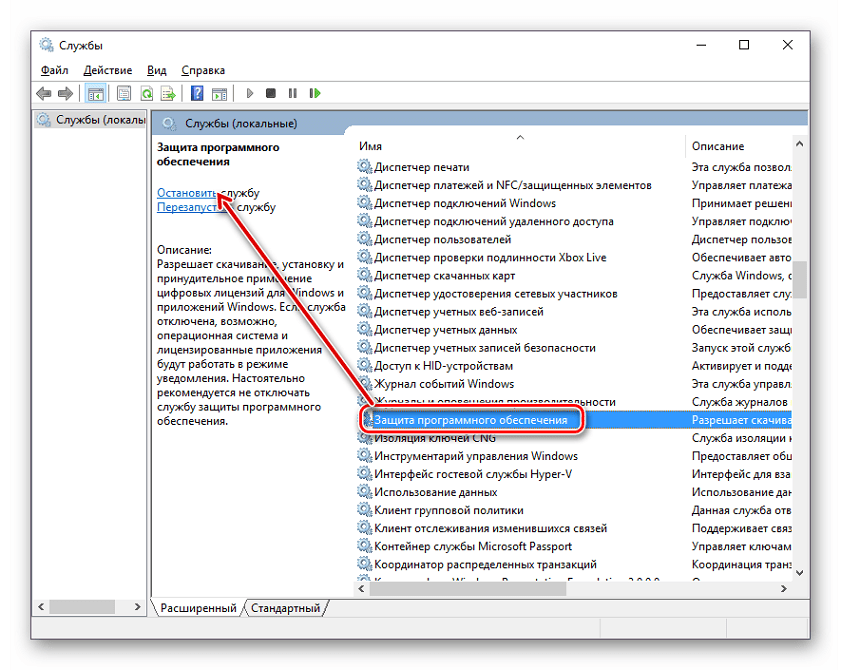
- Если после перезагрузки системы процесс снова заработает и ЦП будет загружен, то необходимо полностью отключить службу через специальное меню. Для этого откройте «Пуск», введите там «Службы» и перейдите к ним.

Здесь найдите строку «Защита программного обеспечения», нажмите на нее левой кнопкой мыши и выберите «Остановить службу».

В этой статье мы подробно рассмотрели причины возникновения проблемы, когда служба платформы защиты программного обеспечения грузит процессор и рассмотрели все способы ее решения. Воспользуйтесь первыми двумя перед тем, как отключать службу, ведь неполадка может скрываться в измененном реестре или наличии на компьютере вредоносных файлов.
Читайте также: Что делать, если процессор грузит процесс mscorsvw.exe, процесс system, процесс wmiprvse.exe.
Еще статьи по данной теме:
Помогла ли Вам статья?
 Пользователи Windows 10, 8.1 и Windows 7 могут замечать, что иногда, особенно сразу после включения компьютера или ноутбука процесс sppsvc.exe грузит процессор. Обычно, эта нагрузка пропадает через минуту-другую после включения и сам процесс исчезает из диспетчера задач. Но не всегда.
В этой инструкции подробно о том, почему может возникать нагрузка на процессор, вызванная sppsvc.exe, что можно сделать, чтобы решить проблему, о том, как проверить, не вирус ли это (скорее всего — нет) и, если возникла такая необходимость — отключить службу «Защита программного обеспечения».
Что такое защита программного обеспечения и почему sppsvc.exe при загрузке компьютера грузит процессор
Служба «Защита программного обеспечения» следит за состоянием ПО от Microsoft — как самой Windows, так и прикладных программ, с целью защиты его от взлома или подмены.
Стандартно, sppsvc.exe запускается через короткий промежуток времени после входа в систему, выполняет проверку и отключается. Если и у вас нагрузка кратковременная — не стоит чего-либо предпринимать, это нормальное поведение данной службы.
Если же sppsvc.exe продолжает «висеть» в диспетчере задач и отъедать значительное количество ресурсов процессора, возможно, есть какие-то проблемы, мешающие работе защиты программного обеспечения, чаще всего — нелицензионная система, программы Майкрософт или какие-либо установленные патчи.
Простые способы решить проблему, не затрагивая работу службы
- Первое, что рекомендую сделать — выполнить обновление системы, особенно если у вас Windows 10 и уже старая версия системы (к примеру, на момент написания статьи, актуальными версиями можно считать 1809 и 1803, а на более старых может «самопроизвольно» возникать описываемая проблема).
- Если проблема с высокой нагрузкой от sppsvc.exe возникла «только что», можно попробовать использовать точки восстановления системы. Также, если в последнее время производилась установка каких-то программ, может иметь смысл временно удалить их и проверить, решена ли проблема.
- Выполните проверку целостности системных файлов Windows, запустив командную строку от имени администратора и используя команду sfc /scannow
Если описываемые простые методы не помогли, переходим к следующим вариантам.
Отключение sppsvc.exe
При необходимости, можно отключить запуск службы «Защита программного обеспечения» sppsvc.exe. Безопасный метод (но не всегда срабатывающий), который легко «откатить» при необходимости, состоит из следующих шагов:
- Запустите планировщик заданий Windows 10, 8.1 или Windows Для этого можно использовать поиск в меню Пуск (панели задач) или нажать клавиши Win+R и ввести taskschd.msc
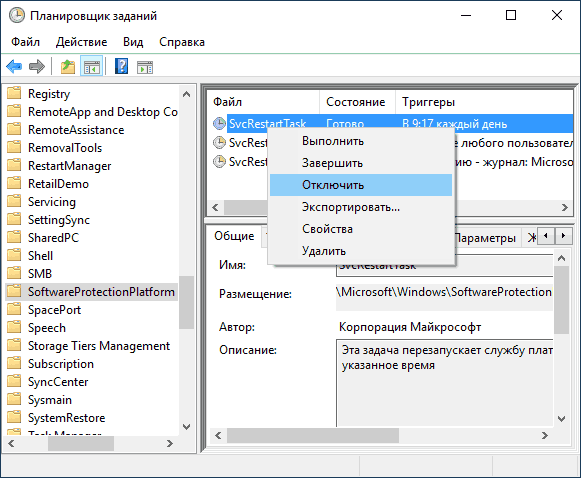
- В планировщике заданий перейдите к разделу Библиотека планировщика заданий — Microsoft — Windows — SoftwareProtectionPlatform.
- В правой части планировщика вы увидите несколько заданий SvcRestartTask, нажмите правой кнопкой мыши по каждому заданию и выберите пункт «Отключить».

- Закройте планировщик заданий и перезагрузите компьютер.
В дальнейшем, если потребуется вновь включить запуск Защиты программного обеспечения, просто включите отключенные задание тем же способом.
Есть и более радикальный метод, позволяющий отключить службу «Защита программного обеспечения». Сделать это через системную утилиту «Службы» не получится, но можно использовать редактор реестра:
- Запустите редактор реестра (Win+R, ввести regedit и нажать Enter).
- Перейдите к разделу
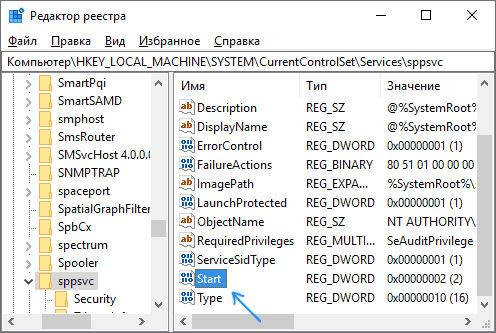
HKEY_LOCAL_MACHINESYSTEMCurrentControlSetServicessppsvc
- В правой части редактора реестра найдите параметр Start, нажмите по нему дважды мышью и измените значение на 4.

- Закройте редактор реестра и перезагрузите компьютер.
- Служба Защита программного обеспечения будет отключена.

Если потребуется вновь включить службу, измените тот же параметр на 2. Некоторые отзывы сообщают, что при использовании данного метода может перестать работать некоторый софт Майкрософт: в моем тесте этого не произошло, но имейте в виду.
Дополнительная информация
Если у вас возникло предположение, что ваш экземпляр sppsvc.exe — вирус, это можно легко проверить: в диспетчере задач нажмите правой кнопкой мыши по процессу, выберите «Открыть расположение файла». После чего в браузере зайдите на virustotal.com и перетащите этот файл в окно браузера для его проверки на вирусы.
Также, на всякий случай, рекомендую проверить и систему на вирусы целиком, возможно, здесь будет полезным: Лучшие бесплатные антивирусы.
Главная » Уроки и статьи » Windows
Пользователи нередко замечают процесс sppsvc.exe в Windows 10. Чаще всего его можно заметить сразу после включения ПК. Проблема в том, что иногда он оказывает серьезную нагрузку без видимых причин. Сохраняться она может в течение длительного времени.
Что это за процесс
Данный процесс представляет собой службу, которая при каждом включении системы проверяет программы от Microsoft. Она следит за тем, чтобы систему и дополнительное ПО нельзя было взломать. Также служба предотвращает подмену важных файлов. Проще говоря, она необходима для защиты ОС. Найти ее можно в диспетчере задач. Процесс присутствует не только в новых версиях системы, но и в более ранних.

По идее, служба не работает постоянно: она просто осуществляет проверку при запуске и сразу после окончания процедуры отключается. При этом действительно может оказываться довольно высокая нагрузка на процессор. Подобное явление не должно вызывать беспокойство. Поводом для активных действий становится длительное присутствие процесса с высокой нагрузкой.
Как отключить
В первую очередь все люди думают именно об деактивации мешающего процесса. Подобная процедура не должна повлиять на работоспособность операционной системы, если использовать «мягкие» методы. Несмотря на это, рекомендуется также рассмотреть варианты, не затрагивающие службу: они полностью безопасны.
Самый щадящий способ отключения – использовать утилиту «Планировщик задач». При необходимости службу можно будет легко включить снова, даже если возникнут какие-то проблемы. Состоит процедура из нескольких этапов:
- Открыть программу. Сделать это можно, введя ее название в поиске на панели задач или использовав команду «taskschd.msc» (без кавычек; вводится в окно, открыть которое можно одновременным нажатием клавиш Win и R).

- Перейти по пути, обведенному на изображении ниже, и найти задачу, именуемую «SvcRestartTask» (обычно первая в списке).

- Далее нужно всего лишь кликнуть по ней ПКМ и в меню выбрать «Отключить».
Изменения будут применены сразу же, так что перезагрузка устройства не требуется. Активацию службы можно осуществить тем же самым способом.
Есть и более действенный, но вместе с тем и более сложный метод. Заключается он в изменении одного из параметров реестра. Важно понимать, что другие разделы (папки) и параметры ни в коем случае нельзя «трогать»: это может привести к непоправимым последствиям. Суть способа состоит в следующем:
- Открыть редактор. Как и в предыдущем случае, можно воспользоваться поиском или командой. Во втором случае нужно ввести слово «regedit».

- Перейти по указанному ниже адресу.

- Необходимо открыть настройки подчеркнутого на скриншоте выше параметра. Сделать это можно, дважды кликнув по нему ЛКМ.
- В небольшом окне будет «Значение». Следует установить 4 и нажать на кнопку «ОК».

Важно отметить, что изменения вступят в силу только после перезагрузки ПК. В любой момент службу можно включить снова, вернув изначальное значение, а именно 2. Главный минус метода – есть некоторая вероятность, что программы от Microsoft перестанут работать.
Способы решения проблемы без отключения
Подобные варианты безопасны и просты в применении, но они далеко не всегда эффективны. Часто проблема возникает у устаревших версий системы, поэтому первым делом рекомендуется ее обновить до последней доступной версии. Также нередко такая проблема обоснована повреждением системных файлов. Запустить проверку их целостности можно командой:

Открыть строку можно либо через все тот же поиск, либо нажав ПКМ по меню «Пуск» и выбрав соответствующий пункт в контекстном меню.
Если повышенная нагрузка появилась недавно, то хорошим способом решения проблемы может оказаться откат системы. Осуществить его можно только при наличии точек восстановления.
Важно помнить, что, прежде чем отключить процесс «sppsvc.exe», необходимо понять, точно ли подобное поведение не является нормой: пользователи часто беспокоятся из-за кратковременной нагрузки. Кроме того, можно всегда прибегнуть к наиболее простым методам, которые не влияют на саму службу и не могут нанести вреда ОС.
Понравилось? Поделись с друзьями!
Дата: 01.11.2021
Автор/Переводчик: Wolf
На чтение 4 мин. Просмотров 967 Опубликовано 03.09.2019
Пользователи Windows часто испытывают высокую загрузку процессора. Эта проблема приводит к снижению производительности ПК, потребляя огромные куски памяти.
Крайне важно принять меры для исправления этой проблемы, поскольку это может привести к смертельному ущербу для вашего компьютера. В этом руководстве мы предоставим вам ряд исправлений, которые должны вам помочь.
Содержание
- Как исправить sppsvc.exe высокая загрузка процессора
- 1. Запустите средство устранения неполадок обслуживания системы
- 2. Запустите сканирование SFC
- 3. Попробуйте остановить службу защиты программного обеспечения
- 4. Обновите свой ПК с Windows
- 5. Попробуйте перезапустить процесс sppsvc.exe.
- 6. Попробуйте выполнить чистую загрузку
Как исправить sppsvc.exe высокая загрузка процессора
- Запустите средство устранения неполадок обслуживания системы
- Запустите сканирование SFC
- Попробуйте остановить службу защиты программного обеспечения
- Обновите свою Windows
- Попробуйте перезапустить процесс sppsvc.exe
- Попробуйте выполнить чистую загрузку
1. Запустите средство устранения неполадок обслуживания системы
Средство устранения неполадок при обслуживании системы поможет вам найти и удалить неиспользуемые файлы, что ускорит работу вашего компьютера.
Чтобы получить доступ к средству устранения неполадок обслуживания системы , выполните следующие действия.
- Перейдите на Пуск и откройте Панель управления .
- Найдите Устранение неполадок в окне поиска Панель управления и откройте его.
- Нажмите Просмотреть все .
- Дважды нажмите Средство устранения неполадок обслуживания системы и следуйте инструкциям на экране.

2. Запустите сканирование SFC
Запуск сканирования SFC может помочь системе найти отсутствующие или поврежденные файлы. Он также восстанавливает зараженные файлы.
Для выполнения сканирования SFC необходимо выполнить следующие шаги:
- Найдите Командную строку в панели поиска Windows, щелкните ее правой кнопкой мыши и выберите Запуск от имени администратора .
-
Введите следующую команду и нажмите клавишу Enter, затем подождите несколько минут:
- DISM.exe/Online/Cleanup-image/Restorehealth
-
Чтобы выполнить сканирование SFC, введите следующую команду:
-
SFC/SCANNOW

-
SFC/SCANNOW

После выполнения этих задач попробуйте перезагрузить компьютер.
3. Попробуйте остановить службу защиты программного обеспечения
Для этого вы должны:
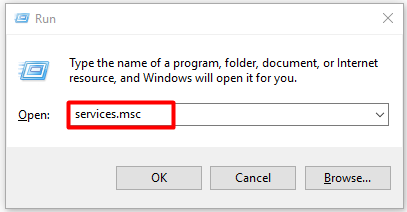
- Откройте окно «Выполнить», нажав клавиши R + Windows на клавиатуре и введите команду services.msc .
-
Нажмите правой кнопкой мыши на Защита программного обеспечения , затем перейдите в Все задачи и нажмите Стоп.

4. Обновите свой ПК с Windows
Убедитесь, что ваша ОС Windows обновлена, и вы используете самые последние исправления/обновления.
Чтобы обновить операционную систему, все, что вам нужно сделать, это выполнить следующие действия:
- Нажмите кнопку I + Windows на клавиатуре и нажмите Обновления и безопасность> Центр обновления Windows .
-
Выберите Проверить наличие обновлений> , чтобы установить доступные обновления.
- Перезагрузите компьютер и проверьте, сохраняется ли проблема

5. Попробуйте перезапустить процесс sppsvc.exe.
Отключите sppsvc.exe , а затем проверьте, открыт ли он в диспетчере задач. Если он все еще работает, ваша ОС может быть заражена вирусом.
Чтобы отключить sppsvc.exe , выполните следующие действия:
- Нажмите кнопку R + Windows на клавиатуре
- Введите regedit и нажмите клавишу ВВОД.
- Перейдите в HKLM SYSTEM CurrentControlSet Services sppsvc на левой панели.
- Нажмите на папку sppsvc, затем дважды нажмите Пуск . Измените Значение данных на 4 и нажмите ОК .
- Перезагрузите Windows и проверьте, улучшилось ли использование вашего процессора
Если процесс все еще открыт в диспетчере задач, выполните сканирование системы с помощью анти-вредоносных программ.
Если вы не нашли процесс открытым, включите его, чтобы увидеть, использует ли он слишком много ЦП.
6. Попробуйте выполнить чистую загрузку
Прежде всего, вам нужно загрузить систему в Безопасный режим . Затем проверьте, если у вас все еще высокая загрузка процессора.
Если система работает в Безопасном режиме , попробуйте выполнить чистую загрузку.
Для этого вы должны:
- Нажмите кнопку Windows на клавиатуре и введите msconfig .
- Нажмите Конфигурация системы и перейдите в Услуги .
-
Установите флажок Скрыть все службы Microsoft и нажмите Отключить все
- Перейдите на вкладку Автозагрузка и затем Откройте диспетчер задач .
- Отключить все элементы автозагрузки
- Закройте диспетчер задач и нажмите ОК , чтобы получить информацию о конфигурации системы.
- Перезагрузите компьютер.Если это не работает, вы должны попытаться включить службы по одной, чтобы увидеть, какая из них вызывает проблему

Если вы можете теперь отслеживать программу, которая вызывает проблему. Попробуйте переустановить его и проверьте, сработало ли это.
Мы надеемся, что наши решения пригодились. Если у вас есть другие исправления, которыми вы хотели бы поделиться с нами, перечислите их в разделе комментариев ниже.
You may have noticed the Microsoft Software Protection Platform Service in the Task Manager, but you don’t know what it is. Sometimes, you even encounter the Microsoft Software Protection Platform Service high CPU issue. MiniTool will introduce this service and help you solve the high CPU issue caused by it.
About Microsoft Software Protection Platform Service
Microsoft Software Protection Platform Service (Sppsvc), a service in Task Manager, is a security service built in Windows in order to stop piracy and protect software tampering, which is implied by its name. The Sppsvc is responsible for downloading, installing and executing Windows digital licenses and applications.
Besides, it is helpful for initiating license. As Microsoft claims, software protection platform service performs well in how Microsoft software activates, validates online and runs when tampering or hacking is detected.
What Causes SPPSVC High CPU Usage
Though it has so many benefits, it has its shortcomings. One of the most frequently discussed points is the Microsoft Software Protection high CPU issue. In fact, high CPU usage issue on Windows OS is a very common one compared with other errors like computer keeps crashing, blue screen of death, black screen, etc.
You may encounter various high CPU usage cases such as state repository service high CPU, Wsappx high CPU, and so forth. How Microsoft Software Protection Platform Service high CPU is different from other high CPU cases?
The SPPSVC high CPU issue will occur under 2 circumstances. It can happen in a genuine Windows copy and a copy that is activated with third-party applications like KMS. You can click here to check if Windows 10 is genuine or not.
What causes Microsoft Software Protection high CPU? Several factors can result in this issue. They are summarized as follows.
- The PC is infected by virus or malicious software.
- The Microsoft Software Protection Platform Service is stuck with validations.
Of course, other elements can also trigger the SPPSVC high CPU issue. Here comes the real point of this error – how to fix Microsoft Software Protection Platform Service high CPU. Well, several solutions have been offered to you.
Solution 1: Restart Microsoft Software Protection Platform Service
If you have the privilege of administrator, you can restart Microsoft software protection platform service to solve the Microsoft Software Protection high CPU issue. This method is pretty simple and convenient. You just need to follow these steps to do that.
Step 1: Open the Run window and type services.msc, and then hit Enter.
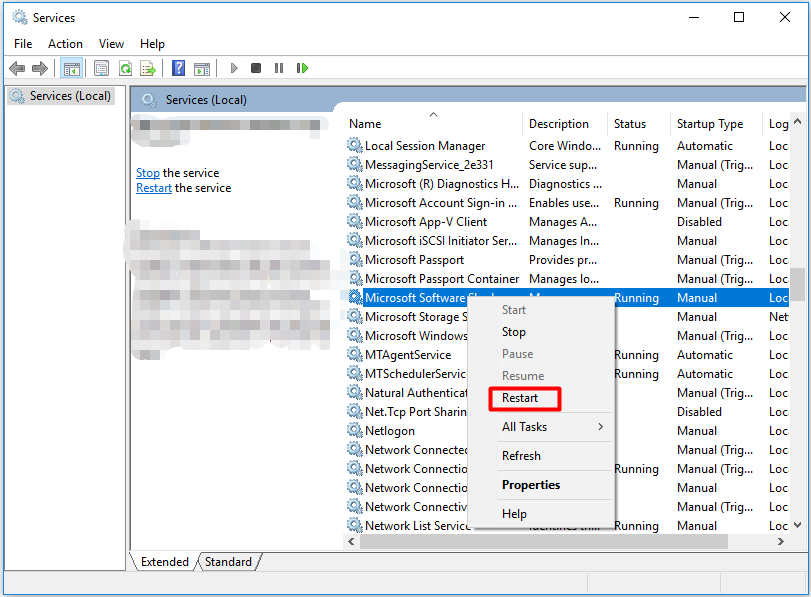
Step 2: Scroll down the service list to find Microsoft Software Protection Platform Service. Then, right click on the service and click Restart option. If the Restart button is greyed out, you need to click Start and then click the Restart button.
Step 3: Now, check if the SPPSVC high CPU issue is solved. If not, try other solutions immediately.
Solution 2: Update Your Windows
The Sppsvc.exe may start consuming system resource because of the missing Windows updates. As it is known to all, outdated system drivers and software can cause various kinds of errors. So, updating your Windows is worth trying.
Step 1: Open Windows Settings by holding Win plus I keys, and then navigate to Windows Updates section.
Step 2: Move to the right side of the window and click on Check for updates option. Then, you will see that Windows is checking for updates. Besides, if Windows finds any available updates, it will download and install it automatically.
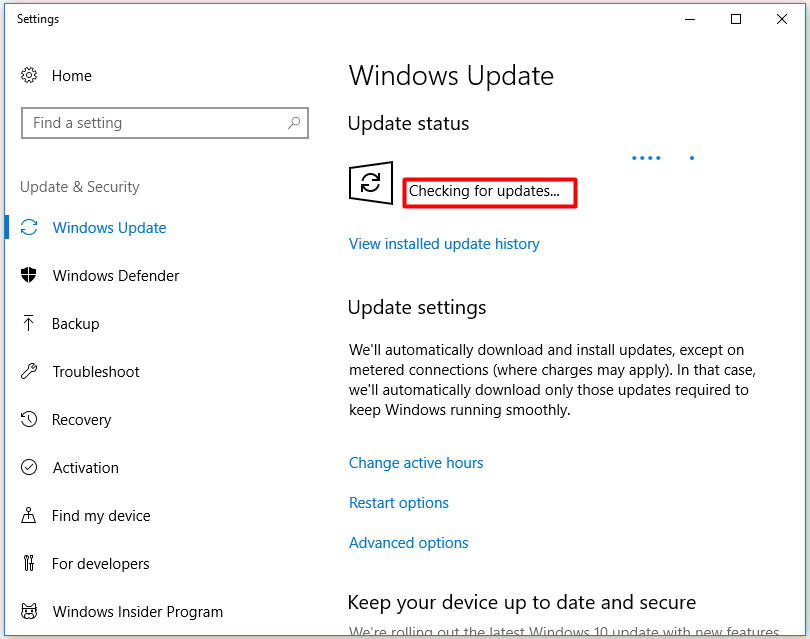
Step 3: When the new update is installed on your computer, reboot the device and see if the high CPU issue is resolved.
Top recommendation: How to Check If Drivers Are up to Date? Here Are Details
Solution 3: Run System Maintenance Troubleshooter
The System Maintenance Troubleshooter is a Windows built-in utility, which can fix various Windows related issues. For instance, the Troubleshooter will help you solve errors such as printer offline, Ethernet not working, unidentified network, Canon printer not responding and so on.
Hence, you can consider running system maintenance troubleshooter with steps below to fix the Microsoft Software Protection high CPU error.
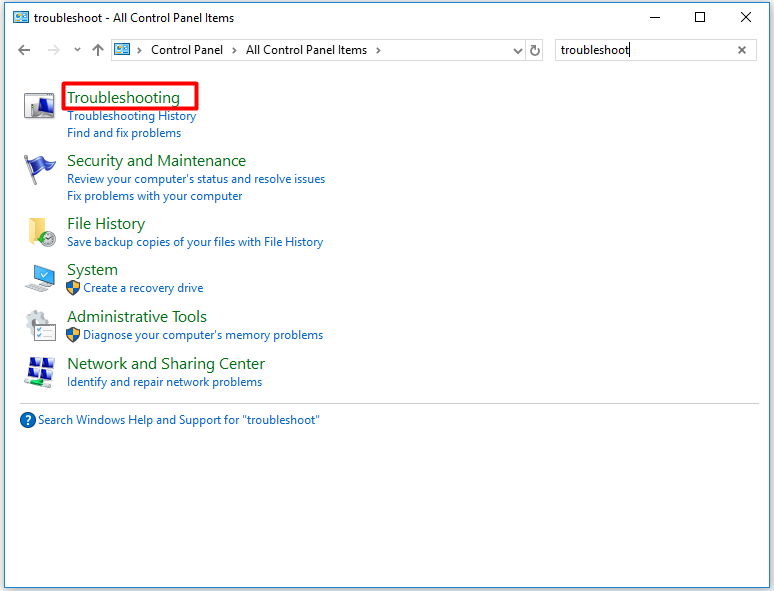
Step 1: After opening Control Panel, type troubleshoot in the search bar and you can see the corresponding search result in the window. Click on Troubleshooting to continue.
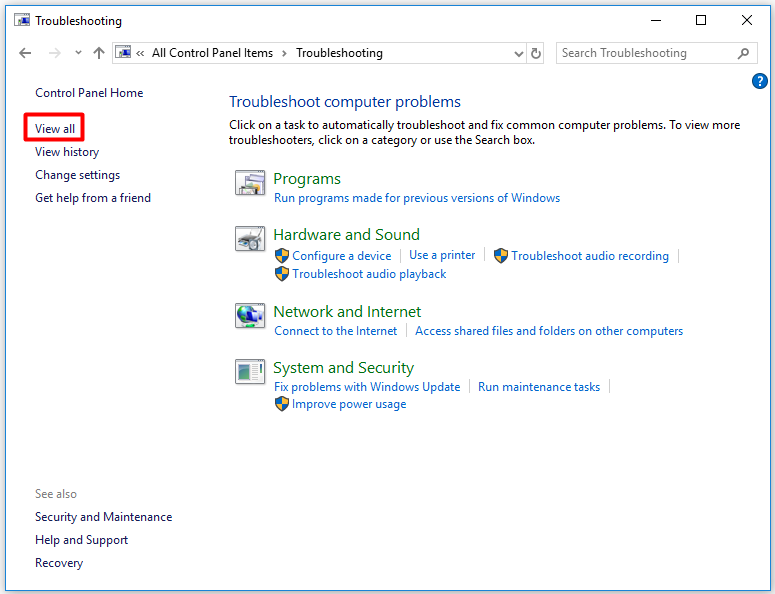
Step 2: In the Troubleshooting window, click View all in the left pane.
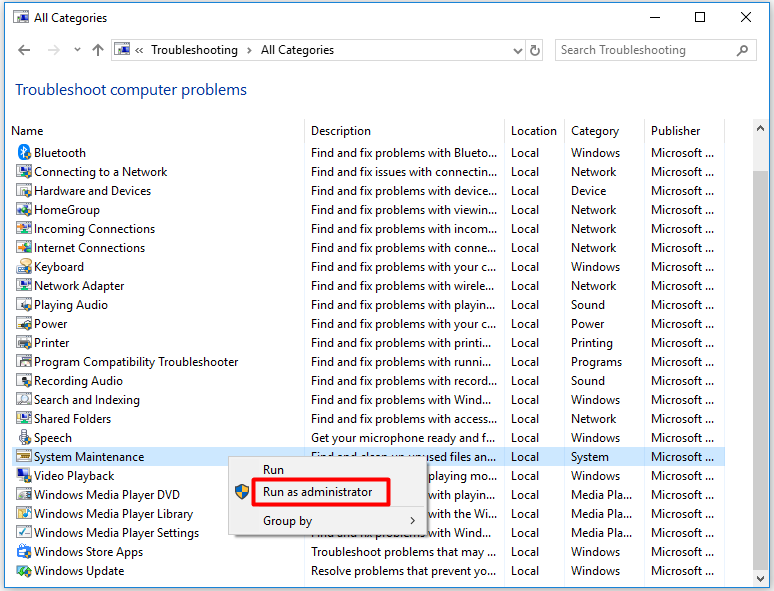
Step 3: Drop down the menu until you find System Maintenance. Right click it and select Run as administrator.
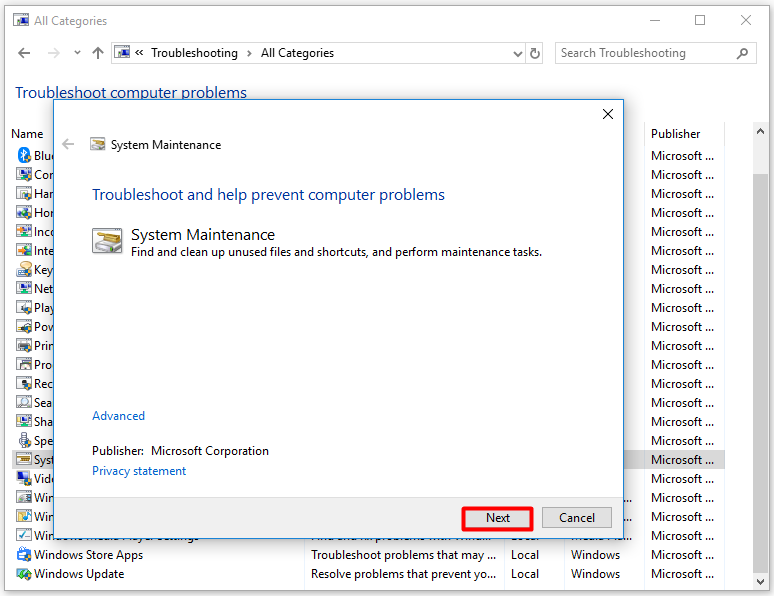
Step 4: In the pop-up window, click the Next button.
Step 5: Now, the Troubleshooter will scan for errors on your operating system. It will tell you the errors and corresponding fixes if it finds any. You just need to follow the on-screen instruction to complete the operation.
Solution 4: Boot Your Computer in Safe Mode
When the Microsoft Software Protection high CPU occurs, try a clean boot. Safe Mode can fulfill the requirement, because only necessary services, drivers and processes will run in this mode. Hence, you can boot your computer into Safe Mode and see if the Microsoft Software Protection Platform Service still uses system’s resource unreasonably.
If the SPPsvc high CPU usage issue disappears in safe mode, it indicates that the software clash with the service is the source of the error. And you need to take some measures to cope with it. For example, you can disable all the services in the Task Manager and then enable them one by one until the issue appears again. Then, you can remove or disable the service.
Solution 5: Scan for Malware or Virus
Since virus and malware can lead to Microsoft Software Protection Platform Service high CPU, it’s recommended to scan your computer for any virus or malicious software with antivirus software installed on your computer. You can do this with your antivirus programs to keep your computer is clean (without virus or malware).
You may also like this: How to Clean up Your Computer? Top 8 Methods for You
If you don’t install any antivirus software on your computer, you can use the built-in program — Windows Defender. Open it and choose a scan option based on your need. However, some users doubt that is Windows Defender enough. As for this, you can utilize other tools like Microsoft Safety Scanner to protect your PC.
Solution 6: Run System File Checker
System File Checker (SFC) is also a utility that comes with Windows operating system (since Windows 98). It is widely used for scanning computer for corrupted system files. Here, you can also apply it to fix Microsoft Software Protection high CPU issue. For that.
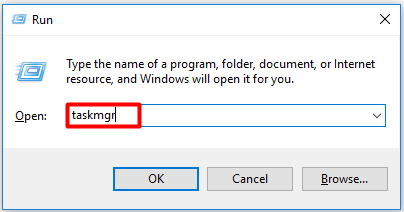
Step 1: Open the Run dialog window and type taskmgr. Then, press the Enter key.
Step 2: Click on the File tab and select Run new task from the elevated menu.
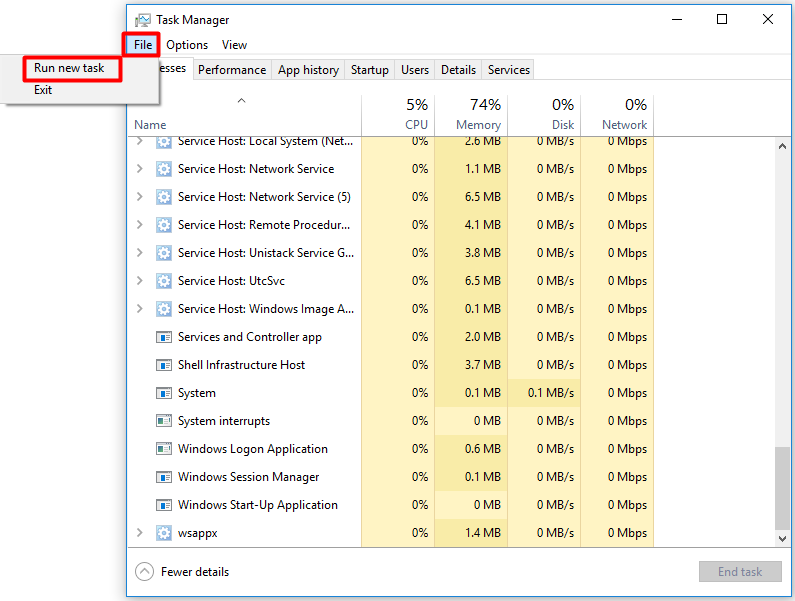
Step 3: From the pop-up window, type powershell and select the Create this task with administrative privileges checkbox. Then, hit Enter.

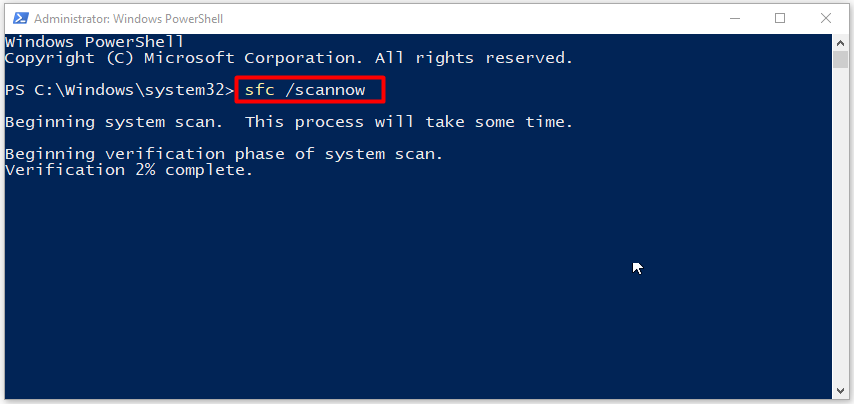
Step 4: Type sfc /scannow and press Enter in the elevated window. After that, the program will scan your system automatically. You just need to wait for some time.
Tip: If you encounter the Windows Resource Protection Found Corrupt Files but Unable to Fix error, type and execute DISM /Online /Cleanup-Image /RestoreHealth in PowerShell instead. This will download files from Windows update servers and replace the previous corrupted ones.
Solution 7: Update or Disable KMS
If you use KMS software to activate Windows products and encounter the SPPsvc high CPU error, you should check if your KMS software is the latest version. If the high CPU issue still appears after you update the KMS activation and reboot the device, try disabling KMS or stopping the sppsvc.exe.
Tip: After disabling the sppsvc.exe, you will see the Windows is not genuine watermark on your lock screen. If you get a genuine copy of Window and run KMS for activating other software, try disabling KMS.
Step 1: Type task scheduler in the search box, and then click on Task Scheduler from the search results.
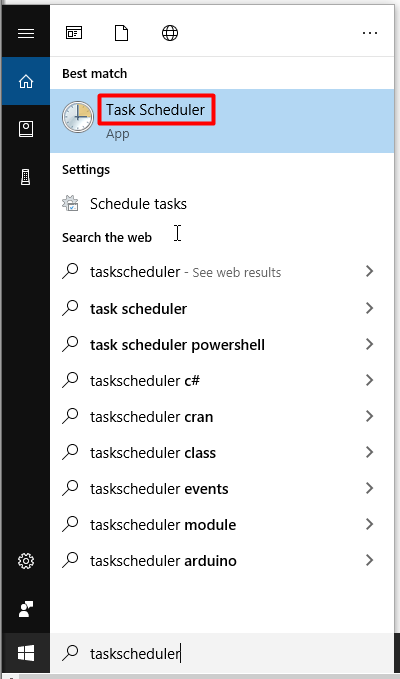
Step 2: After opening the Task Scheduler, expand Task Scheduler Library and open the KMS process. Right click on each entry in the right side of the window and choose the Disable option.
Step 3: Now, restart your computer and check if the Microsoft software protection platform service high CPU error is fixed.
Solution 8: Refresh Your Windows with a Fresh Copy
If the SPPsvc high CPU issue still persists after carrying the solutions above, you can utilize this trump card – refresh your Windows with a fresh copy. In other words, you will install a new copy of Windows.
Tip: Before reinstalling Windows, you should make a full backup of your data.
To do that, you can utilize MiniTool Partition Wizard. The Migrate OS to SSD/HD Wizard and Copy Disk feature can help you install a new copy of Windows with ease. You just need to plug a USB flash drive that contains a genuine Windows to your computer, and then follow the steps below.
Note: MiniTool Partition Wizard is a powerful program, which also enables you to wipe disk, convert MBR to GPT, recover missing data, scan and repair file system error, etc.
Buy Now
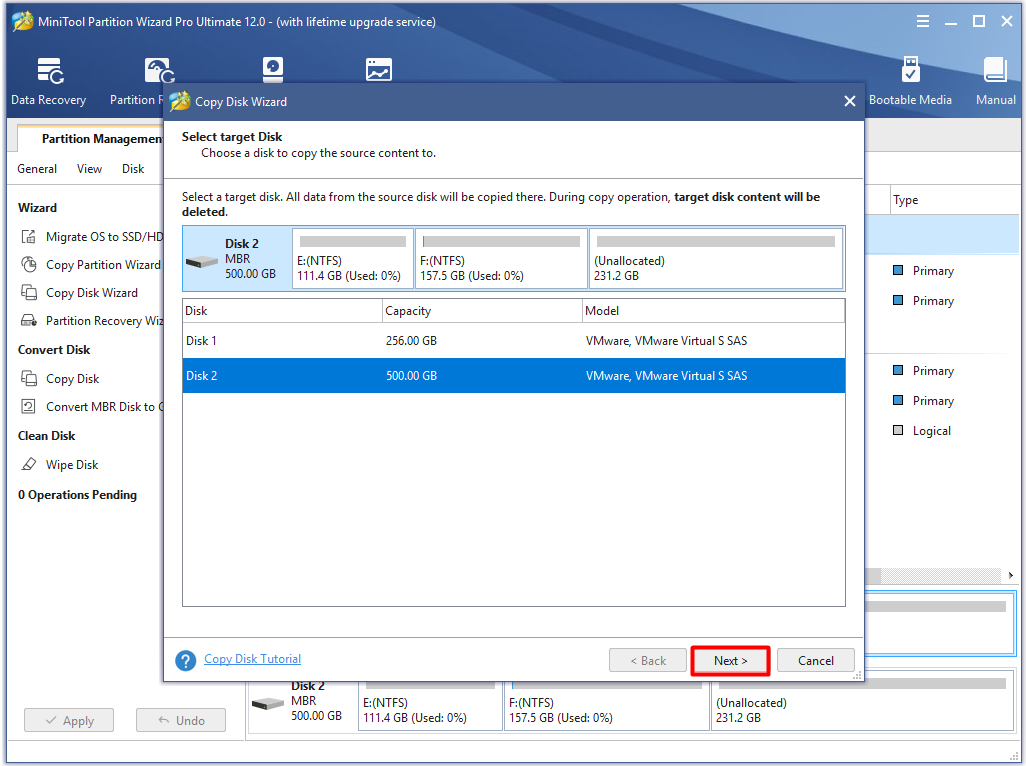
Step 1: Launch MiniTool Partition Wizard to get its main interface. After selecting your system disk, click on the Copy Disk feature in the left action panel.

Step 2: In the next window, choose a destination drive for your copied disk and click Next.
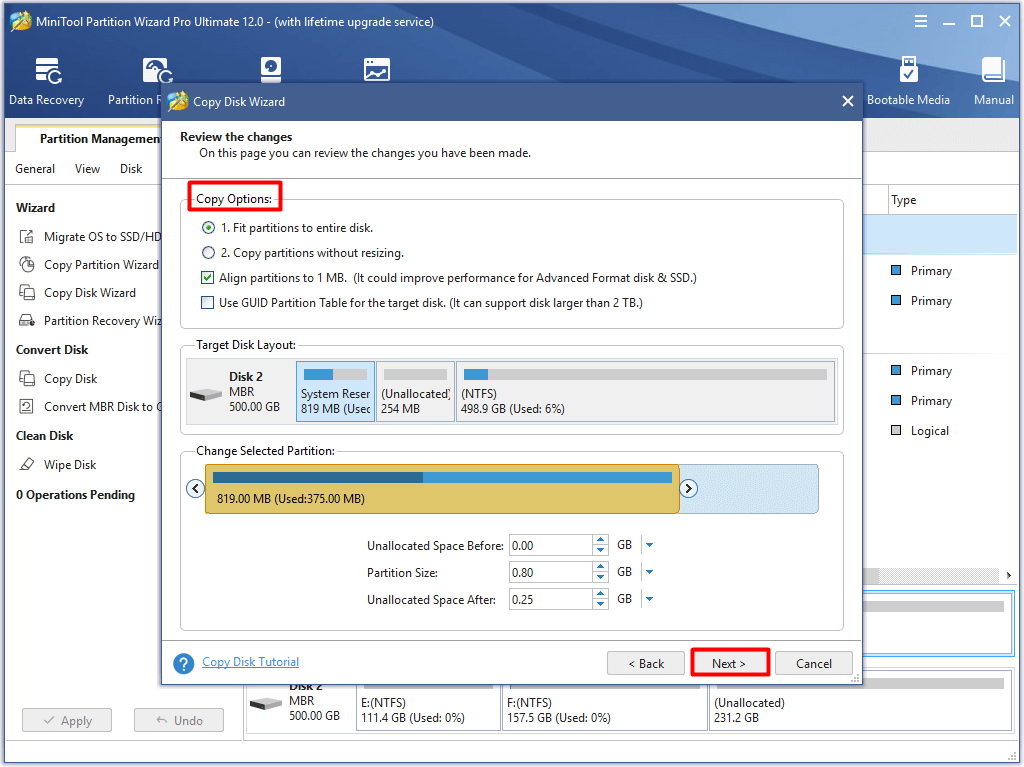
Step 3: You can choose copy options based on your demand in this window. After that, click the Next button to go on.
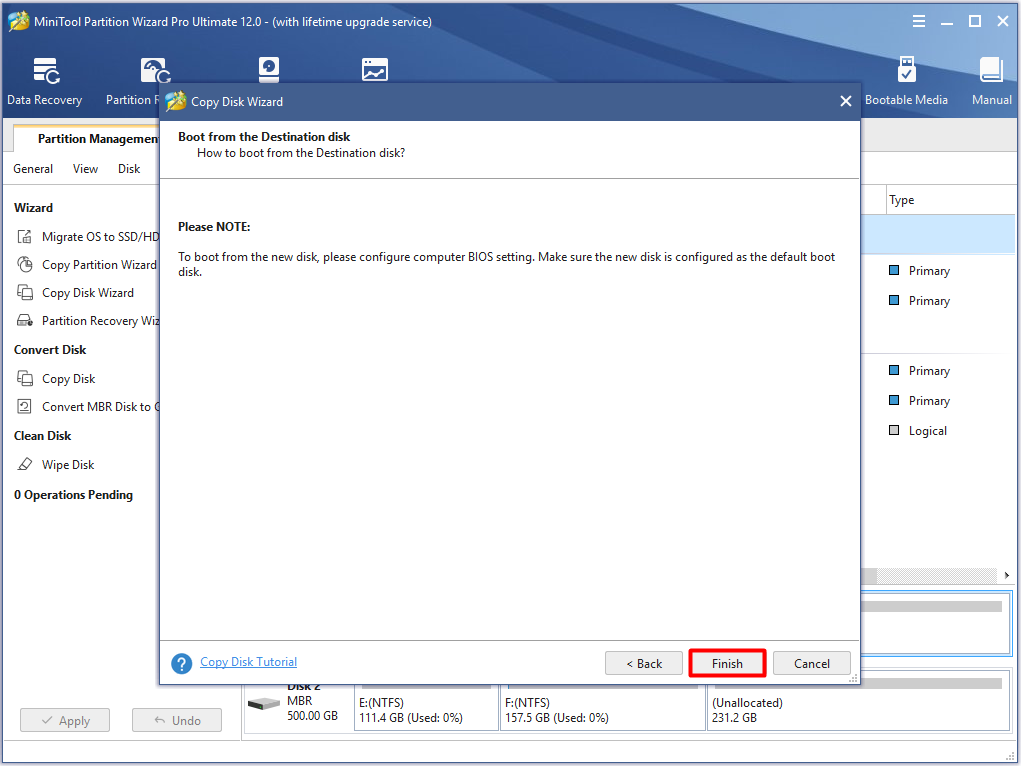
Step 4: Click the Finish button to back to the main interface.
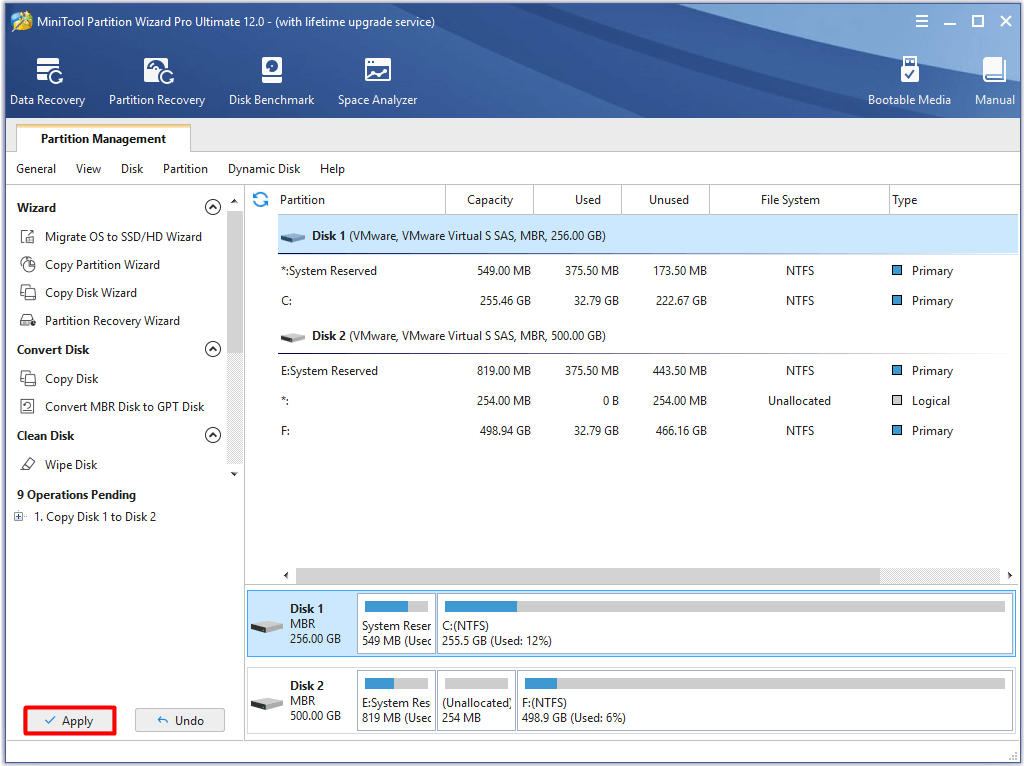
Step 5: Click on Apply to carry out the copy disk operation.
Alternatively, you can also perform restore to bring your computer to a previous date to fix the high CPU issue. However, this will undo some changes that you made after the restore point creation time. Hence, you need to be cautious when making a decision.
I fixed Microsoft Software Protection Platform Service high CPU issue successfully with methods in this post. Are you still seeking solutions to that issue? Click here to get these methods now! Click to Tweet
Conclusion
Read here, you may have an overall understanding of the Microsoft Software Protection Platform Service. More importantly, with the given methods, you will not be confused by Microsoft Software Protection Platform Service high CPU anymore.
Pick one solution to fix the high CPU issue based on your need. If you have any doubt about MiniTool Partition Wizard, send us an email via [email protected].
Microsoft Software Protection Platform Service FAQ
How do I disable Microsoft Software Protection Platform Service Windows 10?
It is pretty easy to disable Software Protection Service Windows 10.
- Open the Run window and type taskmgr, and then hit Enter.
- Find out the target service from the list.
- Right click on the service and choose End task.
How to fix Microsoft Software Protection Platform Service high CPU?
You can use the following methods to fix SPPSVC high CPU issue.
- Restart the Microsoft Software Protection Platform Service
- Update your Windows
- Run the system maintenance troubleshooter
- Boot your computer into Safe Mode
- Scan for malware or virus
- Run the system file checker
- Update or disable KMS
- Disable software protection service Windows 10
- Refresh your Windows with a fresh copy
What is Windows modules installer worker?
Windows Modules Installer Worker (TiWorker.exe) is a part of operating system, which runs in the OS background. It is used to update Windows, install some Microsoft programs, as well as fix or replace system files. The Windows Modules Installer Worker High CPU Usage is also well-known.
What is Microsoft compatibility telemetry high CPU?
Microsoft Compatibility Telemetry is also called Windows Telemetry. It is built to boost Microsoft products and services. It is helpful for handling issues like device security, program and compatibility. What’s more, it collects and sends data regularly between your PC and the Windows development team, which aims to improve the performance, compatibility of your device. You can fix the Microsoft Compatibility Telemetry high disk easily with this guide.
You may have noticed the Microsoft Software Protection Platform Service in the Task Manager, but you don’t know what it is. Sometimes, you even encounter the Microsoft Software Protection Platform Service high CPU issue. MiniTool will introduce this service and help you solve the high CPU issue caused by it.
About Microsoft Software Protection Platform Service
Microsoft Software Protection Platform Service (Sppsvc), a service in Task Manager, is a security service built in Windows in order to stop piracy and protect software tampering, which is implied by its name. The Sppsvc is responsible for downloading, installing and executing Windows digital licenses and applications.
Besides, it is helpful for initiating license. As Microsoft claims, software protection platform service performs well in how Microsoft software activates, validates online and runs when tampering or hacking is detected.
What Causes SPPSVC High CPU Usage
Though it has so many benefits, it has its shortcomings. One of the most frequently discussed points is the Microsoft Software Protection high CPU issue. In fact, high CPU usage issue on Windows OS is a very common one compared with other errors like computer keeps crashing, blue screen of death, black screen, etc.
You may encounter various high CPU usage cases such as state repository service high CPU, Wsappx high CPU, and so forth. How Microsoft Software Protection Platform Service high CPU is different from other high CPU cases?
The SPPSVC high CPU issue will occur under 2 circumstances. It can happen in a genuine Windows copy and a copy that is activated with third-party applications like KMS. You can click here to check if Windows 10 is genuine or not.
What causes Microsoft Software Protection high CPU? Several factors can result in this issue. They are summarized as follows.
- The PC is infected by virus or malicious software.
- The Microsoft Software Protection Platform Service is stuck with validations.
Of course, other elements can also trigger the SPPSVC high CPU issue. Here comes the real point of this error – how to fix Microsoft Software Protection Platform Service high CPU. Well, several solutions have been offered to you.
Solution 1: Restart Microsoft Software Protection Platform Service
If you have the privilege of administrator, you can restart Microsoft software protection platform service to solve the Microsoft Software Protection high CPU issue. This method is pretty simple and convenient. You just need to follow these steps to do that.
Step 1: Open the Run window and type services.msc, and then hit Enter.
Step 2: Scroll down the service list to find Microsoft Software Protection Platform Service. Then, right click on the service and click Restart option. If the Restart button is greyed out, you need to click Start and then click the Restart button.
Step 3: Now, check if the SPPSVC high CPU issue is solved. If not, try other solutions immediately.
Solution 2: Update Your Windows
The Sppsvc.exe may start consuming system resource because of the missing Windows updates. As it is known to all, outdated system drivers and software can cause various kinds of errors. So, updating your Windows is worth trying.
Step 1: Open Windows Settings by holding Win plus I keys, and then navigate to Windows Updates section.
Step 2: Move to the right side of the window and click on Check for updates option. Then, you will see that Windows is checking for updates. Besides, if Windows finds any available updates, it will download and install it automatically.
Step 3: When the new update is installed on your computer, reboot the device and see if the high CPU issue is resolved.
Top recommendation: How to Check If Drivers Are up to Date? Here Are Details
Solution 3: Run System Maintenance Troubleshooter
The System Maintenance Troubleshooter is a Windows built-in utility, which can fix various Windows related issues. For instance, the Troubleshooter will help you solve errors such as printer offline, Ethernet not working, unidentified network, Canon printer not responding and so on.
Hence, you can consider running system maintenance troubleshooter with steps below to fix the Microsoft Software Protection high CPU error.
Step 1: After opening Control Panel, type troubleshoot in the search bar and you can see the corresponding search result in the window. Click on Troubleshooting to continue.
Step 2: In the Troubleshooting window, click View all in the left pane.
Step 3: Drop down the menu until you find System Maintenance. Right click it and select Run as administrator.
Step 4: In the pop-up window, click the Next button.
Step 5: Now, the Troubleshooter will scan for errors on your operating system. It will tell you the errors and corresponding fixes if it finds any. You just need to follow the on-screen instruction to complete the operation.
Solution 4: Boot Your Computer in Safe Mode
When the Microsoft Software Protection high CPU occurs, try a clean boot. Safe Mode can fulfill the requirement, because only necessary services, drivers and processes will run in this mode. Hence, you can boot your computer into Safe Mode and see if the Microsoft Software Protection Platform Service still uses system’s resource unreasonably.
If the SPPsvc high CPU usage issue disappears in safe mode, it indicates that the software clash with the service is the source of the error. And you need to take some measures to cope with it. For example, you can disable all the services in the Task Manager and then enable them one by one until the issue appears again. Then, you can remove or disable the service.
Solution 5: Scan for Malware or Virus
Since virus and malware can lead to Microsoft Software Protection Platform Service high CPU, it’s recommended to scan your computer for any virus or malicious software with antivirus software installed on your computer. You can do this with your antivirus programs to keep your computer is clean (without virus or malware).
You may also like this: How to Clean up Your Computer? Top 8 Methods for You
If you don’t install any antivirus software on your computer, you can use the built-in program — Windows Defender. Open it and choose a scan option based on your need. However, some users doubt that is Windows Defender enough. As for this, you can utilize other tools like Microsoft Safety Scanner to protect your PC.
Solution 6: Run System File Checker
System File Checker (SFC) is also a utility that comes with Windows operating system (since Windows 98). It is widely used for scanning computer for corrupted system files. Here, you can also apply it to fix Microsoft Software Protection high CPU issue. For that.
Step 1: Open the Run dialog window and type taskmgr. Then, press the Enter key.
Step 2: Click on the File tab and select Run new task from the elevated menu.
Step 3: From the pop-up window, type powershell and select the Create this task with administrative privileges checkbox. Then, hit Enter.
Step 4: Type sfc /scannow and press Enter in the elevated window. After that, the program will scan your system automatically. You just need to wait for some time.
Tip: If you encounter the Windows Resource Protection Found Corrupt Files but Unable to Fix error, type and execute DISM /Online /Cleanup-Image /RestoreHealth in PowerShell instead. This will download files from Windows update servers and replace the previous corrupted ones.
Solution 7: Update or Disable KMS
If you use KMS software to activate Windows products and encounter the SPPsvc high CPU error, you should check if your KMS software is the latest version. If the high CPU issue still appears after you update the KMS activation and reboot the device, try disabling KMS or stopping the sppsvc.exe.
Tip: After disabling the sppsvc.exe, you will see the Windows is not genuine watermark on your lock screen. If you get a genuine copy of Window and run KMS for activating other software, try disabling KMS.
Step 1: Type task scheduler in the search box, and then click on Task Scheduler from the search results.
Step 2: After opening the Task Scheduler, expand Task Scheduler Library and open the KMS process. Right click on each entry in the right side of the window and choose the Disable option.
Step 3: Now, restart your computer and check if the Microsoft software protection platform service high CPU error is fixed.
Solution 8: Refresh Your Windows with a Fresh Copy
If the SPPsvc high CPU issue still persists after carrying the solutions above, you can utilize this trump card – refresh your Windows with a fresh copy. In other words, you will install a new copy of Windows.
Tip: Before reinstalling Windows, you should make a full backup of your data.
To do that, you can utilize MiniTool Partition Wizard. The Migrate OS to SSD/HD Wizard and Copy Disk feature can help you install a new copy of Windows with ease. You just need to plug a USB flash drive that contains a genuine Windows to your computer, and then follow the steps below.
Note: MiniTool Partition Wizard is a powerful program, which also enables you to wipe disk, convert MBR to GPT, recover missing data, scan and repair file system error, etc.
Buy Now
Step 1: Launch MiniTool Partition Wizard to get its main interface. After selecting your system disk, click on the Copy Disk feature in the left action panel.
Step 2: In the next window, choose a destination drive for your copied disk and click Next.
Step 3: You can choose copy options based on your demand in this window. After that, click the Next button to go on.
Step 4: Click the Finish button to back to the main interface.
Step 5: Click on Apply to carry out the copy disk operation.
Alternatively, you can also perform restore to bring your computer to a previous date to fix the high CPU issue. However, this will undo some changes that you made after the restore point creation time. Hence, you need to be cautious when making a decision.
I fixed Microsoft Software Protection Platform Service high CPU issue successfully with methods in this post. Are you still seeking solutions to that issue? Click here to get these methods now! Click to Tweet
Conclusion
Read here, you may have an overall understanding of the Microsoft Software Protection Platform Service. More importantly, with the given methods, you will not be confused by Microsoft Software Protection Platform Service high CPU anymore.
Pick one solution to fix the high CPU issue based on your need. If you have any doubt about MiniTool Partition Wizard, send us an email via [email protected].
Microsoft Software Protection Platform Service FAQ
How do I disable Microsoft Software Protection Platform Service Windows 10?
It is pretty easy to disable Software Protection Service Windows 10.
- Open the Run window and type taskmgr, and then hit Enter.
- Find out the target service from the list.
- Right click on the service and choose End task.
How to fix Microsoft Software Protection Platform Service high CPU?
You can use the following methods to fix SPPSVC high CPU issue.
- Restart the Microsoft Software Protection Platform Service
- Update your Windows
- Run the system maintenance troubleshooter
- Boot your computer into Safe Mode
- Scan for malware or virus
- Run the system file checker
- Update or disable KMS
- Disable software protection service Windows 10
- Refresh your Windows with a fresh copy
What is Windows modules installer worker?
Windows Modules Installer Worker (TiWorker.exe) is a part of operating system, which runs in the OS background. It is used to update Windows, install some Microsoft programs, as well as fix or replace system files. The Windows Modules Installer Worker High CPU Usage is also well-known.
What is Microsoft compatibility telemetry high CPU?
Microsoft Compatibility Telemetry is also called Windows Telemetry. It is built to boost Microsoft products and services. It is helpful for handling issues like device security, program and compatibility. What’s more, it collects and sends data regularly between your PC and the Windows development team, which aims to improve the performance, compatibility of your device. You can fix the Microsoft Compatibility Telemetry high disk easily with this guide.
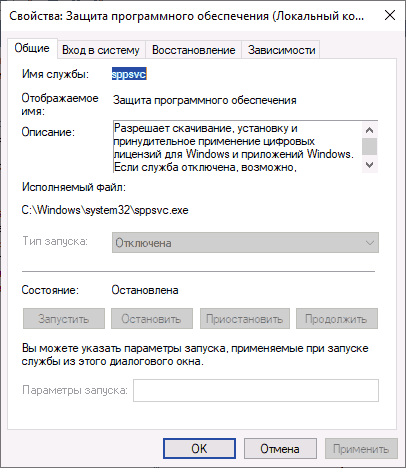
Платформа защиты программного обеспечения Microsoft позволяет компании проверять службы Microsoft и следить за тем, чтобы никто не вмешивался в Windows или любое программное обеспечение Microsoft, включая Office, OneDrive и т. д. Процесс, который выполняет эту работу в Windows 10 – это Sppsvc.exe . Может случиться так, что вы столкнетесь с проблемой, когда Sppsvc.exe вызывает высокую загрузку процессора. Именно в этом посте мы найдем способ найти решение для этого.
Не отключайте этот сервис и не удаляйте его каким-либо образом. В этом случае активация Windows, активация Office и т. Д. Не будут выполнены. Вы увидите активацию водяного знака на рабочем столе. Я видел много сообщений об этом, и это не очень хороший ход, если только вы не обеспокоены этим. Существует взлом ключа реестра ( HKLMSYSTEM CurrentControlSet Services), , и если вы измените его каким-либо образом, вы не сможете его восстановить.
Содержание
- Служба платформы защиты программного обеспечения Sppsvc.exe, вызывающая высокую загрузку ЦП
- 1] Убить sppsvc.exe
- 2] Остановить службы защиты программного обеспечения
- 3] Сканирование и проверка на наличие вредоносных программ
- 4] Проверьте состояние активации Windows
Служба платформы защиты программного обеспечения Sppsvc.exe, вызывающая высокую загрузку ЦП
Теперь, когда предупреждения сняты, давайте посмотрим на возможные решения. Скорее всего, если Sppsvc.exe вызывает высокую загрузку ЦП, это означает, что он застрял с проверками и не может завершить. Мы заметили, что пользователи сообщают об этом с 30-40% загрузки процессора Вот что вы можете посмотреть:
- Убить sppsvc.exe
- Остановить службы защиты программного обеспечения
- Сканирование и проверка на наличие вредоносных программ
- Проверьте активацию Windows.
1] Убить sppsvc.exe

- Щелкните правой кнопкой мыши на панели задач и выберите, чтобы открыть диспетчер задач
-
На вкладке процессов найдите
- Список услуг платформы защиты программного обеспечения Microsoft
- или MMC> Услуги> Свойства защиты программного обеспечения (локальный компьютер)
- Щелкните правой кнопкой мыши программу и выберите «Завершить задачу».
Он обязательно разрешит sppsvc.exe, вызывающий высокую загрузку ЦП – по крайней мере, временно!
2] Остановить службы защиты программного обеспечения

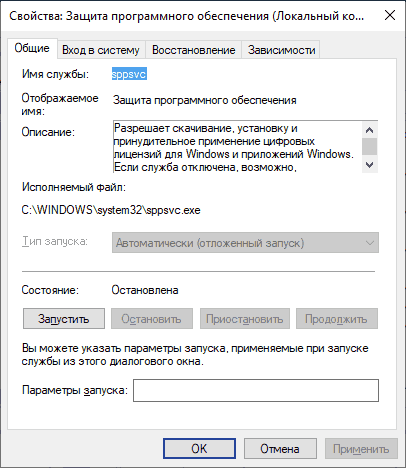
Служба платформы защиты программного обеспечения Microsoft установлена на Автоматический (отложенный запуск) . Обычно это не работает фон. Время от времени вызывается для проверки подлинности программного обеспечения Microsoft и Windows.
Эта служба позволяет загружать, устанавливать и применять цифровые лицензии для приложений Windows и Windows. Если служба отключена, операционная система и лицензионные приложения могут работать в режиме уведомлений. Настоятельно рекомендуется не отключать службу защиты программного обеспечения.
- В командной строке RUN введите services.msc и нажмите клавишу Enter.
- Когда откроются службы Windows, найдите в списке службу Защита программного обеспечения .
- Дважды щелкните, чтобы открыть свойства, и нажмите кнопку Стоп.
- Вы также можете щелкнуть правой кнопкой мыши на сервисе> Все задачи> Стоп.
Последнее действие обязательно остановит платформу Microsoft Software Protection Platform (sppsvc.exe) и остановит другие связанные службы.
Примечание. Нет способа отключить эту службу и изменить метод запуска.
3] Сканирование и проверка на наличие вредоносных программ
Редко, но это хорошая идея, чтобы проверить, был ли файл заменен вредоносной программой. Лучший способ – проверить местоположение запущенного sppsvc.exe.
В диспетчере задач щелкните правой кнопкой мыши на sppsvc.exe и выберите, чтобы открыть расположение файла. Проверьте, если это C: WINDOWS system32 sppsvc.exe. Если да, то файл хороший. Если нет, то вы должны немедленно удалить его. Есть несколько способов сделать это в зависимости от ситуации.
- Попробуйте удалить его напрямую.
- Загрузитесь в безопасном режиме, а затем удалите его.
- Используйте сторонний антивирус, чтобы избавиться от файла.
Наконец, поскольку вы удалили файл, используйте DISM для восстановления файлов. DISM использует клиент Центра обновления Windows, но вы можете использовать параллельную папку Windows из общей сетевой папки или съемного носителя, например DVD-диска Windows или USB-носителя.
4] Проверьте состояние активации Windows
Заметили ли вы, что ваша копия Windows имела проблему с активацией до того, как нагрузка на процессор возросла? Возможно, служба активации Windows не может проверить программное обеспечение Microsoft или саму Windows. Если на вашем компьютере установлен ключ KMS или MAK, возможно, вы захотите проверить действительность ключей.
Ключи KMS по-прежнему проще, поскольку для аутентификации вам необходимо подключиться к корпоративному серверу. Но если кто-то продал вам ключ MAK, который больше не действителен, вам нужно будет купить новый ключ.
Сообщите нам, помогли ли эти решения устранить Sppsvc.exe, вызывающий высокую загрузку ЦП. В противном случае лучше всего обратиться в службу поддержки Microsoft, чтобы решить проблему .
Хотите знать об этих процессах, файлах или типах файлов?
mDNSResponder.exe | Windows.edb файлы | csrss.exe | Thumbs.db файлы | Файлы NFO и DIZ | Index.dat файл | Swapfile.sys, Hiberfil.sys & Pagefile.sys | Nvxdsync.exe | Svchost.exe | RuntimeBroker.exe | TrustedInstaller.exe | DLL или OCX файлы. | StorDiag.exe | MOM.exe | Хост-процесс для задач Windows | ApplicationFrameHost.exe | ShellExperienceHost.exe | winlogon.exe | atieclxx.exe | Conhost.exe | Хост-процесс для задач Windows | Taskhostw.exe.