After reading this article, you will learn all the workable ways on how to transfer photos from iPhone to an external hard drive on Windows/Mac or without a computer. Apply one of the methods to back up your iPhone photos to an external hard drive within minutes.
Compared with the size of an iPhone storage, the capacity of an external hard drive is generally much larger. Common external hard drives from Seagate, Western Digital, and Toshiba range from 500GB to 2TB. In addition to the large storage capacity, external hard drives also have the advantages of an excellent read and write speed, high portability, long life, and more. Thus, it’s reasonable that an external hard drive is the choice of many users when they want to back up iPhone to external hard drive or copy iPhone photos to external hard drive.
Speaking of importing photos from iPhone to an external hard drive, you can get it done either with or without a computer. Here are the details:
How to Transfer Photos from iPhone to External Hard Drive on PC
To transfer photos on your iPhone to an external hard drive on a Windows PC, you have four ways to choose from. After you learn the tips in detail, you will know which one fits your needs best. Whether you want to transfer photos from iPhone directly to an external hard drive or get photos from iPhone to an external storage device without using a USB cable, you can find the way you need from the paragraphs below.
Method 1. Back Up iPhone Photos to External Hard Drive with EaseUS MobiMover
Do you want to transfer all photos from your iPhone to the external hard drive at once? Do you want to copy other files like videos, audio files, messages, books, and more together with the pictures from your iPhone to the external drive to make a backup? If you do, the iOS data transfer software — EaseUS MobiMover will help.
EaseUS MobiMover allows you to transfer files between iPhone and Mac or PC or between two iOS devices. Thus, it also allows you to transfer files between an iOS device and an external storage device like an external hard drive, USB flash drive, SD card, and more.
To transfer photos from iPhone to an external hard drive on Windows:
Step 1. Connect devices and launch EaseUS MobiMover.
Connect both the iPhone and the external hard drive to the PC and make sure these devices are recognized by the computer. Afterward, launch the photo transfer tool and click «Phone to PC» > «Next.»

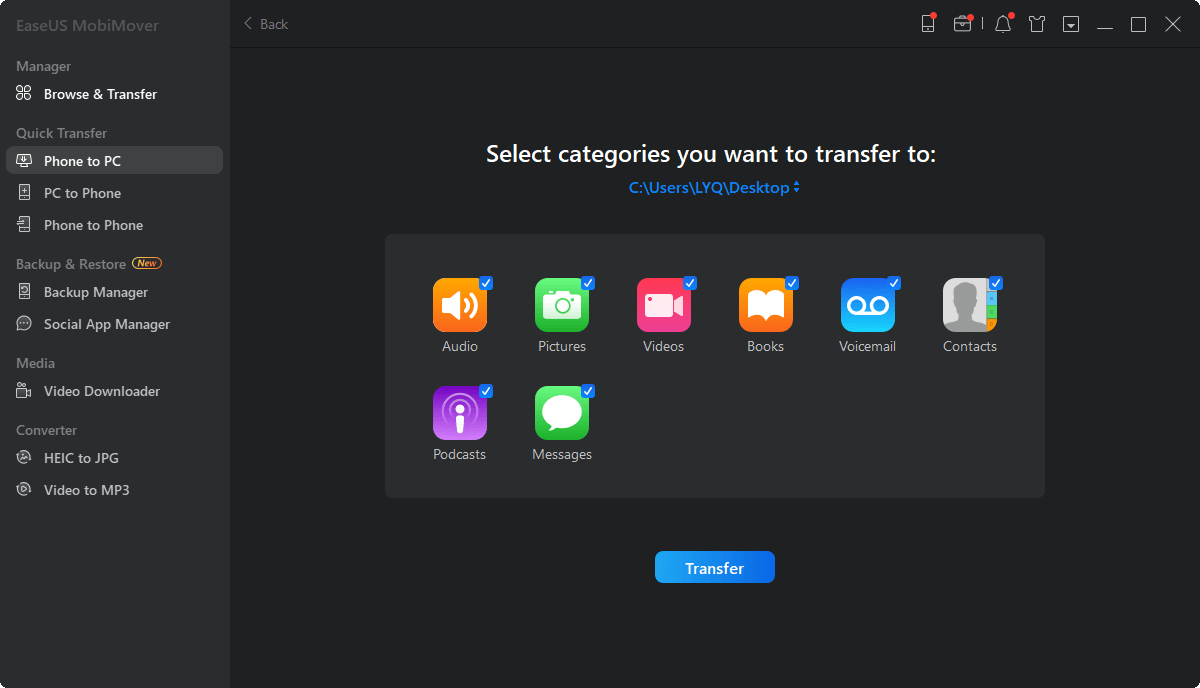
Step 2. Select the category.
Check «Pictures» among all the supported categories. If you need to, you can also transfer other files from your iPhone to the external hard drive, together with photos. Besides, since the default destination is the desktop, you need to click the storage path to change it to your external hard drive.
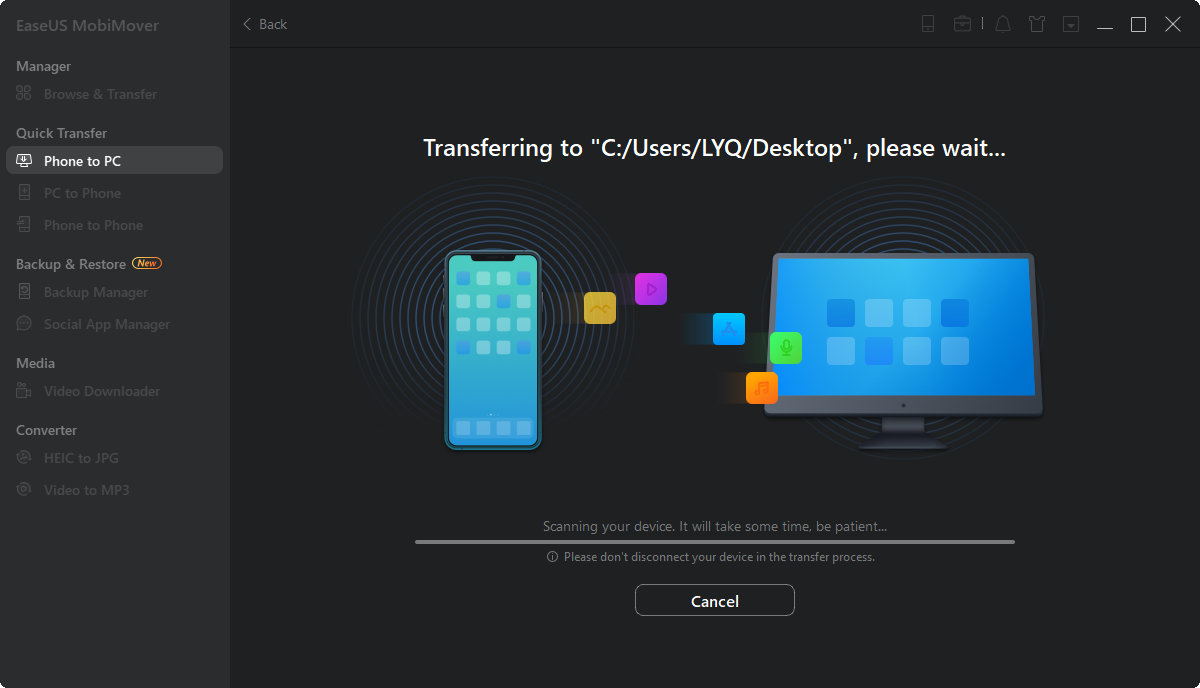
Step 3. Start transferring photos from iPhone to hard drive.
Click the «Transfer» button to start importing photos from the iPhone to the external hard drive. When it has done, go to the selected folder on the hard drive to check these items.
If the photos are lost on your iPhone someday, you can use this tool to transfer photos back to your iOS device from the external hard drive. You can refer to the guide on how to transfer photos from PC to iPhone for more details.
EaseUS MobiMover also allows you to manage iPhone data from computer or convert iPhone photo to JPG. Isn’t it great? Get it now and make it your good helper.
Method 2. Import Photos from iPhone to External Hard Drive on Windows 10 with Photos
On Windows 8 and Windows 10, there is a built-in app on PC called Photos, which will help you manage the photos on the computer and import photos from a folder or a USB device to PC. Thus, it can not only help to transfer photos from iPhone to PC without iTunes but also work to transfer iPhone photos to external hard drive on Windows.
To import photos from iPhone to an external drive on PC:
Step 1. Connect devices to PC.
Connect the external hard drive to your computer. Unlock your iPhone and connect your device to PC running Windows 10 or Windows 8. (Make sure the external storage device can be recognized by the computer.)
Step 2. Trust the computer.
When a prompt appears on your iPhone asking you for permission, click «Allow».
Step 3. Launch the Photos app.
On your PC, open the «Photos» app and click «Import» > «From a USB device» to let Photos find the items on your iPhone.
Step 4. Select photos.
After finding all the photos and videos on your iOS device, there will be a window in Photos asking to select the items you want to import. Select the photos you want to transfer.
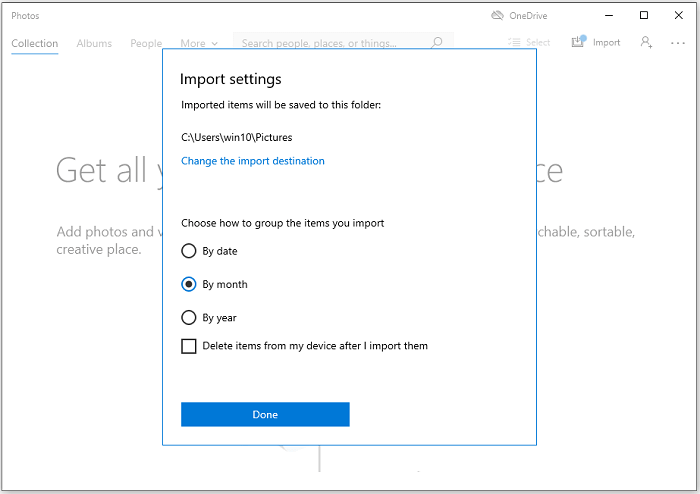
Step 5. Change the storage path.
Then click «Import setting» > «Change the import destination», choose a location on your external hard drive, and then click «Done.»
Step 6. Start importing photos.
Click «Import Selected» to start transferring photos from iPhone to the external hard drive.
Windows 10 Photos app not working? Don’t worry. Follow the fixes to make it work again.
Method 3. Back Up iPhone Photos to External Hard Drive Using iCloud
The last way suitable for both Windows and Mac users is to use iCloud Photos. By enabling iCloud Photos on both your iPhone and the computer, you can transfer your iPhone photos to the computer, and then download the items to the external hard drive. If you want to transfer photos from iPhone to iPad someday, you can also apply iCloud.
To upload photos from iPhone to an external hard drive via iCloud:
Step 1. Turn on iCloud Photos on iPhone.
Turn on iCloud Photos on iPhone: Go to «Settings» > [your name] > «iCloud» > «Photos» and switch on «iCloud Photos».
Step 2. Turn on iCloud Photos on the computer.
- Download and install iCloud for Windows.
- Sign in with the Apple ID you use on the iOS device. (You need to ensure you are using the same Apple ID on the iPhone and PC.)
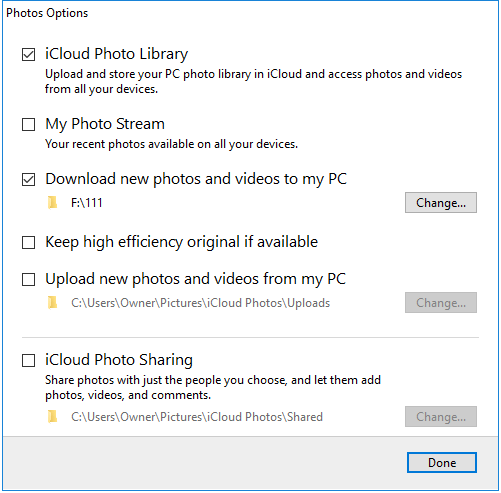
- Click the «Options» button next to Photos and check the «iCloud Photo Library» and the «Download new photos and videos to my PC» options. Then click «Change» under «Download new photos and videos to my PC» to change the default location as your external hard drive.
- Click «Done» > «Apply».
Step 3. Wait for the syncing process to finish.
After the syncing process, the photos on your iPhone will be transferred to the external hard drive successfully.
Method 4. Transfer Photos from iPhone to Hard Drive on Windows PC via File Explorer
Using File Explorer in Windows 10 or Windows Explorer in Windows 8/7 is an exclusive solution for Windows users. With File Explorer, you can directly copy the photos to an external hard drive without any software installation. However, you can only transfer photos in the DCIM folder by date. If you want to transfer photos by album, try EaseUS MobiMover instead. If your iPhone photos are not showing up on PC, follow the troubleshooting guide to solve the problem first.
To import photos from iPhone to external hard drive:
Step 1. Connect devices to the computer.
Unlock your iPhone and connect the iPhone and the external hard drive to your Windows PC using a USB cable. (Make sure the USB cable is a good one.)
Step 2. Allow transferring photos.
Then a prompt will pop up on your iPhone asking for your permission. Click «Allow» to continue.
Step 3. Access iPhone photos on PC.
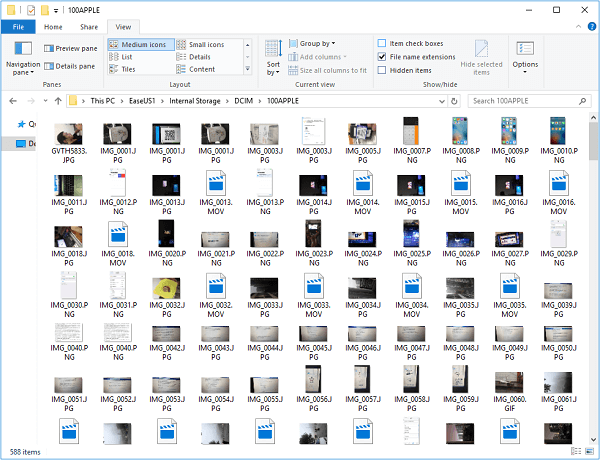
Go to «This PC» > «Apple iPhone» > «Internal Storage» > «DCIM» > «100APPLE» and you will see all the photos in your iPhone Camera Roll.
Step 4. Copy iPhone photos to the external hard drive.
Copy the photos on your iPhone and paste them to the external hard drive. By doing so, you can back up photos from your iPhone to the external hard drive easily and quickly.
How to Transfer Photos from iPhone to External Hard Drive on Mac
If you are a Mac user, there are two more solutions besides using iPhone transfer software or iCloud. (Undoubtedly, the ways below also work to transfer photos from iPhone to Mac.)
Method 1. Import Photos from iPhone to External Hard Drive on Mac via Image Capture
Image Capture is a program on Mac that enables users to take and upload photos to Mac from digital cameras, iOS devices, and other devices that have a camera. Therefore, you can move photos and videos to an external storage device from your iPhone/iPad with the help of Image Capture.
How to back up photos from iPhone to external hard drive:
Step 1. Connect Your External Hard Drive to your Mac.
Connect the hard drive to your Mac with a USB cable and make sure it is recognized by the Mac.
Step 2. Connect Your iOS Device To Your Mac.
Connect your iPhone to the Mac with a USB cable.
Step 3. Launch Image Capture.
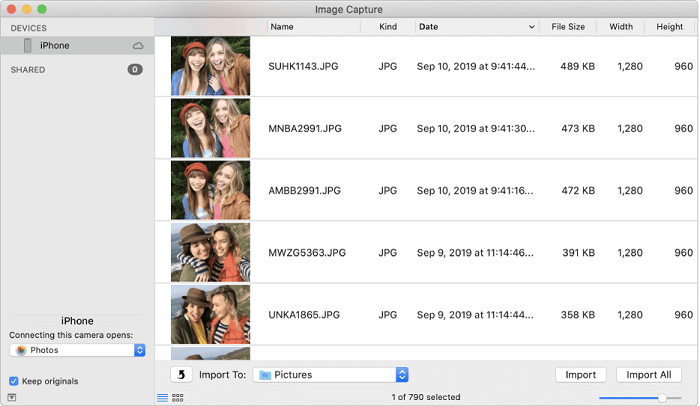
Open «Image Capture» on your Mac and choose your iPhone from in the «Devices» section.
Step 4. Select Destination.
Click the «Import To» pop-up menu, then choose to save the images to your external hard drive.
Step 5. Click Import.
Choose «Import All» to transfer all the items or select the photos you want to transfer and click «Import».
Method 2. Move Photos from iPhone to External Hard Drive via Photos
On Mac OS X 10.10.3 or later, there is also an app called Photos. It’s the replacement of iPhoto in earlier versions. The Photos app enables you to transfer photos from iPhone to Mac using a USB cable. And thus, it will also allow you to transfer photos from iPhone to an external hard drive on Mac.
To transfer photos from iPhone to external hard drive on Mac:
Step 1. Connect devices to Mac.
Connect your iPhone and the external hard drive to the Mac.
Step 2. Launch the Photos app.
Run Photos for Mac, go to the «Devices» section and select your iOS device.
Step 3. Choose the storage path.
Click the «Import to» option and choose to save the imported photos to the external drive.
Step 4. Import photos from iPhone to the external drive.
Click «Import All New Photos» or select the photos you want to transfer to the Mac and then click «Import [number] Selected».

For more workable solutions to import photos from iPhone to external hard drive on Mac, refer to the guide on how to transfer photos from iPhone to flash drive on Mac.
How to Transfer Photos from iPhone to External Hard Drive Without Computer
Sometimes you don’t have a computer available and need to transfer photos from your iPhone to an external hard drive without a computer. Actually, with the growing trend to connect an external storage device to an iPhone or iPad directly, it’s common that there will be a USB-C cable included when you purchase an external hard drive.
With that cable, you can connect the external hard drive to your iPhone or iPad without a computer and exchange data. Even if you don’t have such a cable, you can use Apple’s Lightning-to-USB camera adapter to help you connect these devices.
To import photos from iPhone to external hard drive without a computer:
Step 1. Connect the external hard drive to the iPhone.
Connect the external hard drive to the iPhone with a USB-C cable or via an adapter.
Step 2. Check the connection.
On the iPhone, go to «Files» > «Browse» to check whether the external hard drive is attached successfully.
Step 3. Save iPhone photos to the external hard drive.
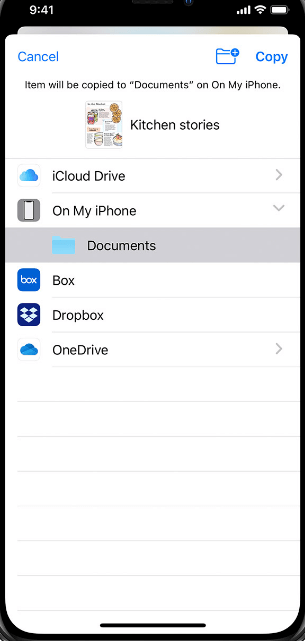
Go to the Photos app, choose the pictures you want to move, tap the «Share» button, and then choose «Save to Files.» Tap «On My iPhone» and select the external hard drive.
By doing so, you can move photos from iPhone to an external hard drive directly without a computer. Besides, you can copy files from the external drive to your iOS device if you need to.
The Bottom Line
These are the proven ways to transfer photos from iPhone to an external hard drive. Whether you want to use a computer or not, you can find the solution you need. All of the solutions can be applied to transfer photos from iPhone to computer. Command these tips to help yourself out whenever you need to perform data transfer between an iPhone/iPad/iPod and a computer/external storage device.
FAQ
1. Can the iPhone connect directly to an external hard drive?
You can connect your iPhone or iPad with a flash drive, USB hard drive, SD card, and other external storage drives, as long as you have the appropriate adapter. The choice of such adapters depends on your device model and the device you want to connect. You can find a suitable adapter from Amazon.
2. How do I organize my iPhone photos to an external hard drive?
To organize an external hard drive, you’ll need to connect it to a computer and organize it by backing up important files and deleting unneeded or duplicated items.
3. How do I transfer files from my iPhone to an external hard drive without a computer?
To do this, you will need a formatted hard drive and an adapter to help. First, connect your iPhone or iPad to the external hard drive via an adapter. Then, go to the Photos app (or you can select other apps that support file sharing) and select the photos you wish to transfer, click the Share button, tap Save to Files, choose your external hard drive, select a folder to hold your pictures, and then tap Save.
After reading this article, you will learn all the workable ways on how to transfer photos from iPhone to an external hard drive on Windows/Mac or without a computer. Apply one of the methods to back up your iPhone photos to an external hard drive within minutes.
Compared with the size of an iPhone storage, the capacity of an external hard drive is generally much larger. Common external hard drives from Seagate, Western Digital, and Toshiba range from 500GB to 2TB. In addition to the large storage capacity, external hard drives also have the advantages of an excellent read and write speed, high portability, long life, and more. Thus, it’s reasonable that an external hard drive is the choice of many users when they want to back up iPhone to external hard drive or copy iPhone photos to external hard drive.
Speaking of importing photos from iPhone to an external hard drive, you can get it done either with or without a computer. Here are the details:
How to Transfer Photos from iPhone to External Hard Drive on PC
To transfer photos on your iPhone to an external hard drive on a Windows PC, you have four ways to choose from. After you learn the tips in detail, you will know which one fits your needs best. Whether you want to transfer photos from iPhone directly to an external hard drive or get photos from iPhone to an external storage device without using a USB cable, you can find the way you need from the paragraphs below.
Method 1. Back Up iPhone Photos to External Hard Drive with EaseUS MobiMover
Do you want to transfer all photos from your iPhone to the external hard drive at once? Do you want to copy other files like videos, audio files, messages, books, and more together with the pictures from your iPhone to the external drive to make a backup? If you do, the iOS data transfer software — EaseUS MobiMover will help.
EaseUS MobiMover allows you to transfer files between iPhone and Mac or PC or between two iOS devices. Thus, it also allows you to transfer files between an iOS device and an external storage device like an external hard drive, USB flash drive, SD card, and more.
To transfer photos from iPhone to an external hard drive on Windows:
Step 1. Connect devices and launch EaseUS MobiMover.
Connect both the iPhone and the external hard drive to the PC and make sure these devices are recognized by the computer. Afterward, launch the photo transfer tool and click «Phone to PC» > «Next.»
Step 2. Select the category.
Check «Pictures» among all the supported categories. If you need to, you can also transfer other files from your iPhone to the external hard drive, together with photos. Besides, since the default destination is the desktop, you need to click the storage path to change it to your external hard drive.
Step 3. Start transferring photos from iPhone to hard drive.
Click the «Transfer» button to start importing photos from the iPhone to the external hard drive. When it has done, go to the selected folder on the hard drive to check these items.
If the photos are lost on your iPhone someday, you can use this tool to transfer photos back to your iOS device from the external hard drive. You can refer to the guide on how to transfer photos from PC to iPhone for more details.
EaseUS MobiMover also allows you to manage iPhone data from computer or convert iPhone photo to JPG. Isn’t it great? Get it now and make it your good helper.
Method 2. Import Photos from iPhone to External Hard Drive on Windows 10 with Photos
On Windows 8 and Windows 10, there is a built-in app on PC called Photos, which will help you manage the photos on the computer and import photos from a folder or a USB device to PC. Thus, it can not only help to transfer photos from iPhone to PC without iTunes but also work to transfer iPhone photos to external hard drive on Windows.
To import photos from iPhone to an external drive on PC:
Step 1. Connect devices to PC.
Connect the external hard drive to your computer. Unlock your iPhone and connect your device to PC running Windows 10 or Windows 8. (Make sure the external storage device can be recognized by the computer.)
Step 2. Trust the computer.
When a prompt appears on your iPhone asking you for permission, click «Allow».
Step 3. Launch the Photos app.
On your PC, open the «Photos» app and click «Import» > «From a USB device» to let Photos find the items on your iPhone.
Step 4. Select photos.
After finding all the photos and videos on your iOS device, there will be a window in Photos asking to select the items you want to import. Select the photos you want to transfer.
Step 5. Change the storage path.
Then click «Import setting» > «Change the import destination», choose a location on your external hard drive, and then click «Done.»
Step 6. Start importing photos.
Click «Import Selected» to start transferring photos from iPhone to the external hard drive.
Windows 10 Photos app not working? Don’t worry. Follow the fixes to make it work again.
Method 3. Back Up iPhone Photos to External Hard Drive Using iCloud
The last way suitable for both Windows and Mac users is to use iCloud Photos. By enabling iCloud Photos on both your iPhone and the computer, you can transfer your iPhone photos to the computer, and then download the items to the external hard drive. If you want to transfer photos from iPhone to iPad someday, you can also apply iCloud.
To upload photos from iPhone to an external hard drive via iCloud:
Step 1. Turn on iCloud Photos on iPhone.
Turn on iCloud Photos on iPhone: Go to «Settings» > [your name] > «iCloud» > «Photos» and switch on «iCloud Photos».
Step 2. Turn on iCloud Photos on the computer.
- Download and install iCloud for Windows.
- Sign in with the Apple ID you use on the iOS device. (You need to ensure you are using the same Apple ID on the iPhone and PC.)
- Click the «Options» button next to Photos and check the «iCloud Photo Library» and the «Download new photos and videos to my PC» options. Then click «Change» under «Download new photos and videos to my PC» to change the default location as your external hard drive.
- Click «Done» > «Apply».
Step 3. Wait for the syncing process to finish.
After the syncing process, the photos on your iPhone will be transferred to the external hard drive successfully.
Method 4. Transfer Photos from iPhone to Hard Drive on Windows PC via File Explorer
Using File Explorer in Windows 10 or Windows Explorer in Windows 8/7 is an exclusive solution for Windows users. With File Explorer, you can directly copy the photos to an external hard drive without any software installation. However, you can only transfer photos in the DCIM folder by date. If you want to transfer photos by album, try EaseUS MobiMover instead. If your iPhone photos are not showing up on PC, follow the troubleshooting guide to solve the problem first.
To import photos from iPhone to external hard drive:
Step 1. Connect devices to the computer.
Unlock your iPhone and connect the iPhone and the external hard drive to your Windows PC using a USB cable. (Make sure the USB cable is a good one.)
Step 2. Allow transferring photos.
Then a prompt will pop up on your iPhone asking for your permission. Click «Allow» to continue.
Step 3. Access iPhone photos on PC.
Go to «This PC» > «Apple iPhone» > «Internal Storage» > «DCIM» > «100APPLE» and you will see all the photos in your iPhone Camera Roll.
Step 4. Copy iPhone photos to the external hard drive.
Copy the photos on your iPhone and paste them to the external hard drive. By doing so, you can back up photos from your iPhone to the external hard drive easily and quickly.
How to Transfer Photos from iPhone to External Hard Drive on Mac
If you are a Mac user, there are two more solutions besides using iPhone transfer software or iCloud. (Undoubtedly, the ways below also work to transfer photos from iPhone to Mac.)
Method 1. Import Photos from iPhone to External Hard Drive on Mac via Image Capture
Image Capture is a program on Mac that enables users to take and upload photos to Mac from digital cameras, iOS devices, and other devices that have a camera. Therefore, you can move photos and videos to an external storage device from your iPhone/iPad with the help of Image Capture.
How to back up photos from iPhone to external hard drive:
Step 1. Connect Your External Hard Drive to your Mac.
Connect the hard drive to your Mac with a USB cable and make sure it is recognized by the Mac.
Step 2. Connect Your iOS Device To Your Mac.
Connect your iPhone to the Mac with a USB cable.
Step 3. Launch Image Capture.
Open «Image Capture» on your Mac and choose your iPhone from in the «Devices» section.
Step 4. Select Destination.
Click the «Import To» pop-up menu, then choose to save the images to your external hard drive.
Step 5. Click Import.
Choose «Import All» to transfer all the items or select the photos you want to transfer and click «Import».
Method 2. Move Photos from iPhone to External Hard Drive via Photos
On Mac OS X 10.10.3 or later, there is also an app called Photos. It’s the replacement of iPhoto in earlier versions. The Photos app enables you to transfer photos from iPhone to Mac using a USB cable. And thus, it will also allow you to transfer photos from iPhone to an external hard drive on Mac.
To transfer photos from iPhone to external hard drive on Mac:
Step 1. Connect devices to Mac.
Connect your iPhone and the external hard drive to the Mac.
Step 2. Launch the Photos app.
Run Photos for Mac, go to the «Devices» section and select your iOS device.
Step 3. Choose the storage path.
Click the «Import to» option and choose to save the imported photos to the external drive.
Step 4. Import photos from iPhone to the external drive.
Click «Import All New Photos» or select the photos you want to transfer to the Mac and then click «Import [number] Selected».
For more workable solutions to import photos from iPhone to external hard drive on Mac, refer to the guide on how to transfer photos from iPhone to flash drive on Mac.
How to Transfer Photos from iPhone to External Hard Drive Without Computer
Sometimes you don’t have a computer available and need to transfer photos from your iPhone to an external hard drive without a computer. Actually, with the growing trend to connect an external storage device to an iPhone or iPad directly, it’s common that there will be a USB-C cable included when you purchase an external hard drive.
With that cable, you can connect the external hard drive to your iPhone or iPad without a computer and exchange data. Even if you don’t have such a cable, you can use Apple’s Lightning-to-USB camera adapter to help you connect these devices.
To import photos from iPhone to external hard drive without a computer:
Step 1. Connect the external hard drive to the iPhone.
Connect the external hard drive to the iPhone with a USB-C cable or via an adapter.
Step 2. Check the connection.
On the iPhone, go to «Files» > «Browse» to check whether the external hard drive is attached successfully.
Step 3. Save iPhone photos to the external hard drive.
Go to the Photos app, choose the pictures you want to move, tap the «Share» button, and then choose «Save to Files.» Tap «On My iPhone» and select the external hard drive.
By doing so, you can move photos from iPhone to an external hard drive directly without a computer. Besides, you can copy files from the external drive to your iOS device if you need to.
The Bottom Line
These are the proven ways to transfer photos from iPhone to an external hard drive. Whether you want to use a computer or not, you can find the solution you need. All of the solutions can be applied to transfer photos from iPhone to computer. Command these tips to help yourself out whenever you need to perform data transfer between an iPhone/iPad/iPod and a computer/external storage device.
FAQ
1. Can the iPhone connect directly to an external hard drive?
You can connect your iPhone or iPad with a flash drive, USB hard drive, SD card, and other external storage drives, as long as you have the appropriate adapter. The choice of such adapters depends on your device model and the device you want to connect. You can find a suitable adapter from Amazon.
2. How do I organize my iPhone photos to an external hard drive?
To organize an external hard drive, you’ll need to connect it to a computer and organize it by backing up important files and deleting unneeded or duplicated items.
3. How do I transfer files from my iPhone to an external hard drive without a computer?
To do this, you will need a formatted hard drive and an adapter to help. First, connect your iPhone or iPad to the external hard drive via an adapter. Then, go to the Photos app (or you can select other apps that support file sharing) and select the photos you wish to transfer, click the Share button, tap Save to Files, choose your external hard drive, select a folder to hold your pictures, and then tap Save.
Владельцы iPhone с небольшим объемом памяти порой диву даются, как быстро заканчивается место на смартфоне. Чаще всего с этой проблемой сталкиваются любители фотографий и видео, а также поклонники Live Photos.
♥ ПО ТЕМЕ: Постучать по крышке Айфона – сделать скриншот: как привязать действия к касанию задней части корпуса iPhone.
Правда, ее можно легко решить – достаточно лишь активировать функцию сохранения резервных копий в облачном хранилище, например, в Медиатеку Фото iCloud (правда, услуга платная). Пользователи, которых интересуют альтернативные сервисы, могут воспользоваться Google Фото или Яндекс.Диском.
Кроме того, резервные копии фотографий можно сохранять на стационарном компьютере. Однако Mac с накопителем в 128 / 256 ГБ для этой цели явно недостаточно, поэтому зачастую приходится использовать внешние накопители.
♥ ПО ТЕМЕ: 10 крутых возможностей связки iPhone + Mac при совместном использовании.
Как перенести фотографии (видео) с iPhone или iPad на компьютер Windows или внешний накопитель при помощи кабеля
1. Подключите внешний накопитель диск (USB-флешку). Если вы собираетесь перенести фото или видео просто на компьютер, пропустите этот пункт.
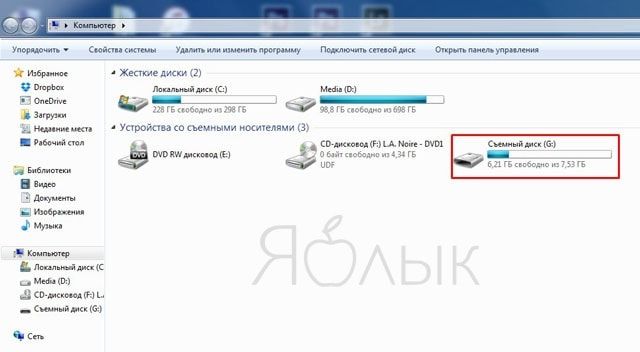
Убедитесь, что подключенный внешний накопитель появился в Проводнике Windows.
♥ ПО ТЕМЕ: На Windows или Mac не читается флэшка. Как исправить?
2. Установите приложение iTunes для Windows (необходимо для установки необходимых драйверов для iPhone и iPad).
3. Подключите iPhone или iPad, с которого нужно перенести фотографии, к компьютеру Windows с помощью кабеля.
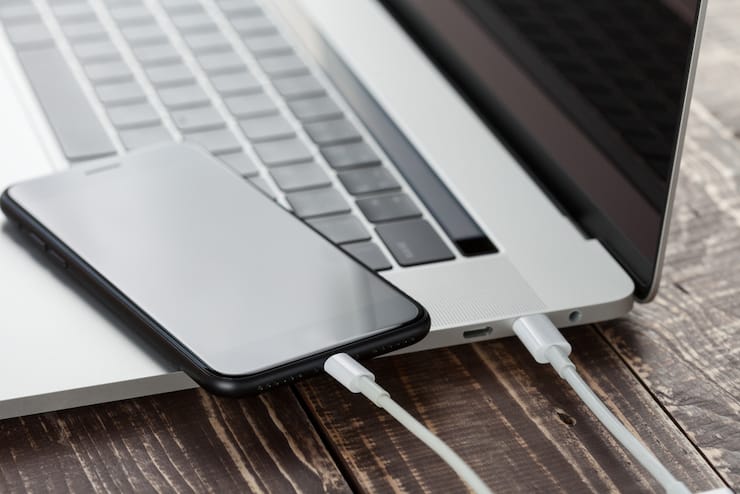
При подключении iPhone или iPad к компьютеру, устройство должно определиться как внешнее устройство.
Примечание: в некоторых случаях iPhone или iPad может не определиться компьютером с установленной ОС Windows из-за использования переходников (адаптеров, хабов, концентраторов). По возможности подключайте устройство напрямую при помощи оригинального кабеля.
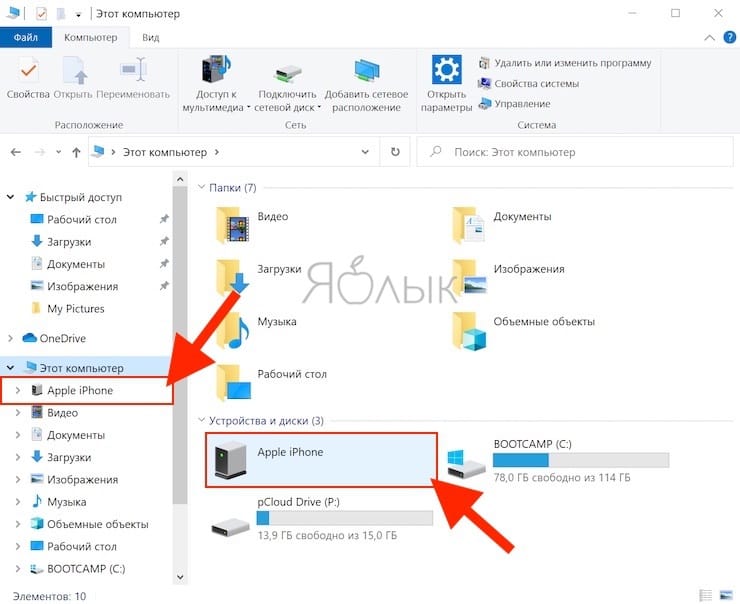
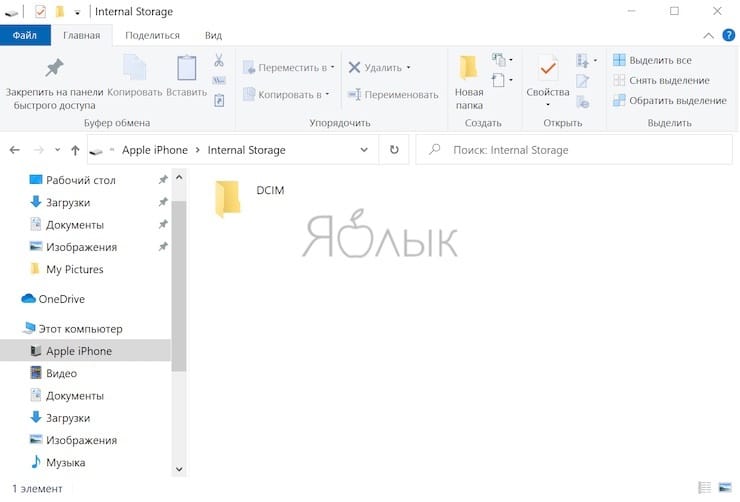
4. Нажмите на значок подключенного устройства Apple.
5. Перейдите по пути Internal Storage → DCIM.
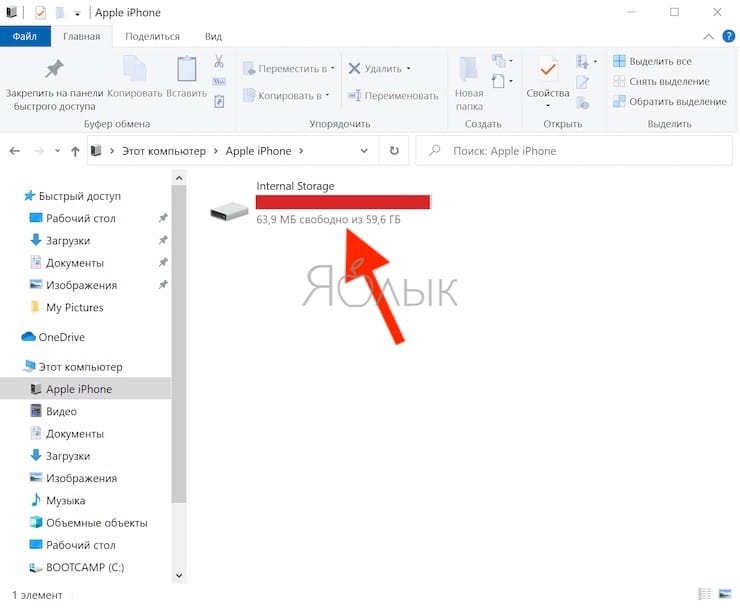
В случае, если вместо папки DCIM, отображается надпись «Эта папка пуста», разблокируйте подключенный iPhone или iPad и нажмите кнопку Разрешить на появившемся уведомлении.
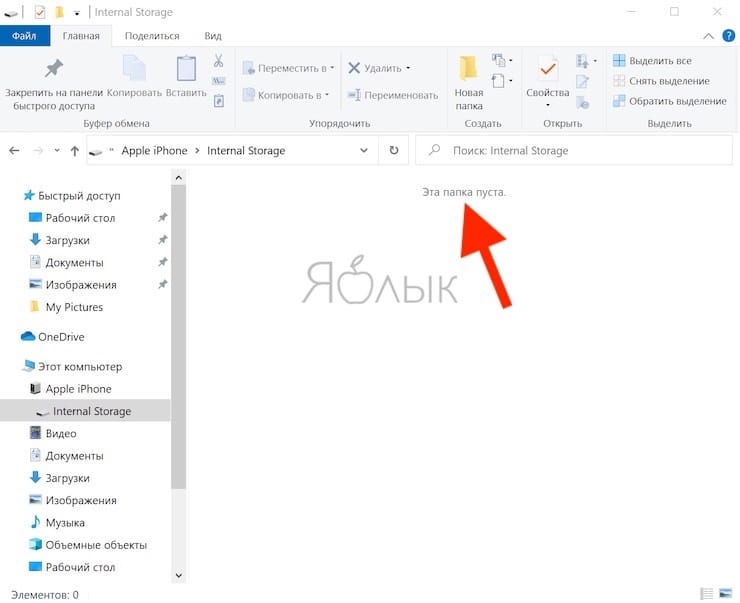
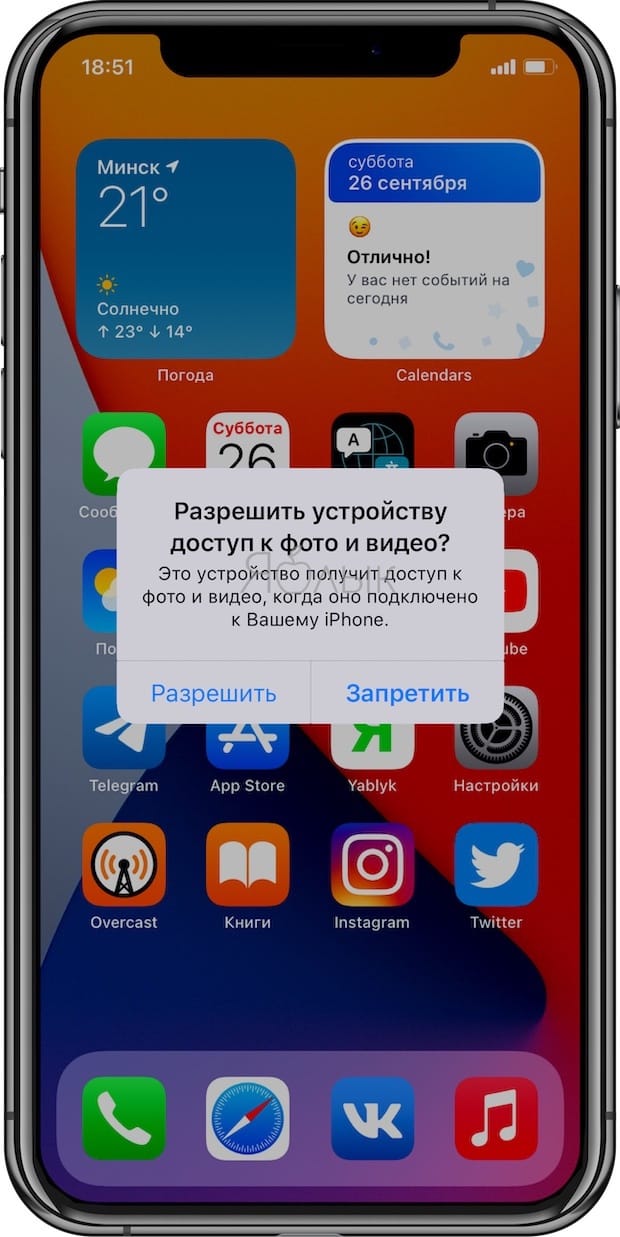
После этого папка DCIM появится в Проводнике Windows.
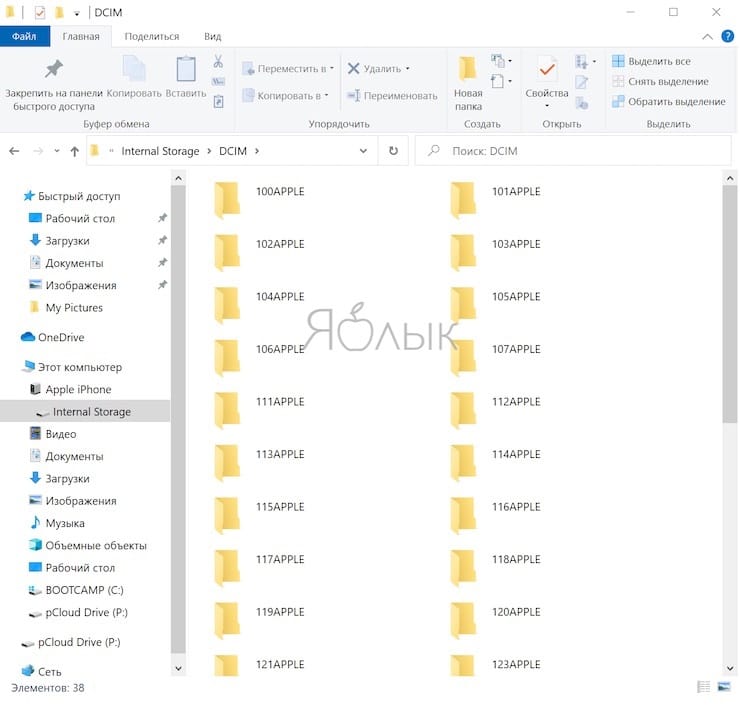
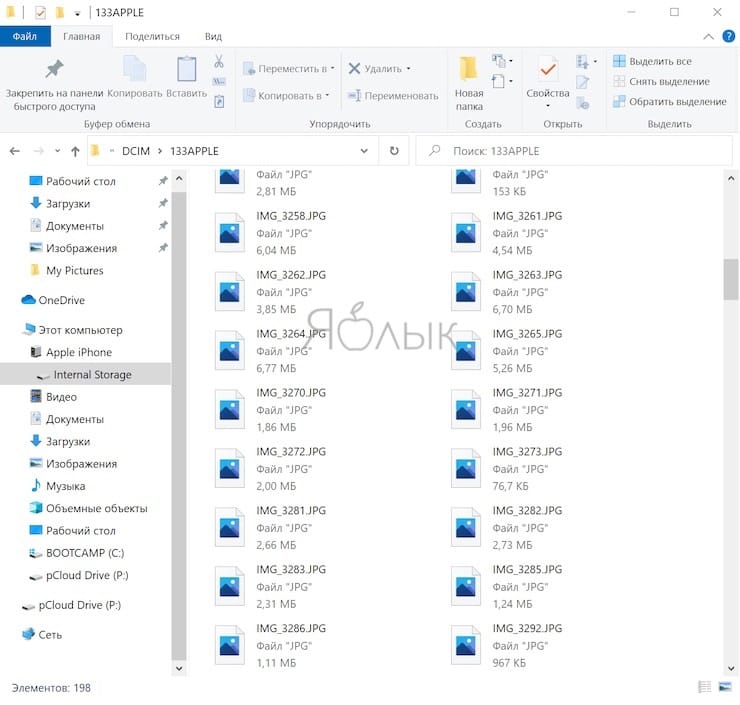
Все фото и видео будут размещены в системных папках вида «100APPLE». Скопируйте на компьютер все содержимое папки DCIM или выбранные фото и видео.
♥ ПО ТЕМЕ: Что такое QuickTake на iPhone, или как снимать видео в режиме «Фото».
Как передать фото и видео с iPhone (iPad) на компьютер Mac при помощи функции AirDrop
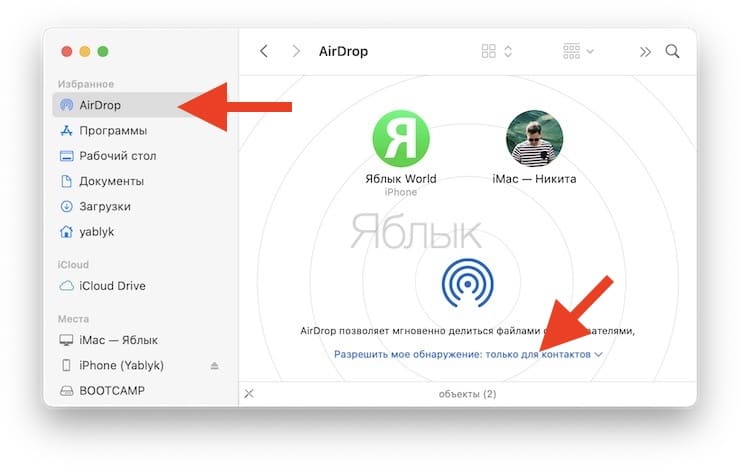
1. На Mac откройте приложение Finder, перейдите в раздел AirDrop на боковой панели и установите параметр «Разрешить мое обнаружение всем» вместо «только для контактов» внизу окна AirDrop.
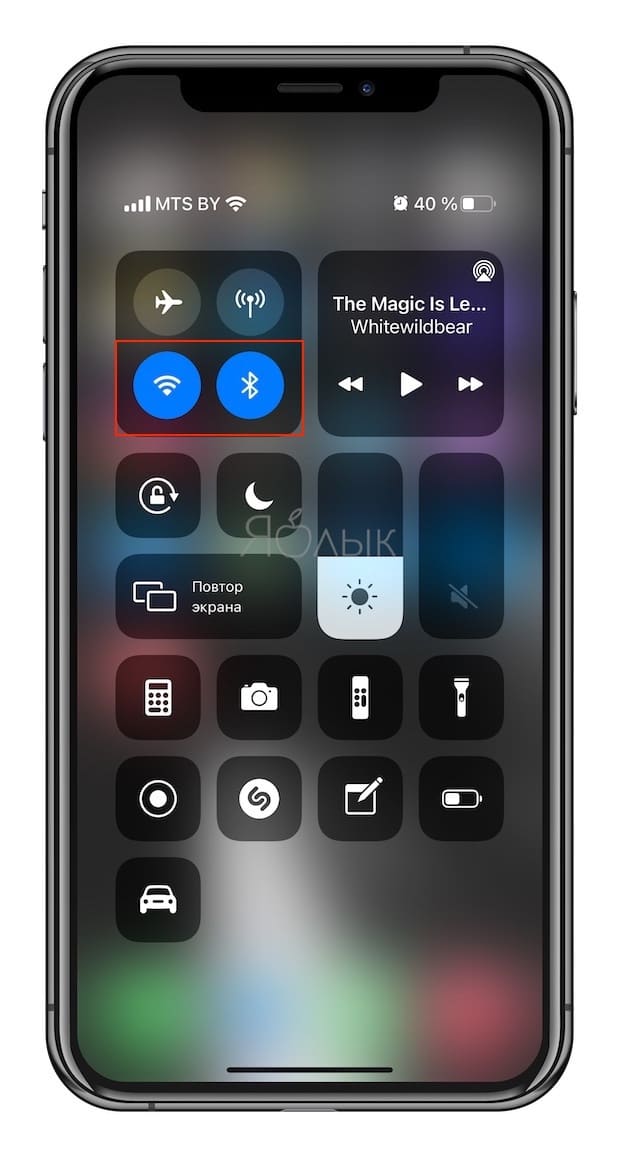
2. На iPhone или iPad включите Wi-Fi и Bluetooth.
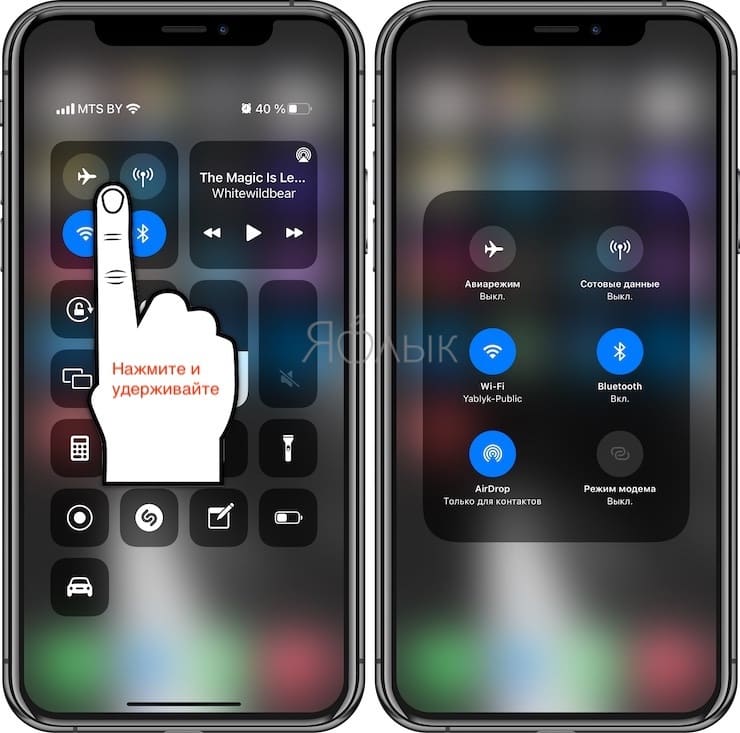
3. На iPhone или iPad включите AirDrop из Пункта управления, для чего нажмите и удерживайте кнопку-блок с беспроводными интерфейсами, а затем активируйте переключатель AirDrop.
4. Откройте приложение Фото. Перейдите в необходимый Альбом и нажмите кнопку Выбрать в правом верхнем углу.
5. Выберите фото или видео для копирования на компьютер Mac (фотографии и видео можно выделять свайпами, не отрывая пальца).
6. Нажмите на иконку Поделиться в нижнем левом углу.

Через несколько секунд слева в середине экрана появятся доступные устройства для передачи посредством AirDrop.
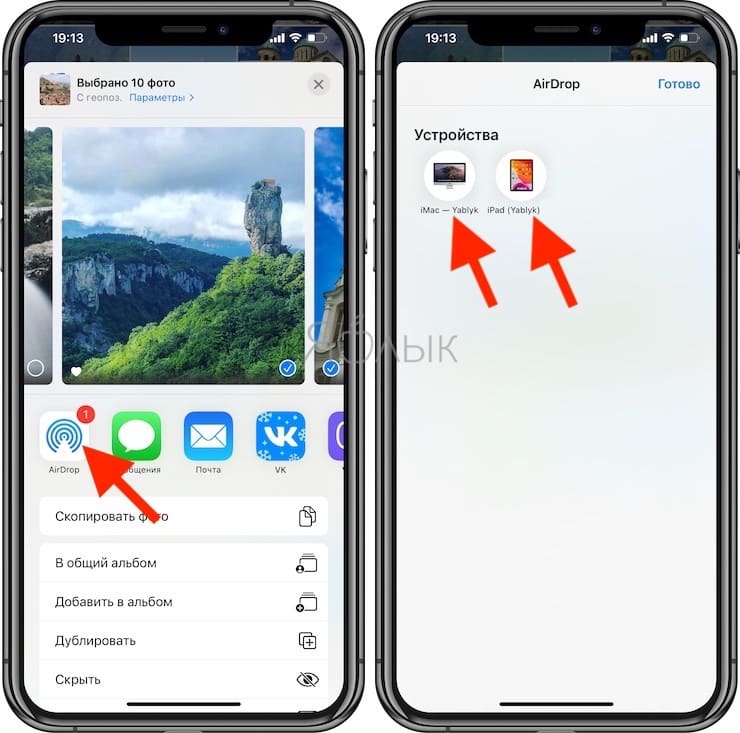
7. Коснитесь иконки появившегося компьютера Mac.
8. На Mac в правом верхнем углу появится всплывающее окно. Нажмите Принять, после чего начнется передача файлов. Загруженные файлы будут доступны в папке Загрузки на Mac.

♥ ПО ТЕМЕ: Можно ли оставлять iPhone подключенным к зарядке на ночь, или как правильно заряжать смартфон.
Как передать фото и видео с Айфона или Айпада на компьютер Mac при помощи приложения «Захват изображений»
Запустите на Mac программу «Захват изображений».
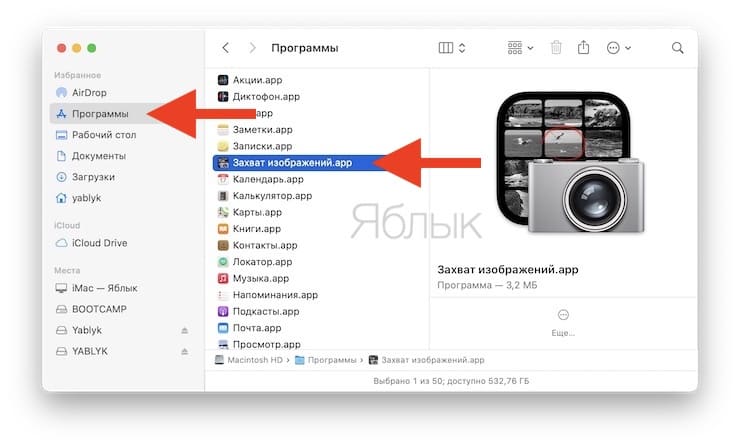
После запуска в панели управления слева найдите iOS-устройство и нажмите на него. На экране появятся все хранящиеся на iPhone или iPad фотографии и видео. Теперь вы можете вручную выделить снимки, которые хотите сохранить на внешнем жестком диске, либо выбрать сразу все, нажав на ⌘Cmd + A.
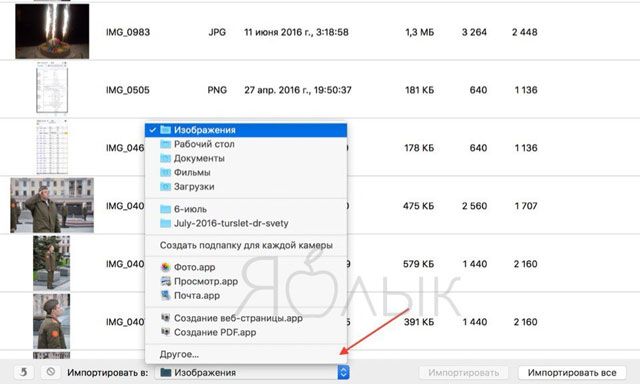
По умолчанию снимки сохраняются в папку «Изображения». Вызовите выпадающее меню и нажмите на «Другое». Теперь выберите папку на внешнем жестком диске, куда нужно сохранить фото.
При желании, можно удалить фото и видео с iOS-устройства при перемещении на компьютер Mac. Для этого поставьте галочку напротив пункта Удалить после импорта в левом нижнем углу.
Нажмите на кнопку «Загрузить» (будут загружены выделенные файлы) или «Загрузить все» (будут загружены все файлы) и ждите, пока фотографии или видео не будут сохранены. Если жесткий диск поддерживает USB 2.0, а фотографий очень много, весь процесс может занять куда больше, чем несколько минут.

Смотрите также:
- Сгружать неиспользуемые, или как настроить автоматическое удаление ненужных приложений на iPhone и iPad.
- Как сделать фото во время видеосъёмки на iPhone.
- Как объяснить Siri, кто является вашим другом, братом, женой, детьми и т.д. и для чего это нужно.
Если сравнивать iPhone с его конкурентами с Android, то в плане встроенной памяти iPhone отстаёт. Памяти не хватает из-за HDR-видео, Live Photo и огромного количества игр и приложений в App Store. Если на вашем iPhone постоянно заканчивается память, вы можете периодически скачивать все свои фотографии и видео с iPhone на внешний жёсткий диск.

Apple советует использовать своё облачное хранилище iCloud, но за него нужно платить. Ещё можно использовать сервис Google Фото, но и в нём память не бесконечная. Всегда можно скинуть фотографии на свой MacBook, но так вы только забьёте память ещё и на компьютере.
Лучшее решение – внешний жёсткий диск. Это недорого и эффективно. Вот по каким причинам стоит перенести свои фотографии с iPhone на внешний жёсткий диск:
- Память на устройстве заканчивается, система начала работать медленнее.
- Вы не хотите платить за подписку iCloud.
- Вы хотите посмотреть фотографии с iPhone на своём телевизоре с USB-разъёмом.
- Вы хотите отправить фото с iPhone кому-то, у кого нет устройств Apple.
- Вы хотите хранить копию важных фотографий с iPhone на случай потери.
Как скачать все фото и видео с iPhone на жёсткий диск через Mac
Шаг 1: Подключите внешний жёсткий диск к своему Mac
Для начала нужно подключить жёсткий диск к своему Mac. Если у вас новый MacBook, вам понадобится переходник на Type-C. Жёсткий диск должен отобразиться в боковом меню Finder. Попробуйте скопировать что-то со своего Mac на жёсткий диск, чтобы убедиться, что всё работает. Если не получается, то формат жёсткого диска несовместим с Mac. В таком случае формат диска нужно изменить на FAT.

Шаг 2: Подключите iPhone к Mac
Если у вас новый MacBook, для этого вам тоже понадобится переходник или кабель Type-C/Lightning.
Шаг 3: Запустите Захват изображений
Захват изображений – полезный инструмент на Mac. Используйте сочетание клавиш Command + Пробел и выберите «Захват изображений». В меню слева найдите и выберите свой iPhone.
Шаг 4: Разблокируйте iPhone
Если смартфон заблокирован, вы не сможете просмотреть свои фотографии. Разблокируйте свой iPhone и не давайте ему заблокироваться в процессе.
Шаг 5: Выберите смартфон
Когда вы выберите свой смартфон, в программе отобразятся все медиафайлы с вашего iPhone. С помощью сочетания клавиш Command + A отметьте все фотографии для переноса. Также можно вручную отметить только некоторые.

Шаг 6: Выберите место назначения
Когда вы отметите фото, нажмите опцию «Импортировать в» внизу. Внизу выберите «Другое», а затем выберите свой жёсткий диск.
Шаг 7: Начните перенос
Нажмите кнопку «Загрузить» и подождите. Если фотографий много, на процесс переноса уйдёт немало времени.

Это всё, вы перенесли свои фотографии с iPhone на жёсткий диск. Теперь можно удалить их со смартфона, чтобы освободить память.
Как перебросить фото с iPhone на жёсткий диск через ПК с Windows
Шаг 1: Установите iTunes на ПК с Windows 10
iTunes можно скачать из Microsoft Store. Весит программа около 200 Мб.
➤ Скачать: iTunes
Шаг 2: Подключите iPhone к компьютеру
С помощью кабеля подключите свой iPhone к компьютеру или ноутбуку с Windows.
Шаг 3: Откройте iTunes
Запустите iTunes, и вы увидите информацию о своём iPhone.
Шаг 4: Включите синхронизацию
Выберите меню «Фото» слева и включите опцию «Синхронизировать».

Шаг 5: Откройте менеджер файлов
Откройте свой менеджер файлов вручную или используйте сочетание клавиш Ctrl + E. Через него можно просмотреть содержимое iPhone.
Шаг 6: Выберите фотографии
Отметьте фотографии для переноса и скопируйте их.

Шаг 7: Подключите внешний жёсткий диск
Подключите к компьютеру свой жёсткий диск, откройте его в менеджере файлов и вставьте туда скопированные фотографии.
Мы советуем время от времени сохранять фотографии и видео с iPhone на жёсткий диск, чтобы на смартфоне не закончилась свободная память.
iPhone 12
Как перенести фото и видео с iPhone (iPad) на компьютер Mac или Windows, USB-флешку или внешний жесткий диск
Владельцы iPhone с небольшим объемом памяти порой диву даются, как быстро заканчивается место на смартфоне. Чаще всего с этой проблемой сталкиваются любители фотографий и видео, а также поклонники Live Photos.

Правда, ее можно легко решить – достаточно лишь активировать функцию сохранения резервных копий в облачном хранилище, например, в Медиатеку Фото iCloud (правда, услуга платная). Пользователи, которых интересуют исключительно бесплатные сервисы, могут воспользоваться Google Фото.
Кроме того, резервные копии фотографий можно сохранять на стационарном компьютере. Однако Mac на 128 ГБ для этой цели явно недостаточно, поэтому зачастую приходится использовать внешние накопители.
Как перенести фотографии с iPhone на компьютер Mac или Windows
Подключите внешний жесткий диск (USB-флешку)
Подключите USB-флешку или внешний накопитель к Mac (Windows) и убедитесь, что он появился в боковой панели в окне Finder (Проводнике Windows).


Проверьте, все ли работает, скопировав что-либо с компьютера на диск. Если у вас ничего не получилось, значит, устройство не отформатировано для работы с Mac (Windows). Эта проблема касается большинства внешних жестких дисков, и решить ее можно, переформатировав устройство в формат FAT.
Подключите iOS-устройство к компьютеру
Подключите iPhone или iPad, с которого нужно перенести фотографии, к Mac (Windows) с помощью кабеля.
Как передать фото и видео с iPhone (iPad) на компьютер Windows
При подключении iPhone или iPad к компьютеру, работающему на базе ОС Windows, устройство должно определиться как внешняя камера (фотоаппарат)
Откройте Мой компьютер и выберите подключенное iOS-устройство. Скопируйте необходимые фотографии и вставьте на компьютер или внешний накопитель.


Если этого не произошло, попробуйте установить на компьютер программу iTunes (скачать здесь).
Как передать фото и видео с iPhone (iPad) на компьютер Mac при помощи функции AirDrop
Главным условием передачи файлов через AirDrop является нахождение устройств (iPhone или iPad и Mac) в одной Wi-Fi сети. Также на обоих устройствах должен быть активирован Bluetooth.

Начиная с iOS 10 и macOS Sierra функция AirDrop работает практически безупречно.
1. На компьютере Mac откройте Finder и перейдите в AirDrop.

2. На iPhone или iPad откройте приложение Фото. Перейдите в необходимый Альбом и нажмите кнопку Выбрать в правом верхнем углу.
3. Выберите фото или видео для копирования на компьютер Mac (фотографии и видео можно выделять свайпами, не отрывая пальца).
4. Нажмите на иконку Поделиться в нижнем левом углу.

Через несколько секунд слева в середине экрана появятся доступные устройства для передачи посредством AirDrop.

5. Коснитесь иконки появившегося компьютера Mac, после чего начнется передача файлов. Загруженные файлы будут доступны в папке Загрузки на Mac.

Как передать фото и видео с Айфона или Айпада на компьютер Mac при помощи приложения «Захват изображений»
Запустите на Mac программу «Захват изображений». Для того чтобы открыть программу, введите ее название в поиске Spotlight (можно воспользоваться «горячими» клавишами ⌘Cmd + Пробел).

После запуска в панели управления слева найдите iOS-устройство и нажмите на него. На экране появятся все хранящиеся на iPhone или iPad фотографии и видео. Теперь вы можете вручную выделить снимки, которые хотите сохранить на внешнем жестком диске, либо выбрать сразу все, нажав на ⌘Cmd + A.

По умолчанию снимки сохраняются в папку «Изображения». Вызовите выпадающее меню и нажмите на «Другое». Теперь выберите папку на внешнем жестком диске, куда нужно сохранить фото.

При желании, можно удалить фото и видео с iOS-устройства при перемещении на компьютер Mac. Для этого поставьте галочку напротив пункта Удалить после импорта в левом нижнем углу.

Нажмите на кнопку «Импортировать» и ждите, пока фотографии или видео не будут сохранены. Если жесткий диск поддерживает USB 2.0, а фотографий очень много, весь процесс может занять куда больше, чем несколько минут.
Источник
Перенос фотографий и видео с iPhone, iPad или iPod touch
Узнайте, как перенести фотографии и видео с iPhone, iPad или iPod touch на компьютер Mac или компьютер с ОС Windows. Вы также можете предоставить доступ к своим фотографиям на всех своих устройствах с помощью функции «Фото iCloud».
![]()
Выбор места для хранения фотографий и видео
Предоставьте доступ к своим фотографиям и видео на всех своих устройствах с помощью функции Фото iCloud. Или храните их локально только на компьютере Mac или компьютере с ОС Windows.
Фото iCloud
Функция Фото iCloud автоматически обеспечивает безопасность, актуальность и доступность ваших фотографий и видео на всех ваших устройствах Apple, на сайте iCloud.com и даже на компьютере с ОС Windows. Функция «Фото iCloud» всегда отправляет и сохраняет исходные фотографии в полном разрешении. Оригиналы можно хранить в полном разрешении на всех устройствах или экономить место, используя версии, оптимизированные для устройств. В любом случае оригиналы можно всегда загрузить в нужное время. Любые вносимые изменения или правки всегда отражаются на всех ваших устройствах.
Фотографии и видео, которые используются в функции «Фото iCloud», занимают место в хранилище iCloud. Прежде чем включить функцию «Фото iCloud», убедитесь, что в iCloud достаточно места для хранения всей вашей коллекции. Можно определить необходимый объем, а затем перейти к расширенному тарифному плану, если это будет необходимо.

Импорт на компьютер Mac
Для импорта фотографий с устройства iPhone, iPad или iPod touch на компьютер Mac можно использовать приложение «Фото».
- Подключите iPhone, iPad или iPod touch к компьютеру Mac кабелем USB.
- Откройте приложение «Фото».
- В приложении «Фото» откроется экран «Импорт», где отобразятся все фотографии и видео, находящиеся на подключенном устройстве. Если экран «Импорт» автоматически не появляется, щелкните имя устройства на боковой панели «Фото».
- В случае появления соответствующего запроса разблокируйте устройство iOS с помощью код-пароля. Если на устройстве iOS отображается предупреждение Доверять этому компьютеру?, нажмите «Доверять», чтобы продолжить.
- Выберите фотографии, которые требуется импортировать, и нажмите «Импортировать выбранные», или нажмите «Импортировать все новые фото».

- Подождите завершения процесса, а затем отключите устройство от компьютера Mac.
Импорт на компьютер PC
Фотографии можно импортировать на компьютер с ОС Windows, подключив к нему устройство и воспользовавшись приложением «Фотографии Windows»:
- Убедитесь, что на компьютере с ОС Windows используется последняя версия iTunes. Для импорта фотографий на компьютер с ОС Windows требуется приложение iTunes 12.5.1 или более поздней версии.
- Подключите iPhone, iPad или iPod touch к компьютеру с ОС Windows кабелем USB.
- В случае появления соответствующего запроса разблокируйте устройство iOS с помощью код-пароля.
- Если на устройстве iOS отображается предупреждение Доверять этому компьютеру?, нажмите «Доверять» или «Разрешить», чтобы продолжить.
Если у вас включена функция «Фото iCloud», прежде чем импортировать фотографии на компьютер с ОС Windows, необходимо загрузить их исходные версии в полном разрешении на iPhone. Узнайте, как это сделать.
После импорта видео с устройства iOS на компьютер с ОС Windows некоторые видео могут иметь в приложении «Фотографии Windows» неправильную ориентацию. Добавив эти видео в iTunes, вы сможете воспроизвести их в правильной ориентации.
Дополнительная информация
- Резервное копирование всех файлов, в том числе фотографий и видео, на внешний жесткий диск с помощью Time Machine
- Импорт фотографий и видео с накопителя, например жесткого диска или SD-карты, в приложение «Фото» для ОС macOS.
- Импорт фотографий на пленке с помощью сканера и приложения «Захват изображений».
- Импорт изображений непосредственно в папку на компьютере Mac с помощью приложения «Захват изображений».
Информация о продуктах, произведенных не компанией Apple, или о независимых веб-сайтах, неподконтрольных и не тестируемых компанией Apple, не носит рекомендательного или одобрительного характера. Компания Apple не несет никакой ответственности за выбор, функциональность и использование веб-сайтов или продукции сторонних производителей. Компания Apple также не несет ответственности за точность или достоверность данных, размещенных на веб-сайтах сторонних производителей. Обратитесь к поставщику за дополнительной информацией.
Источник
Как скинуть фото с айфона на жесткий диск?
Как перенести фотографии (видео) с iPhone или iPad на компьютер Windows или внешний накопитель при помощи кабеля
- Подключите внешний накопитель диск (USB-флешку). …
- Подключите iPhone или iPad, с которого нужно перенести фотографии, к компьютеру Windows с помощью кабеля. …
- Нажмите на значок подключенного устройства Apple.
Как скопировать все данные с айфона на компьютер?
Перенос файлов с iPhone, iPad или iPod touch на компьютер и наоборот
- Подключите устройство к компьютеру. …
- В приложении iTunes на ПК нажмите кнопку устройства в левой верхней части окна iTunes.
- Нажмите «Общие файлы».
- В списке слева выберите приложение на устройстве, которое Вы хотите использовать при переносе файлов.
Как скачать с айфона на флешку?
Выберите папку или фотографии, которые вы хотите перенести на ваш флэш-накопитель, а затем нажмите кнопку «Экспорт» > «Экспорт для ПК» вариант, который отображается на верхней панели. Всплывающее окно появится, выберите ваш USB флэш-диск и нажмите кнопку «Открыть», так что вы можете сохранить фотографии там.
Как использовать айфон в качестве флешки?
1. Копируем файлы через iTunes
- Устанавливаем нужное приложение.
- Подключаем iPhone к компьютеру через кабель и запускаем iTunes.
- В меню с подключенным iPhone выбираем раздел Общие файлы.
- Находим нужное приложение и перетаскиваем в окно необходимые файлы.
- Синхронизируем данные со смартфоном.
11.03.2019
Как скинуть фото с айфона на жесткий диск через мак?
Импорт на компьютер Mac
- Подключите iPhone, iPad или iPod touch к компьютеру Mac кабелем USB.
- Откройте приложение «Фото» на компьютере.
- В приложении «Фото» откроется экран «Импорт», где отобразятся все фотографии и видео, находящиеся на подключенном устройстве.
Как с телефона перенести фото на жесткий диск?
Откройте фотогалерею вашего телефона, откройте изображение и нажмите кнопку « Поделиться» . Оттуда вы сможете выбрать один из нескольких вариантов обмена. Нажмите на значок Google Диска , и файлы будут загружены. После загрузки изображения можно получить доступ через Google Drive.
Как передать файлы с iPhone на компьютер через USB?
Сначала подключите iPhone к компьютеру с помощью USB-кабеля, который позволяет передавать файлы.
- Включите телефон и разблокируйте его. …
- На компьютере нажмите кнопку Пуск , а затем выберите Фотографии , чтобы открыть приложение «Фотографии».
- Выберите Импорт > С USB-устройства и следуйте инструкциям.
Как скинуть фото с айфона на комп без Айтюнса?
Вариант 1
- Подключите устройство к компьютеру при помощи кабеля.
- Запустите приложение «Фотографии» в меню «Пуск».
- Нажмите на кнопку «Импорт» в правом верхнем углу.
- По умолчанию будут отмечены все изображения c iOS-устройства, можно выбрать только необходимые.
- Нажмите «Продолжить» и процесс копирования начнётся.
25.08.2018
Как передать большой файл с iPhone на Windows?
Как передать большой файл с iPhone на Windows
- Сохранить видео через iTunes. Скачайте и установите приложение для Windows, подключите iPhone к компьютеру и в разделе с медиафайлами найдите нужный файл. …
- Загрузить файл через облако …
- Воспользуйтесь iCloud. …
- Воспользуйтесь сторонними сервисами
29.01.2018
Можно ли подключить флешку к iPhone?
Да, флешки на iPhone есть. У таких флешек имеется разъем Lightning, от которого заряжаются смартфоны и планшеты Apple. Есть такие флешки, которые имеют одновременно несколько разъемов, которые способны подключаться не только к iPhone, но и к ПК, ноутбукам, смартфонов на Android с разъемами MicroUSB или USB Type-C.
Как передать файлы через USB на айфон?
Подключите iPhone или iPad к компьютеру с помощью USB-кабеля. Шаг 3. Добавьте в iTunes музыку, которую вы хотите закачать на смартфон. Для этого нажмите «Файл» → «Добавить файл в медиатеку» для открытия определенной песни или «Файл» → «Добавить папку в медиатеку» для добавления папки с музыкой.
Что делать если компьютер не видит айфон как флешку?
Отключите от компьютера все USB-аксессуары, кроме устройства. Попробуйте подключить устройство к другим портам USB. Затем попробуйте использовать другой USB-кабель Apple *. Перезапустите компьютер.
…
Перезапуск устройства:
- iPhone.
- iPad.
- iPod touch.
10.02.2020
Как подключить айфон к машине через USB?
Подключение с использованием кабеля USB
- Перезапустите устройство и бортовой компьютер автомобиля.
- Разблокируйте iPhone и откройте экран «Домой».
- Попробуйте подключиться с помощью другого кабеля или порта USB, если это возможно. …
- Осмотрите порт для зарядки на наличие загрязнений или повреждений. …
- Обновите устройство.
1.04.2021